Easy St. Patrick's Day Treats - Lucky Charms Pops

Want a fun and easy treat for St. Patty’s Day? Look no further! With just a few supplies you can make these pops in less than 20 minutes. By using these molds found on Amazon, I was able to easily craft the cutest holiday treats in minutes flat. The molds worked incredibly well and the chocolate came right out, easily.

INGREDIENTS:

  • Marshmallows separated from Lucky Charms

  • White chocolate bark or Ghirardelli White Chocolate

  • Sprinkles

  • Pop Mold with Sticks

INSTRUCTIONS:

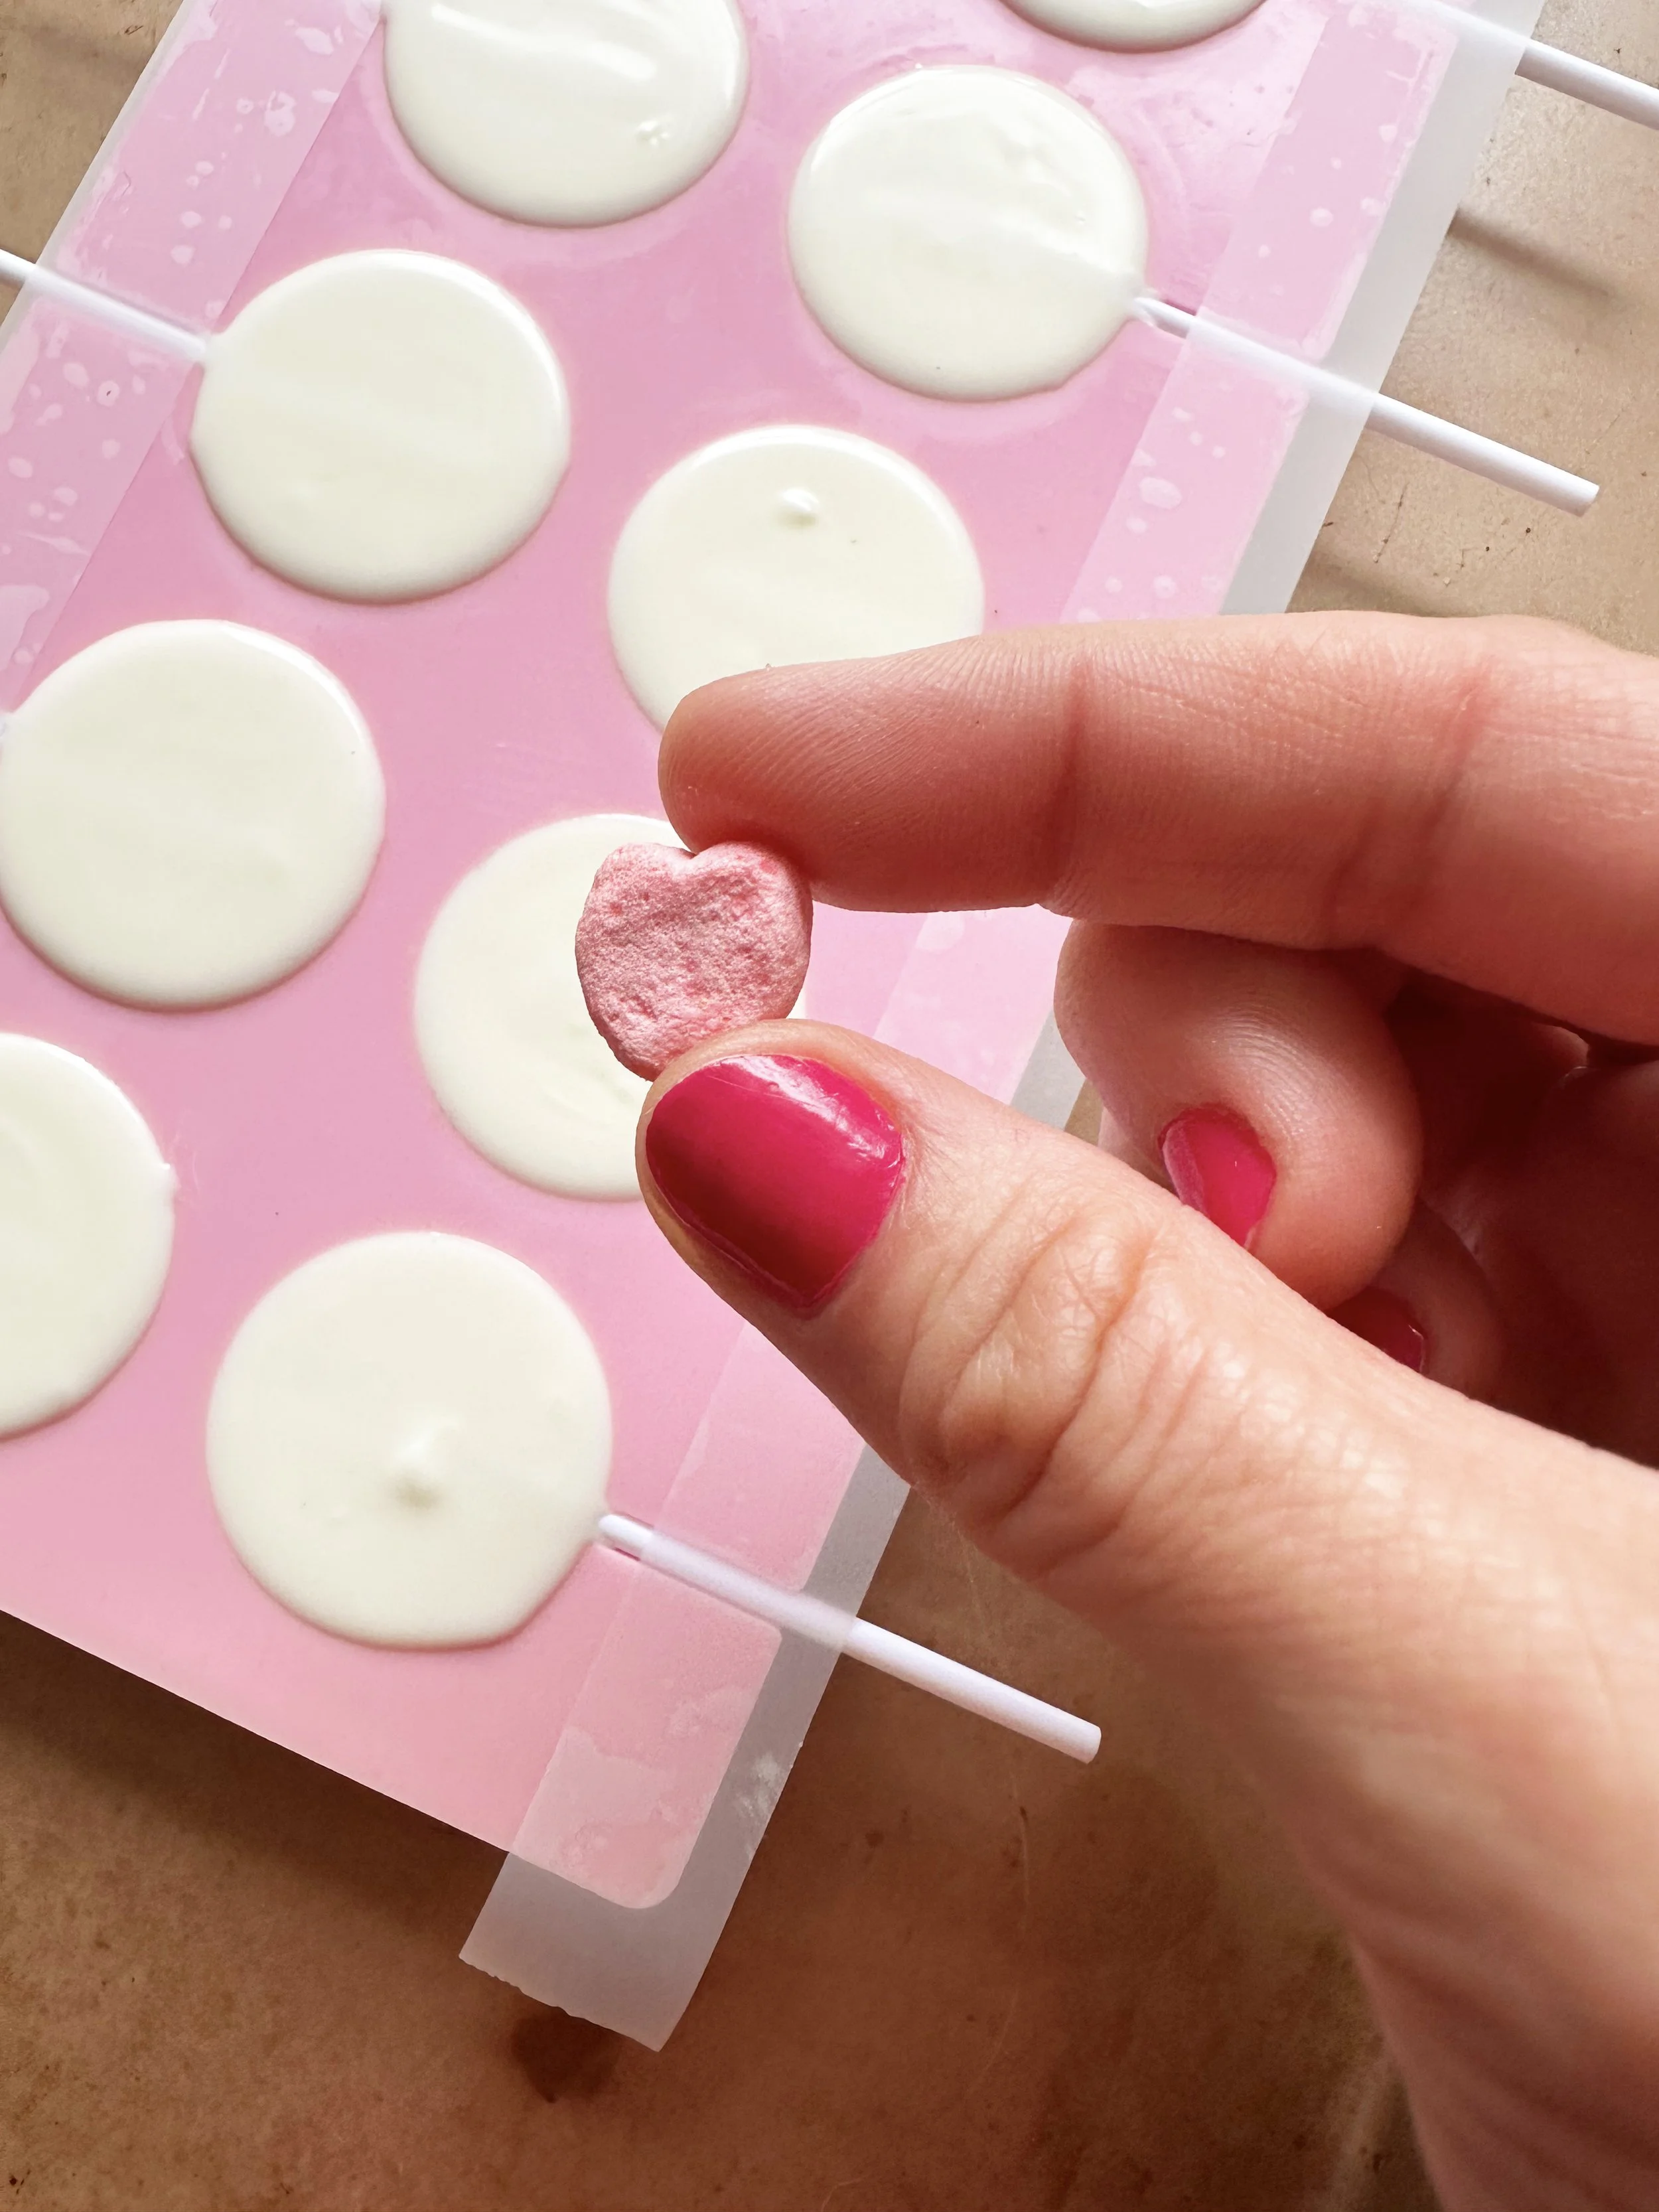
  1. Insert pop sticks into molds (find molds here which came with the sticks). Tape the sticks into the molds, like shown below. Separate marshmallows from Lucky Charm’s Cereal and set aside. I needed 2 marshmallows per pop. Set pop molds onto baking sheet so you can move it around easily.

  2. Melt white chocolate bark until smooth. Spoon into each circle cavity in the mold and fill just covering the sticks. Tap mold on counter lightly until chocolate smooths out and no air bubbles remain. The sticks should be covered.

  3. Add 2 marshmallows to each pop then add a few sprinkles to each one.

  4. Let cool on countertop or in fridge for 20 minutes and then remove tap from molds and remove pops from molds carefully. These ones were so nice to work with, and very good quality.

  5. Individually wrap each pop in a cute treat bag or store in the fridge in an air-tight container. Enjoy!

These were so easy to complete and I definitely plan on making more cereal themed pops soon! Stay tuned for more ideas along the way!

Micro Ingredients - Top Healthy Recipes For Winter

This winter, I am trying to incorporate as many smoothies and healthier recipes as I can into my daily routine. Here are a few amazing smoothie, drink, and recipe ideas from my friends at Micro Ingredients!

Below, you will find some of the season’s top healthiest (and EASIEST) recipes, to keep you feeling great throughout these winter months.

Spirulina Smoothie Recipe (Above)

Recipe:

Organic Spirulina powder, Milk, Fruit and Nuts(optional).

Instructions:

  1.  Add ice to blender

  2.  Add 1 scoop of Spirulina powder

  3.  Add milk and blend!

  4.  Pour in the smoothie to a cup

  5.  Top off with your favorite fruit and enjoy!😍


Awesome Organic Beet Root Powder is a stunning pink color and can be used in smoothies and other recipes as a natural food coloring. Get yours here!

Tropical Fruit Punch Sparkling Drink (Above)

Recipe:

Organic Mango Juice Powder, Organic Lemon Juice powder, Organic Pineapple Powder, Hot water, Ice, Sparkling Water.

Instructions:

  1. Add 1 scoop of Mango juice powder

  2. Add 1 scoop of Pineapple powder

  3. Add 1 scoop of Lemon juice powder

  4. Add 1/4 of water

  5. Mix until dissolved

  6. Add Ice into the cup

  7. Add sparkling water

  8. Enjoy!


Also, this Chaga Mushroom Extract Powder, below, can be added to hot or cold drinks and compliments hot cocoa and coffee very well.

Avocado MCT Smoothie Recipe (Above)

Recipe:

Organic MCT Oil powder, Organic Stevia Powder, Ice, Milk, Avocado.

Instructions:

  1. Add half Avocado into blender

  2. Add 1 scoop of MCT Oil Powder

  3. Add 2 scoop of Stevia Sweetener

  4. Add Ice

  5. Add some Milk or Coconut Milk

  6. Blend

  7. Enjoy!

Psyllium Husk Blended Coffee Drink Recipe (Above)

Recipe:

Organic Psyllium Husk Powder, Organic Stevia Powder, Black coffee, Milk, Ice.

Instructions:

  1. Add 1 scoop Psyllium Husk powder into blender

  2. Add 2 scoops of Stevia Sweetener

  3. Add ice

  4. Add 2/3 of your favorite black coffee

  5. Add milk and blend!

  6. Pour in the drink to a cup

  7. Enjoy!

Matcha Latte Recipe (Above)

Recipe:

Organic Matcha Powder, Organic Stevia Powder, Milk, hot water.

Instructions:

  1. Add 1 scoop Matcha powder into cup

  2. Add ¼ hot water

  3. Mix until dissolved

  4. Add ¾ milk into another cup

  5. Add 2 scoops of Stevia Sweetener

  6. Mix until melted

  7. Pour dissolved Matcha

  8. Mix and Enjoy!

Above, the Organic Freeze-Dried Pomegranate Juice Powder is truly a gem! This is an amazing way to incorporate more antioxidants into your diet! Have a happy, healthy, and prosperous winter, friends!

Oatmeal Peanut Butter Reese's Cookies

Looking for a recipe to make you smile? Everyone who has tried these has fallen in love with them. They’re delicious eaten around a camp fire, or make a few for a friend who needs some cheering up. These may be hard to share once you try them, just warning you!

Oatmeal Cookies

RECIPE (ORIGINALLY FOUND HERE):

Ingredients

  • 1/2 cup butter, softened

  • 1 cup brown sugar

  • 1/2 cup creamy peanut butter

  • 1 large egg

  • 2 teaspoons vanilla extract

  • 3/4 cup all-purpose flour

  • 1 teaspoon baking soda

  • 1 teaspoon cornstarch

  • 1/4 teaspoon baking powder

  • 1/4 teaspoon salt

  • 1 1/2 cups quick oats

  • 1/2 cup mini semi-sweet chocolate chips

  • 1 cup REESE’S Pieces or M&M candies

Oatmeal Cookies

Instructions

  1. Preheat oven to 350ºF and line baking sheets with parchment paper and set aside.

  2. In a large bowl, cream together butter, brown sugar, and peanut butter with a hand or stand mixer until light and fluffy, about 3-4 minutes. Mix in the egg and vanilla, scraping down the sides of the bowl as needed.

  3. In a separate bowl, add the flour, baking soda, cornstarch, baking powder, salt, and quick oats; whisk to combine. With the mixer on low speed, slowly add the flour mixture to the wet ingredients and mix until just combined. Stir in the chocolate chips and REESE’S Pieces candies by hand.

  4. Measure out ¼ cup balls of dough and place them on the baking sheets. Bake the cookies for 11-13 minutes, until the edges are just starting to brown and the top still looks slightly undercooked. Remove from the oven and cool for 5 minutes on the baking sheet before moving them to a wire rack to cool completely. Before these have cooled completely, they will be crumbly. I suggest letting them cool completely before tasting.

  5. Store cookies covered at room temperature for up to 1 week. Enjoy!

Peanut Bar Recipe

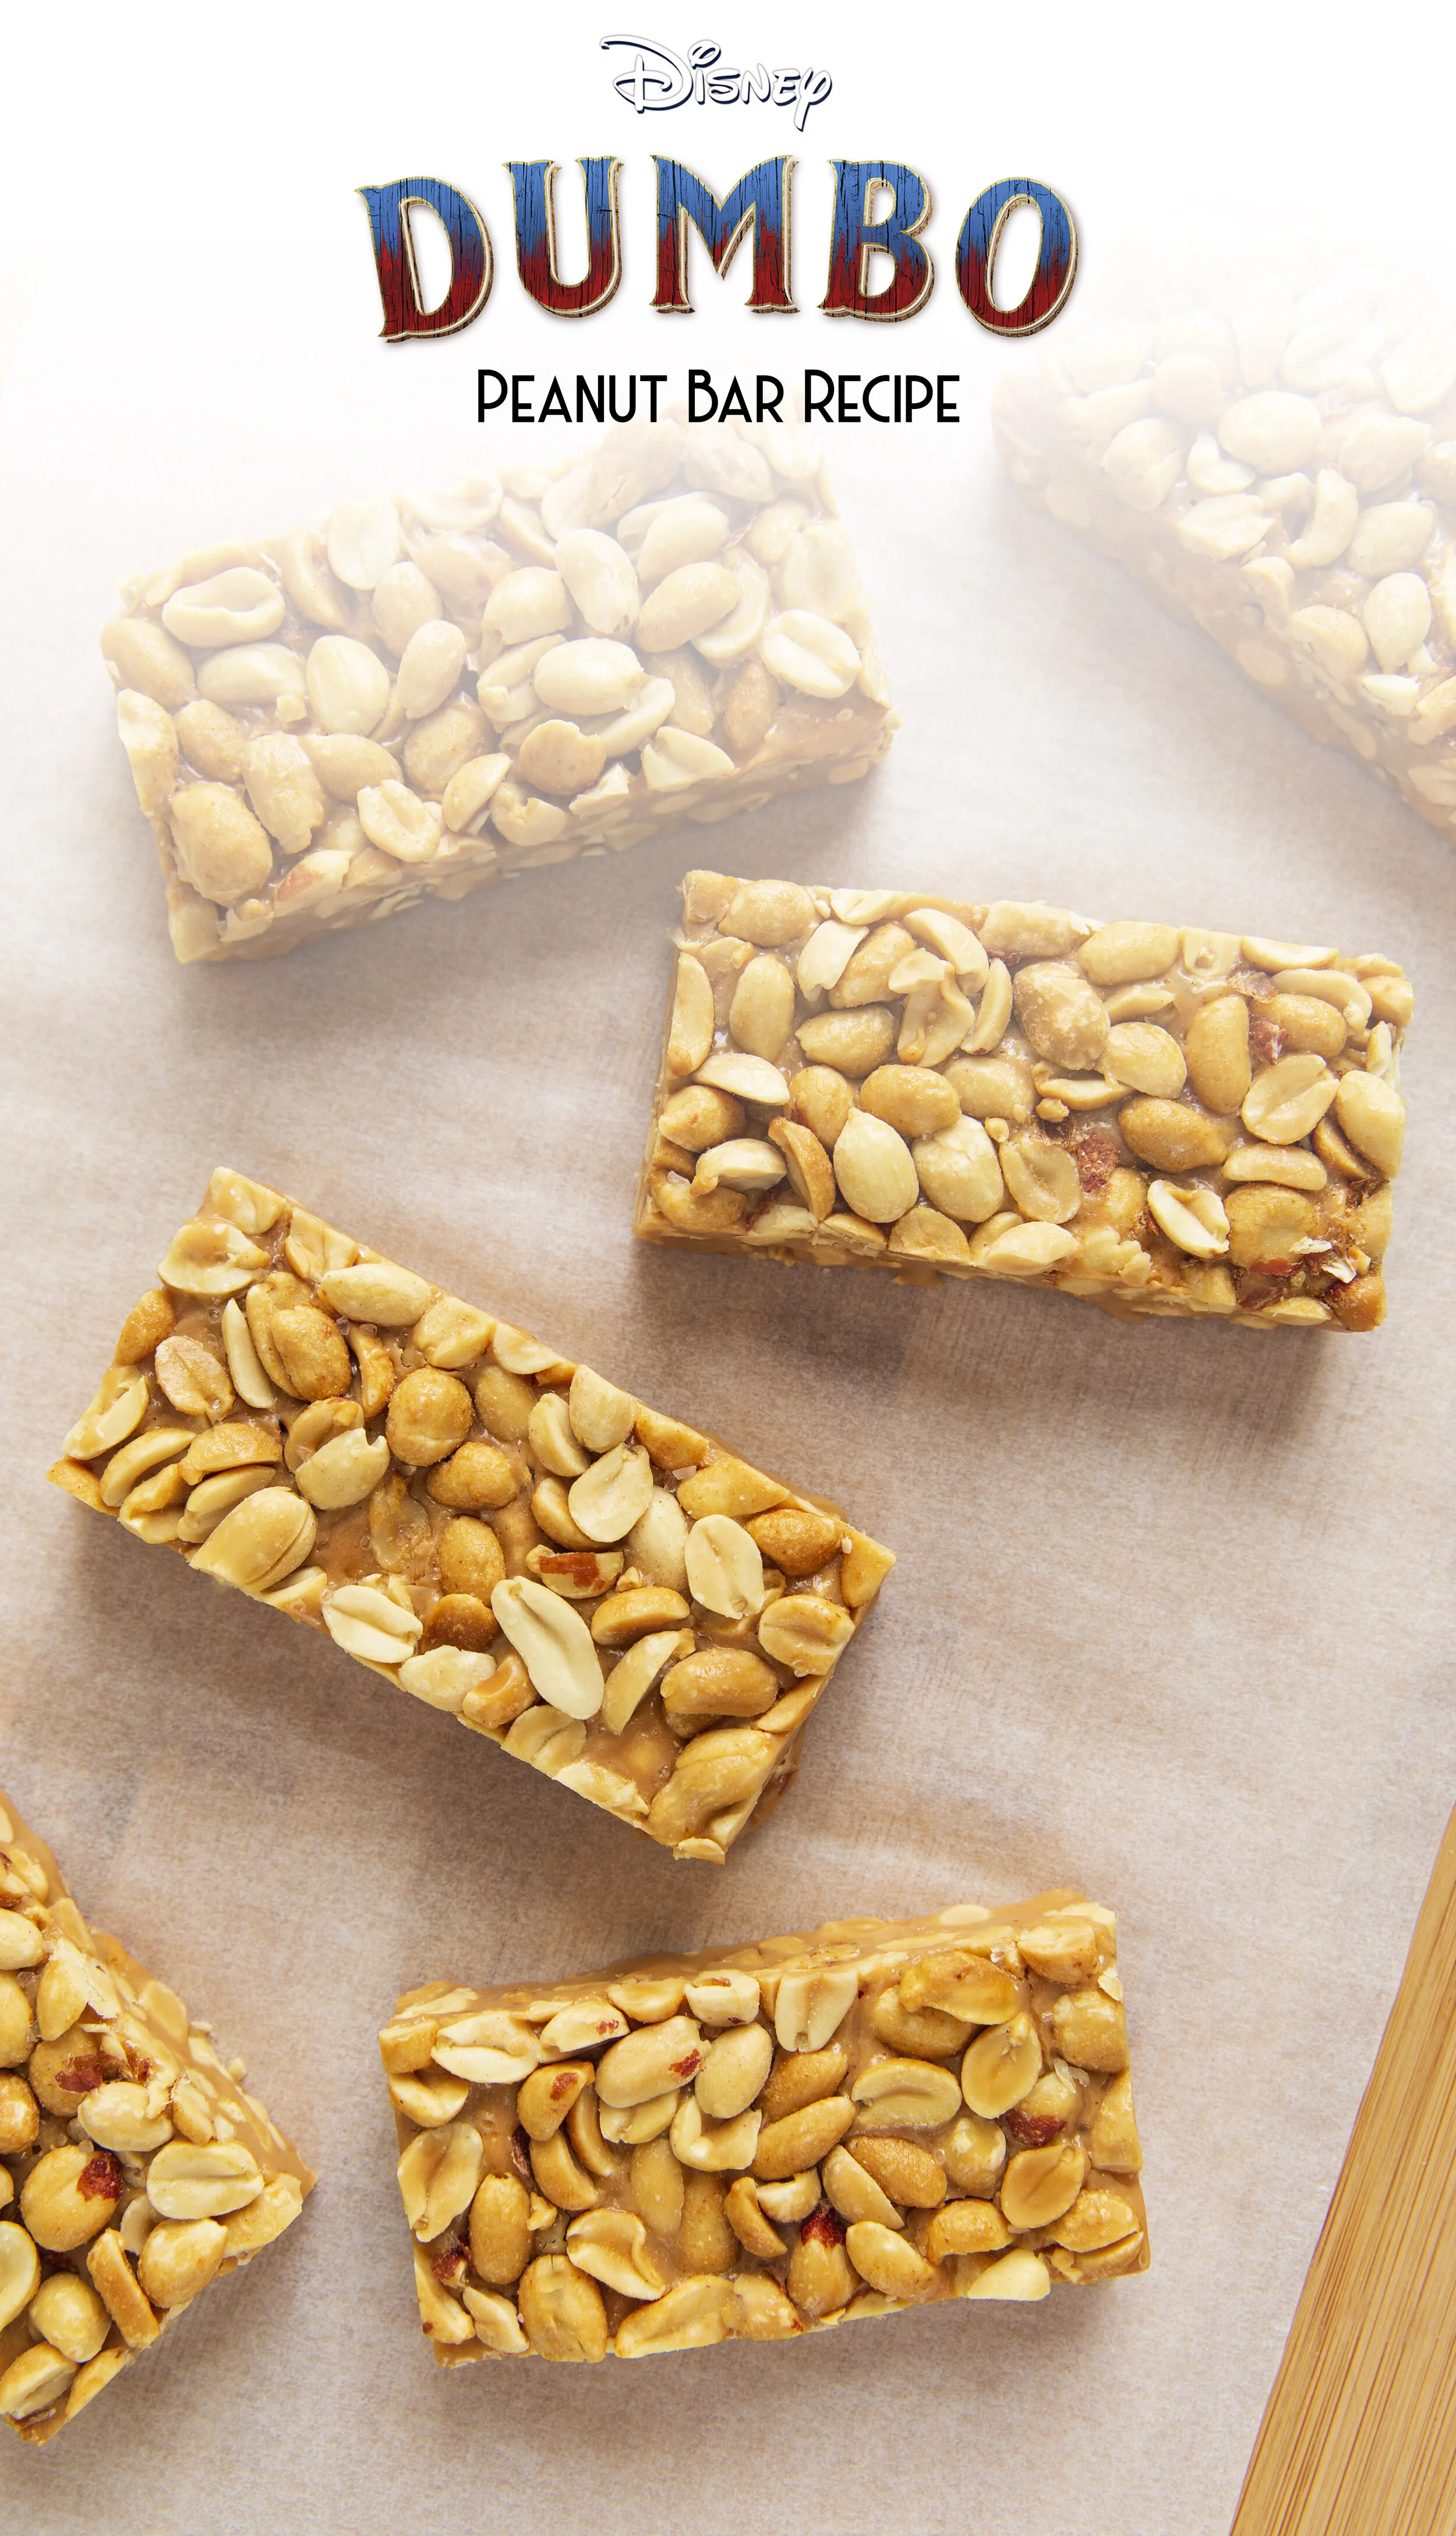
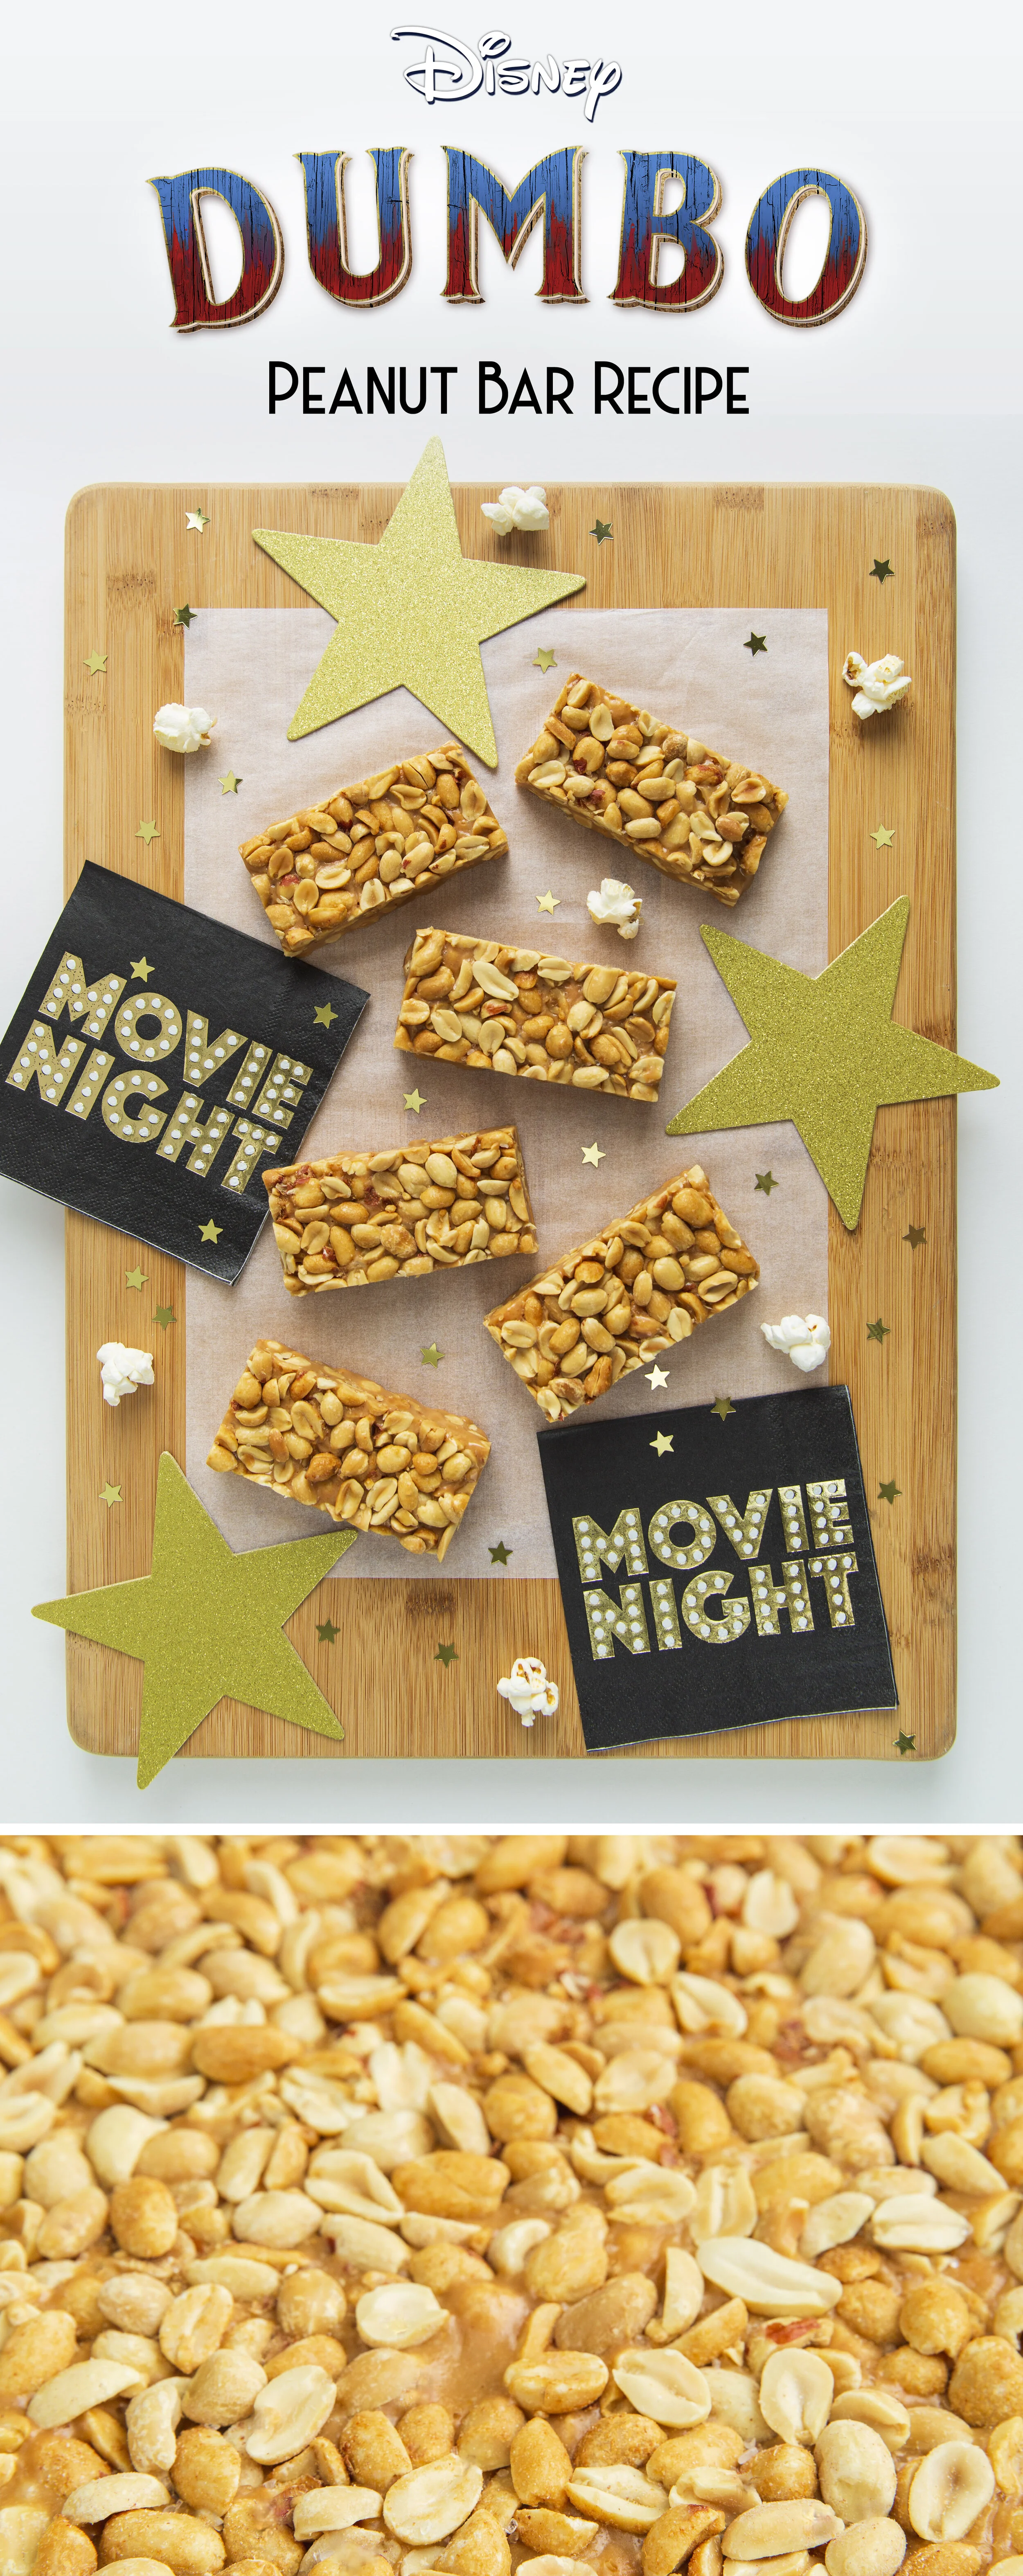
These peanut bars are by far everyone’s favorite treat I have ever created.

With such simple ingredients and work involved in these, they are even great if you’re looking for a quick and easy treat. I made these to help spread the word when the Dumbo movie premiered. Such an honor!

INGREDIENTS

  • cooking spray

  • 1 (16 ounce) jar dry-roasted peanuts, divided

  • 1 (14 ounce) can sweetened condensed milk

  • 1 (12 ounce) package peanut butter chips

  • 3 tablespoons butter

  • 3 cups miniature marshmallows

INSTRUCTIONS:

  1. Spray the bottom of a 9x13-inch baking dish with cooking spray.

  2. Spread 1/2 of the peanuts into the prepared baking dish.

  3. Cook and stir sweetened condensed milk, peanut butter chips, and butter in a saucepan over medium heat until melted, about 5 minutes. Add marshmallows and stir until smooth. Pour mixture over peanuts and top with remaining peanuts.

  4. Refrigerate until chilled, 1 to 2 hours. Cut into bars. Enjoy!

3-Ingredient Meal- Unique End of Summer Recipe With Hatfield

This shop has been compensated by Collective Bias, Inc. and its advertiser. All opinions are mine alone. #FALLInLoveWithHatfield, #MakeEasyMoreInteresting #simplyhatfield #CollectiveBias

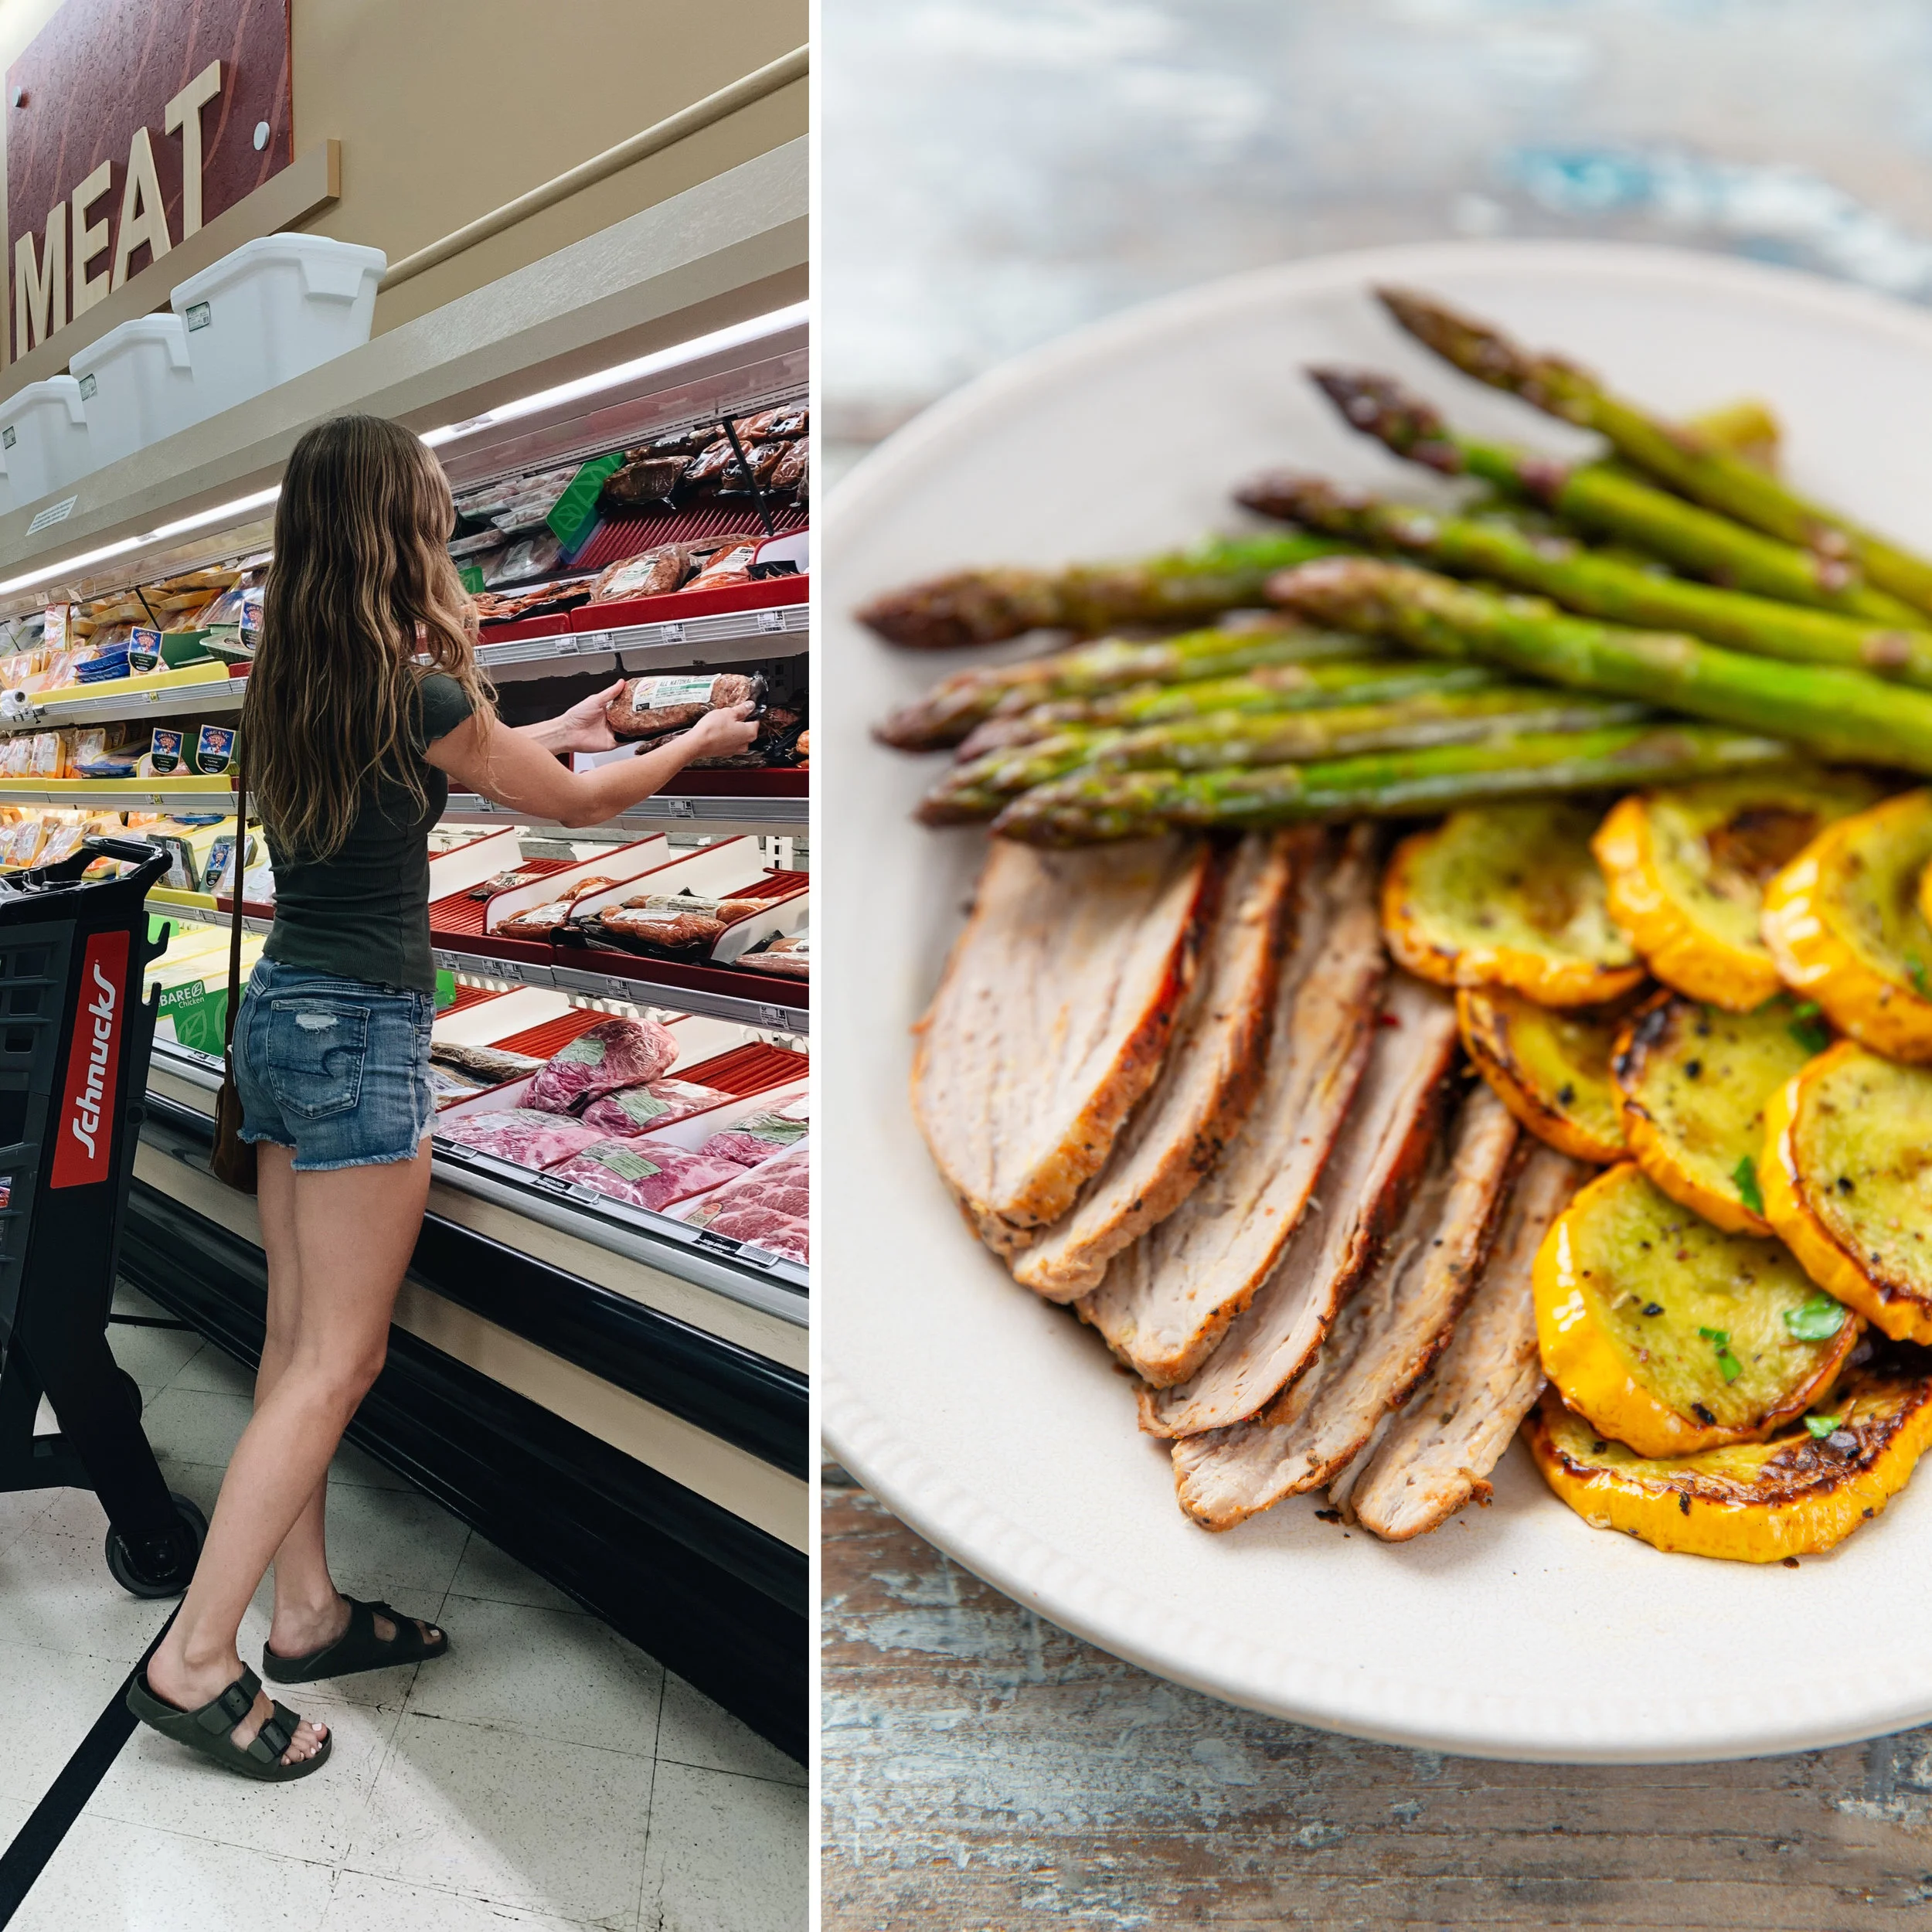
We recently headed to Schnuck’s Market here in Carbondale to shop for our Hatfield® Dry Rubbed Marinated Tenderloin, as well as the grocery items on the list. Luckily, this meal only took 3 main ingredients, so shopping was fast and easy.

Hatfield has amazing products, ranging from dry rub seasoned tenderloins to slow-cooker-ready pork roasts.

TIME SAVING TIP

Since the pork tenderloin is already marinated, your prep and cooking time is reduced by HOURS! Oh my goodness, the aroma of the Tuscan Herb seasonings made the house smell incredible…our mouths were watering after just a few minutes :)

MORE TO LOVE ABOUT HATFIELD

Cook and serve

Simple

Full of Flavor

Makes dinner less about the hard work of cooking, and more about time spent with family.

#1 Marinated Tenderloin in the Northeast is the Hatfield Tuscan Herb Tenderloin

Hatfield offers a HUGE variety of products and selections in their Marinated line. From Tuscan Herb to Texas Smokehouse, so many flavor profiles are covered, that most anyone would find one they loved.

  • Hatfield® Marinated Pork Tenderloin

  • Hatfield® Marinated Pork Loin Filets

  • Hatfield® Marinated Pork Roasts

  • Hatfield® Marinated Pork Chops

  • Hatfield® Marinated Pork Ribs

HOW TO MAKE THIS 3-INGREDIENT MEAL

INGREDIENTS:

  • 1 Package (18.4 oz.) - Hatfield® Dry Rubbed Marinated Tenderloin

  • 1 medium-sized summer squash

  • 1-2 packages asparagus

OTHER ITEMS NEEDED:

  • Olive Oil

  • 3 skillets (at least 1 needs to have a lid for the pork tenderloin)

  • seasoning (I used Italian seasoning)

  • Salt

  • Any other seasonings you like, such as garlic

  • Cooking utensils

  • Tongs for cooking tenderloin, optional

INSTRUCTIONS

Hatfield® Marinated Pork Tenderloin

1.) Remove packaging, and heat skillet to medium heat, with 2TBSP or so of olive oil.

2.) Once the skillet is hot, use optional tongs to place tenderloin onto heated skillet. This will begin to help you build a nice sear on the outsides while cooking the insides as well. Place lid onto pan/skillet, check after 2-3 minutes to ensure no sticking). No need to season the tenderloin, since Hatfield has already done the hard job of marinating the pork for you. This saves hours, luckily.

3.) After 3-4 minutes of cooking, carefully use an oven mitt and pair of tongs and flip the tenderloin to the other side. Replace lid and cook for 4-5 more minutes, moving tenderloin around in skillet if needed, to avoid burning or sticking to the skillet too much.

4.) Cook for an additional 15-20 minutes (or even a bit longer), rotating and flipping the tenderloin every couple of minutes. Make sure meat has cooked to an internal temperature of about 180 degrees F. The meat was extremely tender and cooked SO WELL!

Squash

1.) Heat second skillet and add 1-2 TBSP olive oil.

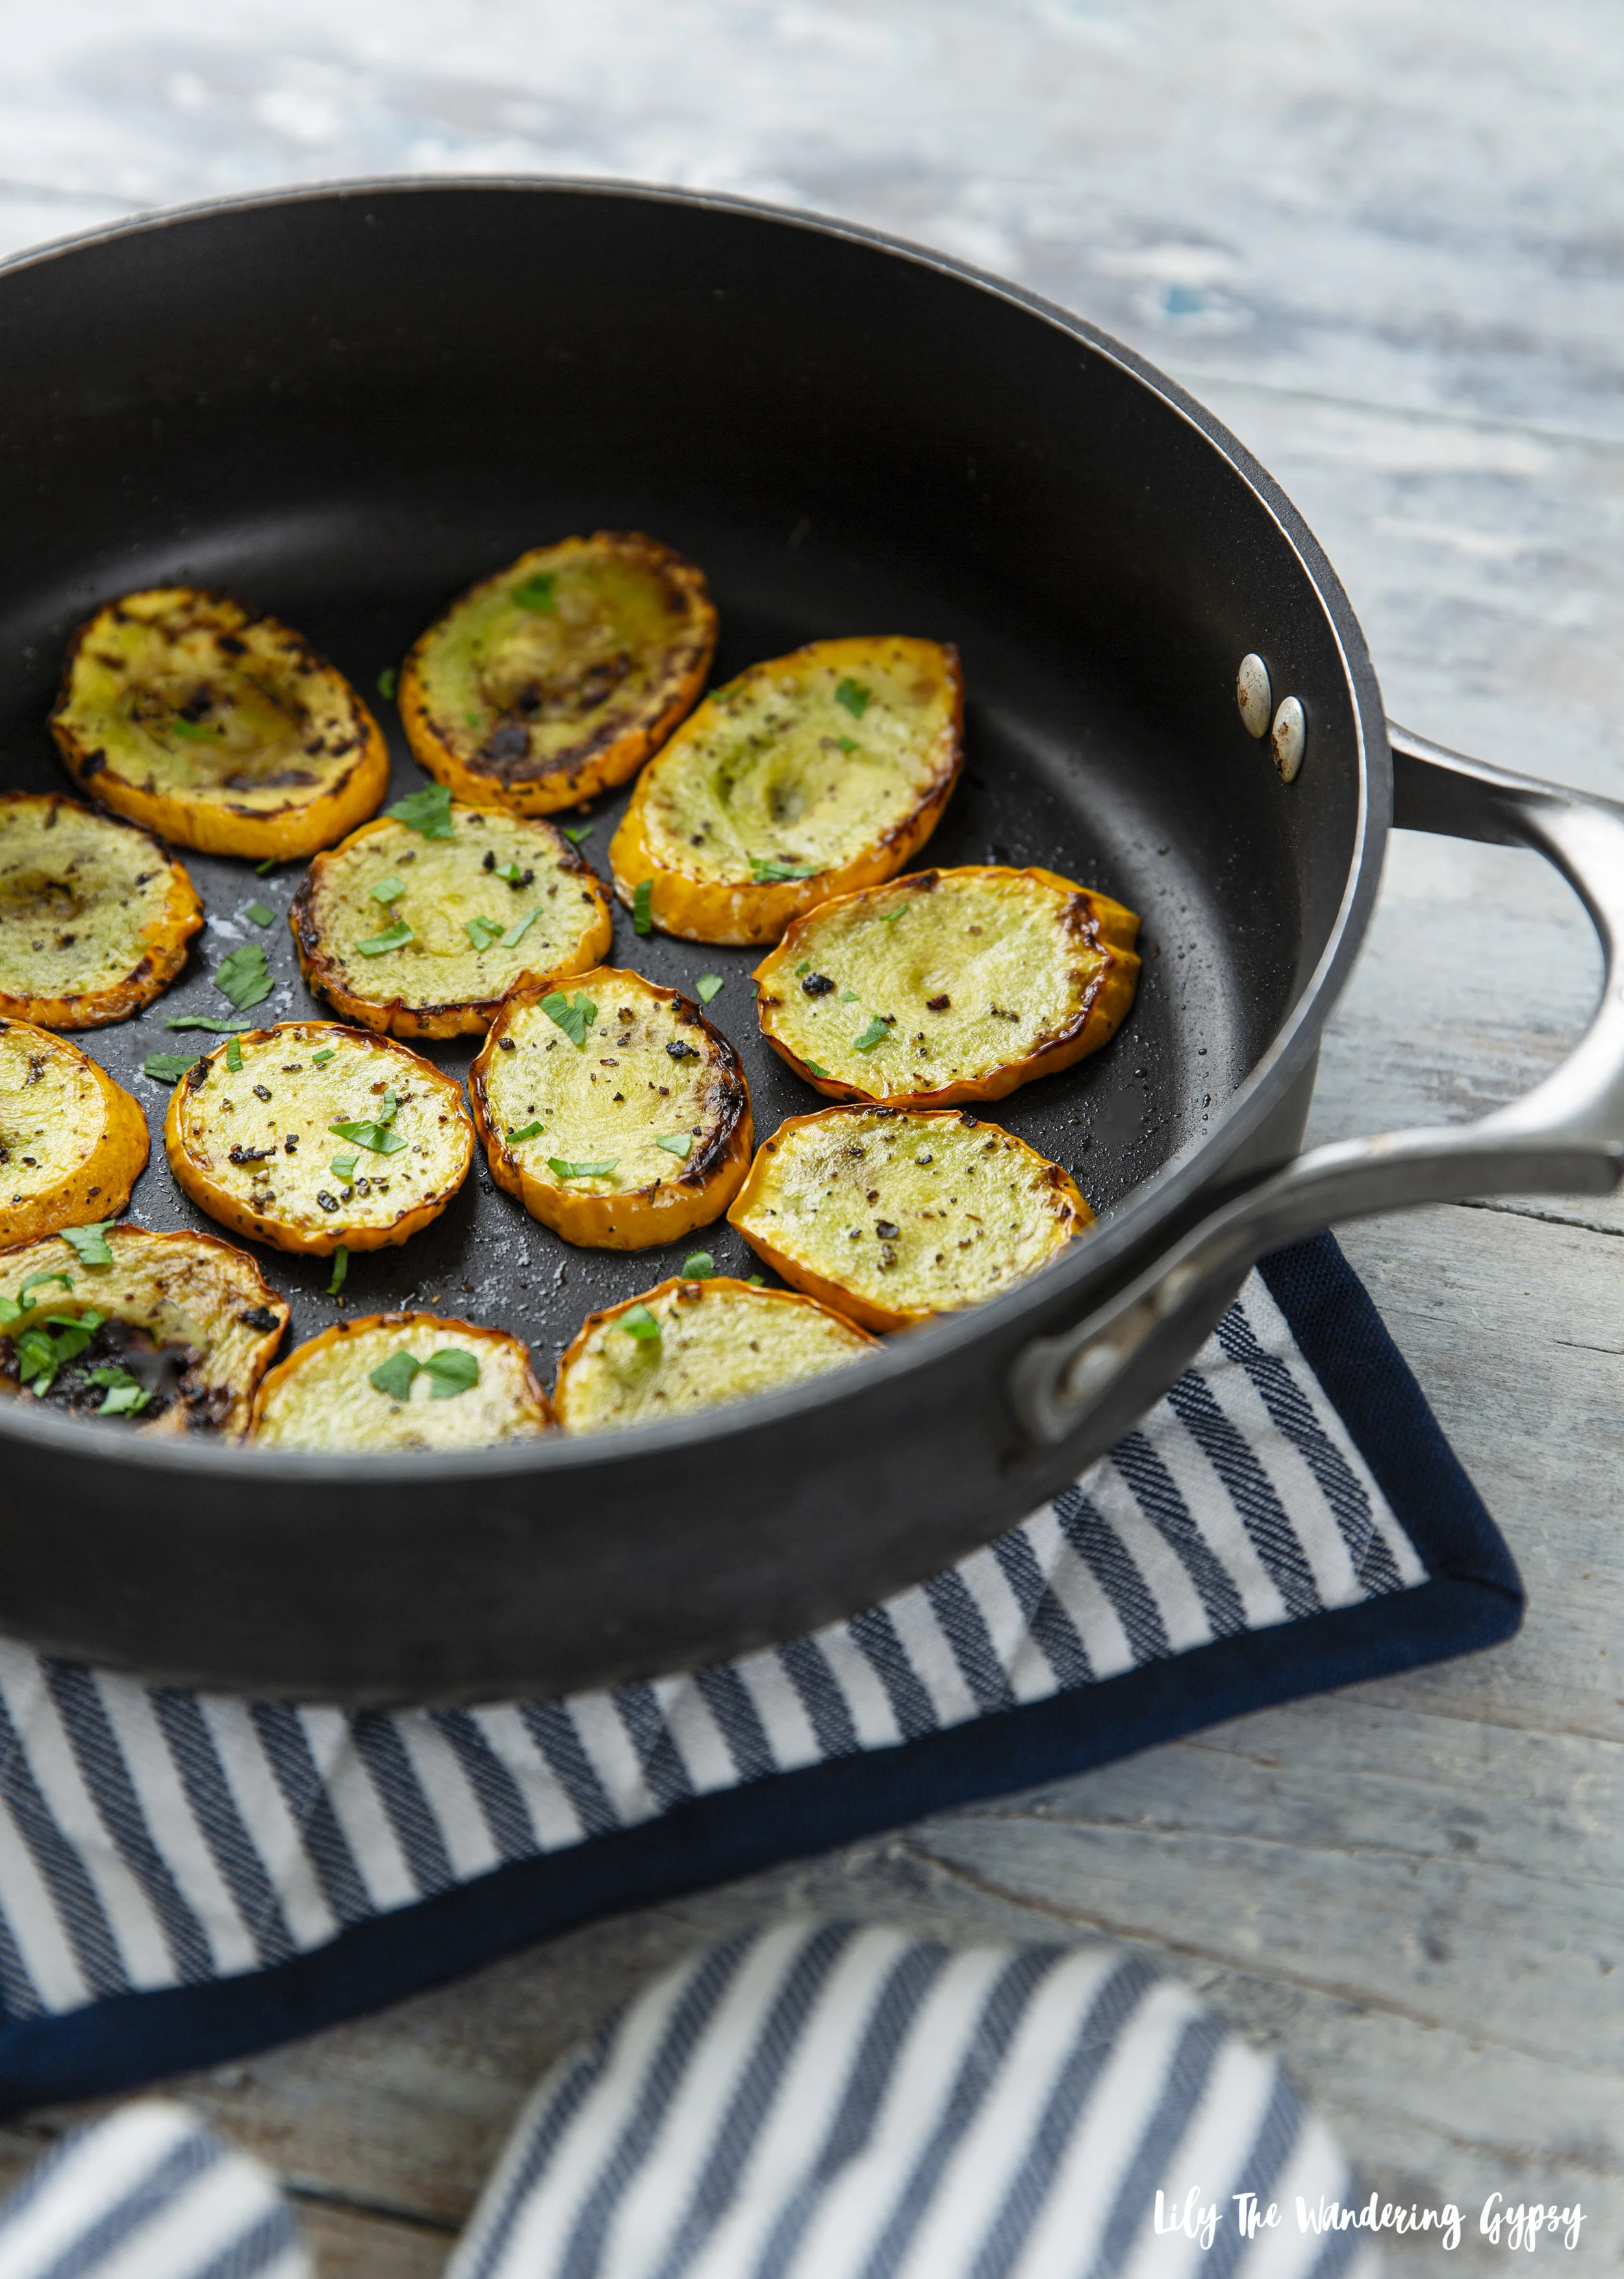
2.) Carefully slice squash and once skillet is hot, add squash to skillet. Sautee about 3 minutes on one side, use tong to flip slices, and cook on other side for 2-3 more minutes, until tender.

Asparagus

1.) Cut bottom 2-3 inches off asparagus stalks.

2.) Cook in hot skillet with olive oil, salt, and garlic, enjoy.

I would definitely recommend keeping a few of these Hatfield Marinated products on hand. Cook one for dinner, have it as leftovers the next few days, and keep 2-3 other Hatfield products in the freezer. They only take a half a day to thaw, so they would be amazing when you need a fulfilling dinner without any fuss.

The other protein that I was considering featuring was the Hatfield® Marinated Pork Roast. It looks incredible, but the preferred cooking method was a crock pot. I would definitely like to keep one on hand for another time.

MEAL PREPPING IDEA

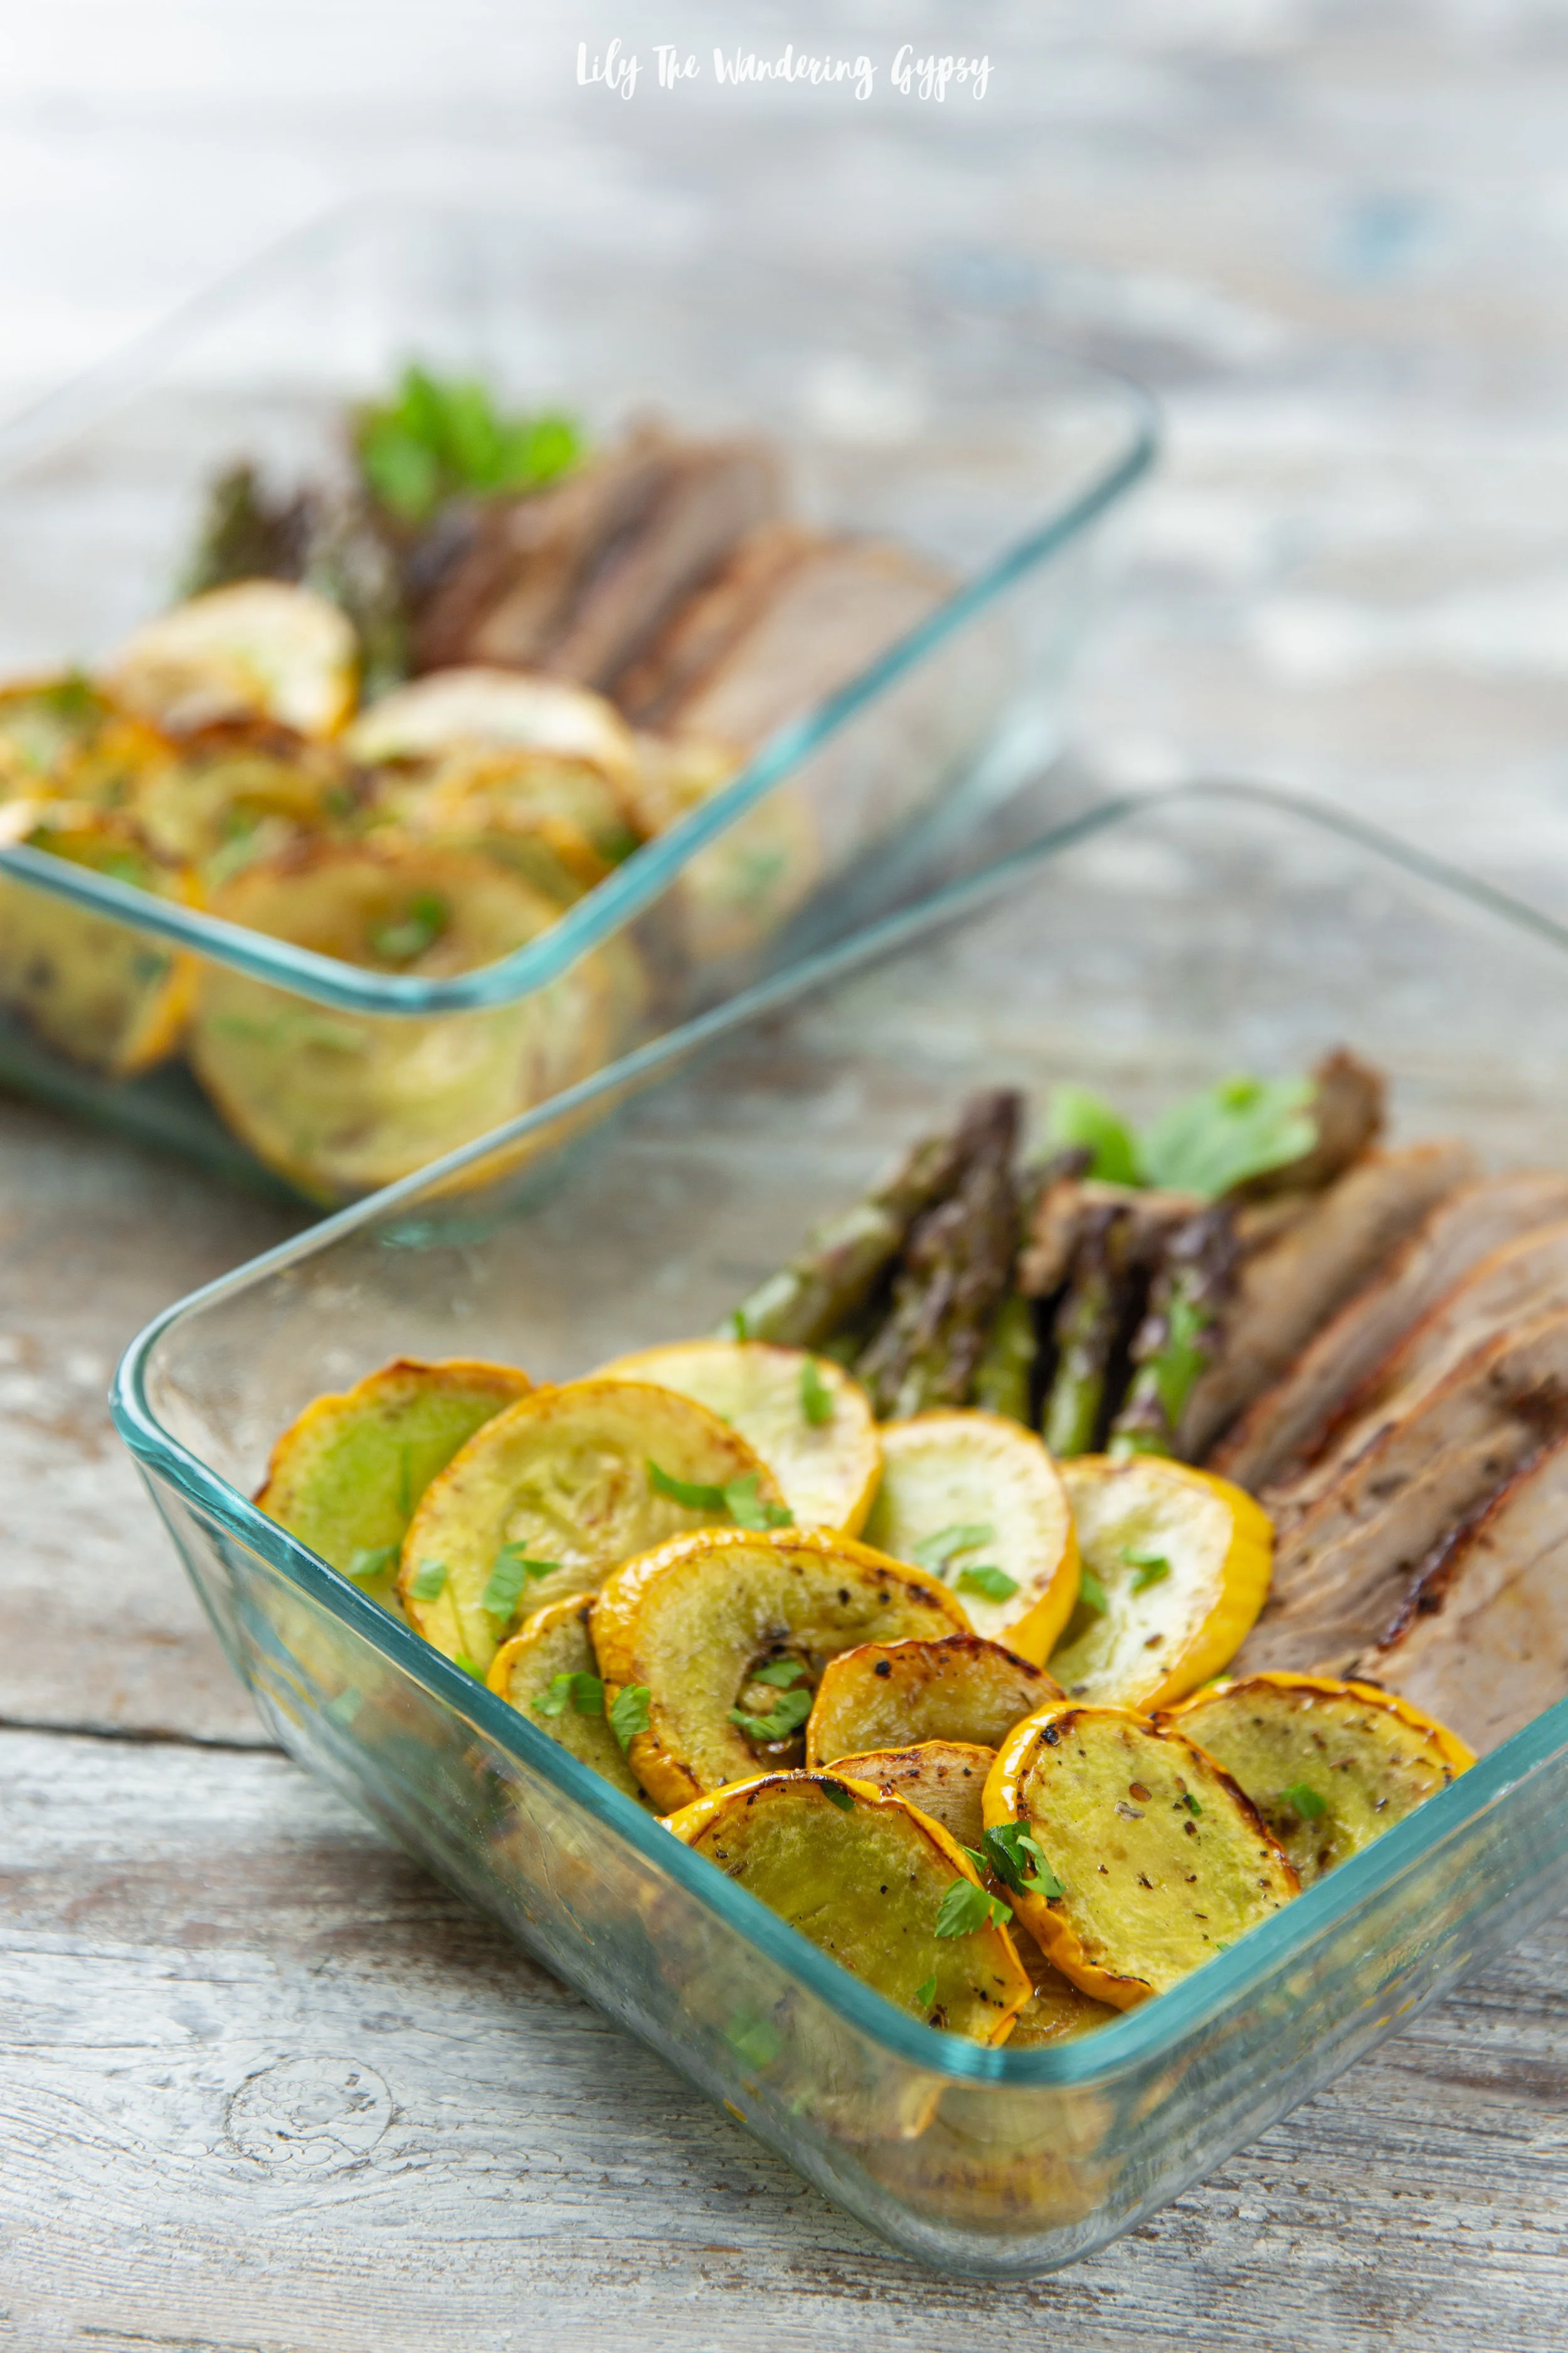
This dish would be super easy to make ahead for lunch or dinner the next day. Simply use clear containers to store the meal, and store it in the fridge for up to 2 days.

I also really love what Hatfield is doing across their social media channels. In fact, they featured my kebabs recipe recently, it was such a nice surprise! Get the full recipe here.

CHECK OUT HATFIELD ON INSTAGRAM HERE!

Simple and Delicious Make Ahead Meal Idea with Laura’s Lean


I was asked by Carusele to participate in the #LaurasLean campaign, sponsored by Laura’s Lean. Although I have been compensated, all opinions are my own.

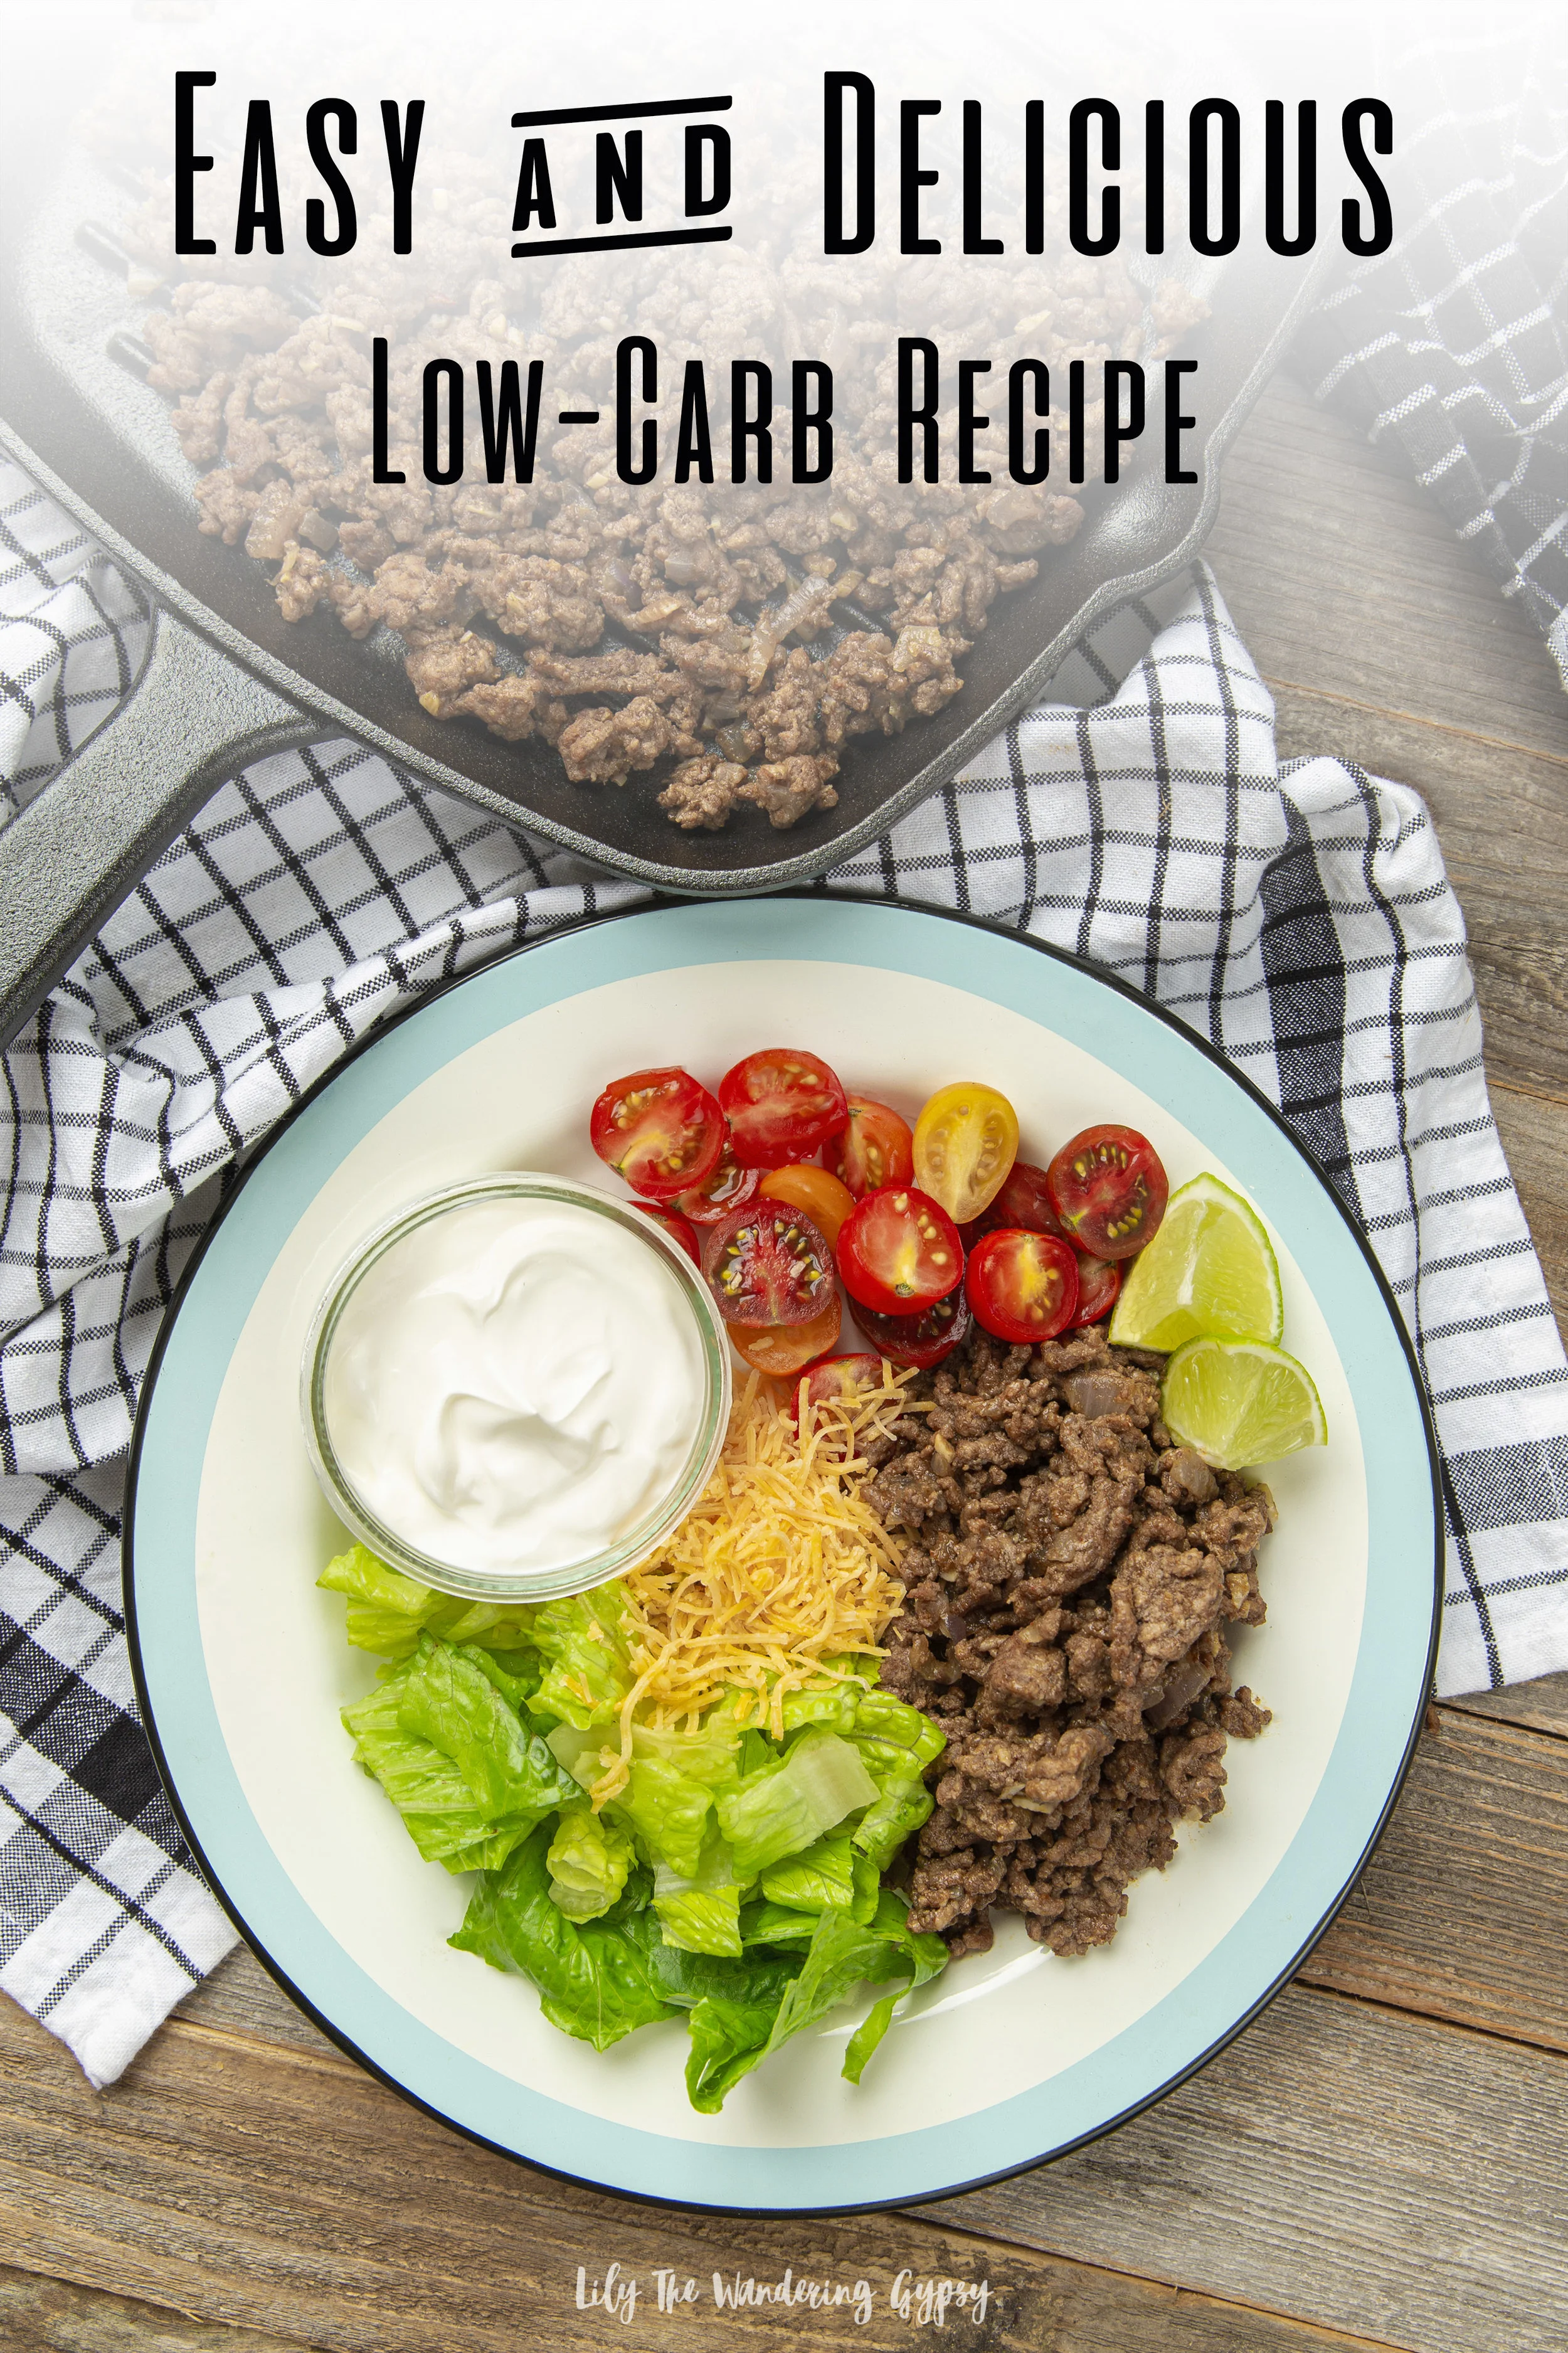
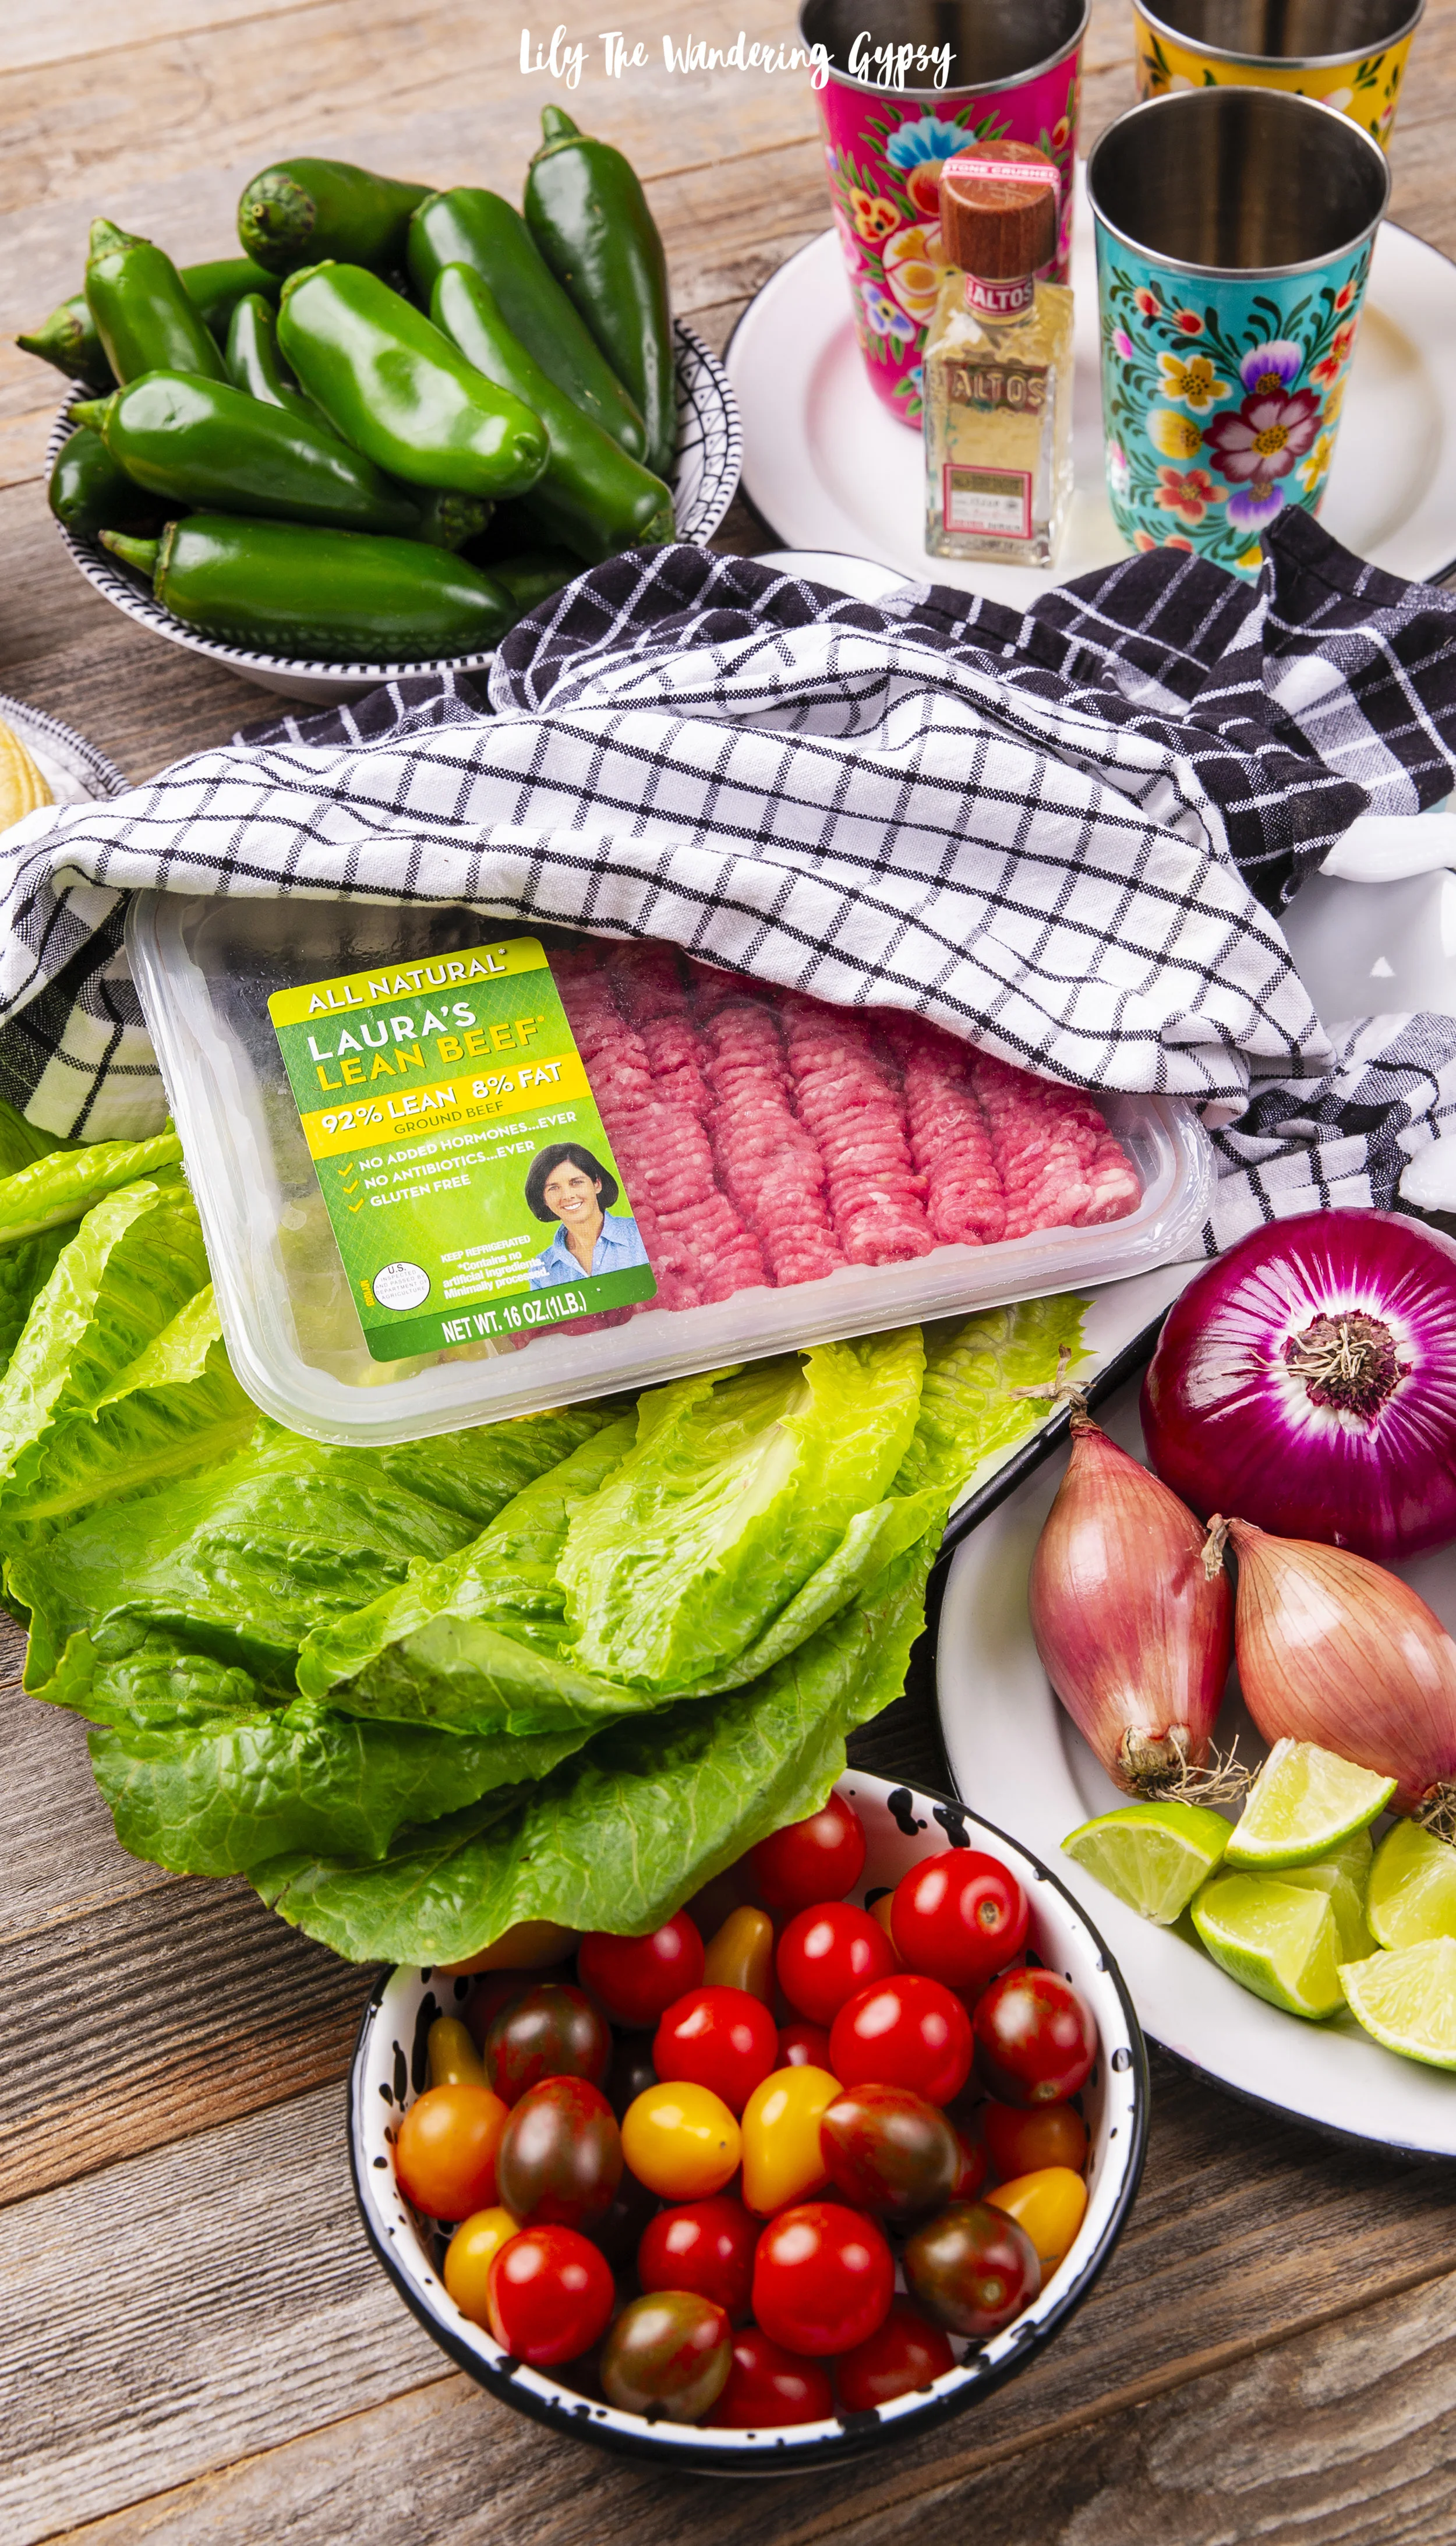
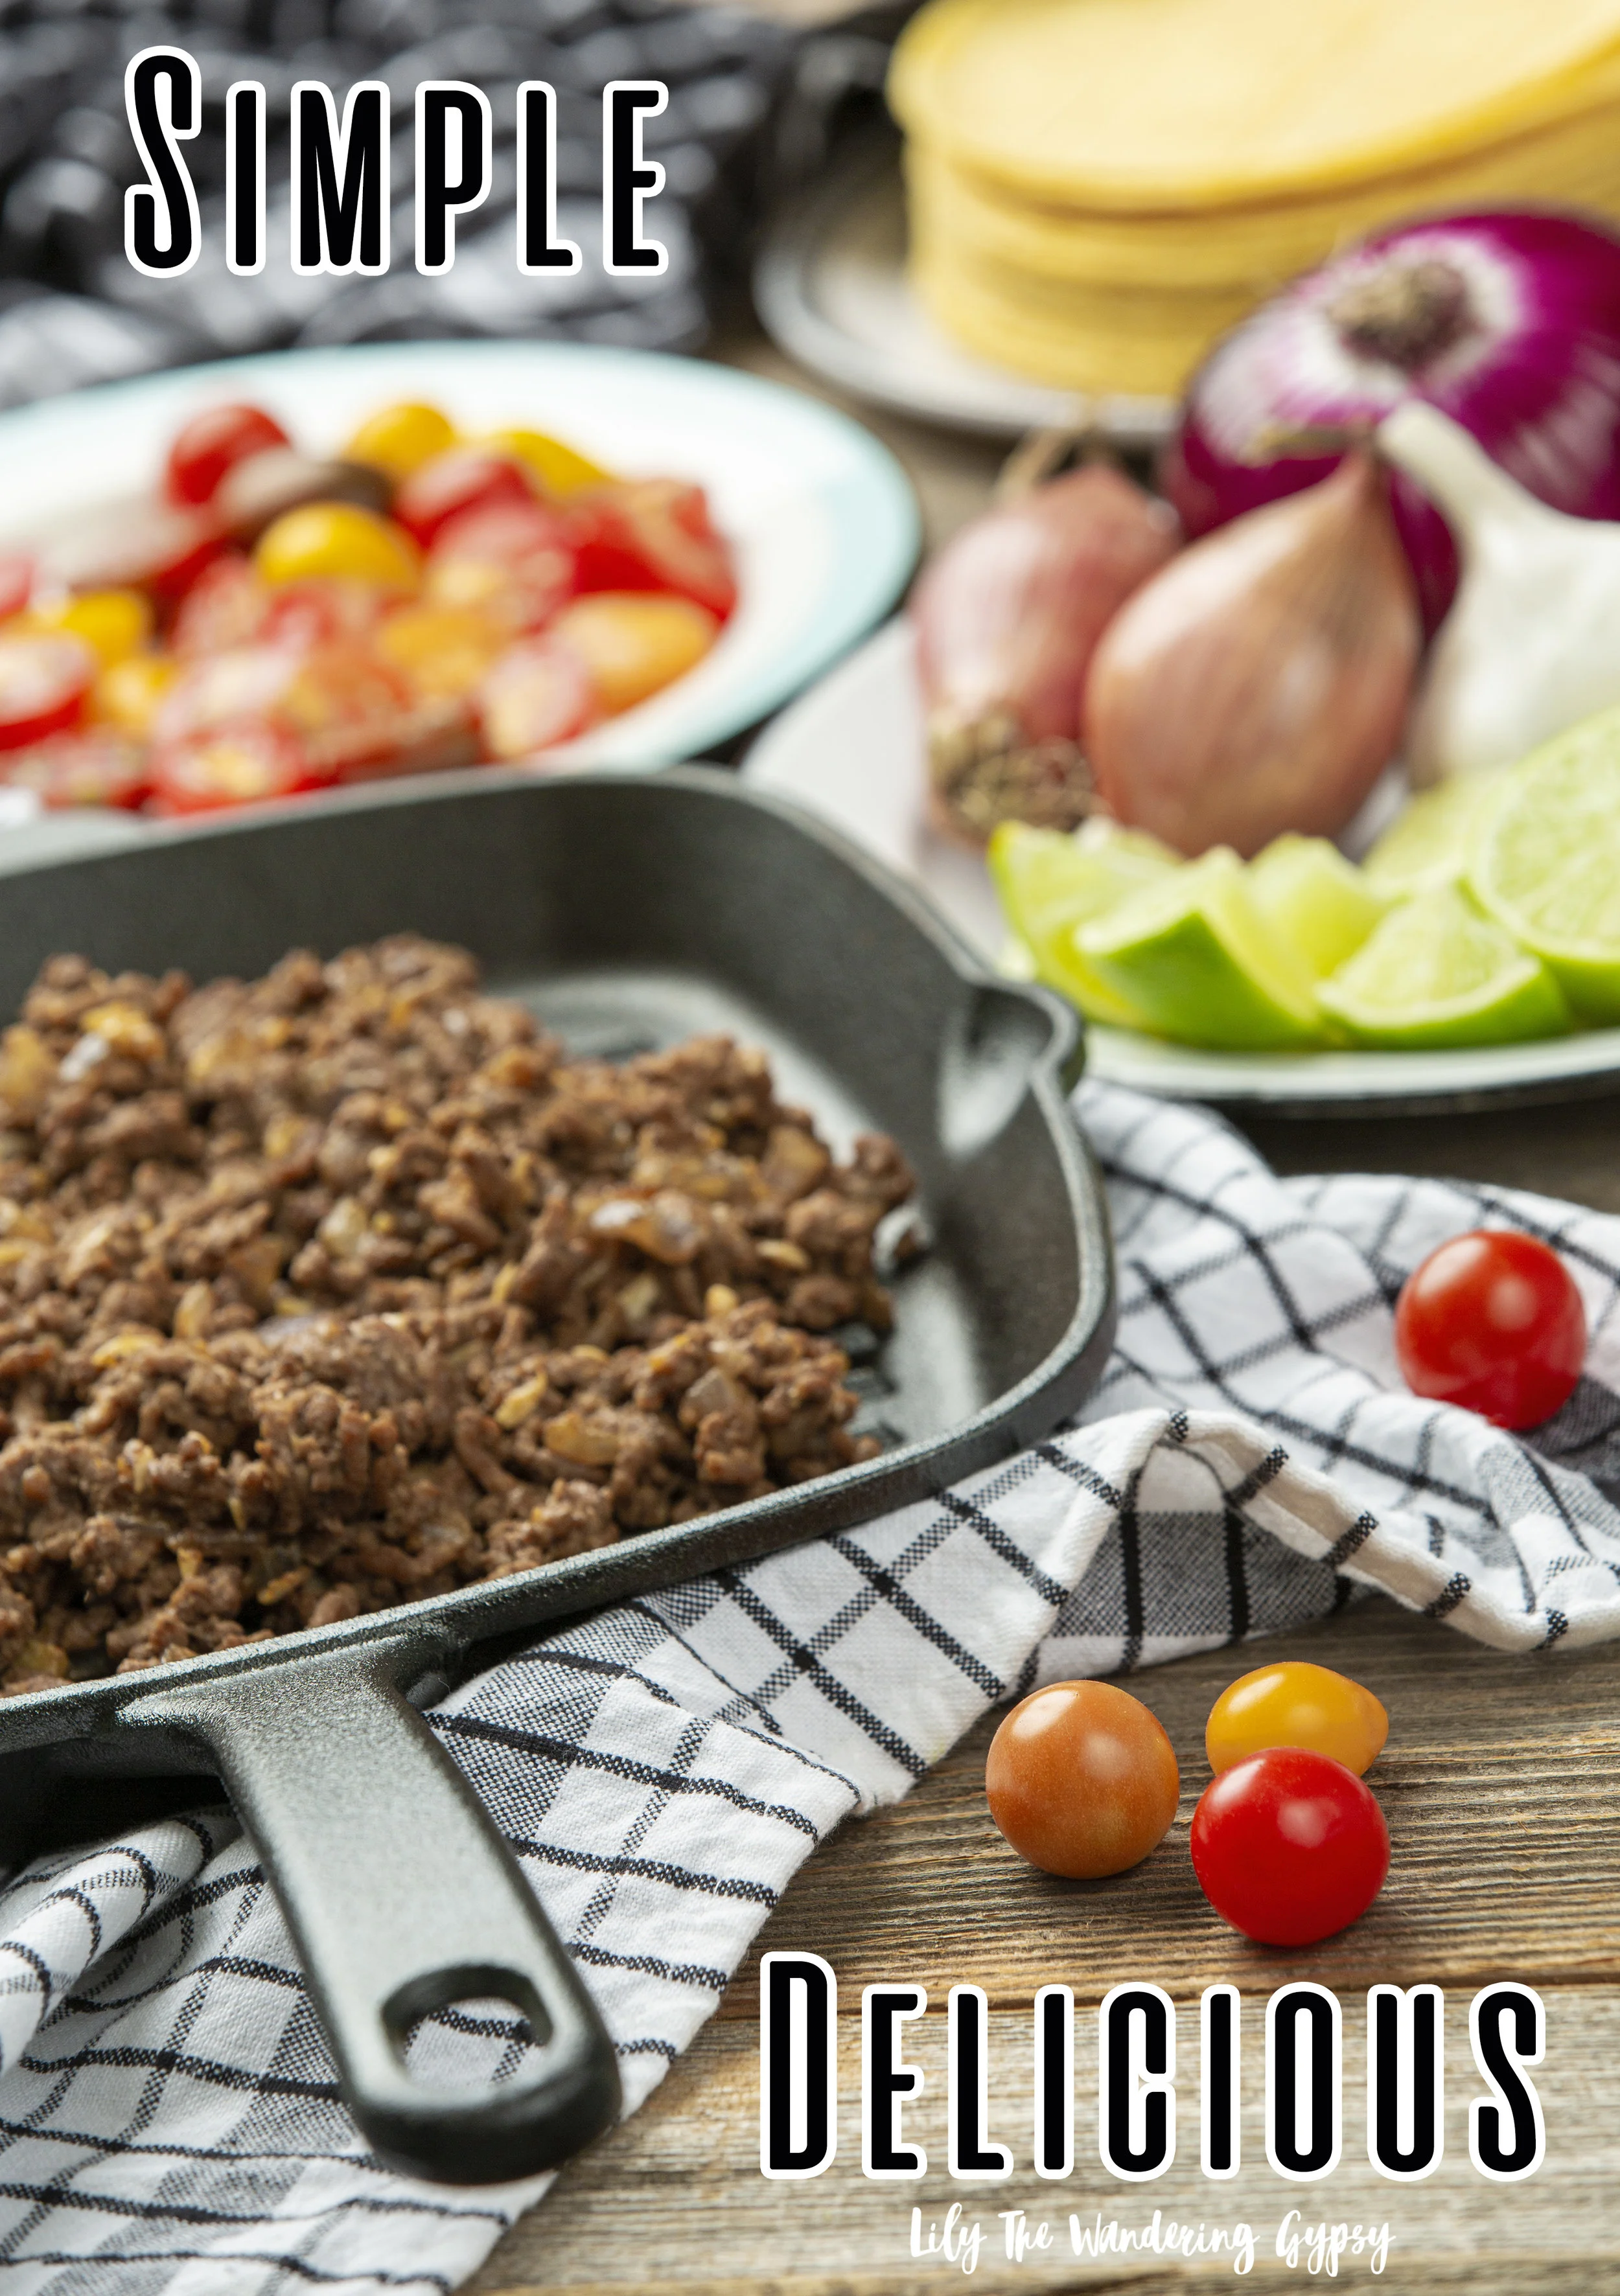
This simple and delicious meal idea is sure to please even the pickiest eaters. Since all of the ingredients are creatively displayed on the plate, each person can create their very own version of their meal. This is food that actually makes you feel great after eating it, exactly what food should be!

I think this would also be fun to serve to guests, for the very same reason, everyone has such different tastes and preferences.

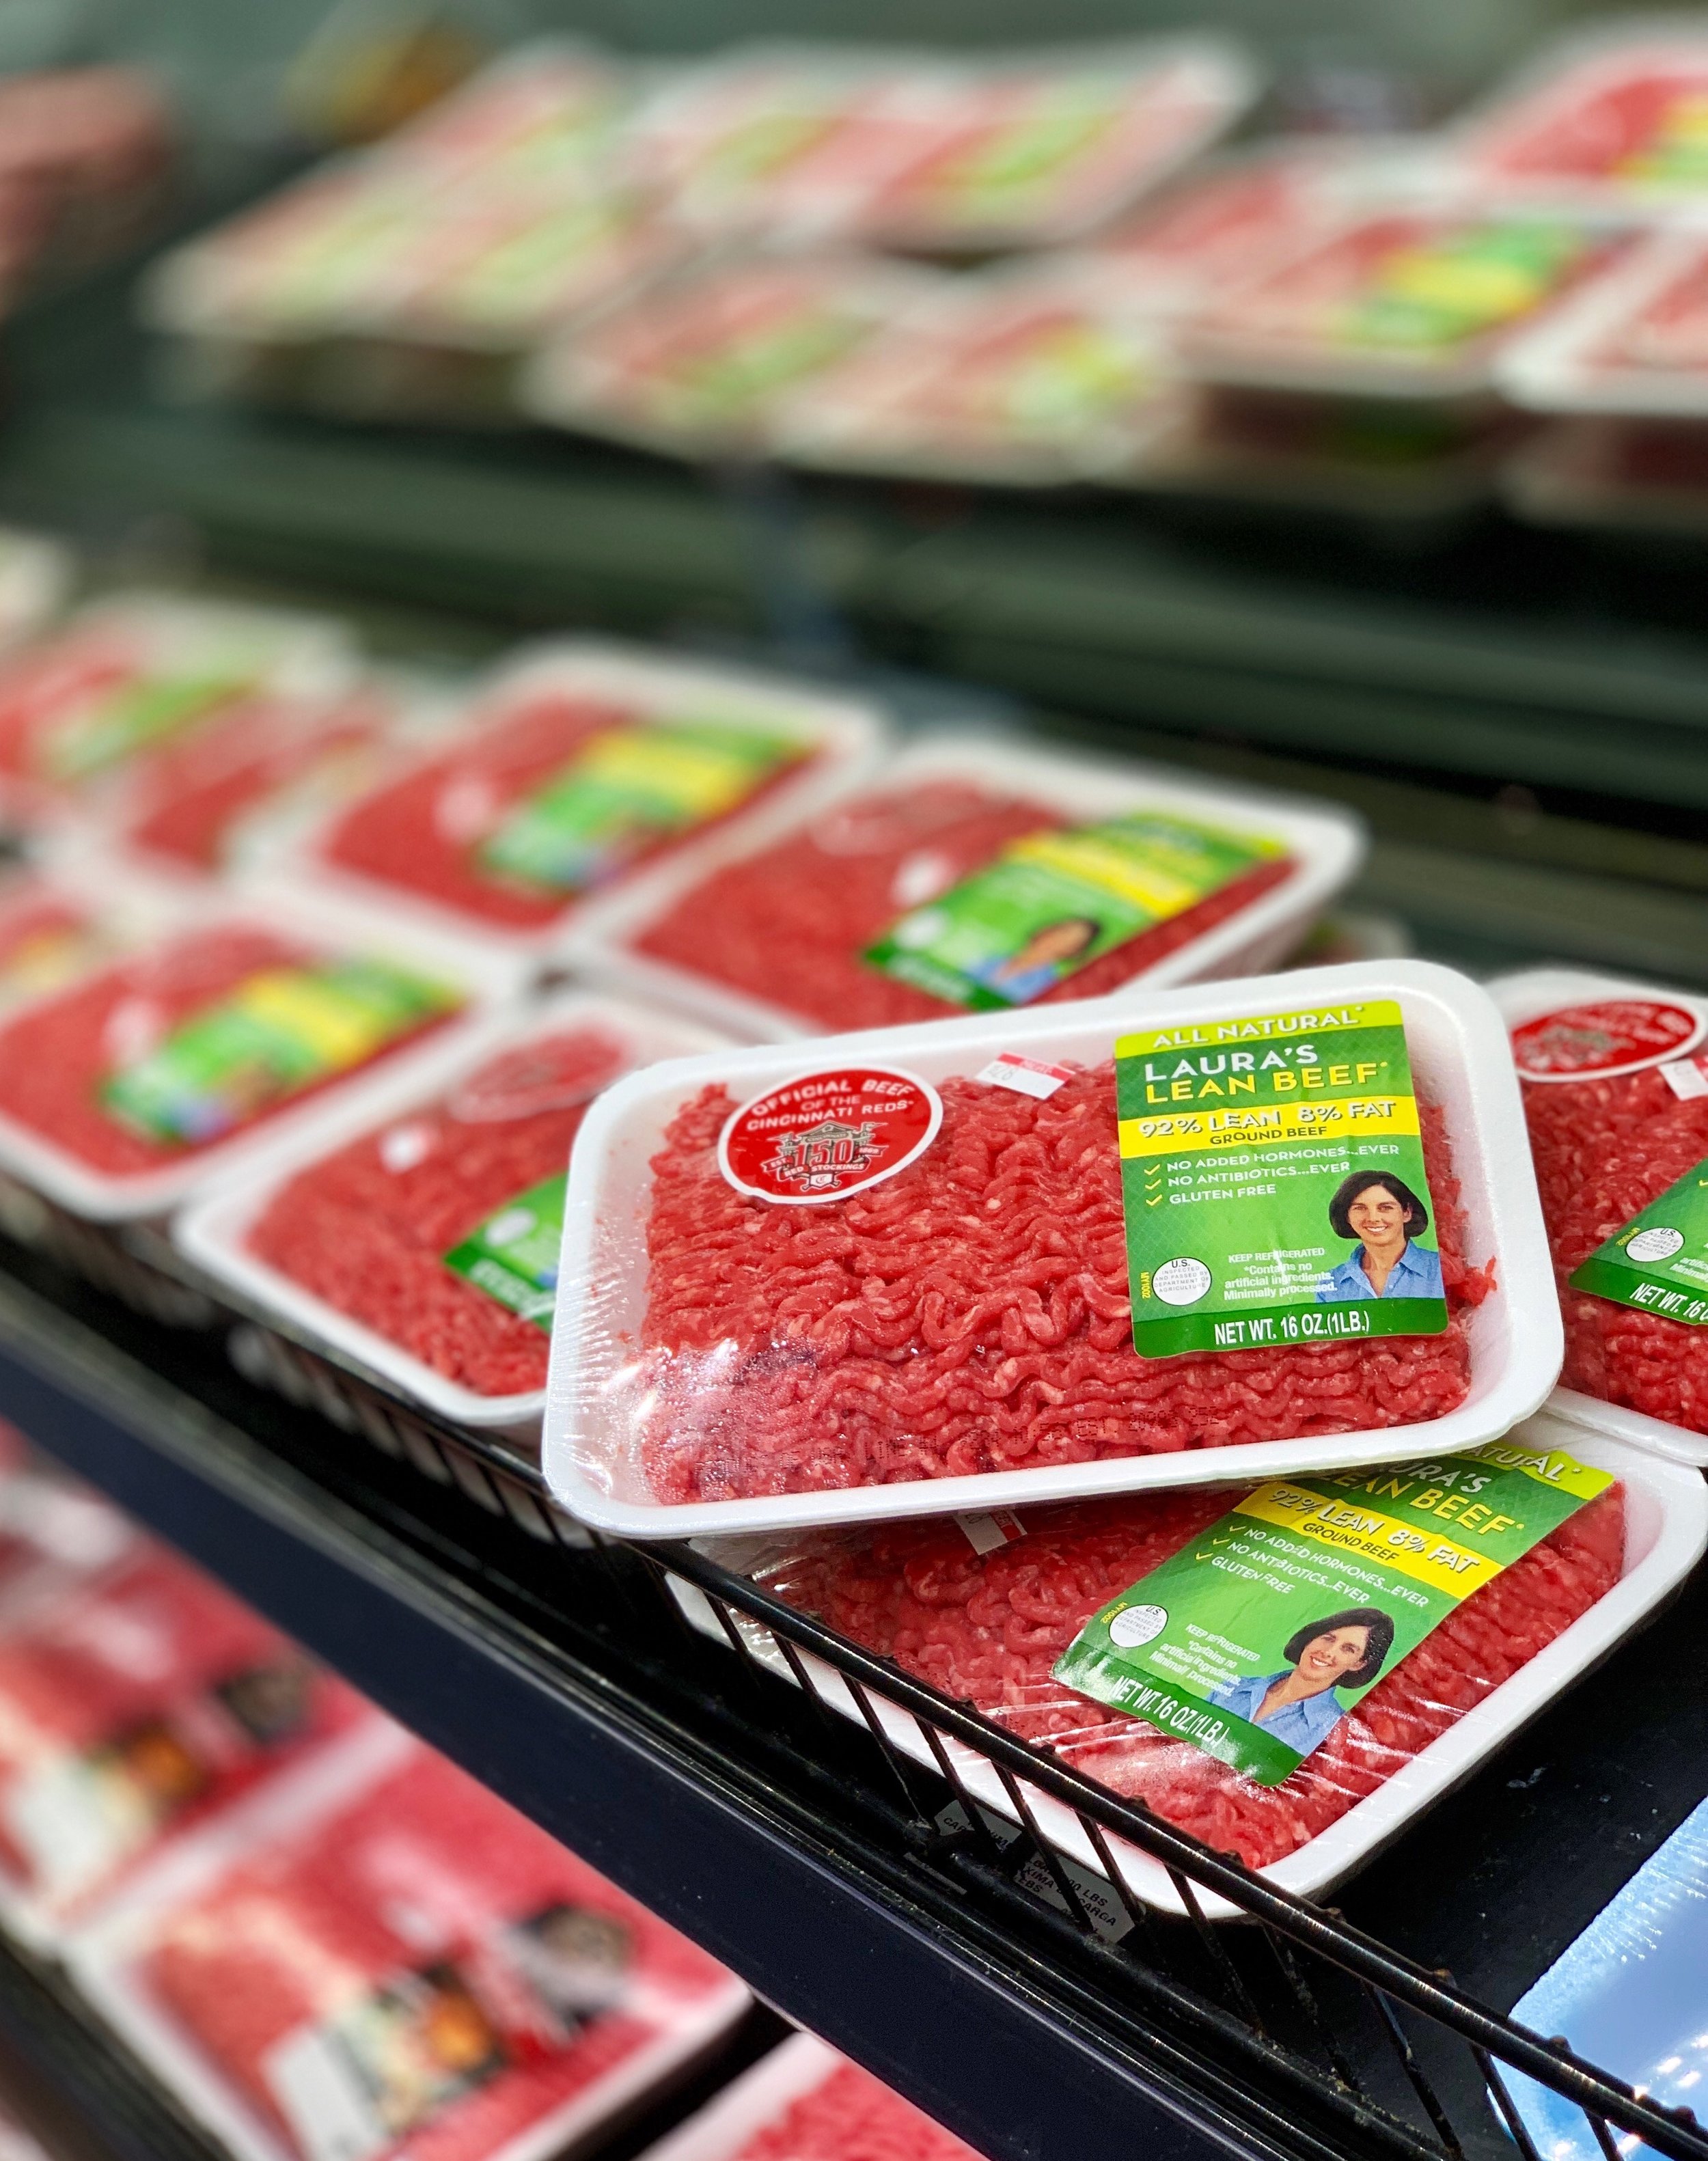
I have been a fan of Laura’s Lean for a couple of years now. Since I shop at Kroger, and I am always drawn to higher-quality, learner ground beef, Laura’s Lean has been a go-to of mine ever since I first tried it. Our local Kroger was remodeled recently, and I tend to prefer their selection and prices way better than anywhere else in town. I always recommend upgrading your beef selection when possible – you definitely deserve the best. When you chose Laura’s Lean, you’re choosing the balance of taste and nutrition for you and your family.

Learn Where To Buy Laura’s Lean Near You!

Keep reading to get the full details on this lean recipe and learn how easy it is to make this yummy meal.

This dish would be so great as a make-ahead option too, since most of the ingredients can be stored overnight and bought to work or school the next day. I stored each of the leftover ingredients in individual containers, and created a whole extra meal the next day. 

PERFECT FOR …

 WORK LUNCHES

BACK TO SCHOOL

 BUSY FAMILIES

 …and anyone who loves an easy, simple, delicious meal that takes under 30 minutes to prepare and enjoy!

Find Laura’s Lean Ground Beef or Ground Beef Patties at Kroger nationwide.

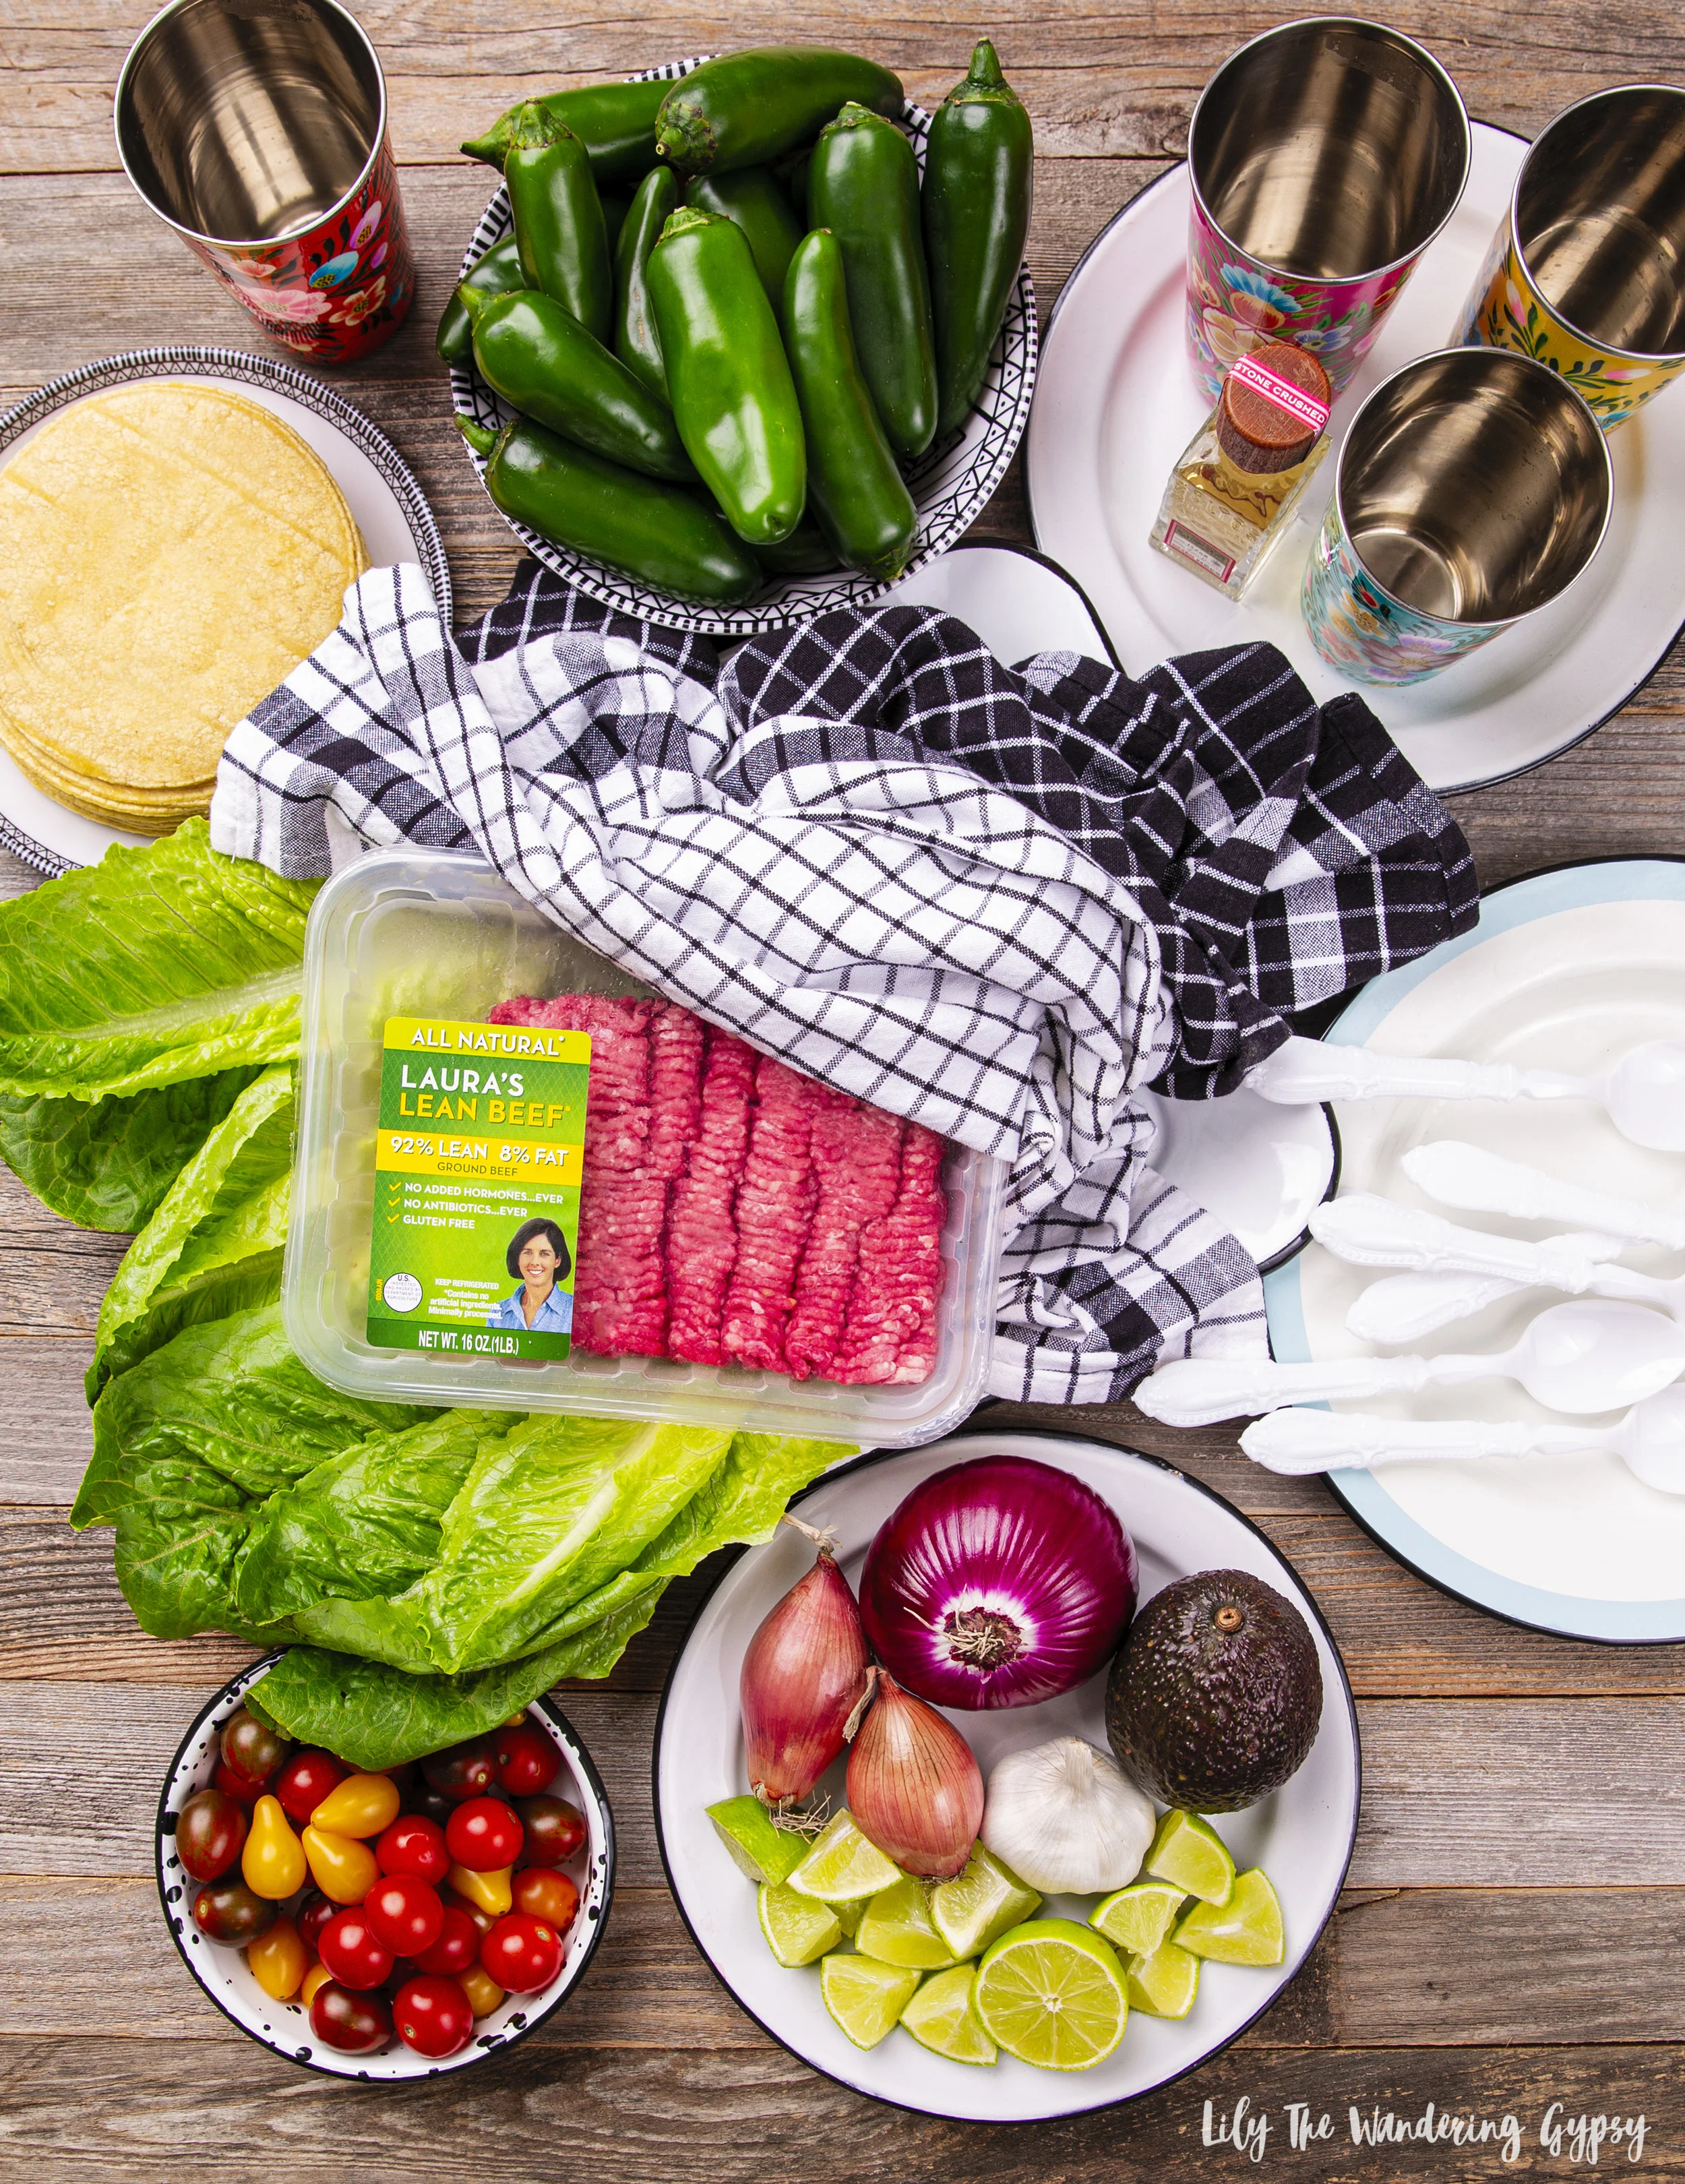
INGREDIENTS (SERVES 3-4):

1 (16 oz.) package of Laura’s Lean Beef

1/2 – 1 cup chopped onion

2-3 cloves garlic – chopped or minced

2-3 TBSP olive oil

3-4 TBSP Taco Seasoning (or more if you prefer)

2 cups shredded cheddar

Lettuce - chopped, tomatoes - diced, sour cream, and any other toppings you prefer.

Tortillas – optional – omit if low carb is preferred.

Salt

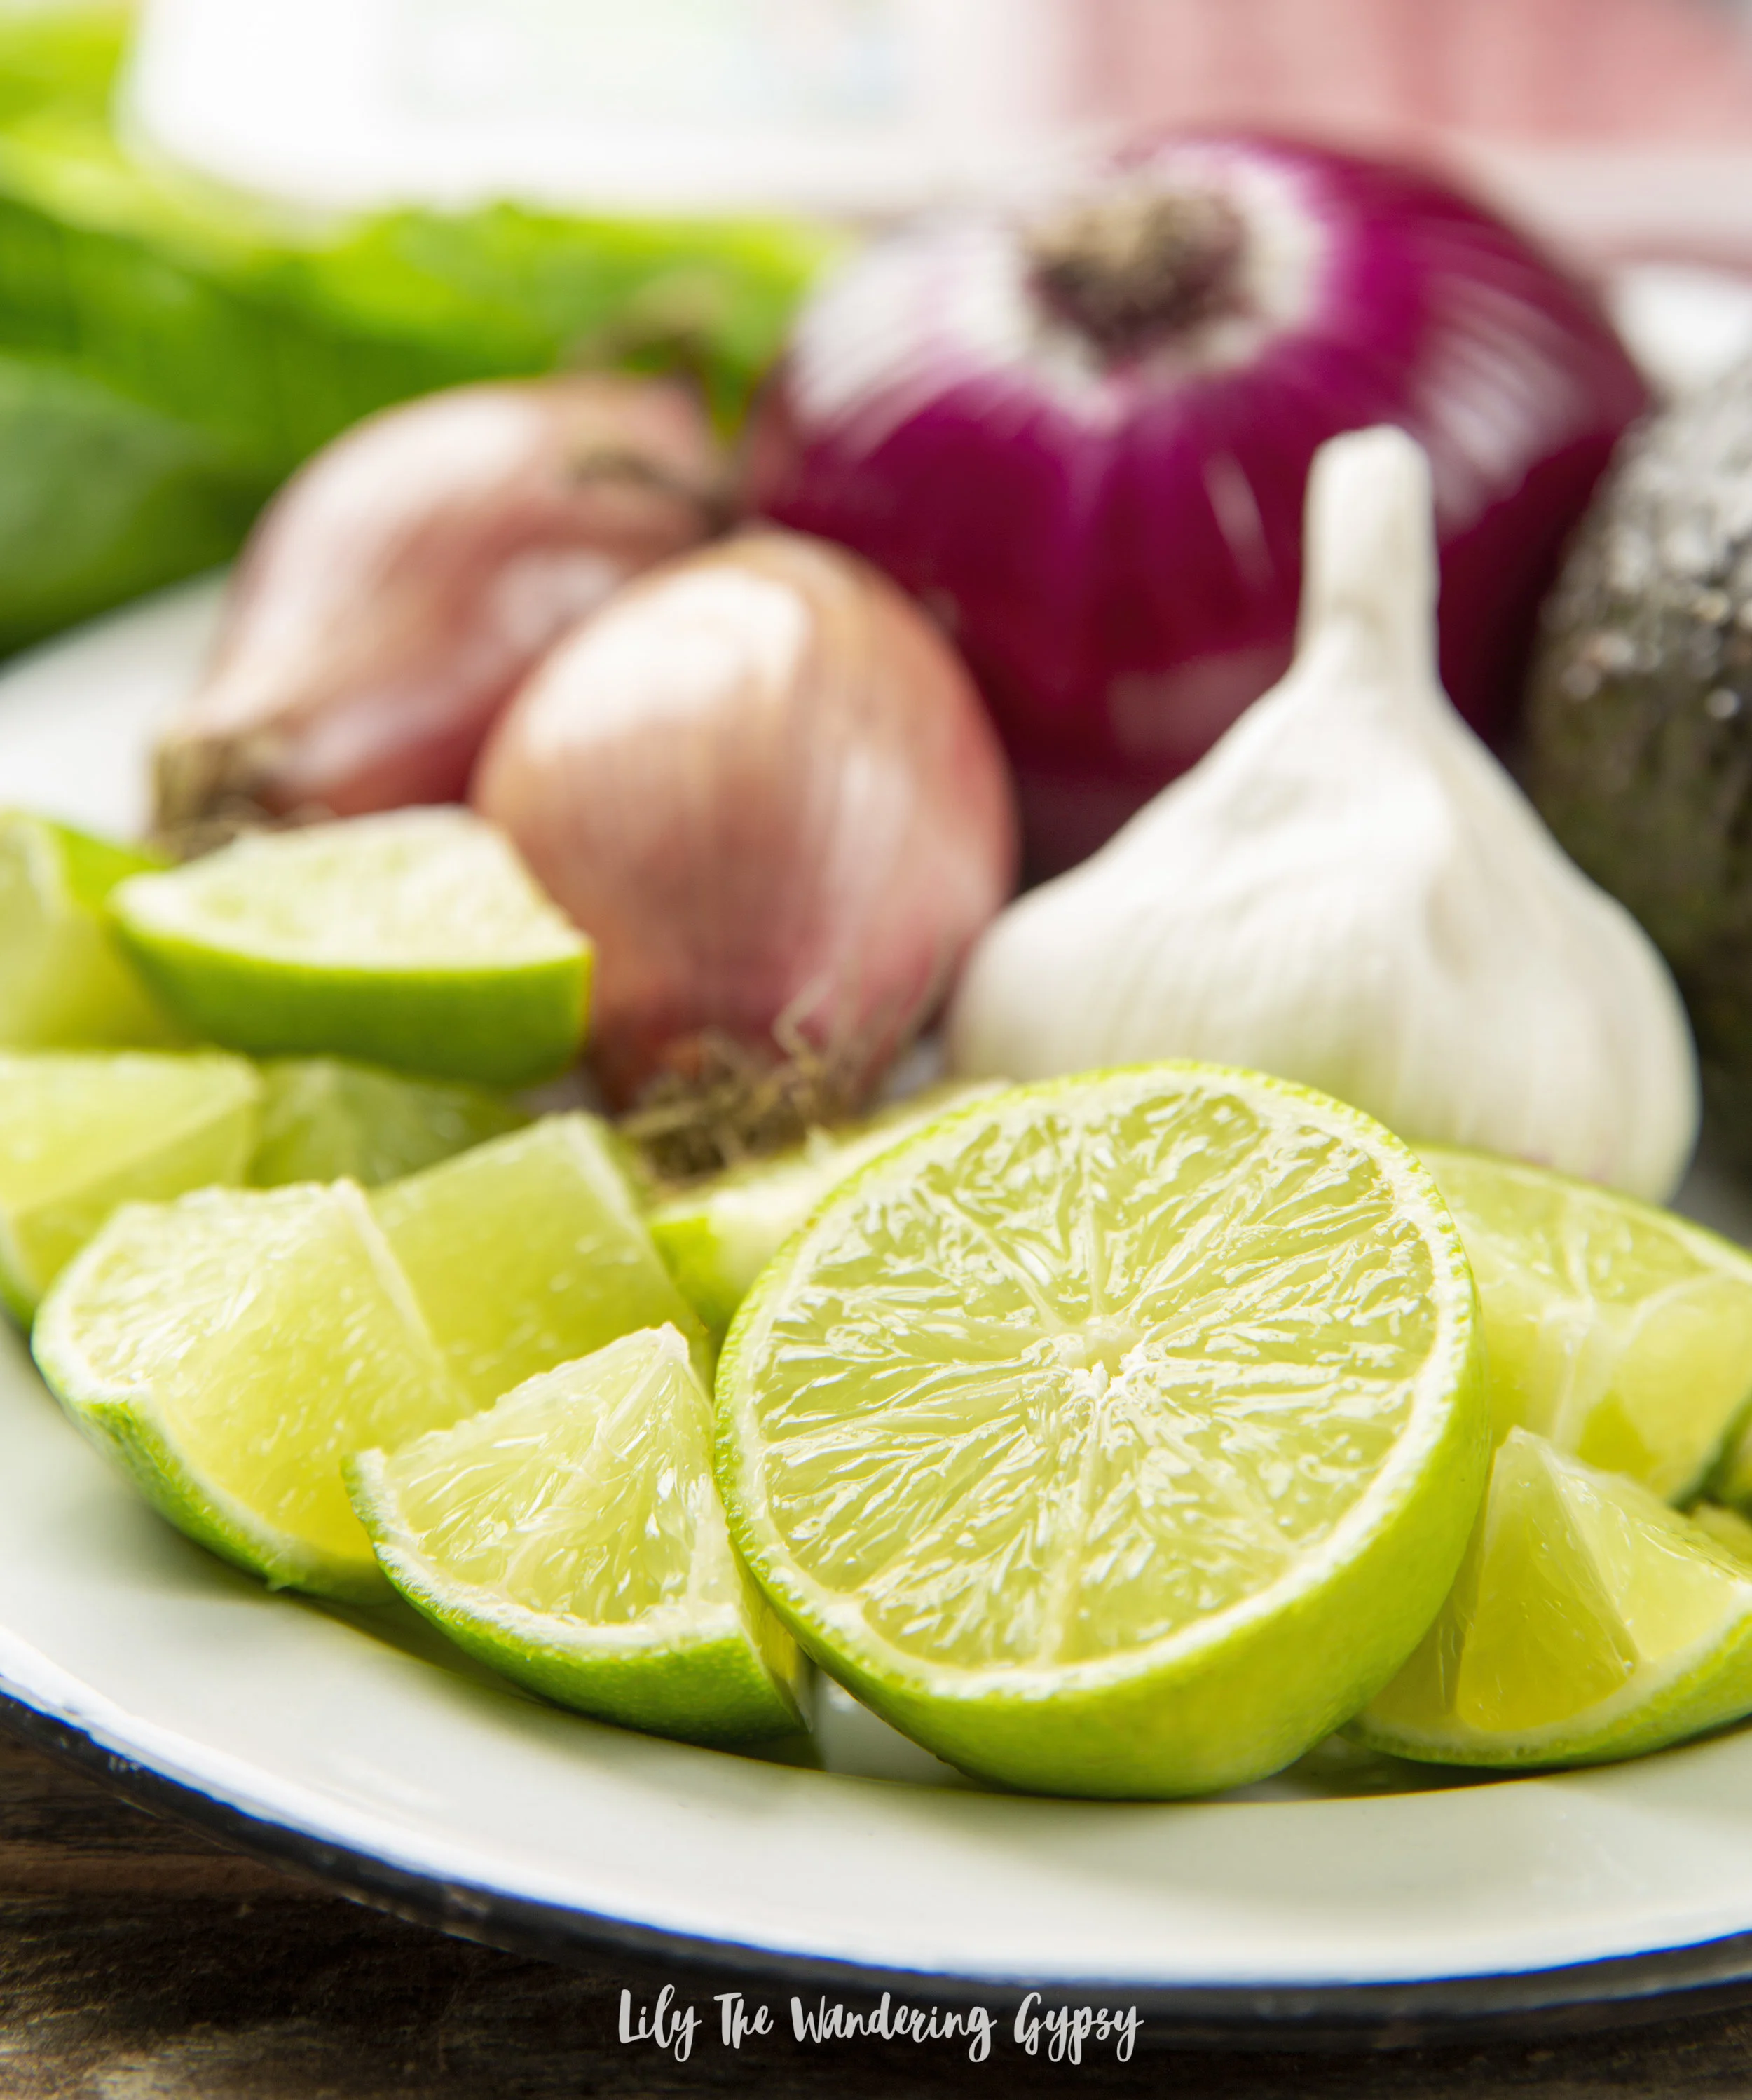
1-2 limes

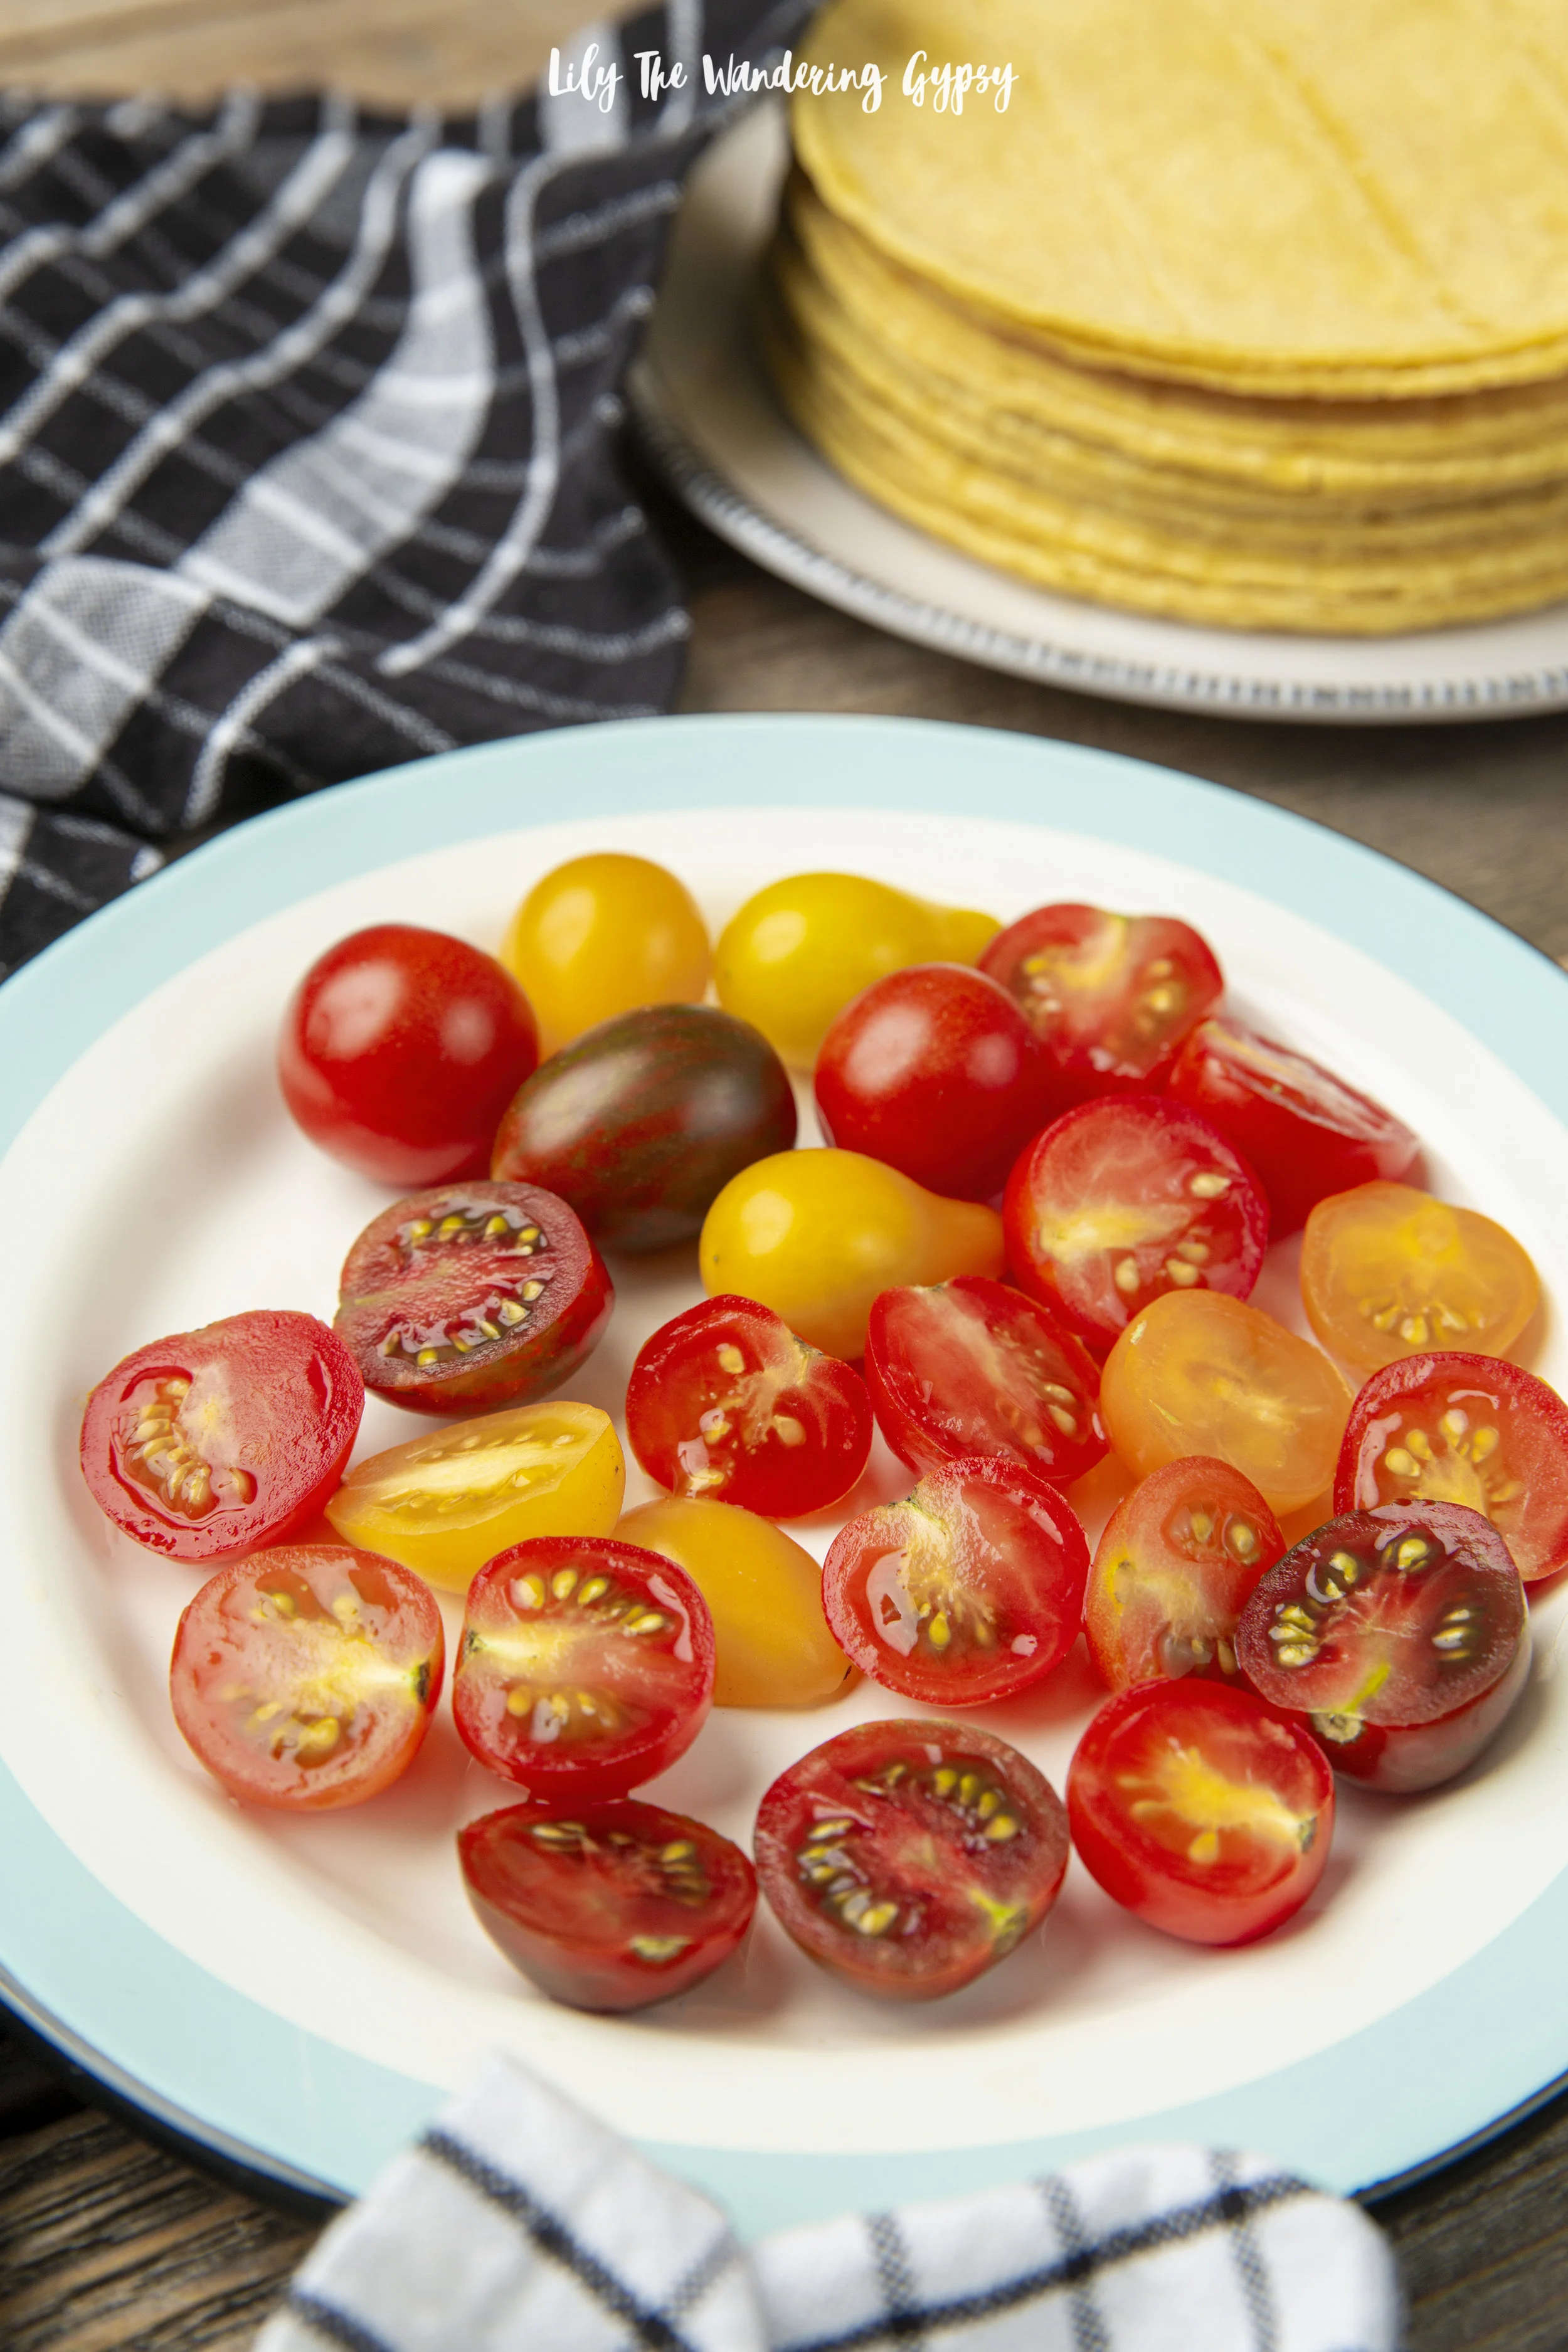
We really loved being able to use home grown tomatoes, right from our garden!

Laura’s Lean is so great – it’s so lean and has a taste that’s better than anything else on the market.

INSTRUCTIONS:

1.) Chop onions and garlic into tiny pieces, set aside. In a medium to large skillet, add 1-2 TBSP olive oil, and turn heat to medium. Add chopped onions and garlic, and season with a small sprinkle of the taco seasoning. Cook until tender.

2.) Once veggies are sautéed, add Laura’s Lean Ground Beef, and begin to cook. Season with 3-4 tsp salt + 2-3 more TBSP of the taco seasoning, and more if you prefer. Cook until brown. Season with fresh lime juice if you would like.

3.) If you do see any excess grease after your beef has cooked, feel free to strain it in a colander in the sink. Once drained, add beef back to skillet and get ready to prepare your plates.

4.) On each plate, add Laura’s Lean ground beef, lettuce, tomatoes, shredded lettuce, sour cream, cheese, and any other toppings you like! Serve with warmed tortillas, and enjoy.

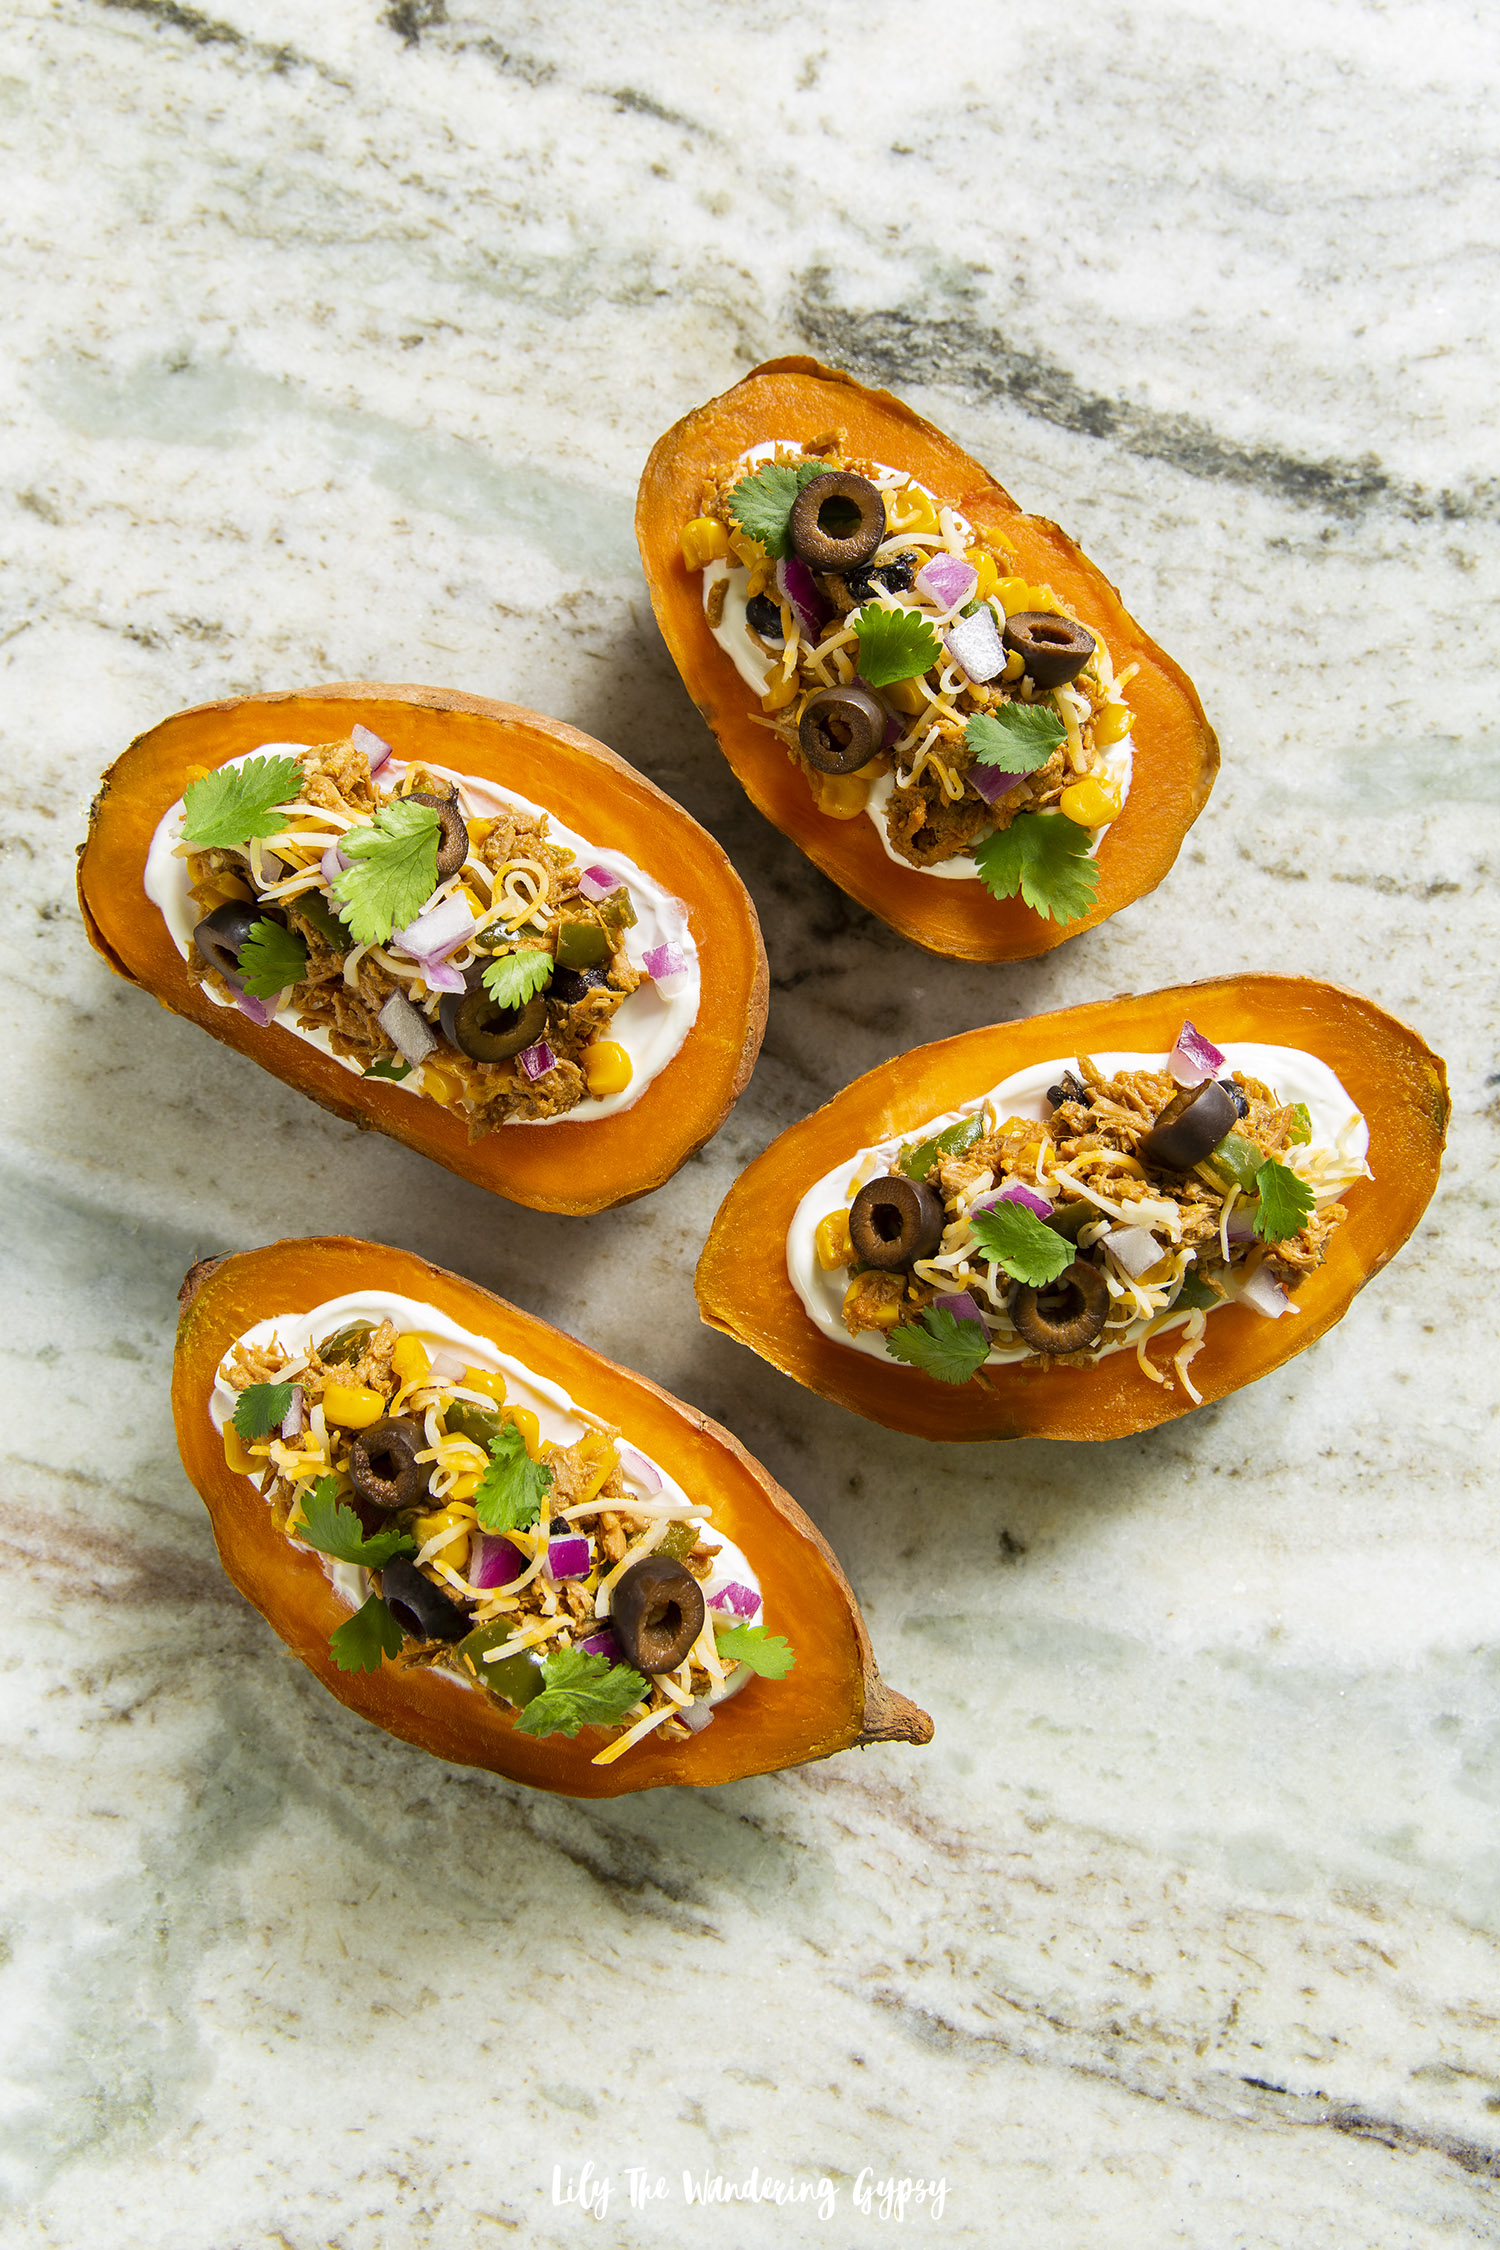
Loaded Sweet Potatoes - an easy dinner idea!

These sweet potatoes are perfect for warmer weather. Everything can be prepped ahead and the toppings can be completely prepped ahead of time, and these would be exceptional to bring for lunch! I just love how many amazing nutrients come from sweet potatoes too. Hope you enjoy!

INSTRUCTIONS:

1.) Rinse sweet potatoes with water and pat dry. Use a fork to make pricks in the outsides of the potatoes, and bake wrapped in foil for 30-40 minutes. Once soft enough to make a soft impression with your fingers, CAREFULLY unwrap from foil and place on a heat proof cutting surface. Cut in half lengthwise, and arrange on a plate.

2.) Top with items like sour cream, leftover crock pot pork, shredded cheese, cilantro, onions, and black olives, and you have one of THE most delicious entrees you have had in a long time. Enjoy!

What to Pair with Asti Spumante + Mini Fruit Tart Recipe

This post was sponsored by the Italian Trade Agency as part of an Influencer Activation for Influence Central and all opinions expressed in my post are my own. Message for readers 21 and older.

Throughout life, I have been so inspired by my Italian heritage. I enjoy wine, food, and art, all of which are very close to my heart. My grandfather’s parents moved to the United States from Italy around 1910, and since I was so close to his side of my family, I always felt such a connection to that culture. Living La Dolce Vita, meaning living the sweet life, is a great phrase for the way I feel about what you will find in this post. Learn how to pair this sweet sparkling Italian wine called Asti Spumante with something sweet and easy to make.

 In this post, I wanted to share a bright, refreshing glass of Asti Spumante with you (from one of 20 wine regions in Italy), and provide an easy yet elegant recipe for mini fruit tarts, which pair very well with this sparkling Italian wine.

Asti Spumante is a sparkling wine that is produced from Moscato Bianco grapes in the southeastern part of the Piedmont region of Italy, concentrated around the cities of Asti and Alessandria, but also near Cuneo. 

Though Piedmont accounts for only 7% of Italy’s wine production, it is celebrated for producing wines of extremely high quality. Piedmont stands proud as the region with the most DOC/DOCG zones (58) and the largest percentage of officially classified wines (86%). Piedmont is Italy’s northwesternmost region, sharing a border with Switzerland and France, and surrounded by the Alps to the north and west and the last peaks of the Apennine Mountains to the south.

(Image Source: Extraordinary Italian Wine

Below, you will notice a regional map of Italy, and the Piedmont region is shown in red.

The region is surrounded on three sides by the Alps. The name Piedmont comes from Latin meaning, ‘at the foot of the mountains,’ which makes for a very rocky soil and terrain in some areas. It’s an agricultural region, where more than half its 170,000 acres of vineyards are registered with DOC designations.

Italy produces the largest volume of wine in the world. The country may have more than 3,000 varieties of grapes, of which 590 are officially recorded with hundreds left to be catalogued. The wines are often referred to as “passionate wines,” extremely expressive wines that convey many emotions.

I often go for white wines when possible, and enjoy Chardonnay a LOT. This variety of wine has notes of light citrus fruit flavors (apple and pear mostly,) and a few hints of vanilla. Foods that pair well with Chardonnay include semi-soft cheeses such as goat cheese, herb-crusted halibut or scallops, chicken breast, and more.

My grandfather was one of my favorite people ever, and it’s really an honor to be able to celebrate him and the positive impact he had on me. My last name is Accettura, which is actually a city in the Southern Italian region of Basilicata. It has always been my dream to one day visit, and hopefully I will.

Since my grandfather loved cooking for me and treating us to delicious meals at restaurants in the Chicago area and on our vacations to Florida, I learned to love good food. He would be so proud of me for following my dreams of working for myself as a food and lifestyle photographer.

Many sites I researched concluded that fresh fruit are a great pairing for Asti Spumante. A few sites even mentioned fruit tarts, which I knew would be gorgeous to pair with this wine.

HOW TO MAKE MINI FRUIT TARTS:

Ingredients:

 1-2 packages of ready to use flaky shells (freezer section near the puff pastry and pie crusts)

Fresh fruit topping:

1 kiwi, cut into small pieces

1 package of blueberries

3 strawberries, cut into slices then into slices, like a pizza

Fresh whipped cream:

1 pint heavy whipping cream

¼ cup (or more) granulated sugar

2 tsp Vanilla bean paste or regular vanilla

1/3 C. powdered sugar, sifted

Optional – frosting bag and larger star-shaped piping tip

Instructions:

1.) Make whipped cream. In a stand mixer, whip together cream, granulated and powdered sugars, and vanilla. Beat until stiff peaks form, put into fridge to cool. After 15-20 minutes or less, transfer into prepared frosting bag.

2.) Lay all shells out onto work surface, and use your frosting bag to full shells. I used a swirling motion to get a nice shape. See below.

3.) Cut up fruits, and add one fruit at a time to all cups. First put one blueberry on each cup. Then, put one piece of kiwi on each, then one piece of strawberry. Serve with Asti Spumante and enjoy!

Experiment with Italian wines in creative, unexpected settings: Italian whites at the beach, Italian Rosato with BBQ, Italian whites with sushi, Nero d’Avola with Korean BBQ, Montepulciano d’Abruzzo with burgers, Valpolicella with ribs, Lambrusco with Mac n’ Cheese, Pairing Italian wines with cheese and meats.

I am SO honored to have had this chance to work with the Italian Wine Trade Agency on this incredible project. What an incredible learning experience. Cheers to amazing opportunities. 

As I mentioned before, my grandfather was 50% Italian; his parents relocated to the United States from Italy in the early 1900s. Since I was so close to my grandparents on my dad’s side, I was raised learning all about the Italian foods that my grandfather grew up enjoying, then cooking for me. I also learned later in life that my dad inherited several vintage bottles of Italian wines that my grandpa, Vito, had been keeping in the basement for many years. We still keep that wine as a memento of him, which makes this post even more special to me.

Asti Spumante’s characteristics are a persistent froth, a color from pale yellow to pale gold, the perlage is fine and persistent; its fragrance is soft and characteristic and, finally, its taste is aromatic, distinctive, sweet and balanced in structure. That’s why Asti is a wine with a strong and aristocratic personality. The bubbles add SO much to the experience.

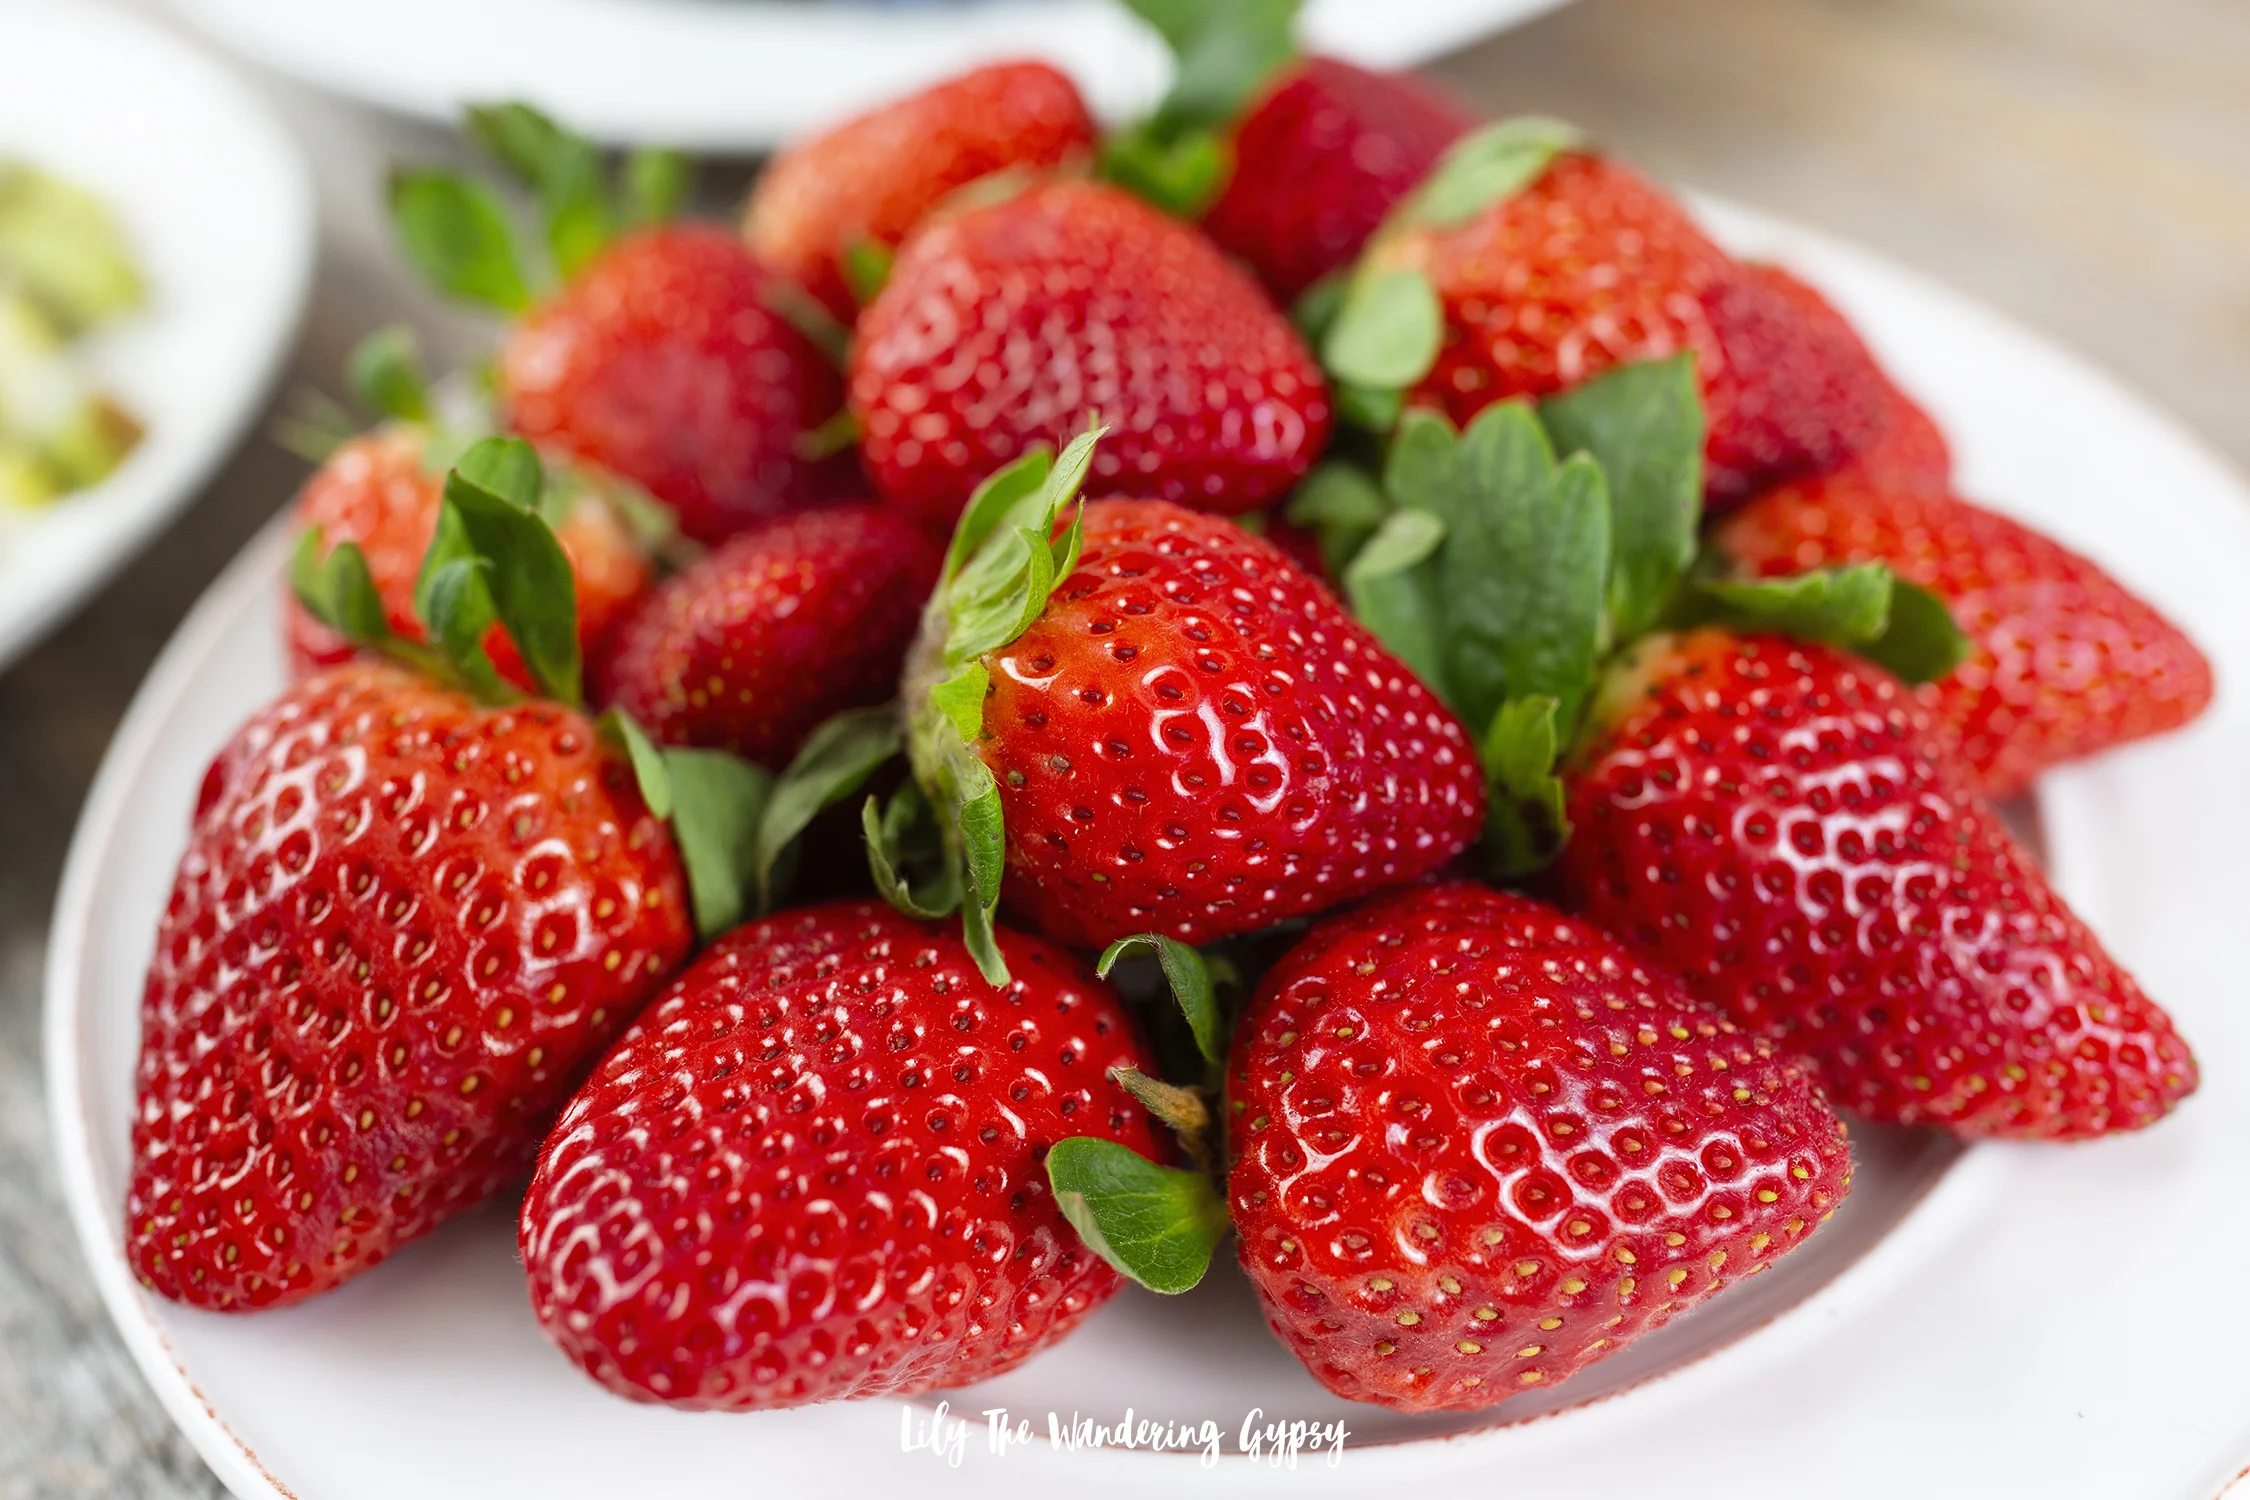
Since strawberries are looking so great in stores right now, they were perfect to feature in this recipe, and to pair their sweet taste with the sparkling wine.

Made from the Moscato Bianco grape, Asti Spumante is sweet and low in alcohol. In fact, it is the perfect wine of the sweet occasions and to toast after a meal. It accompanies desserts and is very suitable with fruit, as it has hints of acacia flowers, wisteria, peach and apricot.

Use any variety of fruits you would like to make these adorable mini fruit tarts. I would recommend incorporating at least 3-4 colors of different fruits for the best effect.

Thank you so much for joining me to learn more about Italian wine and what pairs best with Asti Spumante. Have you ever tried this wine before?

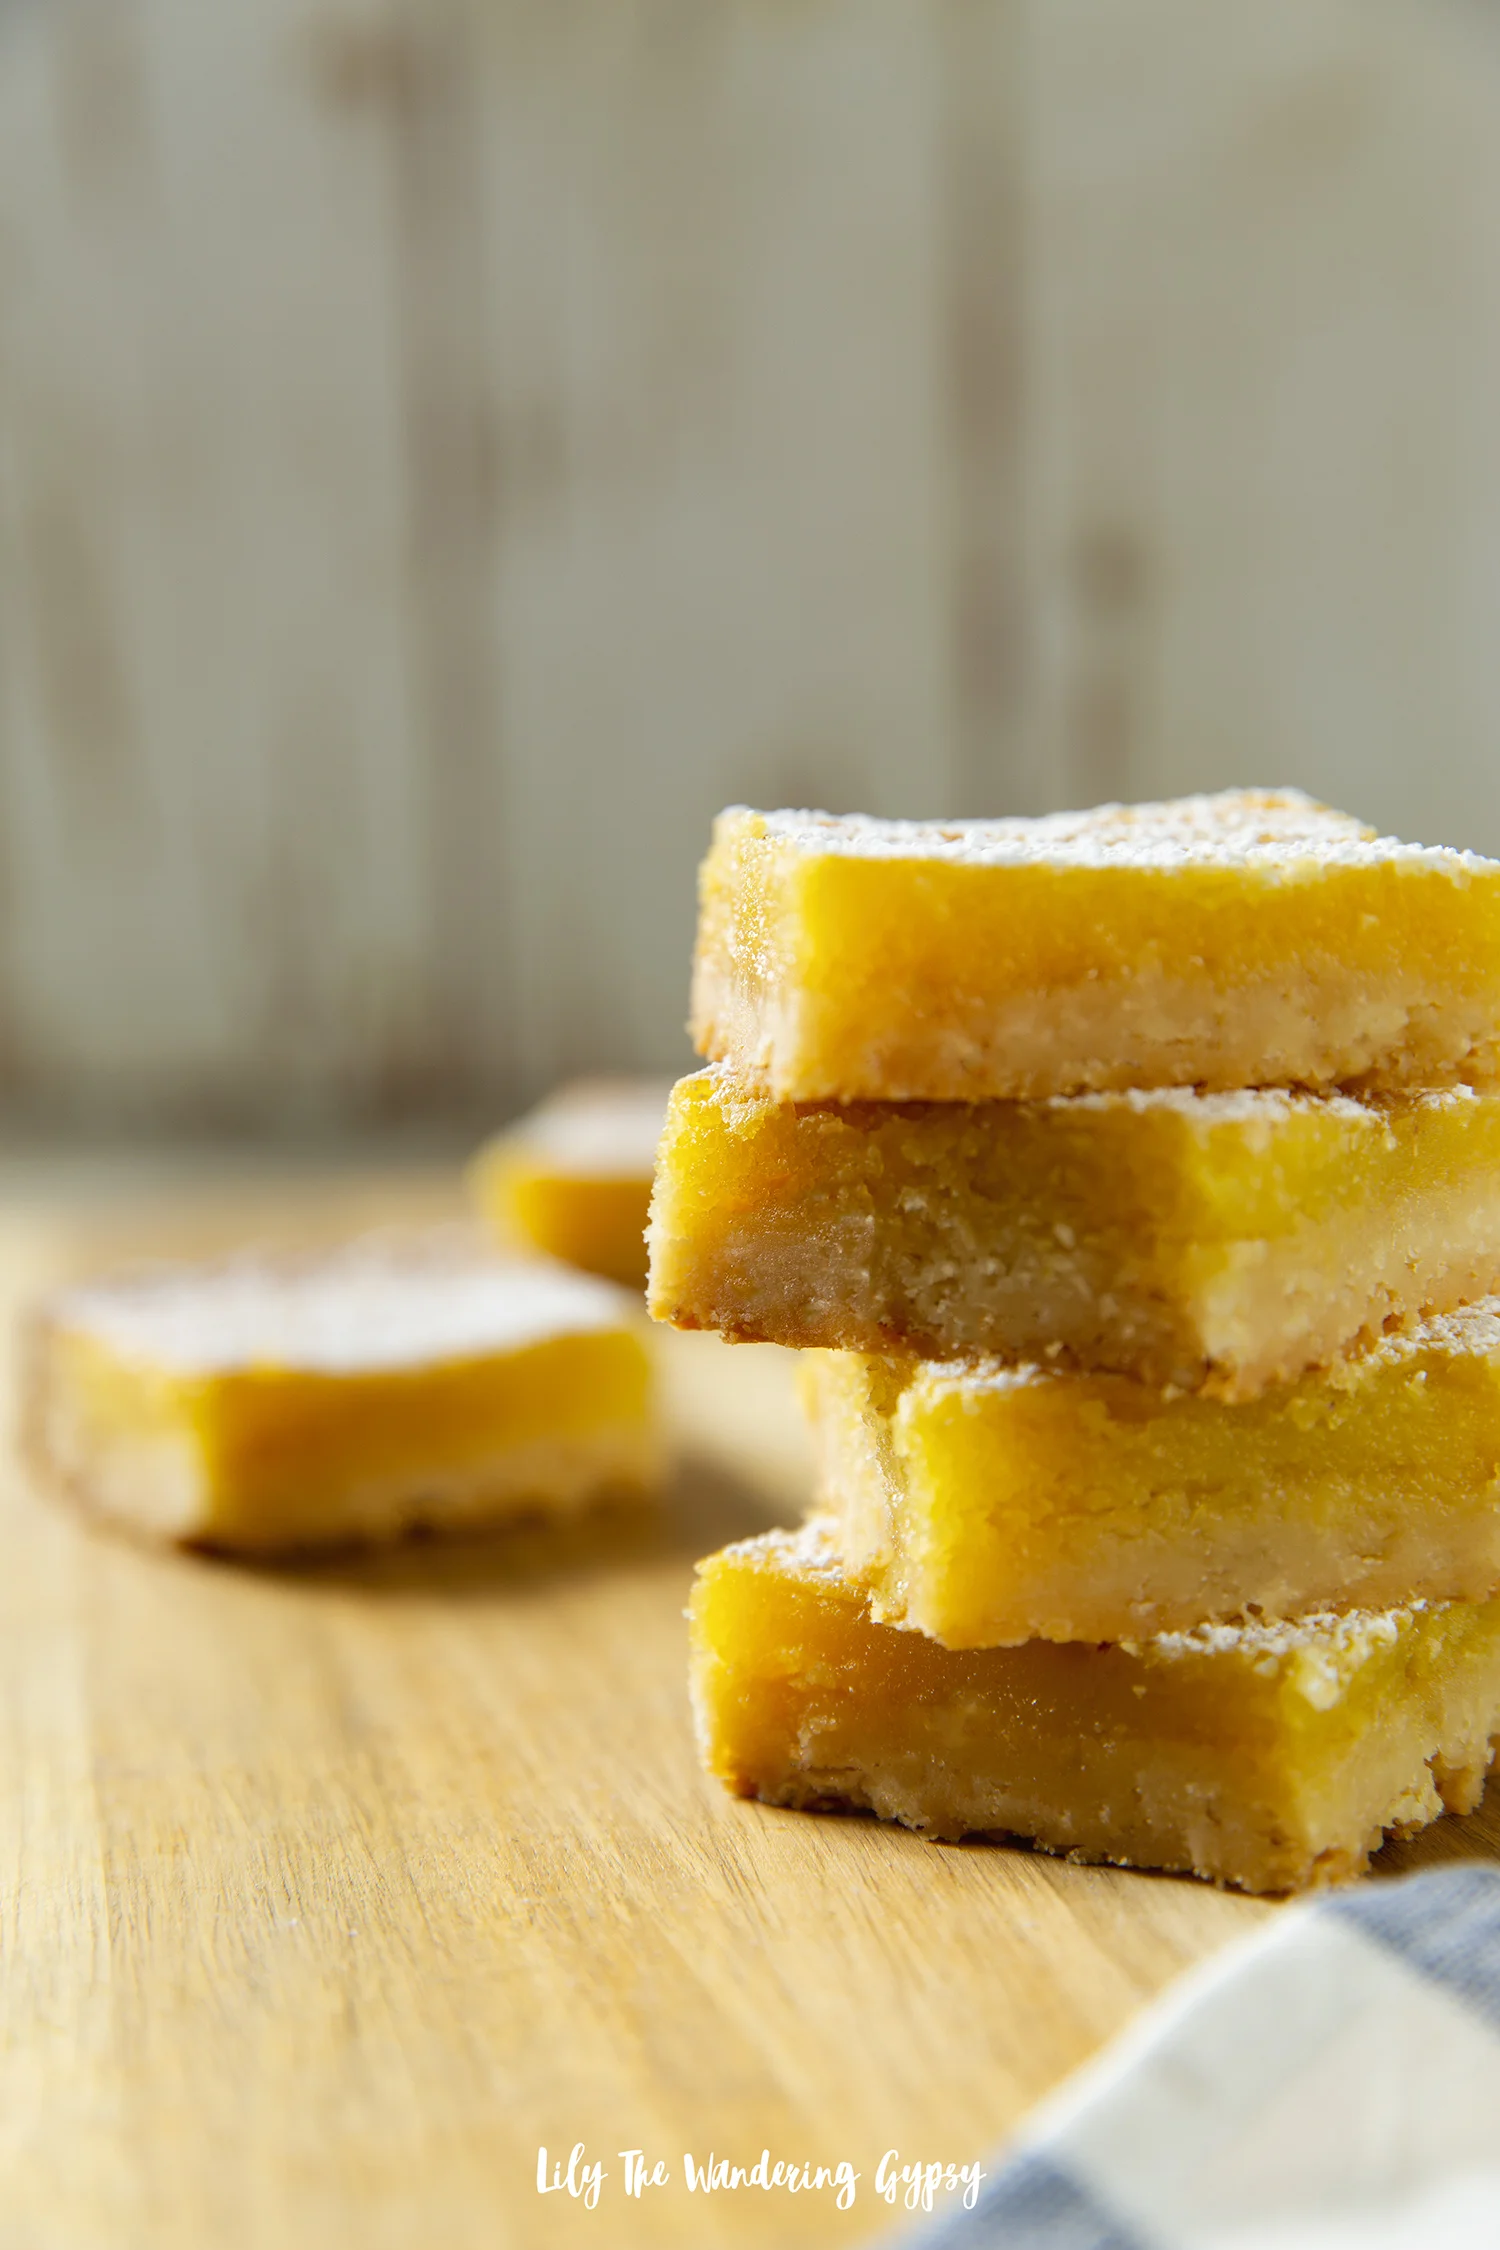
Lemon Bar Recipe (With Shortbread Crust)

Hello! Thanks for stopping by to check out my latest recipe. I love lemon bars, and feel like they’re always WAY overpriced at bakeries, and sometimes aren’t tart enough (sometimes they’re way too sweet).

Also, this recipe actually came from a moment where I was baking cutout sugar cookies, but they wound up spreading too much to use. After one sheet pan full of super conjoined cookies, but still a delicious taste, I decided that perhaps, I could use the cookie dough for a crust of sorts. Well, I found a delicious lemon filling to accompany this delicious sugar cookie crust, and WOW, these were amazing!

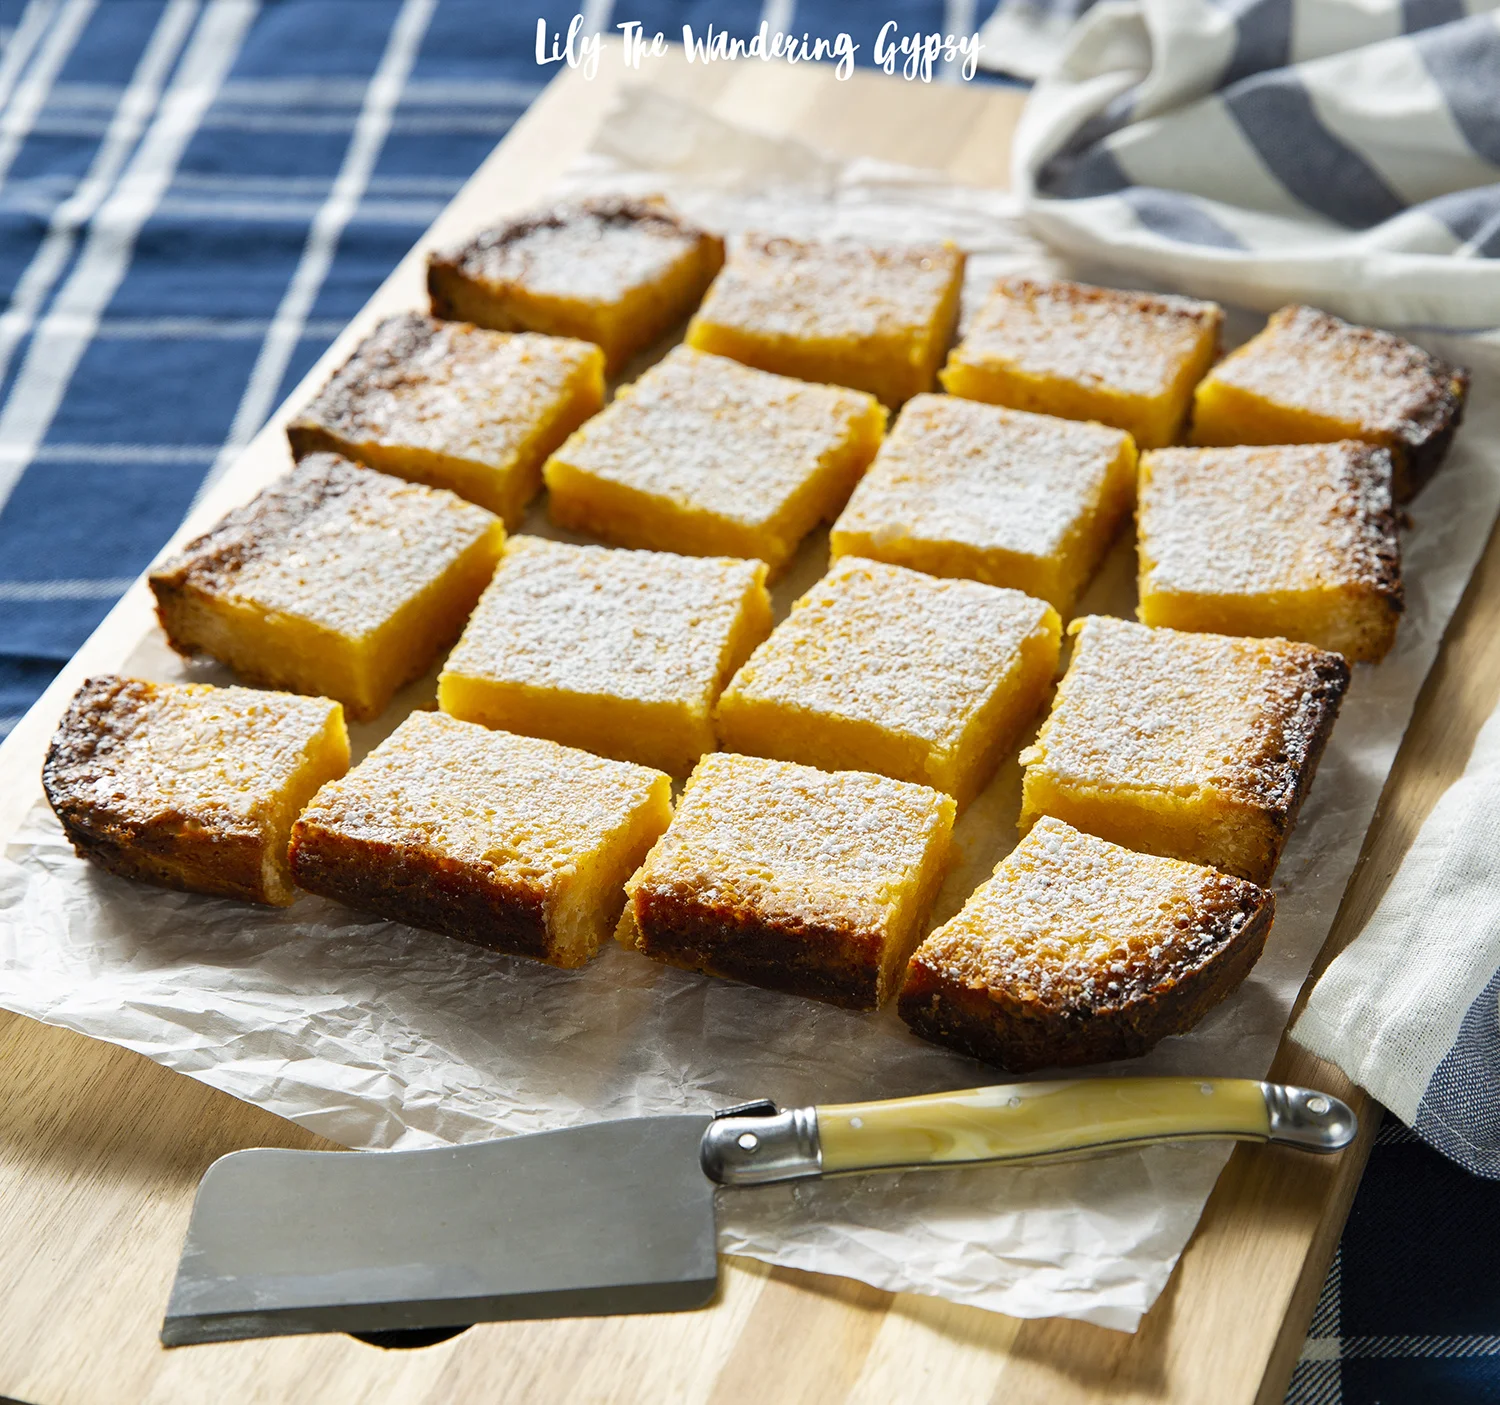
I even cut them up into small 2” squares and they were a HIT! So fun to keep a little container of these in the fridge for a homemade treat or for an awesome gift, too. Hope you enjoy!

Crust Ingredients (Originally found here)

1 1/2 cups butter salted, softened

1 cup powdered sugar

3 tbsp lemon juice freshly squeezed

1 tbsp lemon zest

3 cups all-purpose flour


Filling Ingredients:

1.5 C. sugar

1/4 C. flour

4 eggs

2 lemons, juiced (feel free to use limes)

Parchment paper

Flour for dusting pan


Instructions:

  1. Preheat oven to 325 F degrees (feel free to bake at 350 if your oven doesn’t run super hot). Prepare 8x8” or 9x9” baking dish with non stick spray. Prepare baking pan by spraying non-stick spray, adding a strip of parchment paper that will help you remove the bars from the pan. Then, feel free to add more non stick spray to the paper, then a light dusting of flour.

  2. Add the butter to the bowl of your mixer and blend until smooth on medium speed. Add the powdered sugar, lemon juice and lemon zest to the mixer bowl and continue mixing on low until fully incorporated. Scrape down the sides of the bowl. Add the flour and mix until well blended. Feel free to gather dough into a ball or round shape to discourage air bubbles while baking.

  3. Press dough into baking pan and smooth out to remove any air bubbles.

  4. Bake crust for 12-15, just until crust is slightly done towards the center.

5. Remove crust from oven, let cool for 5-10 minutes, then pour lemon filing over crust, evening out with a large spoon or spatula. Bake 18-20 minutes longer, until edges begin to get brown. Feel free to cover with foil for last 5-10 minutes of baking time.

6. Let cool completely, then use the overhanging parchment paper to carefully remove the entire baked bar and place it onto a cutting board.

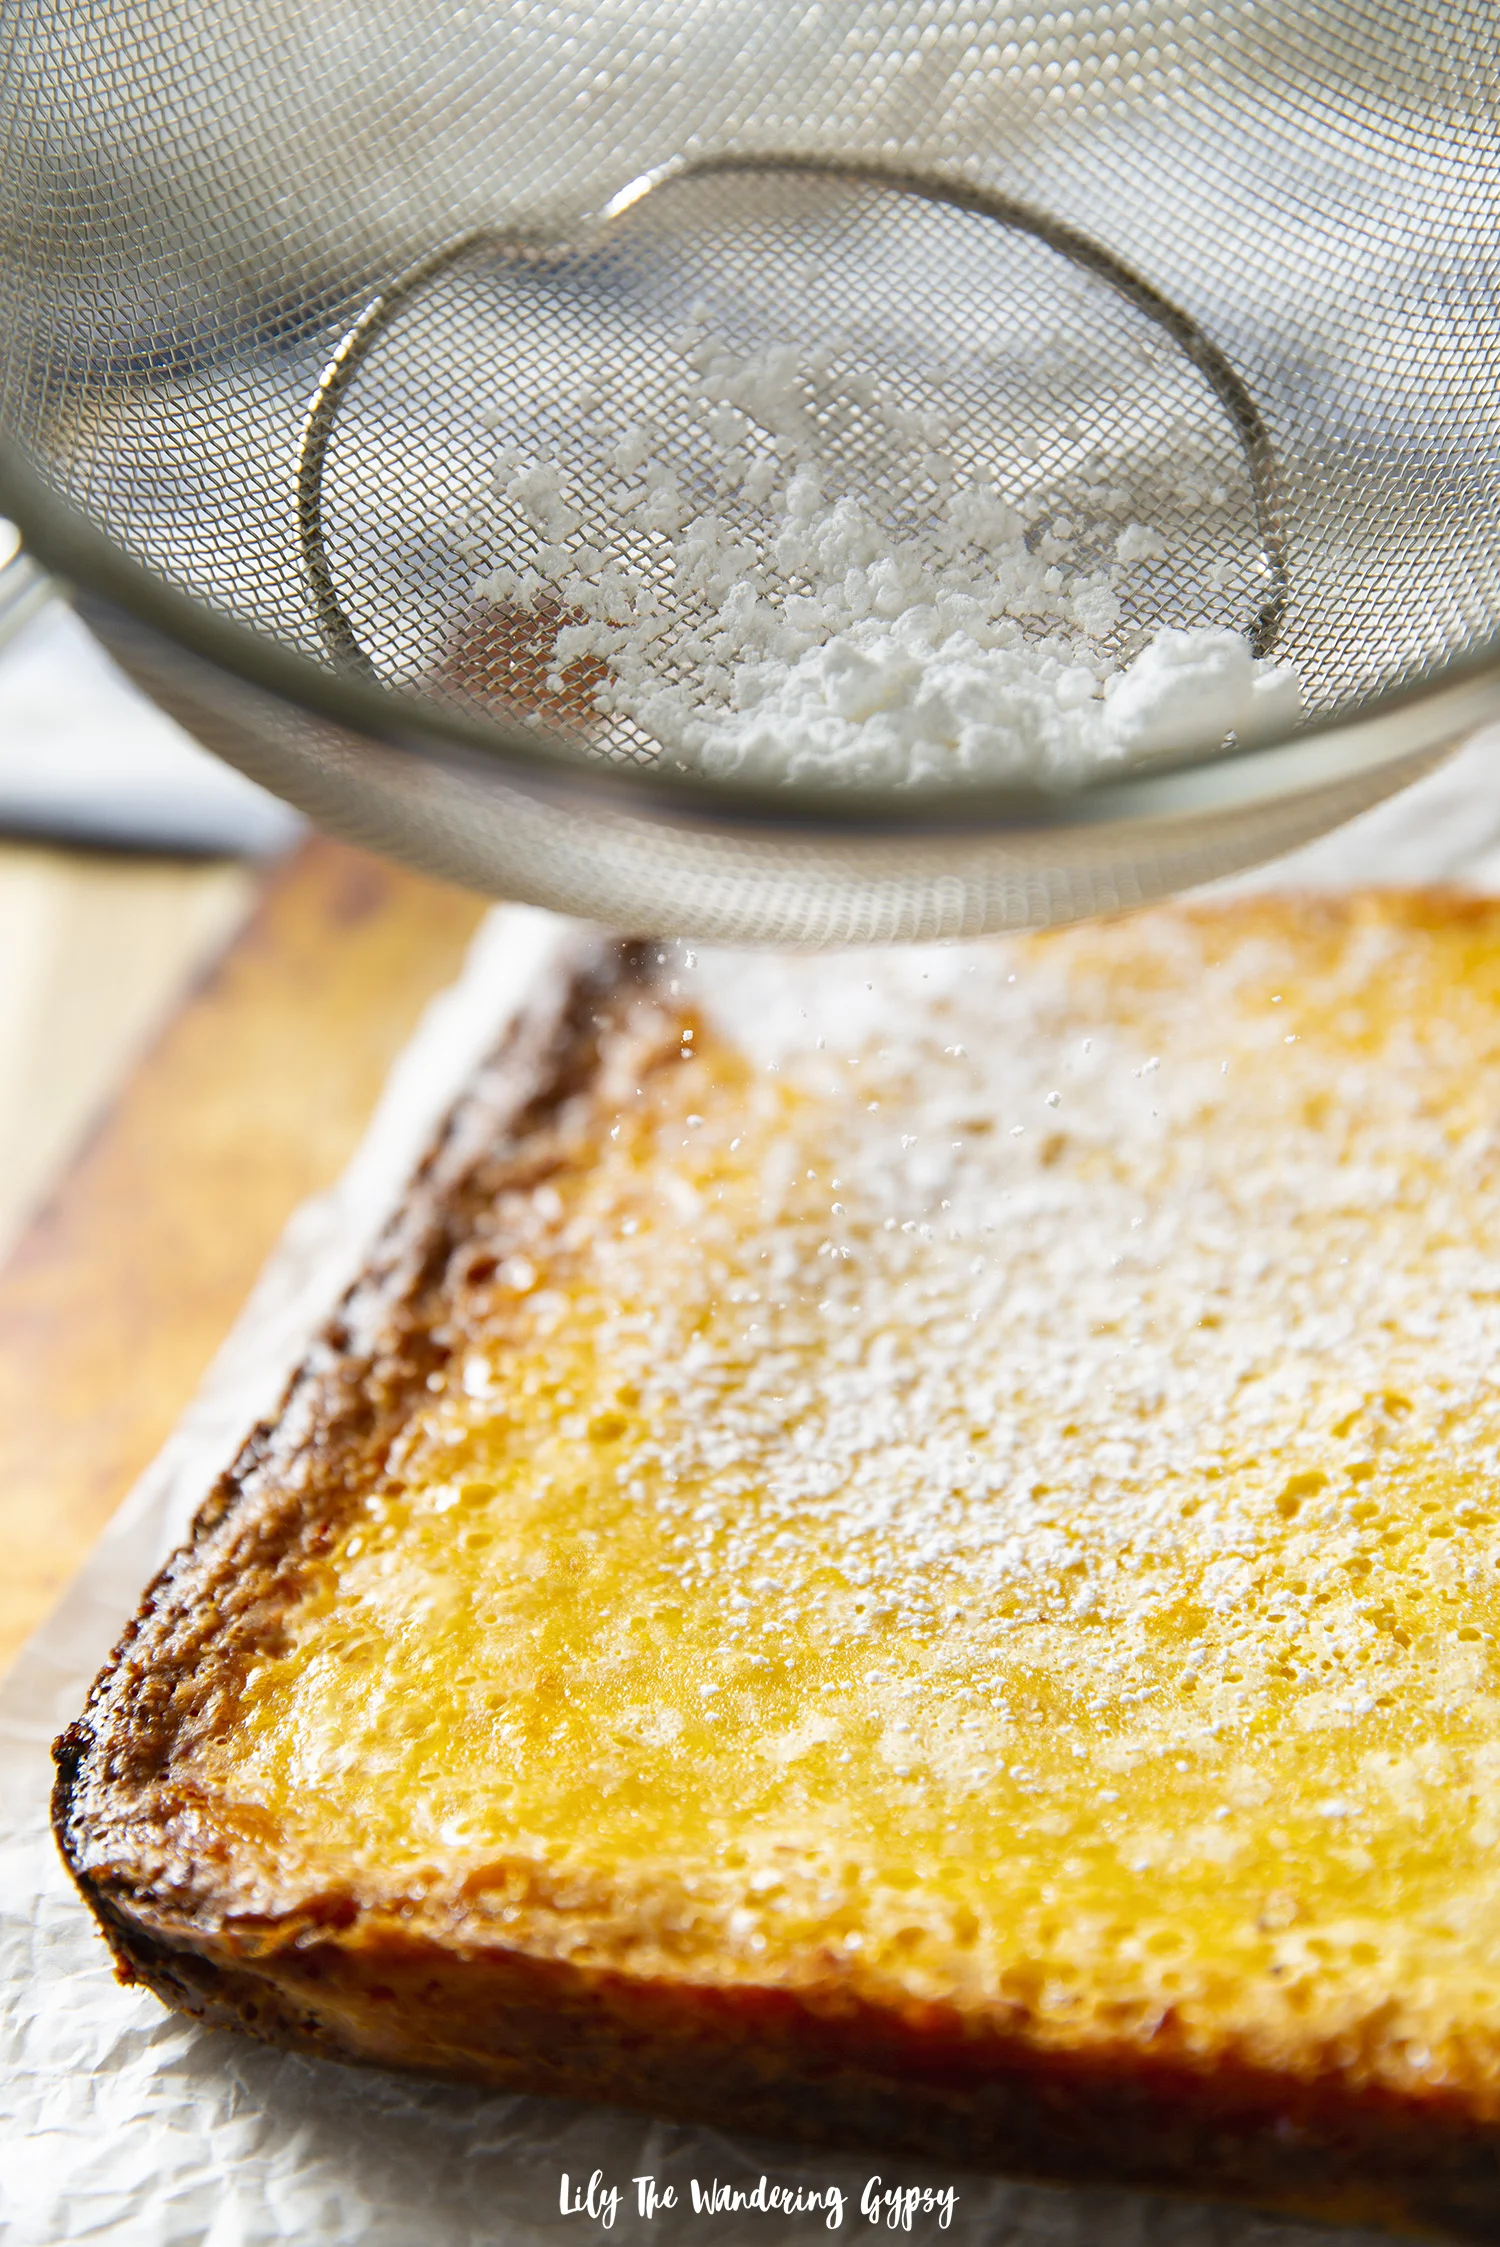
7. Use a knife with a sharp, straight edge to cut the bars in half each way, then two more times on each side (3 cuts per side, 6 cuts total). Feel free to add sifted powdered sugar over the top as well, before cutting.

8. Serve and enjoy!

Easy and Delicious Organic Acapulco Burgers Recipe

This post has been sponsored by Cans Get You Cooking. All thoughts and opinions are my own. #CansGetYouCooking

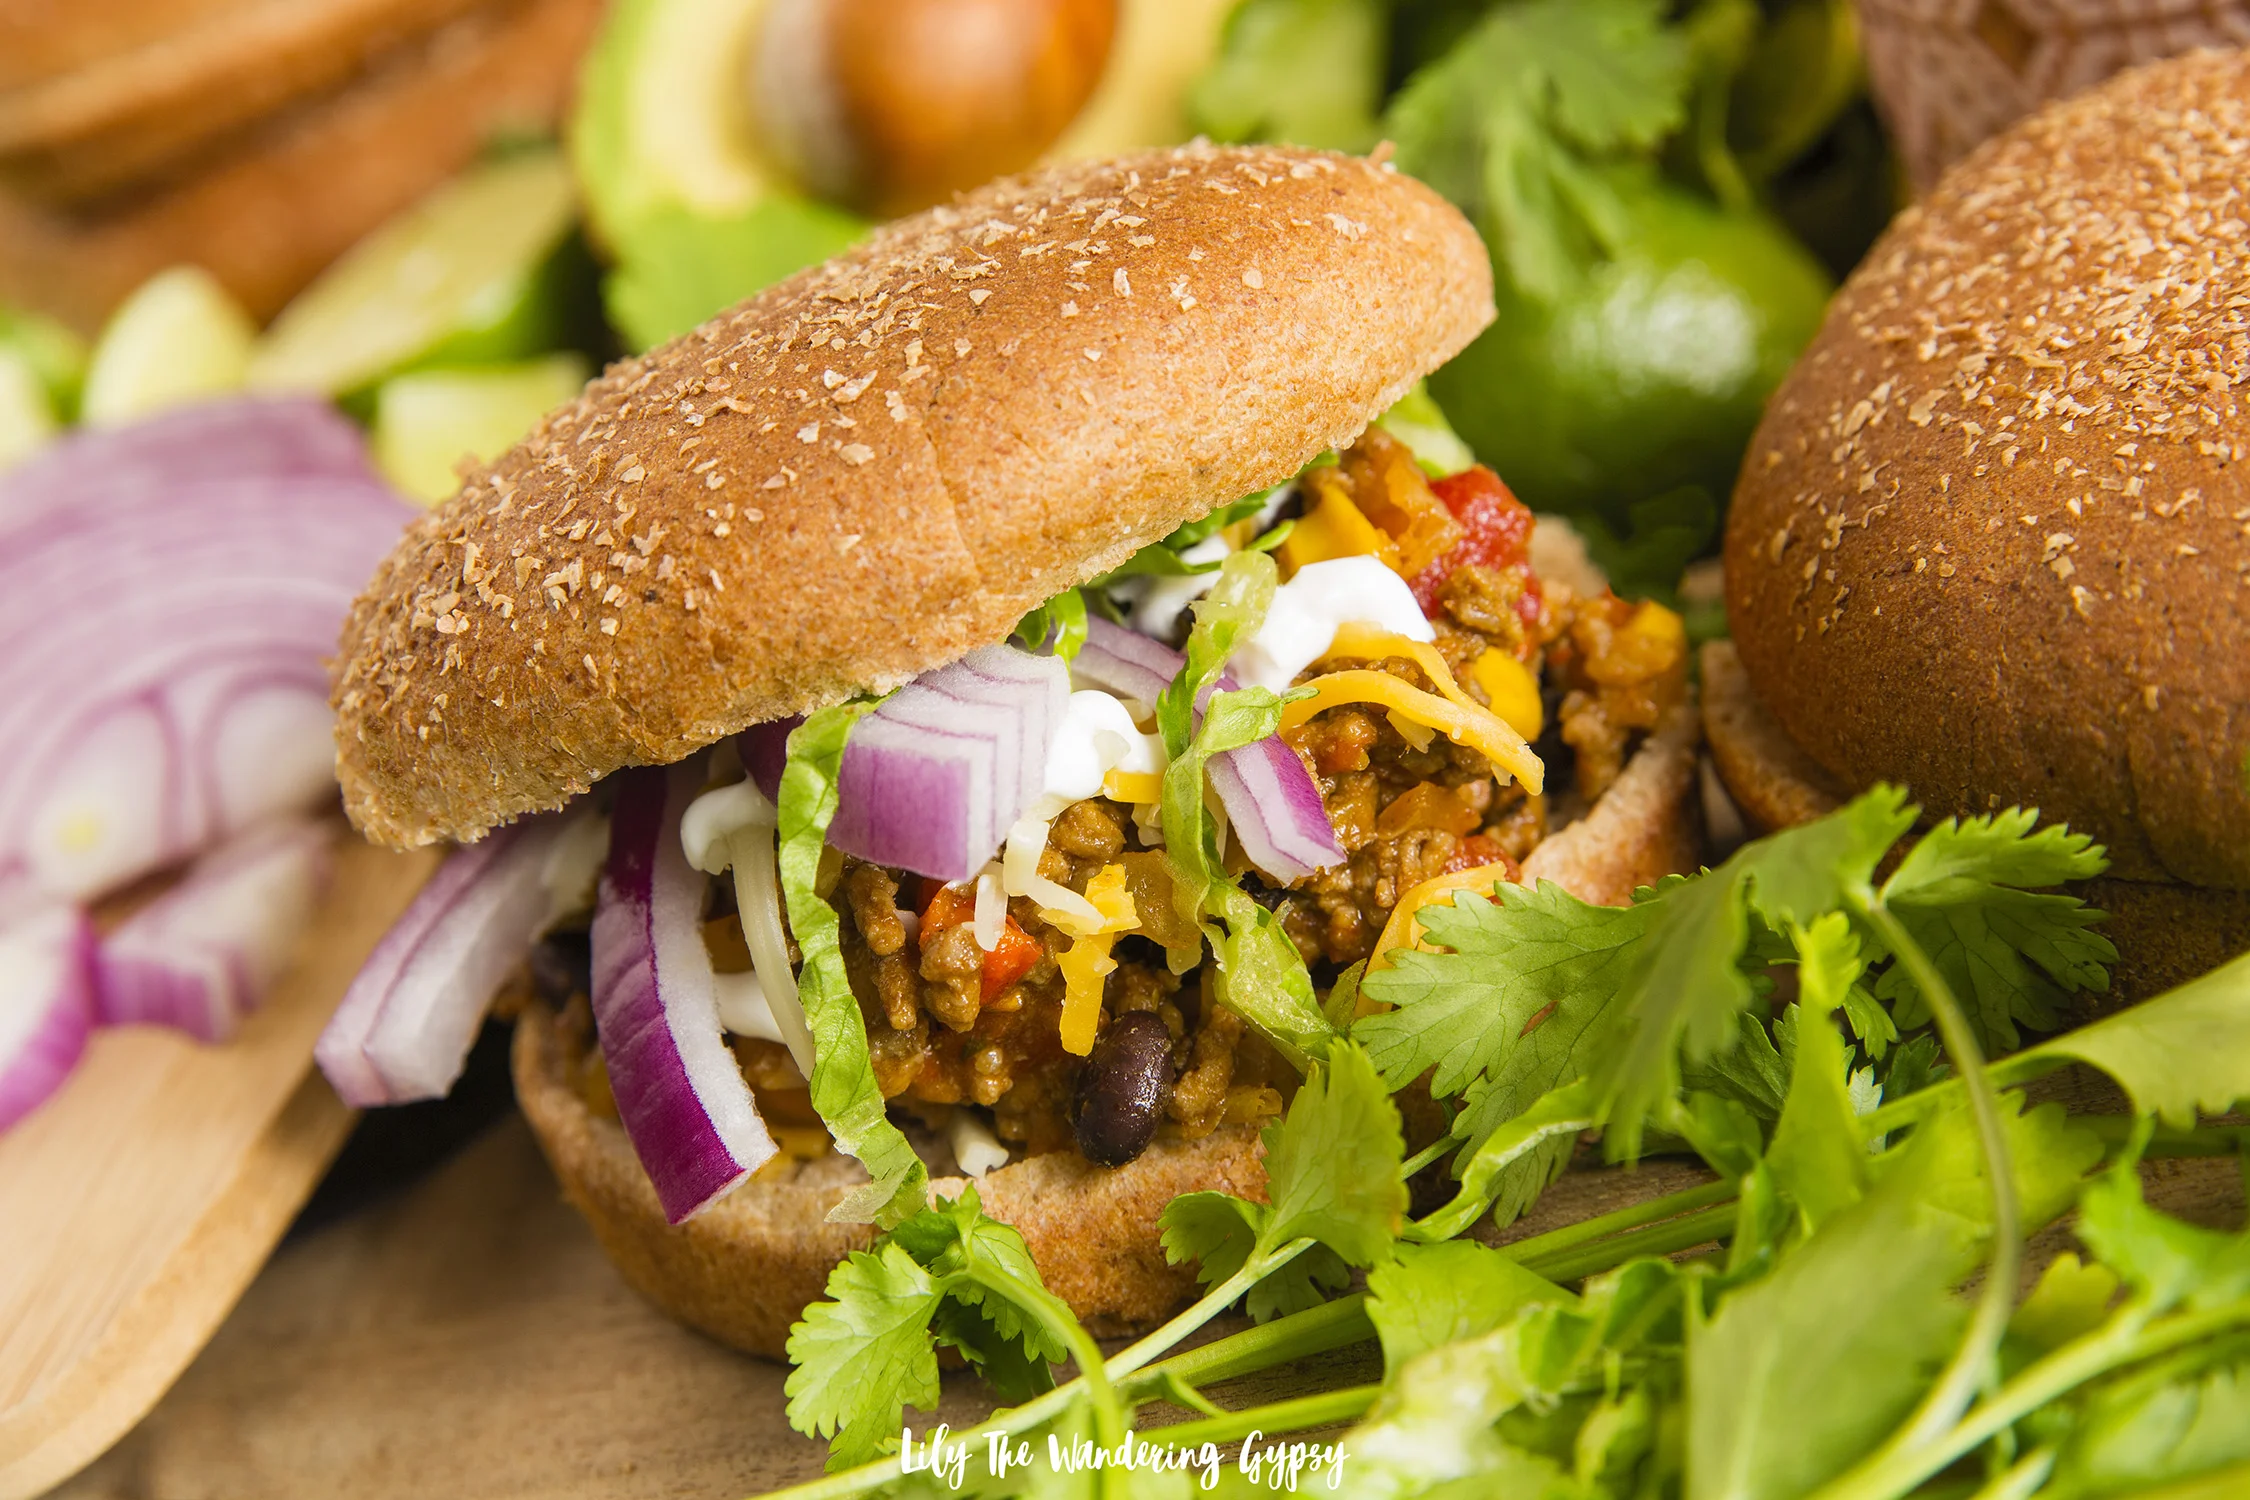
February is National Canned Food Month, and I am so excited to share unique and simple ways to incorporate canned vegetables into a delicious homemade meal that most everyone will love—even picky eaters! These Acapulco Burgers are similar to a Sloppy Joe Sandwich but with a Latin twist! Filled with seasoned ground beef, canned green chilis, canned black beans, and more, they are then topped with traditional toppings you will love. The flavor combination is out of this world!

From appetizers to sides, main dishes, and even meal prep, canned foods are an essential part of my weekly menu routine. I am so excited to share a very simple, yet fulfilling and delicious recipe that can be prepped ahead of time or made in less than an hour.

If you are looking to make this recipe fully vegetarian, I have tips and suggestions for that below as well. Hope you enjoy!

I used as many organic ingredients as I could; AND many of my favorite vegetables are now widely available canned, in an organic version! Below, you can check out the cans I used in this recipe. 

The Old El Paso Chopped Green Chilis are definitely a pantry or “Cantry” staple! I use them when I am cooking ground beef and chicken or when I am eating all vegetarian! If you’re looking for more recipes using canned goods creatively, you should definitely check out CansGetYouCooking.com and be sure to use hashtag #CansGetYouCooking in any food photos you share

Green Valley Organic Canned Corn is one of my all-time favorite canned corns, available at my local grocery store. I love knowing that fresh fruits and vegetables are harvested at the peak of ripeness and canned within only four hours, sealing in their nutrition and flavor, you know? It's always sweet, fresh, crisp, and perfect for recipes or to enjoy by itself with a bit of melted butter on top, of course!

Next, I am loving Bush’s Beans NEW Organic Black Beans. They are DELICIOUS! I have tried at least 7 different types of black beans over the year, and these ones are my favorite! I simply strained the beans, then rinsed them off. I use canned black beans in 2-3 recipes per week because, to me, beans make a great base for any vegetarian meal. That's why I was so happy to find out how wonderful these were!

Lastly, the Muir Glen Organic Fire Roasted Diced Tomatoes really rounded out the flavor of this dish! I love using canned tomatoes in everything from burrito or taco filling to Italian dishes and soups. I often make sure to have 2-3 cans of tomatoes in my pantry at all times as well.

 Keeping my "Cantry" stocked really helps cut down on time in the kitchen—allowing more time with friends and family! Not to mention, a well-stocked pantry full of fruits and vegetables can help you serve up the recommended 42 cups of fruit and 53 cups of vegetables a family of four needs every week, providing a diet higher in 17 essential nutrients including potassium, calcium, and fiber.

Now that I have explained a bit more about the benefits of these canned goods, feel free to watch this video for full instructions. Grab the recipe and instructions below.

ACAPULCO BURGERS INGREDIENTS:

½ - 1 pound of ground beef

½ cup chopped white onion

1-2 cloves of garlic, minced

1-2 Tbsp olive oil

¼ Cup Mexican seasoning (or more if you desire)

1 can – 4.5 oz. Old El Paso Chopped Green Chilis

1 can – 14.5 oz Green Valley Organic Corn - strained

1 can – 15 oz Muir Glen Organic Diced Fire Roasted Tomatoes

1 can – 14.5 oz Bush’s Best Organic Black Beans - strained and rinsed

4-6 burger buns

TOPPINGS:

Red onions

Cilantro

Sour Cream

Shredded Cheddar Cheese

Shredded lettuce

INSTRUCTIONS:

1.) In a skillet over medium heat, add olive oil, onions, and garlic. Sauté for several minutes until softened. Next, add ground beef and cook until brown. Add Mexican seasoning. Strain and return to skillet. You can see a photo of the ground beef I made, below.

2.) Add canned chilis, corn, tomatoes, and black beans, and stir again until incorporated. Sauté for another 5-7 minutes, until filling has all become completely warm and is to your desired temperature. Turn off heat.

3.) Time to make your Acapulco Burgers! Scoop about 1/3-1/2 cup of filling onto each burger bun, then top with shredded cheese, sour cream, red onions, lettuce, and anything else your heart desires! Enjoy!!

PIN IT FOR LATER…

For a little more fun, watch the video, below!

Go Organic This Super Bowl With Michelob ULTRA Pure Gold + A Cast Iron Skillet Nachos Recipe

This post is sponsored by Michelob ULTRA Pure Gold but the content and opinions expressed here are my own. Learn how to make this year’s Super Bowl LIII the most delicious one yet.

#LiveULTRA #PureGold #Organic #SuperBowl

Pair Michelob ULTRA Pure Gold Organic Light Lager with these exceptional Organic Vegetarian Skillet Nachos for a game day snack that will be a huge hit. Michelob ULTRA Pure Gold is made from organic grains inspired by nature and it’s free from artificial colors and flavors. When I learned Michelob ULTRA Pure Gold was not only organic and delicious, but also lower in carbs and calories than a glass of wine, I was sold! You can bet this Super Bowl I’m pairing my favorite organic recipes with Michelob ULTRA Pure Gold.

ORGANIC VEGETARIAN CAST IRON SKILLET NACHOS RECIPE (Serves 4)

I was inspired to create this recipe because of the organic ingredients in the beer, plus my love for always eating organic every chance possible. I always aim to use as many organic, vegetarian ingredients in my recipes! Thiese skillet nachos could be made vegan by simply excluding or subbing out the cheese and sour cream - everything else is vegan!

Some of Tastemade’s other organic recipes include these homemade Nachos, Buffalo Chicken Dip, and Chicken Wings.

Ingredients (Use organic when possible):

1 bag of blue corn tortilla chips or any chips you like

1 small can green chilis

1 cup diced, roasted sweet potatoes

1 cup finely chopped red and yellow peppers

thinly sliced jalapeños

2 cups shredded cheddar cheese

1/2 - 1 cup sour cream (transfer into plastic squeeze bottle for easy use and application)

1/2 - 1 cup lettuce (not shown)

1/2 cup black olives (not shown)

Cast Iron Skillet - at least 12” across

Instructions (See video below for more details):

1.) Spray skillet with non-stick spray. Place a layer of tortilla chips to cover the bottom of the skillet.

2.) Add your prepared toppings such as: diced chilis, shallots, onions, roasted sweet potato, seasonings, peppers, black beans and anything else that can be baked in the oven. Also, top with jalapeños and 1-2 cups of shredded cheddar cheese.

3.) Bake nachos at 400 degrees for 10-12 minutes, or until cheese has melted. ***BE CAREFUL when removing the cast iron skillet from the oven because the handle is deceptively BOILING HOT. Please always use an oven mitt when handling the nachos and the skillet.

4.) Top with sour cream, cilantro, tomatoes, and any other ingredients you like. Enjoy with Michelob ULTRA Pure Gold Organic Light Lager this Super Bowl.

These skillet nachos are also fun because they are more of an interactive dish, where people can mingle around the meal and grab small bites as they wish. Keep beer on ice or in the fridge for easy pairing!

About Michelob ULTRA Pure Gold Organic Light Lager:

BE SURE TO CHECK OUT THE MICHELOB ULTRA’S SUPER BOWL COMMERCIAL ON YOUTUBE ON 1/30!

With the USDA Organic certification on each and every package, that means they provide organic beer that proves quality, organic ingredients make for better taste. Let’s go organic this Super Bowl!

Michelob believe in thriving on a steady diet of friends, fitness, and occasionally laughing a little too hard. We believe you can work out and still go out, that you can stay fit and stay fun. We believe that getting more out of life requires putting more into life. 

Live Fit. Live Fun. Live ULTRA

Watch the Michelob ULTRA Super Bowl Commercial here, or watch below!

As one of the largest beer brands in the U.S, Michelob ULTRA represents not only a premium light and refreshing beer, but a brand that embodies wellness and active lifestyles. The brand is uniquely positioned at the intersection of health and happiness. We believe in a life of balance where you don’t have to sacrifice beer in order to maintain your active lifestyle.

Michelob ULTRA wants you to be proud of who you are, your hard work, and what makes you truly unique. We want to celebrate together and be a part of that journey with you – whether it is about living fit or living fun. Michelob ULTRA plays a part in living a full life. One that’s filled with friends, fitness and of course—fun. 

Michelob ULTRA’s new packaging is light and refreshing boasting the USDA Organic seal, just like the light, golden hue of the lager itself. With a light taste like that, it’s very easily drinking, and pairs well with food AND football!
Live life to its fullest with other foodie and football fans alike this Sunday, 2/3/2019!

WATCH THESE THREE VIDEOS FOR MORE RECIPE IDEAS!!!

The Best Meals Bring Us Together ~ Easy Party Recipes with Idahoan® Steakhouse® Soups

One of my favorite things about cooler weather is that it’s great excuse to get everyone together for a warm, potato soup! Gather your friends and family, and try new Idahoan® Steakhouse® Soups. They will warm you right up. This could also be an amazing Game Day party menu too! Find out how I made a low cost meal for a crowd, and learn a little bit about how Idahoan® soups and other great foods bring us all together!

Thank you Idahoan® Steakhouse® Soups for sponsoring this post. Enjoy the flavorful, slow-cooked taste of restaurant-quality soup at home, in minutes.

I have actually been a fan of the Idahoan® brand for over 15 years! I remember always having it in the cabinet at home, and once I began to make more meals for myself and for my friends around age 18, and as I moved out of my parents’ houses, and began doing grocery shopping of my own, I literally ALWAYS made sure to have several packets of the Idahoan® instant mashed potatoes. I still always have a packet or two on hand, and love always having something yummy pairing it with dinner, usually chicken breasts, green beans, and mashed potatoes. That sounds SO good right now!!

These packets of potatoes literally shaped the way I prepared meals from the very beginning. That’s why I was really honored to be able to create a meal for friends, inspired by Idahoan®, one of the very foods I used to feed some of my first groups of friends once I moved to my own place. To see how their foods are still bringing the most important people in my life together is really heart warming. Making meals for friends is always fun, and it’s a really great way to get people together when we are all so busy.

Idahoan Steakhouse® Soups are available in a variety of delicious flavors, including: Loaded Potato, Creamy Potato, Cheddar Broccoli, and Cheddar Potato.

HOW TO MAKE SOUP FOR A LARGE CROWD OR PARTY

(SERVES 8-10+)

For our group, I mixed three different packets of Idahoan® Steakhouse® Soups together, then added 12 Cups of water (because each packet requires 4 cups of water to make, and that’s it!).

Ingredients:

3 packages of Idahoan® Steakhouse® Soups in any flavor (Learn more about available flavors below)

12 Cups water

2-3 tsp Seasoning Mix of your choice - I used a Greek Seasoning, which added black pepper taste

Optional - 1-2 cups fresh broccoli flowerettes (cut into small, bite-sized pieces

What Toppings To Offer:

(Best displayed in cute bowls with spoons so guests can serve themselves)

Shredded Cheddar Cheese

Soup Crackers

Bacon Bits

Sour Cream

Hot Sauce

This was a VERY cost effective way to feed a large group!

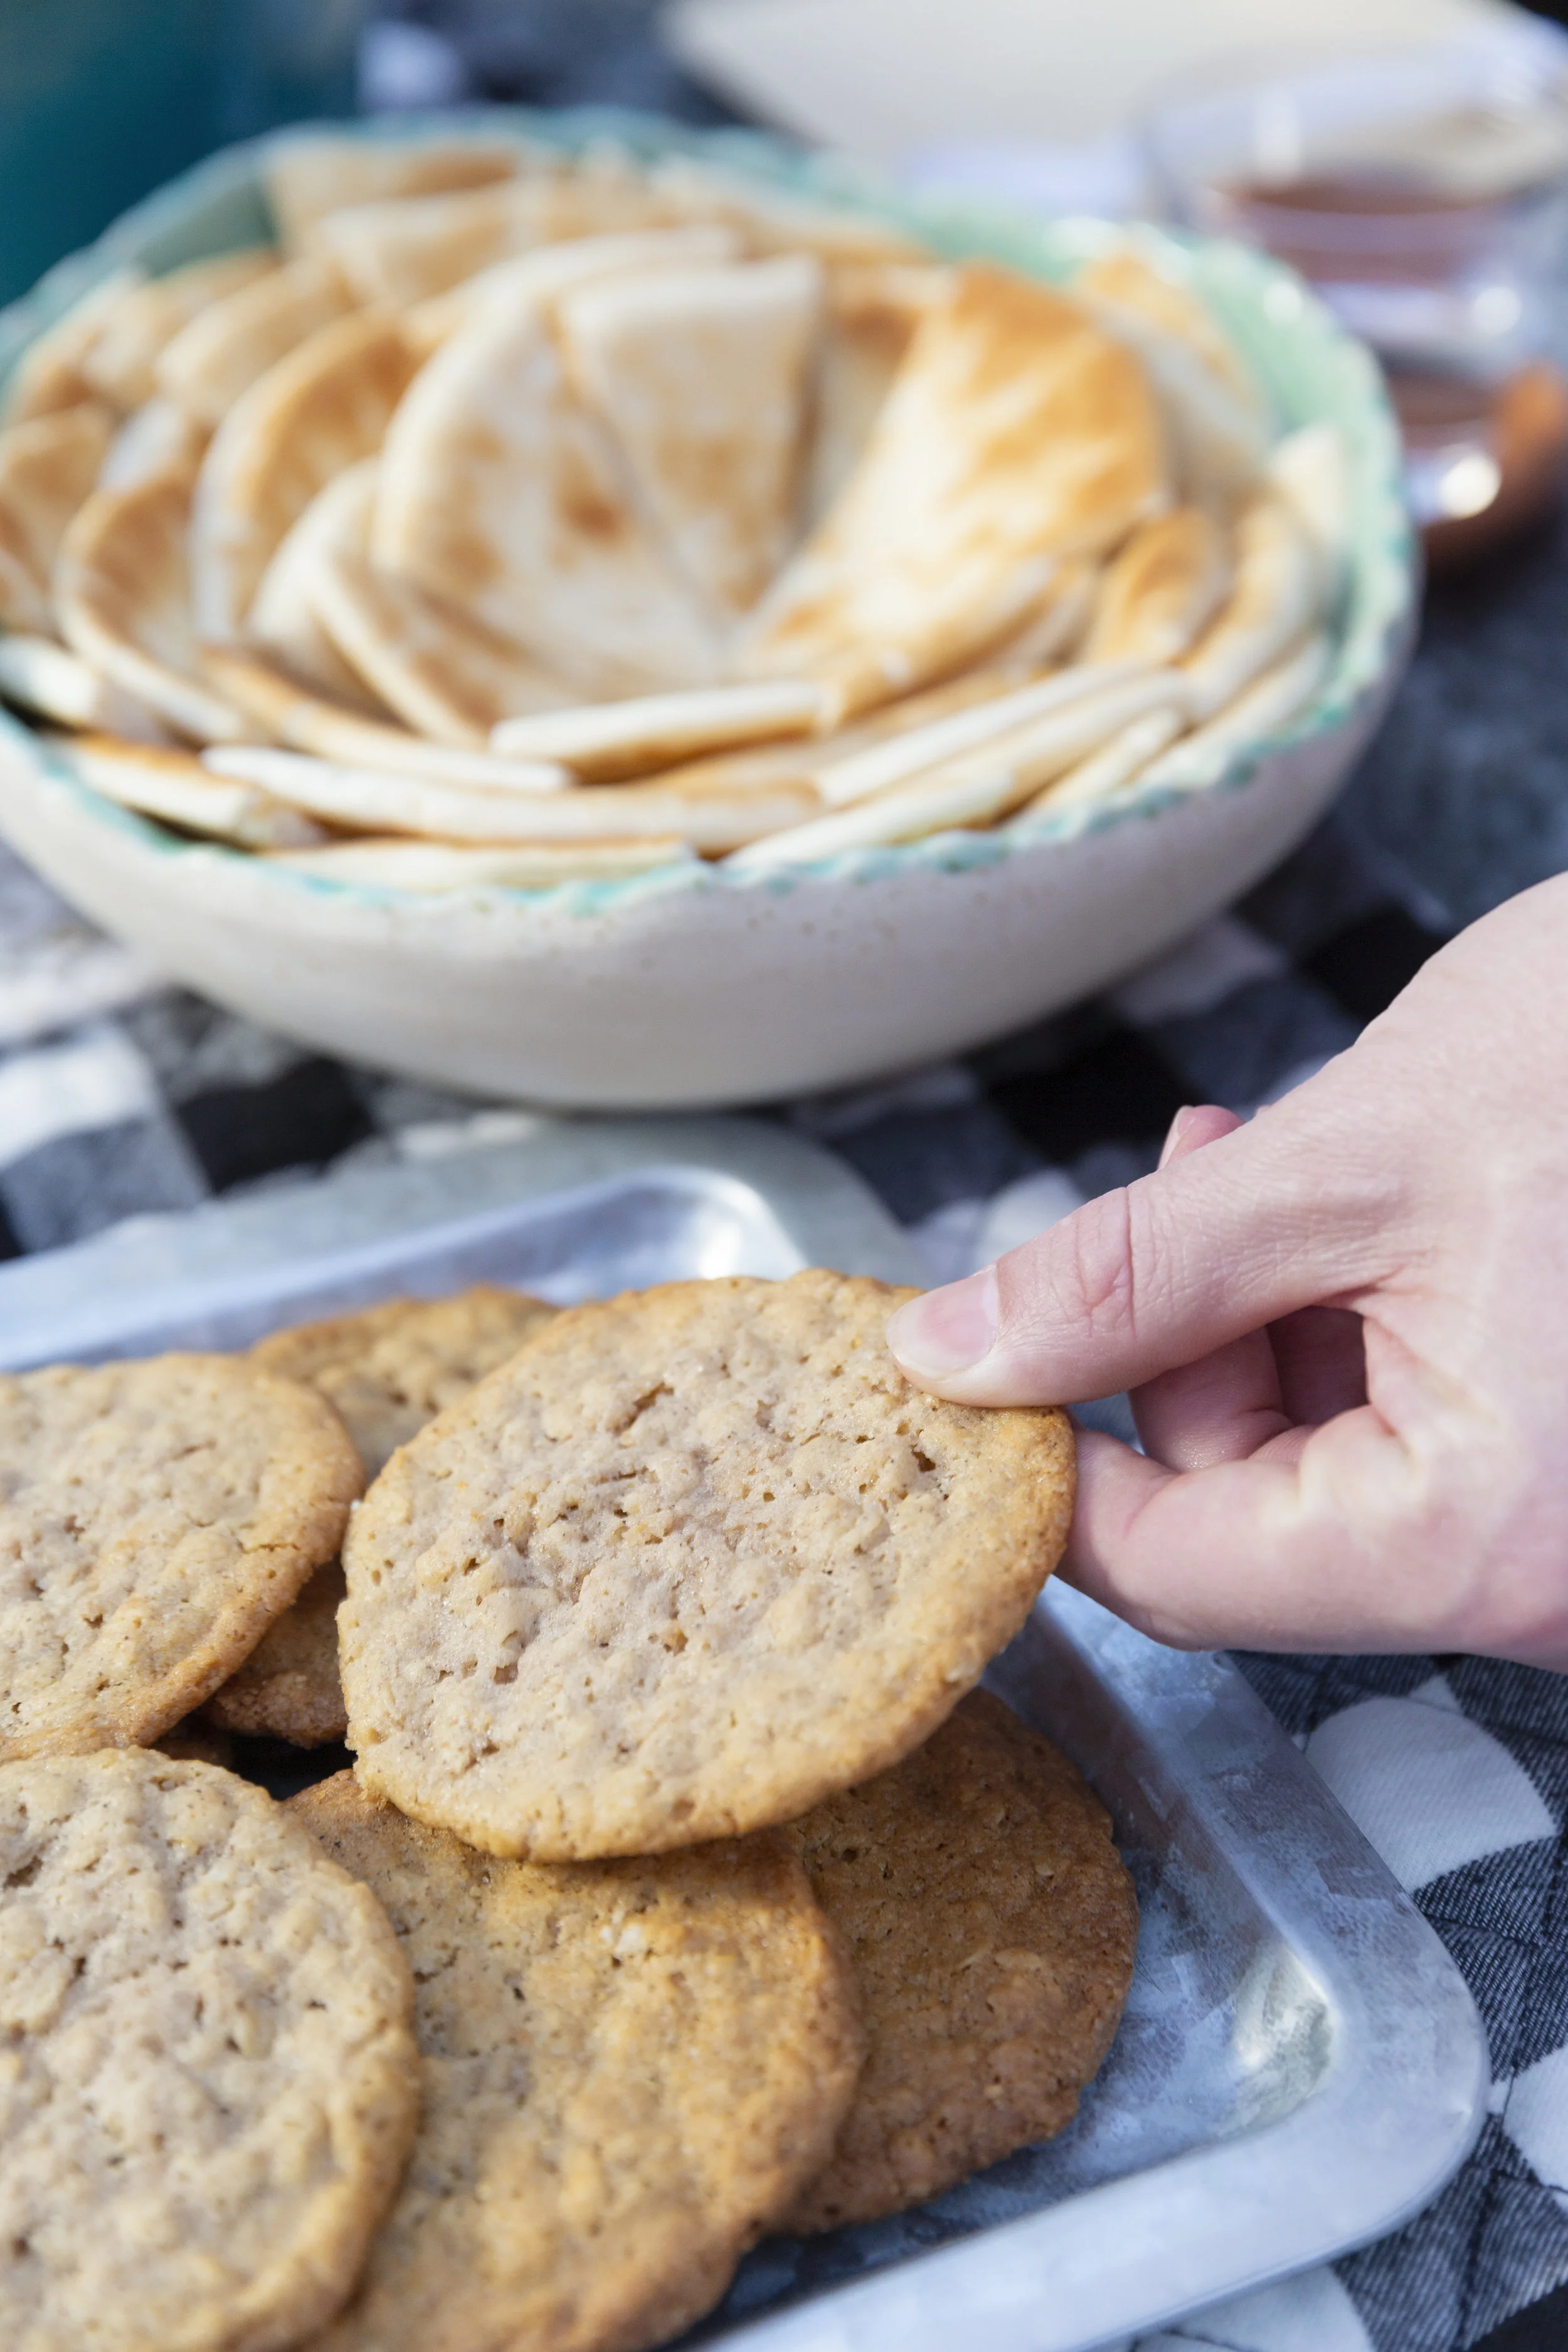
We served up soup and SO many other tasty sides. The cookies were a huge hit! Get the recipe below.

FOR THE DECOR:

I set the table with a slivery grey piece of fabric, then placed a black and white buffalo plaid fabric table runner over the top. I thought this really tied the warm, cozy, inviting feel of the soup into the decor as well. Next, I found the cutest white plastic spoons at the party store, plus some periwinkle colored bowls. While I could have also used glass or ceramic bowls, these worked great! Another fun idea would have been to use coffee mugs for people to eat soup from, and it would be even more casual.

I did however provide cloth napkins for guests, and a few other cute paper and bamboo plates for all those yummy side dishes.

The Best Oatmeal Cookie Recipe - Makes 20 Cookies

These cookies were a huge hit, and finished off the meal nicely. After eating our meal, we sat around the table, reminiscing about fun times we all had together over the past year, and eating oatmeal cookies.

This recipe was found on this inspiring blog, The Comfort of Cooking, here.

Note - I would recommend doubling the below recipe for a crowd.

OLD FASHIONED CHEWY OATMEAL COOKIES

YIELD: Makes 20 cookies

INGREDIENTS:

1 cup (2 sticks) unsalted butter, softened
1 cup granulated sugar
1/2 cup packed brown sugar
1 large egg
2 teaspoons vanilla extract
1 2/3 cups all-purpose flour
1 teaspoon ground cinnamon
3/4 teaspoon baking soda
1/4 teaspoon salt
1/8 teaspoon baking powder
1/8 teaspoon ground nutmeg
1 1/2 cups quick cooking oats

DIRECTIONS:

1.) Preheat oven to 350 degrees F. Line 2 large baking sheets with parchment paper; set aside.

2.) In a large bowl with an electric mixer, beat butter and both sugars until fluffy. Mix in egg and vanilla until well blended. Combine flour, cinnamon, baking soda, salt, baking powder and nutmeg in a bowl. Stir into butter mixture. Gently stir in oats until well blended.

3.) Shape dough into rounded golfball-sized balls (about 2 Tbsp. each). Place on prepared baking sheet (I fit 9 per sheet). Flatten with the bottom of a measuring cup dipped in sugar.

4.) Bake for 8-10 minutes. Let cool on baking sheet 5 minutes before removing to a wire rack to cool completely.

Enjoy!

Spinach Artichoke Dip + Pita Bread Slices (Serves 6-8)

I found this recipe on the Spend With Pennies Blog, here.

PREP TIME 10 minutes

COOK TIME 25 minutes

TOTAL TIME 35 minutes

This is my favorite Spinach Artichoke dip recipe!! It’s easy to make and always a huge hit!

INGREDIENTS:

  • 8 oz cream cheese , softened

  • 2/3 cup sour cream

  • 1/3 cup mayonnaise

  • 2 cloves garlic minced

  • 1 1/2 cups mozzarella cheese divided

  • 1/2 cup fresh shredded parmesan cheese

  • 1/2 cup gruyere cheese

  • 10 oz frozen chopped spinach defrosted and squeezed dry

  • 14 oz marinated artichoke hearts chopped

INSTRUCTIONS:

1.) Preheat oven to 375 degrees F. Cut pitas into 6 pieces each, like pizza slices.

2.) In a bowl combine cream cheese, sour cream, mayonnaise and garlic with a hand mixer until fluffy.

3.) Stir in parmesan cheese, 1 cup mozzarella cheese, gruyere cheese, spinach, and artichokes.

4.) Place into a 9x9 casserole dish (or deep dish pie plate) and top with remaining 1/2 cup mozzarella cheese.

5.) Bake 25-30 minutes or until bubbly and cheese is browned. Carefully remove from oven and serve directly from baking dish when safe to serve.

6.) Meanwhile, bake pita triangles for 5-7 minutes, remove from oven before they are too crunchy, and are still a bit soft but warm.

Enjoy!

What soup flavors will you feature at your next gathering? You could also make a batch of each soup and see what your guests lie best! Lay out all the toppings in matching bowls, and offer guests spoons, napkins, plates, bread, and more! Enjoy!

Have a wonderful day!

Light + Crispy Sprinkle Sugar Cookie Recipe

Light, crispy, festive, and delicious cookies you are sure to love! Uncomplicated ingredients and an easy baking process makes these cookies a 10/10 all around! You will love the light, airy crunch that the ingredients offer, and these can be customized to any colors you would like - even holidays or team colors!

INGREDIENTS:

1 c. butter

1 c. vegetable oil

1 cup powdered sugar

1 cup granulated sugar

2 eggs

1 tsp vanilla

4 cups flour (2 cups all purpose flour + 2 self rising flour if you would like)

1 tsp baking soda

1 tsp cream of tartar

1 tsp. salt

ball sprinkles or colorful sanding sugar - almost any sprinkles will do!

baking sheets

parchment paper

INSTRUCTIONS:

1.) Preheat oven to 350 degrees F. Cream butter and sugar until combined

2.) Add vegetable oil + powdered sugar

3.) Add egg + vanilla

4.) Add dry ingredients slowly, blend everything together until fully incorporated.

5.) Pour about 1/4 cup sprinkles into a shallow bowl or dish. Roll dough into 1-1.5” balls, and roll in sprinkles. Coat the dough as much as possible with the sprinkles - you may need to use your fingers to help press sprinkles into dough. Place each ball onto parchment lined baking sheets, and use a glass to flatten the balls a little bit.

6.) Bake 6 cookies per baking sheet for 8-10 minutes each, they will spread a little bit, so this insures the cookies do not touch while baking. Transfer onto cooling rack, and enjoy while still a little warm, or after they have cooled - they will get nice and crunchy! Enjoy.

Soft Iced Cutout Gingerbread Cookies Recipe

Super excited to share this recipe now that I have perfected it. What a lovely make-ahead gift idea for the holidays, and you can decorate them in any color scheme you would like! O really hope you enjoy this gingerbread cookie recipe, created just for you!

Also, haooy New Year’s Eve! We are spending the last day of 2018 reflecting on the past year, and are also looking forward to planning what the next year will hold for us. This year was filled with so many incredible projects and spending time with people we love and who inspire us! We also have a few exciting projects and travels ahead of us, but for now I wanted to share my favorite cookie recipe of the year!

This recipe was originally posted here - https://theviewfromgreatisland.com/soft-glazed-gingerbread-cookies-recipe/

Soft Glazed Gingerbread Cookies

Prep Time: 20 minutes

Cook Time: 10 minutes

Total Time: 30 minutes

Category: dessert

Cuisine: American, British

Author: Sue Moran

Yield: 12-14 cookies

Serving Size: 1 cookie

Calories per serving: 154

Ingredients

  • wet ingredients

  • 6 tbsp (85 g) unsalted butter, at room temperature

  • 1/3 packed cup plus 2 tbsp (90 g) dark brown sugar

  • 1/3 cup (100 g) molasses

  • 1 large egg yolk

  • dry ingredients

  • 1 3/4 cups plus 2 tbsp (235 g) all-purpose flour

  • 1 tbsp Dutch-processed cocoa powder

  • 1/2 tsp baking soda

  • 1 tsp ground ginger

  • 1/2 tsp ground cinnamon

  • 1/8 tsp ground cloves

  • 1/4 tsp salt

  • 1/4 tsp freshly ground black pepper

  • glaze

  • 1 cup sifted confectioner's sugar

  • 1 Tbs/15g unsalted butter, melted

  • 1/2 tsp vanilla extract

  • 1 Tbsp plus 1 tsp warm water

  • cookie cutters

  • parchment paper

  • baking sheets

Instructions

  1. Preheat the oven to 375F/190C.

  2. Cream together the butter, sugar, and molasses in a stand mixer or with electric beaters. Beat in the egg yolk.

  3. Sift together the dry ingredients. Slowly add the dry ingredients to the butter mixture, beating on low until the dough comes together.

  4. Turn out the dough onto a lightly floured surface and knead it until all the floury crumbles are incorporated. Flatten the dough into a disk and then roll out to about 1/4 inch thickness.

  5. Cut out shapes from dough and transfer them to parchment paper lined baking sheets.

  6. Transfer the cookies to a lined baking sheet and bake for 8-10 minutes. You don't want to over bake these cookies, so do a test cookie or two to figure out the best timing for your oven. The cookies will be soft when you remove them from the oven, but will firm up as they cool.

  7. While the cookies are baking whisk the glaze ingredients together until they become a smooth thin glaze. Add more water if the glaze is too thick, it should have the consistency of maple syrup or a thin honey.

  8. Put the cookies on a cooling rack and brush them with the glaze while still slightly warm. The glaze will dry in about 30 minutes.

These cookie bake up perfectly to a soft cookie that holds it shape after just 5-6 minutes of baking!

I am also super happy with this frosting, because traditional powdered sugar icing tastes WAY too sweet, but with the addition of melted butter, the taste is rich and compliments the strong taste of these gingerbread cookies.

If you plan on freezing these cookies, I would omit the butter from the frosting recipe. It turned a bit white after being frozen on plates in Ziploc bags.

I even marbled a few colors of icing on some cookie by taking a small amount of each color on the toothpick, then transferring it to the cookies, then swirling the colors. Think of all the color combos you could make!

If you wind up trying these cookies out, tag me on Instagram as @happysolez, I would LOVE to see what you create! Happy New Year!

Merry Christmas! Our Christmas Cookies

Hello! I hope you’re all having a very merry Christmas! It’s pretty warm out today, so it’s not a white Christmas, but I would always prefer to the cold. I got to participate in a fun cookie baking experience this year. The four of us got to take home TONS of cookies and everything turned out so well. The goal was to make enough cookies so we could all bring cookie platters home and also enjoy a few others along the way. I learned SO much about making the perfect cutout sugar cookies too :)

The cookies we created include:

Cutout Sugar Cookies

Shortbread Cookies Dipped in White Chocolate and Dark Chocolate

Chocolate Crinkle Cookies

Oatmeal, White Chocolate Craisin Cookies

Snickerdoodles

(Recipes all coming soon!)

Happy Holidays! I hope you all had a wonderful day!

Sheet Pan Spicy Roasted Brussels and Rainbow Veggies Recipe

This post was sponsored by Colman’s, all opinions are my own.

A delicious and health-forward vegan recipe that makes eating your vegetables easy AND delicious. Colman’s Mustard Glazed Brussels Sprouts and Roasted Vegetables make an amazing holiday side dish, snack, or even dinner idea. Colman’s dry mustard does have some heat and spice to it, but it’s a very nice, subtle warming flavor which I just love.

Flavors of mustard grace the outer edges of a wide array of vegetables, in every color and crunch level –you’re going to love these veggies! The mustard flavor also paired exceptionally well with the other marinade ingredients like honey and soy sauce.

Plus, these vegetables make a very elegant dinner or side dish, and go very well with lots of different refreshments. I just love how pretty the Brussels sprouts are when they are cut open. They are like mini cabbages, and while they do have a stronger and sometimes more acquired taste than other vegetables, they are said to be high in vitamins, minerals, and antioxidants. The more vegetables one can incorporate into their diets, the happier their bodies might be. While everyone is of course different, I love treating my friends and family to healthier meal options.

I always love creating plant-based meals that offers a new alternative to dinner or a side dish. Impress just about anyone (even if they are “newbies” to or unsure about Brussels sprouts, these are definitely a crowd pleaser.

By incorporating Colman’s dry and wet mustards into the glaze for these vegetables, I absolutely LOVED the new, unique flavors that came through from baking the ingredients with such a great marinade. If you can imagine a potato or egg salad containing mustard, that is where I got the idea that potatoes, Brussels sprouts, and so many other veggies would pair perfectly with the Colman’s mustards.

Colman’s has been creating mustards since 1814, using time-honored traditions and the highest quality ingredients.

INGREDIENTS (Serves 4-5):

Marinade:

2 Tbsp Colman’s Dry Mustard

2-3 Tbsp Colman’s Wet Mustard

1/3 C. Olive Oil or more, to ensure all veggies are fully coated at the end

2-3 tsp. seasoned salt

1 Tbsp balsamic vinegar

2 Tbsp honey

Suggested Vegetables:

2 Cups Brussels Sprouts (cut into halves, and cut some into quarters)

½ -1 C. thinly sliced Russet potatoes

½ C. sweet potatoes – chopped into small pieces

½ C. yellow zucchini

½ C. green zucchini

¼ C. corn – from cob or canned

1 head of garlic

INSTRUCTIONS:

1.) Prep all veggies, and cover sheet tray(s) with foil, Spray with non stick spray and preheat oven to 400 degrees. Carefully cut off top of garlic head. Set aside.

2.) In a medium to large mixing bowl, mix up all marinade then add veggies to mixing bowl. Use tongs to coat all vegetables, then transfer all veggies to sheet pan(s). To create the garlic head, simply cut off the top of the garlic to expose the cut tops of each clove, while still leaving the rest of the head in tact.

3.) Bake 20 minutes covered with foil, then CAREFULLY remove foil (there will be lots of steam, which can burn someone easily). Bake 10-15 more minutes, and then remove from oven. Transfer to serving tray or large bowl, OR transfer into plastic containers to give to busy families during the holidays. Enjoy!

Here are a few more images of the finished veggies and head of garlic. Definitely recommended!

Have an amazing holiday! And enjoy this delicious, health-forward dish today!

Check out Colman’s Dry and Wet Mustards today, and spice up just about any savory dish you can imagine!

Dulce De Leche No Bake Dessert Recipe

Do I have a delightfully easy no bake dessert for you! This one would be PERFECT to serve during the holidays, and if you make it in a larger dish, this would be great for a crowd! These desserts are seriously incredible, and I think they would even taste great with chocolate syrup as well.

INGREDIENTS:

1 pint heavy or light whipping cream

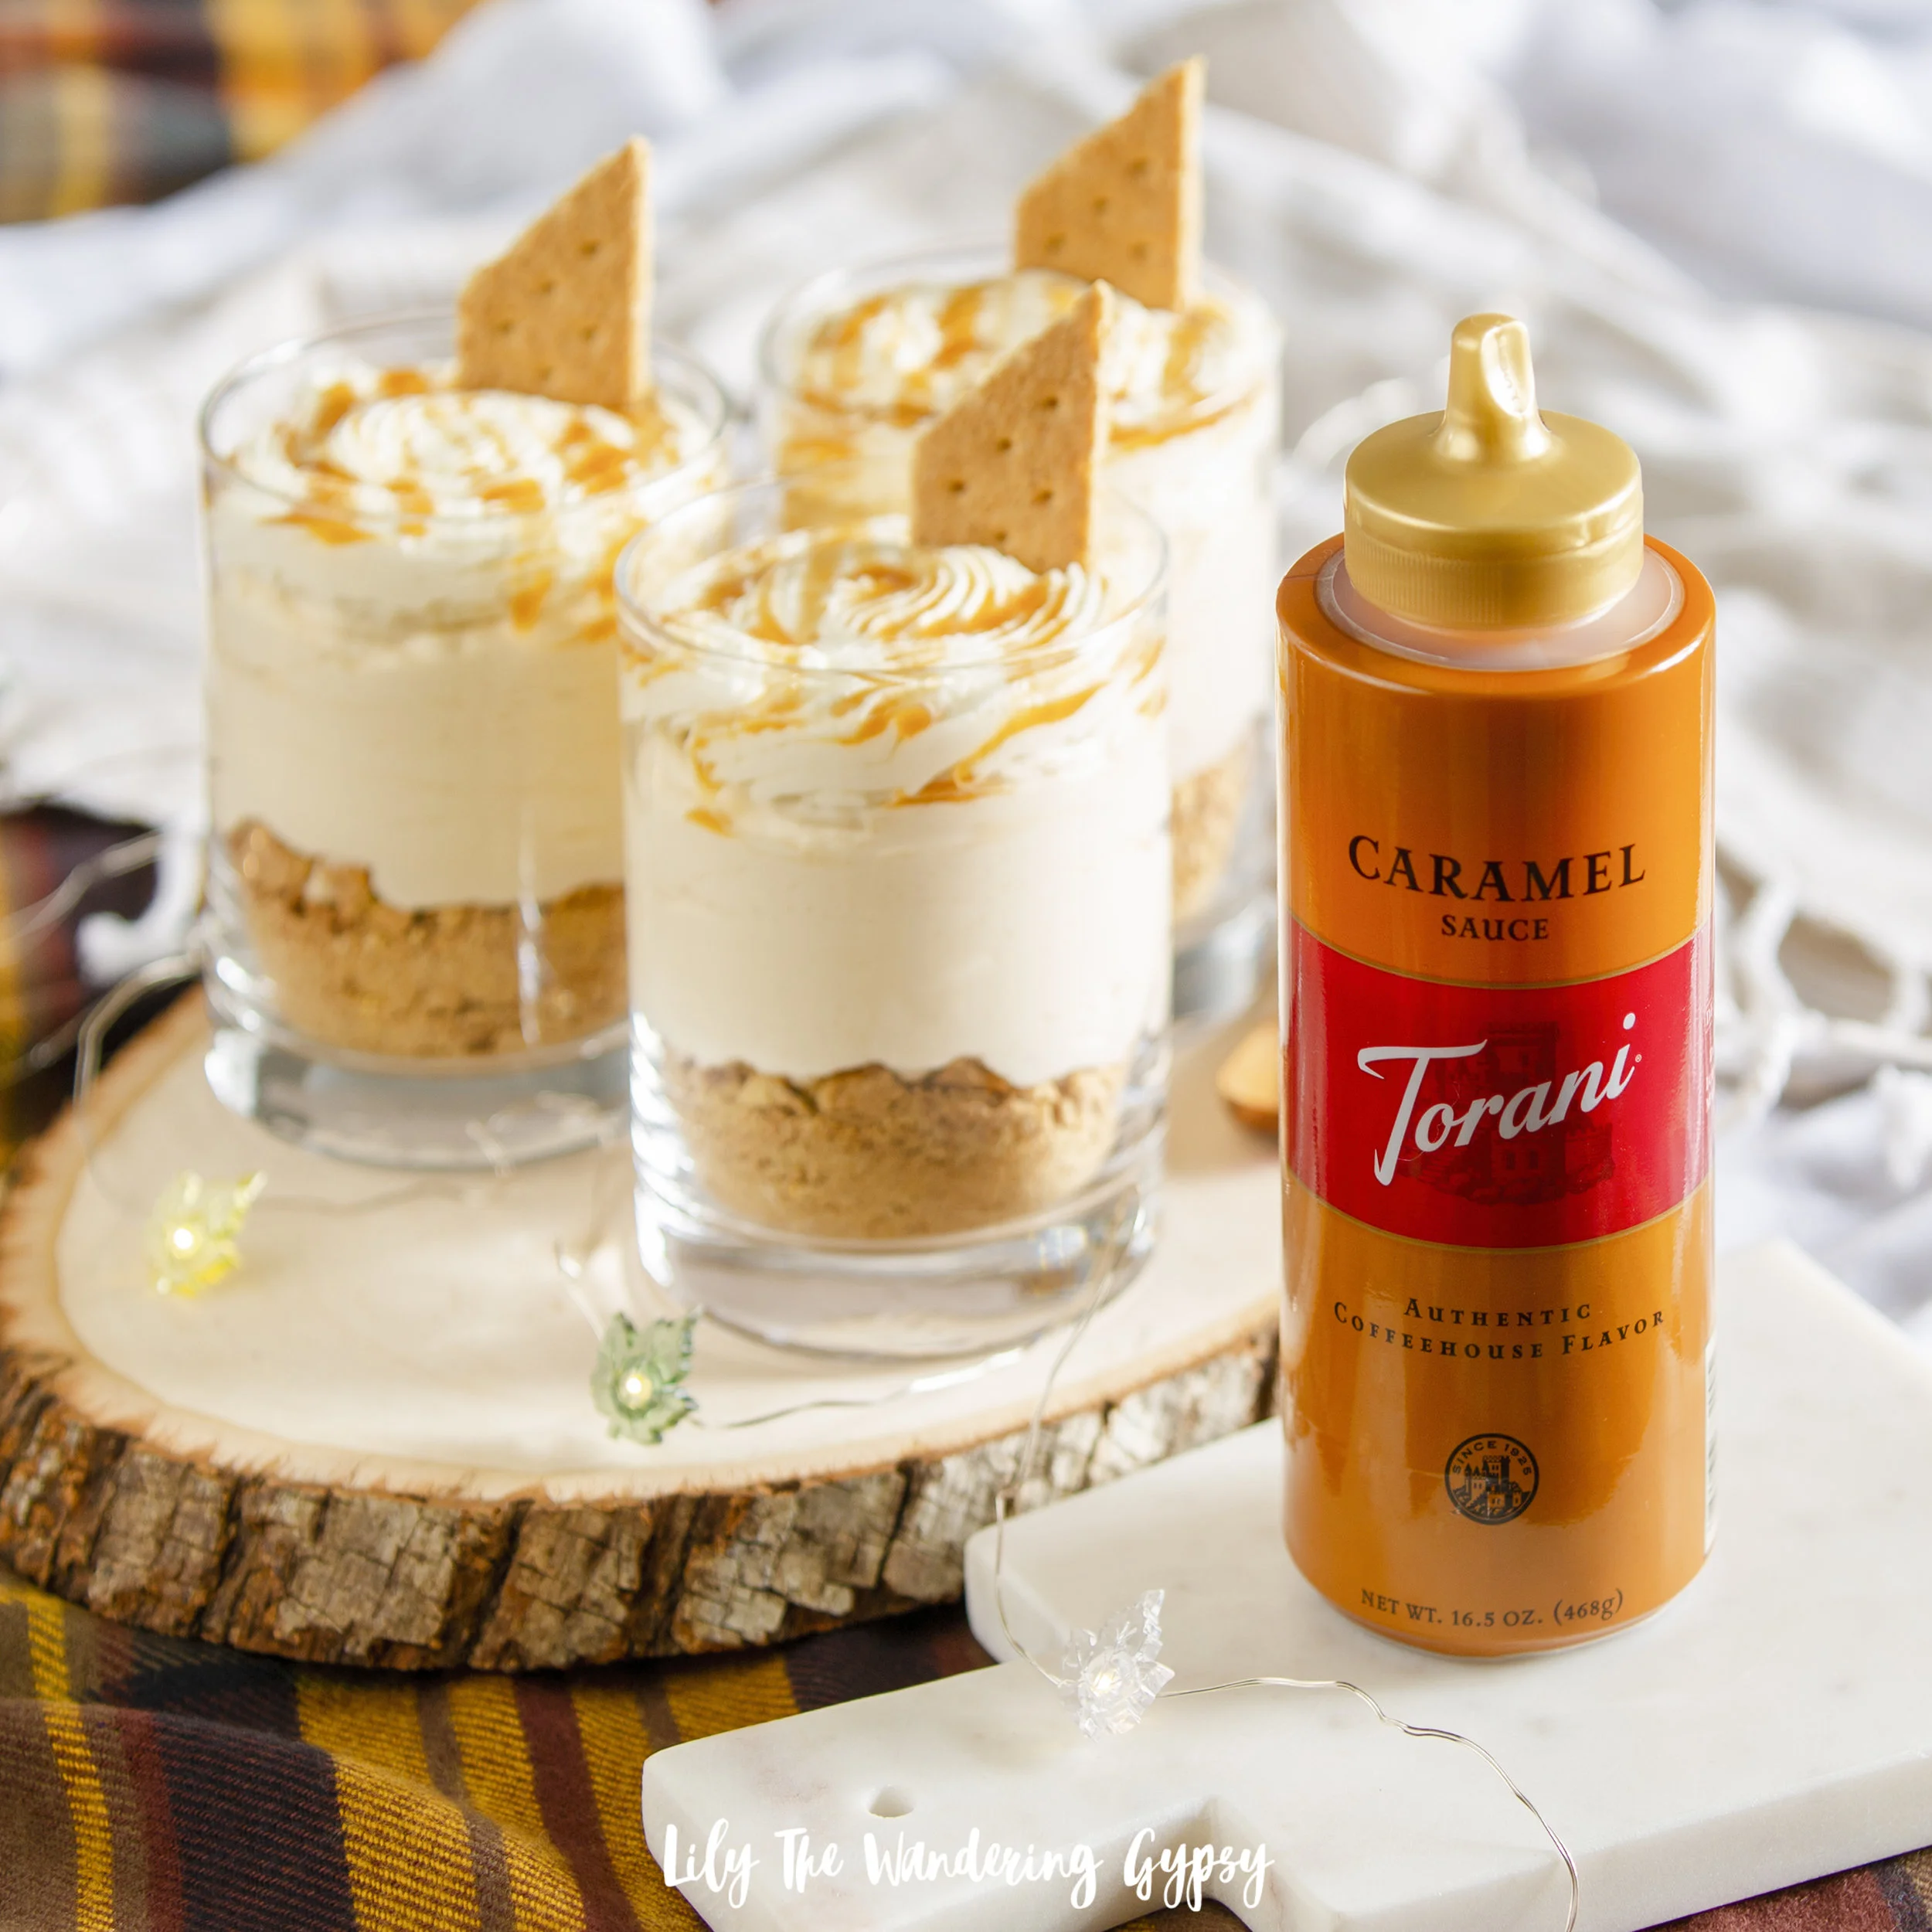
1/2-1 cup Torani Caramel Sauce (found at Walmart in the coffee aisle, near the chocolate sauces)

1 box of graham crackers (reserve several for top garnish)

INSTRUCTIONS:

1.) Place three medium-sized glasses on your work surface, and crush up graham crackers as small as possible. I placed 15 or more graham crackers into a stronger Ziploc bag, closed the bag, and then used a jar to crush up the crackers.

2.) Divide the crushed up crackers between the three glasses. Now, to make your filling! Beat heavy whipping cream for several minutes, until stiff peaks form. Reserve about 1/2 Cup of the whipped cream for your topping, then, add vanilla and Torani Caramel sauce, then finish mixing to combine everything. Divide the filling between the glasses.

3.) For the garnish, I used a sharp knife to carefully cut the graham cracker squares in half, then I cut a diagonal angle as well. This is totally optional, I just thought it was cute. Also drizzle more Torani syrup over the top of the dessert and enjoy.

Winnie The Pooh Mini Bear Sandwiches

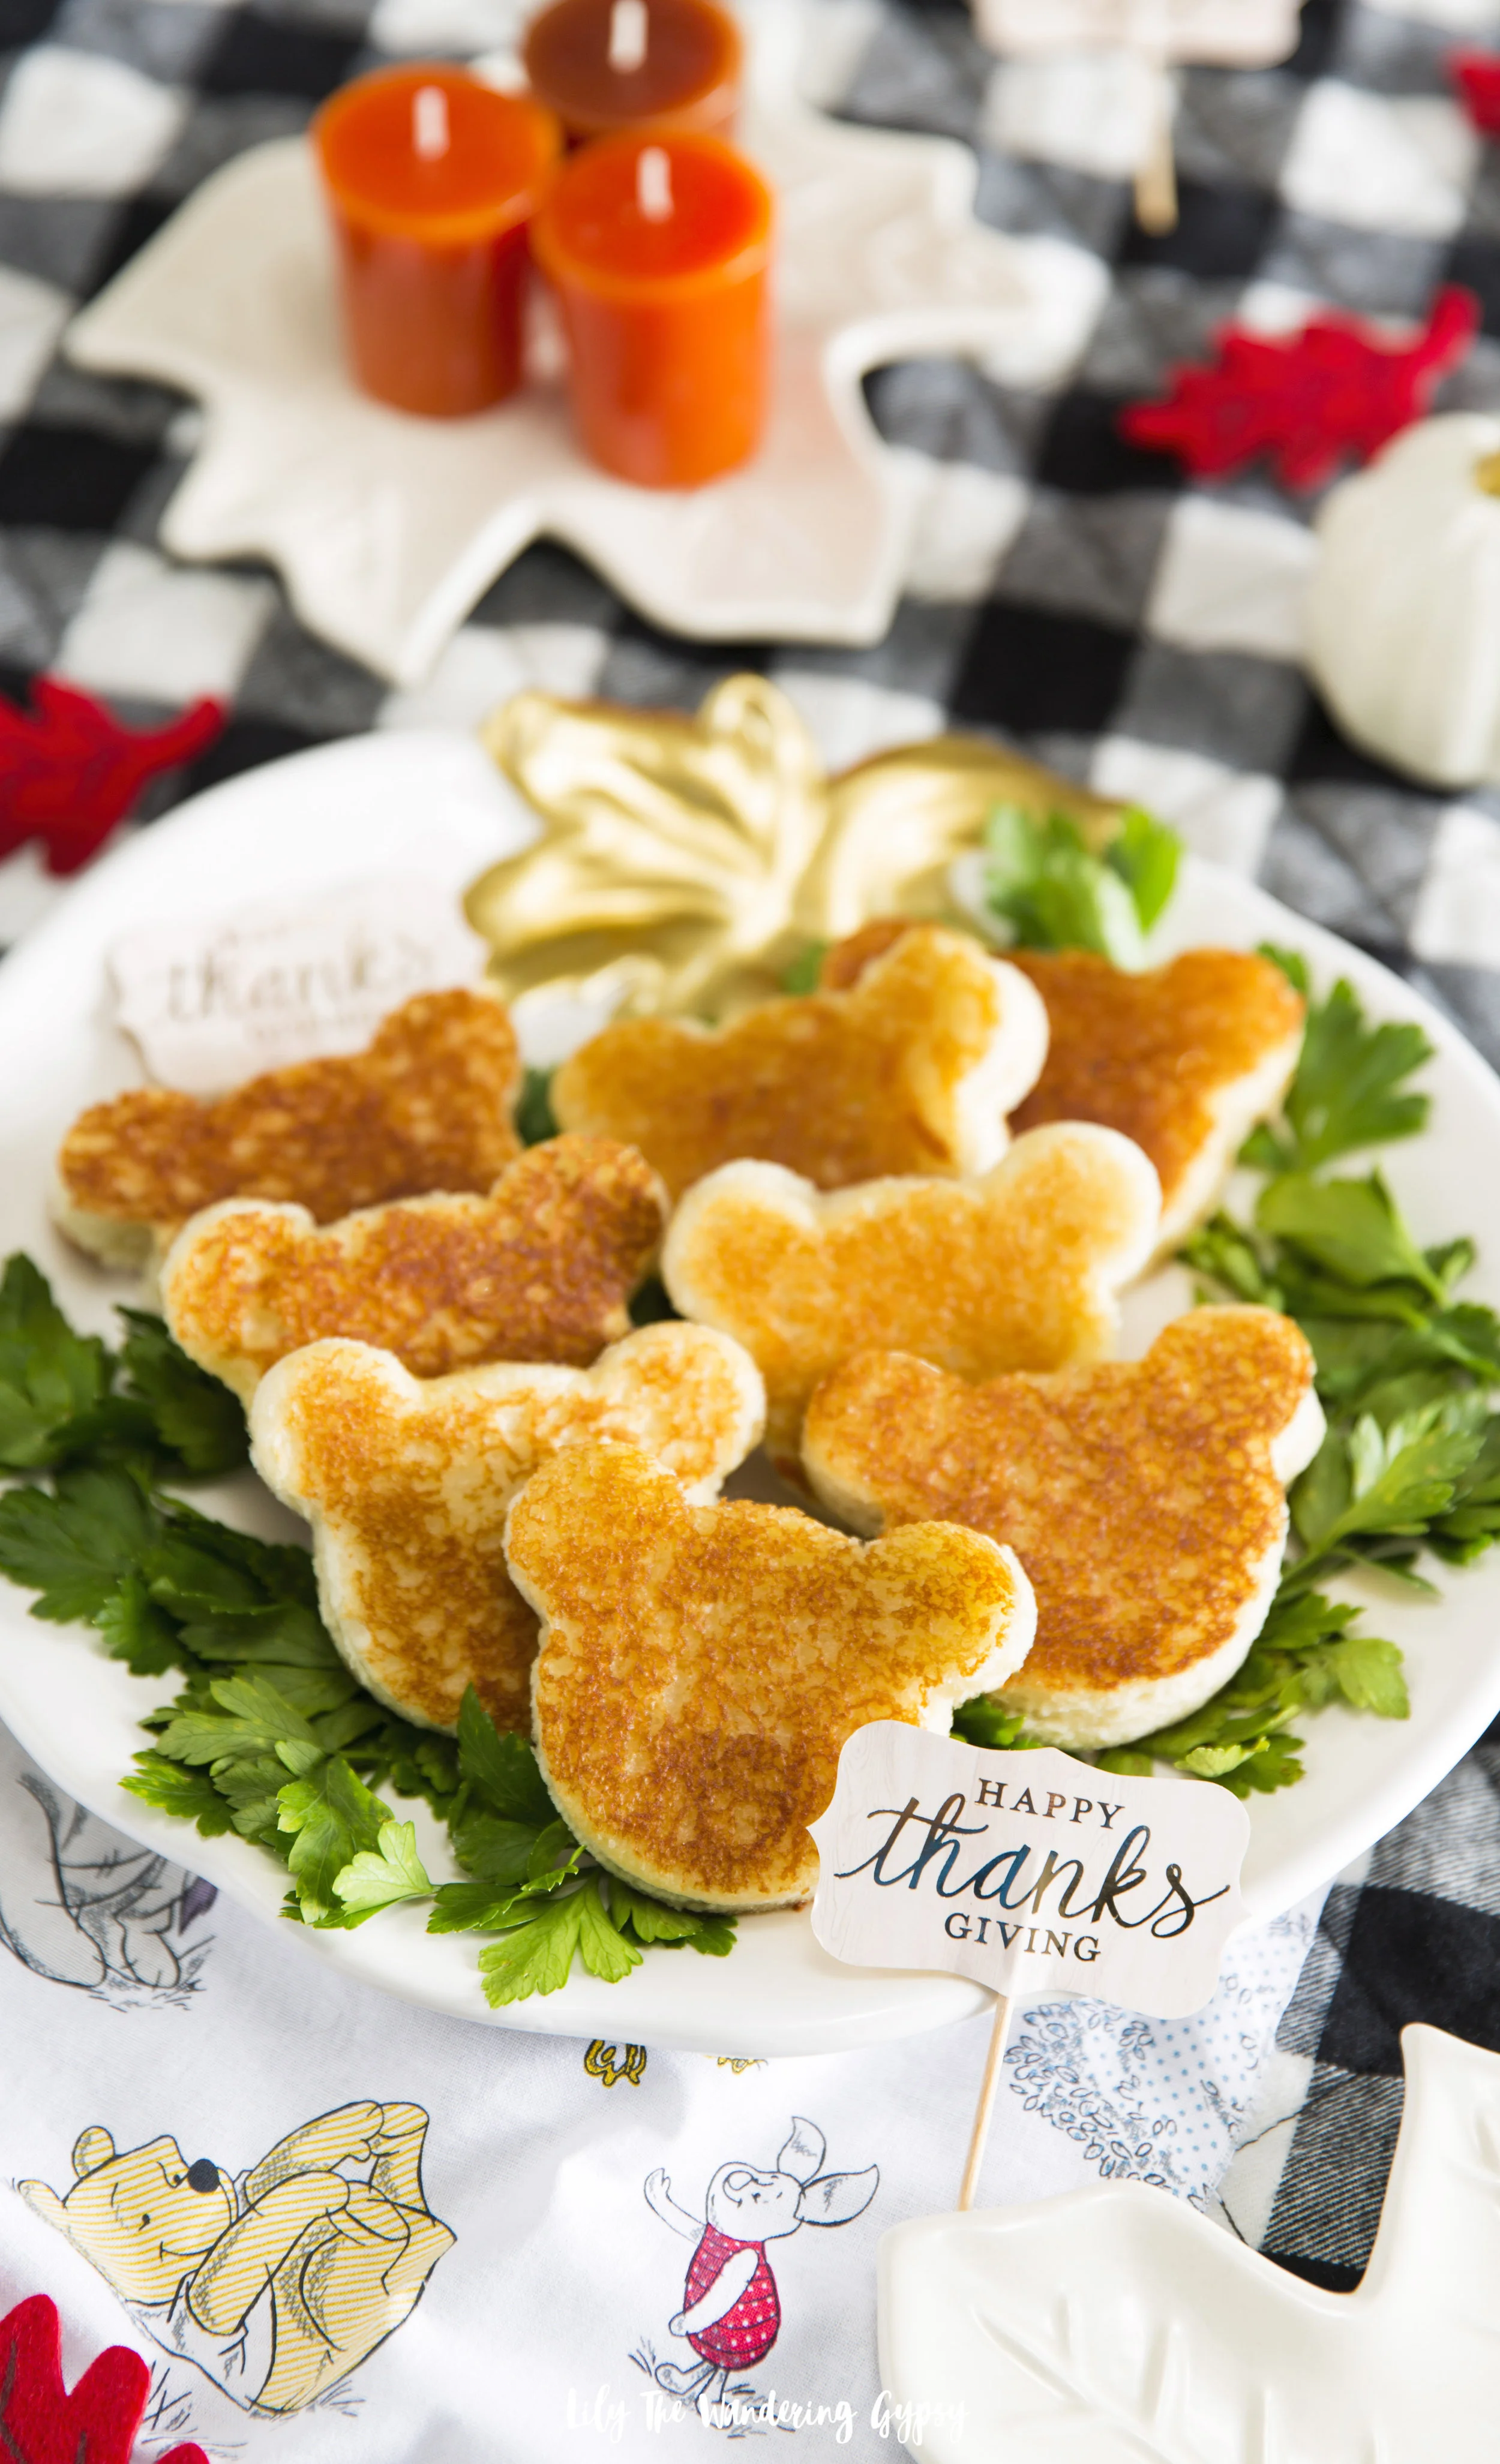
These little mini grilled cheese sandwiches are inspired by Disney’s new movie, Christopher Robin. I found these to be incredibly fun and easy to make and can even be partially prepped ahead of time if you will be making a lot of them for a crowd. #WisdomByPooh

INGREDIENTS (makes 10 sandwiches)

  • 20 pieces of sliced bread

  • cookie cutter in your favorite shape

  • up to 2 cups shredded cheddar cheese

  • butter spread or my favorite dairy free option, Earth Balance

  • skillet

INSTRUCTIONS:

1.) Simply use a cookie cutter to cut shapes from your favorite sliced bread. Those can be cut out up to one day in advance, then stored in an air tight bag.

2.) Heat skillet over medium heat, and add butter to each piece of bread, set aside.

3.) When skillet is hot, add as many pieces of bread as you can, butter side down. Sprinkle approximately 1 TBSP of shredded cheese per piece of bread. To avoid a mess, try to make sure the cheese stays on the bread, rather than getting it all over the skillet to burn.

4.) Place other pieces of buttered bread shapes on top, and let the cheese melt. Use a spatula to VERY CAREFULLY flip over the sandwiches to then heat the other side evenly, until cheese has melted.

5.) serve on a cute platter and enjoy!

I styled these in a Thanksgiving theme, but they would be amazing for just about any holiday. I thought they would be amazing for little ones, to tide them over as the full meal is being made. These could be a fun way to get picky eaters to try something new also.

Glitz N Glam Christmas Party Recipes with 7UP + Canada Dry Ginger Ale at Target

This post was sponsored by Keurig Dr Pepper. All thoughts and opinions are my own. Must be 21 or older to consume alcohol. Please drink responsibly. #SipSipHooray

So excited to share a drink recipe AND a fun candy-making recipe that you’re definitely going to want to incorporate into your next holiday gathering. Show your friends and family just how much you care about them by making this year’s festivities extra Glitz N Glam too. Let’s raise a glass to this fun time of year and get to celebrating! I am so excited to share two fun holiday recipes that both incorporate 7UP and Canada Dry Ginger Ale, and I know you’re going to be so inspired to visit Target and incorporate some of these ideas into your next shindig!

If you are someone who believes it’s not a great party without some sort of theme and décor, then you are just like me. I love everything to coordinate and look polished and put together, but I don’t want to spend a ton of time working on setup when I could be prepping food and drinks instead. This décor idea is simple and very easy to recreate, and can be very good for your party budget as well.

The holidays are the absolute perfect time to go a little more on the sparkly, glitzy, and glam-inspired look. After years of styling parties for my blog, and for my friends, and family, I really know what works and what is not so much worth the trouble. For instance, I used a backdrop décor theme of white and silver, and made sure the overall color scheme reads shimmering winter, which allows the food and drinks to be the star of your party. Any time I can incorporate metallics into a party theme, I do it because a bit of shimmer really classes things up, and makes the party feel even more special! This sort of color scheme is also great because silver and white are colors that are pretty readily available at most craft stores and can even be found year round!

Luckily, I was able to find most of my ingredients and party supplies at Target, my FAVORITE place to get inspired for parties and holidays! I love walking their home décor, food, and party aisles to get ideas for upcoming events and parties. They seem to have just about everything and more. You can sSave on Canada Dry and 7UP with Cartwheel, now in the Target app.

I also love how silver and white portray a very classic and elegant look, which makes it incredibly versatile for all ages!

This drink I created, the Orange Spice Punch, is PERFECT for those who love a flavor that is a little more tart with sweet undertones. Also, using a cinnamon stick for garnish was neat because you could stir the drink with it, then the cinnamon taste and aroma was in the drink too.

Also, orange and dark chocolate are a delicious pairing, so making these chocolate truffles with a darker chocolate was a really good idea. The 60% cacao chocolate chips really tasted amazing to use as the base of the chocolates.

7UP ORANGE SPICE PUNCH

(Recipe Found Here)

INGREDIENTS

  • 1 qt. orange sherbet

  • 2 L. 7UP®

  • 12 oz. Canada Dry® Ginger Ale

  • 6 oz. orange juice

  • 6 oz. cranberry juice

  • 1 cup Canadian whiskey (optional)

  • Lemon, lime, and orange slices; cinnamon sticks; and pumpkin spice, for garnish

  • Prep Time: 4 minutes

  • Ready In: 6 minutes

  • Serving Size: 30 people

DIRECTIONS

  • Add everything except for sherbet into a one-gallon punch bowl.

  • Float scoops of sherbet on top.

  • Let sherbet soften in the punch for a few minutes before serving.

  • Garnish with lemon, lime, and orange slices, cinnamon sticks, and a touch of pumpkin spice.

Please drink responsibly.

Best served in something extra fancy! 

7UP FIRECRACKER CANDY TRUFFLES

(RECIPE FOUND HERE)

INGREDIENTS

·       POPPER CANDY

·       Confectioners’ sugar for dusting

·       1 cup granulated sugar

·       2 tbsp. light corn syrup

·       1/4 cup 7UP®

·       1 tbsp. baking soda

·       1-2 tsp. citric acid (optional, adds flavor)

·       Pink food coloring

·       TRUFFLES

·       1-2/3 cups heavy cream

·       1 bag of chocolate chips (good quality 60% cacao), chopped + 6 oz. more for coating truffles (I used 1.5 bags of chocolate chips altogether)

·       Pinch of salt (I used large grain salt, it worked super well)

·       1/2 tsp. ground cinnamon (optional)

·       3/4 tsp. cayenne (optional)

·       1/2 tsp. chili powder (optional)

  • Prep Time: 15 minutes

  • Ready In: 2 hours 15 minutes

  • Serving Size: 10-12 people

DIRECTIONS

·       POPPER CANDY

·       Prepare a baking sheet with parchment and dust with confectioners’ sugar.

·       Place granulated sugar, corn syrup, and 7UP® in a pot, whisking to combine. Bring mixture to a boil, and cook until a temperature of 300° is achieved. Watch your temp, or this can burn relatively easily.

·       Remove from heat, and stir in baking soda, (optional) citric acid, and food coloring of your choice. The citric acid just adds flavor, which is super tart. So, if you would prefer to just have a sweet topping, do not include the citric acid.

·       Pour onto prepared baking sheet, sprinkle with remaining citric acid, and set aside to cool while preparing truffles.

·       TRUFFLES

·       To make the truffles, bring cream to a simmer in a shallow saucepan.

·       Place chocolate in a shallow bowl, and pour warm cream over chocolate.

·       Let stand for 10 minutes.

·       Stir with a rubber spatula until chocolate mixture is smooth.

·       Season with a pinch of salt, ground cinnamon, and cayenne.

·       Pour into a shallow baking dish, and chill in refrigerator until firm. This step was a bit tricky, but I found that spreading the chocolate in a pretty thin layer worked best and was the fastest.

·       To form truffles, scoop with a small ice cream scoop, melon baller, or kitchen spoon and roll into a balls. Feel free to re-freeze chocolate if it’s not firm enough to make the balls. Note – this step was a bit tricky. At first, the chocolate was way too soft to form balls from. I also had the chocolate freeze completely, because I left them in the freezer too long. Just check on the chocolate ganache at 15 minutes, then every 5 minutes after that.

·       Place truffles in freezer to firm up again before covering with more chocolate. Below, you can see an image of the chocolate balls after they have been frozen for about 20 minutes.

·       Once popper candy is cooled and hard, place in a large resealable bag and break up into pieces with a rolling pin or mallet.

·       Cover chilled truffles with melted chocolate, and then sprinkle with popper candy…“pop” one in your mouth and enjoy!

Above, you can see how I covered the truffles in melted chocolate – it was really fun, and I ate SO much chocolate in the process, LOL!

TIP

·       Keep in refrigerator, and be aware that popping candy need to be used quickly because of its delicate nature. Enjoy!

You can find more recipe inspiration at 7UP.com.

Setting up a Glitz N Glam holiday party is easy if you stick to these fun décor ideas, as well as offer guests food and drinks that they cannot resist! What is your favorite color scheme and recipe ideas for your holiday parties?

#SipSipHooray

Spinach and Sausage Stuffed Mushrooms Recipe

These delicious stuffed mushrooms are not only delicious, they are very easy to make, and really make an impressive dish. Bring a platter of these stuffed mushrooms to your next party or potluck, or make them for dinner.

I was surprised by how easy these stuffed mushrooms were to make! Sure, I have enjoyed stuffed mushrooms in the past, but I have always been under the impression that they were hard to make because they looked so fancy and upscale. While there are several steps to this recipe, the finished product is well worth the time spent making a deliciously creamy spinach and sausage filling, which tasted incredible baked inside of these organic mushrooms.

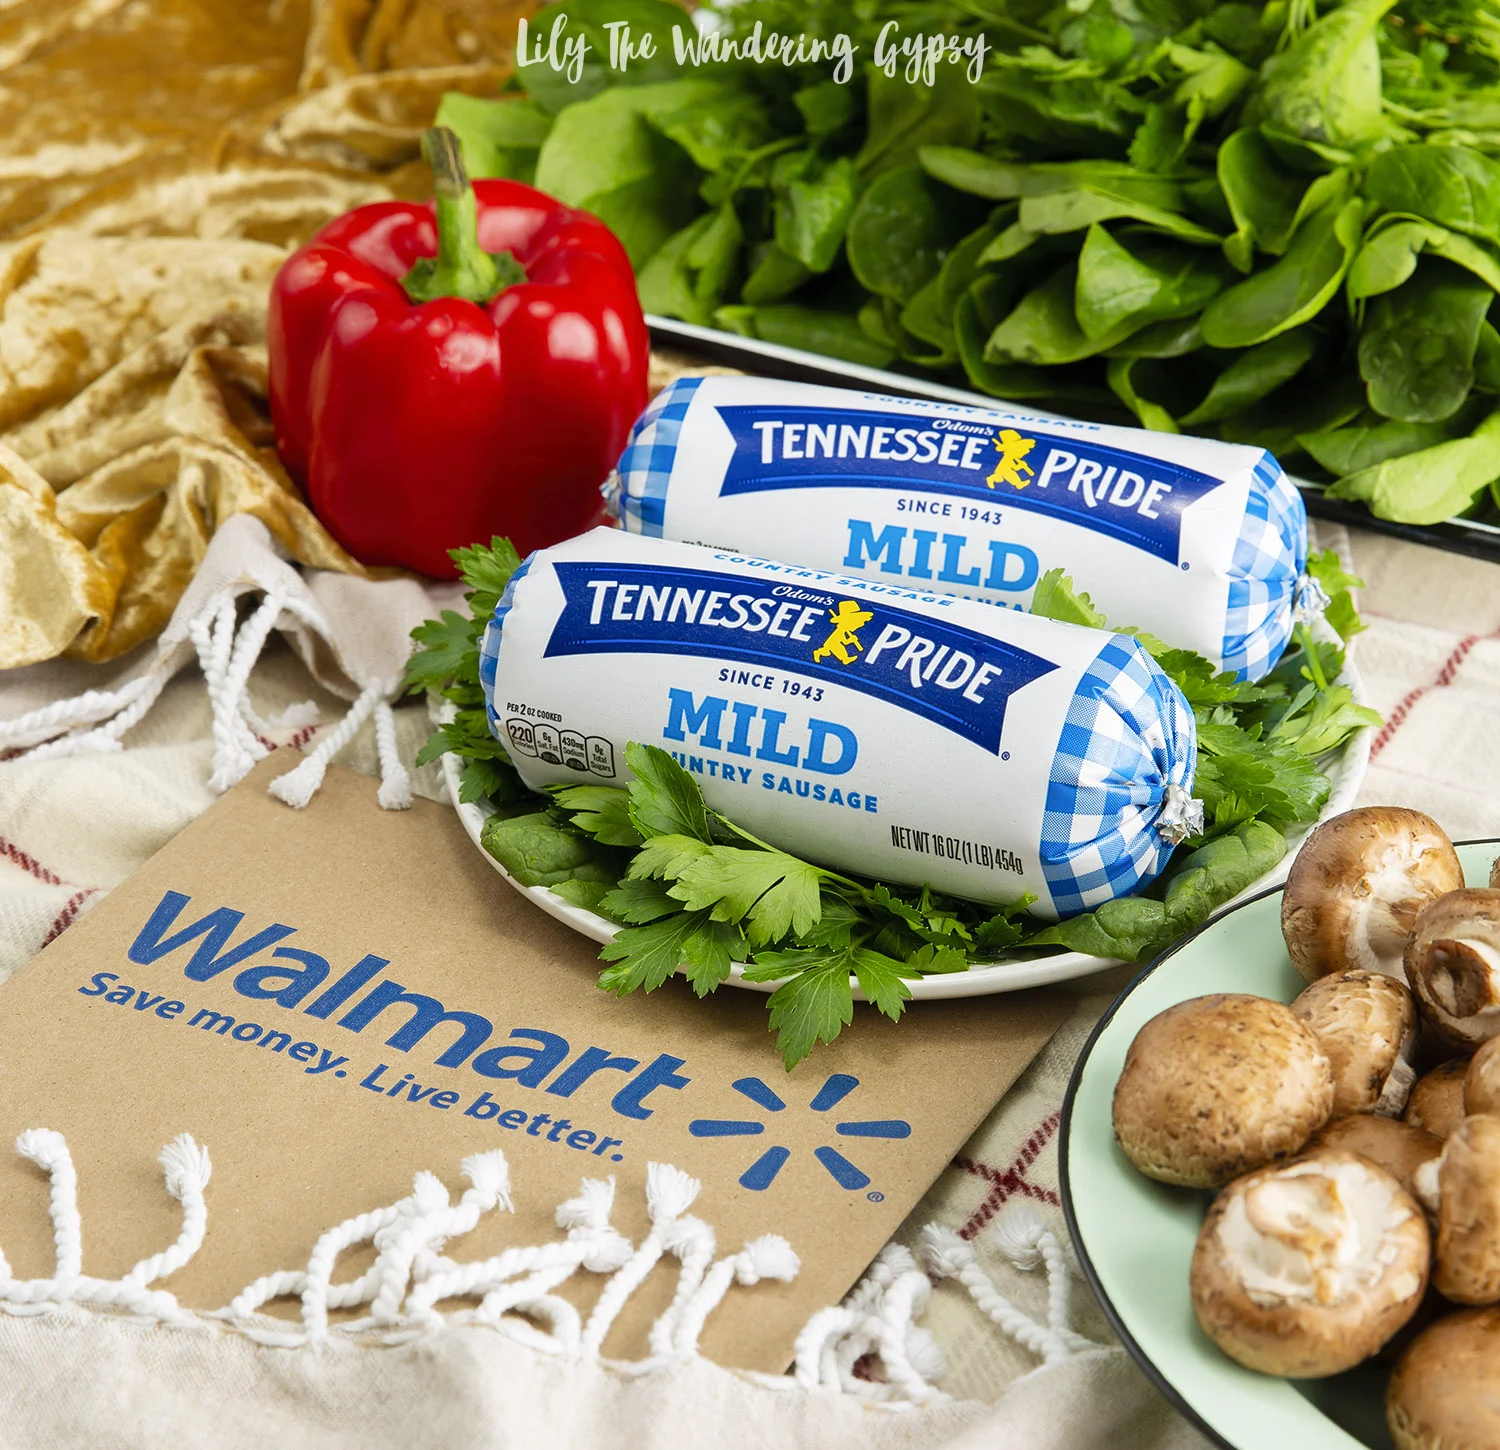
INGREDIENTS (MAKES ABOUT 20 mushrooms)

1 lb. ground sausage or chorizo

2 (8-10 oz.) packages of button mushrooms (organic when possible)

1.5 - 2 cups chopped fresh spinach (chopped into very small pieces with scissors or a knife)

6-8 oz. cream cheese

1.5 cups shredded mozzarella cheese

1/4 cup parmesan cheese (to sprinkle on top of mushrooms)

1/3 - 1/2 cup breadcrumbs

1/2 - 1 cup red pepper - chopped into small pieces

Salt

Italian Seasoning

1/2 - 1 cup onion - chopped into small pieces

Baking sheet

Parchment paper - optional

INSTRUCTIONS:

1.) In a skillet, sauté onions and 2 tsp Italian seasoning 4-5 minutes. Add entire package of ground sausage, and then cook until brown (10-12 minutes). Use strainer in sink to remove as much grease as possible. Return to skillet, and add red pepper. Cook about 4 minutes, see mine above.

2.) Next, add cream cheese and shredded cheese and heat over medium low heat until everything has melted and is well combined. Add in your spinach and cover to steam for about 2 minutes. Lastly, stir in breadcrumbs and mix until combined. Remove from heat and grab a kitchen teaspoon.

3.) Begin to fill mushrooms with filling. I found that for these smaller button mushrooms, it doesn’t even take much to fill them, but you get a great 2-3 bite treat.

4.) Place mushrooms on a baking sheet, optionally lined with parchment paper and bake 12-18 minutes, until mushrooms are tender and you see some liquid leaking out. That means they’re ready!

My boyfriend said this was one of the best dishes I have ever made, and that really meant a lot to me! I hope you all enjoy these stuffed mushrooms as much as we did. Enjoy!!