This bread pudding is out of this world! I love it and you will too!
Read MoreFire Up Your Grill with Smithfield® Craft Collection™ Yuengling® Brats!
This is a sponsored conversation written by me on behalf of Smithfield®. The opinions and text are all mine.
I love the taste of a rich lager beer during summer, and I have been on a real grilling kick lately. When I learned that Smithfield® came out with a new product, brats that are infused with Yuengling® beer, I got pretty excited! Bringing my love of good food together with tasty beer is a specialty of mine, and I wanted to share a way to grill and serve these brats that you’re going to love. I wanted to added lots of vibrant color to this meal with fresh toppings and flavors you and your guests are going to love. Learn more about my experience with Smithfield® Craft Collection™ Yuengling® Brats, they’re such a great excuse to celebrate summer!

I found my Smithfield Yuengling Bratwurst at my Kroger. You can purchase your own by shopping at your local Kroger or Kroger banner store like Ralph’s, Smiths or Food 4 Less!

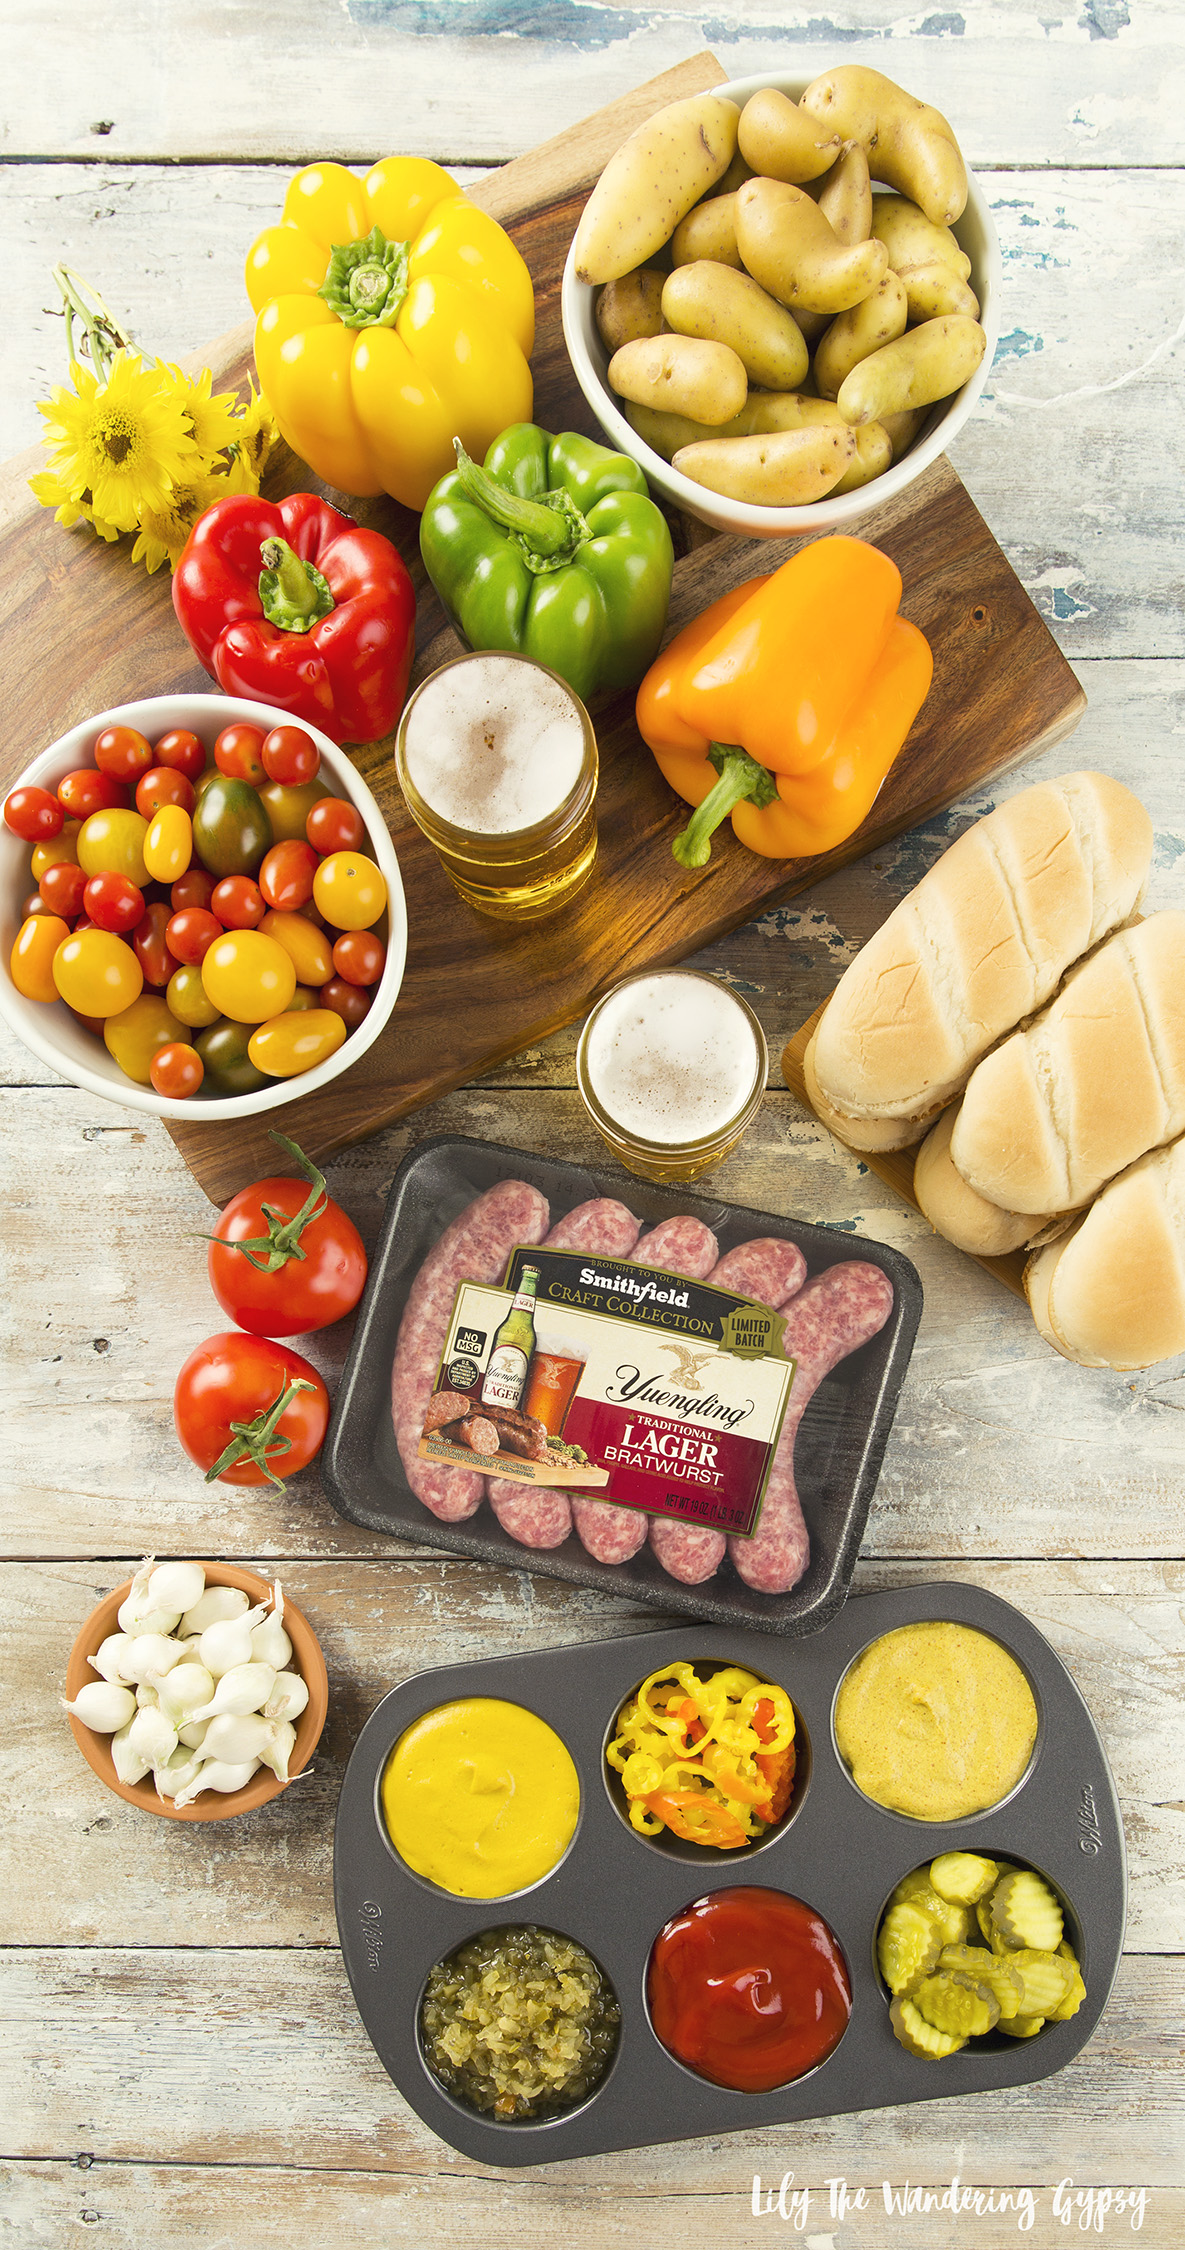
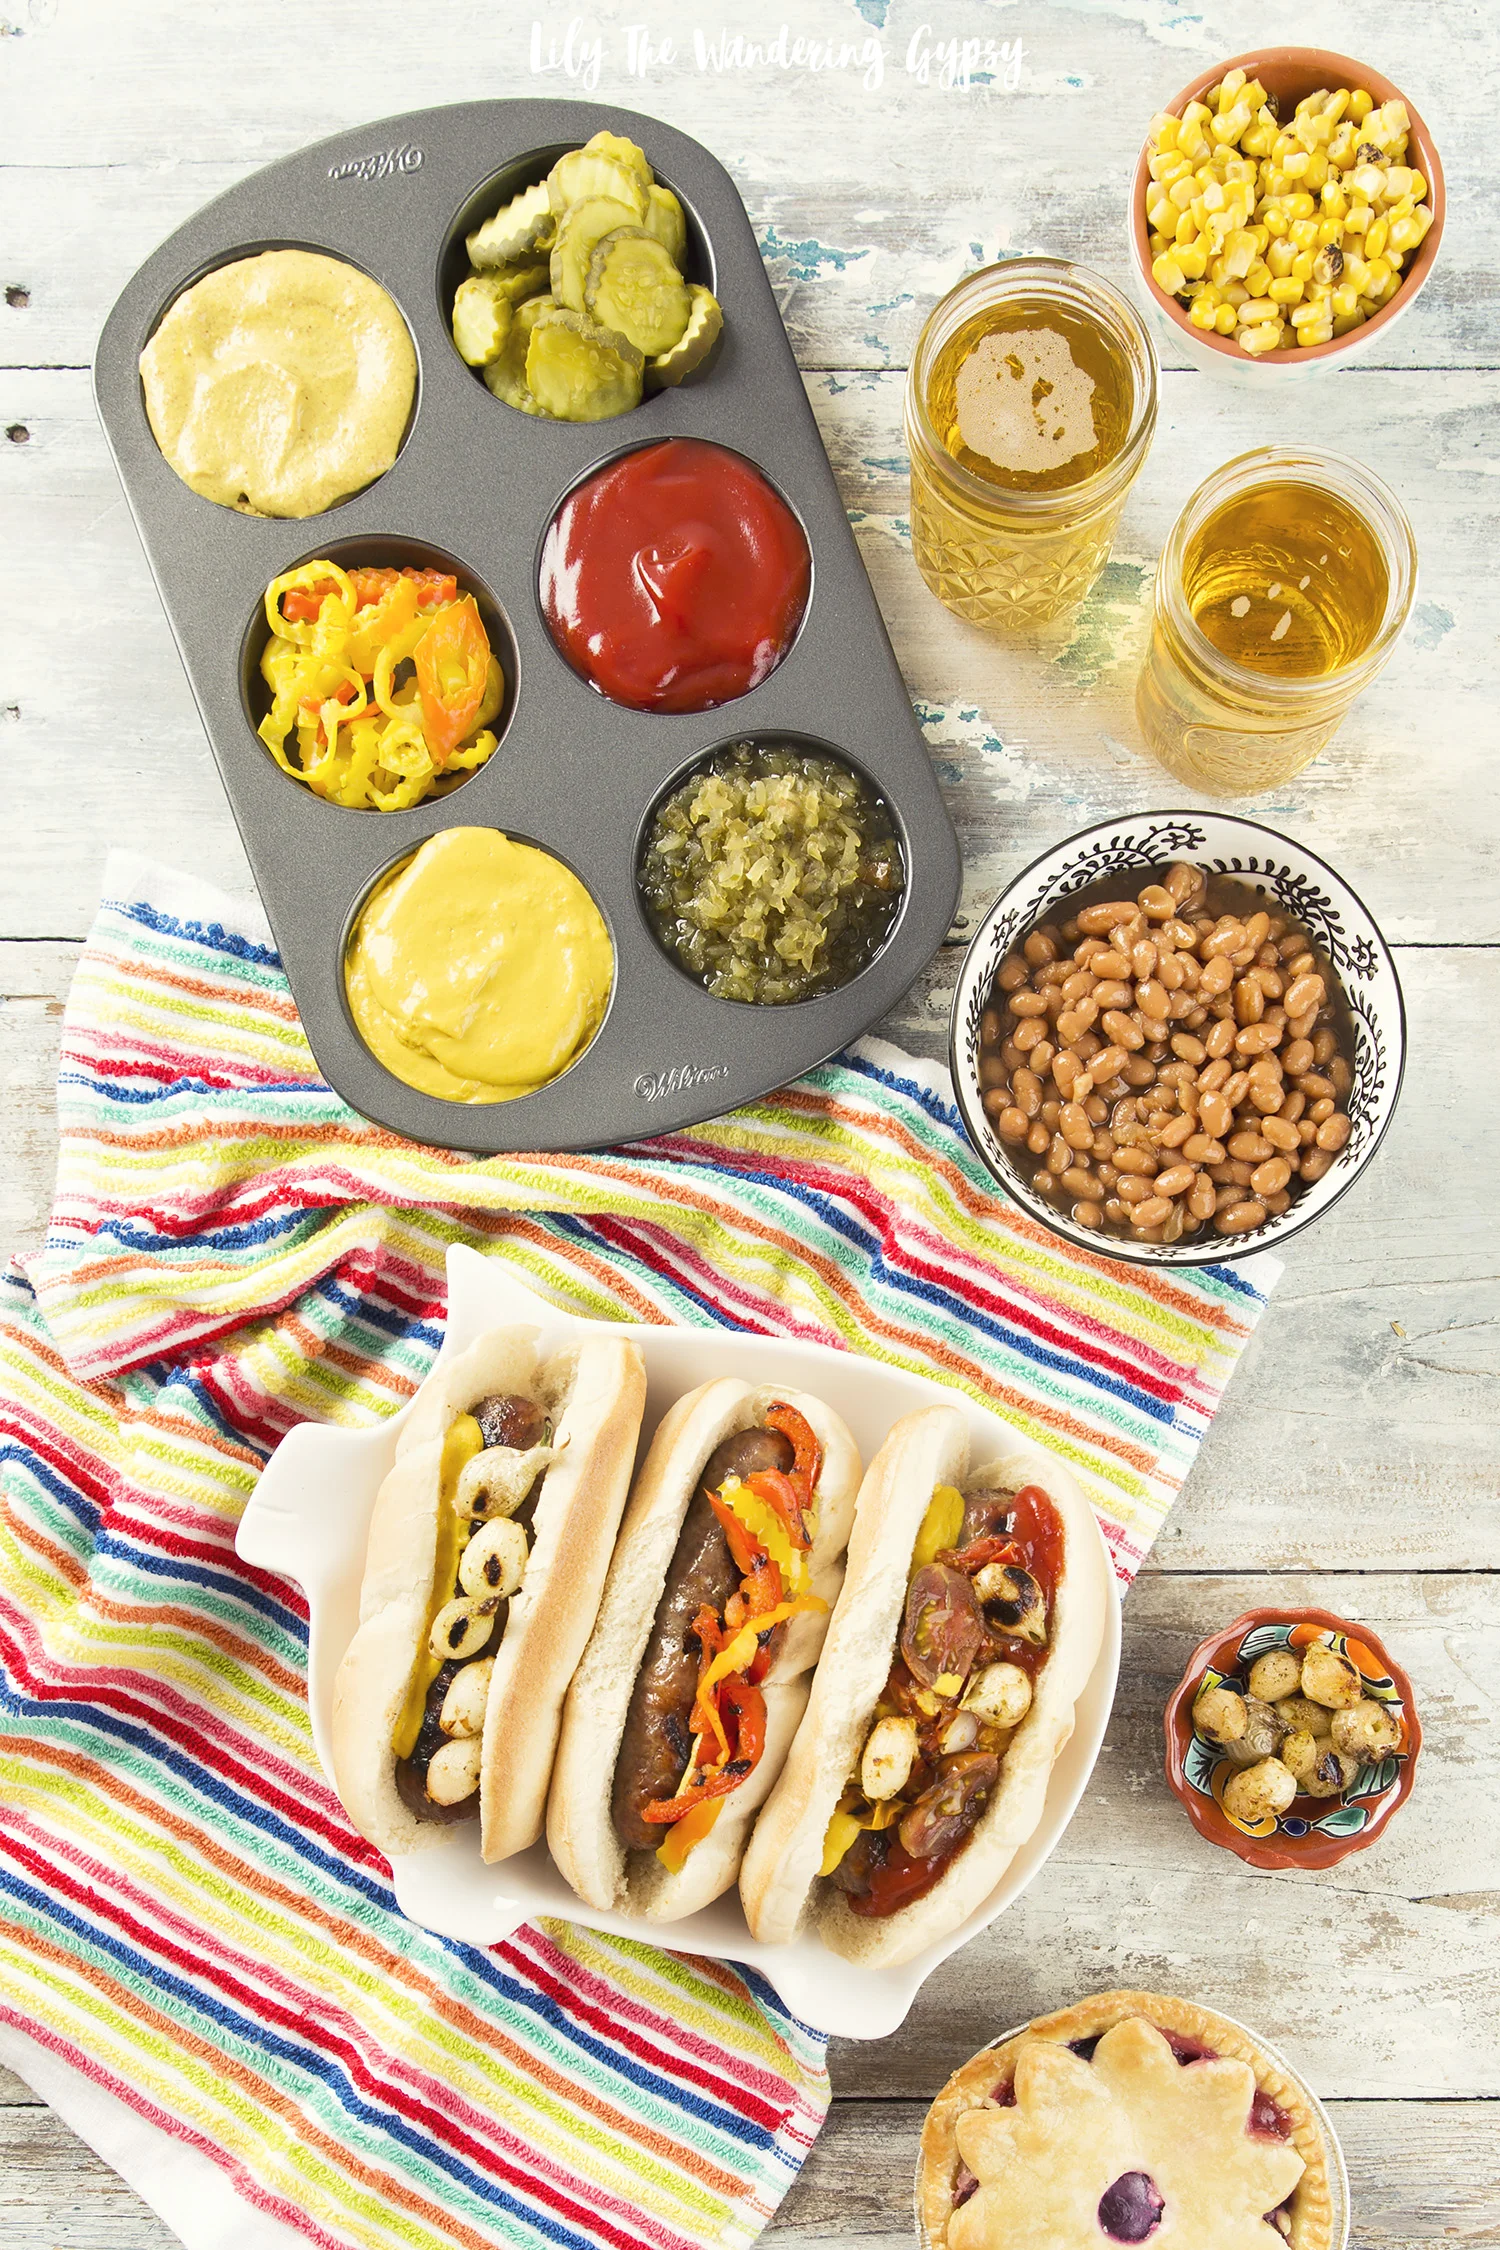
- Smithfield Yuengling Bratwurst (Make 1-2 per guest, I always make extras to have as leftovers)
- Colorful Bell Peppers
- 1 package of Pearl Onions (I fit about 12 per skewer)
- At least 1-2 (12 oz) Beers (for boiling brats) – Try Yuengling Lager for extra flavor!
- Buns
- Condiments (see below for ideas)
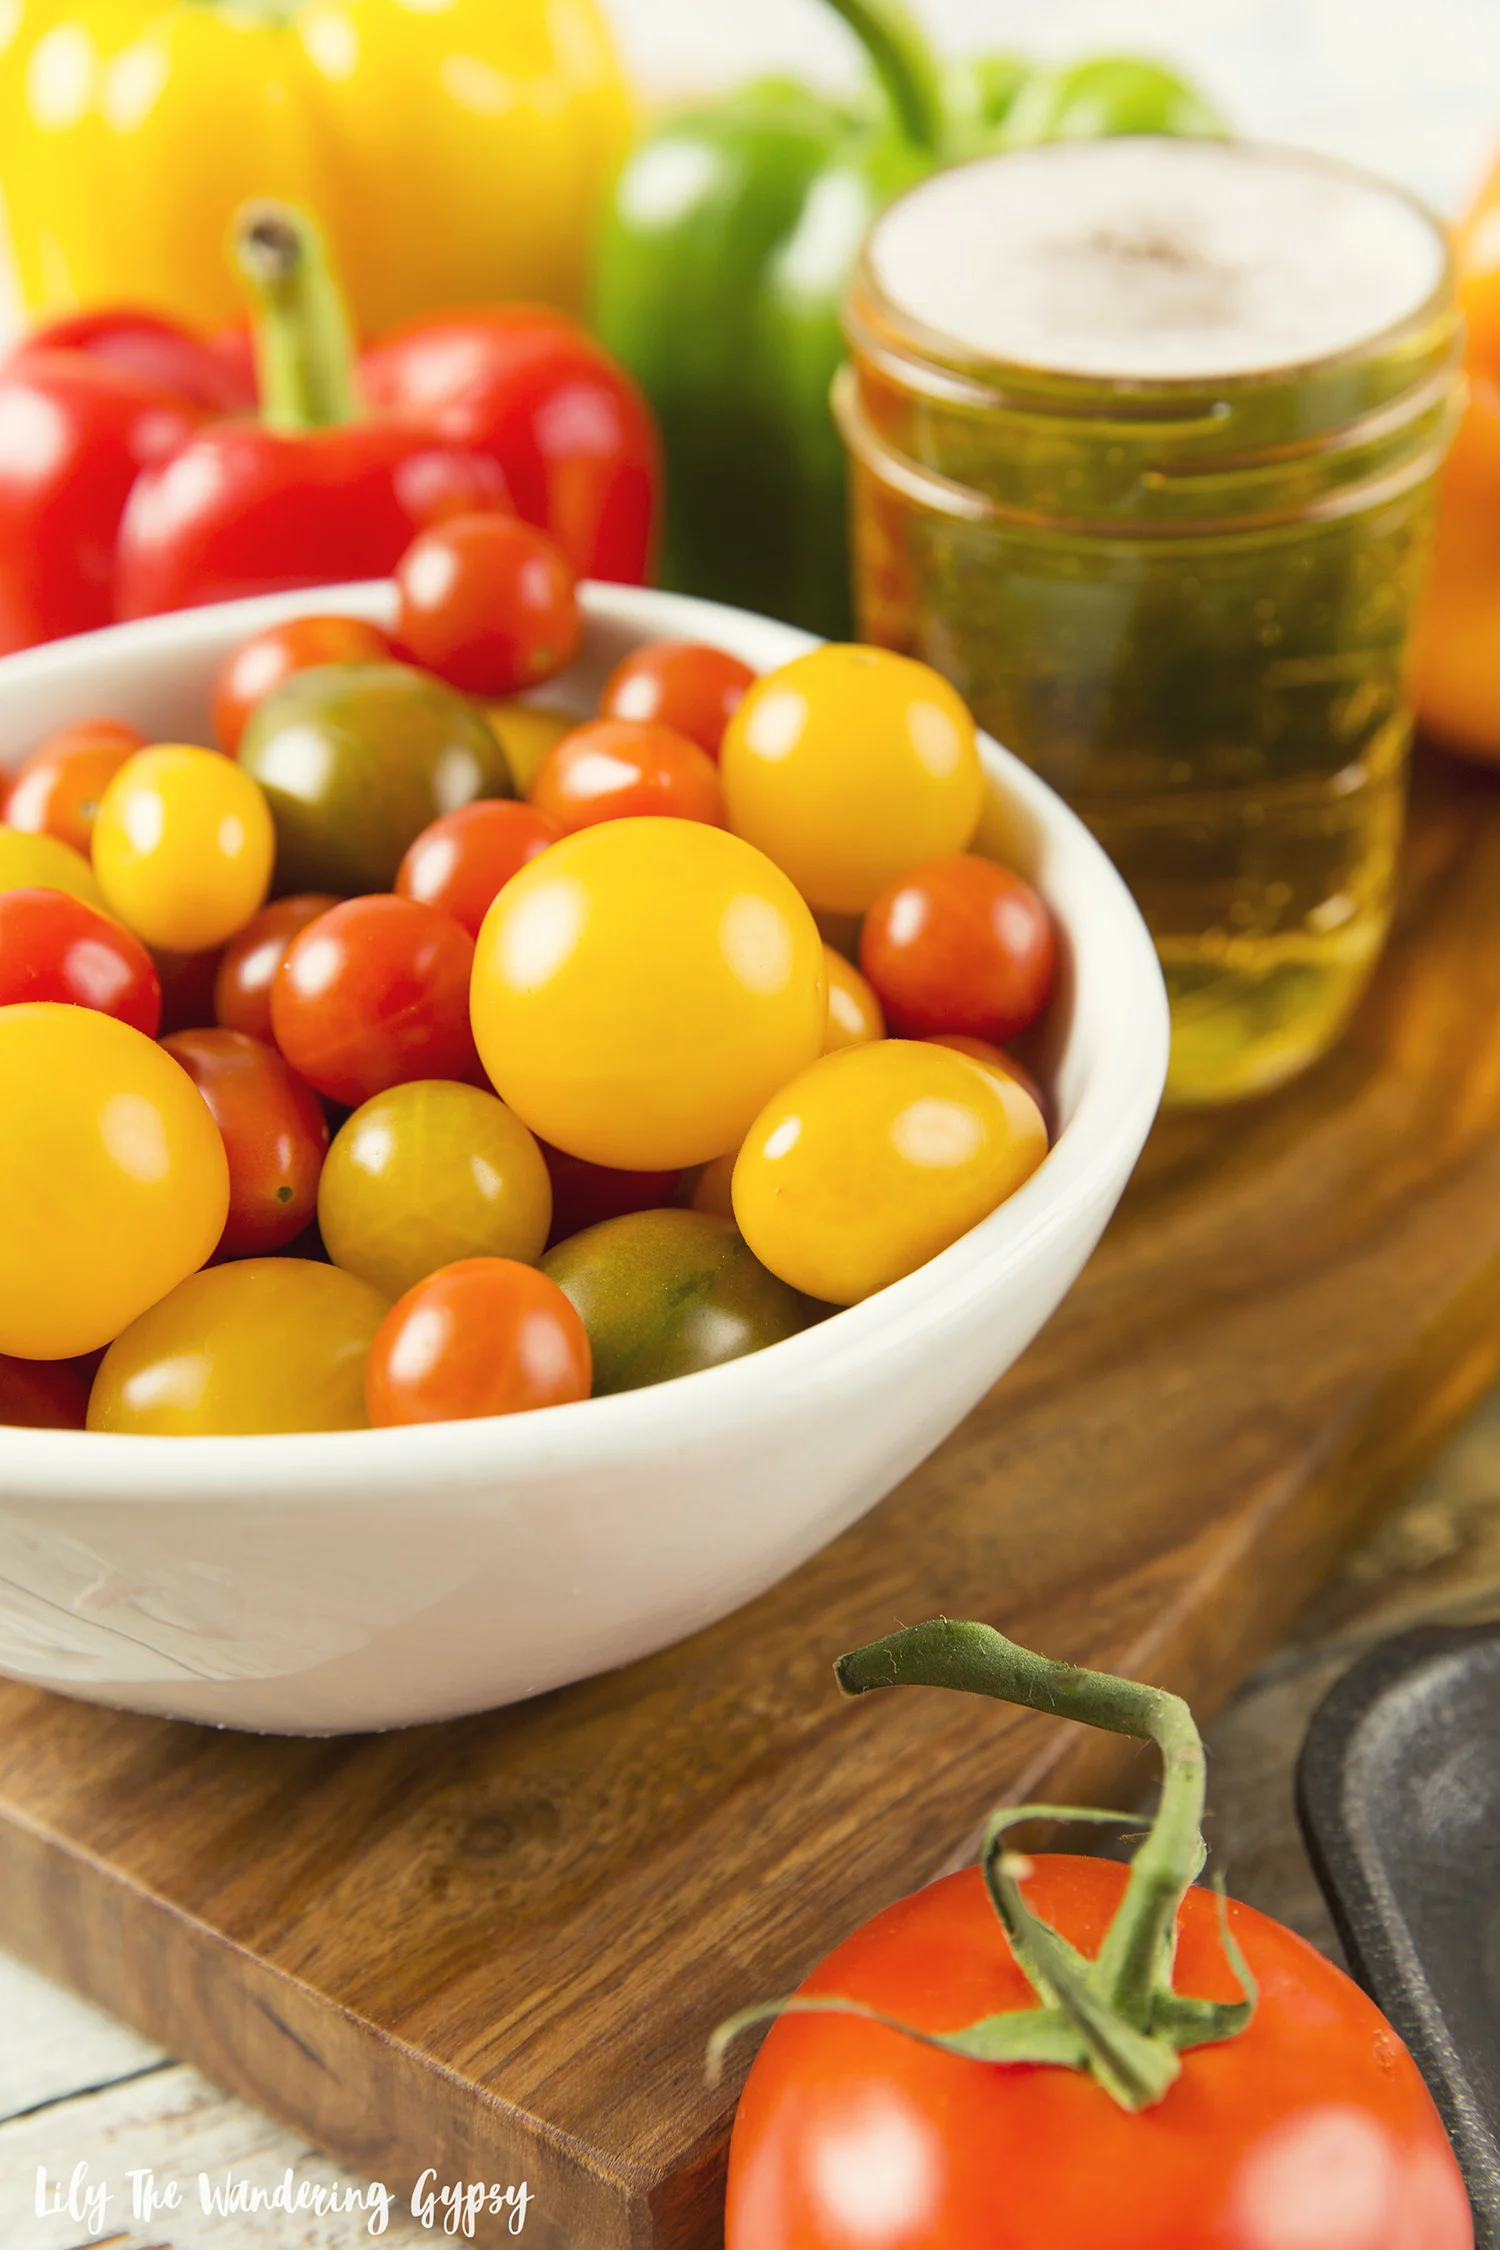
- Small, Colorful Heirloom Tomatoes or similar
- Olive Oil
- Seasoning of choice for peppers
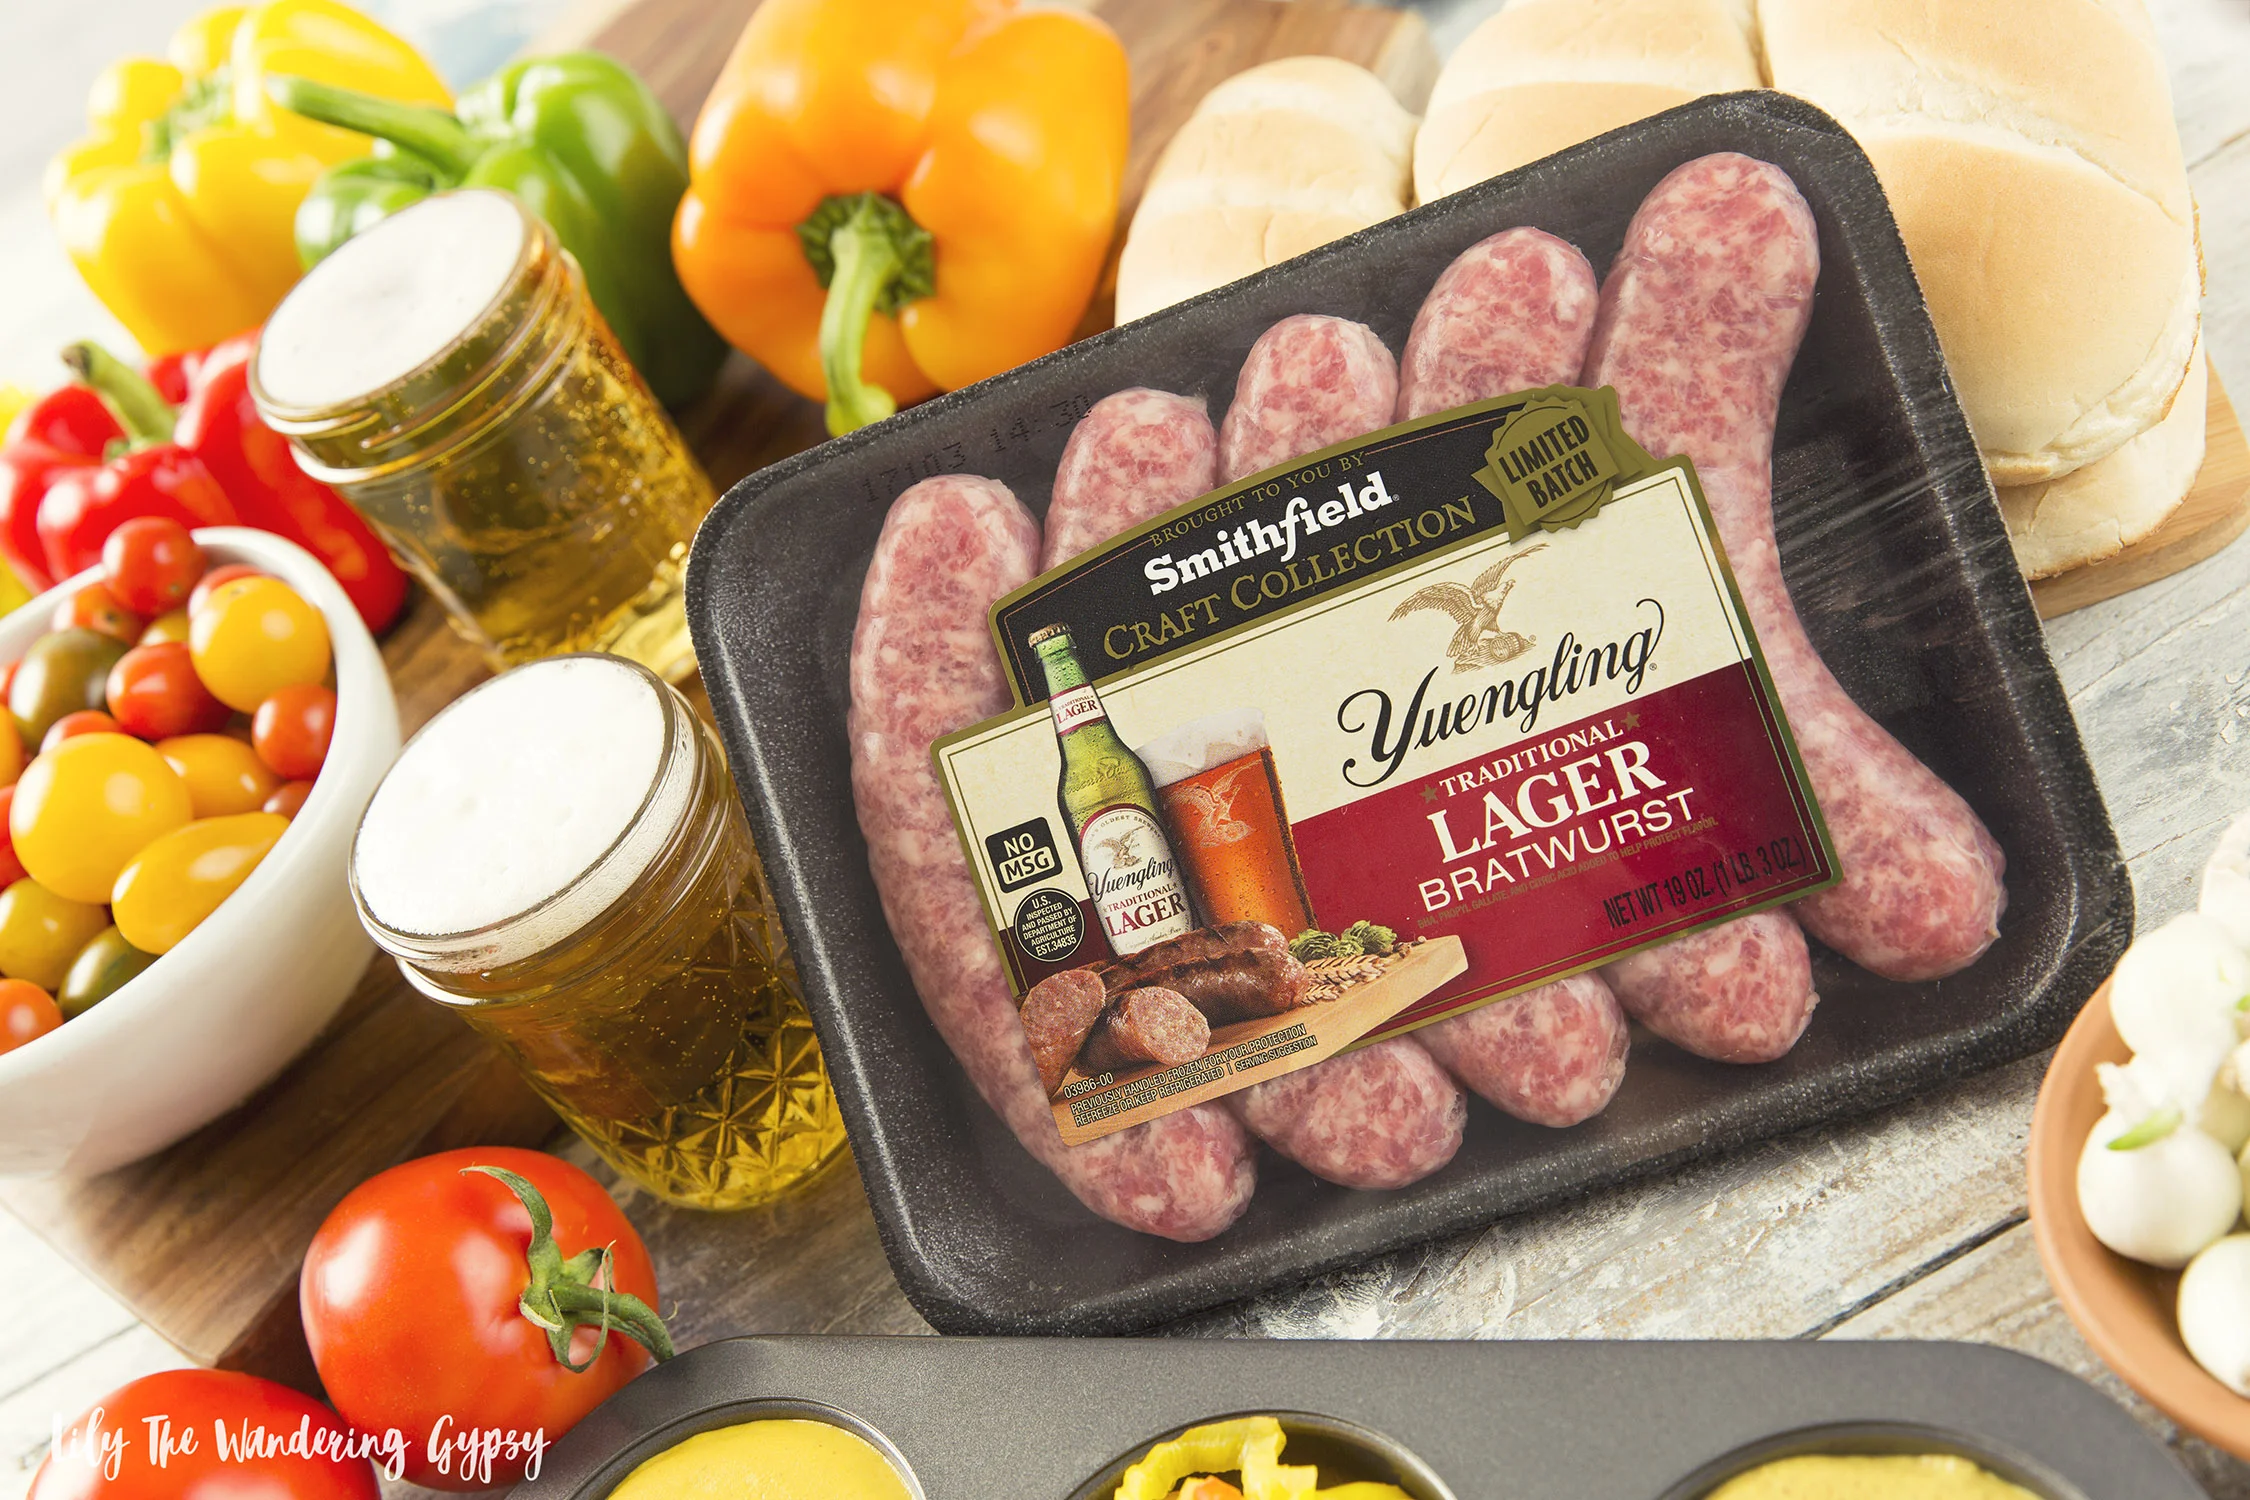
Checking labels and ingredient lists is really important to me, so when I looked at the back of the brats packaging and found only two ingredients – pork and beer, I was sold That shows you how fresh and natural these brats are. The casing stayed together very well during cooking, and the taste of Yuengling was definitely present. Yuengling is America’s oldest brewery (located in Pottsville PA) and Smithfield (located in Smithfield, VA) is the ham capital of the world. Both come from towns with a slower, more thoughtful pace – grounded in tradition with a pride for their heritage. With that heritage comes an appreciation for quality, flavor and family; why Smithfield & Yuengling make the perfect pair.
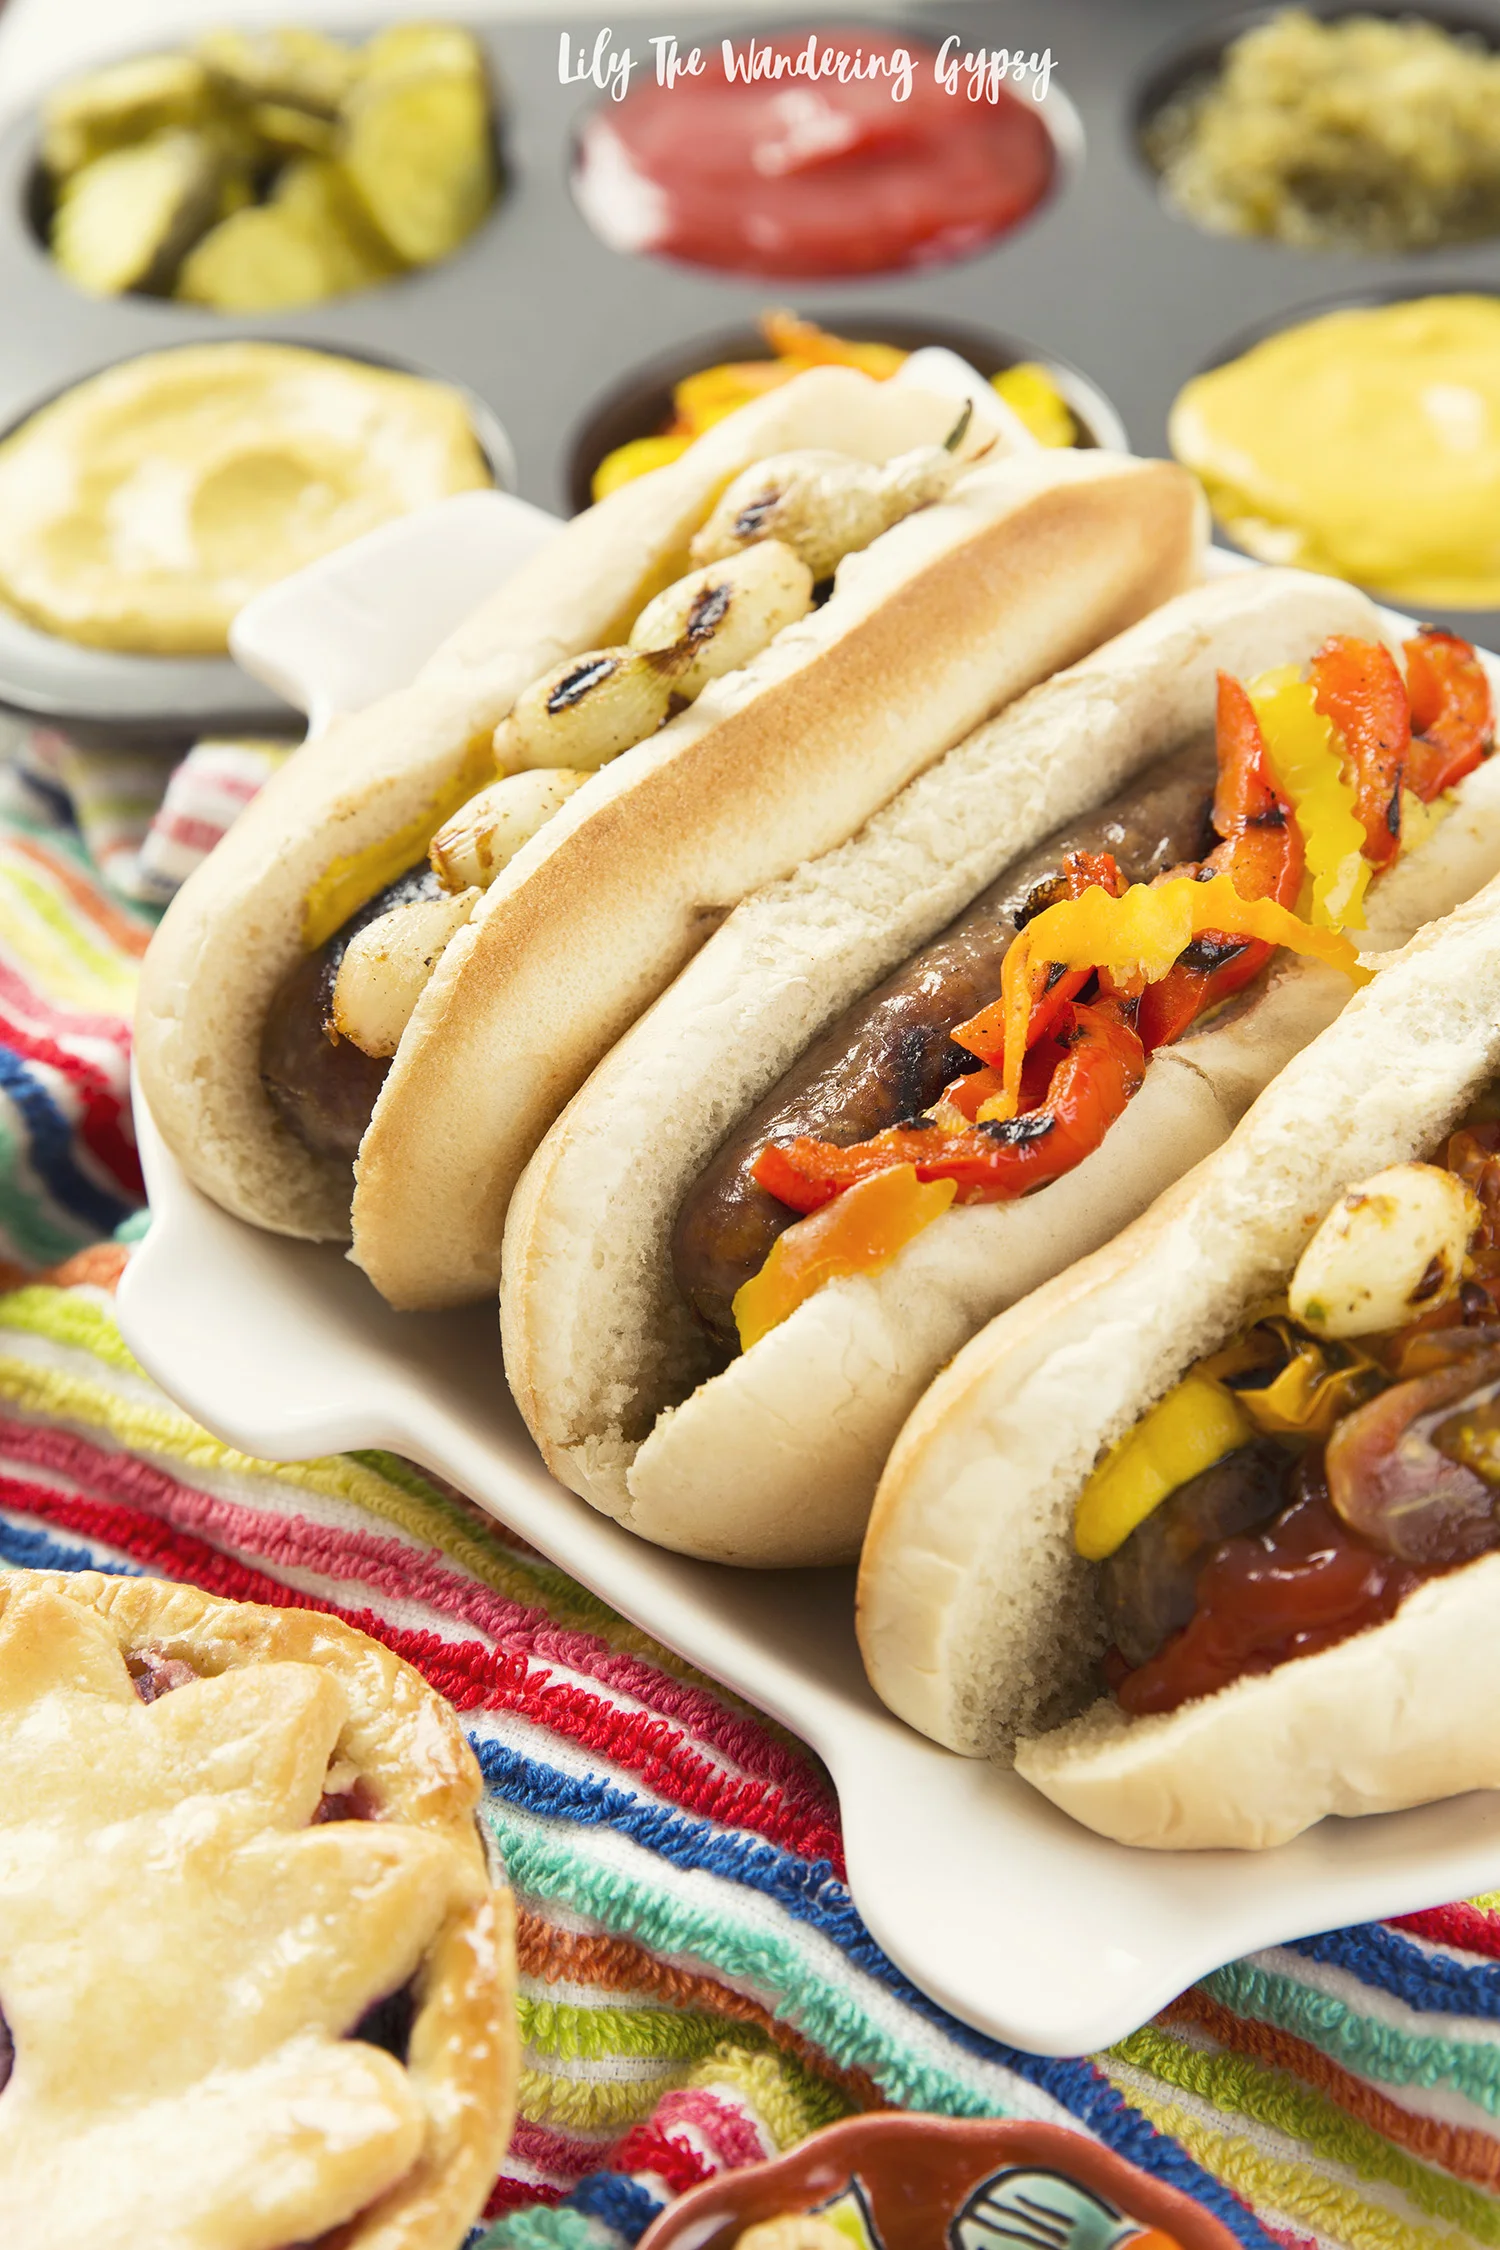
I also love incorporating as many fresh ingredients as possible into each recipe as side dishes and toppings, so I wound up doing 4 skewers on the grill as well, along with slices of colorful bell peppers.

FOR THE SKEWERS
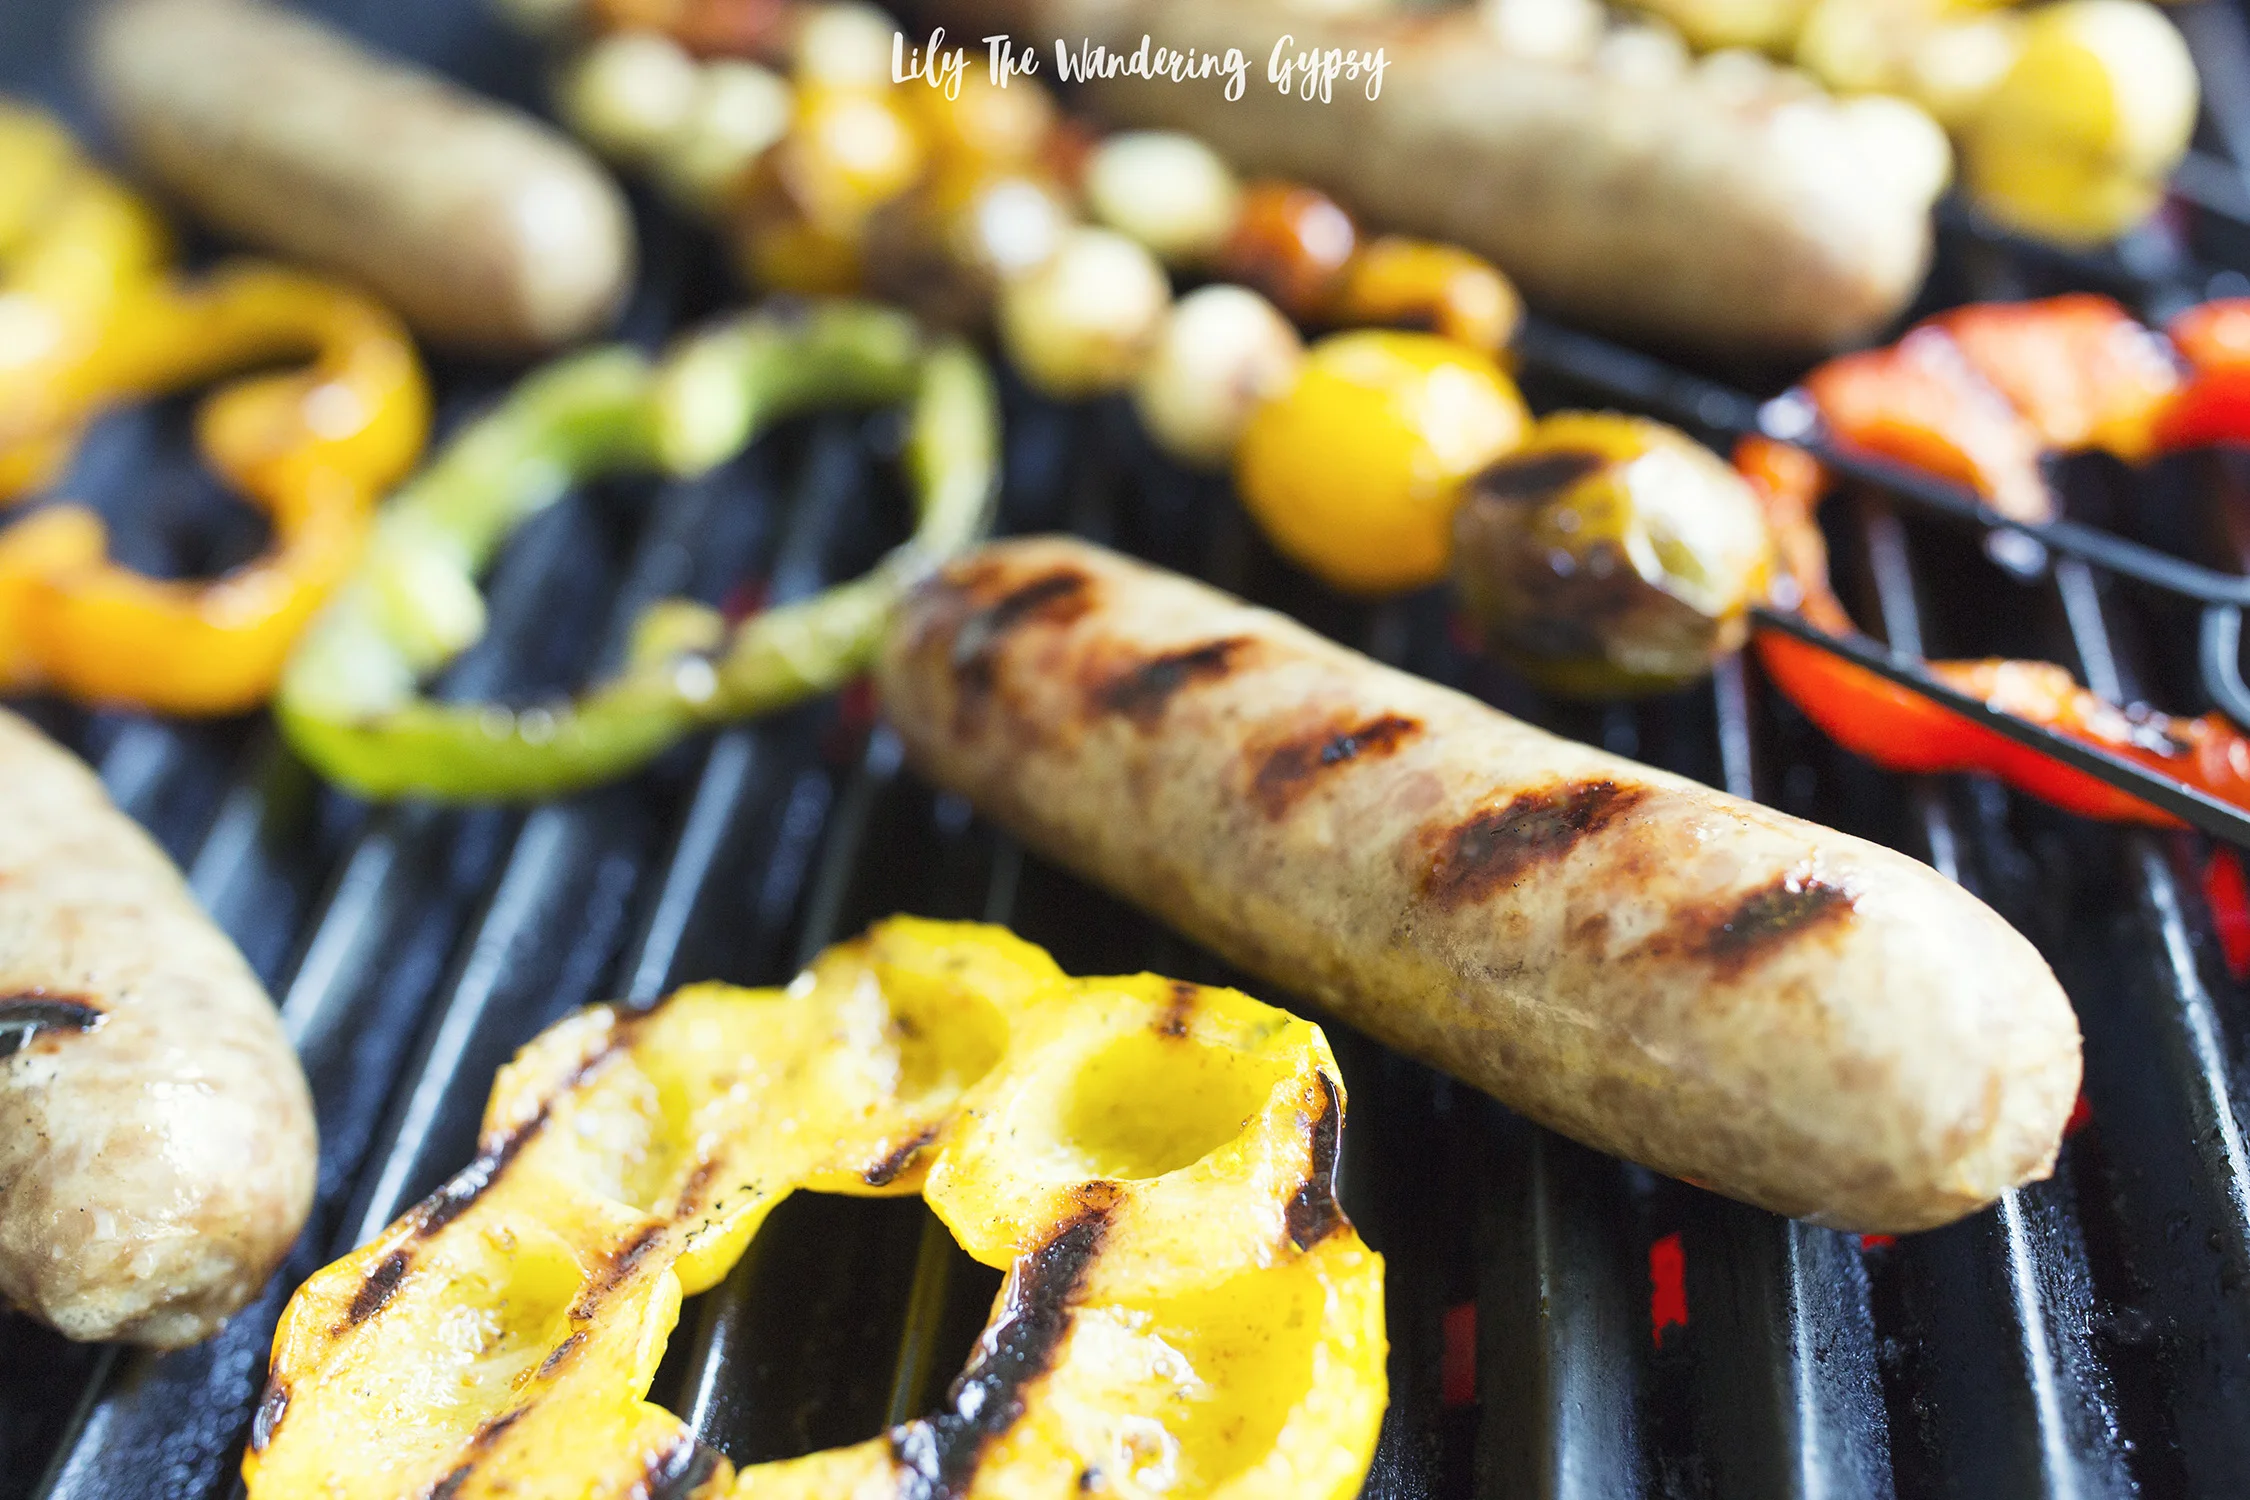
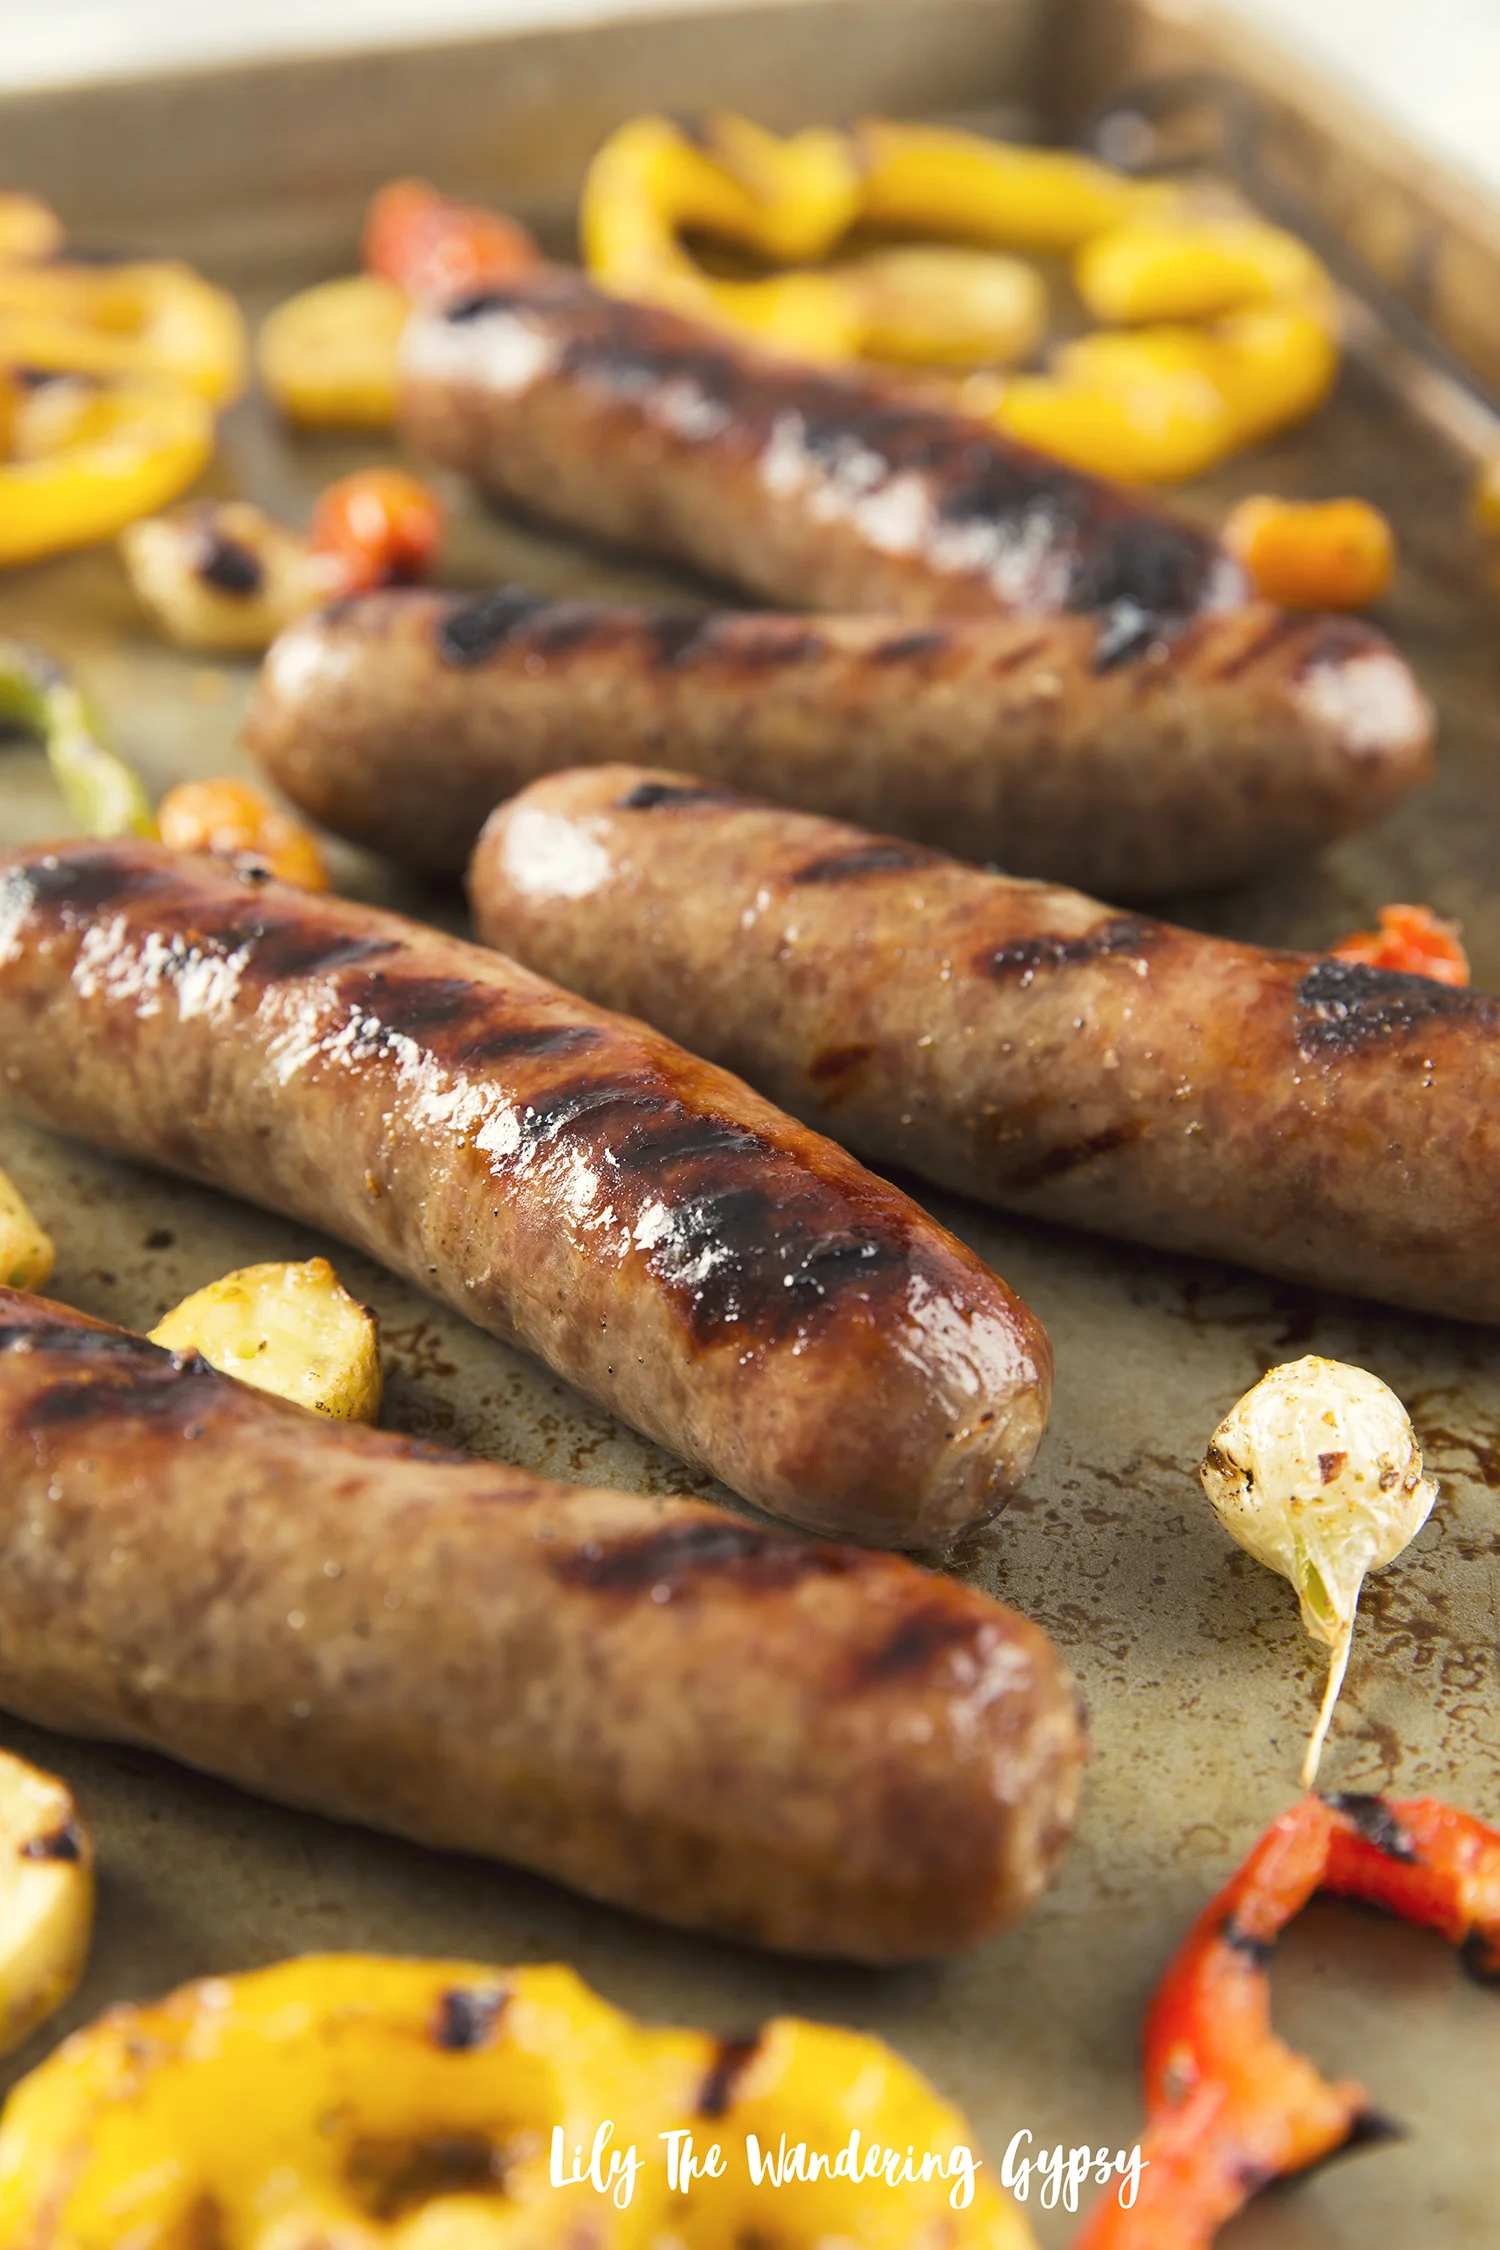
These turned out absolutely beautiful! I am learning that a bit of “char” to the veggies enhances the taste so much, and adds a certain rustic appearance to the food that I just love so very much. It’s so visually pleasing, and can take almost any variety of pepper, onion, or garlic, and transform it into a delicacy with very little oil or salt. These flavors compliment the brats extremely well.
I like to add a seasoning mix and olive oil to most veggies I cook, and this time, I peeled the sin off of each little pearl onion by slicing off the bottom, and just doing a twisting motion, until the top of the onion skin came off. These were so darn cute :) I skewered everything.
I thought the little pearl onions would be a cute and clever take on grilled onions that are traditionally served on a brat or hotdog. And they were so cute! The brat I made with stone ground mustard and pearl onions was delicious!
** Note – to prepare bell peppers for grilling, slice a couple slices from the middle part of the peppers to get the prettiest cuts before chopping up the rest of the peppers to boil with the brats.

FOR THE BRATS
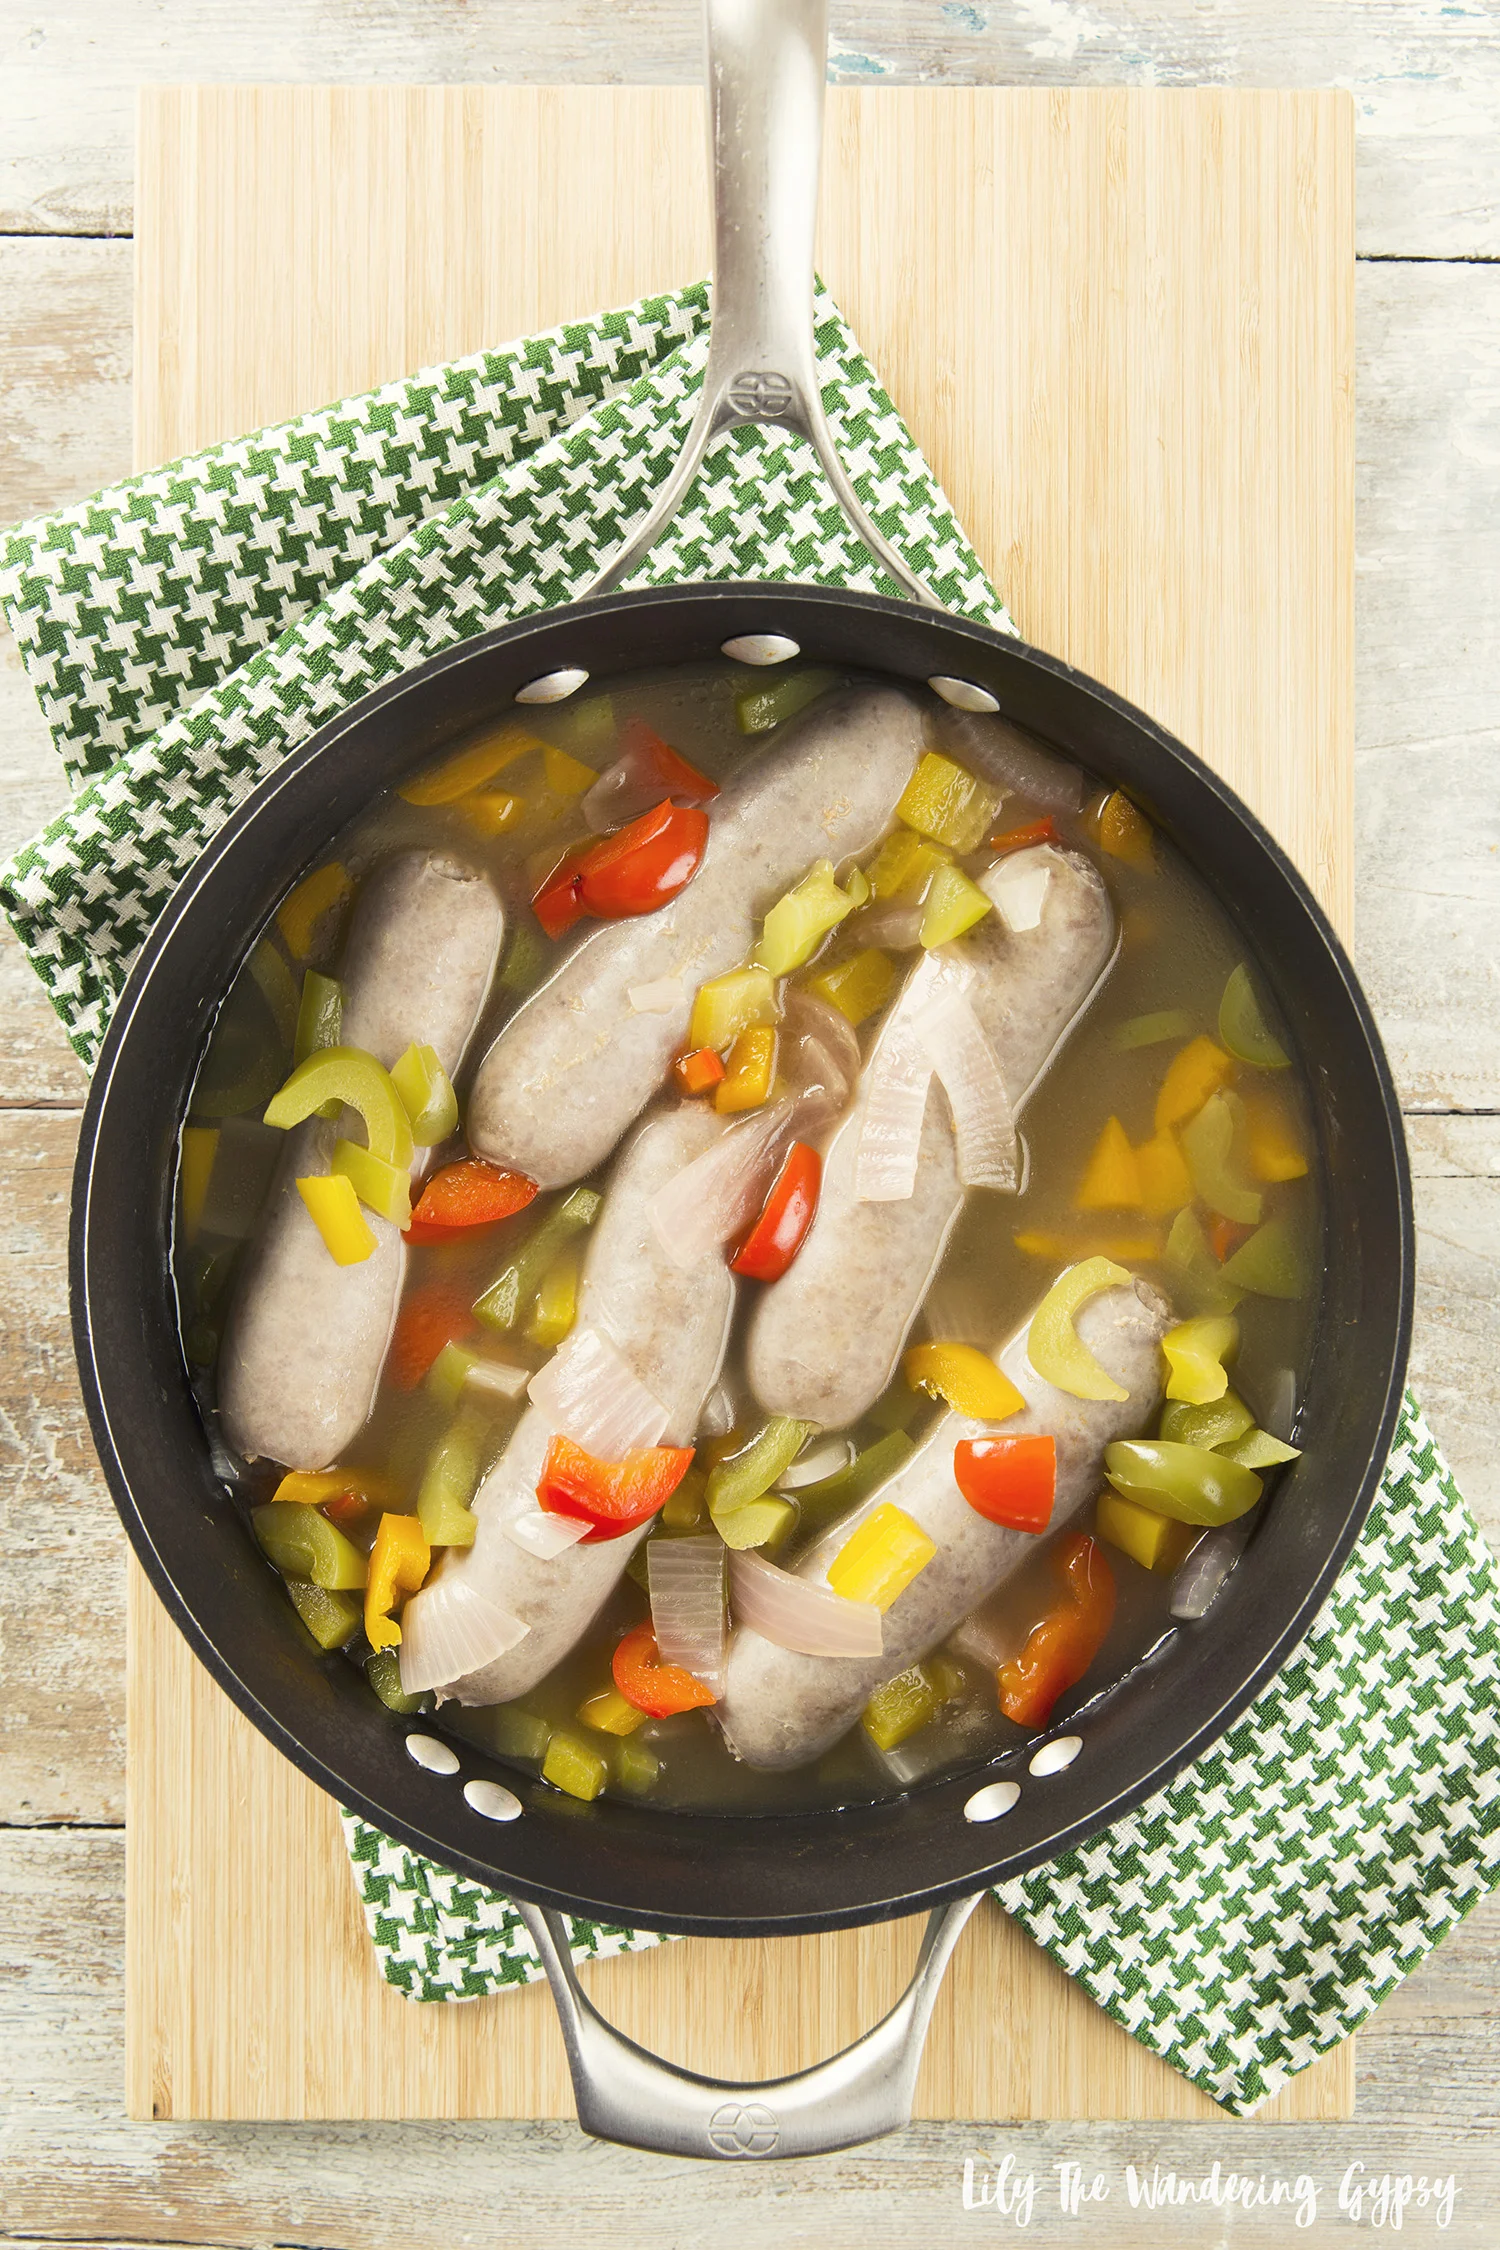
These brats are made with premium cuts of pork and a special blend of sweet and savory spices. There is no MSG added, they were tasty and super easy to work with! All you need to do is pour your beer into a pot and turn on the stove to medium high. Chop up the remainder of the 4 bell peppers, and ¼-1/2 of a red onion, and add those to the beer. Once boiling, carefully add your brats to the hot liquid, and boil with a lid on for about 10 minutes. Make sure the internal temp is around 165 degrees.
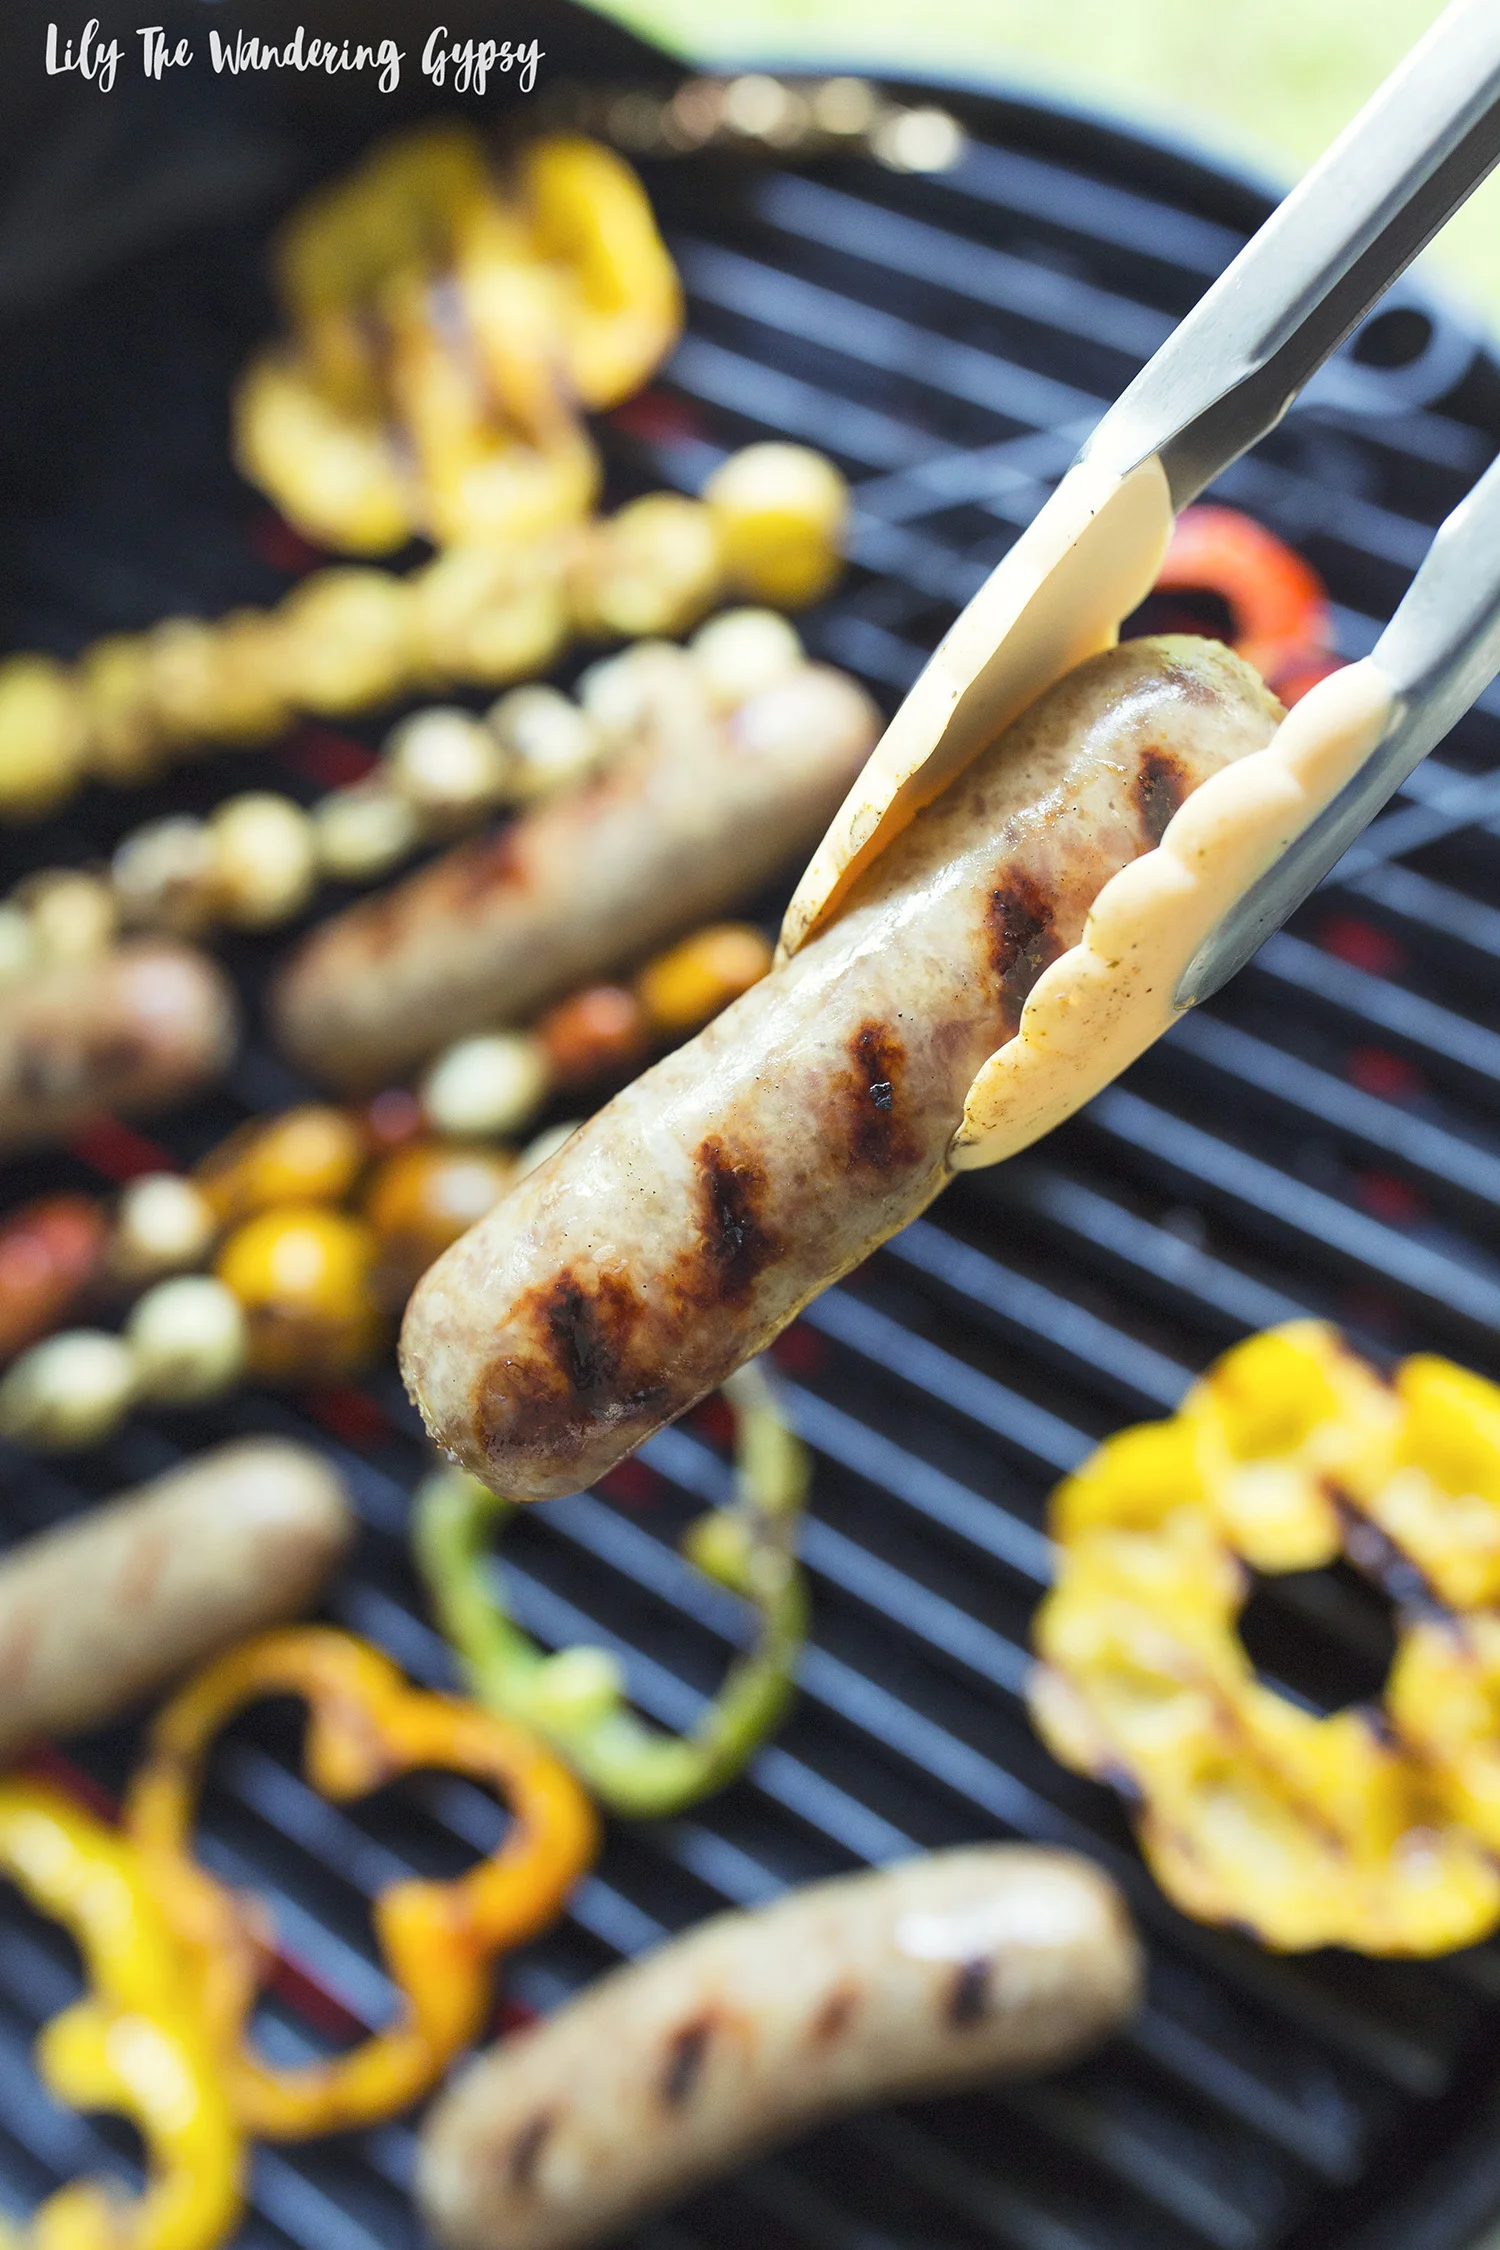
Meanwhile, add skewers to your hot grill which should be sprayed with non-stick spray. Also, add bell pepper rings here too. These will take about 6 minutes to cook.

After your brats are boiled, add them to a hot grill. You’re basically looking to get those beautiful grill marks here, not really cooking them. They get such a nice flavor from the grill too!
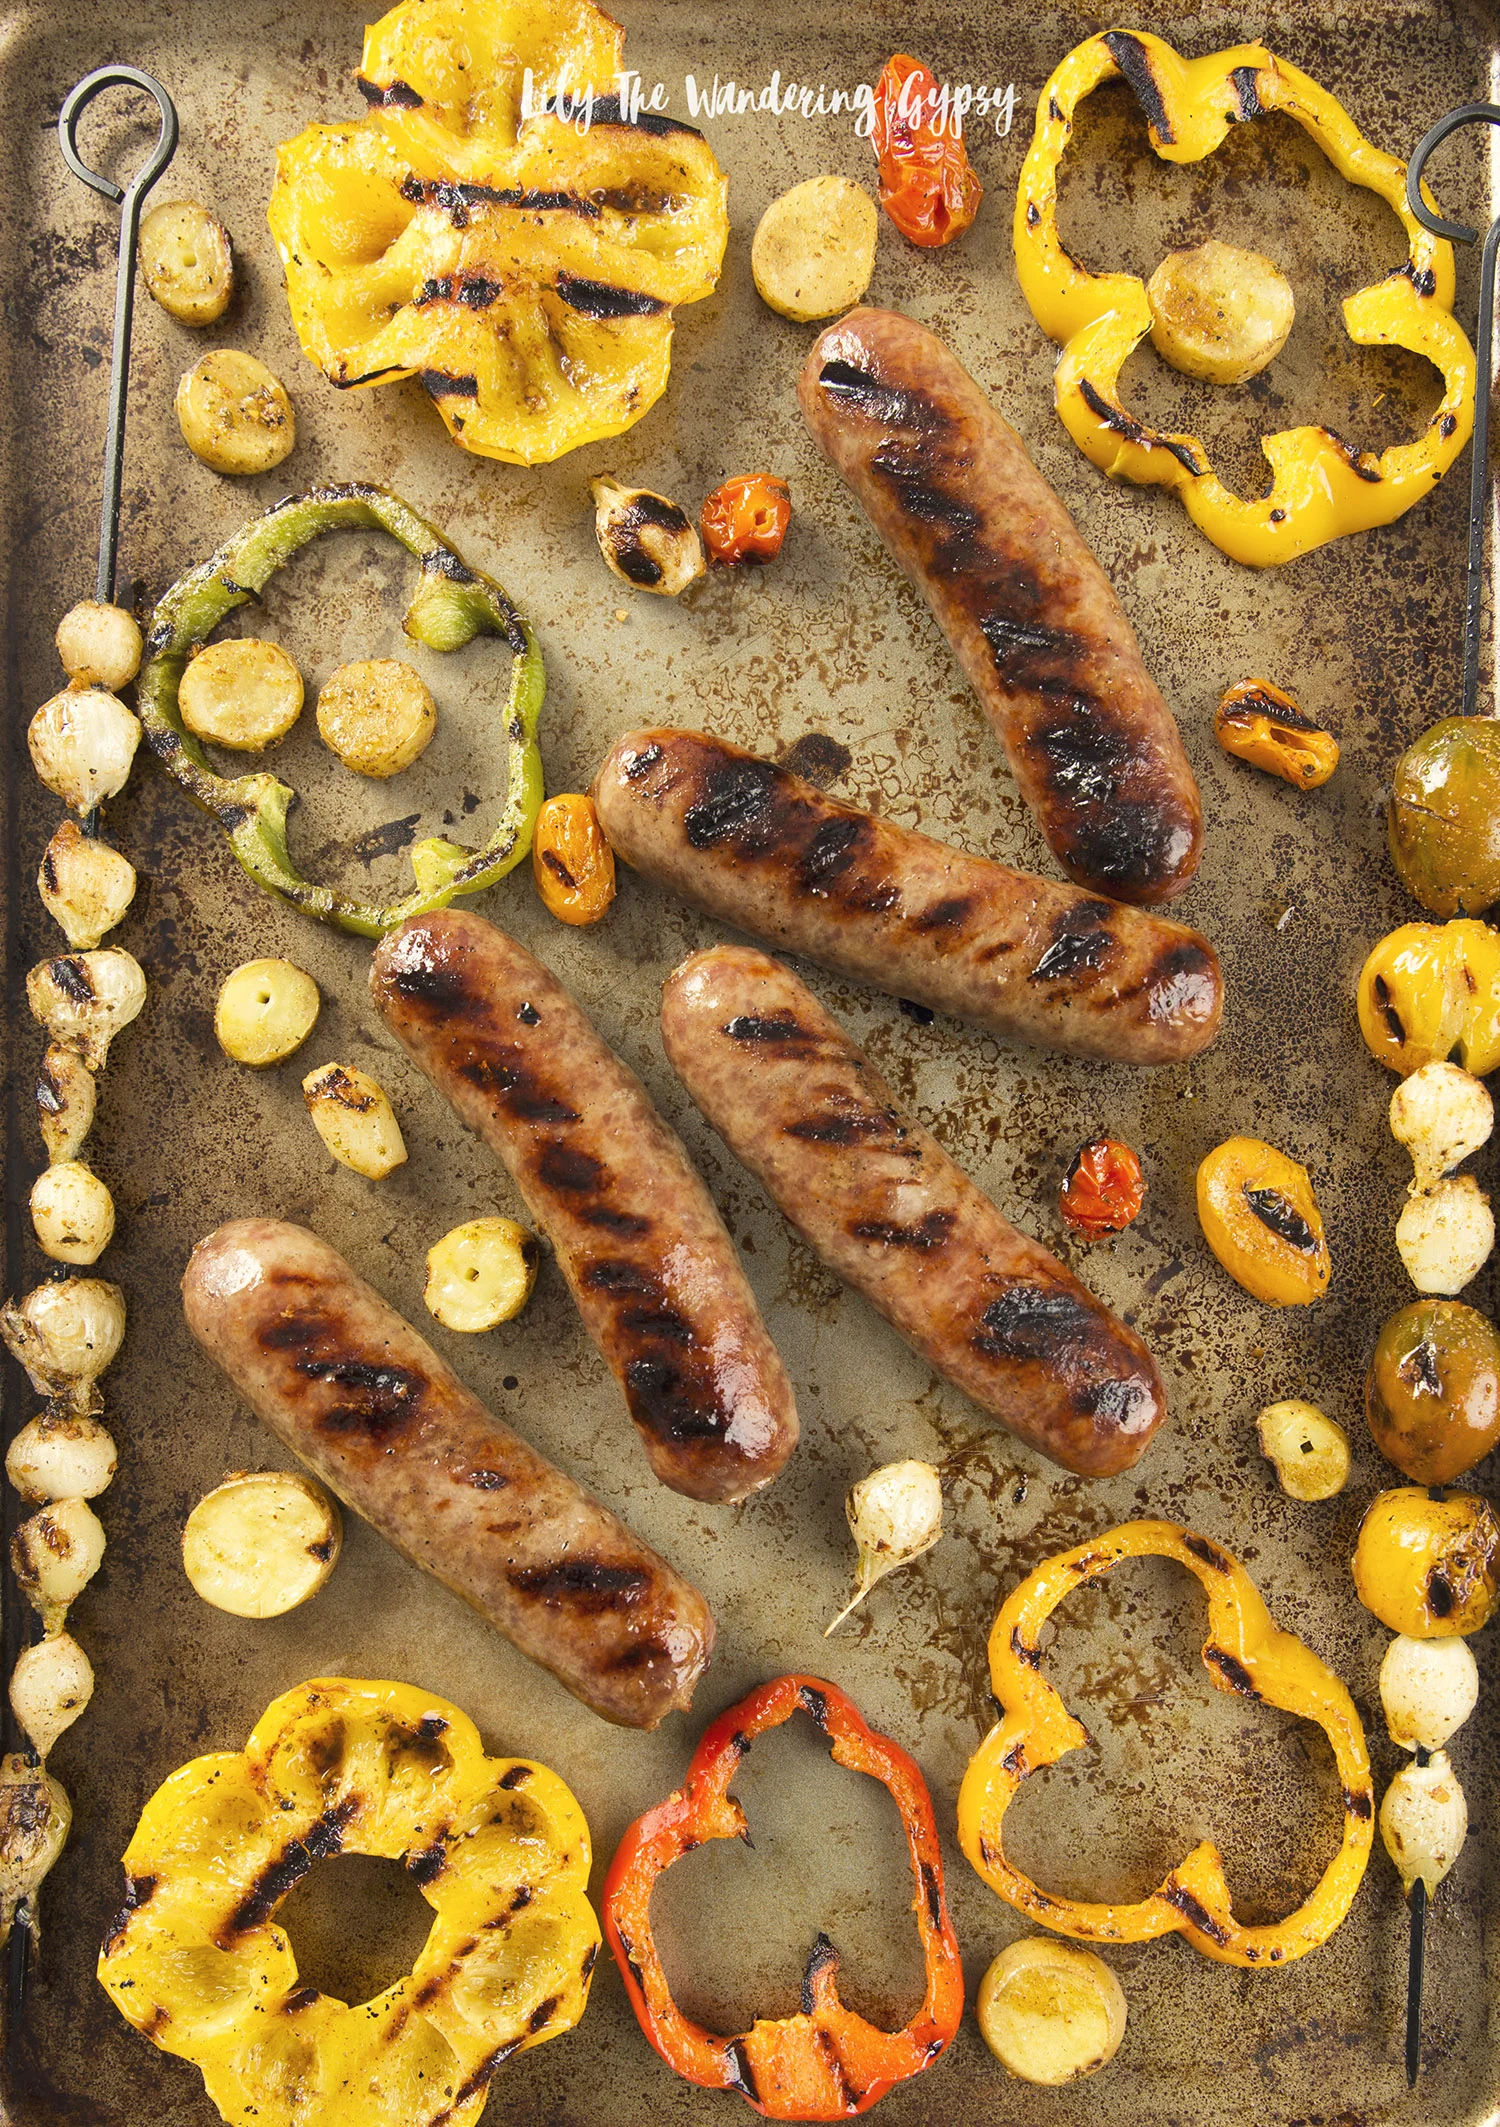
It was so fun to dress up these Smithfield ™ Yuengling Brats with fresh ingredients I grilled myself! This would be a great way to get kids and possible picky eaters to enjoy more veggies, too. Everything is more fun in bright colors, and the peppers look stunning served with these brats. Bring everything in from the grill on a sheet pan, and it’s quite a beautiful display!
Have you ever cooked brats before? This was my first time, and had no problems at all – things went so smoothly, that I know you can do it too! What will you be grilling this summer?
Right now, you can save $1 when you purchase Smithfield Yuengling Bratwurst at Kroger! Stop by your local Kroger to grab some today!
My Top 10 Summer Recipes
Here are some of my best, most delicious summer recipes! Hope you enjoy!
Read More{ Snow Pea + Sugar Snap Pea } Power Salad With Sesame Ginger Dressing
This green powerhouse of a salad utilizes fresh, local ingredients and a delicious salad dressing recipe! Enjoy.
Read MoreGrilled Pork Tenderloin Street Tacos Recipe
Learn how to grill the perfect Pork Tenderloin and save hours on prep work! Learn how.
Read MoreOrganic Grilled Chicken and Local Fresh Green Beans
Looking for a fresh and healthy grilled meal idea? Check this out!
Read MoreMy Post Was Featured by AOL Lifestyle Collective!
So excited that my post was featured on several pages of the SOL Lifestyle website! I am honored to be a part of their network, and cannot thank them enough for sharing this! Learn more abut the feature
Read MoreChocolate Chip Cookie Stacks! (And A Video)
If you're looking for the perfect way to create festive snacks that are fun and easy to prepare, look no further!
Read MoreRodial Luxury Skincare - Get Ready For Summer
Learn more about Rodial, the luxury skincare line that will make your skin flawless for summer!
Read MoreUnlocking Pinterest As Your Social Strategy's Secret Weapon {And I Am Linqia's Featured Influencer of The Month!}
I am so happy to be featured as Linqia's May Influencer Of The Month! They've asked me share some of my greatest Pinterest Tips, and it's such an honor to be recognized. Learn more here!
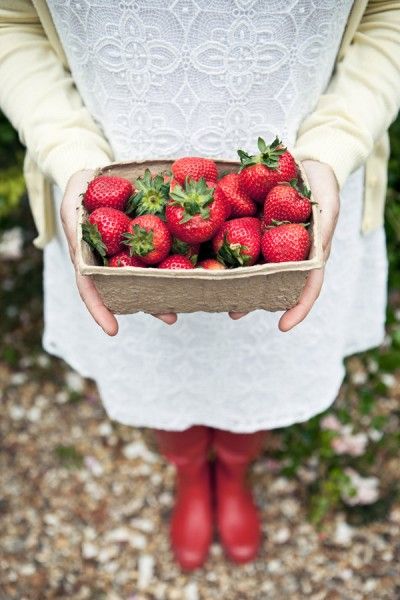
Read MoreStrawberries in Southern Illinois
These strawberries are juicy red, taste delicious, and are only available for a short time during the early summer season. See the beautiful berries that were are so lucky to have here in southern Illinois.
Read MorePhotography Field Trip: Lightfoot Farms Greenhouse
Check out one of southern Illinois' best greenhouses, and see all the beauty I found!
Read MoreI Won A Contest! And Get Lots Of Summer Party Ideas Here!
I recently won a contest to upgrade my next summer gathering! Check out how I won, and get lots of adorable summer party ideas, here.
Read MorePinterest Trend: Strawberry Season
I went all in yesterday, and bought my first flat of strawberries. Can't wait to share photos and recipes, but for now, I could not wait to share a few of my favorite strawberry-related pins on the blog today. We prepped all the berries a few hours after market, because they were so ripe and ready, and if we weren't making so many smoothies lately, and freezing them, they would have all gone bad. A flat contains 8 pints of strawberries, and while I did not save but a couple of dollars buying them that way, these Farmer's Market strawberries are so much more of a vibrant red color, and they have way more taste than those we have bought in the grocery stores lately.
From that flat, we basically set up with two cutting boards, both Bobby and I cut off al the green tips and the bruised or super soft parts of the strawberries, and then placed them cut end down on two baking sheets atop parchment paper. This way, they do not get all frozen together. We could have used 3-4 sheet pans, but I on;y have room for two pans in our freezer.
After they froze overnight, we stored them in two gallon-sized Ziplock bags, and then ate out first smoothie, it was amazing!
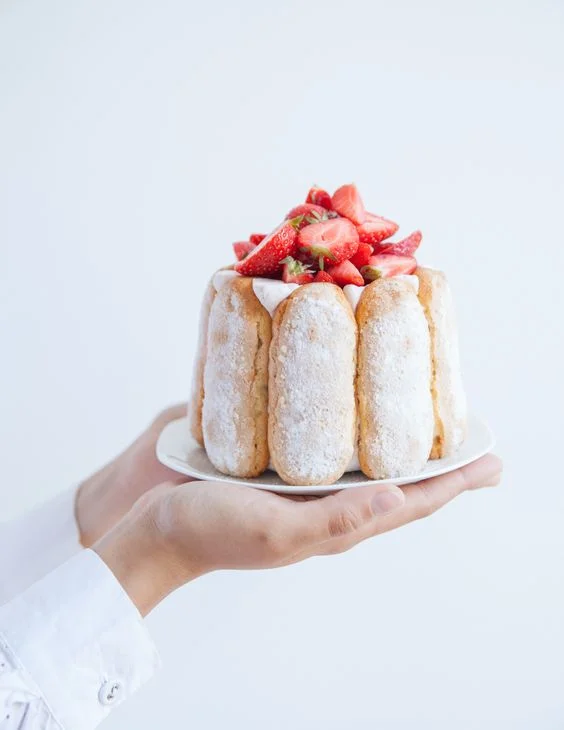
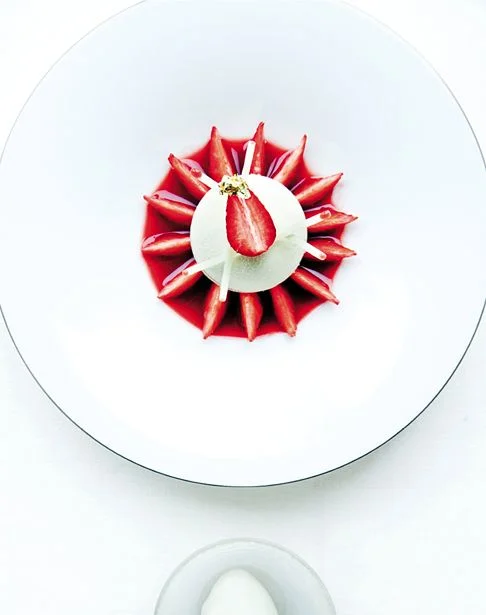
Elegant Way To Plate A Strawberry Dessert
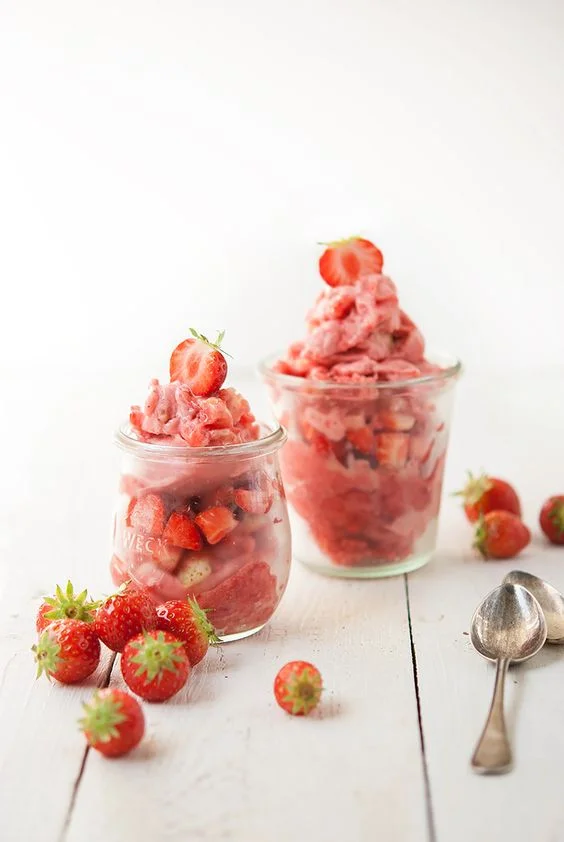

Strawberry Greek Frozen Yogurt Recipe

The Ultimate Chocolate Charcuterie Board
The ultimate party dessert!
Read MorePacking Tips For Your Next Cruise
Heading out on a cruise or somewhere tropical this year? I have lots of ideas on how to pack better, so your vacation is better than you could even imagine!
Read MoreFreezer Fresh Ideas ~ Basil Chicken Broccoli Pasta ~ Quick and Easy Dinner Idea
A delicious and easy-to-prepare meal for those days when things couldn't be busier! Check out my latest recipe, inspired by Kroger.
Read MoreCherrybrook Premium Pet Supplies + The Doodle That Stole All The Treats
Learn all about these wonderful dog treats and toys from a really great website, Cherrybrook Pet Supplies!
Read MoreSt. Germain Margarita Cocktail Recipe
A twist on a classic cocktail, using Elderflower Liqueur
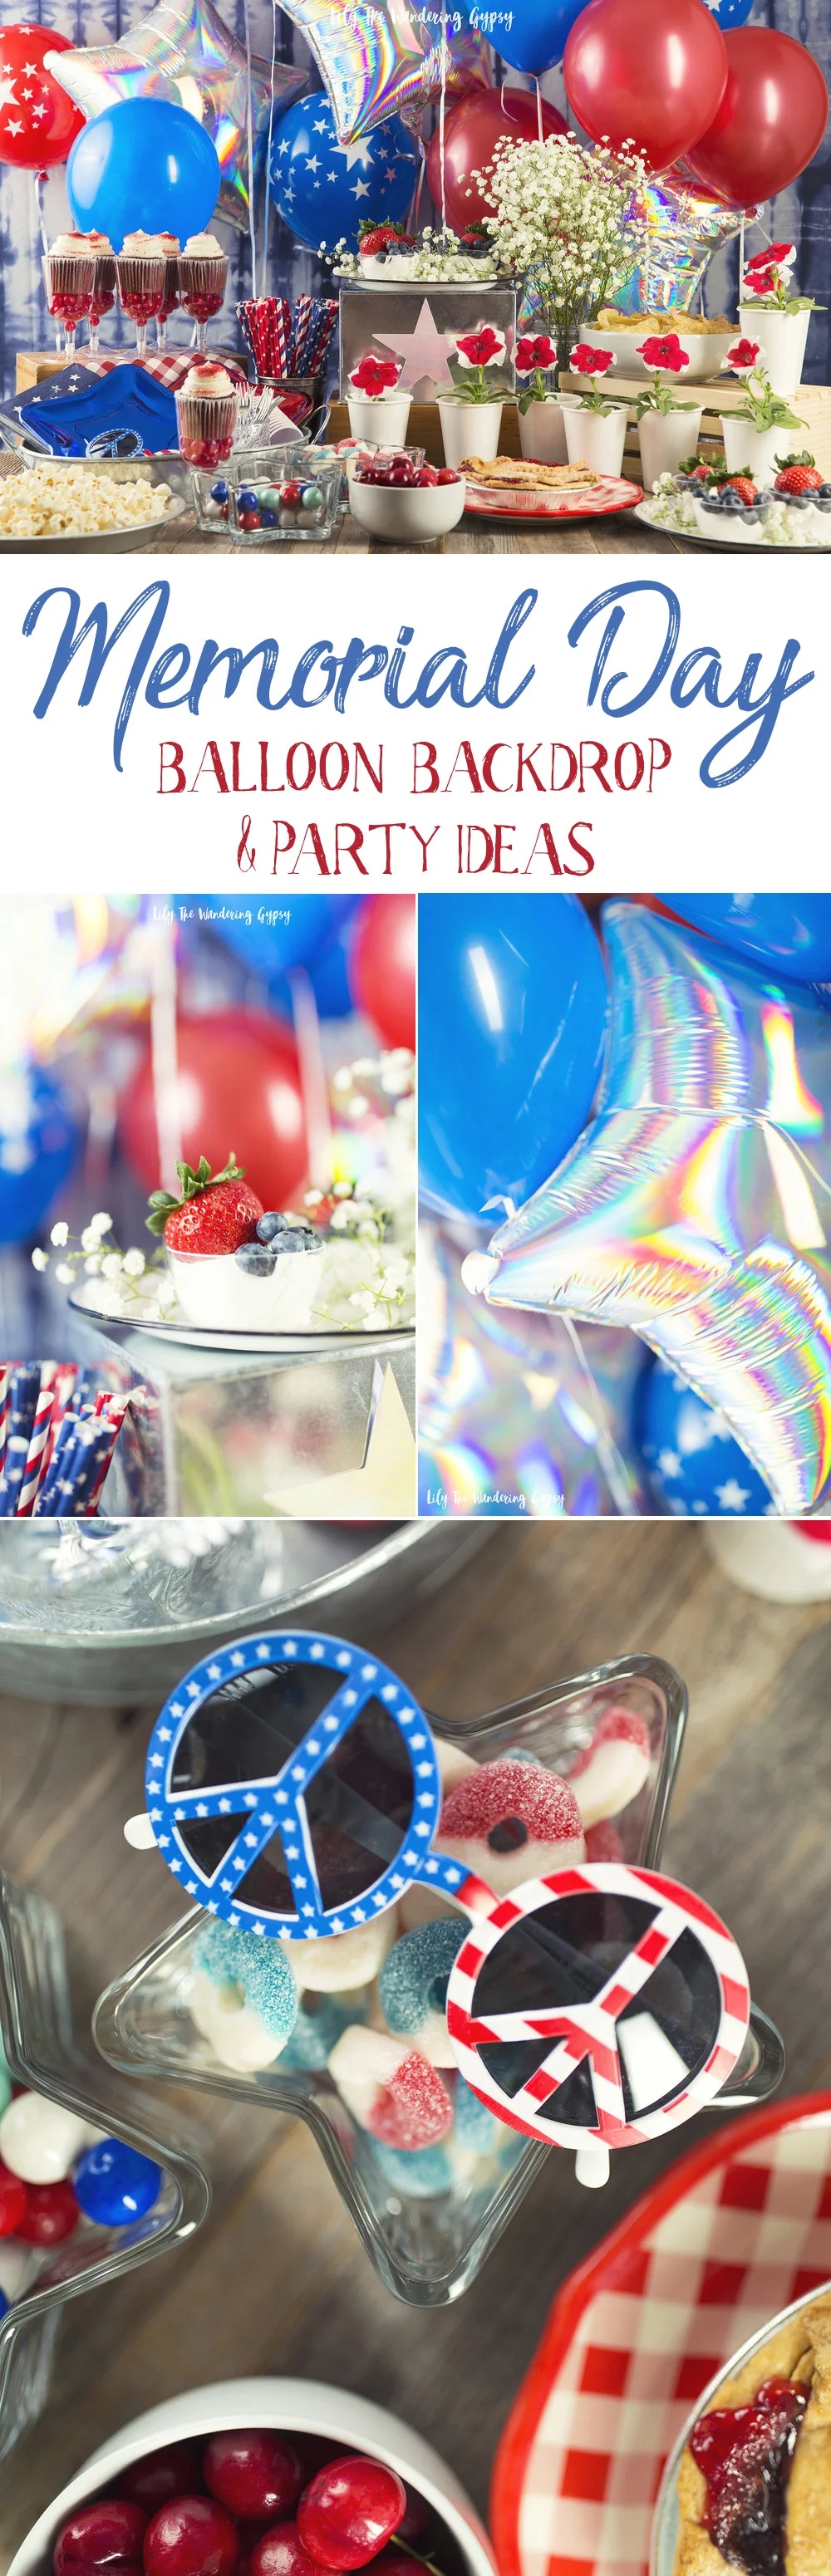
Read MoreA Memorial Day Party With Balloon Time! Get These Cute Recipes and Decor Ideas!
This is a sponsored conversation written by me on behalf of Balloon Time Helium Tanks. The opinions and text are all mine.
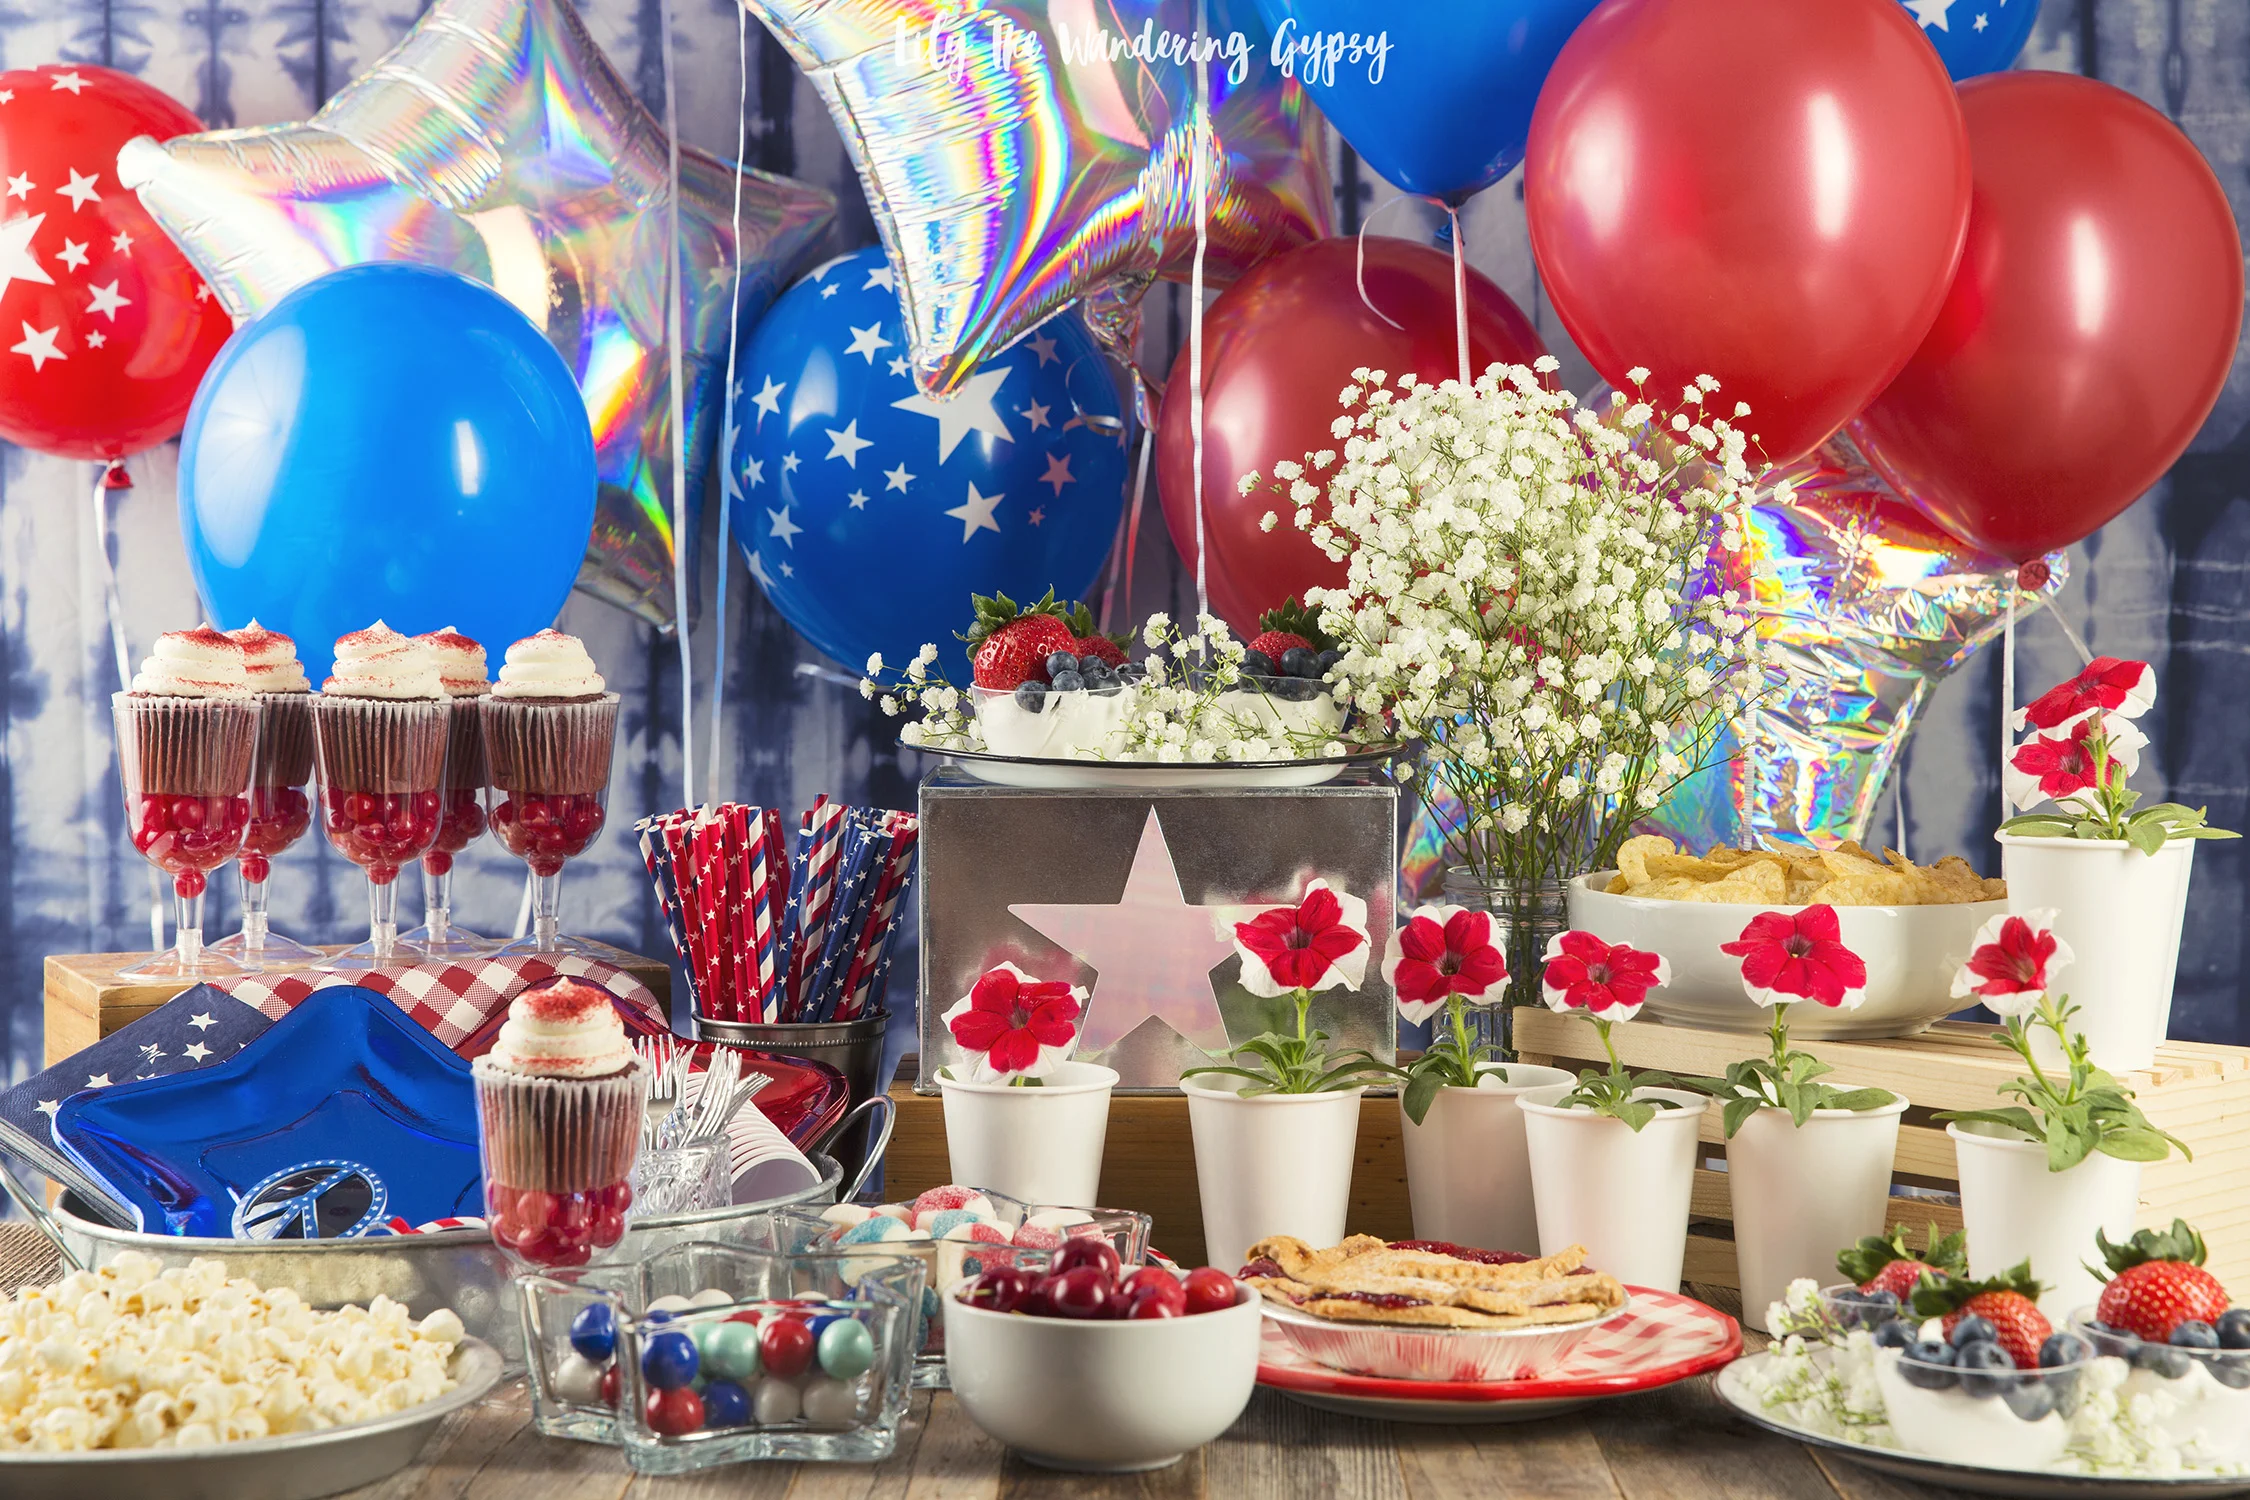
This party would be adorable for guests of any age, and feel free to add a bit more of your favorite food or drinks for your friends and family to enjoy while we celebrate Memorial Day, and other fun holidays in May and the upcoming summer months.


Tie Dyed Fabric In Indigo and White (See My DIY Here)
Helium-Safe Balloons (I used red, blue, and star-printed latex ones, and 3 holographic mylar ones in star shapes)
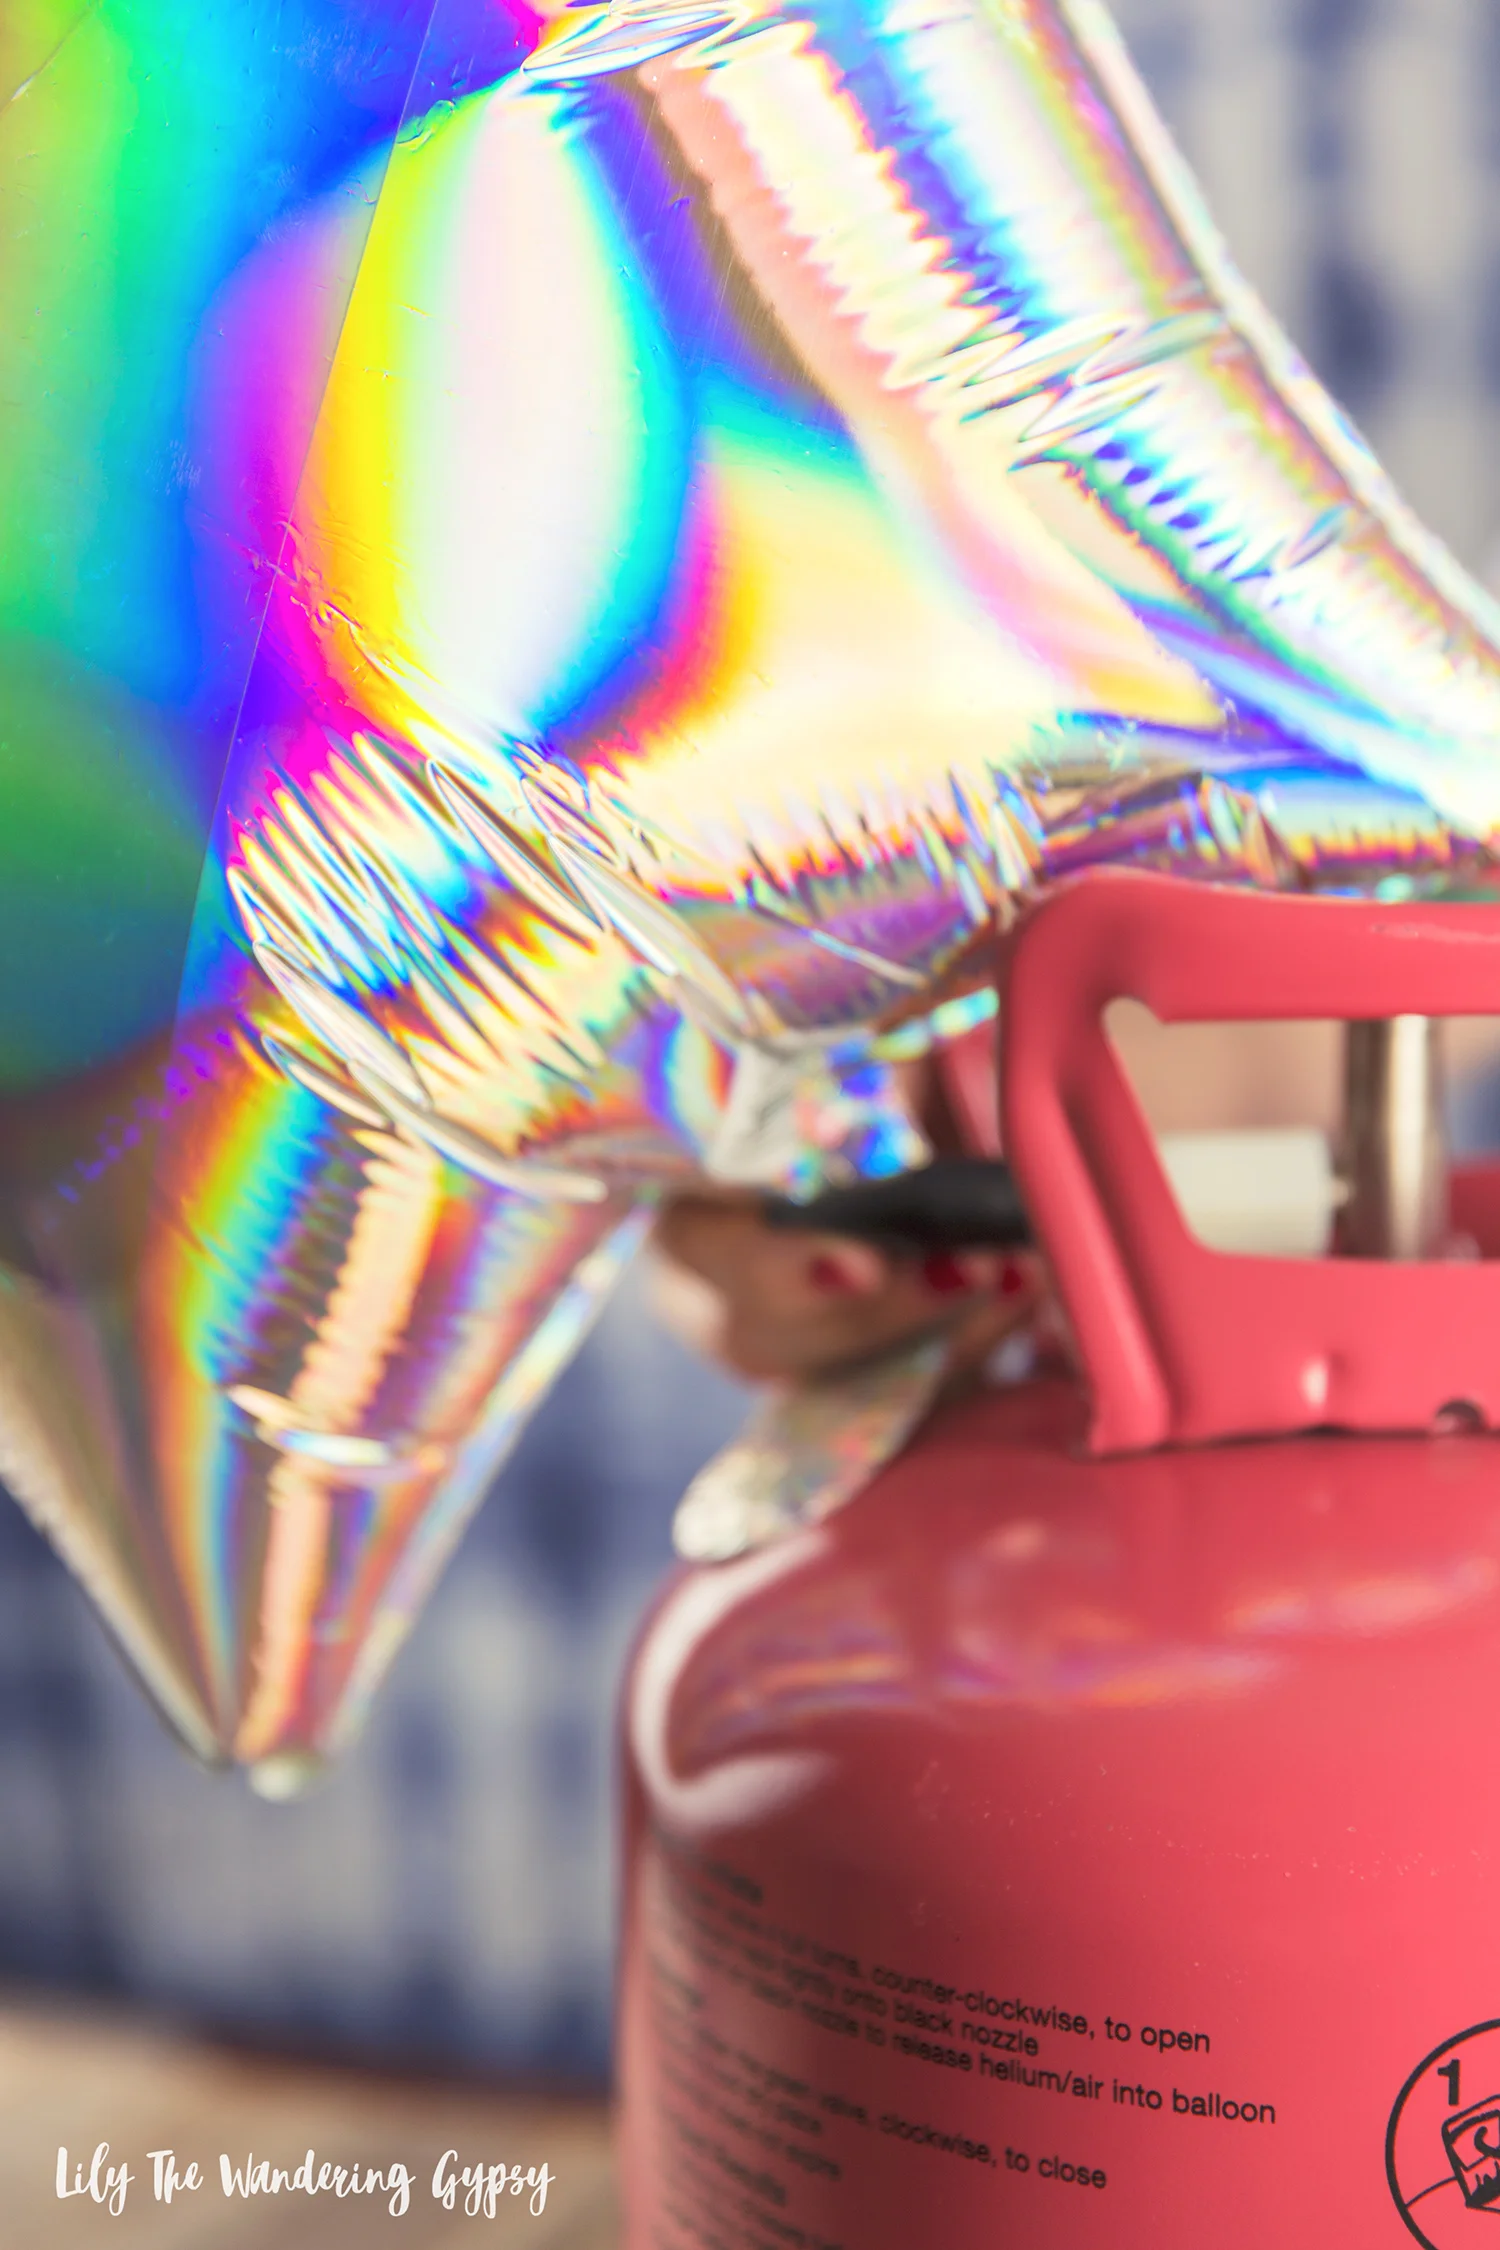
Helium Tank (I used one from Balloon Time)
Curling Ribbon included with helium tank
Weights for Balloons (these can be made from just about anything that is somewhat heavy. Or, tape to attach balloons to the back of your table


1.) Get acquainted with your Balloon Time Helium Tank. At first, I had a bit of trouble realizing that there are two steps to working the tank. FIRST, on your helium tab, you will find a green handle, that you turn about 4 times until it won't turn any longer. SECOND, insert your balloon onto the black nozzle, and push down to release the helium into your balloon. I did not realize to do the second part, and thought my tank was empty - oopsies! It was not :)
2.) Fill your three star balloons, and about 5-10 of each of the other colors, red and blue. Adding some white balloons would also be adorable! After filling each balloon, tie about 3-4 feet of ribbon to them, and attach them to your weights, so they won't float away :) I cut each ribbon to be a bit of a different length, so they would have a more layered effect, which I just loved!
3.) Put up your tie dyed back drop behind where your table will go, and then start filling the background with balloons! I started with my stars, then worked out from there, with the other balloons. Put your table in front of that, and begin styling the party!
4.) I love displaying food at different heights on the table, to create lots of visual interest. For this party setup, I used a mixture of wooden crates, galvanized metal boxes,
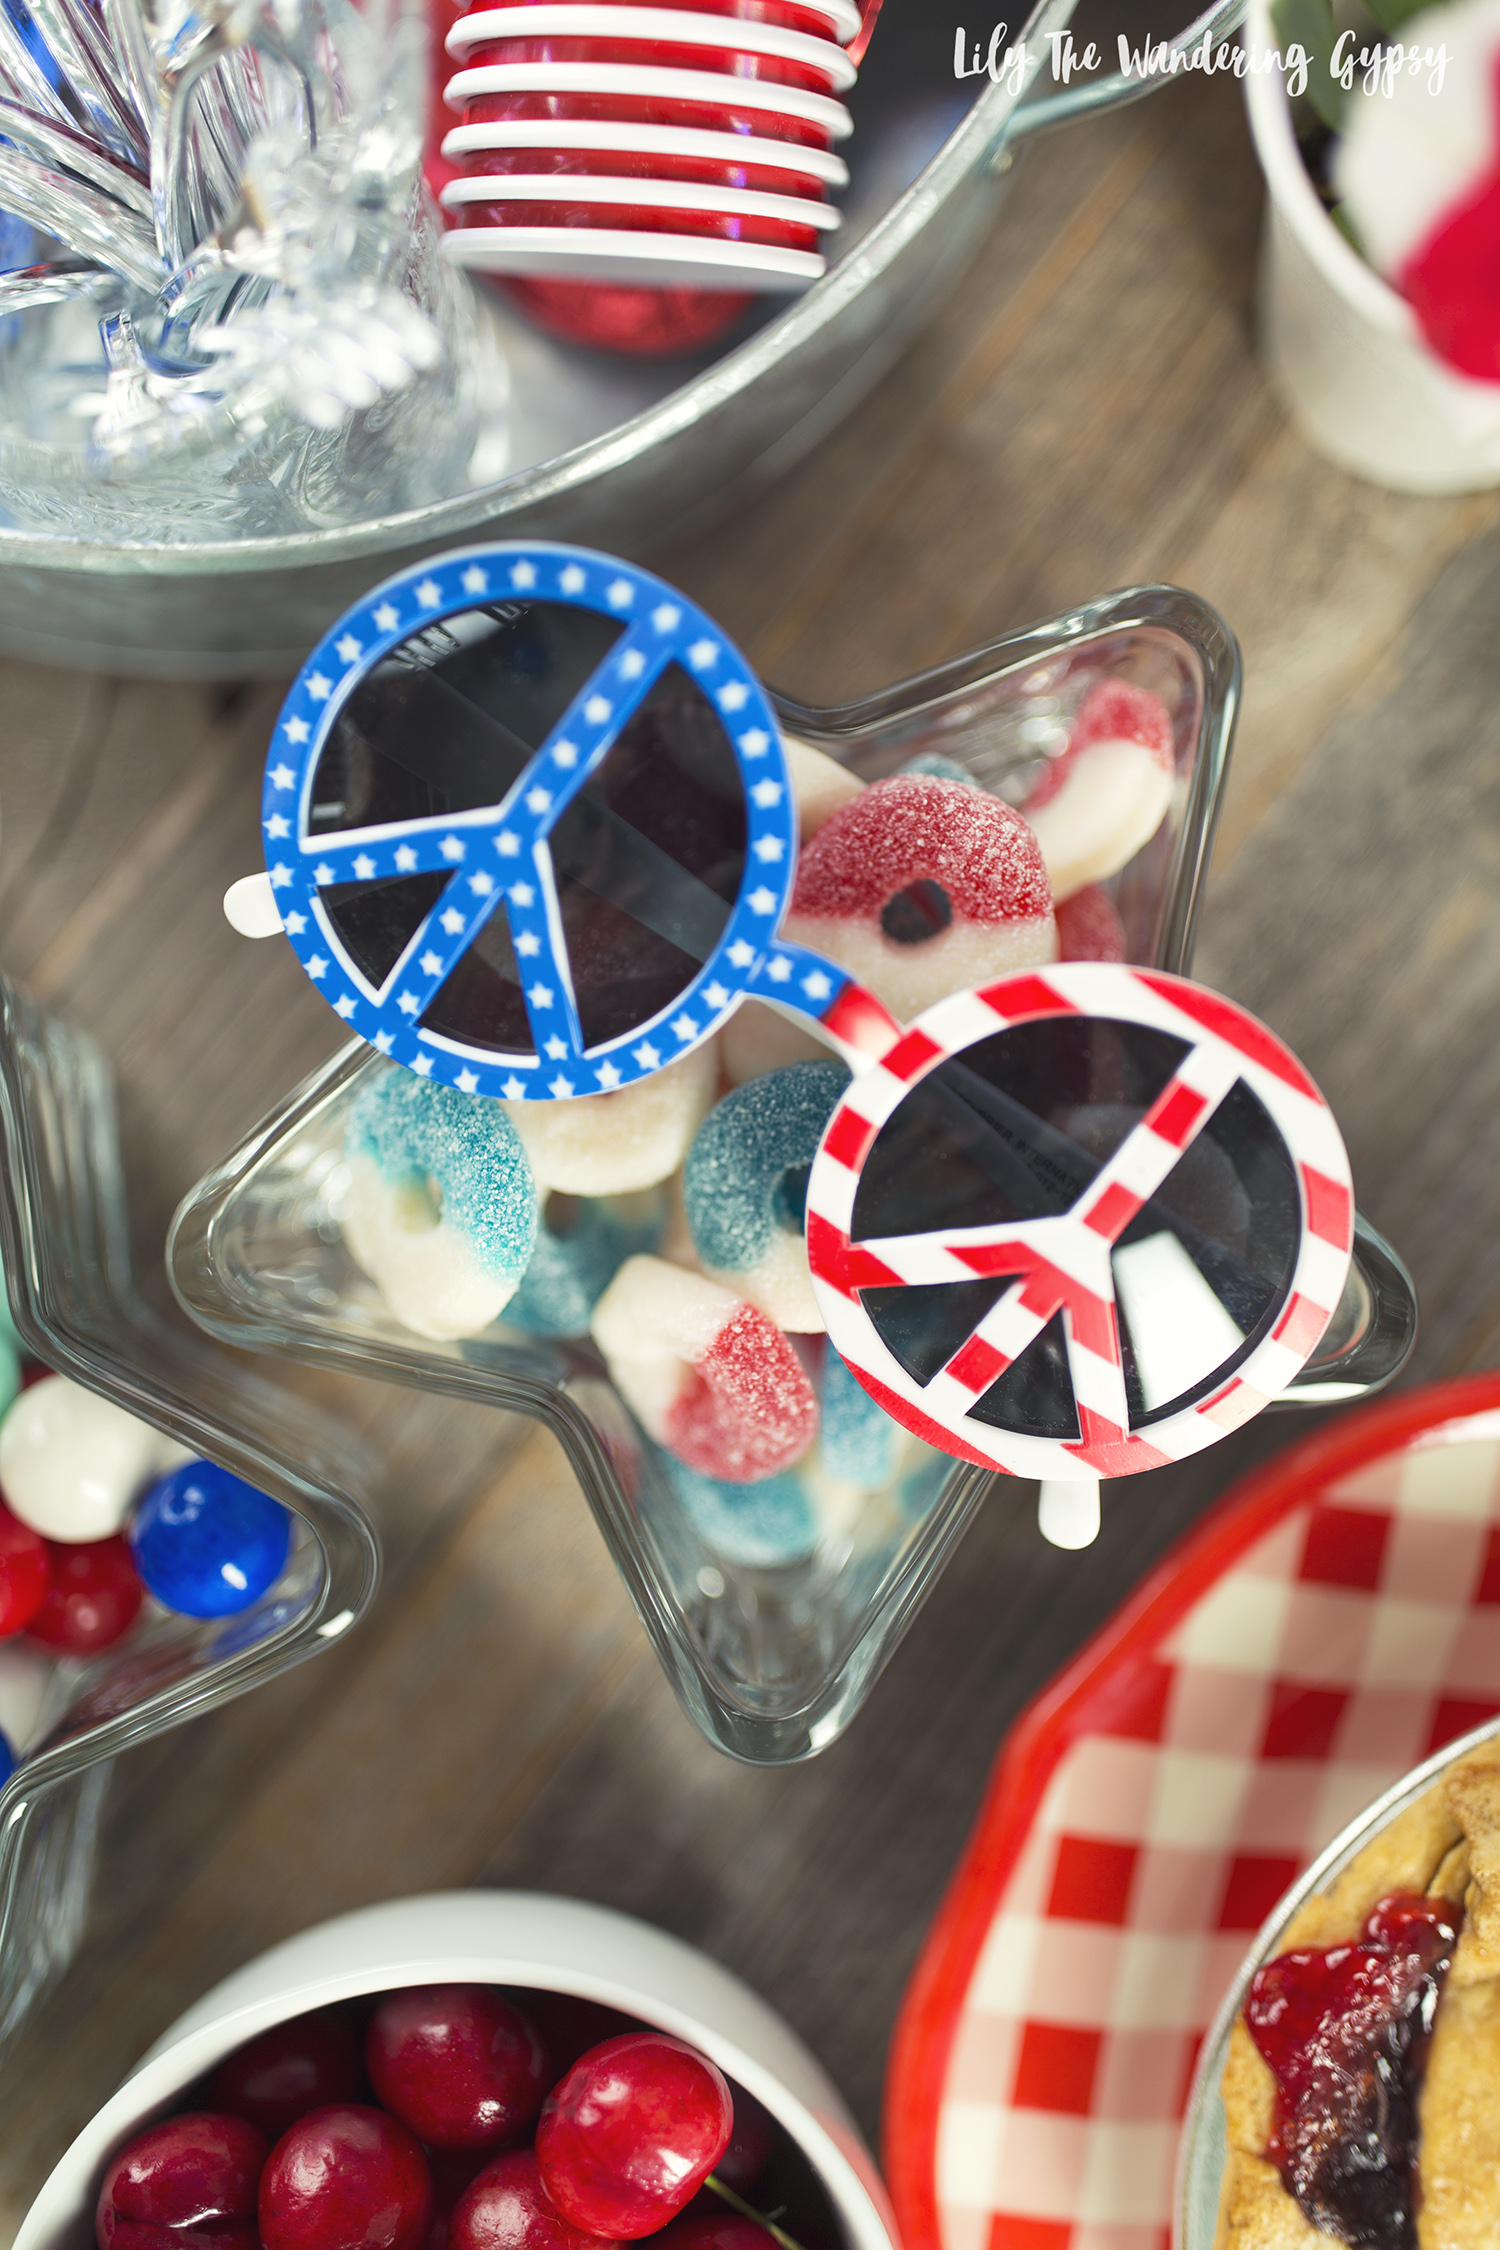
5.) Other cute items you might want to offer include patriotic-themed star plates, napkins, cute paper straws, cute sunglasses, and red/white/blue candies in star-shaped glass dishes.


When I first learned about this project with Balloon Time, I instantly went into research mode. That's how I start every post that I create, so I can learn more about the brands and the products I am about to work with. I also love seeing what other bloggers may have done with and for these brands before, and I was so excited and very honored to be chosen, because Balloon Time has enlisted the DIY and Party Skills of many amazing bloggers that I follow pretty regularly, like Studio DIY, Hostess With The Mostess, A Subtle Revelry, and Confetti Sunshine!
I wanted to put my own spin on this project and include lots of cute dessert ideas, too!

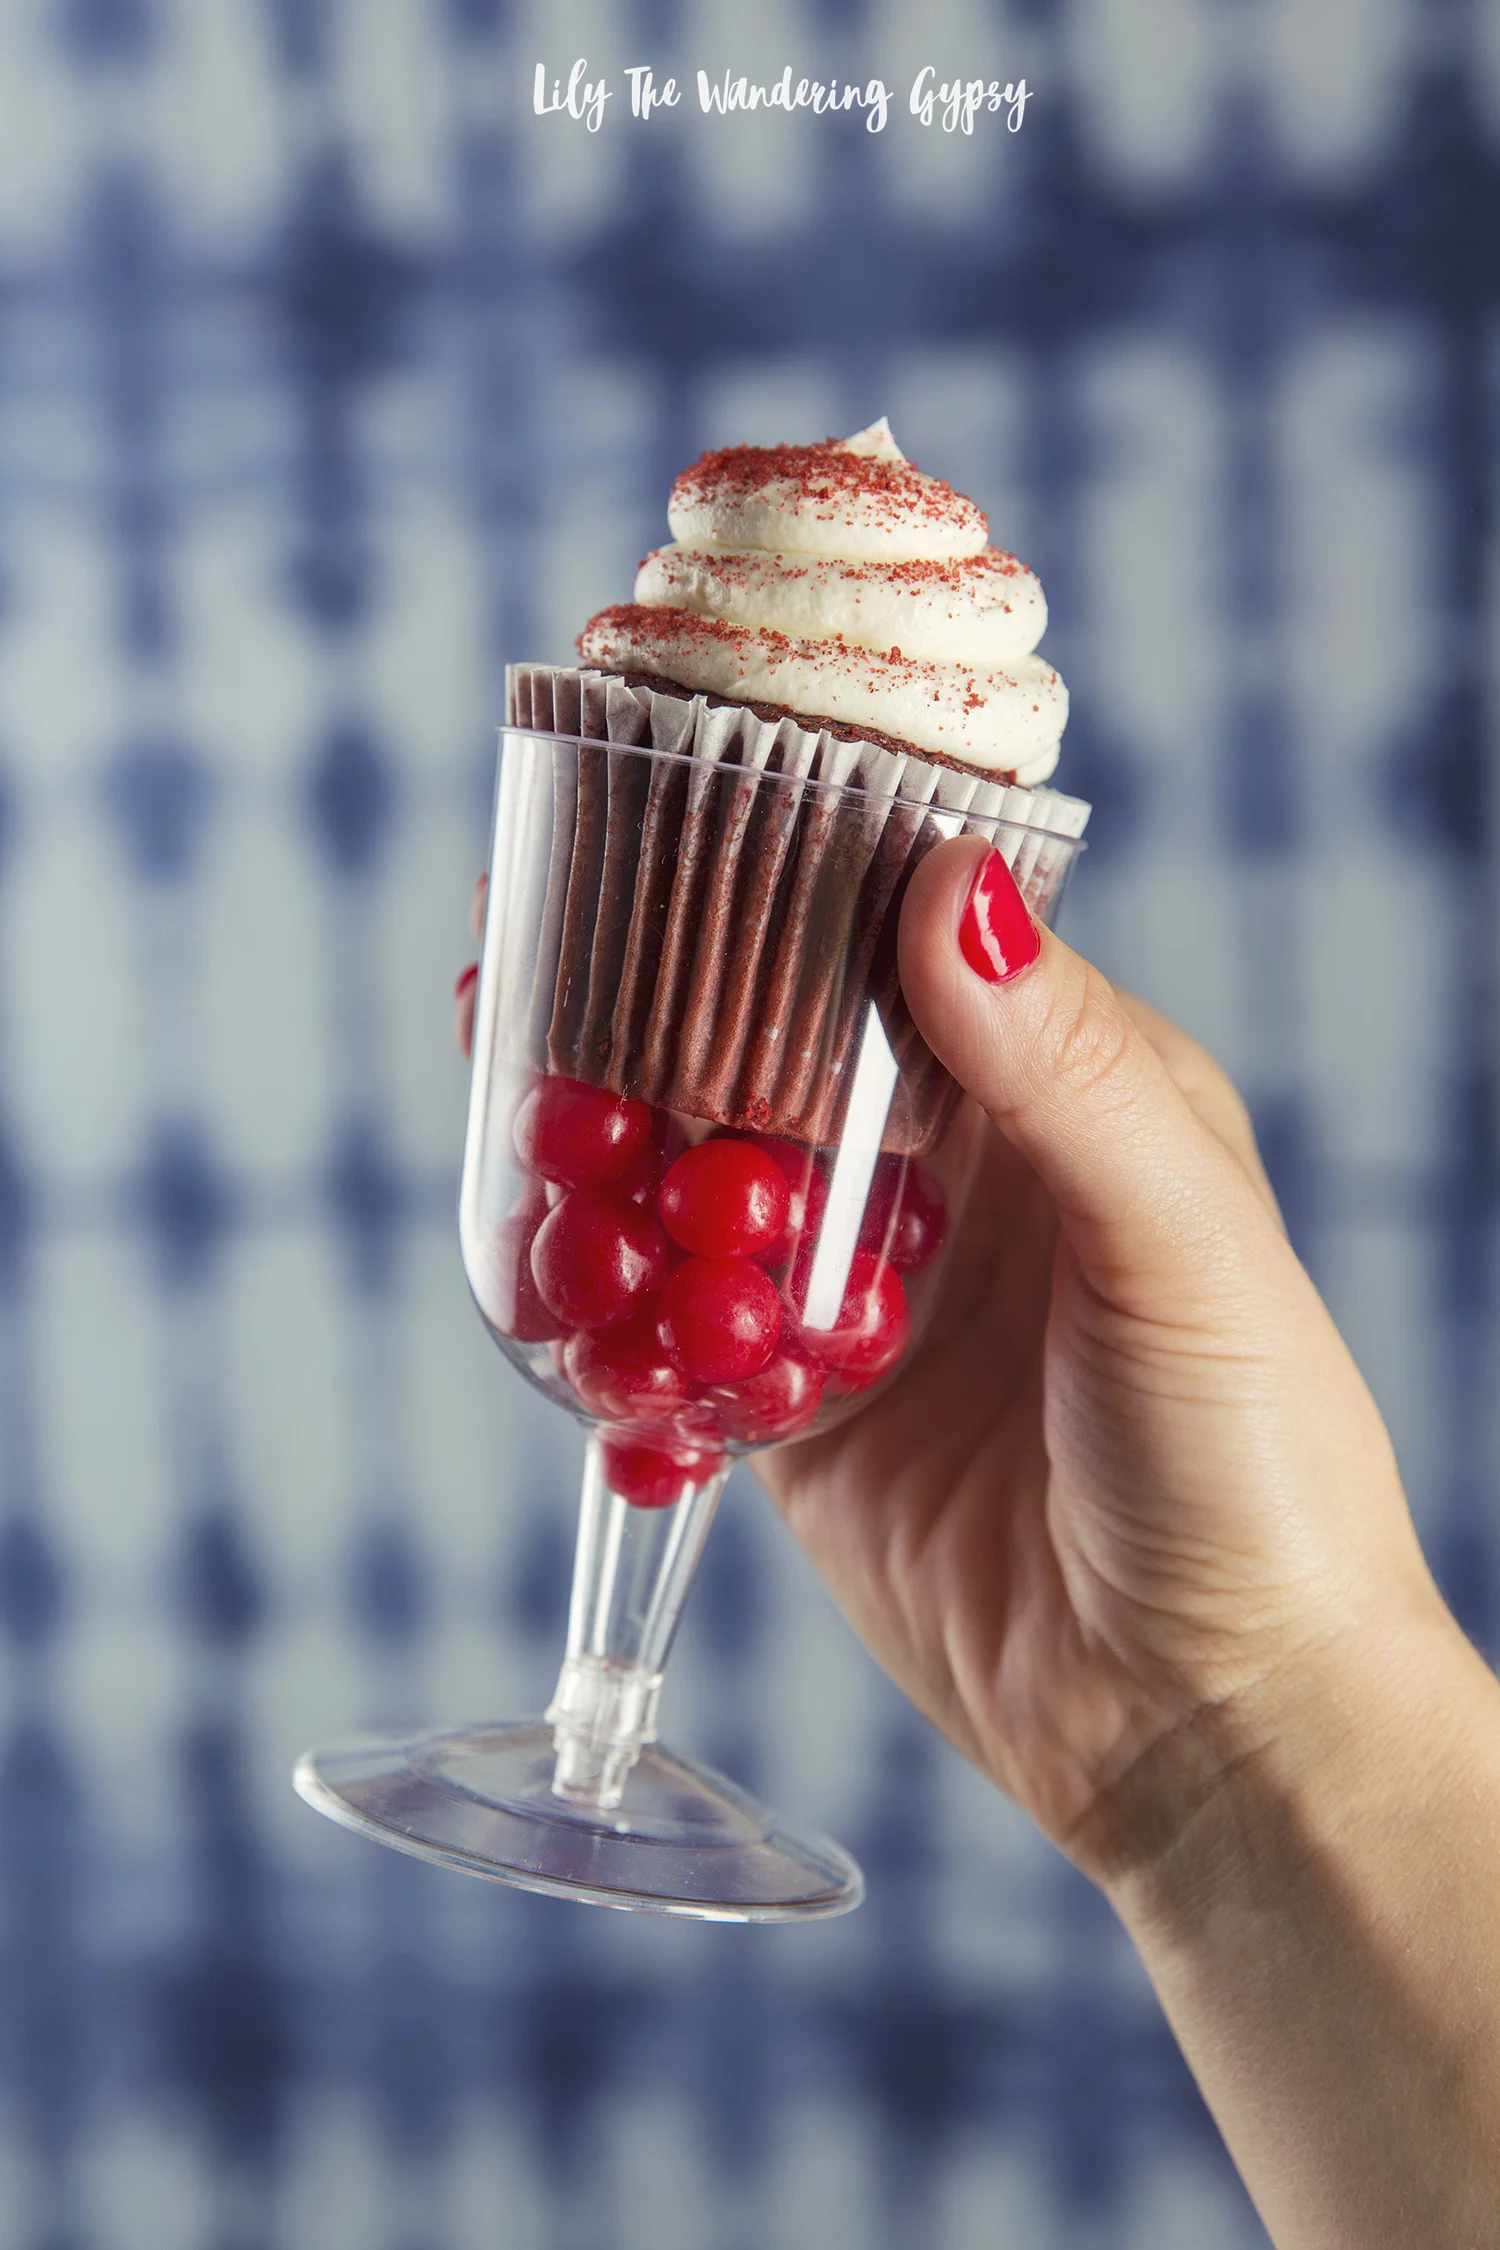
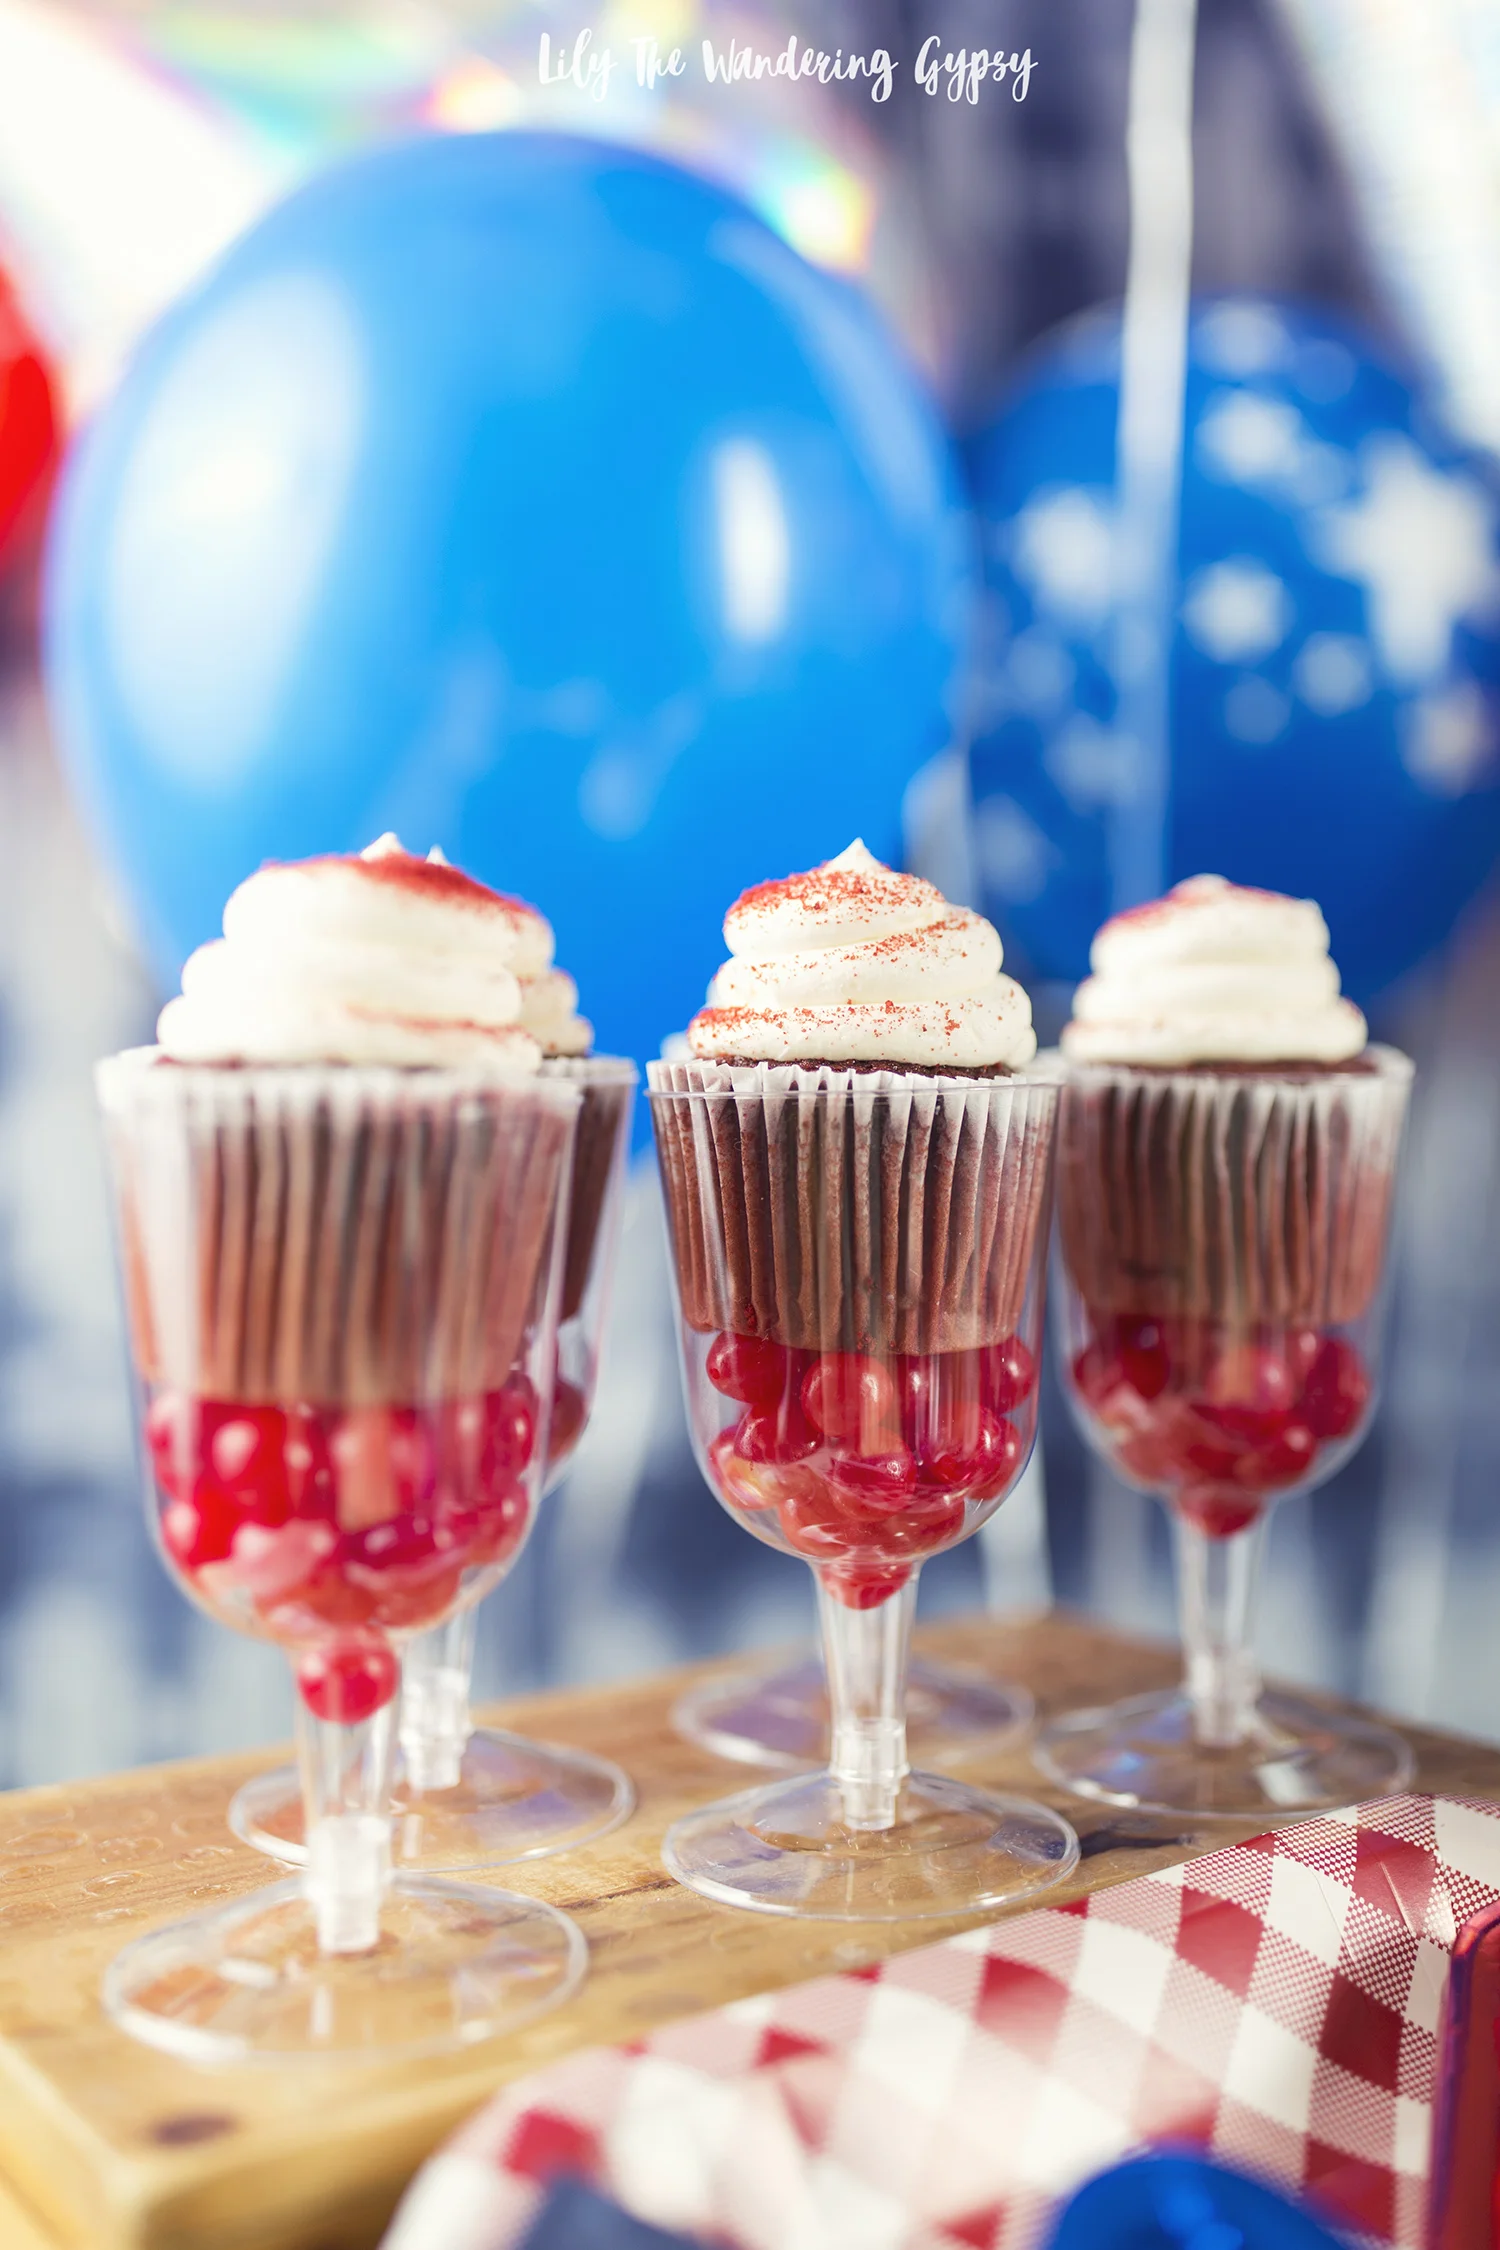
I love these delicious red velvet cupcakes from my local grocery store, which you could use in a pinch, or bake cupcakes from your own favorite recipe.
WHAT YOU NEED:
Red Velvet Cupcakes, Plastic Wine Glasses, Candies To Decorate

Simply fill glasses 1/3 full with colorful candies. Next, put the cupcake into each glass, and you have an elevated way to enjoy your cupcakes! This makes dessert very easy to carry around, too.
It's funny. The end of May in Illinois can offer gorgeous weather, chilly weather, rainy weather, or just plain HOT weather. Here in Illinois, we just come to enjoy those years when we get good weather for holidays, but it's never 100% for sure that we will even want to be outside. SO, I designed this party for an indoor OR outdoor gathering!

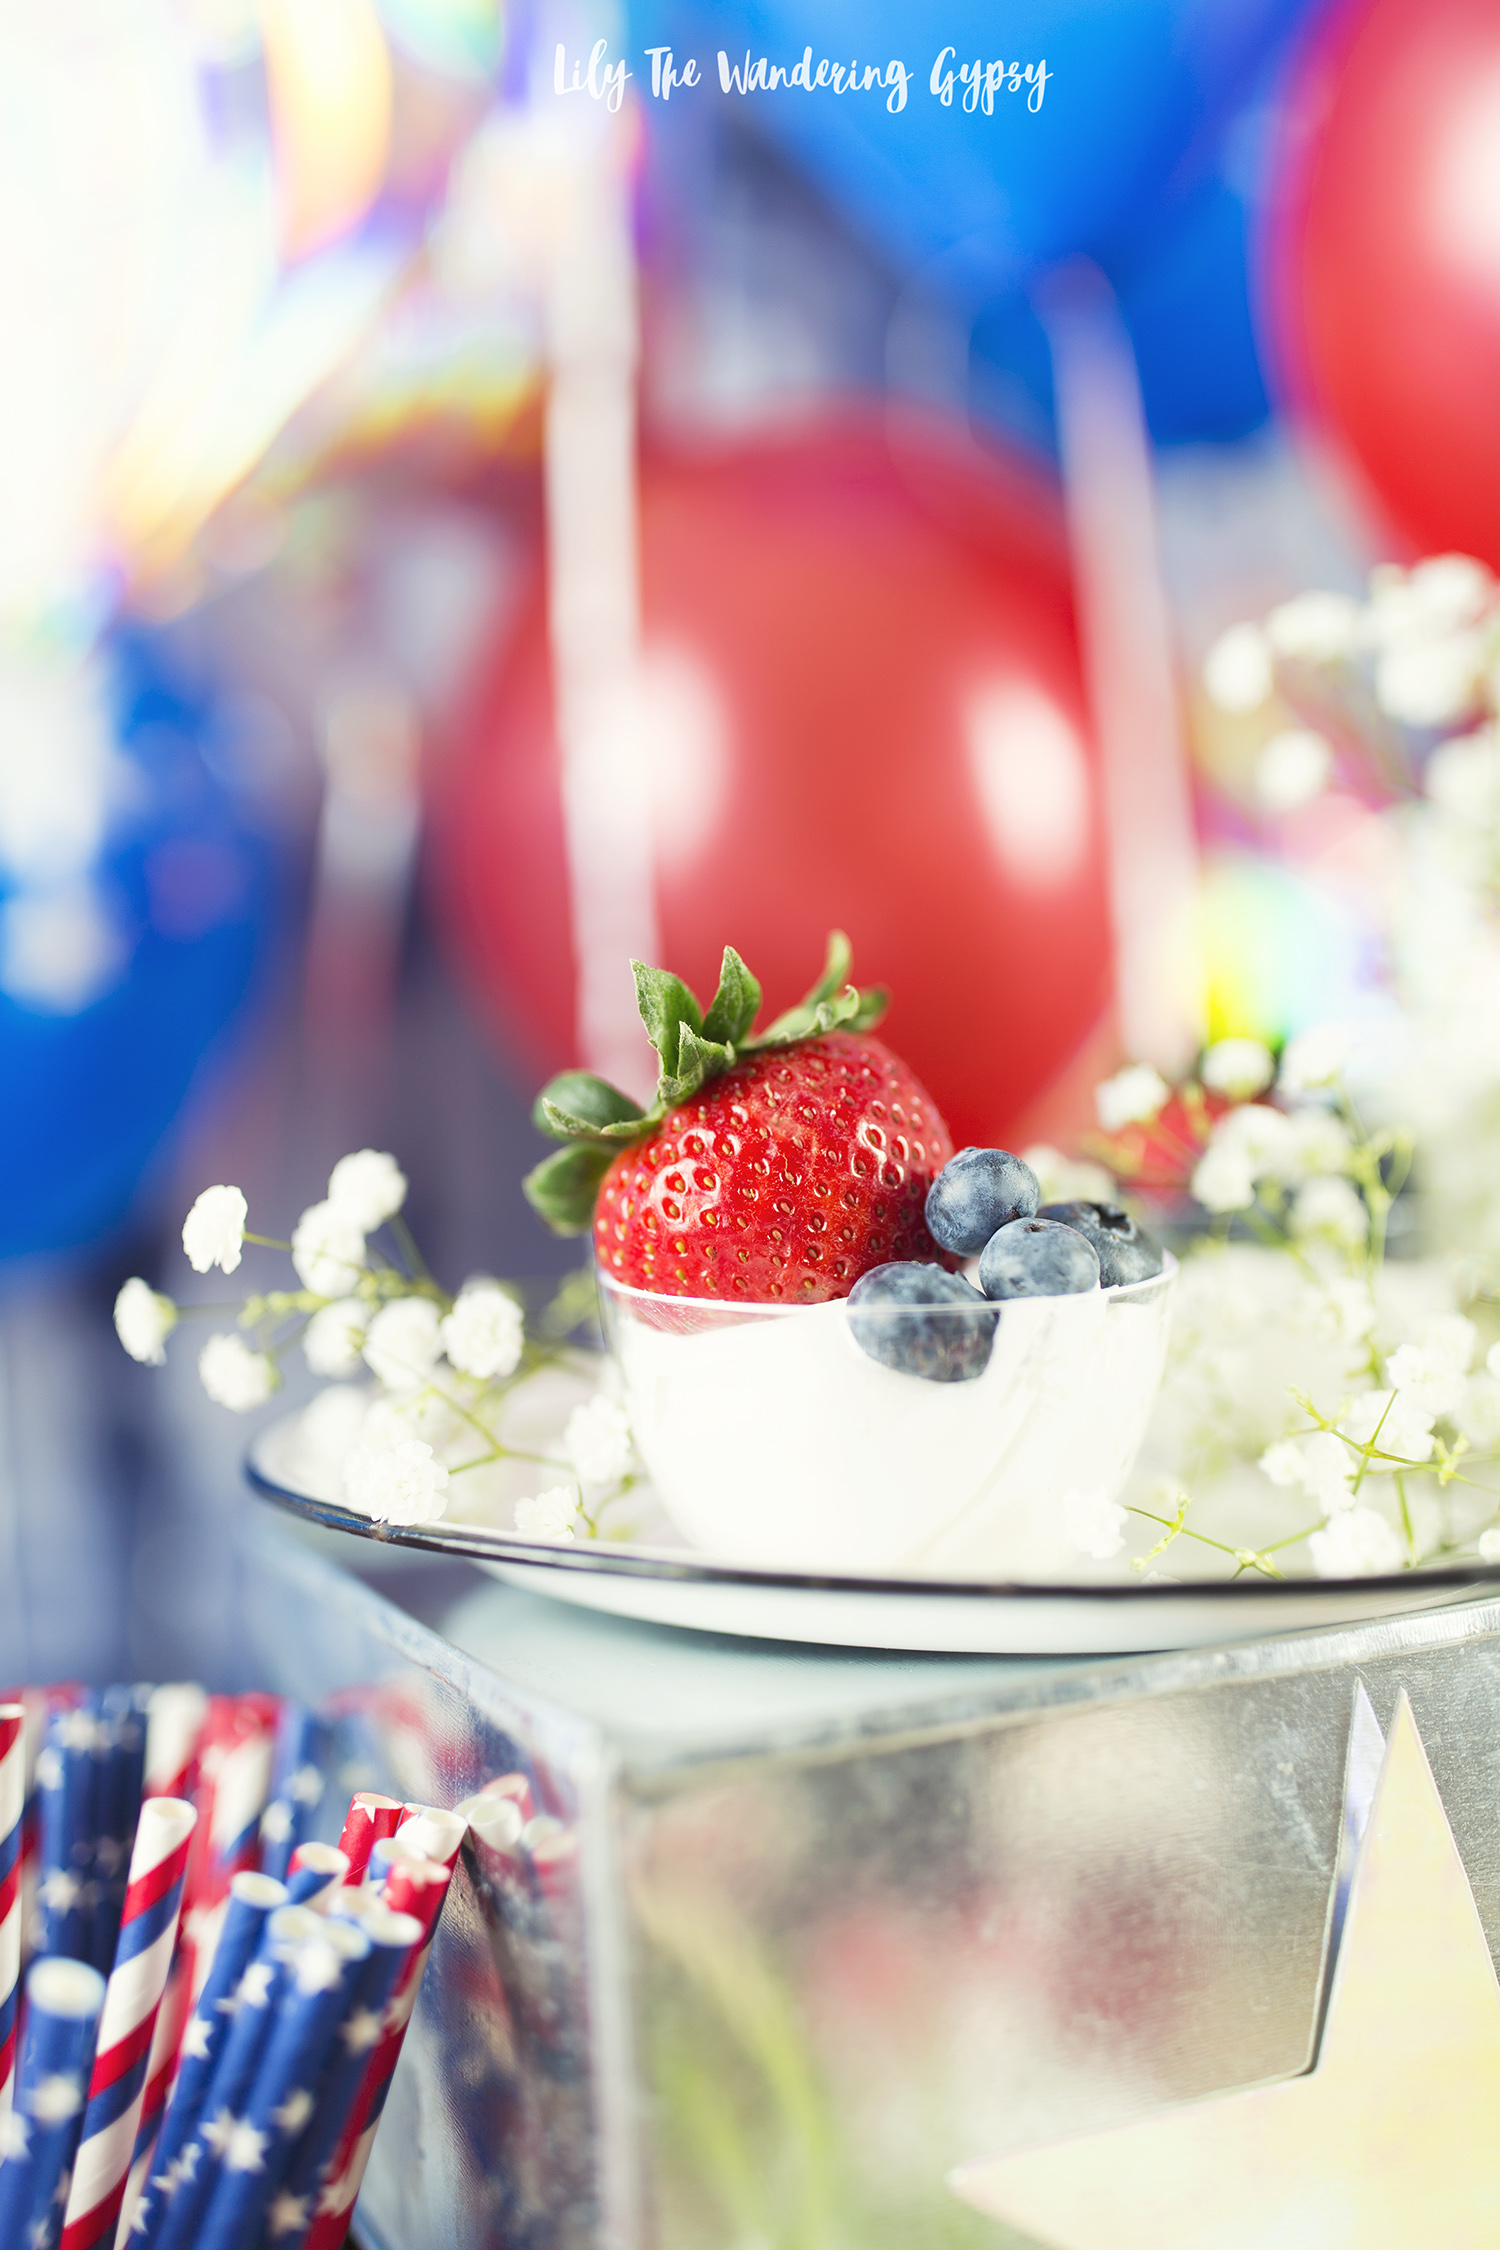
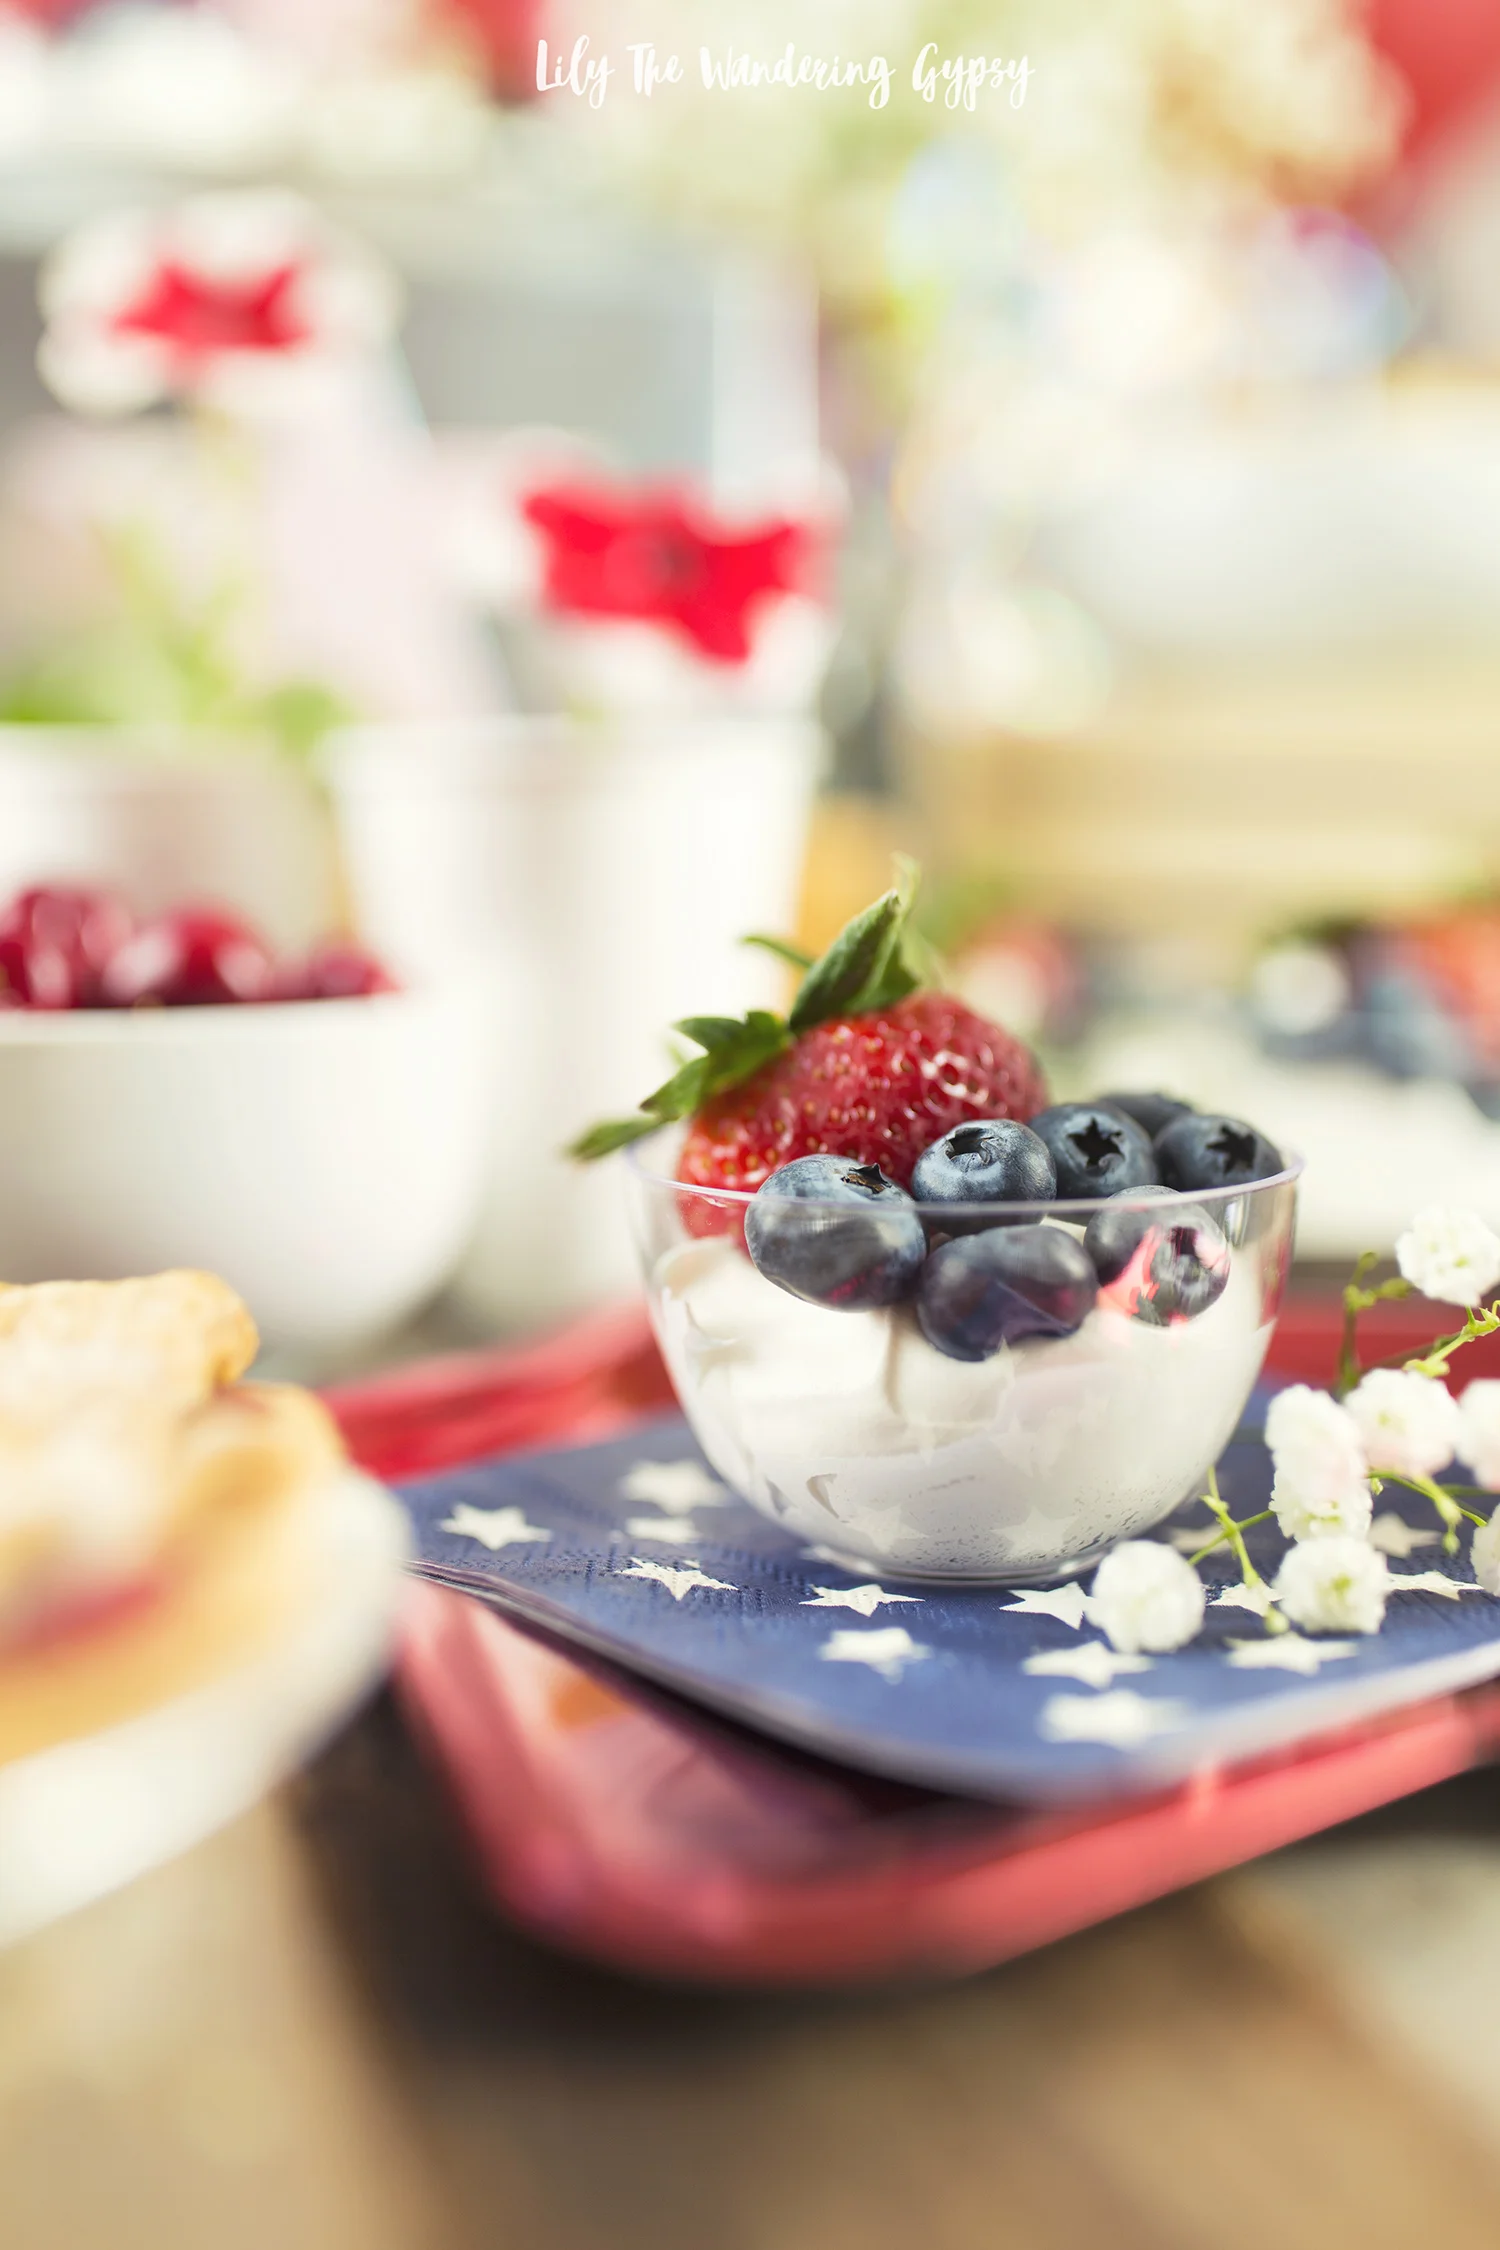
I found this pack of 6 tiny, plastic dessert bowls at the dollar store, and then, using an ice cream scoop, I added a scoop of cool whip to each bowl. Next, I added one full strawberry to each cup, and then about 6-8 blueberries to one side. These taste SO good, and will be easy for guests to enjoy. Also, I would only recommend making these about 30 minutes before serving, because the strawberries get mushy if you wait much longer. But, I love how these turned out so much!

Thanks so much for joining me to learn more about my latest party! I hope you have gotten lots of great party ideas too.


Enjoy!
This is a sponsored conversation written by me on behalf of Balloon Time. The opinions and text are all mine.