Soft Iced Cutout Gingerbread Cookies Recipe

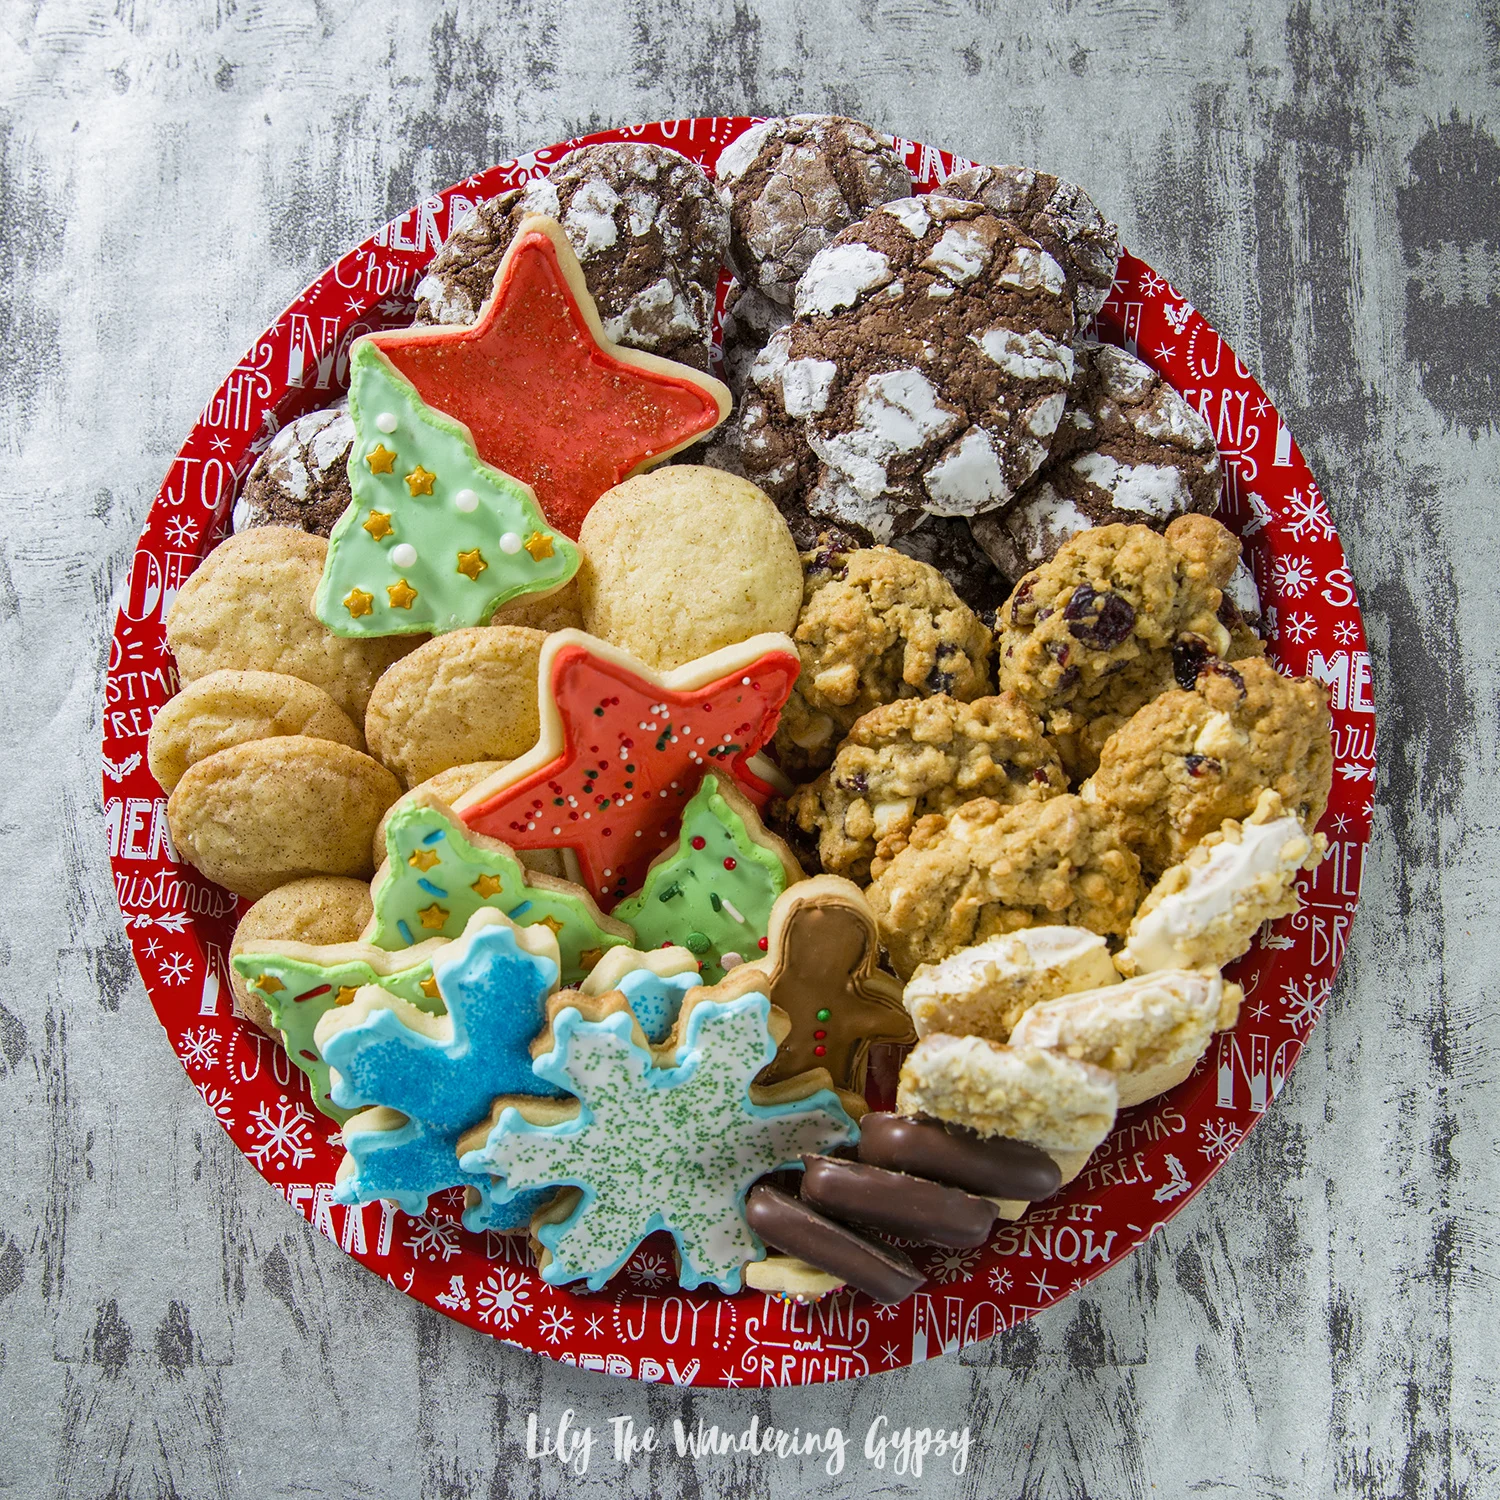
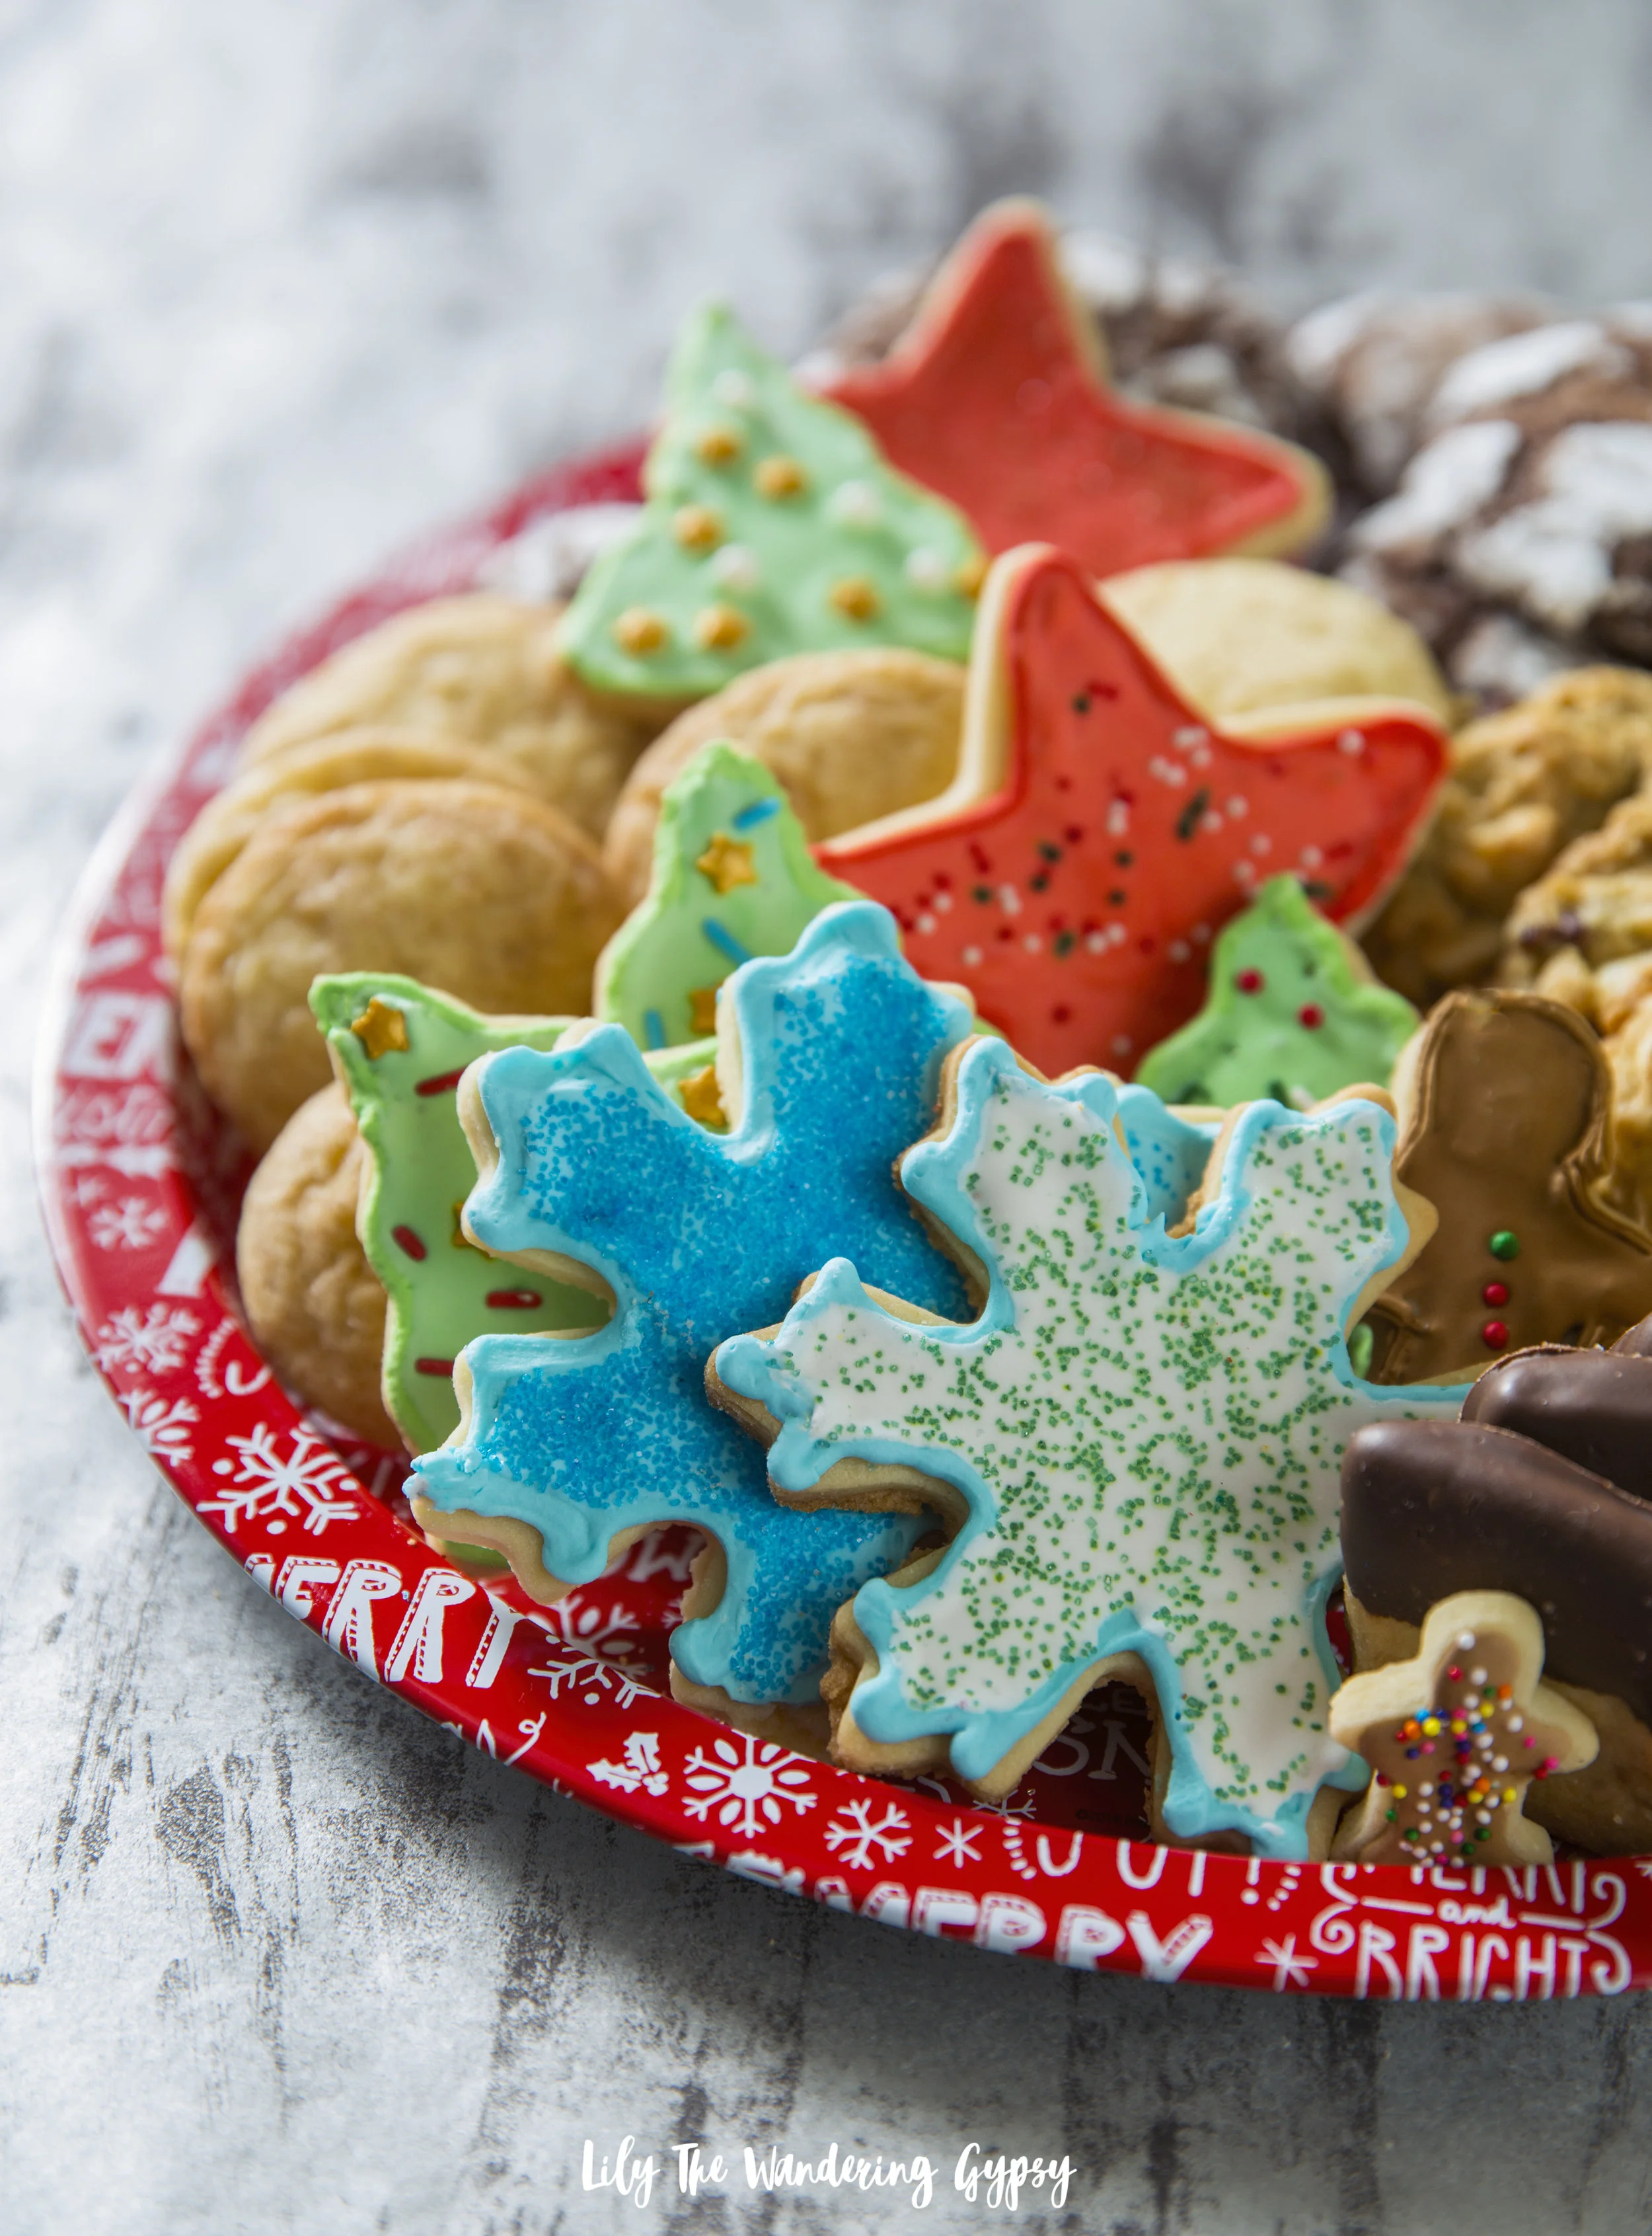
Super excited to share this recipe now that I have perfected it. What a lovely make-ahead gift idea for the holidays, and you can decorate them in any color scheme you would like! O really hope you enjoy this gingerbread cookie recipe, created just for you!

Also, haooy New Year’s Eve! We are spending the last day of 2018 reflecting on the past year, and are also looking forward to planning what the next year will hold for us. This year was filled with so many incredible projects and spending time with people we love and who inspire us! We also have a few exciting projects and travels ahead of us, but for now I wanted to share my favorite cookie recipe of the year!

This recipe was originally posted here - https://theviewfromgreatisland.com/soft-glazed-gingerbread-cookies-recipe/

Soft Glazed Gingerbread Cookies

Prep Time: 20 minutes

Cook Time: 10 minutes

Total Time: 30 minutes

Category: dessert

Cuisine: American, British

Author: Sue Moran

Yield: 12-14 cookies

Serving Size: 1 cookie

Calories per serving: 154

Ingredients

  • wet ingredients

  • 6 tbsp (85 g) unsalted butter, at room temperature

  • 1/3 packed cup plus 2 tbsp (90 g) dark brown sugar

  • 1/3 cup (100 g) molasses

  • 1 large egg yolk

  • dry ingredients

  • 1 3/4 cups plus 2 tbsp (235 g) all-purpose flour

  • 1 tbsp Dutch-processed cocoa powder

  • 1/2 tsp baking soda

  • 1 tsp ground ginger

  • 1/2 tsp ground cinnamon

  • 1/8 tsp ground cloves

  • 1/4 tsp salt

  • 1/4 tsp freshly ground black pepper

  • glaze

  • 1 cup sifted confectioner's sugar

  • 1 Tbs/15g unsalted butter, melted

  • 1/2 tsp vanilla extract

  • 1 Tbsp plus 1 tsp warm water

  • cookie cutters

  • parchment paper

  • baking sheets

Instructions

  1. Preheat the oven to 375F/190C.

  2. Cream together the butter, sugar, and molasses in a stand mixer or with electric beaters. Beat in the egg yolk.

  3. Sift together the dry ingredients. Slowly add the dry ingredients to the butter mixture, beating on low until the dough comes together.

  4. Turn out the dough onto a lightly floured surface and knead it until all the floury crumbles are incorporated. Flatten the dough into a disk and then roll out to about 1/4 inch thickness.

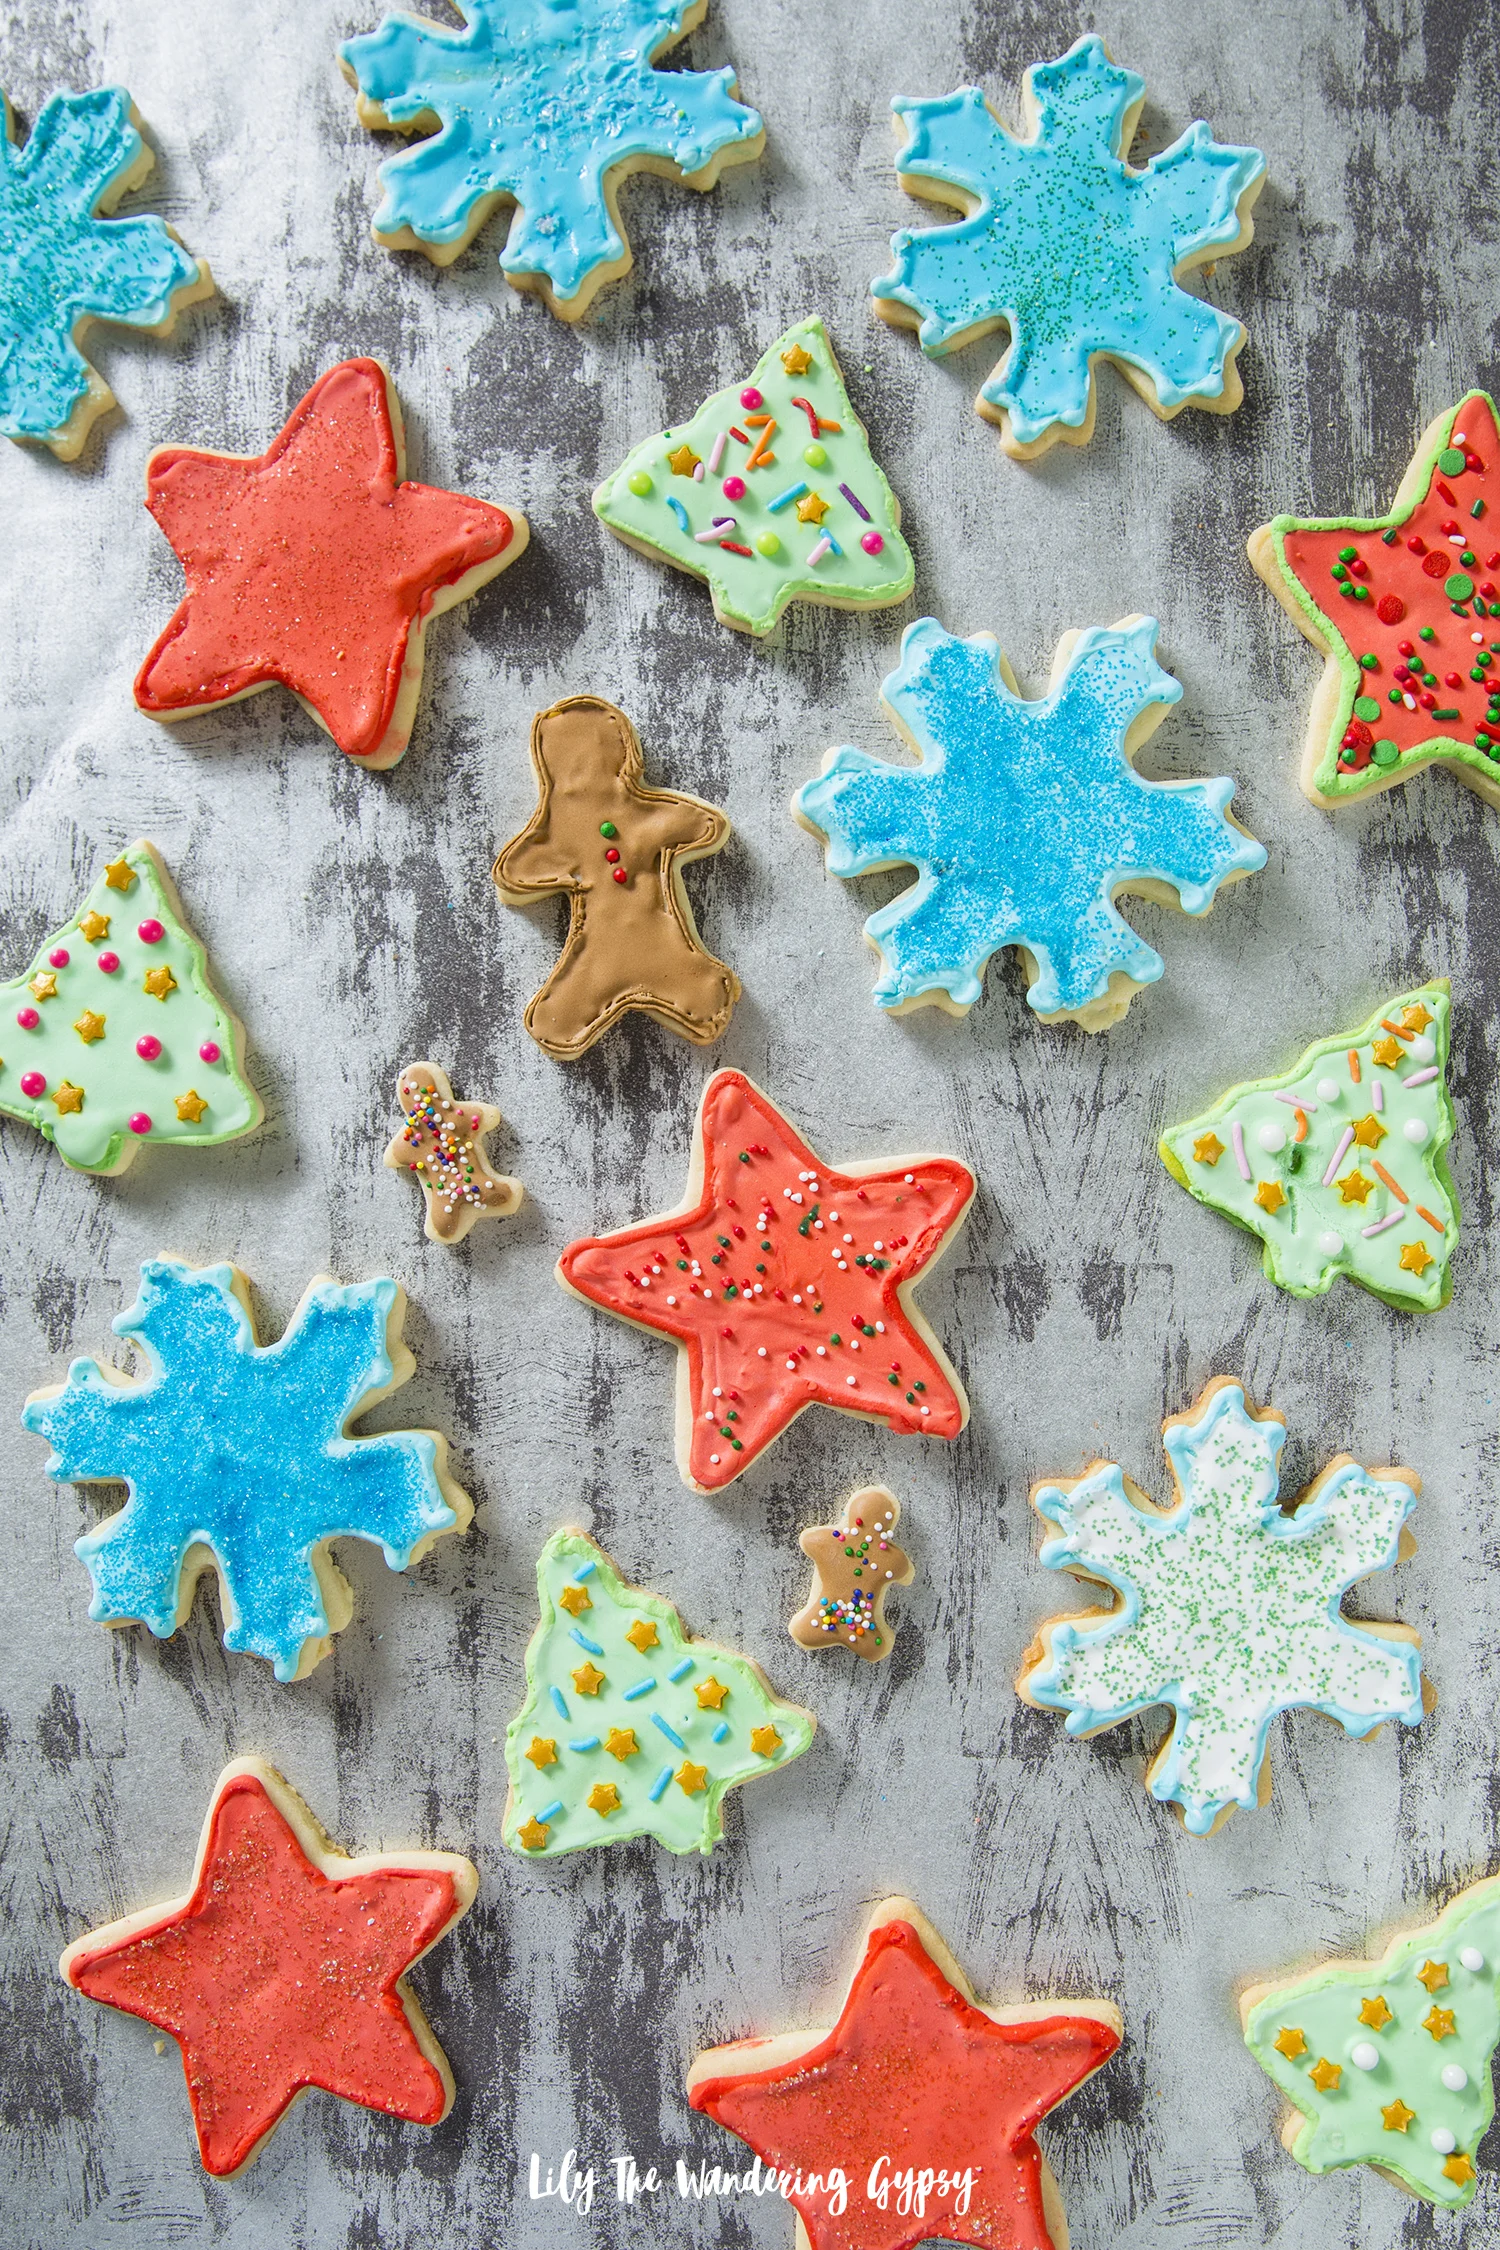
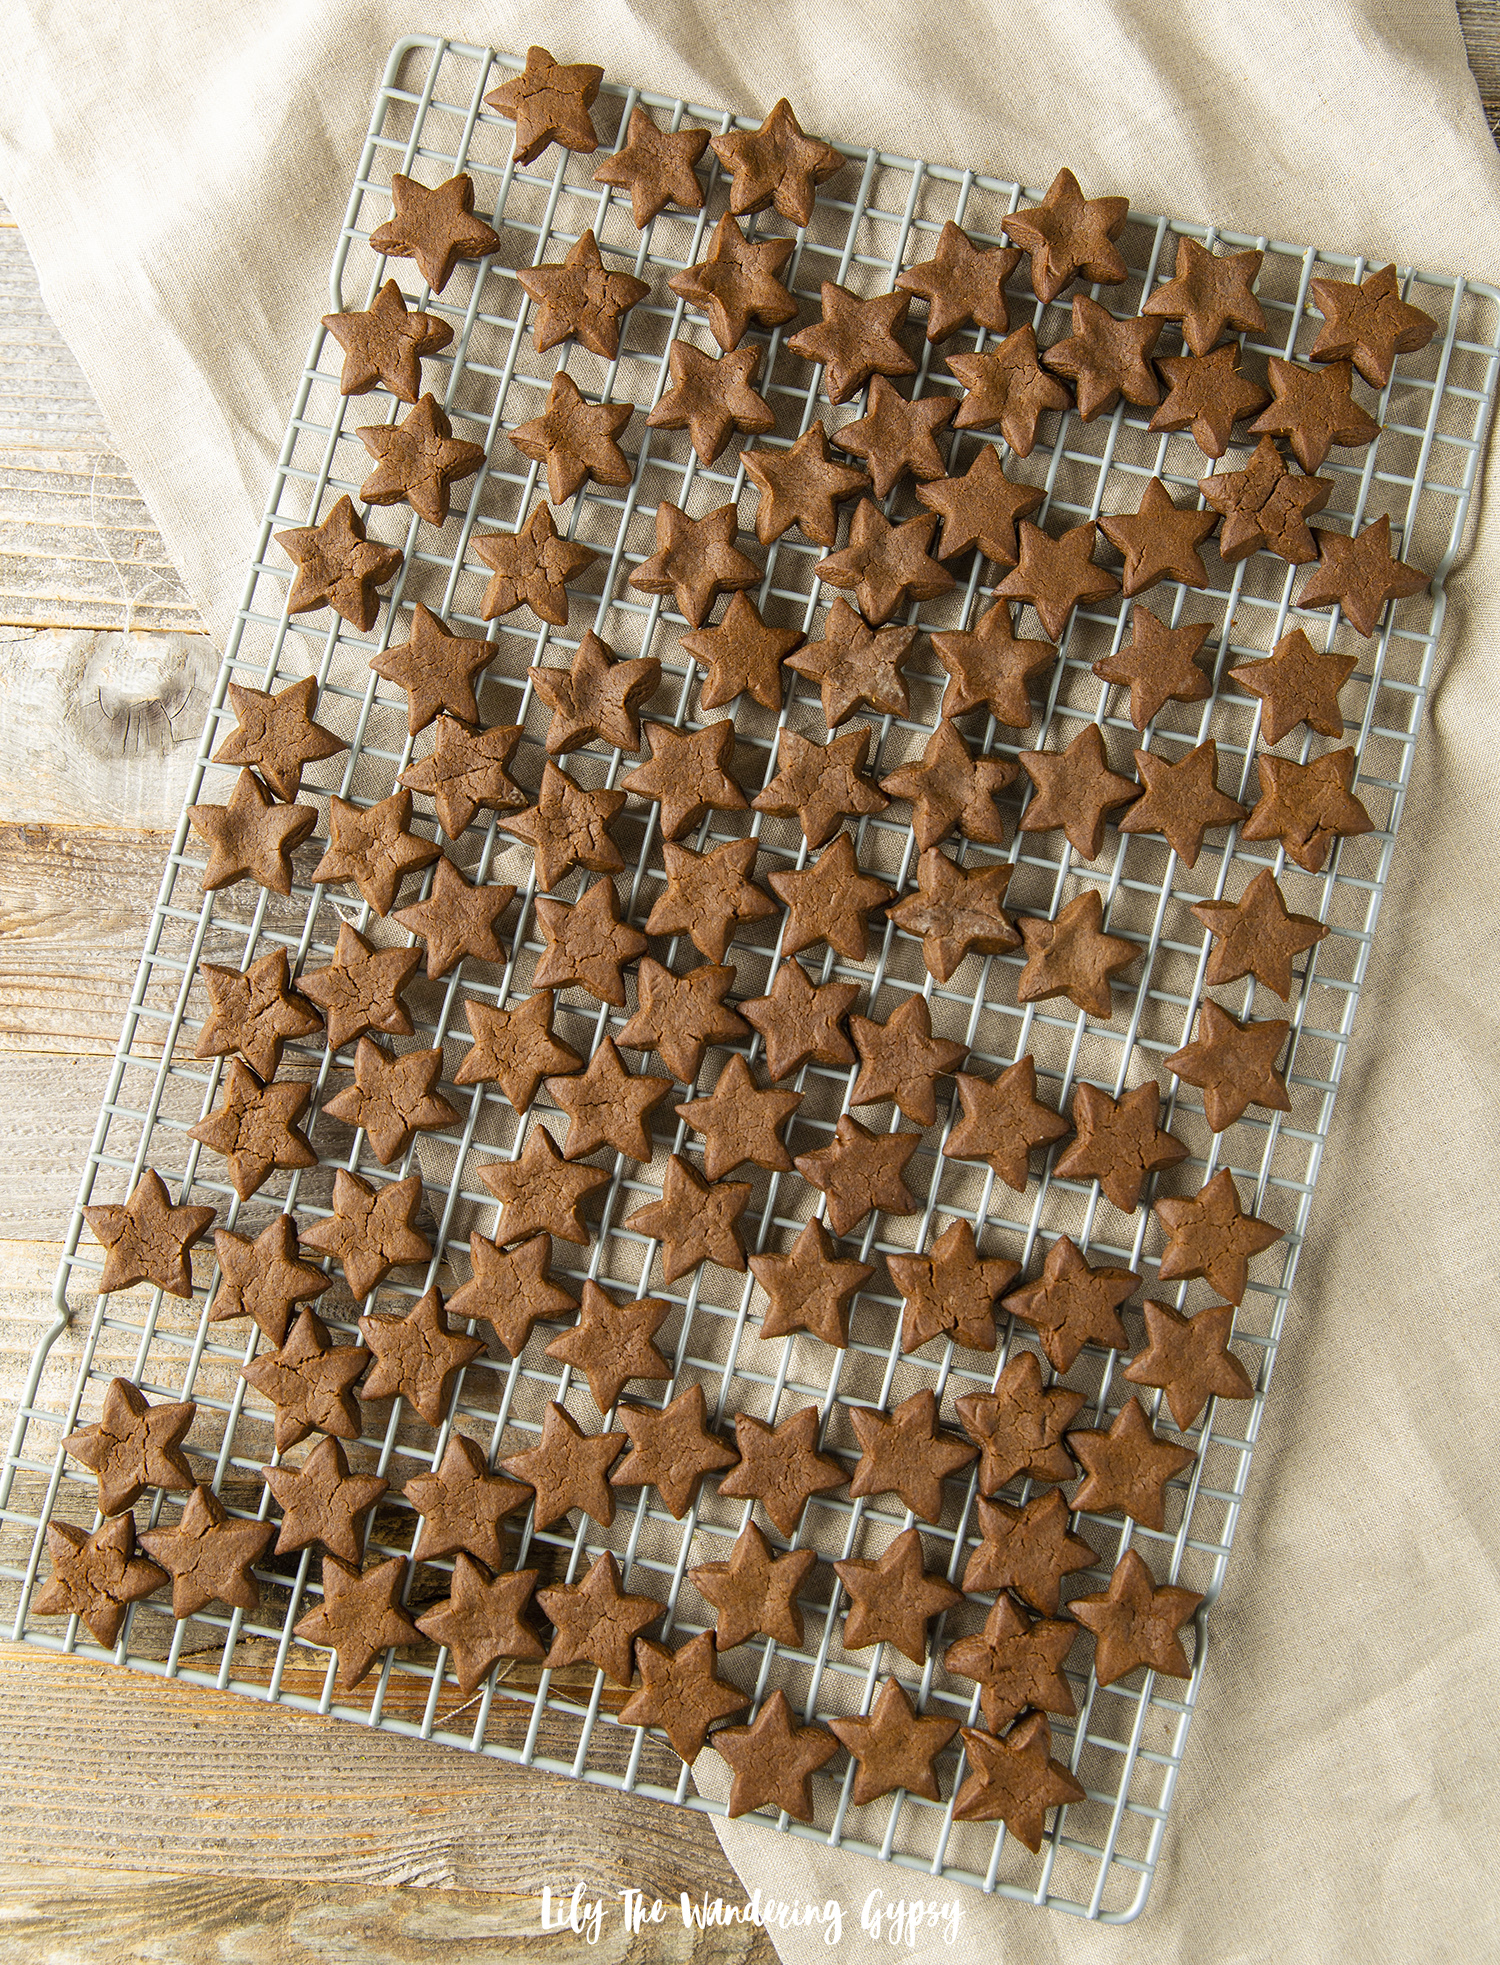
  5. Cut out shapes from dough and transfer them to parchment paper lined baking sheets.

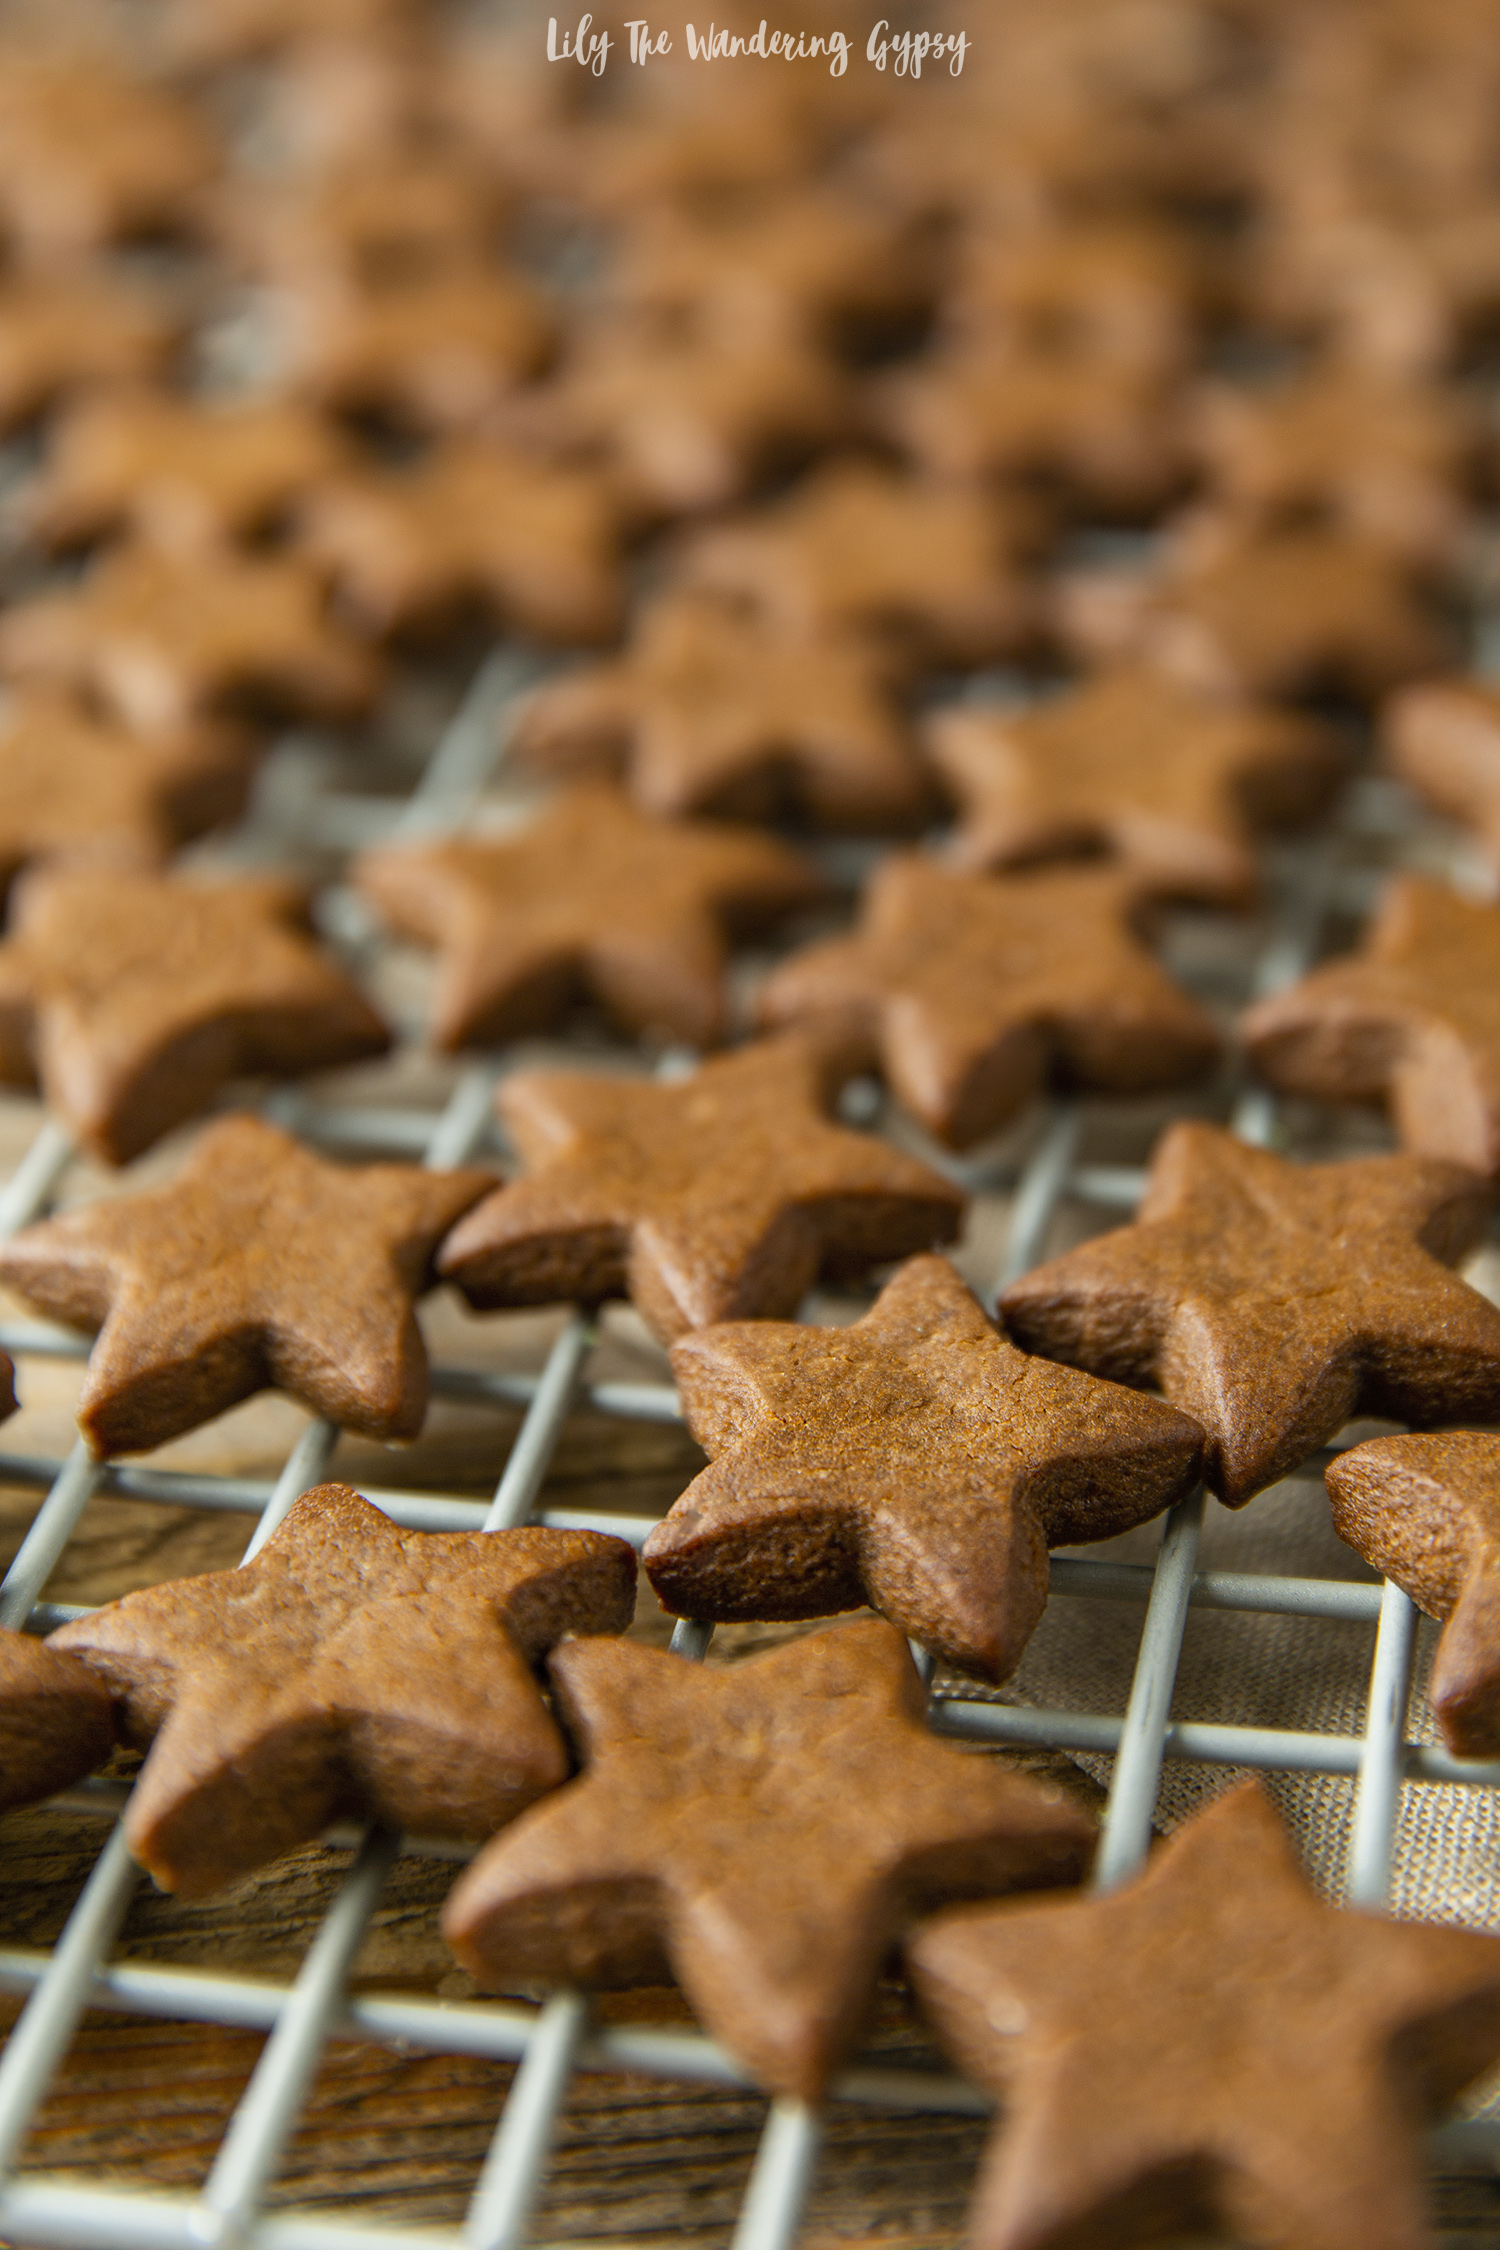
  6. Transfer the cookies to a lined baking sheet and bake for 8-10 minutes. You don't want to over bake these cookies, so do a test cookie or two to figure out the best timing for your oven. The cookies will be soft when you remove them from the oven, but will firm up as they cool.

  7. While the cookies are baking whisk the glaze ingredients together until they become a smooth thin glaze. Add more water if the glaze is too thick, it should have the consistency of maple syrup or a thin honey.

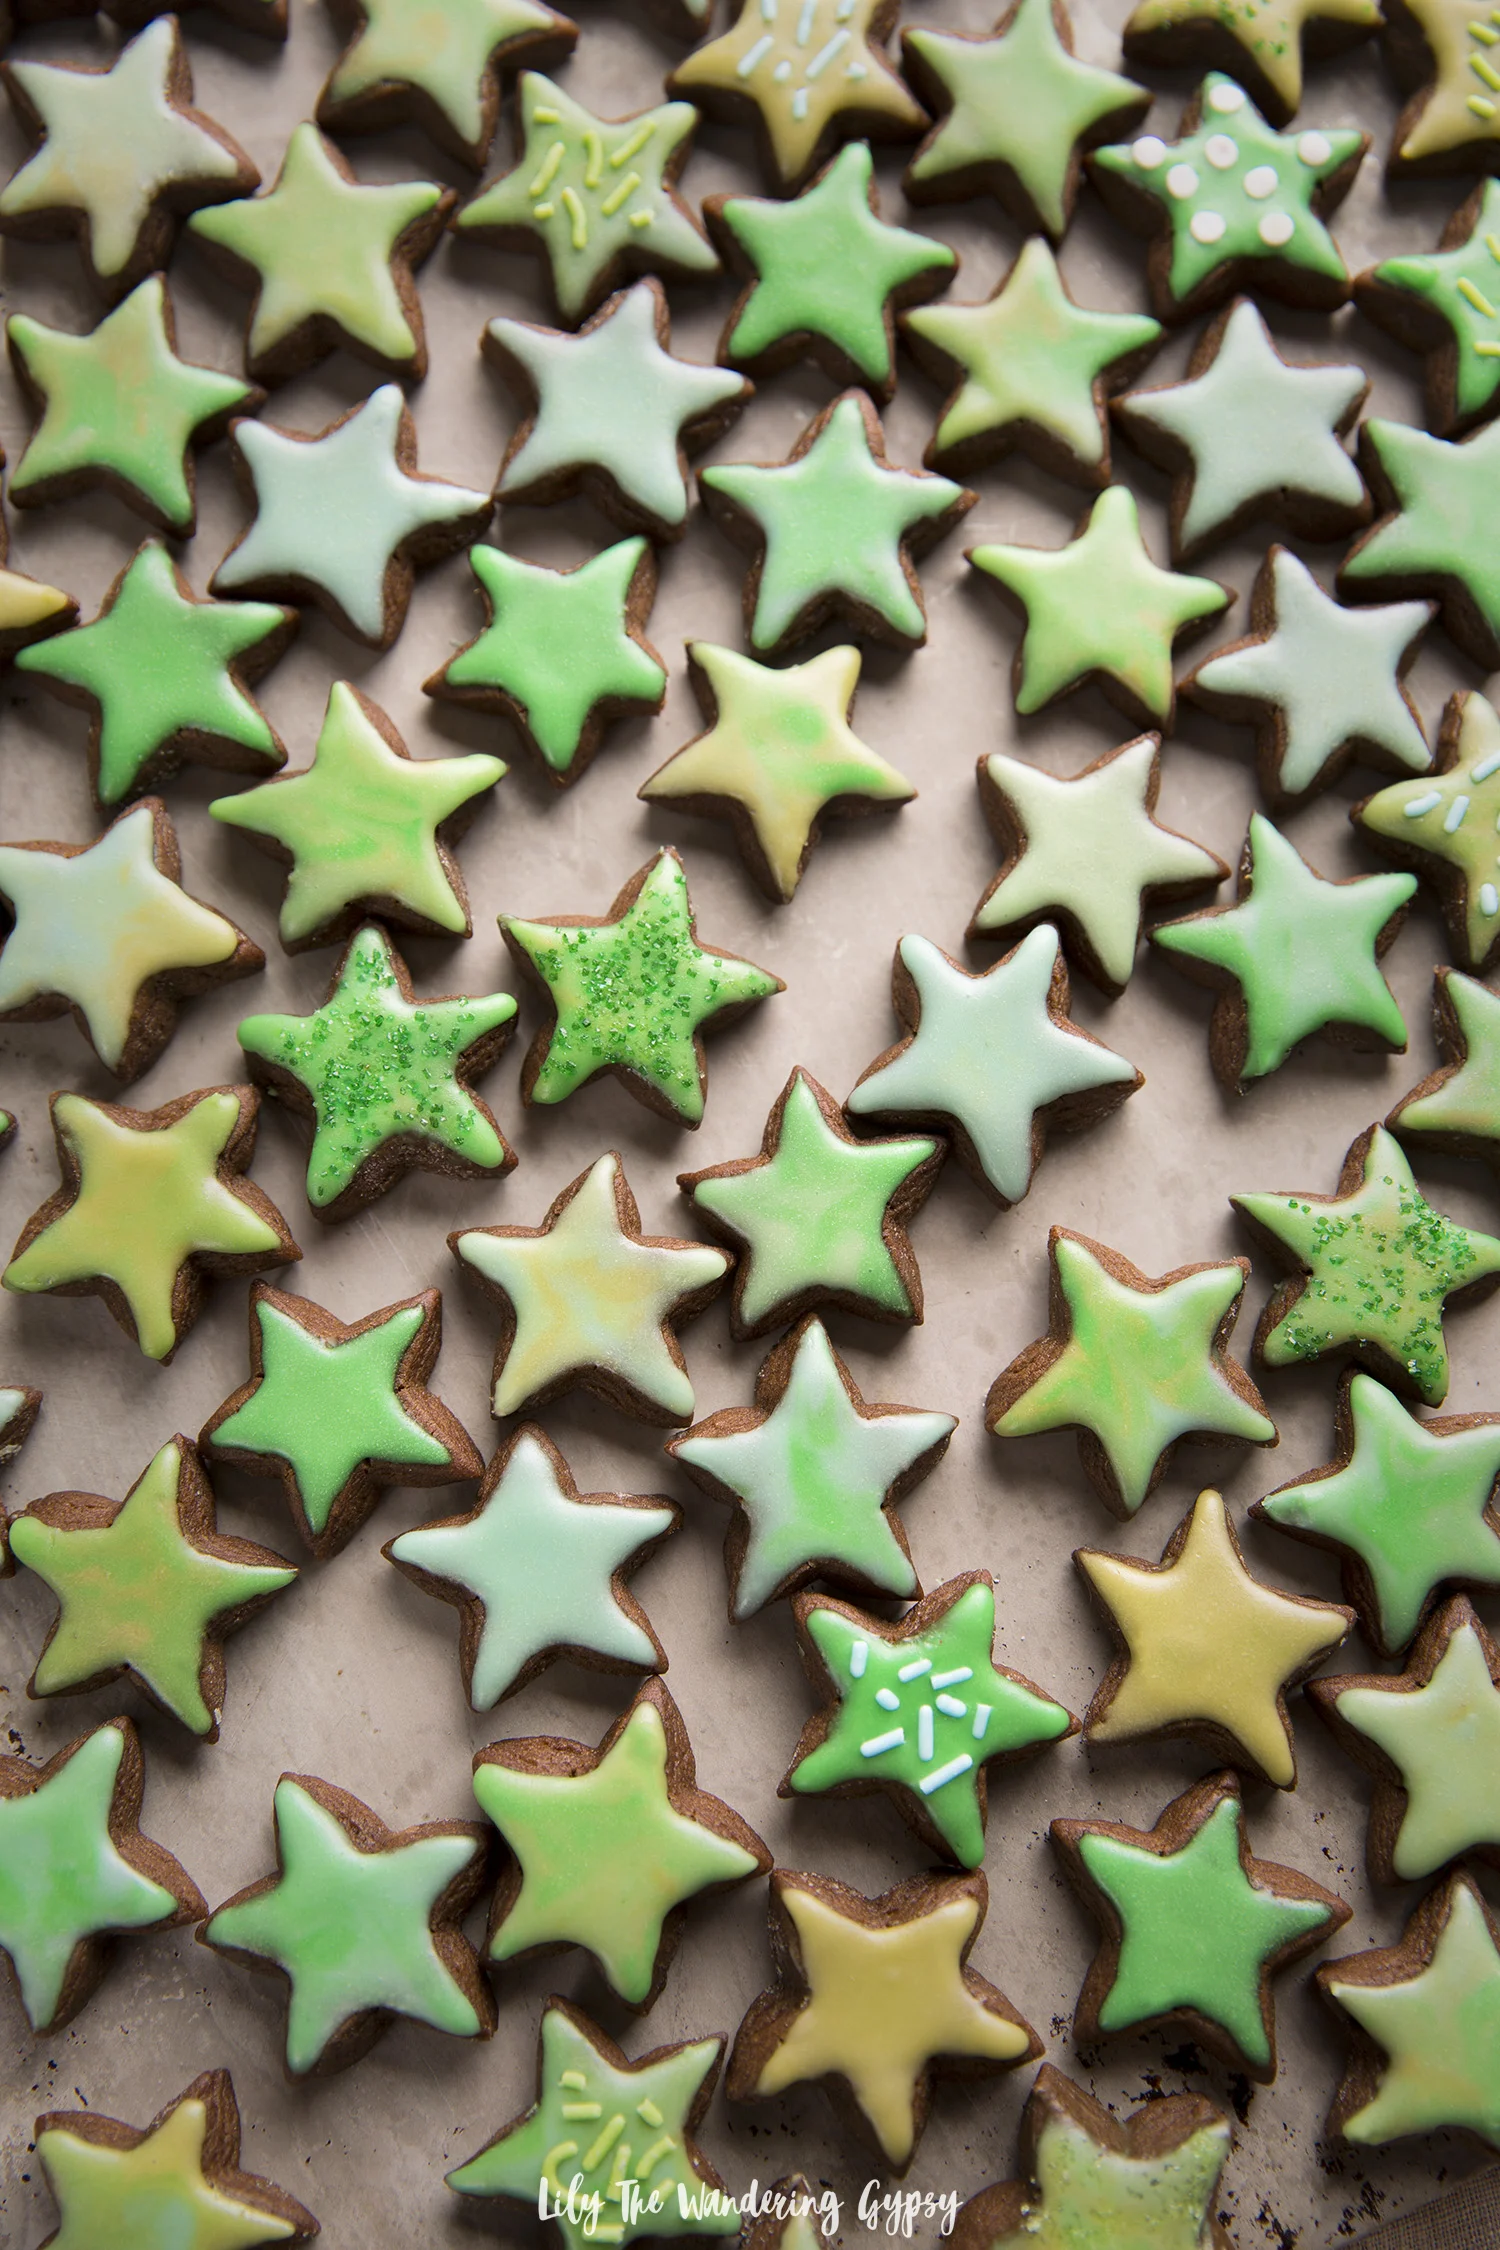
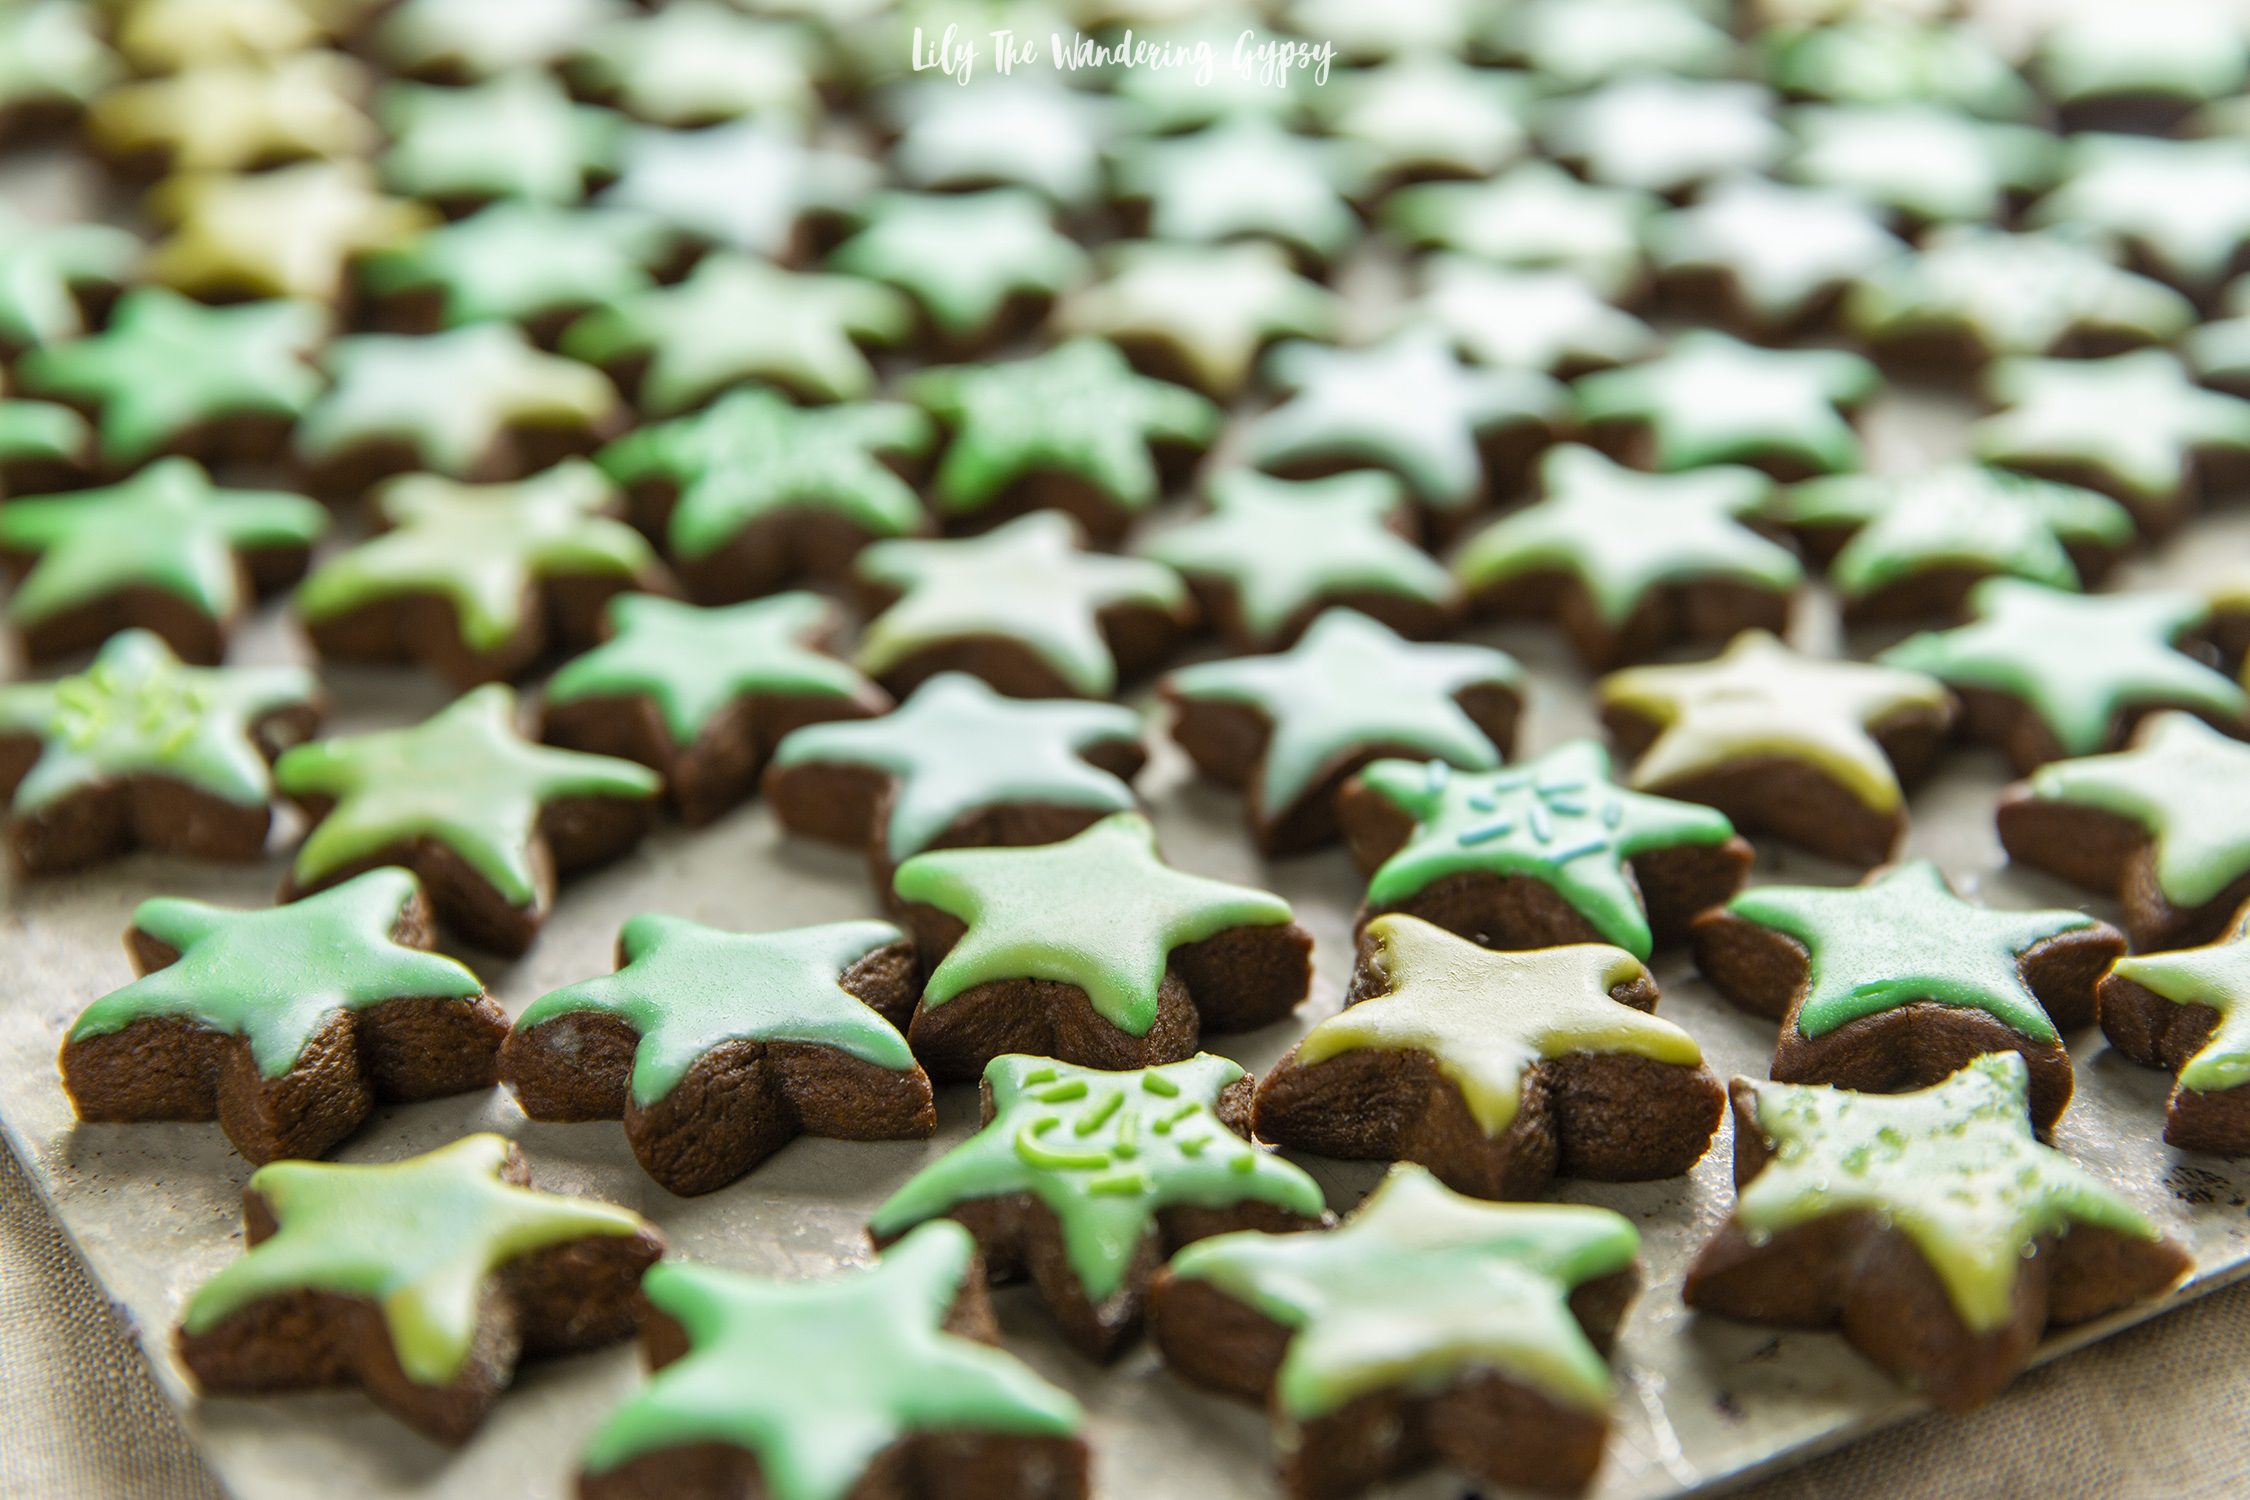
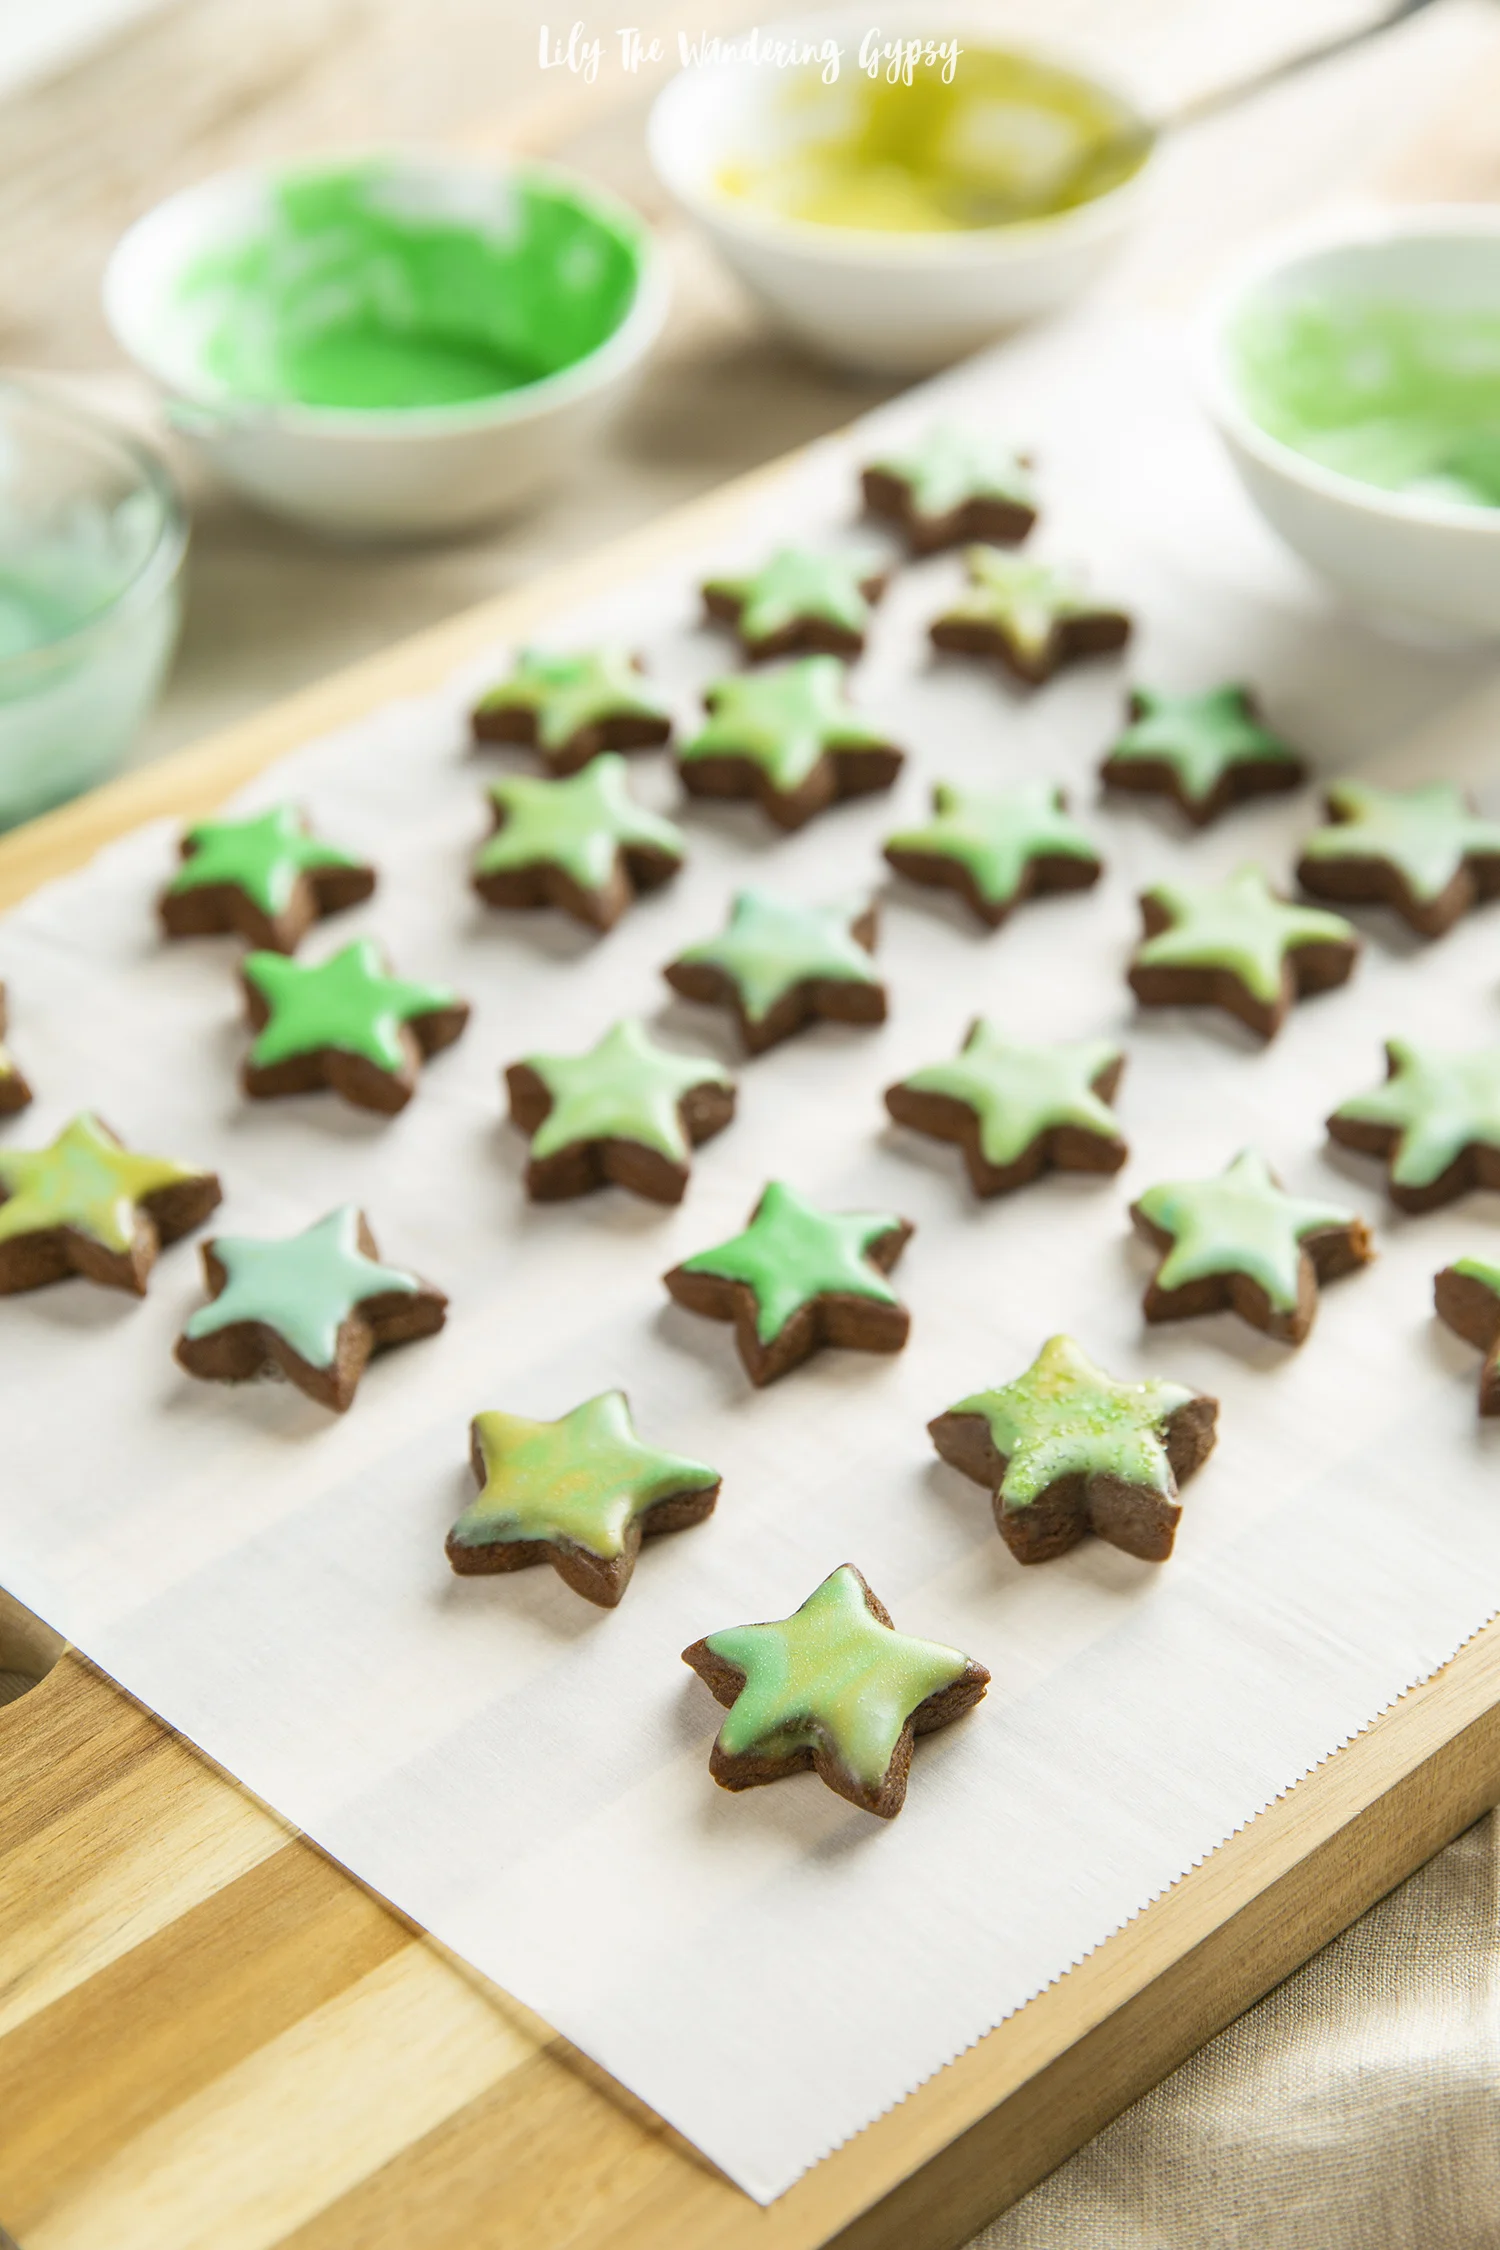
  8. Put the cookies on a cooling rack and brush them with the glaze while still slightly warm. The glaze will dry in about 30 minutes.

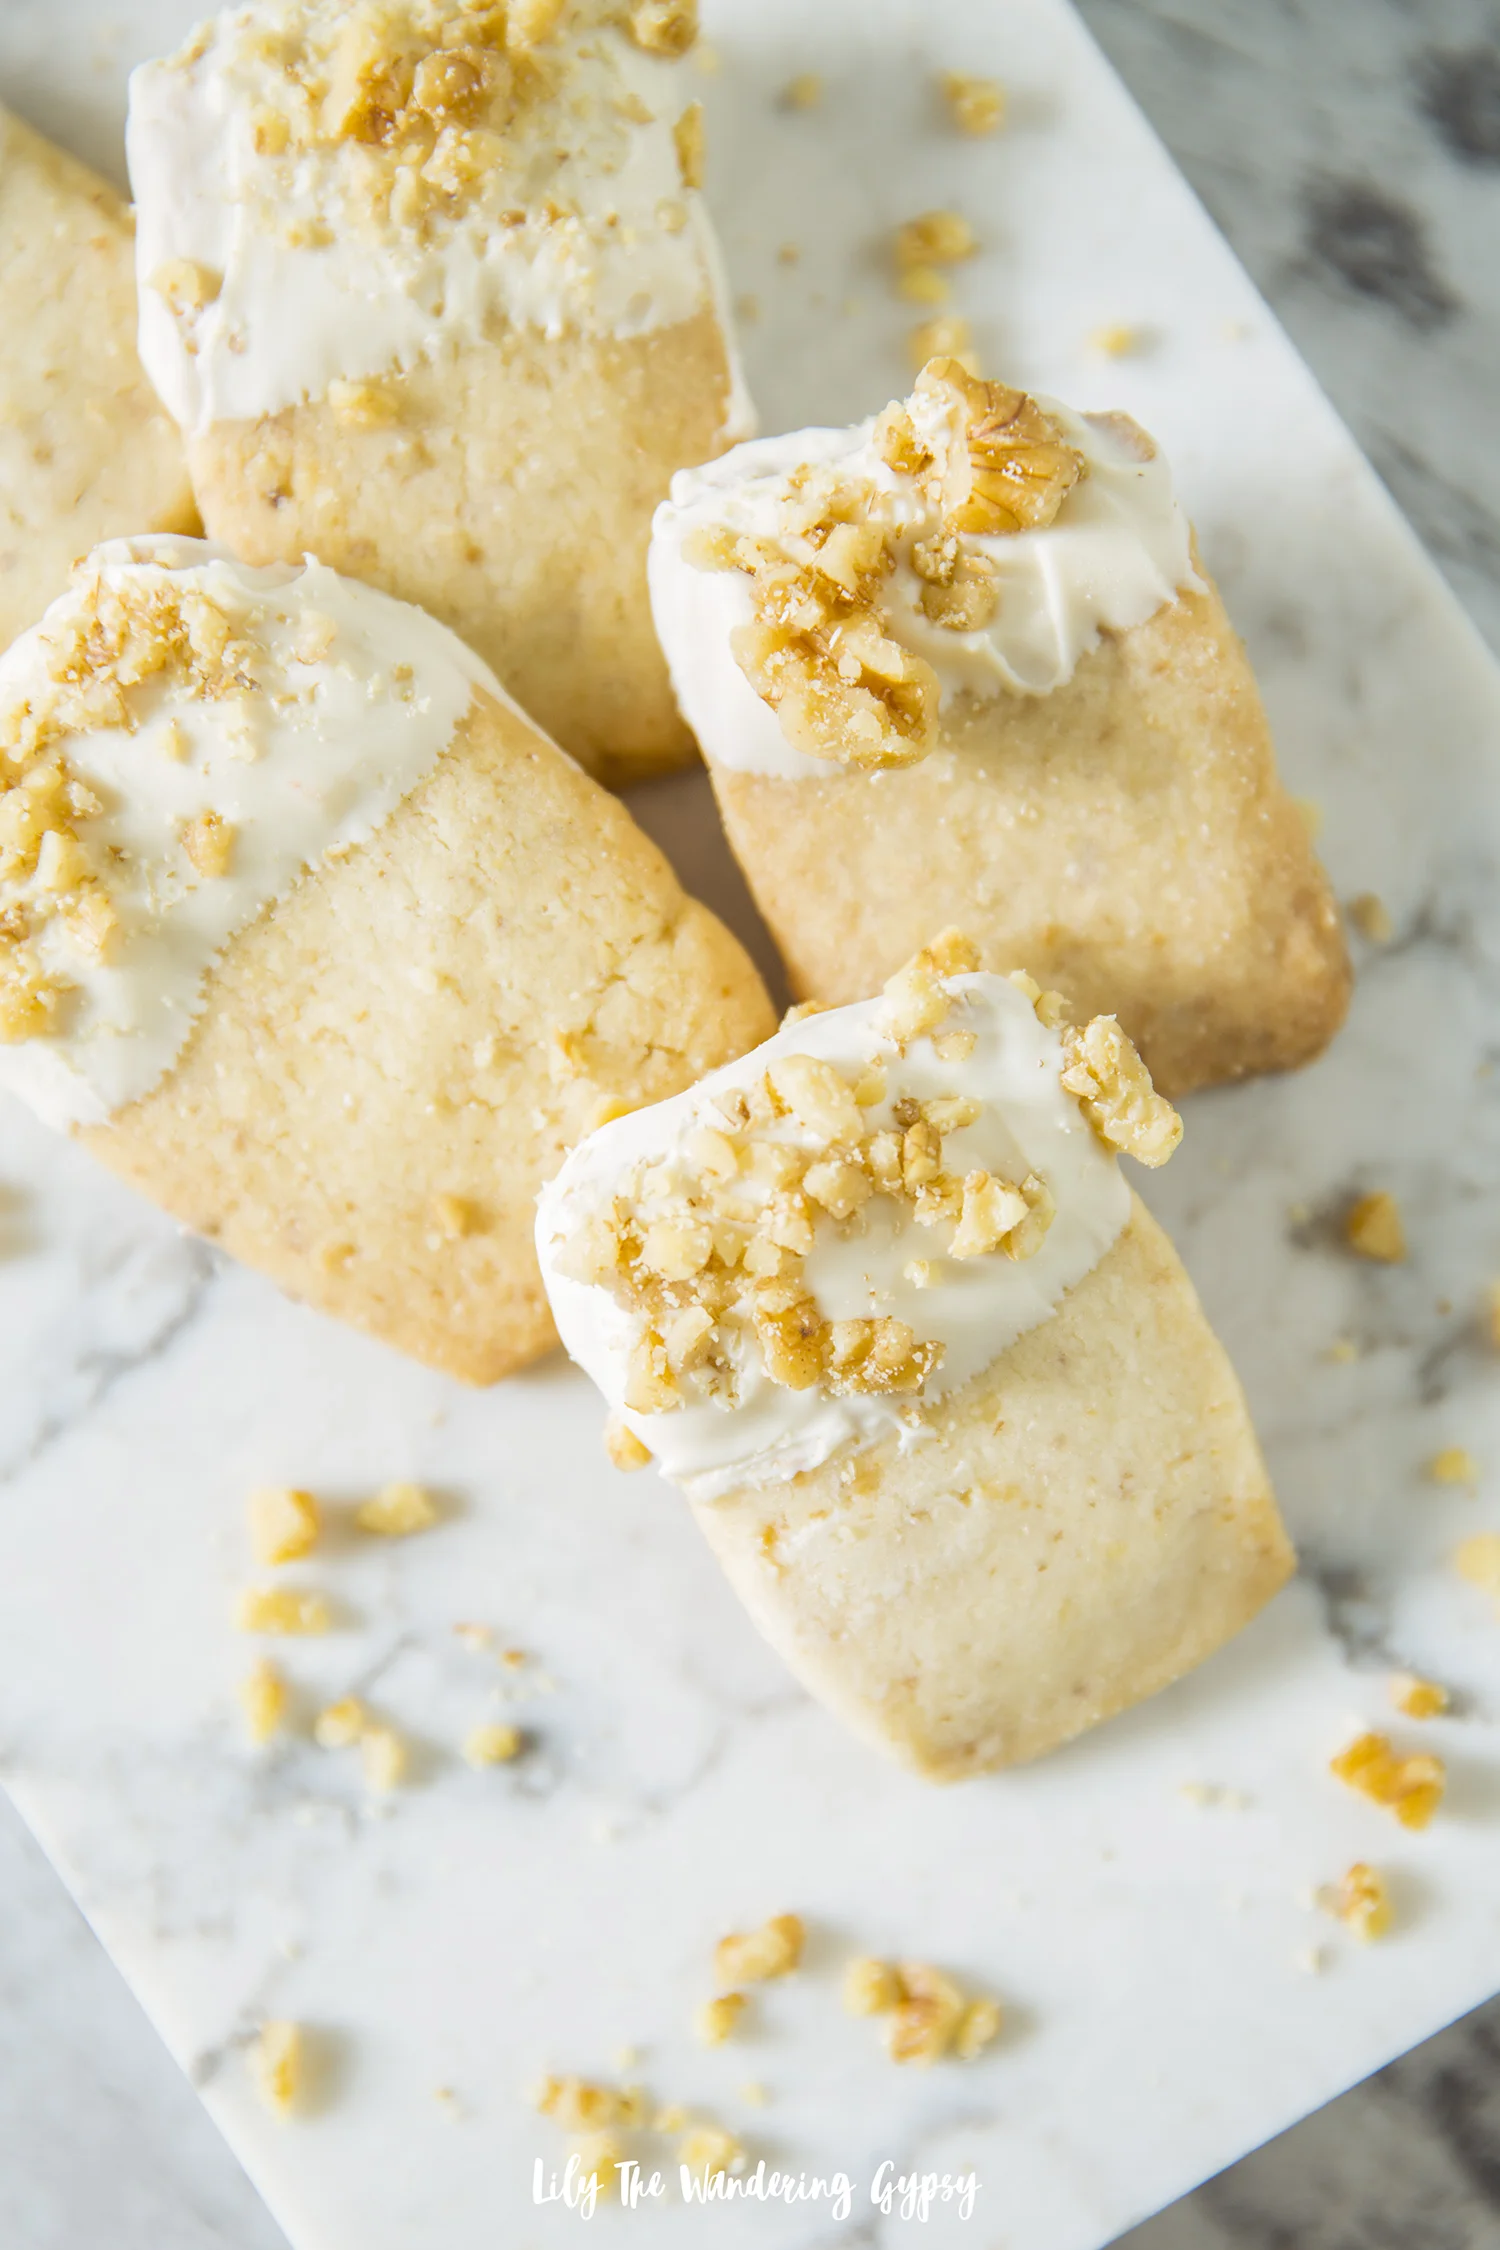
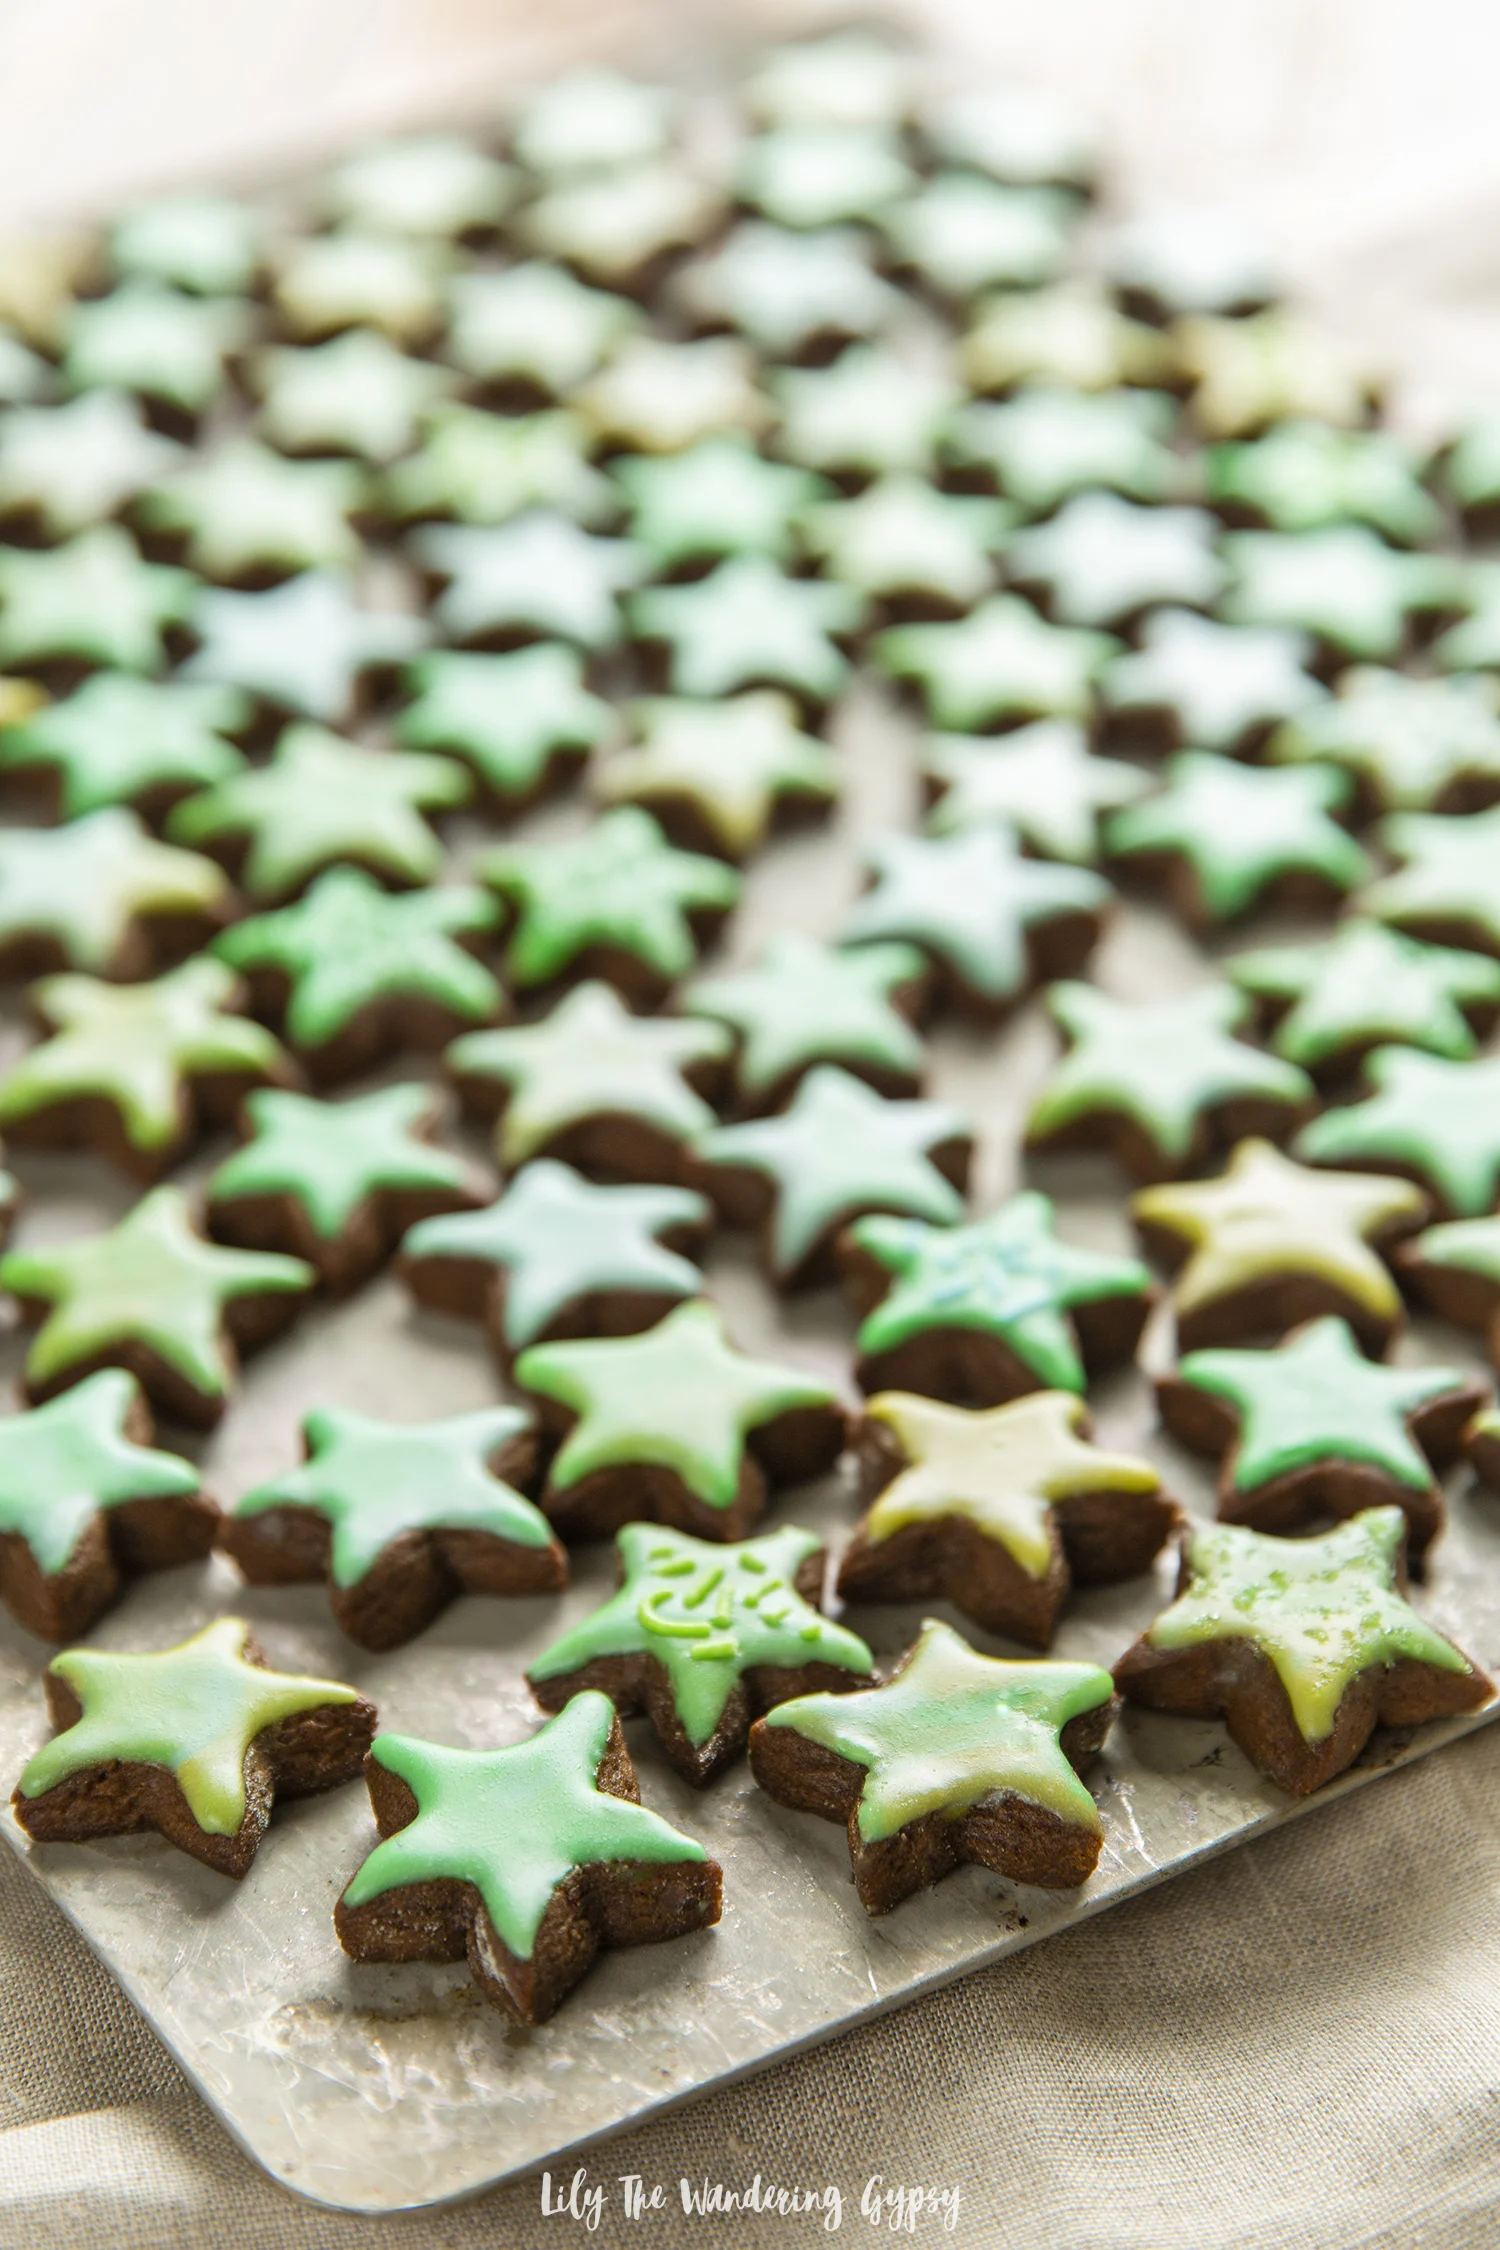
These cookie bake up perfectly to a soft cookie that holds it shape after just 5-6 minutes of baking!

I am also super happy with this frosting, because traditional powdered sugar icing tastes WAY too sweet, but with the addition of melted butter, the taste is rich and compliments the strong taste of these gingerbread cookies.

If you plan on freezing these cookies, I would omit the butter from the frosting recipe. It turned a bit white after being frozen on plates in Ziploc bags.

I even marbled a few colors of icing on some cookie by taking a small amount of each color on the toothpick, then transferring it to the cookies, then swirling the colors. Think of all the color combos you could make!

If you wind up trying these cookies out, tag me on Instagram as @happysolez, I would LOVE to see what you create! Happy New Year!

Merry Christmas! Our Christmas Cookies

Hello! I hope you’re all having a very merry Christmas! It’s pretty warm out today, so it’s not a white Christmas, but I would always prefer to the cold. I got to participate in a fun cookie baking experience this year. The four of us got to take home TONS of cookies and everything turned out so well. The goal was to make enough cookies so we could all bring cookie platters home and also enjoy a few others along the way. I learned SO much about making the perfect cutout sugar cookies too :)

The cookies we created include:

Cutout Sugar Cookies

Shortbread Cookies Dipped in White Chocolate and Dark Chocolate

Chocolate Crinkle Cookies

Oatmeal, White Chocolate Craisin Cookies

Snickerdoodles

(Recipes all coming soon!)

Happy Holidays! I hope you all had a wonderful day!

Sheet Pan Spicy Roasted Brussels and Rainbow Veggies Recipe

This post was sponsored by Colman’s, all opinions are my own.

A delicious and health-forward vegan recipe that makes eating your vegetables easy AND delicious. Colman’s Mustard Glazed Brussels Sprouts and Roasted Vegetables make an amazing holiday side dish, snack, or even dinner idea. Colman’s dry mustard does have some heat and spice to it, but it’s a very nice, subtle warming flavor which I just love.

Flavors of mustard grace the outer edges of a wide array of vegetables, in every color and crunch level –you’re going to love these veggies! The mustard flavor also paired exceptionally well with the other marinade ingredients like honey and soy sauce.

Plus, these vegetables make a very elegant dinner or side dish, and go very well with lots of different refreshments. I just love how pretty the Brussels sprouts are when they are cut open. They are like mini cabbages, and while they do have a stronger and sometimes more acquired taste than other vegetables, they are said to be high in vitamins, minerals, and antioxidants. The more vegetables one can incorporate into their diets, the happier their bodies might be. While everyone is of course different, I love treating my friends and family to healthier meal options.

I always love creating plant-based meals that offers a new alternative to dinner or a side dish. Impress just about anyone (even if they are “newbies” to or unsure about Brussels sprouts, these are definitely a crowd pleaser.

By incorporating Colman’s dry and wet mustards into the glaze for these vegetables, I absolutely LOVED the new, unique flavors that came through from baking the ingredients with such a great marinade. If you can imagine a potato or egg salad containing mustard, that is where I got the idea that potatoes, Brussels sprouts, and so many other veggies would pair perfectly with the Colman’s mustards.

Colman’s has been creating mustards since 1814, using time-honored traditions and the highest quality ingredients.

INGREDIENTS (Serves 4-5):

Marinade:

2 Tbsp Colman’s Dry Mustard

2-3 Tbsp Colman’s Wet Mustard

1/3 C. Olive Oil or more, to ensure all veggies are fully coated at the end

2-3 tsp. seasoned salt

1 Tbsp balsamic vinegar

2 Tbsp honey

Suggested Vegetables:

2 Cups Brussels Sprouts (cut into halves, and cut some into quarters)

½ -1 C. thinly sliced Russet potatoes

½ C. sweet potatoes – chopped into small pieces

½ C. yellow zucchini

½ C. green zucchini

¼ C. corn – from cob or canned

1 head of garlic

INSTRUCTIONS:

1.) Prep all veggies, and cover sheet tray(s) with foil, Spray with non stick spray and preheat oven to 400 degrees. Carefully cut off top of garlic head. Set aside.

2.) In a medium to large mixing bowl, mix up all marinade then add veggies to mixing bowl. Use tongs to coat all vegetables, then transfer all veggies to sheet pan(s). To create the garlic head, simply cut off the top of the garlic to expose the cut tops of each clove, while still leaving the rest of the head in tact.

3.) Bake 20 minutes covered with foil, then CAREFULLY remove foil (there will be lots of steam, which can burn someone easily). Bake 10-15 more minutes, and then remove from oven. Transfer to serving tray or large bowl, OR transfer into plastic containers to give to busy families during the holidays. Enjoy!

Here are a few more images of the finished veggies and head of garlic. Definitely recommended!

Have an amazing holiday! And enjoy this delicious, health-forward dish today!

Check out Colman’s Dry and Wet Mustards today, and spice up just about any savory dish you can imagine!

Holiday Entertaining With Blue Diamond® Gourmet Almonds & Nut Thins®

This post was sponsored by Blue Diamond®. The opinions and text are all my own. #NutsAboutTheHolidays

I recently created a gorgeous, holiday-inspired charcuterie and party spread that turned out so well! Inspired by these delicious Blue Diamond® Gourmet Almonds and Blue Diamond® Almond Nut-Thins® from Walmart. Best enjoyed with those you truly love spending time with during the holidays.

In this post, I will show you a few inspiring ways to incorporate almonds, crackers, and other delicious ingredients into a stylish snack board platter, perfect for a holiday party and more!

While I have created my fair share of charcuterie boards in the past, I will admit, I have also spent a lot of time researching new ways to style charcuterie boards, chocolate boards, and other gorgeous platters of food. That’s just the food stylist in me, I guess! For this post, I was incredibly inspired by those images you may have seen of bountiful, well placed ingredients with lots of varied textures and flavors – something for everyone, I guess you could say!

RECREATE THIS SNACK BOARD

I consider this offering more of a snack board than a charcuterie board, because traditionally, the word charcuterie relates to a variety of meats. I am eating meat less and less these days, and my friends and family members are too, so I figured that I would just offer a vegetarian selection of goodies and call it a Holiday Snack Board.

One of the highlights of this snack board is definitely the brie cheese; with honey and herbed Blue Diamond Gourmet Almonds on top. It looks so elegant, and like it took a very long time to create. It was finished in less than 20 minutes and was the perfect pairing with the Blue Diamond Almond Nut-Thins.

Ingredients:

1 bag Blue Diamond Gourmet Garlic Herb and Olive Oil Almonds

1 box Blue Diamond Almond Nut-Thins

1 8oz. round of brie or similar cheese

3-4 Tbsp. honey (2 Tbsp. in small star shaped dish + 2-3 Tbsp. to top cheese)

2 cups cauliflower and broccoli florets

1 package of dill or parsley, or any other green herbs for garnish.

1-2 cups green olives, marinated in olive oil, a pinch of salt, and Mediterranean seasoning mix

1 cup red peppers, sliced small and thin

Any other cheeses you would like to add to your board, or that you already have on hand.

Instructions:

1.)   Bake brie cheese in a heat safe container, or on a baking sheet at 375 degrees Fahrenheit for 10-15 minutes, covered in foil, until middle is fully molten. Carefully check if the middle has melted yet by applying pressure with a spoon or other utensil. You will sort of be able to tell of the cheese is liquid inside yet or not. Once that is fully baked, top with 2-3 Tbsp. honey and ¼ cup or a small handful of Blue Diamond Gourmet Garlic, Herb and Olive Oil Almonds.

2.) Place the brie onto a small round plate (mine measured 6.5” across), then arrange Blue Diamond Almond Nut-Thins around the plate. They fit there perfectly, and this made for an exceptional way to enjoy the crackers and cheese! I also placed a tiny sprig of dill on top, but any fresh green herb would work here, but is not necessary.

3.)   Place the brie in the center of your board as the focal point, then begin placing bowls of seasoned almonds, olives, and any sauces or dips on there too. Then, place crackers, fresh ingredients and any other fun goodies you have around the board to make a full, elegant snack board. Guests will LOVE what you have provided them with.

I was able to find so many incredible items to add to my snack board from Walmart, and I was so inspired by their large selection of snack items! Browse the fresh section, the cracker and nut aisles for the Blue Diamond products, plus the candy and snack aisles to find as many different flavors and textures as possible for your snack board.

This year for décor and styling, I am all about a pink Christmas and as always, shimmering accents and as many trees as possible. I used a large wooden cutting board for the base of the snack board, then used a pink ceramic cutting board with a handle as the main focus. That pale pink was everywhere this year, and I love it so much! It goes so well with whites, light wood tones, and other shimmering accents.

Happy Holidays! Make sure to check out the Blue Diamond website for more holiday entertainment inspiration!

Gourmet Game Day Dipping Station

This post has been sponsored by The Kraft Heinz Company. All thoughts and opinions are my own.

If you’re anything like me, you’ll agree that it makes life easier to let guests serve themselves so you can enjoy the festivities too. That’s why this Game Day Dipping Station is absolutely genius! This spread was a huge hit, and I cannot wait to show you all of the details. Get the recipes for two delicious dips, and also get ideas on how to style your next game day gathering. 

This Gourmet Game Day Dipping Station is sure to be a huge hit!

RECIPES (Serves parties of 6-8)


Featured Products + Ingredients


HEINZ Ketchup

KRAFT Mayo

KRAFT Ranch Dressing

KRAFT Mustard

Chicken Strips

Chicken Nuggets – 2 bags

1/3 – ½ C. chopped cilantro

1/3 – ½ C. fresh jalapenos, finely chopped

1/3 – ½ fresh dill, chopped

1 bag of curly fries – any brand you like

Juices

Glass Carafe to hold juice(s)

2 decorative bowls to hold dips

Floral arrangement – 2 packages of pine branches or source your own + 1 jar with water in it.

Small cake stands – optional

12 crispy rice treats

12 paper straws

1 cup white chocolate or almond bark – melted until smooth

Check out Kraft products at Dollar General, and get great savings on everything from Kraft in store as well!

Dip 1

1/3 C. cilantro + 1/3 C. finely chopped fresh jalapeno + 1 16oz. bottle of KRAFT Ranch

Dip 2

1 – 1 ½ C. KRAFT Mayo + ½ C. KRAFT Mustard + 1/3 – 1.2 C. fresh chopped dill

Instructions:

1.) Preheat oven to 400 degrees and prepare 3 baking sheets with parchment paper. Spread out Chicken Nuggets onto one, Chicken Strips on another, and fries on the last sheet. Set aside.

2.) Make both dips. In one medium mixing bowl, add 1 bottle of KRAFT Ranch, plus the cilantro and jalapeno. Stir until everything is combined. For the second dip, add mayo, mustard, and dill, and stir until combined. Transfer dips to two decorative serving bowls and provide serving spoons for guests. They're perfect when paired with the Chicken Strips and Chicken Nuggets!

3.) Bake food as instructed on packaging, and begin to prepare your delicious Game Day Dipping Station. I used a piece of light grey colored stretchy velvet as the table cloth, then I added one striped green and white kitchen towel to the center of the table. Place a small cake stand and floral arrangement in center of table and build out from there as symmetrically as possible.

I placed two decorate serving bowls with dips in the center, then Chicken Strips behind that, and lastly, the Chicken Nuggets and curly fries on the outsides.

4.) To make the treat pops, stick paper straws into crispy rice treats. Melt white chocolate and use a spoon to apply it to the treats, one at a time. Place them onto a prepared sheet pan, and also add sprinkles if you would like in team colors or others! These added a lot to the display and made a great dessert.

Dollar General is great - I found ALL the necessities there!

And below, you can see my two helpers. They love taking rides to the store with me! They are the best, and they'll definitely be enjoying game day with us. Have an amazing game day! 

Dulce De Leche No Bake Dessert Recipe

Do I have a delightfully easy no bake dessert for you! This one would be PERFECT to serve during the holidays, and if you make it in a larger dish, this would be great for a crowd! These desserts are seriously incredible, and I think they would even taste great with chocolate syrup as well.

INGREDIENTS:

1 pint heavy or light whipping cream

1/2-1 cup Torani Caramel Sauce (found at Walmart in the coffee aisle, near the chocolate sauces)

1 box of graham crackers (reserve several for top garnish)

INSTRUCTIONS:

1.) Place three medium-sized glasses on your work surface, and crush up graham crackers as small as possible. I placed 15 or more graham crackers into a stronger Ziploc bag, closed the bag, and then used a jar to crush up the crackers.

2.) Divide the crushed up crackers between the three glasses. Now, to make your filling! Beat heavy whipping cream for several minutes, until stiff peaks form. Reserve about 1/2 Cup of the whipped cream for your topping, then, add vanilla and Torani Caramel sauce, then finish mixing to combine everything. Divide the filling between the glasses.

3.) For the garnish, I used a sharp knife to carefully cut the graham cracker squares in half, then I cut a diagonal angle as well. This is totally optional, I just thought it was cute. Also drizzle more Torani syrup over the top of the dessert and enjoy.

Winnie The Pooh Mini Bear Sandwiches

These little mini grilled cheese sandwiches are inspired by Disney’s new movie, Christopher Robin. I found these to be incredibly fun and easy to make and can even be partially prepped ahead of time if you will be making a lot of them for a crowd. #WisdomByPooh

INGREDIENTS (makes 10 sandwiches)

  • 20 pieces of sliced bread

  • cookie cutter in your favorite shape

  • up to 2 cups shredded cheddar cheese

  • butter spread or my favorite dairy free option, Earth Balance

  • skillet

INSTRUCTIONS:

1.) Simply use a cookie cutter to cut shapes from your favorite sliced bread. Those can be cut out up to one day in advance, then stored in an air tight bag.

2.) Heat skillet over medium heat, and add butter to each piece of bread, set aside.

3.) When skillet is hot, add as many pieces of bread as you can, butter side down. Sprinkle approximately 1 TBSP of shredded cheese per piece of bread. To avoid a mess, try to make sure the cheese stays on the bread, rather than getting it all over the skillet to burn.

4.) Place other pieces of buttered bread shapes on top, and let the cheese melt. Use a spatula to VERY CAREFULLY flip over the sandwiches to then heat the other side evenly, until cheese has melted.

5.) serve on a cute platter and enjoy!

I styled these in a Thanksgiving theme, but they would be amazing for just about any holiday. I thought they would be amazing for little ones, to tide them over as the full meal is being made. These could be a fun way to get picky eaters to try something new also.

New Godiva G Cubes

Make it a GODIVA Holiday! Indulge and savor each bite of these @Godiva G Cubes, which are

available in flavors like Dark Chocolate Mint, Milk Chocolate Salted Caramel Ganache, White

Chocolate Coffee and MORE! These individually wrapped, gourmet chocolates make an

amazing gift or the perfect offering for a holiday party. Get yours today! #GodivaGCubes

Winnie The Pooh + Christopher Robinson Inspired Recipe

Enjoy family movie nights? If you are a lover of all things Winnie The Pooh, then this Pooh Approved Snack Mix and DIY Hunny Pot are exactly what you could to make! Perfect for family movie nights, because sometimes doing nothing leads to the very best of something! Simply mix up teddy bear shaped crackers and other health-conscious snacks to please the entire family!

My heart is overwhelmed by this fun opportunity I had to create this recipe and one more for WINNIE THE POOH and DISNEY and HELLO SOCIETY!!!!!

Happy Halloween! Check out this Bloody Glass Cupcake recipe!

Halloween was pretty fun this year! We made all sorts of deliciously spooky food and drinks! Here is one of the recipes which turned out even better than expected! This homemade honey blood made a big impact while the broken pieces of sugar glass looks incredibly realistic is was just incredible!

I used a bow of red velvet cake mix to make the cupcakes then had SO much fun decorating these cupcakes. The black cupcake liners were also so perfect for that dark and mysterious / murderous look I was going for, LOL!

In this post, I will teach you some very exciting techniques!

HOW TO MAKE SUGAR GLASS:

HOW TO MAKE FAKE EDIBLE BLOOD WITH HONEY:

HOW TO MAKE HOMEMADE BUTTERCREAM FROSTING:

Stay tuned! Tips will be published tomorrow. Enjoy!

Mummy Wrapped Jalapeño Poppers

Looking for an eye-catching appetizer that people will love for Halloween? These Mummy Wrapped Jalapeño Poppers are delightfully spooky and you’re going to love them. And, bonus points because these can be made vegetarian or with bacon in the filling - it’s up to YOU!

INGREDIENTS (MAKES ABOUT 20-24 poppers)

1 (8oz.) block of cream cheese

1-1.5 cups shredded cheddar cheese

2-3 Tbsp seasoning - I like Ranch or Mexican seasoning for these

1-2 packages of pizza crust (the thinner the better - I used Wewalka Bistro Crust)

Candy eyes at least 40 pieces (I like these ones)

Baking sheet (I love these Air Bake ones)

Parchment paper - (only suggested if you are not using a baking rack)

Baking rack - optional (similar here and here)

INSTRUCTIONS:

1.) Slice top 1/3 of each pepper off, lengthwise. Carefully remove seeds and other inside material with the back of a kitchen spoon or similar tool. I tend to use rubber gloves when making these, so my hands do not catch any of the spiciness of the peppers.

2.) Using a small spoon to add filling to peppers, or place your filling ingredients into a plastic bag and cut the end off to use to pipe the filling into the peppers for a more polished look. Wipe off excess filling that may have gotten on the edges or the tops.

3.) Cut pizza dough into the thinnest strips you can. I use the dough as cold as possible, or almost frozen so it cuts well and also holds the shape of the strips well. Next, wrap small strips of dough around filled peppers in a “mummy sort of way”. I left room for the eye area, and after they baked I placed candy eyes to give them a good personality + spooky look.

4.) Bake at 350-375 degrees F for 10-15+ minutes on a metal baking sheet, covered in parchment paper. These baked pretty quickly and I just LOVE how they turned out!

Add the candy eyes to the mummy poppers! While poppers are still warm, take two candy eyes in your fingers, and place them on the “mummy face” both nest to each other at once, so they are both looking/pointing in the right direction. You can have a lot of fun with these, and I would love them to be a part of your Halloween celebrations and festivities! Enjoy! Happy Haunting!

Top 10 Halloween Cakes

While many of us celebrated Halloween this weekend, I am still in the Halloween spirit! Here are some outstanding examples of Halloween Cakes that I found incredibly inspiring. I hope you do too!

A Halloween Bat Cake that takes the cake for the most elegant and 3-Dimensional cake.

This amazing Brushstroke Halloween Ghost Cake is out of this world spooky and artistic!

Another adorable and festive Halloween cake that is decorated just right.

This “eye-catching” cake sure does look amazing!

This zombie cake looks so realistic and those graveyard cupcakes pair so well with the theme!

A perfectly decorated two tier cake to inspire your Halloween!

The undead would definitely feel welcome at THIS Halloween party!

This zombie face wedding cake would definitely win an award for one of the creepiest cakes!

Love this cake, especially the eyeballs and hand sticking out from the top!

This bleeding brain Halloween cake is just too gross!

Vegetarian Pot Pies Recipe with Amy’s Kitchen

Thank you Amy’s for sponsoring this post. #StartWithAmys this Soup Season.

With cooler weather on the horizon, it’s time to incorporate comfort food that will make you happy about what you are serving and eating. For over 30 years, Amy’s Kitchen has been cooking up vegetarian meals made with high-quality ingredients. As fall quickly approaches, it’s time to get your soup on!

I found a unique way to incorporate three varieties of Amy’s Kitchen soups into a Vegetarian Pot Pie, and I hope you love it! Since Amy’s Soups already taste delicious on their own, I was able to allow those flavors to shine, while simply complimenting them with a few more veggies and a flaky, puff pastry woven lattice crust. This dish can be made as individual pot pies, or as one large casserole – it’s completely up to you! And, feel free to use this lattice technique, or simply use a full sheet of puff pastry crust right across the top.

This homemade, vegetarian dish is waiting to be served at your next weeknight dinner, holiday meal, or even as a make-ahead meal that can be frozen and baked in just a short time, making dinner exceptionally easy AND delicious!

The phrase “comfort food” definitely comes to mind with this dish. It’s filled with an array of veggies, plus Amy’s Organic Cream of Mushroom Soup, Organic Chunky Vegetable Soup, and their Organic Vegetable Barley Soup. This dish is literally brimming with vegetables, you are going to love it. Even super picky eaters will enjoy this food. It’s a great idea to stock up for the cooler months with Amy’s soups! Keep a few soup cans stashed in your pantry (or desk!) for those times when you want something tasty that will warm you up as well. I always feel better after a warm meal, and these soups make an exceptional meal all on their own!

I love this cream of mushroom soup - it could surely be enjoyed on its own, warmed up with a handful of oyster crackers in the bowl for some crunch. I have never found a cream of anything soup that I am happy with. I have found that most canned cream soups are all way too thick and just full of unnecessary ingredients, and I have found too some have a sort of strange aroma. This has always turned me away from using condensed cream soups, but now I have a newfound hope thanks to Amy’s Kitchen! The Cream of Mushroom Semi-Condensed Soup worked super well for the base of this recipe, and would even be super delicious heated and enjoyed on its own, or with a handful of soup crackers.

I have fond memories of my mom making chicken pot pie many, many times as a child. She would use a traditional recipe that incorporated chicken and a small portion of veggies. It was always amazing, but as I grew older, and realized the importance of eating plant-based, I knew I needed to adapt a few of my most treasured family recipes into vegetarian versions.

Luckily, all of Amy’s products contain high-quality ingredients. That is extremely important for me, and I am so happy I have made a small lifestyle switch to considering each and every ingredient in the foods I eat and prepare for those I love. At Amy’s, they choose the best ingredients for each recipe. They cook with ingredients that people use in their own kitchens and trust, like carrots, beans, flour and spices! They don’t use a lot of starches and thickeners (which I do notice when I open their soups and other foods. They rely instead on slow simmering and cooking to develop soups and creamy sauces. This is very apparent as I was using the Amy’s Cream of Mushroom soup, it’s a really smooth texture without being overly thick, like other cream canned soups.

PRINTABLE RECIPE BELOW - RIGHT CLICK TO SAVE OR PRINT

INGREDIENTS:

1 can Amy’s Organic Cream of Mushroom Soup

1 can Amy’s Organic Chunky Vegetable Soup

1 can Amy’s Organic Vegetable Barley Soup (any of their other vegetable soups will work well too)

1 sheet of puff pastry

½ red onion - chopped

1-2 cloves garlic – minced

1-2 TBSP olive oil

½ of a red potato – chopped into very small pieces

1 c. broccoli – chopped into small pieces

½ c. corn (frozen or canned)

½ c. frozen peas

2-4 TBSP seasoning (I use a mixture of low sodium seasoned salt and a Greek spice blend)

1 TBSP butter or butter alternative

3 TBSP flour

salt

Optional 1 egg for egg wash (simply use which to stir up one egg in a small bowl)

INSTRUCTIONS:

1.)   Sautee olive oil, onions, and garlic, and 1-2 TBSP seasoning for 2-3 minutes. Once onions are soft, add potatoes and cook at medium heat for about 3 minutes with the pan’s lid on. Carefully stir the potatoes once during cooking, and replace lid.

2.)   Add 1 cup broccoli, corn, and frozen peas, and simmer another 3 minutes. Add up to 2 tsp more seasoning at this point, and stir to coat all veggies.

3.)   Turn off heat, and transfer all veggies from skillet to another heat safe bowl and set aside. Do not clean or wipe out skillet yet.

4.)   In this same skillet, melt 1 TBSP butter. Once melted, stir in 3 TBSP flour, and stir until combined. This helps to thicken the sauce. It will look “chunky”, but that’s ok!

5.)   Add 1 can of Amy’s Organic Cream of Mushroom soup, and stir to combine. Turn heat back onto medium, and add the bowl of veggies back into the skillet. Stir to combine, and heat for 2-3 minutes while stirring, to combine and thicken everything.

6.)   Preheat oven to 400 degrees for Transfer into prepared baking dish(es) – make sure to spray them with non-stick spray first!

7.)   Time to do the crust! Either place one sheet of puff pastry across the top of the baking dish and trim the sides and cut vents at top, OR use the lattice technique I have shown in this post!

8.)   To lattice: cut ½” or 1” strips out of your puff pastry sheet and weave them across the top of the pie. I start by placing three strips vertically, then working on weaving in the three horizontal strips. From there, I can then place the remaining strips of puff pastry into the top of the pie. Cut excess dough hanging over sides of baking dish, and if you want, use your fingers to gently press the dough strips down onto the baking dish so it does not move while baking.

9.)   Brush top of pie with an optional egg wash, and bake small pies for 17-22 minutes or one pie for 25-35 minutes. The puff pastry need to be pretty crunchy on top to ensure that the dough touching the filling is not doughy.

What a fun and comforting vegetarian meal to make for your favorite people! Perhaps you could even surprise a busy family with a frozen version of this pie, and they can enjoy a vegetarian meal in a less than a half hour of baking time! Enjoy!

I was selected for this opportunity as a member of CLEVER and the content and opinions expressed here are all my own.

Veggie Lovers’ Club Sandwich Recipe with Pepperidge Farm

This post has been sponsored by Pepperidge Farm®, all thoughts and opinions are my own.

If you’re wanting to find more ways to connect with family or friends, I often find that food brings people together better than nearly anything else. I recently created the most delicious Veggie Lovers’ Club Sandwich with Pepperidge Farm Farmhouse® Butter Bread, and it’s quickly becoming my go-to bread for sandwiches, breakfast recipes, and even making toast, which I love so dearly.

This sandwich contains ingredients in all sorts of colors; I just love to eat as many different colored veggies as possible each day. I hope you enjoy!

I find that sandwiches with fresh and delicious ingredients that can be made ahead of time really helps save time and brings families closer together. I absolutely love providing my friends and family with fresh, nourishing meals that in turn give them energy and encouragement to inspire wonderful days ahead. Whether you’re making this Club Sandwich for two or you’re making brunch for a whole house full of family and guests, I would definitely recommend the thick, rich, buttery taste of this awesome, slow baked Butter Bread – you’re going to love its fresh-from-the-oven taste!

When I visit the bread aisle at the grocery store, I see SO many choices for white bread. But even with all of those choices, few actually compare to this Butter Bread. I love how thick the slices are. Since I am already a huge fan of anything from Pepperidge Farm and I saw that this new flavor was available at a wide range of stores, I was instantly relieved to finally find a white bread with thicker slices and a bit of a buttery taste! YUM!

My boyfriend always jokes that any product that has butter in the name, I will love. Well, he is completely correct about that – I was seriously SO excited when I found out that one of my recipes contained butter bread, I nearly jumped for joy. That’s how much I love butter!

Find new Pepperidge Farm Farmhouse® Butter Bread at retailers like Target and Kroger here! This product may quickly become your FAVORITE new bread for every recipe you can imagine.

This Veggie Lovers’ Club Sandwich is such a fun way to spend more time together and also experience new and different ingredients and flavors – which is a super fun way to bond with those you love. Find joy in the simple flavors of these all-natural sandwich toppings!

INGREDIENTS (MAKES 2 SANDWICHES)

FOR THE SANDWICH:

6 slices of Pepperidge Farm Butter Bread

8 spinach leaves

10 slices of English cucumber

½ - 1 Cup sprouts (any flavor you like)

Toaster for bread

Food processor for beet spread

FOR THE BEET SPREAD:

1 package of pre-cooked beets or 1 can of beets (remove any liquid)

2-3 tsp olive oil

3 tsp balsamic vinaigrette

½ tsp salt

1 tsp Italian seasoning

(topped with chives – optional)

FOR THE GREEN GODDESS SANDWICH SPREAD:

¼ C. Greek yogurt (use non-dairy alternative for vegan)

1/8 C. mayo (use non-dairy alternative for vegan)

¼ C. finely chopped chives

2-3 Tbsp freshly chopped tarragon

1-2 tsp salt

1 tsp garlic powder

INSTRUCTIONS:

1.) Make Beet Sauce by putting all ingredients into food processor or blender, and pureeing until smooth. Add more salt if desired.

2.) Make Green Goddess Sandwich Spread by mixing all ingredients in a small bowl with a spoon until well combined. Feel free to add more salt, garlic powder, or any other seasonings you enjoy.

3.) Toast 6 slices of Butter Bread and get ready to make the Club Sandwich.

4.) To construct each sandwich – add Beet Spread on one slice of bread, then top with sprouts. On another slice of bread, add Green Goddess Spread and 5 slices of cucumbers (and a bit of salt on top of cucumbers if desired). One piece of bread will remain without any toppings.

5.) Lastly, layer the pieces like this – Beet Spread + Sprout slice, topped by the Green Goddess and Cucumber slice, then the final top slice of bread, and cut in half to serve! The beautiful layers of bread and ingredients are just so colorful and delicious. This toast also held up very well with all of these ingredients!

I hope you enjoy this vegetarian recipe with those you love! Good food brings people together, and that time with loved ones is what keeps me happy every day! Please let me know if you wind up making this recipe!

Rustic Apple Pie Pizza Recipe + Why I love Fall Baking

This is a sponsored post written by me on behalf of Oregon Chai®. The opinions and text are all mine. #OregonChaiMeTime 

Wow! Have I got an incredible recipe for you today. It embodies the fall spirit, and includes a dessert “pizza!” This delicious and unique recipe is rustic, sweet, and crunchy; an amazing pairing with a nice, warm Oregon Chai® Tea Latte! Make this amazing dessert for your next gathering, dinner with friends and family, or even for a potluck. This dessert will vanish before you know it.

To me, baking is one of the best ways to spend “me time.” I tend to find myself baking the most once the weather cools down, when I have a bit of free time, or even when too many days have passed since I created something delicious.  Any day that includes chai tea and some me time is a GOOD DAY!

I wasn’t always able to bake freely though. Before we got our new furnace this summer, the house would get WAY too hot (83 degrees +) when I turned on the oven, and so it was nearly impossible to justify baking when the house would not cool down from it. I made so many no-bake meals, or even used our awesome toaster oven to try to make complete meals, small casseroles, and even side dishes – baking cookies, pies, or brownies really doesn’t go well in the toaster oven.

I didn’t even realize how strong of a connection I had to baking, until I had limited use of the oven, and realized how sad I was when I looked through Pinterest and saw all of those recipes that I could not even attempt. I now bake every few days (or more) and I am so happy about how cool our house stays finally. Thank goodness for good air conditioning, LOL!

I also tend to LOVE sweet desserts and dishes, so this one is just perfect for me. If you like desserts that are on the more savory or less sweet side of life, then you can majorly reduce the amount of sugar I have suggested. Either way, you’re going to love this apple pie pizza.

Pizza is such a familiar comfort food, and when I had a slice of this Apple Pie Pizza, it took me back to eating some of the best thin crust pizza ever, combined with one of my favorite fall desserts ever.

Since we are surrounded by apple orchards here in southern Illinois, using apples in my recipe came as a very natural solution to eating more local ingredients!

This rustic recipe is crunchy around the edges from this crispy crunchy dough, sweet, tart from the apples, buttery from the dough, and the egg wash and cinnamon sugar topping makes the most excellent crunch when you bite into it.

Perfect for enjoying on a chilly fall day or evening! I was extremely happy with how this recipe turned out, and I know you will be too. I used an organic pie crust from the store, and it held the shape of the lattice just perfectly.

By cutting the lattice into smaller, ½” strips, I was able to make a very intricate pattern on top of this Apple Pie Pizza. Feel free to also cut the strips into 1” pieces to make life much easier! The ½” strips were not incredibly hard to work with, just a little more time consuming. But, patience always pays off when you’re baking.

RECIPE

INGREDIENTS:

1 package refrigerated pie crust (2 per package)

2 apples, I used green apples

4-5 Tbsp.  sugar

1 tsp. cinnamon

1/8 tsp. nutmeg

1 egg, whisked for egg wash

4-6 Tbsp. water in a small bowl to use to attach pie dough together

Round or Rectangular baking sheet

Parchment paper

Oregon Chai Tea Latte Concentrate to enjoy while baking!


INSTRUCTIONS:

1.) Chop 2 apples into tiny pieces and coat with 1 ½ - 2 Tbsp. sugar, ½ tsp. cinnamon, and 1/8 tsp. nutmeg.

2.) Unroll both pie crusts onto a work surface covered in parchment paper. Optional: use a rolling pin to smooth out any creases.

3.) Use a ruler to mark every ½” or 1” on one pie crust. Also, use the ruler and a sharp knife to impress even lines and cut strips from the pie crust. Set aside.

4.) Spread an even layer of apples onto the other pie crust.

5.) Weave dough strips over apples, first laying half of the strips vertically, then weaving the horizontal pieces in next. Feel free to use a little bit of water in each place where the dough strips overlap. Brush top crust with egg wash.

6.) Once done weaving, sprinkle on a mixture of 2 Tbsp. sugar + ½ tsp cinnamon, and bake for 15-20 minutes at 375 degrees F. Slice like a pizza and enjoy! We cut the finished Apple Pie Pizza with a sharp knife, but you could also use a pizza cutter!

Make sure to also grab your Ibotta offer here for 75 cents off any 1 Oregon Chai product at Walmart (9/26/18 – 11/30/18, or until supplies last).

Stock up now! This tea is so delicious you will want to incorporate it into your every day routines and serve it to anyone who visits you.

I was able to easily order the Oregon Chai Tea Latte Concentrate (32 oz.) on Walmart.com using their super easy Online Grocery Pickup service!

Below, you will see how easy it was to search for all of the available Oregon Chai products at Walmart. I spent around $12 to create this entire recipe, and since the Chai Tea was under $4.00 I saved SO much compared to going to a coffee shop for an overpriced drink.

After I went to the checkout page, I simply chose “Pickup” for FREE (see below)! No shipping charges at all, which saved me around $6.00. YAY!! I love a good deal.

The taste of this Oregon Chai Tea was rich, smooth, and has those amazing chai spices that I can’t get enough of. I like to add macadamia milk to my chai tea, instead of traditional dairy milk, and my body loves me for it! What a delicious way to get a little pick-me-up during baking or during any other time of the day.

Once my order was ready, I was able to run by my local Walmart and easily grab the tea in the pickup area. Super easy since I had so many errands to run that day.

Has your local Walmart installed an Online Grocery Pickup station yet? Ours JUST remodeled, and I had an extremely easy experience, let me walk you through it/ 

1.) Visit the Walmart Online Grocery Pickup station and scan the barcode given in your email.

You can also just wait outside and call the phone number on the pickup area. They will bring everything right out to you!

Like I said, baking helps me de-stress and helps me continue to be creative, so after getting a ton of things checked off the to-do list, I relaxed for a bit, then got to baking.

I hope you have an absolutely splendid fall, and please comment below to let me know if you tried making this recipe! This would be so fun with kids, and would be a fun holiday baking activity. Enjoy!

Easy Caramel Brownie Layer Cake

If you are a fan of layers upon layers of chocolate brownies, homemade whipped cream, and caramel, then this is definitely the cake for you! Although it looks so elegant, it really is pretty easy. This dessert allows us to think beyond the traditional chocolate cake, and make your next dessert rich, decadent, and delicious! When I made this dessert for a potluck, people raved about it. It was so delicious once the whipped cream layers sat with the brownie layers, because the sides stay a bit crunchy, and the inside portion of the cake moisten up and form more of a fudgy and cake-like consistency all at the same time, that’s out of this world! Hope you enjoy.

INGREDIENTS:

*Note - Amazon Affiliate Links have been provided if available

For The Whipped Cream:

For The Brownies:

  • 2 boxes of brownie mix (I used Ghirardelli caramel turtle brownie mix, and instead of mixing the caramel into the brownies to bake, I decorated the top pf the cake with it!)

  • Brownie ingredients (eggs, oil, and water)

  • 3 round baking sheets - I found mine for about $1 each at Walmart!

  • Caramel Sauce if not included in Brownie boxes you use.

INSTRUCTIONS:

1.) Preheat oven to 375 degrees. On parchment paper, trace your circular baking dish three times. Cut those three paper circles out and set aside. Spray three circular baking pans with Pam, then place the circular paper pieces into the baking pans and spray a little bit more to coat paper.

2.) Mix up 2 boxes of your favorite brownie mix and pour into three prepared circular baking pans. Bake the three circle pans for 15-20 minutes, check to see if they are done by inserting a toothpick to see if they are done.

3.) To make your homemade whipped cream, in a stand mixer, add 1 pint of heavy whipping cream + 1/3-1/2 C. sugar + 1-2tsp vanilla. I also love using vanilla bean powder to add little black flecks and more vanilla flavor to my whipped cream. Whip for 2-4 minutes on high, until stiff peaks form. Just keep mixing, it may seem like an eternity, but is so worth it! Do not over beat the cream, or it will begin to resemble butter, and not be very fluffy.

4.) Now, it’s time to “layer up”! I have shown all of my layering steps below, so you basically layer up: brownies and whipped cream until you get to the top layer. Make sure to make the top layer of whipped cream as smooth as possible. But, no need to stress about being perfect - this cake is a naked cake and is pretty rustic anyway, so the more homemade it looks, the better!

5.) To decorate the top: I used caramel sauce in a squeeze tube that worked perfectly to decorate. I basically just made a continuous line of caramel vertically across the entire cake, then crossed that again with caramel lines horizontally. I rotated the cake as I worked, which was great. Add sprinkles and enjoy!

THIS CAKE ROCKS! HOPE YOU ENJOY!

If you wind up making this recipe or any other recipes, please tag me on Instagram with @happysolez! Thanks!!

2 Ingredient Fall Apple Dip Recipe

Yum! Fall is right around the corner and I have an amazing recipe for you! Everyone loves this amazing dessert, and I know you will too. My al time favorite Fall flavor would have to be caramel apple. The mix of those sweet tart green apples meld so perfectly with the salted caramel sauce and the tangy bite of the cream cheese adds an upscale flavor to this dish, which I hope you enjoy!

INGREDIENTS:

1 (8 oz.) Block of Cream Cheese

1/3 - 1/2 of a jar of salted caramel sauce (we love the Smucker's Simple Delight Salted Caramel)

2-3 apples, sliced (we used green and red, any flavor will do!)

INSTRUCTIONS:

1.) Open the block of cream cheese, and place it onto a plate, and pour LOTS of caramel over the top of the cream cheese.

2.) Chop apples and place beside dip. Enjoy!

Pull Apart Cupcake Cake Recipe

This recipe is PERFECT for parties and holidays, because it's easy to eat! Everyone has their own individual cupcake to share the joy, no need to cut THIS cake. 

We were ecstatic when we learned that we had the opportunity to collaborate with Martha Stewart to promote her baking items at Macy's. It's quite the honor, and several times throughout this process I exclaimed, "I am shooting recipes for Martha Stewart"!!! 

In order to creatively incorporate her Essentials collection into pins that would encourage people to want to learn more, I thought that a sweet treat would obviously be perfect, so I found a fun recipe on marthastewart.com and creates it! Below, you will find that very recipe, and I hope you are inspired by this fun post to make your very own cupcake cake!

MARTHA STEWART RECIPE (originally found here):

Pull-Apart Vanilla-Wafer Cupcake Cake with Berries

Talk about a fun dessert! It looks like a sheet cake on top, but there are actually vanilla-coconut cupcakes underneath the fresh berries and fluffy whipped-cream frosting. It's easy to make and even easier to serve -- no slicing required.

Source: Martha Stewart Living, May 2018

INGREDIENTS

  • 45 vanilla-wafer cookies, pulsed in a food processor until finely ground (1 1/2 cups)
  • 1/2 cup unbleached all-purpose flour
  • 1 teaspoon baking powder
  • 1/4 teaspoon kosher salt
  • 1 stick unsalted butter, softened
  • 3/4 cup granulated sugar
  • 2 large eggs, room temperature
  • 3/4 cup whole milk
  • 1 cup sweetened shredded coconut
  • 1 teaspoon unflavored gelatin
  • 1 cup cold heavy cream
  • 2 tablespoons confectioners' sugar
  • 1/4 teaspoon pure vanilla extract
  • 1 1/2 cups mixed fresh berries, such as blueberries, raspberries, and blackberries

DIRECTIONS

  1. 1. Preheat oven to 350 degrees. Line a standard muffin tin with paper liners. Whisk together cookie crumbs, flour, baking powder, and salt.

  2. 2. Beat butter with granulated sugar on medium speed until pale and fluffy, about 1 minute. Beat in eggs, one at a time. Reduce speed to low and add flour mixture in 3 batches, alternating with milk, beginning and ending with flour mixture and beating until combined after each addition. Fold in coconut.

  3. 3. Divide batter among cups. Bake until cupcakes are golden brown and centers bounce back when gently pressed, 22 to 24 minutes. Let cool completely in tin on a wire rack.

  4. 4. Add 2 tablespoons water to a small saucepan. Sprinkle with gelatin; let stand until thick, about 5 minutes. Gently heat over medium until gelatin has dissolved. Remove from heat; let cool 5 minutes (but don't let it set).

  5. 5. Beat together cream, confectioners' sugar, and vanilla on medium speed until very soft peaks form, 1 to 2 minutes. Add gelatin mixture; beat on medium until stiff peaks form, about 1 minute more.

  6. 6. Remove cupcakes from tin and arrange on a platter in a three-by-four rectangle. Spoon frosting over each row of cupcakes; using an offset spatula, smooth to cover tops, forming a rectangular shape. Refrigerate at least 1 hour and up to 3 hours. Sprinkle with berries before serving.

Fresh Vegan Mushroom Tacos Recipe (Awesome in Cast Iron)

If you're looking for a new way to incorporate those fresh, local, Farmer's Market ingredients into a recipe, here's a good one! These Vegan Mushroom, Onion, and Pepper Tacos are super delicious and you definitely won't even miss the meat! 

Even more special, is the fact that we got to create this recipe for Martha Stewart Essentials available at Macy's. It's been SUCH an honor creating a set of four recipes for Martha! It's definitely a food blogger's dream :)

Keep reading to get the full details on this delicious, vegan recipe (but, feel free to add some cheese or sour cream if you like!!).

We found all of the fresh ingredients at our local Farmer's Market here in Carbondale, IL.

As soon as I learned about this amazing opportunity, I went searching through all of the items and decided upon four very delicious recipes, which I will link you to as soon as they are live! 

I was encouraged to use recipes right from MarthaStewart.com, so I used her basic recipes, then embellished and modernized them to make them extremely appealing for my Pinterest fans. Well, everyone has loved them so far, and now all of the cast iron skillets are SOLD OUT on the MAcy's website! Perhaps my recipes helped, but the fact that they were each around $15.00 might also be the reason these have all sold out. Nonetheless, find your favorite cast iron or other skillet, and let's get started!

Ingredients / Materials: 

- 1-2 lb. Fresh Mushrooms 

- 1 red onion

- 1 medium bell pepper (we used several small ones)

- 2 Tbsp. or more Mexican Seasoning

- 1/2 bunch of cilantro

- Small Flour Tortillas

- Martha Stewart Cast Iron Skillet 

Instructions:

1. Prepare and chop mushrooms, red onions, and bell peppers. 

2. Heat olive oil in a Cast Iron Skillet, add chopped onions, then belle peppers, then lastly, mushrooms.

3.) Season veggies generously with Mexican seasoning, a tiny bit of salt, and any other seasoning you would like. Also, add chopped cilantro at the end and stir everything one last time. 

4.) Warm tortillas, then add the veggie filling, and enjoy! They're so delicious, I hope you love them! 

FLYWAY FAMILY FARM MUSHROOMS (MAKANDA, IL)

As I mentioned, I got to use local ingredients from our Farmer's Market! We loved finally being able to utilize three different varieties of mushrooms from Flyway Family Farm. They have different mushrooms at the market almost every weekend!

Also, I used the red onions and colorful bell peppers from Country Sprout Organics, my other favorite booth at our local market! 

Hopefully, you have enjoyed this recipe! Stay tuned for several more recipes inspired by Martha Stewart! 

Two Amazing Recipes for Summer Get-Togethers with Mission® Tortillas

This is a sponsored post written by me on behalf of Mission®. All opinions are entirely my own.

If summer get-togethers make you giddy with joy and excitement, then you’re not alone! I too love brainstorming recipes with friends, then planning, prepping, and preparing the food, then finally getting everyone together to enjoy the bounty. Food always brings people together, and is great shared with old friends and new ones! This summer, I am going to make it my mission to enjoy the company of others over great food as much as possible!

I love how these Mission® Super Soft Flour Tortillas really made my two recipes even better than I could have ever imagined. I have tried all sorts of tortillas, and these are the softest, tastiest ones yet. They were so versatile, and absolutely perfect for my Vegetarian Southwest-Inspired Pinwheels AND for my Grilled Steak Tacos. I always feel like the tortillas make or break a recipe, and I was so happy to find a new favorite. You can use the store locator on the Mission website to find Mission tortillas at stores near you, and find even more delicious recipes as well.

I’m not sure if you’ve ever experienced this, but I am always let down when tortillas kind of get dried out super quickly, then kind of crack when you roll anything out of them (like the pinwheels). Well, these were perfect. They held together super well, and worked amazingly well for this 4 ingredient appetizer!

And, since I wanted to offer lots of delicious toppings for these Grilled Steak Tacos, my first thought was fresh ingredients of course!

I thought it would be so fun to offer guests some handmade pickled jalapeños as party favors. Every time we serve these to guests or bring them to someone’s house, we always get lots of compliments on them.

PICKLED JALAPENOS

(Making 1 day in advance is recommended)

I think it’s time to start sharing them with people, so I filled mini jars with a mixture of fresh ingredients like jalapeño slices, garlic cloves, and mini red onions. Now, it’s time to pickle!

I heated a solution of 1.5 cups white vinegar plus 1 cup water, and 1-2 tbsp salt until the salt has dissolved. Let it cool a bit, then carefully pour the vinegar solution over the ingredients, leaving a little bit of room at the top of the jar so it does not spill out. Place lids back on, and gift as soon as the next day.  

These turned out SO cute, and you could even tie cute ribbons around the jars for an even more festive look.

In addition to the pickled jalapeños, I offered pickled red onions (get my recipe here), plus a guacamole tomatillo sauce and a traditional red salsa too.

The lettuce even came right out of my own garden! This was my first year to try growing lettuce, and while it may be almost at the end of its season, I love treating friends to things I grew!

GRILLED STEAK TACOS

INGREDIENTS:

1/3 cup olive oil

2-3 tbsp soy sauce

2-3 tbsp or more taco seasoning

Juice from 1 lime

1 tsp salt

1-2 lbs flank steak or similar

INSTRUCTIONS:

Simply marinate each pound of steak in 1/3 cup olive oil, 2-3 tbsp soy sauce, 2-3 tbsp or more taco seasoning + the juice from 1 lime + 1 tsp salt for at least 1-2 hours or overnight. Simply grill for 3 or so minutes per side if your steak is thin like mine was. Slice and serve with fresh sides and warmed Mission Super Soft Flour Tortillas (they taste best warmed).

Slice up the steak and set out the toppings, the tacos are ready to eat!!!

SOUTHWEST INSPIRED VEGETARIAN PINWHEELS

I searched for vegetarian pinwheel recipes and hardly found anything! These are so great tasting, and you will never miss the meat.

Ingredients:

1 package Mission® Super Soft Flour Tortillas

Plus 1-2 bunches of cilantro

1 head of green lettuce

To create the sauce:

1 (8 oz.) box of cream cheese, softened

½ cup (or more) taco sauce or red enchilada sauce

½ - 1 cup cream cheese

¼ - ½ tsp salt, optional

INSTRUCTIONS:

1.    Mix all sauce ingredients together, and stir until smooth. I used a hand mixer

2.    Lay one tortilla out onto your work surface, and spread 1.5 -2 tbsp sauce in an even layer on tortilla.

3.    Add a line of cilantro and a line of small pieces of lettuce towards one side of the tortilla, then roll up into an even roll.

4.    Cut in 2” sections, and display on a cute tray. I used cactus pieces from a local market.

Enjoy!


The bottom line - I would definitely recommend Mission Super Soft Flour Tortillas to anyone who loves superior taste and excellent ingredients!

Happy summer, friends!