Easy Caramel Brownie Layer Cake

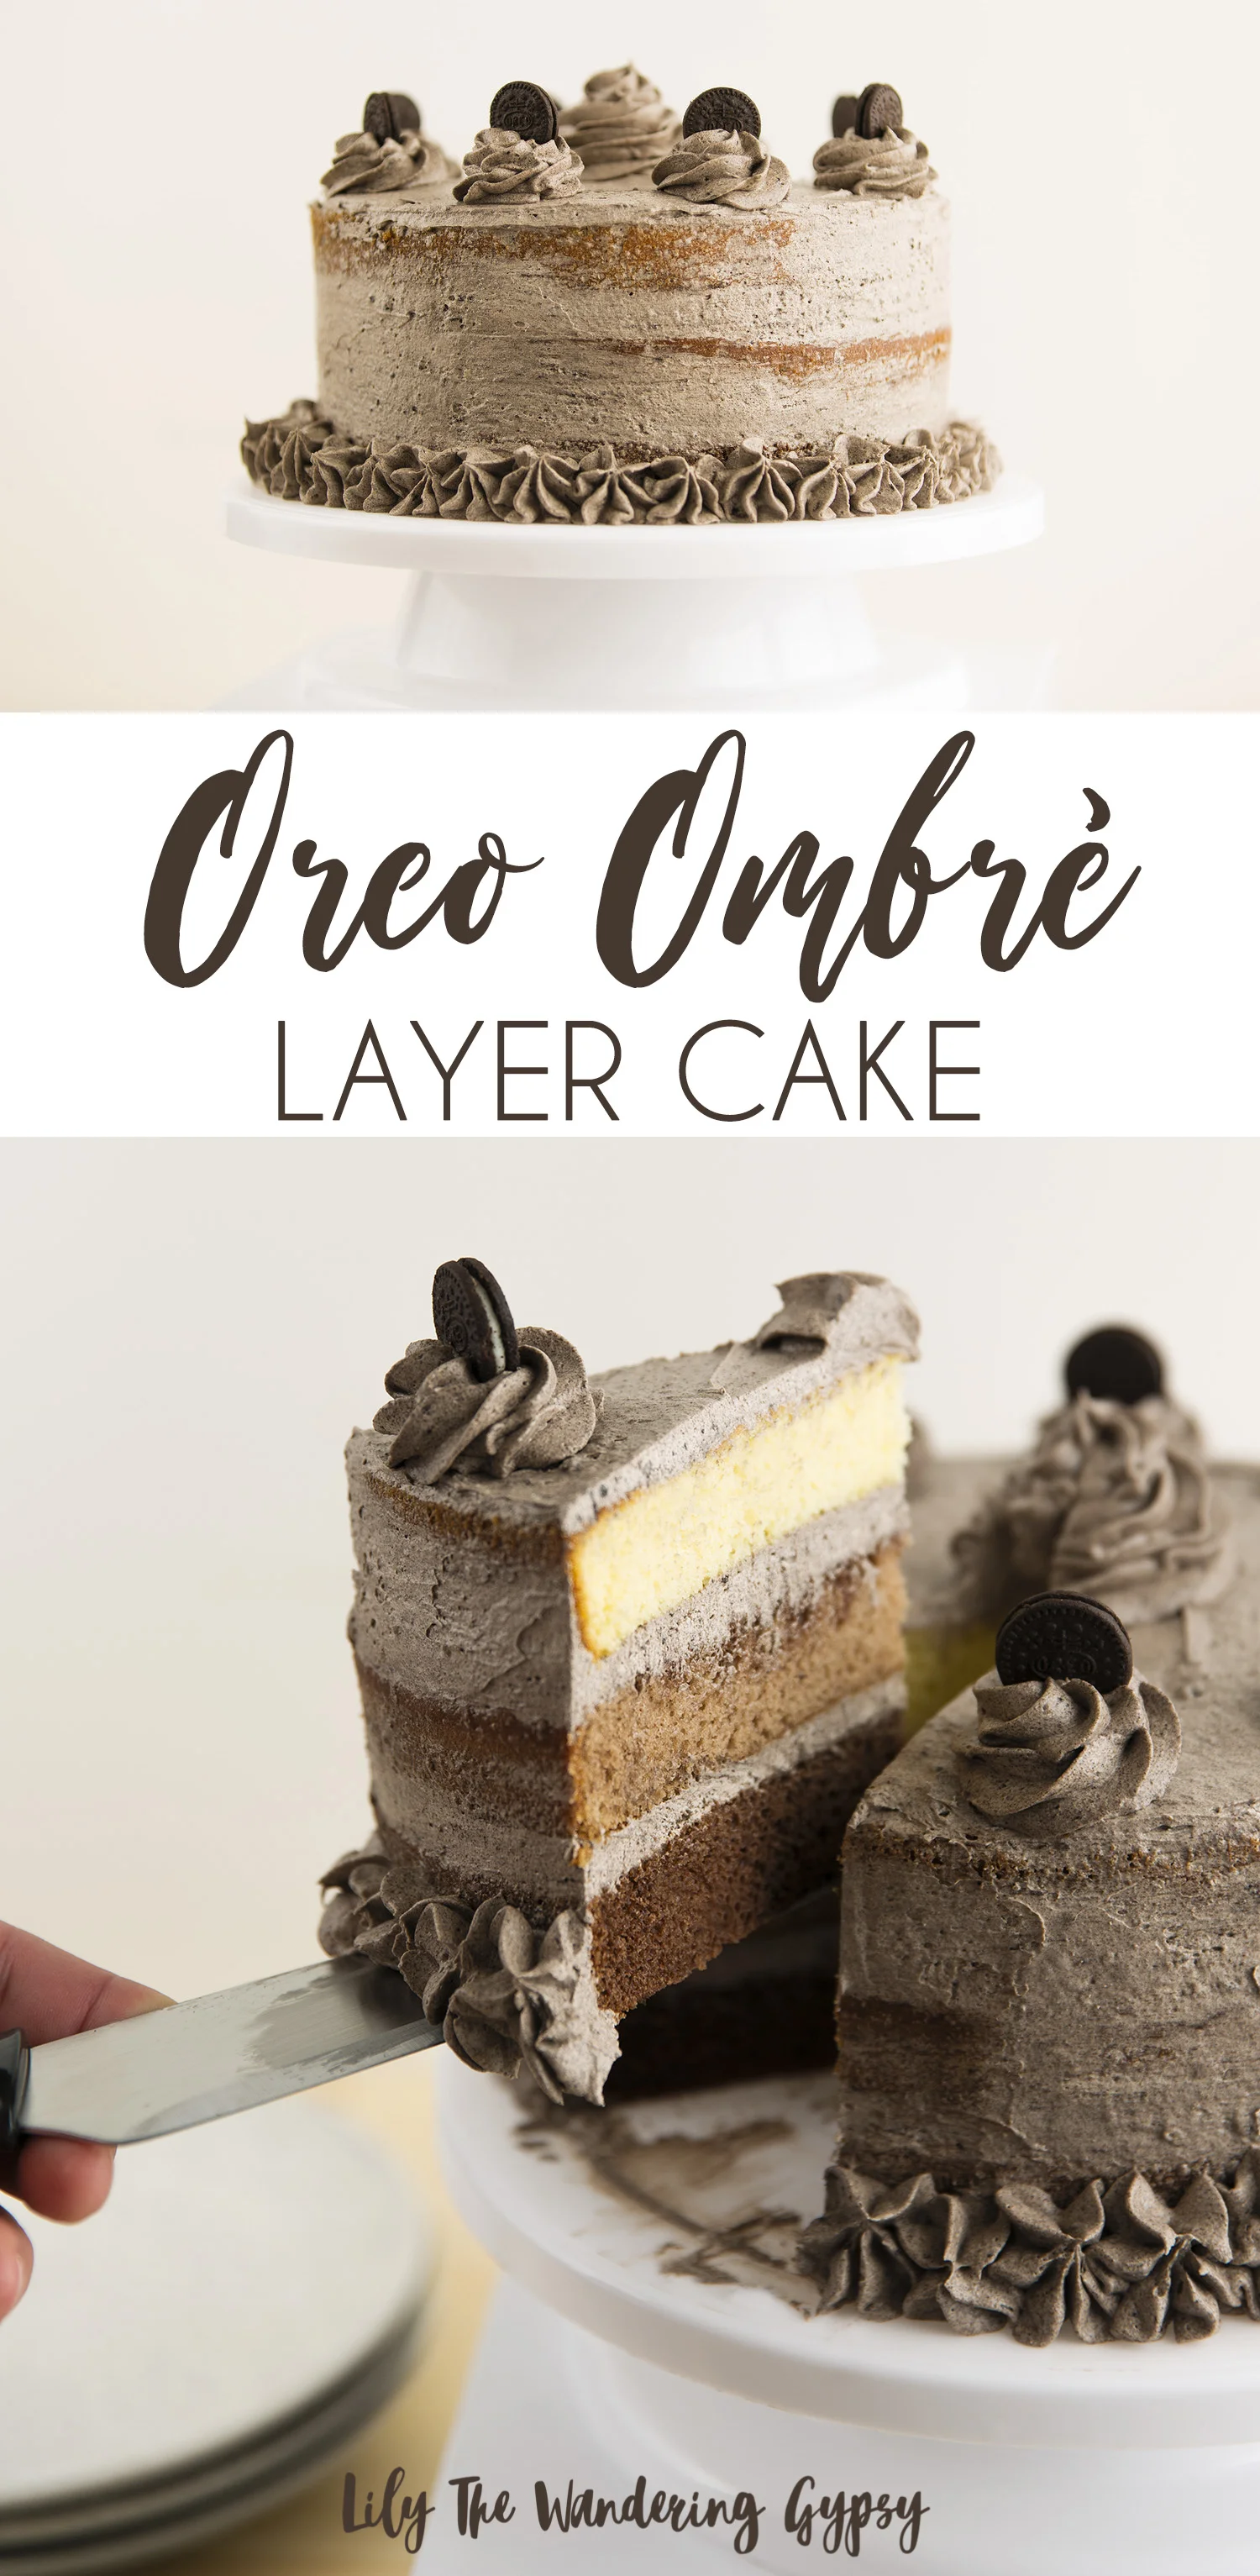
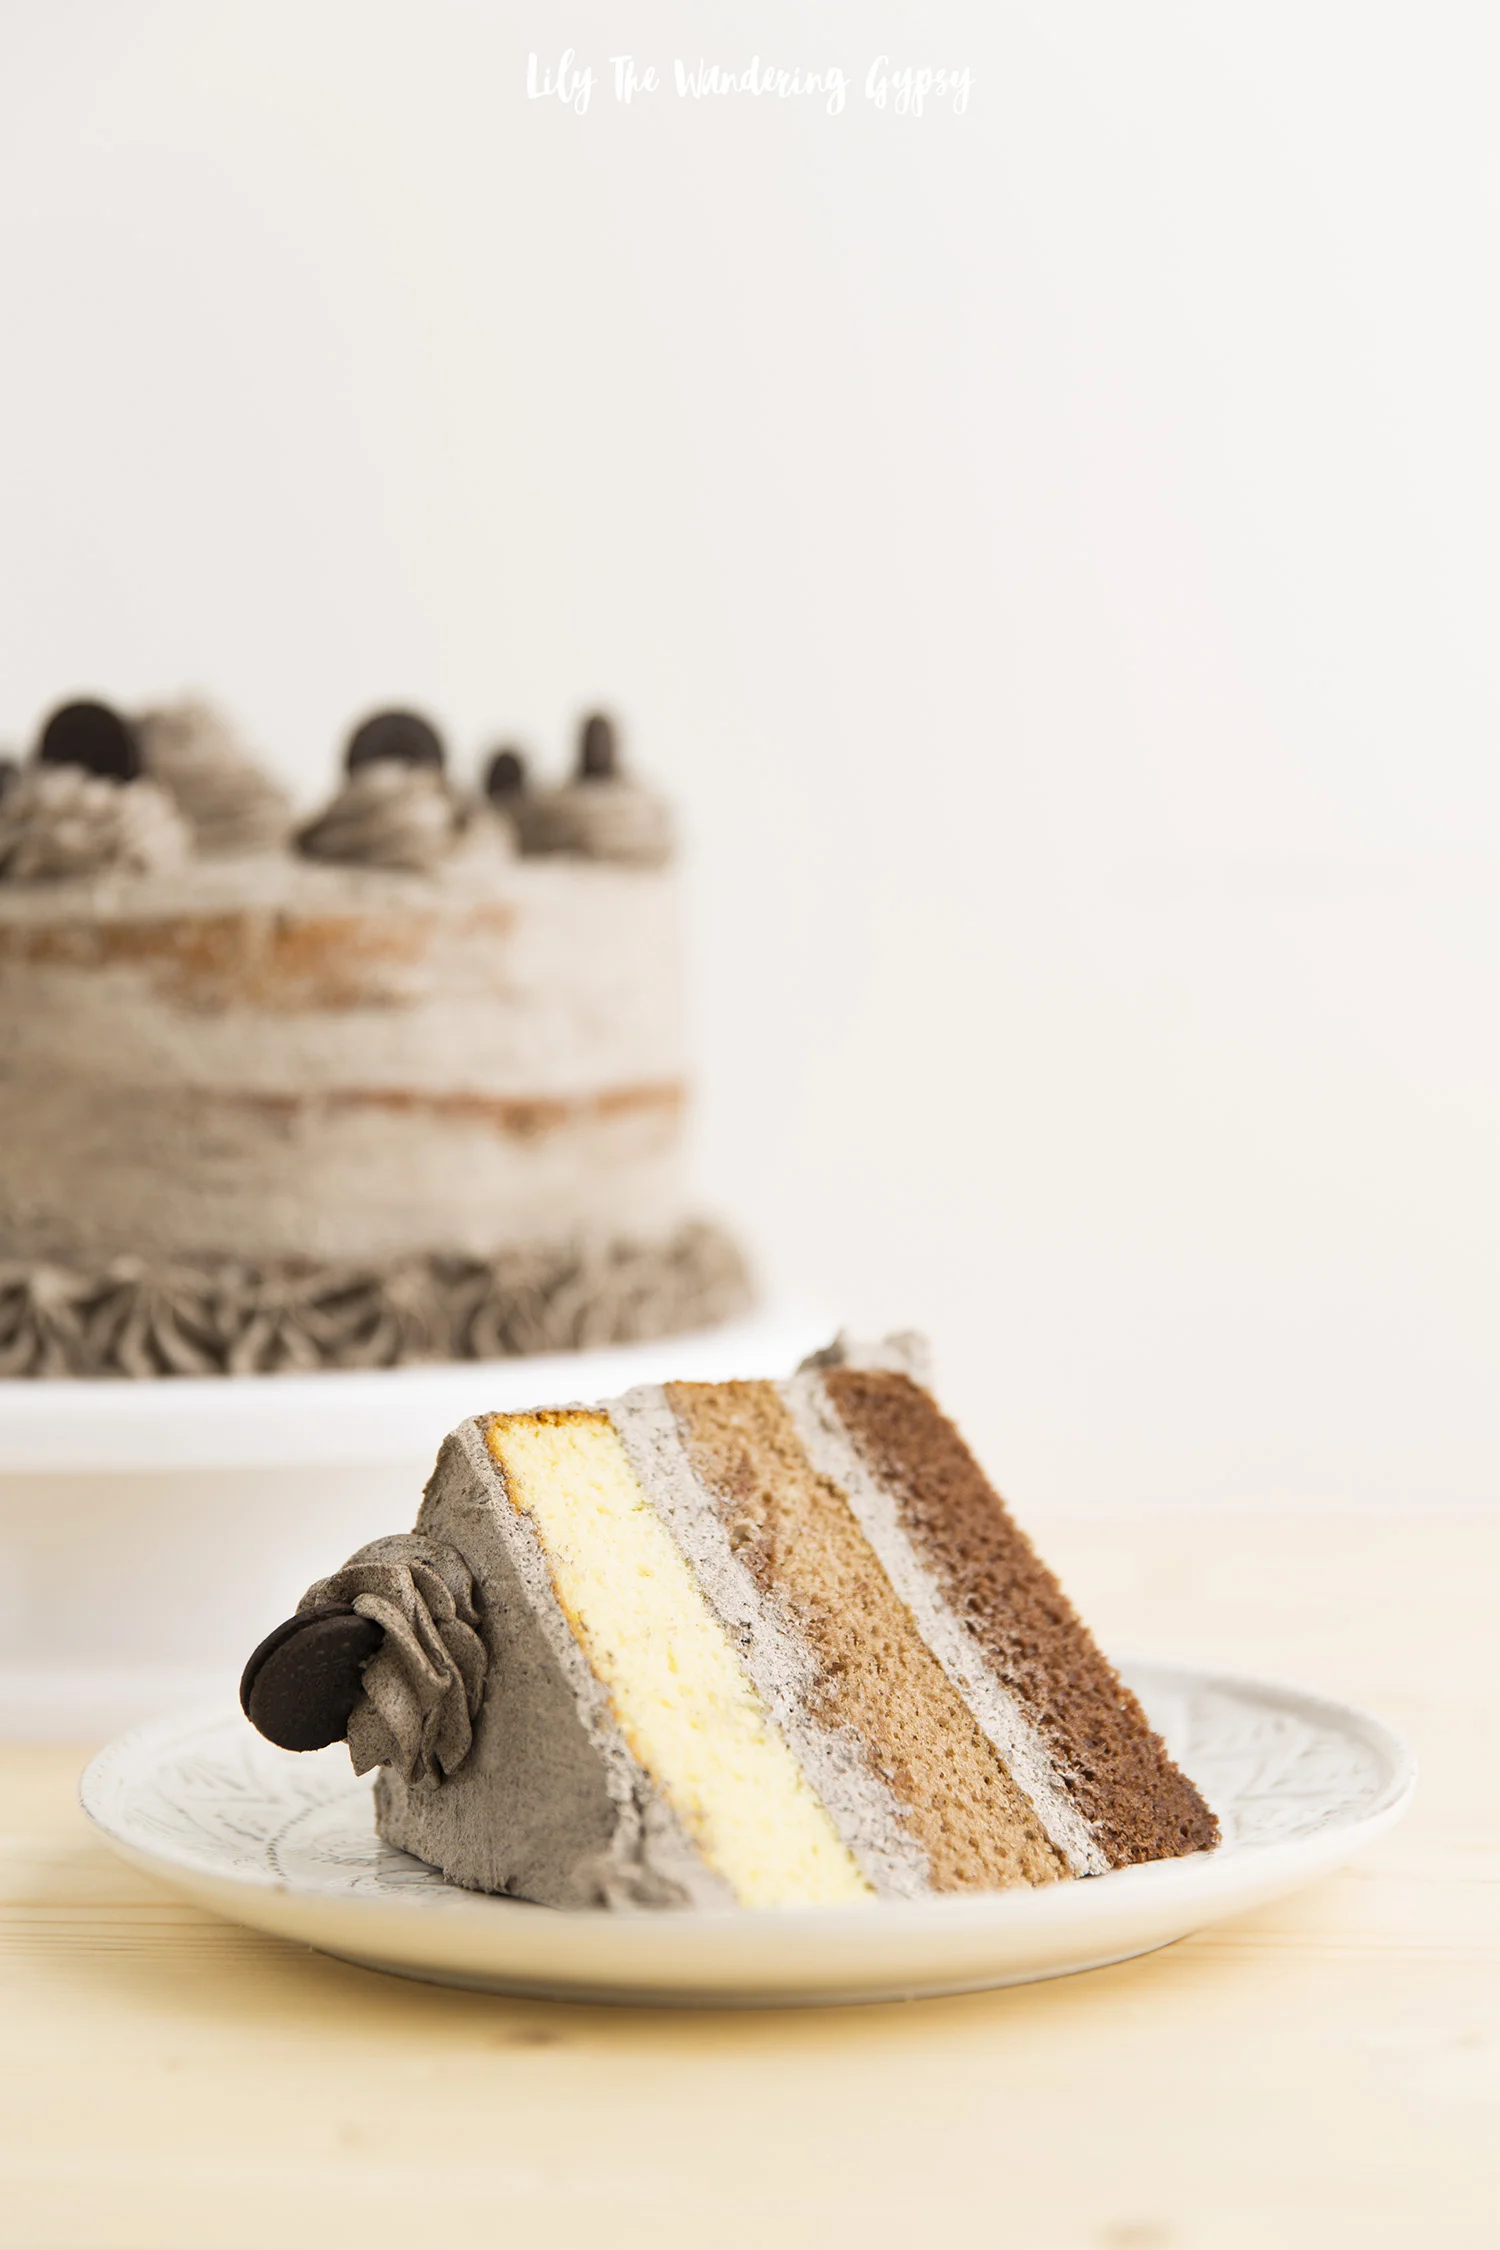
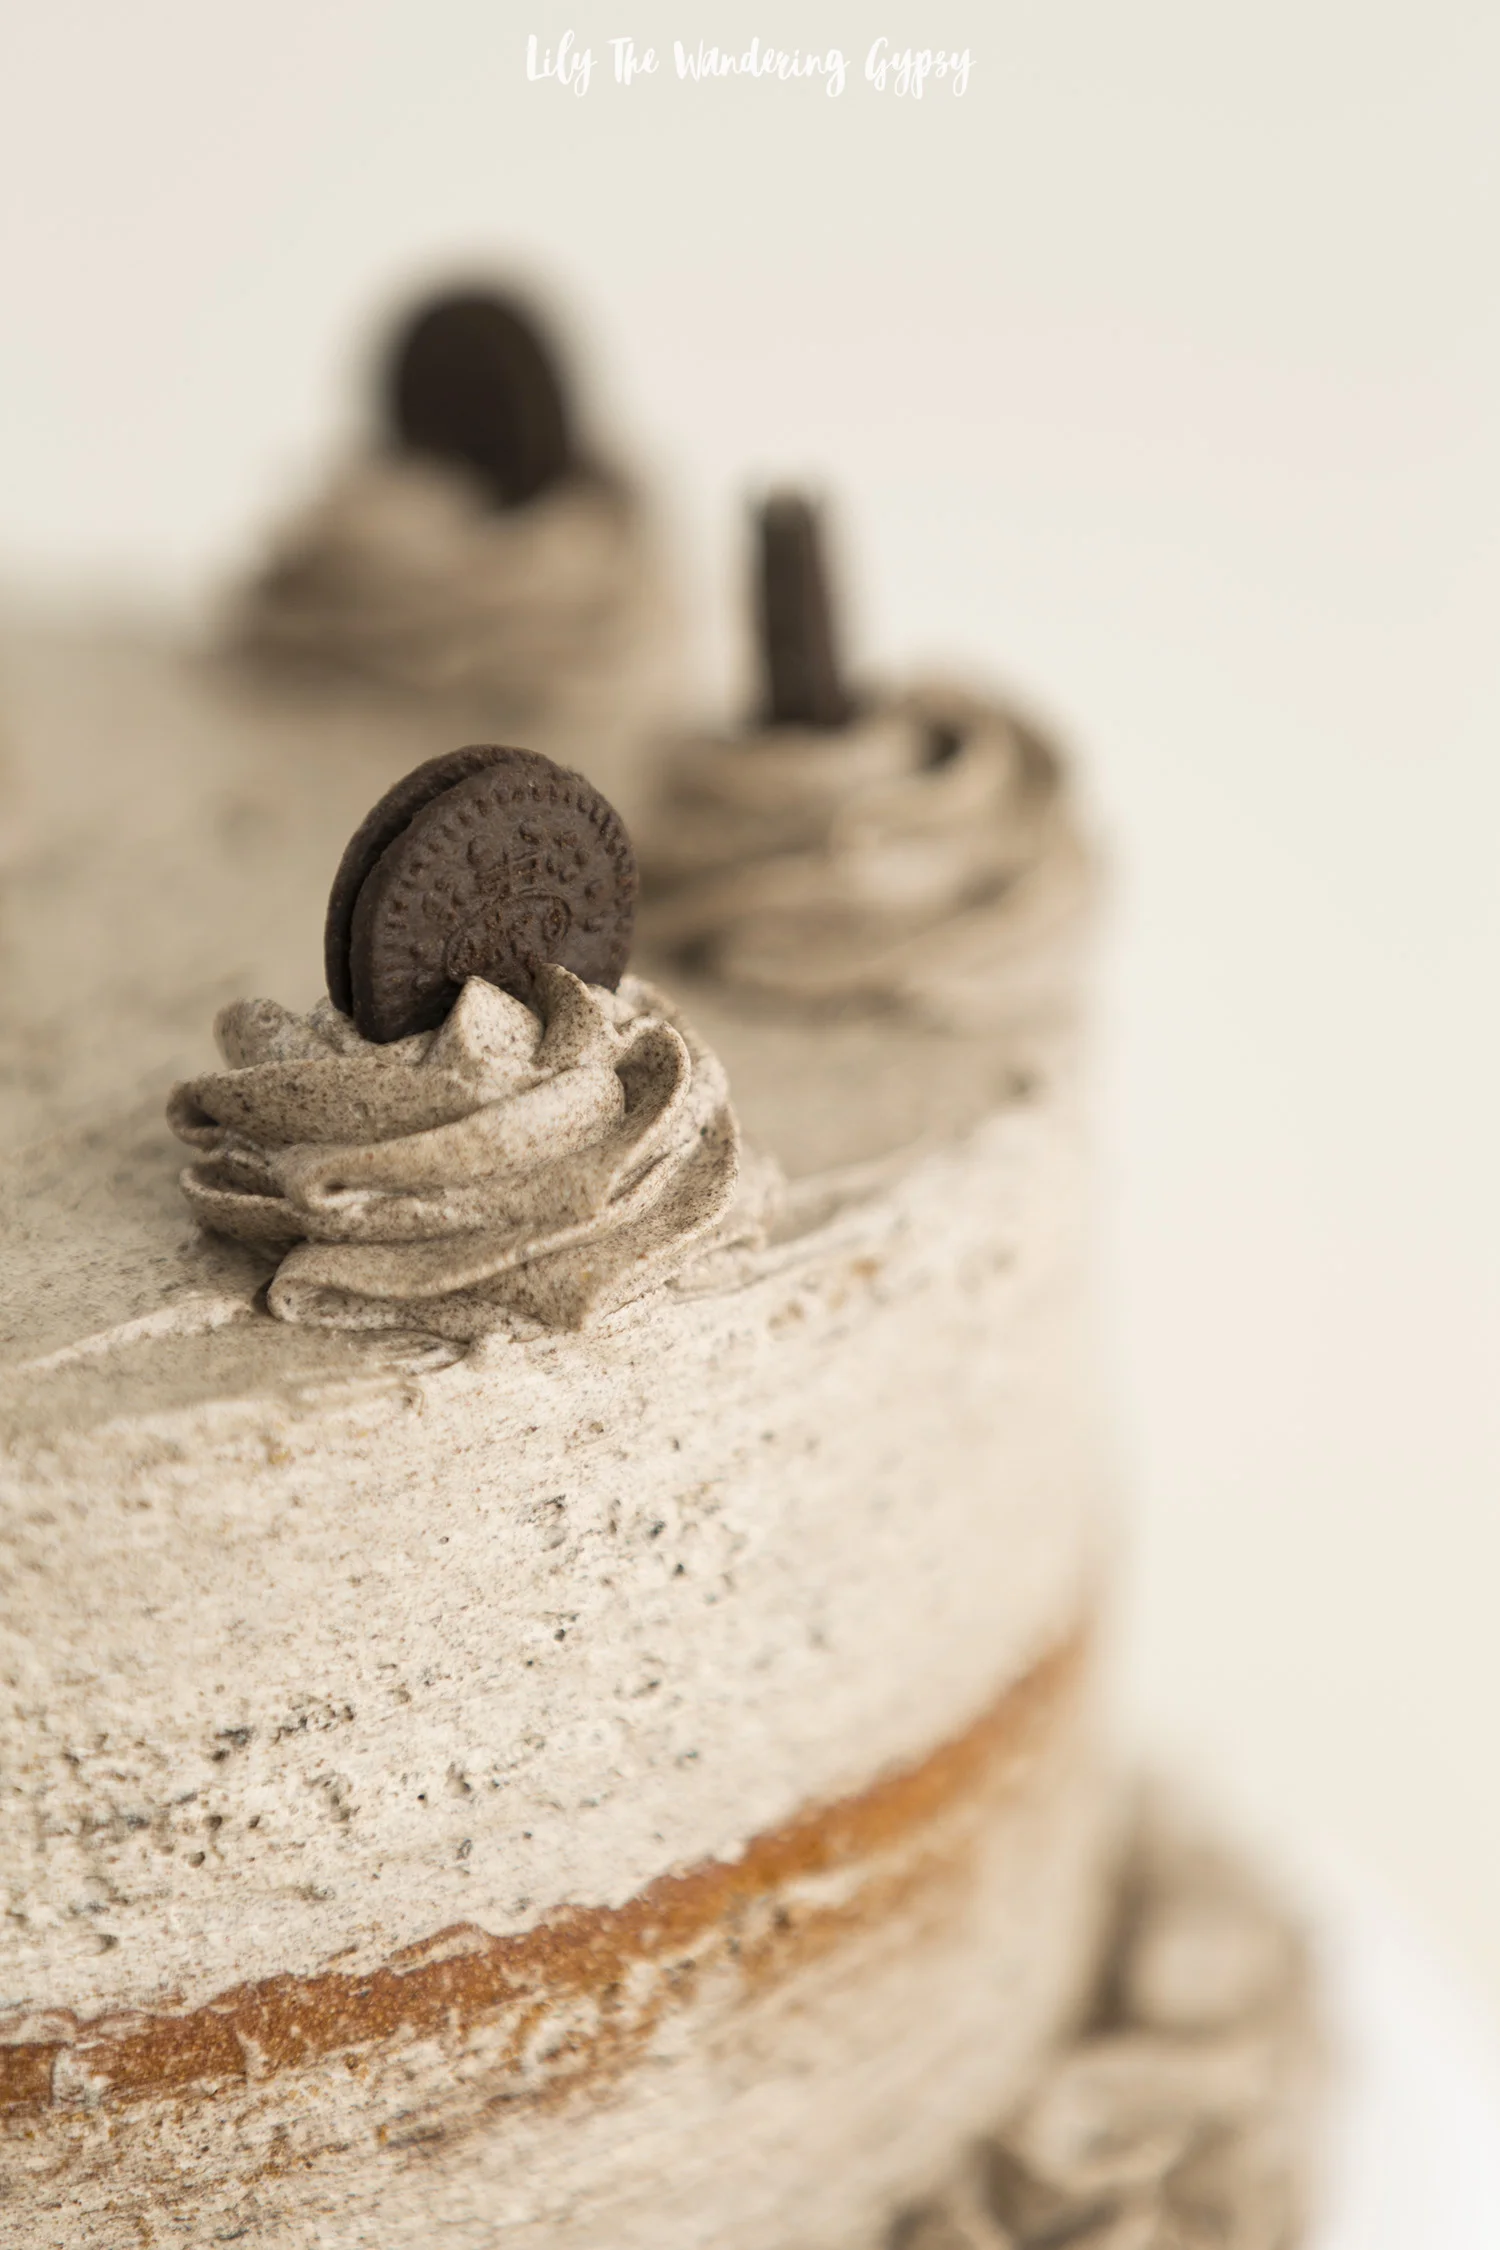
If you are a fan of layers upon layers of chocolate brownies, homemade whipped cream, and caramel, then this is definitely the cake for you! Although it looks so elegant, it really is pretty easy. This dessert allows us to think beyond the traditional chocolate cake, and make your next dessert rich, decadent, and delicious! When I made this dessert for a potluck, people raved about it. It was so delicious once the whipped cream layers sat with the brownie layers, because the sides stay a bit crunchy, and the inside portion of the cake moisten up and form more of a fudgy and cake-like consistency all at the same time, that’s out of this world! Hope you enjoy.

INGREDIENTS:

*Note - Amazon Affiliate Links have been provided if available

For The Whipped Cream:

For The Brownies:

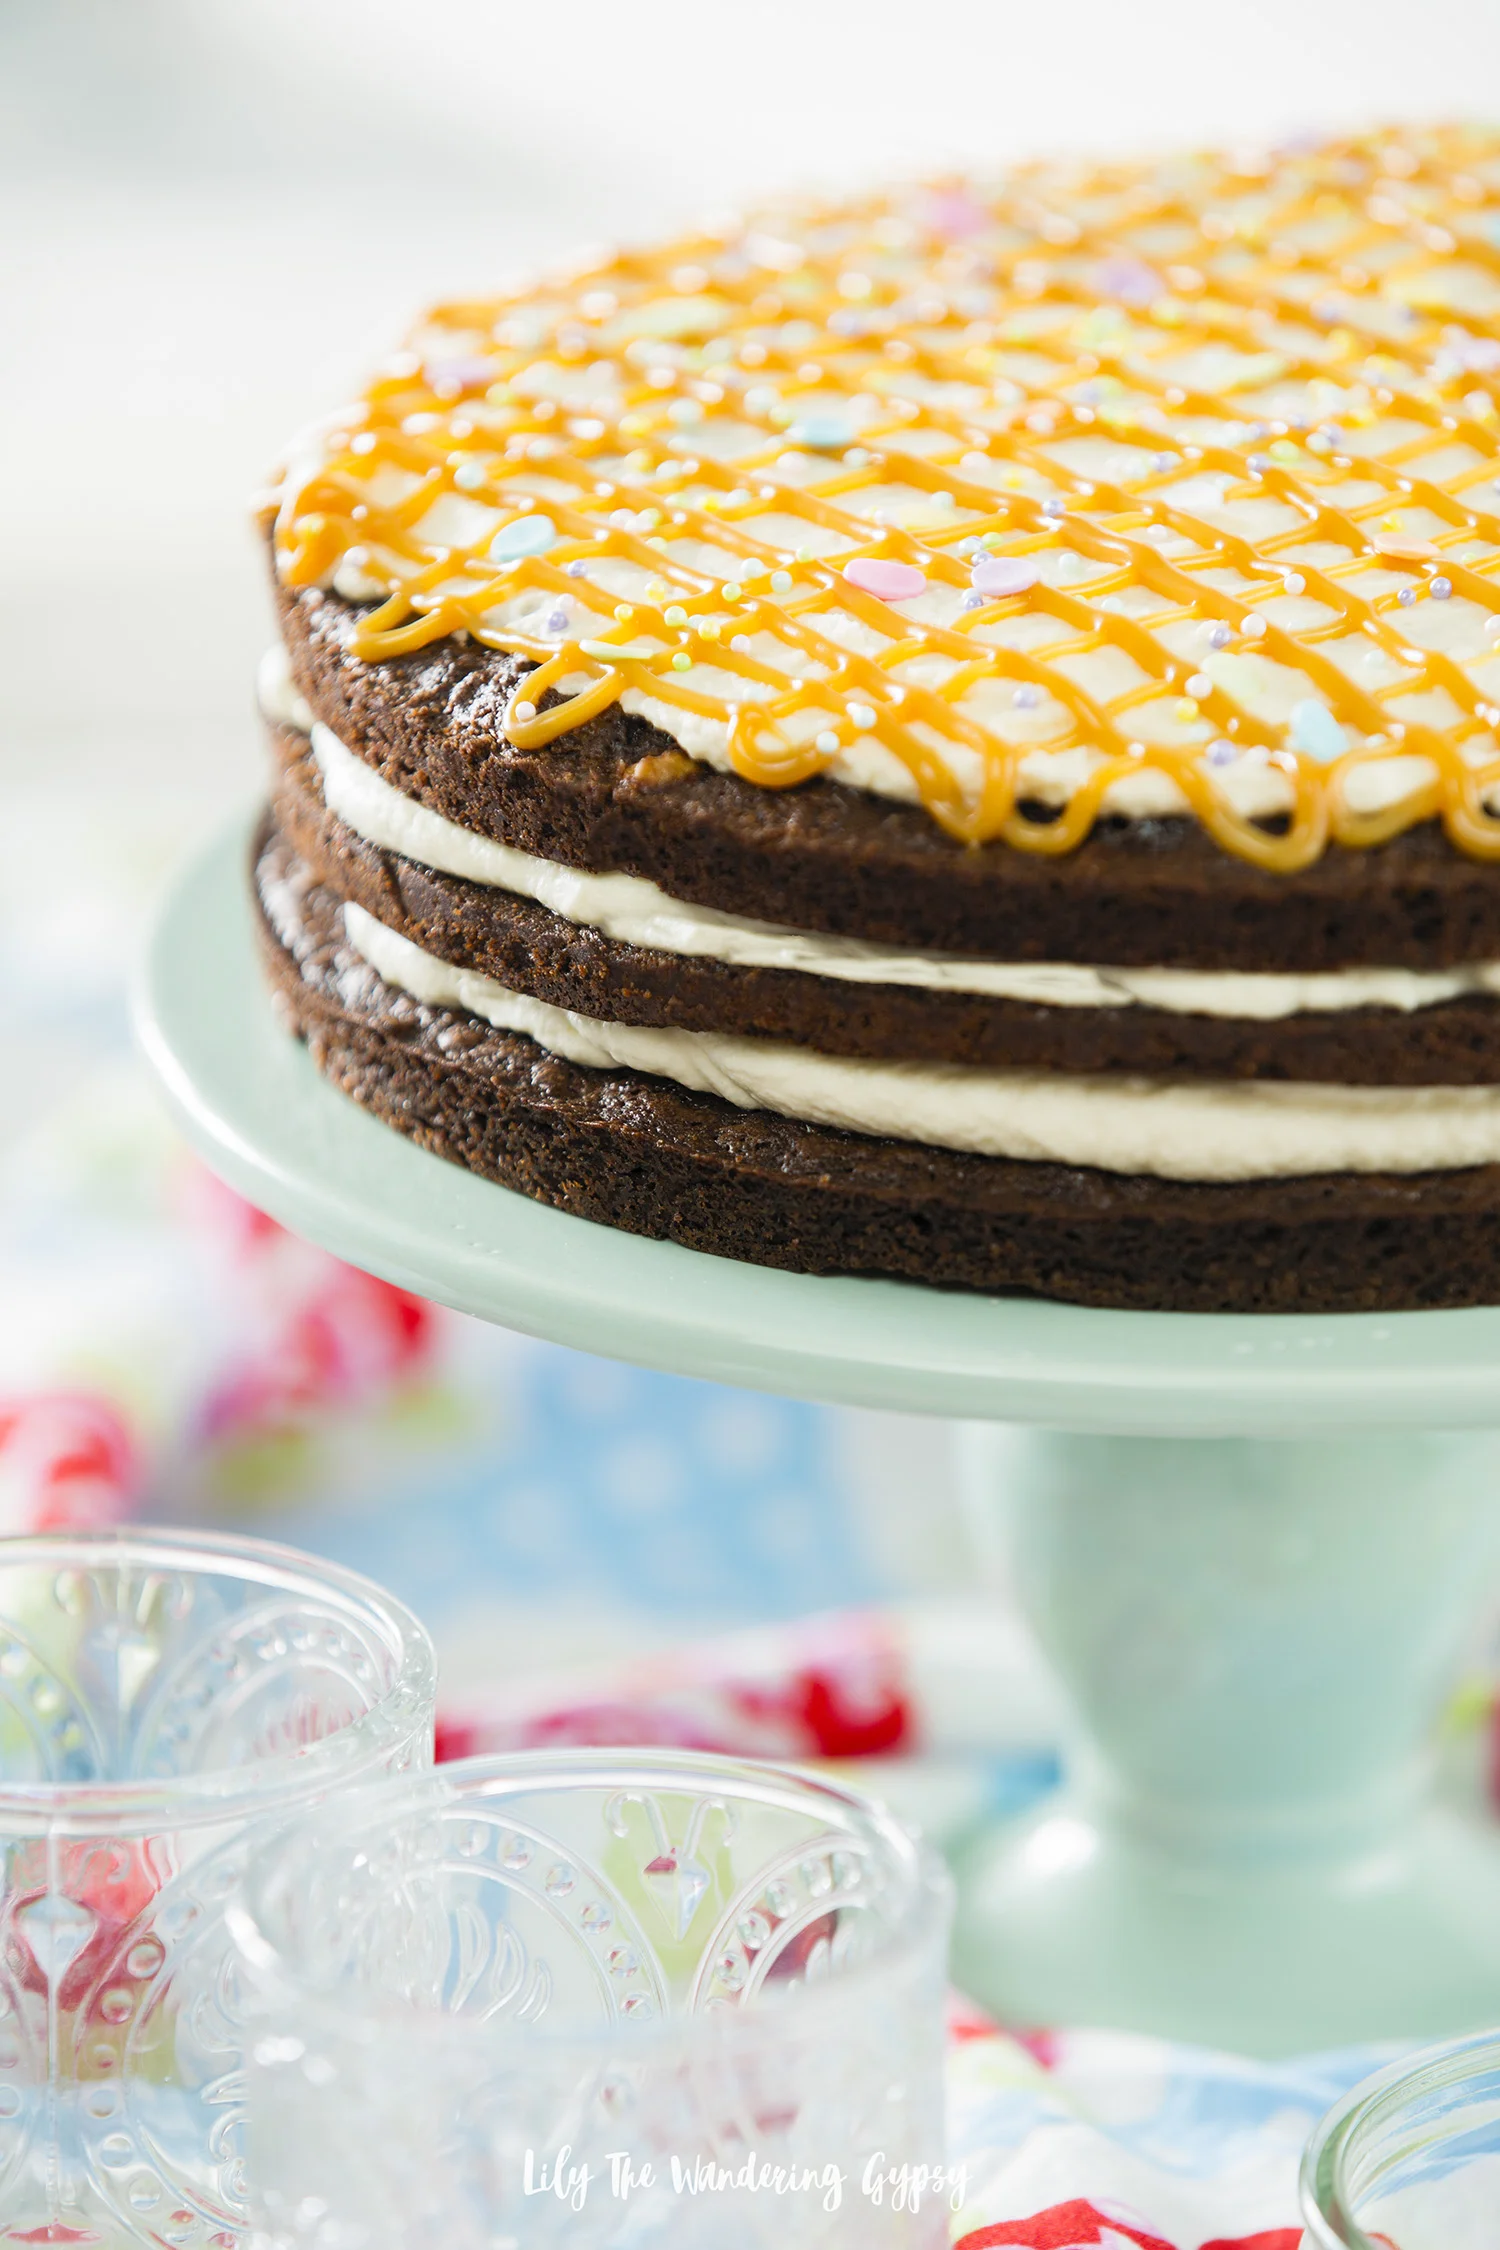
  • 2 boxes of brownie mix (I used Ghirardelli caramel turtle brownie mix, and instead of mixing the caramel into the brownies to bake, I decorated the top pf the cake with it!)

  • Brownie ingredients (eggs, oil, and water)

  • 3 round baking sheets - I found mine for about $1 each at Walmart!

  • Caramel Sauce if not included in Brownie boxes you use.

INSTRUCTIONS:

1.) Preheat oven to 375 degrees. On parchment paper, trace your circular baking dish three times. Cut those three paper circles out and set aside. Spray three circular baking pans with Pam, then place the circular paper pieces into the baking pans and spray a little bit more to coat paper.

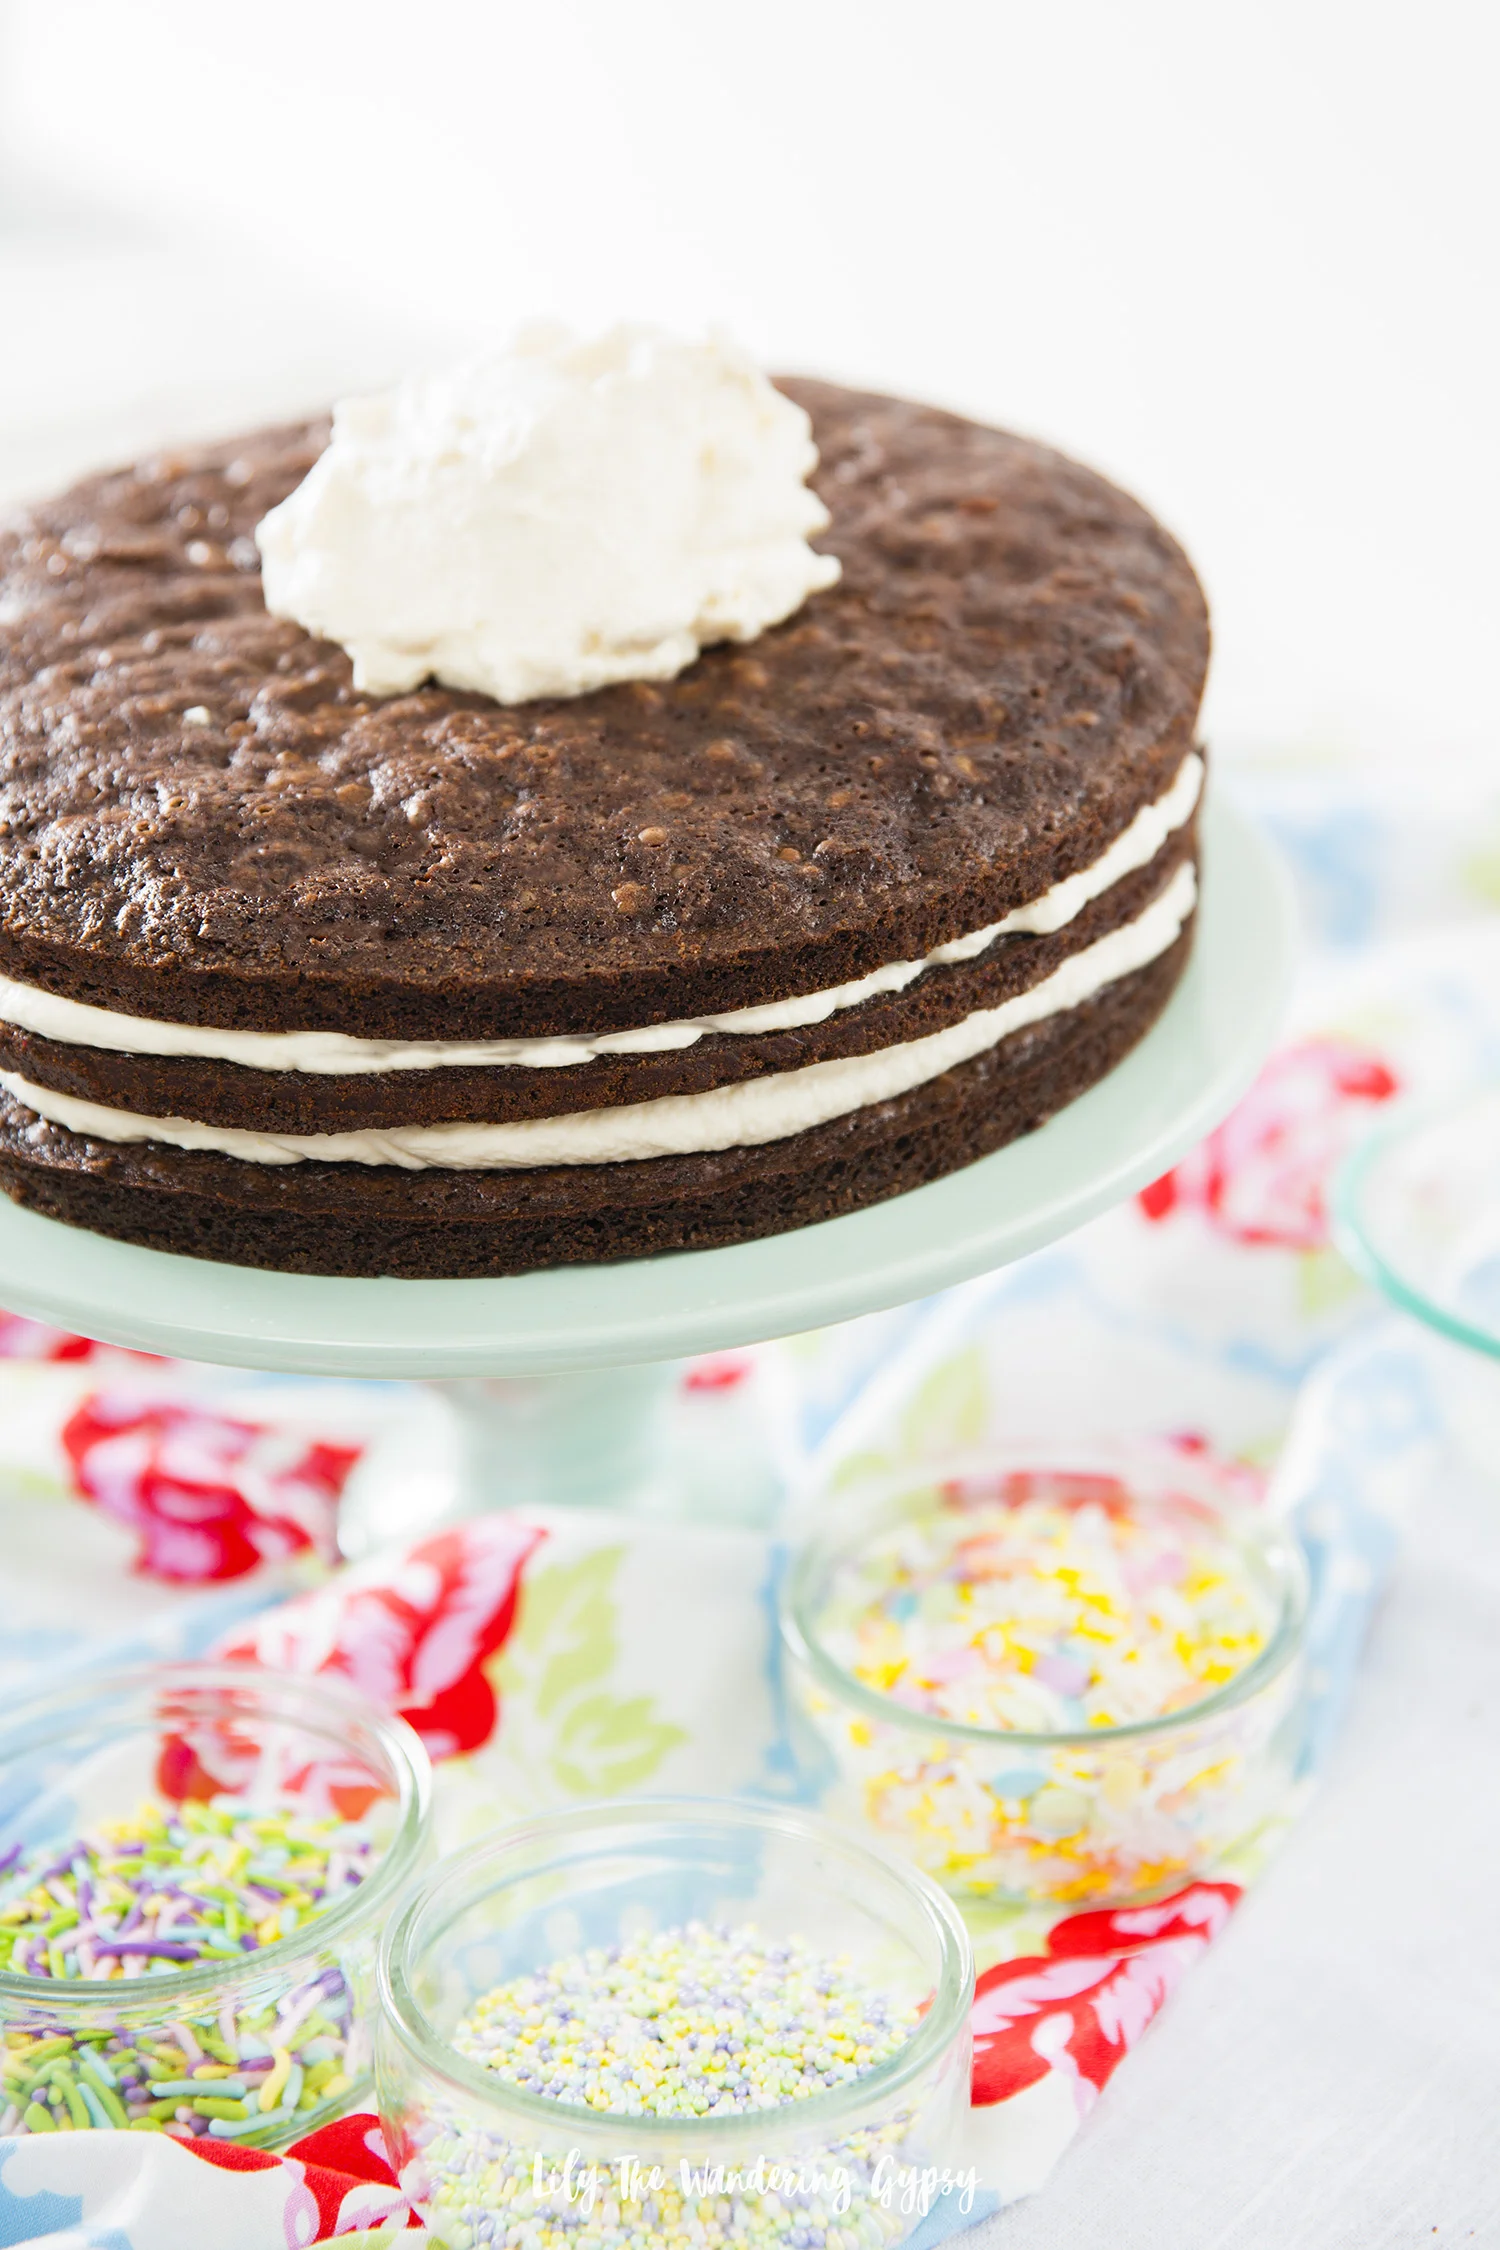
2.) Mix up 2 boxes of your favorite brownie mix and pour into three prepared circular baking pans. Bake the three circle pans for 15-20 minutes, check to see if they are done by inserting a toothpick to see if they are done.

3.) To make your homemade whipped cream, in a stand mixer, add 1 pint of heavy whipping cream + 1/3-1/2 C. sugar + 1-2tsp vanilla. I also love using vanilla bean powder to add little black flecks and more vanilla flavor to my whipped cream. Whip for 2-4 minutes on high, until stiff peaks form. Just keep mixing, it may seem like an eternity, but is so worth it! Do not over beat the cream, or it will begin to resemble butter, and not be very fluffy.

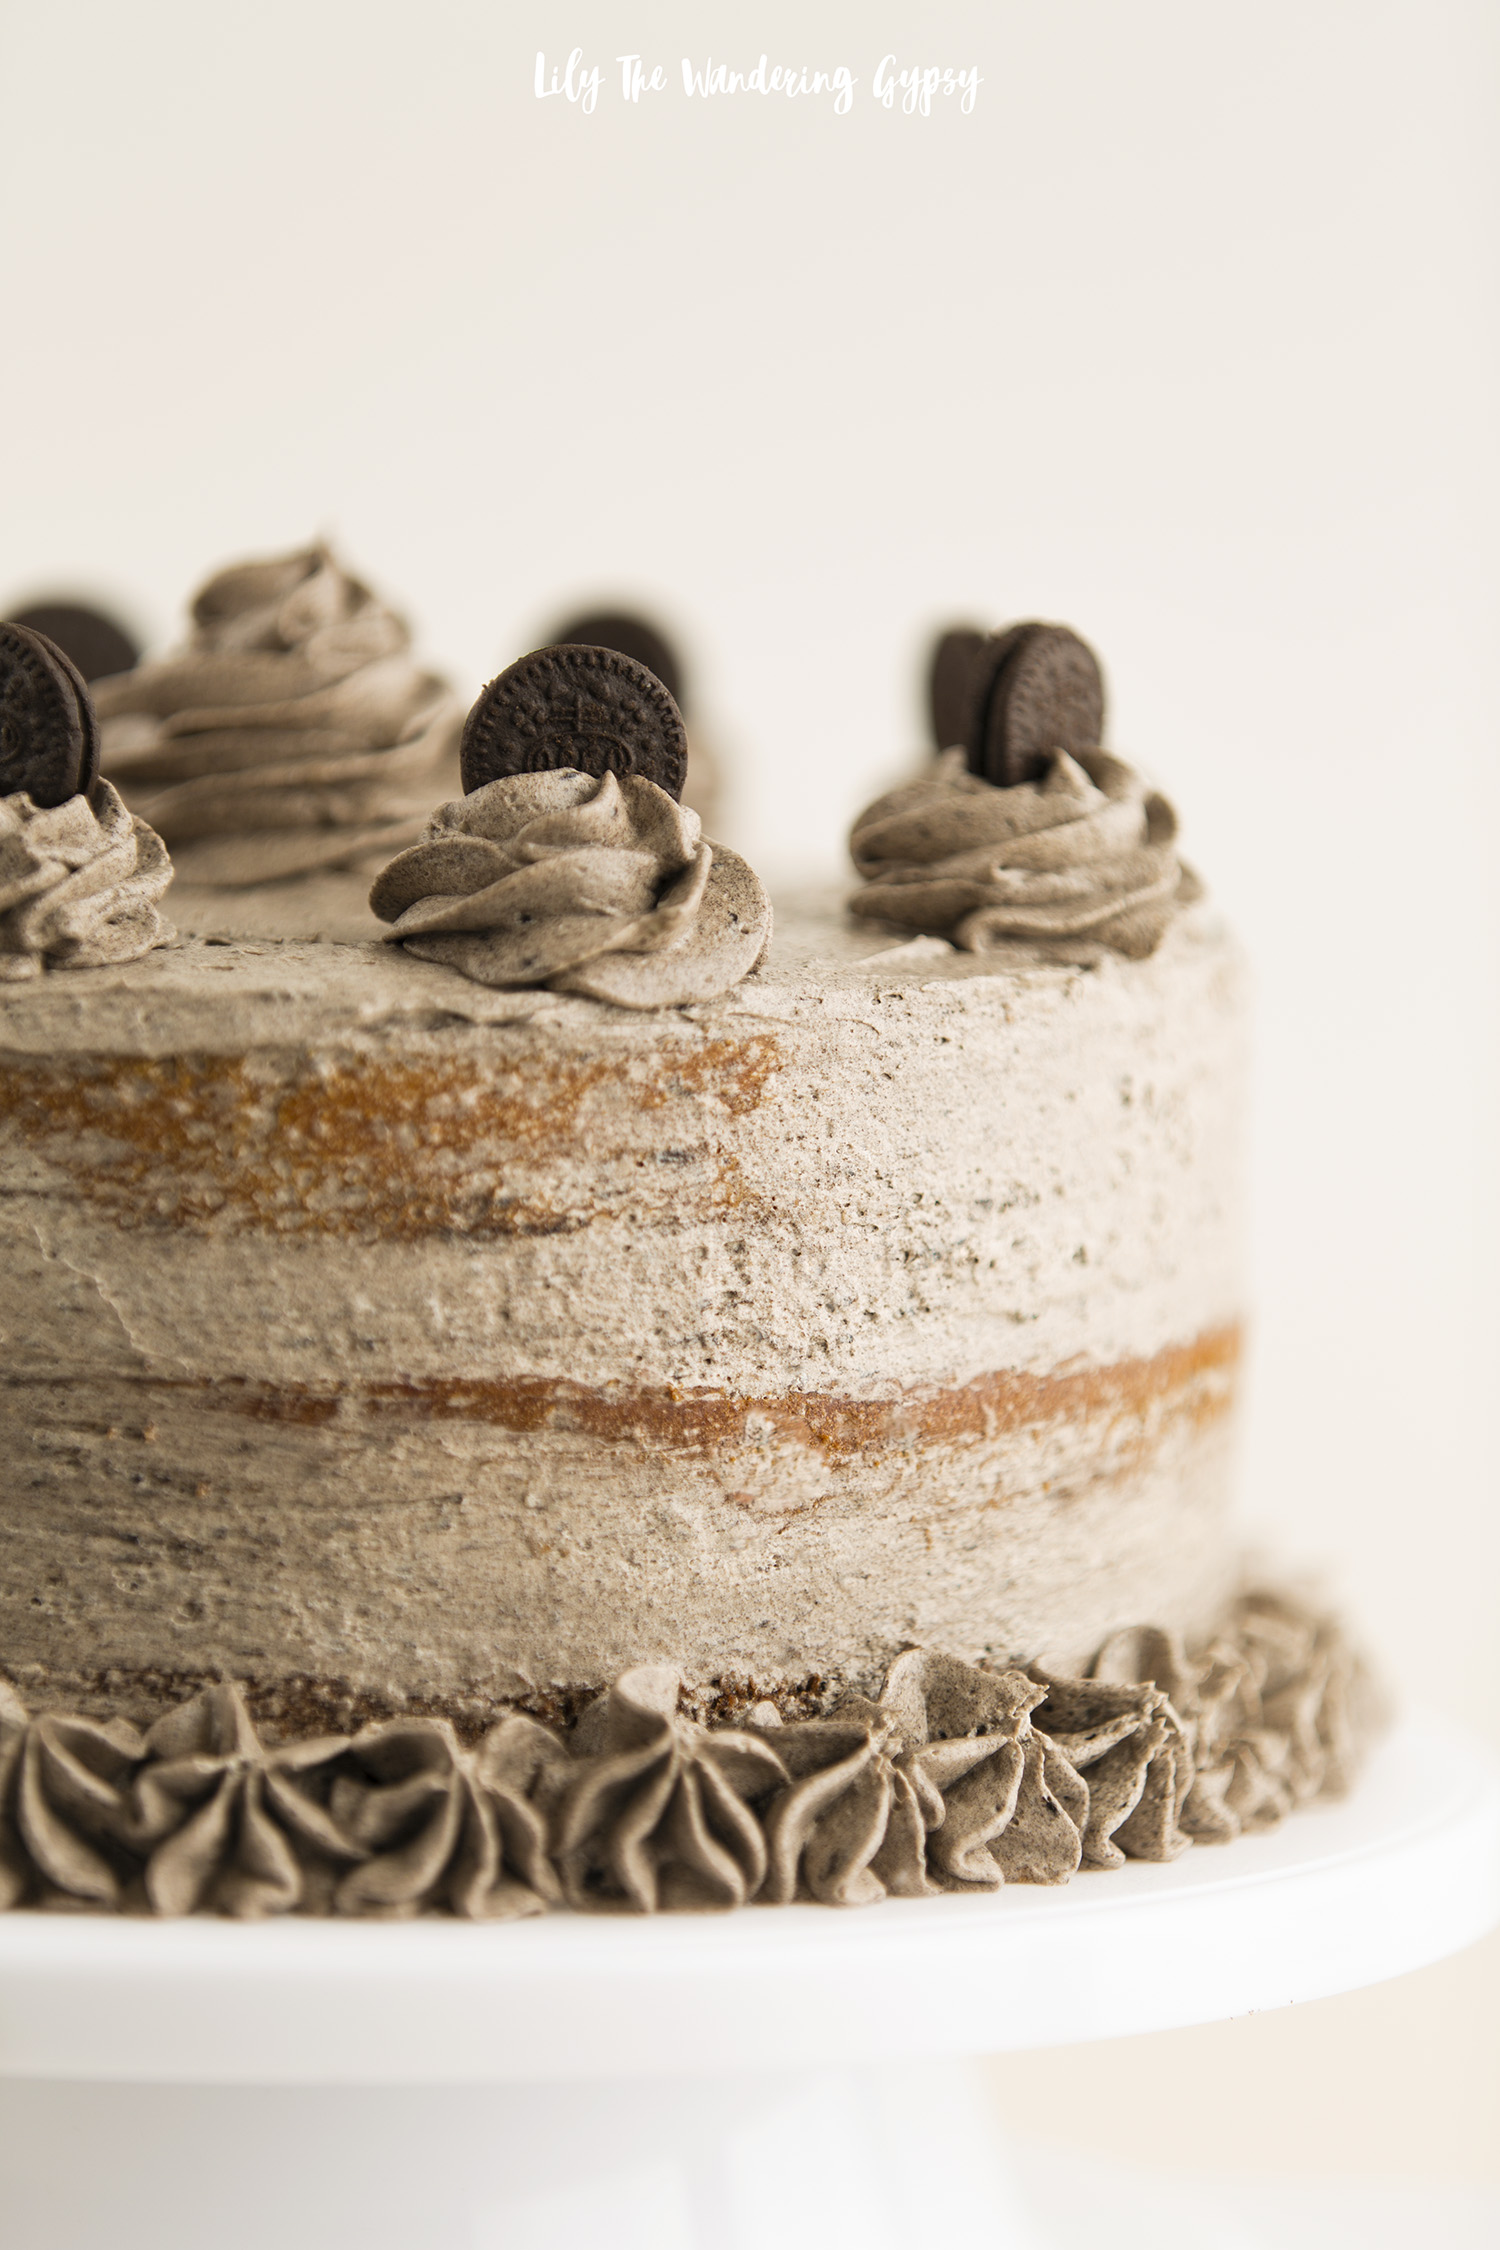
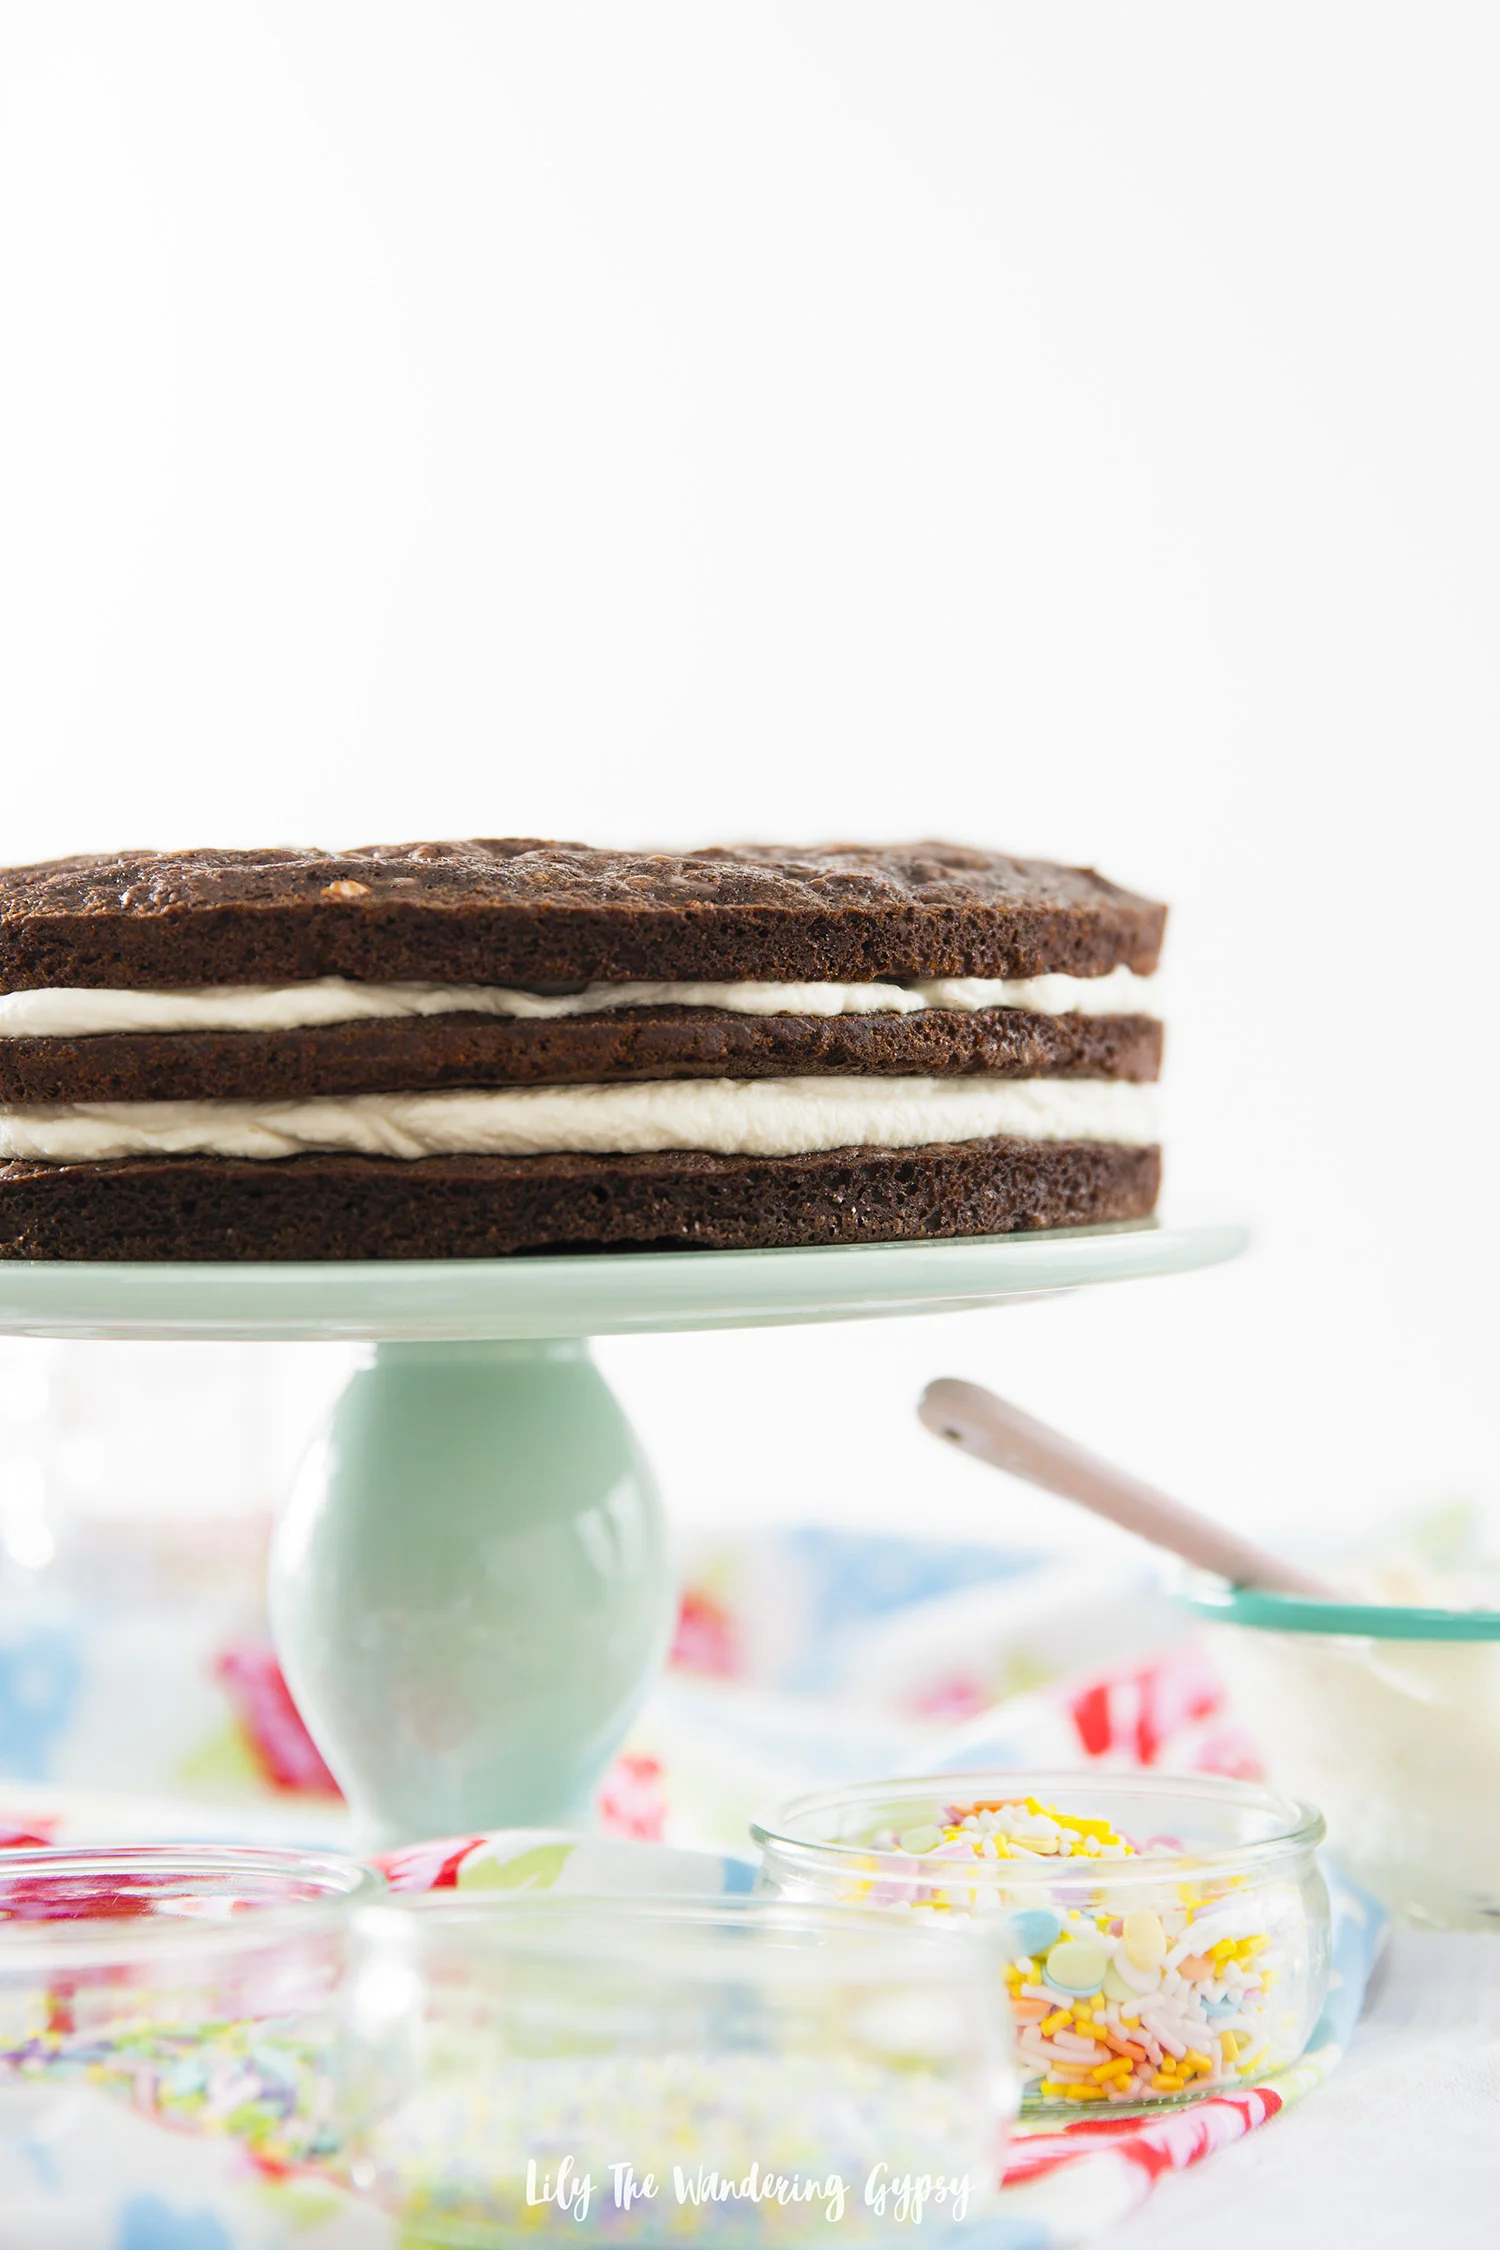
4.) Now, it’s time to “layer up”! I have shown all of my layering steps below, so you basically layer up: brownies and whipped cream until you get to the top layer. Make sure to make the top layer of whipped cream as smooth as possible. But, no need to stress about being perfect - this cake is a naked cake and is pretty rustic anyway, so the more homemade it looks, the better!

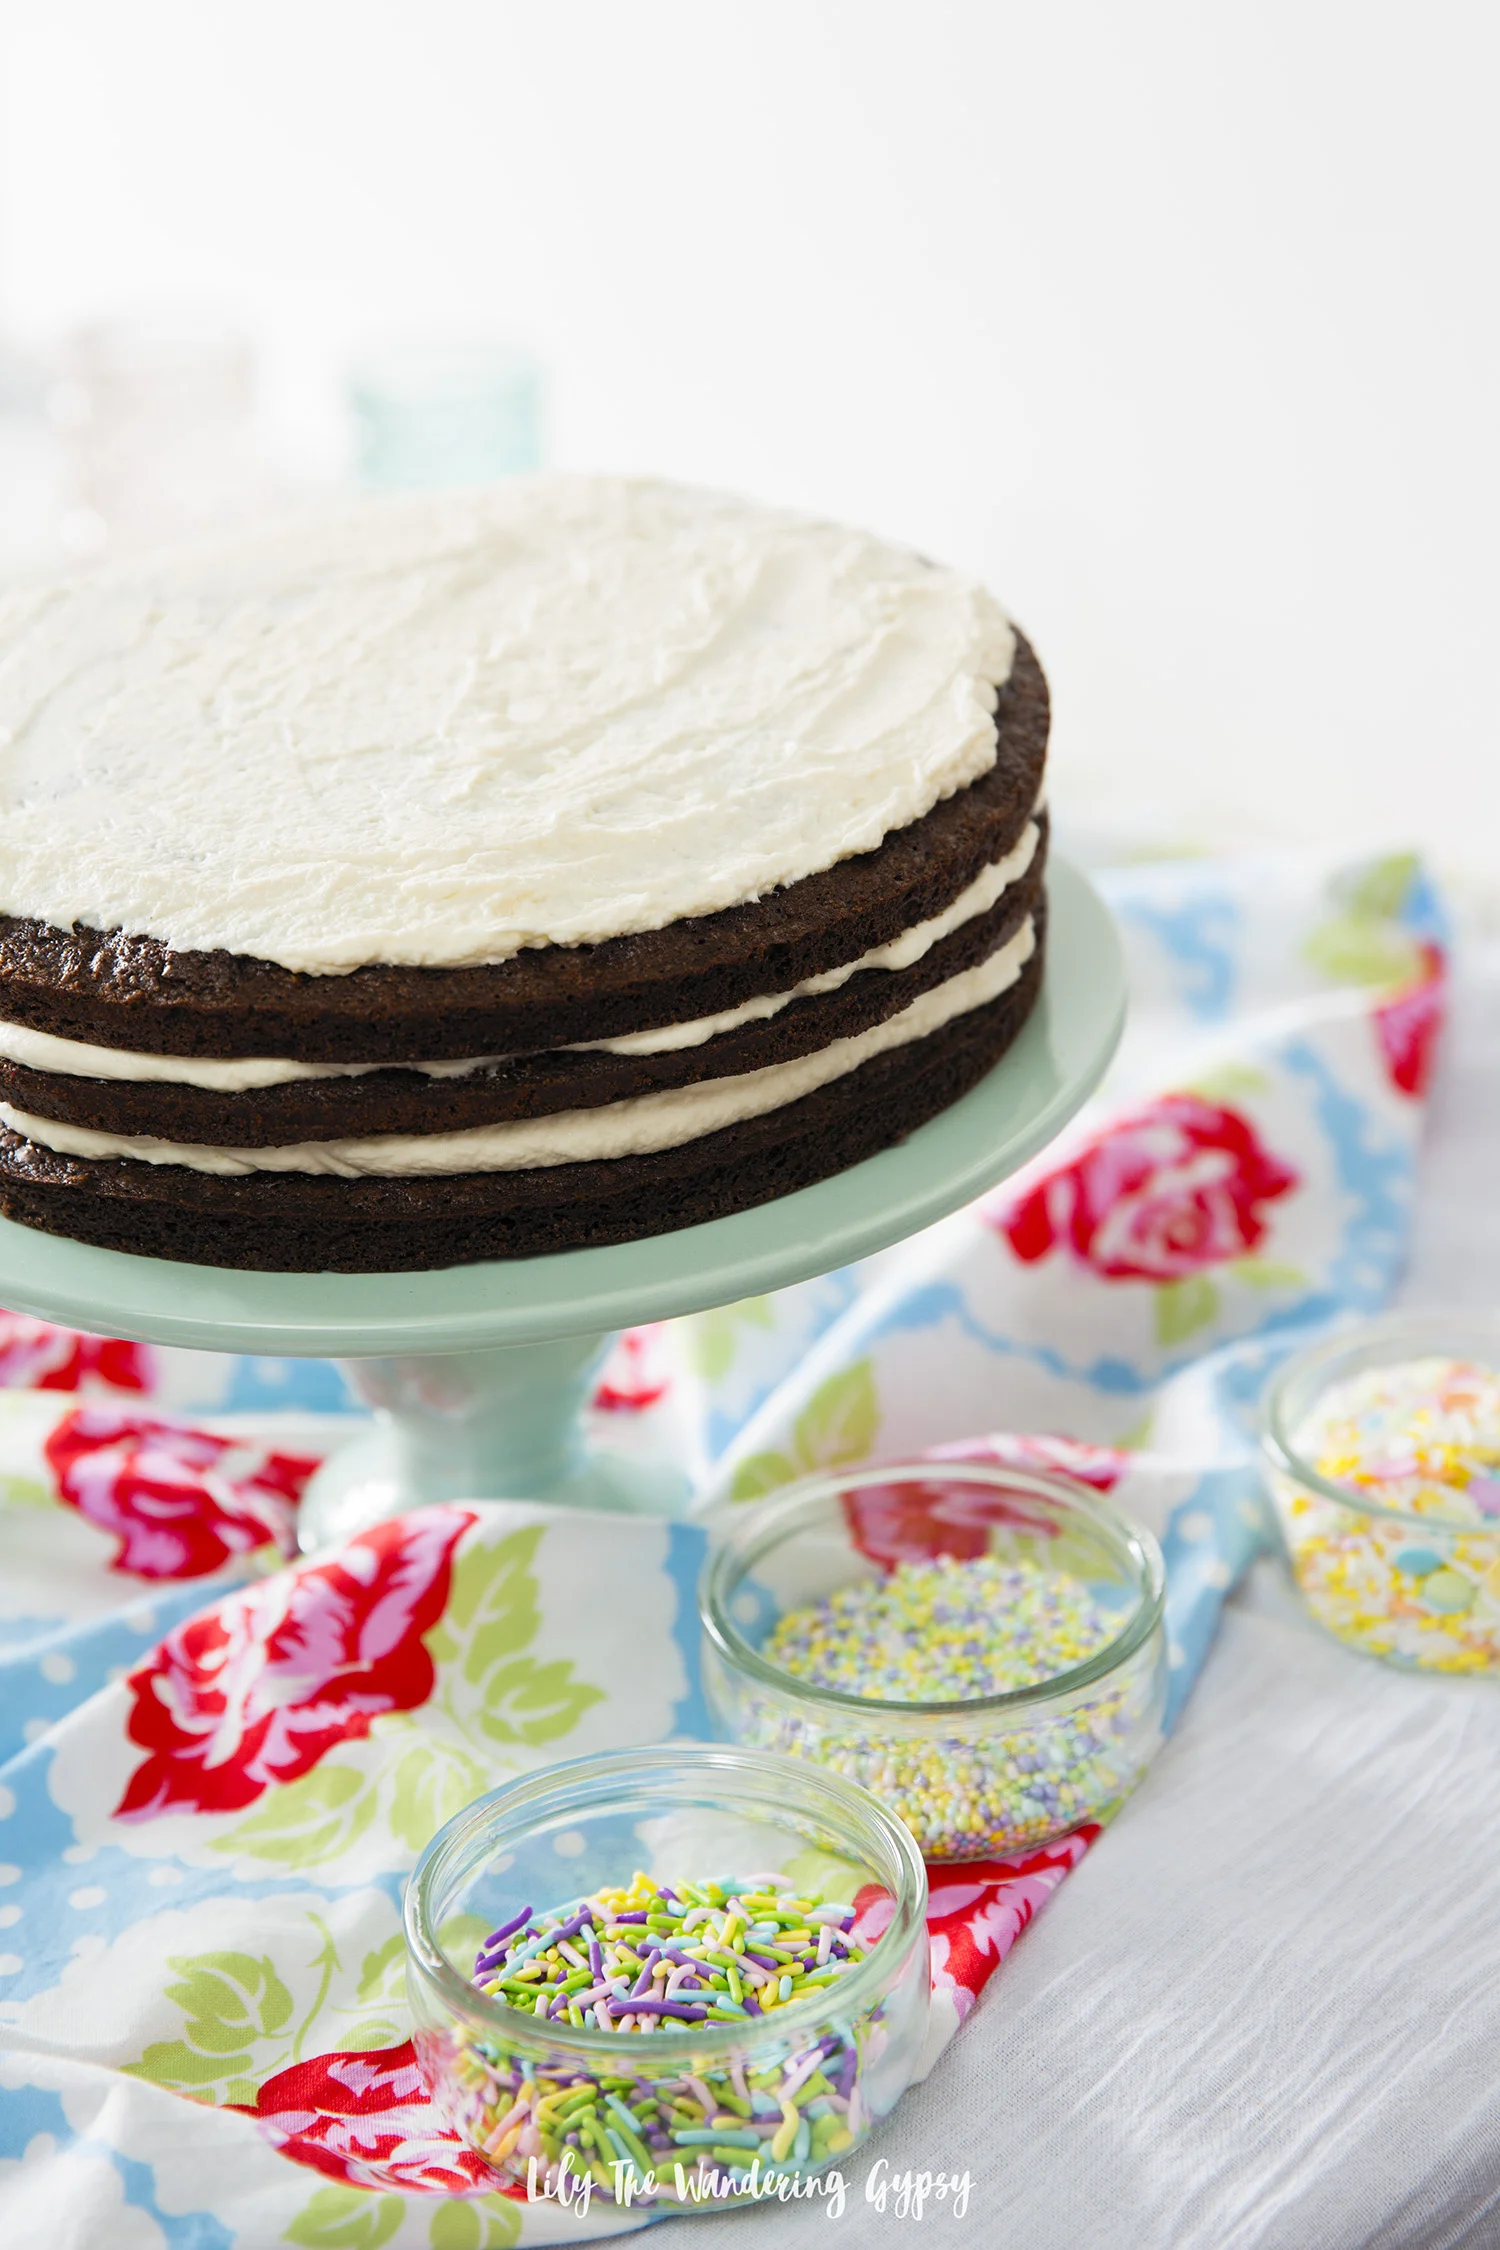
5.) To decorate the top: I used caramel sauce in a squeeze tube that worked perfectly to decorate. I basically just made a continuous line of caramel vertically across the entire cake, then crossed that again with caramel lines horizontally. I rotated the cake as I worked, which was great. Add sprinkles and enjoy!

THIS CAKE ROCKS! HOPE YOU ENJOY!

If you wind up making this recipe or any other recipes, please tag me on Instagram with @happysolez! Thanks!!

Ombre Oreo Cake Recipe with New COOL WHIP Mix-Ins, Oreo

This post has been sponsored by COOL WHIP. All thoughts and opinions are my own.

Oreo is one of my favorite flavors of all time. I would always go for a cookies and cream cone in a store with a million flavor options. I was extremely excited to be able to create a decadent, three layer ombre cake to show my love for all things Oreo!

FULL VIDEO INSTRUCTIONS:

Two iconic foods – COOL WHIP and Oreo are mixing together for the ultimate dessert! I am considering this my new “secret ingredient” because it tastes like something that an upscale bakery would use. Everyone who tries this cake is definitely going to ask what makes it taste so delicious and unique.

If I had created this layer cake with traditional icing, it would be very heavy and not anywhere near as delicious. The light, airy texture of new COOL WHIP Mix-

Ins, Oreo makes you feel like you can indulge a little without the calories.

I was extremely impressed with this product, it’s going to become a staple ingredient in my home!

The Oreo Mix-Ins worked so well to add the finishing touches to my cake – I used an icing bag fitted with a star tip and added little dollops around the bottom of the cake. Next, I added a few dollops on top and finished with a mini Oreo cookie! What a perfect homage to my favorite cookie ever!

This cake reminds me so much of the birthday cakes that my grandparents would treat me to each year as a child. They came from an Italian bakery in the Chicagoland area, and was something I looked forward to each year, and now I can nourish that tradition in my own family and friends. I am seriously excited for whichever one of my friends has the next birthday because I cannot wait to make another one of these cakes already.

I hope you enjoy this cake as much as I did. This cake tastes like it was made from scratch, when in reality, this cake took just around an hour to make!

OMBRE OREO CAKE

PREP TIME: 30-40 minutes

TOTAL TIME: 1 hour – 1.5 hours depending upon decorating time

INGREDIENTS:

3-4 containers of COOL WHIP Mix-Ins, Oreo (found at Walmart or your local retailer)

1 box of white cake mix, plus ingredients to make cake

1 box of Devil’s food cake mix, plus ingredients to make cake (use the same brand for both)

Mini Oreo cookies to decorate cake

OTHER MATERIALS:

3 round cake pans

Hand Mixer

Parchment paper, cut into circles to fit into round pans

Rotating cake decorating stand

Flat icing spatula

Icing Bag + Large Star Icing Tip

INSTRUCTIONS:

  1. Bake cakes. To create the ombre effect, I mixed up both of my cake mixes according to the packages, then added 3 cups of vanilla batter to one pan, 3 cups of chocolate batter to another pan, then in my third pan, I swirled the remaining batters. It created a gorgeous middle layer. I made sure to use two cake mixes of the same brand so that they contained the same ratio of ingredients for each layer.

  2. Once cakes have completely cooled, carefully slice the cakes so they are flat on top (they tops will have rounded during baking). I used a serrated bread knife and it worked super well.

3. Remove the paper from the first layer, and place the chocolate layer onto the cake stand, upside down. Cover that layer with ½-1 container of Cool Whip Mix Ins Oreo. Smooth out the Oreo Mix-Ins and place the second “swirled” middle layer onto that. Again, cover the top of the second layer with Oreo Mix-Ins, then place the vanilla layer on top UPSIDE DOWN, to ensure a flat cake on top. Note – when I first opened the product, it had a lot of fluffy light texture. Once I stirred it and started icing the cake with it, the COOL WHIP got a lot smoother.

4. Cover the top of the cake with a smooth layer of Oreo Mix-Ins, then add a thin layer to the entire outside of the cake, smoothing several times with the icing spatula. Make sure this layer is as smooth as possible, then place cake into freezer for around 1 hour.

5. Time to decorate the cake! Using that same delicious COOL WHIP Mix-Ins, Oreo as before, pipe little shapes along the entire bottom of the cake. Make sure to keep as consistent of shapes as you can.

6. Lastly, add dollops of icing swirls around the top of the cake (I did 8 total), and add mini Oreo cookies on top. I also added one larger dollop in the middle of the top of the cake and it all turned out so well!

I was SO happy to see how the layers stayed perfectly together with the help of the Cool Whip Oreo layers. I am thrilled to share this recipe because it’s practically fool proof.

Thank you so much for taking the time to check out this recipe. I hope it has inspired you! This cake would be perfect for birthdays, Mother’s Day, Father’s Day, graduation parties, and even just because!

Learn more about this wonderful new COOL WHIP Mix-Ins,Oreo here and retailers near you carrying it, and connect with COOL WHIP on social!

FACEBOOK

INSTAGRAM

PINTEREST