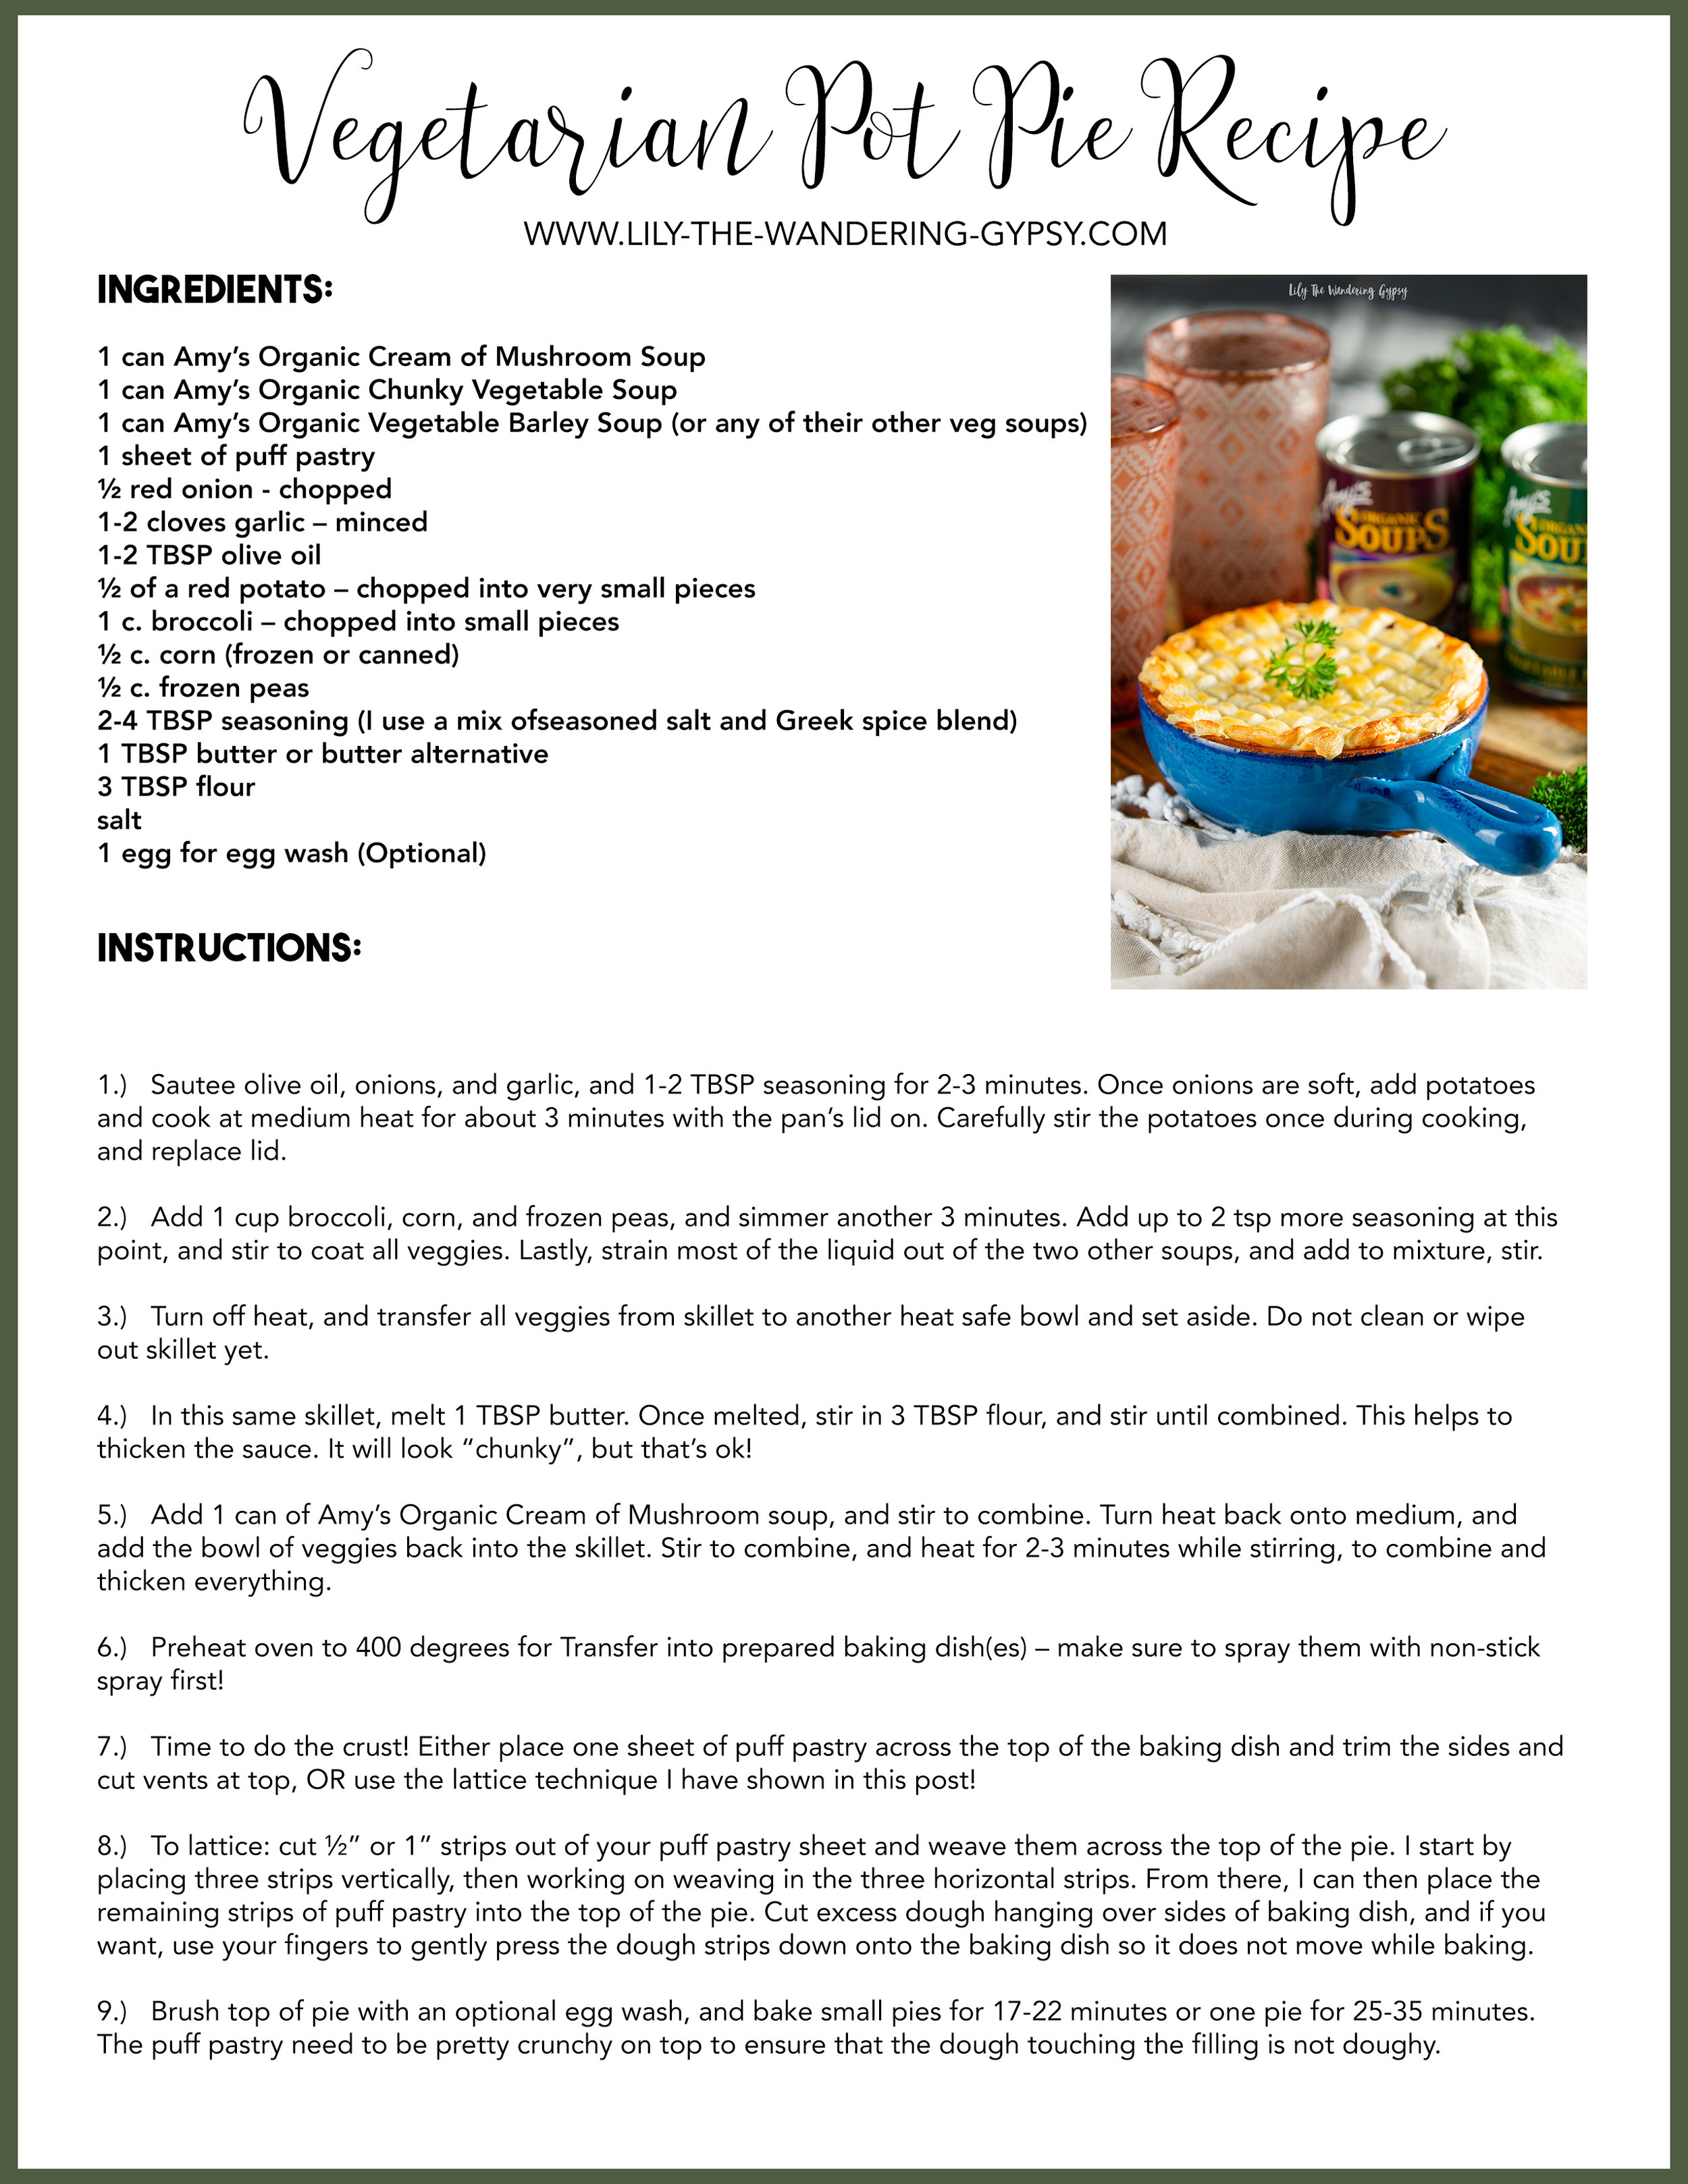
Winnie The Pooh + Christopher Robinson Inspired Recipe

Enjoy family movie nights? If you are a lover of all things Winnie The Pooh, then this Pooh Approved Snack Mix and DIY Hunny Pot are exactly what you could to make! Perfect for family movie nights, because sometimes doing nothing leads to the very best of something! Simply mix up teddy bear shaped crackers and other health-conscious snacks to please the entire family!

My heart is overwhelmed by this fun opportunity I had to create this recipe and one more for WINNIE THE POOH and DISNEY and HELLO SOCIETY!!!!!

Happy Halloween! Check out this Bloody Glass Cupcake recipe!

Halloween was pretty fun this year! We made all sorts of deliciously spooky food and drinks! Here is one of the recipes which turned out even better than expected! This homemade honey blood made a big impact while the broken pieces of sugar glass looks incredibly realistic is was just incredible!

I used a bow of red velvet cake mix to make the cupcakes then had SO much fun decorating these cupcakes. The black cupcake liners were also so perfect for that dark and mysterious / murderous look I was going for, LOL!

In this post, I will teach you some very exciting techniques!

HOW TO MAKE SUGAR GLASS:

HOW TO MAKE FAKE EDIBLE BLOOD WITH HONEY:

HOW TO MAKE HOMEMADE BUTTERCREAM FROSTING:

Stay tuned! Tips will be published tomorrow. Enjoy!

Mummy Wrapped Jalapeño Poppers

Looking for an eye-catching appetizer that people will love for Halloween? These Mummy Wrapped Jalapeño Poppers are delightfully spooky and you’re going to love them. And, bonus points because these can be made vegetarian or with bacon in the filling - it’s up to YOU!

INGREDIENTS (MAKES ABOUT 20-24 poppers)

1 (8oz.) block of cream cheese

1-1.5 cups shredded cheddar cheese

2-3 Tbsp seasoning - I like Ranch or Mexican seasoning for these

1-2 packages of pizza crust (the thinner the better - I used Wewalka Bistro Crust)

Candy eyes at least 40 pieces (I like these ones)

Baking sheet (I love these Air Bake ones)

Parchment paper - (only suggested if you are not using a baking rack)

Baking rack - optional (similar here and here)

INSTRUCTIONS:

1.) Slice top 1/3 of each pepper off, lengthwise. Carefully remove seeds and other inside material with the back of a kitchen spoon or similar tool. I tend to use rubber gloves when making these, so my hands do not catch any of the spiciness of the peppers.

2.) Using a small spoon to add filling to peppers, or place your filling ingredients into a plastic bag and cut the end off to use to pipe the filling into the peppers for a more polished look. Wipe off excess filling that may have gotten on the edges or the tops.

3.) Cut pizza dough into the thinnest strips you can. I use the dough as cold as possible, or almost frozen so it cuts well and also holds the shape of the strips well. Next, wrap small strips of dough around filled peppers in a “mummy sort of way”. I left room for the eye area, and after they baked I placed candy eyes to give them a good personality + spooky look.

4.) Bake at 350-375 degrees F for 10-15+ minutes on a metal baking sheet, covered in parchment paper. These baked pretty quickly and I just LOVE how they turned out!

Add the candy eyes to the mummy poppers! While poppers are still warm, take two candy eyes in your fingers, and place them on the “mummy face” both nest to each other at once, so they are both looking/pointing in the right direction. You can have a lot of fun with these, and I would love them to be a part of your Halloween celebrations and festivities! Enjoy! Happy Haunting!

Creamy Tomato, Basil, Parmesan Soup Recipe

A delicious, homemade version of a classic tomato soup recipe. This will be the only tomato soup recipe you will ever need. With lots of tomatoes, a creamy base, and a hint of parmesan, this soup is sure to please! We even doubled the recipe, and finished the soup in a matter of days. Keep reading to get the recipe, below!

Luckily, I used this recipe from Tastes Better From Scratch and I was thrilled with the outcome!

FIND THE ORIGINAL RECIPE HERE

The weather definitely turned to fall/winter today. Last night, it began to get pretty chilly but definitely bearable. This morning, the high was about 45 degrees, and I am super happy to welcome cooler temps with this soup recipe and lots of others. Perhaps loaded baked potato soup will be next!

Ingredients (serves 8)

  • 2 14.5 ounce cans diced tomatoes , with the juice

  • 2 tsp olive oil, if using stovetop method

  • 1 cup carrot , finely diced

  • 1 cup onion , finely diced

  • 1 cup celery , finely diced

  • 2 Tablespoons tomato paste

  • 4 cups low-sodium chicken broth

  • 1 teaspoon dried oregano leaves (Tbs fresh oregano)

  • 1 cup fresh basil leaves or more (or 2-3 Tbsp dry basil)

  • ½ cup butter

  • ½ cup all-purpose flour

  • 1 cup freshly grated parmesan cheese

  • 1½ cups half and half (or whole milk)

  • 1 teaspoon salt

  • ¼ teaspoon freshly ground black pepper

Instructions

For the Stove Top (This is the method I used):

  1. Add diced tomatoes, carrots, onions, celery, tomato paste, chicken broth, oregano, and basil to a large soup pot. Bring to a gently boil and cook for several minutes, until the vegetables are tender. Alternately, I cooked the onions for a few minutes with 2 tsp olive oil, then add carrots, celery, and seasonings to cook until carrots are a bit tender.

  2. In a separate pot, prepare the roux. Add butter to the pot over medium low heat and allow to melt. Stir in the flour and whisk together constantly for about 10 minutes or until the roux is a nice golden brown color. Slowly add 1 cup of the soup from the other pot to the roux--it will start to form a thick paste.  Slowly add another 3 cups of warm soup to the roux. Whisk together until smooth. Add the roux mixture to soup pot and stir to combine. Note - the rue + soup mixture was thick at first, but when added back into the larger soup pot, everything turned out extremely well!

  3. Pour soup into blender (you may need to do this in batches, depending on how big your blender is)

  4. Purée until smooth. Return to soup pot.

  5. Stir in the Parmesan cheese, half and half (or milk), and salt and pepper. Add additional oregano and basil if needed, to taste. Stir well. Cook for a few more minutes until warmed through. Enjoy!

For the Slow Cooker:

  1. Add diced tomatoes, carrots, onions, celery, tomato paste, chicken broth, oregano, and basil to your slow cooker. Cover and cook on low for 5-6 hours until flavors are blended and vegetables are soft.

  2. About 30 minutes before the soup is ready, prepare a roux. Melt the butter over medium low heat in a skillet and add the flour. Whisk together constantly for about 10 minutes or until the roux is a nice golden brown color. Slowly add 1 cup of the soup from the slow cooker to the roux--it will start to form a thick paste.  Slowly add another 3 cups of warm soup to the roux. Whisk together until smooth. Add the roux mixture to the slow cooker and stir to combine.

  3. Pour soup into blender (you may need to do this in batches, depending on how big your blender is)

  4. Purée until smooth. Return to the slow cooker.

  5. Stir in the Parmesan cheese, half and half (or milk), and salt and pepper. Add additional oregano and basil if needed, to taste. Stir well. Cover and cook on low for another 20-30 minutes or until warm. Enjoy!

Vegetarian Pot Pies Recipe with Amy’s Kitchen

Thank you Amy’s for sponsoring this post. #StartWithAmys this Soup Season.

With cooler weather on the horizon, it’s time to incorporate comfort food that will make you happy about what you are serving and eating. For over 30 years, Amy’s Kitchen has been cooking up vegetarian meals made with high-quality ingredients. As fall quickly approaches, it’s time to get your soup on!

I found a unique way to incorporate three varieties of Amy’s Kitchen soups into a Vegetarian Pot Pie, and I hope you love it! Since Amy’s Soups already taste delicious on their own, I was able to allow those flavors to shine, while simply complimenting them with a few more veggies and a flaky, puff pastry woven lattice crust. This dish can be made as individual pot pies, or as one large casserole – it’s completely up to you! And, feel free to use this lattice technique, or simply use a full sheet of puff pastry crust right across the top.

This homemade, vegetarian dish is waiting to be served at your next weeknight dinner, holiday meal, or even as a make-ahead meal that can be frozen and baked in just a short time, making dinner exceptionally easy AND delicious!

The phrase “comfort food” definitely comes to mind with this dish. It’s filled with an array of veggies, plus Amy’s Organic Cream of Mushroom Soup, Organic Chunky Vegetable Soup, and their Organic Vegetable Barley Soup. This dish is literally brimming with vegetables, you are going to love it. Even super picky eaters will enjoy this food. It’s a great idea to stock up for the cooler months with Amy’s soups! Keep a few soup cans stashed in your pantry (or desk!) for those times when you want something tasty that will warm you up as well. I always feel better after a warm meal, and these soups make an exceptional meal all on their own!

I love this cream of mushroom soup - it could surely be enjoyed on its own, warmed up with a handful of oyster crackers in the bowl for some crunch. I have never found a cream of anything soup that I am happy with. I have found that most canned cream soups are all way too thick and just full of unnecessary ingredients, and I have found too some have a sort of strange aroma. This has always turned me away from using condensed cream soups, but now I have a newfound hope thanks to Amy’s Kitchen! The Cream of Mushroom Semi-Condensed Soup worked super well for the base of this recipe, and would even be super delicious heated and enjoyed on its own, or with a handful of soup crackers.

I have fond memories of my mom making chicken pot pie many, many times as a child. She would use a traditional recipe that incorporated chicken and a small portion of veggies. It was always amazing, but as I grew older, and realized the importance of eating plant-based, I knew I needed to adapt a few of my most treasured family recipes into vegetarian versions.

Luckily, all of Amy’s products contain high-quality ingredients. That is extremely important for me, and I am so happy I have made a small lifestyle switch to considering each and every ingredient in the foods I eat and prepare for those I love. At Amy’s, they choose the best ingredients for each recipe. They cook with ingredients that people use in their own kitchens and trust, like carrots, beans, flour and spices! They don’t use a lot of starches and thickeners (which I do notice when I open their soups and other foods. They rely instead on slow simmering and cooking to develop soups and creamy sauces. This is very apparent as I was using the Amy’s Cream of Mushroom soup, it’s a really smooth texture without being overly thick, like other cream canned soups.

PRINTABLE RECIPE BELOW - RIGHT CLICK TO SAVE OR PRINT

INGREDIENTS:

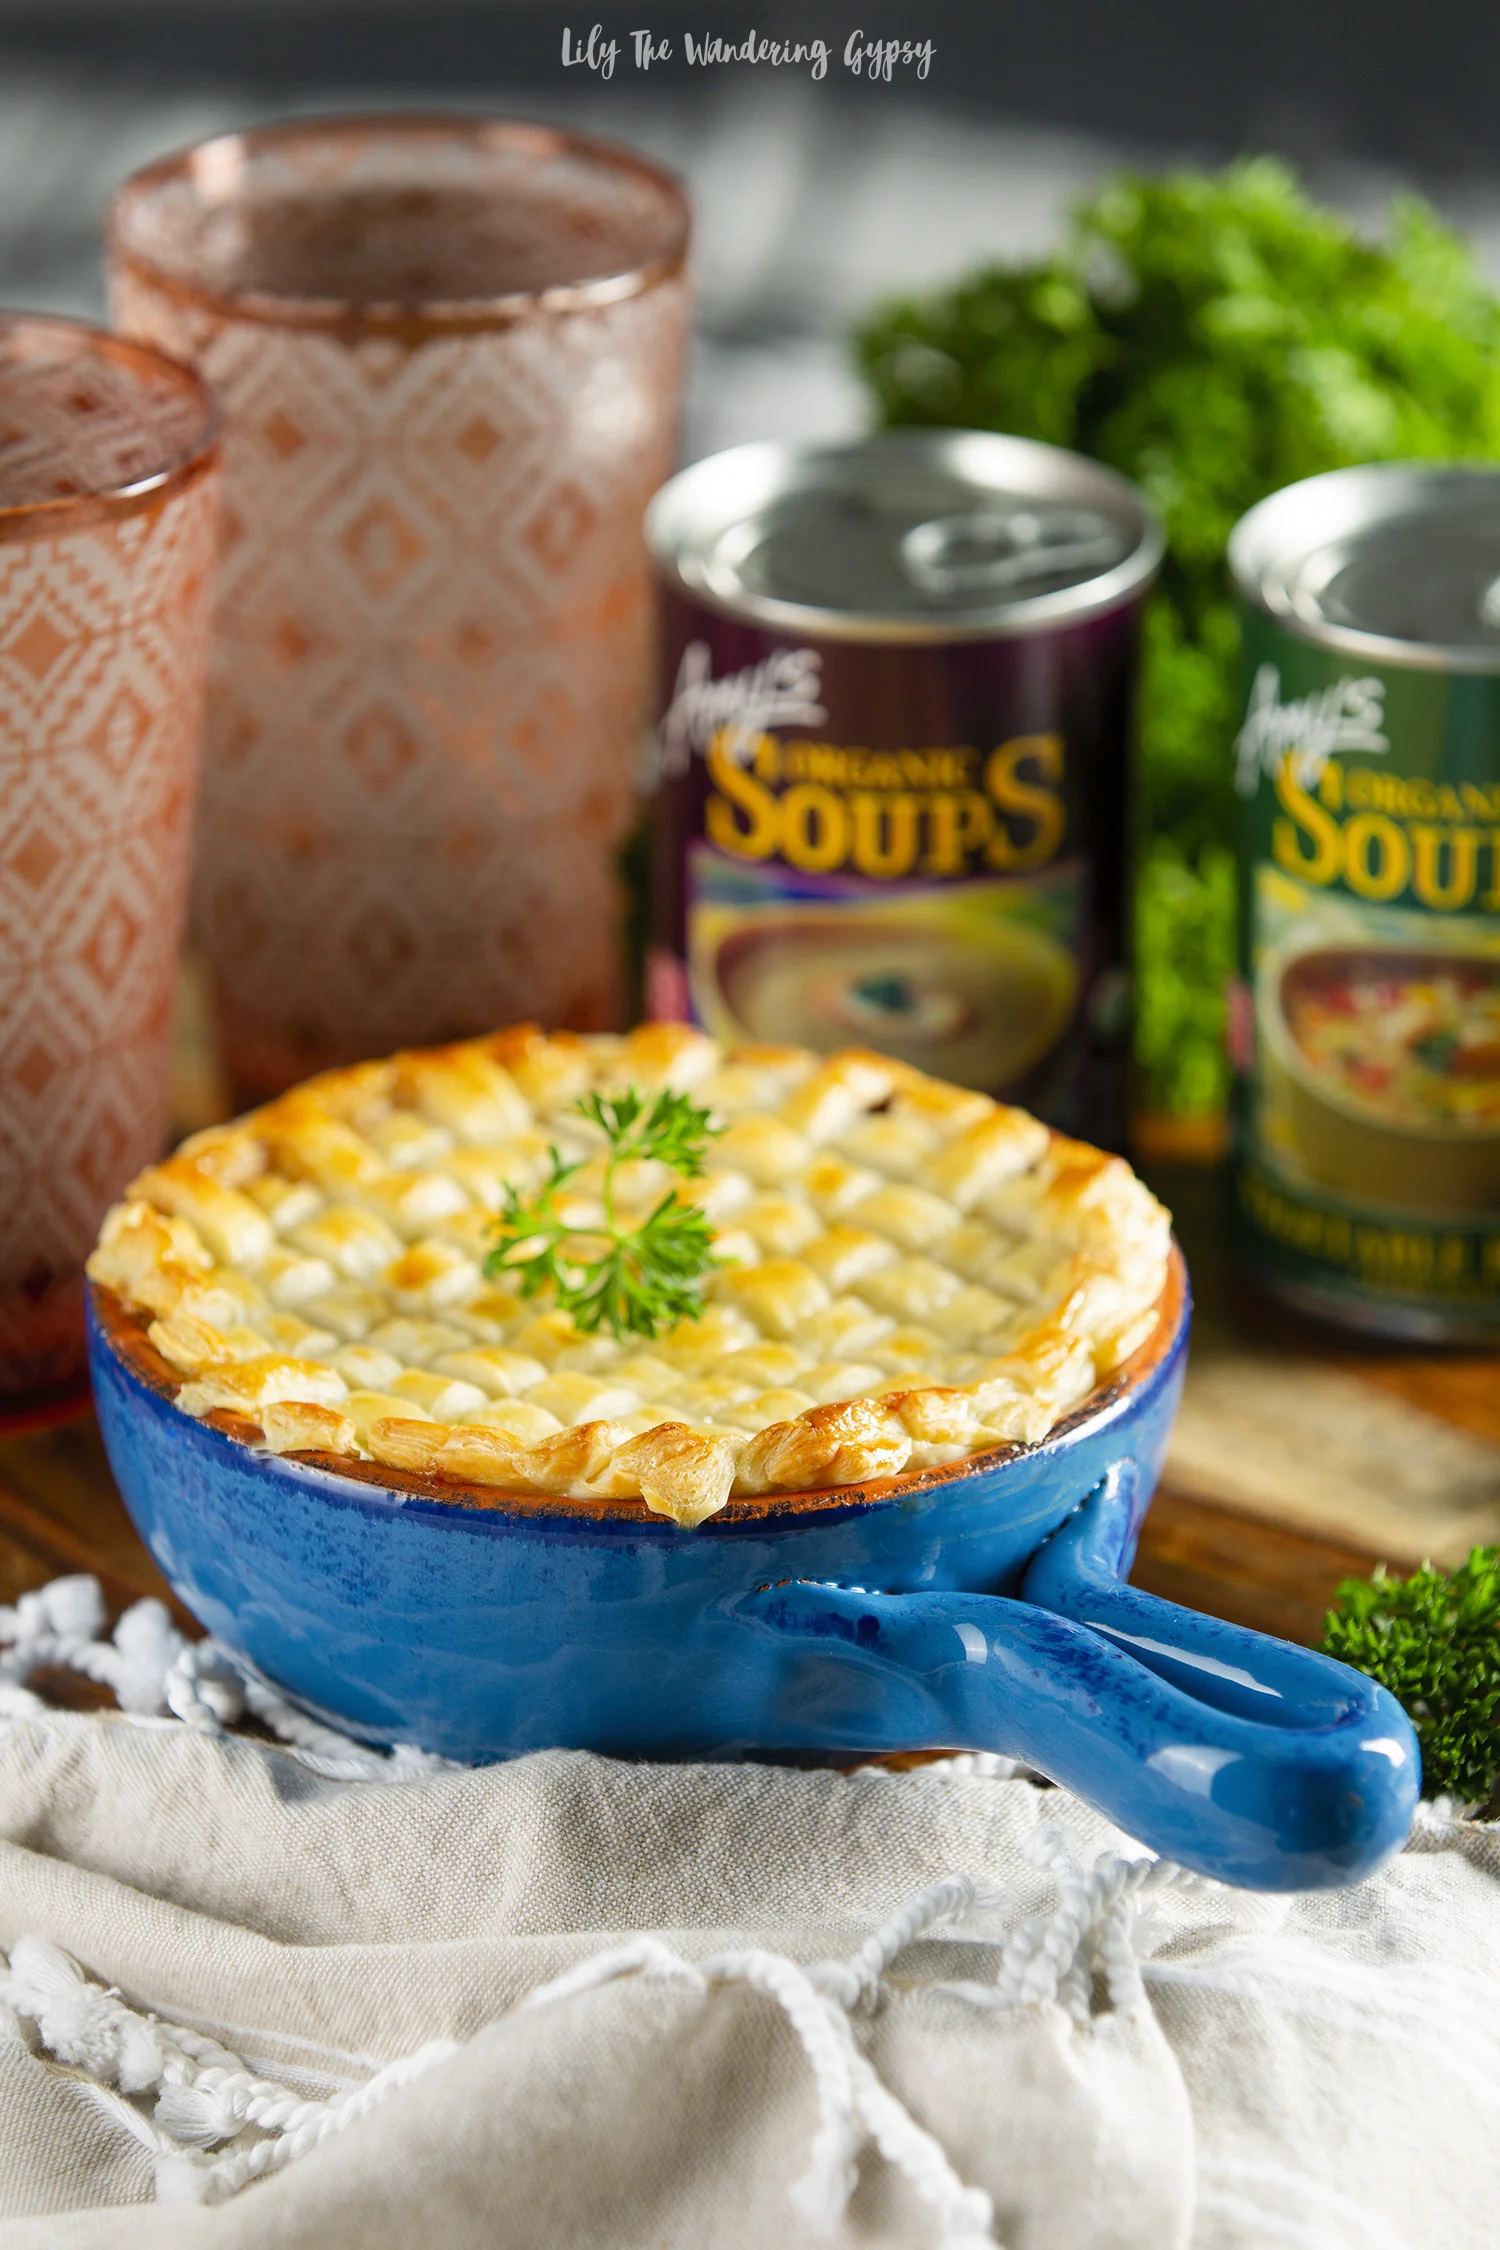
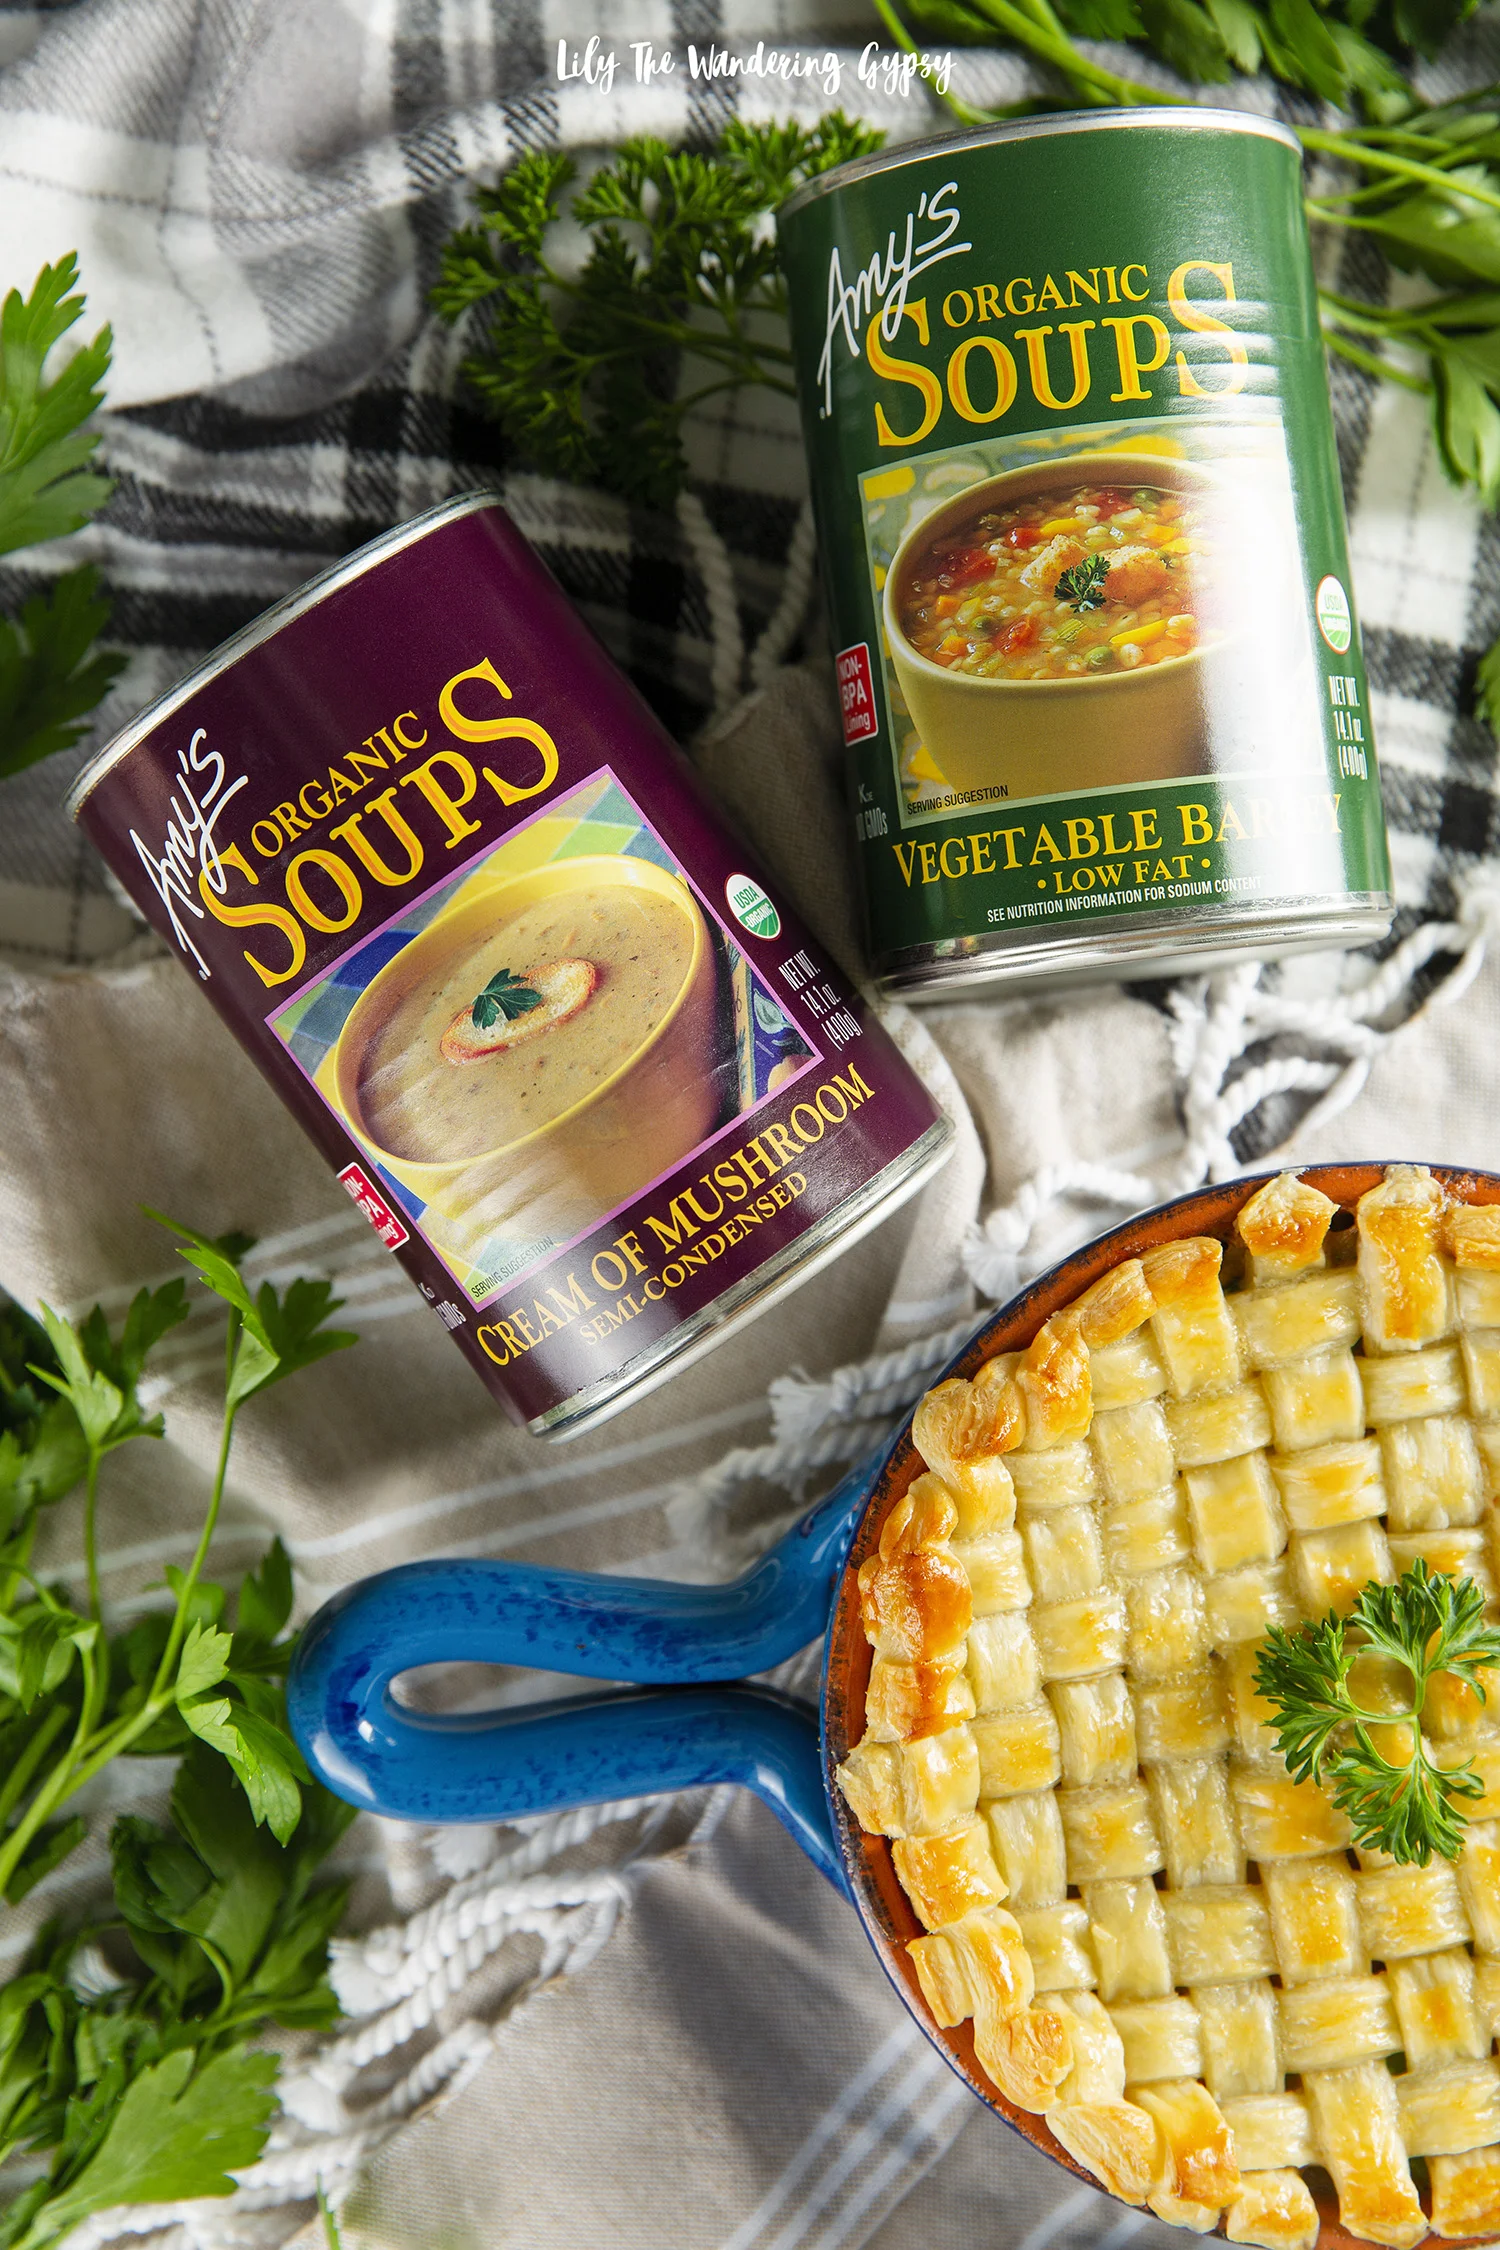
1 can Amy’s Organic Cream of Mushroom Soup

1 can Amy’s Organic Chunky Vegetable Soup

1 can Amy’s Organic Vegetable Barley Soup (any of their other vegetable soups will work well too)

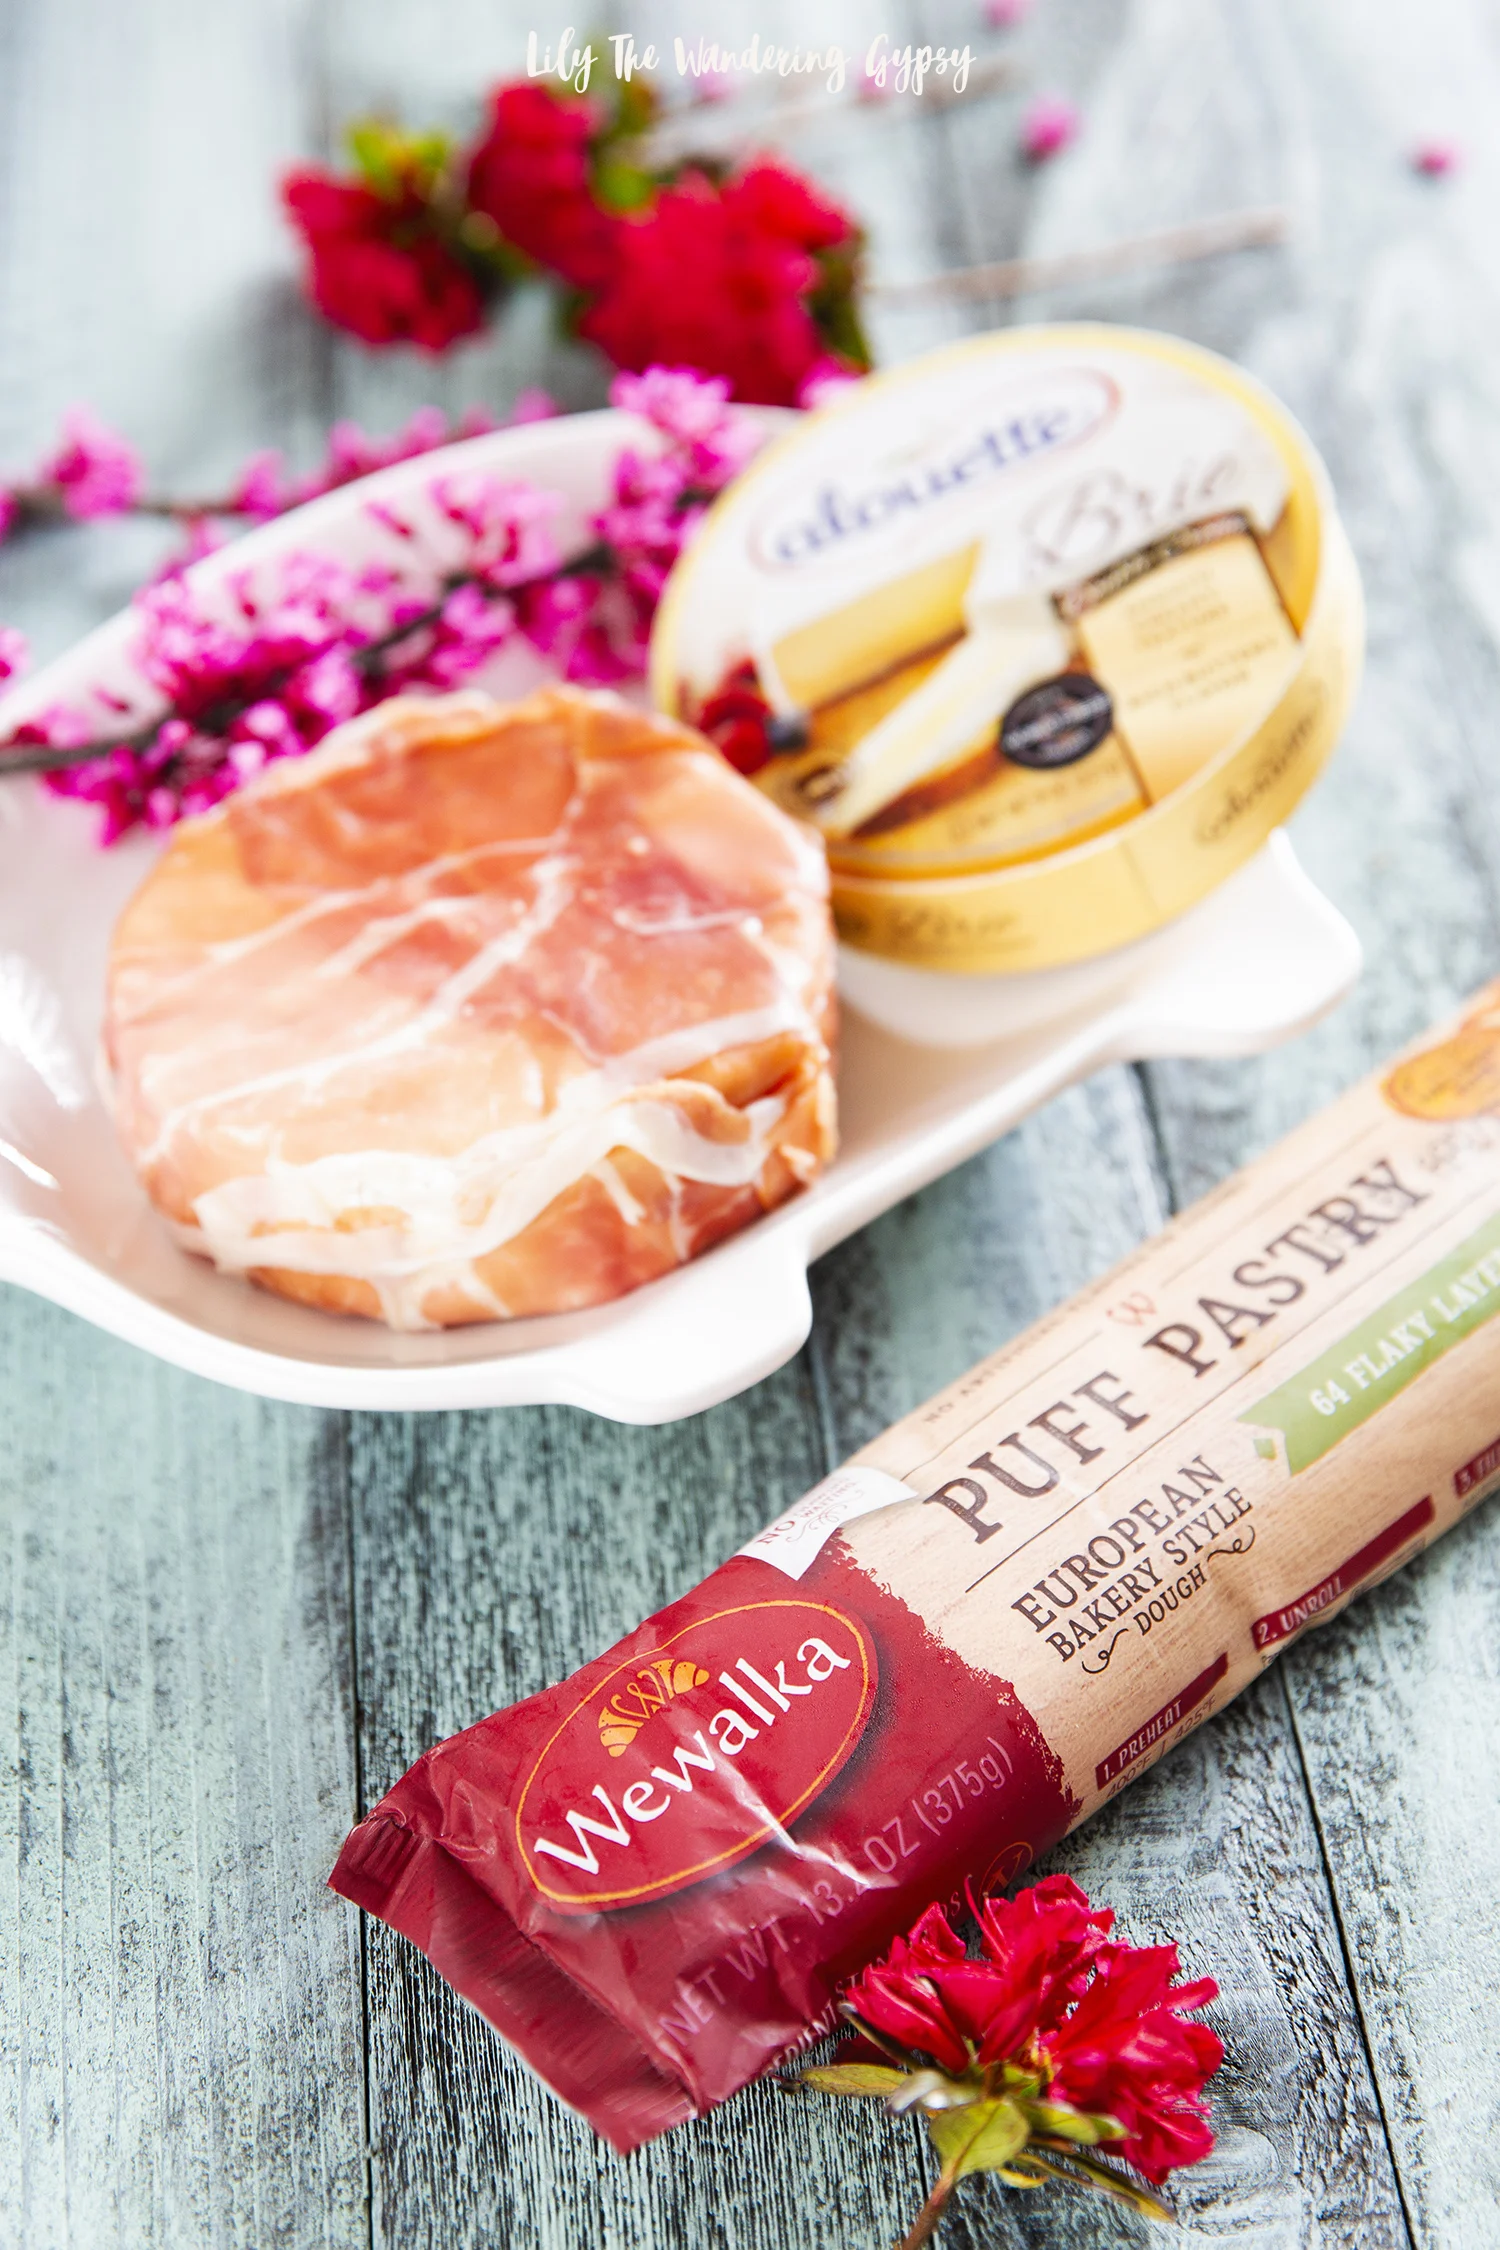
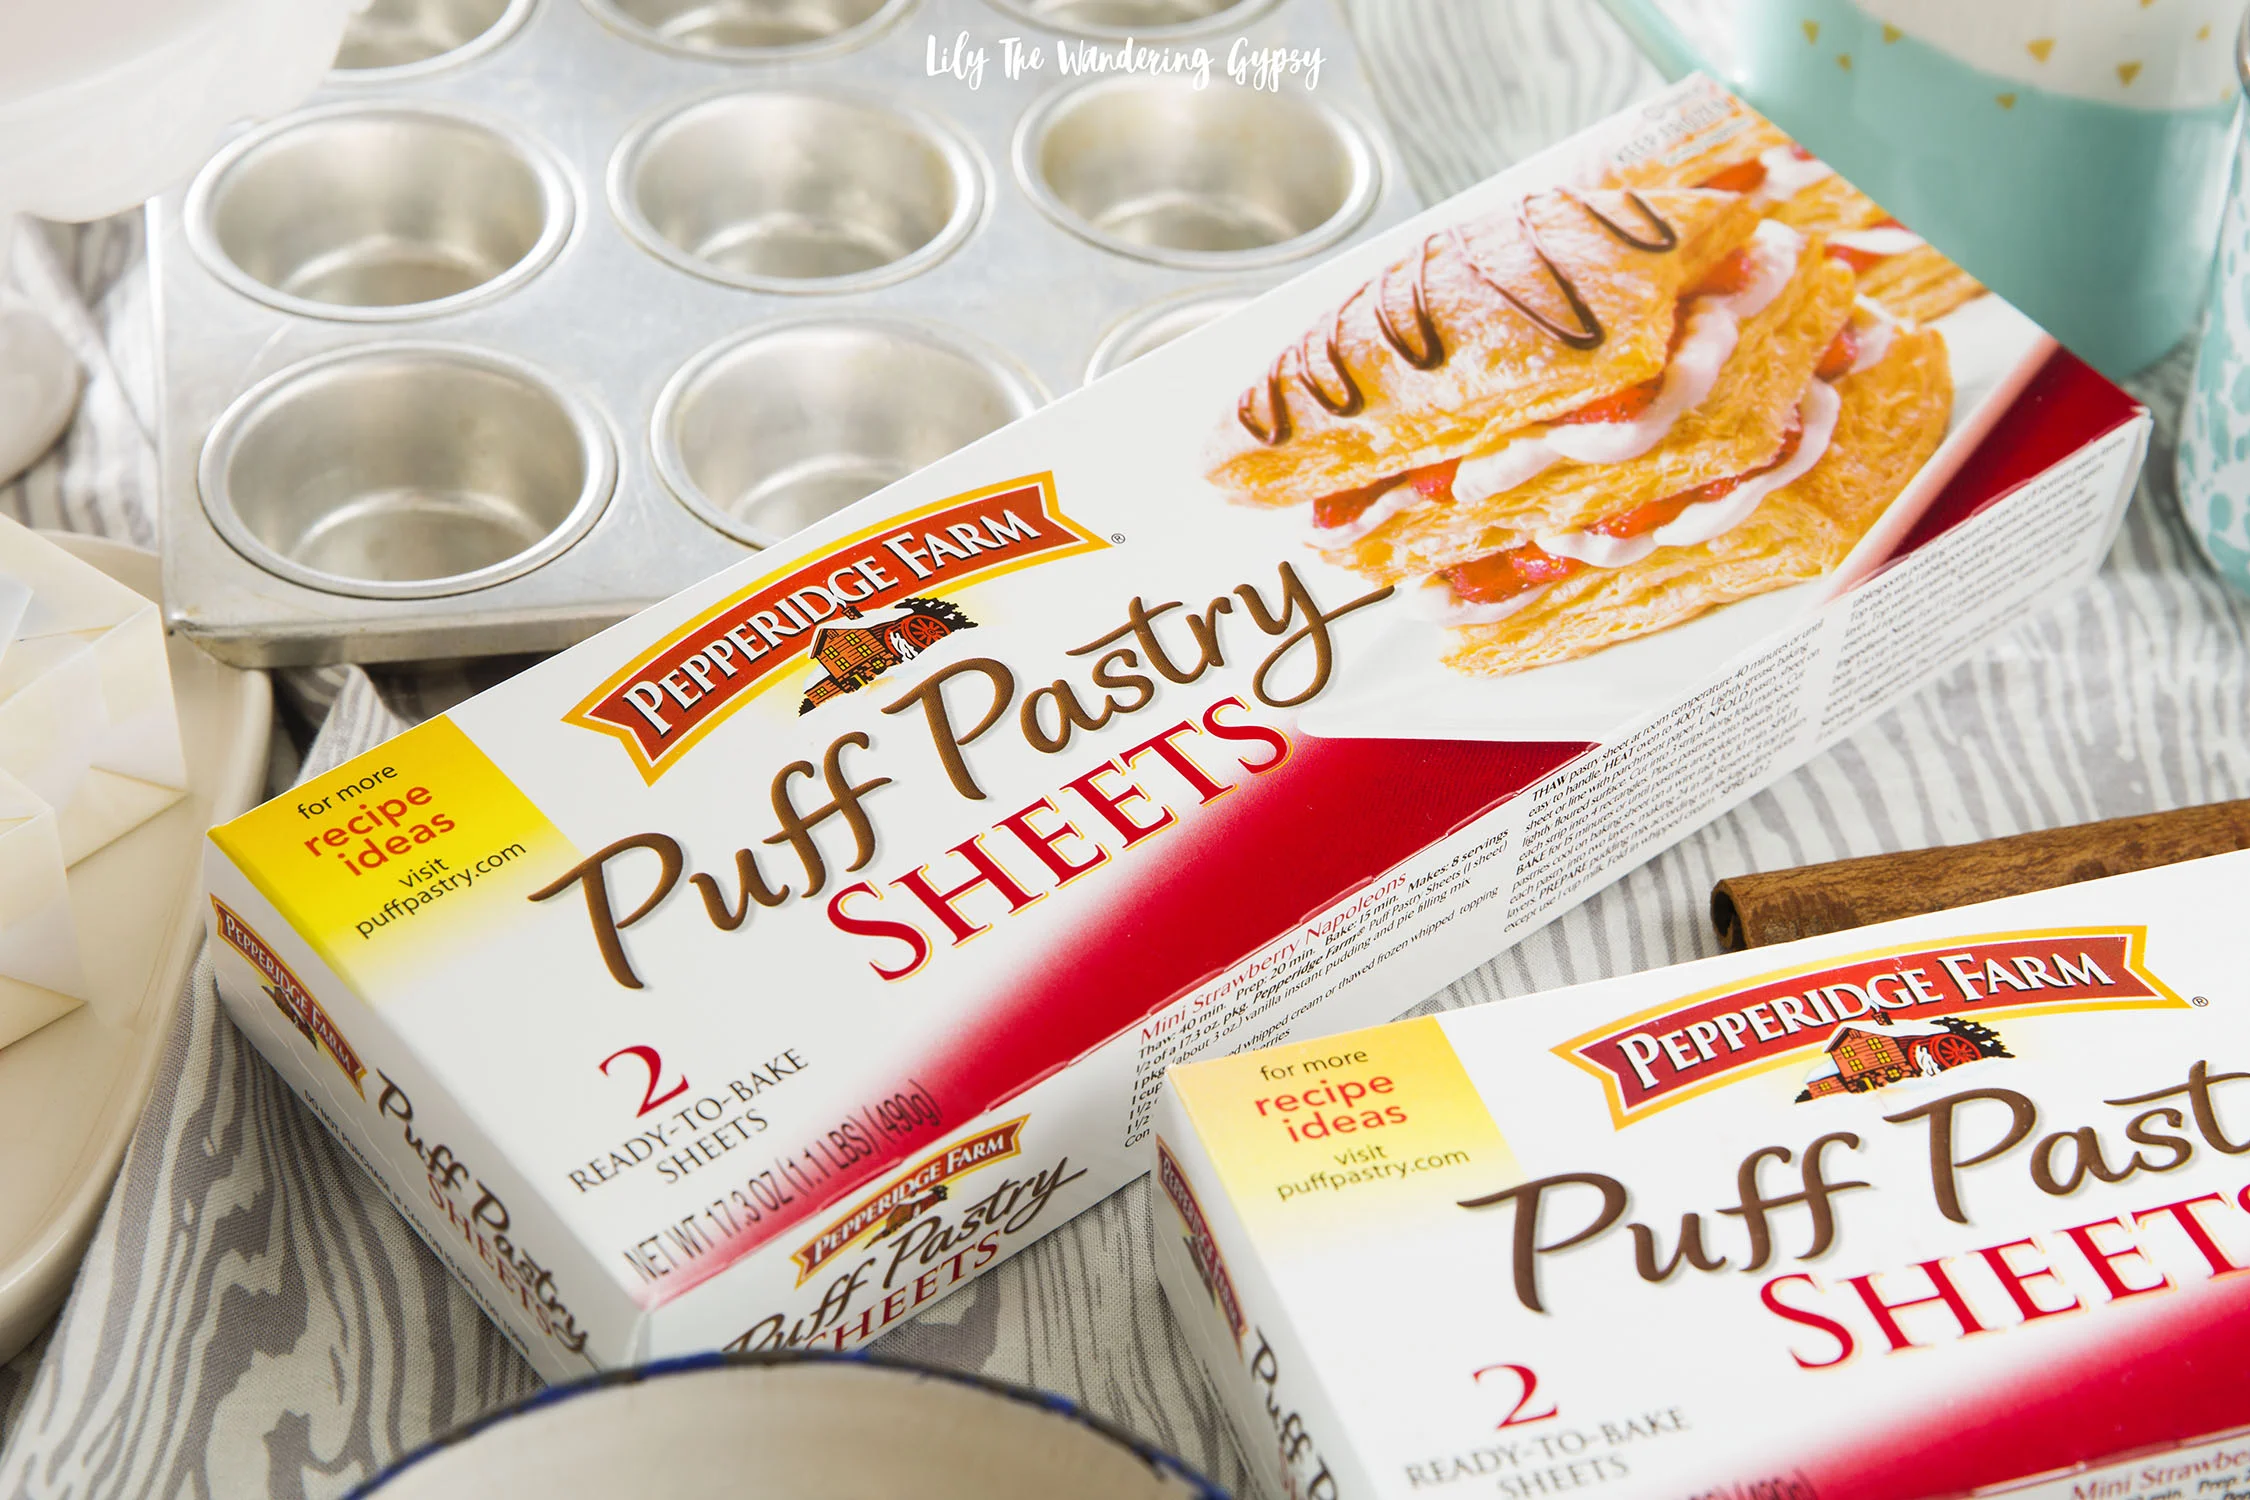
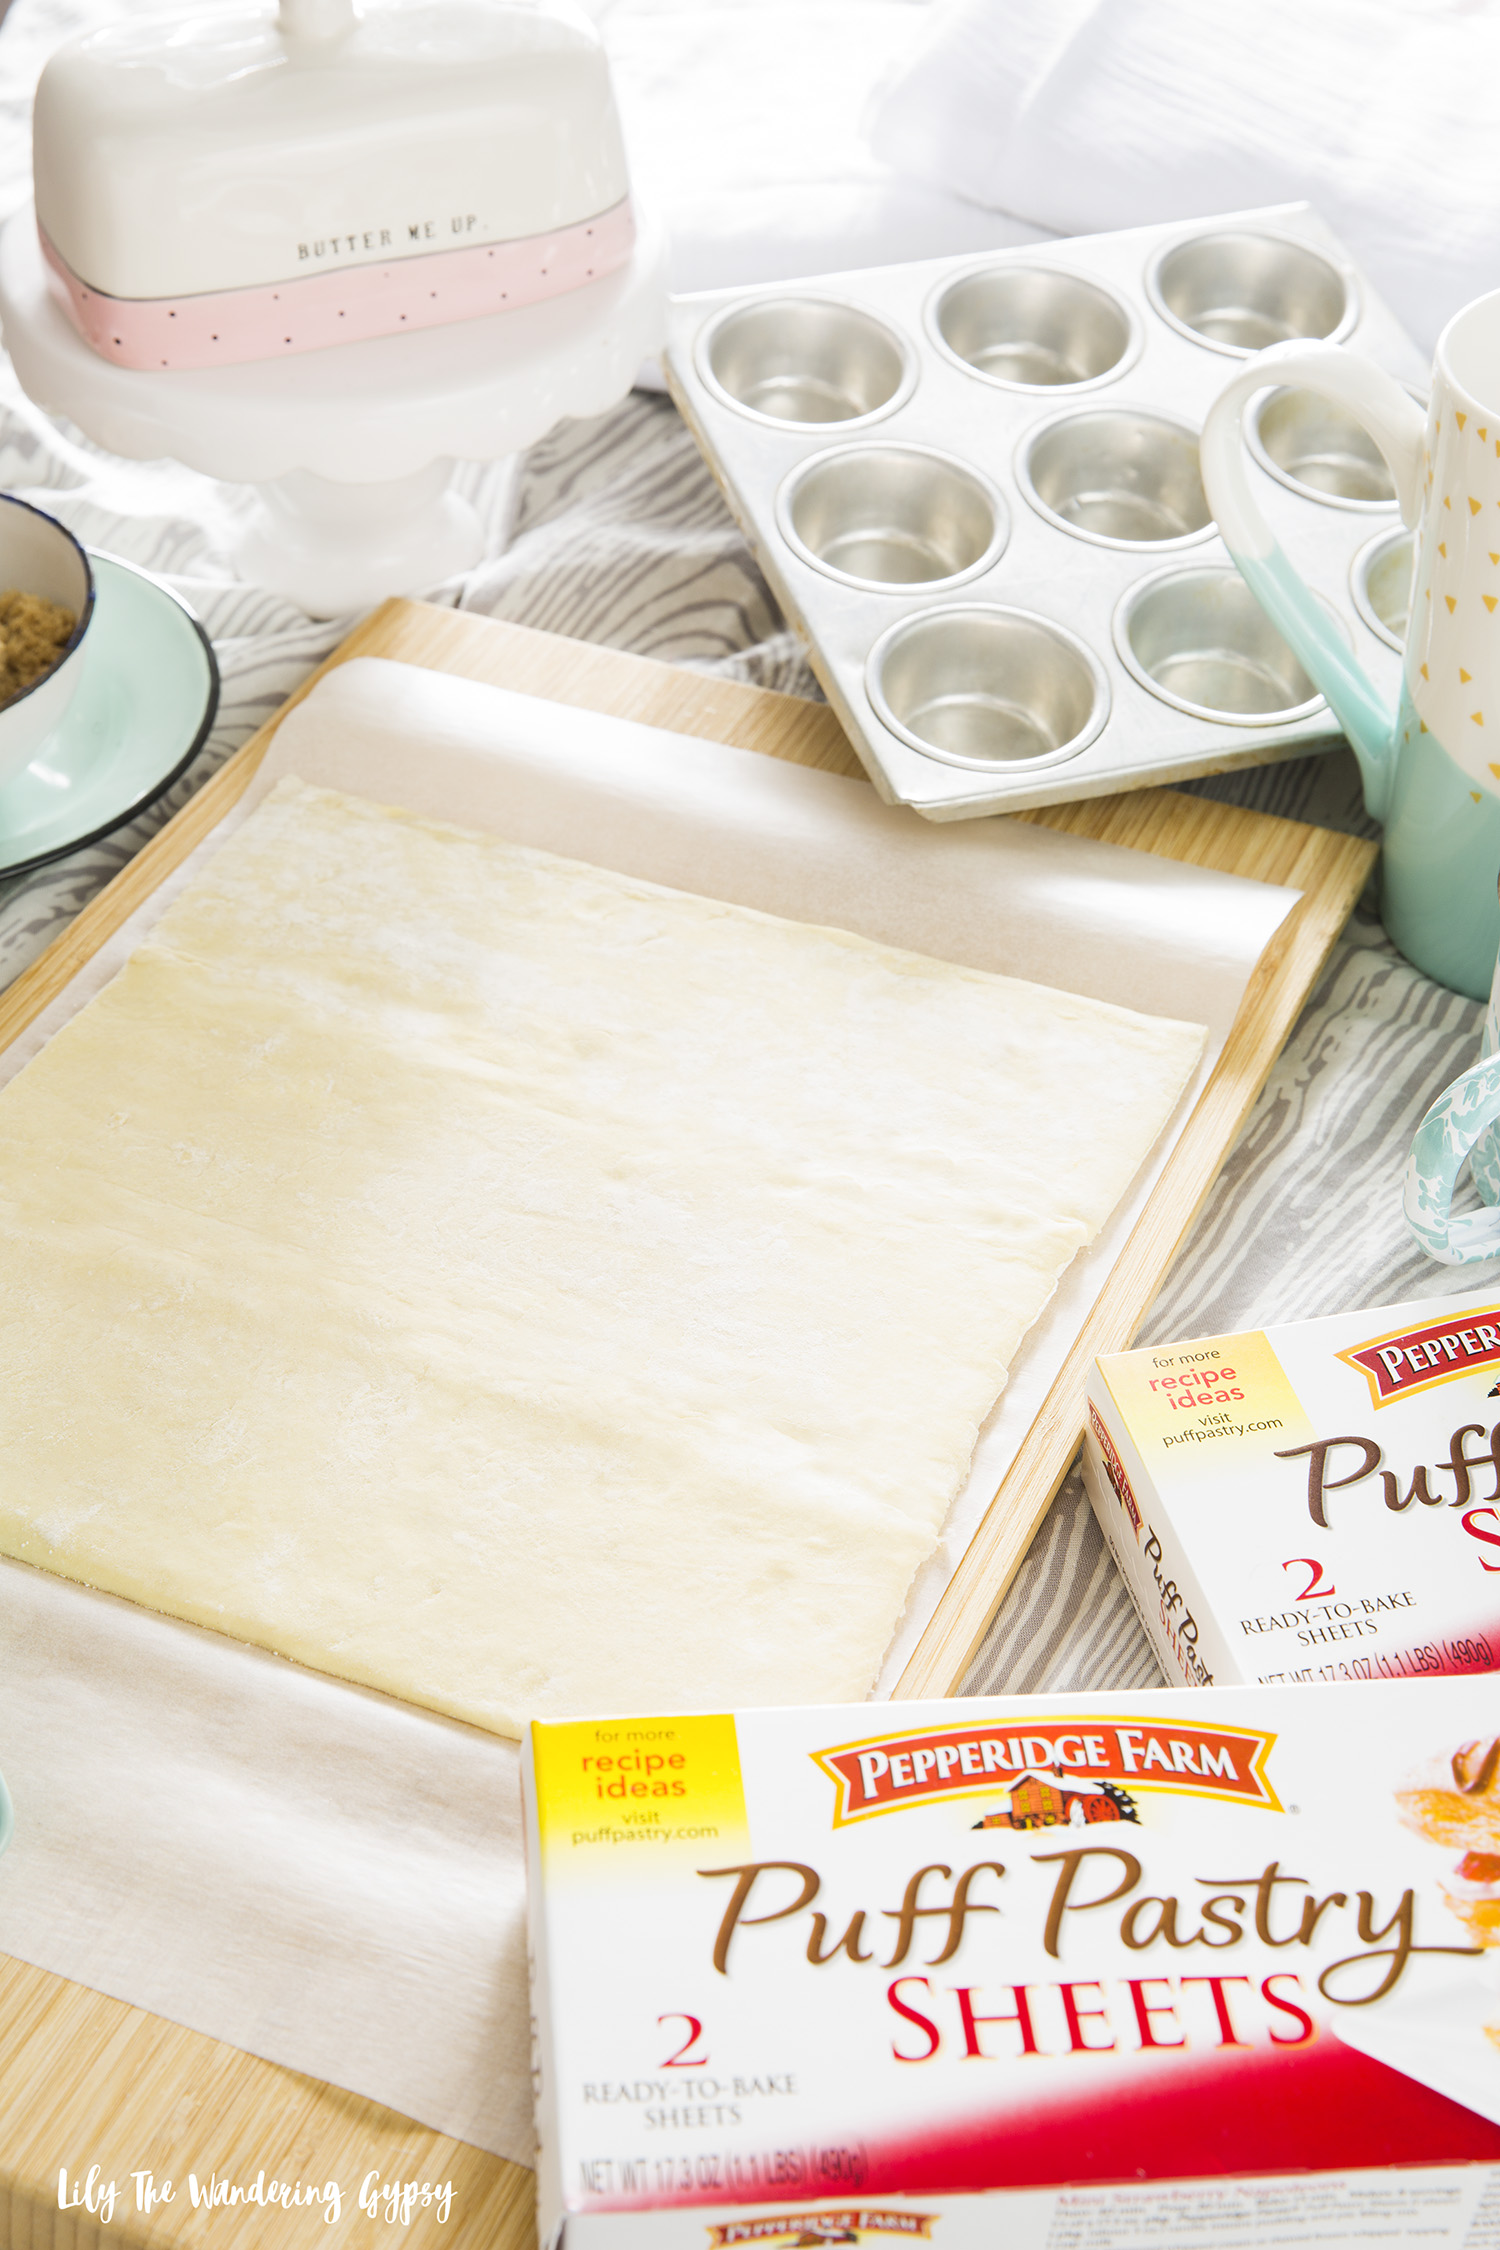
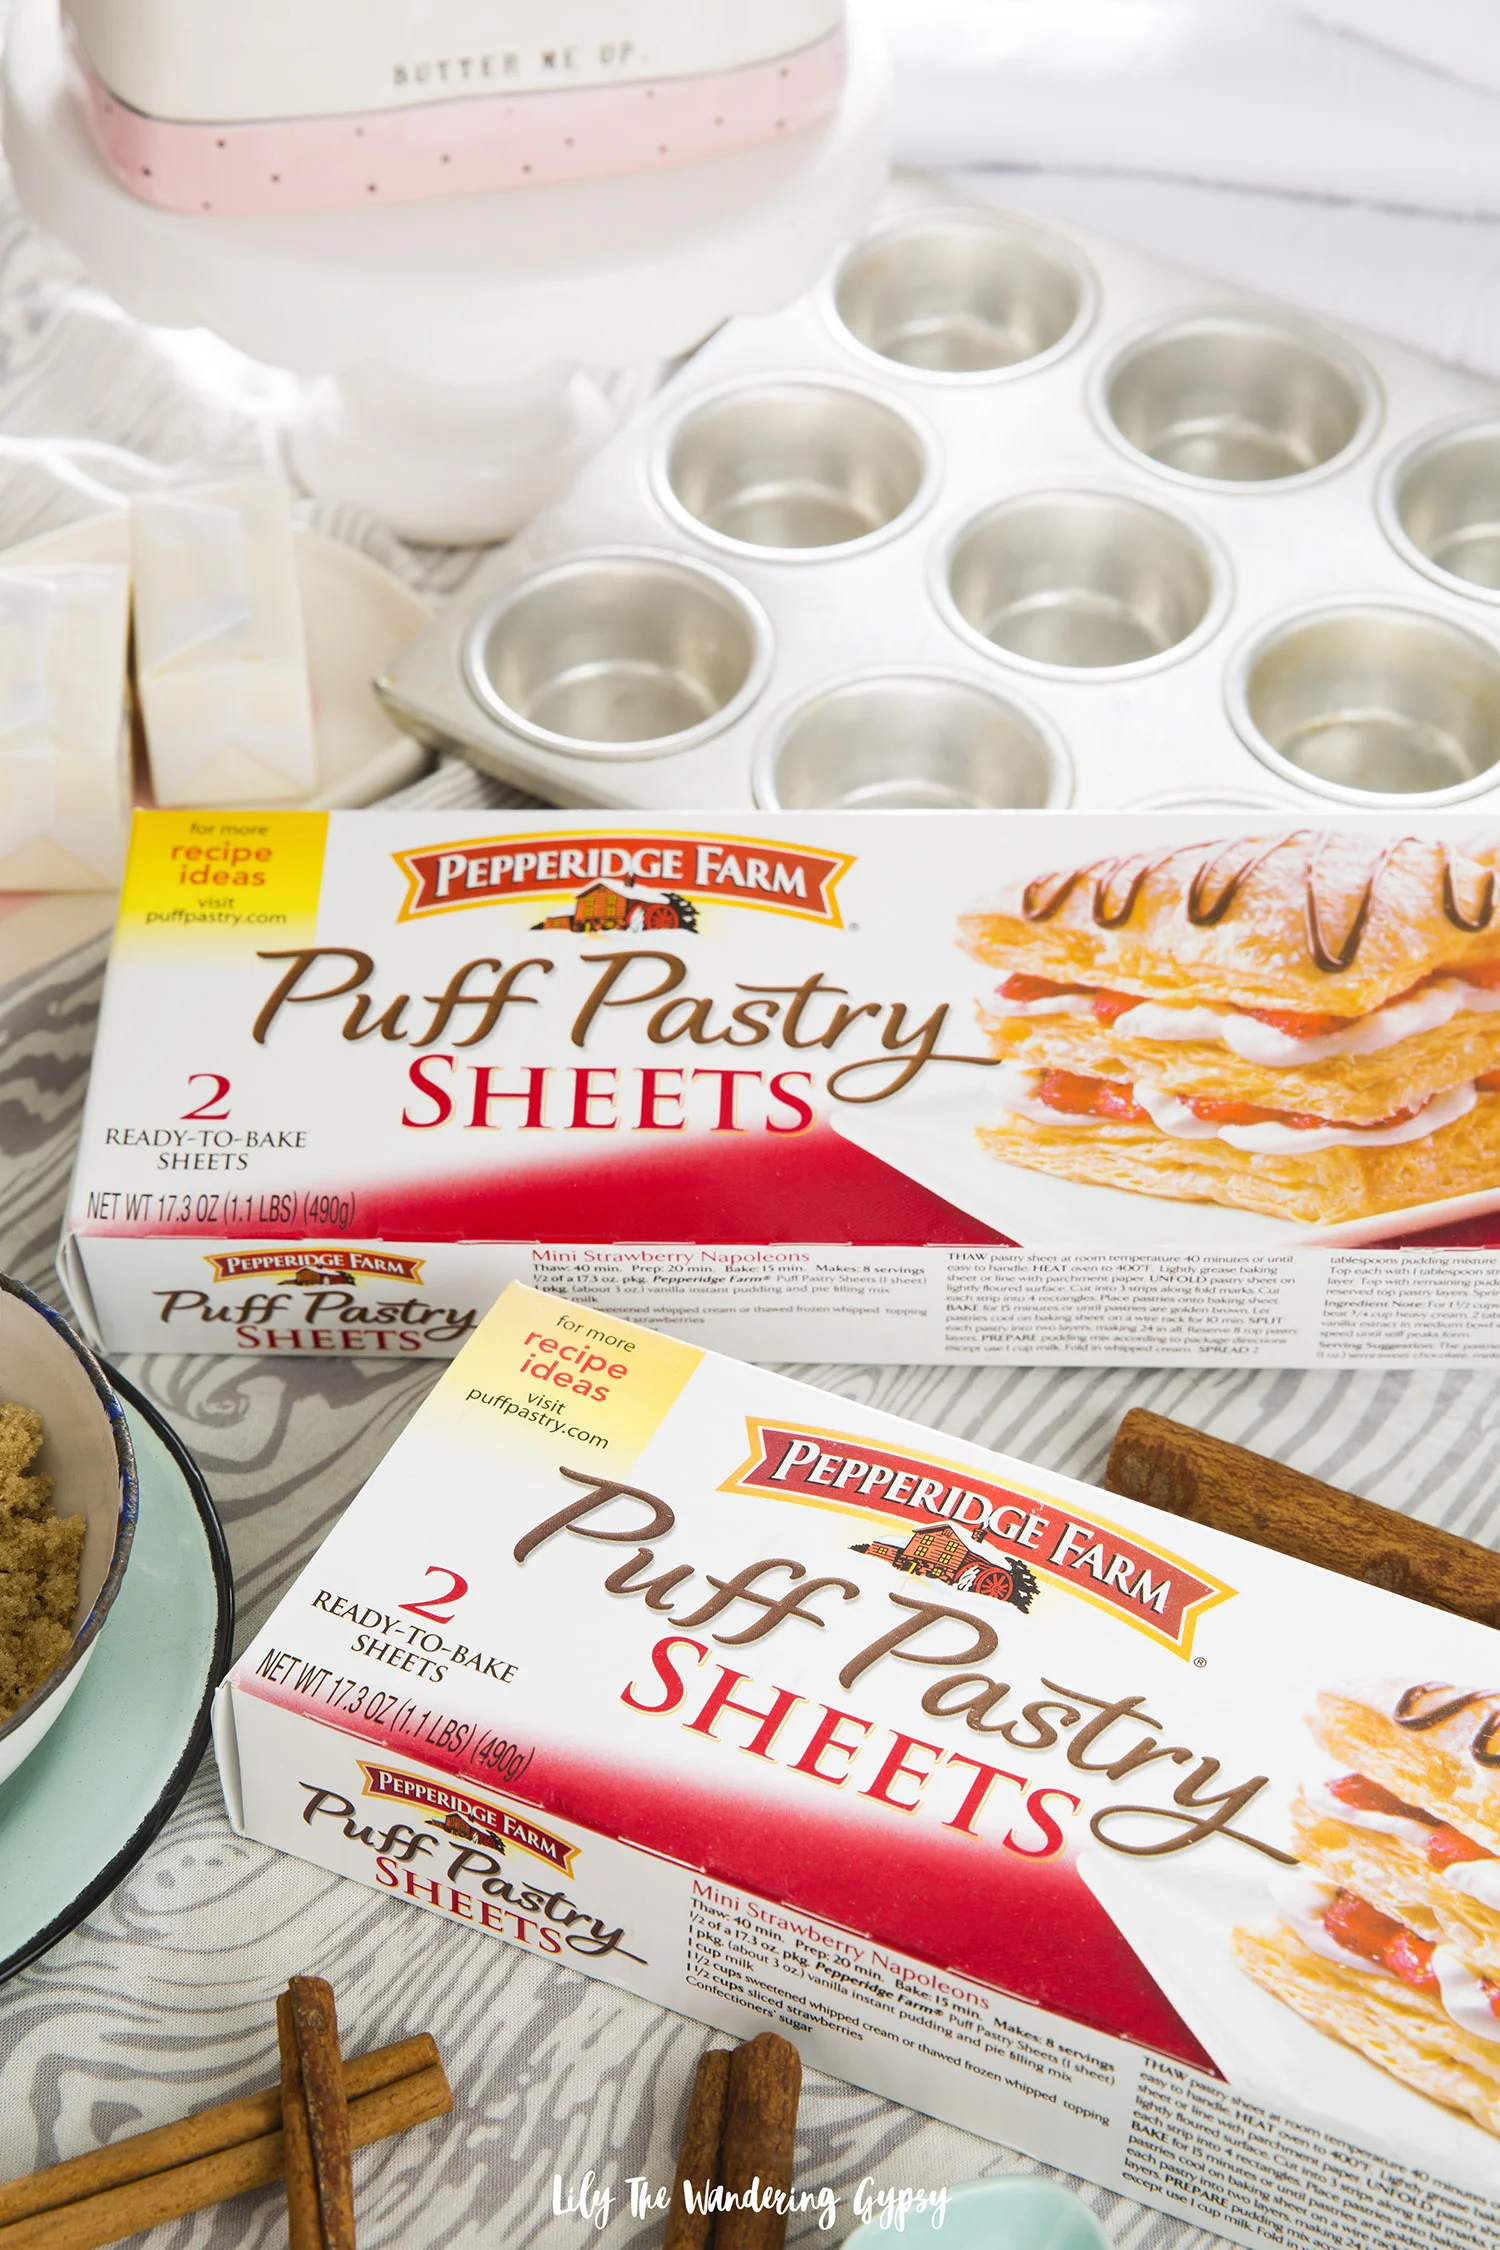
1 sheet of puff pastry

½ red onion - chopped

1-2 cloves garlic – minced

1-2 TBSP olive oil

½ of a red potato – chopped into very small pieces

1 c. broccoli – chopped into small pieces

½ c. corn (frozen or canned)

½ c. frozen peas

2-4 TBSP seasoning (I use a mixture of low sodium seasoned salt and a Greek spice blend)

1 TBSP butter or butter alternative

3 TBSP flour

salt

Optional 1 egg for egg wash (simply use which to stir up one egg in a small bowl)

INSTRUCTIONS:

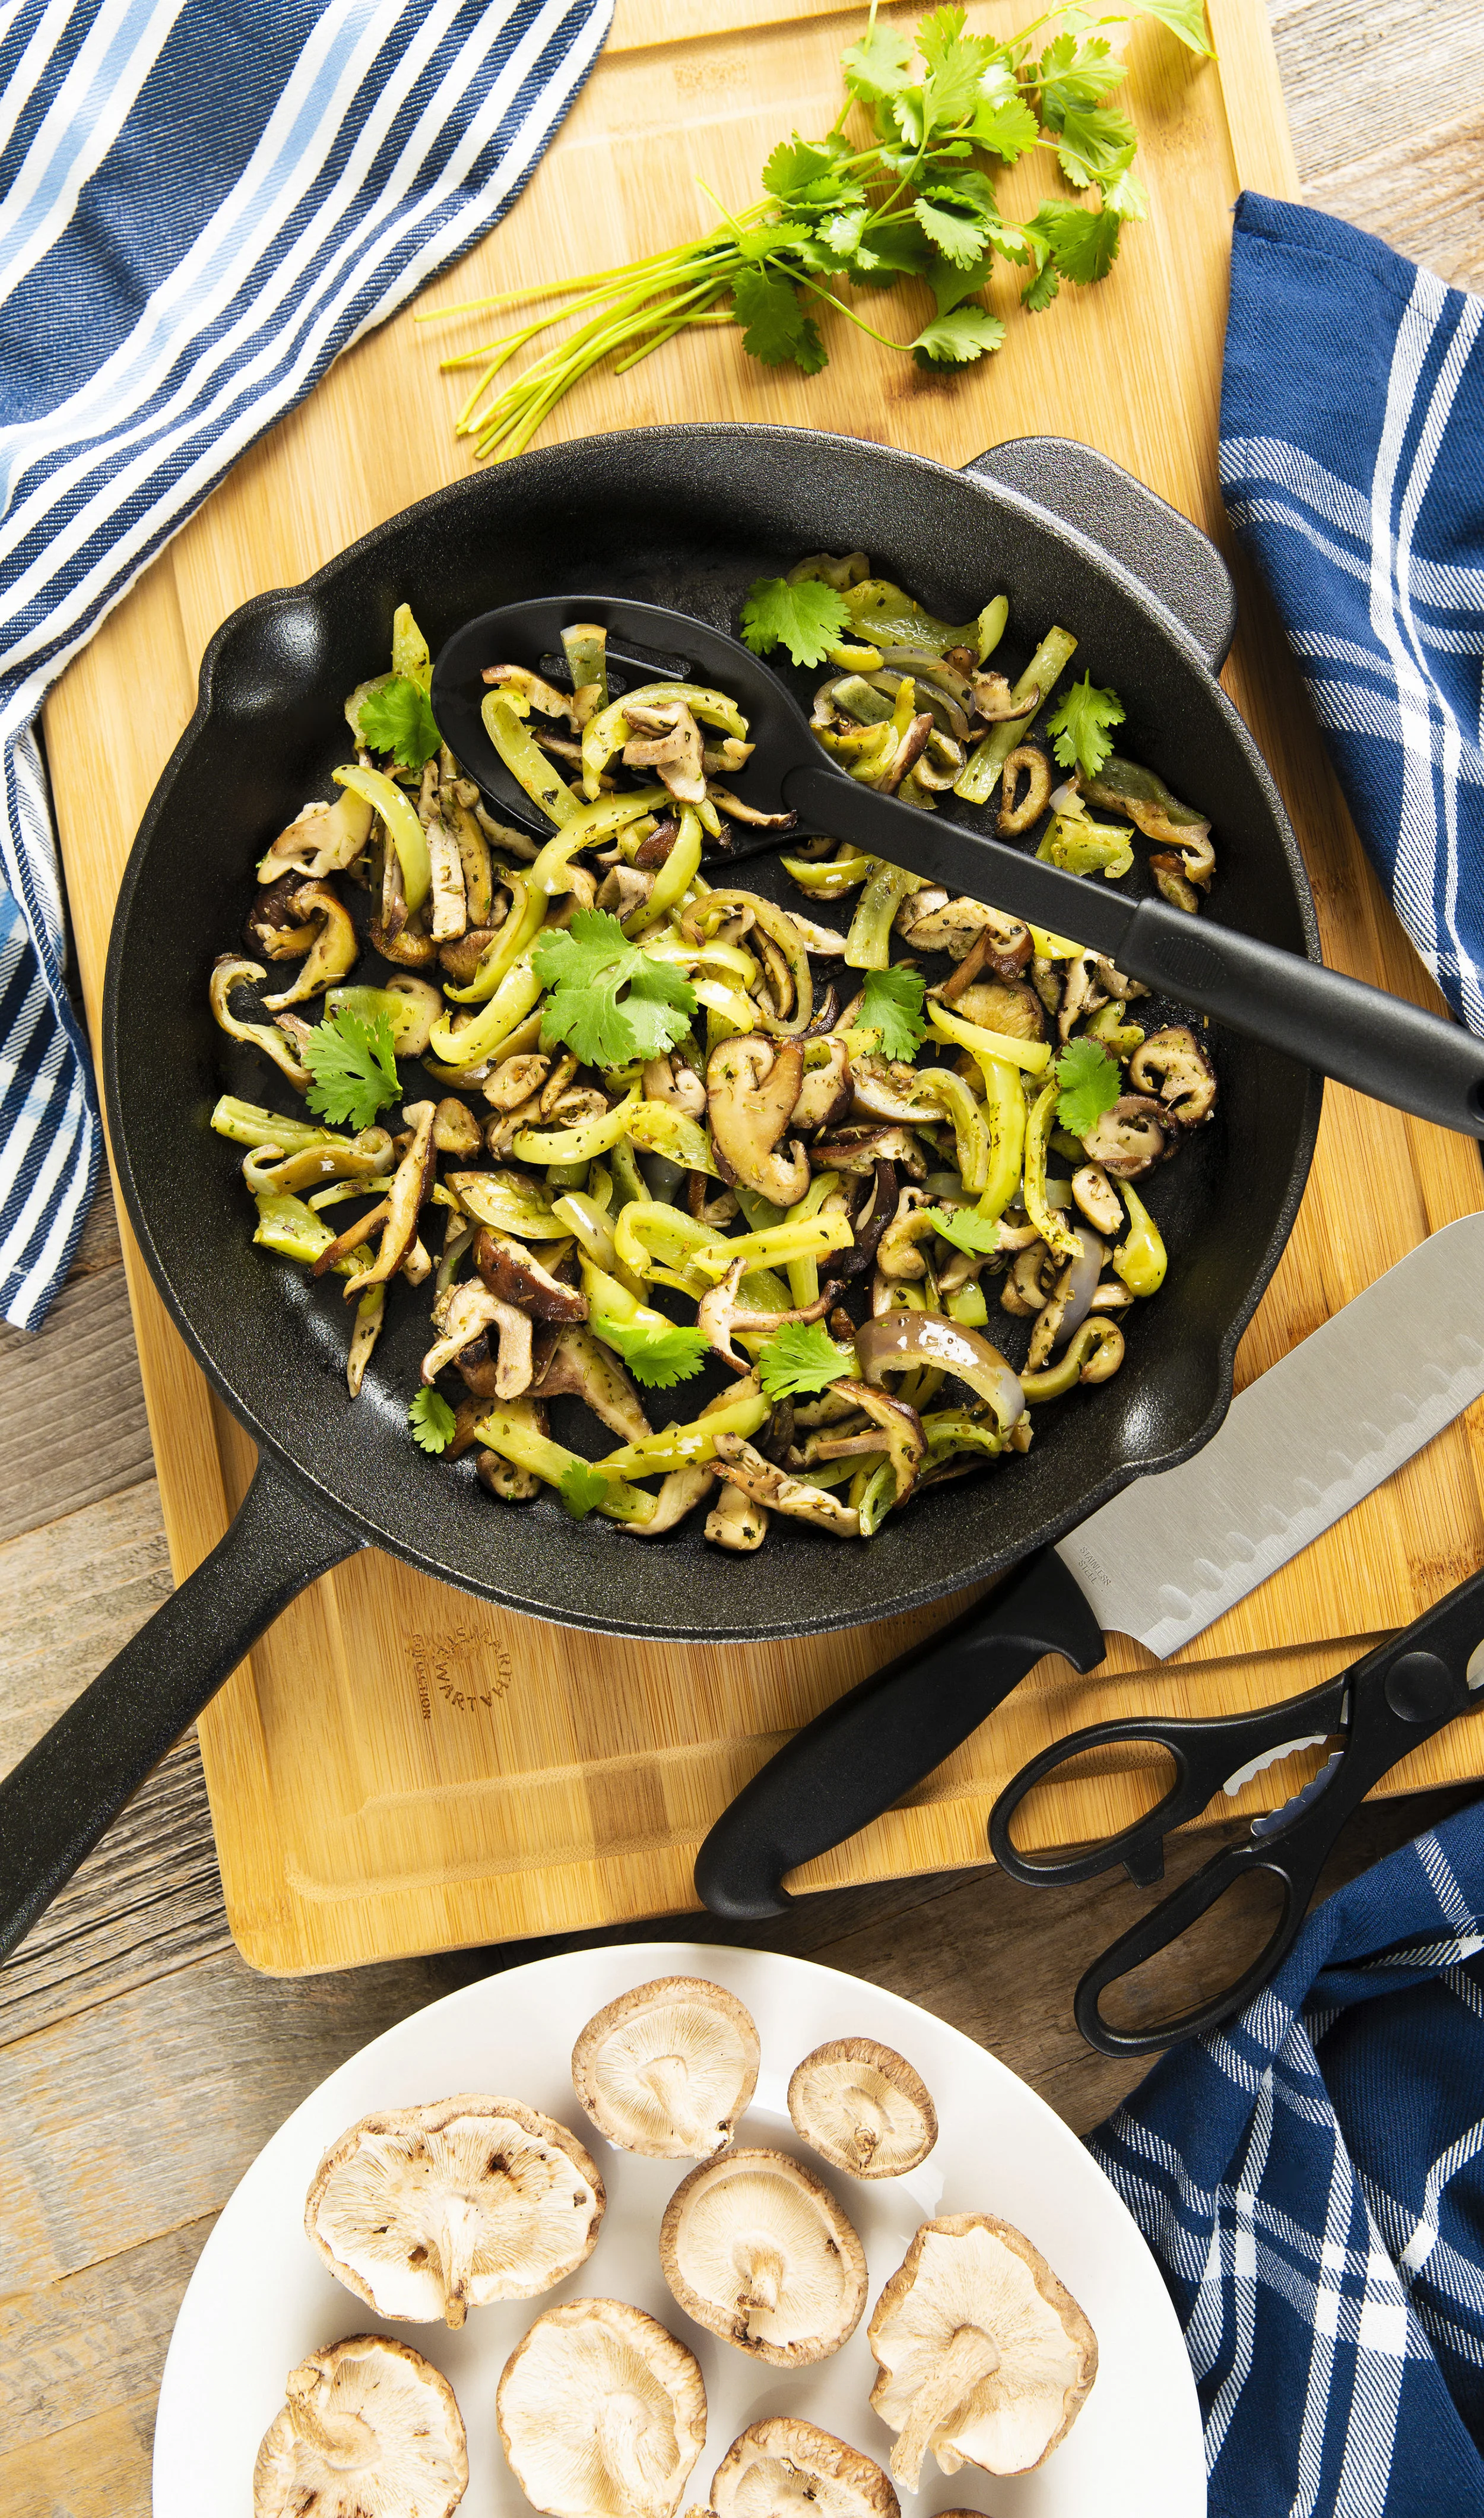
1.)   Sautee olive oil, onions, and garlic, and 1-2 TBSP seasoning for 2-3 minutes. Once onions are soft, add potatoes and cook at medium heat for about 3 minutes with the pan’s lid on. Carefully stir the potatoes once during cooking, and replace lid.

2.)   Add 1 cup broccoli, corn, and frozen peas, and simmer another 3 minutes. Add up to 2 tsp more seasoning at this point, and stir to coat all veggies.

3.)   Turn off heat, and transfer all veggies from skillet to another heat safe bowl and set aside. Do not clean or wipe out skillet yet.

4.)   In this same skillet, melt 1 TBSP butter. Once melted, stir in 3 TBSP flour, and stir until combined. This helps to thicken the sauce. It will look “chunky”, but that’s ok!

5.)   Add 1 can of Amy’s Organic Cream of Mushroom soup, and stir to combine. Turn heat back onto medium, and add the bowl of veggies back into the skillet. Stir to combine, and heat for 2-3 minutes while stirring, to combine and thicken everything.

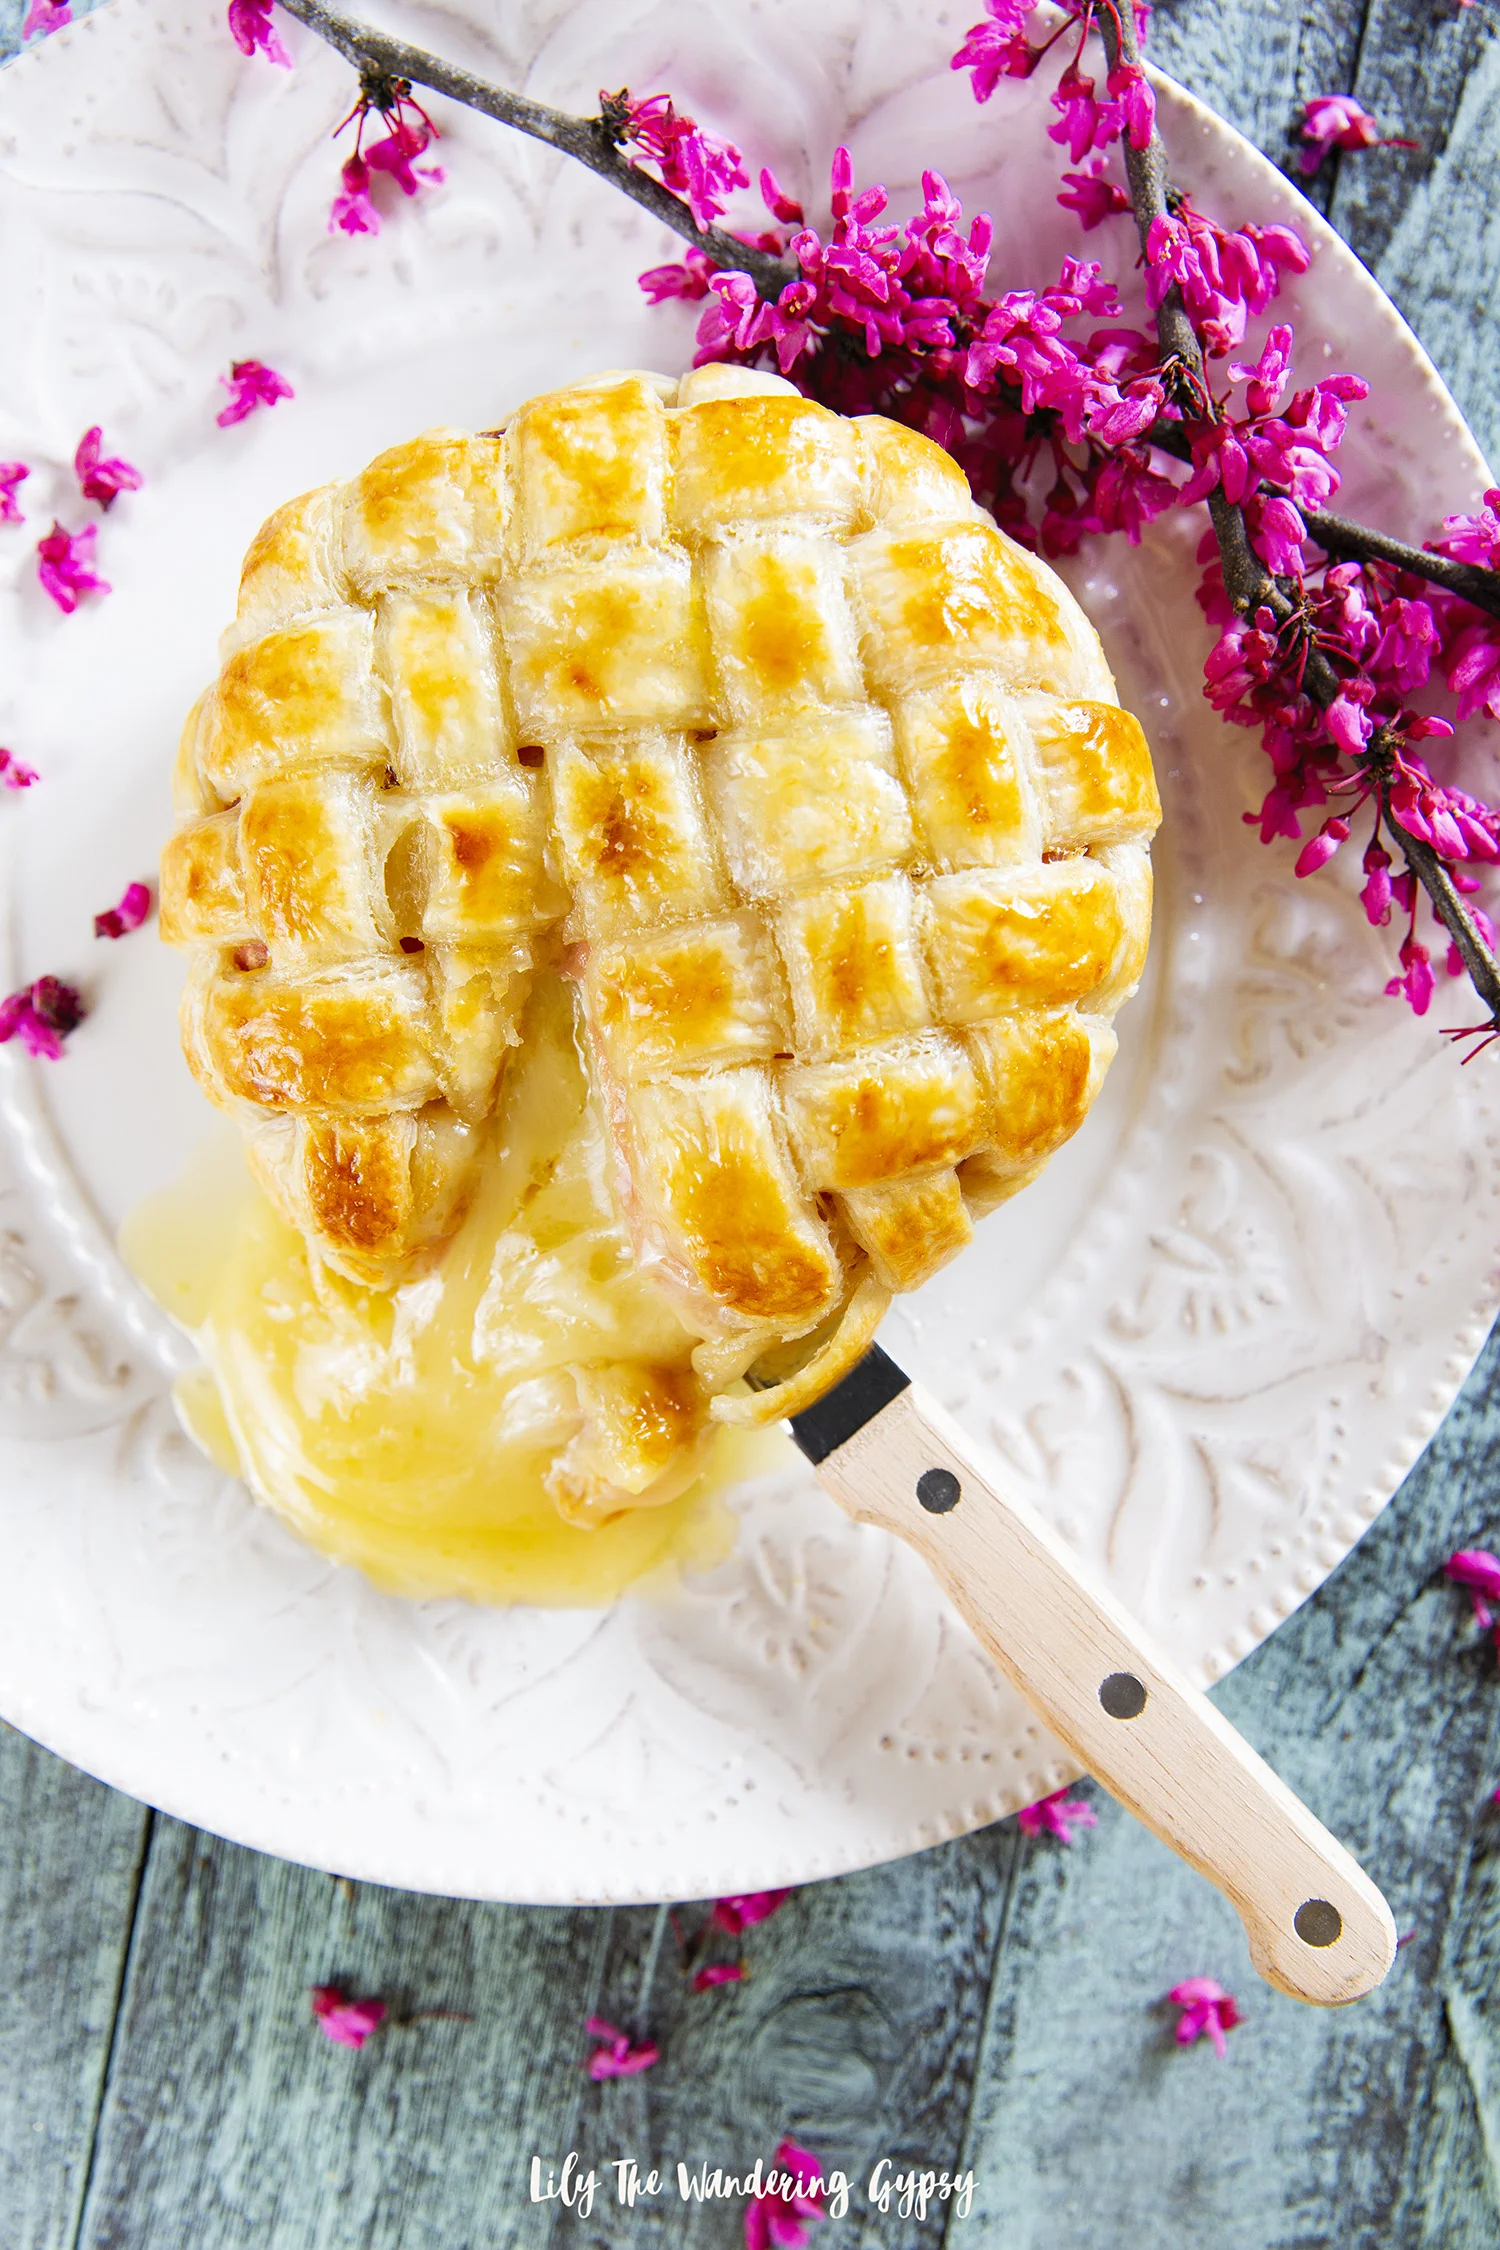
6.)   Preheat oven to 400 degrees for Transfer into prepared baking dish(es) – make sure to spray them with non-stick spray first!

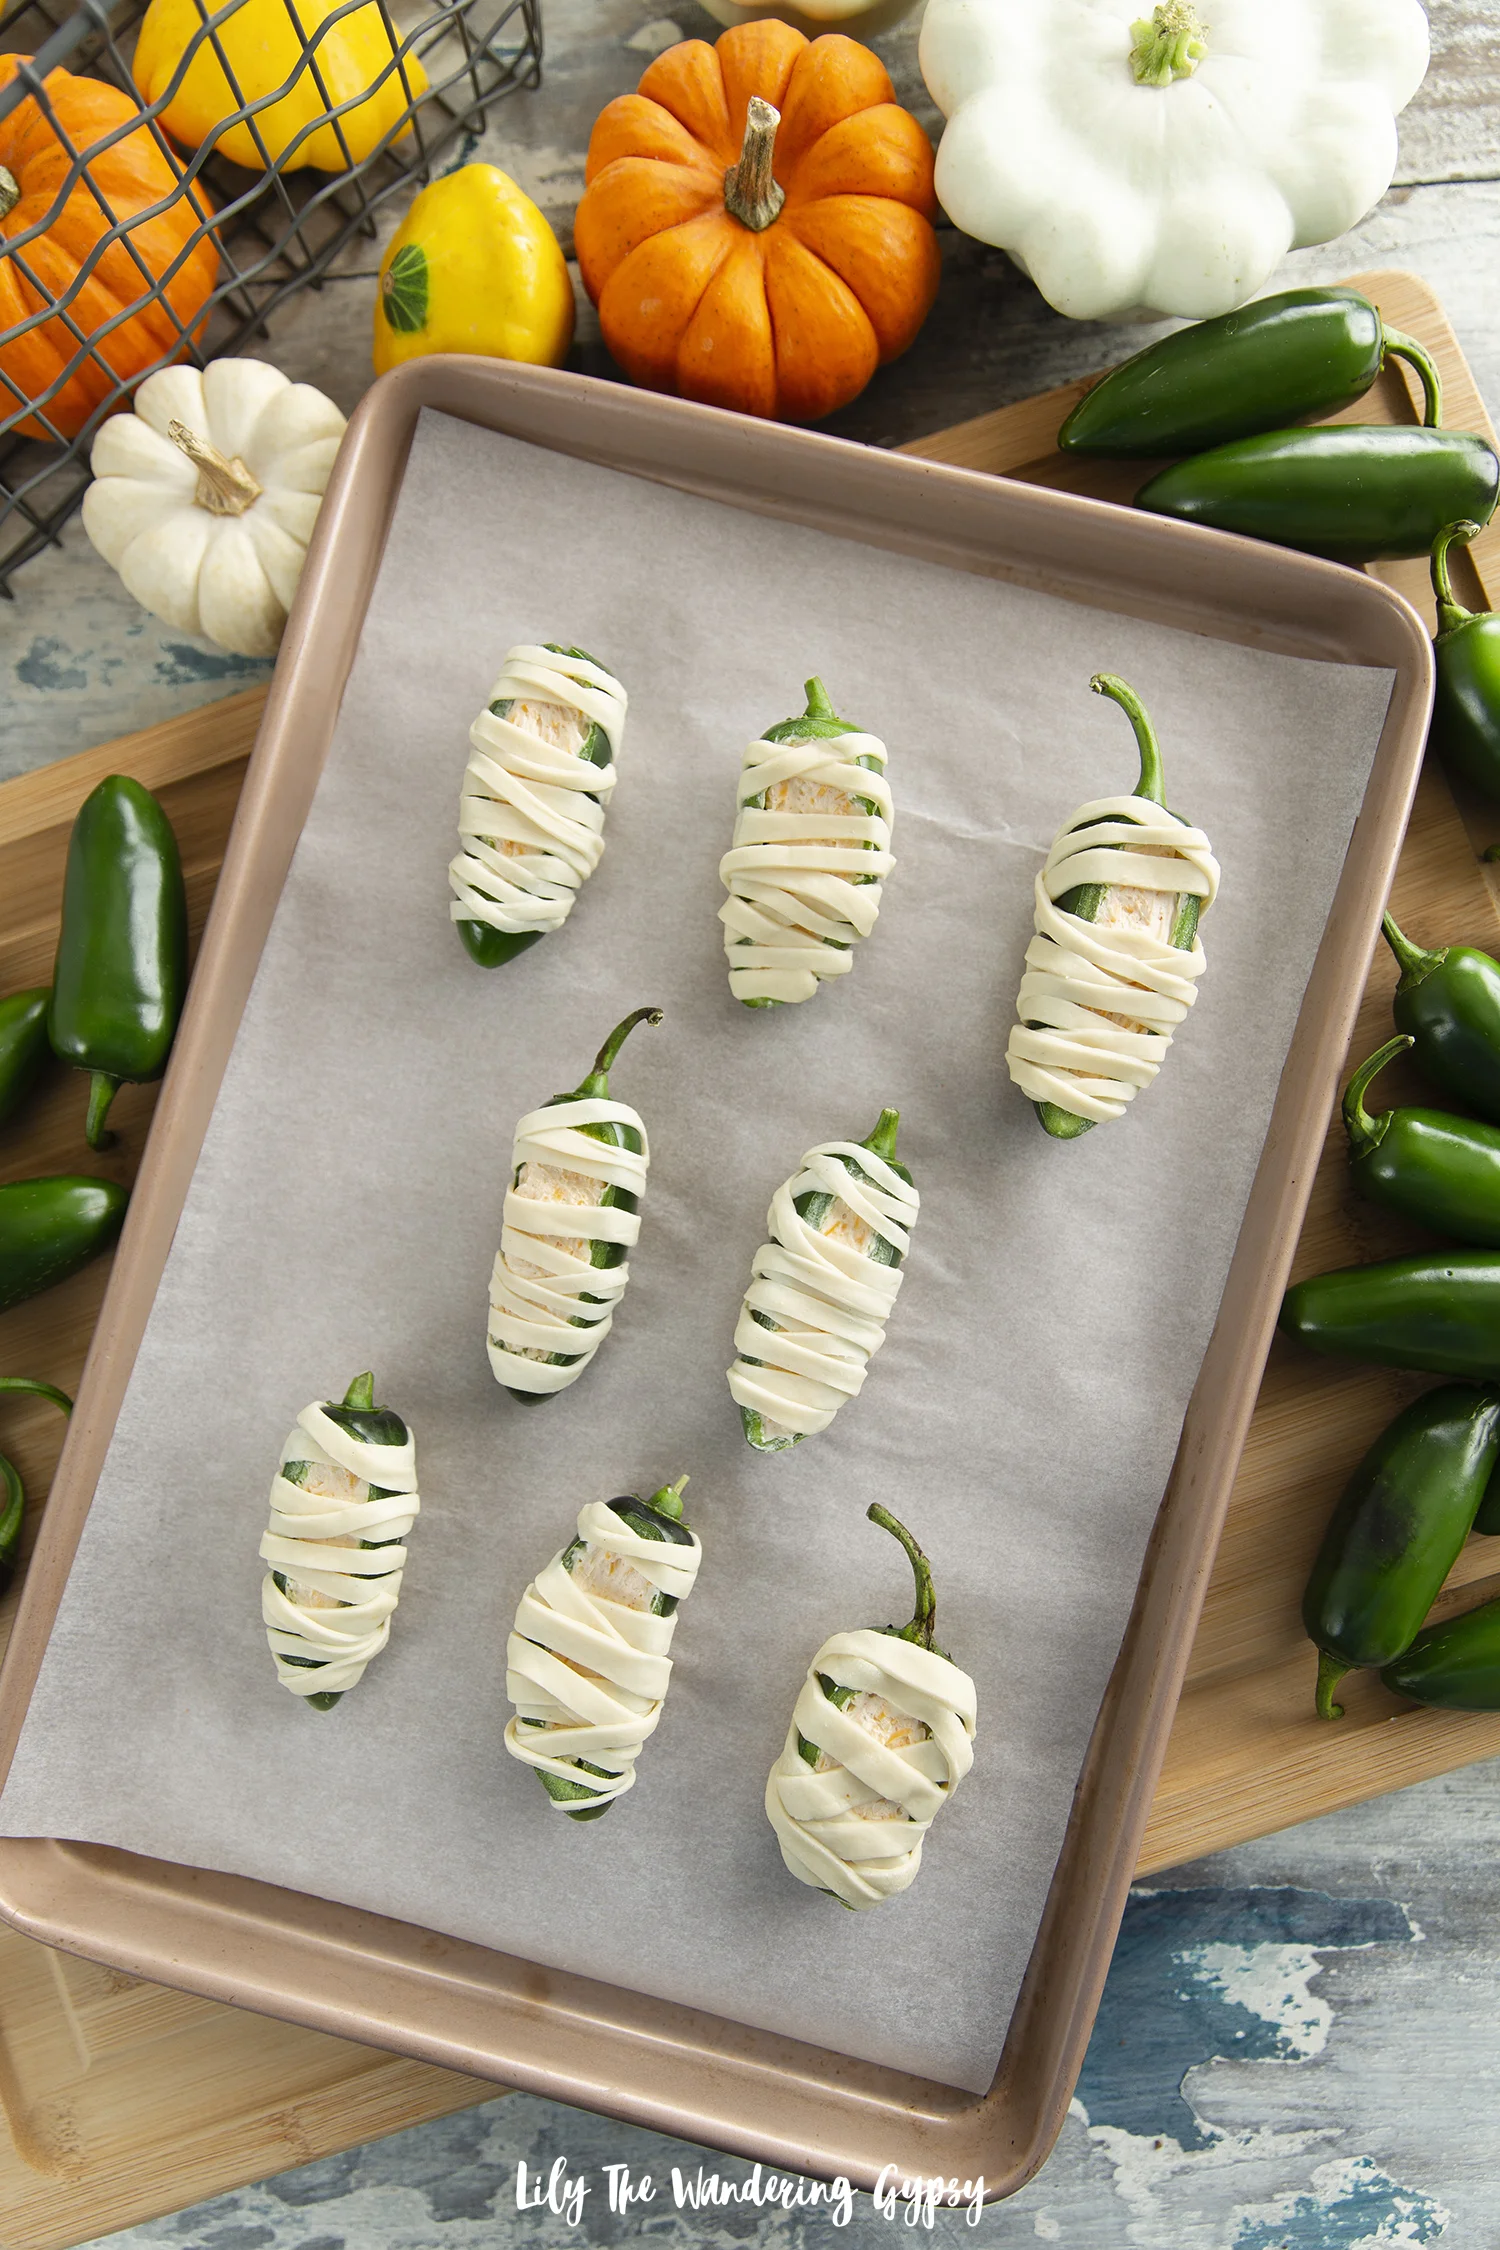
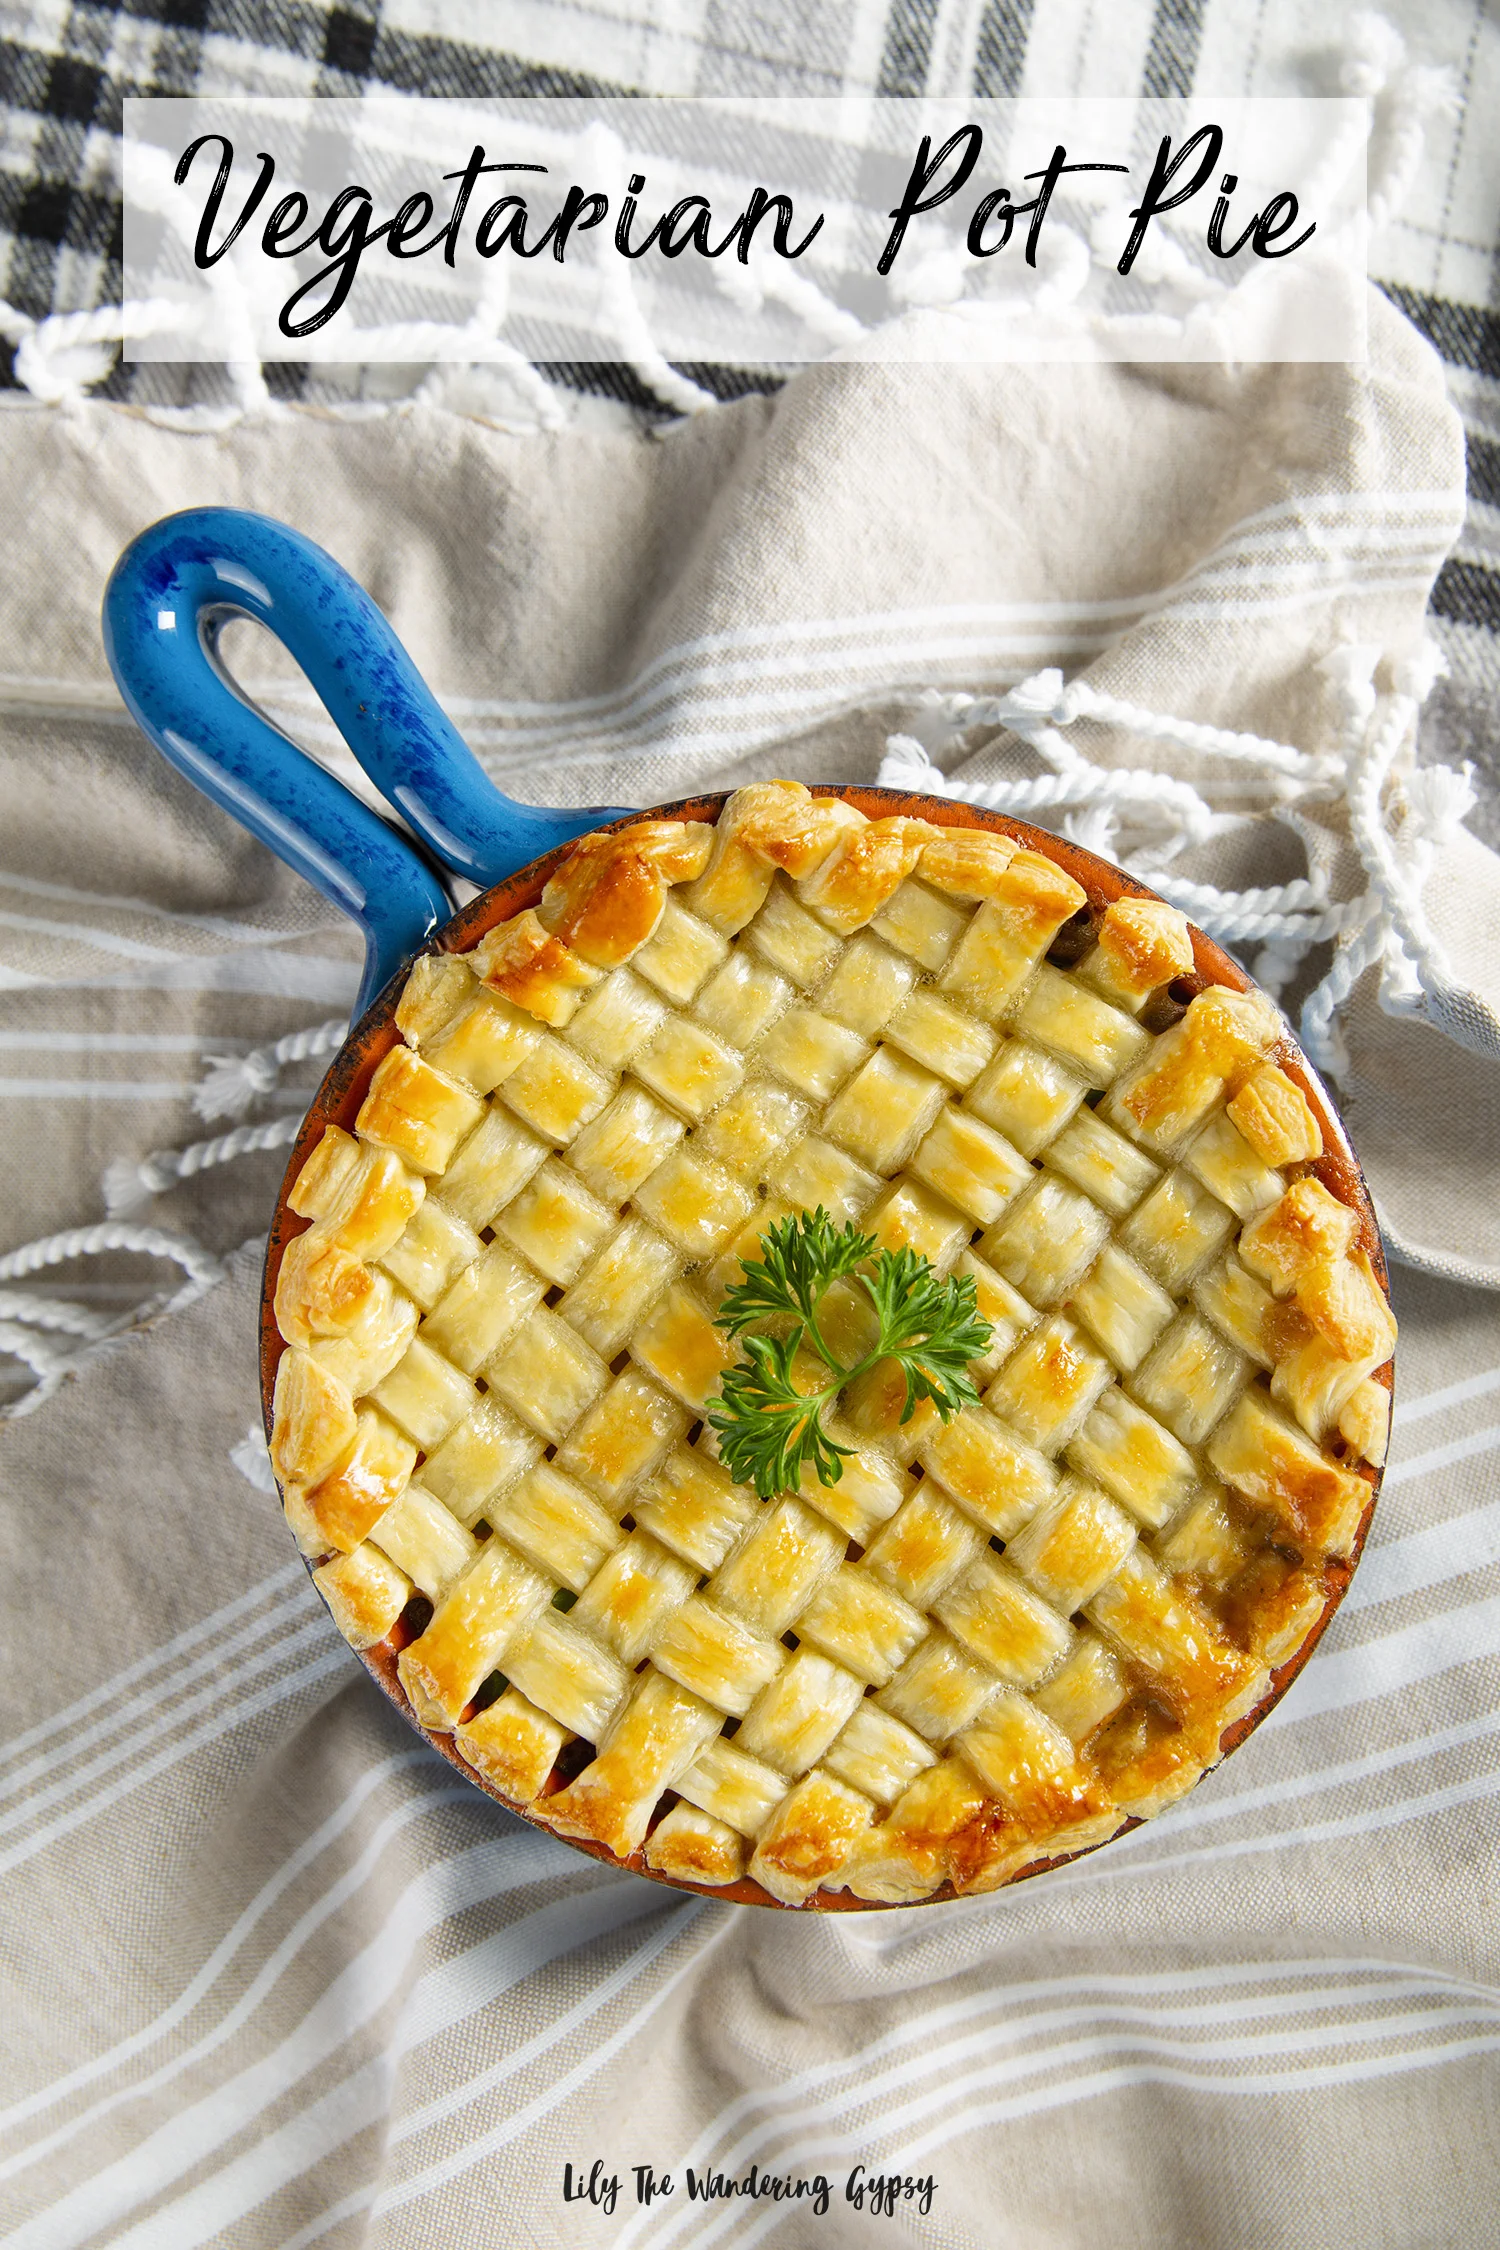
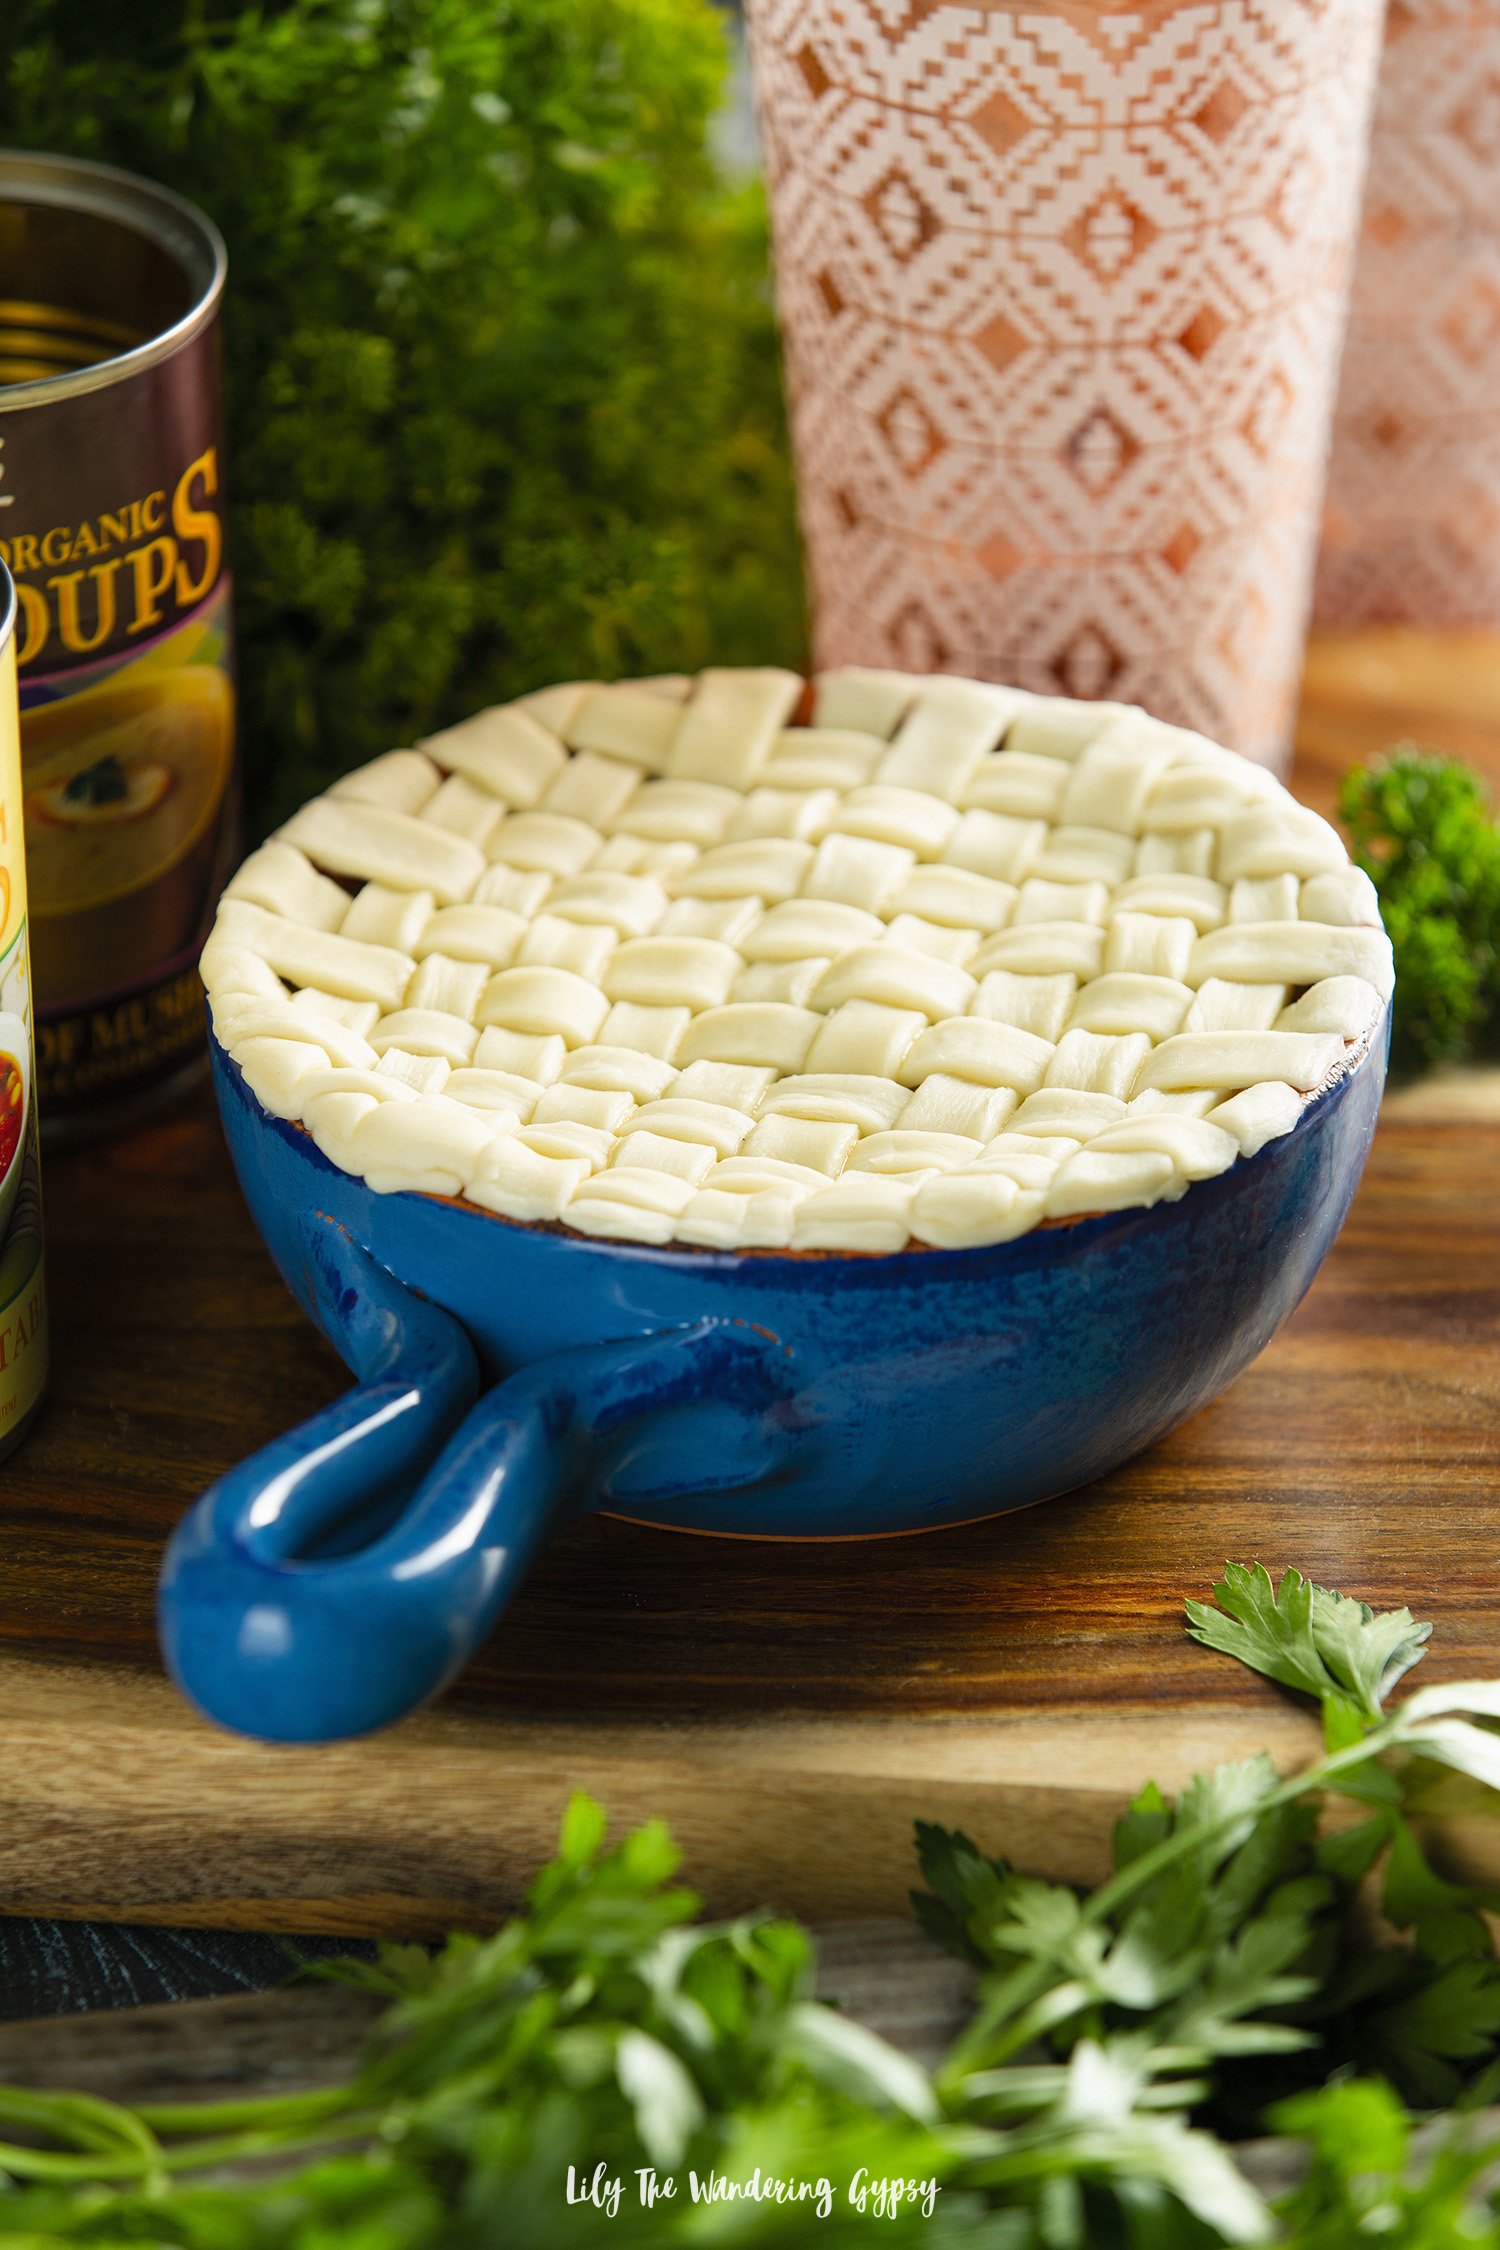
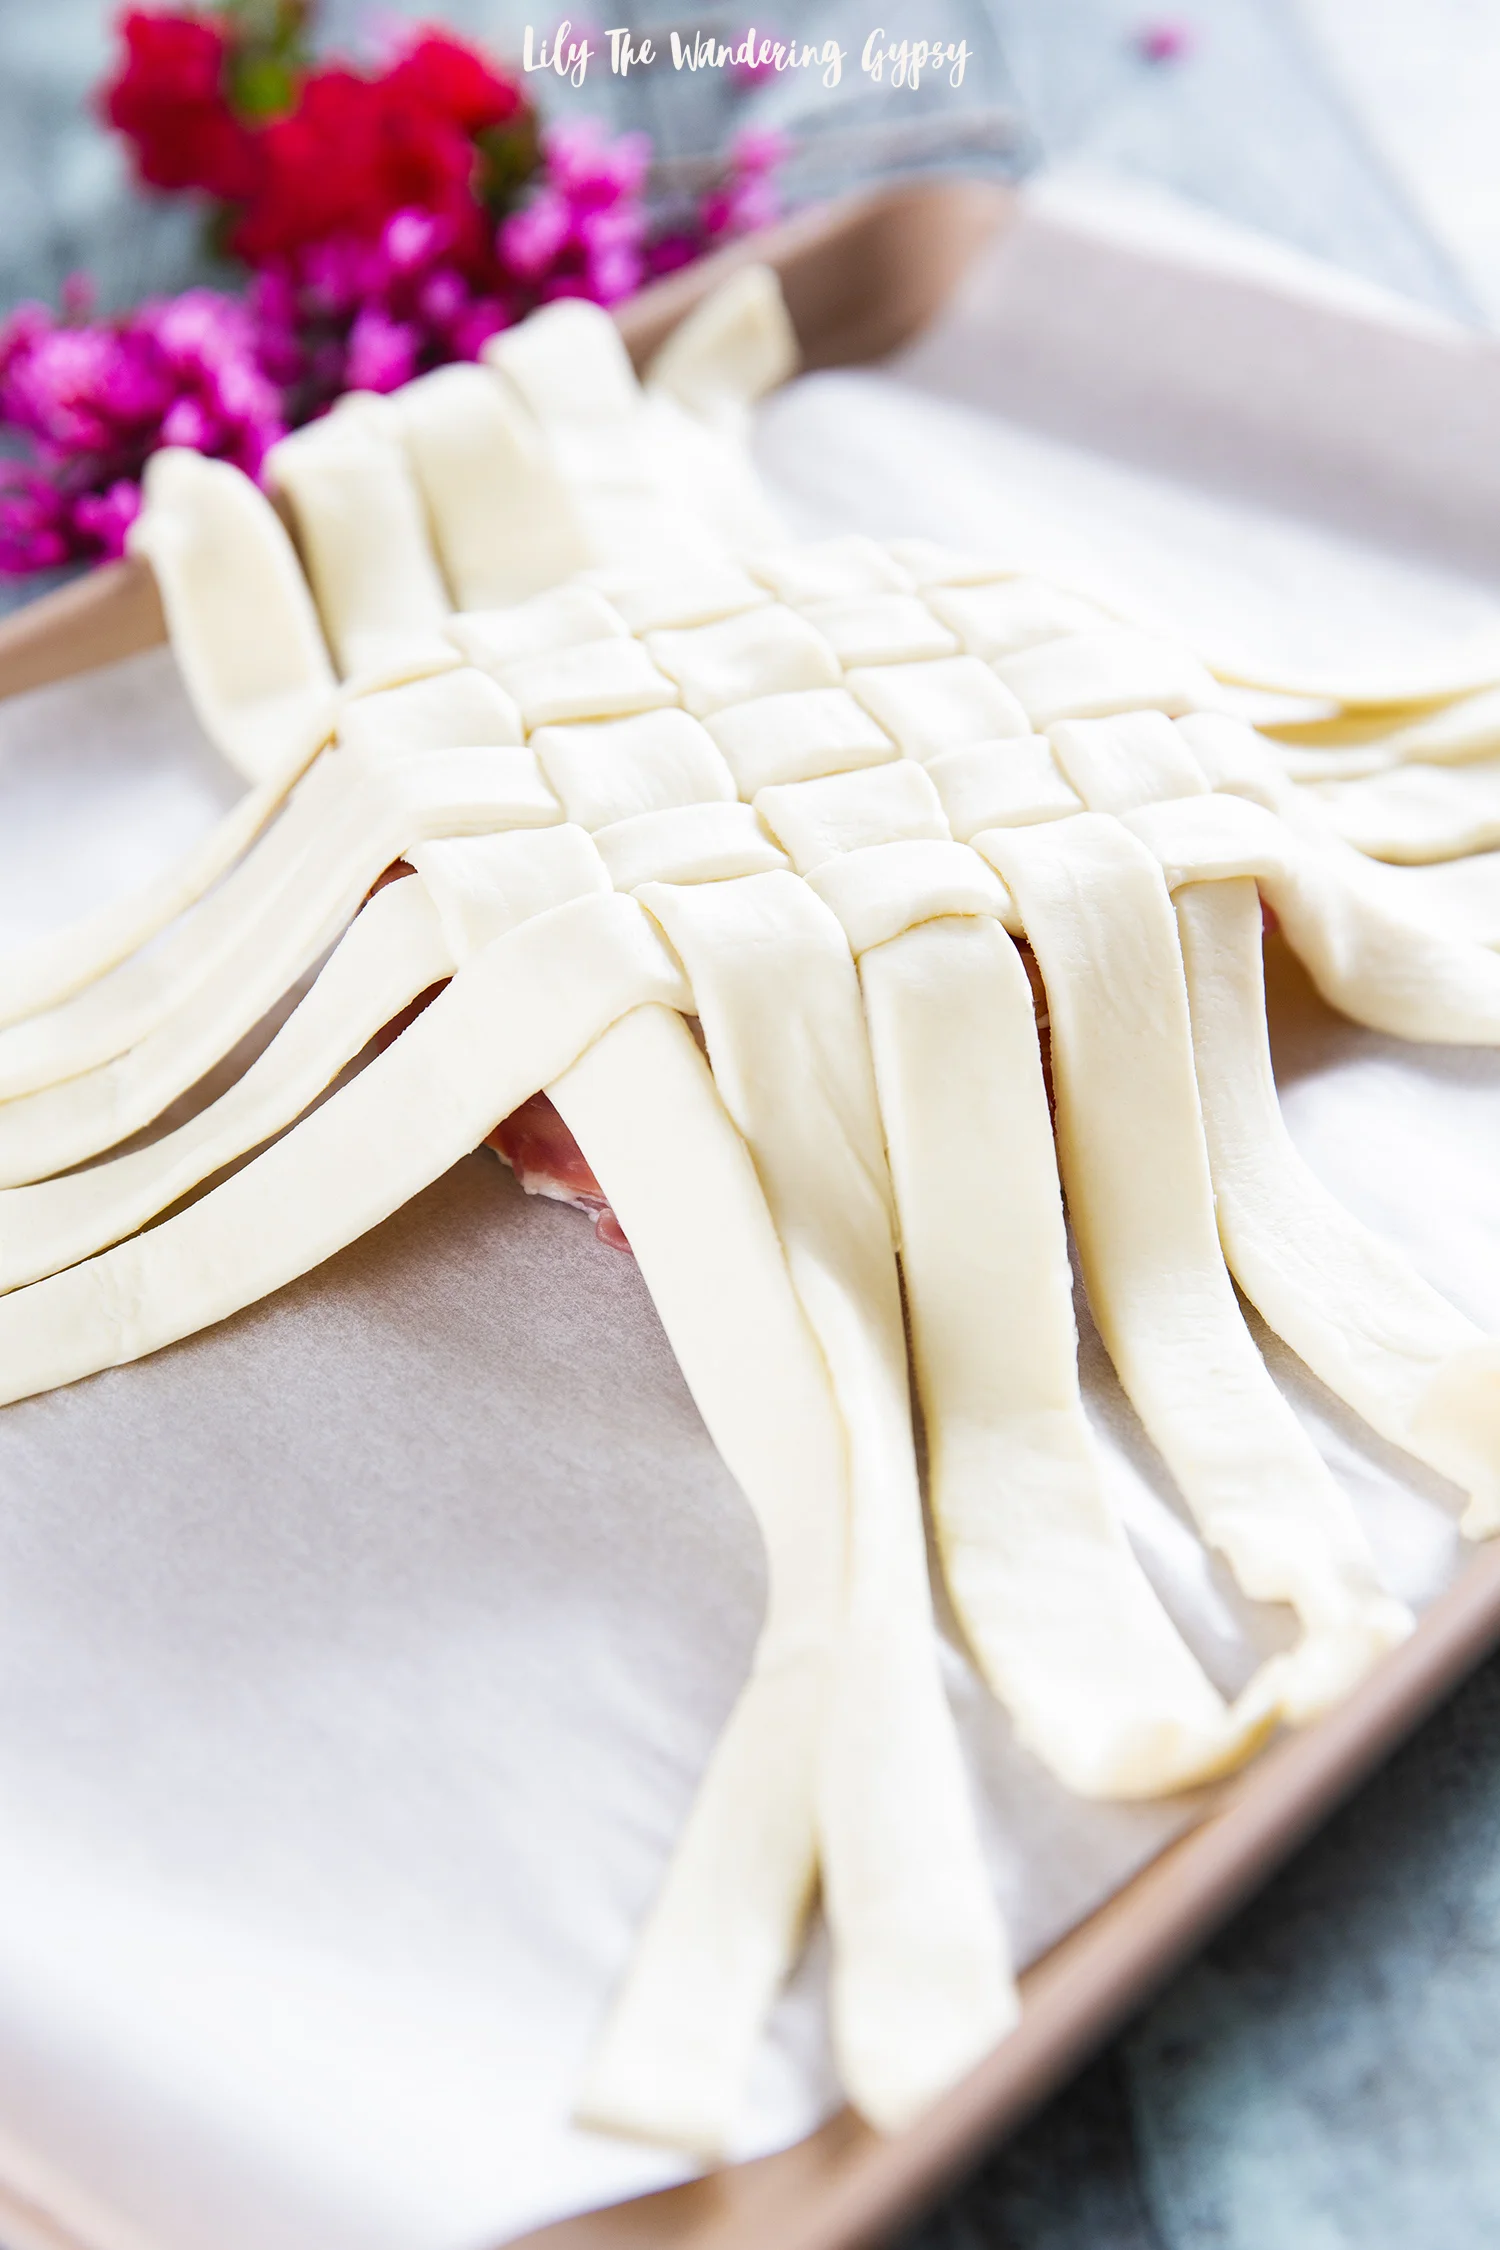
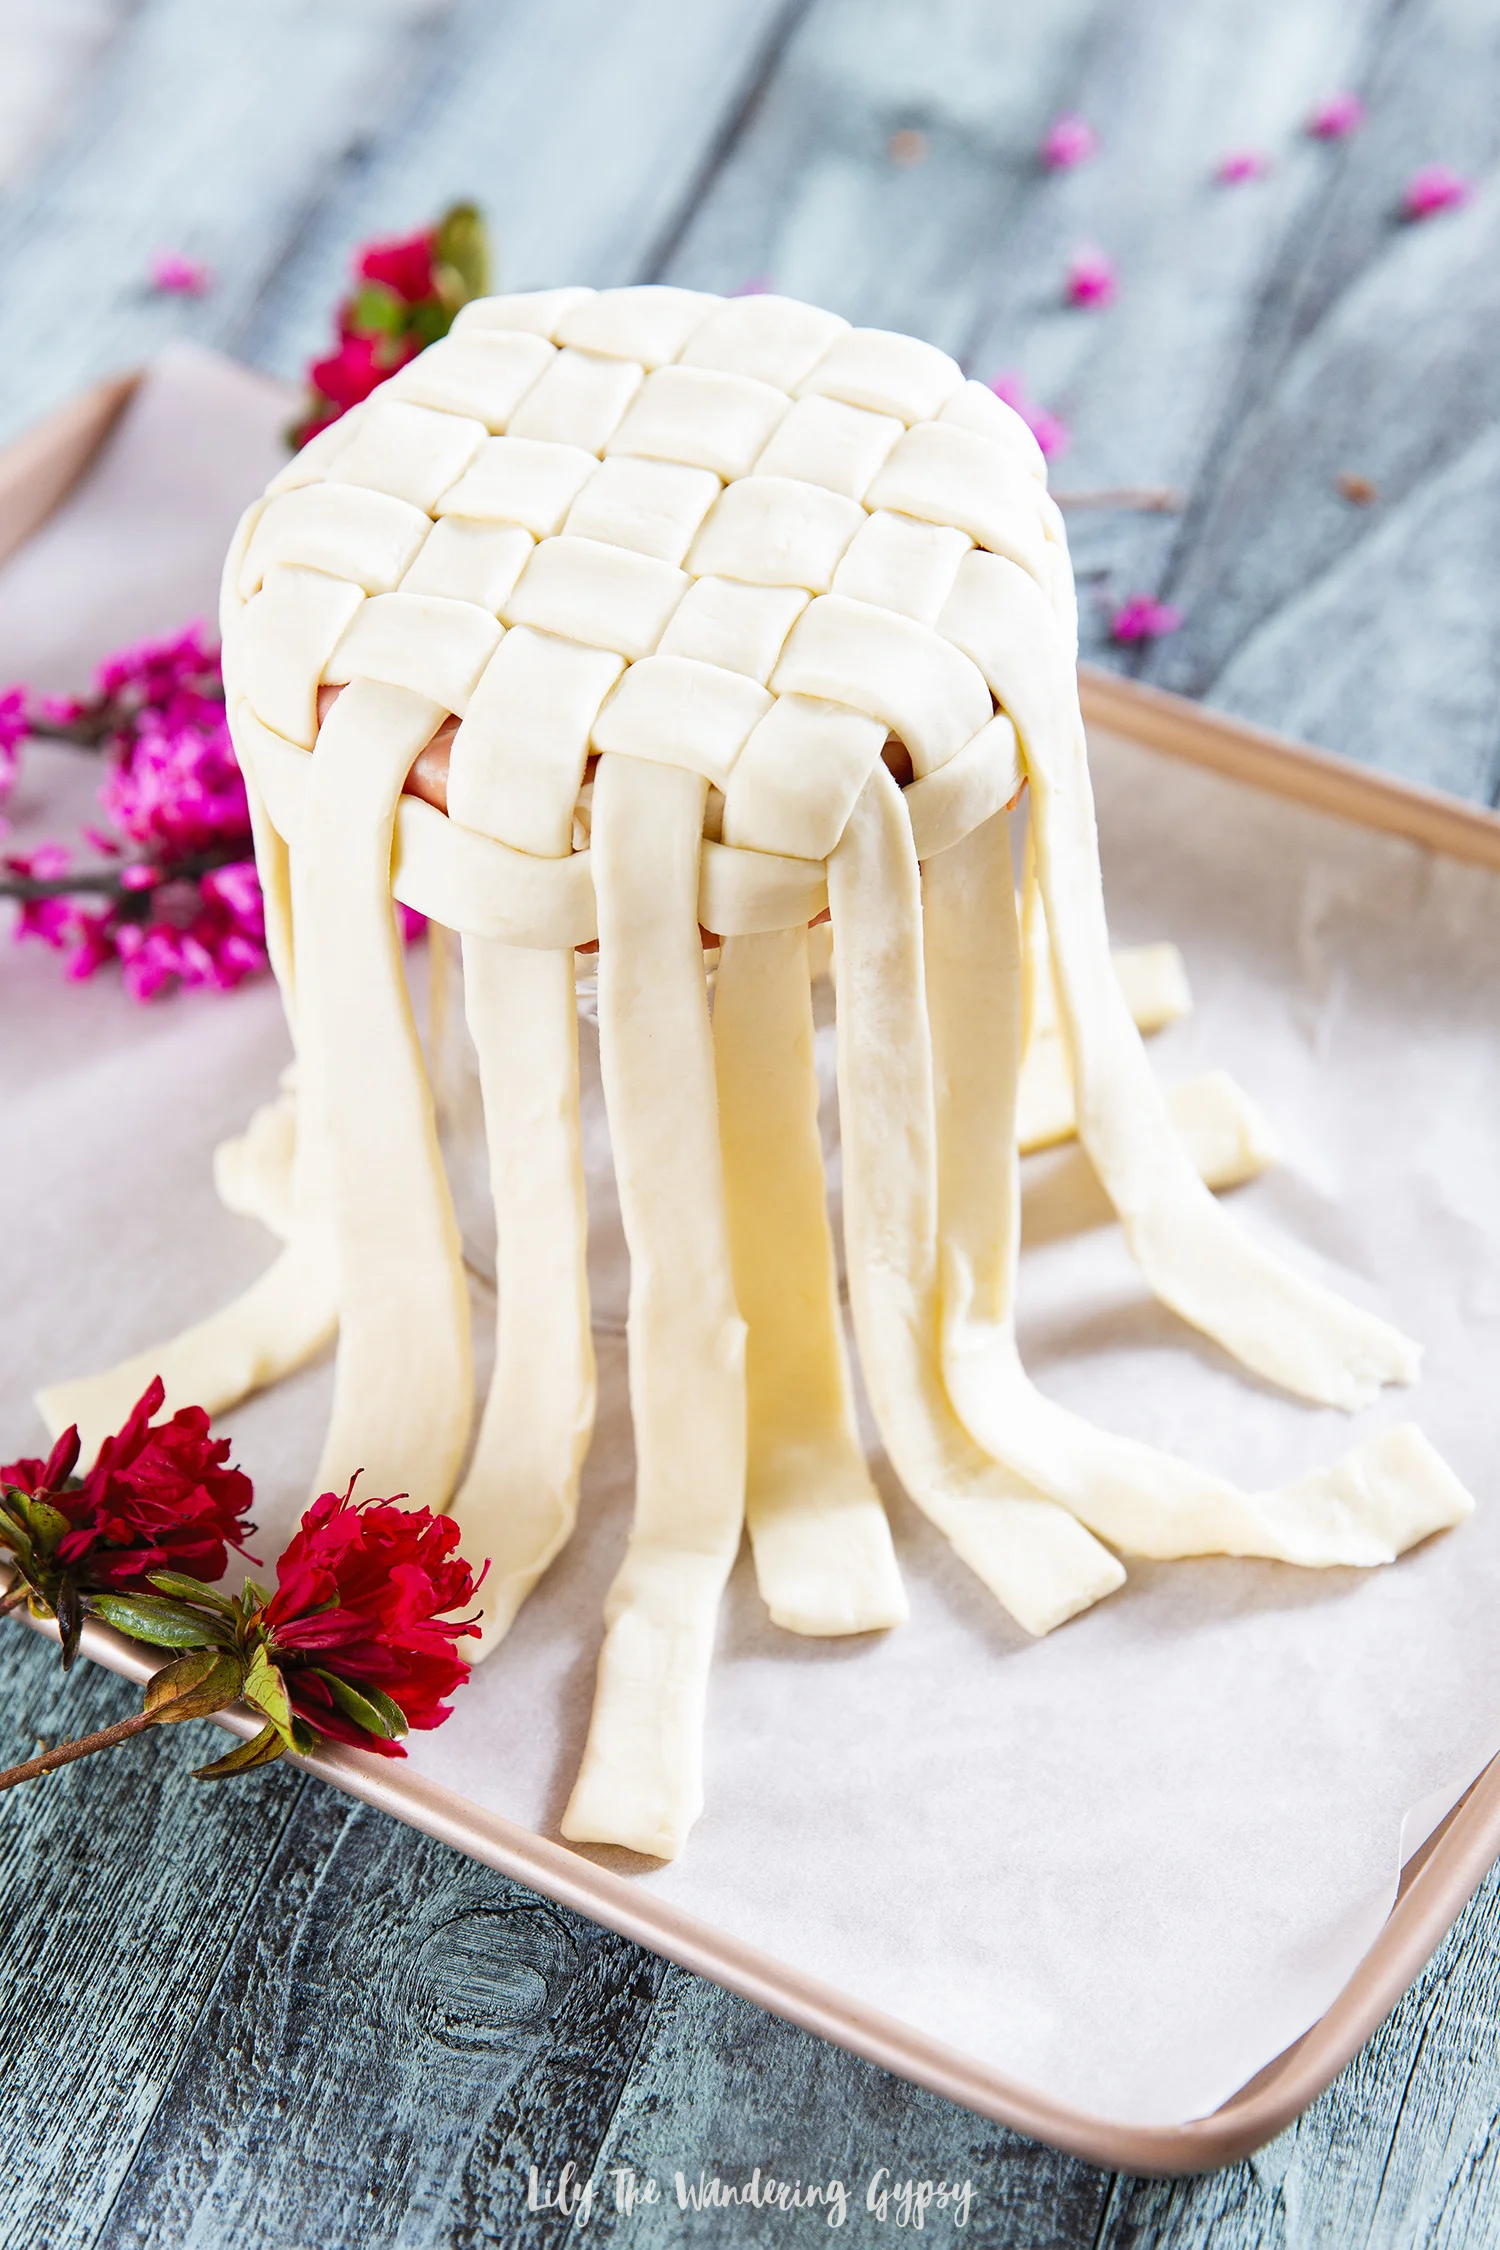
7.)   Time to do the crust! Either place one sheet of puff pastry across the top of the baking dish and trim the sides and cut vents at top, OR use the lattice technique I have shown in this post!

8.)   To lattice: cut ½” or 1” strips out of your puff pastry sheet and weave them across the top of the pie. I start by placing three strips vertically, then working on weaving in the three horizontal strips. From there, I can then place the remaining strips of puff pastry into the top of the pie. Cut excess dough hanging over sides of baking dish, and if you want, use your fingers to gently press the dough strips down onto the baking dish so it does not move while baking.

9.)   Brush top of pie with an optional egg wash, and bake small pies for 17-22 minutes or one pie for 25-35 minutes. The puff pastry need to be pretty crunchy on top to ensure that the dough touching the filling is not doughy.

What a fun and comforting vegetarian meal to make for your favorite people! Perhaps you could even surprise a busy family with a frozen version of this pie, and they can enjoy a vegetarian meal in a less than a half hour of baking time! Enjoy!

I was selected for this opportunity as a member of CLEVER and the content and opinions expressed here are all my own.

Easy Caramel Brownie Layer Cake

If you are a fan of layers upon layers of chocolate brownies, homemade whipped cream, and caramel, then this is definitely the cake for you! Although it looks so elegant, it really is pretty easy. This dessert allows us to think beyond the traditional chocolate cake, and make your next dessert rich, decadent, and delicious! When I made this dessert for a potluck, people raved about it. It was so delicious once the whipped cream layers sat with the brownie layers, because the sides stay a bit crunchy, and the inside portion of the cake moisten up and form more of a fudgy and cake-like consistency all at the same time, that’s out of this world! Hope you enjoy.

INGREDIENTS:

*Note - Amazon Affiliate Links have been provided if available

For The Whipped Cream:

For The Brownies:

  • 2 boxes of brownie mix (I used Ghirardelli caramel turtle brownie mix, and instead of mixing the caramel into the brownies to bake, I decorated the top pf the cake with it!)

  • Brownie ingredients (eggs, oil, and water)

  • 3 round baking sheets - I found mine for about $1 each at Walmart!

  • Caramel Sauce if not included in Brownie boxes you use.

INSTRUCTIONS:

1.) Preheat oven to 375 degrees. On parchment paper, trace your circular baking dish three times. Cut those three paper circles out and set aside. Spray three circular baking pans with Pam, then place the circular paper pieces into the baking pans and spray a little bit more to coat paper.

2.) Mix up 2 boxes of your favorite brownie mix and pour into three prepared circular baking pans. Bake the three circle pans for 15-20 minutes, check to see if they are done by inserting a toothpick to see if they are done.

3.) To make your homemade whipped cream, in a stand mixer, add 1 pint of heavy whipping cream + 1/3-1/2 C. sugar + 1-2tsp vanilla. I also love using vanilla bean powder to add little black flecks and more vanilla flavor to my whipped cream. Whip for 2-4 minutes on high, until stiff peaks form. Just keep mixing, it may seem like an eternity, but is so worth it! Do not over beat the cream, or it will begin to resemble butter, and not be very fluffy.

4.) Now, it’s time to “layer up”! I have shown all of my layering steps below, so you basically layer up: brownies and whipped cream until you get to the top layer. Make sure to make the top layer of whipped cream as smooth as possible. But, no need to stress about being perfect - this cake is a naked cake and is pretty rustic anyway, so the more homemade it looks, the better!

5.) To decorate the top: I used caramel sauce in a squeeze tube that worked perfectly to decorate. I basically just made a continuous line of caramel vertically across the entire cake, then crossed that again with caramel lines horizontally. I rotated the cake as I worked, which was great. Add sprinkles and enjoy!

THIS CAKE ROCKS! HOPE YOU ENJOY!

If you wind up making this recipe or any other recipes, please tag me on Instagram with @happysolez! Thanks!!

2 Ingredient Fall Apple Dip Recipe

Yum! Fall is right around the corner and I have an amazing recipe for you! Everyone loves this amazing dessert, and I know you will too. My al time favorite Fall flavor would have to be caramel apple. The mix of those sweet tart green apples meld so perfectly with the salted caramel sauce and the tangy bite of the cream cheese adds an upscale flavor to this dish, which I hope you enjoy!

INGREDIENTS:

1 (8 oz.) Block of Cream Cheese

1/3 - 1/2 of a jar of salted caramel sauce (we love the Smucker's Simple Delight Salted Caramel)

2-3 apples, sliced (we used green and red, any flavor will do!)

INSTRUCTIONS:

1.) Open the block of cream cheese, and place it onto a plate, and pour LOTS of caramel over the top of the cream cheese.

2.) Chop apples and place beside dip. Enjoy!

Pull Apart Cupcake Cake Recipe

This recipe is PERFECT for parties and holidays, because it's easy to eat! Everyone has their own individual cupcake to share the joy, no need to cut THIS cake. 

We were ecstatic when we learned that we had the opportunity to collaborate with Martha Stewart to promote her baking items at Macy's. It's quite the honor, and several times throughout this process I exclaimed, "I am shooting recipes for Martha Stewart"!!! 

In order to creatively incorporate her Essentials collection into pins that would encourage people to want to learn more, I thought that a sweet treat would obviously be perfect, so I found a fun recipe on marthastewart.com and creates it! Below, you will find that very recipe, and I hope you are inspired by this fun post to make your very own cupcake cake!

MARTHA STEWART RECIPE (originally found here):

Pull-Apart Vanilla-Wafer Cupcake Cake with Berries

Talk about a fun dessert! It looks like a sheet cake on top, but there are actually vanilla-coconut cupcakes underneath the fresh berries and fluffy whipped-cream frosting. It's easy to make and even easier to serve -- no slicing required.

Source: Martha Stewart Living, May 2018

INGREDIENTS

  • 45 vanilla-wafer cookies, pulsed in a food processor until finely ground (1 1/2 cups)
  • 1/2 cup unbleached all-purpose flour
  • 1 teaspoon baking powder
  • 1/4 teaspoon kosher salt
  • 1 stick unsalted butter, softened
  • 3/4 cup granulated sugar
  • 2 large eggs, room temperature
  • 3/4 cup whole milk
  • 1 cup sweetened shredded coconut
  • 1 teaspoon unflavored gelatin
  • 1 cup cold heavy cream
  • 2 tablespoons confectioners' sugar
  • 1/4 teaspoon pure vanilla extract
  • 1 1/2 cups mixed fresh berries, such as blueberries, raspberries, and blackberries

DIRECTIONS

  1. 1. Preheat oven to 350 degrees. Line a standard muffin tin with paper liners. Whisk together cookie crumbs, flour, baking powder, and salt.

  2. 2. Beat butter with granulated sugar on medium speed until pale and fluffy, about 1 minute. Beat in eggs, one at a time. Reduce speed to low and add flour mixture in 3 batches, alternating with milk, beginning and ending with flour mixture and beating until combined after each addition. Fold in coconut.

  3. 3. Divide batter among cups. Bake until cupcakes are golden brown and centers bounce back when gently pressed, 22 to 24 minutes. Let cool completely in tin on a wire rack.

  4. 4. Add 2 tablespoons water to a small saucepan. Sprinkle with gelatin; let stand until thick, about 5 minutes. Gently heat over medium until gelatin has dissolved. Remove from heat; let cool 5 minutes (but don't let it set).

  5. 5. Beat together cream, confectioners' sugar, and vanilla on medium speed until very soft peaks form, 1 to 2 minutes. Add gelatin mixture; beat on medium until stiff peaks form, about 1 minute more.

  6. 6. Remove cupcakes from tin and arrange on a platter in a three-by-four rectangle. Spoon frosting over each row of cupcakes; using an offset spatula, smooth to cover tops, forming a rectangular shape. Refrigerate at least 1 hour and up to 3 hours. Sprinkle with berries before serving.

Fresh Vegan Mushroom Tacos Recipe (Awesome in Cast Iron)

If you're looking for a new way to incorporate those fresh, local, Farmer's Market ingredients into a recipe, here's a good one! These Vegan Mushroom, Onion, and Pepper Tacos are super delicious and you definitely won't even miss the meat! 

Even more special, is the fact that we got to create this recipe for Martha Stewart Essentials available at Macy's. It's been SUCH an honor creating a set of four recipes for Martha! It's definitely a food blogger's dream :)

Keep reading to get the full details on this delicious, vegan recipe (but, feel free to add some cheese or sour cream if you like!!).

We found all of the fresh ingredients at our local Farmer's Market here in Carbondale, IL.

As soon as I learned about this amazing opportunity, I went searching through all of the items and decided upon four very delicious recipes, which I will link you to as soon as they are live! 

I was encouraged to use recipes right from MarthaStewart.com, so I used her basic recipes, then embellished and modernized them to make them extremely appealing for my Pinterest fans. Well, everyone has loved them so far, and now all of the cast iron skillets are SOLD OUT on the MAcy's website! Perhaps my recipes helped, but the fact that they were each around $15.00 might also be the reason these have all sold out. Nonetheless, find your favorite cast iron or other skillet, and let's get started!

Ingredients / Materials: 

- 1-2 lb. Fresh Mushrooms 

- 1 red onion

- 1 medium bell pepper (we used several small ones)

- 2 Tbsp. or more Mexican Seasoning

- 1/2 bunch of cilantro

- Small Flour Tortillas

- Martha Stewart Cast Iron Skillet 

Instructions:

1. Prepare and chop mushrooms, red onions, and bell peppers. 

2. Heat olive oil in a Cast Iron Skillet, add chopped onions, then belle peppers, then lastly, mushrooms.

3.) Season veggies generously with Mexican seasoning, a tiny bit of salt, and any other seasoning you would like. Also, add chopped cilantro at the end and stir everything one last time. 

4.) Warm tortillas, then add the veggie filling, and enjoy! They're so delicious, I hope you love them! 

FLYWAY FAMILY FARM MUSHROOMS (MAKANDA, IL)

As I mentioned, I got to use local ingredients from our Farmer's Market! We loved finally being able to utilize three different varieties of mushrooms from Flyway Family Farm. They have different mushrooms at the market almost every weekend!

Also, I used the red onions and colorful bell peppers from Country Sprout Organics, my other favorite booth at our local market! 

Hopefully, you have enjoyed this recipe! Stay tuned for several more recipes inspired by Martha Stewart! 

Two Amazing Recipes for Summer Get-Togethers with Mission® Tortillas

This is a sponsored post written by me on behalf of Mission®. All opinions are entirely my own.

If summer get-togethers make you giddy with joy and excitement, then you’re not alone! I too love brainstorming recipes with friends, then planning, prepping, and preparing the food, then finally getting everyone together to enjoy the bounty. Food always brings people together, and is great shared with old friends and new ones! This summer, I am going to make it my mission to enjoy the company of others over great food as much as possible!

I love how these Mission® Super Soft Flour Tortillas really made my two recipes even better than I could have ever imagined. I have tried all sorts of tortillas, and these are the softest, tastiest ones yet. They were so versatile, and absolutely perfect for my Vegetarian Southwest-Inspired Pinwheels AND for my Grilled Steak Tacos. I always feel like the tortillas make or break a recipe, and I was so happy to find a new favorite. You can use the store locator on the Mission website to find Mission tortillas at stores near you, and find even more delicious recipes as well.

I’m not sure if you’ve ever experienced this, but I am always let down when tortillas kind of get dried out super quickly, then kind of crack when you roll anything out of them (like the pinwheels). Well, these were perfect. They held together super well, and worked amazingly well for this 4 ingredient appetizer!

And, since I wanted to offer lots of delicious toppings for these Grilled Steak Tacos, my first thought was fresh ingredients of course!

I thought it would be so fun to offer guests some handmade pickled jalapeños as party favors. Every time we serve these to guests or bring them to someone’s house, we always get lots of compliments on them.

PICKLED JALAPENOS

(Making 1 day in advance is recommended)

I think it’s time to start sharing them with people, so I filled mini jars with a mixture of fresh ingredients like jalapeño slices, garlic cloves, and mini red onions. Now, it’s time to pickle!

I heated a solution of 1.5 cups white vinegar plus 1 cup water, and 1-2 tbsp salt until the salt has dissolved. Let it cool a bit, then carefully pour the vinegar solution over the ingredients, leaving a little bit of room at the top of the jar so it does not spill out. Place lids back on, and gift as soon as the next day.  

These turned out SO cute, and you could even tie cute ribbons around the jars for an even more festive look.

In addition to the pickled jalapeños, I offered pickled red onions (get my recipe here), plus a guacamole tomatillo sauce and a traditional red salsa too.

The lettuce even came right out of my own garden! This was my first year to try growing lettuce, and while it may be almost at the end of its season, I love treating friends to things I grew!

GRILLED STEAK TACOS

INGREDIENTS:

1/3 cup olive oil

2-3 tbsp soy sauce

2-3 tbsp or more taco seasoning

Juice from 1 lime

1 tsp salt

1-2 lbs flank steak or similar

INSTRUCTIONS:

Simply marinate each pound of steak in 1/3 cup olive oil, 2-3 tbsp soy sauce, 2-3 tbsp or more taco seasoning + the juice from 1 lime + 1 tsp salt for at least 1-2 hours or overnight. Simply grill for 3 or so minutes per side if your steak is thin like mine was. Slice and serve with fresh sides and warmed Mission Super Soft Flour Tortillas (they taste best warmed).

Slice up the steak and set out the toppings, the tacos are ready to eat!!!

SOUTHWEST INSPIRED VEGETARIAN PINWHEELS

I searched for vegetarian pinwheel recipes and hardly found anything! These are so great tasting, and you will never miss the meat.

Ingredients:

1 package Mission® Super Soft Flour Tortillas

Plus 1-2 bunches of cilantro

1 head of green lettuce

To create the sauce:

1 (8 oz.) box of cream cheese, softened

½ cup (or more) taco sauce or red enchilada sauce

½ - 1 cup cream cheese

¼ - ½ tsp salt, optional

INSTRUCTIONS:

1.    Mix all sauce ingredients together, and stir until smooth. I used a hand mixer

2.    Lay one tortilla out onto your work surface, and spread 1.5 -2 tbsp sauce in an even layer on tortilla.

3.    Add a line of cilantro and a line of small pieces of lettuce towards one side of the tortilla, then roll up into an even roll.

4.    Cut in 2” sections, and display on a cute tray. I used cactus pieces from a local market.

Enjoy!


The bottom line - I would definitely recommend Mission Super Soft Flour Tortillas to anyone who loves superior taste and excellent ingredients!

Happy summer, friends!

Brunch Party - Vegan Avocado and Egg Toast Board

Brunching ain't always easy, but I found a way to make it so :) Try setting up a toast board, where everyone can choose their own toppings! It's such a fun and interactive way to have guests gather around a giant array of great food and drinks! 

If you're a fan of hard boiled eggs, then here is one way to enjoy these protein packed, brunch-worthy hard boiled eggs from Great Day Farms, available at Walmart!

To make this amazing spread, you head to the produce section and grab as many colorful fresh ingredients as you possibly can. Make sure you do stick to a budget, as fresh veggies can sometimes items can weigh a bit more than expected and then ring the bill up quite a bit. I found these amazing heirloom tomatoes for around $2.99 per pound - which made them incredibly reasonable. 

Embrace anything that is in season (via the farmer's market or local grocer), like jalapeños, basil, avocados, red onions, and other delicious vegetarian ingredients. 

This is a great idea for hosting friends who are in town for the weekend, and all have different tastes - this toast board embraces just about everyone!

Also, you could prep these ingredients for lunch at work, or even for a summer picnic. These ingredients are 100% natural, and actually offer energy and so much inspiration for the day ahead. 

By offering fresh, wholesome ingredients to those you love, you can truly help nourish them with a seriously fulfilling meal. Feel free to add sliced turkey or even lox to add a really elegant vibe to this rather upscale meal.

Lattice Weave Puff Pastry Wrapped Prosciutto + Brie Recipe

Looking for an elegant and luxurious recipe to bring to that next BBQ or summer party? Perhaps you want a special date night dish that can be enjoyed with a couple of drinks and a movie. This  Lattice Weave Puff Pastry Wrapped Prosciutto + Brieis so delicious, that those who get to enjoy such a treat will likely lick the plate clean. 

I found that by using Wewalka Puff Pastry, it held its shape super well and wasn't overly greasy, which was great. The brie I used, shown below, also worked out great. I found that brie is very affordable, ranging anywhere from $5 to way more expensive options. If you're new to Brie, then start off less expensive or in the middle of the price range.

This is a very rich and indulgent dish, but if you share it with friends, there's definitely no guilt in eating something like this. It's really amazing.

Ingredients:

1 (8 oz) Round of Brie 

1 package Wewalka puff pastry

1 egg, whisked with a fork for egg wash

1 package of Prosciutto, any brand you like

Crackers, pretzels, etc, to dip in cheese

Instructions:

1. Preheat oven to 400 degrees F. Slice puff pastry into 1/2" strips, set aside.

2. Wrap opened brie round with prosciutto, then set on a pan or clean work surface.

3. To create lattice: place two dough strips on top of prosciutto wrapped brie in an X shape. Here is a link to a good tutorial on how to make the rest of the lattice (just make sure dough has no spaces between strips, so it holds in the cheese well. Once the entire top of the brie has been latticed (see below), grab a drinking glass and let's finish this masterpiece!

4. So, the image below is a little strange looking, but I basically put the ingredients on top of a drinking glass to elevate it so I could then finish "weaving" the sides for a more finished look. You may notice that the widest part of the brie / the outer edge has one slice of dough wrapped around it, then I could easily finish wrapping the other pieces under the brie. I also sliced a few inches off of each strip, so there wasn't a huge wad of dough below the brie when it baked.

5. Below, you see the final brie round before baking! You can definitely prep this ahead of time, and bake it right before you need it. Brush with egg wash if desired for an even shinier finish.

And presto chango...Look at THIS BEAUTY, below! It is absolutely gorgeous!

6. Bake for 20-25 minutes or until crust is brown and flaky, cut into the cheese and let the middle just ooze out! Dip crackers, pretzels, green apples, and more into this creation, and enjoy!!

When you slice into this awesome creation, you may hear a little crunch of the flaky layers of dough, and then you will see the cheese just ooze out. Dip crackers, pretzels, and anything your heart desires into this melty cheese. The brie is very rich and creamy and does have a little bit of that funky taste that brie just has, but it pairs so well with the prosciutto and the puff pastry.

What do you think? Does this look like something you would eat or serve at your next gathering? I really hope you've enjoyed!!!

Delicious No Bake Tiramisu Recipe

This Italian inspired dessert has been described as "sexual" and will make your tastebuds go crazy! Perhaps this recipe will start off your weekend just right! But in all seriousness, since this is a no-bake treat, and can be served in individual jars, it's perfect for summer parties, and everyone is going to love this recipe. 

Both rich and somehow light at the same time, the homemade whipped ricotta filling and the familiar taste of coffee really make for a decadent treat.

Easy Eggless No-Bake Tiramisu

Prep Time: 20 min + chill time

Yield: 9

INGREDIENTS

·       1 cup (250ml) whipping cream

·       1 cup (250g) mascarpone, softened

·       1/4 cup (50g) granulated sugar

·       1 tsp (5ml) vanilla extract

·       1&1/2 cups espresso or very strong coffee, cooled

·       2 tbsp (30ml) coffee liquor (I used Kahlua)

·       2 dozen lady fingers

·       2 tbsp cocoa powder

INSTRUCTIONS

1.   Beat the whipping cream until stiff peaks form. Set aside.

2.   Mix the mascarpone, sugar and vanilla until combined. Add in the whipped cream and beat again until smooth.

3. Prep small Ball jars by removing all lids, rinsing and drying thoroughly, and setting them all out onto a tray or surface.

3.   Stir the coffee and liqueur together. Lightly dip 2-3 lady fingers into the coffee mixture, then place the 2-3 lady fingers into the jars to create the bottom layer of the dessert. Make sure not to soak the lady fingers too much or there will be lots of coffee left in the bottom of the jars. Repeat in all jars.

The Kahlua is optional but adds a nice kick and authentic flavor to the flavor of this dessert!

4. Using the small ice cream scooper, scoop a generous amount of the ricotta mixture over each jar, making them look as much like a perfect scoop of ice cream as possible.

5. Sprinkle cocoa powder (or even hot cocoa mix) through a metal strainer over top of each jar. A light dusting of the cocoa powder really gives them a nicer, upscale look. Enjoy!

The other fun thing about this post is that I get to show off my new kitchen update, we painted and I installed new "tiles" from The Smart Tiles, here!

PRINT THE RECIPE...

PIN IT FOR LATER...

DIY Bottle Koozies + Vegetarian Taco Bowl Recipe

This shop has been compensated by Collective Bias, Inc. and Constellation Brands. All opinions are mine alone. The following content is intended for readers who are 21 or older. #CelebratorySips #CoronaSummer #CollectiveBias

Summer is here and what a better way to celebrate all the hard work you have done this year with a Beer + Craft Night with friends? I’ve been really wanting to make some customized / embellished drink koozies for some time, and when I learned about this amazing opportunity with Corona®, I jumped at the opportunity to celebrate all that Corona embodies - offering a passport to carefree enjoyment and refreshing, delicious refreshments! With a refreshing, smooth taste balanced between heavier European imports and lighter domestic beer, Corona Extra is an even-keeled cerveza with fruity-honey aromas and a touch of malt. The flavor is crisp, clean and well balanced between hops and malt.


What a perfect way to celebrate summer with a snazzy new way to keep your drinks cold and to liven up the party...even if it is a craft night that turns into a party :)


These bottle and can koozies really make a statement. They will also help you identify which beer belongs to each person. For only $3-4 you can make your very own Summer Drink Koozie - keep reading to get the instructions and design ideas!

KOOZIE MATERIALS:

Foam Koozies (found in the foam aisle at a craft store)

Ribbons and trim of various colors

Low temp glue gun

Glue sticks (I used fabric glue sticks)

Cardboard for use as your work surface, or a heat-safe work surface (the glue can get messy!)

KOOZIE INSTRUCTIONS:


  1. Plug in your glue gun and get it ready to use. Cut ribbons and trims to fit around your koozies, leaving a little extra just in case.

  2. Once glue is hot enough, on a heat-safe work surface, add a bit of hot glue to the end of one ribbon, and begin to glue it around the top of the koozie. For the more patterned koozies, I used 4 strips of woven ribbon around. See steps below.

Notice the raw edges of the ribbons, above. We will cover those in the next image, with one more strip of ribbon, glued up the back.

3. For the tassel koozie (below), I glued on my tassel trim first, then covered that with a more tie dyed looking ribbon for a more finished look. See steps below.

4. Feel free to embellish further with stick on jewels and more ribbons - let your creativity run wild! Note - I tried using sticky-backed jewels, but I needed to glue them on, or they would fall off after a short use. Still super cute either way!

FOR THE VEGETARIAN TACO SALADS:

Ingredients:

2 Sweet potatoes (chopped)

2-3 TBSP Olive Oil

2-4 TBSP Mexican Seasoning

1-2 tsp salt

(Other toppings include: lettuce, shredded cheddar, tomatoes, sour cream, guacamole, cilantro, and more!)

Note - this can be made vegan if you use all vegan toppings, like vegan sour cream.

Taco Salad Instructions:


  1. Preheat oven to 375-400 degrees.

  2. Cut sweet potatoes into cubes, and chop onions into small pieces. Place into a mixing bowl, and toss with 1-2 TBSP Olive Oil.

  3. Bake potatoes and onions for 15-20 minutes, then add sliced peppers on top, and bake another 10 minutes or until the ingredients are baked soft enough to enjoy.

  4. To create your bowls, add a bed of lettuce, then top with sweet potatoes, and any other toppings you like. Enjoy with a Corona Extra®!

Have an amazing summer, friends!

PIN IT FOR LATER...

Vegetarian Cashew and Superior Green Filled Cheesecake Recipe

This post is sponsored by FoodScience of Vermont. All opinions and content are my own.

#LiveSuperior

Looking to add more Superfoods to your diet? Learn how to infuse a cashew-based “cheesecake” with health-boosting ingredients!

This delicious cashew-based version of a traditional cheesecake is filled with all natural ingredients thanks to FoodScience of Vermont Superior Greens, which contains whole fruits and vegetables, promotes healthy aging and radiant skin, mental clarity, and a healthier immune system while offering a boost of healthy enzymes to support your immune system, plus probiotics. It’s amazing how this one line of Superior Powder products can offer so much!

Try it, you’ll love it. Find the product at Rite Aid® and RiteAid.com here!

I love incorporating unique and health conscious ingredients into my recipes, like the FoodScience of Vermont Superior Greens, which contains three servings of fruits and vegetables in each ½ scoop – which means that this ultra concentrated version of some of the healthiest ingredients on Earth really will work quickly and efficiently!

This recipe is divine! I believe this would be great for someone looking for healthier alternatives to dessert recipes, or someone who has never ever tried a cashew based cheesecake before. It’s fun to introduce friends and family to things like that.

I have been very interested in the detox process as well as considering eating as many whole foods as possible. This FoodScience of Vermont Superior Greens is a great step, in addition to more exercise and lots of water intake, towards reaching my nutrition and other health goals I have set for myself.

While the product can be enjoyed in a smoothie or mixed into a glass of cold water, I thought it would be exciting to introduce this product to my wonderful readers, friends, and family through a mouth-watering dessert recipe.

Perfect for summer when you don’t want to bake a ton, or when you want something that’s not overly sweet but deliciously frozen, this is the recipe that will check all of those boxes! Bring this to an event, or serve it to friends at a summer gathering and just look at everyone’s faces light up when they realize that this is not the “cheesecake” they were expecting, but one that is WAY, WAY better for them, but still tastes indulgent.

Now, as for the crust, I know the traditional vegan cheesecakes are made with dates, and are basically no bake, but my favorite part of a cheesecake IS the crust, so I wanted to keep it traditional with lots of additional natural ingredients to sweeten things up naturally. Feel free to use a date crust here too.

Food Science of Vermont provides us with ways to get 3 servings of fruits and vegetables in each ½ scoop. The scoop is provided, so it’s very easy to measure out just how much you will need.

While the traditional use for this product is mixed into smoothies, cold water, and other drinks, I thought it would be genius to use the delicious taste and the nourishing super food ingredients to infuse this recipe with a unique taste and twist.

The crust is made from a delicious mixture of coconut, walnuts, oats, graham crackers and vegan “butter”. I used a spring form pan, similar to a traditional cheesecake, but really modernized this recipe with almost all vegan ingredients and that extra boost of has helpful enzymes and probiotics, making this an all around awesome dessert or snack. Give it a try, I bet you’ll enjoy it!

INGREDIENTS:

(Makes “Cheesecake” in 6 in x 3 in spring form pan):

Crust Ingredients:

10 - 12 full graham cracker rectangles

¼ c. oats

¼ - ½ C. or more walnuts

½ C. or more dried coconut pieces/flakes

¼ tsp. cinnamon, optional

6-8 (or more) TBSP salted Vegan Butter or regular butter

¼ C. Sugar

*Note: Feel free to use less graham crackers and more of the oats, nuts, or coconut if you prefer and even healthier crust.

Filling Ingredients:

3 C. soaked cashews (soak for at least 3-5 hours)

1 can chilled coconut milk (use the top thicker part and save or discard water)

¾ - 1 C. macadamia milk, coconut milk, or similar

4 – ½ C. agave or maple syrup

½ - 1 tsp. vanilla

2 TBSP FoodScience of Vermont Superior Greens Powder


INSTRUCTIONS:

For The Vegan Filling:

1. Soak cashews for 3-5 hours, and strain. Add to a blender with coconut milk, and process until smooth. If the mixture does not pour well, then add a bit more macadamia milk or agave. Taste the filling to make sure it is to your liking. Time to make the crust!

For The Crust:

1.    Preheat oven to 350 degrees F, and prepare your spring form pan by using non stick spray inside, and using a paper towel to wipe pan for a more even finish. Also, you may cover the bottom of the pan so the butter does not drip out while baking. Alternately, bake on top of a sheet pan to prevent spills in the oven.

2.    In a food processor, blend up graham crackers (use hands to make pieces smaller before processing), coconut, walnuts, and oats. Feel free to mix in some whole oats after processing for that “whole oat” look in your crust.

1.    Once processed to an even powder, mix with melted butter, sugar, and pour 2 ½ cups into pan. Use a flat bottomed glass or candle holder to press and flatten the crust down, making sure to clean up the edges with a knife for a neater look once the spring form pan is removed.

4.    Bake crust for 15-20 minutes, until edges begin to brown. The crust will firm up quite a bit once cooled, so even if it’s soft after baking, it may already be done. Let crust cool completely, and fill with filling until there is about ½-1/4” until the top of the spring form pan. Freeze for 2-3 hours or overnight.

5.    Time to CAREFULLY remove it from the spring form pan. I would recommend using a sharp knife or skewer along the top edge to break the seal with the pan. At first, mine looked like it was cracking, so I re-tightened the outside of the spring form pan, ran a skewer along the top edge, and once I loosened the pan again, it removed pretty easily. Just be patient with it. At this point, feel free to place it back into the freezer

6.    Place “cheesecake” onto a plate to decorate. Top with fruits like blackberries, strawberries and blueberries (the two latter are actually ingredients in the FoodScience of Vermont Superior Greens powder). I sliced the strawberries in half and left the green parts on because the full strawberries just looked too big. The “cheesecake” would be fine to serve right now, or place back into the freezer for 2-4 hours so the berries begin to freeze and they get a beautiful frosty look to them.

FoodScience of Vermont offers three uniquely designed powdered drink supplements loaded with phytonutrients, stabilized probiotics, and many other beneficial natural ingredients. I really hope you enjoy!

Head to your local Rite Aid® or visit bit.ly/FSSuperiorPowders to get your Superior Powders.

Follow FoodScience of Vermont on social:

Follow the brand’s hashtag on Instagram #livesuperior

Facebook: https://www.facebook.com/FoodScienceVT

Twitter: @FoodScienceVT

Pinterest: https://www.pinterest.com/foodsciencevt/

Instagram: @foodscienceofvermont

Festive Chocolate Bark Recipe

A deliciously sweet and festive treat that only takes a few minutes to create! You will absolutely love how great the flavors of the white chocolate and dark chocolate meld together to satisfy your sweet tooth. Customize the colors and decorations to suit your holiday, team colors, or other special occasions!

INGREDENTS:

1 bag of dark chocolate chips (I used a darker chocolate from Ghiradelli)

1 bag of white chocolate chips (I like Ghiradelli white melting wafers) 

Sprinkles of your choice (At least 3 Tablespoons or more)

INSTRUCTIONS:

Melt dark chocolate either in the microwave or a double boiler. Line a baking sheet with parchment paper and pour chocolate on. You can smooth it with a spatula to the thickness you desire. Stick in the freeze for 20 minutes.

Melt while chocolate.  Let it set for 3 full minutes (or at least until it slightly thickens). Remove baking sheet with chocolate from the freezer and immediately pour white chocolate on top. Sprinkle on sprinkles. Freeze for 20 minutes.

Once set, break into pieces with your hands (or rubber gloves). Keep refrigerated.

Tres Leches Cupcakes Recipe

These deliciously moist tres leches cupcakes are a new take on a traditional Mexican dessert recipe. 

I was extremely happy with how these Tres Leches Cupcakes turned out. Just as delicious as the traditional Tres Leches Cake, but more easily handled at a party or shower. 

Tres Leches Cake (Recipe originally posted here on the Tastes Better From Scratch Blog)

Prep Time: 1 hr 30 mins  //  Cook Time: 40 mins  //  Total Time: 2 hrs 10 mins

Ingredients

  • 1 cup all-purpose flour
  • 1 1/2 teaspoon baking powder
  • 1/4 teaspoon salt
  • 5 large eggs , separated
  • 1 cup sugar , divided
  • 1/3 cup whole milk
  • 1 teaspoon vanilla
  • 12 oz can evaporated milk
  • 14 oz can sweetened condensed milk
  • 1/4 cup whole milk
  • Metallic cupcake holders (silicone ones would work well too) - paper cupcake liners will not work for this recipe.
  • Alternately, use a 9"x13" cake pan

For the whipped topping:

  • 1 pint Heavy Cream , for Whipping
  • 3 Tablespoons Sugar
  • 1/2 teaspoon vanilla
  • ground cinnamon , for topping

Instructions

  1. Preheat oven to 350 degrees F. Add foil cupcake liners to tin or alternately, lightly spray a 9x13'' pan with non-stick cooking spray.

  2. In a medium bowl combine flour, baking powder, and salt in a large bowl. Separate the eggs into two separate bowls.

  3. Add 3/4 cup sugar to the bowl with the egg yolks and mix on high speed until yolks are pale yellow. Add the 1/3 cup milk and vanilla and stir to combine. 

  4. Pour the egg yolk mixture over the flour mixture and stir gently just until combined (don't over-mix).

  5. Use electric beaters to beat the egg whites on high speed. Gradually add the remaining 1/4 cup of sugar as you mix and continue beating until stiff peaks.

  6. Fold egg whites into the batter gently, just until combined. Pour batter into prepared pan(s). If making cupcakes, fill batter about 2/3 full, if making a cake, make sure to smooth batter into an even layer so your baked cake doesn't have divots in it.

  7. Bake cupcakes for 15-20 minutes, or bake cake for 35 to 40 minutes, or until a toothpick inserted in the center of the cake comes out clean. Remove from the oven and allow cake(s) to cool completely.

8. Combine the evaporated milk, sweetened condensed milk, and whole milk in a small bowl. Once the cake has cooled use a wooden skewer to poke holes all over the top of the cupcakes or cake. 

9. Slowly pour the milk mixture over the the top of the cupcakes - Make sure to poke LOTS of holes into cupcakes, or milk mixture will fall over the sides. Pour slowly to avoid overflow, and you will want to soak the cupcakes 2-3 times each. The foil cupcake liners help a lot here, so the milk stays in the liners, making sure to pour near the edges and all around.

10. Refrigerate the cupcakes or cake for at least 1 hour or overnight, to allow it to soak up the milk.

11. In the meantime, whip the heavy cream, sugar and vanilla until stiff peaks. Smooth over the top of the cake or cupcakes. Optionally, sprinkle cinnamon on top. Serve with fresh sliced strawberries or raspberries, if desired. Enjoy!

This was the first recipe where I made successful, homemade whipped cream and have never looked back since!!! 

Mini Cinnamon Rolls with Puff Pastry Recipe

This post was sponsored by Pepperidge Farm® Puff Pastry. All thoughts and opinions are my own. #InspiredByPuff

Puff Pastry adds a unique twist to recipes. It’s light and airy, and also a bit crispy, and you’ve likely never had cinnamon rolls like these before! After you eat these cinnamon rolls, you will never want to go back to the pre-made ones. This more homemade version can also be made (prepared and sliced) ahead of time, then baked just a few minutes before needed. Check out this delicious recipe for crispy, crunchy cinnamon rolls with an ooey gooey center. They’re perfect for brunch, holidays, and everyday meals!

If you’re seeking new and innovative recipes, try incorporating Pepperidge Farm® Puff Pastry Sheets! They add an elegant touch and a very upscale taste to nearly any dish you can imagine.

One of my favorite ways to connect with friends and family is through food. I enjoy creating special treats for these people, and when I use Puff Pastry, I feel like I am providing a meaningful experience as well as a valued connection. If you’re someone who likes to plan ahead and make that extra effort to offer food that is a little bit more elevated (yet still simple), this recipe would be perfect for you! The crispy, flaky outer layer comes from the light and flaky texture of the Puff Pastry, while the interior of the cinnamon rolls stays soft and warm. I chose to use Puff Pastry in this recipe because it’s the most delicious ingredient I can incorporate without being too overly complicated. This recipe is delicious beyond words.

Also, since this recipe uses only a few ingredients, it’s great for a last minute treat too. The Puff Pastry Sheets do need to be thawed, so that would be the only other prep work required. I always make sure to have 1-2 packages of Puff Pastry in the freezer, because it makes life easy! Not only will your creations turn out beautifully, you know that the versatility of Puff Pastry means that it’s a top choice for just about any occasion.

INGREDIENTS:

(Makes 9-10 cinnamon rolls, or more if you slice them thinner):

(For The Dough)

½ Package of Pepperidge Farm® Puff Pastry Sheets, thawed*

*To that at room temperature, remove the pastry sheets from the box and outer wrapping; thaw for no more than 40 minutes. To thaw in the microwave, remove 1 pastry sheet from the box and outer wrapping and wrap in a paper towel; microwave on HIGH for 15 seconds, turn it over and repeat!

(For The Cinnamon Filling)

½ cup butter

1-2 tbsp. cinnamon

½-3/4 cup brown sugar

(For The Icing)

1 tsp. maple syrup

1 tbsp. milk or cream

¾ cup powdered sugar

INSTRUCTIONS:

  1. Preheat oven to 375 degrees, and open your Pepperidge Farm® Puff Pastry Sheets. Grab one of the sheets of Puff Pastry, and save the other one for later in a gallon size zip top bag. Prepare your mini muffin tin by spraying it with non-stick spray, then spread with paper towel to disperse evenly.

  2. On a board covered with parchment paper, place the dough, and pinch any seams/folds together so they are as flat as possible. You can also use a rolling pin during this step.

3. Using a silicone or wooden spatula, spread a thin layer of the cinnamon, brown sugar, and butter spread as evenly as possible. Make sure you do not go all the way to the edges, to prevent a mess.

4. Use both hands to carefully and evenly roll the sheets into a “log” shape. For best results, freeze the log for about ten minutes.

5. Using a sharp knife, carefully make marks ¾” apart, then cut slices from the log. Try to keep the slices as round as possible. If the dough log becomes soft during cutting, then place it back into the freezer for 5-10 minutes and cut the rest of the slices.

Note – if you want to make more cinnamon rolls, simply cut thinner slices from the dough and bake for 5 less minutes.

6. Place each slice into the prepared muffin tin, and bake (on top of another baking sheet to prevent butter from spilling out when baking) for 15-18 minutes, until outer pastry is golden and puffy (not wet or doughy).

7. Once cinnamon rolls are baked, carefully remove them from the muffin tin with a fork, and place on plate to serve.

8. Make your icing while they are baking, by combining powdered sugar, maple syrup, and milk in a bowl and stirring with a spoon until smooth.

9. Drizzle icing onto cinnamon rolls and enjoy!

Learn more about Pepperidge Farm® Puff Pastry Sheets and connect on social!

Facebook: @Pepperidge Farm Puff Pastry

Twitter: @PFPuffPastry

Instagram: @pfpuffpastry

Pinterest: @puffpastry

Hashtag: #InspiredByPuff


YOU MAY ALSO LIKE THESE RECIPES…

Apple Pie Pizza Recipe

Easy Holiday Meal Idea

Pumpkin Oat Dog Treats

Creamy Tomato Basil Soup

Veggie + Prosciutto Sandwich Recipe (Healthier Lunch Idea)

Sometimes you just want a deliciously decadent and healthier sandwich! Here is a delicious recipe that could even be made without the prosciutto to make a vegetarian sandwich too. Loaded with goat cheese, vegetables, and all sorts of toppings, this sandwich is sure to please!

INGREDIENTS:

- Whole Grain Bread of choice (4 slices)

- Goat Cheese Crumbles (3-4 Tablespoons)

- Red Pepper Slices (We used 1/8 of a red pepper, cut into slices)

- Pickled Red Onions (get our recipe here)

- 1/3 of a Jalapeno - sliced very thinly

- Seasoning like salt and pepper

- Panini Maker (we love this one from Cuisinart, which has removable, dishwasher-safe plates)

INSTRUCTIONS:

1. Add a layers of ingredients onto each piece of bread. One side has dijon mustard and prosciutto, the other side has red peppers, pickled red onions, goat cheese crumbles, and also slices of jalapeno, and optional seasoning (like a pinch of salt and pepper). Turn on panini maker

2.) Carefully close sandwich sides together, and place into panini maker. Toast for 3 or so minutes, to ensure the bread does not burn, but that the cheese is nice and melty inside. Remove from panini maker with a spatula, cut in half, and ENJOY!!!

Note - this panini maker heats up pretty quickly, so there is no need to preheat for more than a few minutes. Also, make sure that the plates are sitting flat on your sandwich, compared to sitting at an angle, so the entire sandwich cooks evenly.

CUISINART PANINI MAKER, NOW ON SALE AT MACY'S!

Dressed to grill. This panini & griddler in one brings the best of all worlds straight to the convenience of your countertop. Opening flat to double the cooking surface, this commanding essential features preset temps for grilling everything from burgers to steaks to sandwiches. Plus, this smart cooker puts health first—the front feet adjust to increase the amount of grease drained away from food. Model GR-11.

  • Dimensions: 12.8" x 10.9" x 6"
  • Power on & ready-to-cook indicator lights
  • Removable nonstick grill plates measures 10 1/4" x 6 1/2"
  • 3-year limited warranty
  • Brushed stainless steel
  • Dishwasher safe plates

Soft Batch Iced Pecan Cookies Recipe

These Soft Iced Pecan Brown Sugar Cookies are absolutely delightful! They retain so much of their softness and the added pecan on top adds a natural crunch that really makes these cookies incredible. Good luck eating just one!

INGREDIENTS:

(Makes about 20 cookies)

FOR THE COOKIES:

  • 2 cups (283g) all-purpose flour(scoop and level to measure)
  • 1/2 tsp baking soda
  • 1/2 tsp salt
  • 1 cup (226g) unsalted butter, softened
  • 1 cup (210g) packed light brown sugar
  • 1 large egg
  • 1 tsp vanilla extract
  • 1 cup pecans, toasted, cooled and chopped into bits 
  • 20 extra toasted pecans to top cookies (save the pretty ones for the tops)

Note - to toast your pecans, either place them onto a skillet on medium heat for about 6-7 minutes (see below), or bake them in the oven while oven is preheating - check at 5 minutes, then every 2 minutes after so they do not burn! 

FOR THE ICING:

  • 1 tsp vanilla extract
  • 1 1/2 Tbsp cream
  • pinch salt
  • 2 C. powdered sugar (or more for thicker icing)
  • 4 oz (1/2 Cup) cream cheese at room temperature

INSTRUCTIONS

1. Preheat oven to 350 degrees, and in the bowl of a stand mixer, beat butter and sugars until they are light and fluffy. Add egg and vanilla and beat until combined. 

2. Add sifted flour, baking soda, and salt, and beat again until just combined. Lastly, add chopped pecans and stir by hand until incorporated. 

3. Shape 1" round balls of dough, and bake for about 10-12 minutes, until centers of cookies are fully cooked and edges begin to brown. (The tops will not be shiny anymore). Bake closer to ten minutes if you want softer cookies.

4. Meanwhile, make frosting and get ready to decorate cookies. Let cookies cool completely, then use a spoon to layer on a circle of icing. The icing was super smooth and easy to work with. Top each cookie with a pecan right after icing them. Enjoy!

I'm so happy with how these cookies turned out...