I have an absolutely incredible DIY project for you today! Here is a fun way to spruce up your summer wardrobe. This shop has been compensated by CollectiveBias, Inc. on behalf of its advertiser. All opinions and ideas are my own. #GIVEEXTRAGETEXTRA #Walgreens #CollectiveBias

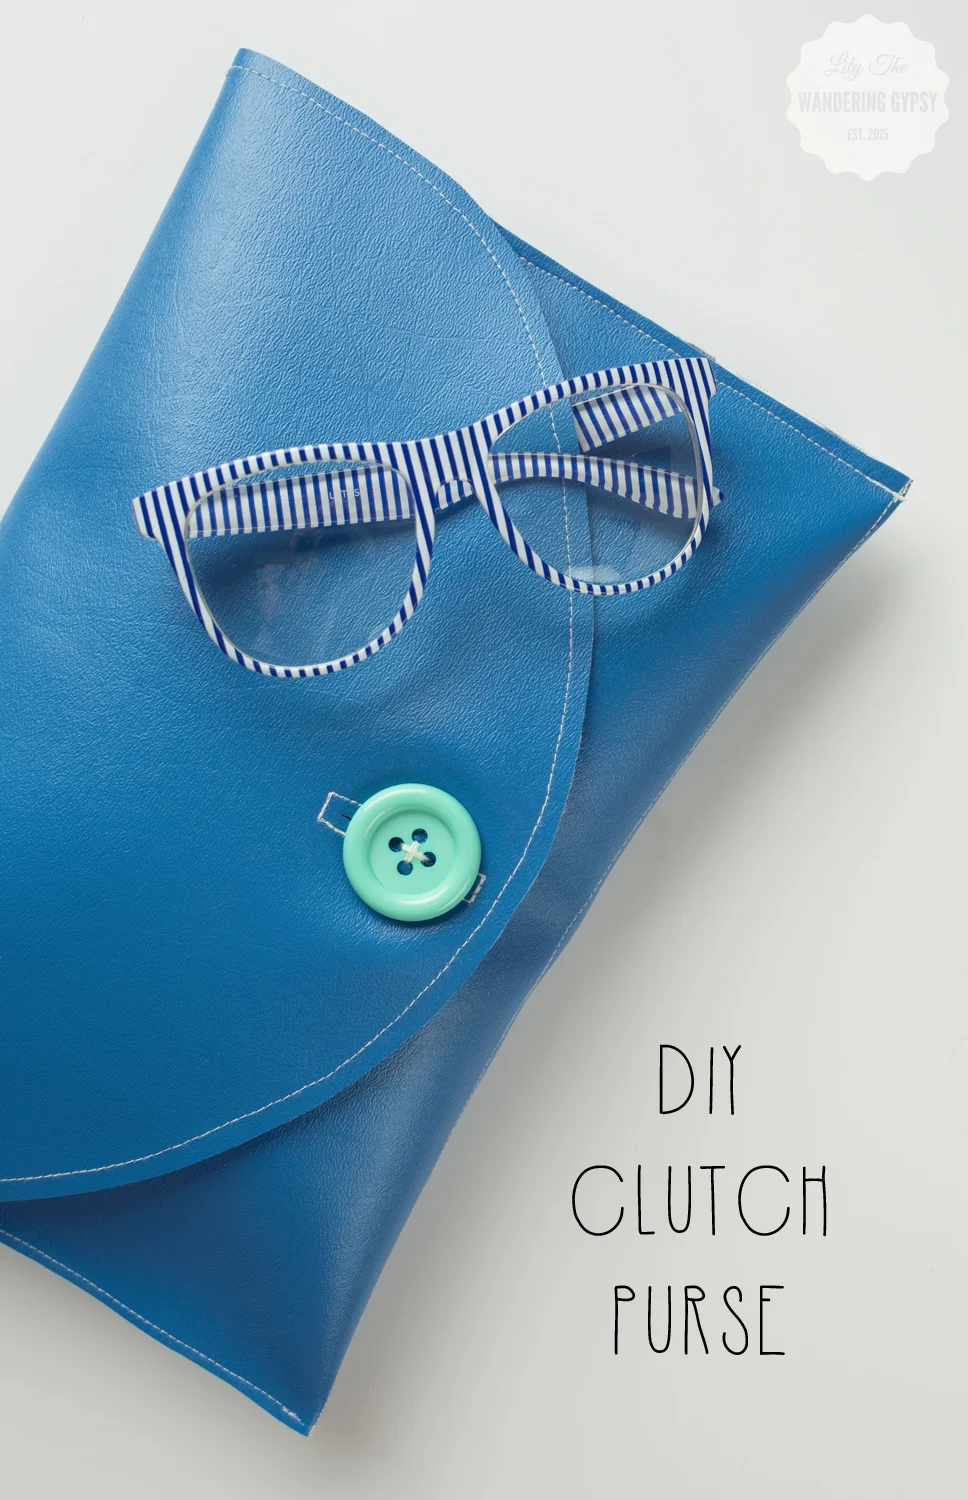
I always have this problem - I have a great outfit picked out to wear to visit friends or family, and am happy with my jewelry, then I have NO purse to match my outfit! Sure, I have my every day purse, that would work, but I always want something a bit more suited for the occasion.
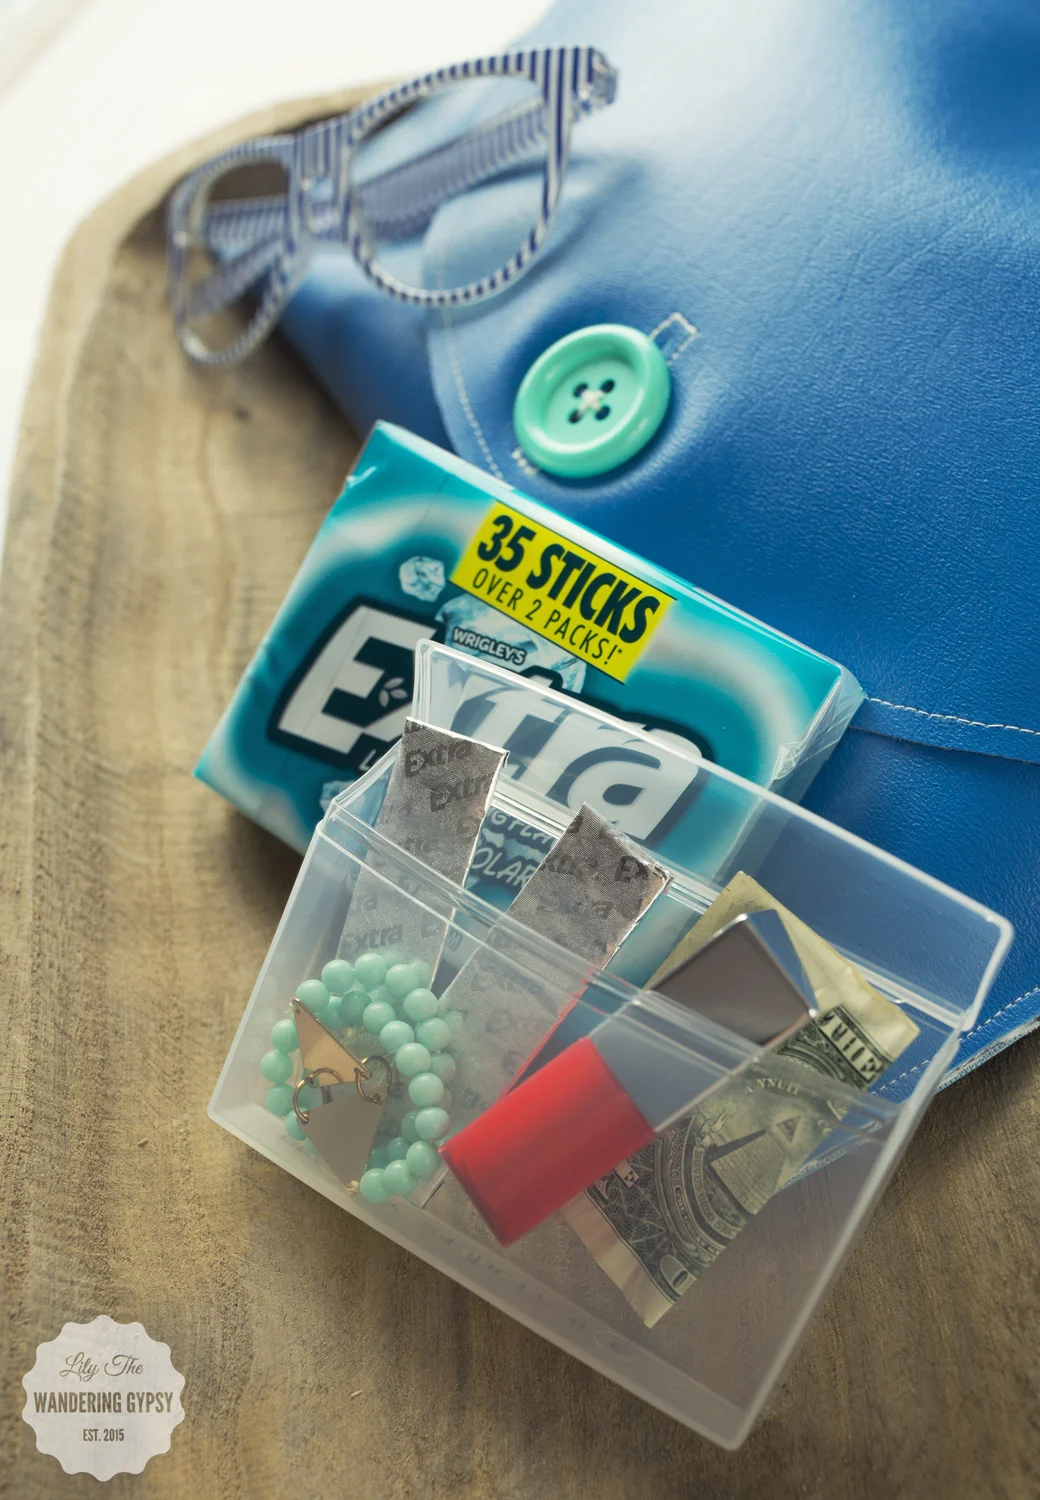
It's always a good idea to bring along a pack of gum with you for a night out, so your breath is fresh! Fun Fact - these new Extra® 35-stick packs have lots of gum to supply your friends as well. You never know what conversation or new friend you could make by sharing a stick of gum with someone!! By simply giving Extra, you may get Extra!
So, here is one way to solve the problem. Sew yourself a quick and easy clutch purse, that takes less than 20 minutes! If you have never, ever sewn before, it could of course take you a tiny bit longer. But, I am very happy with how quickly this project came together!
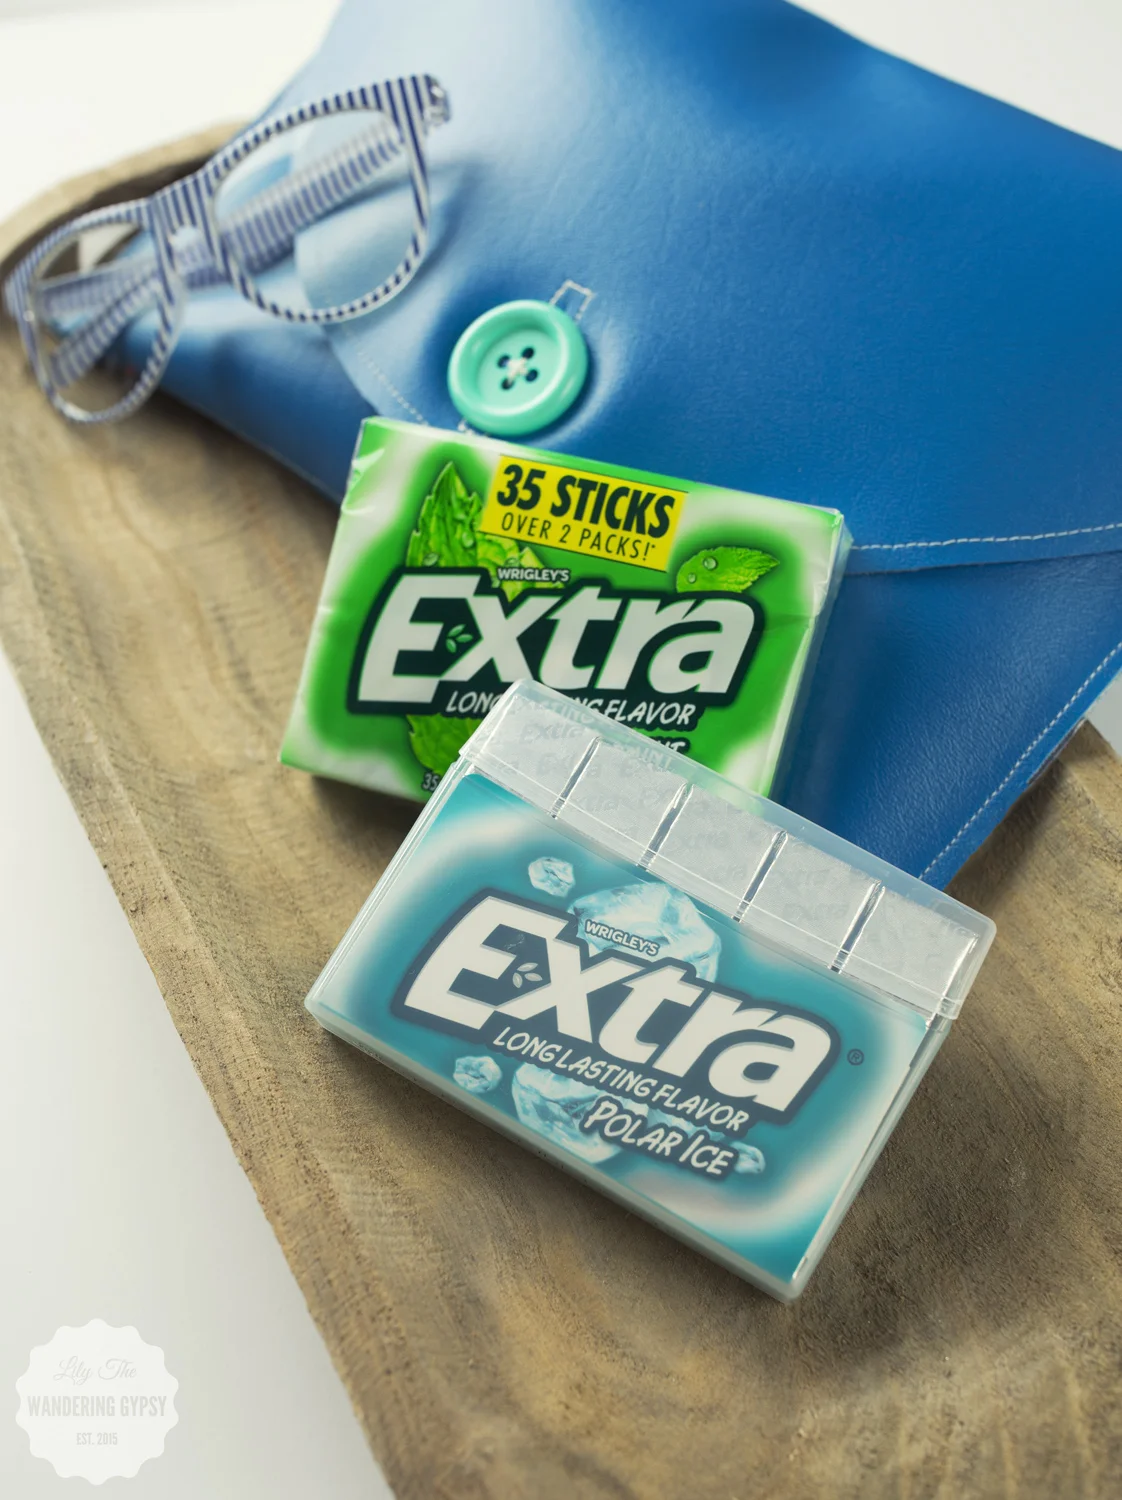
The Flavors Featured In This Post Include:
Extra® Gum Spearmint
Extra® Gum Polar Ice®

MATERIALS:
- 1/3 yard of vinyl (found in the home decor area of the JoAnn's)
- 1/3 yard of flannel or felt
- Scissors
- 2 small binder clips
- Sewing Machine with Needle and Thread
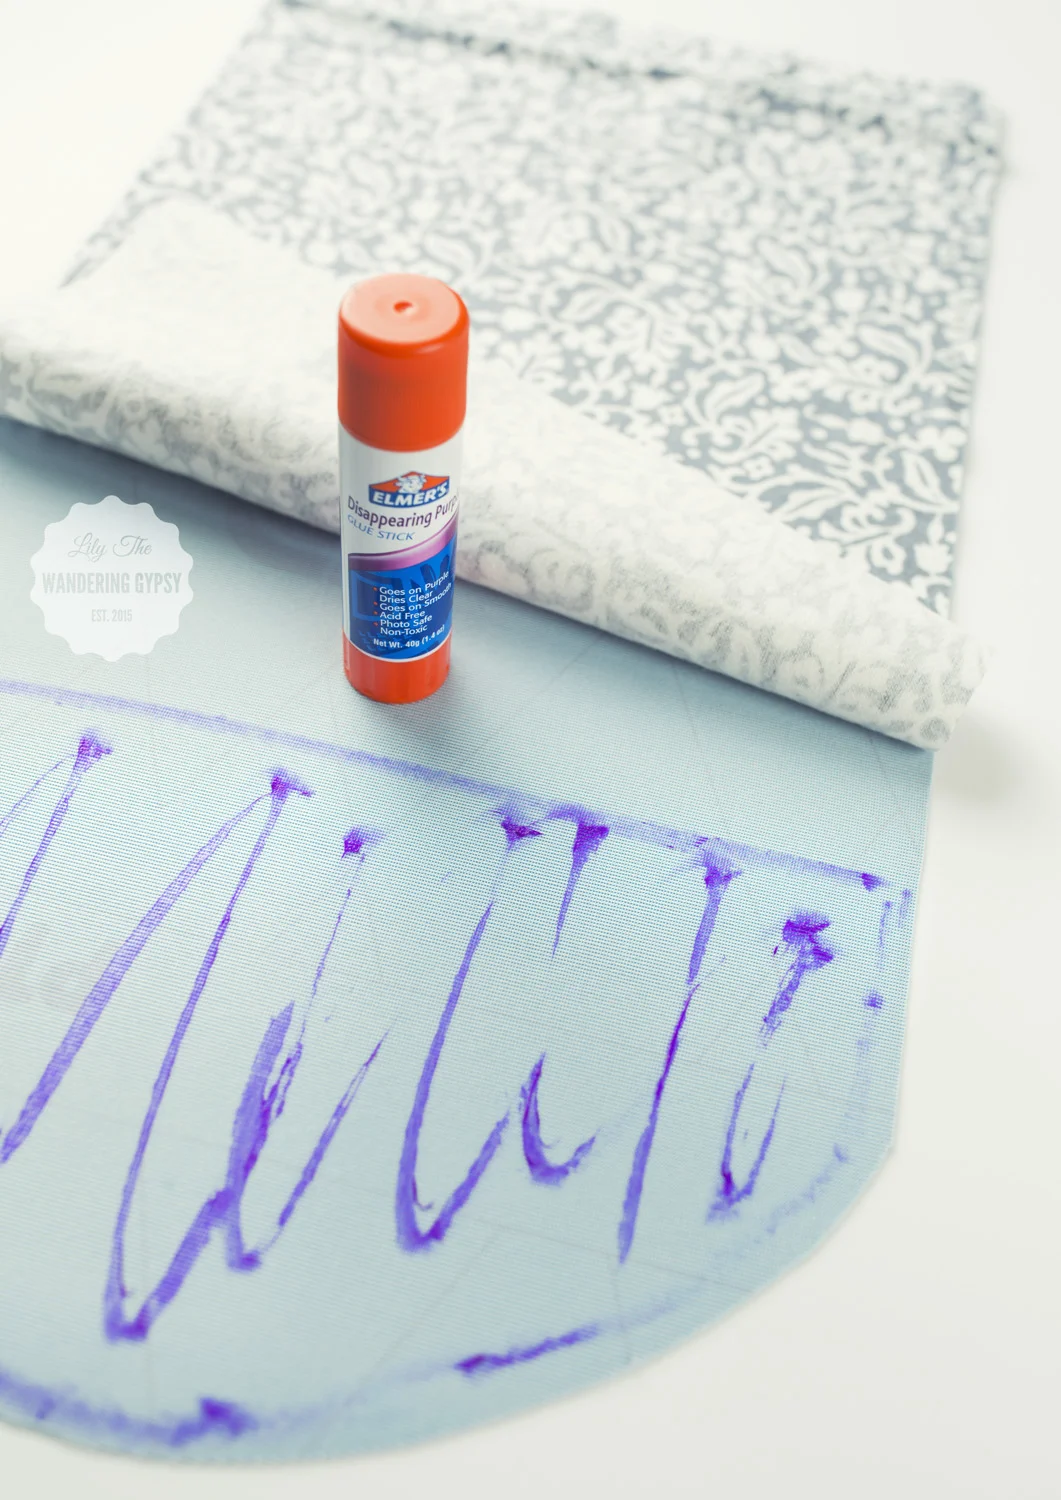
- Glue Stick
- Hand Sewing Needle and Thread
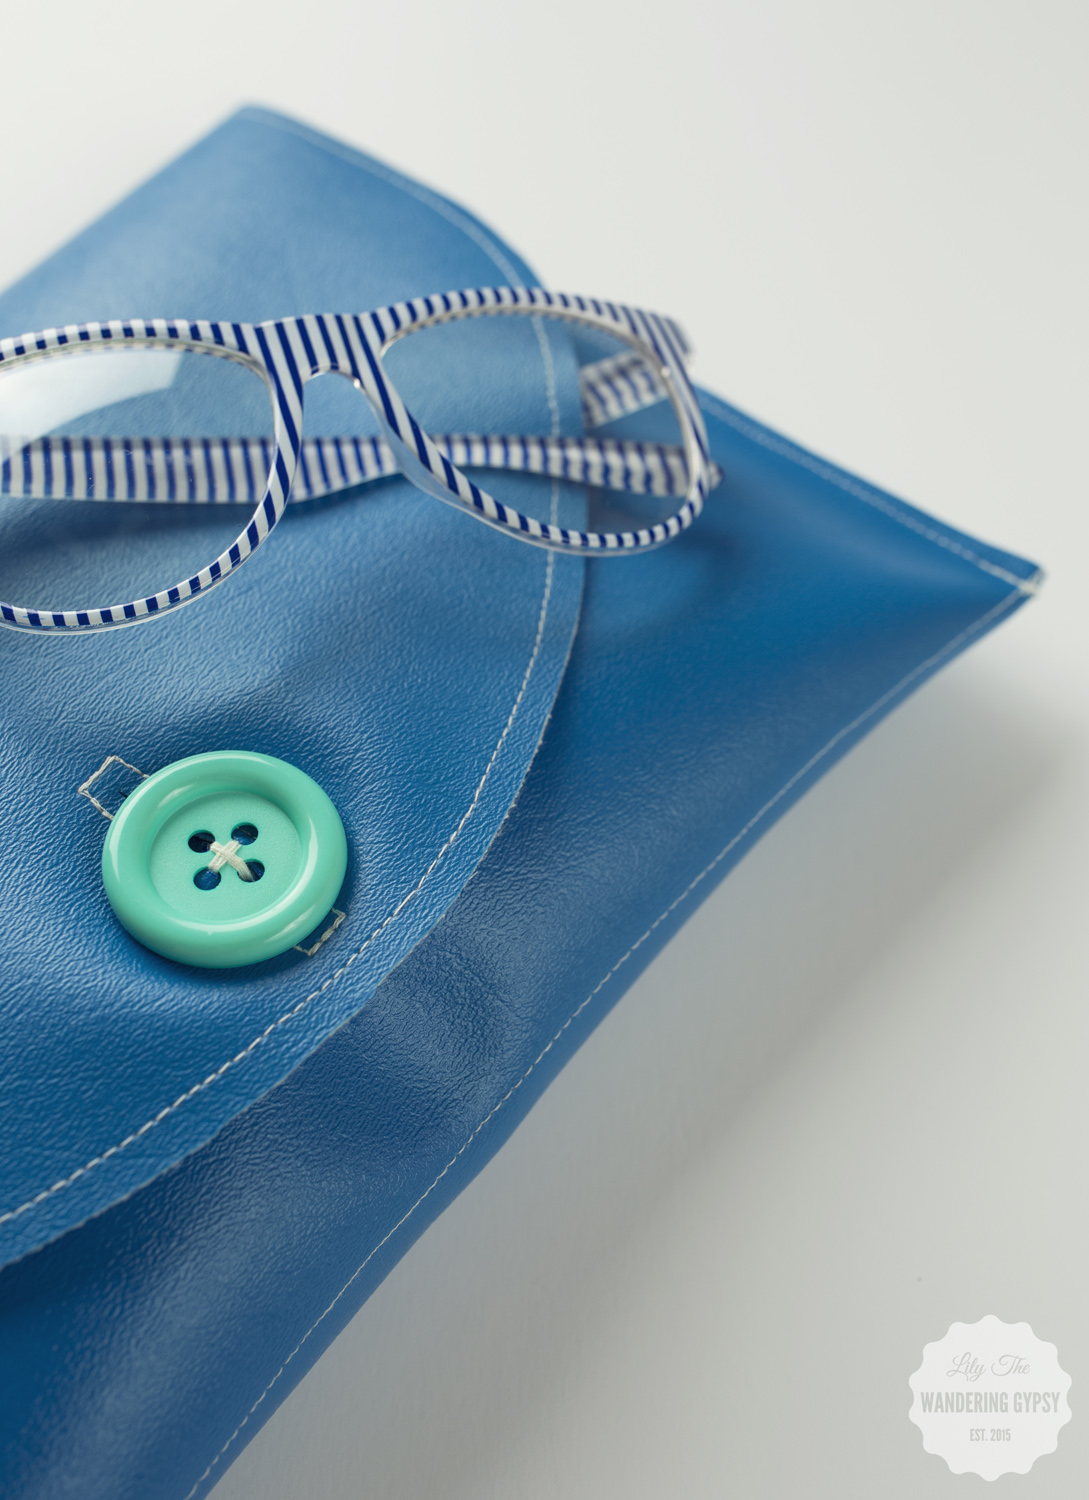
- Button For Closure
INSTRUCTIONS:
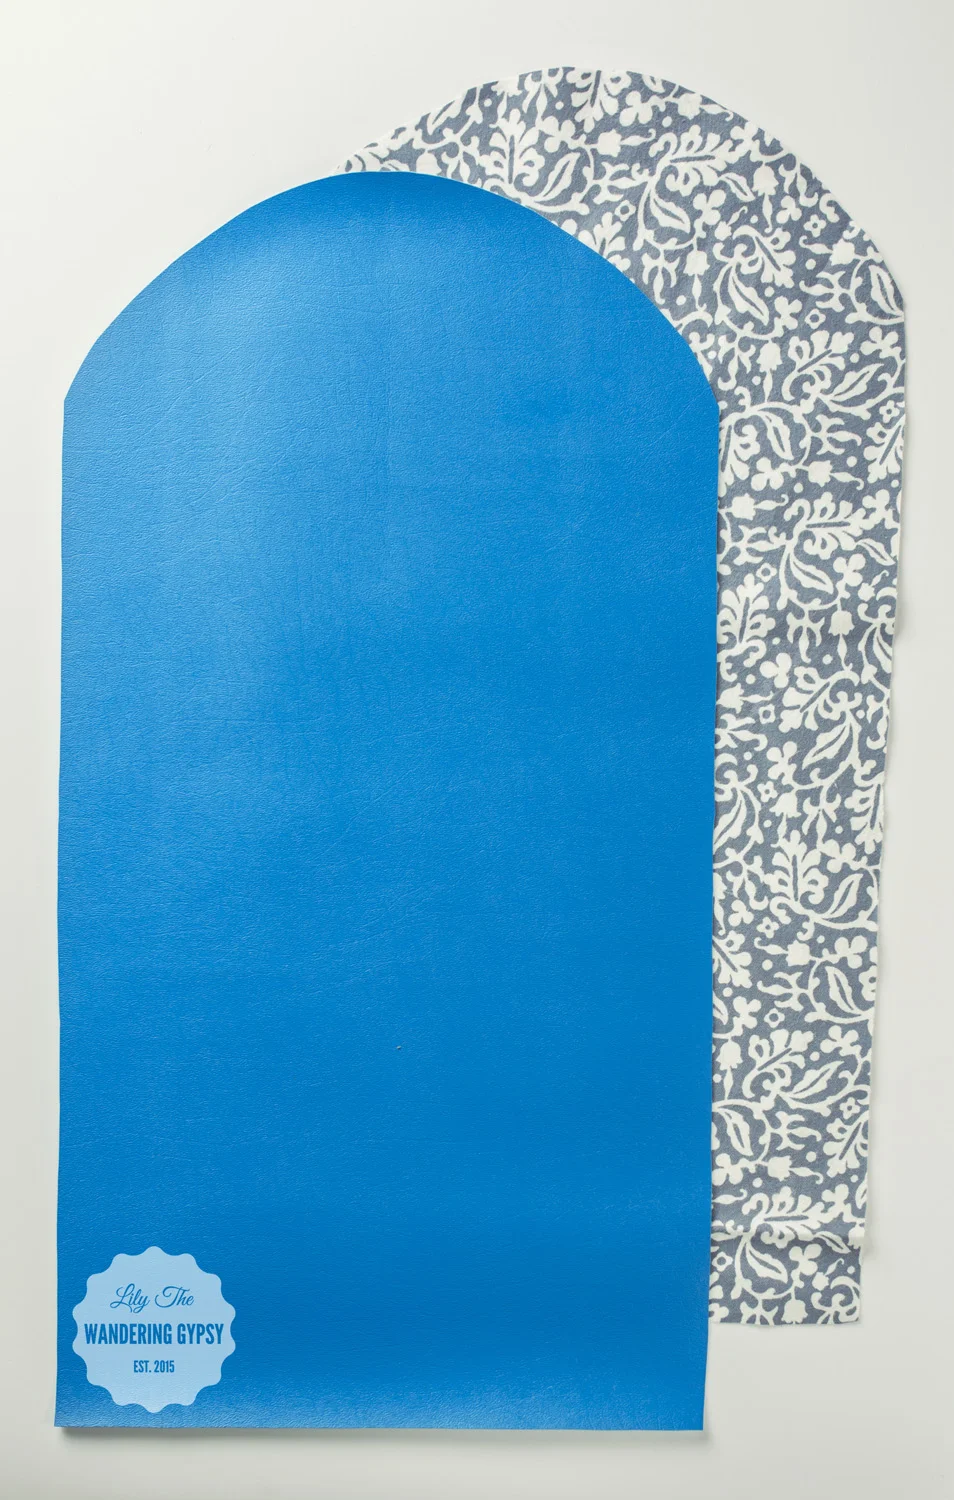
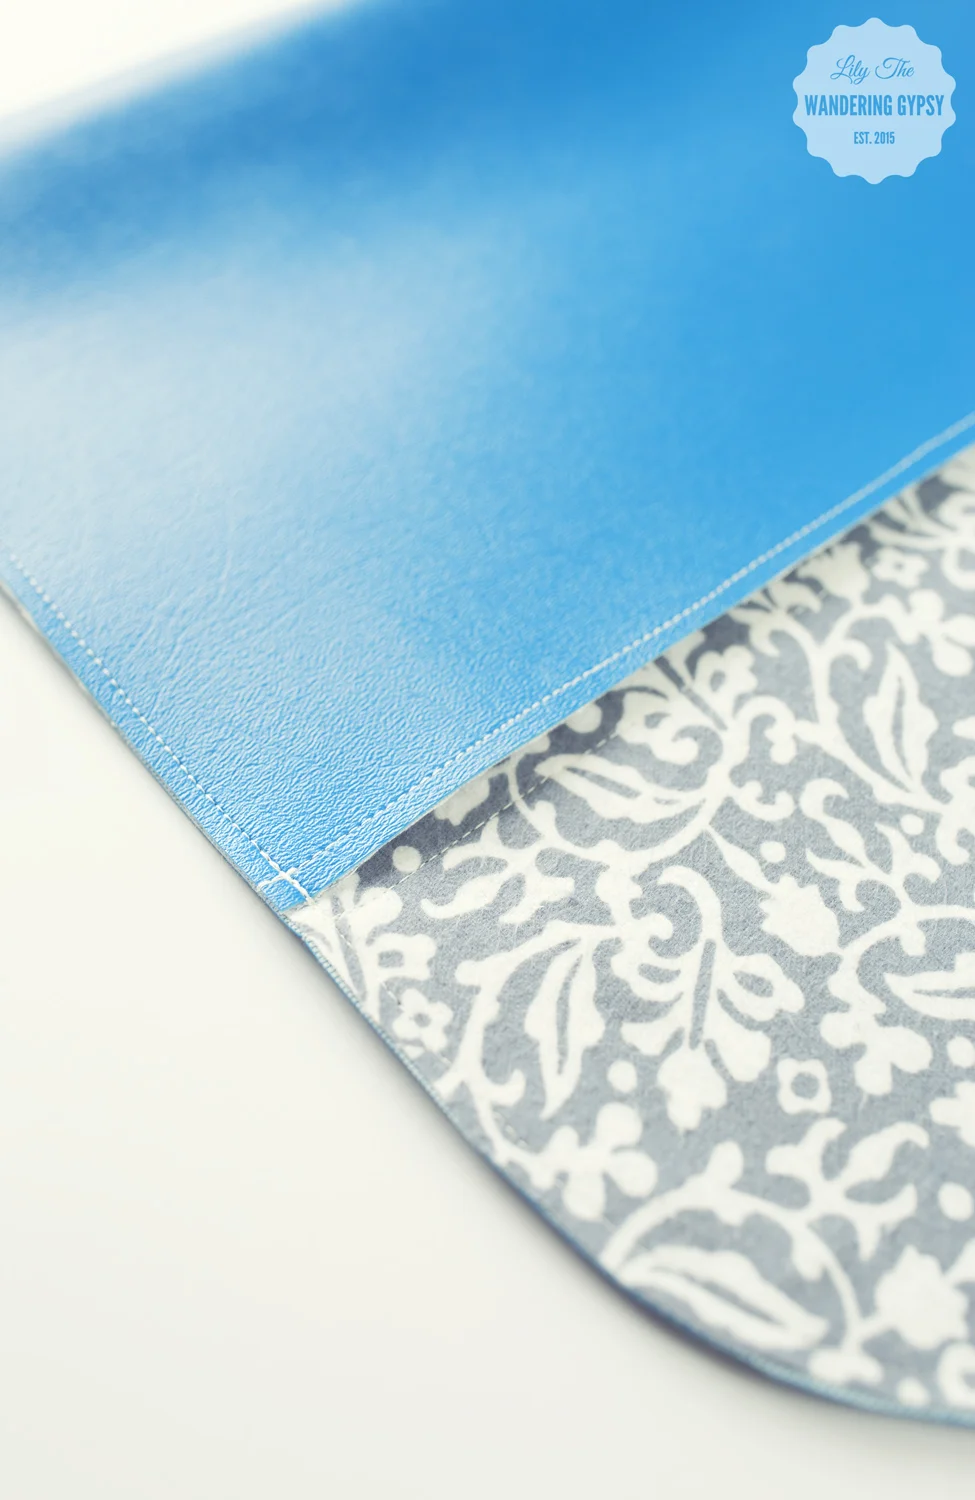
1.) Cut 1 piece of vinyl and 1 piece of flannel.
* Each piece should be roughly 12" across, and 30" tall.
* To round the top pieces, I folded them each in half lengthwise, and created a rounded edge.
2.) Using a glue stick, carefully glue both pieces together so they line up as well as possible.
3.) Measure roughly 10" from the straight edge of the pieces, and sew a straight line across, to create a crease, where the bottom of the clutch will fold up.
4.) Fold up the flat edge to create an envelope shape, and sew all the way around the outside edges of the materials. I keep the edge of the presser foot right against the right edge of the fabrics. Double stitch where the pieces meet, see below.
5.) Sew along the open edge of the clutch to add yet another crease, on the flap part of the material.
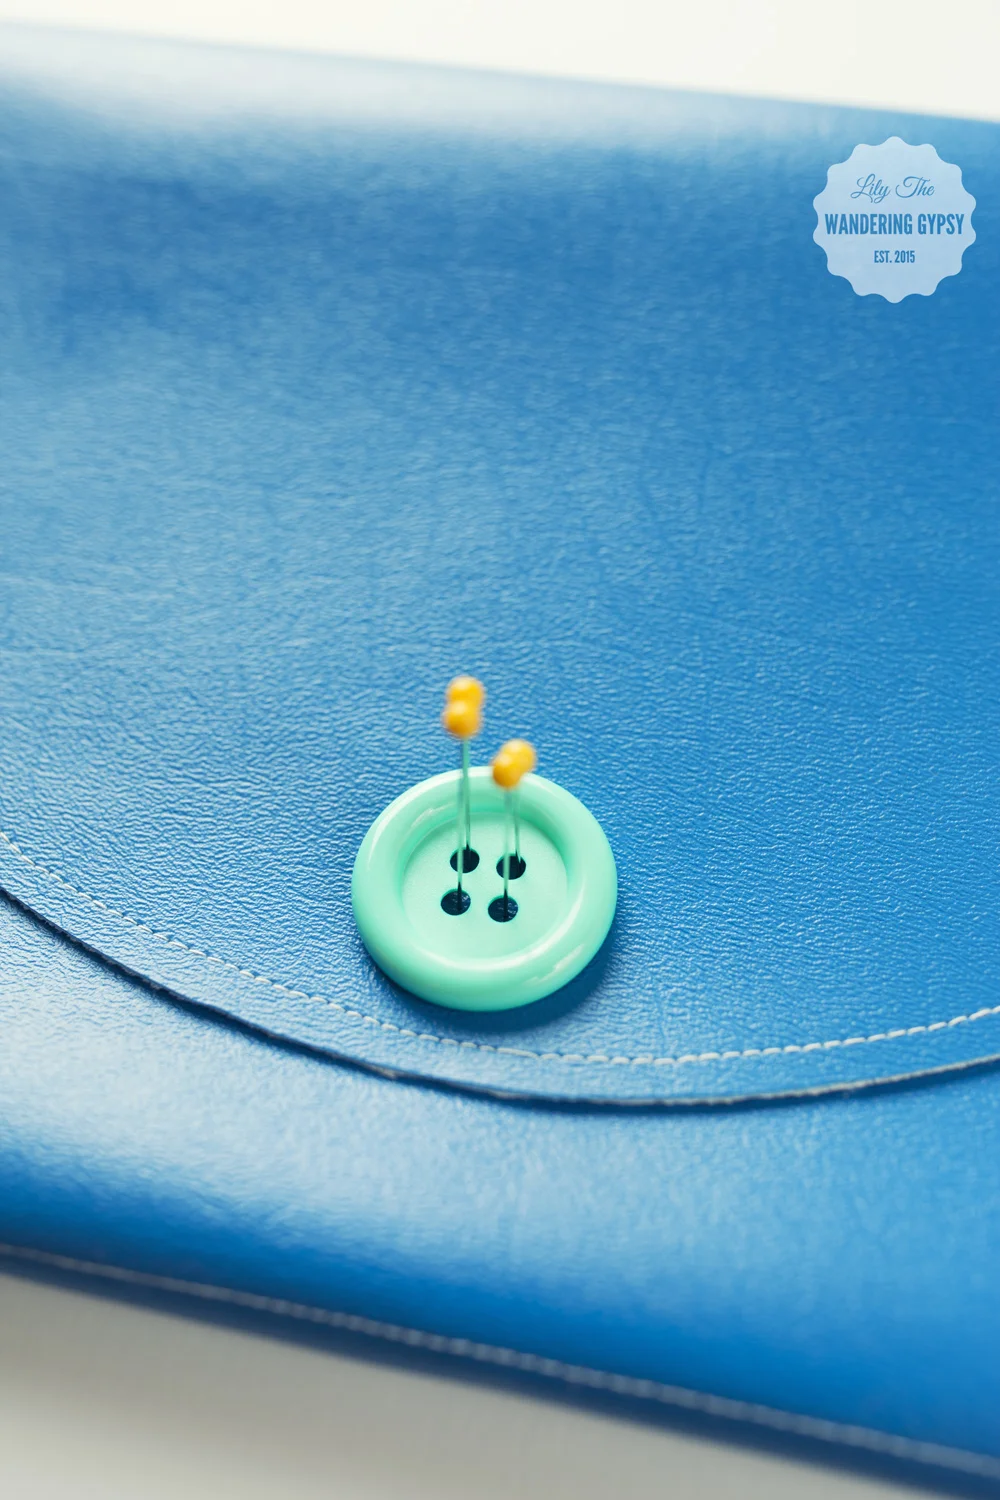
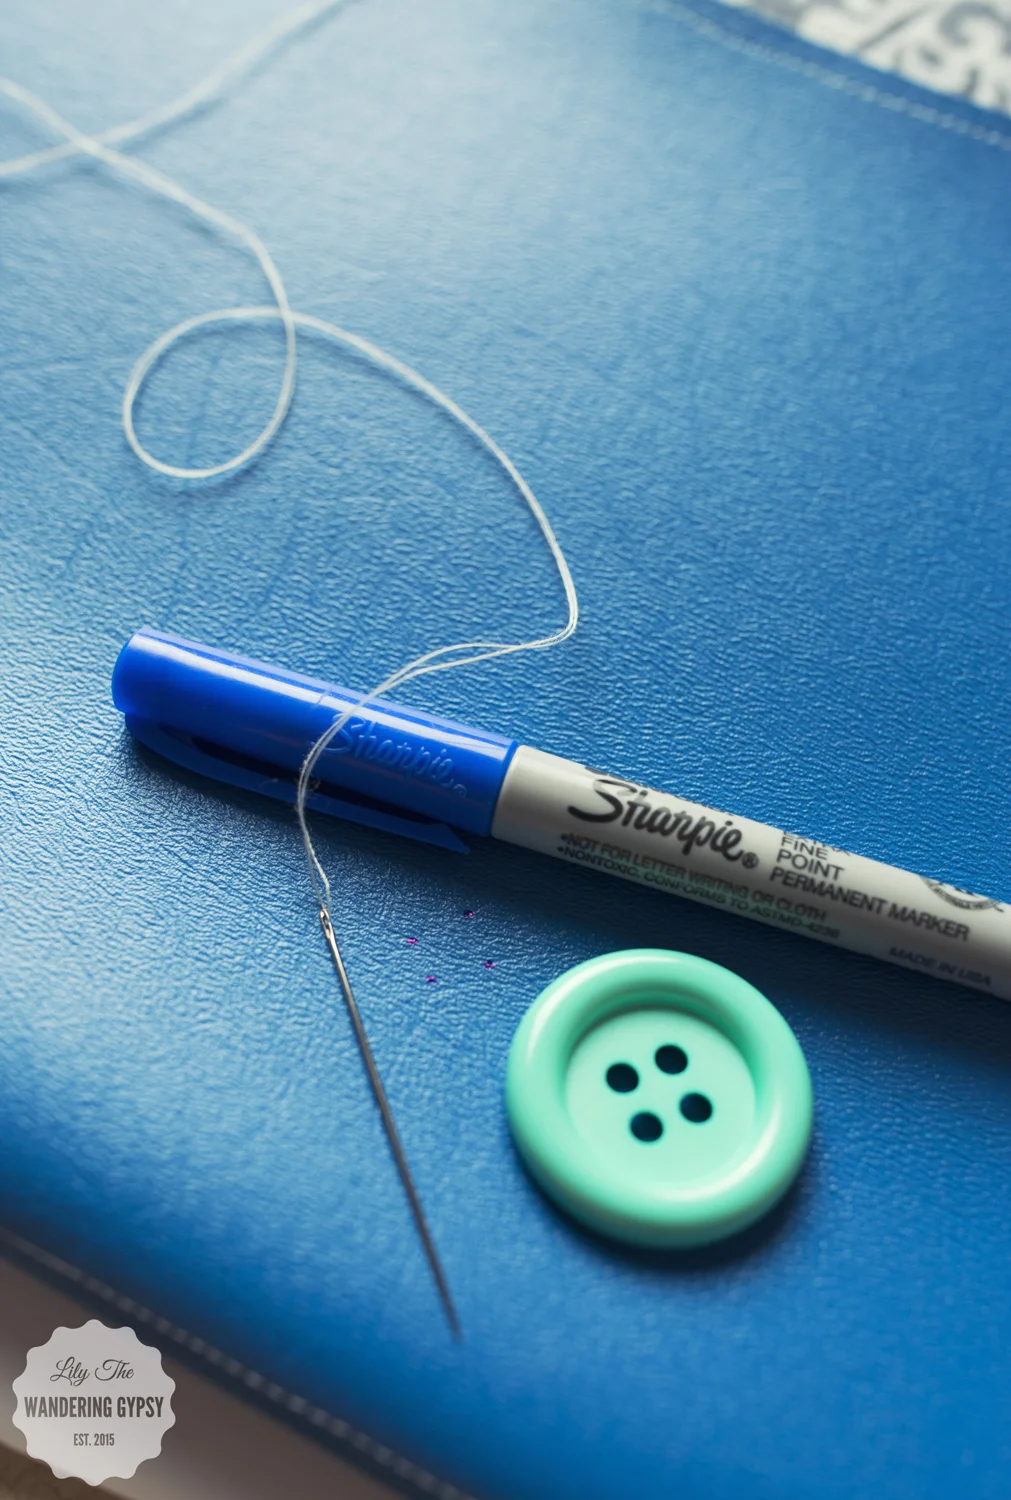
6.) To mark where your button should go, place it onto the flap, and push sewing pins through the layers. This will transfer 4 dots to the layer beneath, which will tell you where to sew your button. Mark the 4 holes with a permanent marker, and sew the button onto the purse.
7.) Sew on your button very securely!

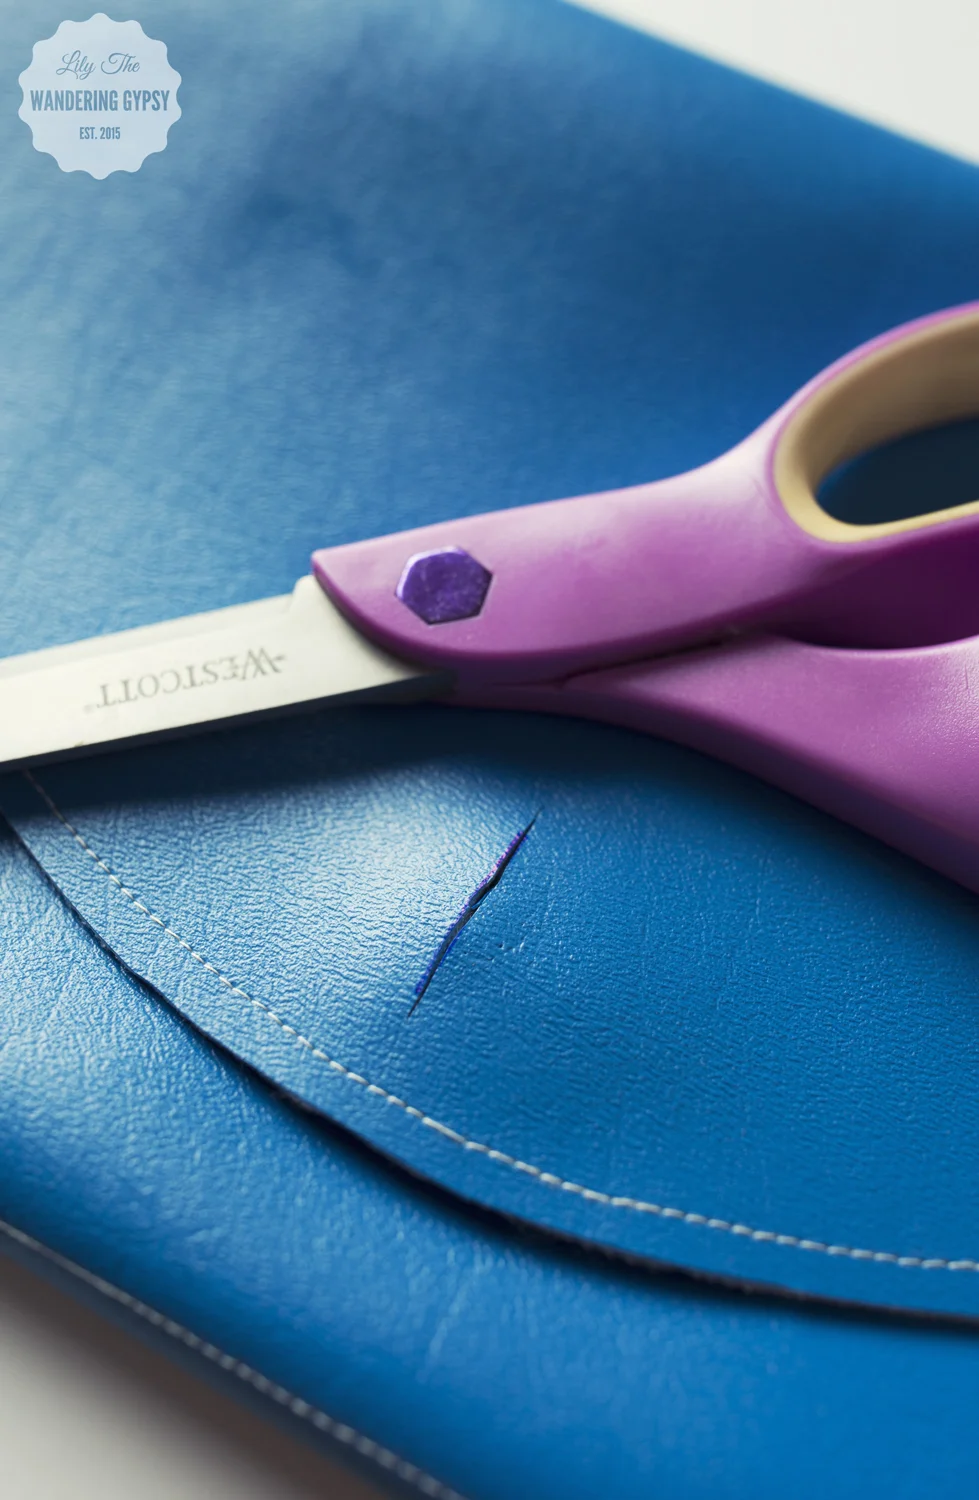
8.) Make your button hole. Here's a tip - fold the flap over the button you just sewed on. Mark how long the button is, and then clip a hole the proper length. Test this out, to make sure the button fits through the button hole without any resistance, but is not too large where it won't hold.
* Sew around the button hole a couple of times, and snip any loose threads.
9.) That's it! Get ready to fill your new clutch purse with some essentials like gum, lipstick, lotion, and other goodies, and you're ready to go!

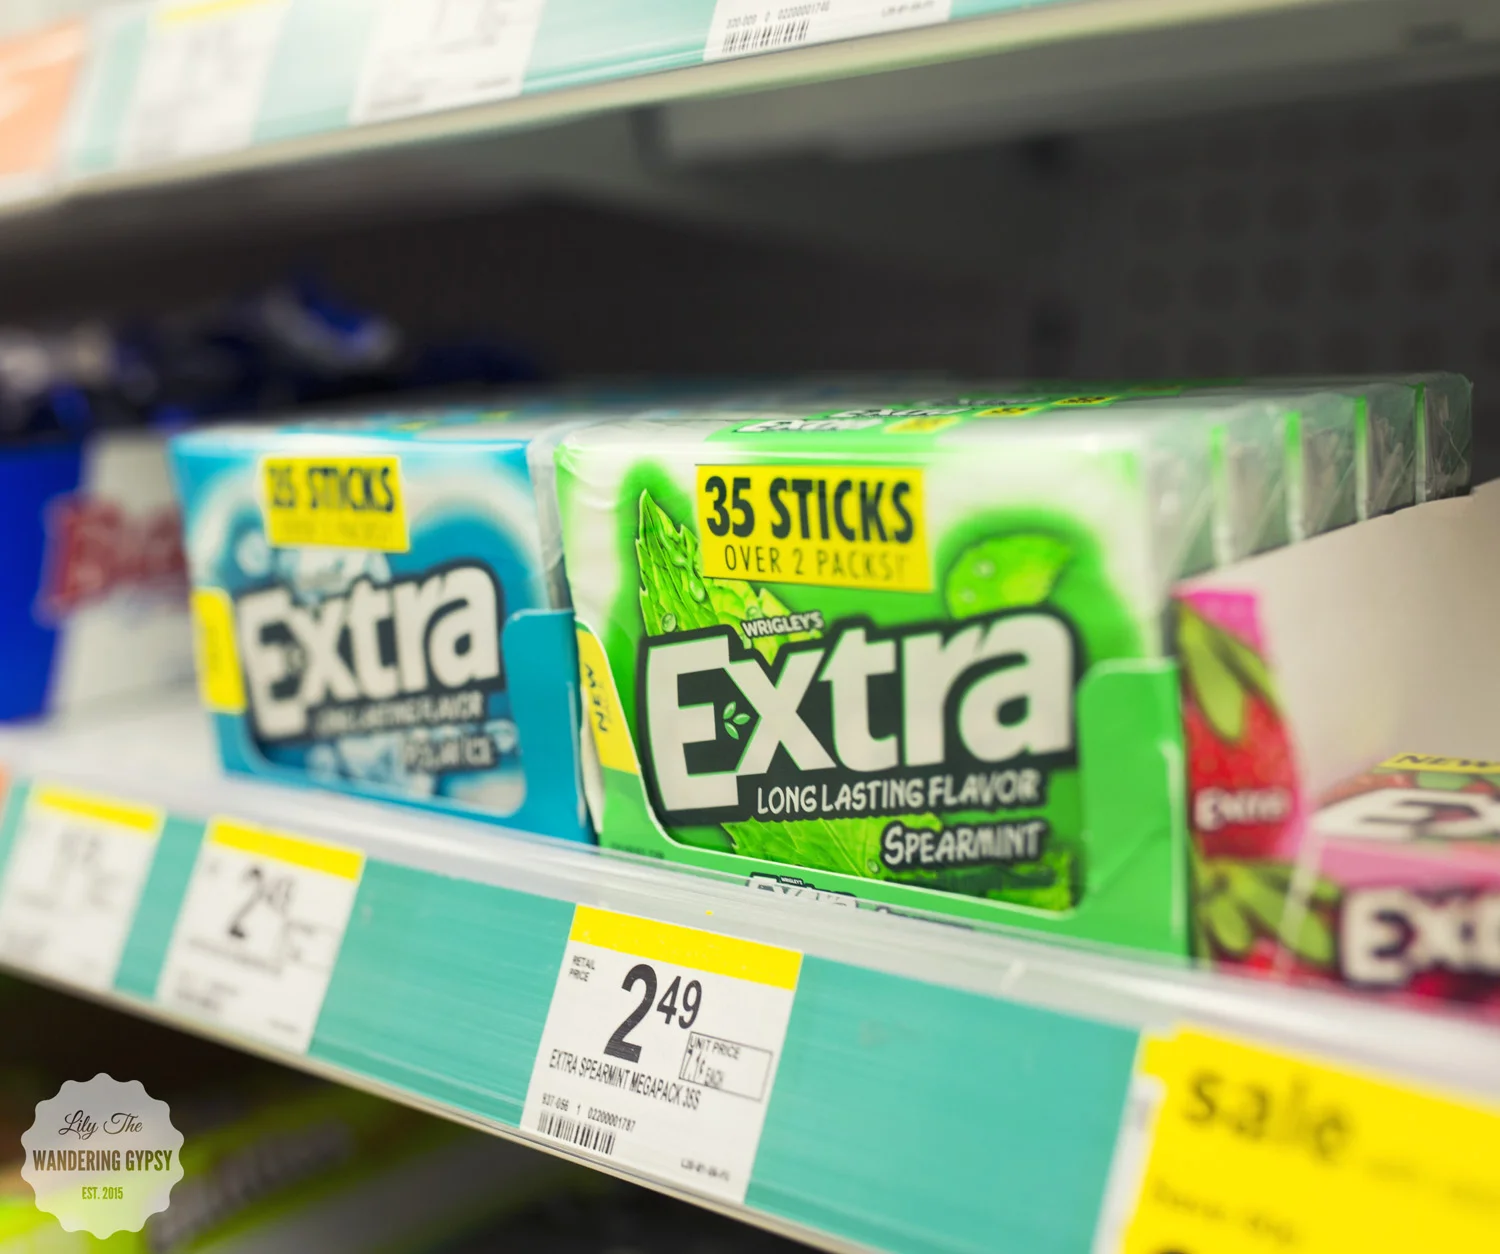

Extra® Gum 35-stick packages at Walgreens have more gum than you may be used to seeing! The case is super durable, and can actually be reused or recycled after you are done with the gum (see the image below). These larger stick packages ensure that you will run out of gum less often, and there is more gum to go around!