I've partnered with Brita Stream to create this post! Enjoy! #BritaStream
Summer is one of my favorite seasons. The weather warms up, the sun shines almost every day, and I have so many more opportunities to be active and enjoy the outdoors among many other fun projects. All of these reasons make it even more important to drink more water, and to make sure your body is performing at its best.
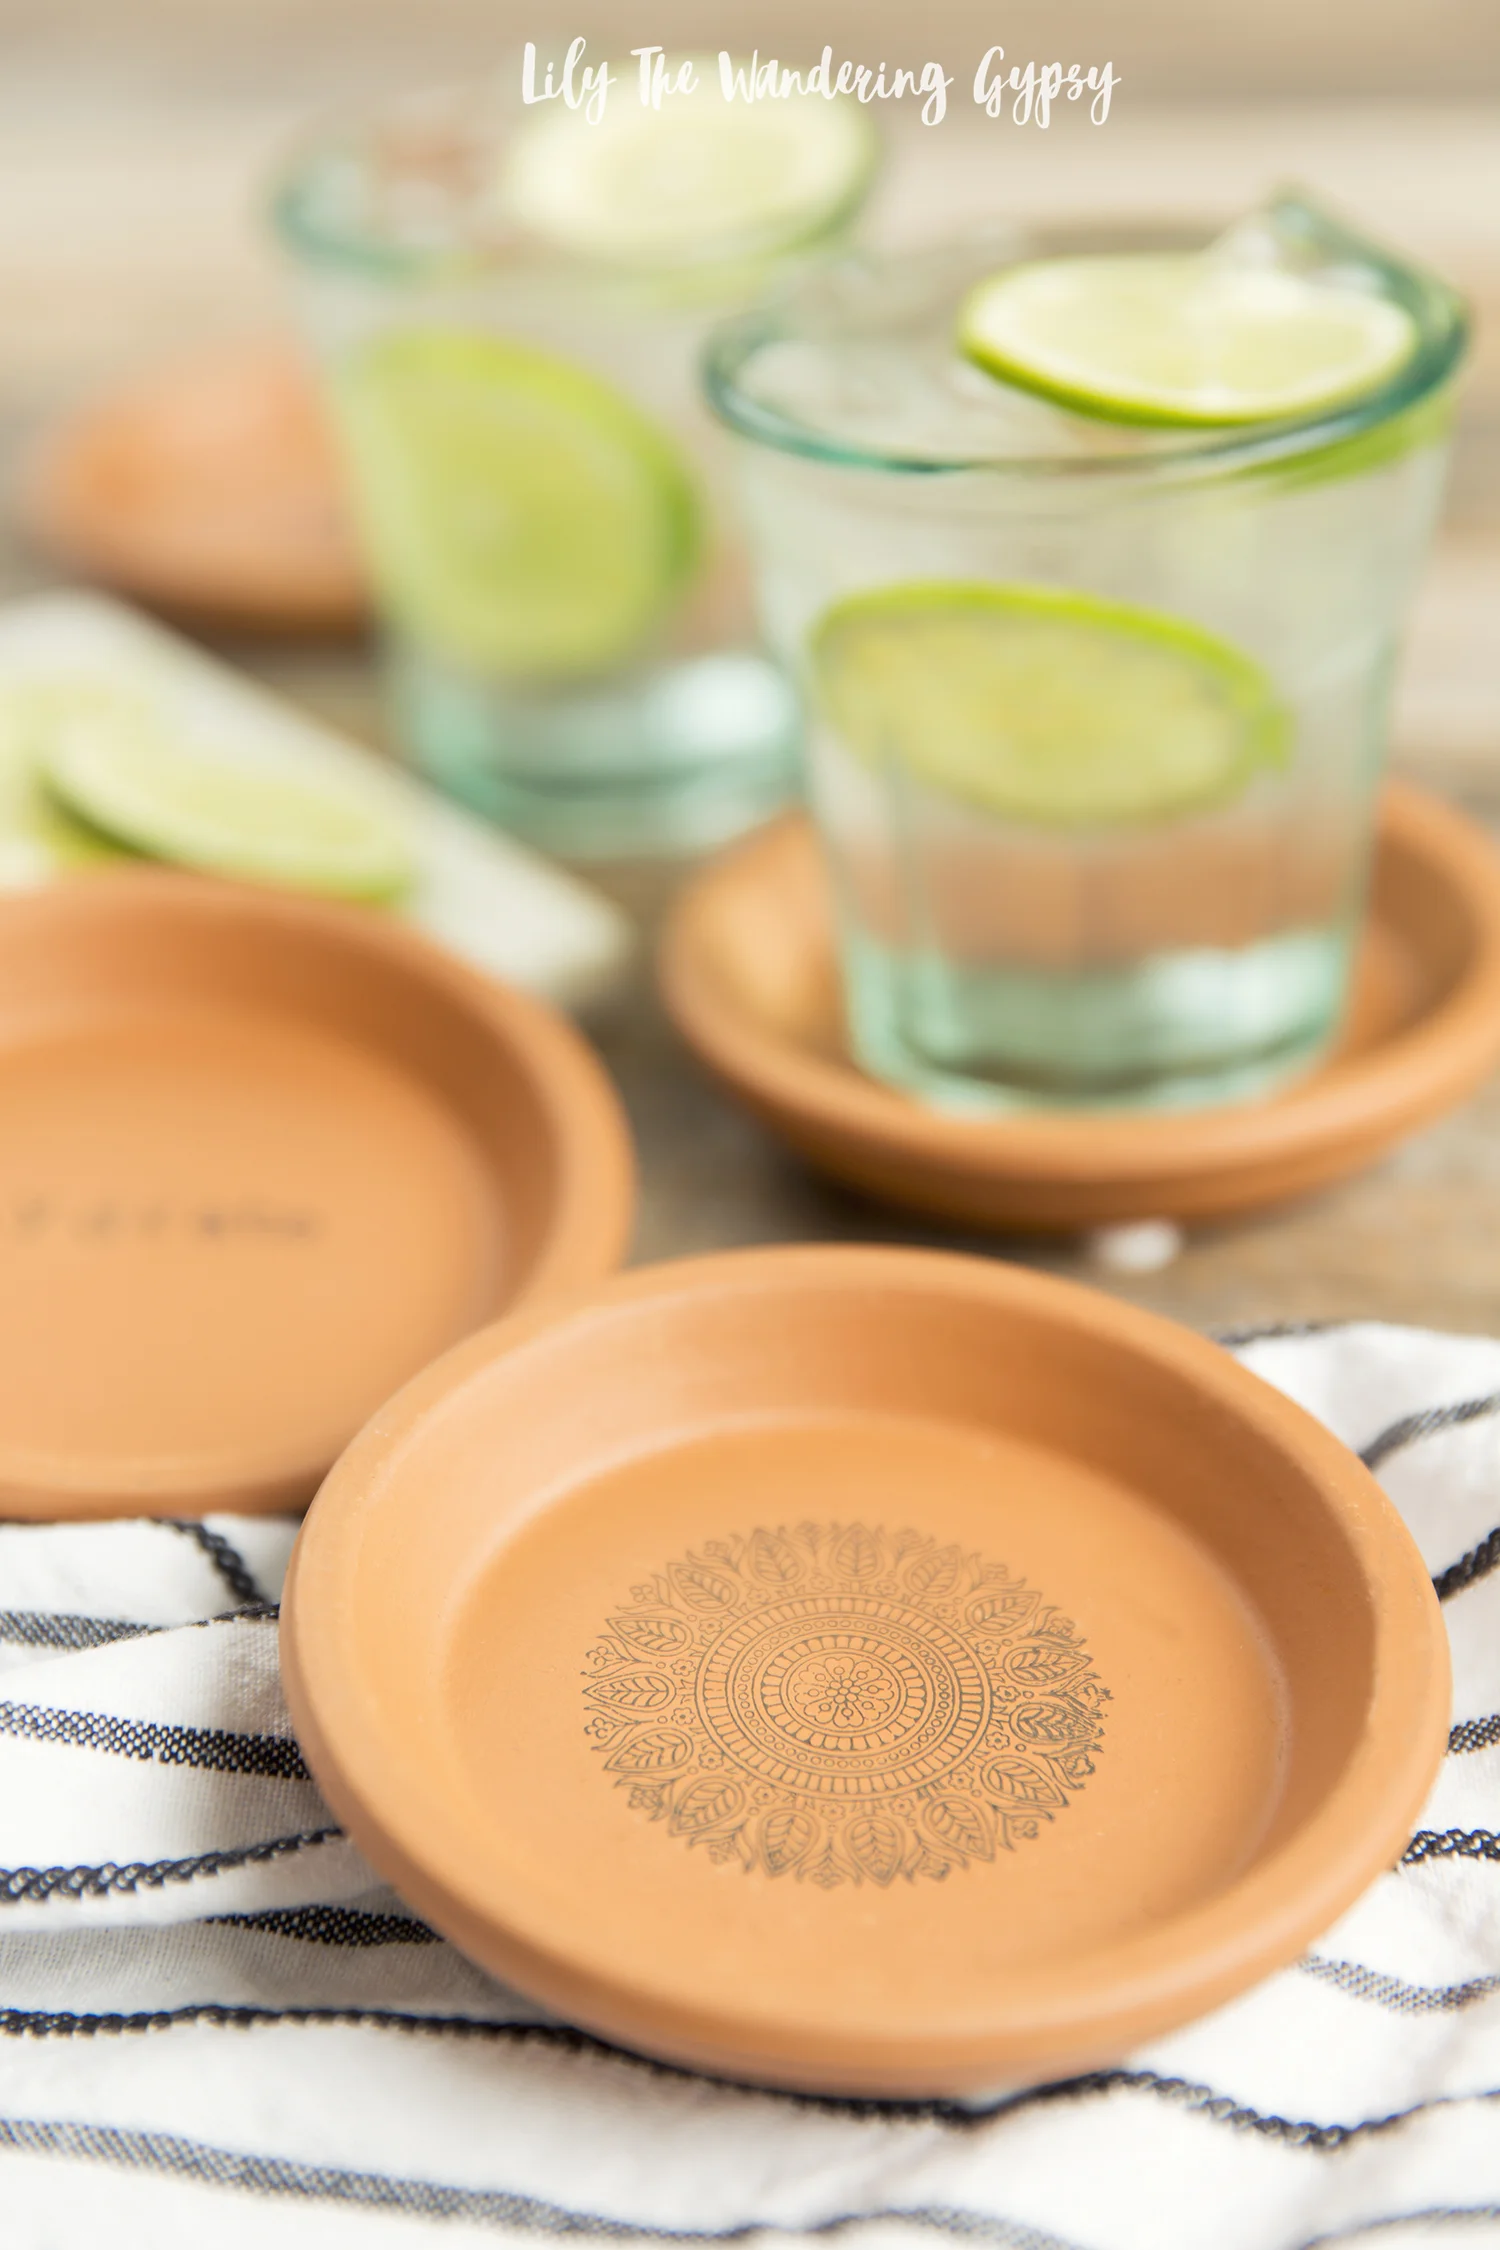
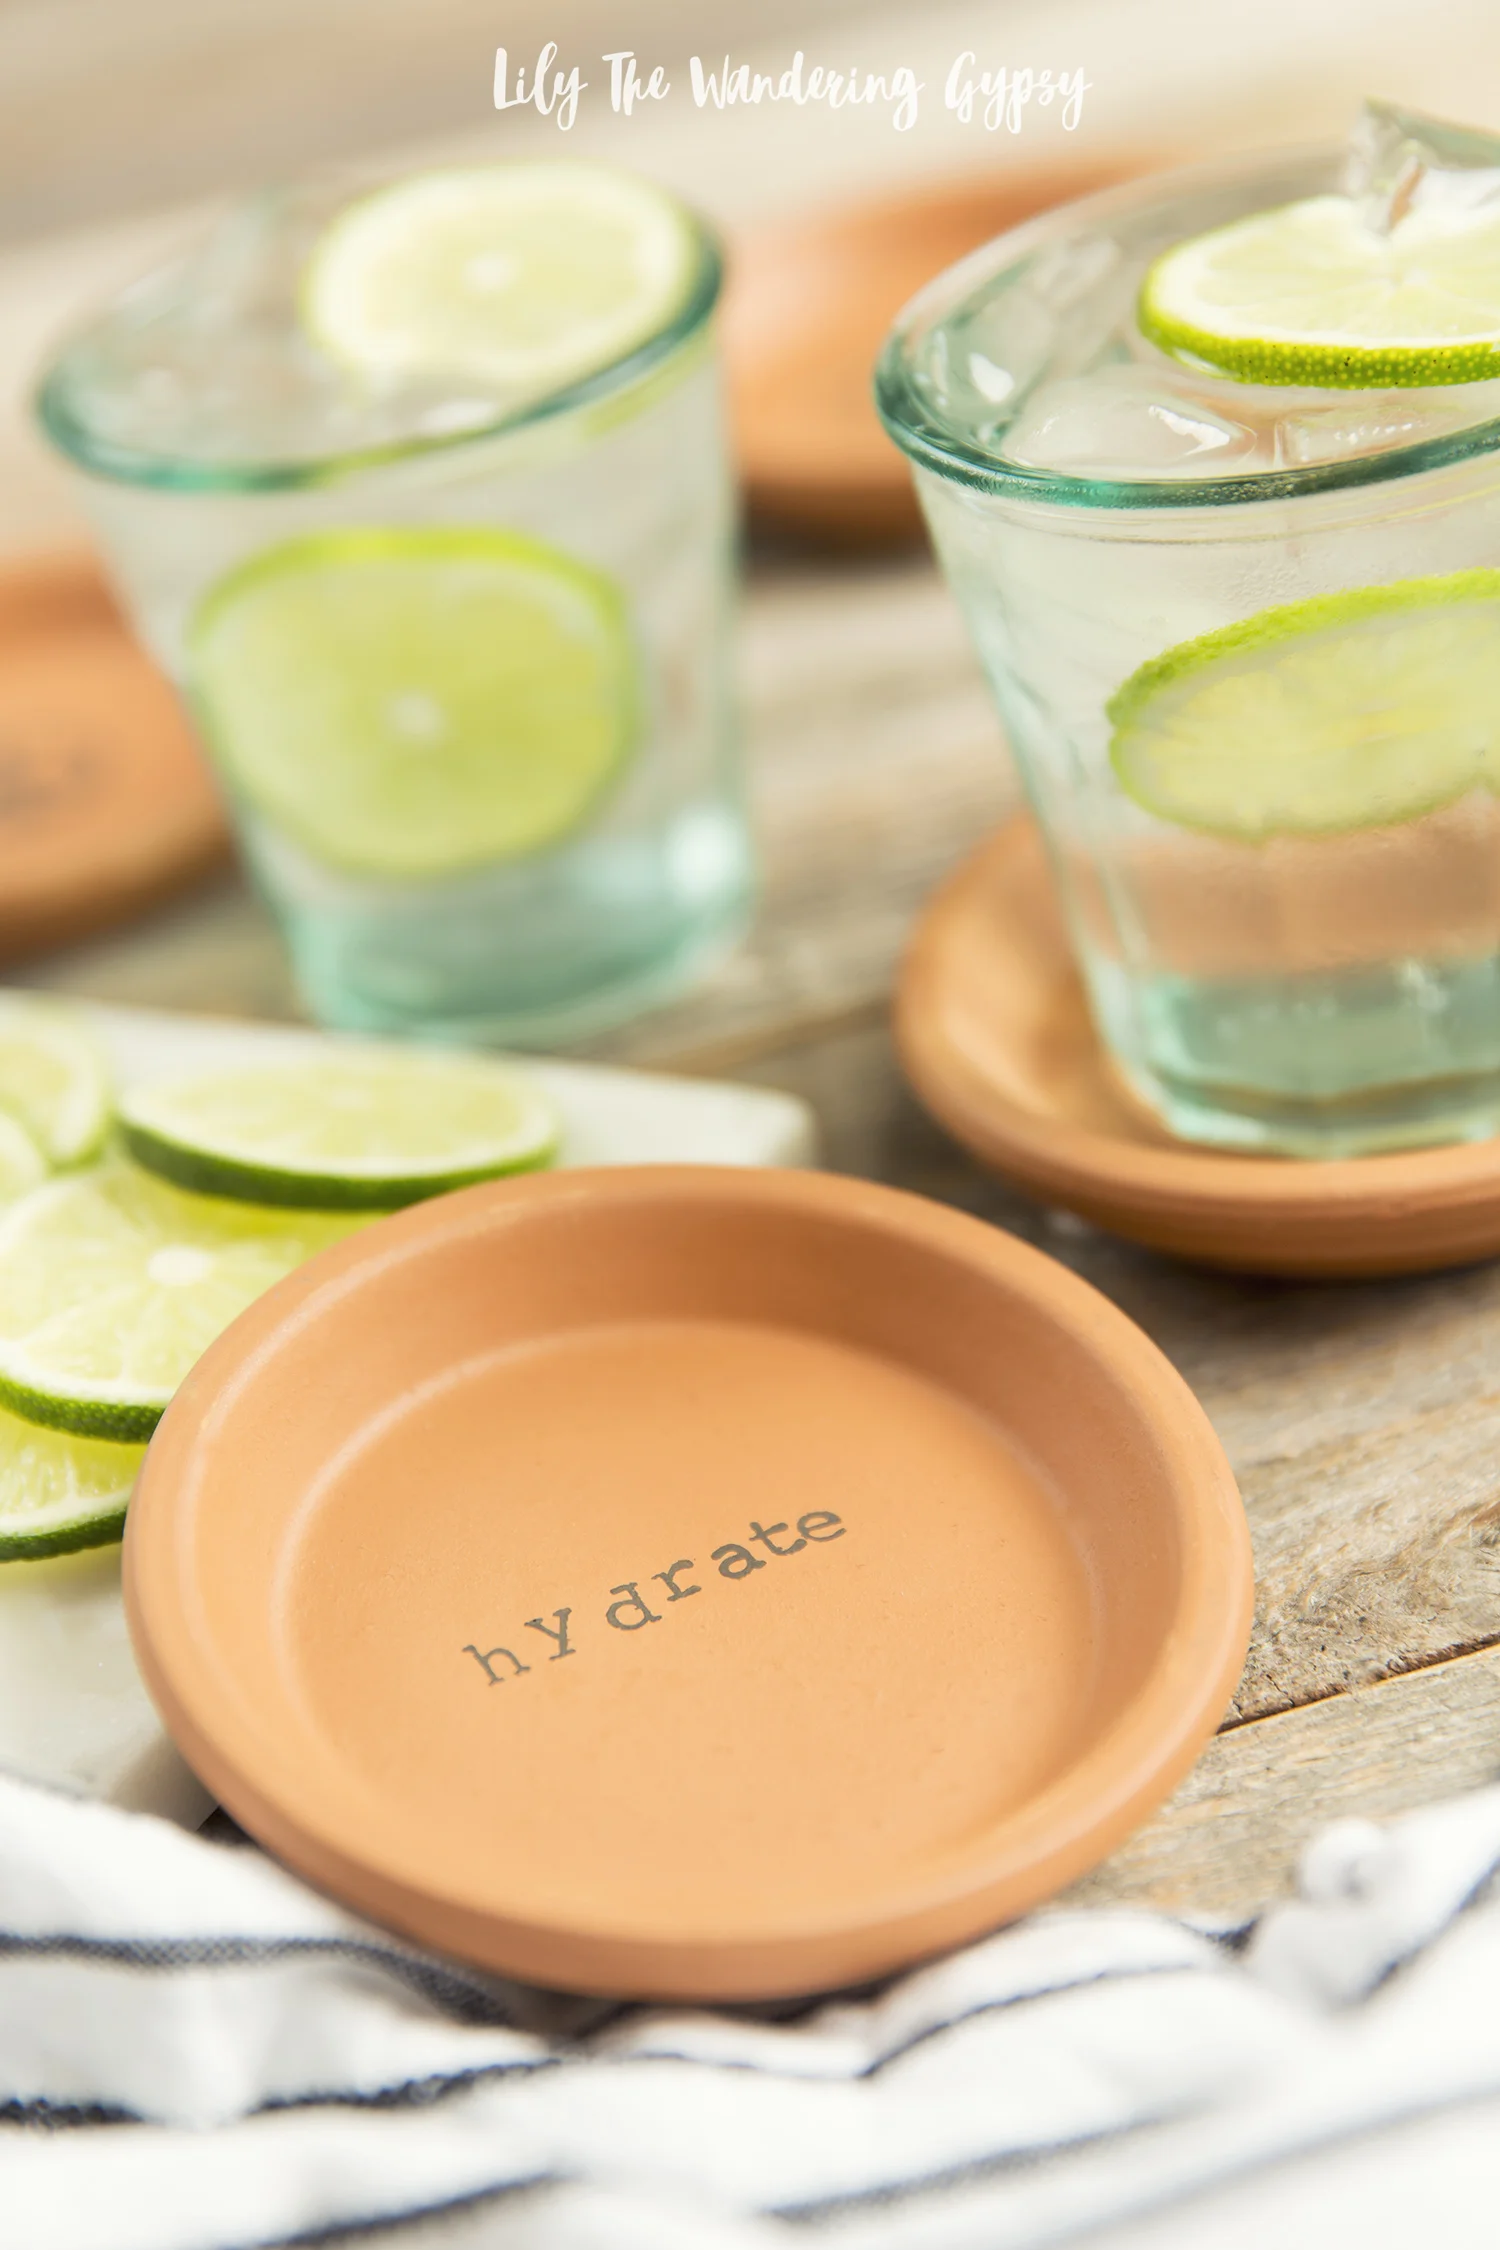
I also love all the DIY projects that inspire me at this time of year, and these Terra Cotta Stamped Coasters are something I have wanted to make for some time now. They look like they would be sold at an expensive boutique, but can be made for less than $10! And, if you already have rubber stamps, this project should cost you even less to make.
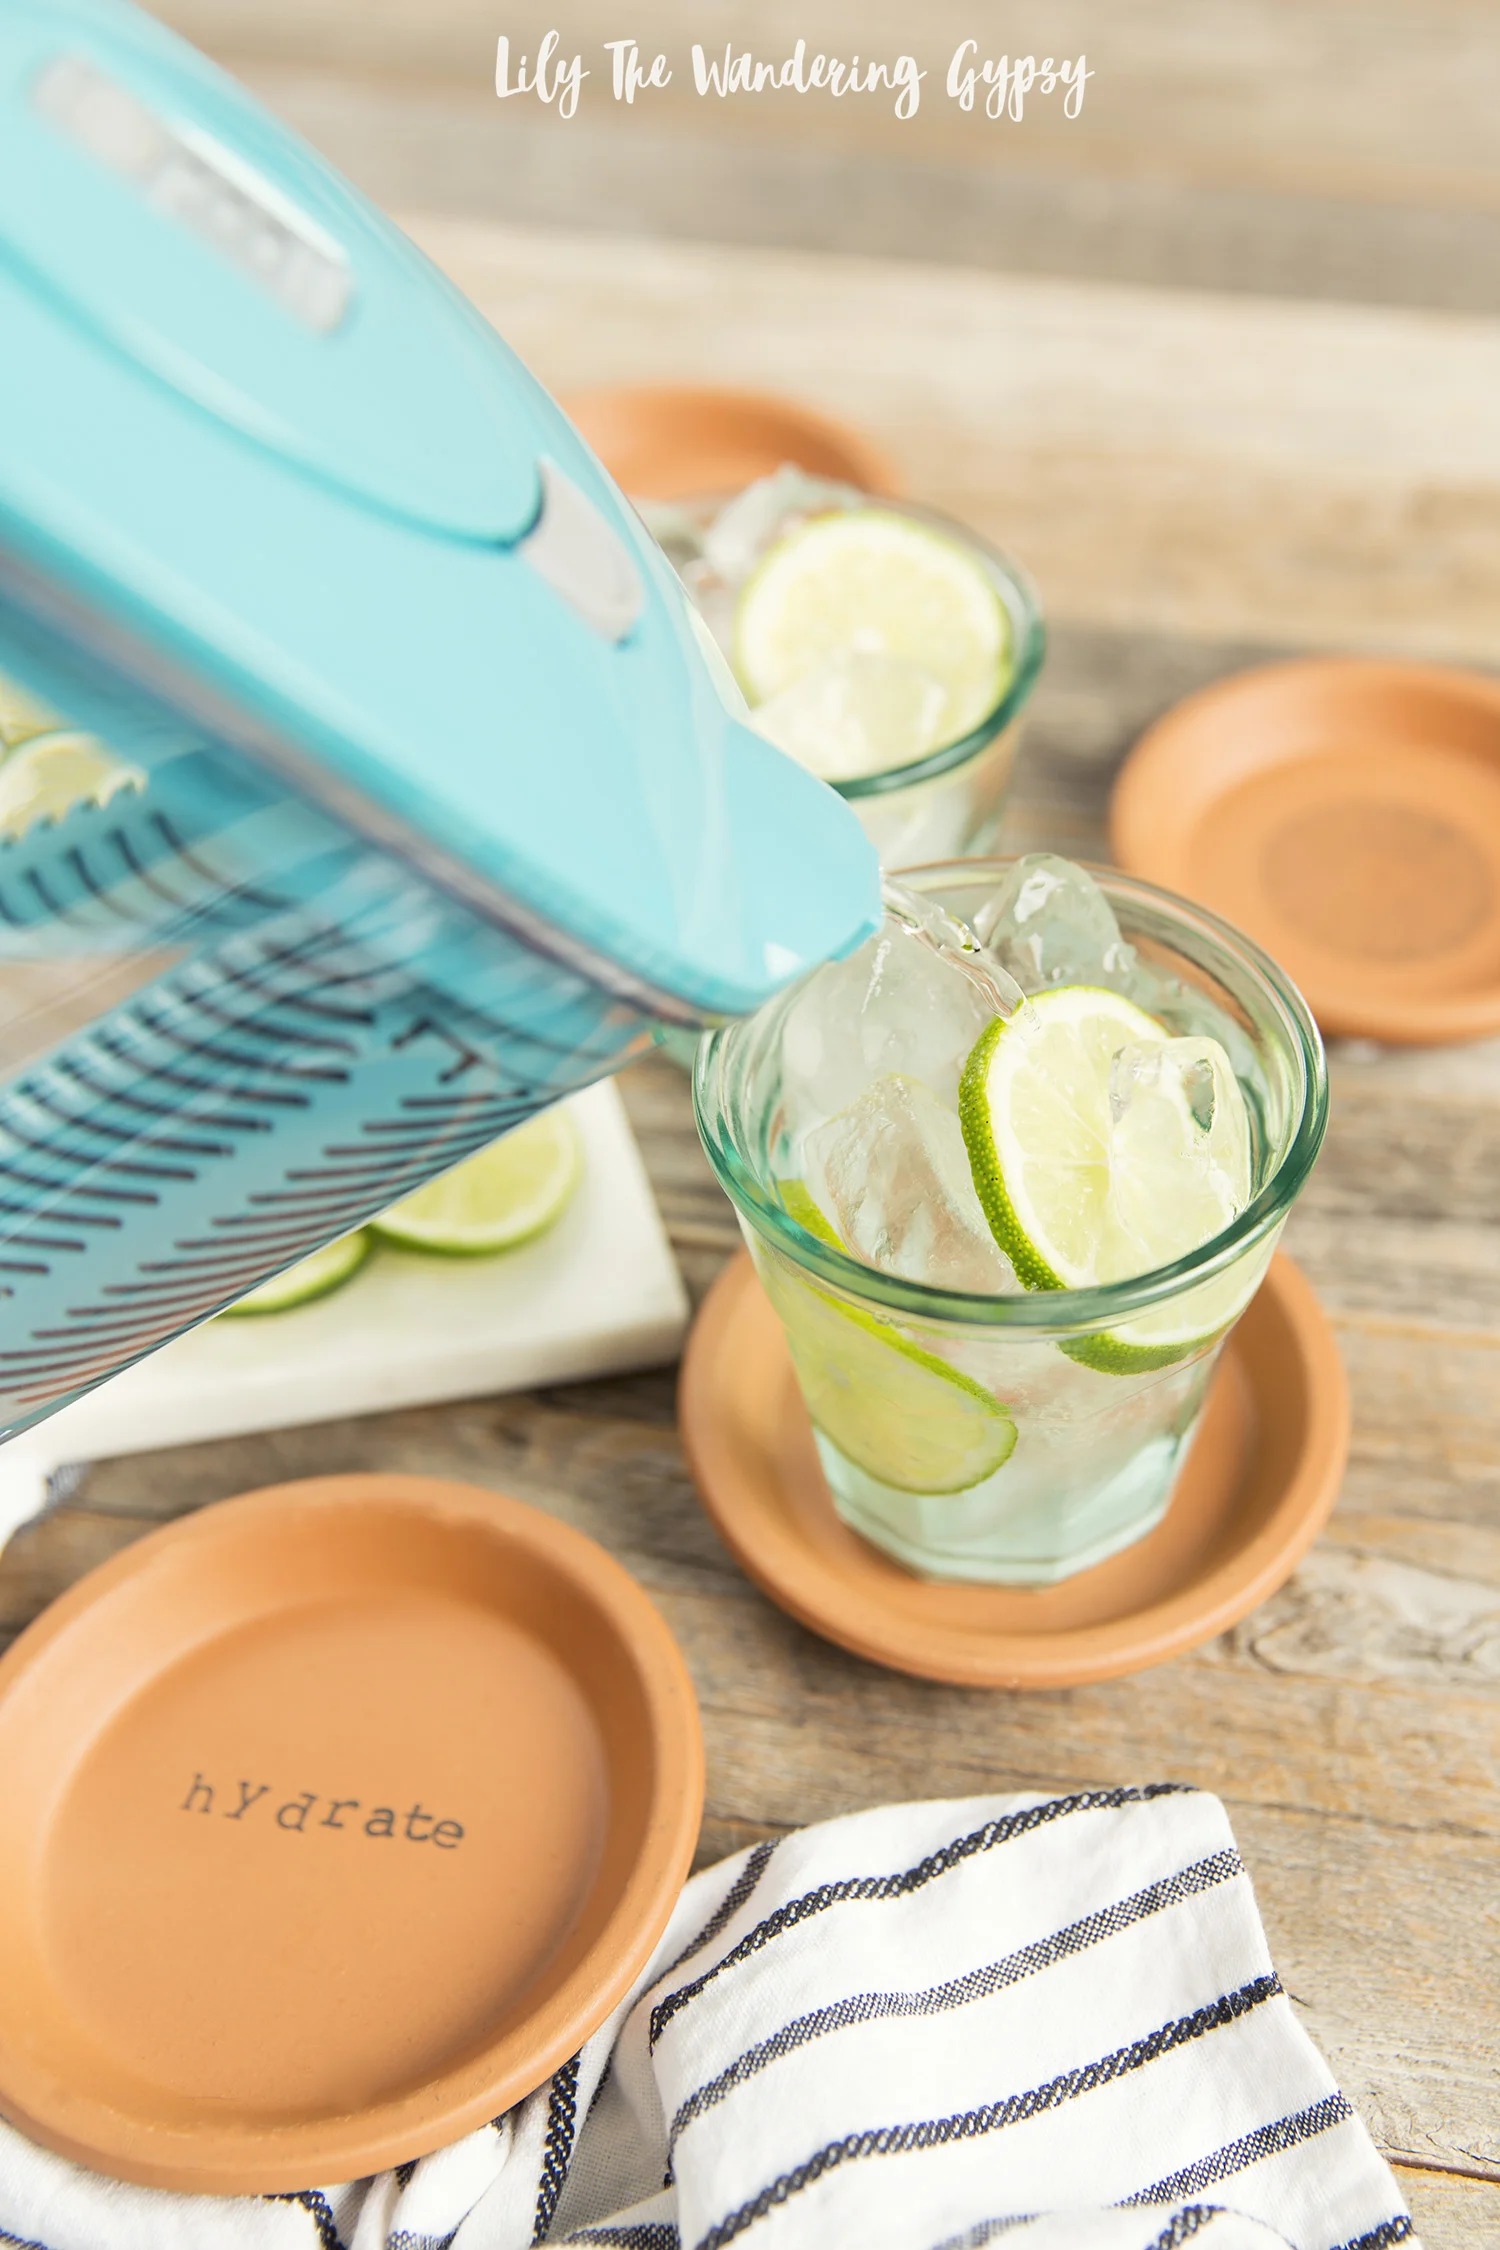
I also wanted to share how I am going to incorporate more water into my daily activities, with the help of my new Brita Stream Pitcher. If I always have cold, filtered water in the fridge, I will grab that when I get thirsty. I can also use it to keep my water bottle filled to have at my desk, in my car, and on my bedside. I always have a bottle of water by my side and it seriously helps me drink tons of water throughout the day. I try not to let myself get too thirsty, because that is a sign you're already dehydrated.
WHAT YOU NEED:
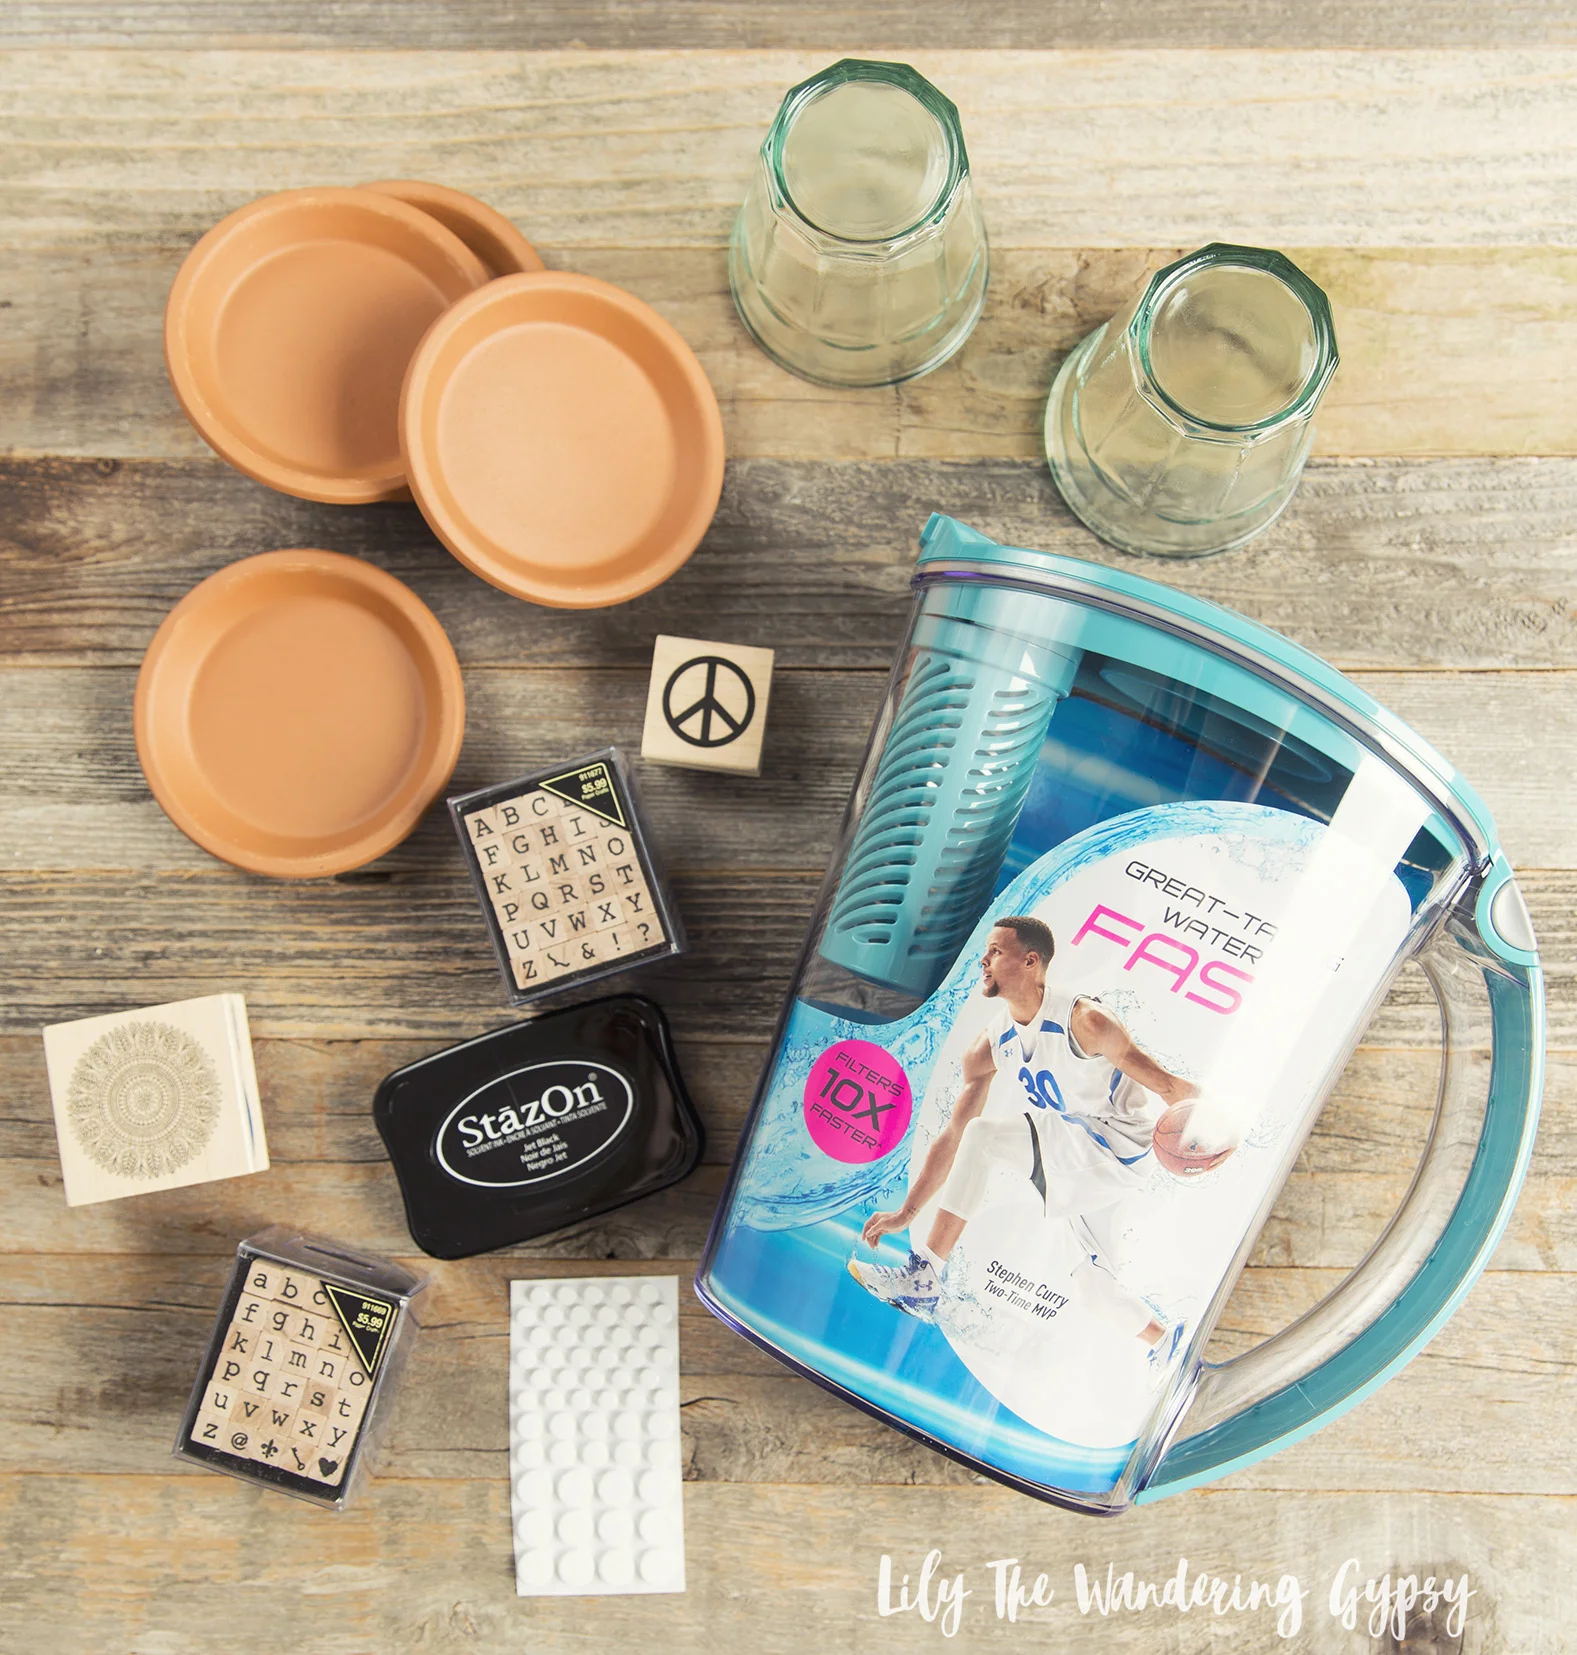
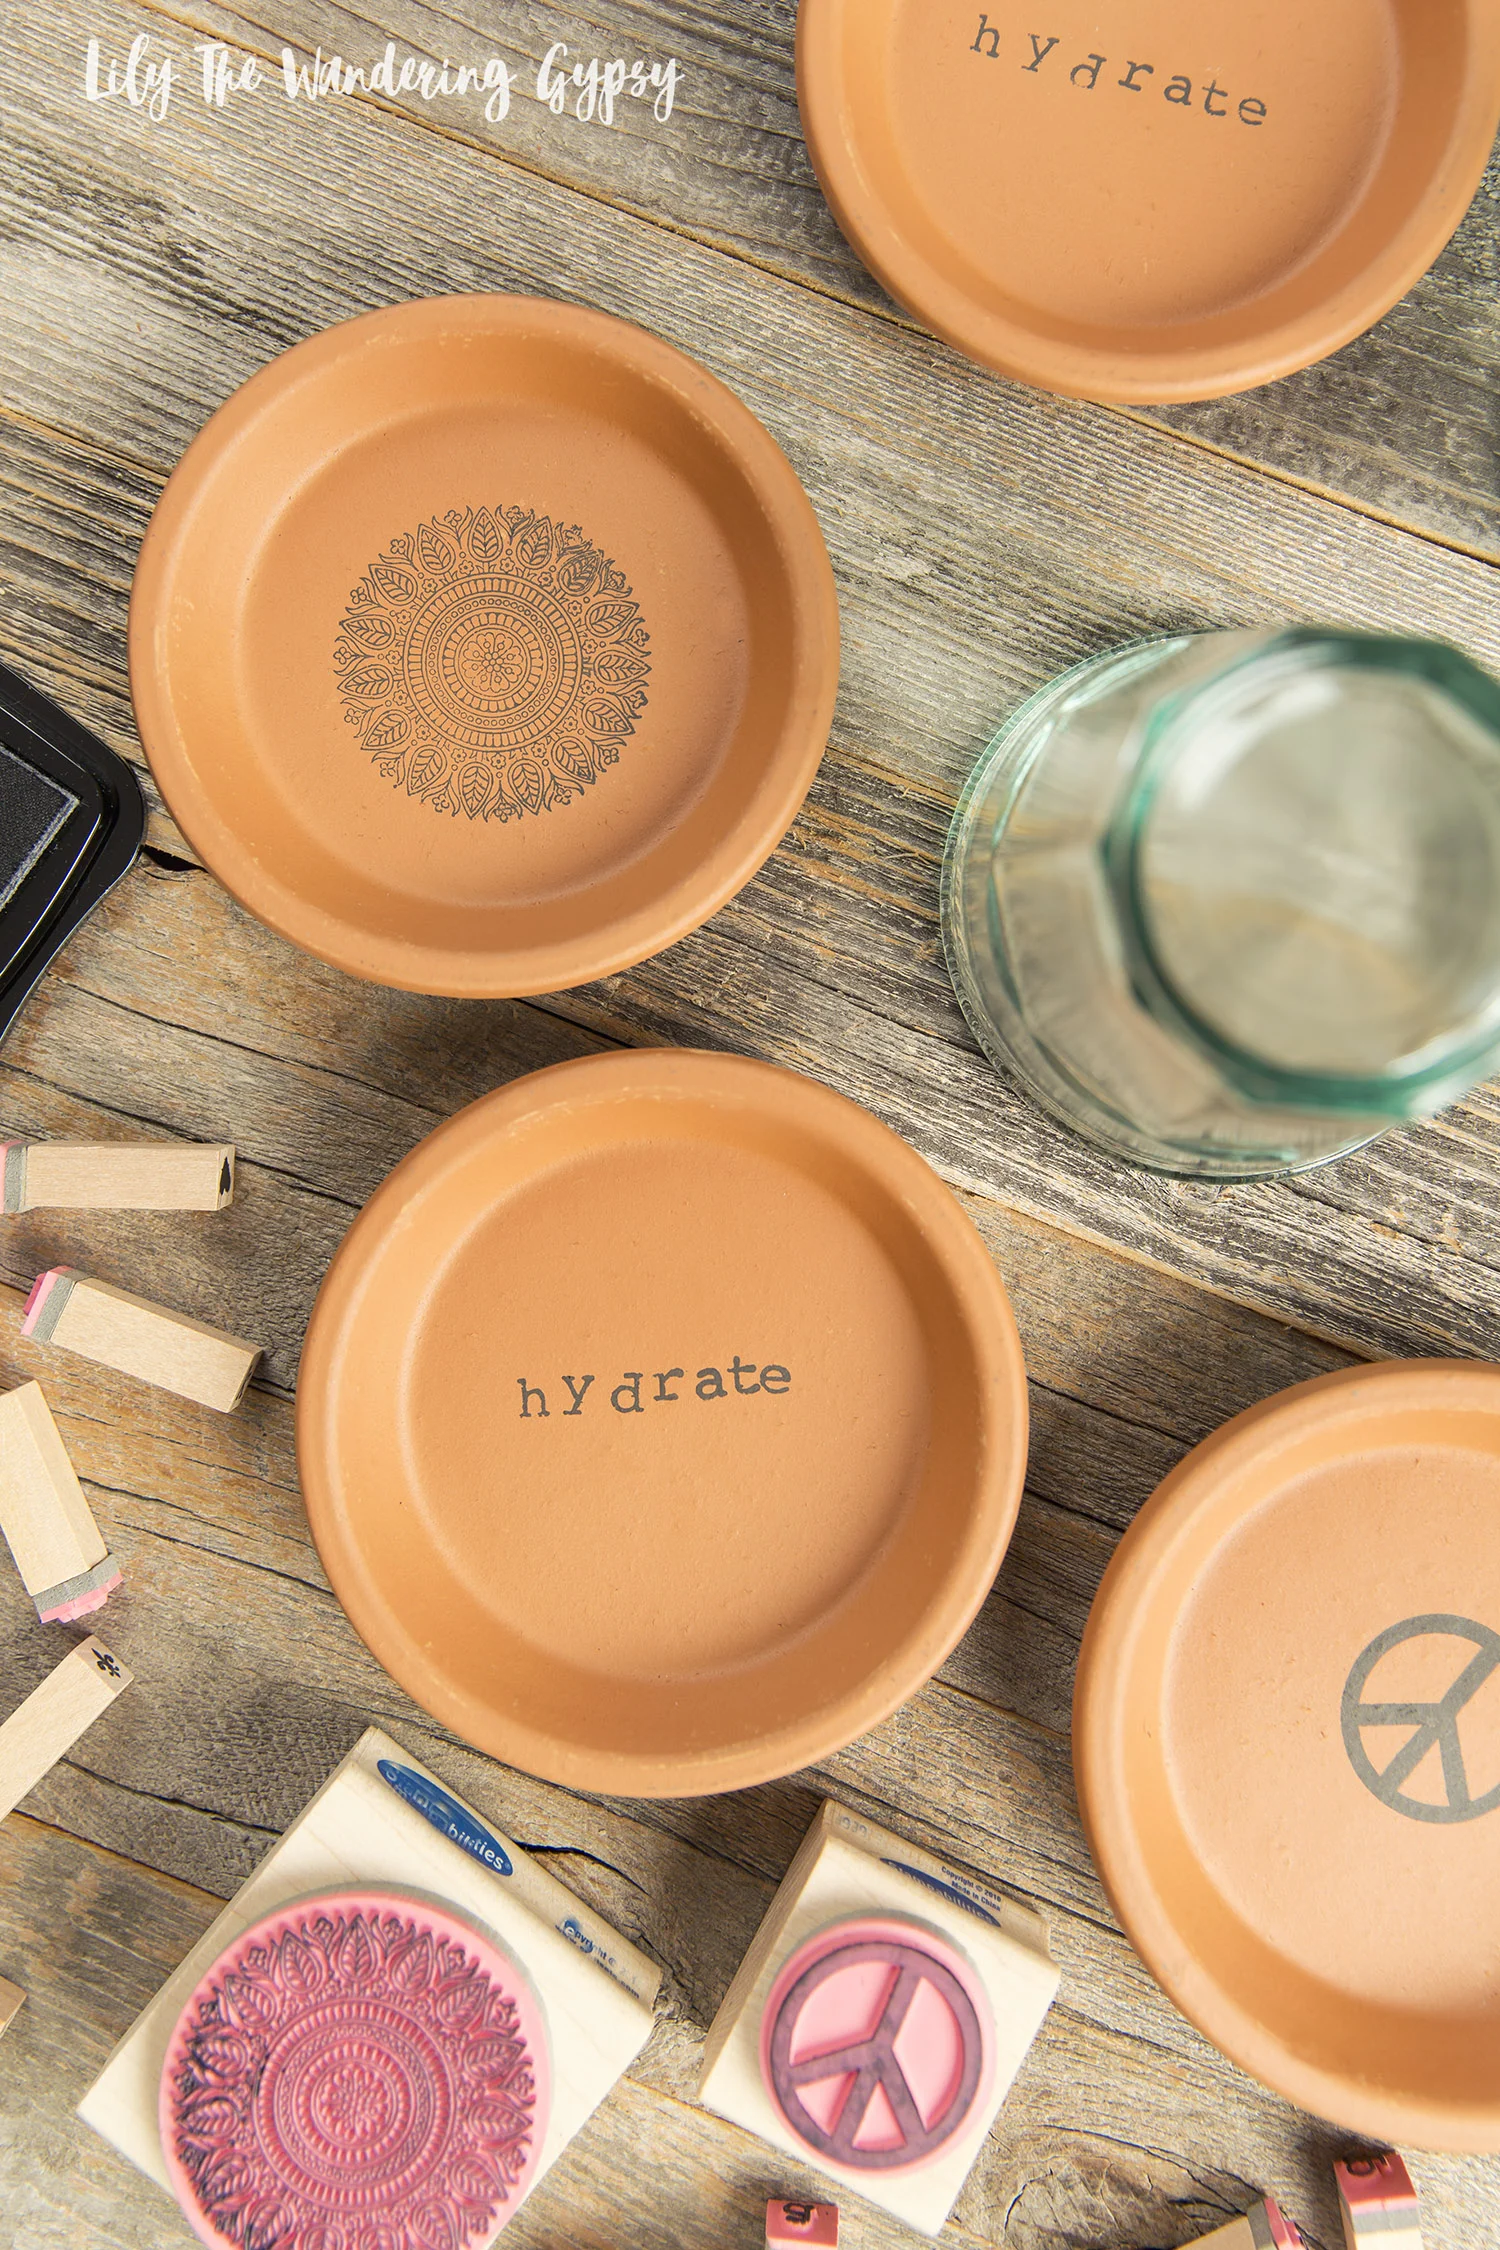
- 4 Terra Cotta Dishes (found in the gardening aisle with all of the terra cotta pots)
- Stamp Pad (I recommend the StazOn brand because it is very permanent through the condensation of a cold glass)
- Letter Stamps (mine came in a set with every letter of the alphabet)
- Other Rubber Stamps (I used a mandala-style one, and a peace sign one)
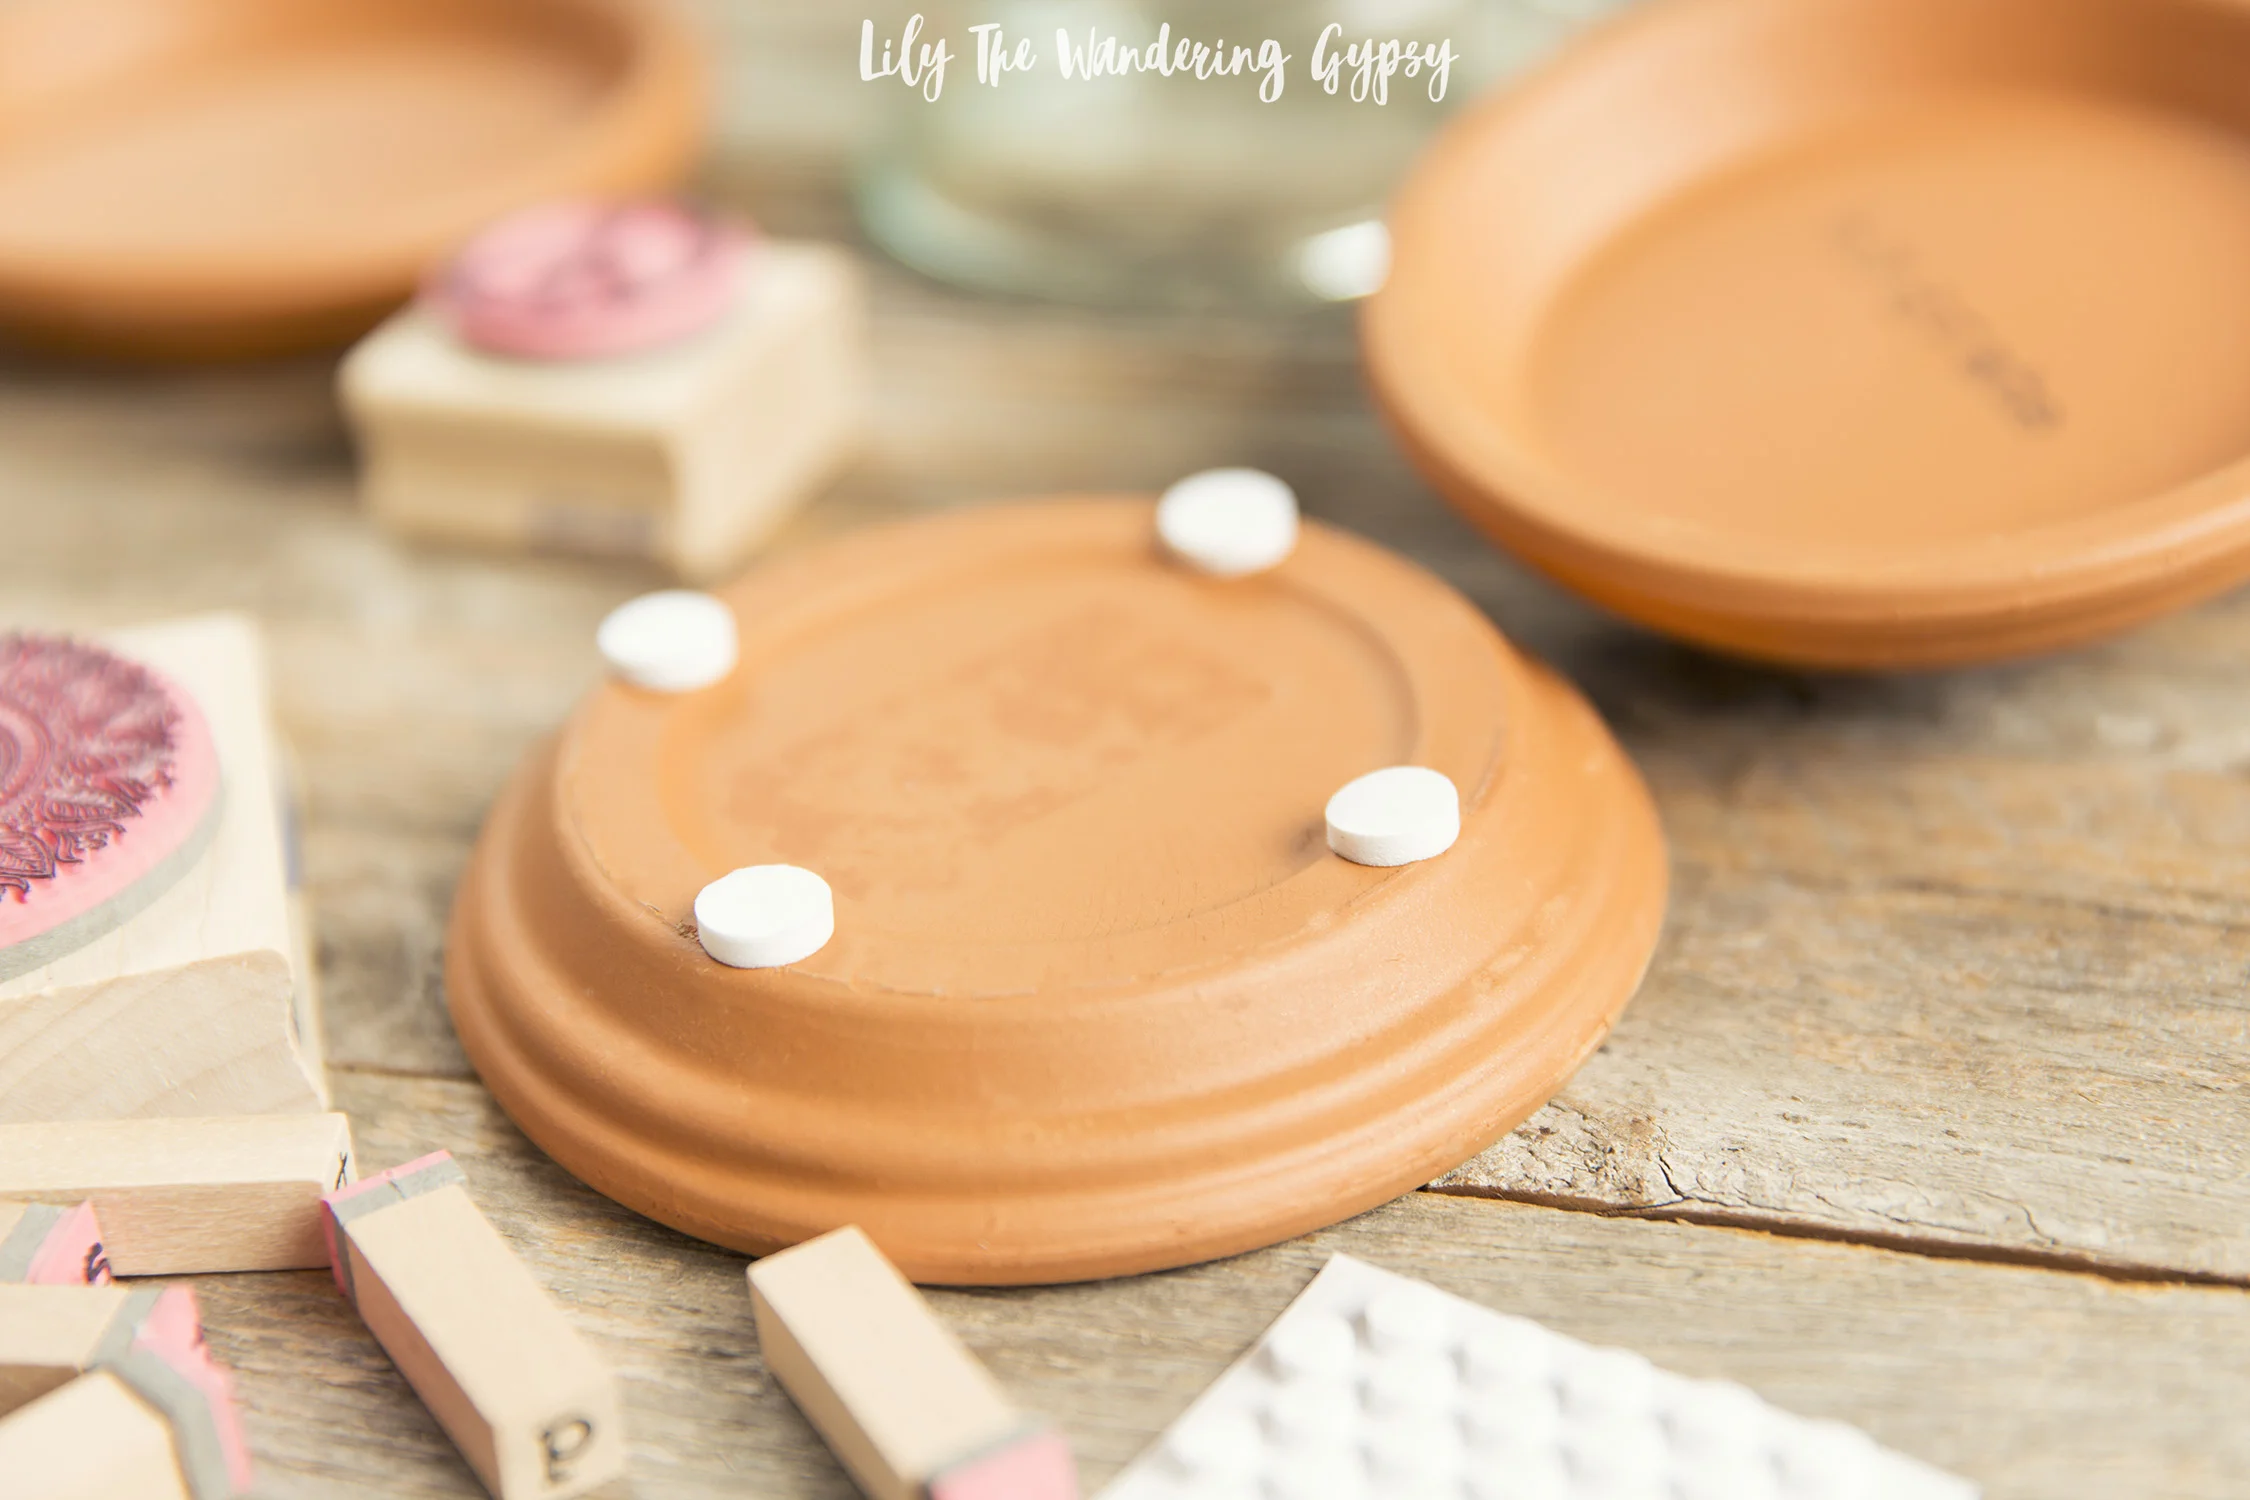
- Optional Foam or Rubber Feet For Coasters

INSTRUCTIONS:
1.) Lay out all of your materials, and decide what you will stamp onto your coasters. I chose the word "hydrate" for two coasters, a peace sign for one, and a mandala for the other.
2.) Open your inkpad, and get ink onto your stamp, and first do a test stamp onto a piece of scrap paper. This is super important so you get comfortable with how much pressure to apply, and so you make sure to create a clear impression of the stamp. The ink dries almost instantly too, which even makes these great for last minute gifts! Feel free to get as creative as you want with this step. A nautical theme would also be super cute!
3.) Optionally, add your rubber or foam feet to the bottom of the coasters. I do recommend this step, because it would reduce the chances of any condensation making it to your table or furniture surface.
You could make these with any theme or personalized message, think about the gifting possibilities of these beautiful coasters.
LEARN MORE ABOUT THE BRITA STREAM PITCHER:
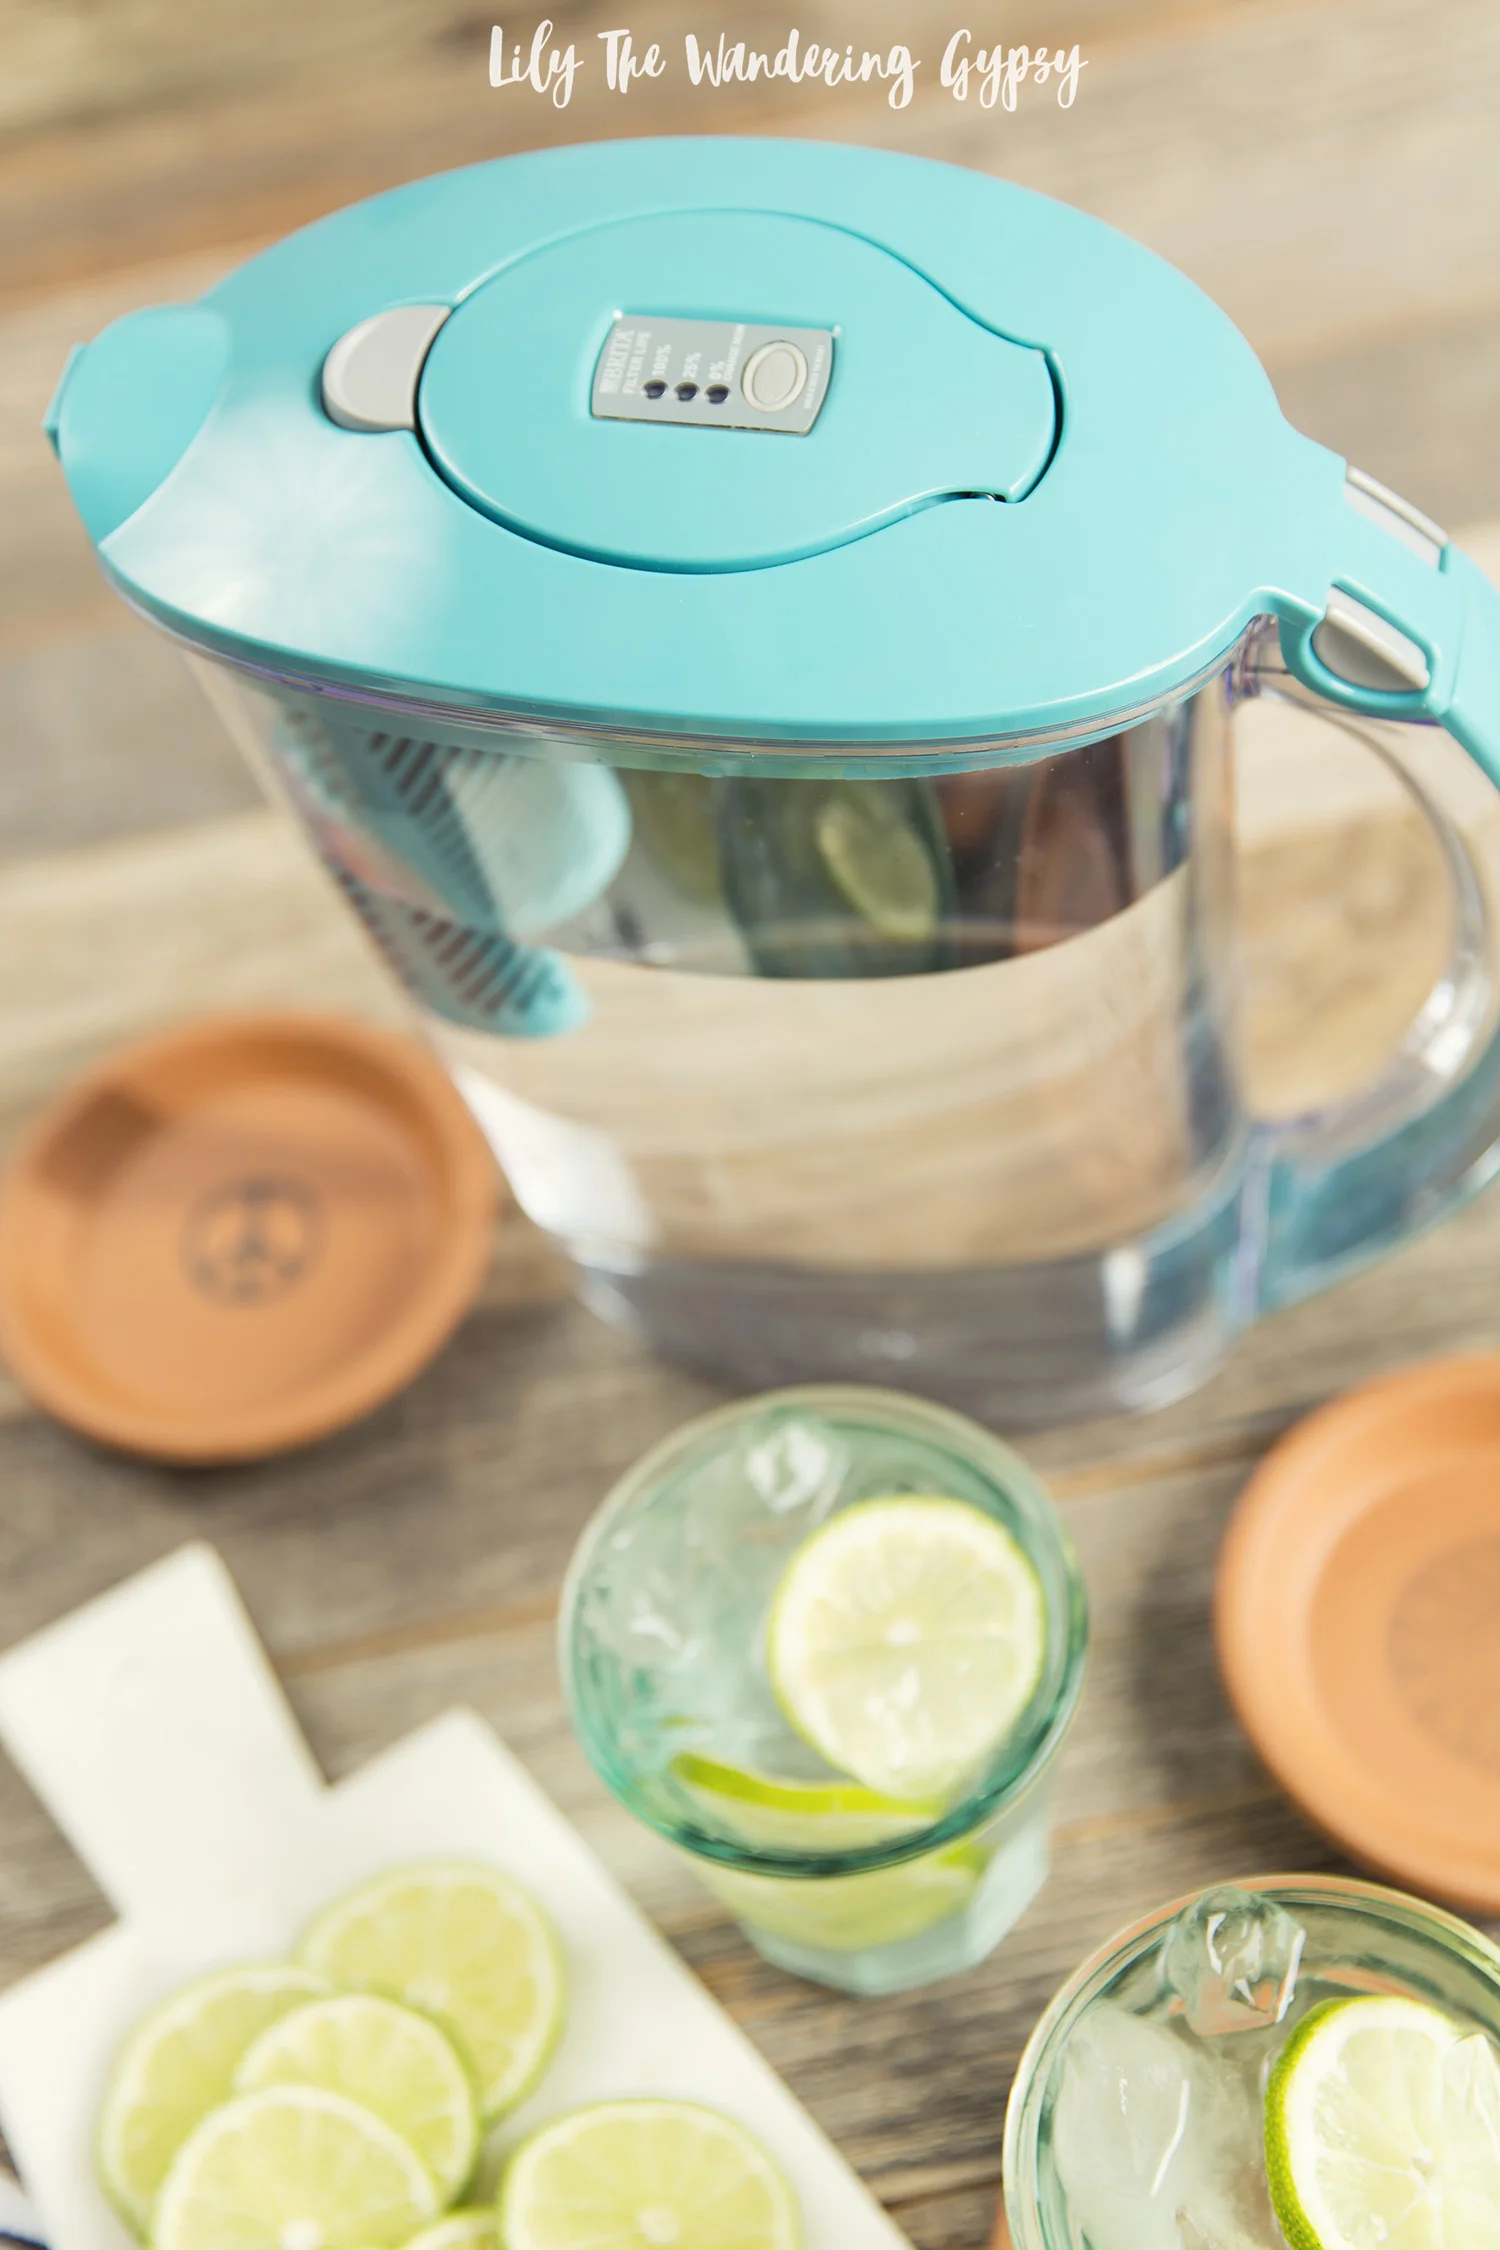
I absolutely love this pitcher. Our water here in Carbondale, IL always gets really good ratings on our annual water quality reports, but I really dislike the taste. So, we filter all of the water we drink from our house. I just love being able to have a pitcher of cold, filtered water in the fridge at all times, which, like I mentioned before in this post, encourages me to drink way more water. The great thing about the Stream is that when you fill the pitcher it is ready to pour immediately. No more waiting because it filters as you pour. Also, the new Brita Stream Pitcher filters ice water if you don't have time to cool your water in the fridge ahead of time.

HOW TO USE THE PITCHER:
1.) Wash your hands, and remove filter from bag.
2.) Run cold tap water through the filter for 15 seconds, and remove the filter cage from the lid of the pitcher. Feel free to rinse your pitcher as well.
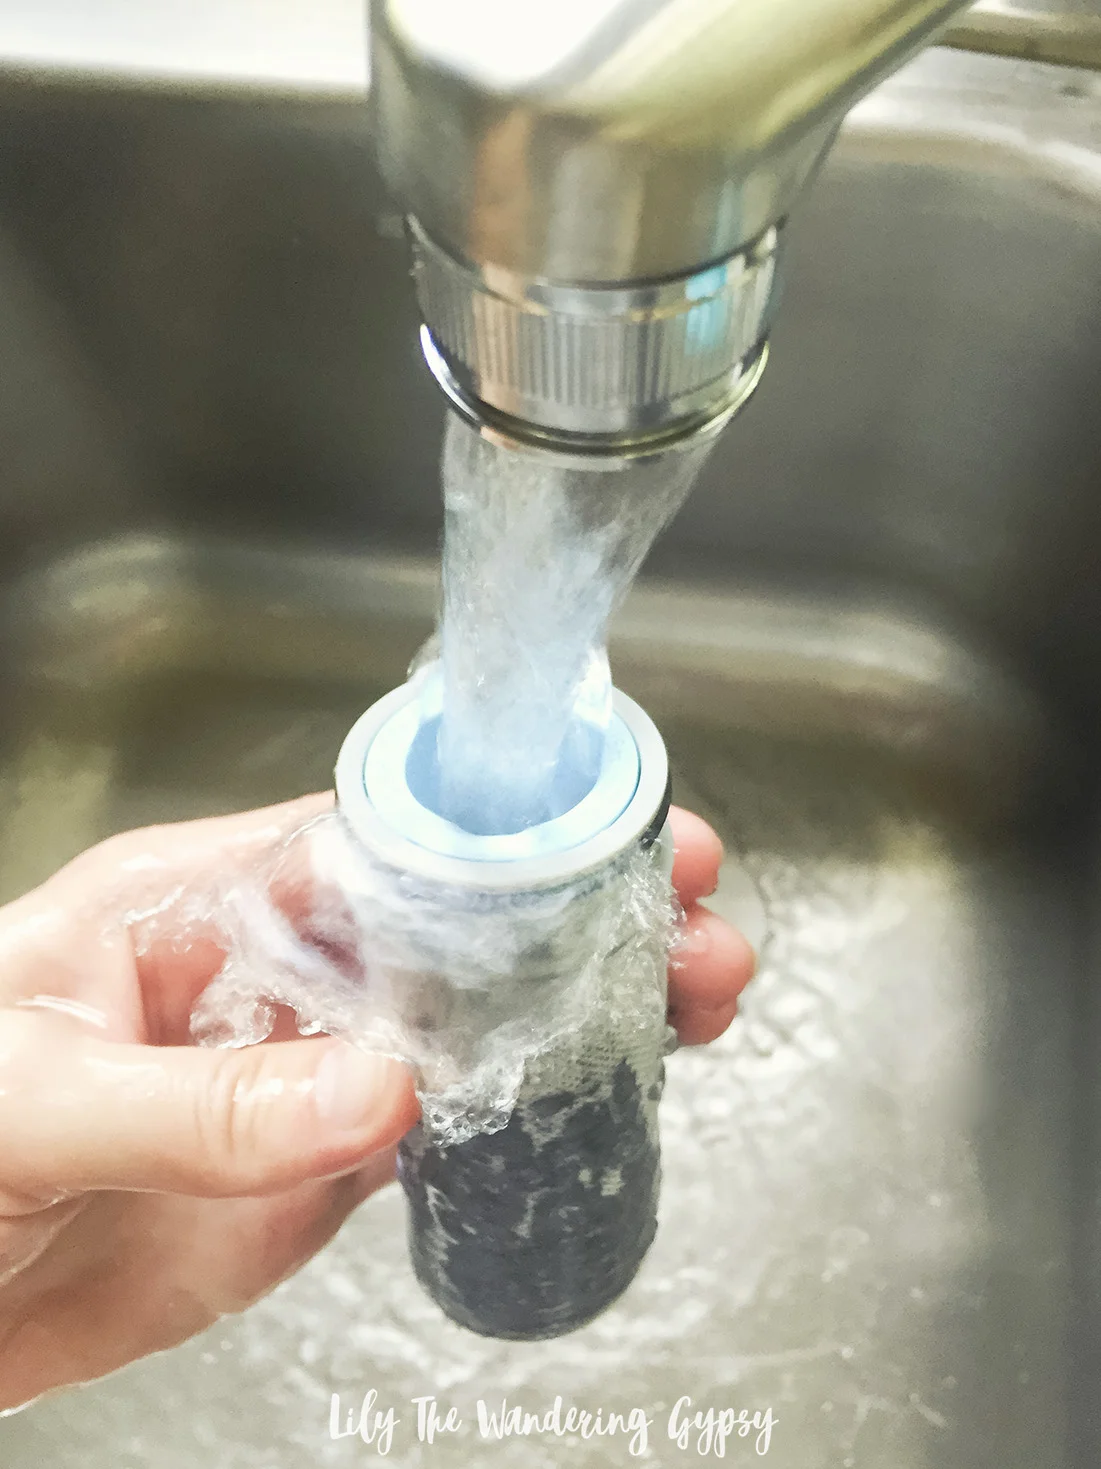
3.) Insert the filter into the filter cage, and fill pitcher with tap water, or ice water. Pour yourself some delicious, filtered water and enjoy! I love adding some citrus fruits to my water, but when it tastes as good as it does from this Brita Stream Pitcher, you do not need anything to mask the taste of the water. It's very good.
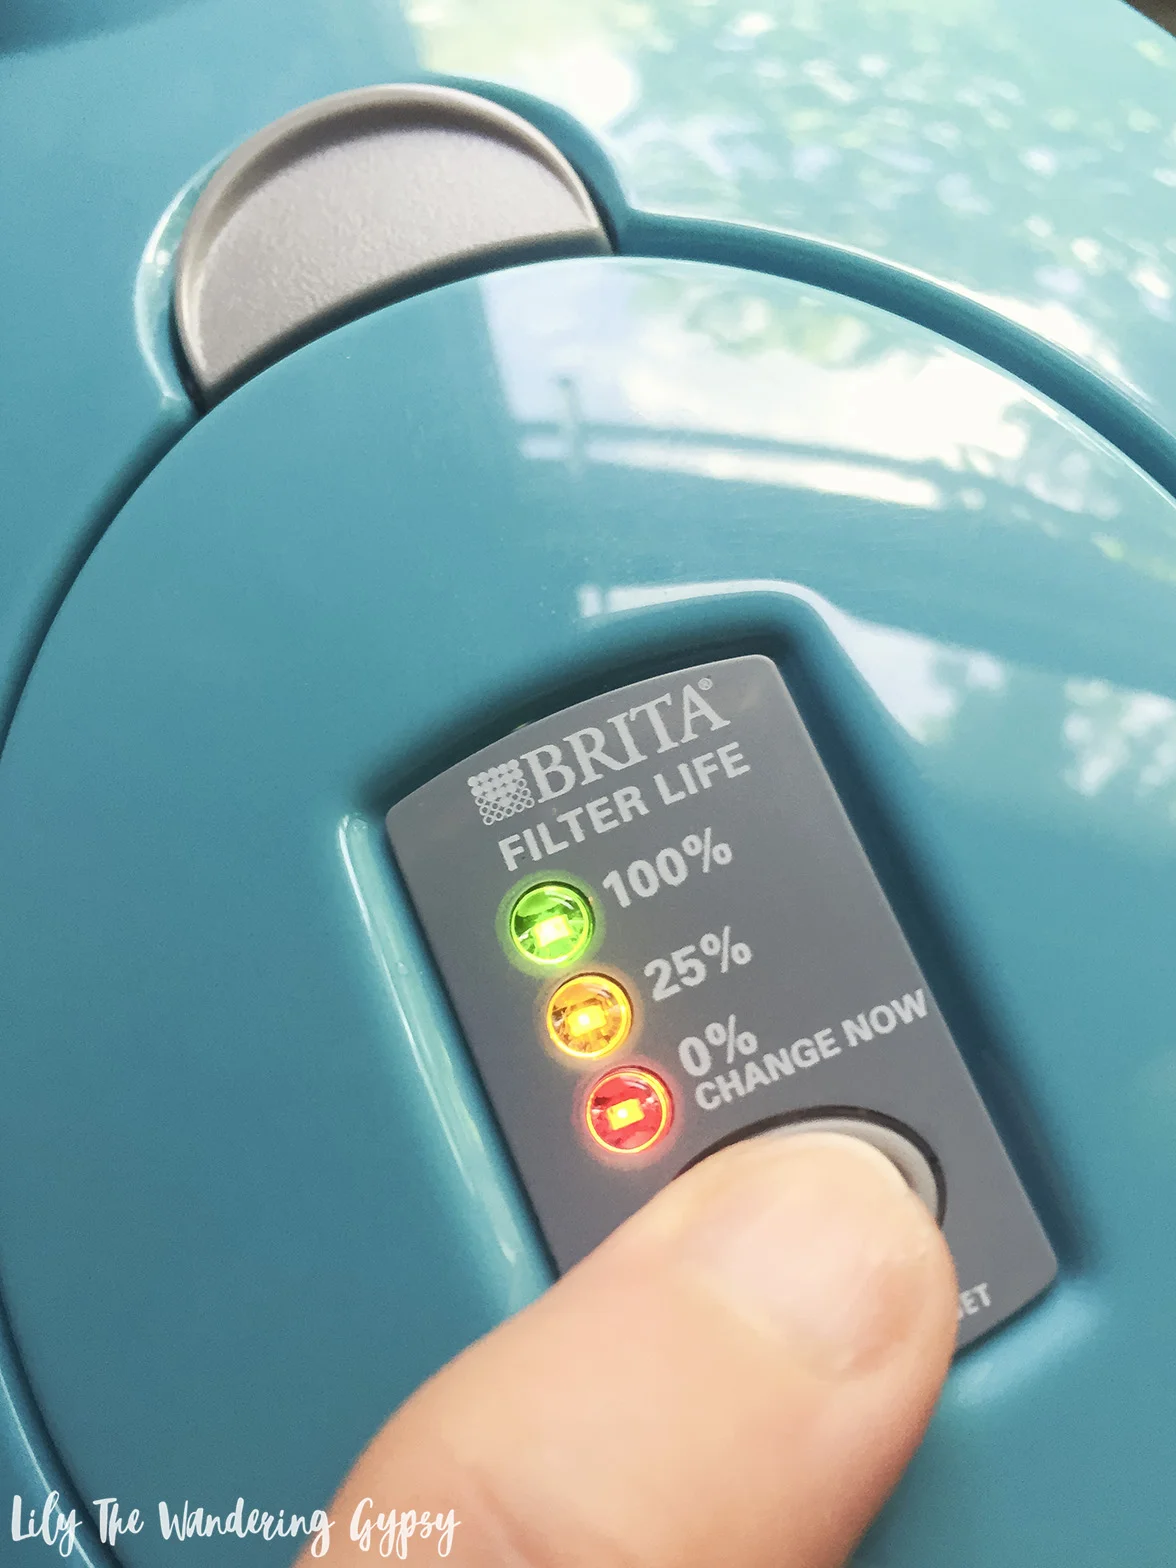
4.) The instructions say that you are supposed to filter up to 40 gallons per filter, which is adequate for the two of us, at our house. Use the button on top of the pitcher to tell you when the filter needs replaced (see images below).
We were so fortunate to spend some time in Arizona at the beginning of this year, and really wish we had been lucky enough to have this Brita Stream Pitcher with us! We drank SO much water each day because it was so hot and dry there. You can always use the pitcher to fill your water bottles, which is one of my favorite uses for the pitcher. I tend to drink more water when it's cold, and the Brita Stream Pitcher even filters ice water! Perfection!
I hope you have enjoyed this fun DIY Tutorial, and if you wind up making some of your own, tag me on Instagram under @happysolez, or comment below this post with the link to your project. I cannot wait to see what you create!