FREE Summer Fun + A Cute DIY Gift Idea!

This post is sponsored by Zynga, but the content and opinions expressed here are my own.

Looking for fun and entertaining ways to enjoy the summer? Well I have teamed up with Zynga Words With Friends 2 to help share some fun and easy ways to have fun for FREE. Hey, we can all use a break, right?!

With this fun gift idea + a brand-new version of the Words With Friends app will help entertain everyone this summer. Help create more winning experiences this year, enjoy the thrill of the game.

Learn more about Words with Friends 2 here.

Download the game here (Apple store) or here (Google Play). Brush up on rules here!

You may be familiar with their first WWF game, but this one is a bit more updated and runs SUPER fast on my phone.

I love how you actually stretch your brain capacity and also learn new words. It’s fun for the whole entire family, and even fun with groups of friends too. I feel smarter during and after playing Words With Friends – I always pull out new words in conversations later that day! The game helps me connect with friends (new and old)!

I have met all sorts of new friends through the WWF app! There are always tons of players ready to start or complete a game with us, every time we login. We play ALL the time, and since we are always on the go, it’s something familiar in each place too.

With all of the Double Letter (DL), Triple Letter (TL), Double Word (DW), and Triple Word (TW) spots on the board, you can really gain a lot of points in just a turn or two.

Some of our highest scoring words are: CLOTS, TAXED, and HANDLED!!

DIY SUMMER GIFT IDEA

I know that rock painting has been around for decades, but I thought that a fun way to commemorate our friendship and share the beauty of the river would be to paint our friends’ names on rocks, then spell out their names in a gift. I had so much fun, and the best part of this crafty activity, is that you may already have everything you need – deeming this a FREE project!

MATERIALS:

Smooth River Rocks

Acrylic Craft Paint in White, Coral, Mint, and Raspberry

2-3 Small Craft Paintbrushes

Paper To Cover Work Surface

INSTRUCTIONS:

1.) Head to your local river to collect rocks, find them at a craft or hardware store, or find them anywhere else you like!

2.) Wipe off excess dirt from rocks with damp washcloth.

3.) Paint thick, white letters onto each rock. I used two coats of white paint for each letter. Below, you will see some rocks with two coats of white paint and some rocks in-process with only one coat of white paint.

4.) Paint colorful designs on top of white paint, on each rock.

5.) Give rocks as gift and let recipient spell out their names or secret message once they receive your gift! That’s it, and this project was so fun and easy. What a thoughtful gift.

THE FINISHED PRODUCT:

Luckily, The Words With Friends app is free as well, and while I was painting the rocks, my boyfriend Bobby entertained himself with the Words With Friends app on my new phone.

A SENSE OF CONNECTION:

With the weather being so warm and beautiful right now, it was a lot of fun to gather rocks for this project, then gift such a special and thoughtful memento to my friends. I feel like we are even more connected, just like how we will be able to play WWF from afar and know that we are still connecting and interacting.

Do you play Words With Friends yet? If so, what are some of your best words? Do you play with old friends or new ones?

Have a wonderful rest of the summer! Tag me on Instagram with @happysolez if you make this project, and tag the brand, @wordswithfriends on Instagram and as @wordswfriends on Facebook to show them how you spend time playing!!

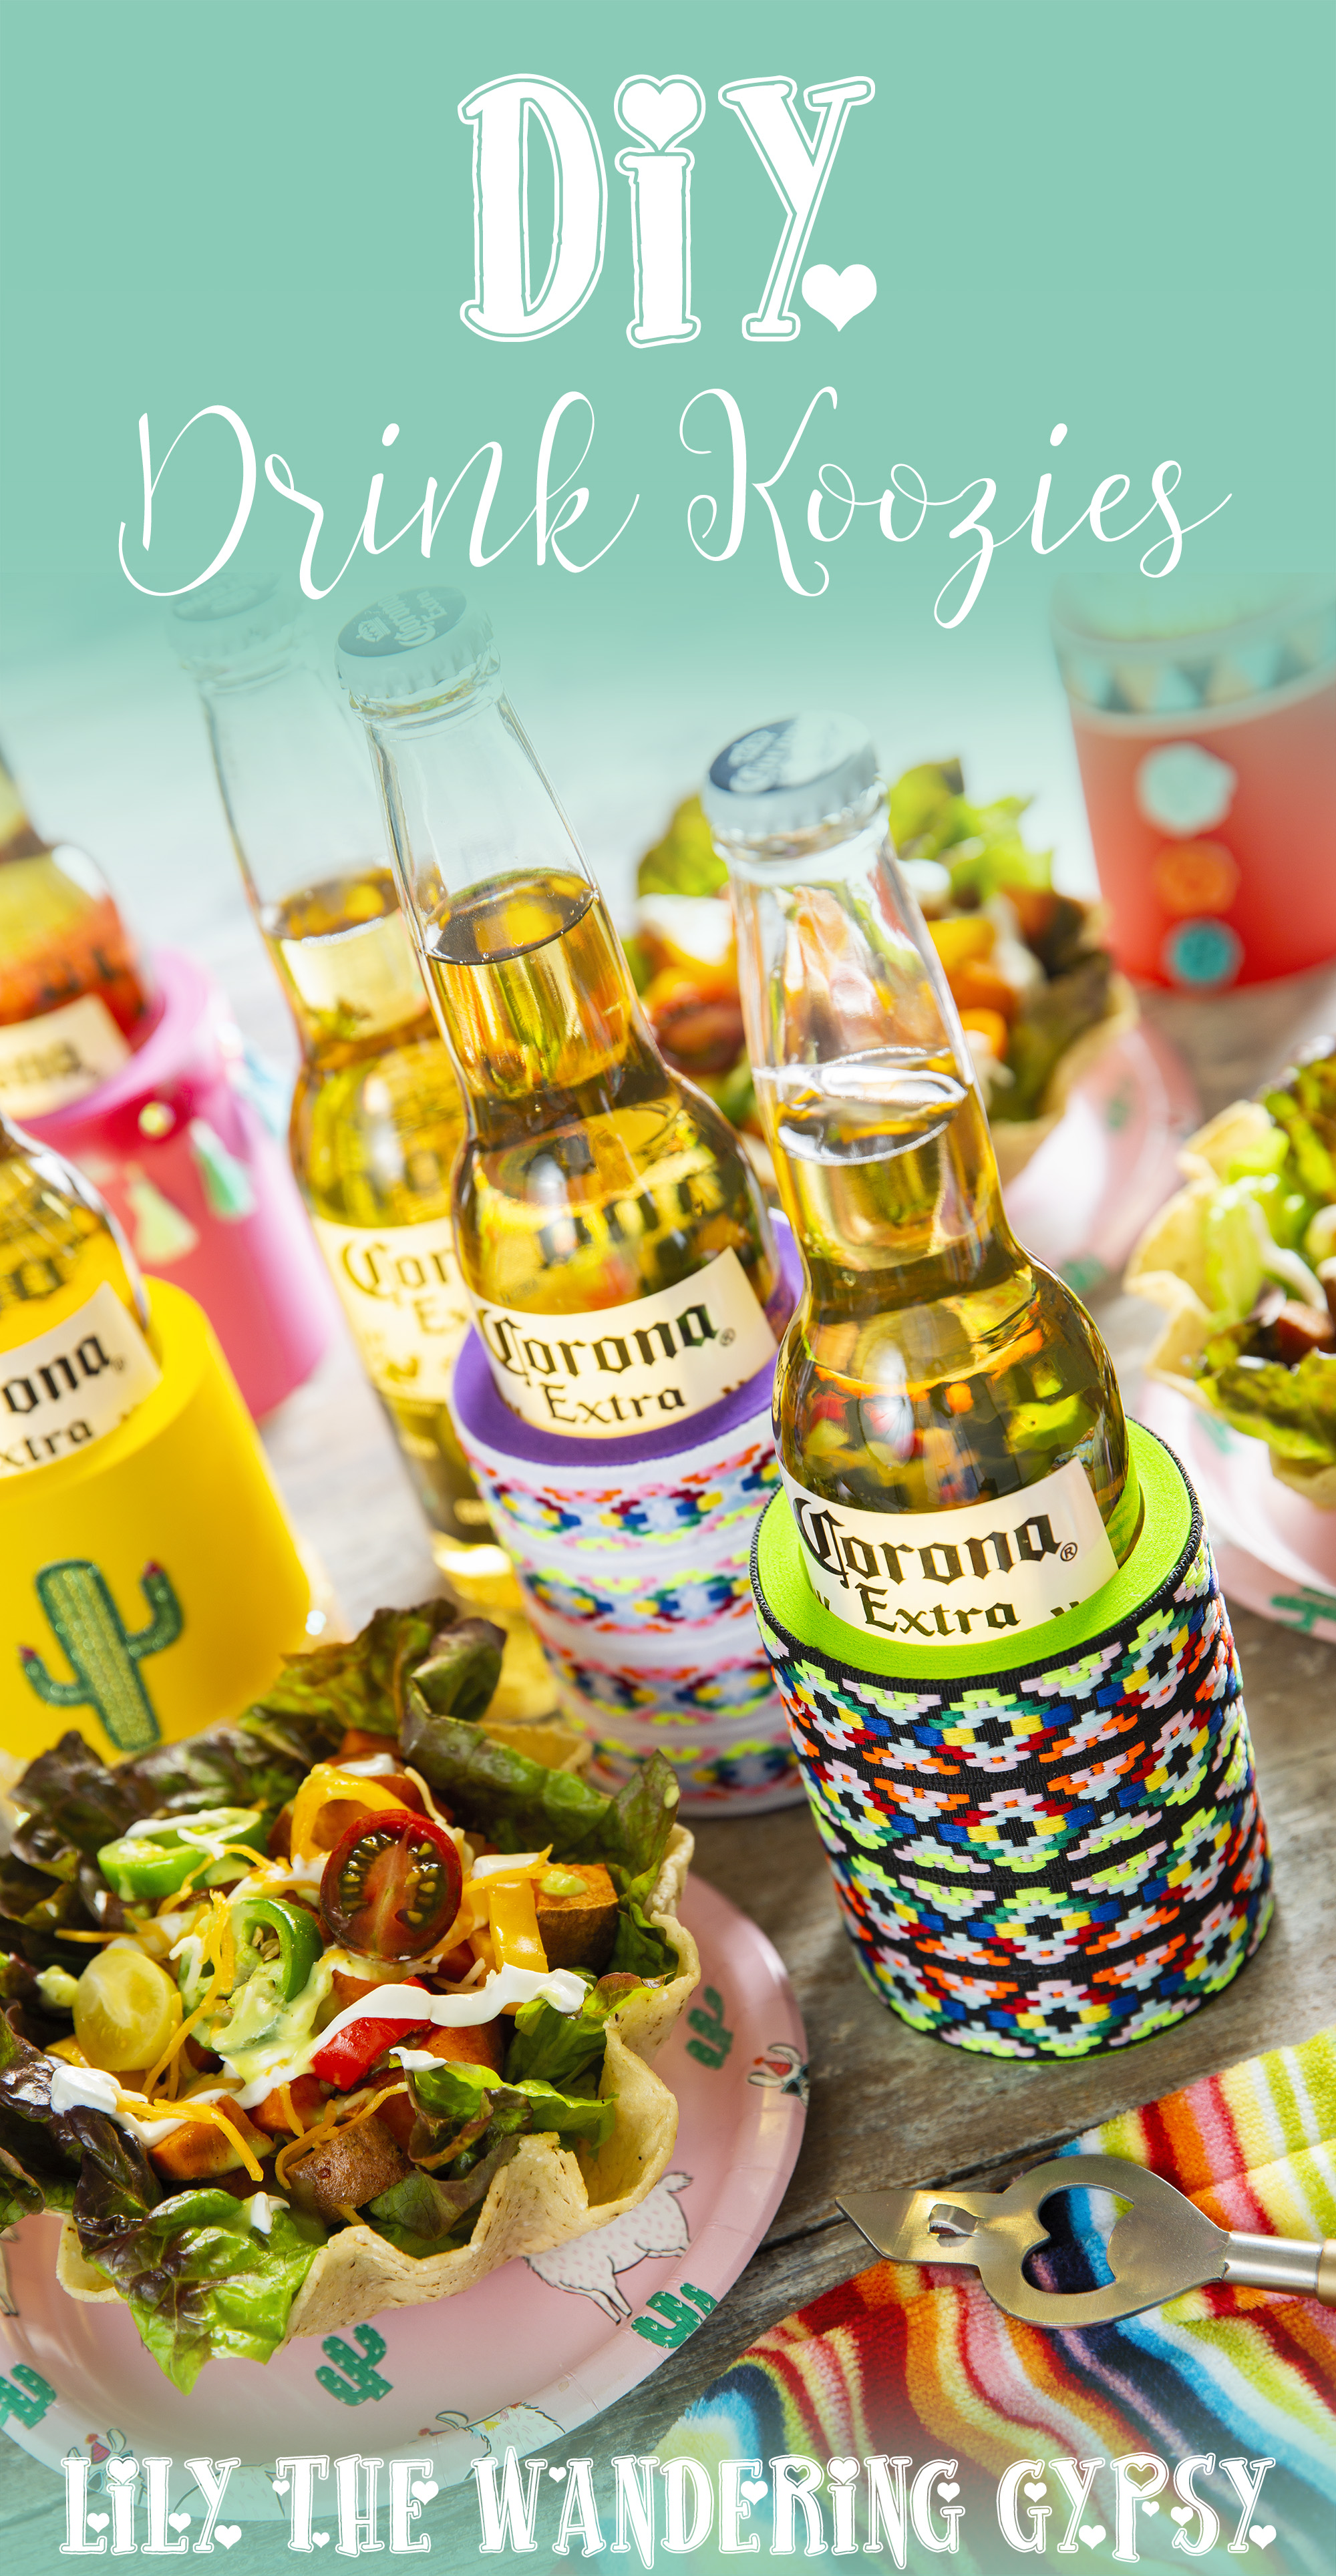
DIY Bottle Koozies + Vegetarian Taco Bowl Recipe

This shop has been compensated by Collective Bias, Inc. and Constellation Brands. All opinions are mine alone. The following content is intended for readers who are 21 or older. #CelebratorySips #CoronaSummer #CollectiveBias

Summer is here and what a better way to celebrate all the hard work you have done this year with a Beer + Craft Night with friends? I’ve been really wanting to make some customized / embellished drink koozies for some time, and when I learned about this amazing opportunity with Corona®, I jumped at the opportunity to celebrate all that Corona embodies - offering a passport to carefree enjoyment and refreshing, delicious refreshments! With a refreshing, smooth taste balanced between heavier European imports and lighter domestic beer, Corona Extra is an even-keeled cerveza with fruity-honey aromas and a touch of malt. The flavor is crisp, clean and well balanced between hops and malt.


What a perfect way to celebrate summer with a snazzy new way to keep your drinks cold and to liven up the party...even if it is a craft night that turns into a party :)


These bottle and can koozies really make a statement. They will also help you identify which beer belongs to each person. For only $3-4 you can make your very own Summer Drink Koozie - keep reading to get the instructions and design ideas!

KOOZIE MATERIALS:

Foam Koozies (found in the foam aisle at a craft store)

Ribbons and trim of various colors

Low temp glue gun

Glue sticks (I used fabric glue sticks)

Cardboard for use as your work surface, or a heat-safe work surface (the glue can get messy!)

KOOZIE INSTRUCTIONS:


  1. Plug in your glue gun and get it ready to use. Cut ribbons and trims to fit around your koozies, leaving a little extra just in case.

  2. Once glue is hot enough, on a heat-safe work surface, add a bit of hot glue to the end of one ribbon, and begin to glue it around the top of the koozie. For the more patterned koozies, I used 4 strips of woven ribbon around. See steps below.

Notice the raw edges of the ribbons, above. We will cover those in the next image, with one more strip of ribbon, glued up the back.

3. For the tassel koozie (below), I glued on my tassel trim first, then covered that with a more tie dyed looking ribbon for a more finished look. See steps below.

4. Feel free to embellish further with stick on jewels and more ribbons - let your creativity run wild! Note - I tried using sticky-backed jewels, but I needed to glue them on, or they would fall off after a short use. Still super cute either way!

FOR THE VEGETARIAN TACO SALADS:

Ingredients:

2 Sweet potatoes (chopped)

2-3 TBSP Olive Oil

2-4 TBSP Mexican Seasoning

1-2 tsp salt

(Other toppings include: lettuce, shredded cheddar, tomatoes, sour cream, guacamole, cilantro, and more!)

Note - this can be made vegan if you use all vegan toppings, like vegan sour cream.

Taco Salad Instructions:


  1. Preheat oven to 375-400 degrees.

  2. Cut sweet potatoes into cubes, and chop onions into small pieces. Place into a mixing bowl, and toss with 1-2 TBSP Olive Oil.

  3. Bake potatoes and onions for 15-20 minutes, then add sliced peppers on top, and bake another 10 minutes or until the ingredients are baked soft enough to enjoy.

  4. To create your bowls, add a bed of lettuce, then top with sweet potatoes, and any other toppings you like. Enjoy with a Corona Extra®!

Have an amazing summer, friends!

PIN IT FOR LATER...

Best Of Pinterest: Top 6 Most Adorable Spring Treat Recipes and DIY Ideas

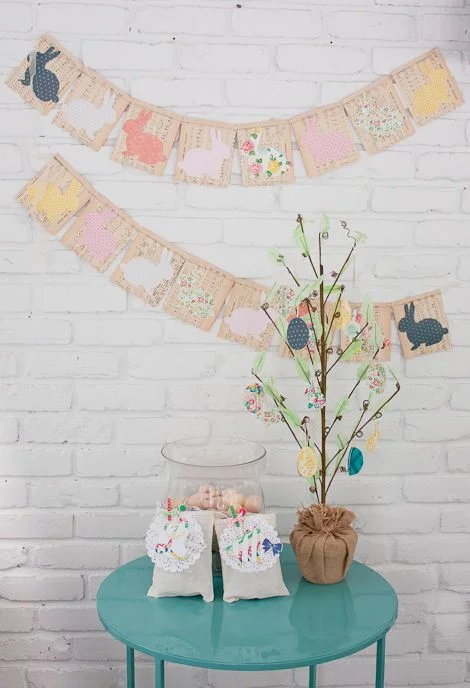
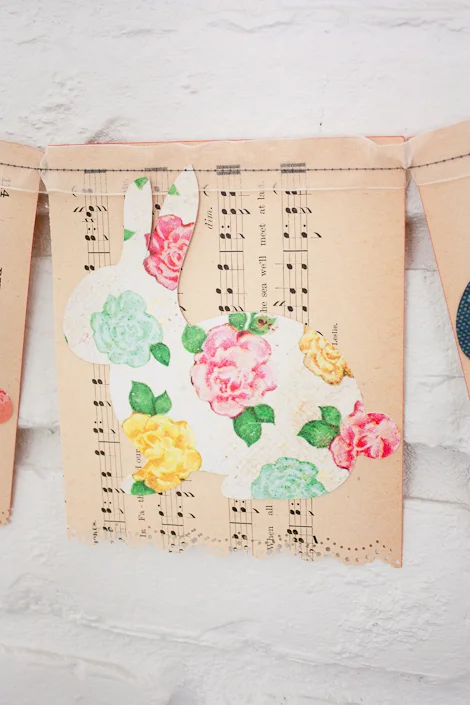
1.) What an adorable little vignette! Crate Paper's post shows us how to decorate for Spring in a shabby chic style, with lots of DIY ideas. So, get out your floral scrapbooking papers, and some sheet music, and get ready to make your space ready for the Easter Bunny to arrive!

Find It On Pinterest, Here.

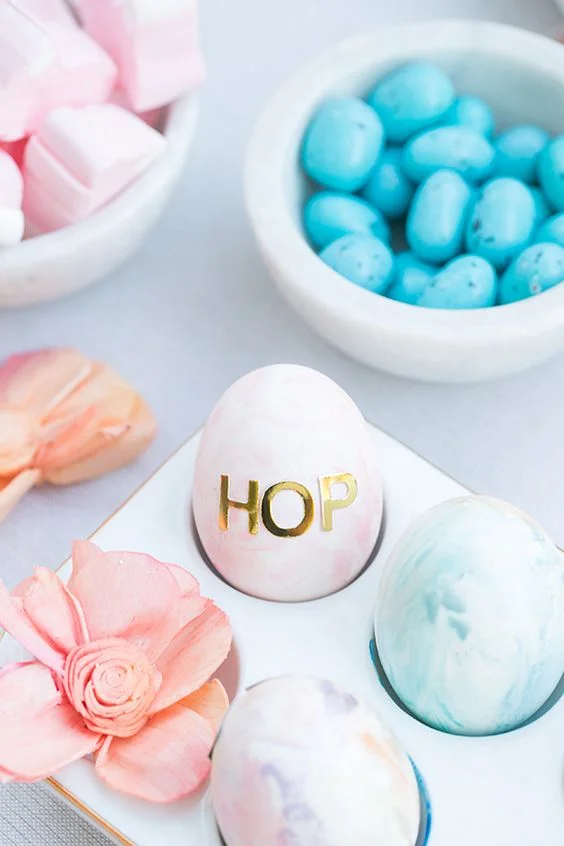
2.) Next, why not celebrate with friends and family by decorating some good old fashioned Easter Egg decorating? Stick to soft, pastel colors and provide lots of coordinating candy fir guests. Sugar And Charm shares all the details, so check out their post for more details.

Find It On Pinterest, Here.

3.) Have you ever herd of Spiked Peeps? Well, Sugar & Charm shows you how to make them from scratch! The colors they used are marvelous, and why not add a bit of booze to this fun day? 

Find It On Pinterest, Here.

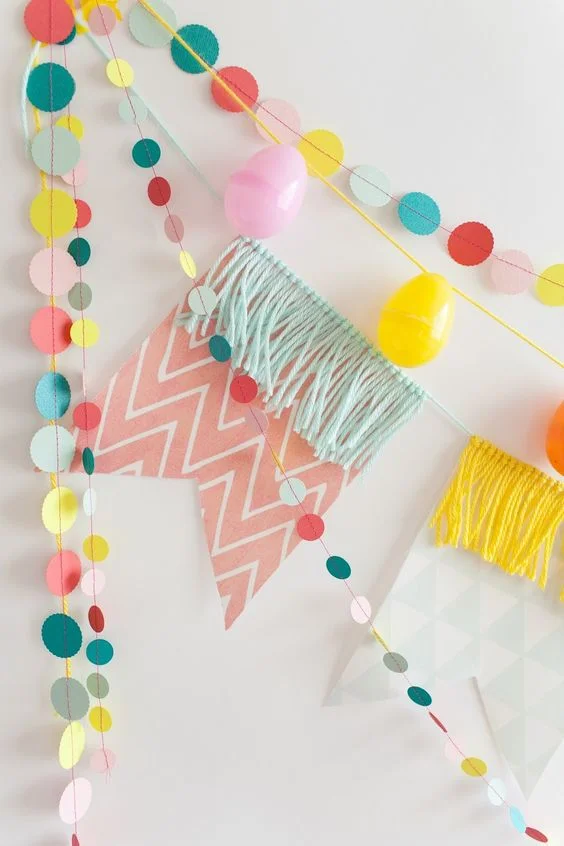
4.) Tell Love & Party provides this adorable and festive bunting DIY with unexpected mixes of colors, prints, and patterns. The addition of the Easter Eggs is also quite cute. And, even a bit of fringe! Who doesn't love mint fringe? 

Find It On Pinterest, Here.

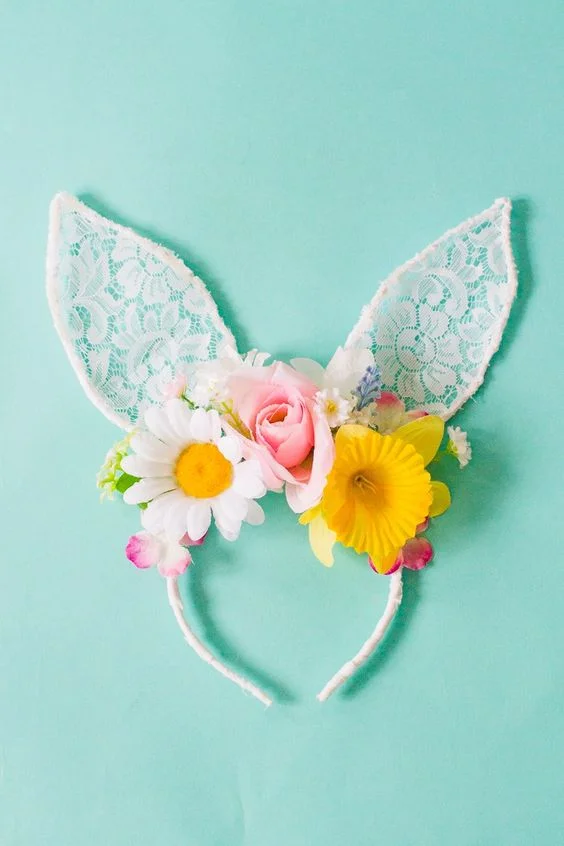
5.) Looking for a wearable and fun DIY project for Easter? This one from Bespoke Bride is perfect! Boho Bunny, if you will. Starting with a traditional headband, add some wired, lace ears and a floral crown, and you have a beautiful accessory for just about any age. 

Find It On Pinterest, Here.

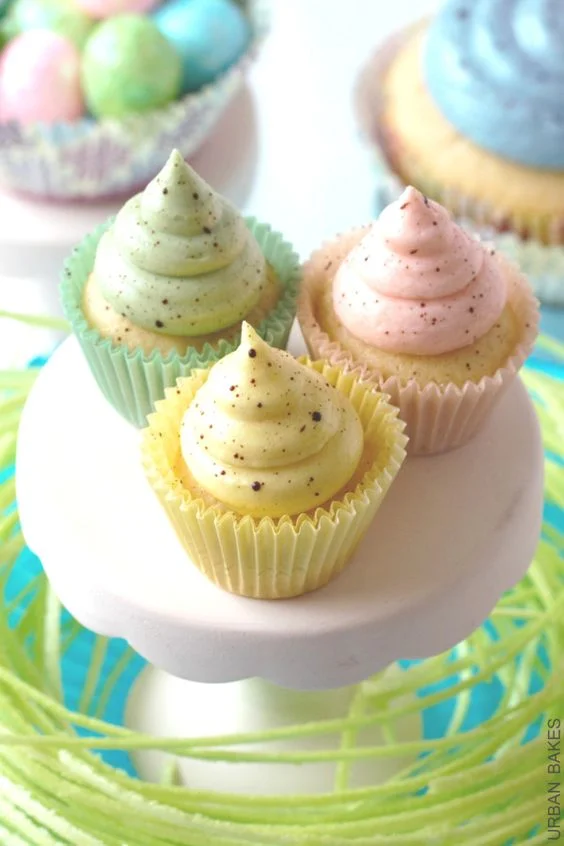
6.) Love the looks of specked eggs? Then, these beautiful Speckled Cupcakes by Urban Bakes are just what you need to make. The colors are perfect, and you can learn how to make the little speckled detail on her blog

Find It On Pinterest, Here

PIN IT FOR LATER

#SoFabSeasons - TONS Of Great Apple Recipes For Fall

Apples are such a huge part of the landscape and economy here in southern Illinois, and I love how versatile apples can be - in recipes, decor, and DIY projects. Have you created anything from apples lately? 

You may remenber my Baked Apple Donuts that I created for this apple-themed post roundup for #SoFabSeasons.
 photo donut 1.jpeg

One of my favorite things that brings up memories of fall is Apples! Do you remember apple picking with your family? How about all of those those tasty fall recipes for everything from fresh apple fritters to hot apple cider! We are excited to share with you this collection of amazing apple themed posts from many of our outstanding members here in the Social Fabric community. We know that you will enjoy them and hope that you can create some new fall memories for yourself and the ones you love.
SoFabSeasons Apples  
DESSERT RECIPES (* denotes recipes used in graphic)

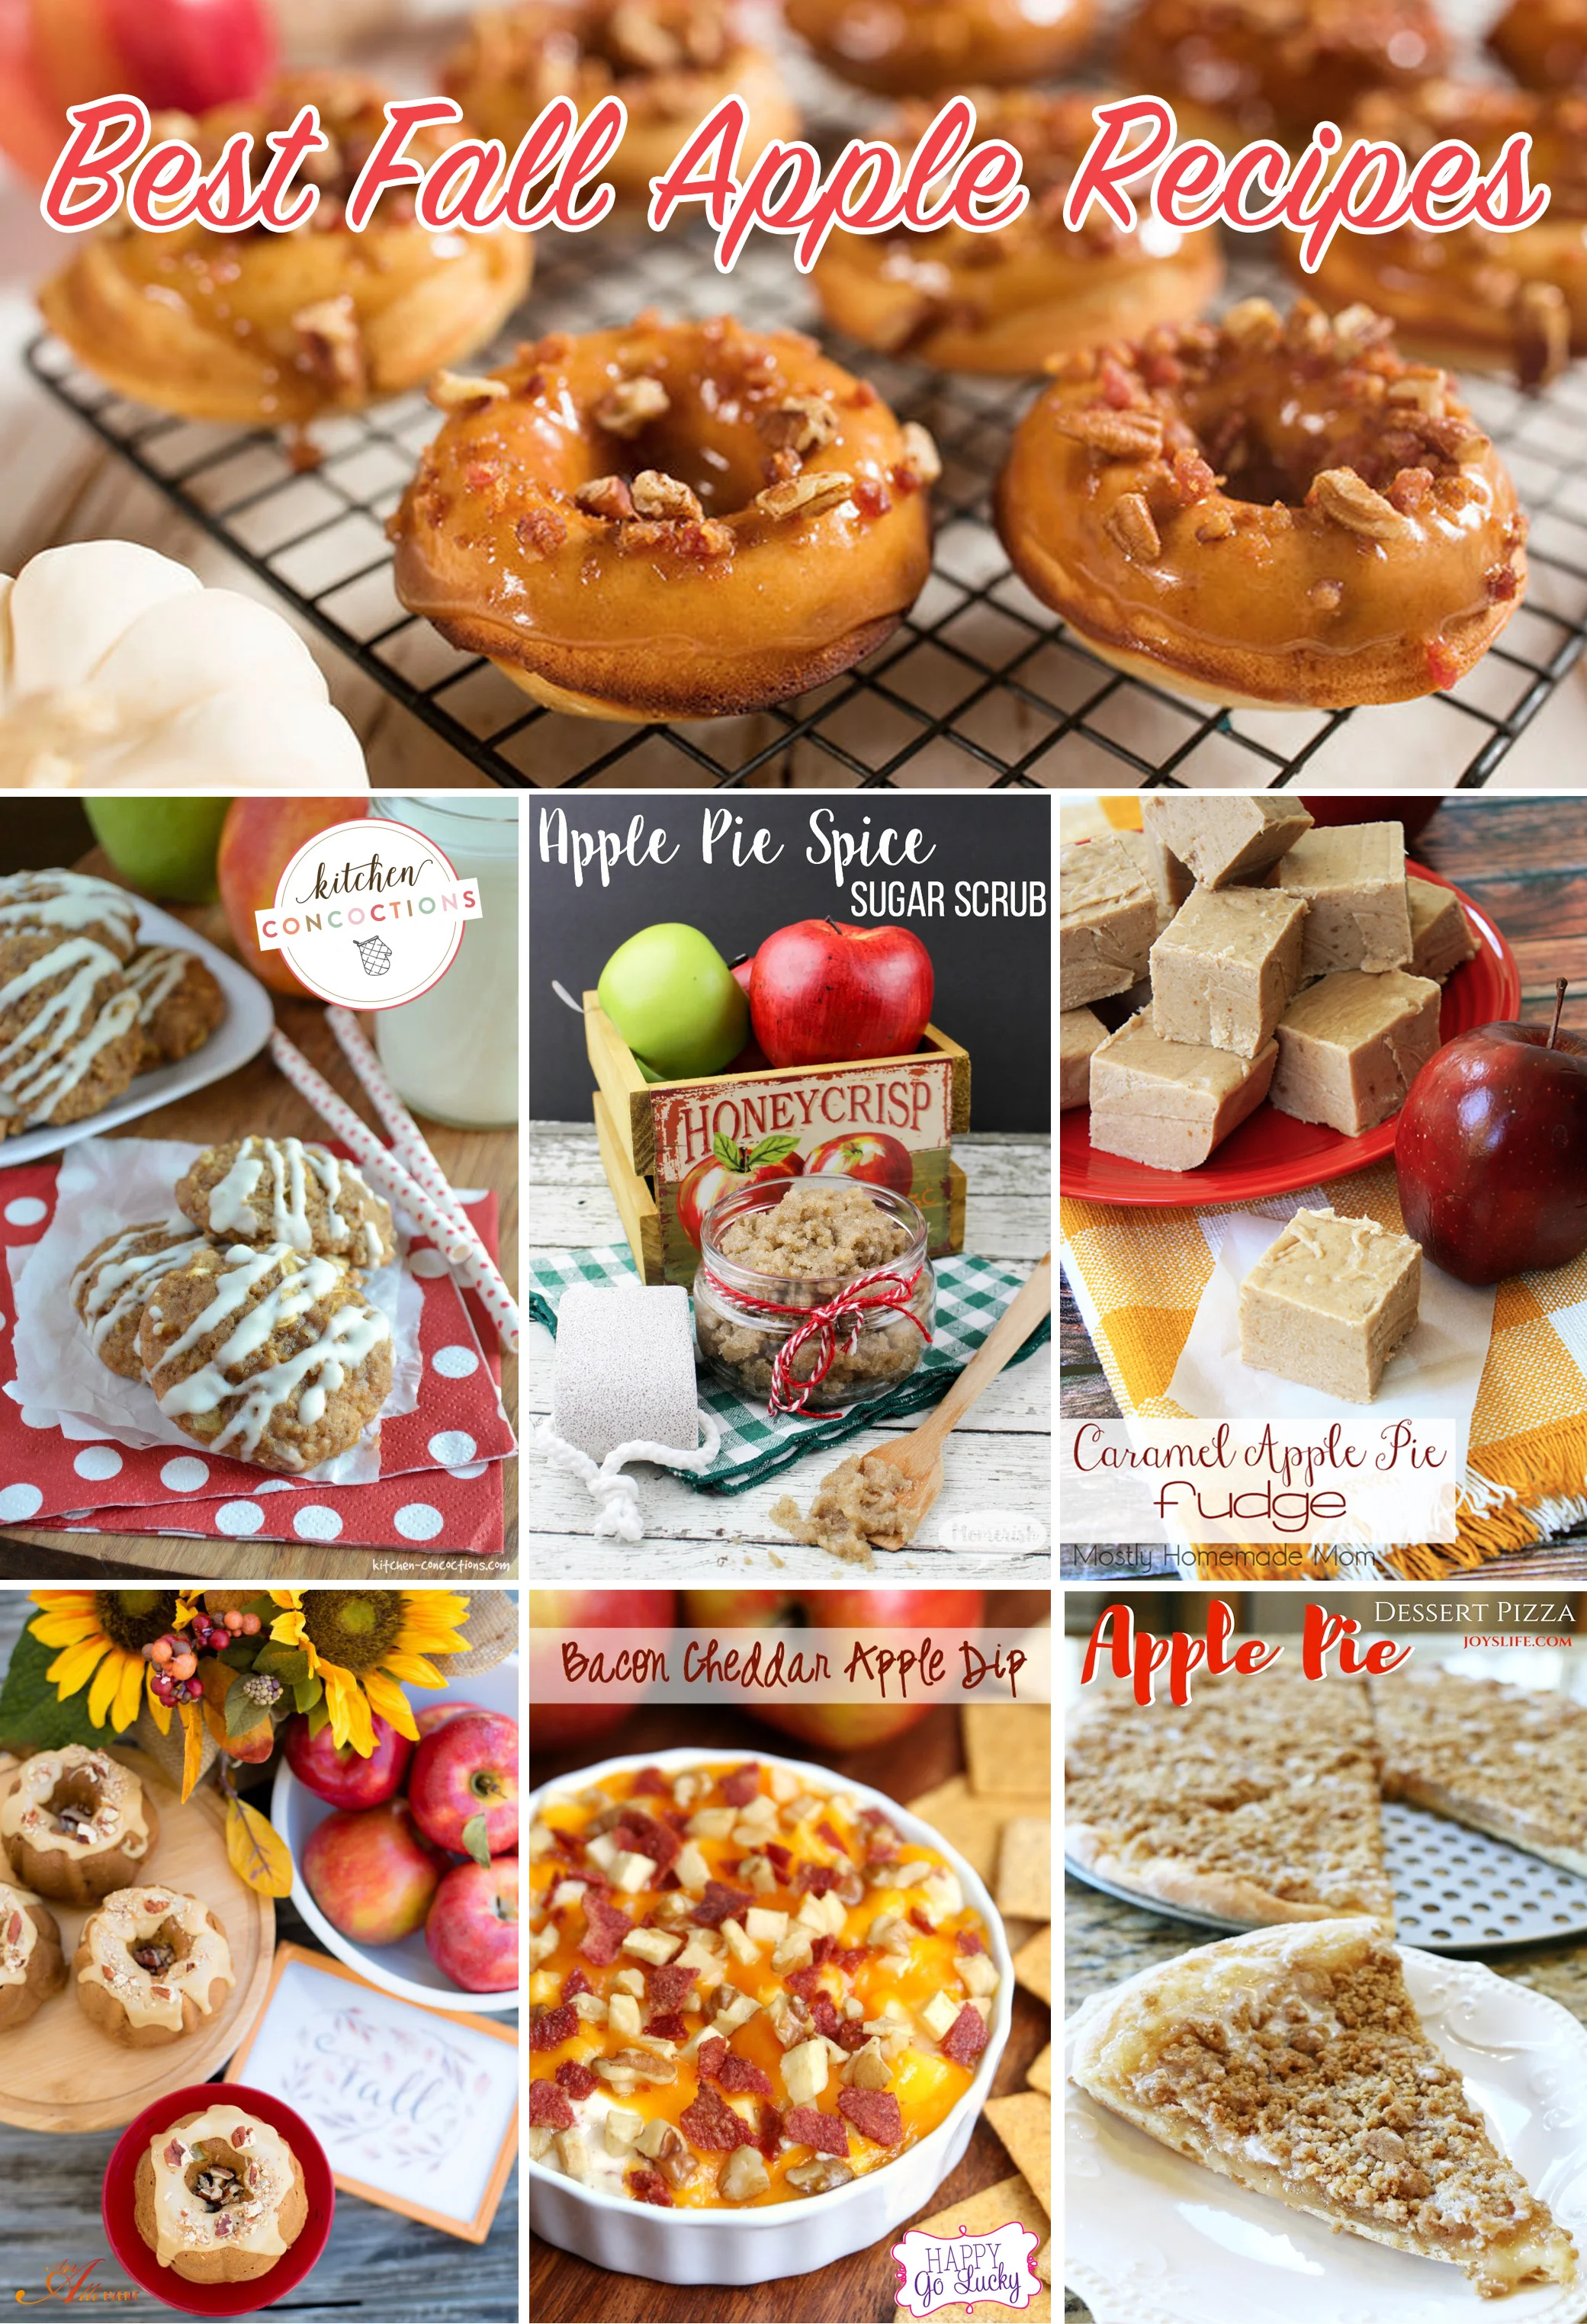
*Lily the Wandering Gypsy - Fresh Apple Donuts with Bacon, Caramel Pecan Glaze

Home and Garden Cafe - Apple Pie Coconut Ice Cream

*Joy's Life - Apple Pie Dessert Pizza

*Kitchen Concoctions - Toffee Apple Pie Cookies

The Bandit Lifestyle - Delicious Apple Fritters Perfect for Fall

Roasted Beanz - Easy Crustless Almond Raisin Apple Pie

Wondermom Wannabe - Clean Eating Apple Crisp with Caramel Sauce

Anti June Cleaver - Mini Dutch Apple Pear Pie to Get You Ready for Fall

Basic N Delicious - Apple Cinnamon Bundt Cake

Mostly Homemade Mom - Caramel Apple Pie Fudge

Little Blog in the Country - Pressure Cooker Canned Apple Pie Filling

Diana Rambles - Apple Spice Dump Cake

The Tip Toe Fairy - Apple Plum Skillet Cobbler

Five Marigolds - Sweet and Savory Salted Caramel Apple Dip

Intelligent Domestications - Apple Cinnamon Roll Cake & Apple Cream Cheese Icing

Home Maid Simple - Easy Apple Crisp

More or Less Cooking - Best Apple Fritter Coffee Cake

My Big Fat Happy Life - Skinny Caramel Ice Cream

* An Alli Event - Apple Bundt Cake with Praline Frosting

Tobin's Tastes - Caramel Apple Cheesecake Dip

Ginger Casa - Delicious Apple Cranberry Pecan Crumble

Sweet Sensations - Apple Cobbler with Oatmeal Muffin Crust

A Labor of Life - How to Make Delicious Apple Roses

Julie Is Coco and Cocoa - Fried Cinnamon and Sugar Apple Rings

Polka Dotted Blue Jay - Mini Carmel Apple Bites

Finding Sanity in Our Crazy Life - No Bake Oatmeal Apple Pecan Cookies

Being Tazim - Strawberry Apple Crumble Vegan and Dairy Free

Upstate Ramblings - Caramel Apple Cake

Rebecca Lately - Baked Apple Recipe

Simple Food 365 - Light and Fluffy Apple Cinnamon Coffee Cake

Mama Plus One - Homemade Apple Cider Donuts

Bento Lunch (dot) net - Caramel Apple Pudding Parfaits

MORE APPLE RECIPES

Broken TeePee - Salmon and Rice Noodles on Apples, Carrots & Zucchini

Revel & Glitter - Autumn Cranberry Apple Pear Salad

* Happy Go Lucky - Bacon Cheddar Apple Dip

Honest and Truly - Delicious and Easy Mini Apple Pancakes

Smiling Notes - Healthy Apple Pie Oat Pancakes

Creative Southern Home - Apple Bread

Beyond Mommying - Apple Bacon Grilled Cheese

Momcrieff - Apple Pancake Rings for Breakfast or Snack

Tiaras and Tantrums - Favorite Autumn Apple Snacks

Injenious Life - Gluten Free Applesauce Muffins

Everyday Party - Simple Caramel Apple Cider

A Paper Arrow - Apple Bread for the Fall

Happy and Blessed Home - Delicious Apple Recipes

Mom Saves Money - DIY Dehydrated Apple Rings

Gluesticks Blog - Baked Apple Chips

Life With Lorelai - Caramel Apple Crumbly Bread Recipe

Ava's Alphabet - Baked Apple Pancake

Life with Lovebugs - Spiced Applesauce and Oatmeal Muffins

For the Love of Crust - Homemade Crockpot Apple Cider

Oat & Sesame - Maple Your Applesauce

Southern Mom Loves - Cheddar and Apple Goldfish Snack Mix Recipe

My Life Cookbook - Cinnamon Apple Breakfast Bread (Gluten Free)

ACTIVITIES

Tales of Mommyhood - Apple Picking Favorite Family Activity

Mama Luvs Books - Apple Picking in Rhode Island

Kori at Home - Apple Tot School Unit with FREE Printables

Jenny at Dapperhouse - DIY Apple Basket Sorting Game

To & Fro - Tips for Apple Picking with Your Family

CRAFTS

Little Mama Jama - Apple Stamping Sensory Activity for Preschoolers

Creative Ramblings - Fabulous Fall Wood Apple Sign

Woods of Bell Trees - Quilted Apple Pillow

For What It's Worth - Apple Themed Party with DIY Apple Craft

The Kennedy Adventures - Paper Plate Apple Craft

Babs Projects - Apple Scented Potpourri Pouches

Great Contradictions - Apple Themed Candy Bar Wrapper Printables

BEAUTY

* Momerish - Apple Pie Sugar Scrub Perfect for Fall Pampering

Can you believe all these incredible Apple themed posts? Bookmark this page so you can come back and try out all the recipes, crafts and activities with you and your family! Check back next month when Social Fabric features posts with a pumpkin theme. You can always search the hashtag #SoFabSeasons to find more of what you're looking for!

Olympics Inspired - Candy Flavored Vodkas!

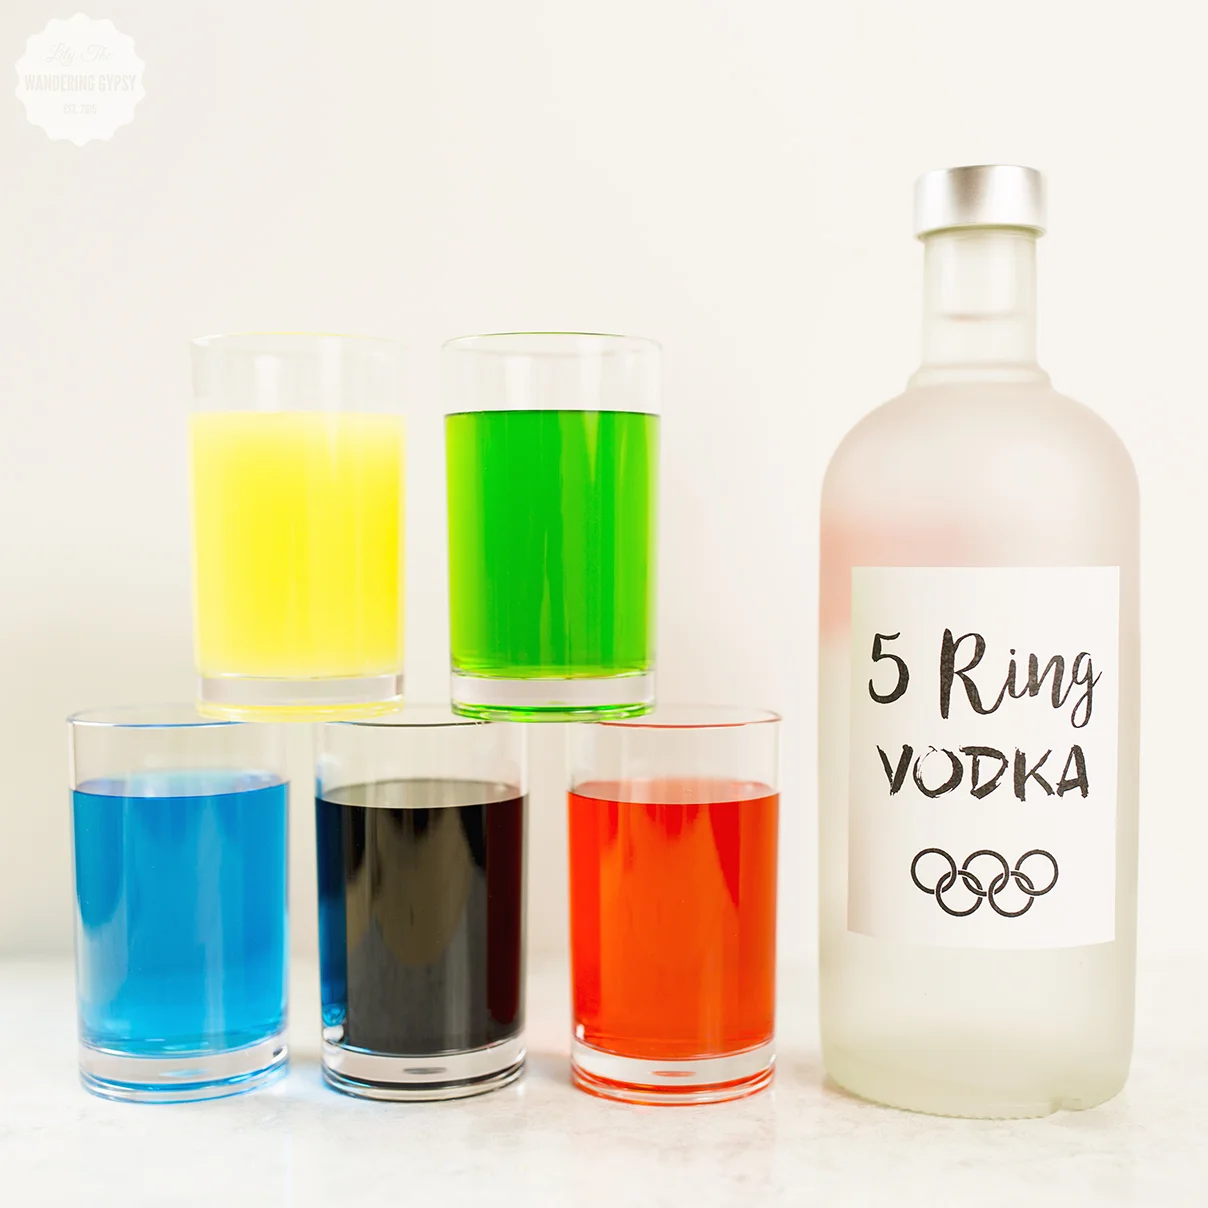
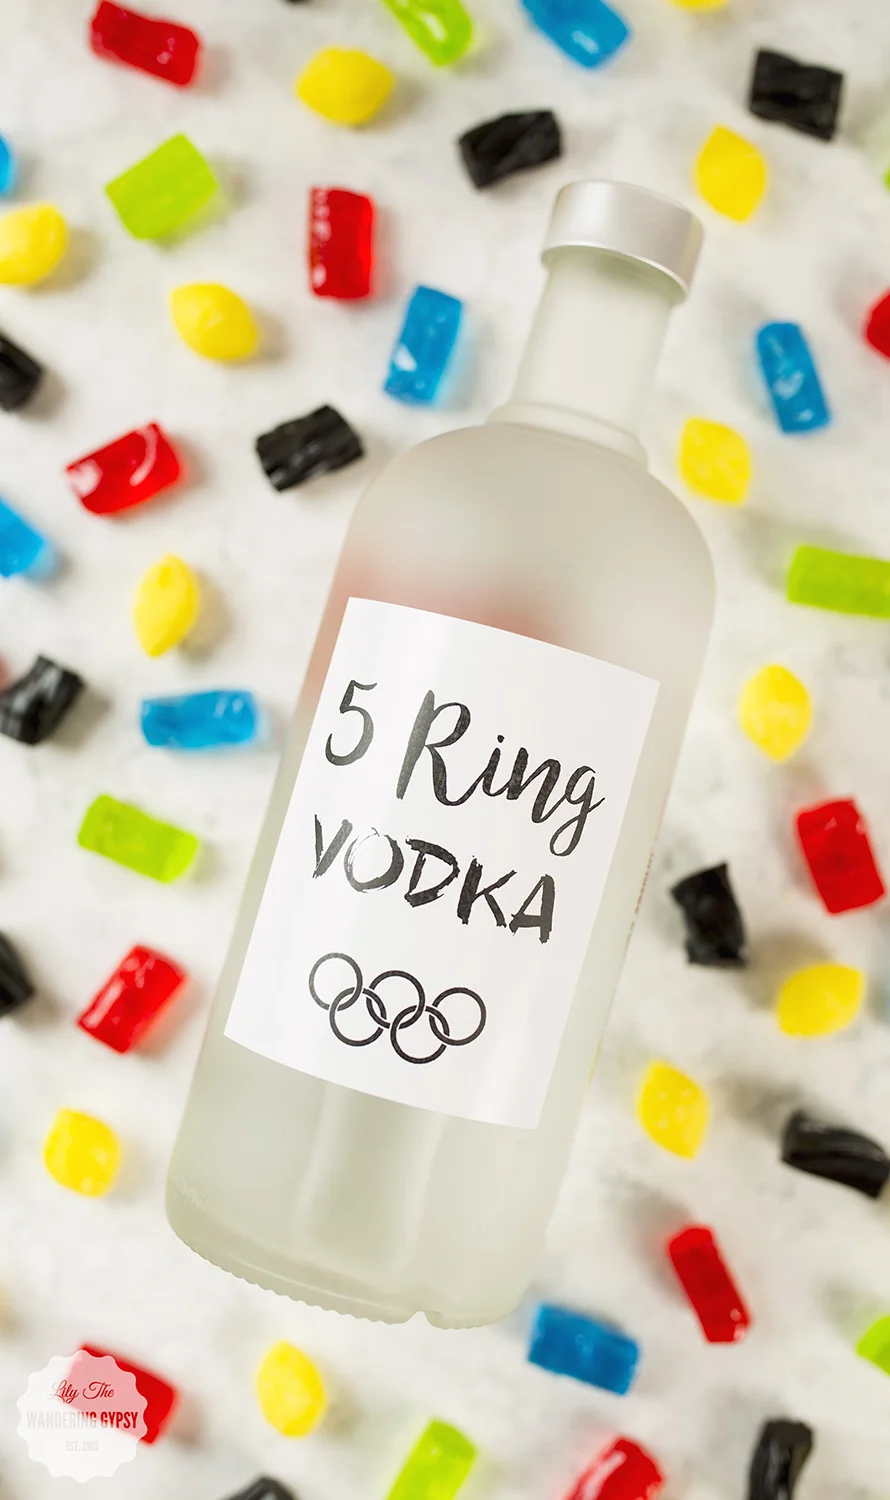
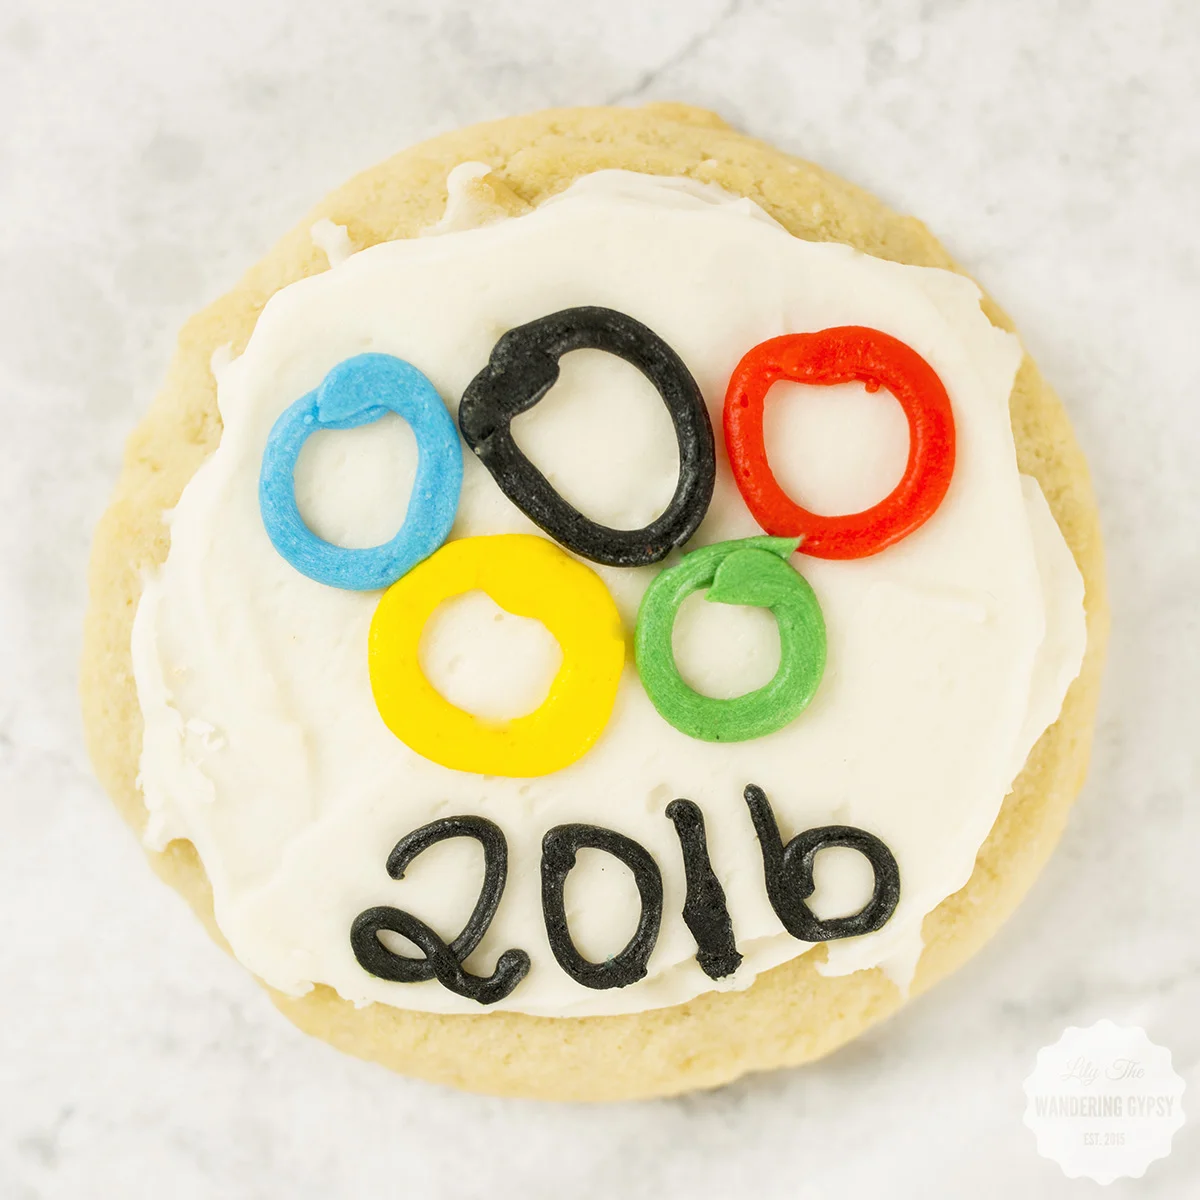
I had a blast creating these 5 flavored vodkas, inspired by the 2016 Olympics! With 5 different types of candy, I created 5 festive flavors of infused vodka, and then created a cute label for the Vodka I used. 

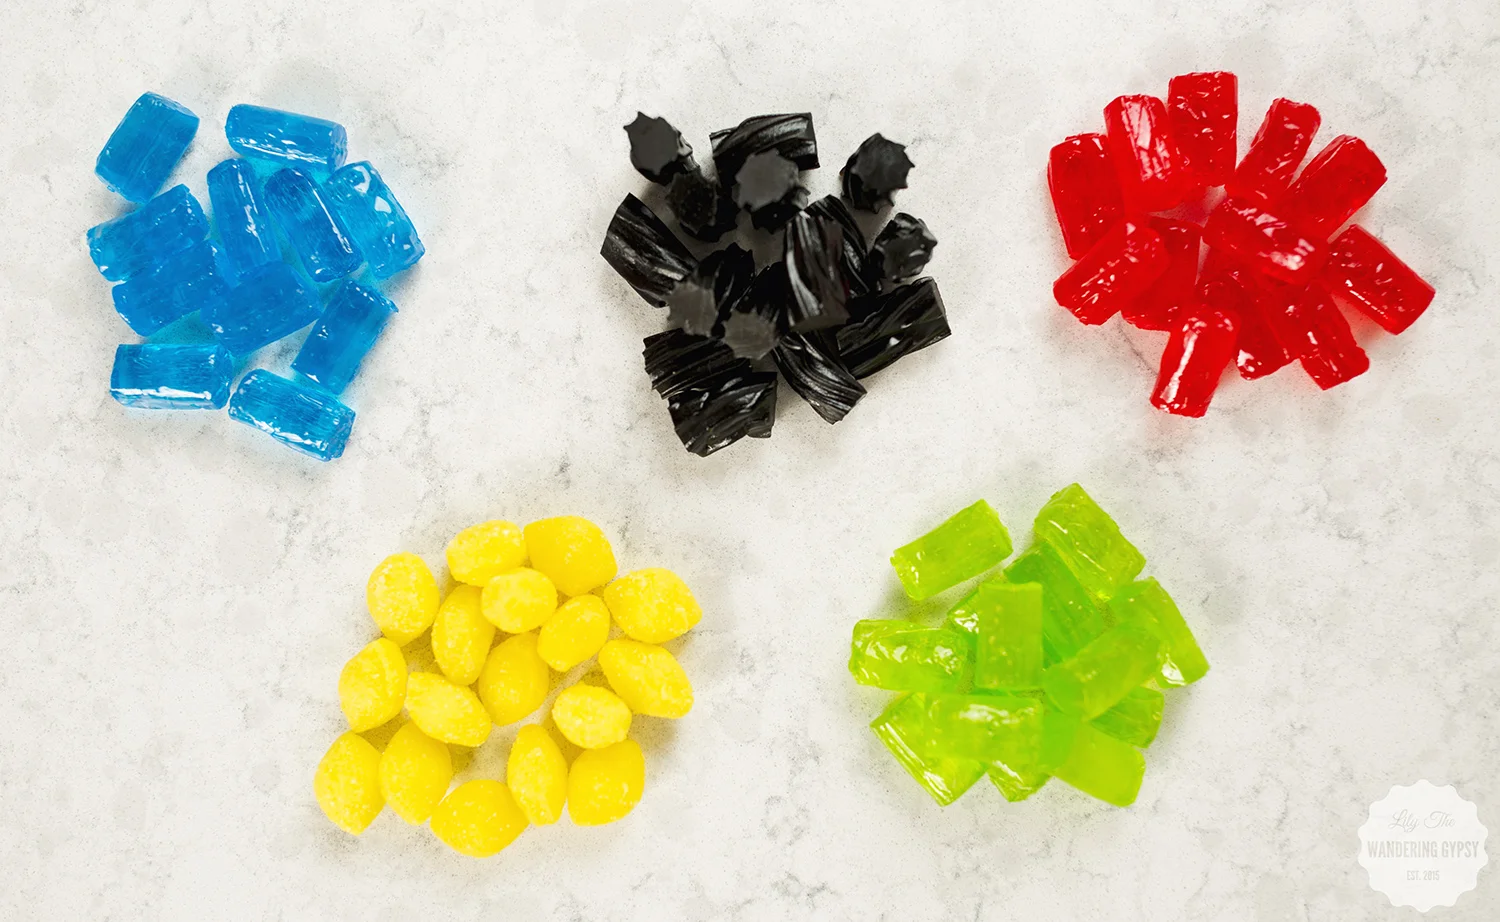
Here is how I got the 5 flavors/colors. Note, I did use a teeny bit of food coloring in the black and green flavors, but the other colors turned out so vibrant. All you have to do is to divide 1-2 bottles of unflavored vodka into 5 jars with lids. In order to really infuse the alcohol, keep these in the fridge overnight, if you can. The longer you wait, the better! I also recommend using as much candy in the jar as you can.

BLUE: Blue Jolly Ranchers - BLACK: Black Licorice + Black Food Dye - RED: Cherry Jolly Ranchers - YELLOW: Lemon Heads - GREEN: Green Apple Jolly Ranchers + Lime Green Food Coloring

You could of course customize these fun flavors and colors for college or pro sports teams, holidays, and more! Let me know if you wind up making these, I'd love to see what you create. 

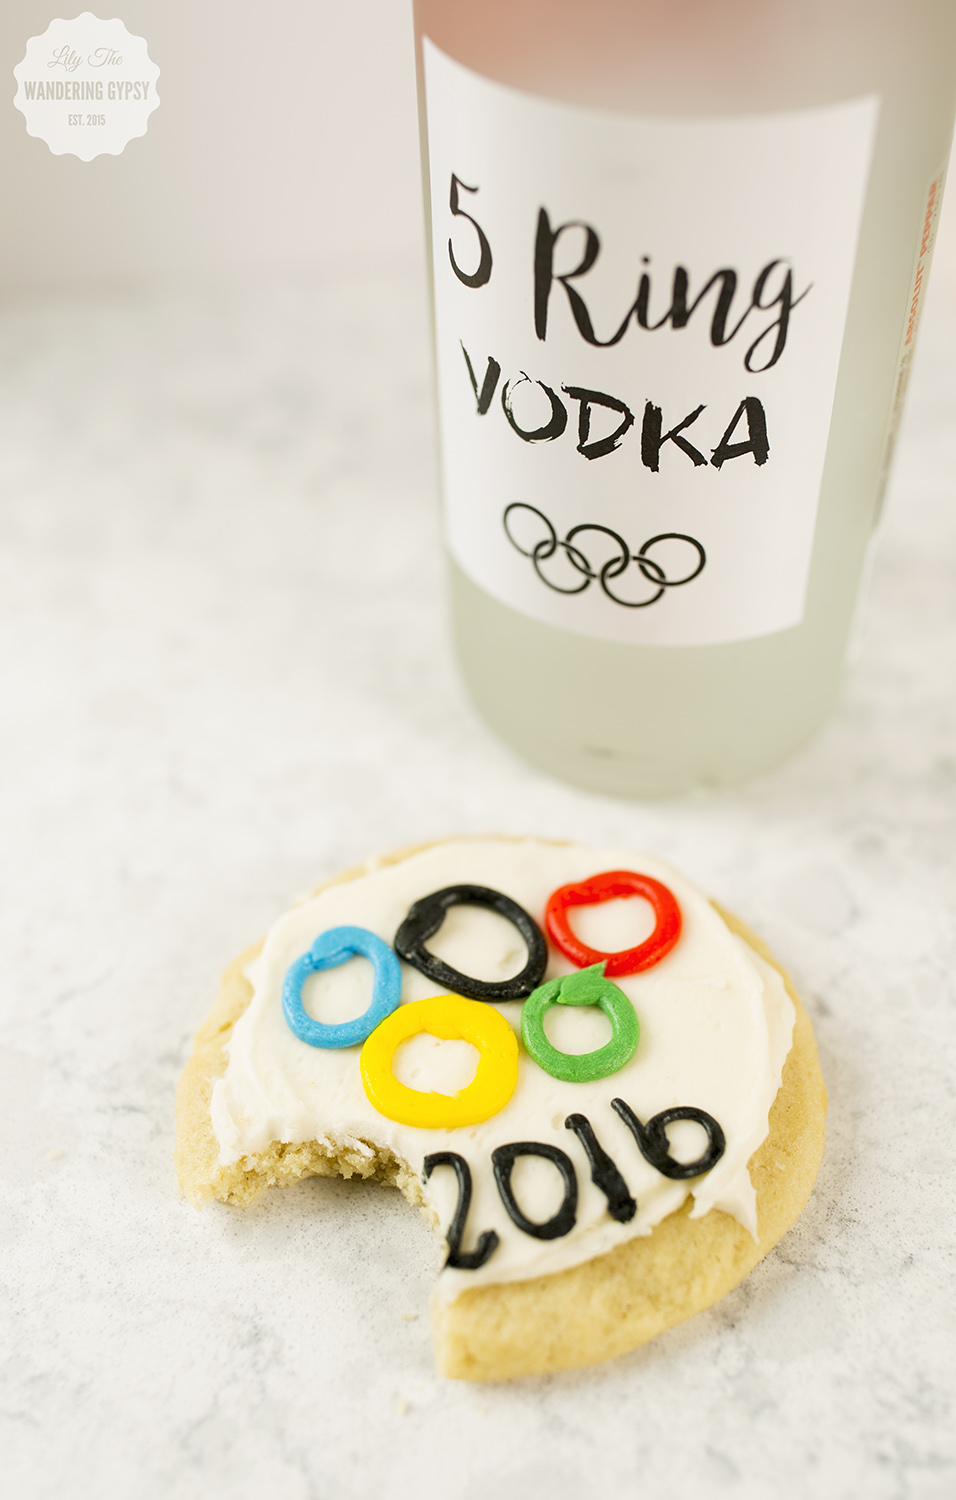
Also, I grabbed this amazingly tasty Sugar Saucer Cookie from Longbranch Cafe, my favorite restaurant in Carbondale! 

And, if you were wondering how I created the label on the bottle, I found 8.5" x 11" sticker paper at a local print shop, and printed a label I created in InDesign. I found the fonts on dafont.com - love that site! Go Team!!!

DIY Summer Fun - Washi Tape Everything!

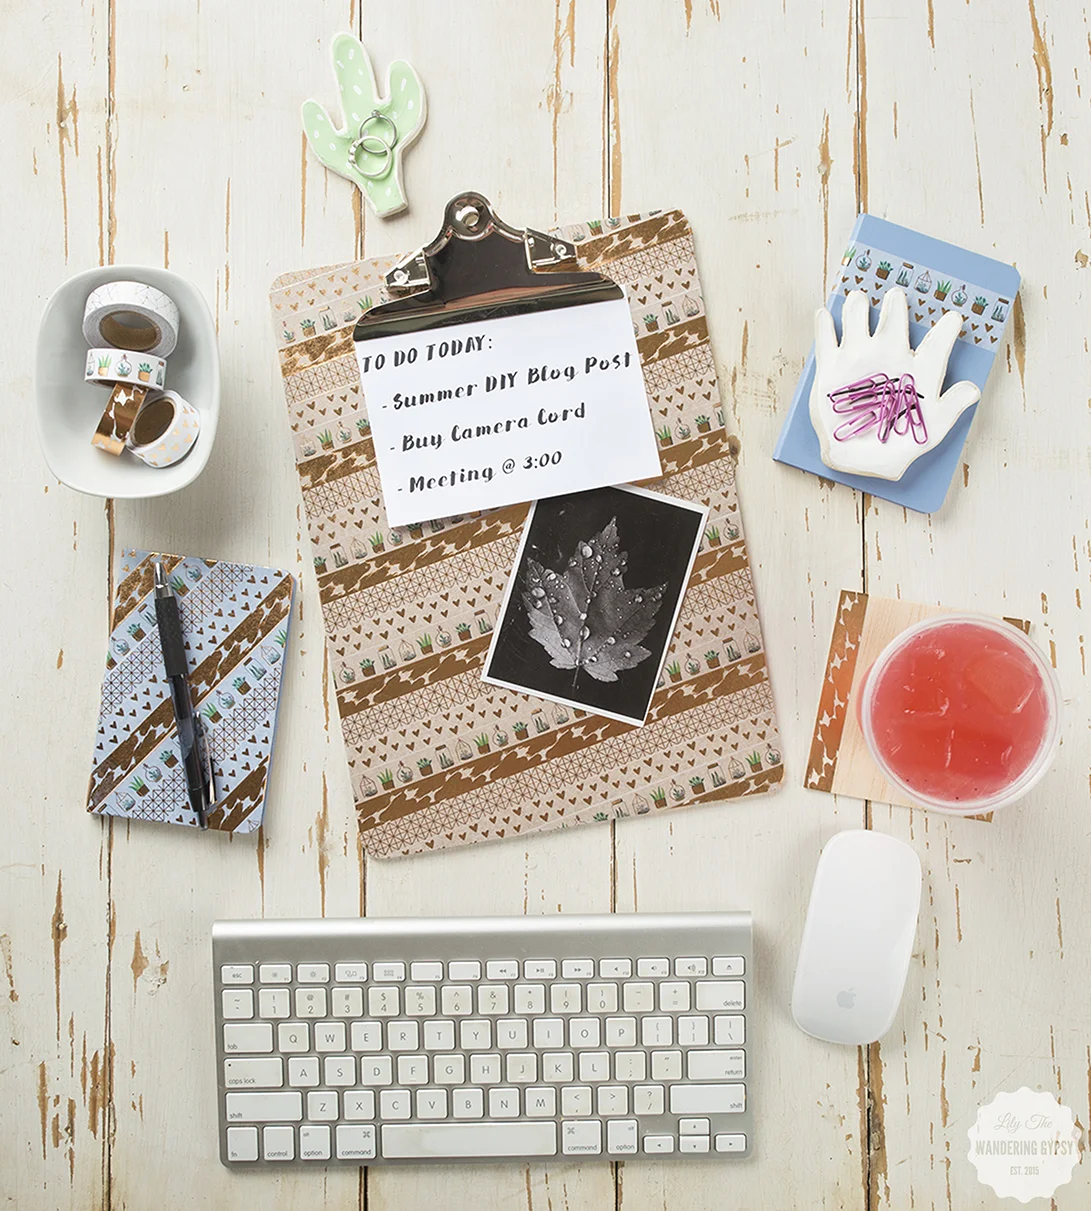
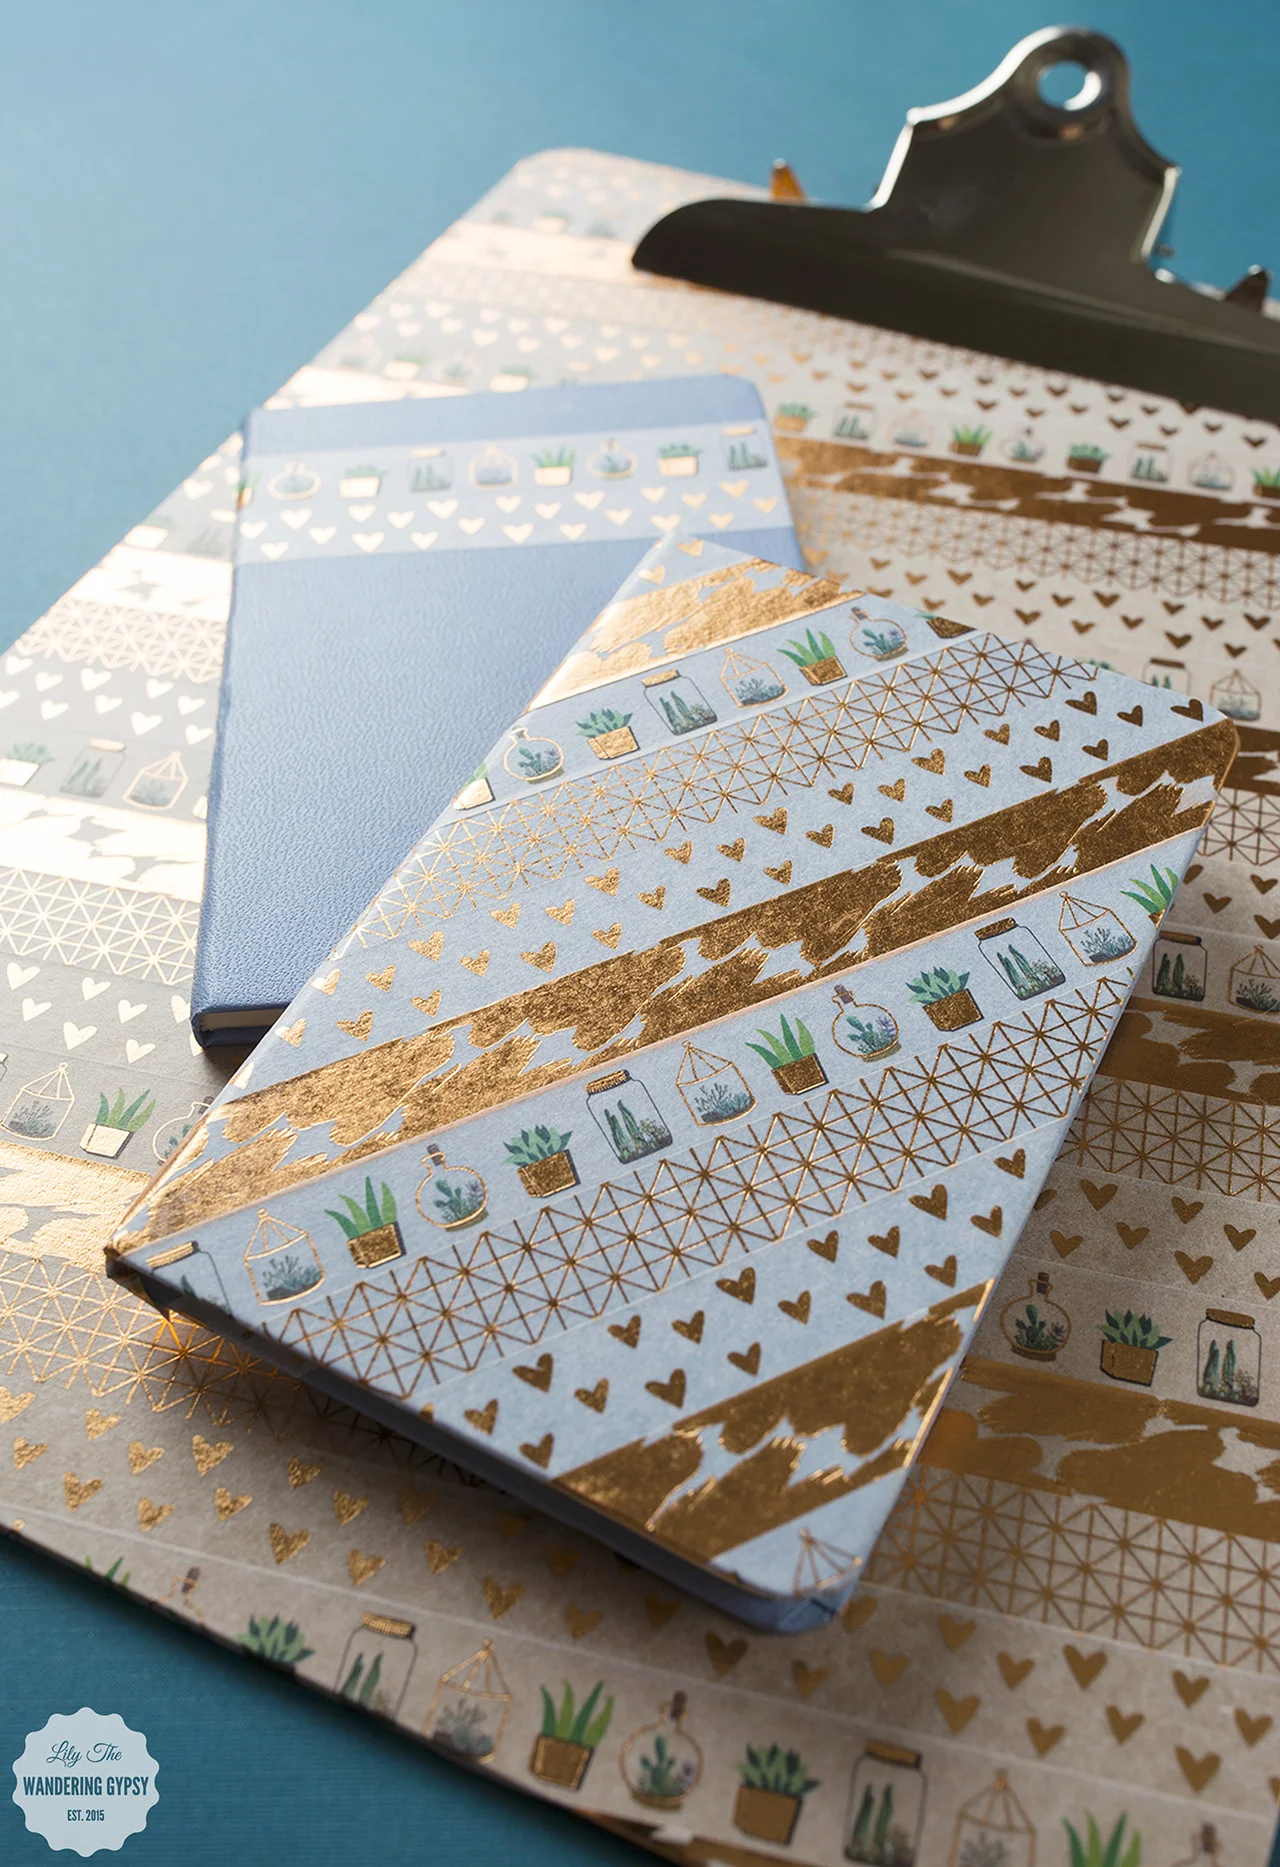
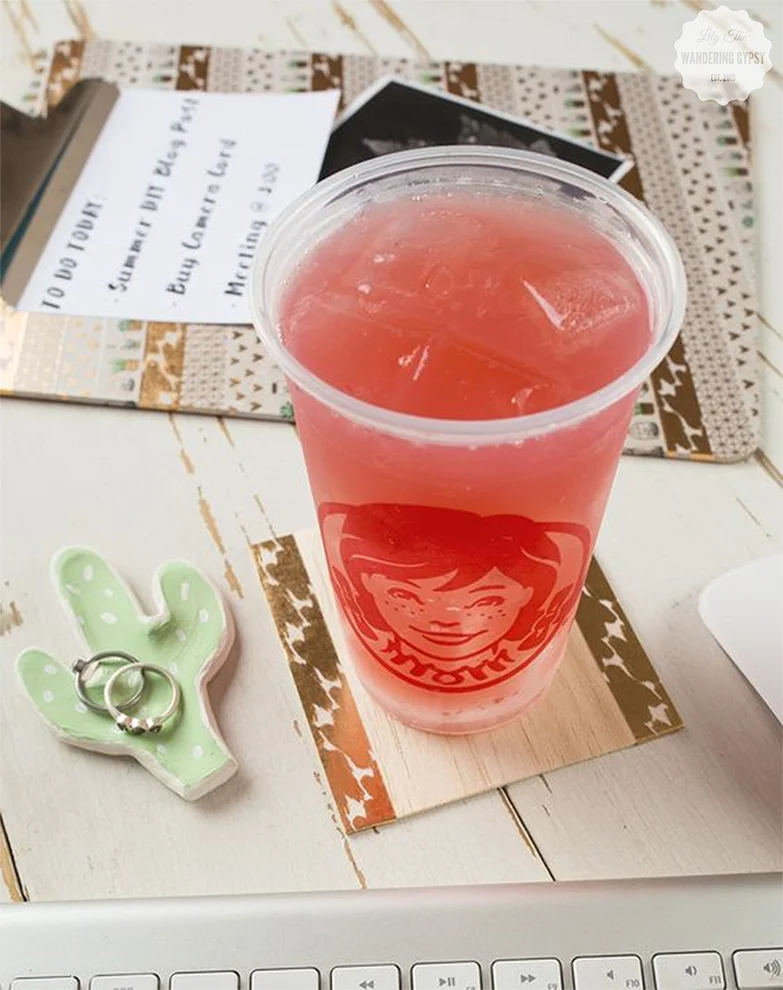
Washi Tape is here to stay, and I absolutely love it! This tape sticks to SO many surfaces, and creates an instant pop of color and a bit of whimsy to anything you adhere it to. 

Below, you will find a few items that I covered, to show you how easy it is to update just about anything on your desk and around your home!

I created these photos for a fun campaign that I helped share for Wendy's Blackberry Lemonade. I loved creating this DIY project for such a well-known brand! 

I covered an assortment of items, including: A clip board, wooden utensils, blank journals, and paper gift bags! Seriously, this project was SO fun!!!


DIY Summer Fun - Pineapple Gift Boxes

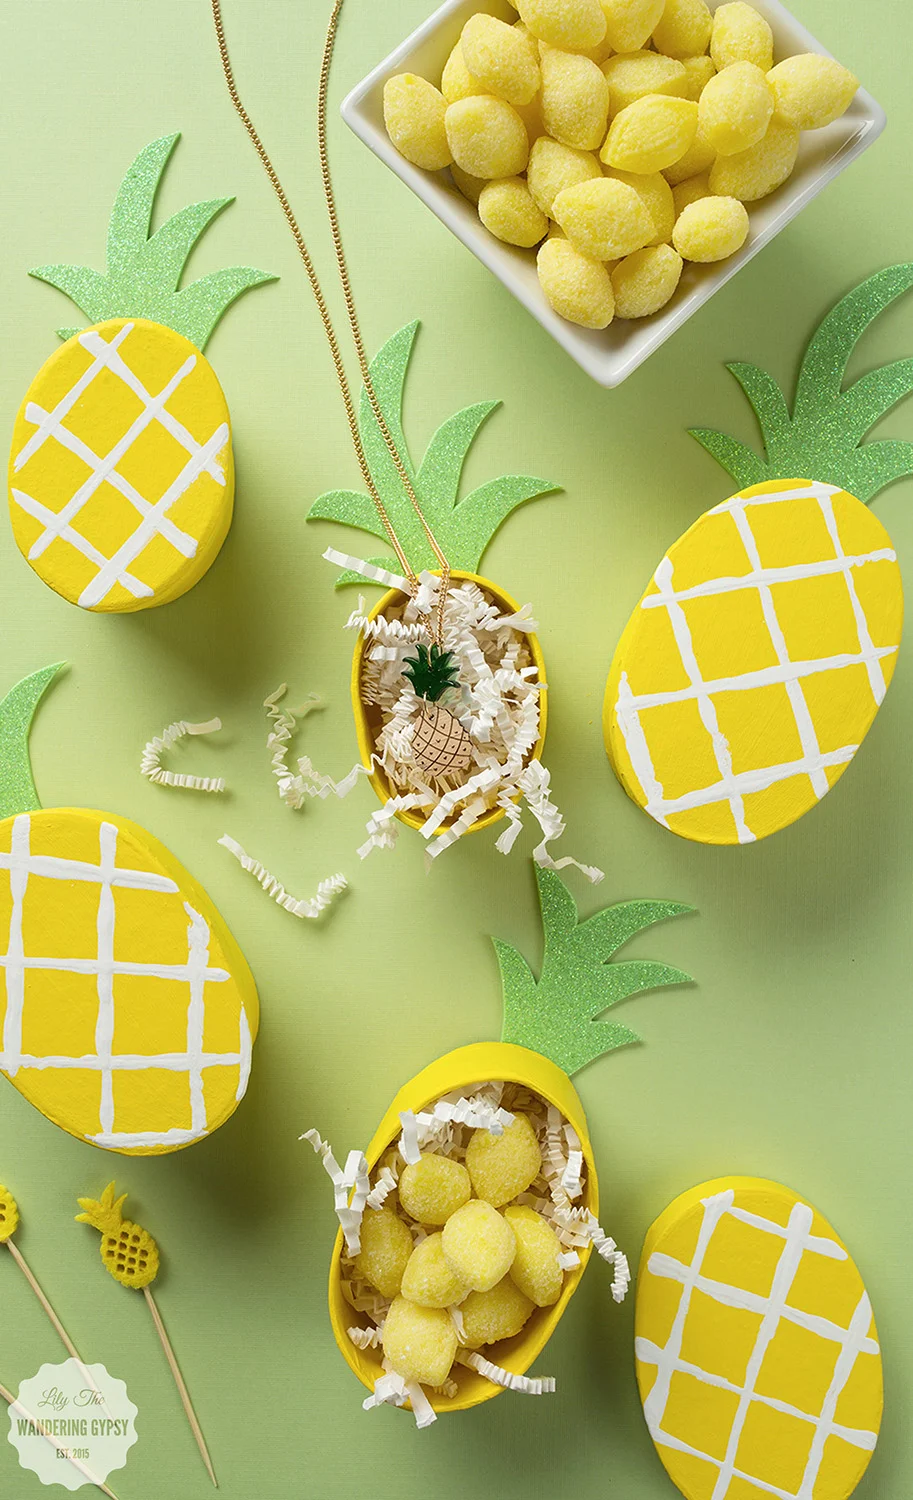
There's no doubt that it's summer, why not embrace it and make something cute inspired by tropical breezes (wishful thinking), and pineapples! Why not make someone smile by creating a gift box that is a present in itself. I made this project a little while back in order to help Wendy's to help promote their Blackberry Lemonade. It was just the right amount of tart and sweet, wrapped up into one pretty drink! What will you be making and gifting this summer?

This post was totally inspired by the amazingly awesome blog, Damask Love

- Oval-shaped Paper Mache Boxes 

- Yellow Paint, White Paint

- Paint Brush (to paint over entire box)

- Wooden Skewer Sticks (to paint white marks on boxes)

- Paint Brush

- Mint Green Sparkle Foam Sheet 

- Glue

- Gift Items or Candy to fill boxes

1.) Cover your work surface, and paint your boxes yellow. I used 2 coats, but they dried pretty quickly.

2.) Make sure your yellow paint is 100% dry, then with a skewer stick, draw/paint the lines onto the boxes. I basically put the white paint onto a paper plate, then laid the skewer sticks down, covered the end in paint, then drew the lines across the boxes. This helps you create super straight lines, too!

3.) Now, cut out your green top parts. Feel free to print the photo, below, to get the right shapes. I just sort of free-handed one, and traced it on the non-glitter side of the foam. These were so easy to cut out! 

4.) Now, simply glue the little green top pieces onto the boxes, and you're done!! Fill them with paper shreds, and whatever your heart delights! 

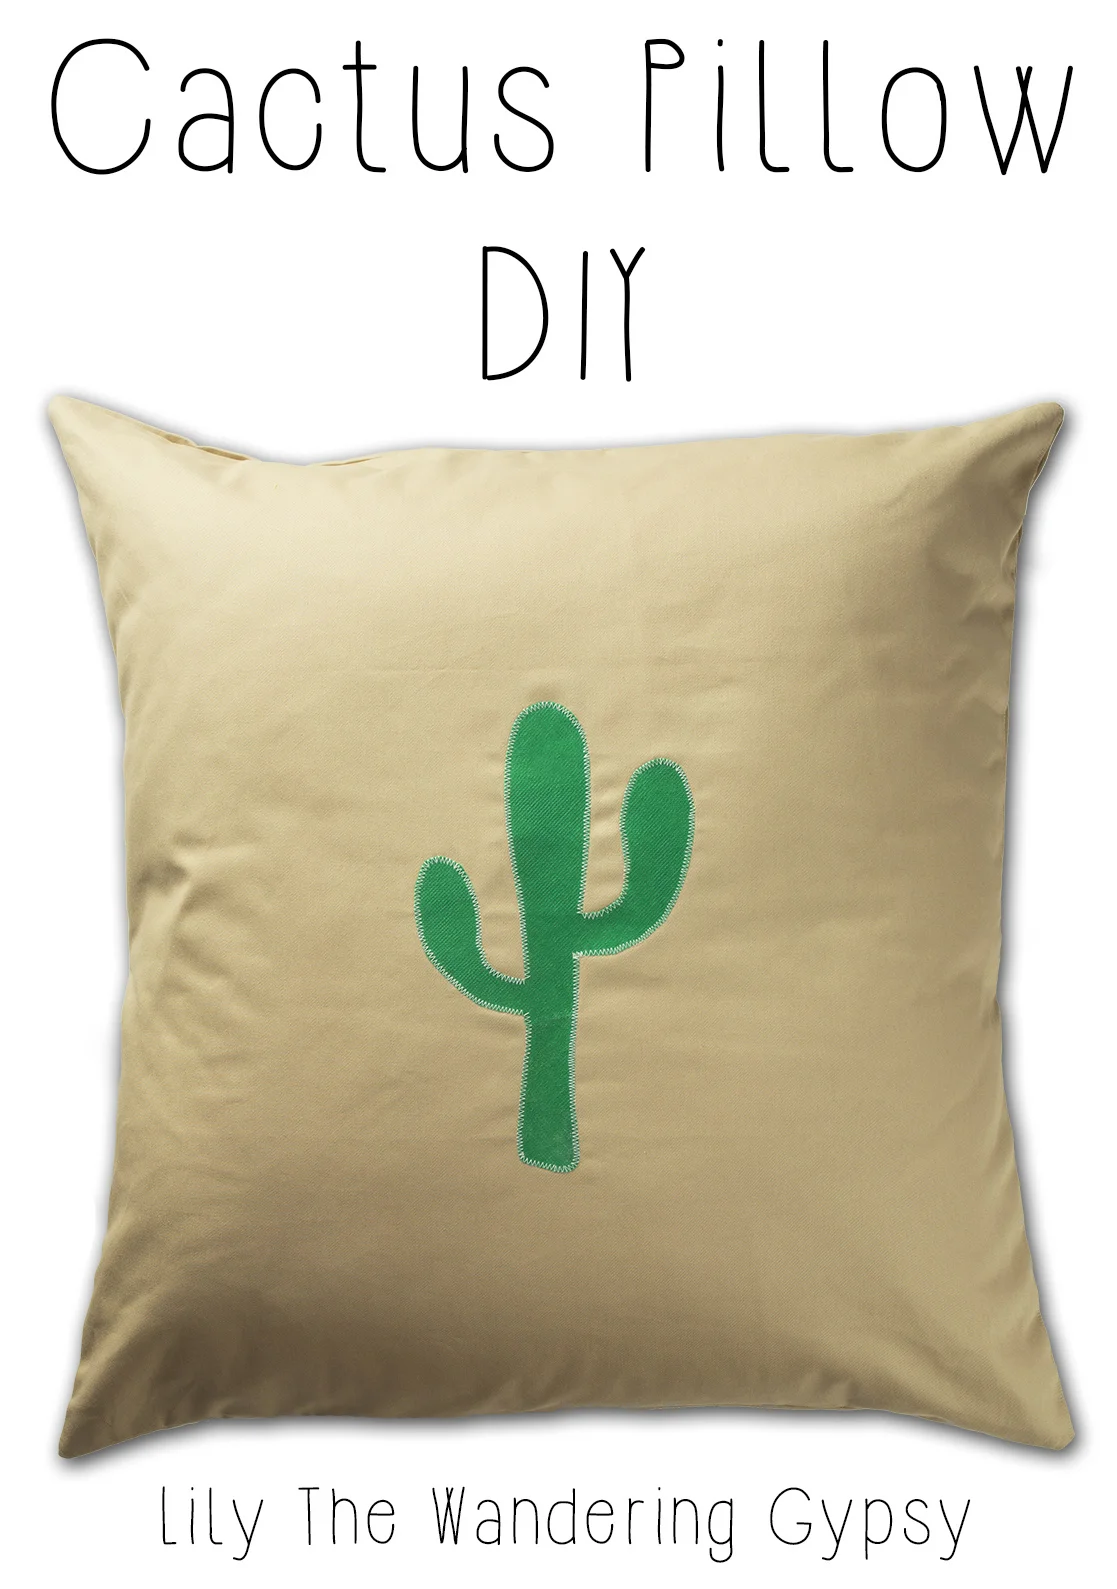
Cactus Pillow DIY

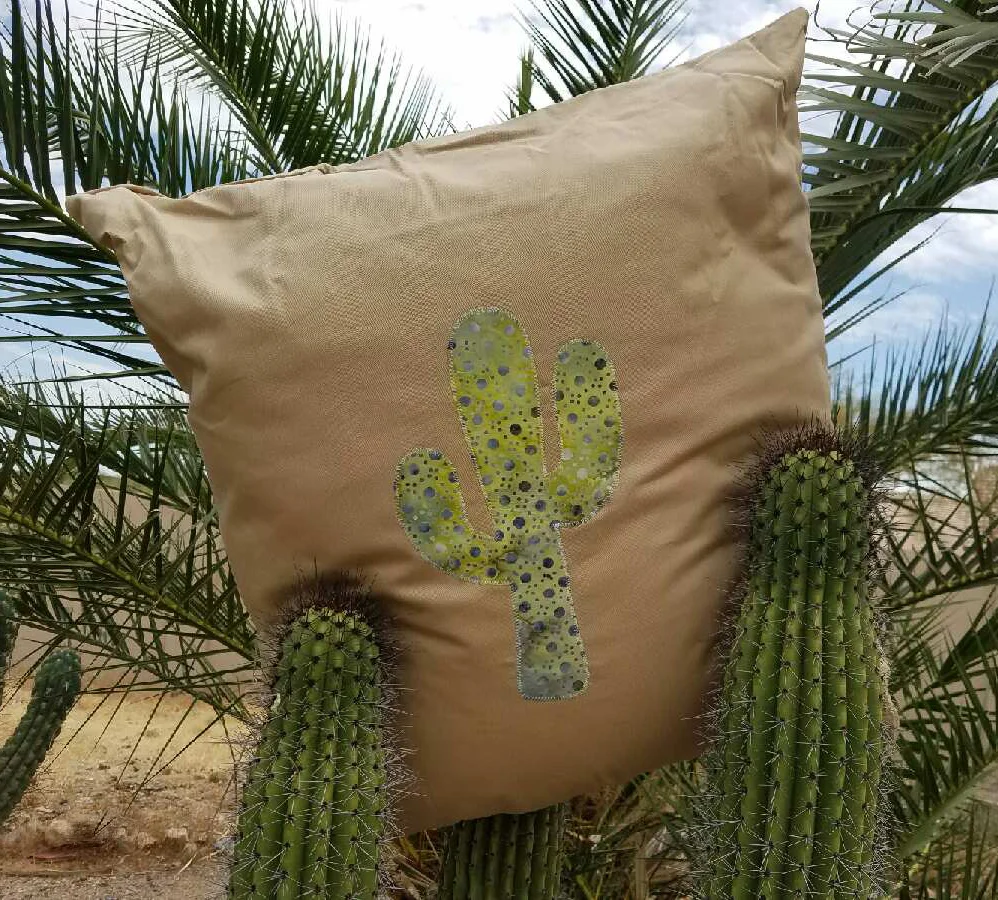
This is an amazingly awesome DIY project! Perfect to make for yourself, or to give to someone else. In this tutorial, I used a pillow form from an existing pillow (which was cheaper than buying a pillow insert by itself! I got a pillow that was on super sale at Hobby Lobby - I thought that was pretty great! 

My Step Mom was kind enough to take photos of a similar pillow, that I sent to my dad for Father's Day

MATERIALS NEEDED:

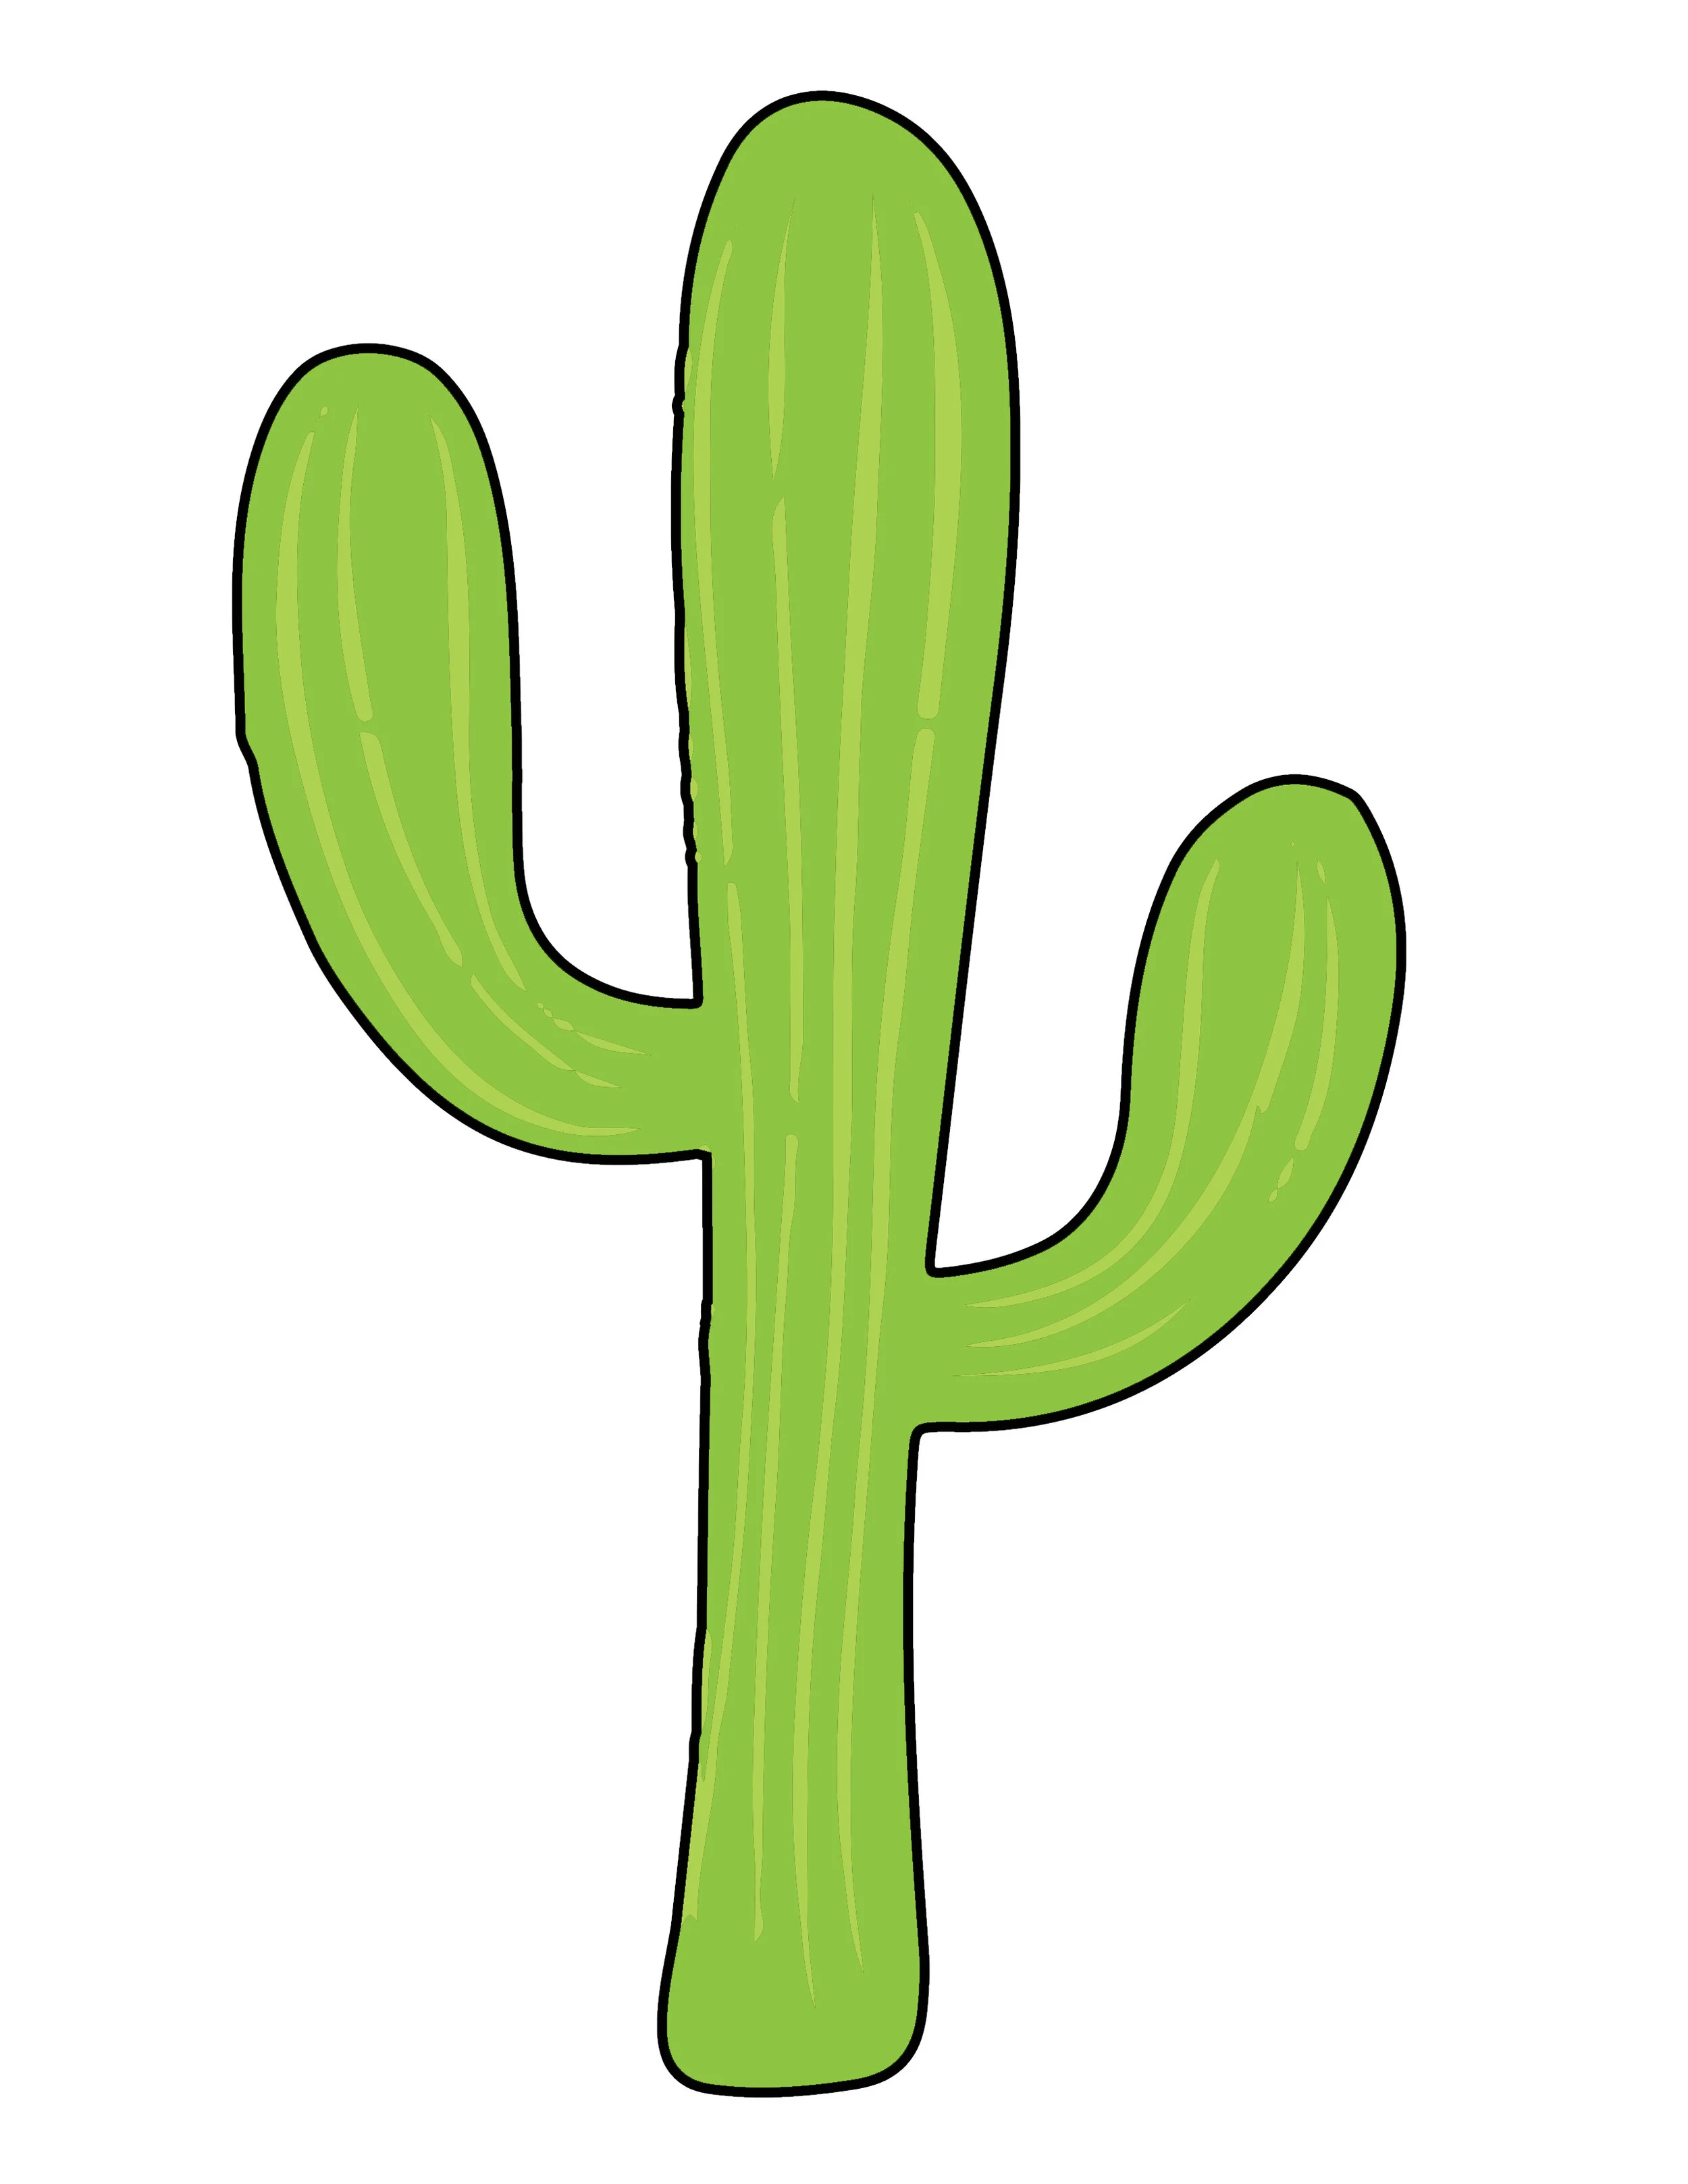
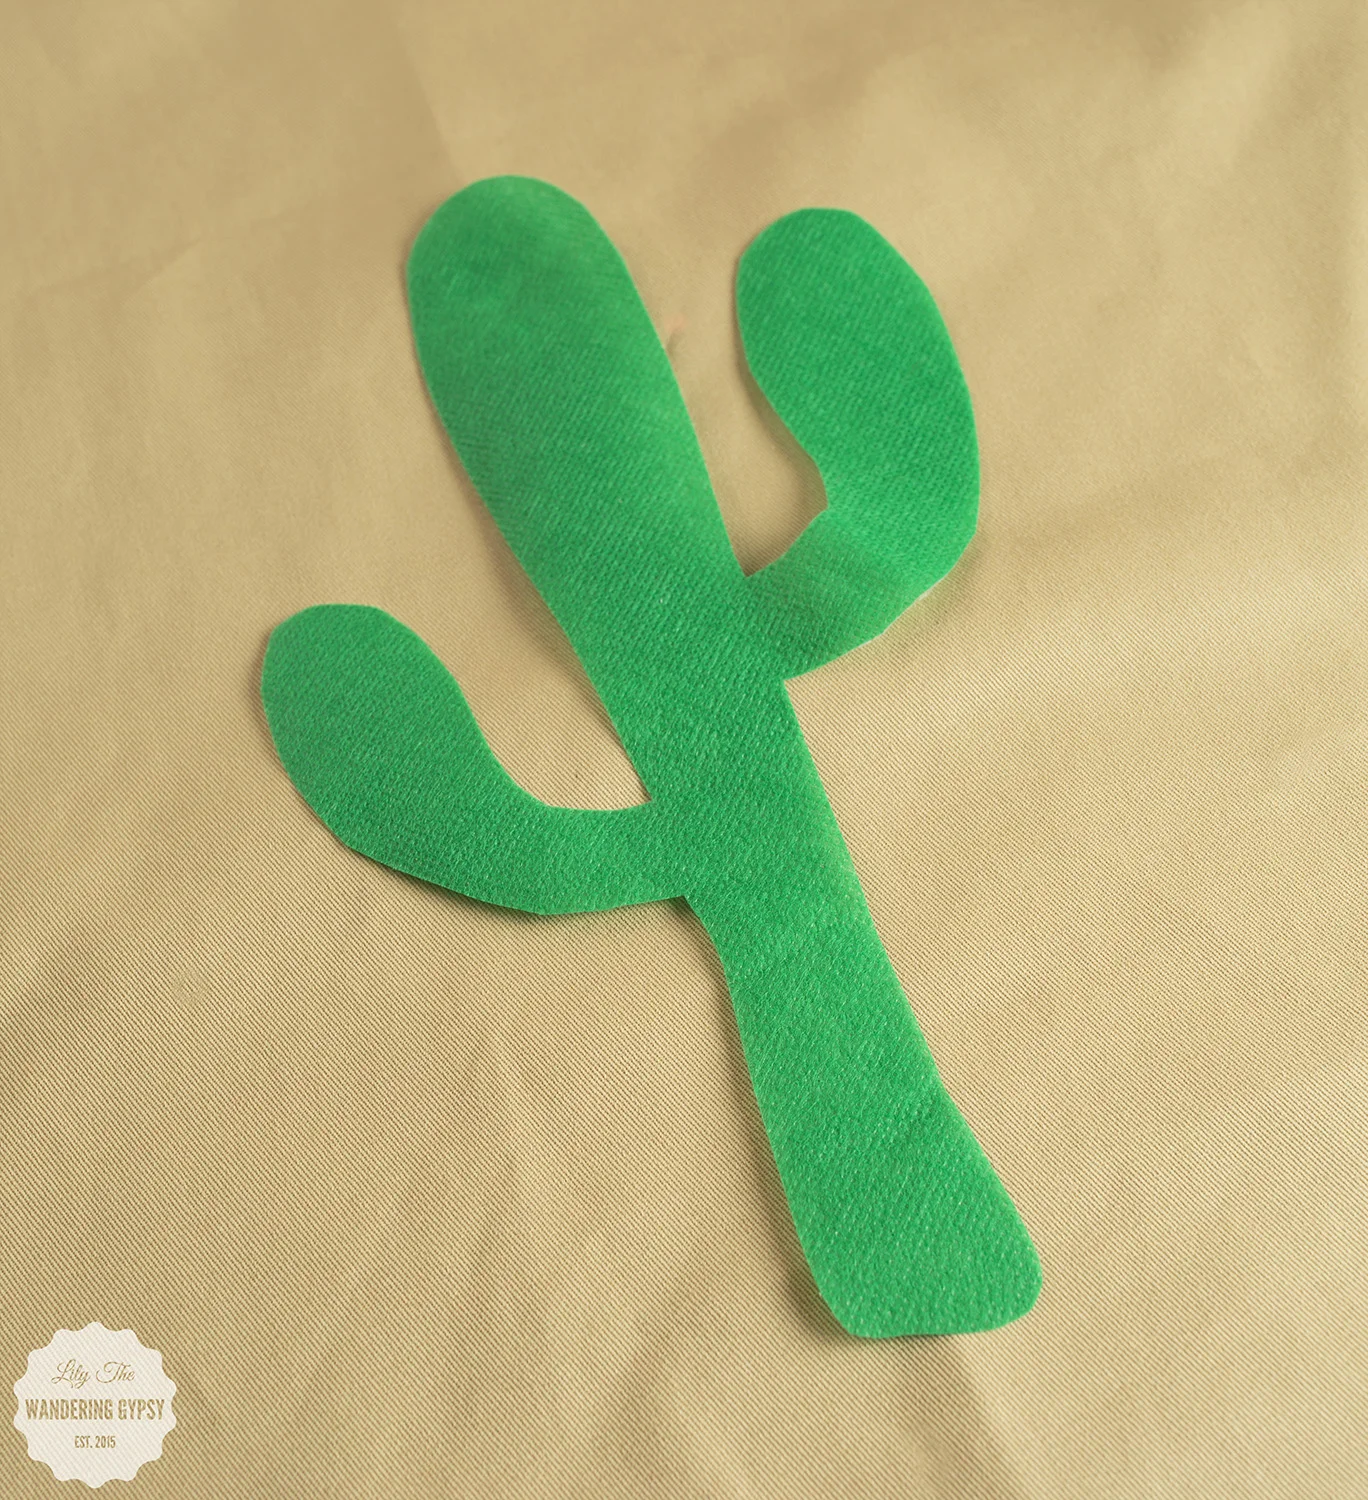
Right click this image to save it, then print at 100%.

- Pillow Form

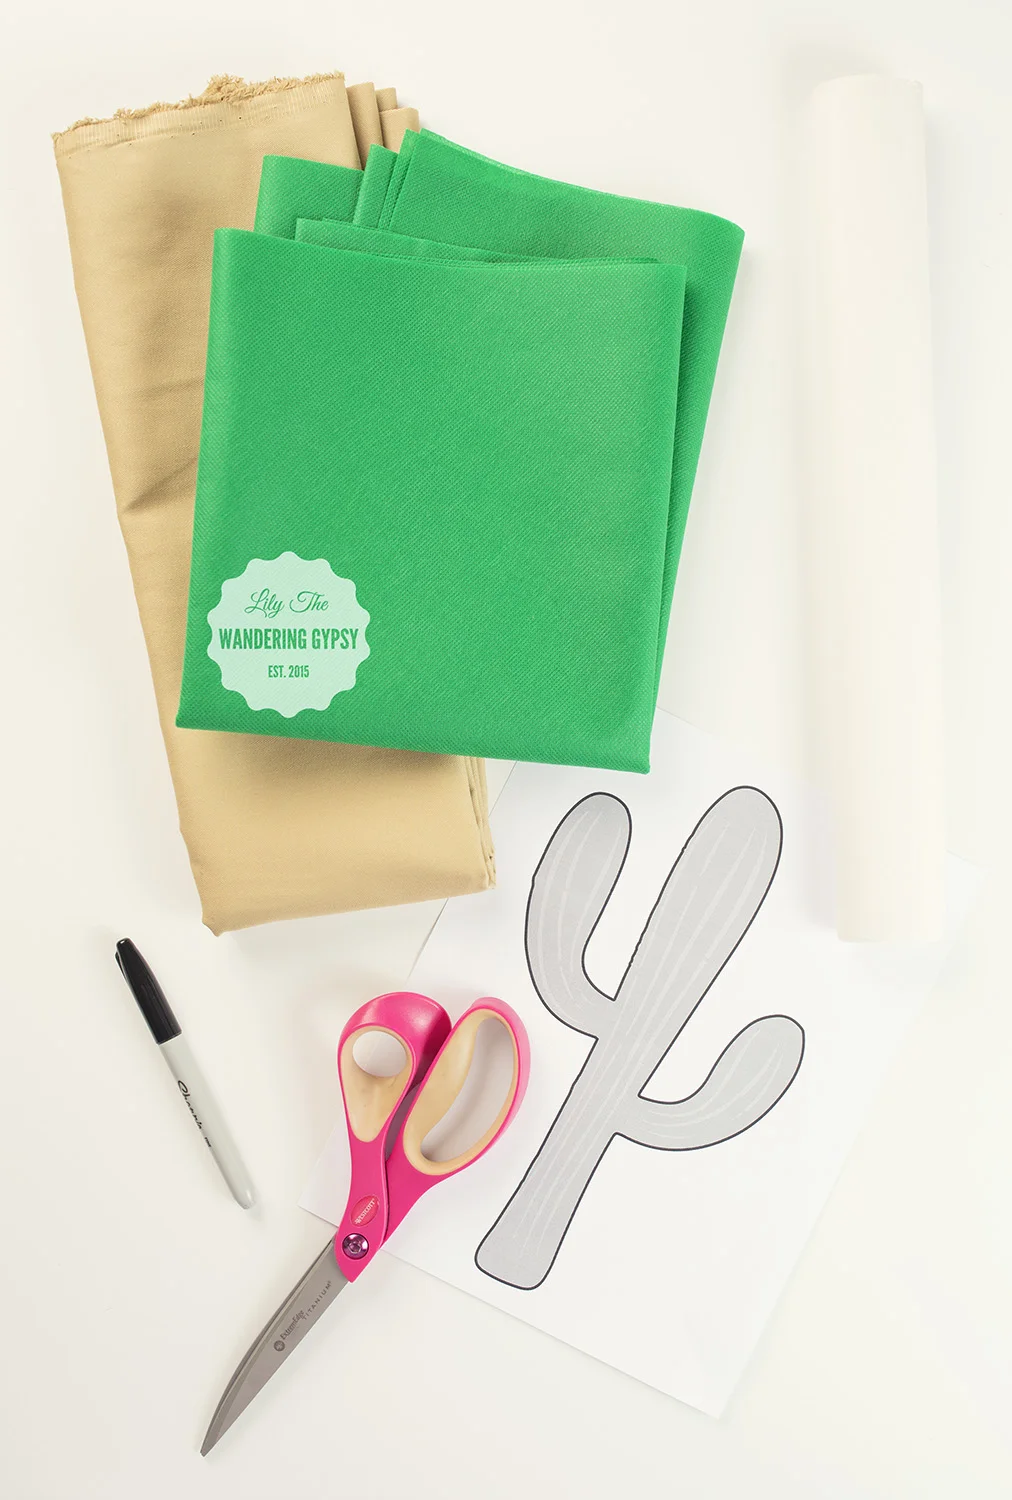
- Solid Tan Canvas (or similar) material That will cover your pillow 1.5 times (I will explain below)

- Green Cotton Fabric (for cactus) - Note - Only 100% Cotton Material works, because you will be ironing it. 

- Fusible Webbing (the only kind I would EVER suggest would be Heat N Bond Lite Iron-On Adhesive. It's hard to see, but it's the paper-like material in the top right of the image, right. 

- Iron + Ironong Board

- Sewing Machine, Thread, Scissors

- Printed out image of cactus, right. 


INSTRUCTIONS:

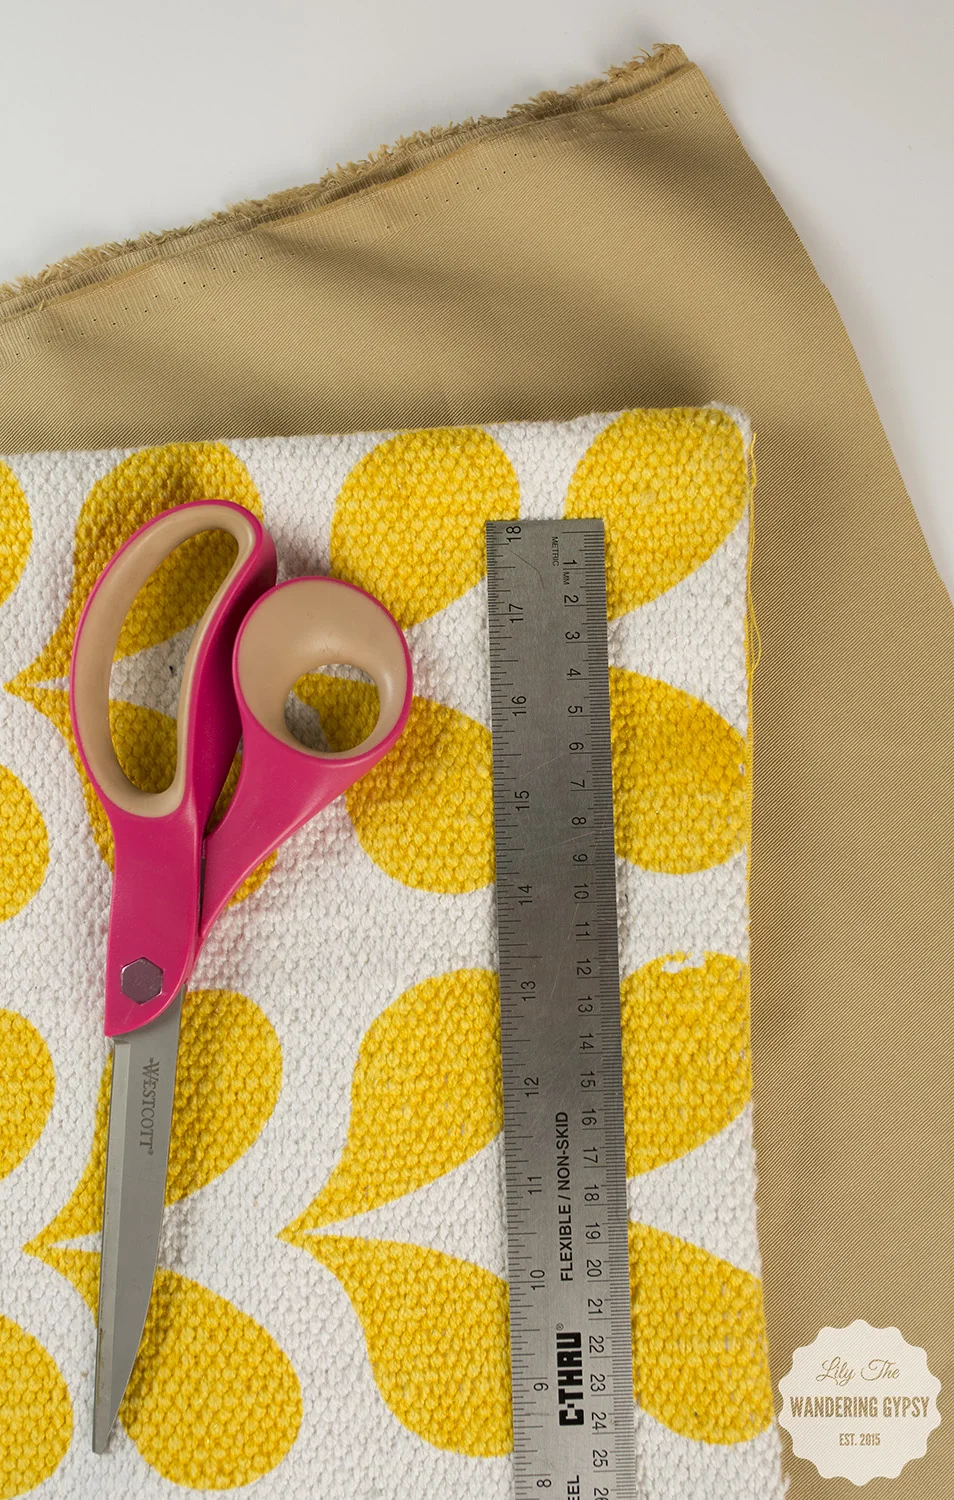
1.) Iron canvas material if needed. Remove pillow case from pillow form, and lay it down onto the canvas fabric. Cut one piece the exact same shape as the pillow case - this will be the front of your pillow. Alternately, measure your pillow form, and use those measurements instead. 

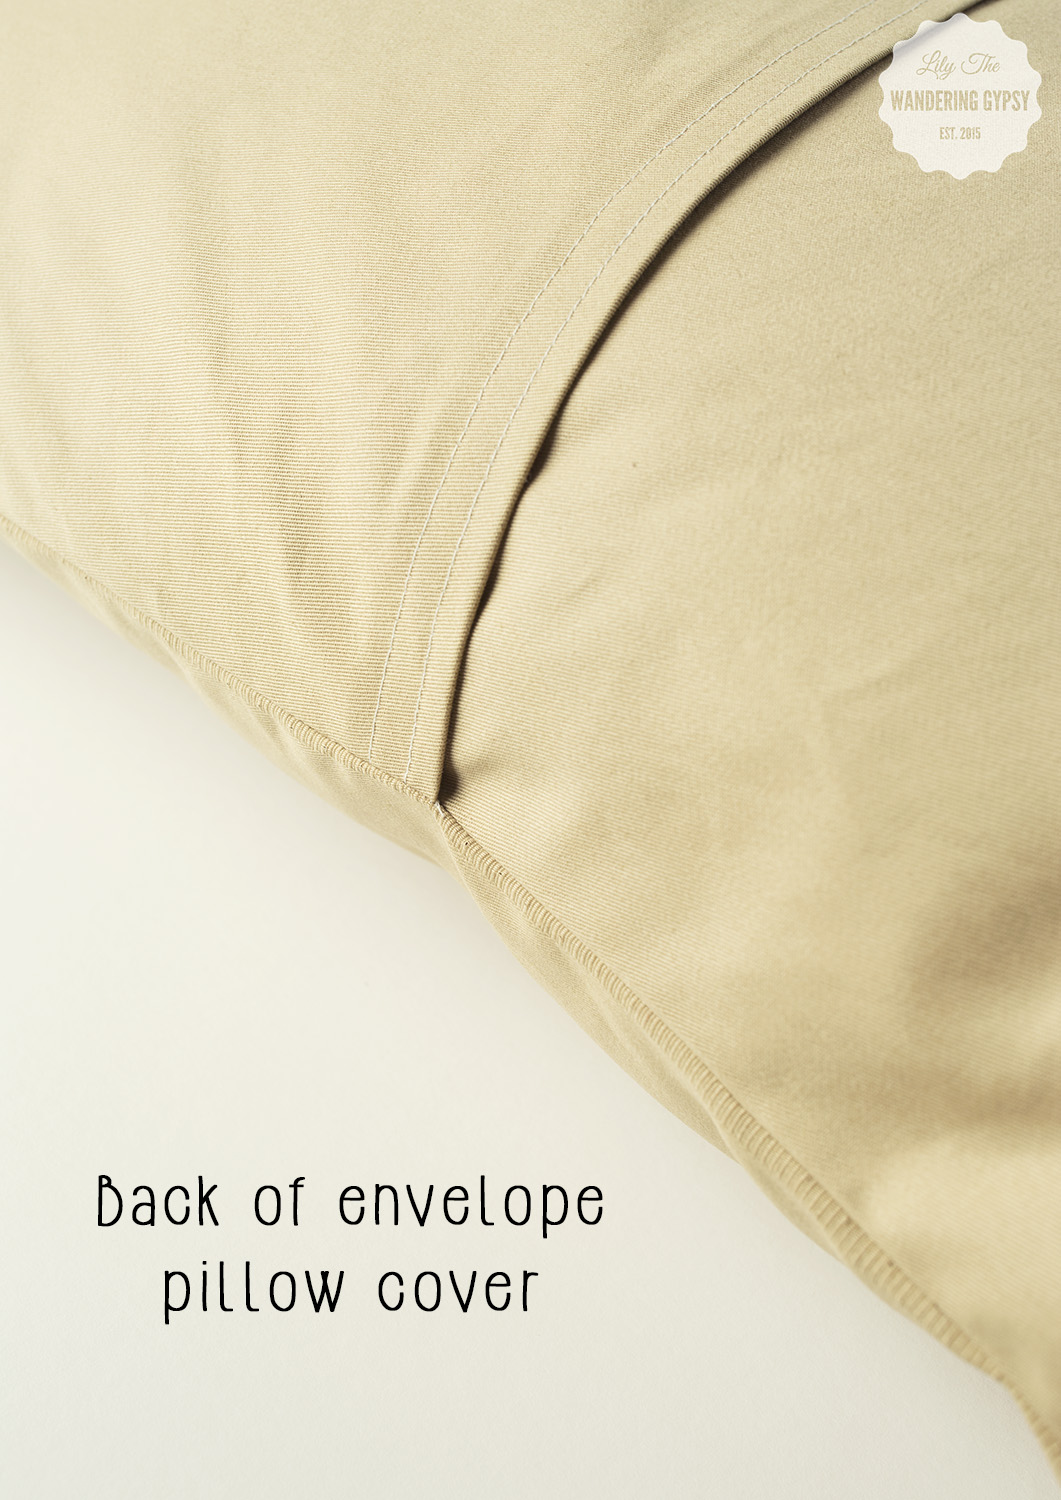
- Next, to cut the back part of the pillow, you need two pieces to create the envelope flaps. 

- Using the same width as the front piece, cut a second piece of fabric about 1.5 times the length of the front piece. For instance - if my front piece measured 10" x 10", my second fabric piece would measure 10" x 15".

- Cut the long piece into two pieces, a bit off center, so one piece is longer then the other by a few inches. 

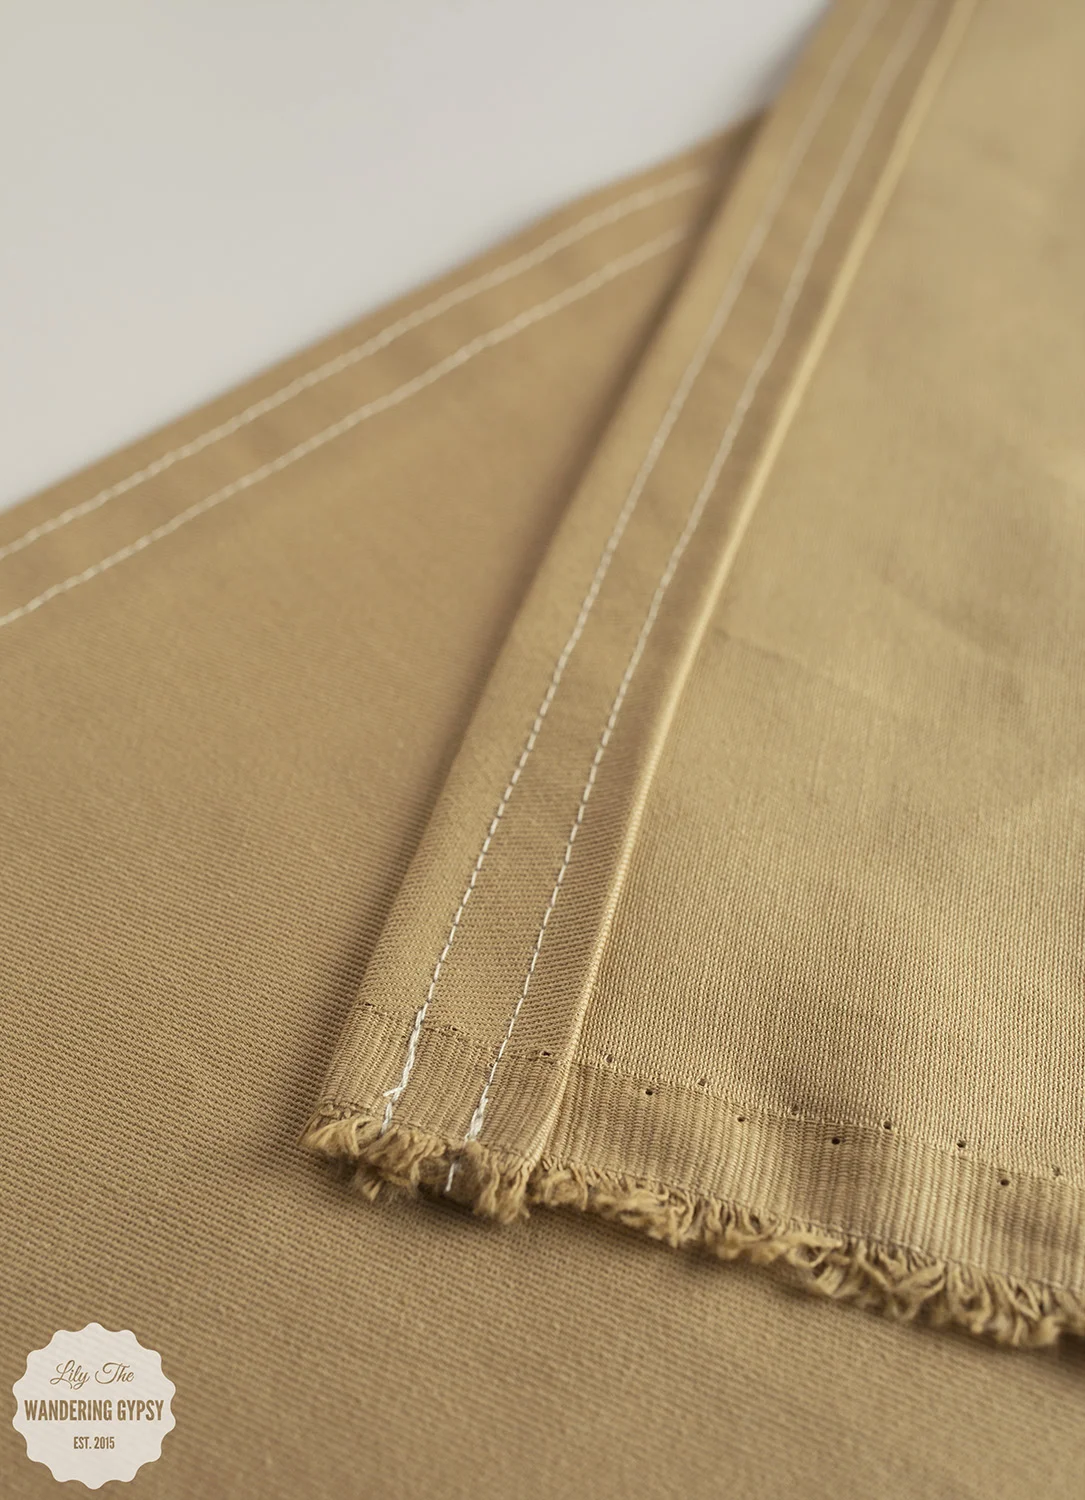
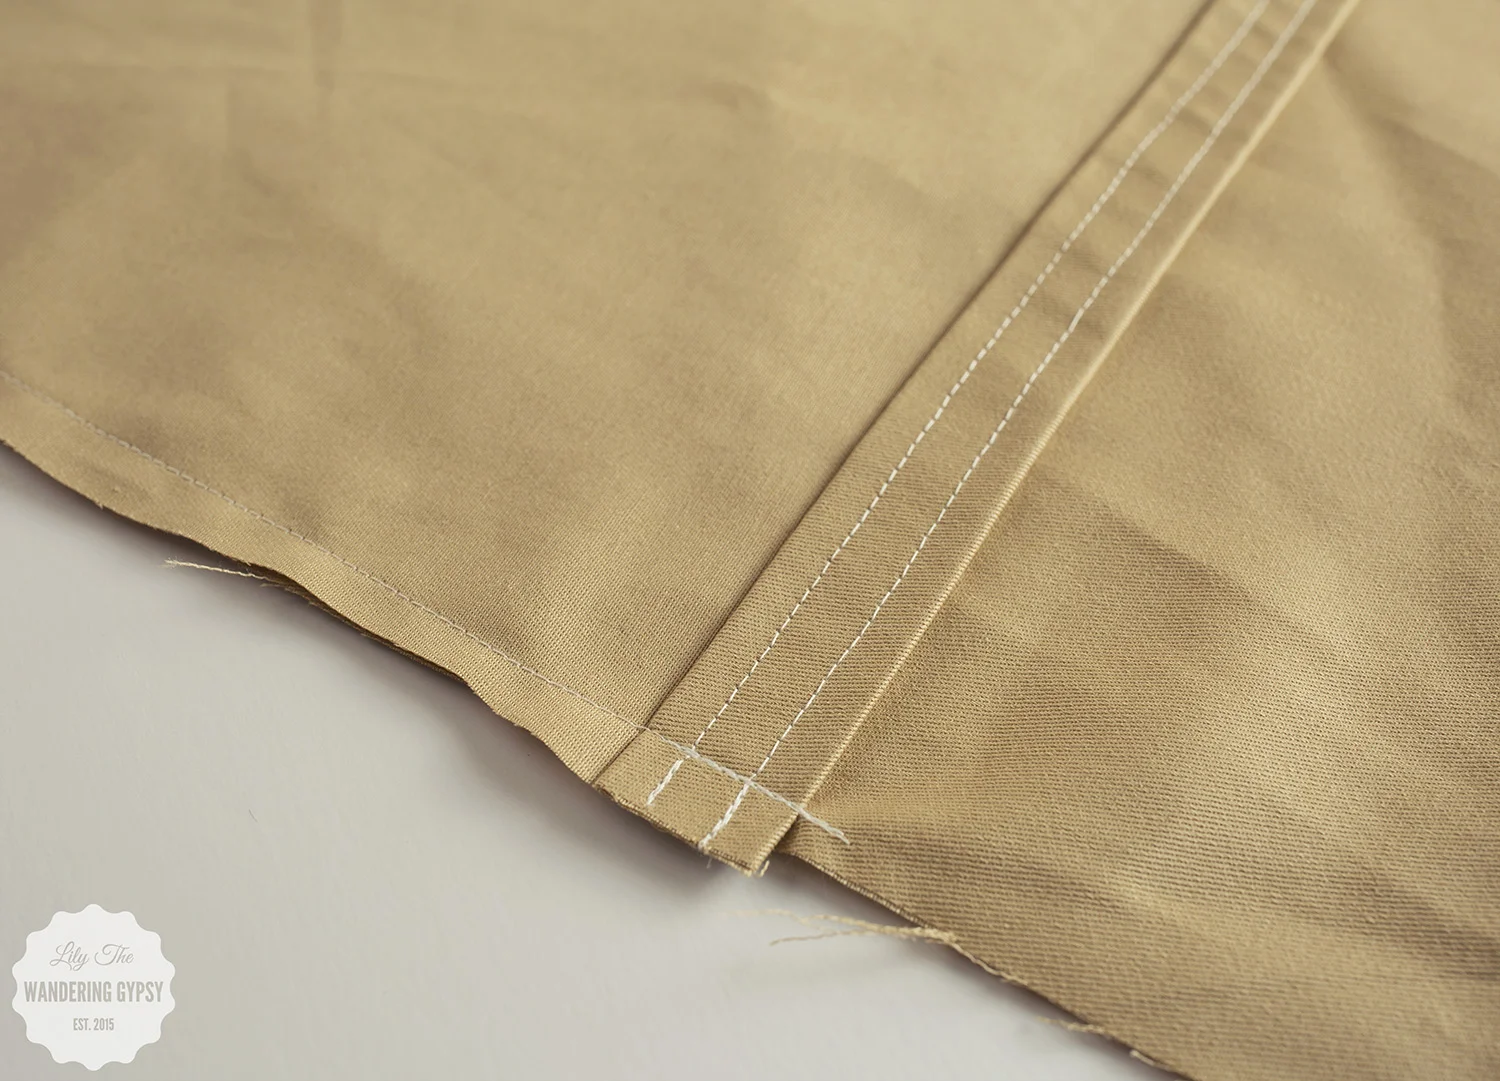
2.) Next, you will create a nice hem line for the two back pieces. With an iron, fold down one edge of each piece (going horizontally), over twice. This will create a nice finished edge. Sew the hem line down a couple of times to secure it. Iron again, if you want. 

3.) Now, let's make an applique!! 

- Trace the cactus shape onto the paper/smooth side of the fusible webbing material with a permanent marker.

- Cut out the cactus shape you drew, and iron it onto the green fabric. Like I mentioned before, only 100% cotton can be used for this! The green material I chose wound up being 10% polyester and got stuck to my iron, and melted! No fun!

- Cut out the cactus shape you ironed onto the green fabric, and peel the paper backing off of the shape. One trick I use, is to slightly score the paper backing, to start the "peeling" process :) 


4.) Time to iron on the cactus. Fold the front piece of tan material in half and then half again, to find the center. Use this to line up your cactus shape. Then, iron the shape onto the front of the fabric. Iron the whole piece of fabric, and get ready to sew on the applique!

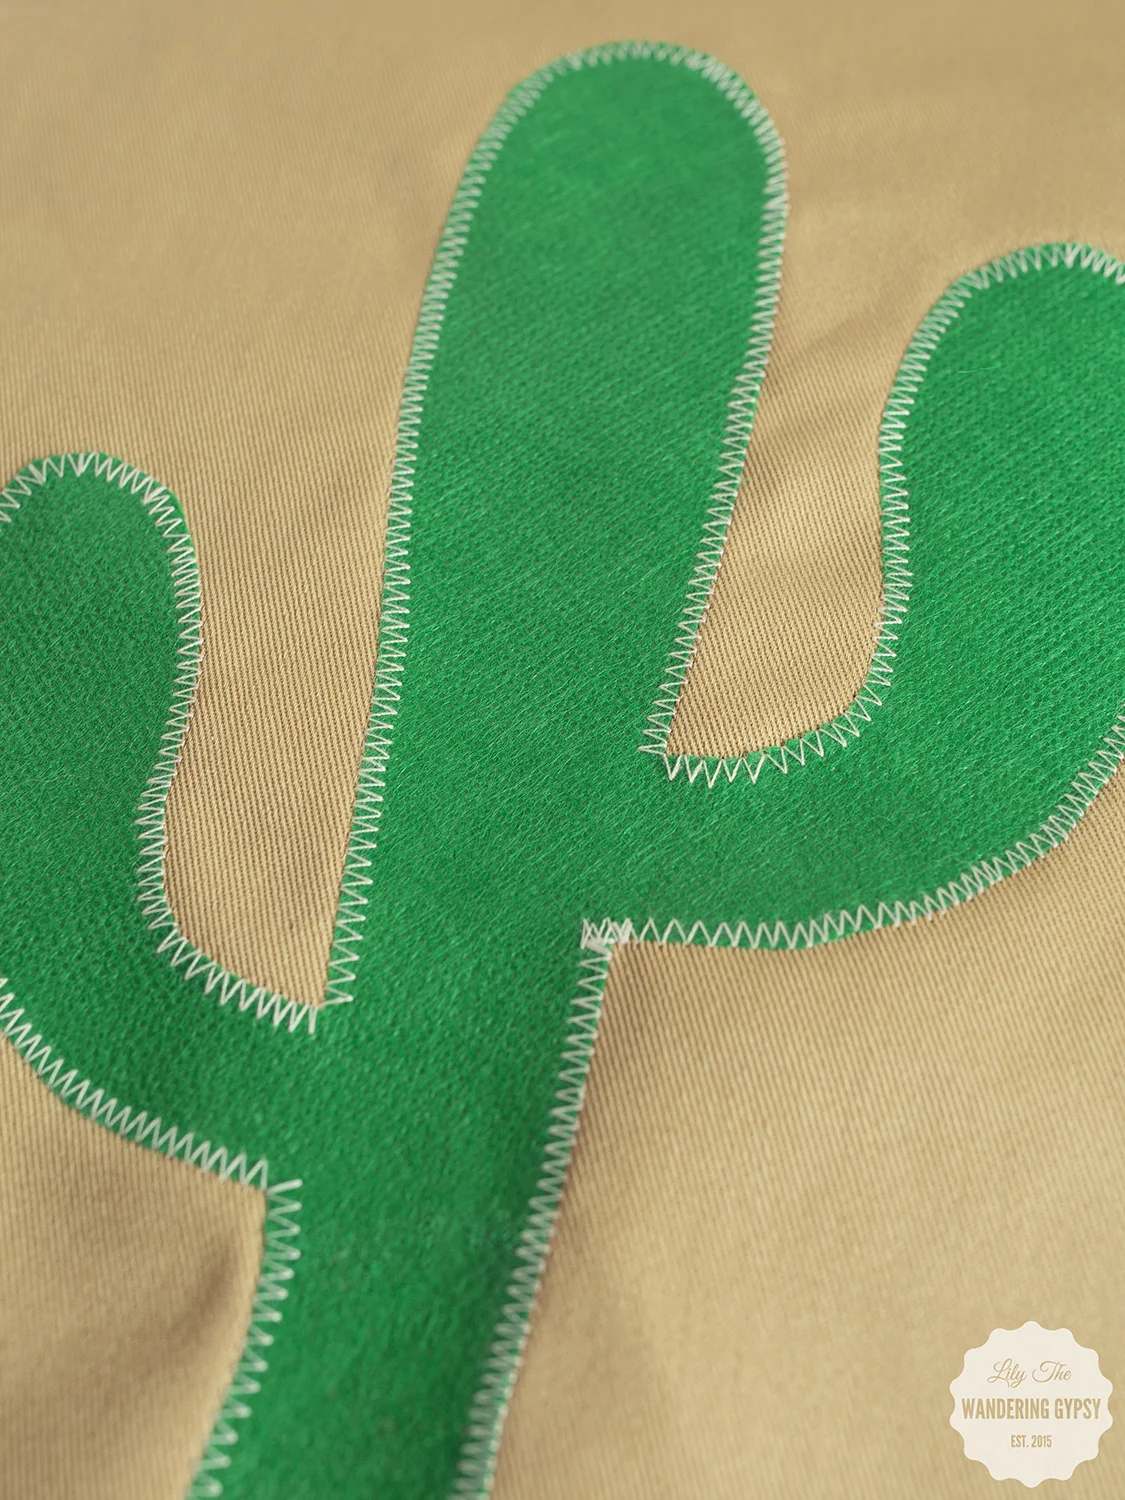
5.) Using a zig zag stitch or a straight stitch, sew all around the cactus shape. Tie any loose thread ends on the back side of the fabric. 

6.) Time to sew and construct the pillow case! This is such a great way to make a pillow case - it's removable and washable, too! 

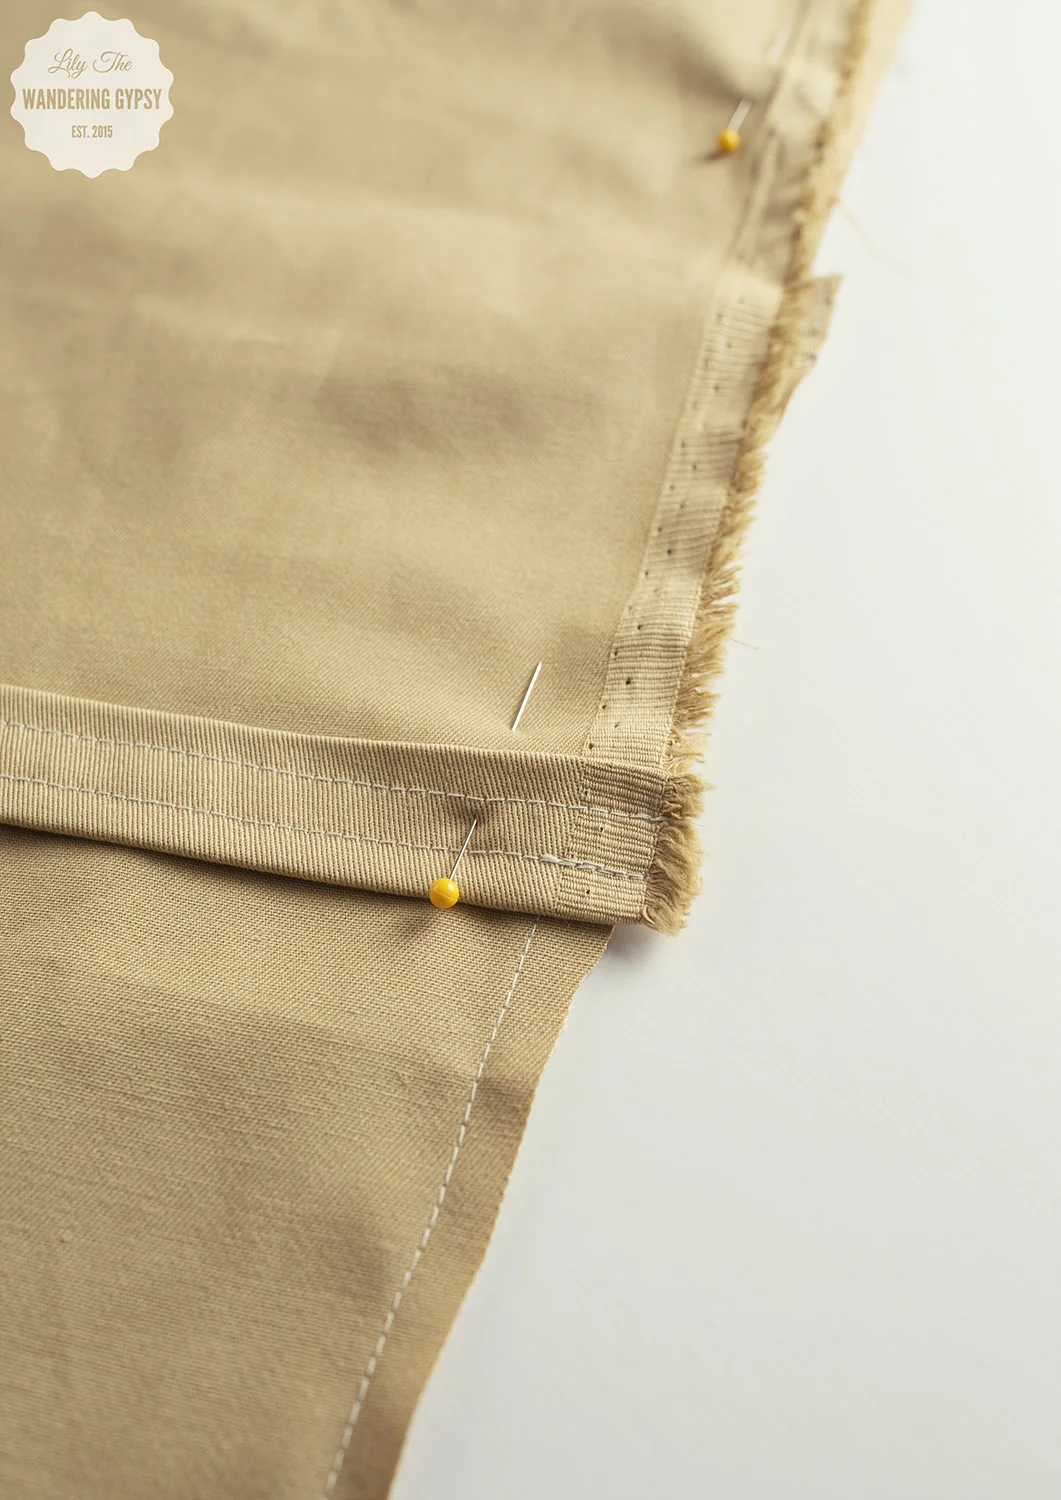
- Pin the shorter back piece with the hem line going horizontally in the middle. Pin the front panel and the first back section together - right sides together. Pin, and sew around the edges. Clip loose threads.

7.) Now, pin the longer back piece up to the ones you just sewed. Line raw edges up, and again, pin and sew around the edges

8.) Trim any excess fabric around the edges, and turn your pillow right side out. Iron, if you want, and you're DONE!!!

I hope you enjoyed this tutorial! If you wind up making one of your own, please link to it in the comments below! Happy Sewing, friends!!

DIY Summer Fun - Cookie Cutter Jewelry & Trinket Trays

I recently collaborated with Wendy's to create several Summer Inspired DIY Projects! Throughout the next week or so, I will be sharing instructions to all 5 projects! This project in particular, was inspired by a blog post I found on the Aww, Sam Blog. * Note - this project is kind of messy, so lots of paper towels were needed!!!! So excited to present you with these Cookie Cutter Trinket Trays! Enjoy :)

MATERIALS:

- Air Dry Clay (2 smaller packages will do)

- Cookie Cutters - I got mine here (for 99 cents each!). I got a cactus, hand, lips, pineapple, and teepee.

- CeramCoat Paint in green, white, red, tan, black, and yellow

- Clear Poly waterproof paint-on coating, optional.

- Clay sculpting tools (I found these ones for $2.47 near the clay supplies at Hobby Lobby)

- Water in a small dish to use for smoothing clay with your fingers

- Waxed Paper and Tape to keep surface clean

- 2 Paint Brushes for larger areas, and then one for finer detailed lines

- Paint clean up supplies like water and paper towels

INSTRUCTIONS:

- Prep your work surface. On a smooth, dry table, tape down a piece of parchment paper that will cover the surface well.

- Open your clay, and grab a hand full of clay.

- Roll clay into a smooth ball, and then place it onto the waxed paper. press the clay down with the lid of the clay container, until it is less than 1/2 thick. Alternatively, you can place a second piece of waxed paper on top of the clay, and use your hand and/or a rolling pin to flatten the clay. 

- Once flattened, press one shape at a time out of the clay, and carefully remove the clay from the cutter. I wound up using a clay tool to help with the hand space and the top of the pineapple shape.

- Next, you need to flatten and smooth out the clay shape. I did this by setting the clay shape onto the waxed paper, and then using water on my finger tips to smooth the edges. If you wanted raised edges, apply more pressure to the center, and less around the edges. I used a clay tool to kind of give the teepee dish a ridge around the sides. 

- Also, you can use a plate and paper straws to shape the sides of the clay while it dries. 

- Let dry for at least 3-5 hours, or ideally overnight. I didn't have that much time, so I painted them after about 5 hours and the paint seems to have stuck very well! 

- I just LOVE how these turned out! Remember, check back soon to see what other summer DIY projects I have for you! Have a happy and creative summer :) 

- A special thanks to Wendy's for inspiring me to create this project! Check out their Blackberry Lemonade ASAP, it's good!!!

- Find more summer DIY Ideas On My Blog and On My DIY Pinterest Board

Another Adorable Gift Basket With Erin Pelicano Jewelry

I hope you enjoyed my previous gift basket post, here. I had so much fun putting that basket together, that I created yet a second gift basket. These are so perfect for Mother's Day (and for gifting at just about any time of the year). The reason why I like the style of this gift basket so much, is because after you gift this beautiful creation, someone can then use the basket as store in a closet, bathroom, pantry, and more. 

Adorable Gift Basket DIY Tutorial
Check out this cute gift basket DIY project!

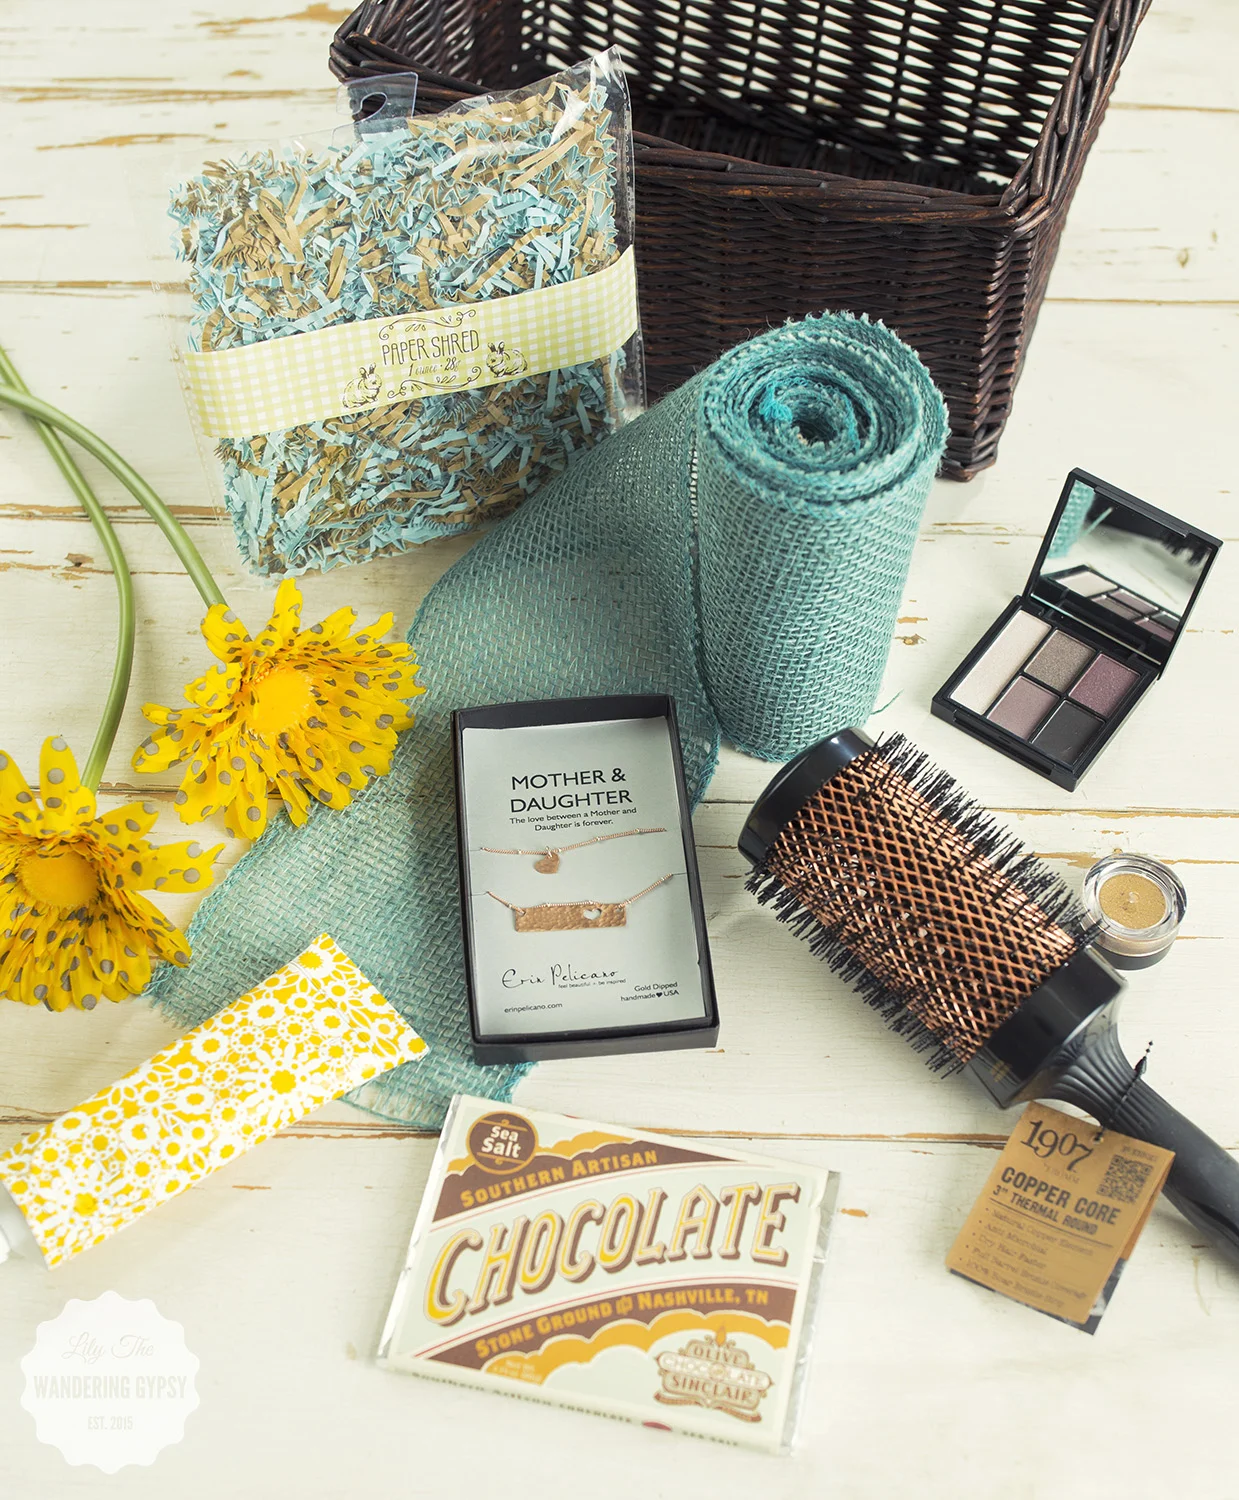
MATERIALS:

1 Wicker Basket

1 Roll of ribbon to wrap around the basket (not wired)

Hot Glue Gun + Glue (I used about 12 sticks, so it takes a lot)

2-3 Silk Flower Heads 

Tissue Paper

Paper Crinkles

Fun Goodies To Fill Basket


INSTRUCTIONS:

1.) Cut a piece of ribbon, long enough to wrap around the basket and overlap about 3" in back. 

Check out this cute gift basket DIY project!

2.) Glue the ribbon to the basket. I was pleasantly surprised at how easy it was to work with this burlap ribbon roll. It just seemed to mold to the shape of the basket so well. Starting at the back of the basket, glue the top of the ribbon and the cut end of the ribbon to the basket. Continue to wrap the ribbon around, and glue it/secure it every few inches. I glued up the basket where the vertical basket pieces were. 

Check out this cute gift basket DIY project!

Gotta love that glue gun :)

Check out this cute gift basket DIY project!

3.) When you have glued the ribbon all the way around the basket, make sure the ribbon is attached well throughout the entire basket. Feel free to touch up any spots that may be loose. Fold the remaining cut end of ribbon over, to make sure loose edges are not showing. Then, glue that in place. Yay! The "hard part" is done. 

Check out this cute gift basket DIY project!

Here is what your gift basket should look like...(below)

Check out this cute gift basket DIY project!

4.) Now, fill the bottom half of the basket with tissue paper.

Check out this cute gift basket DIY project!

5.) Then, add your paper crinkles. They should mold to the shape of the basket pretty well. These were from Target for $1.00 - I just love the color combo!

Check out this cute gift basket DIY project!

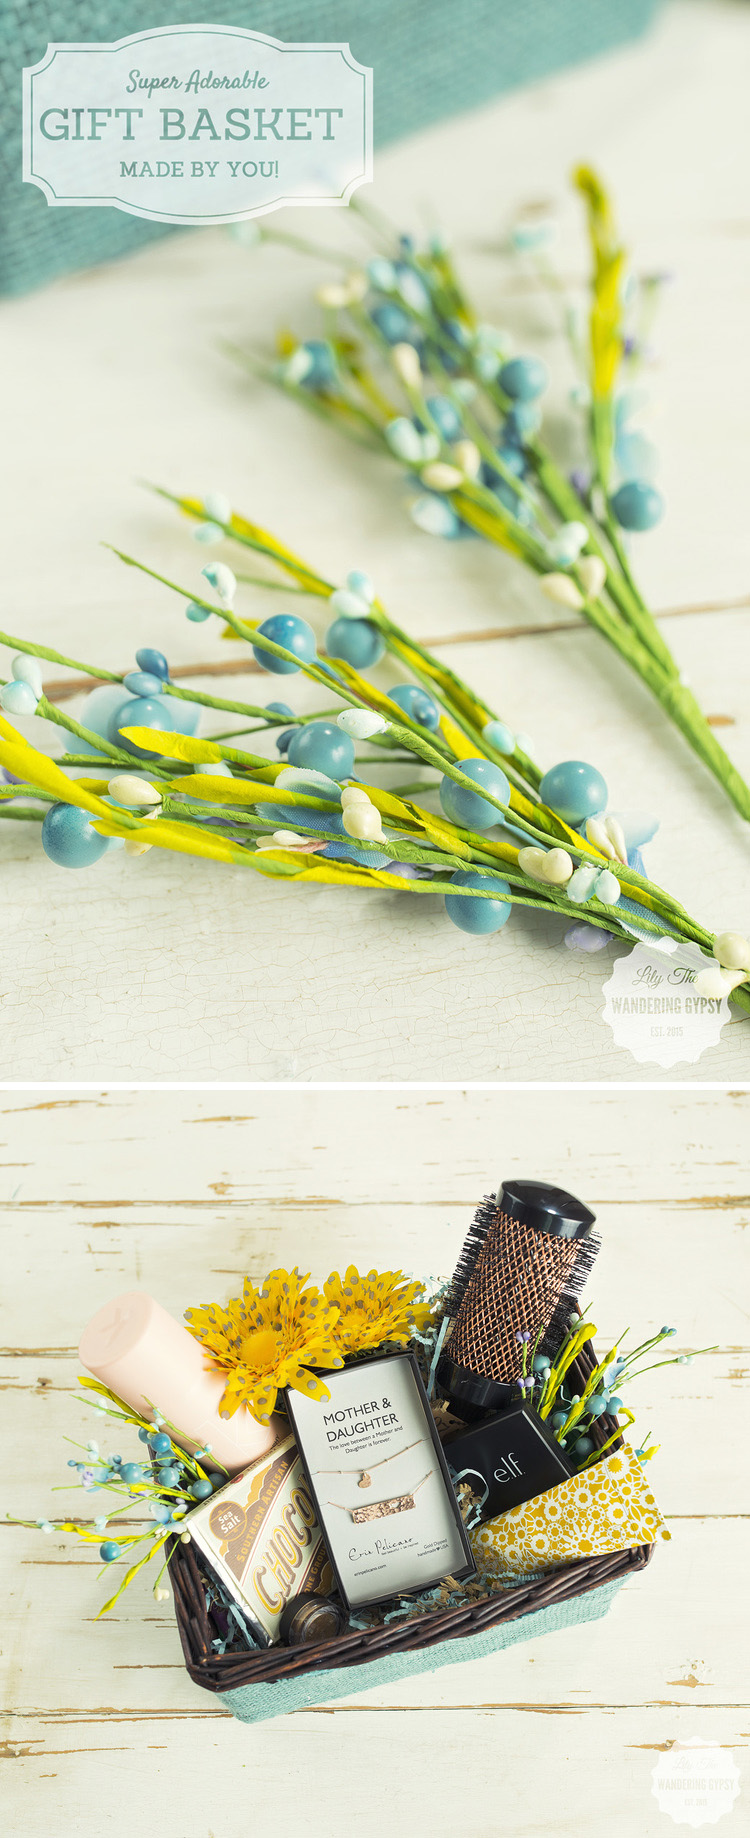
I wanted to make this cute gift basket like a floral arrangement of sorts, and I found these adorable berries (below), that really were the absolute perfect colors. So, it made me really happy to find these at JoAnn's during their recent Daffodil Dash sales :)

Check out this cute gift basket DIY project!

Mother's Day Gift Basket with Erin Pelicano Necklaces

I am so honored to be able to share another gorgeous necklace by Erin Pelicano. She has an incredibly wonderful sense of style, and I just love everything she creates! A few (or more) of her pieces are absolutely perfect for Mother's Day! In fact, they say Mother & Daughter right on them :) 

Erin Pelicano Jewelry + Lily The Wandering Gypsy

I thought a fun way to show off her beautiful necklaces would be in a cute, Mother's Day Gift Basket. Indulge Mom this Mother's Day (or any other time of the year), and give her thoughtful gifts, elegantly arranged in a gift basket. Stay tuned for a second blog post with another idea, coming soon!!

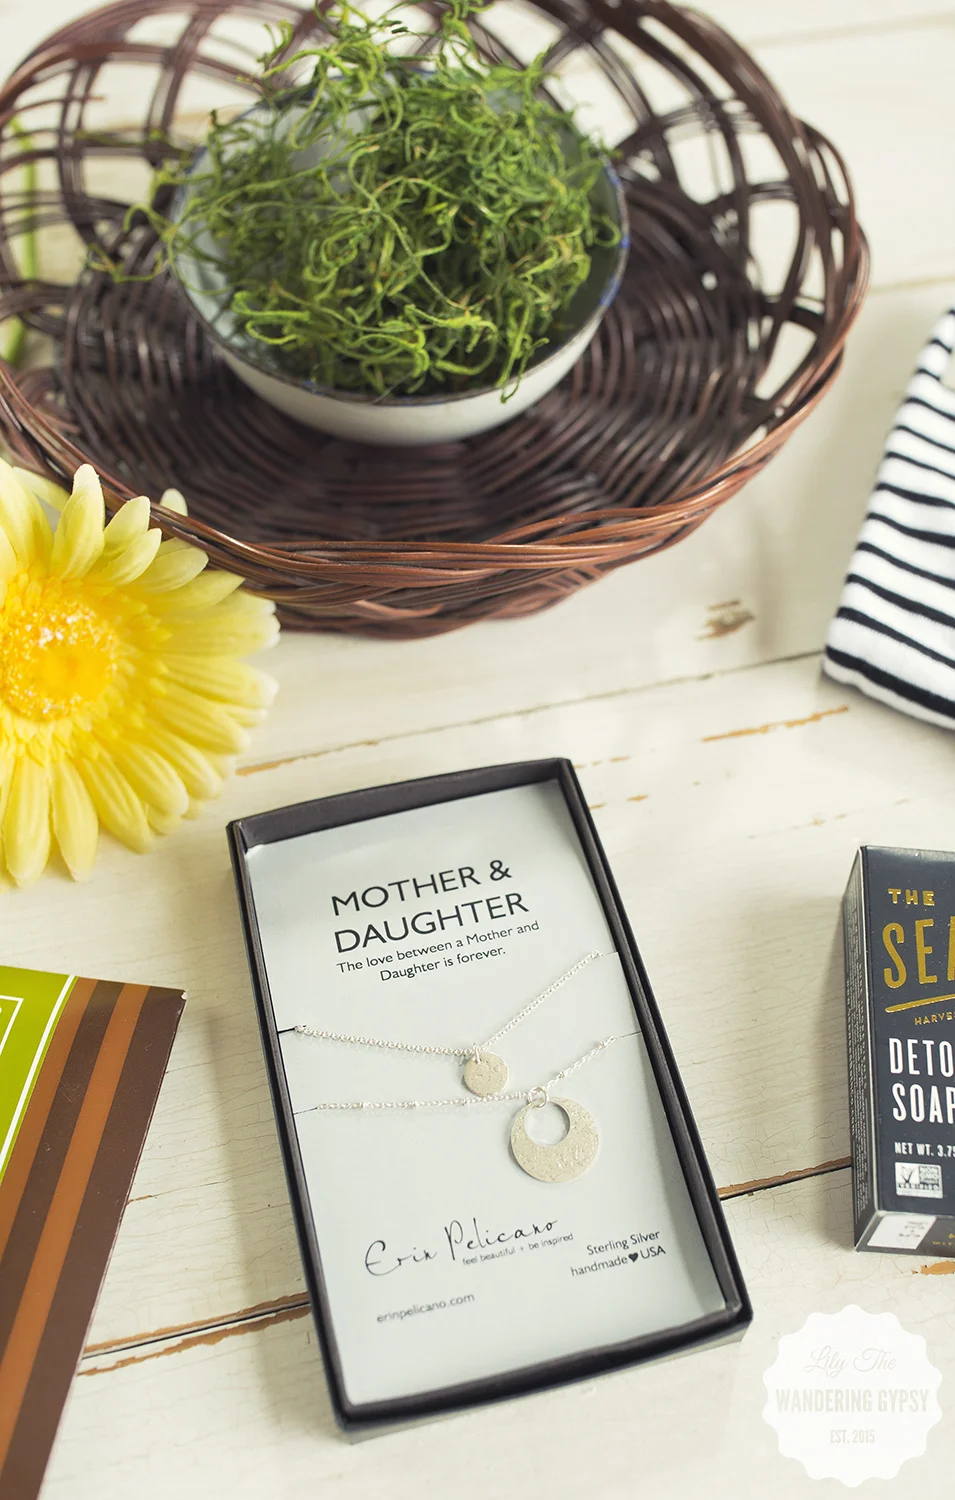
The items featured in this gift basket were partially provided by my goodie bag that I received at Create + Cultivate Dallas! Both the Seaweed Bath Co. Detox Cellulite Soap and the Black and White Striped Nora Socks from Richer Poorer Inc. were from C+C! The Poco Dolce Olive Oil Chocolate Bar was purchased in Santa Fe at Chocolate + Cashmere (which I will soon post photos of), and of course, the main attraction is this gorgeous necklace from Erin Pelicano! 

Erin Pelicano + Lily The Wandering Gypsy


Let's Make A Gift Basket! 

I found this shallow basket to be perfect for a gift basket, featuring Erin's beautiful Mother & Daughter Necklace. 

MATERIALS:

- Shallow Wicker Basket

- Tissue Paper

- Moss

- Gerber Daisy Heads

- Various Items To Fill Basket That Mom Will Love

Lightly crumple up a piece of tissue paper and form it to the basket. This will ensure that the moss won't fall out. 

Lightly crumple up a piece of tissue paper and form it to the basket. This will ensure that the moss won't fall out. 

Add some moss to your gift basket for a rustic and Earthy look. 

Add some moss to your gift basket for a rustic and Earthy look. 

Use wire cutters to easily remove flower heads from their stems. 

Use wire cutters to easily remove flower heads from their stems. 

Now, gather your gifts, and begin to place them in the basket in a cute way. I first added the striped socks in back, and the chocolate next to them. Next, I centered the necklace, and placed the detox soap behind it. Lastly, I added the flowers in front left, and the center back. Just play around with the placement to ensure everything can be seen well.

Erin Pelicano + Lily The Wandering Gypsy

A Gift Basket Tip: You can use Shrink Plastic (found at Dollar Tree) around this gift basket to hold everything in place. Stay tuned, as I will likely shrink wrap this basket, to keep it safe so I can send it to my mom! 

Erin Pelicano Jewelry + Lily The Wandering Gypsy

Cactus DIY Project!

We had a blast while we were in Arizona and throughout the southwest. There were literally cacti everywhere. I was constantly in awe of their beauty. I know why cacti are so popular in home decor, party decor, and DIY projects these days! I wanted to share an idea I created to display in a recent recipe post for Hunt's Canned Tomatoes (see it here). 

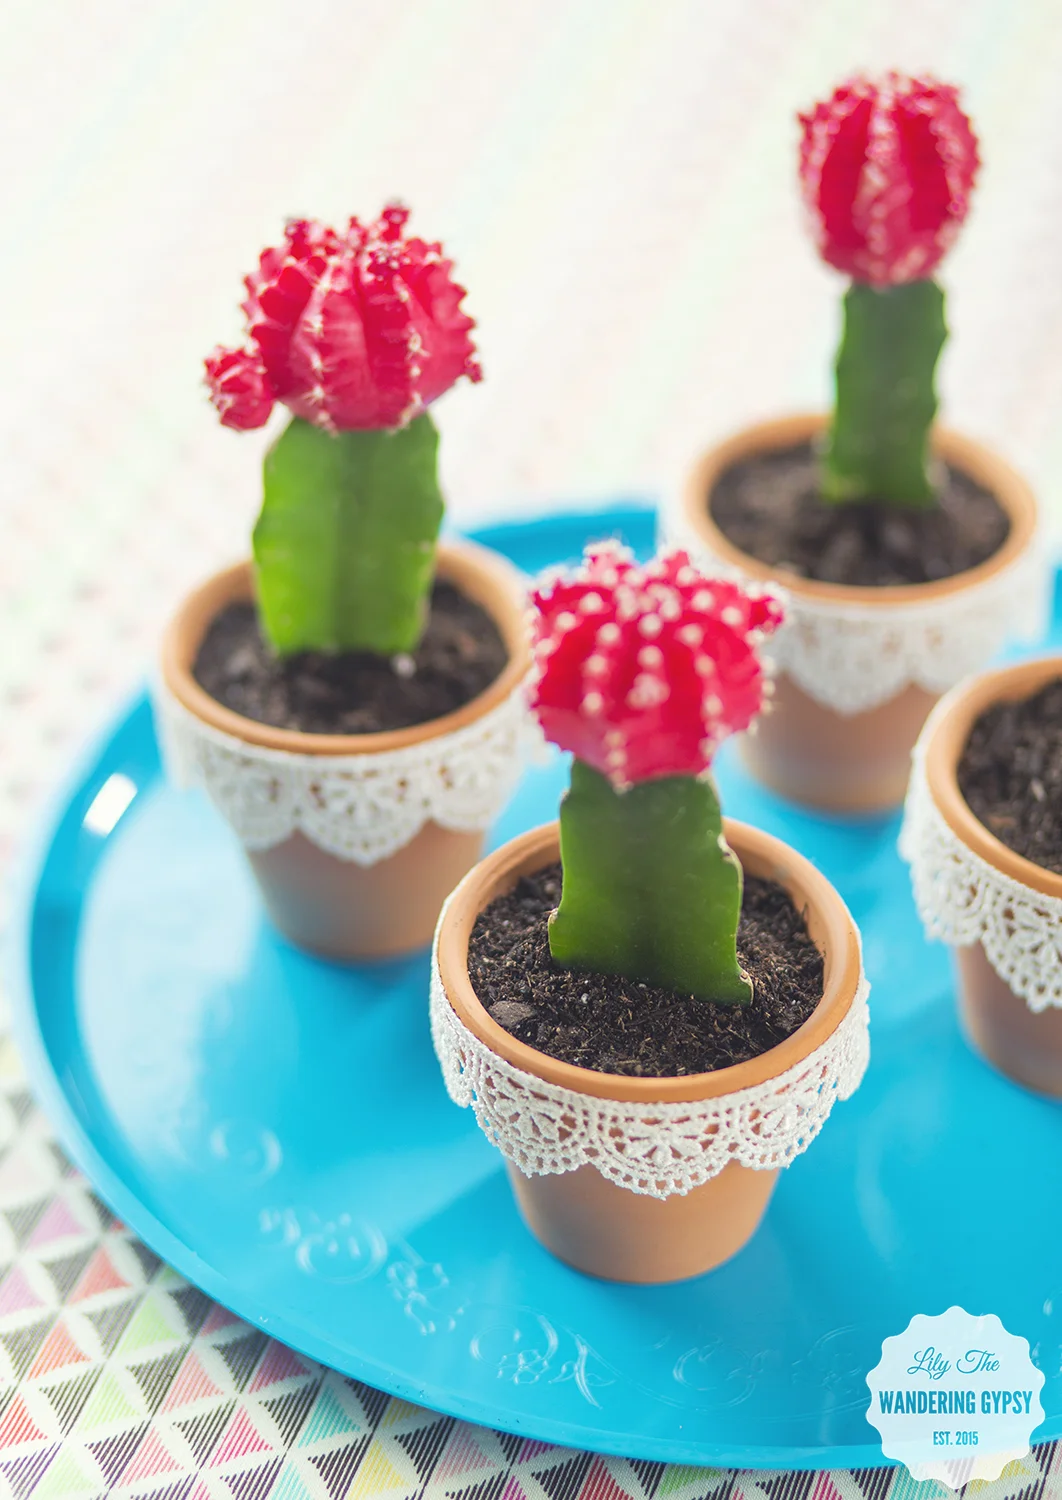
These little decorations were so easy and pretty inexpensive. I love how the ribbon really dressed up these terra cotta pots so well. 

Happy Crafting! Check out this cute #cactus DIY :)
Materials Needed For This DIY
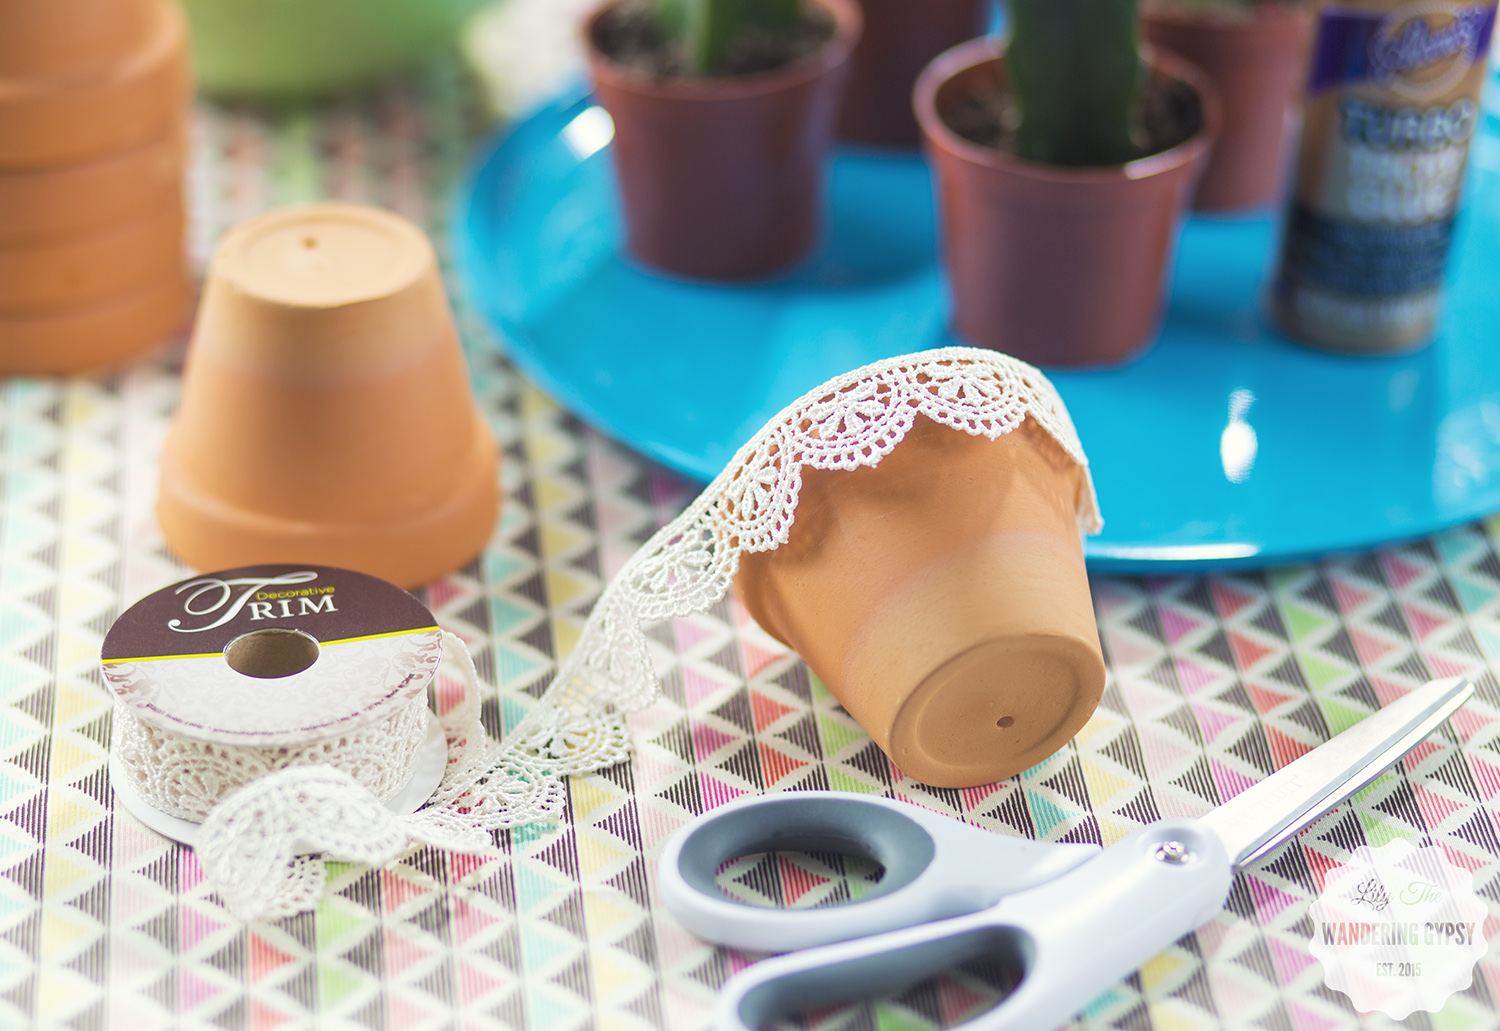
5DB_1340 100.jpg

2.75" - 4" Terra Cotta Pots

Lace Ribbon (found here)

Tacky Glue

Cacti

Small Amount Of Potting Soil & Small Measuring Cup

Instructions

1.) Measure Your Ribbon - See how much ribbon you need by wrapping the ribbon/lace around the terra cotta pots, and cutting the ribbon where it meets the other end without overlapping. 

Cute and Easy Cactus DIY Decor Idea!

2.) Add a small line of glue around the top rim of the pot, and press ribbon pieces all the way around the top of the pot. Make sure you wipe any excess glue that seeps out. Next, we plant the cacti in their new homes.  

Cute and Easy Cactus DIY Decor Idea!

Aren't they pretty?! I think the would be lovely for a Cinco de Mayo celebration, wedding, shower, and more! 

Cute and Easy Cactus DIY Decor Idea!

3.) Next, we will plant our cacti in their beautiful new pots. Make sure your cacti will fit! 

Cute and Easy Cactus DIY Decor Idea!

4.) Now, take the cacti and its dirt  out of the plastic pot it came in. Knock off any loose dirt into a container or trash can, and allow the roots to loosen up a bit. 

Cute and Easy Cactus DIY Decor Idea!

5.) Place the cactus into its new home!

Cute and Easy Cactus DIY Decor Idea!

6.) Add a bit of new dirt on top of the cactus, and pat down to secure into place. Make sure it's not leaning too far to one side, and there you have it! A new little addition to your party decor ideas, or your home! 

Cute and Easy Cactus DIY Decor Idea!

Aren't they cute...

Happy Crafting! Check out this cute #cactus DIY :)

Summer On-The-Go & Entertaining With Black Box Wines! - Plus 2 DIY Wine Party Tutorials

This shop has been compensated by Collective Bias, Inc. and its advertiser. All opinions are mine alone. #BlackBoxSummer #CollectiveBias The following content is intended for readers who are 21 or older.

I would like to share some adorable DIY party ideas for a cute summer party on-the-go with you today! Black Box Wines are the perfect summer party pal, because they are extremely portable. Black Box Wines are amazing for a camping party, that is a little bit more upscale. Why not add a little wine-tasting to your camp out!

Be sure to visit the Simple Entertaining Social Hub for more details about ways to entertain this summer.

These wines are eco-friendly, because the bag and box are recyclable! Black Box Wines taste good, and they are about half the price of bottled wines. Also, they can stay fresh up to 6 weeks, and contain 750 ml - the equivalent of 4 bottles. Imagine trying to carry 4 bottles of wine, which is way more to juggle than this one awesome box of tasty goodness! 50 gold Metals for quality can't be wrong!

A SUMMER PARTY RECIPE - WINE & CHEESE PAIRING SKEWERS

I love the idea of a wine and cheese party, but if guests can carry the appetizers around, it prevents anyone from being left out, or everyone having to hover over one plate of food. Instead, offer guests skewers, and a plentiful plate of meats and cheeses, and let them decide what they want! I also like the idea of having grapes and as many fresh fruits and veggies as possible. I liked using these cardboard food containers I got at a craft store. They hold so much, and are coated to avoid any messes. 

Cut up salami, summer sausage, and various cheeses and let guests use skewers to create their own Wine & Cheese Pairing Skewers!! 

Cut up salami, summer sausage, and various cheeses and let guests use skewers to create their own Wine & Cheese Pairing Skewers!! 

Let your guests choose their own adventure, and add whatever type of meats and cheeses they want! Less food will be wasted with this method, which saves money.

Let your guests choose their own adventure, and add whatever type of meats and cheeses they want! Less food will be wasted with this method, which saves money.

 photo SOCIAL HUB graphic.png Be sure to visit the Simple Entertaining Social Hub for more details about ways to entertain this summer.

FABRIC WINE GLASS MARKERS

DIY Fabric Wine Glass Markers #BlackBoxSummer #CollectiveBias (Msg4 21+)

INSTRUCTIONS:

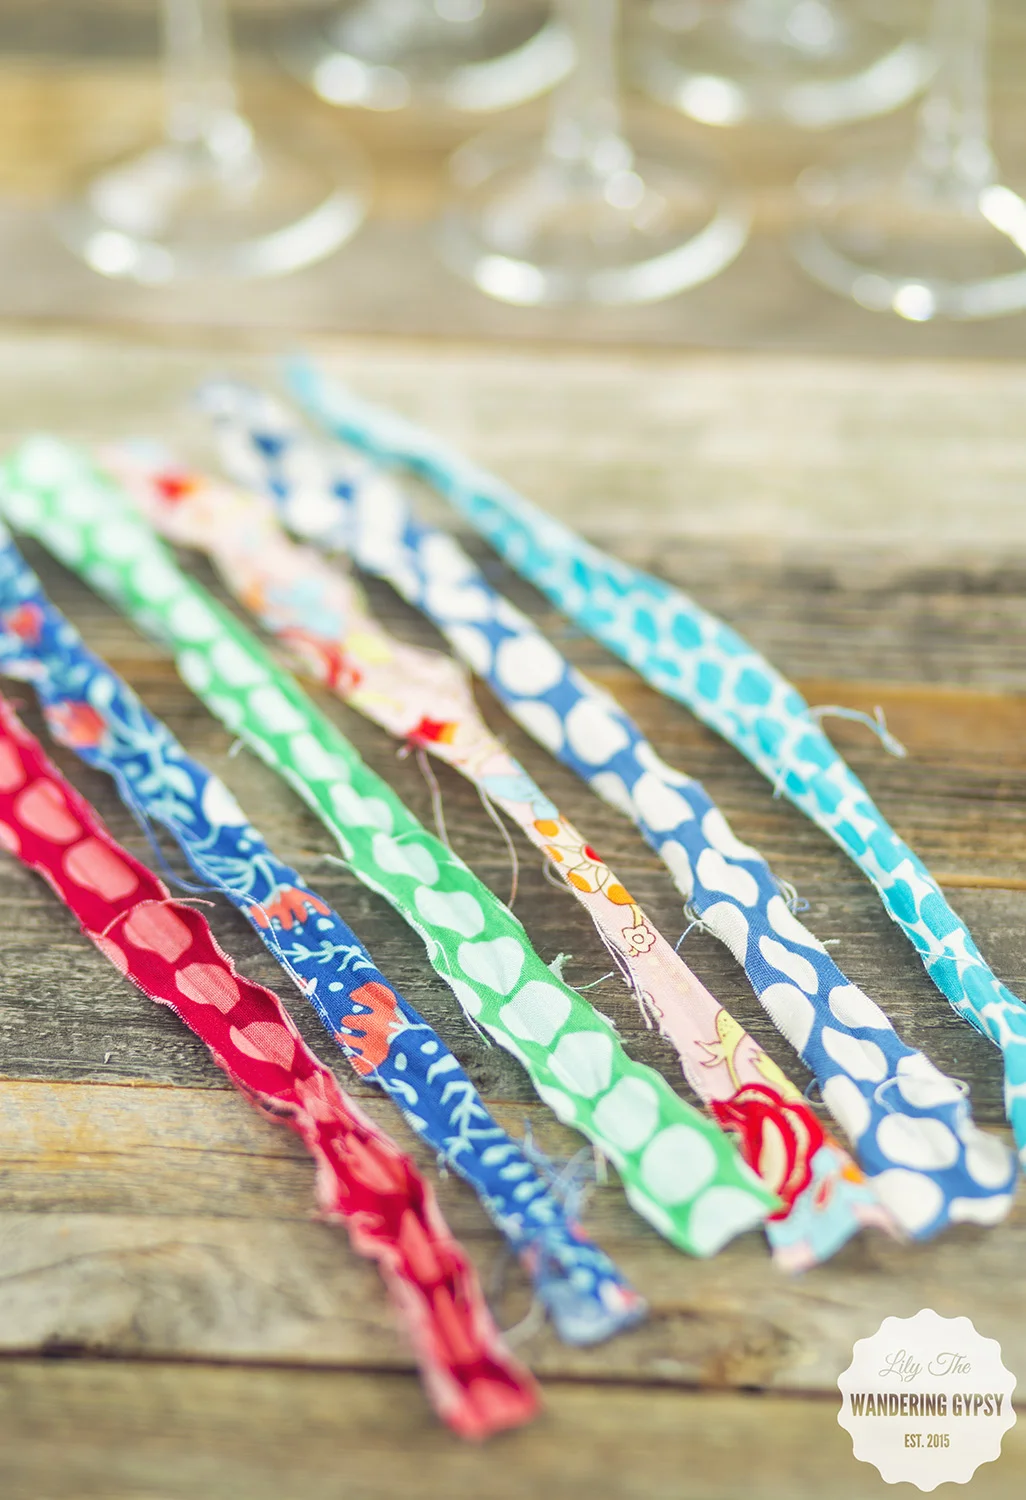
1.) These are super simple and can be made for FREE! Just cut your fabric strips that are 12" long x 1" wide. I just freehanded these, but a rotary cutter could always be used.

2.) Now, to get the rough edges on the fabric pieces, pull them and stretch them as much as possible. Keep pulling from both ends until you get a more frayed look. 

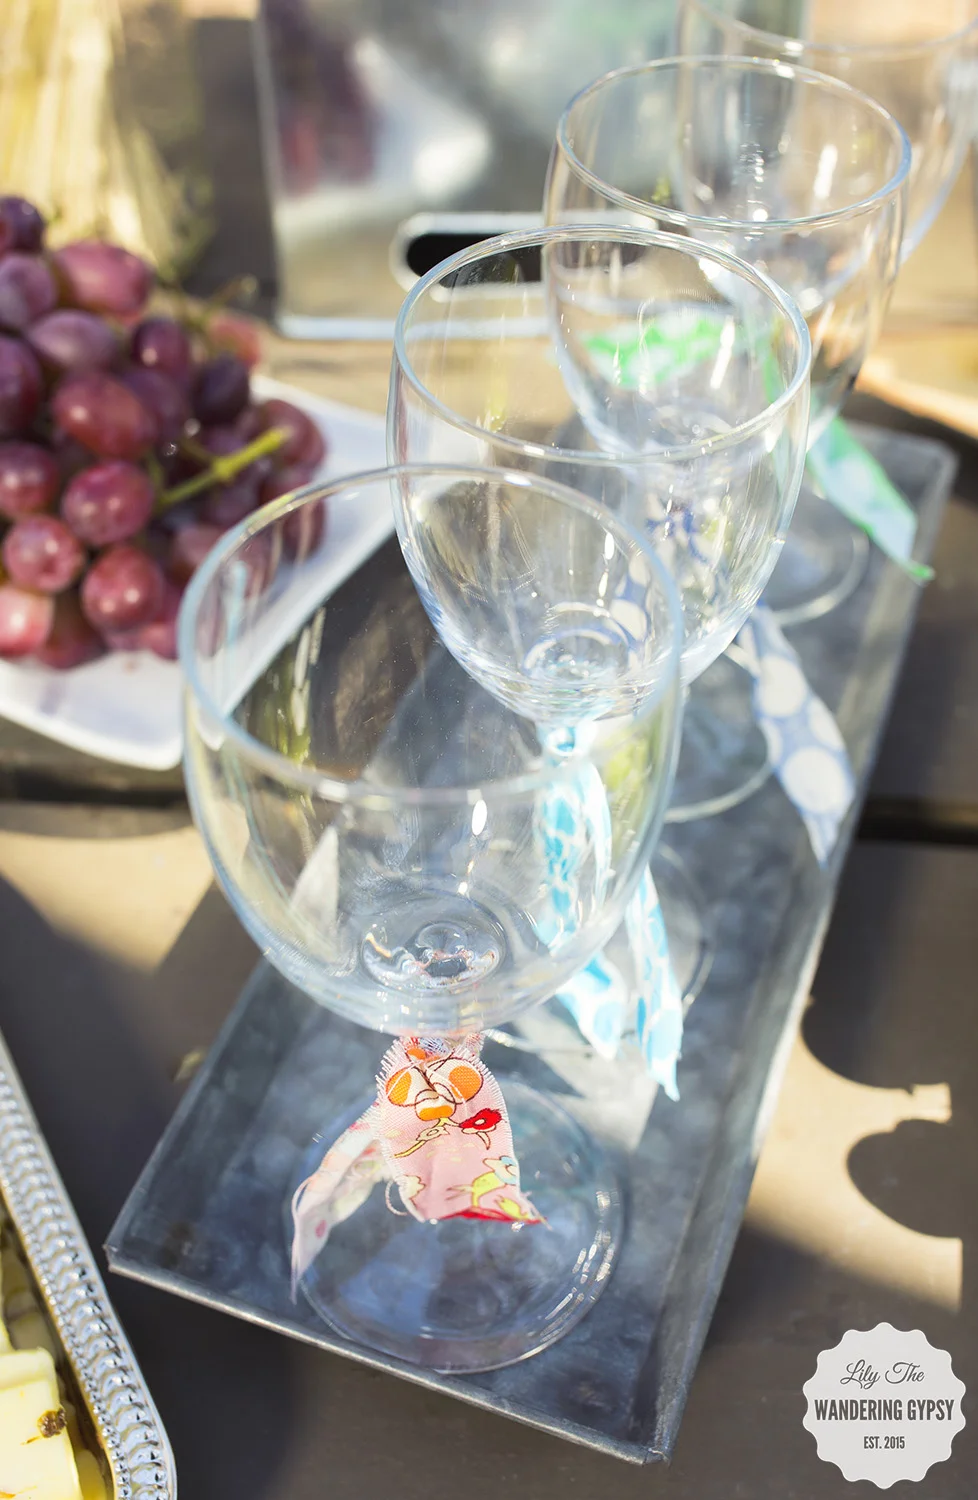
3.) Tie the distressed fabric strips around the top of the wine glass stem, and double knot. 

4.) I found that cutting about 1" off of each of the long ends at a diagonal was best. That's it! 

DIY Fabric Wine Glass Markers #BlackBoxSummer #CollectiveBias (Msg4 21+)

WINE PARTY TIP! 

To ensure guests can reach the boxes of wine, elevate them onto something like a glass vase or metal box. This also adds visual interest to your party table. 

Cute Summer Party Ideas! #BlackBoxSummer #CollectiveBias (Msg4 21+)

DIY WINE SIGN TUTORIAL

Cute Summer Party Ideas! #BlackBoxSummer #CollectiveBias (Msg4 21+)

This little project came together so well! It was one of the easiest party decor projects ever. 

WHAT YOU NEED:

All you need is a few materials and about 15 minutes, and you can make this cute DIY Wine Sign! Perfect for summer parties On-The-Go!

All you need is a few materials and about 15 minutes, and you can make this cute DIY Wine Sign! Perfect for summer parties On-The-Go!

4 Galvanized letters - found at a fabric store, Birch Round (or Rectangle) - found at that same fabric store, and a hot glue gun with glue. Super Glue / Krazy glue did NOT work at all, just a warning :) 

1.) Plug in your glue gun, and begin to do a sample placement of your letters onto the birch round. This birch round actually has a twine hanger attached, but you can cut it off. 

2.) I found that the best way to securely attach the letters was to mark where each letter went with a dot of pencil, then apply hot glue and quickly re-attach your letters. 

3.) Glue all letters in place and you are DONE! This project only took about 15 minutes!

DIY Wine Sign! #BlackBoxSummer #CollectiveBias (Msg4 21+)
For a wonderful Summer On-The-Go party, consider providing your guests with Black Box Wines! Enjoy!
Cute Summer Party Ideas! #BlackBoxSummer #CollectiveBias (Msg4 21+)