Garden Progress + DIY Palette Garden Bed - Mid March 2024

We are in year tow of our garden here in central Arkansas, zones 7a-8b,. Last year, we started some of our garden via seed, but we started all seeds outdoors. We built our amazing DIY palette garden beds (one of which we rebuilt this year), and cannot wait to plant our little seedlings in our new garden beds once they are a bit stronger.

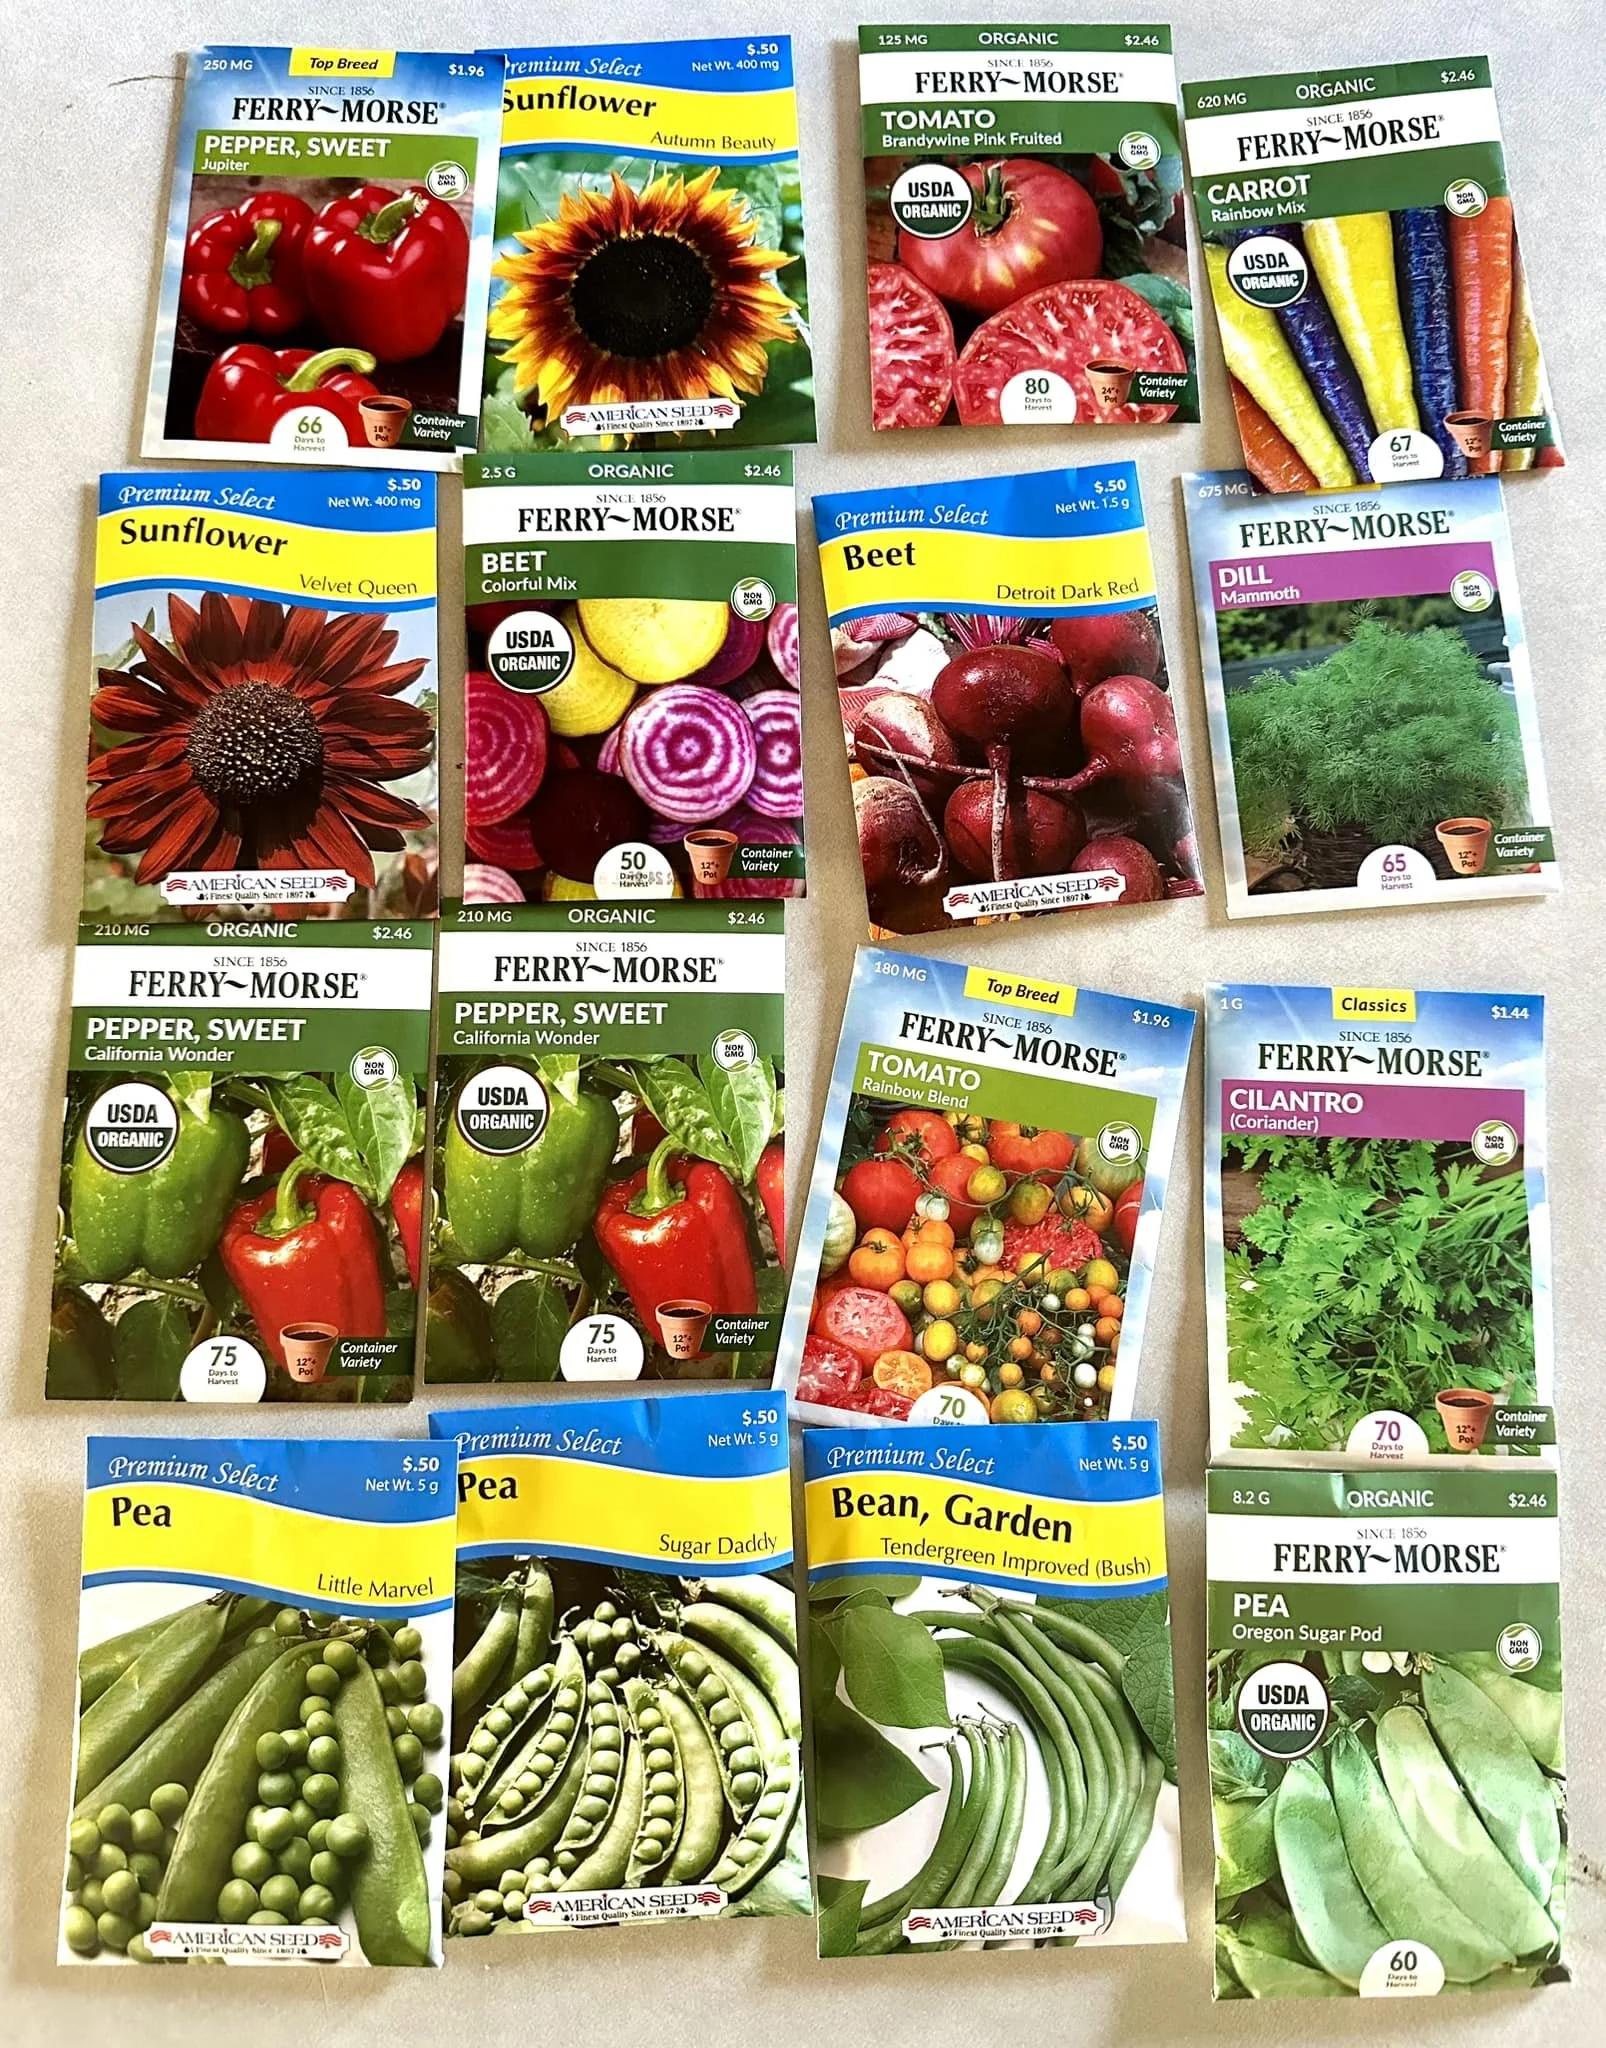
HERE’S WHAT WE PLANTED ON MARCH 8, 2024

Notes from the garden: 2/25 and 2/28/2024

Planted basil seeds from our garden then planted organic basil seeds from store. Also planted Cave City Yellow Watermelon (one cup grew wonderful and one did not grow at all).
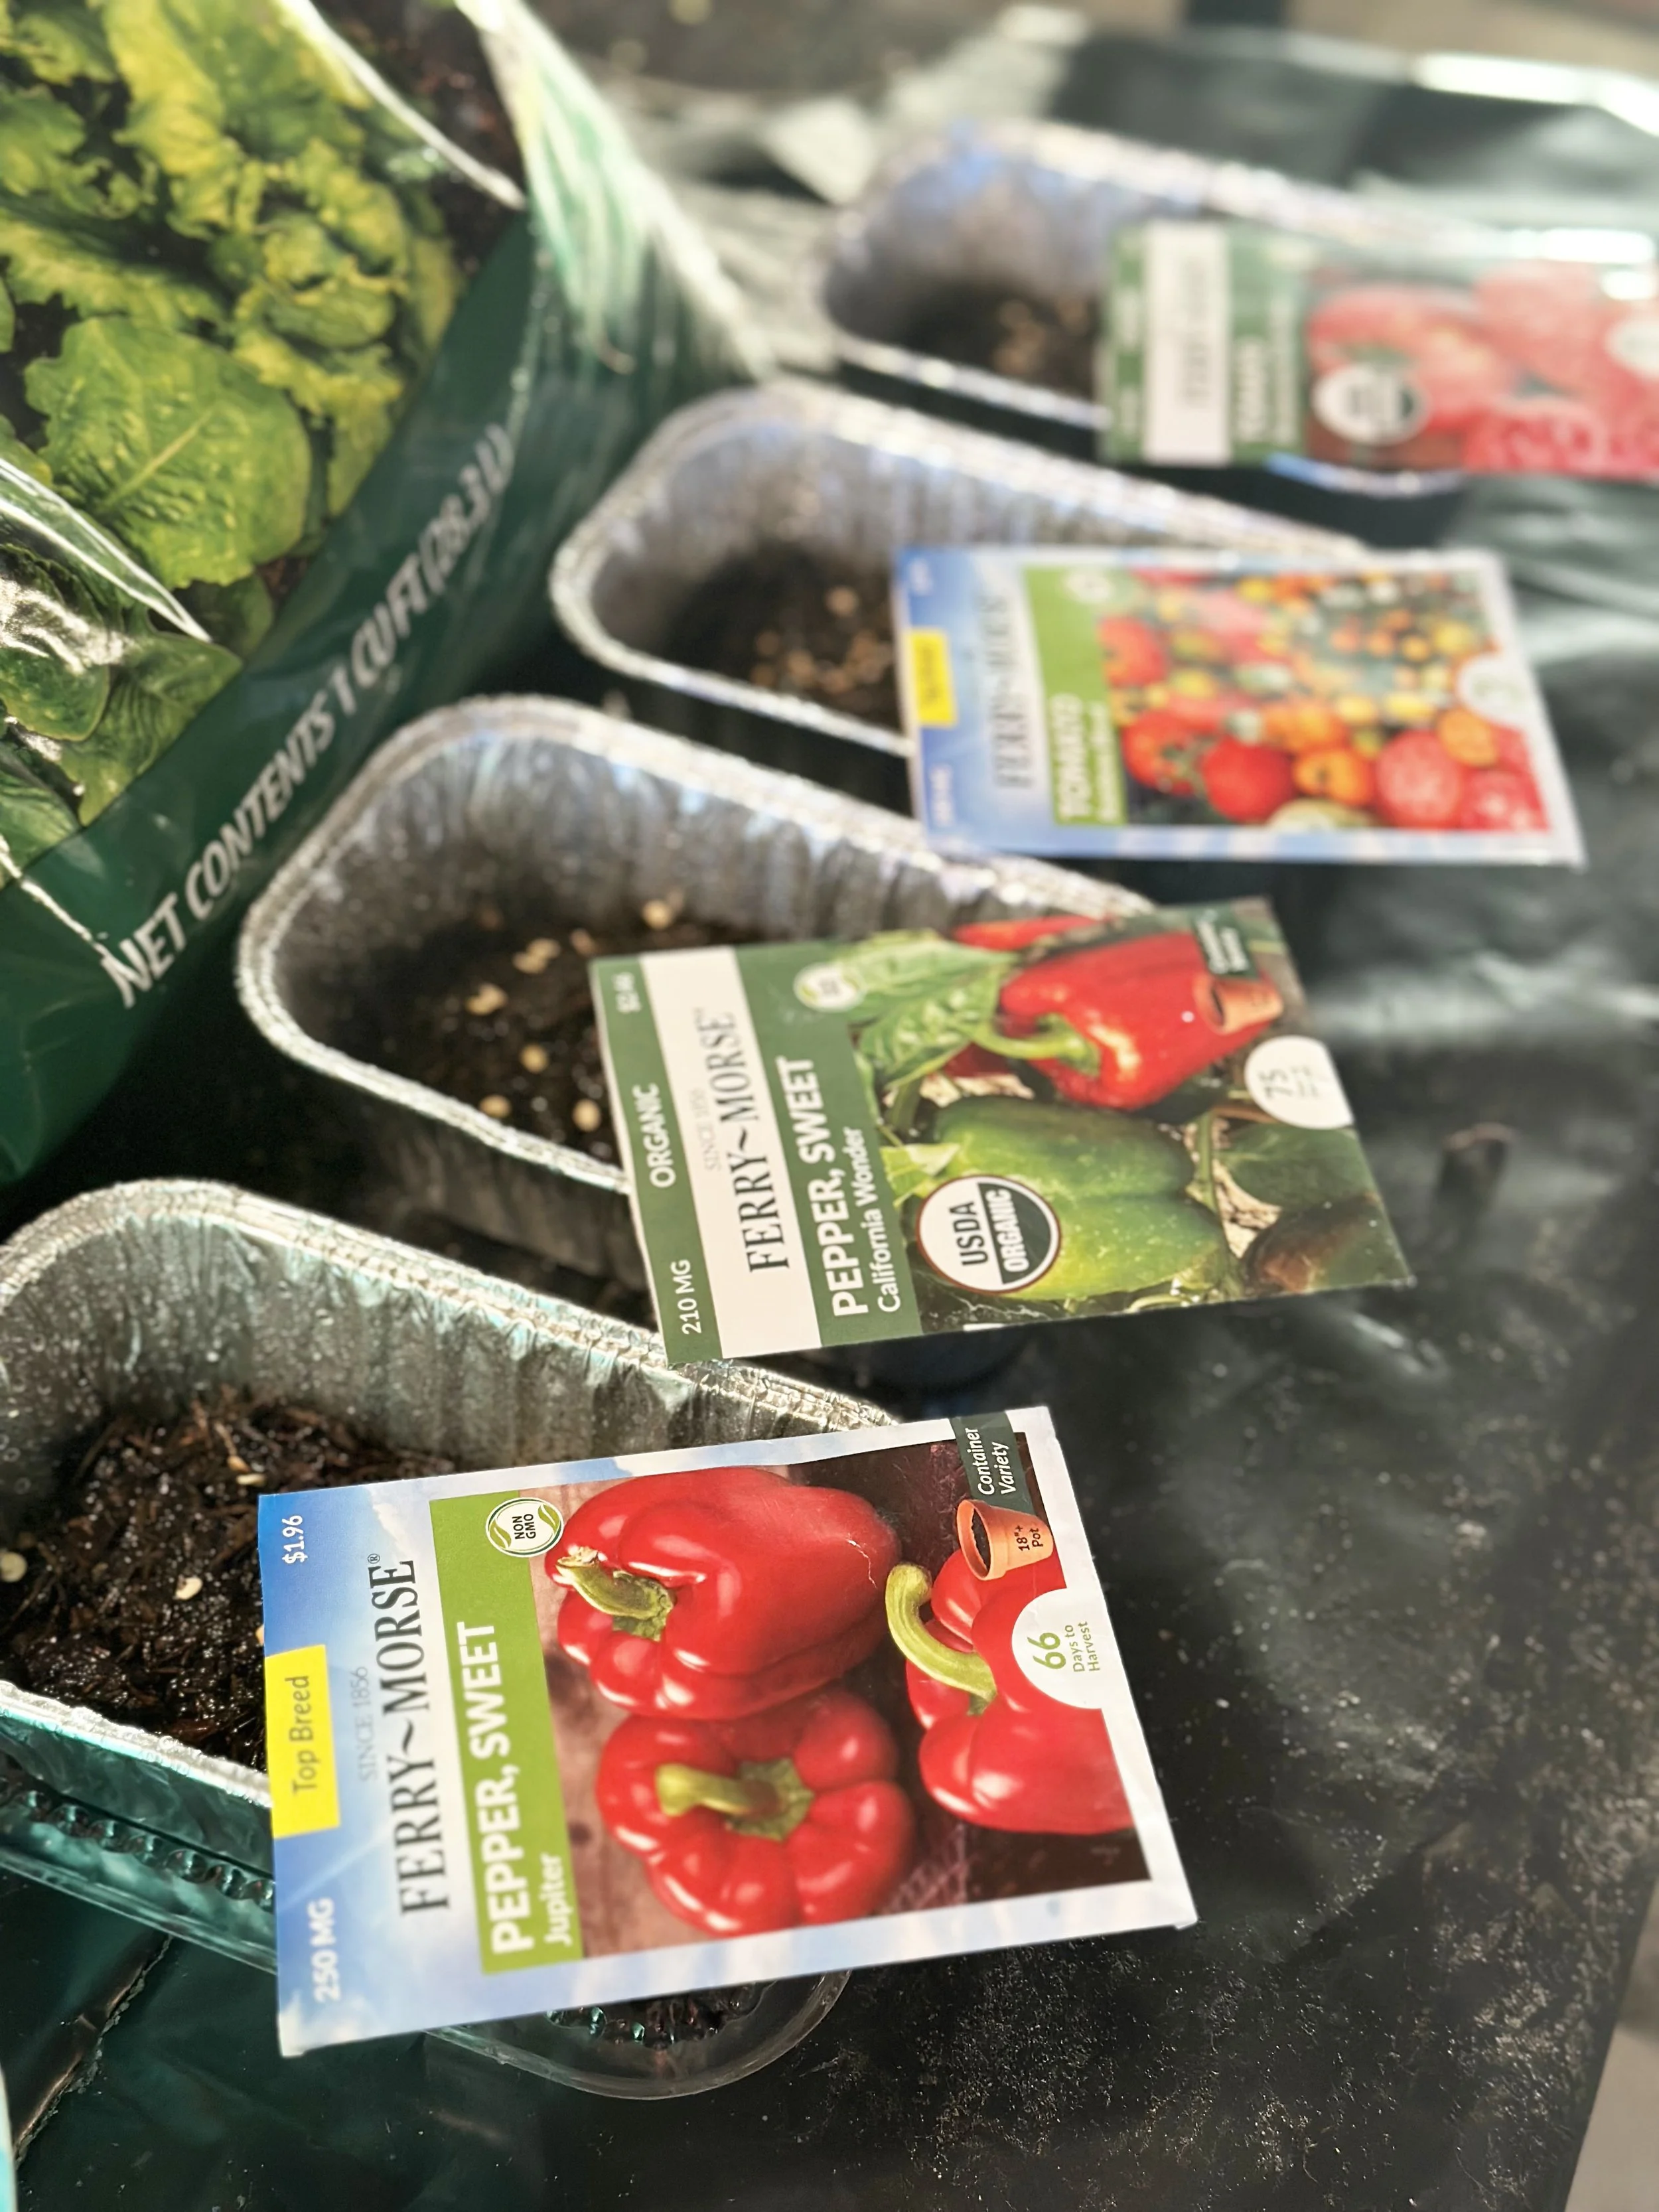
3/8/2024

Planted seeds of the following: Sunflowers, Bell Peppers, Cilantro, Dill, tomatoes, peas.

3/14/2024

Seeing growth on the following: Peppers, sunflowers, and peas, cilantro.


Below, you can see some of my most cherished seedlings! Last year we went on a fun adventure near Cave City, AR. The watermelons from that city are famous so we decided to wash/dry/preserve some of those seeds from last summer. We saved both yellow watermelon, shown below, and I just started some of the red Cave City watermelons a few days ago, and I am already seeing growth on them!

Above, Cave City Watermelon Seedlings after one week, and below, after two weeks and transplanted into a larger pot.

Below, you will see one misfortune in the seedling game we are playing. Before I thought to use my plastic cups for seedlings,we purchased two type of Spinach seeds online and the Giant Noble spinach seeds from a farm in Columbus, OH barely had any growth since 2/28/24, and the American Spinach seeds I ordered elsewhere has shown less than half germination. So, perhaps it was the seeds, but maybe I over watered, or something? So, I will try these same sets of seeds in my clear plastic cups and let you all know if it is the tray or what. You never know what you are going to get!

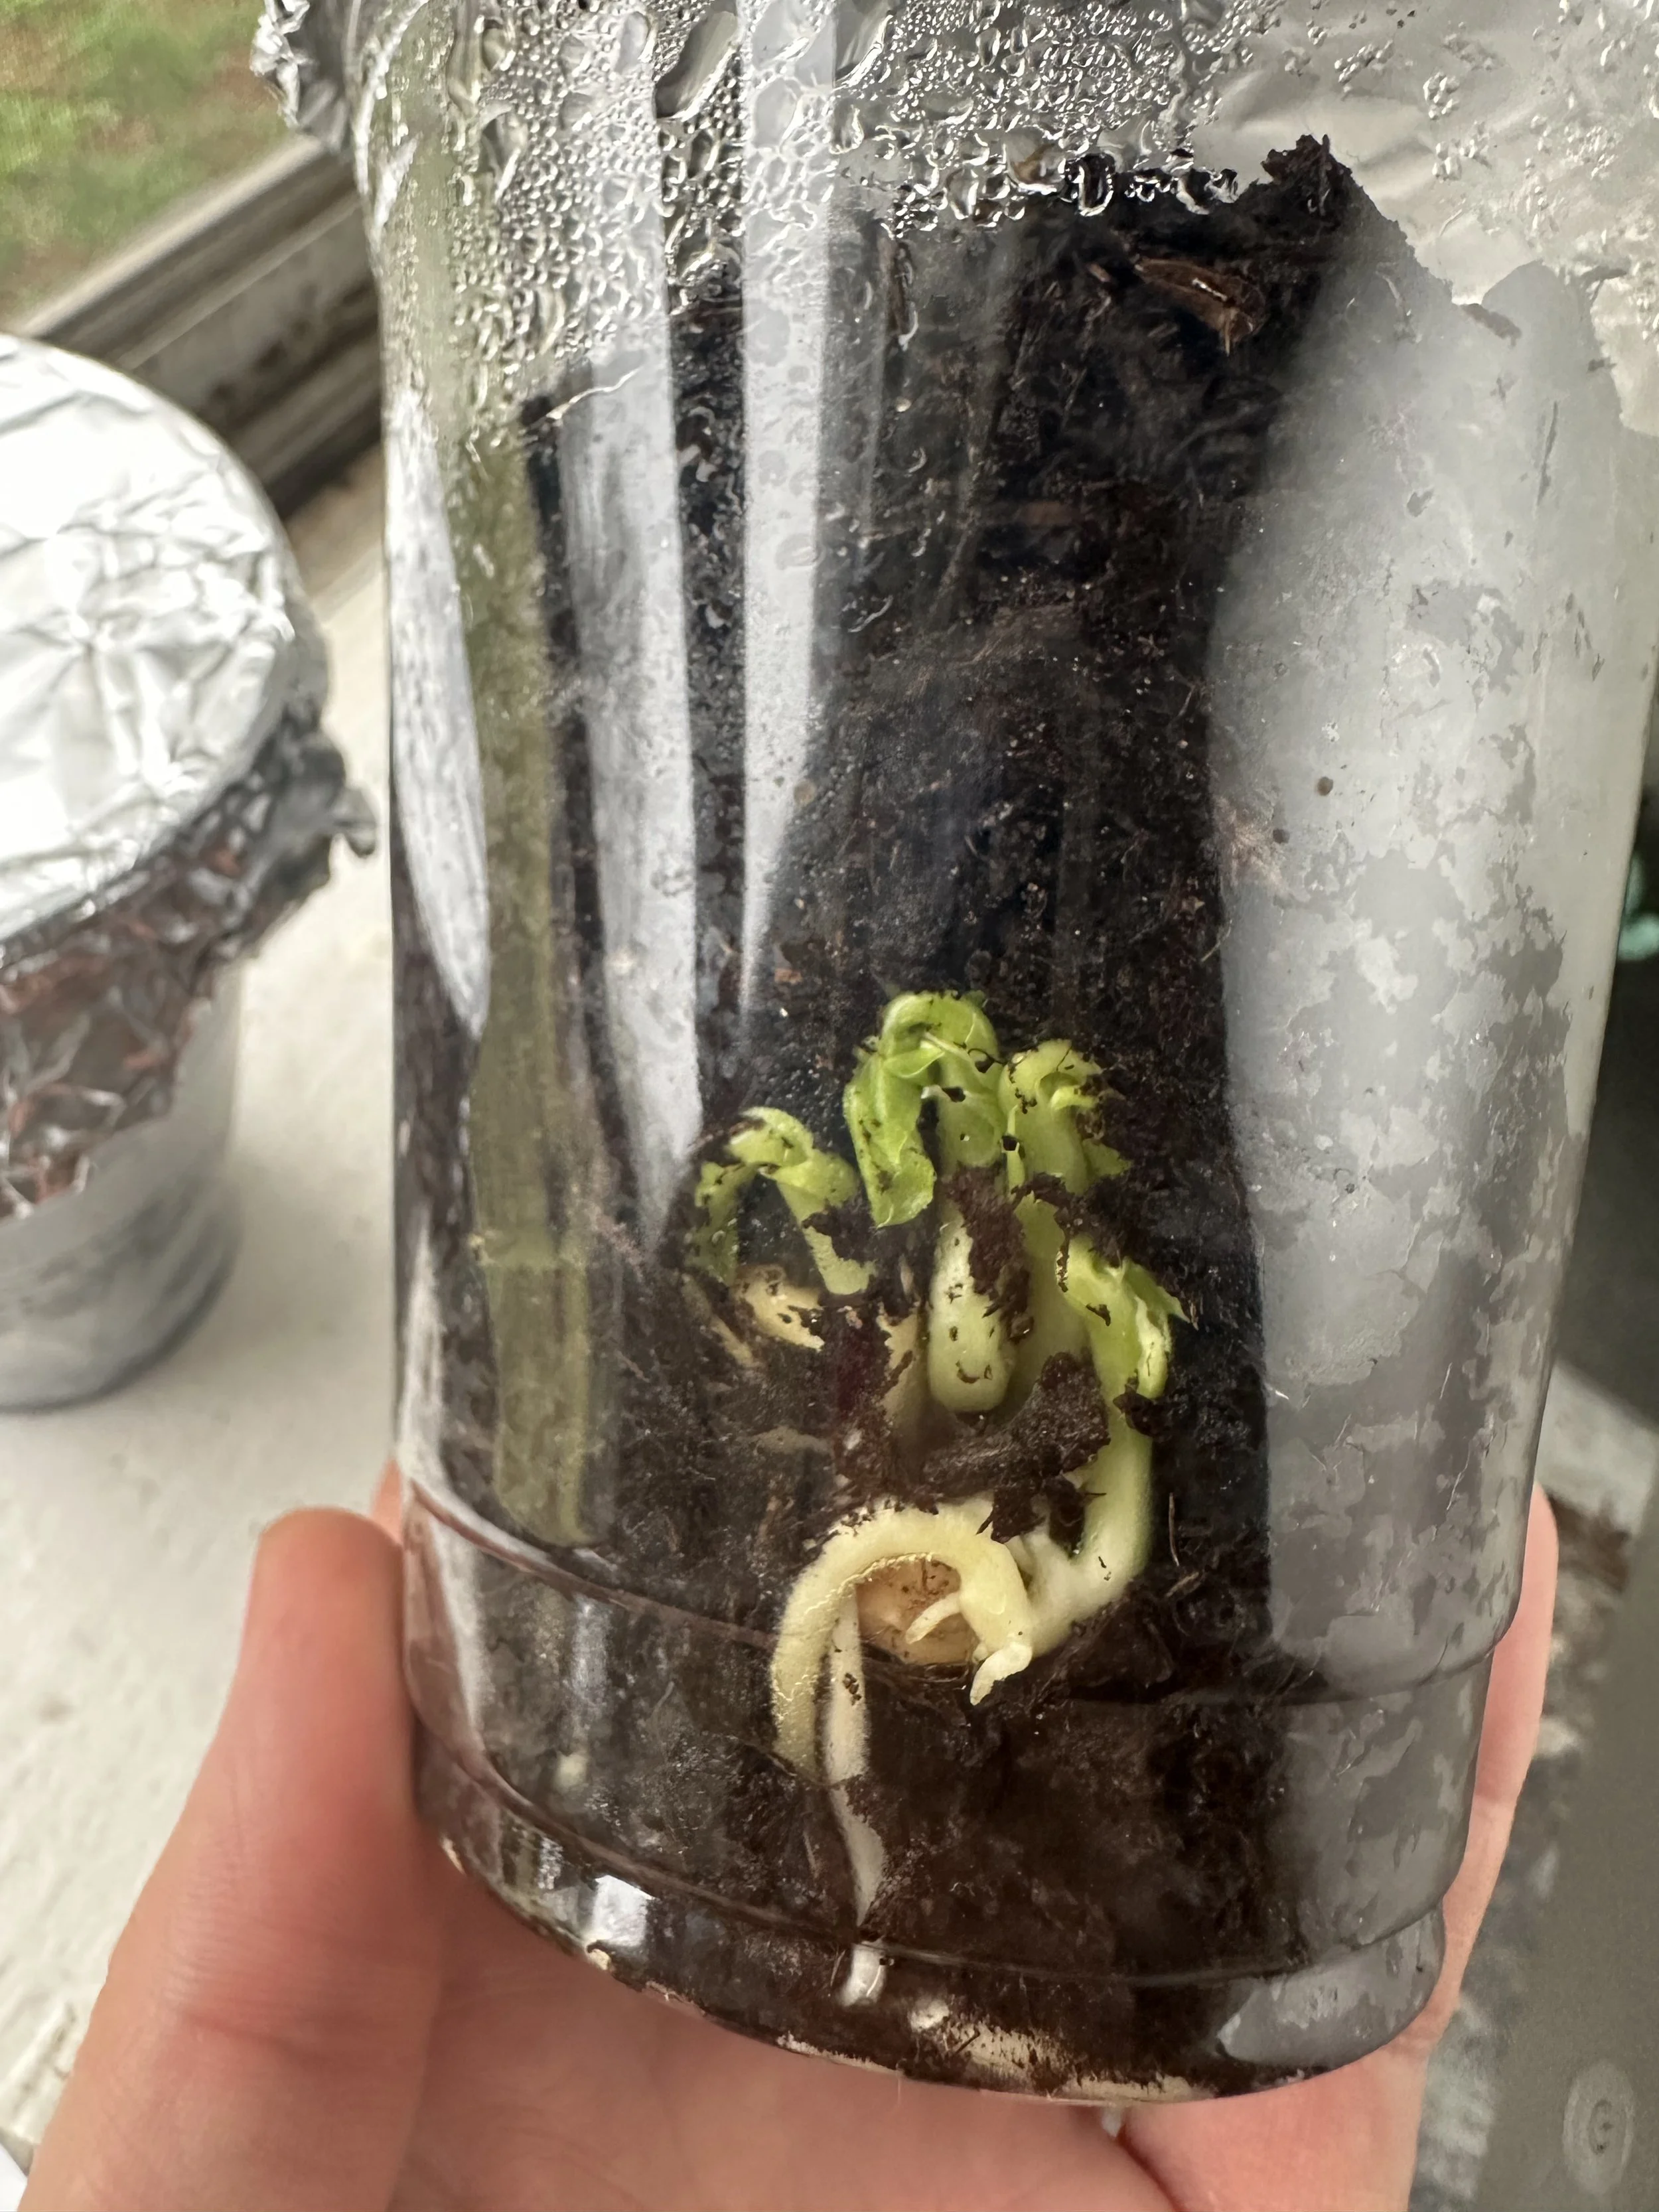
I am wondering if it is honestly these trays or what, because most everything else I started in my cups, has been germinating within 5-7 days! Below, you can see a cup I planted our Sugar Daddy Peas in on 3/8/24 and wow they are taking OFF!

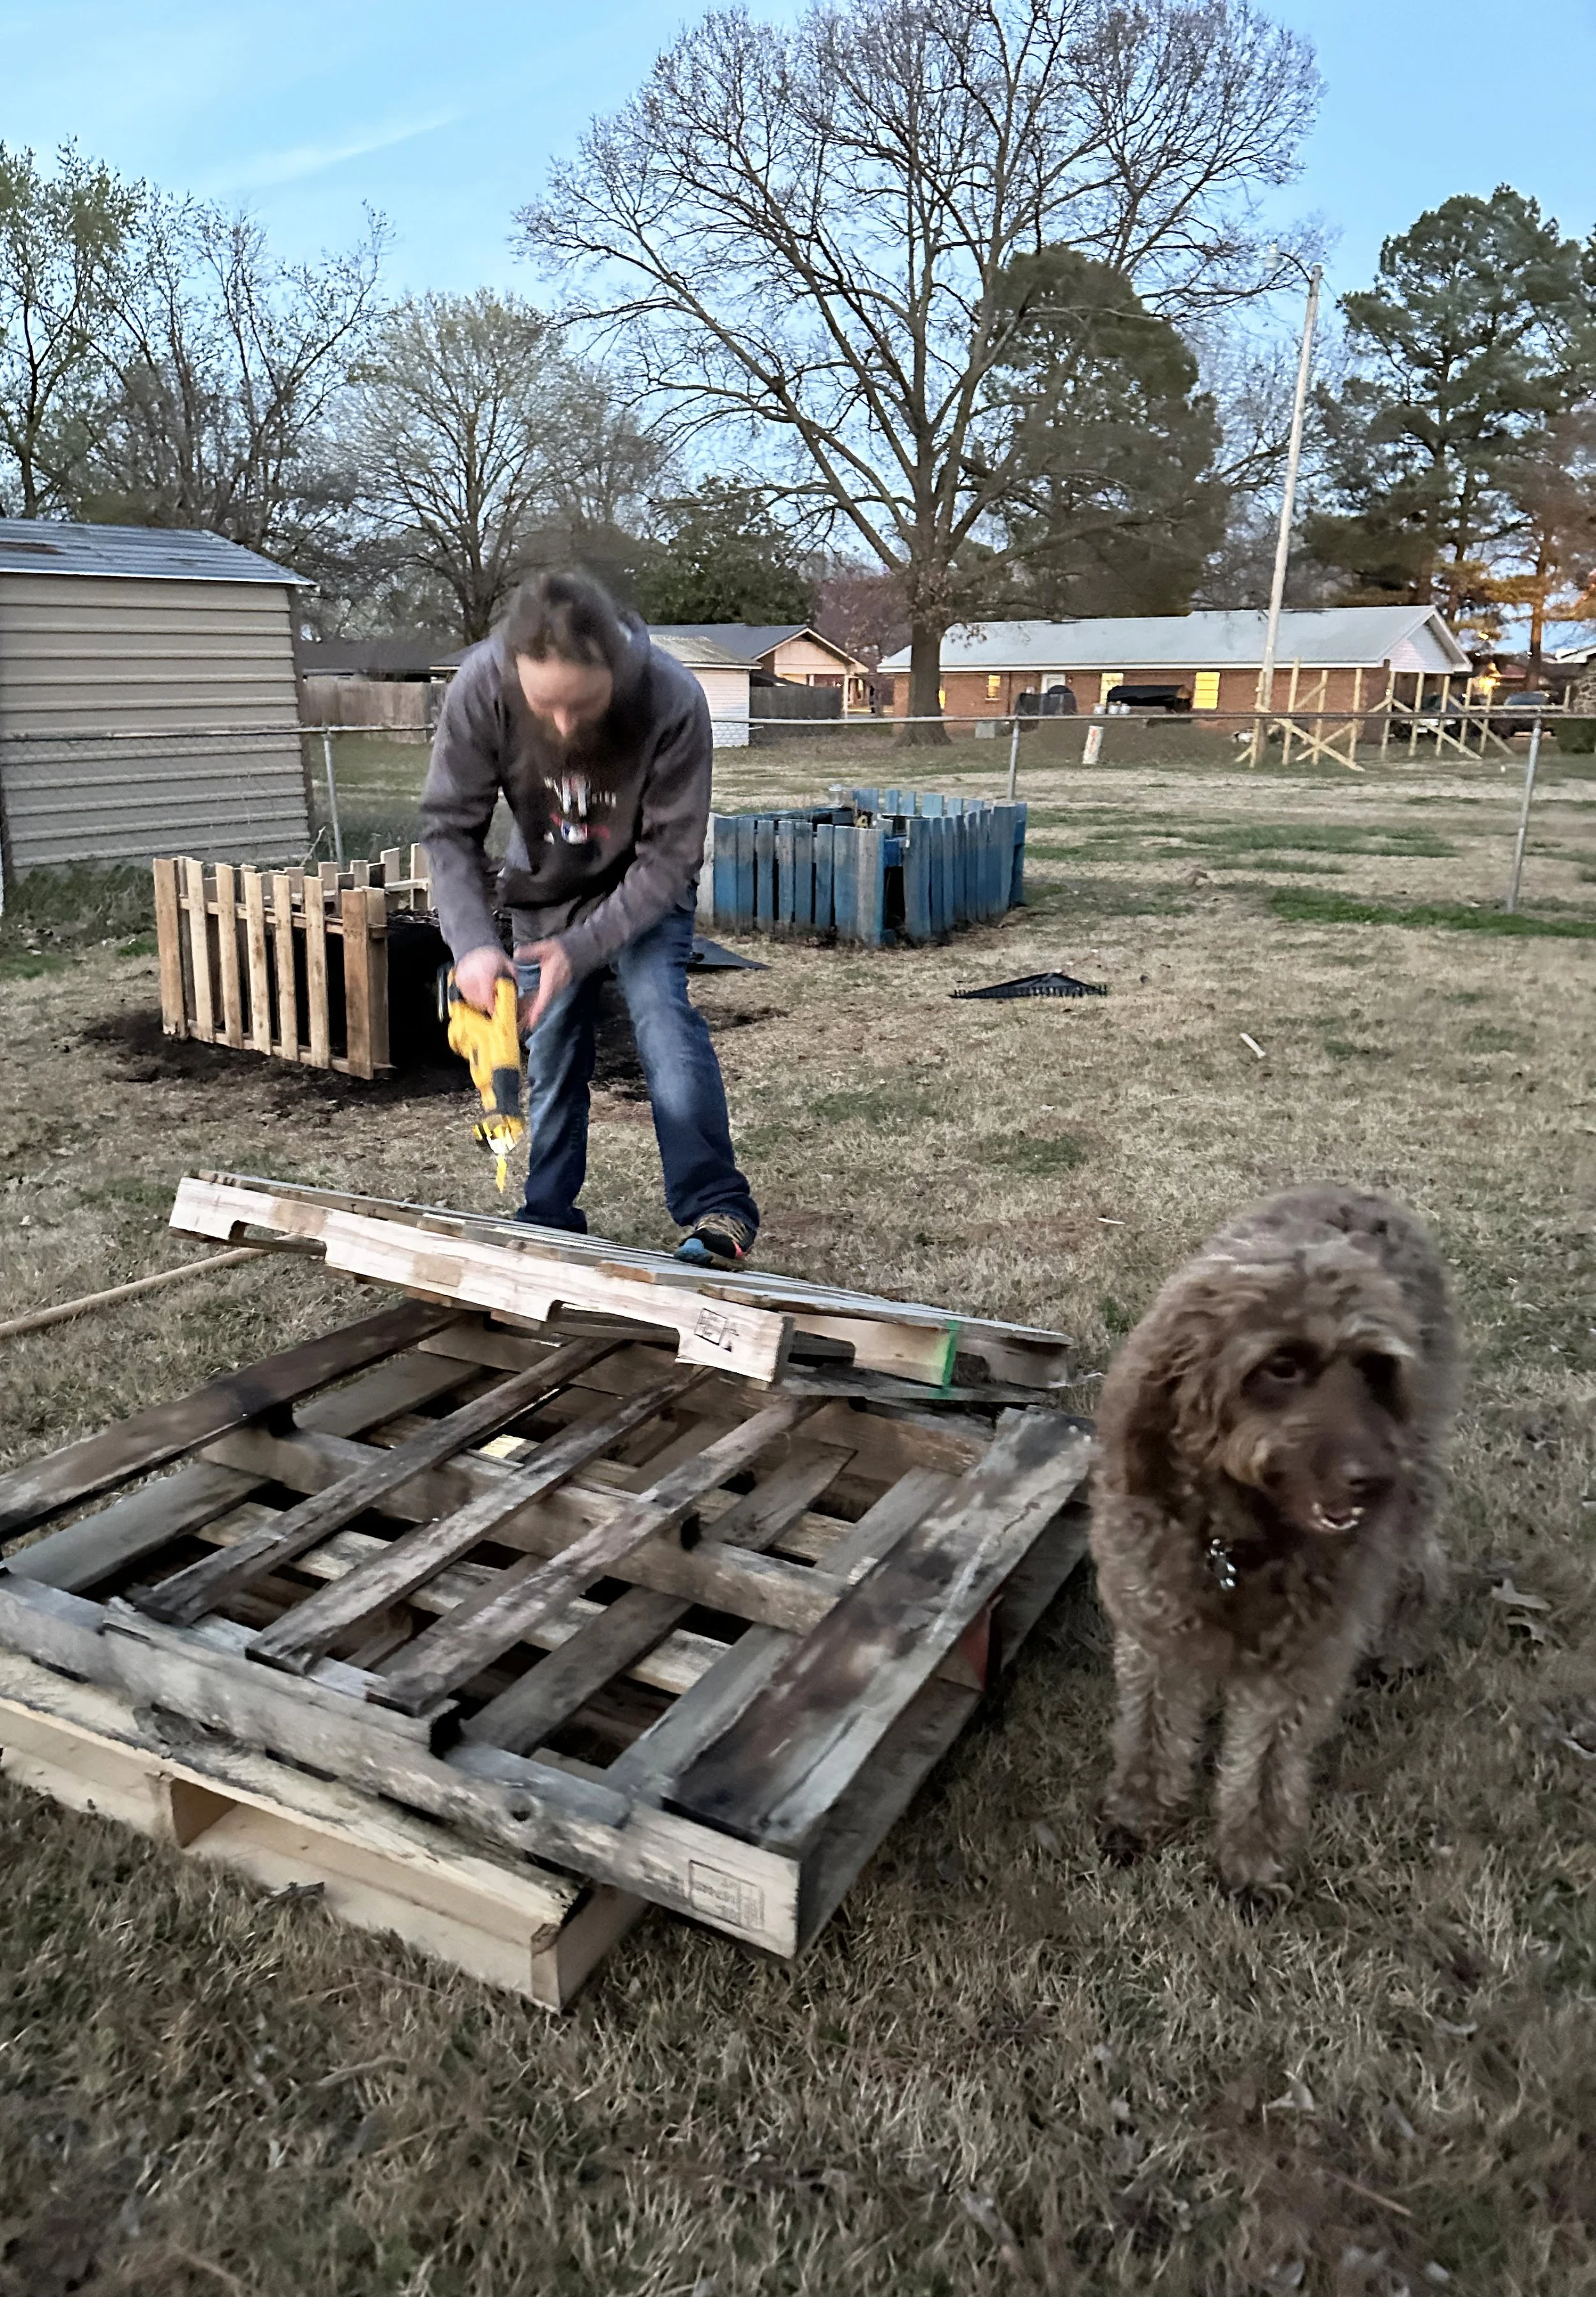
DIY Palette Garden Bed Instructions:

Materials Needed:

4 Palettes, 2 1/2” wood screws, drill, saw.

Tools We Use:

Instructions:

We cut/sawed apart a total of 4 palettes length wise, and used them to create the four sides. We used 2 1/2” wood screws to attach all the sides together. Next, we used smaller boards which were still attached to the extra pallet pieces as sides, in lieu of using weed barrier fabric like we did last year on the blue bed.

After you have reinforced the sides and made sure there is nowhere for dirst to fall out, then fill the bed with as many sticks as you can. This helps us save because we use less bags of dirt

Lastly, fill the remaining space in with bags of dirt. We like using the Miracle Grow soil if we can!

Once our seedlings are strong enough and there is no more cold weather snaps forecasted, our seedlings wil be plated outside in these beds, in an efort to have an even bigger and more varied garden than year one, last year!

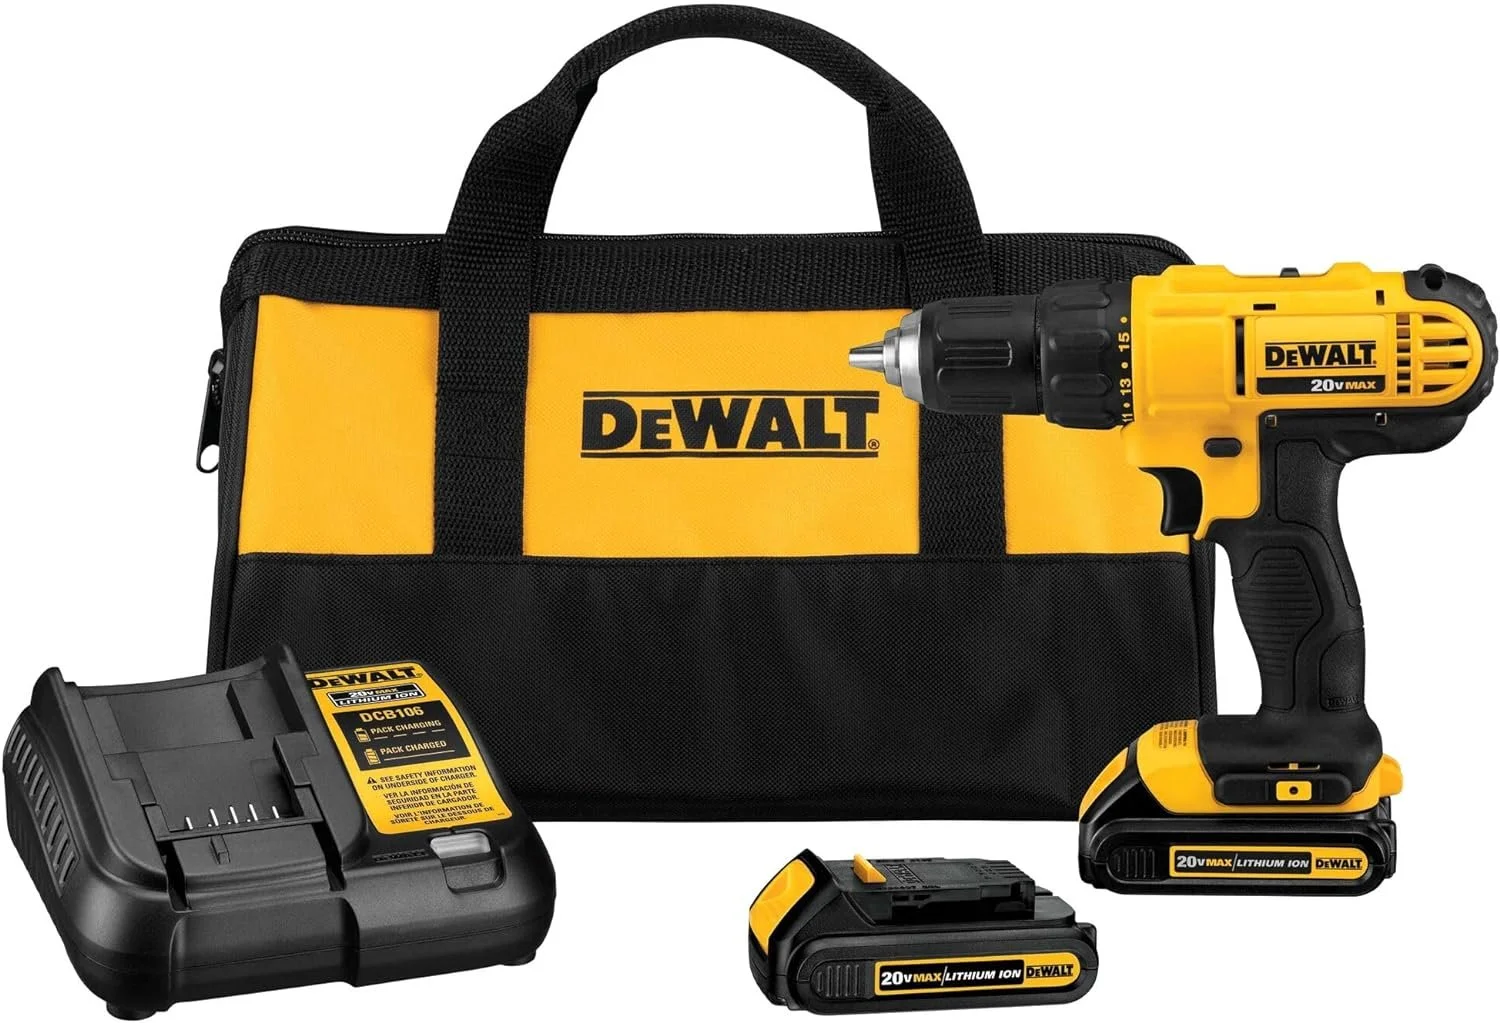
I wish I had known about these exact DEWAT Tools being on sale but I provided some links to the deals below for our handheld saw and our amazing cordless handheld drill from DEWALT. They have lasted a long time.

BELOW, OUR GARDEN FROM LAST YEAR (2023)

We got tons of tomatoes and tons of basil (which grew nestled beneath all of our tomatoes, shown here.

Below, out first palette garden bed built last year, then the awesome GardenWerx bag and gardening tools Travis got me as a surprise last year. I could not find a link for them, but I included a few cute ideas below.

Can’t wait to see how the garden performs this season!

Sheet Pan Spicy Roasted Brussels and Rainbow Veggies Recipe

This post was sponsored by Colman’s, all opinions are my own.

A delicious and health-forward vegan recipe that makes eating your vegetables easy AND delicious. Colman’s Mustard Glazed Brussels Sprouts and Roasted Vegetables make an amazing holiday side dish, snack, or even dinner idea. Colman’s dry mustard does have some heat and spice to it, but it’s a very nice, subtle warming flavor which I just love.

Flavors of mustard grace the outer edges of a wide array of vegetables, in every color and crunch level –you’re going to love these veggies! The mustard flavor also paired exceptionally well with the other marinade ingredients like honey and soy sauce.

Plus, these vegetables make a very elegant dinner or side dish, and go very well with lots of different refreshments. I just love how pretty the Brussels sprouts are when they are cut open. They are like mini cabbages, and while they do have a stronger and sometimes more acquired taste than other vegetables, they are said to be high in vitamins, minerals, and antioxidants. The more vegetables one can incorporate into their diets, the happier their bodies might be. While everyone is of course different, I love treating my friends and family to healthier meal options.

I always love creating plant-based meals that offers a new alternative to dinner or a side dish. Impress just about anyone (even if they are “newbies” to or unsure about Brussels sprouts, these are definitely a crowd pleaser.

By incorporating Colman’s dry and wet mustards into the glaze for these vegetables, I absolutely LOVED the new, unique flavors that came through from baking the ingredients with such a great marinade. If you can imagine a potato or egg salad containing mustard, that is where I got the idea that potatoes, Brussels sprouts, and so many other veggies would pair perfectly with the Colman’s mustards.

Colman’s has been creating mustards since 1814, using time-honored traditions and the highest quality ingredients.

INGREDIENTS (Serves 4-5):

Marinade:

2 Tbsp Colman’s Dry Mustard

2-3 Tbsp Colman’s Wet Mustard

1/3 C. Olive Oil or more, to ensure all veggies are fully coated at the end

2-3 tsp. seasoned salt

1 Tbsp balsamic vinegar

2 Tbsp honey

Suggested Vegetables:

2 Cups Brussels Sprouts (cut into halves, and cut some into quarters)

½ -1 C. thinly sliced Russet potatoes

½ C. sweet potatoes – chopped into small pieces

½ C. yellow zucchini

½ C. green zucchini

¼ C. corn – from cob or canned

1 head of garlic

INSTRUCTIONS:

1.) Prep all veggies, and cover sheet tray(s) with foil, Spray with non stick spray and preheat oven to 400 degrees. Carefully cut off top of garlic head. Set aside.

2.) In a medium to large mixing bowl, mix up all marinade then add veggies to mixing bowl. Use tongs to coat all vegetables, then transfer all veggies to sheet pan(s). To create the garlic head, simply cut off the top of the garlic to expose the cut tops of each clove, while still leaving the rest of the head in tact.

3.) Bake 20 minutes covered with foil, then CAREFULLY remove foil (there will be lots of steam, which can burn someone easily). Bake 10-15 more minutes, and then remove from oven. Transfer to serving tray or large bowl, OR transfer into plastic containers to give to busy families during the holidays. Enjoy!

Here are a few more images of the finished veggies and head of garlic. Definitely recommended!

Have an amazing holiday! And enjoy this delicious, health-forward dish today!

Check out Colman’s Dry and Wet Mustards today, and spice up just about any savory dish you can imagine!

Veggie Lovers’ Club Sandwich Recipe with Pepperidge Farm

This post has been sponsored by Pepperidge Farm®, all thoughts and opinions are my own.

If you’re wanting to find more ways to connect with family or friends, I often find that food brings people together better than nearly anything else. I recently created the most delicious Veggie Lovers’ Club Sandwich with Pepperidge Farm Farmhouse® Butter Bread, and it’s quickly becoming my go-to bread for sandwiches, breakfast recipes, and even making toast, which I love so dearly.

This sandwich contains ingredients in all sorts of colors; I just love to eat as many different colored veggies as possible each day. I hope you enjoy!

I find that sandwiches with fresh and delicious ingredients that can be made ahead of time really helps save time and brings families closer together. I absolutely love providing my friends and family with fresh, nourishing meals that in turn give them energy and encouragement to inspire wonderful days ahead. Whether you’re making this Club Sandwich for two or you’re making brunch for a whole house full of family and guests, I would definitely recommend the thick, rich, buttery taste of this awesome, slow baked Butter Bread – you’re going to love its fresh-from-the-oven taste!

When I visit the bread aisle at the grocery store, I see SO many choices for white bread. But even with all of those choices, few actually compare to this Butter Bread. I love how thick the slices are. Since I am already a huge fan of anything from Pepperidge Farm and I saw that this new flavor was available at a wide range of stores, I was instantly relieved to finally find a white bread with thicker slices and a bit of a buttery taste! YUM!

My boyfriend always jokes that any product that has butter in the name, I will love. Well, he is completely correct about that – I was seriously SO excited when I found out that one of my recipes contained butter bread, I nearly jumped for joy. That’s how much I love butter!

Find new Pepperidge Farm Farmhouse® Butter Bread at retailers like Target and Kroger here! This product may quickly become your FAVORITE new bread for every recipe you can imagine.

This Veggie Lovers’ Club Sandwich is such a fun way to spend more time together and also experience new and different ingredients and flavors – which is a super fun way to bond with those you love. Find joy in the simple flavors of these all-natural sandwich toppings!

INGREDIENTS (MAKES 2 SANDWICHES)

FOR THE SANDWICH:

6 slices of Pepperidge Farm Butter Bread

8 spinach leaves

10 slices of English cucumber

½ - 1 Cup sprouts (any flavor you like)

Toaster for bread

Food processor for beet spread

FOR THE BEET SPREAD:

1 package of pre-cooked beets or 1 can of beets (remove any liquid)

2-3 tsp olive oil

3 tsp balsamic vinaigrette

½ tsp salt

1 tsp Italian seasoning

(topped with chives – optional)

FOR THE GREEN GODDESS SANDWICH SPREAD:

¼ C. Greek yogurt (use non-dairy alternative for vegan)

1/8 C. mayo (use non-dairy alternative for vegan)

¼ C. finely chopped chives

2-3 Tbsp freshly chopped tarragon

1-2 tsp salt

1 tsp garlic powder

INSTRUCTIONS:

1.) Make Beet Sauce by putting all ingredients into food processor or blender, and pureeing until smooth. Add more salt if desired.

2.) Make Green Goddess Sandwich Spread by mixing all ingredients in a small bowl with a spoon until well combined. Feel free to add more salt, garlic powder, or any other seasonings you enjoy.

3.) Toast 6 slices of Butter Bread and get ready to make the Club Sandwich.

4.) To construct each sandwich – add Beet Spread on one slice of bread, then top with sprouts. On another slice of bread, add Green Goddess Spread and 5 slices of cucumbers (and a bit of salt on top of cucumbers if desired). One piece of bread will remain without any toppings.

5.) Lastly, layer the pieces like this – Beet Spread + Sprout slice, topped by the Green Goddess and Cucumber slice, then the final top slice of bread, and cut in half to serve! The beautiful layers of bread and ingredients are just so colorful and delicious. This toast also held up very well with all of these ingredients!

I hope you enjoy this vegetarian recipe with those you love! Good food brings people together, and that time with loved ones is what keeps me happy every day! Please let me know if you wind up making this recipe!

Veggie + Prosciutto Sandwich Recipe (Healthier Lunch Idea)

Sometimes you just want a deliciously decadent and healthier sandwich! Here is a delicious recipe that could even be made without the prosciutto to make a vegetarian sandwich too. Loaded with goat cheese, vegetables, and all sorts of toppings, this sandwich is sure to please!

INGREDIENTS:

- Whole Grain Bread of choice (4 slices)

- Goat Cheese Crumbles (3-4 Tablespoons)

- Red Pepper Slices (We used 1/8 of a red pepper, cut into slices)

- Pickled Red Onions (get our recipe here)

- 1/3 of a Jalapeno - sliced very thinly

- Seasoning like salt and pepper

- Panini Maker (we love this one from Cuisinart, which has removable, dishwasher-safe plates)

INSTRUCTIONS:

1. Add a layers of ingredients onto each piece of bread. One side has dijon mustard and prosciutto, the other side has red peppers, pickled red onions, goat cheese crumbles, and also slices of jalapeno, and optional seasoning (like a pinch of salt and pepper). Turn on panini maker

2.) Carefully close sandwich sides together, and place into panini maker. Toast for 3 or so minutes, to ensure the bread does not burn, but that the cheese is nice and melty inside. Remove from panini maker with a spatula, cut in half, and ENJOY!!!

Note - this panini maker heats up pretty quickly, so there is no need to preheat for more than a few minutes. Also, make sure that the plates are sitting flat on your sandwich, compared to sitting at an angle, so the entire sandwich cooks evenly.

CUISINART PANINI MAKER, NOW ON SALE AT MACY'S!

Dressed to grill. This panini & griddler in one brings the best of all worlds straight to the convenience of your countertop. Opening flat to double the cooking surface, this commanding essential features preset temps for grilling everything from burgers to steaks to sandwiches. Plus, this smart cooker puts health first—the front feet adjust to increase the amount of grease drained away from food. Model GR-11.

  • Dimensions: 12.8" x 10.9" x 6"
  • Power on & ready-to-cook indicator lights
  • Removable nonstick grill plates measures 10 1/4" x 6 1/2"
  • 3-year limited warranty
  • Brushed stainless steel
  • Dishwasher safe plates

Crudité Vegetable Wreath + Delicious Dip Recipe

Looking to offer more veggies and healthy options at your next party? This Crudité wreath is an excellent way to entice guests to snack on healthier ingredients compared to offering fried foods, chips, or something higher in fat. I made this fun appetizer during the holidays and would definitely make it again! I had so much fun shopping for all of the fresh ingredients.

Although this particular post is styled in more of a holiday theme, it can definitely be served in any setting, during any season! I was so happy to find all of these fresh ingredients in season during the winter. 

Ingredients (serves 10-15) 

FOR THE CRUDITE:

8 cups broccoli florets

3 cups Brussels sprouts, trimmed

2 cups green beans, trimmed

1 cup sugar snap peas, strings removed

Greek Yogurt

Cream cheese (8 oz.)

½ bunch curly kale, washed

2 cups cauliflower florets

9 cherry tomatoes

FOR THE DIP:

1 cup plain nonfat Greek yogurt

½ cup mayonnaise

2 tablespoons finely chopped shallot

1/2 C. shredded cheddar cheese, optional

2 tablespoons chopped fresh dill or 1 teaspoon dried

4 teaspoons white-wine vinegar

1 teaspoon garlic powder

1 teaspoon sugar

½ teaspoon salt

½ teaspoon ground white pepper

INSTRUCTIONS:

  1. To prepare crudité: Put a large pot of water on to boil. Set a large bowl of ice water by the stove. Blanch broccoli for 1 to 2 minutes in the boiling water. Using a slotted spoon, transfer the broccoli to the ice bath to chill. Drain well. Blanch Brussels sprouts, green beans and snap peas in the same way.
  2. To prepare dip: Whisk yogurt, mayonnaise, cream cheese, shallot, dill, vinegar, garlic powder, sugar, salt and pepper in a medium bowl. Transfer to a serving bowl; set it in the center of a large circular platter or decorative serving board.
  3. Arrange kale around the bowl, with the frilly edges on the outside. Top with the broccoli, Brussels sprouts, green beans, snap peas and cauliflower. Garnish with cherry tomatoes and serve. Enjoy!

Sheet Pan Meal - Pork Chops and Roasted Rainbow Vegetables Recipe

Wow! This quick and easy dish contains vegetables of every color of the rainbow. It's important to eat as many colors during each meal as possible. By updating traditional boneless pork chops and pairing them with fresh ingredients, your senses will delight you and your busy schedule won't have to wait.

Read More

Bluegrass + The Farmer's Market

I have written about the new Carbondale Community Farmer's Market before, but this week, I was so inspired by the live music that Hey Honey played! I created this fun video to showcase how vibrant this market is, so check it out here, or on my YouTube channel! 

Visit the Carbondale Community Farmer's Market every Wednesday from 3-6 pm, next to the Town Square Market, at the 200 block of Washington Street in Carbondale, IL. You will have access to seasonal produce, meat, eggs, bread, hand crafted sodas, sandwiches, baked goods, and more. You can even pick up some dinner at the market from Longbranch Cafe (I had the most amazing Sloppy Joes this week), and you can bring something home to snack on, or use for your meals throughout the rest of the week. I always like visiting each and every booth to see what's in season! 

Hope you can stop by the market soon! 

Market Fresh Ratatouille Recipe

Are you looking for a fresh, tasty recipe that you can make with items you find at the Farmer's Market? Here's a recipe you will love! This shop has been compensated by CollectiveBias, Inc. on behalf of its advertiser. All opinions and ideas are my own. #PickedAtPeak  #CollectiveBias

By incorporating fresh vegetables, and Prego® Farmers' Market sauces, your family will be eating more vegetables, and asking for seconds! This dish smells absolutely delicious while it is baking, and you can also make this dish ahead of time, and even freeze it to bake at a later date. Win-Win in my mind! 

I love the fact that we have two farmer's markets here in Carbondale, IL, and since the soil in Illinois is SO fertile, we are lucky enough to have lots of options as to what local foods we want to use. 

LET'S TALK SAUCE:

- New Prego® Farmers' Market Sauces have market-fresh ingredients, like vine-ripened tomatoes, garlic, and basil, that are picked at the peak of freshness. These new sauces are available at Walmart in the pasta aisle, my favorite aisle of all...

When I first began researching this ratatouille recipe, I found that every recipe traditionally called for a lengthy process of creating a sauce of your own. This recipe will save you so much time, by simply incorporating a jar of Prego® sauce, which makes this dish taste amazing. 

This Cotton Market Bag, above, was printed and designed by my friend at Bodega Press. It's one of my favorites! 

INGREDIENTS FOR 2-3 SERVINGS:

Squash At The Carbondale Market

- 1 Jar of new Prego® Farmers' Market sauce. I loved the Classic Marinara and the Tomato & Basil.

- 1 Zucchini, sliced very thin

- 1 Yellow Squash

- 1 Chinese Eggplant (the skinny kind)

- Olive Oil & Brush to apply oil

- Fresh Parsley, chopped finely

- Salt and other seasonings as desired

- Circular Baking Dish & Non Stick Cooking Spray

- Foil

Note: The above image shows more vegetables you can add to this recipe, but you can definitely make this with just the few ingredients I have listed. 

- Also, you can slice up onions and tomatoes, and layer them in between the other slices. 

To purchase these sauces, visit your local Walmart store, or shop online, here.

INSTRUCTIONS:

1.) Slice all 3 vegetables (zucchini, squash, and eggplant) very thinly (You can also include slices of onion and tomato here ). I used a Mandolin Slicer, which worked incredibly well for this recipe. CAUTION - Please, please use the guard piece that comes with the machine, because this took a small part of my boyfriend's pinky off and caused a big mess! Poor Bobby...Anyway! He's doing fine now :)

Set veggie slices aside and grab your sauce! It's already time to prepare your dish. 

2.) Spray your baking dish with non-stick cooking spray. Spread a thin layer of sauce, roughly 1/4" - 1/2" around the bottom of the dish. I used about 2/3 of the jar of sauce, but ideally 1/2 of a jar would be perfect!

3.) "Shingle" your vegetables, see below. I loved this part! Get about 4-6 veggie rounds in your hand, and alternate colors. 

4.) Put the shingled veggies into the baking dish, over the sauce, making sure not to press too hard, because you don't want the sauce on top of the veggies while baking.

5.) Continue the veggie spiral all the way to the center of the dish.

6.) Chop the parsley to sprinkle on top of the dish.

7.) Brush olive oil onto the veggies, carefully as to not get sauce on top of the veggie slices. Add salt and any other seasonings you want to the top of the dish. Garnish with chopped, fresh parsley - this adds so much to the look of your dish! 

8.) Lastly, bake the dish at 375 degrees, for roughly 30 minutes covered in foil, then for another 10-20 minutes with the foil off. Once the vegetables have browned, and the sauce has cooked down to a desirable amount, you're done! 

Enjoy!