Easy Vegan Potato Soup Recipe

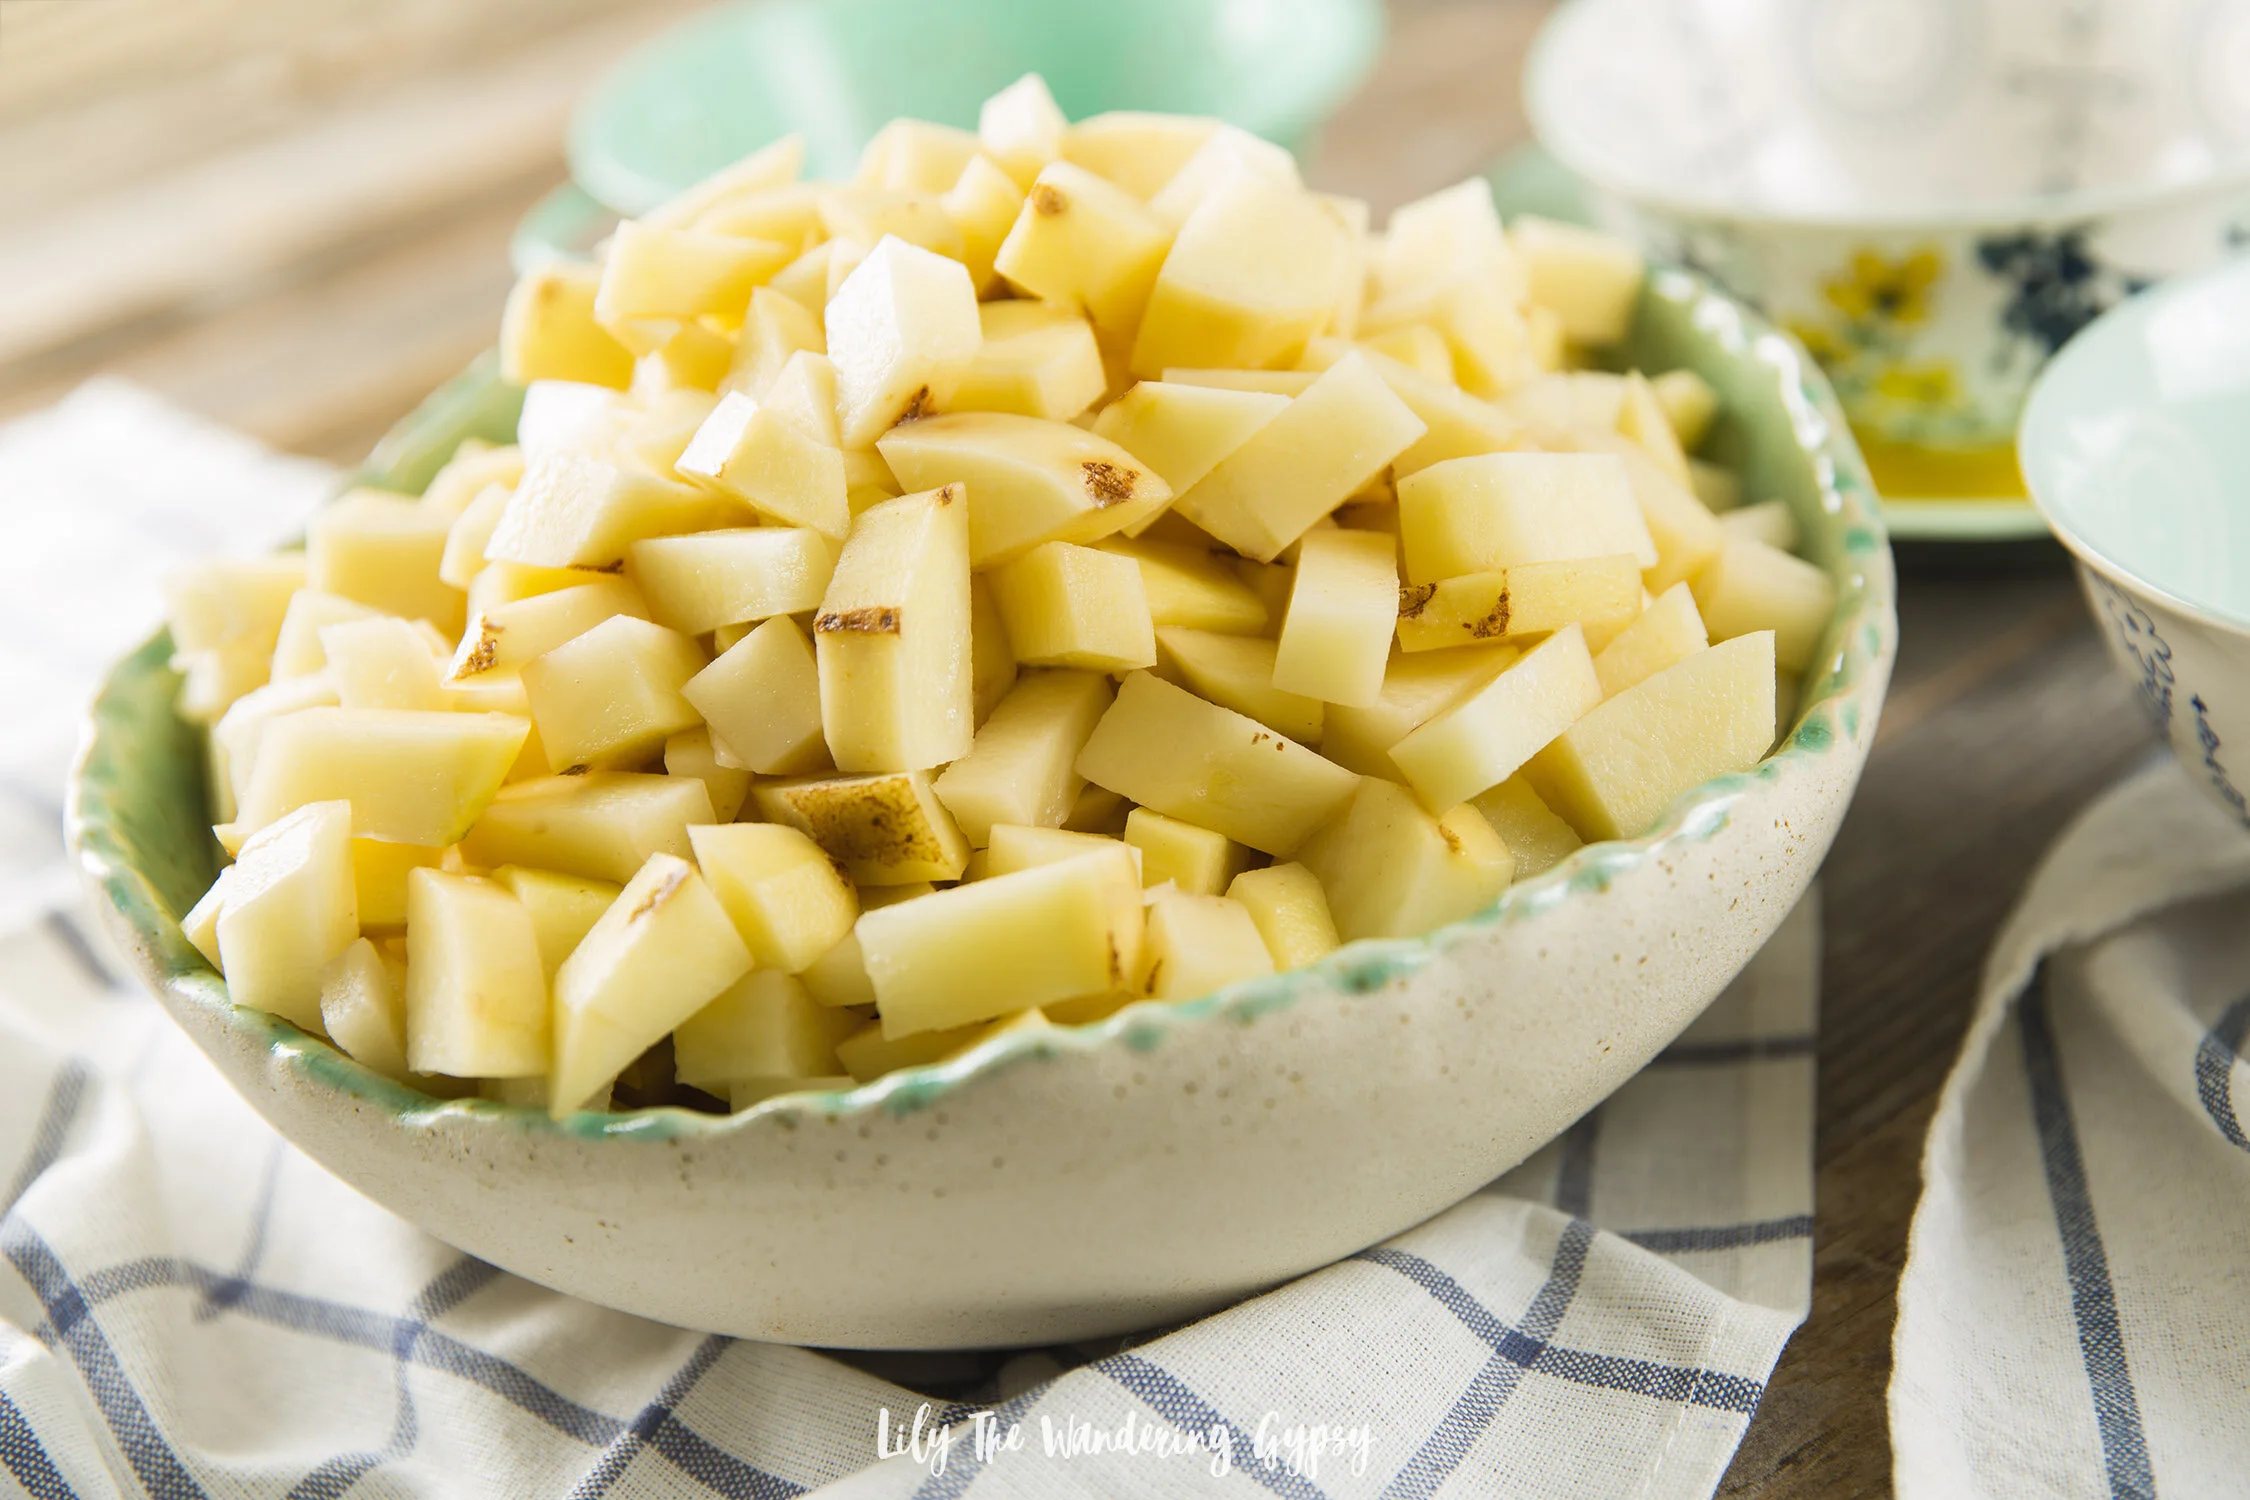
Vegan Potato Soup Recipe

This soup pairs well with a nice, dark, stout beer!

5DB_3445.jpg
Vegan Potato Soup Recipe

Using vegan cheese options is a great way to add flavor and dimension to your dairy-free soups.

Vegan Potato Soup Recipe

INGREDIENTS (found here, via A Virtual Vegan)

  • 2 TBSP vegan butter or olive oil.

  • 2 medium onions , chopped finely

  • 2 ribs celery , diced

  • 2 large carrots , diced

  • 4 cloves garlic , chopped finely

  • 2 teaspoons salt , plus more to taste

  • ½ teaspoon ground black pepper , plus more to taste

  • 4 tablespoons all purpose flour , or gluten-free all purpose flour

  • 2 cups non dairy milk , cashew milk or soy milk are my milks of choice for savory recipes but any other unsweetened creamy non-dairy milk will work too

  • 2½ - 3 cups flavorful vegetable broth/stock , divided

  • 5 medium / about 700 g potatoes , cut into ½ inch cubes

  • ¼ teaspoon ground nutmeg , (optional)

  • 1 bay leaf

INSTRUCTIONS

  • To a large saucepan, add the vegan butter/oil and warm over a medium heat before adding the onions, celery and carrots. Cook, stirring constantly, until the onions are just starting to get a little color, then add the garlic and cook for another 2 minutes.

  • Add the salt and pepper, then the flour to the pan and stir it all around for about a minute to cook the raw flour taste out, then slowly add the soy milk, stirring as you go to work out any lumps. Then add the vegetable broth (reserving about ½ a cup), chopped potatoes, nutmeg and the bay leaf.

  • Stir really well then let it simmer for about 30 minutes, or until the potatoes are soft and just starting to break down. Add all of, or some of, the reserved ½ a cup of broth if you prefer a thinner consistency. Taste and adjust seasoning if necessary.

Vegan Potato Soup Recipe

Vegan Game Day Appetizers with Gardein

Super excited for #FootballSeason with @gardein! Here is a delicious #vegetarian #football #party #appetizer that will please fans. These #plantbased Gardein Meatless Meatballs are great baked in the oven, then finished off in your favorite sauce in a skillet in the oven. They also have a range of other products like chicken fingers and chicken strips which we have thoroughly enjoyed all season long.

The brand was so kind to send me an assortment of their meatless appetizers

#GardeinGameDay #IC #appetizer #meatlessmonday #footballparty #recipe #heresmyfood #meatless

Flyway Family Mushroom Farm - Makanda, IL

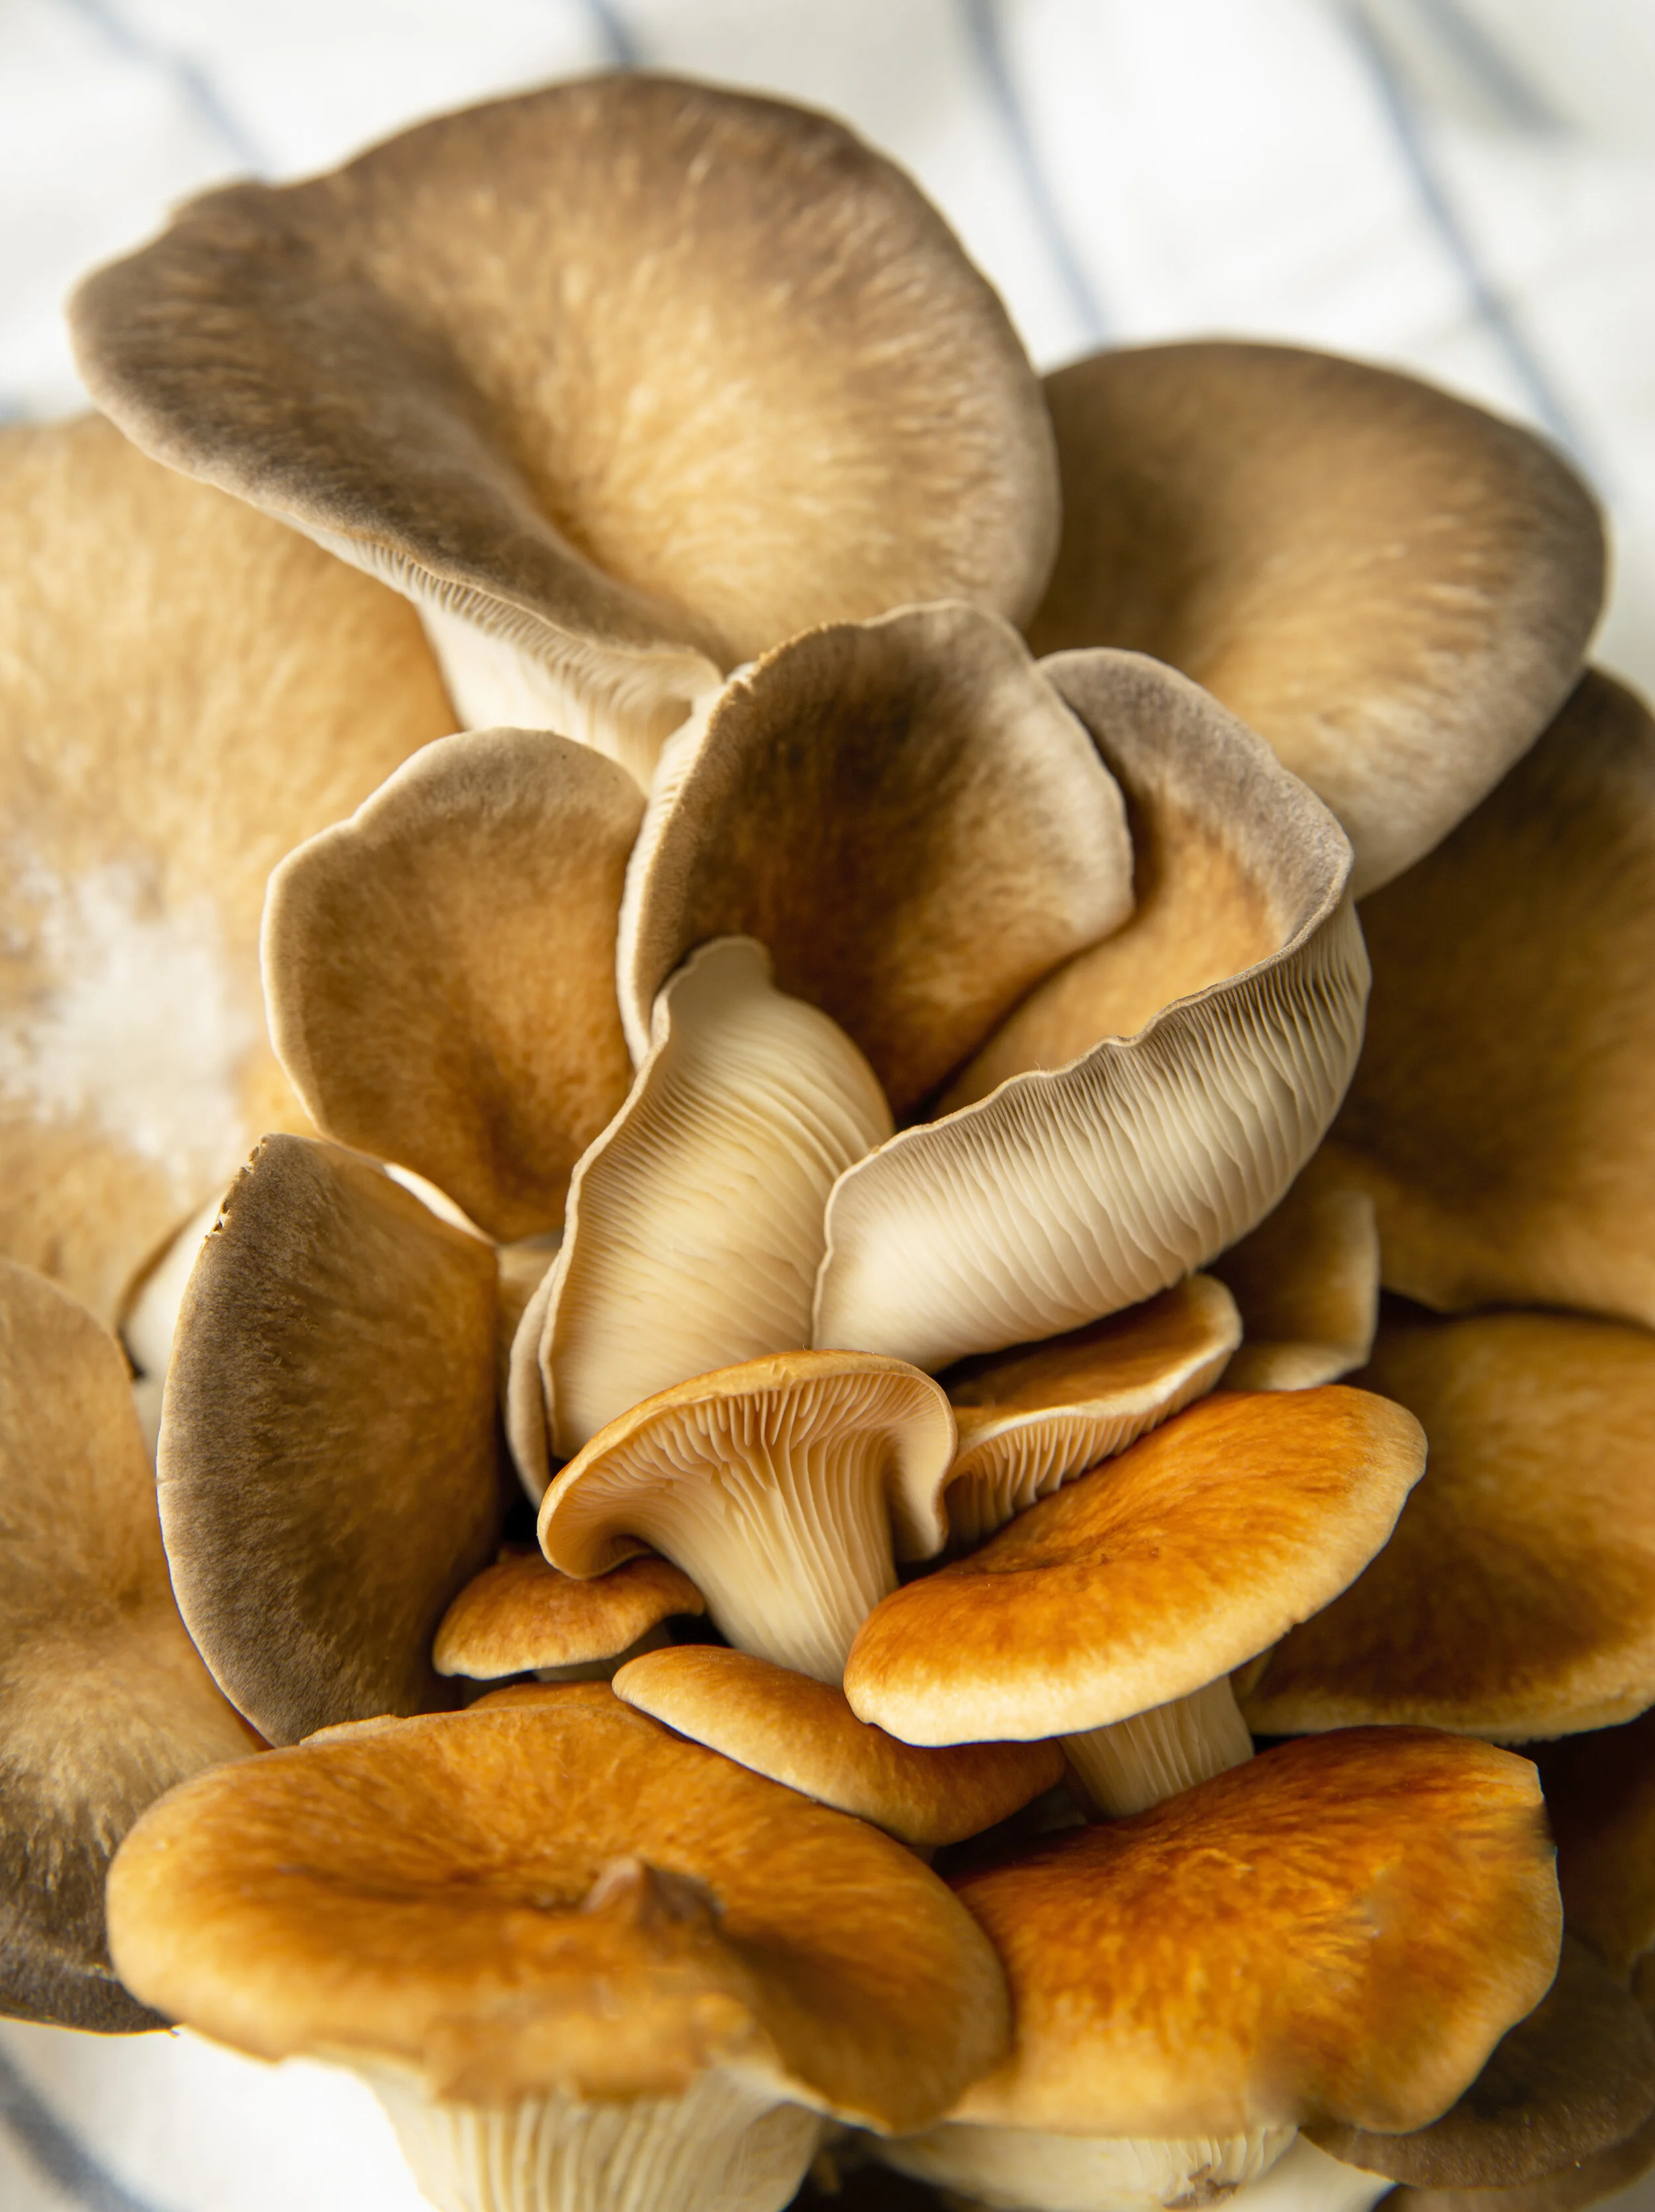
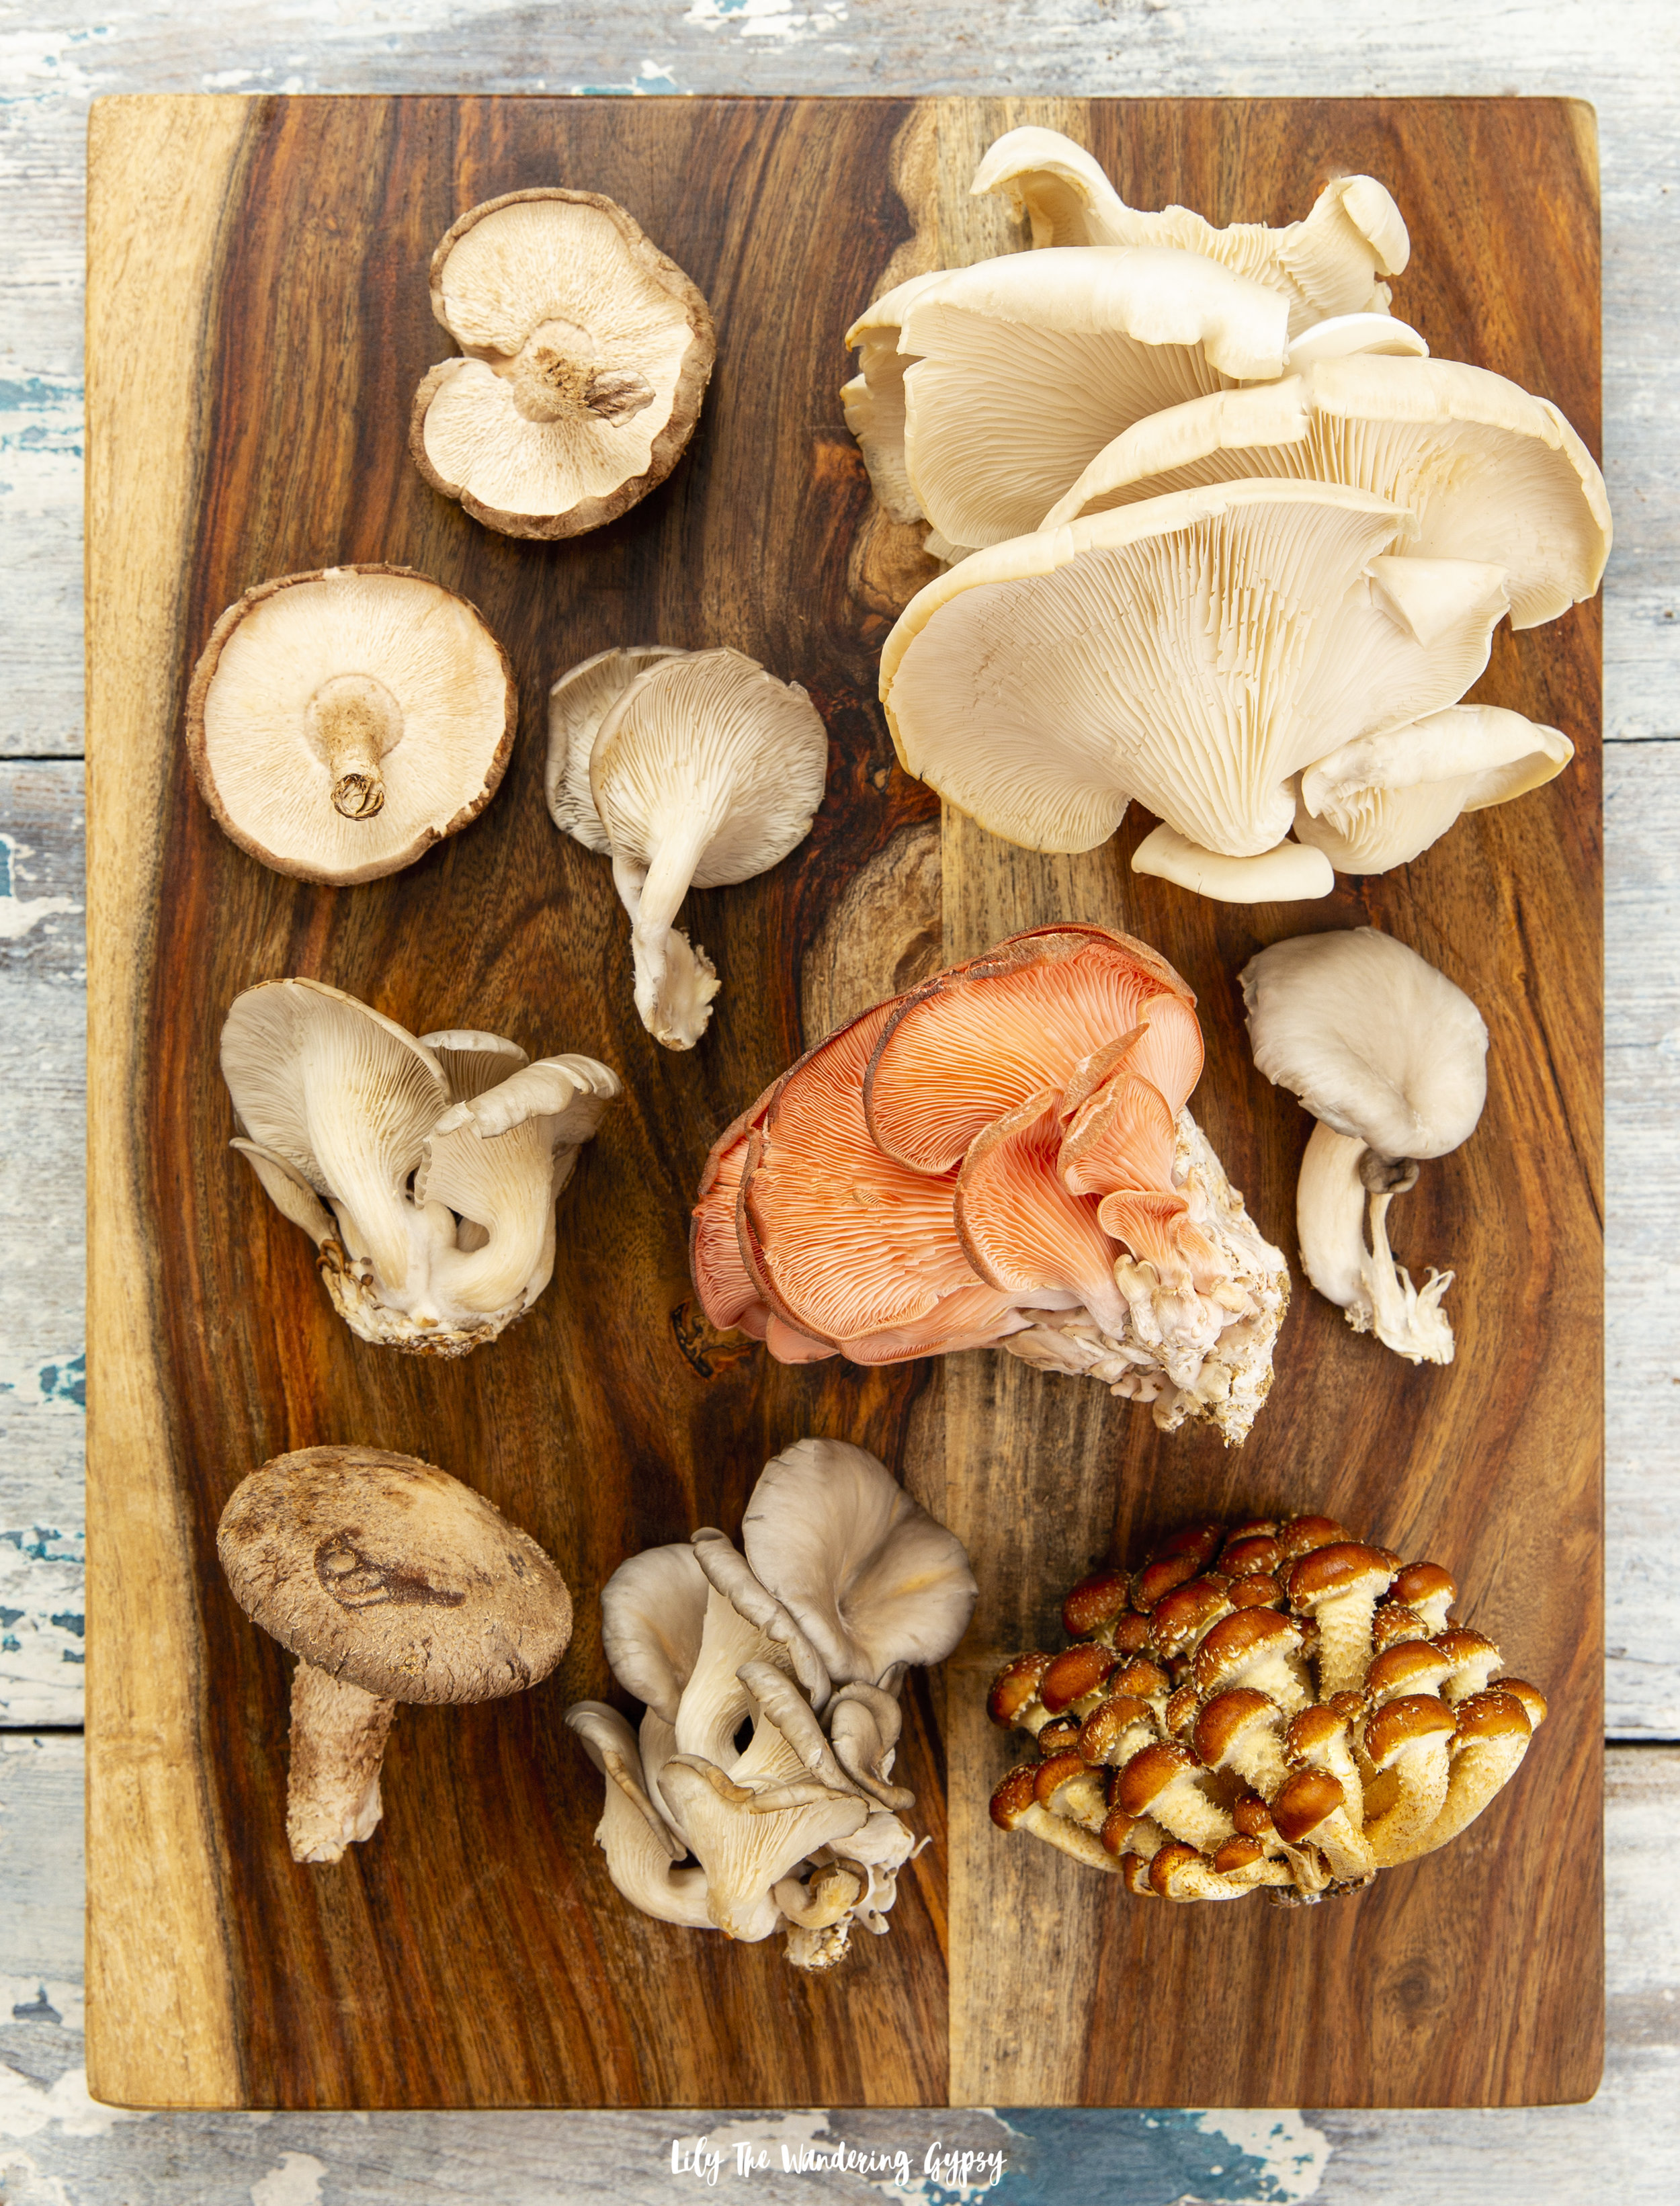
I met Mike and Jess at the Carbondale Farmer’s Market years ago, and they are some of my favorite people to this day. They sell their incredible, gourmet mushrooms at the market every Saturday throughout the entire season from April - November. You can also find their mushrooms at various local restaurants, grocery stores like The Neighborhood Co-Op, and at the Urbana, IL Market.

Connect With Flyway Family Farm on Facebook and Instagram!

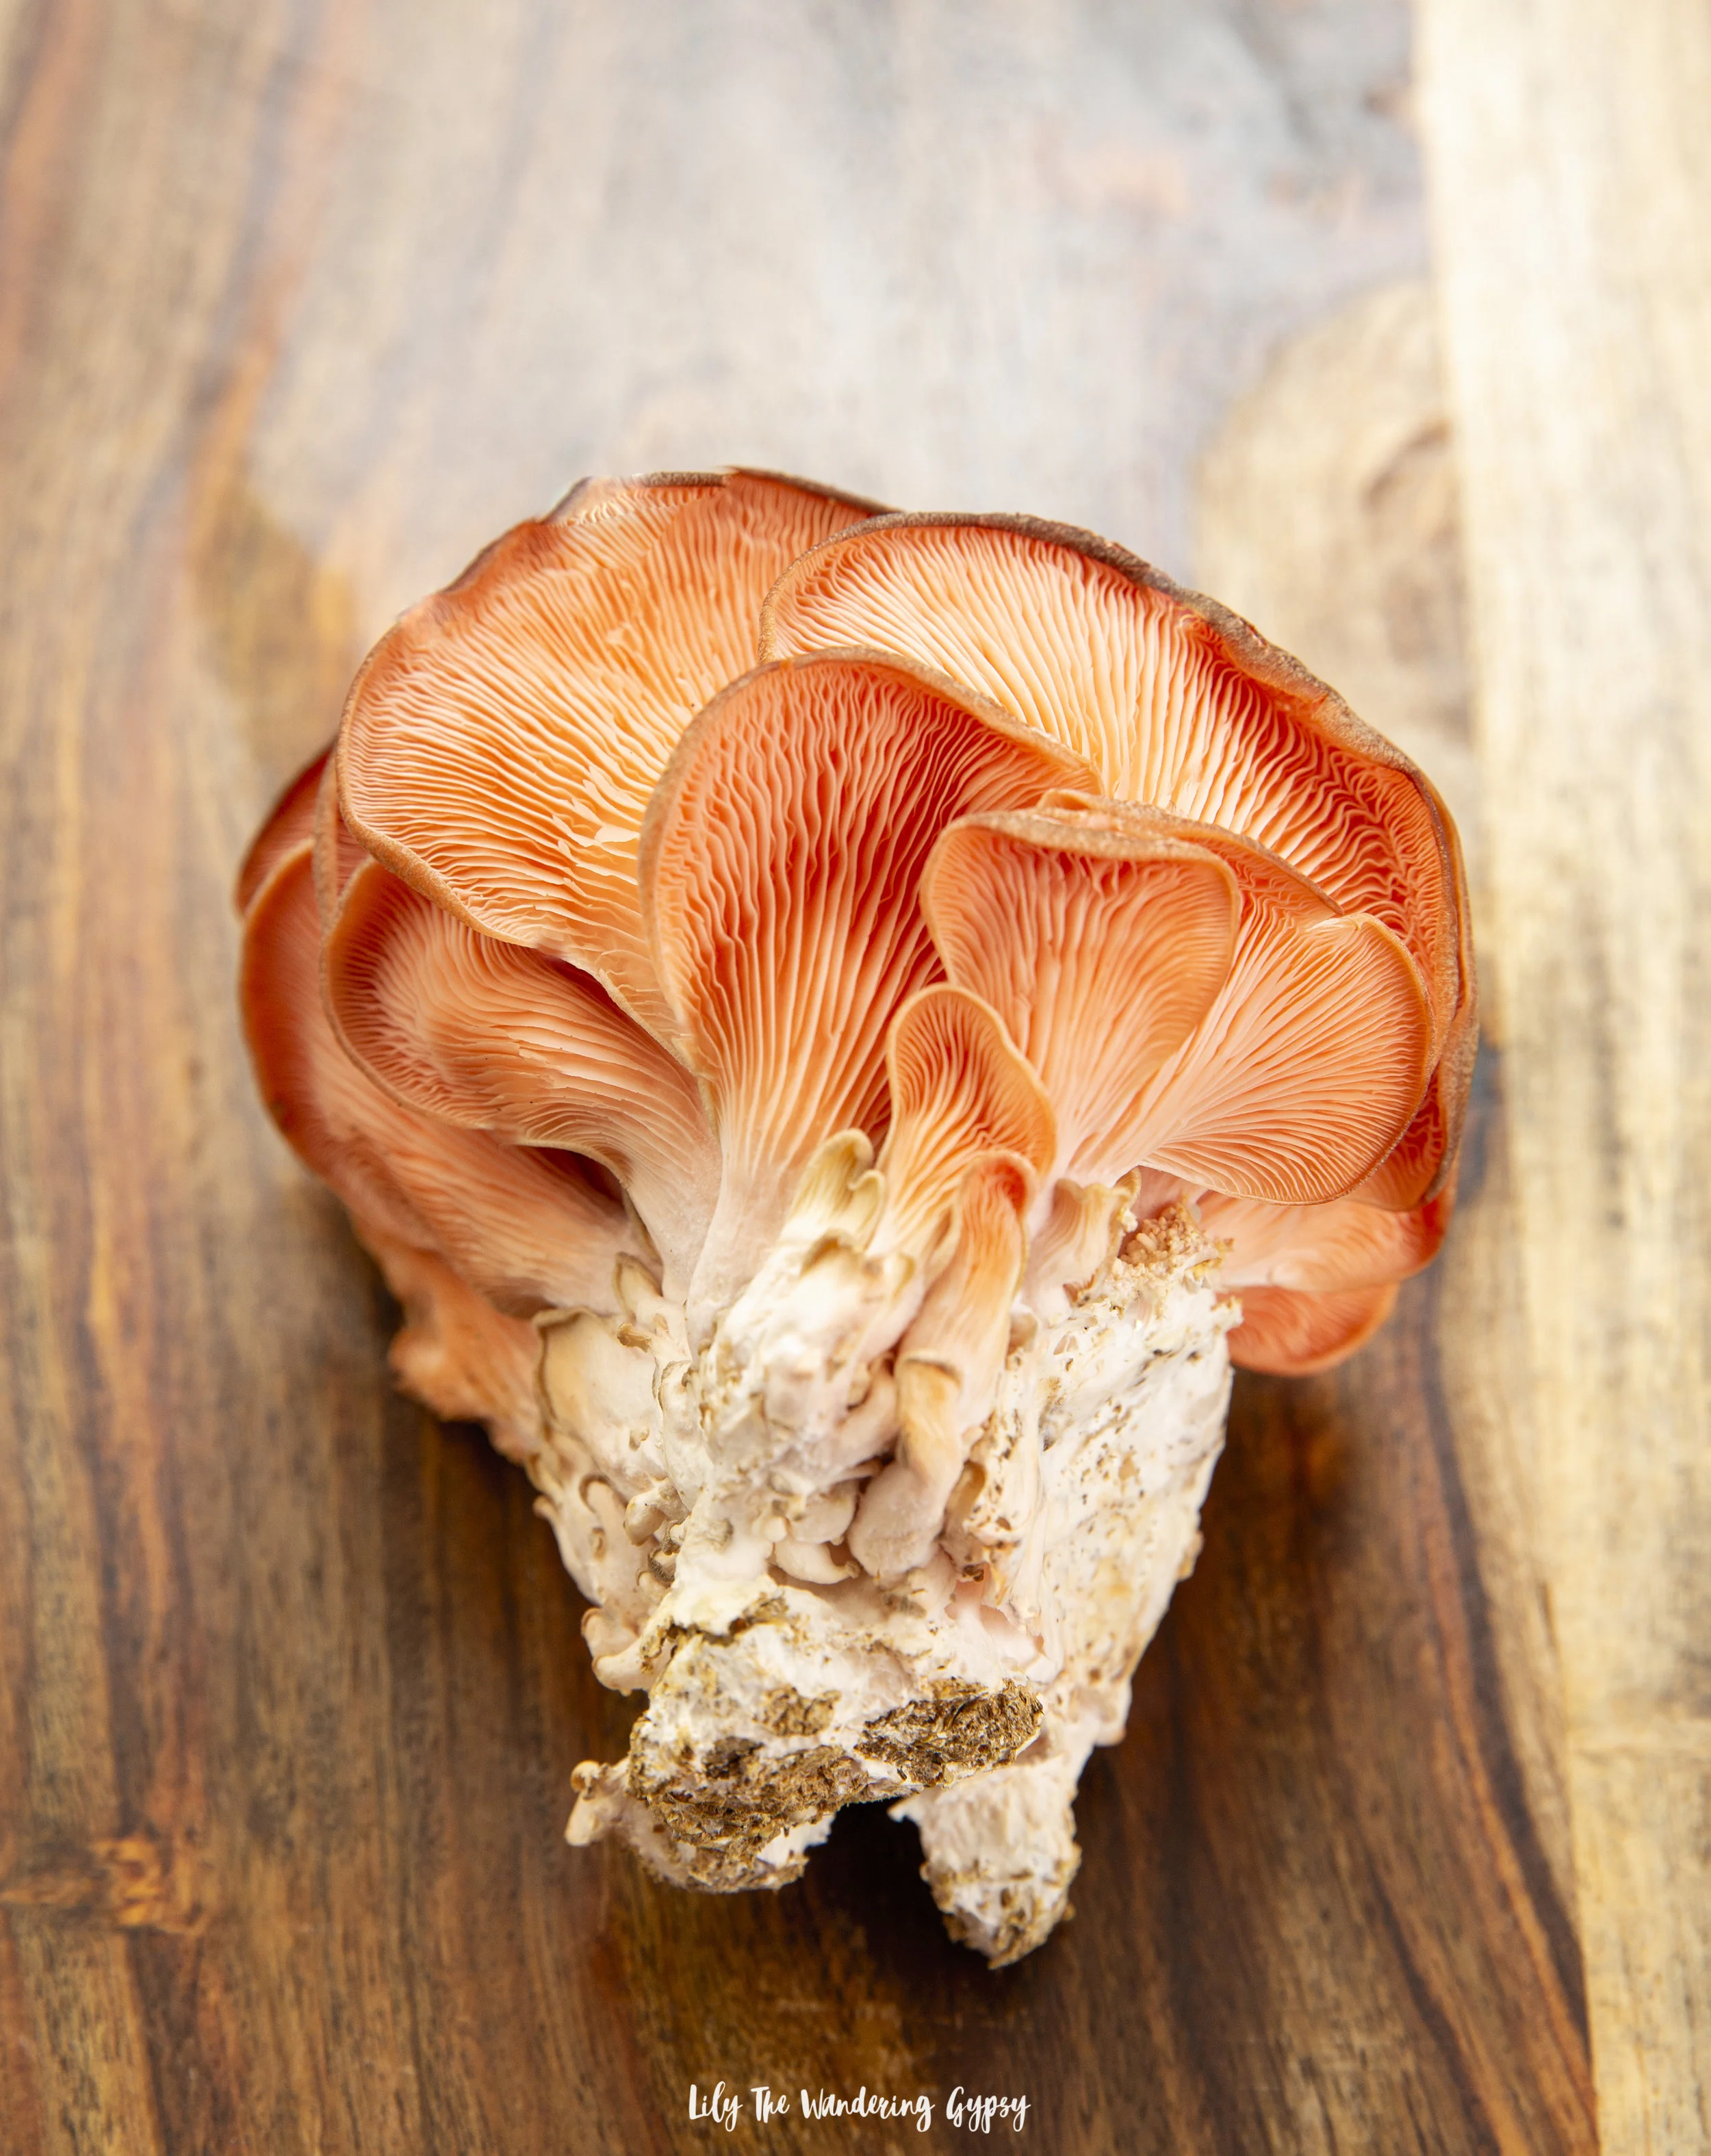
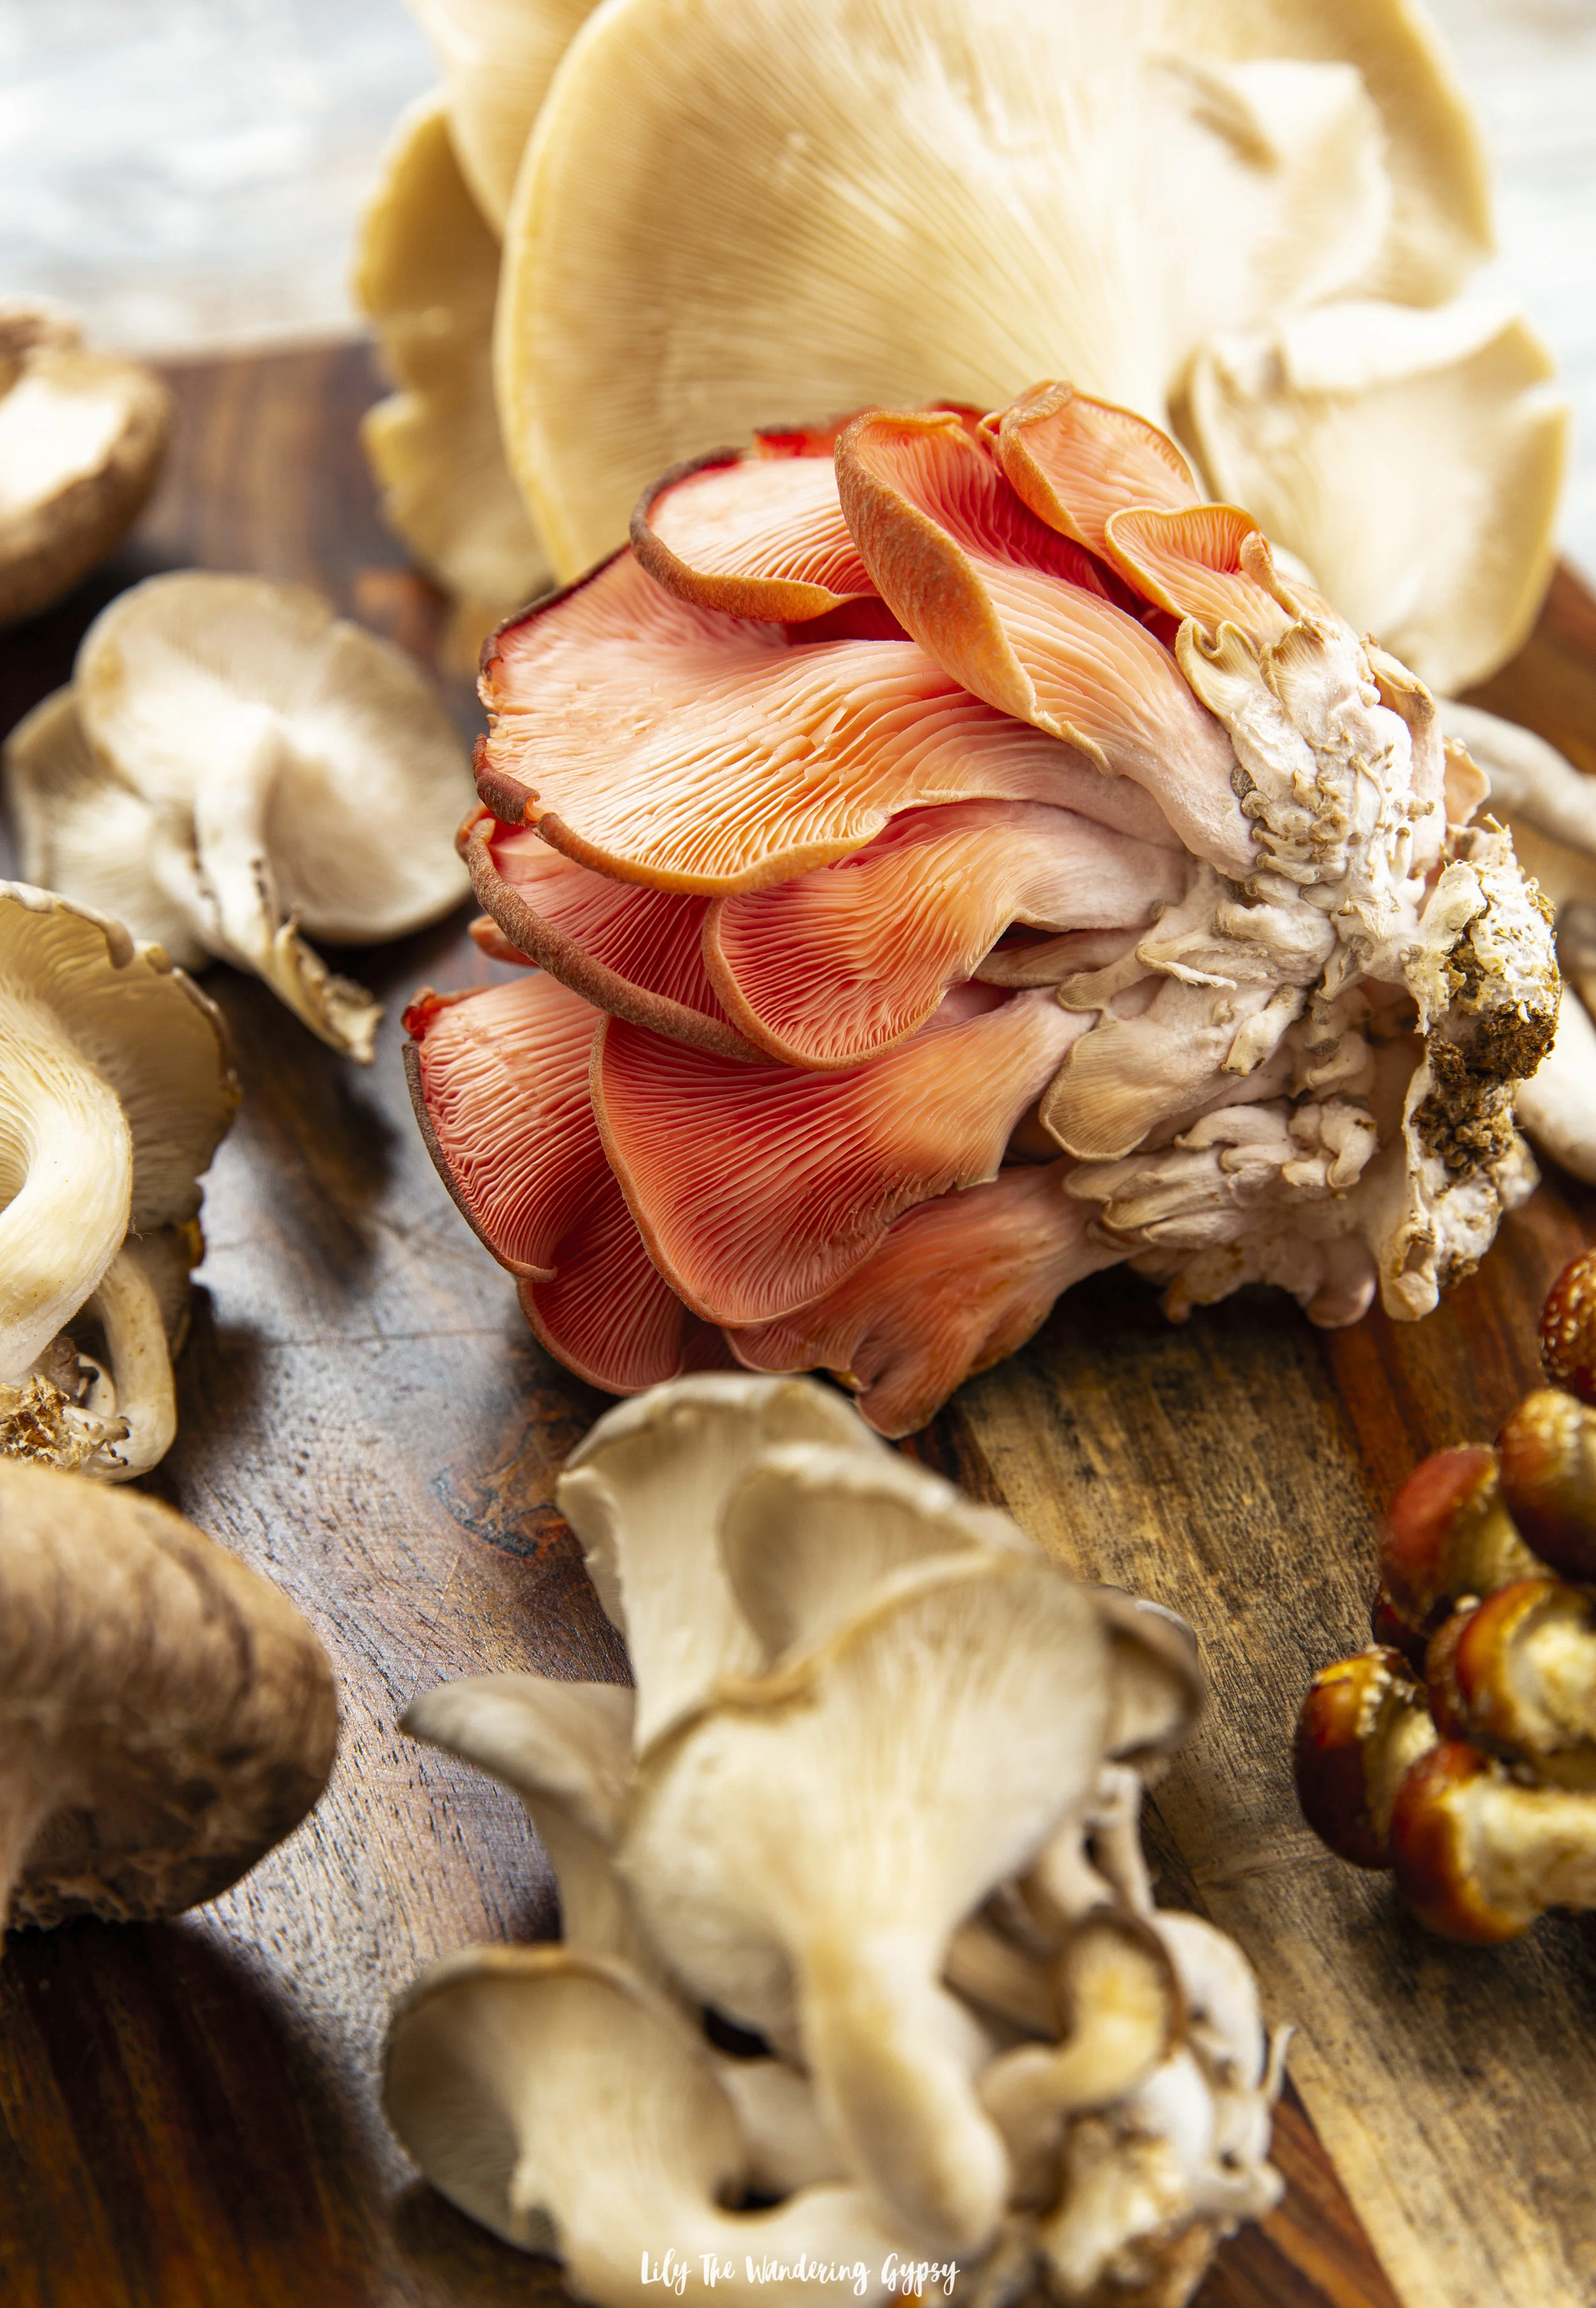
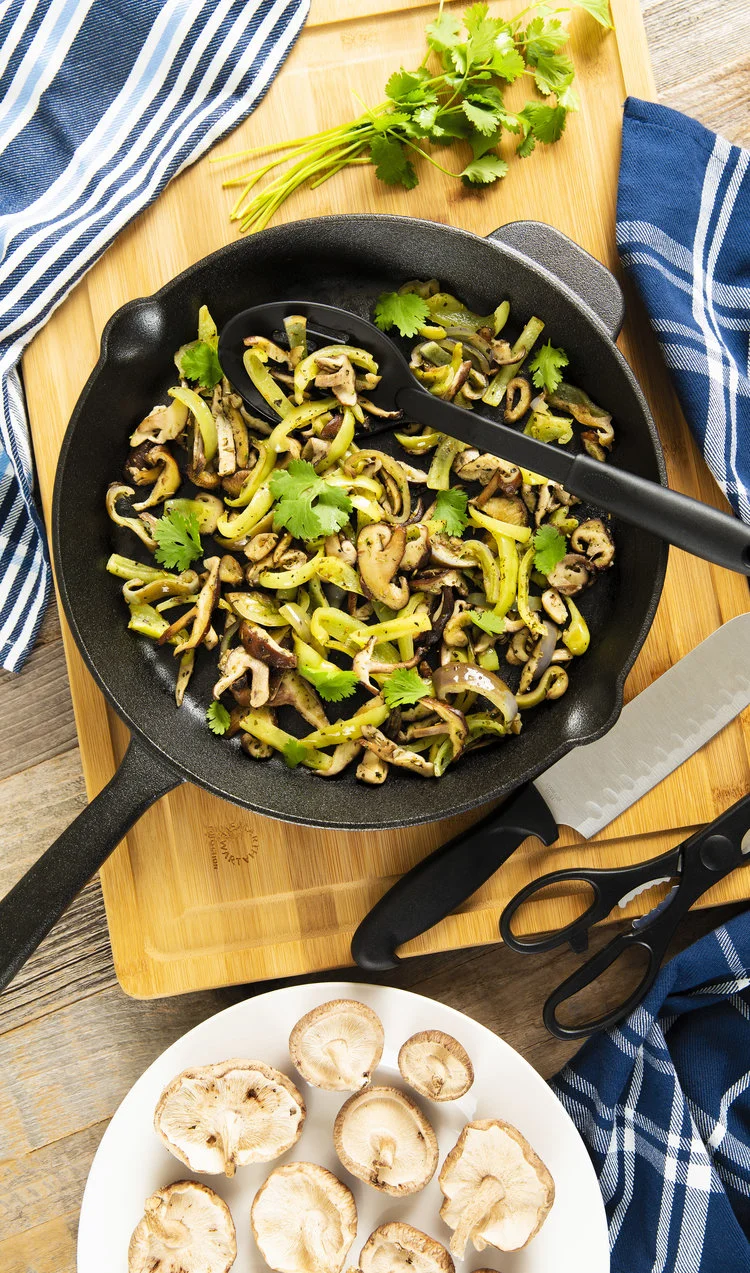
I recently had the honor of capturing some of their current offerings. They have a Chef’s Mix, which contained some of each. These pink oyster mushrooms were so incredible in a mixed veggie skillet we made recently while camping.

Last year, we also created a really incredible post for Martha Stewart, featuring several of the Flyway Family Farm mushrooms, which I also found at the Farmer’s Market.

Looking for a delicious marinated mushroom recipe? They can be made ahead of time, and enjoyed for up to five days.

TRY THESE RECIPES

Sheet Pan Spicy Roasted Brussels and Rainbow Veggies Recipe

This post was sponsored by Colman’s, all opinions are my own.

A delicious and health-forward vegan recipe that makes eating your vegetables easy AND delicious. Colman’s Mustard Glazed Brussels Sprouts and Roasted Vegetables make an amazing holiday side dish, snack, or even dinner idea. Colman’s dry mustard does have some heat and spice to it, but it’s a very nice, subtle warming flavor which I just love.

Flavors of mustard grace the outer edges of a wide array of vegetables, in every color and crunch level –you’re going to love these veggies! The mustard flavor also paired exceptionally well with the other marinade ingredients like honey and soy sauce.

Plus, these vegetables make a very elegant dinner or side dish, and go very well with lots of different refreshments. I just love how pretty the Brussels sprouts are when they are cut open. They are like mini cabbages, and while they do have a stronger and sometimes more acquired taste than other vegetables, they are said to be high in vitamins, minerals, and antioxidants. The more vegetables one can incorporate into their diets, the happier their bodies might be. While everyone is of course different, I love treating my friends and family to healthier meal options.

I always love creating plant-based meals that offers a new alternative to dinner or a side dish. Impress just about anyone (even if they are “newbies” to or unsure about Brussels sprouts, these are definitely a crowd pleaser.

By incorporating Colman’s dry and wet mustards into the glaze for these vegetables, I absolutely LOVED the new, unique flavors that came through from baking the ingredients with such a great marinade. If you can imagine a potato or egg salad containing mustard, that is where I got the idea that potatoes, Brussels sprouts, and so many other veggies would pair perfectly with the Colman’s mustards.

Colman’s has been creating mustards since 1814, using time-honored traditions and the highest quality ingredients.

INGREDIENTS (Serves 4-5):

Marinade:

2 Tbsp Colman’s Dry Mustard

2-3 Tbsp Colman’s Wet Mustard

1/3 C. Olive Oil or more, to ensure all veggies are fully coated at the end

2-3 tsp. seasoned salt

1 Tbsp balsamic vinegar

2 Tbsp honey

Suggested Vegetables:

2 Cups Brussels Sprouts (cut into halves, and cut some into quarters)

½ -1 C. thinly sliced Russet potatoes

½ C. sweet potatoes – chopped into small pieces

½ C. yellow zucchini

½ C. green zucchini

¼ C. corn – from cob or canned

1 head of garlic

INSTRUCTIONS:

1.) Prep all veggies, and cover sheet tray(s) with foil, Spray with non stick spray and preheat oven to 400 degrees. Carefully cut off top of garlic head. Set aside.

2.) In a medium to large mixing bowl, mix up all marinade then add veggies to mixing bowl. Use tongs to coat all vegetables, then transfer all veggies to sheet pan(s). To create the garlic head, simply cut off the top of the garlic to expose the cut tops of each clove, while still leaving the rest of the head in tact.

3.) Bake 20 minutes covered with foil, then CAREFULLY remove foil (there will be lots of steam, which can burn someone easily). Bake 10-15 more minutes, and then remove from oven. Transfer to serving tray or large bowl, OR transfer into plastic containers to give to busy families during the holidays. Enjoy!

Here are a few more images of the finished veggies and head of garlic. Definitely recommended!

Have an amazing holiday! And enjoy this delicious, health-forward dish today!

Check out Colman’s Dry and Wet Mustards today, and spice up just about any savory dish you can imagine!

Veggie Lovers’ Club Sandwich Recipe with Pepperidge Farm

This post has been sponsored by Pepperidge Farm®, all thoughts and opinions are my own.

If you’re wanting to find more ways to connect with family or friends, I often find that food brings people together better than nearly anything else. I recently created the most delicious Veggie Lovers’ Club Sandwich with Pepperidge Farm Farmhouse® Butter Bread, and it’s quickly becoming my go-to bread for sandwiches, breakfast recipes, and even making toast, which I love so dearly.

This sandwich contains ingredients in all sorts of colors; I just love to eat as many different colored veggies as possible each day. I hope you enjoy!

I find that sandwiches with fresh and delicious ingredients that can be made ahead of time really helps save time and brings families closer together. I absolutely love providing my friends and family with fresh, nourishing meals that in turn give them energy and encouragement to inspire wonderful days ahead. Whether you’re making this Club Sandwich for two or you’re making brunch for a whole house full of family and guests, I would definitely recommend the thick, rich, buttery taste of this awesome, slow baked Butter Bread – you’re going to love its fresh-from-the-oven taste!

When I visit the bread aisle at the grocery store, I see SO many choices for white bread. But even with all of those choices, few actually compare to this Butter Bread. I love how thick the slices are. Since I am already a huge fan of anything from Pepperidge Farm and I saw that this new flavor was available at a wide range of stores, I was instantly relieved to finally find a white bread with thicker slices and a bit of a buttery taste! YUM!

My boyfriend always jokes that any product that has butter in the name, I will love. Well, he is completely correct about that – I was seriously SO excited when I found out that one of my recipes contained butter bread, I nearly jumped for joy. That’s how much I love butter!

Find new Pepperidge Farm Farmhouse® Butter Bread at retailers like Target and Kroger here! This product may quickly become your FAVORITE new bread for every recipe you can imagine.

This Veggie Lovers’ Club Sandwich is such a fun way to spend more time together and also experience new and different ingredients and flavors – which is a super fun way to bond with those you love. Find joy in the simple flavors of these all-natural sandwich toppings!

INGREDIENTS (MAKES 2 SANDWICHES)

FOR THE SANDWICH:

6 slices of Pepperidge Farm Butter Bread

8 spinach leaves

10 slices of English cucumber

½ - 1 Cup sprouts (any flavor you like)

Toaster for bread

Food processor for beet spread

FOR THE BEET SPREAD:

1 package of pre-cooked beets or 1 can of beets (remove any liquid)

2-3 tsp olive oil

3 tsp balsamic vinaigrette

½ tsp salt

1 tsp Italian seasoning

(topped with chives – optional)

FOR THE GREEN GODDESS SANDWICH SPREAD:

¼ C. Greek yogurt (use non-dairy alternative for vegan)

1/8 C. mayo (use non-dairy alternative for vegan)

¼ C. finely chopped chives

2-3 Tbsp freshly chopped tarragon

1-2 tsp salt

1 tsp garlic powder

INSTRUCTIONS:

1.) Make Beet Sauce by putting all ingredients into food processor or blender, and pureeing until smooth. Add more salt if desired.

2.) Make Green Goddess Sandwich Spread by mixing all ingredients in a small bowl with a spoon until well combined. Feel free to add more salt, garlic powder, or any other seasonings you enjoy.

3.) Toast 6 slices of Butter Bread and get ready to make the Club Sandwich.

4.) To construct each sandwich – add Beet Spread on one slice of bread, then top with sprouts. On another slice of bread, add Green Goddess Spread and 5 slices of cucumbers (and a bit of salt on top of cucumbers if desired). One piece of bread will remain without any toppings.

5.) Lastly, layer the pieces like this – Beet Spread + Sprout slice, topped by the Green Goddess and Cucumber slice, then the final top slice of bread, and cut in half to serve! The beautiful layers of bread and ingredients are just so colorful and delicious. This toast also held up very well with all of these ingredients!

I hope you enjoy this vegetarian recipe with those you love! Good food brings people together, and that time with loved ones is what keeps me happy every day! Please let me know if you wind up making this recipe!

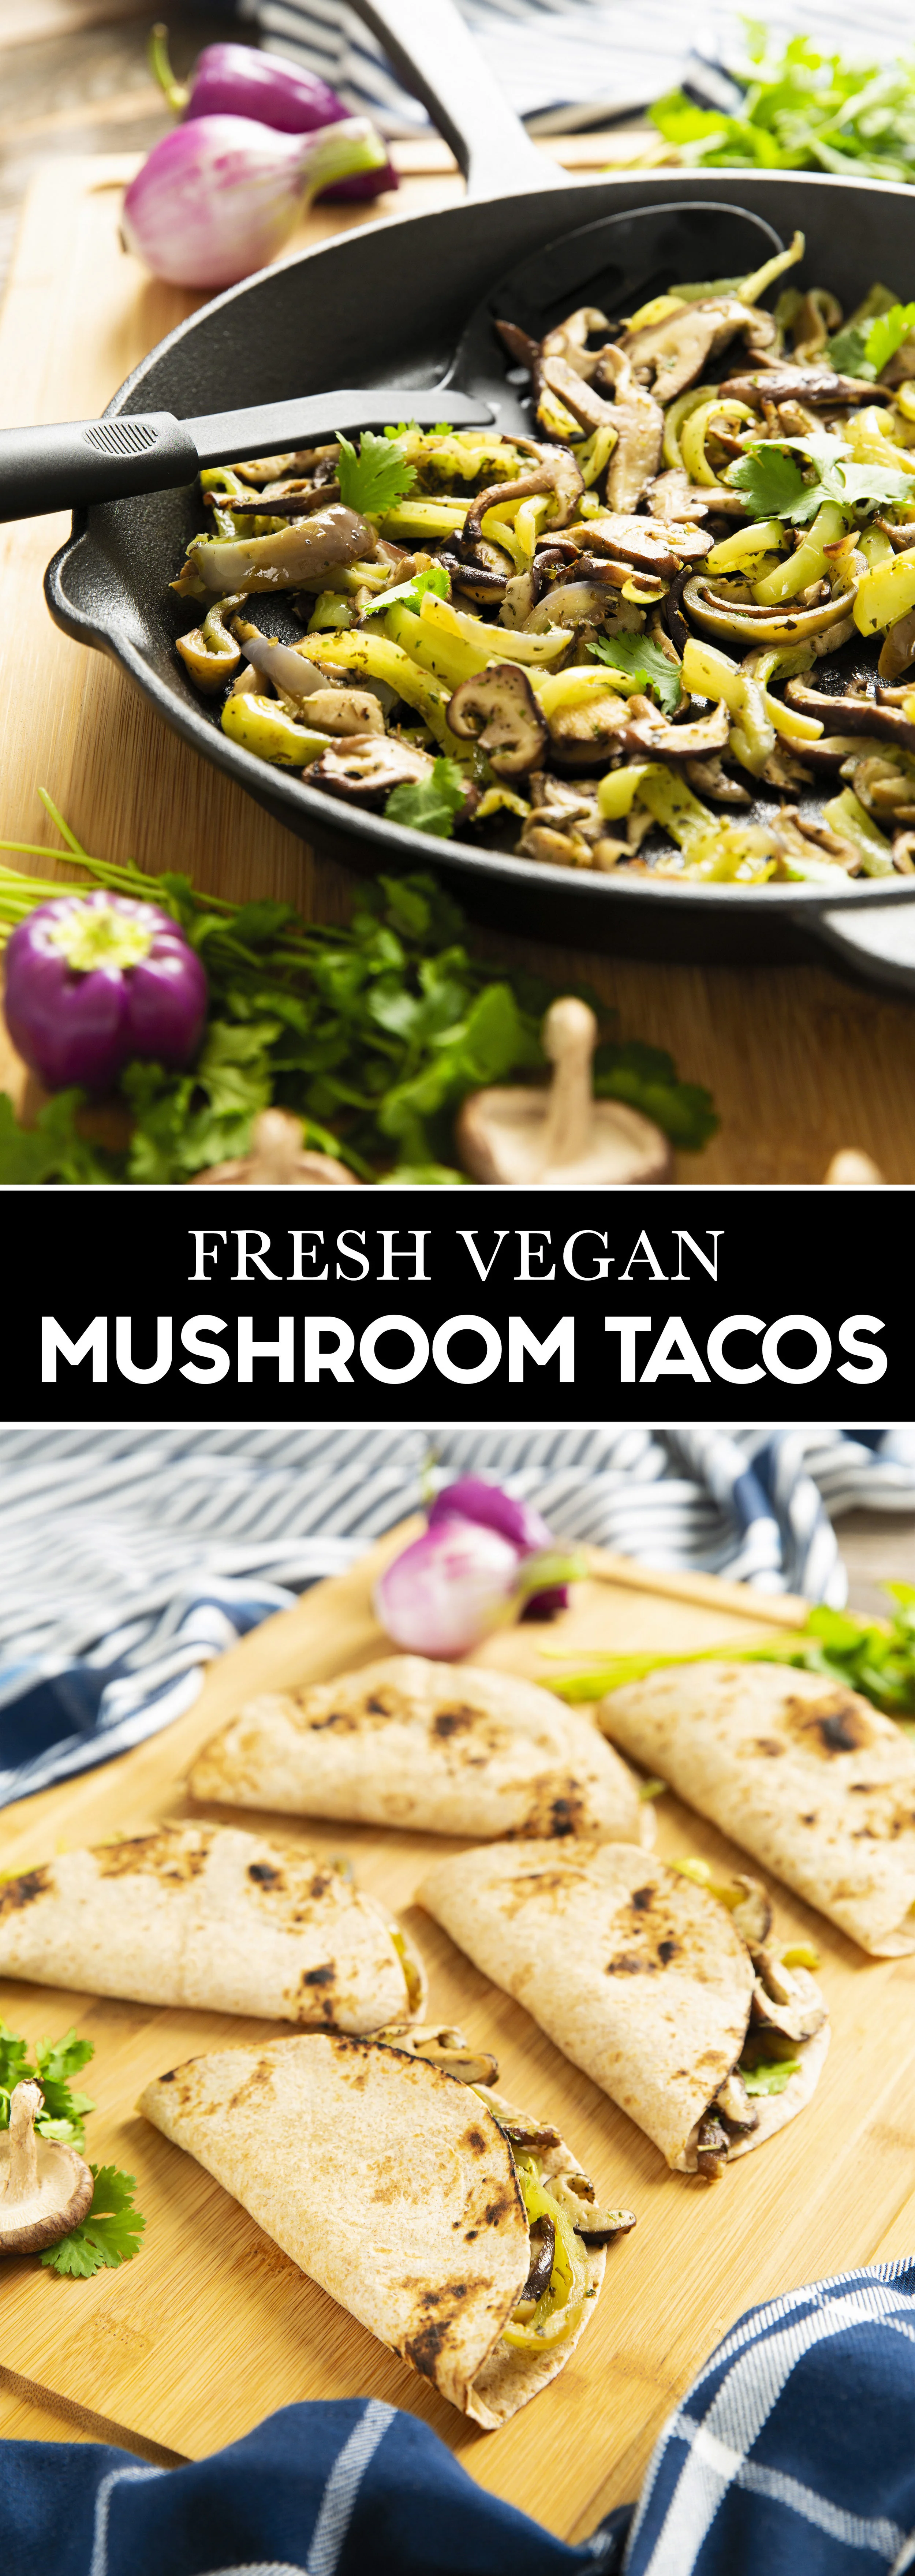
Fresh Vegan Mushroom Tacos Recipe (Awesome in Cast Iron)

If you're looking for a new way to incorporate those fresh, local, Farmer's Market ingredients into a recipe, here's a good one! These Vegan Mushroom, Onion, and Pepper Tacos are super delicious and you definitely won't even miss the meat! 

Even more special, is the fact that we got to create this recipe for Martha Stewart Essentials available at Macy's. It's been SUCH an honor creating a set of four recipes for Martha! It's definitely a food blogger's dream :)

Keep reading to get the full details on this delicious, vegan recipe (but, feel free to add some cheese or sour cream if you like!!).

We found all of the fresh ingredients at our local Farmer's Market here in Carbondale, IL.

As soon as I learned about this amazing opportunity, I went searching through all of the items and decided upon four very delicious recipes, which I will link you to as soon as they are live! 

I was encouraged to use recipes right from MarthaStewart.com, so I used her basic recipes, then embellished and modernized them to make them extremely appealing for my Pinterest fans. Well, everyone has loved them so far, and now all of the cast iron skillets are SOLD OUT on the MAcy's website! Perhaps my recipes helped, but the fact that they were each around $15.00 might also be the reason these have all sold out. Nonetheless, find your favorite cast iron or other skillet, and let's get started!

Ingredients / Materials: 

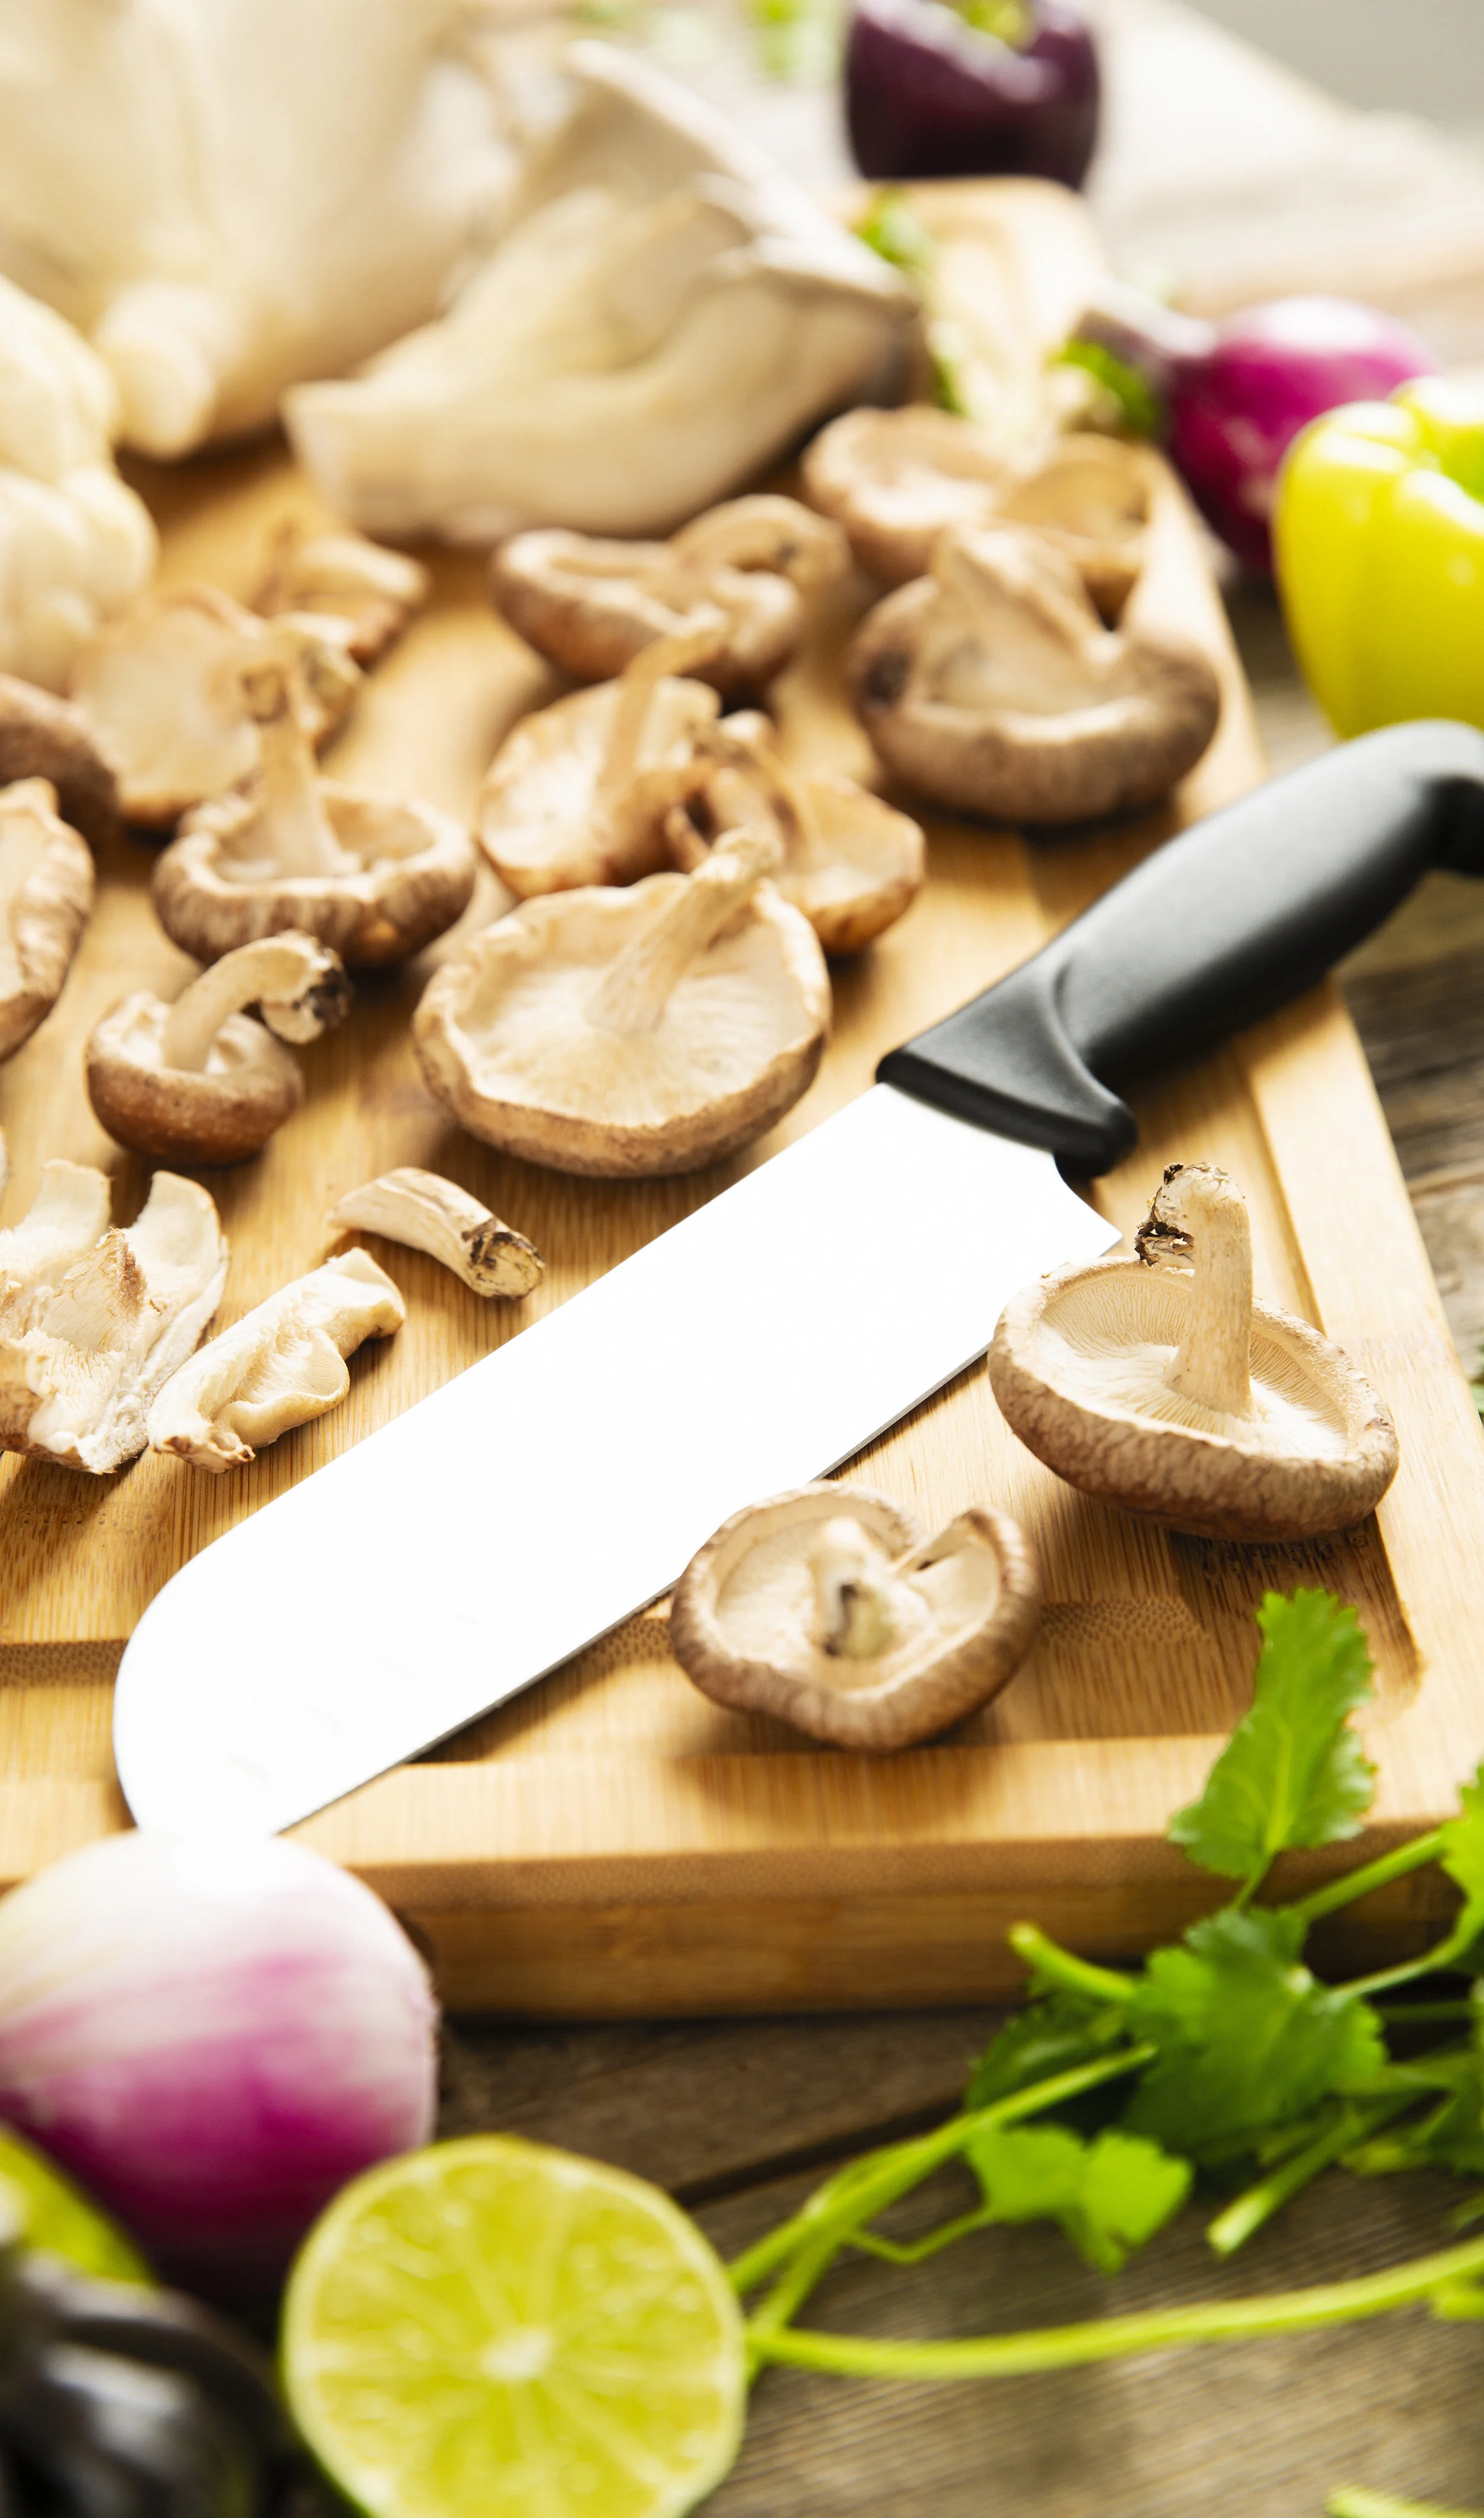
- 1-2 lb. Fresh Mushrooms 

- 1 red onion

- 1 medium bell pepper (we used several small ones)

- 2 Tbsp. or more Mexican Seasoning

- 1/2 bunch of cilantro

- Small Flour Tortillas

- Martha Stewart Cast Iron Skillet 

Instructions:

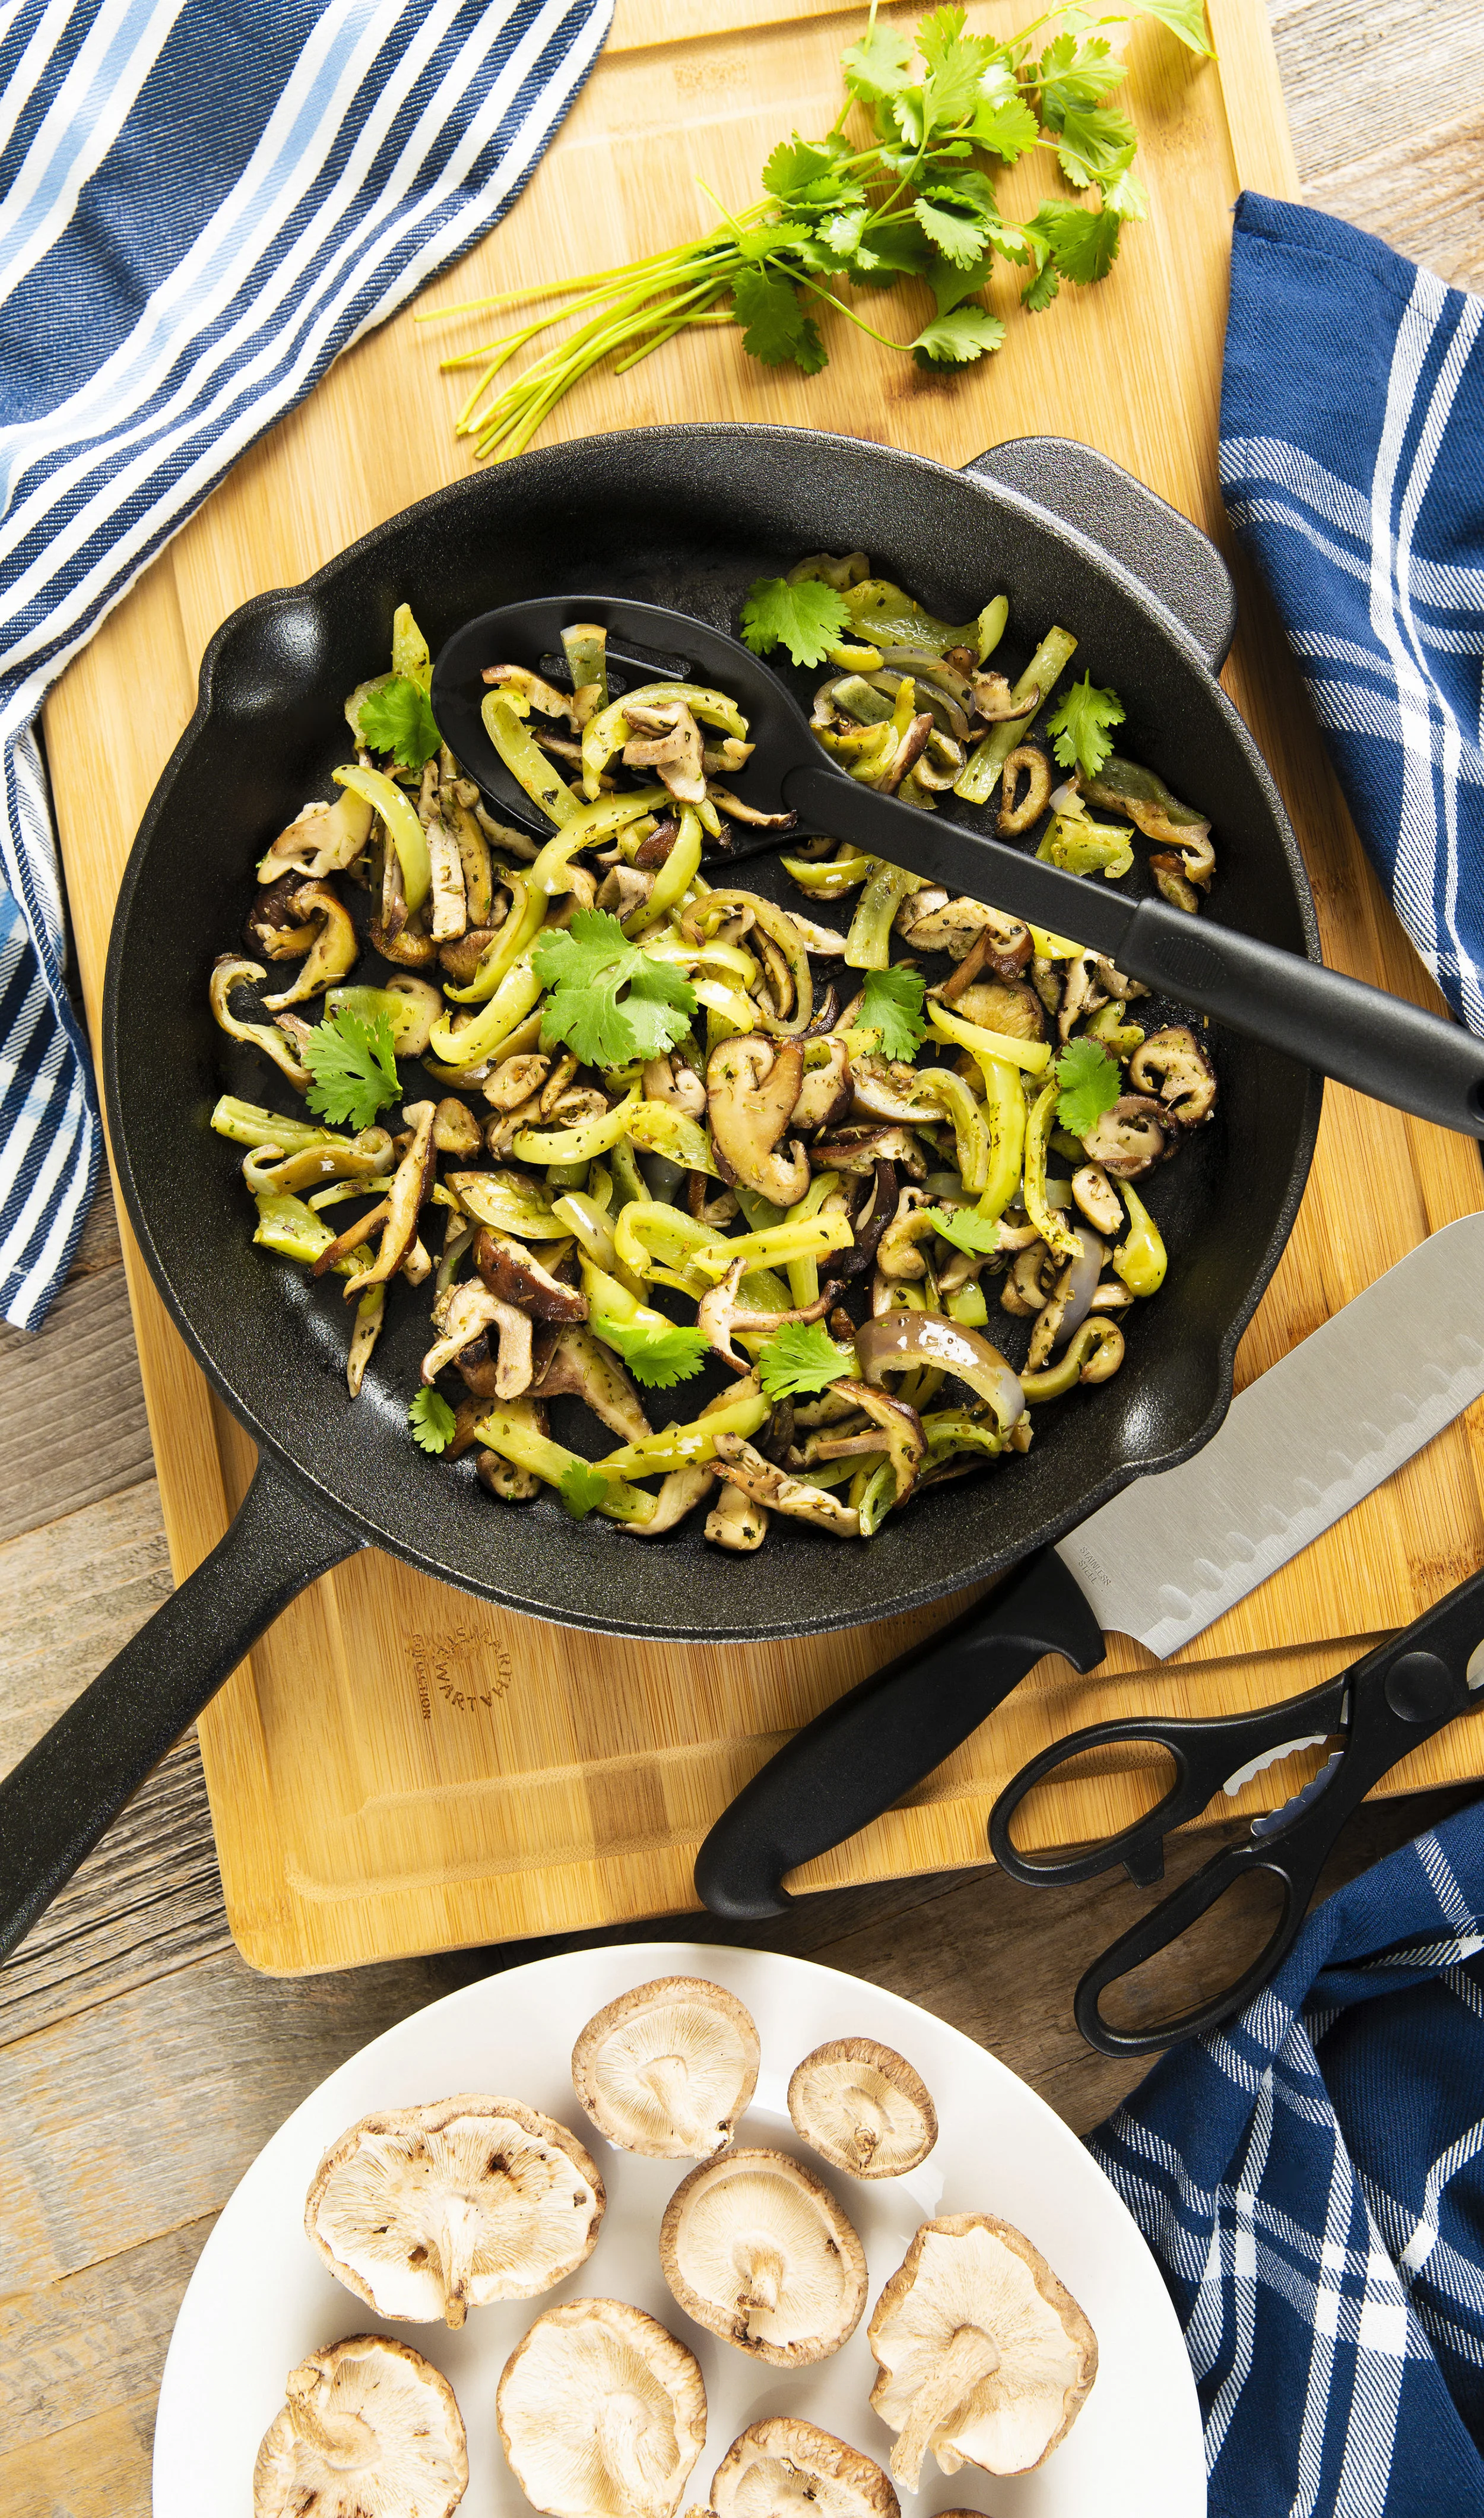
1. Prepare and chop mushrooms, red onions, and bell peppers. 

2. Heat olive oil in a Cast Iron Skillet, add chopped onions, then belle peppers, then lastly, mushrooms.

3.) Season veggies generously with Mexican seasoning, a tiny bit of salt, and any other seasoning you would like. Also, add chopped cilantro at the end and stir everything one last time. 

4.) Warm tortillas, then add the veggie filling, and enjoy! They're so delicious, I hope you love them! 

FLYWAY FAMILY FARM MUSHROOMS (MAKANDA, IL)

As I mentioned, I got to use local ingredients from our Farmer's Market! We loved finally being able to utilize three different varieties of mushrooms from Flyway Family Farm. They have different mushrooms at the market almost every weekend!

Also, I used the red onions and colorful bell peppers from Country Sprout Organics, my other favorite booth at our local market! 

Hopefully, you have enjoyed this recipe! Stay tuned for several more recipes inspired by Martha Stewart! 

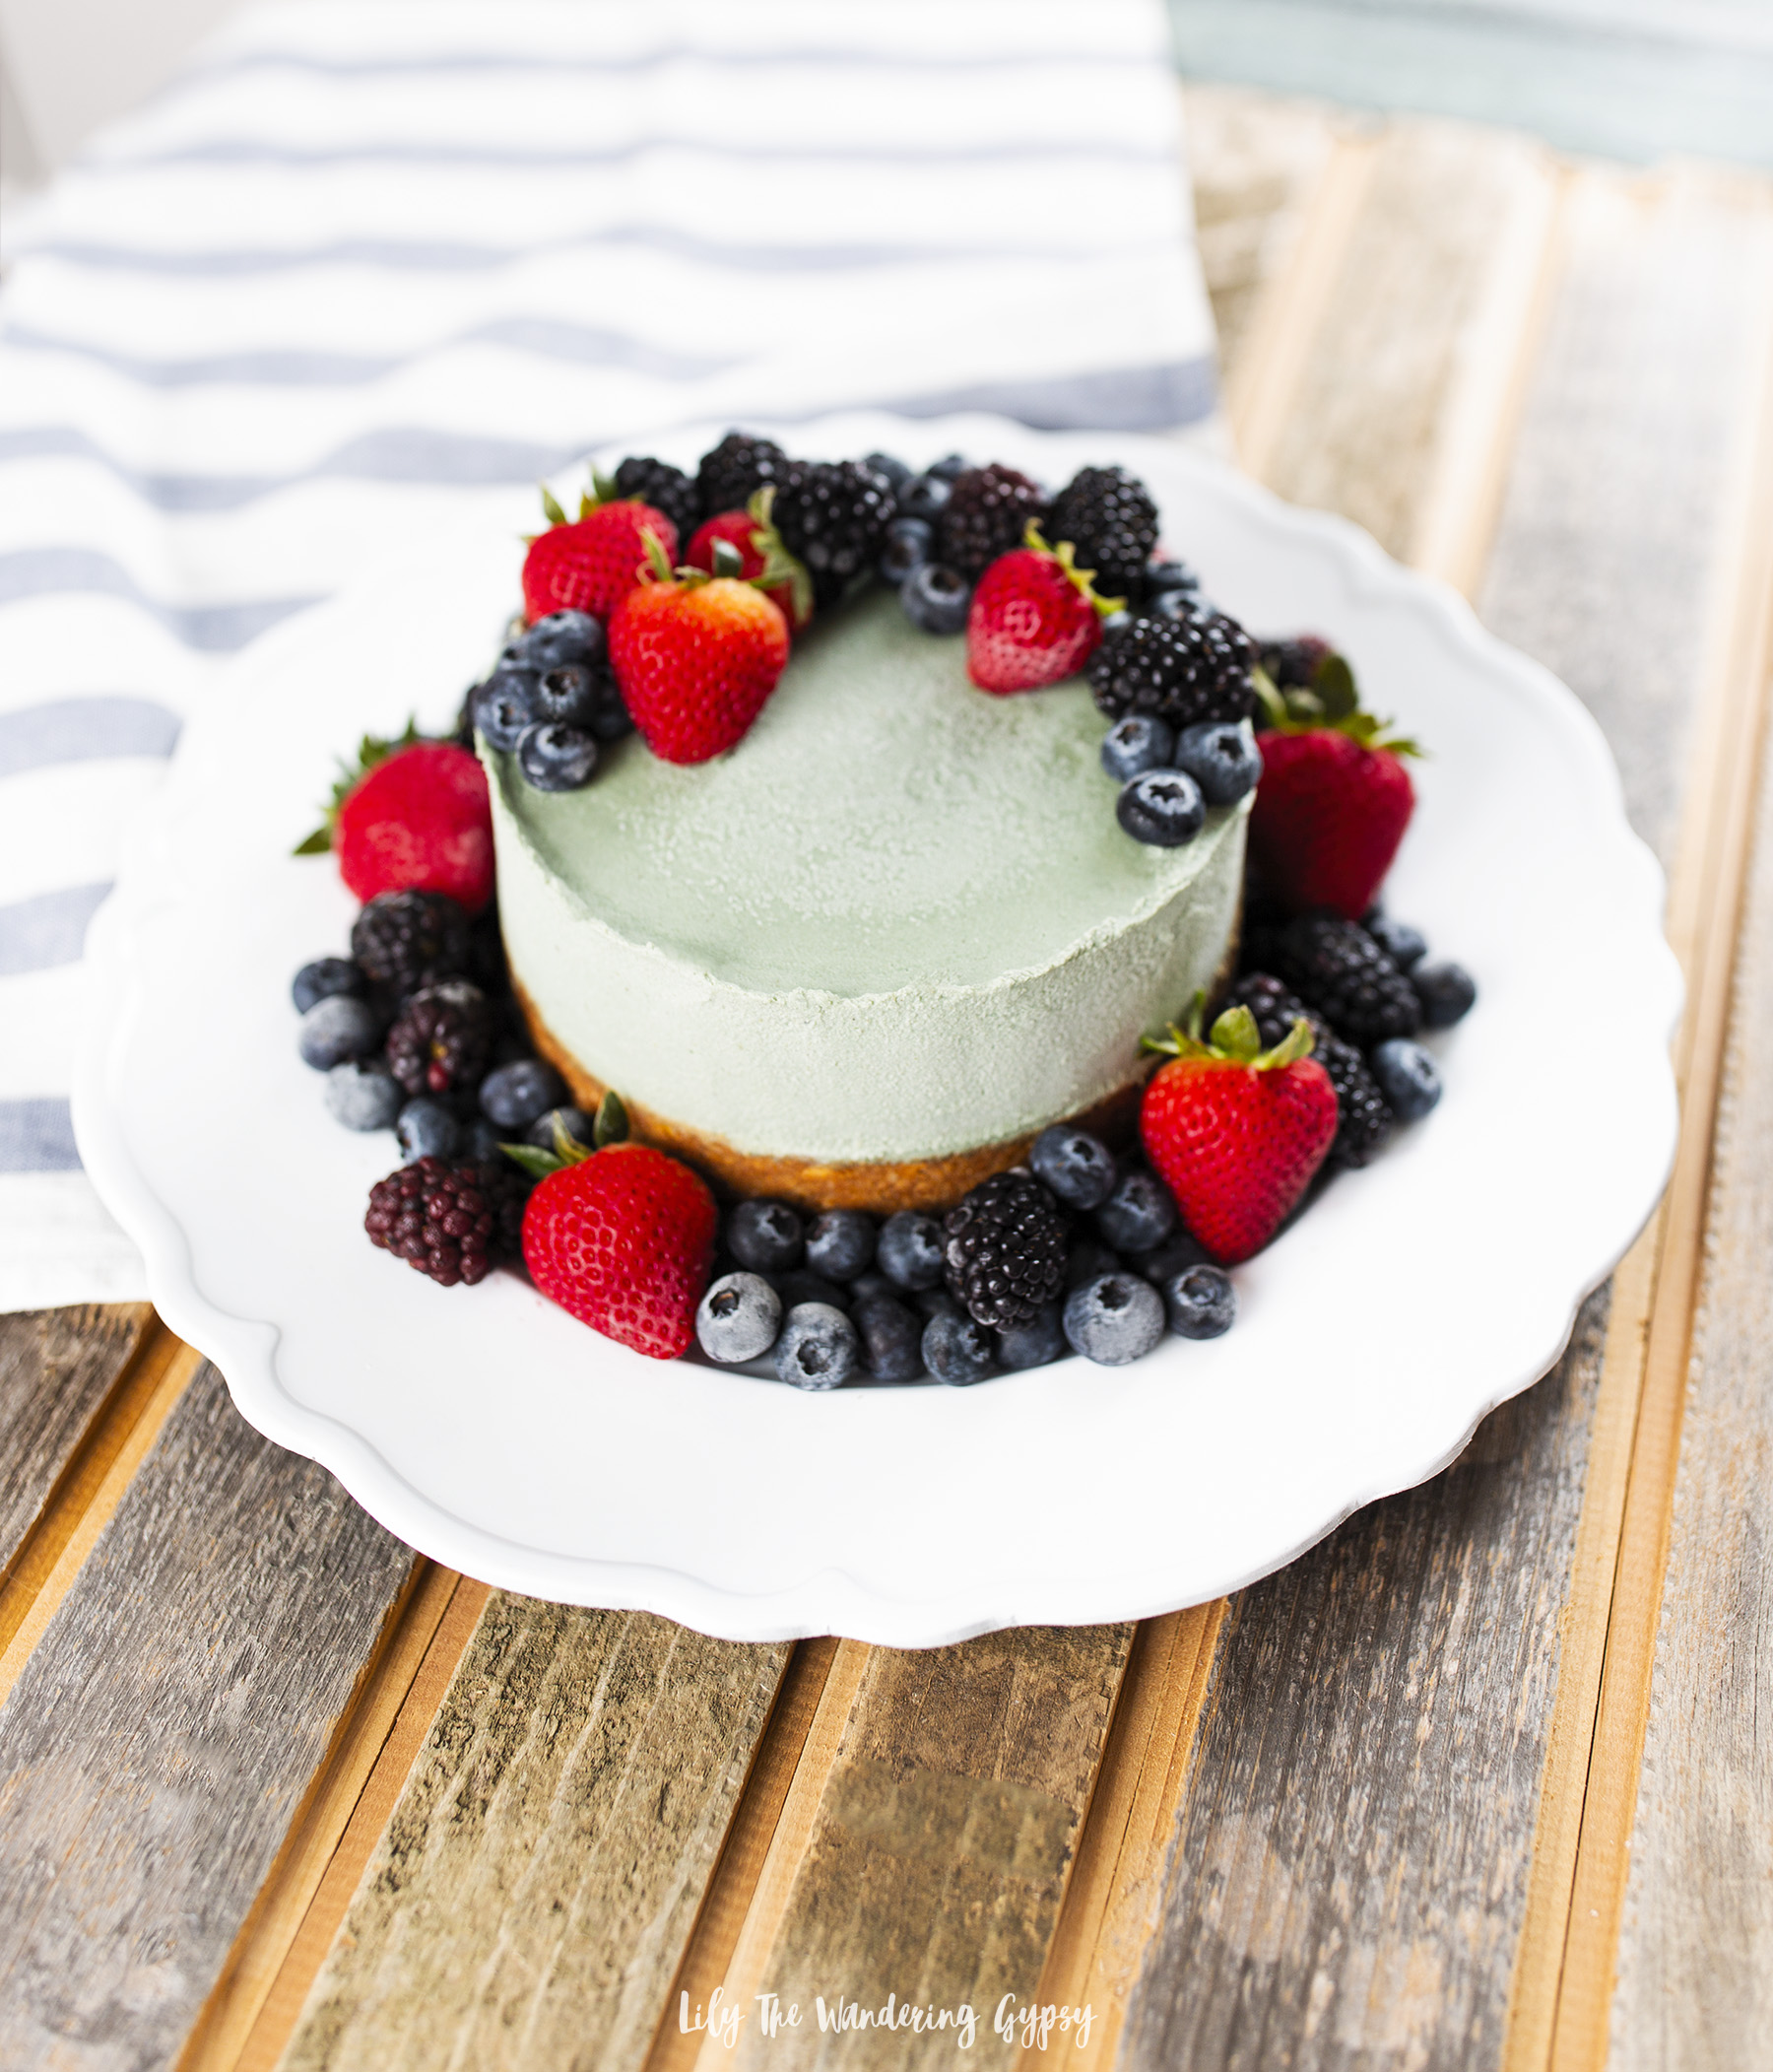
Vegetarian Cashew and Superior Green Filled Cheesecake Recipe

This post is sponsored by FoodScience of Vermont. All opinions and content are my own.

#LiveSuperior

Looking to add more Superfoods to your diet? Learn how to infuse a cashew-based “cheesecake” with health-boosting ingredients!

This delicious cashew-based version of a traditional cheesecake is filled with all natural ingredients thanks to FoodScience of Vermont Superior Greens, which contains whole fruits and vegetables, promotes healthy aging and radiant skin, mental clarity, and a healthier immune system while offering a boost of healthy enzymes to support your immune system, plus probiotics. It’s amazing how this one line of Superior Powder products can offer so much!

Try it, you’ll love it. Find the product at Rite Aid® and RiteAid.com here!

I love incorporating unique and health conscious ingredients into my recipes, like the FoodScience of Vermont Superior Greens, which contains three servings of fruits and vegetables in each ½ scoop – which means that this ultra concentrated version of some of the healthiest ingredients on Earth really will work quickly and efficiently!

This recipe is divine! I believe this would be great for someone looking for healthier alternatives to dessert recipes, or someone who has never ever tried a cashew based cheesecake before. It’s fun to introduce friends and family to things like that.

I have been very interested in the detox process as well as considering eating as many whole foods as possible. This FoodScience of Vermont Superior Greens is a great step, in addition to more exercise and lots of water intake, towards reaching my nutrition and other health goals I have set for myself.

While the product can be enjoyed in a smoothie or mixed into a glass of cold water, I thought it would be exciting to introduce this product to my wonderful readers, friends, and family through a mouth-watering dessert recipe.

Perfect for summer when you don’t want to bake a ton, or when you want something that’s not overly sweet but deliciously frozen, this is the recipe that will check all of those boxes! Bring this to an event, or serve it to friends at a summer gathering and just look at everyone’s faces light up when they realize that this is not the “cheesecake” they were expecting, but one that is WAY, WAY better for them, but still tastes indulgent.

Now, as for the crust, I know the traditional vegan cheesecakes are made with dates, and are basically no bake, but my favorite part of a cheesecake IS the crust, so I wanted to keep it traditional with lots of additional natural ingredients to sweeten things up naturally. Feel free to use a date crust here too.

Food Science of Vermont provides us with ways to get 3 servings of fruits and vegetables in each ½ scoop. The scoop is provided, so it’s very easy to measure out just how much you will need.

While the traditional use for this product is mixed into smoothies, cold water, and other drinks, I thought it would be genius to use the delicious taste and the nourishing super food ingredients to infuse this recipe with a unique taste and twist.

The crust is made from a delicious mixture of coconut, walnuts, oats, graham crackers and vegan “butter”. I used a spring form pan, similar to a traditional cheesecake, but really modernized this recipe with almost all vegan ingredients and that extra boost of has helpful enzymes and probiotics, making this an all around awesome dessert or snack. Give it a try, I bet you’ll enjoy it!

INGREDIENTS:

(Makes “Cheesecake” in 6 in x 3 in spring form pan):

Crust Ingredients:

10 - 12 full graham cracker rectangles

¼ c. oats

¼ - ½ C. or more walnuts

½ C. or more dried coconut pieces/flakes

¼ tsp. cinnamon, optional

6-8 (or more) TBSP salted Vegan Butter or regular butter

¼ C. Sugar

*Note: Feel free to use less graham crackers and more of the oats, nuts, or coconut if you prefer and even healthier crust.

Filling Ingredients:

3 C. soaked cashews (soak for at least 3-5 hours)

1 can chilled coconut milk (use the top thicker part and save or discard water)

¾ - 1 C. macadamia milk, coconut milk, or similar

4 – ½ C. agave or maple syrup

½ - 1 tsp. vanilla

2 TBSP FoodScience of Vermont Superior Greens Powder


INSTRUCTIONS:

For The Vegan Filling:

1. Soak cashews for 3-5 hours, and strain. Add to a blender with coconut milk, and process until smooth. If the mixture does not pour well, then add a bit more macadamia milk or agave. Taste the filling to make sure it is to your liking. Time to make the crust!

For The Crust:

1.    Preheat oven to 350 degrees F, and prepare your spring form pan by using non stick spray inside, and using a paper towel to wipe pan for a more even finish. Also, you may cover the bottom of the pan so the butter does not drip out while baking. Alternately, bake on top of a sheet pan to prevent spills in the oven.

2.    In a food processor, blend up graham crackers (use hands to make pieces smaller before processing), coconut, walnuts, and oats. Feel free to mix in some whole oats after processing for that “whole oat” look in your crust.

1.    Once processed to an even powder, mix with melted butter, sugar, and pour 2 ½ cups into pan. Use a flat bottomed glass or candle holder to press and flatten the crust down, making sure to clean up the edges with a knife for a neater look once the spring form pan is removed.

4.    Bake crust for 15-20 minutes, until edges begin to brown. The crust will firm up quite a bit once cooled, so even if it’s soft after baking, it may already be done. Let crust cool completely, and fill with filling until there is about ½-1/4” until the top of the spring form pan. Freeze for 2-3 hours or overnight.

5.    Time to CAREFULLY remove it from the spring form pan. I would recommend using a sharp knife or skewer along the top edge to break the seal with the pan. At first, mine looked like it was cracking, so I re-tightened the outside of the spring form pan, ran a skewer along the top edge, and once I loosened the pan again, it removed pretty easily. Just be patient with it. At this point, feel free to place it back into the freezer

6.    Place “cheesecake” onto a plate to decorate. Top with fruits like blackberries, strawberries and blueberries (the two latter are actually ingredients in the FoodScience of Vermont Superior Greens powder). I sliced the strawberries in half and left the green parts on because the full strawberries just looked too big. The “cheesecake” would be fine to serve right now, or place back into the freezer for 2-4 hours so the berries begin to freeze and they get a beautiful frosty look to them.

FoodScience of Vermont offers three uniquely designed powdered drink supplements loaded with phytonutrients, stabilized probiotics, and many other beneficial natural ingredients. I really hope you enjoy!

Head to your local Rite Aid® or visit bit.ly/FSSuperiorPowders to get your Superior Powders.

Follow FoodScience of Vermont on social:

Follow the brand’s hashtag on Instagram #livesuperior

Facebook: https://www.facebook.com/FoodScienceVT

Twitter: @FoodScienceVT

Pinterest: https://www.pinterest.com/foodsciencevt/

Instagram: @foodscienceofvermont

Vegan Dairy-Free Yogurt Parfait Cups Recipe - Healthier Snack + Dessert Alternative

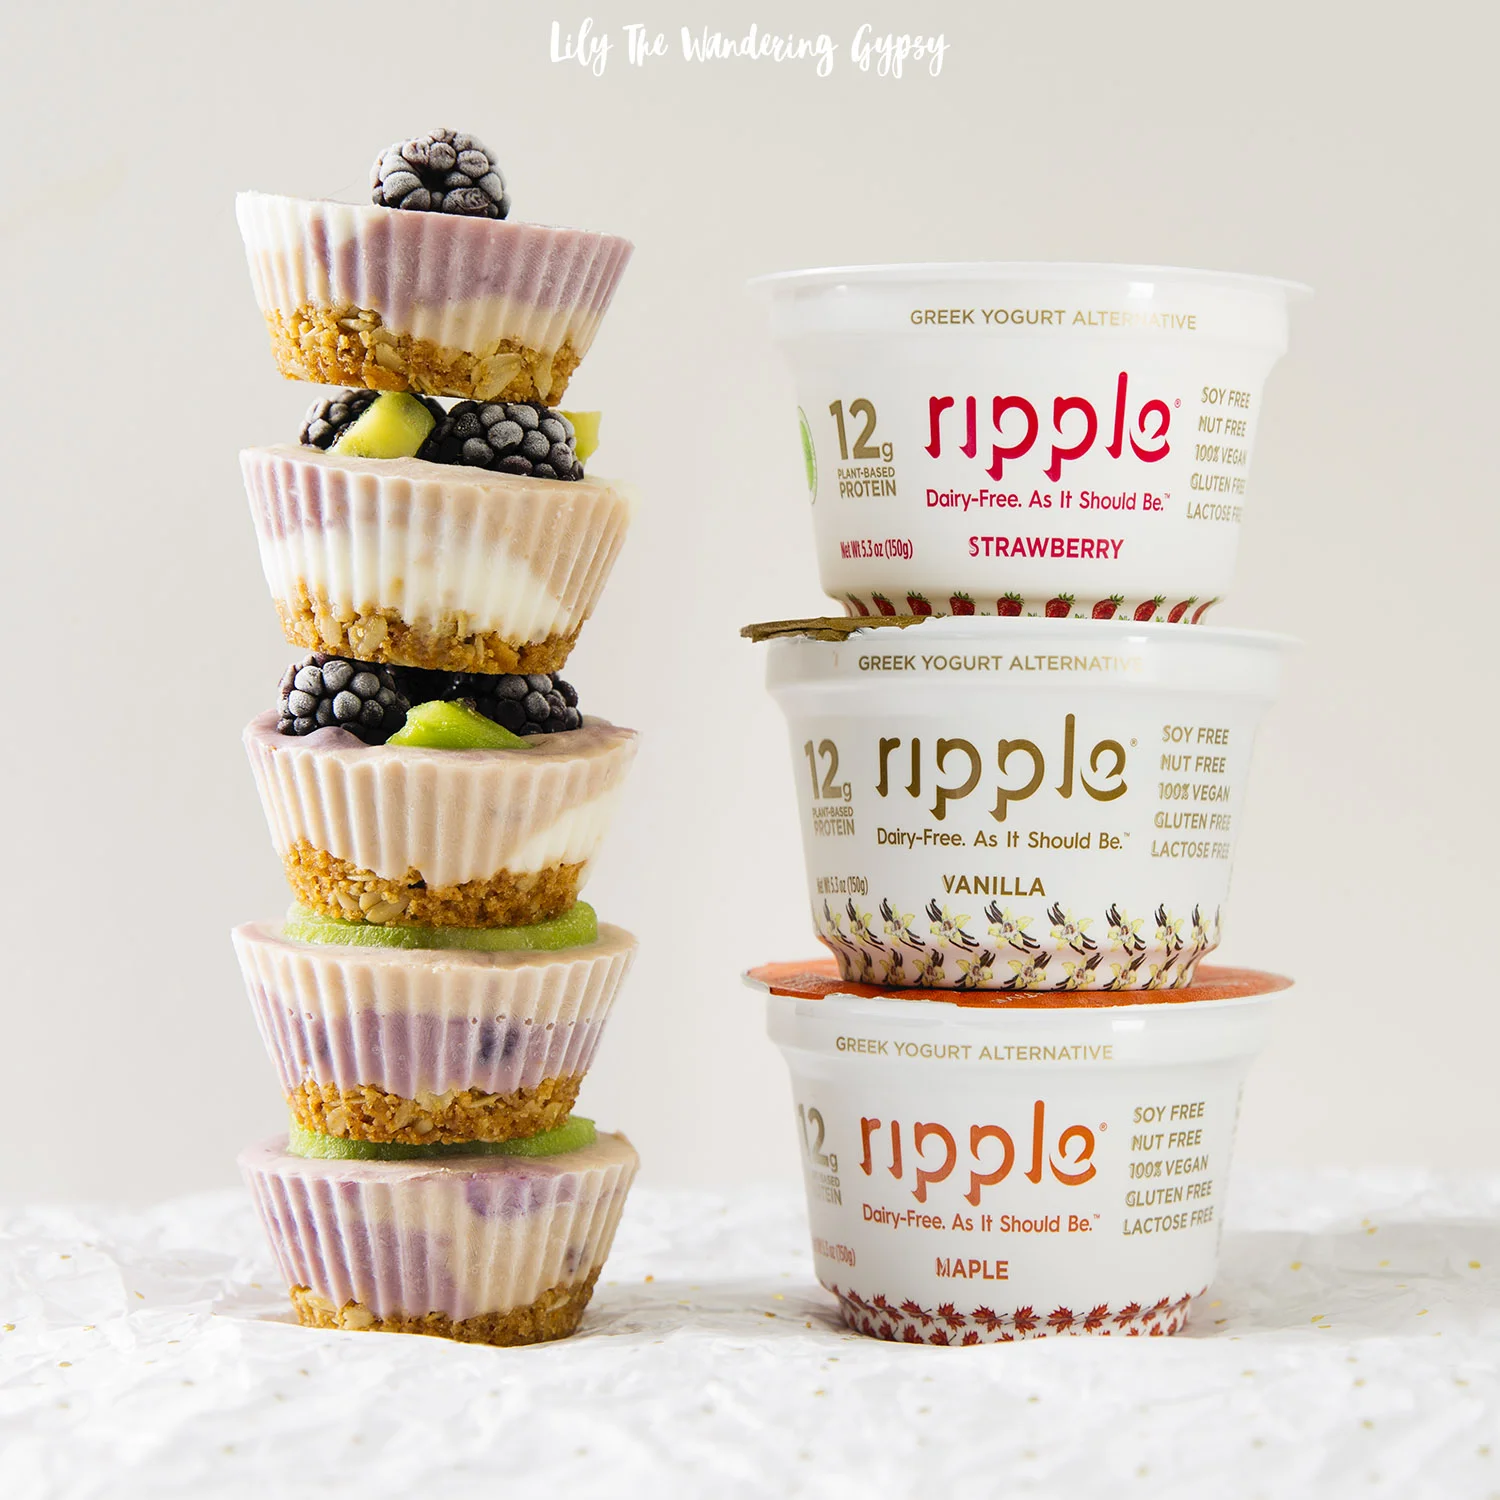
This delicious alternative to ice cream or other sweets wound up tasting delicious! Get the recipe for these Dairy-Free Frozen Yogurt Parfaits, created in partnership with Ripple Yogurt and Kroger. 

Could you ever imagine eating dairy-free yogurt? That may seem sort of the norm these days, but can you imagine eating yogurt created from peas? I had a great time experimenting with a fun recipe idea that's been on my mind for some time now - frozen yogurt parfait cups with graham cracker + oat crusts! 

INGREDIENTS:

1-3 flavors of Ripple yogurt (I used strawberry, vanilla, and blueberry)

10 Graham Crackers (choose honey free for true vegan), crushed into an even consistency

5 Tbsp melted Vegan Butter, such as Earth Balance Organic 

3 Tbsp brown sugar

1 tsp vanilla

pinch salt

Blackberries, kiwi, and any other fruit for toppings

Other items: silicone muffin cups, muffin tin, spoon for mixing

These Dairy-Free Frozen Yogurt Parfaits are inspired by Ripple yogurts, available at Kroger!

INSTRUCTIONS:

1.) For the crust: melt butter in a medium bowl, and add crushed graham crackers, oats, brown sugar, vanilla, and salt. 

2.) Fill prepared silicone or paper cupcake liners with crust mixture 1/3-1/2 and bake for 5-7 minutes at 350* F.

3.) One cooled, fill cupcake liners the rest of the way with yogurt. Freeze for 30 minutes, and then top with chopped fruits. Freeze at least 1 more hour, until cups are completely frozen. Remove them from the cupcake tin, and remove the wrappers, and reveal your beautiful layers of dairy-free, vegan ingredients!What a tasty snack!


In 2015, Ripple founder set out to separate the fats from peas and create a milk-lie substitute that is great for people who want an alternative to dairy (source: Food&Wine). "Dubbed Ripptein, the additive strips away plant flavors and leaves behind only protein, according to Fast Company. (That's one reason Ripple's pea milk doesn't taste like liquefied legumes.).

Now, I will admit, this yogurt does have less of a smooth texture than I was used to, but once I froze this yogurt into these delicious fro yo cups, everything was divine! Feel free to try this recipe out with any mixture of yogurt, fruit, and other ingredients that you would like!

"From a biochemical standpoint, milk is protein, and fat, and sugar," Neil Renninger, Ripple cofounder and co-CEO, told Fast Company. "There are plenty of plant sugars you can use, and plenty of plant fats. There are also plenty of plant proteins you can use, but the problem is that they all taste like the plant they derive from. We had to figure out how to make a plant protein that didn't taste like a plant protein."

The company's new pea half-and-half, which Fast Company says dissolves into coffee "like the real thing, without the calories," launches in July, while customers may have to wait until the end of this year—or possibly early next year—for its yogurt.

Renninger admitted neither the half-and-half nor the yogurt were easy to create. For example, "with half-and-half, the challenge was getting something that worked well in coffee, but also would work well in a culinary situation," he said. "It's a bit of a balance providing that creaminess and a clean taste. Protein is an important part of the creaminess in half-and-half, but if you don't have clean protein, you can't get that creaminess without adding off flavors."

Delicious Root Vegetables - Vegan Recipe

If you are looking to incorporate more vegan meals and more colorful ingredients into your routine, then here is a delicious, healthy meal you can make in just a short amount of time! Grab your veggies, and fire up the grill.

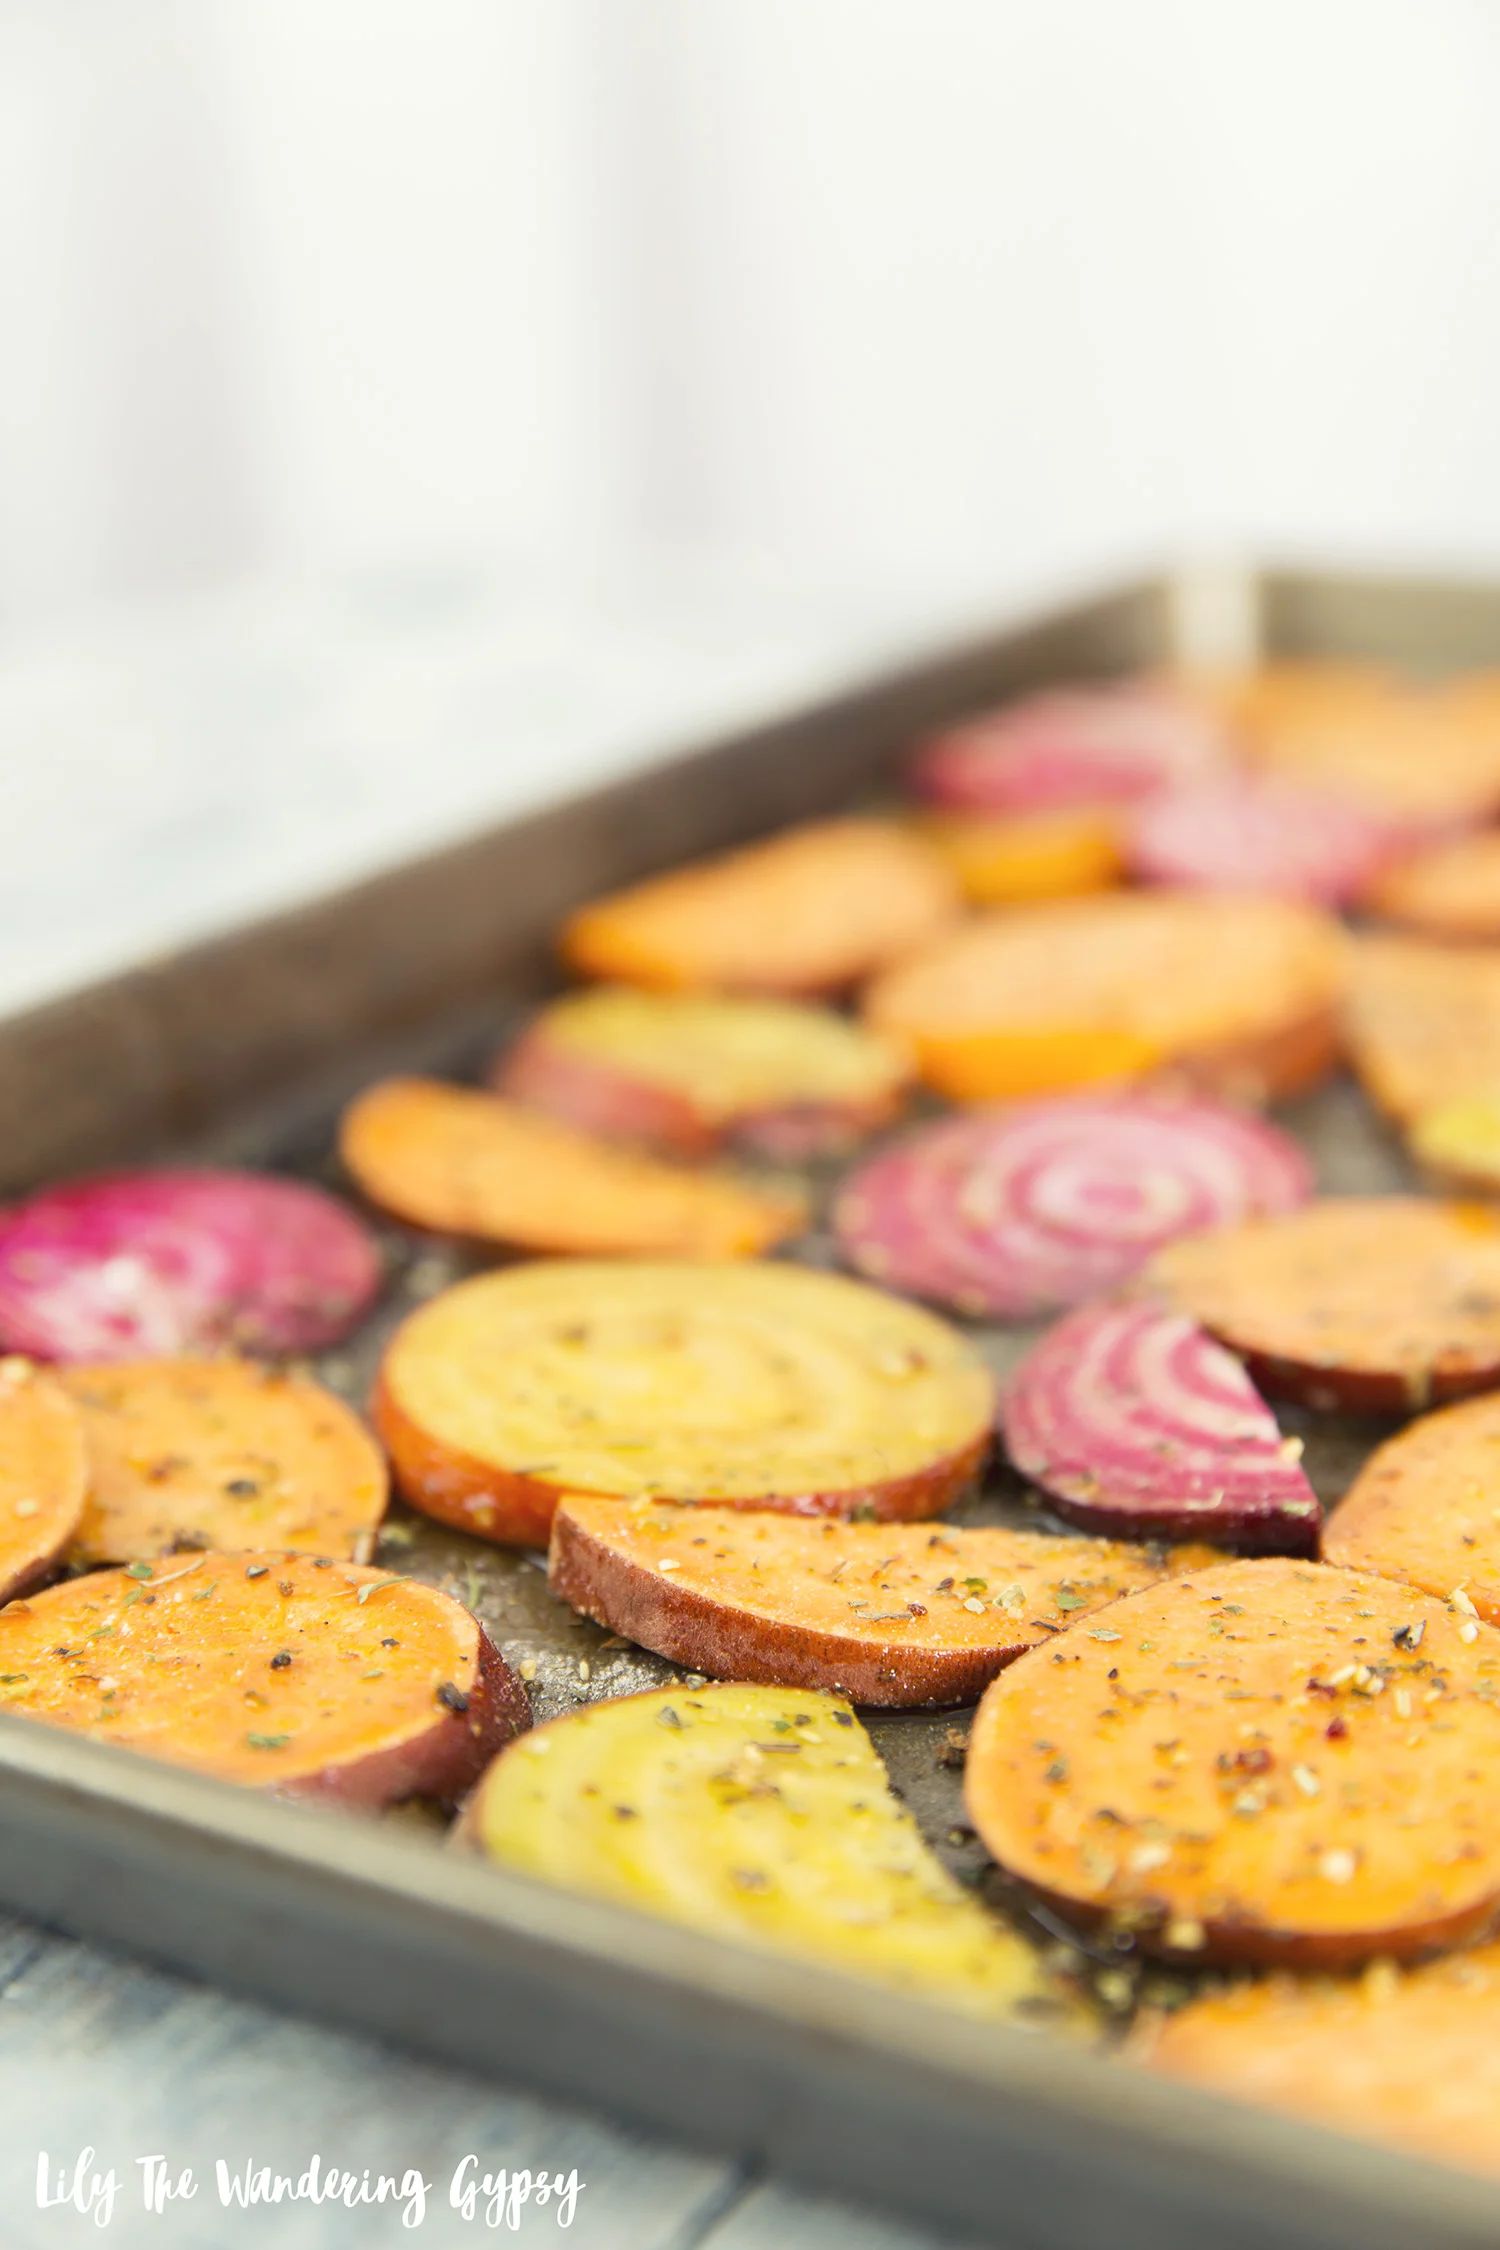
1.) Head to the store, or to your garden, and grab an assortment of sweet potatoes, red or yellow potatoes, and Chioggia beets. Below, I found an image of the beets, so you can see how "normal" they look on the outside, and how they appear to have rings or stripes on the inside. 

2.) Turn on your grill to medium high, and thinly slice all root vegetables, and set them on a baking sheet, so they are not overlapping. Brush on a light coating of olive oil or melted coconut oil, and add a generous sprinkle of seasonings to both sides. Use a pair of tongs to flip the slices if you do not want to get your hands messy. Make sure seasoning is applied evenly. 

3.) Take your baking sheet and pair of tongs out to the grill, and use your tongs to add each slice of root veggie to the grill. Try to make sure not to let the oil drip down into the grill, or it could be a bit messy and cause larger flames. Feel free to let the veggie slices touch, but not overlap, so they get those beautiful grill marks on them. Close the lid of the grill, and wait 4-5 minutes until the pieces have a nice grill mark on them. Flip them and let them over for another 2-4 minutes, until soft, and they're ready to eat!

4.) Transfer slices back onto the baking sheet, and bring back in to serve. These are amazing by themselves as a vegan meal option, or serve them as a side dish. They're absolutely delicious!!!

If you're new to eating beets, then try to slice up 1-2 beets for every 5 potatoes, so you have more potato than beet. Enjoy!

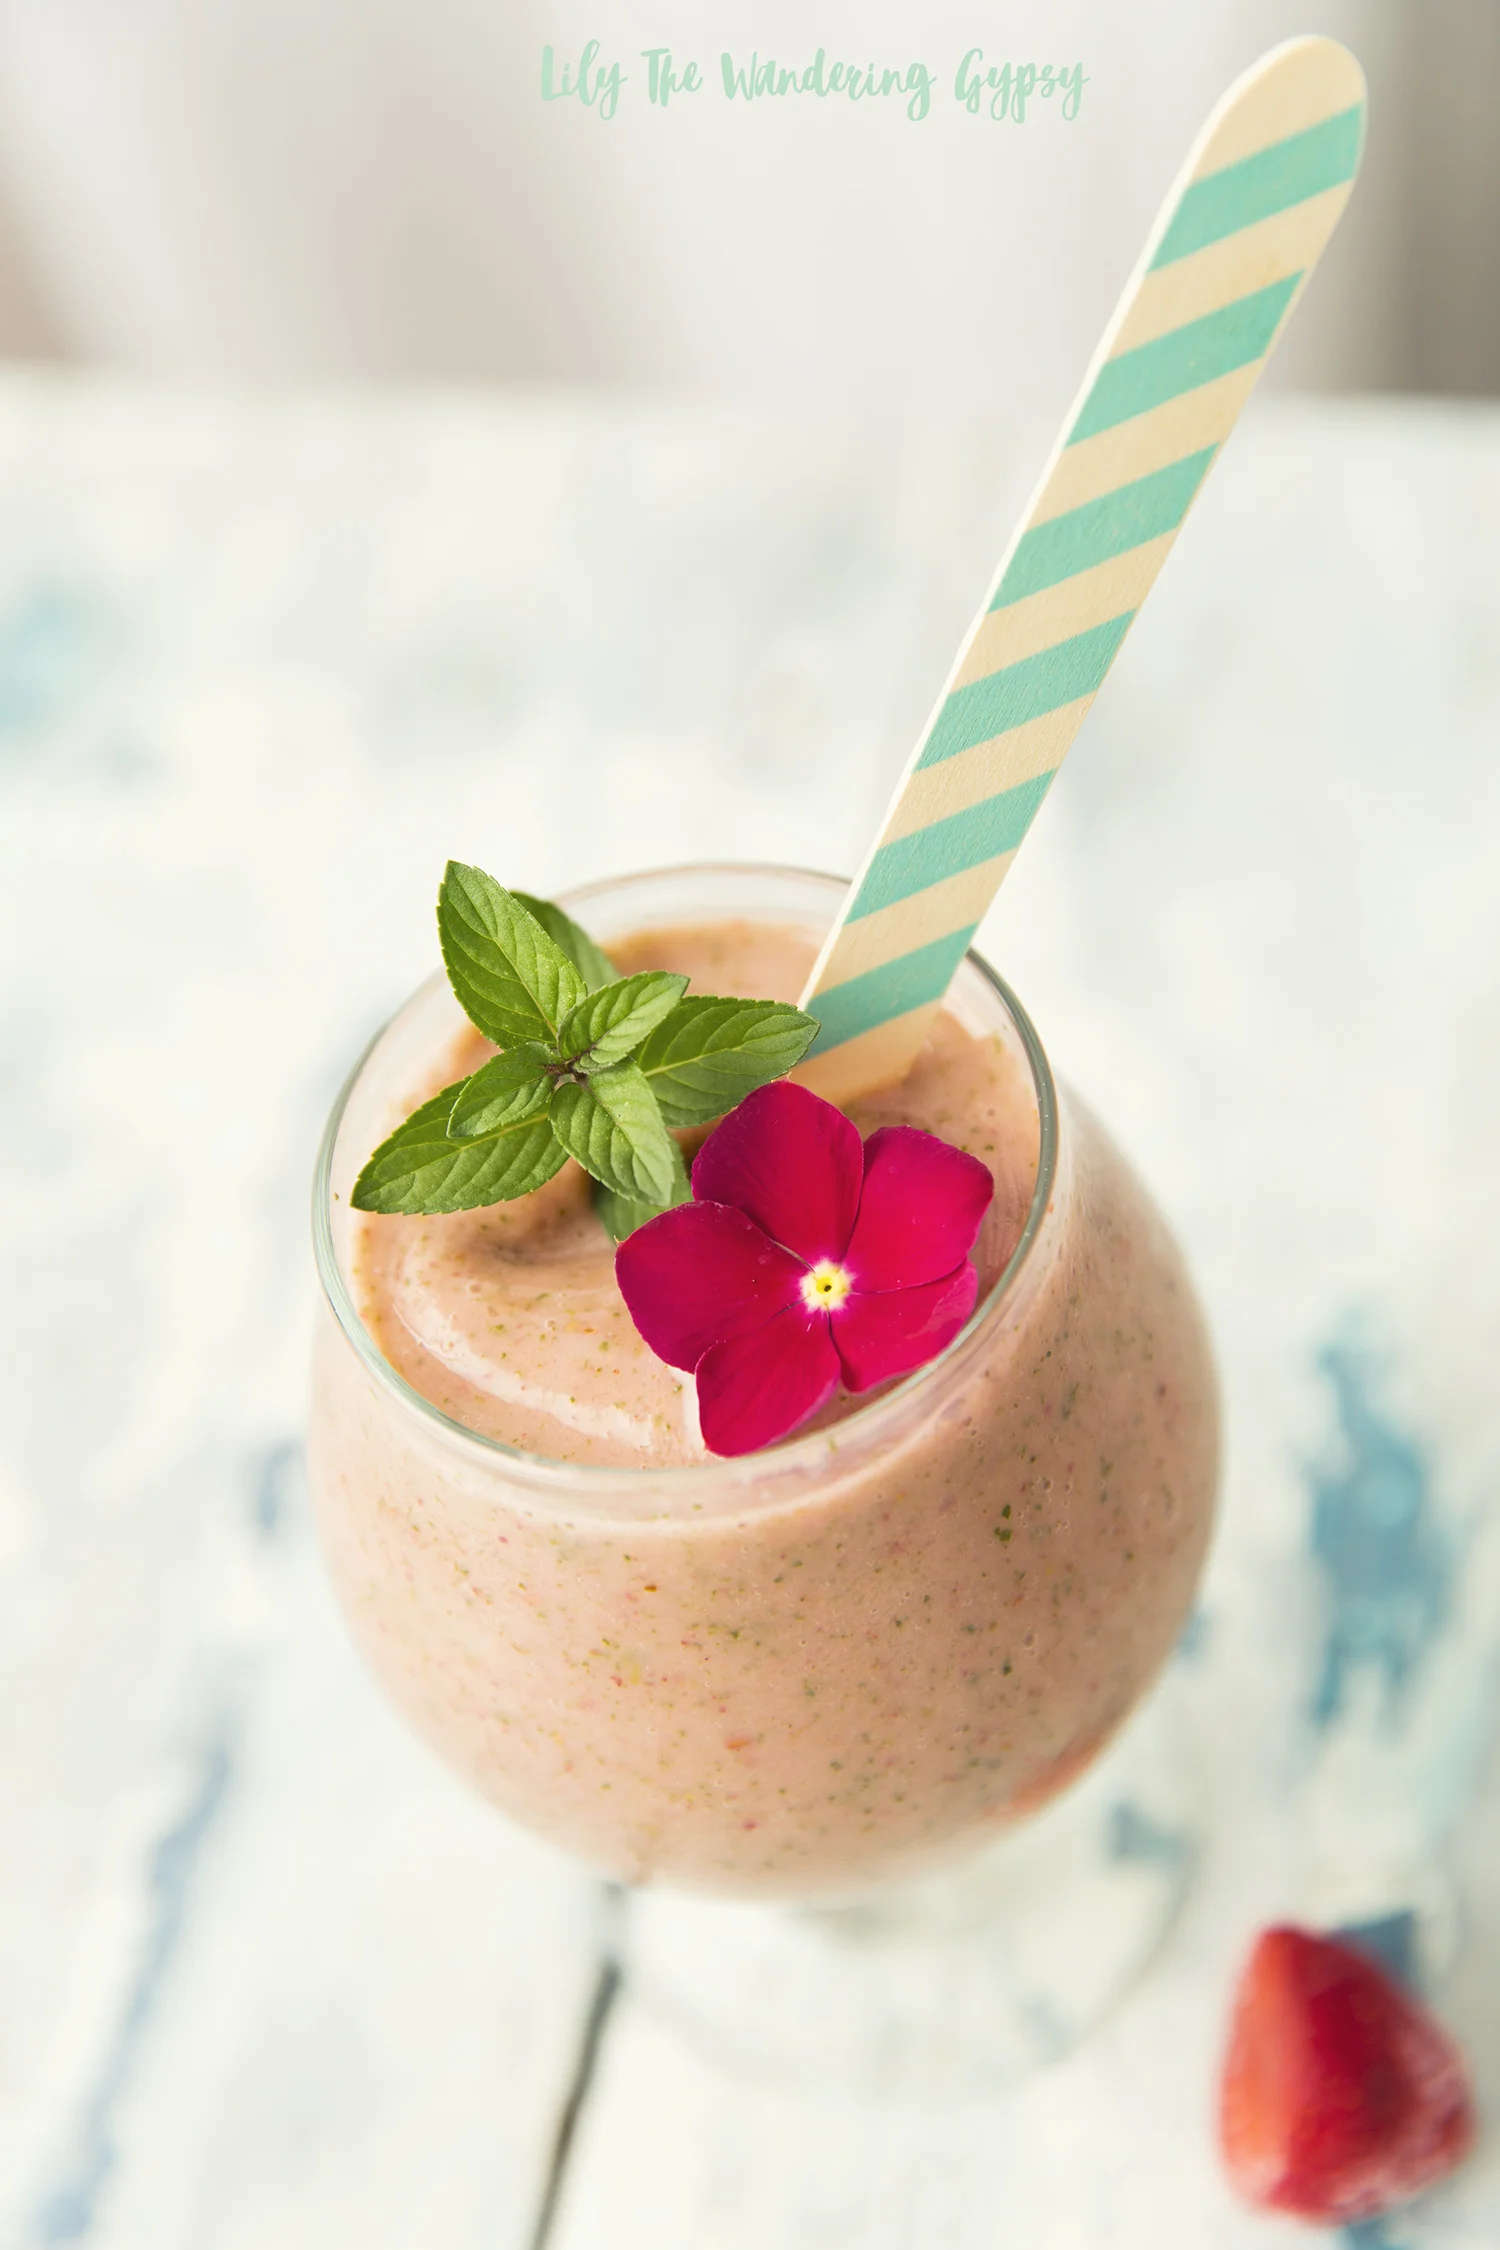
Vegan Strawberry, Peach, Spinach Smoothie Recipe

I found a great way to easily incorporate spinach into smoothies! It add a teeny tiny bit of extra texture to the smoothie, but does not alter the taste at all! 

Have you ever used frozen spinach before? While I would of course prefer to use fresh spinach every time, if you're simply using it in your smoothies, then frozen is a great option. I believe the frozen spinach in the bags is already steamed, and is so incredibly convenient to add a small bit into your smoothies! I love adding all of those awesome nutrients from the spinach!

I've been trying to reduce my meat and dairy intake lately, and up until now, my smoothie recipes would always include yogurt. It's of course 100% fine to add yogurt, this smoothie is amazing on its own, and does not even need it! 

1 Cup Frozen Strawberries

1 Cup Frozen Peaches

1/2 Cup Frozen Pineapples

1/2 Cup Frozen Spinach

1 1/2 Cups Nut Milk (I like combo of Macadamia Milk, Coconut Milk, and Hemp Milk)

1/2 C Pineapple Coconut Juice or Similar

1-2 Tbsp Agave Nectar

1/2 Cup Water

1.) In a blender that can handle frozen ingredients well, add your frozen ingredients, and then your liquid ingredients. 

2.) Blend on Smoothie Mode or Frozen Drink Mode for two rounds, Taste to make sure you're happy with the flavor.

3.) Serve in a cute glass, adorn with flowers and herbs from your garden, and a cute wooden spoon. Enjoy!

No Bake Cheesecake Recipe For The Gal On The Go With ZonePerfect® Bars (With Vegan Filling)

I have an absolutely incredible recipe for you today! This shop has been compensated by CollectiveBias, Inc. on behalf of its advertiser, ZonePerfect. #SnackandRally #CollectiveBias

I wanted to share this recipe because it is a wonderfully healthy snack option for those of you who are always on the go. The little bit of time you spend creating this recipe during your down time, will save you tons of time in the morning. Or, that time of day when you're having to multi task, or when you are in a hurry and can't even spare two minutes to make a meal to eat. Life doesn't slow down because you are tired or hungry. 

This was my first time making Vegan Cheesecake Filling and they turned out incredibly well!! The crust is made from ZonePerfect® Bars, and the chocolatey,peanut buttery, and graham cracker flavored bars added such a nice crunch and sweetness to this recipe. Note - The ZonePerfect® Bars are not vegan, so only the filling is actually vegan. Sorry for any confusion I may have created by calling the original recipe I shared, completely vegan. 
ZonePerfect® Bars offer a snacking option that is rewarding, satisfying, and nutritious, and actually taste amazing! These bars give you the 2nd, and even 3rd wind that you need to have the vitality and energy that you need for busy days or nights. They satisfy cravings, are convenient, and leave you feeling happy to knowing that you just got your chocolate (or sweet) fix, but in reality have eaten something that contains no less that 10 grams of protein in each bar. They are also a good source of fiber, and offer versatility of flavor and balance.  Let's make some No Bake Cheesecakes! 

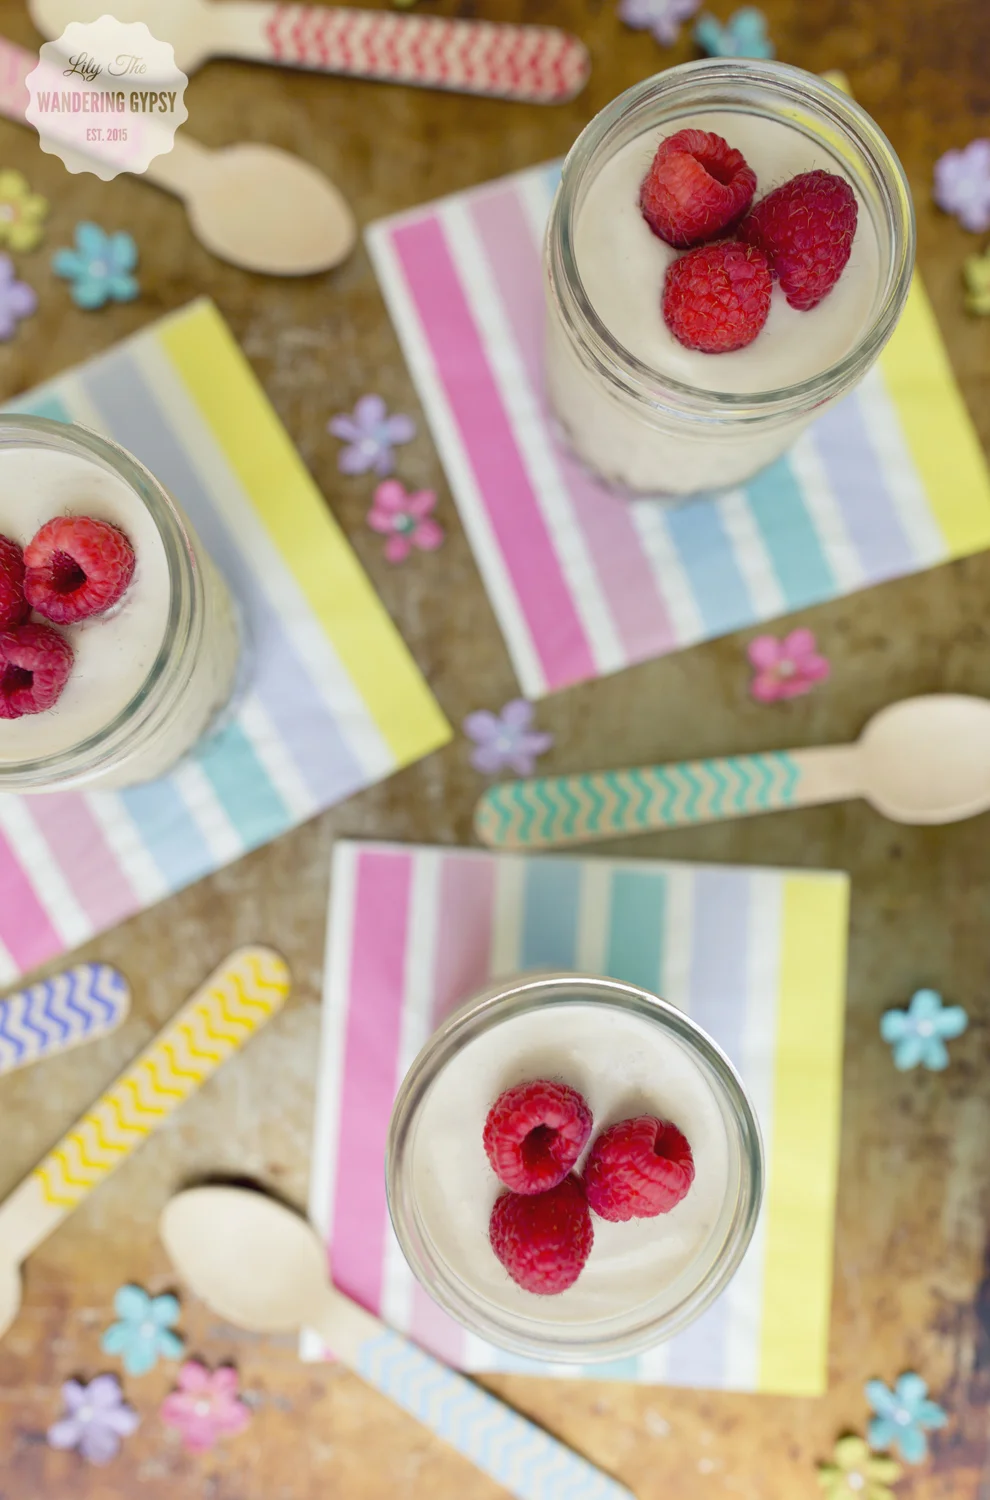
Everyone who ate them raved about them, and couldn't get enough of them. I love the fact that I put them in individual jars, so that you can even grab one as a quick meal on your way out the door, or if you're anything like me, eat them as you're rushing around the house, doing a million things before you have to leave. I am definitely one of those people who tries to literally start a project a half hour before leaving the house, on top of the things I need to already do to get myself ready and out the door. By utilizing recipes like this one, you can easily fit these into your lifestyle and be more efficient. 

*Note - To make this recipe, you must soak the cashews for a few hours, so make sure you do this ahead of time!!


INGREDIENTS FOR ABOUT 8 JARS:

- ZonePerfect® Bars in Chocolate Peanut Butter and Fudge Graham

- 1 (10 oz) Can of Cashew Pieces (I used a can of salted cashews, and they worked very well. The salt goes away completely when you soak your cashews).

- 1 Can Of Coconut Milk

- 1 (11 Fl. oz) Culinary Coconut Milk (It was more of a liquid consistency than that in the can)

- Organic Agave Nectar (Any type will do)

- Lemon juice for taste (optional)

- Raspberries and other fresh fruit of your choice

OTHER MATERIALS:

- Small Jars

- Blender (for filling)

- Food Processor (for crust)

- Long spoon to scrape ingredients from blender

- Sharp knife to prepare crust

You're in luck! Save up to $4 when you buy two boxes in the ZonePerfect® Bundle Pack.

Shop Online For ZonePerfect® Bars Here.

Find More Ideas For Recipes & Ideas Here.

I found all of these ingredients at Walmart, which made this project easier. Look for ZonePerfect® Bars near the pharmacy area, by the nutritional bars and other healthy items. 

MAKE THE VEGAN FILLING:

1.) Begin by soaking the cashews in water for 3-4 hours. I made sure to use a container with a lid, so it didn't spill. I could not believe how soft the cashews got in this short amount of time. Check the cashews to see if they are soft, and when they're ready, drain out all of the water with a strainer. None of the salt will be left.

2.) In a blender, add all of the cashews, and the more "liquid" coconut milk. Blend until smooth (see photo below).

Next, add the can of coconut milk. When I first added it, I was concerned that the mixture would turn out watery (because there was a clear liquid in the can), but when I blended everything up, it was perfect! 

Add your agave sweetener one or two squirt at a time. Taste the mixture and keep adding agave until you think it's sweet enough. Depending on what type of agave you get, you may not need much at all. The stye I got (in the photo of ingredients), was not very strong or sweet, so I added a few squirts and it tasted perfect!

MAKE THE ZonePerfect® CRUST:

Note - Crust is not vegan, sorry for any confusion!

100% Vegan Crust would contain 1 Cup pitted dates + 1 cup raw walnuts - bended in a food processor). But, this ZonePerfect® tasted absolutely incredible!!! 

3.) Unwrap about 5-6 bars, or as many as will fit into your food processor.

4.) Chop the ZonePerfect® Bars as small as you can with your knife, and put the pieces into the food processor. At first, I only chopped the bars into quarters, and they did not process well. I took them back out, and chopped them up a lot more, and they were absolutely perfect. ZonePerfect® one might say :)

6.) Blend/Process the ZonePerfect® bars as much as you can. Look at that beautiful crust!!!

7.) Put the ZonePerfect® crust into the jars, and press the materials down as much as you can. I just divided the Zone Perfect crust evenly between the jars. 

8.) Pour the vegan "cheesecake" filling into the jars, and fill pretty close to the top. 

9.) Now, put the lids onto the jars, and put them into the fridge for a few hours, or overnight. This will help them set up, and the filling tastes so much better if it is cold! 

10.) After they have chilled for a bit, take them out and top them with fresh fruit! I enjoyed scooping the ZonePerfect® crust and mixing it into the "cheesecake". It added a nice chocolatey sweetness that made these amazing for an On The Go Snack, whether it was breakfast, a snack, or a light meal. They're very filling and had a lovely hint of cashews and coconuts. 

Thanks so much for taking a look at my recipes!! Have you ever eaten or created a vegan cheesecake filling or something like this recipe? Comment below and let me know. Take care!