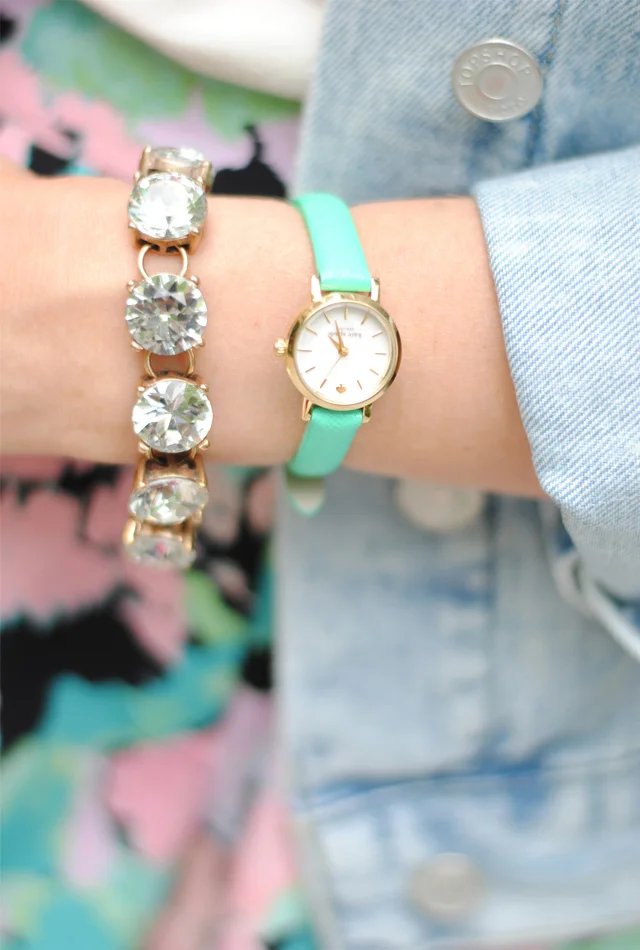
So excited to share this party, perfectly inspired by music festivals, good weather, and good friends! Read on to learn about tons of fun party ideas and what to serve your guests.
Read MoreSweeten Your Spring with an Easter Party Inspired by Marie Callender Pies
Looking for some major Easter Party inspirations? Look no further! I have created the cutest party around, so take a peek to get inspired for your very own gathering this holiday.
Read MoreA Dog-Friendly Easter Basket and A Dog Easter Egg Hunt #TargetMadeMeDoIt
Learn all about including your dog into your Spring and Easter festivities and create a fun and unique DIY Dog Easter Basket.
Read MorePatagonia Barely Baggies Shorts
Looking for an amazing, new pair of shorts that will last forever and then some? These cute shorts are durable and extremely functional, and will quickly become your new favorite item.
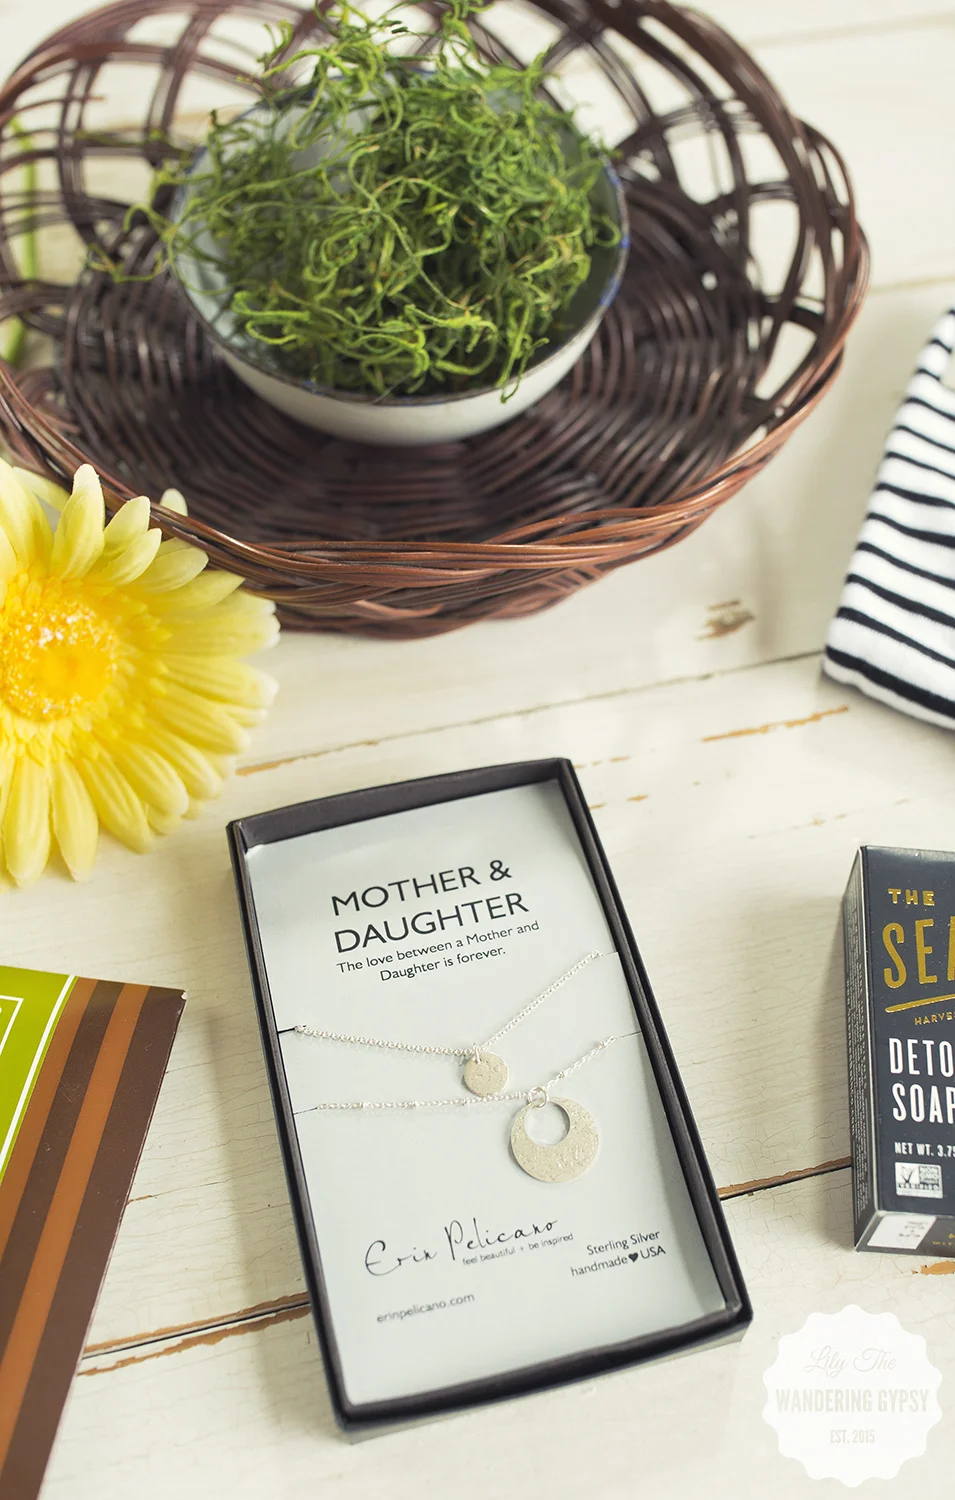
Read MoreMother's Day Gift Basket with Erin Pelicano Necklaces
I am so honored to be able to share another gorgeous necklace by Erin Pelicano. She has an incredibly wonderful sense of style, and I just love everything she creates! A few (or more) of her pieces are absolutely perfect for Mother's Day! In fact, they say Mother & Daughter right on them :)

I thought a fun way to show off her beautiful necklaces would be in a cute, Mother's Day Gift Basket. Indulge Mom this Mother's Day (or any other time of the year), and give her thoughtful gifts, elegantly arranged in a gift basket. Stay tuned for a second blog post with another idea, coming soon!!
The items featured in this gift basket were partially provided by my goodie bag that I received at Create + Cultivate Dallas! Both the Seaweed Bath Co. Detox Cellulite Soap and the Black and White Striped Nora Socks from Richer Poorer Inc. were from C+C! The Poco Dolce Olive Oil Chocolate Bar was purchased in Santa Fe at Chocolate + Cashmere (which I will soon post photos of), and of course, the main attraction is this gorgeous necklace from Erin Pelicano!
Let's Make A Gift Basket!
I found this shallow basket to be perfect for a gift basket, featuring Erin's beautiful Mother & Daughter Necklace.
MATERIALS:
- Shallow Wicker Basket
- Tissue Paper
- Moss
- Gerber Daisy Heads
- Various Items To Fill Basket That Mom Will Love
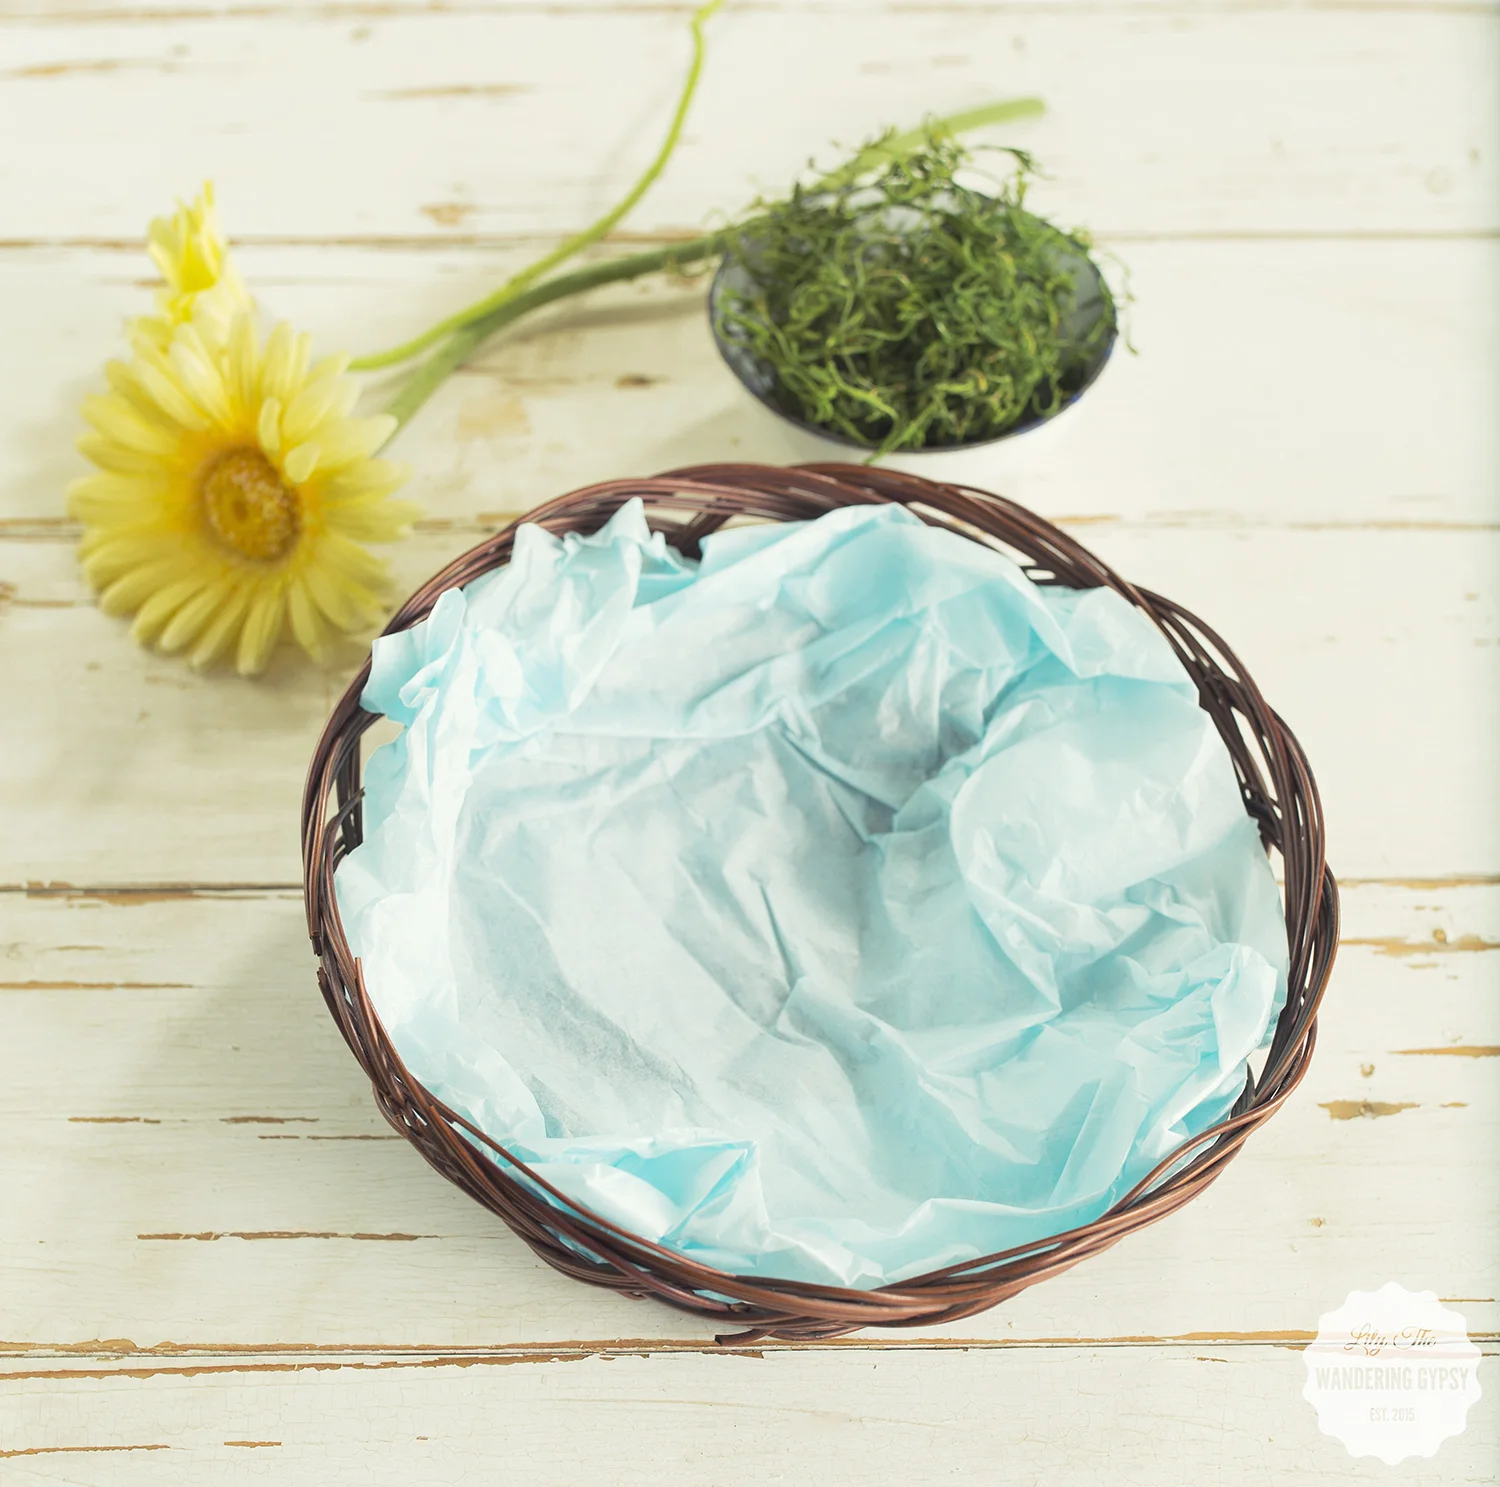
Lightly crumple up a piece of tissue paper and form it to the basket. This will ensure that the moss won't fall out.

Add some moss to your gift basket for a rustic and Earthy look.
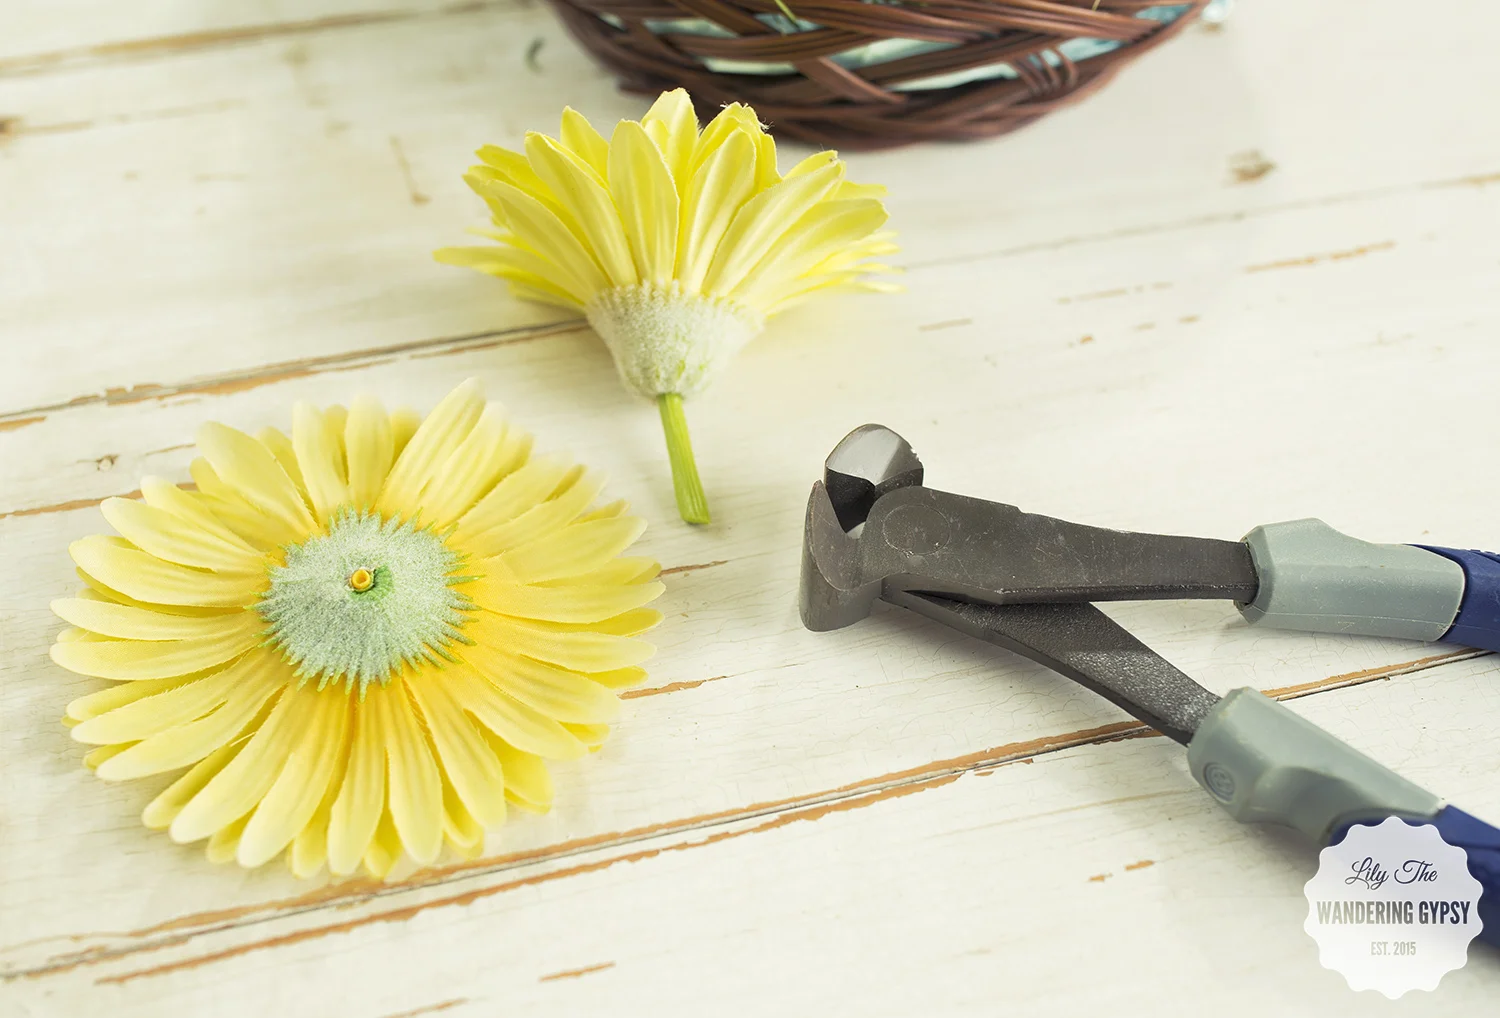
Use wire cutters to easily remove flower heads from their stems.
Now, gather your gifts, and begin to place them in the basket in a cute way. I first added the striped socks in back, and the chocolate next to them. Next, I centered the necklace, and placed the detox soap behind it. Lastly, I added the flowers in front left, and the center back. Just play around with the placement to ensure everything can be seen well.

A Gift Basket Tip: You can use Shrink Plastic (found at Dollar Tree) around this gift basket to hold everything in place. Stay tuned, as I will likely shrink wrap this basket, to keep it safe so I can send it to my mom!


Nike Internationalists
I am in dire need of some cute, new sneakers, and I think I have found the ones! The Nike Internationalists are adorable, and would look cute with so many outfits.

SPOTTED PAIR // LILAC PAIR // BLACK PAIR
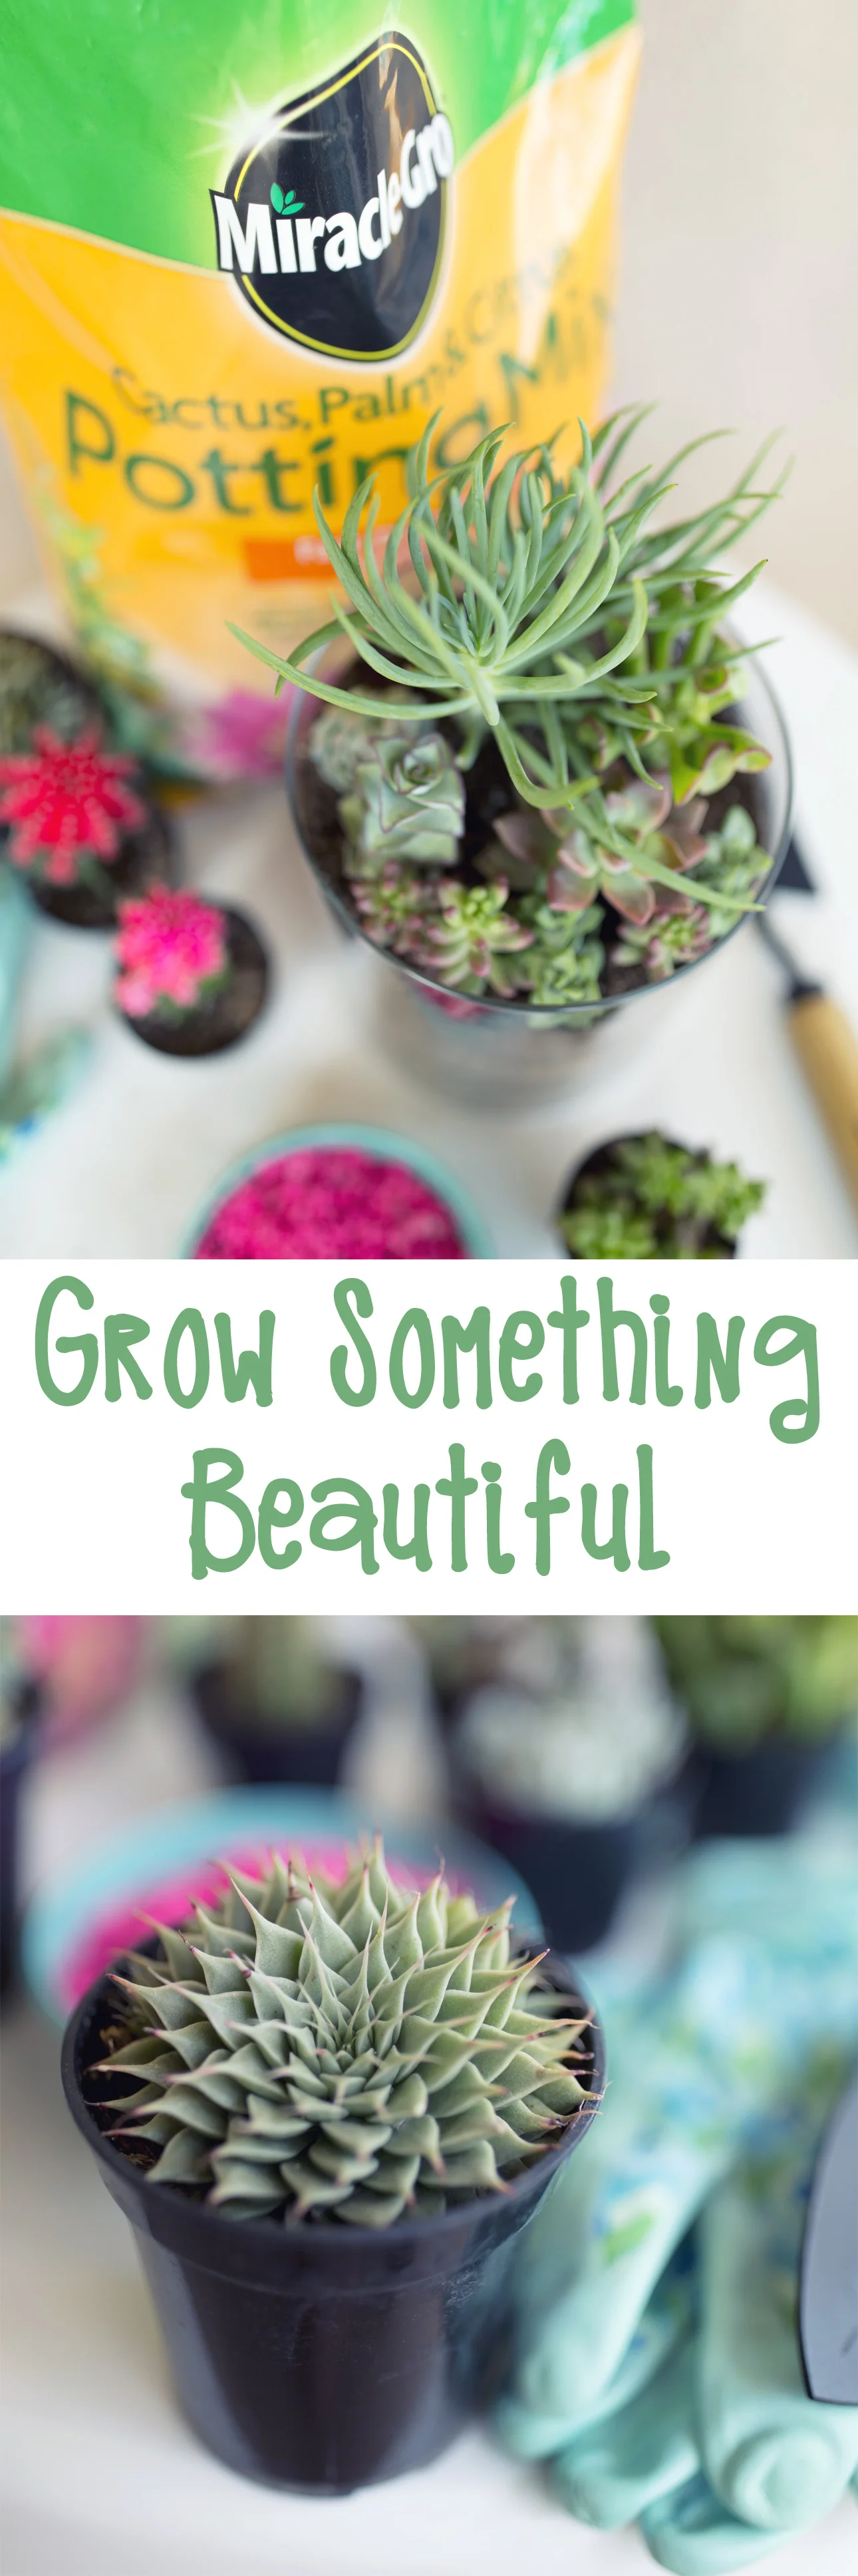
Miracle Gro - Grow Together - A Cute Terrarium DIY
Super excited to share my latest project with you! I have teamed up with Miracle Gro and HelloSociety to bring you some pretty amazing Spring Inspirations. I planted the terrarium arrangement about 2 weeks ago, and it's still as happy as ever!
I had so much fun working on this project while visiting my family in Arizona. The timing couldn't have been more perfect, because the Cave Creek, AZ Home Depot has SO many amazing succulents and cacti to choose from.
My plants obviously love their new home in Miracle Gro Cactus, Palm, and Citrus Potting Mix. The instructions for this terrarium are at the bottom of this post.
Check back soon to see more photos as they go live on my Dedicated Board.
MATERIALS:
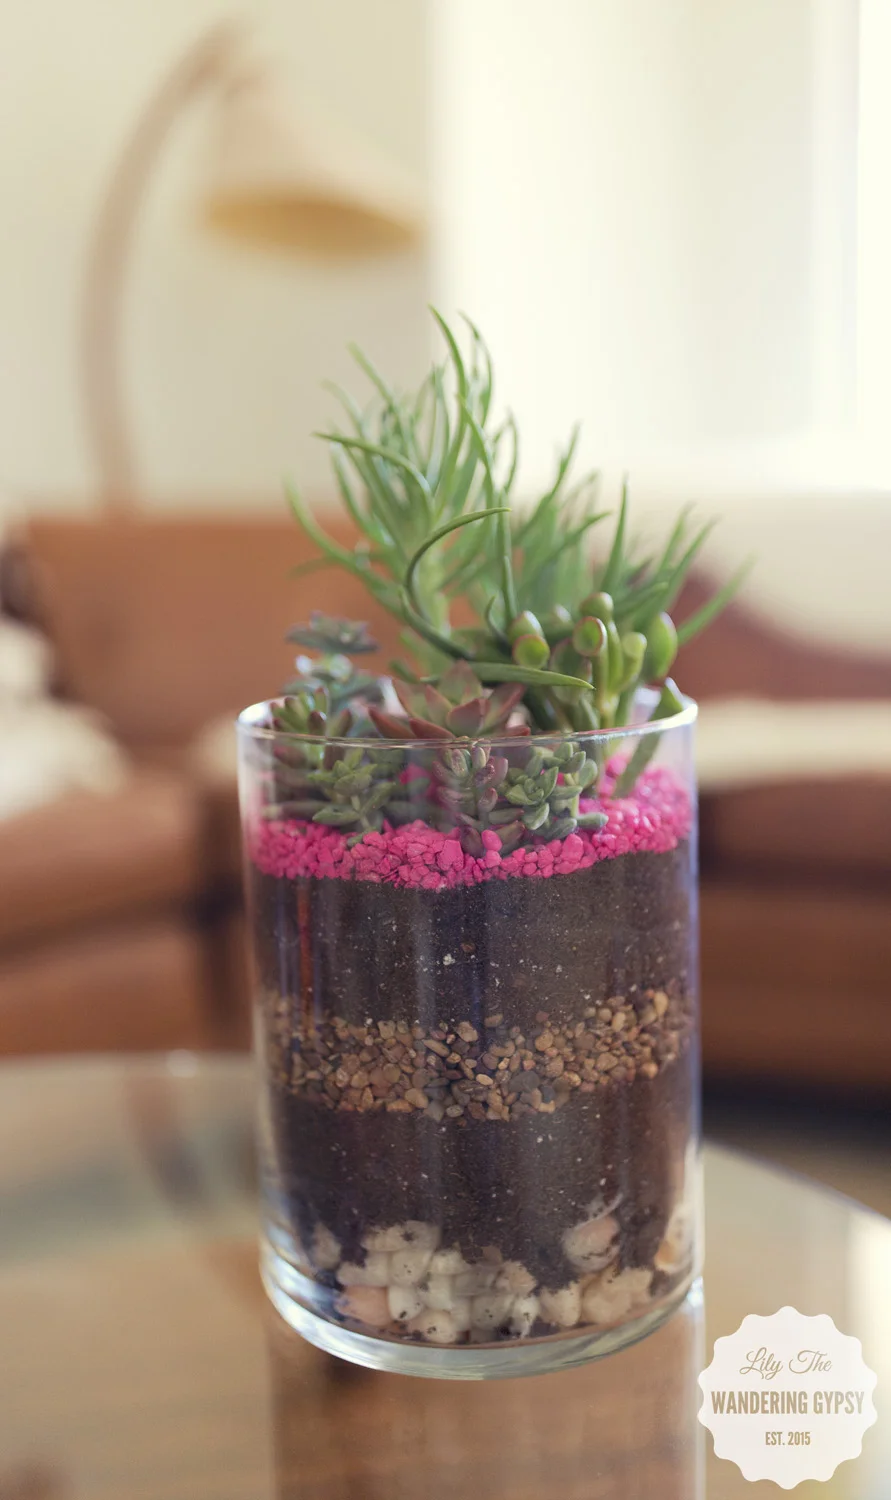
Various succulents and cacti (varied heights are good), Miracle Gro Cactus, Palm, Citrus Potting Mix, natural colored pebbles, white or brown aquarium rocks, neon pink aquarium rocks, activated charcoal (optional), gardening gloves, shovel, funnel, tall glass container (Walmart has the best prices that I've found).
INSTRUCTIONS:
In a tall glass container , or glass container of your choice, add an optional layer of activated charcoal. Next, add about 2 inches of larger pebbles. Add a layer of dirt on top, then pat the dirt down with the back of your hand, to create a flat surface. Next, add white or brown colored aquarium rocks, and flatten them with your hand. Add a bit more dirt, almost to the very top, but leaving about 1-2" of space at top. Do a test arrangement by placing the potted succulents into the container. Feel free to break apart plants if it looks like there are multiples in one container. Once you have a layout that you like, take the succulents out of their container (over a bucket or similar), and knock off as much loose dirt as you can. Place plants into dirt and add a bit more dirt on top. Now, using a funnel, add pink rocks around plants, to hide all dirt. That's it! A fun project you can create in an hour or so!
Clematis Jackmanii Giveaway + Garden Inspirations + Top Gardening Inspirations On Pinterest
Nature Hills Nursery has asked me to offer my readers a chance to win a Jackmanii Clematis! You will win the plant listed here, in container #2.
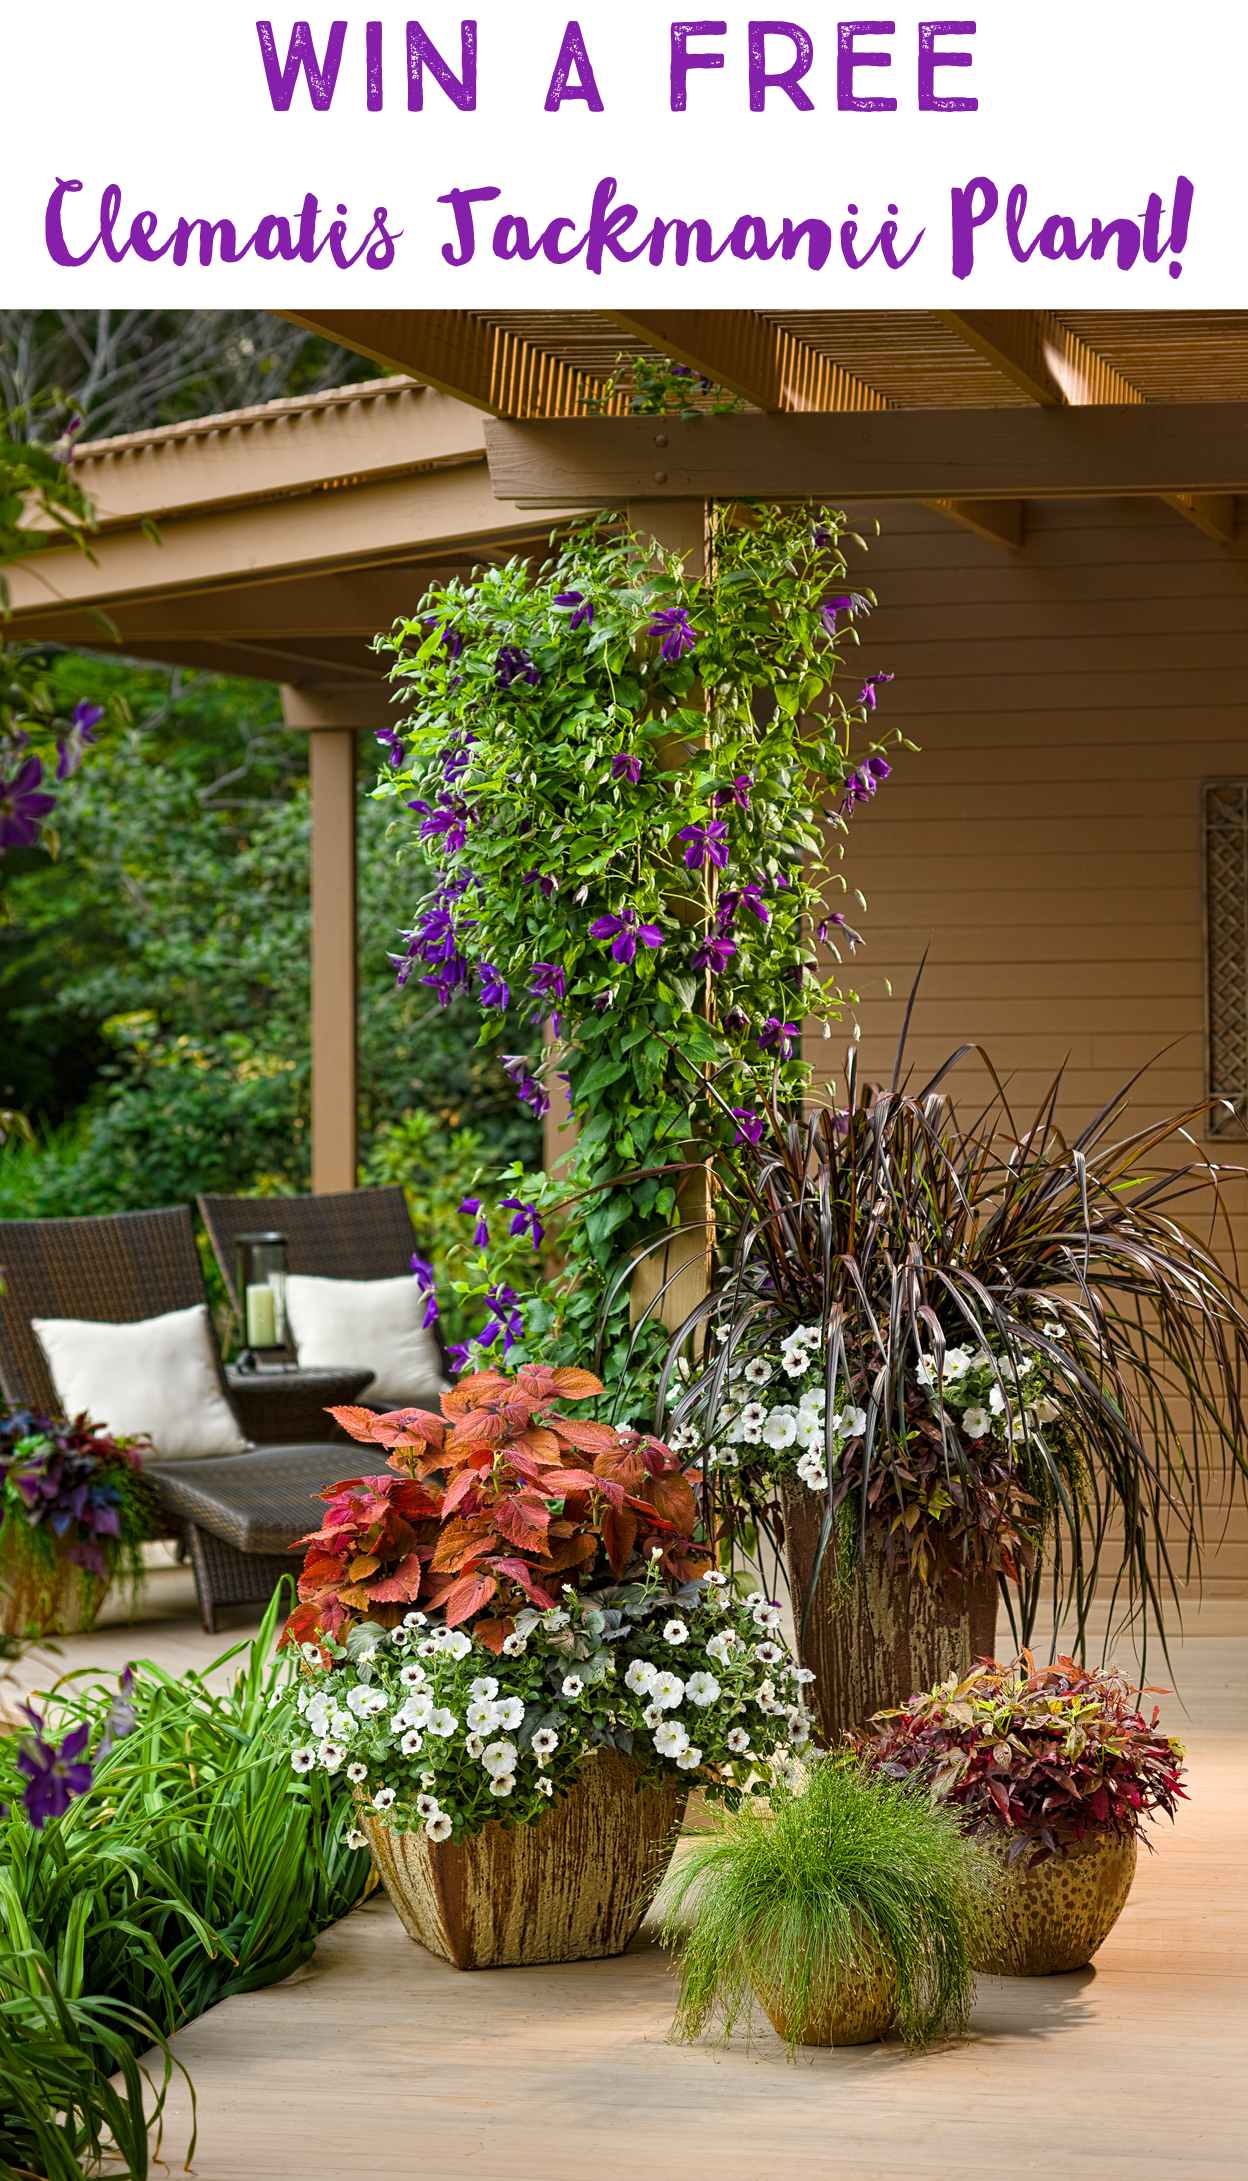
The 5" flowers transition from deep purple to a lighter violet with age. 'Jackmanii Superba' is an excellent cultivar for later season color - blooming from midsummer to early fall. Jackmanii can also be used as a ground cover!
Clematis 'Jackmanii Superba' is easy to grow in a rich, porous, alkaline soil with plenty of room for the roots to spread. Clematis perform best perform when the tops are in full sunlight and the roots are shaded. Apply mulch or plant a shallow rooted groundcover to keep the roots cool and shaded.
Flowers are produced on new growth so prune this plant back to 1 to 2 feet in late winter or early spring.
* Profusion of Purple Flowers
* Flowers Fade From Deep to Light Purple
* Blooms Mid Summer Through Fall
They have also nominated me as one of the Top Ten People To Follow On Pinterest In 2016! They love my Pinterest board called, How Does Your Garden Grow. How nice of them!!!

MORE GARDENING INSPIRATIONS...
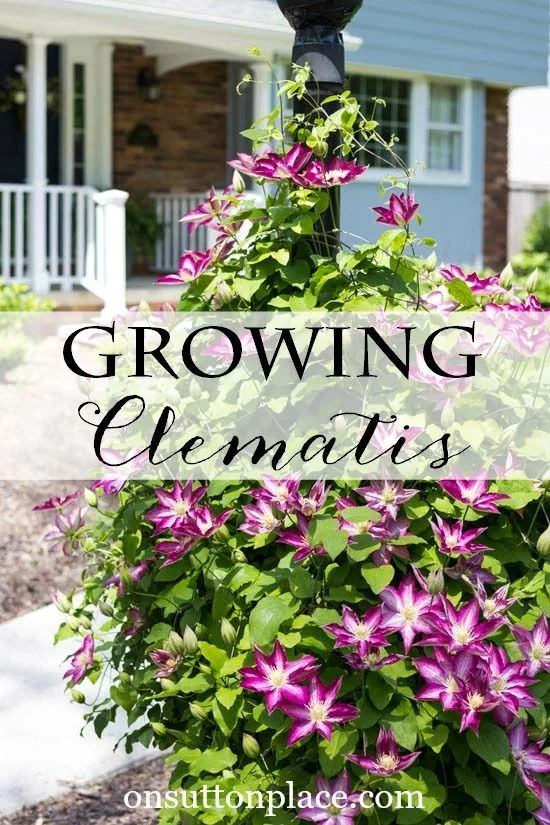
Tips On Growing Clematis
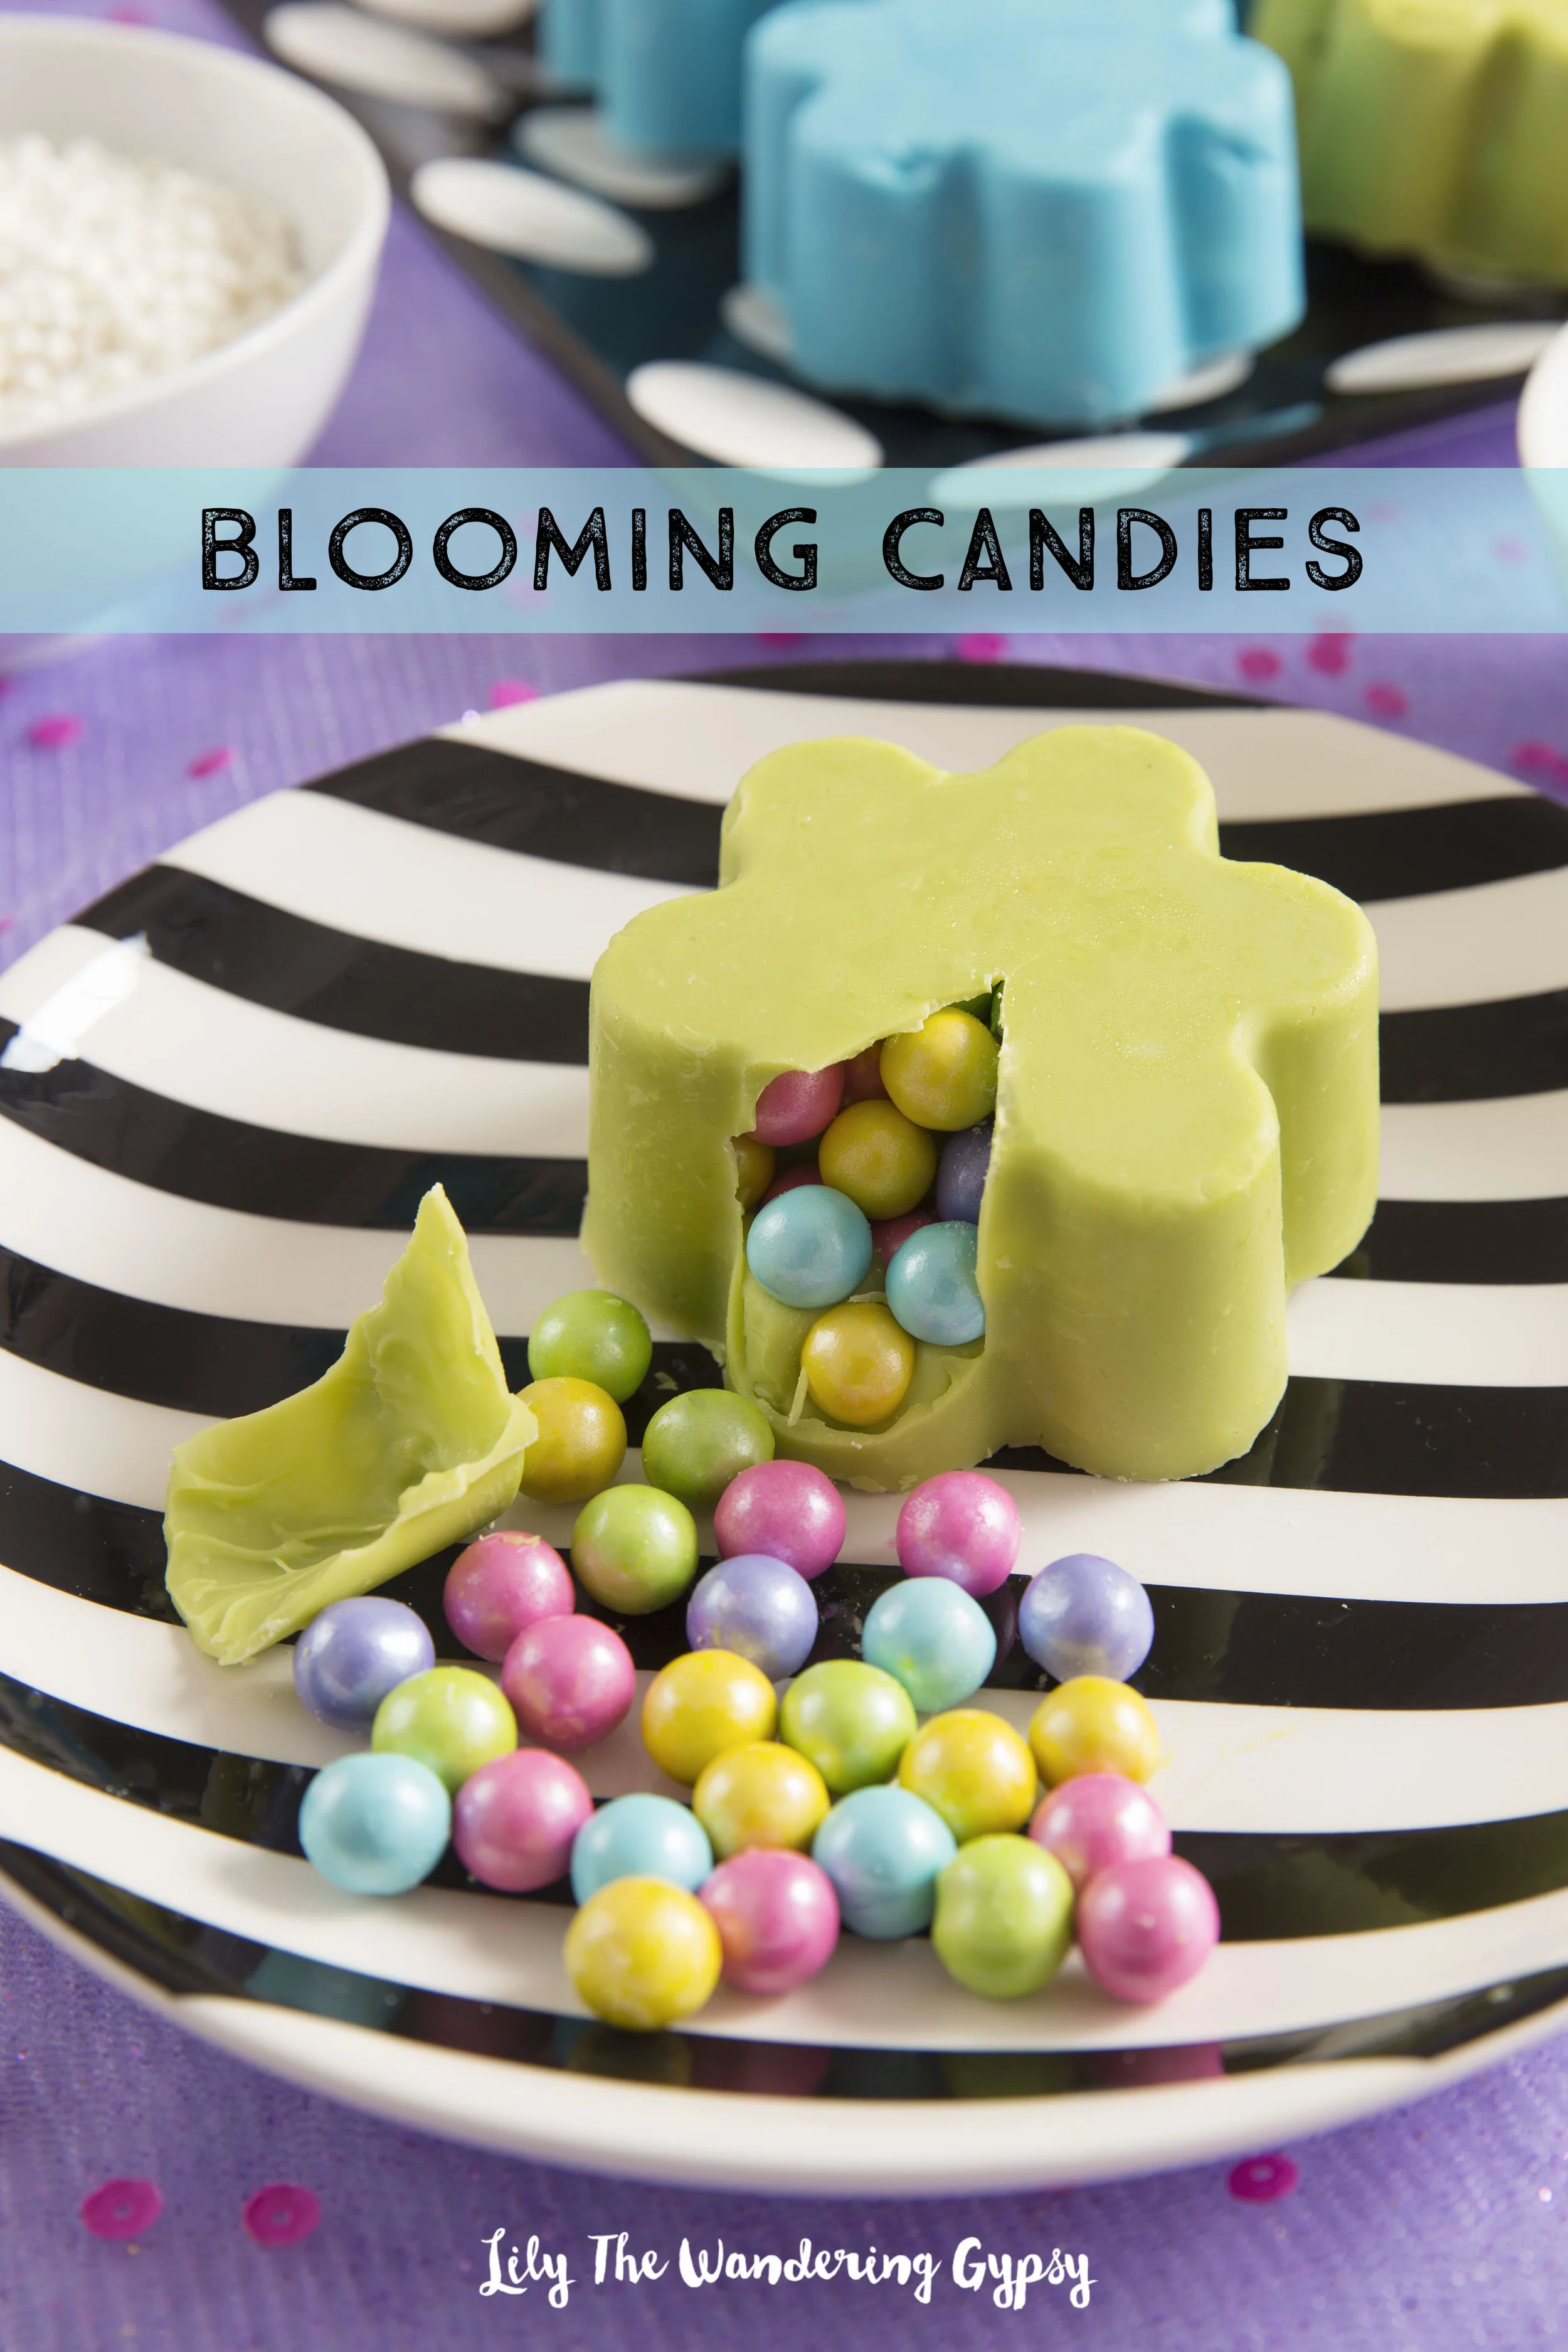
How To Make Blooming Candies
I had so much fun creating this project! I was inspired by summer, and all the pretty flowers that are blooming right now! For this recipe, I used silicone brownie molds, so I could fill them with tons of candy. I also used Blue and Vibrant Green Candy Melts. My filler candies were Sixlets, found here. See the list of ingredients below...and have FUN! You can make these in just about any color combo, for special events, holidays, and sporting events.
HERE'S HOW YOU MAKE THEM...

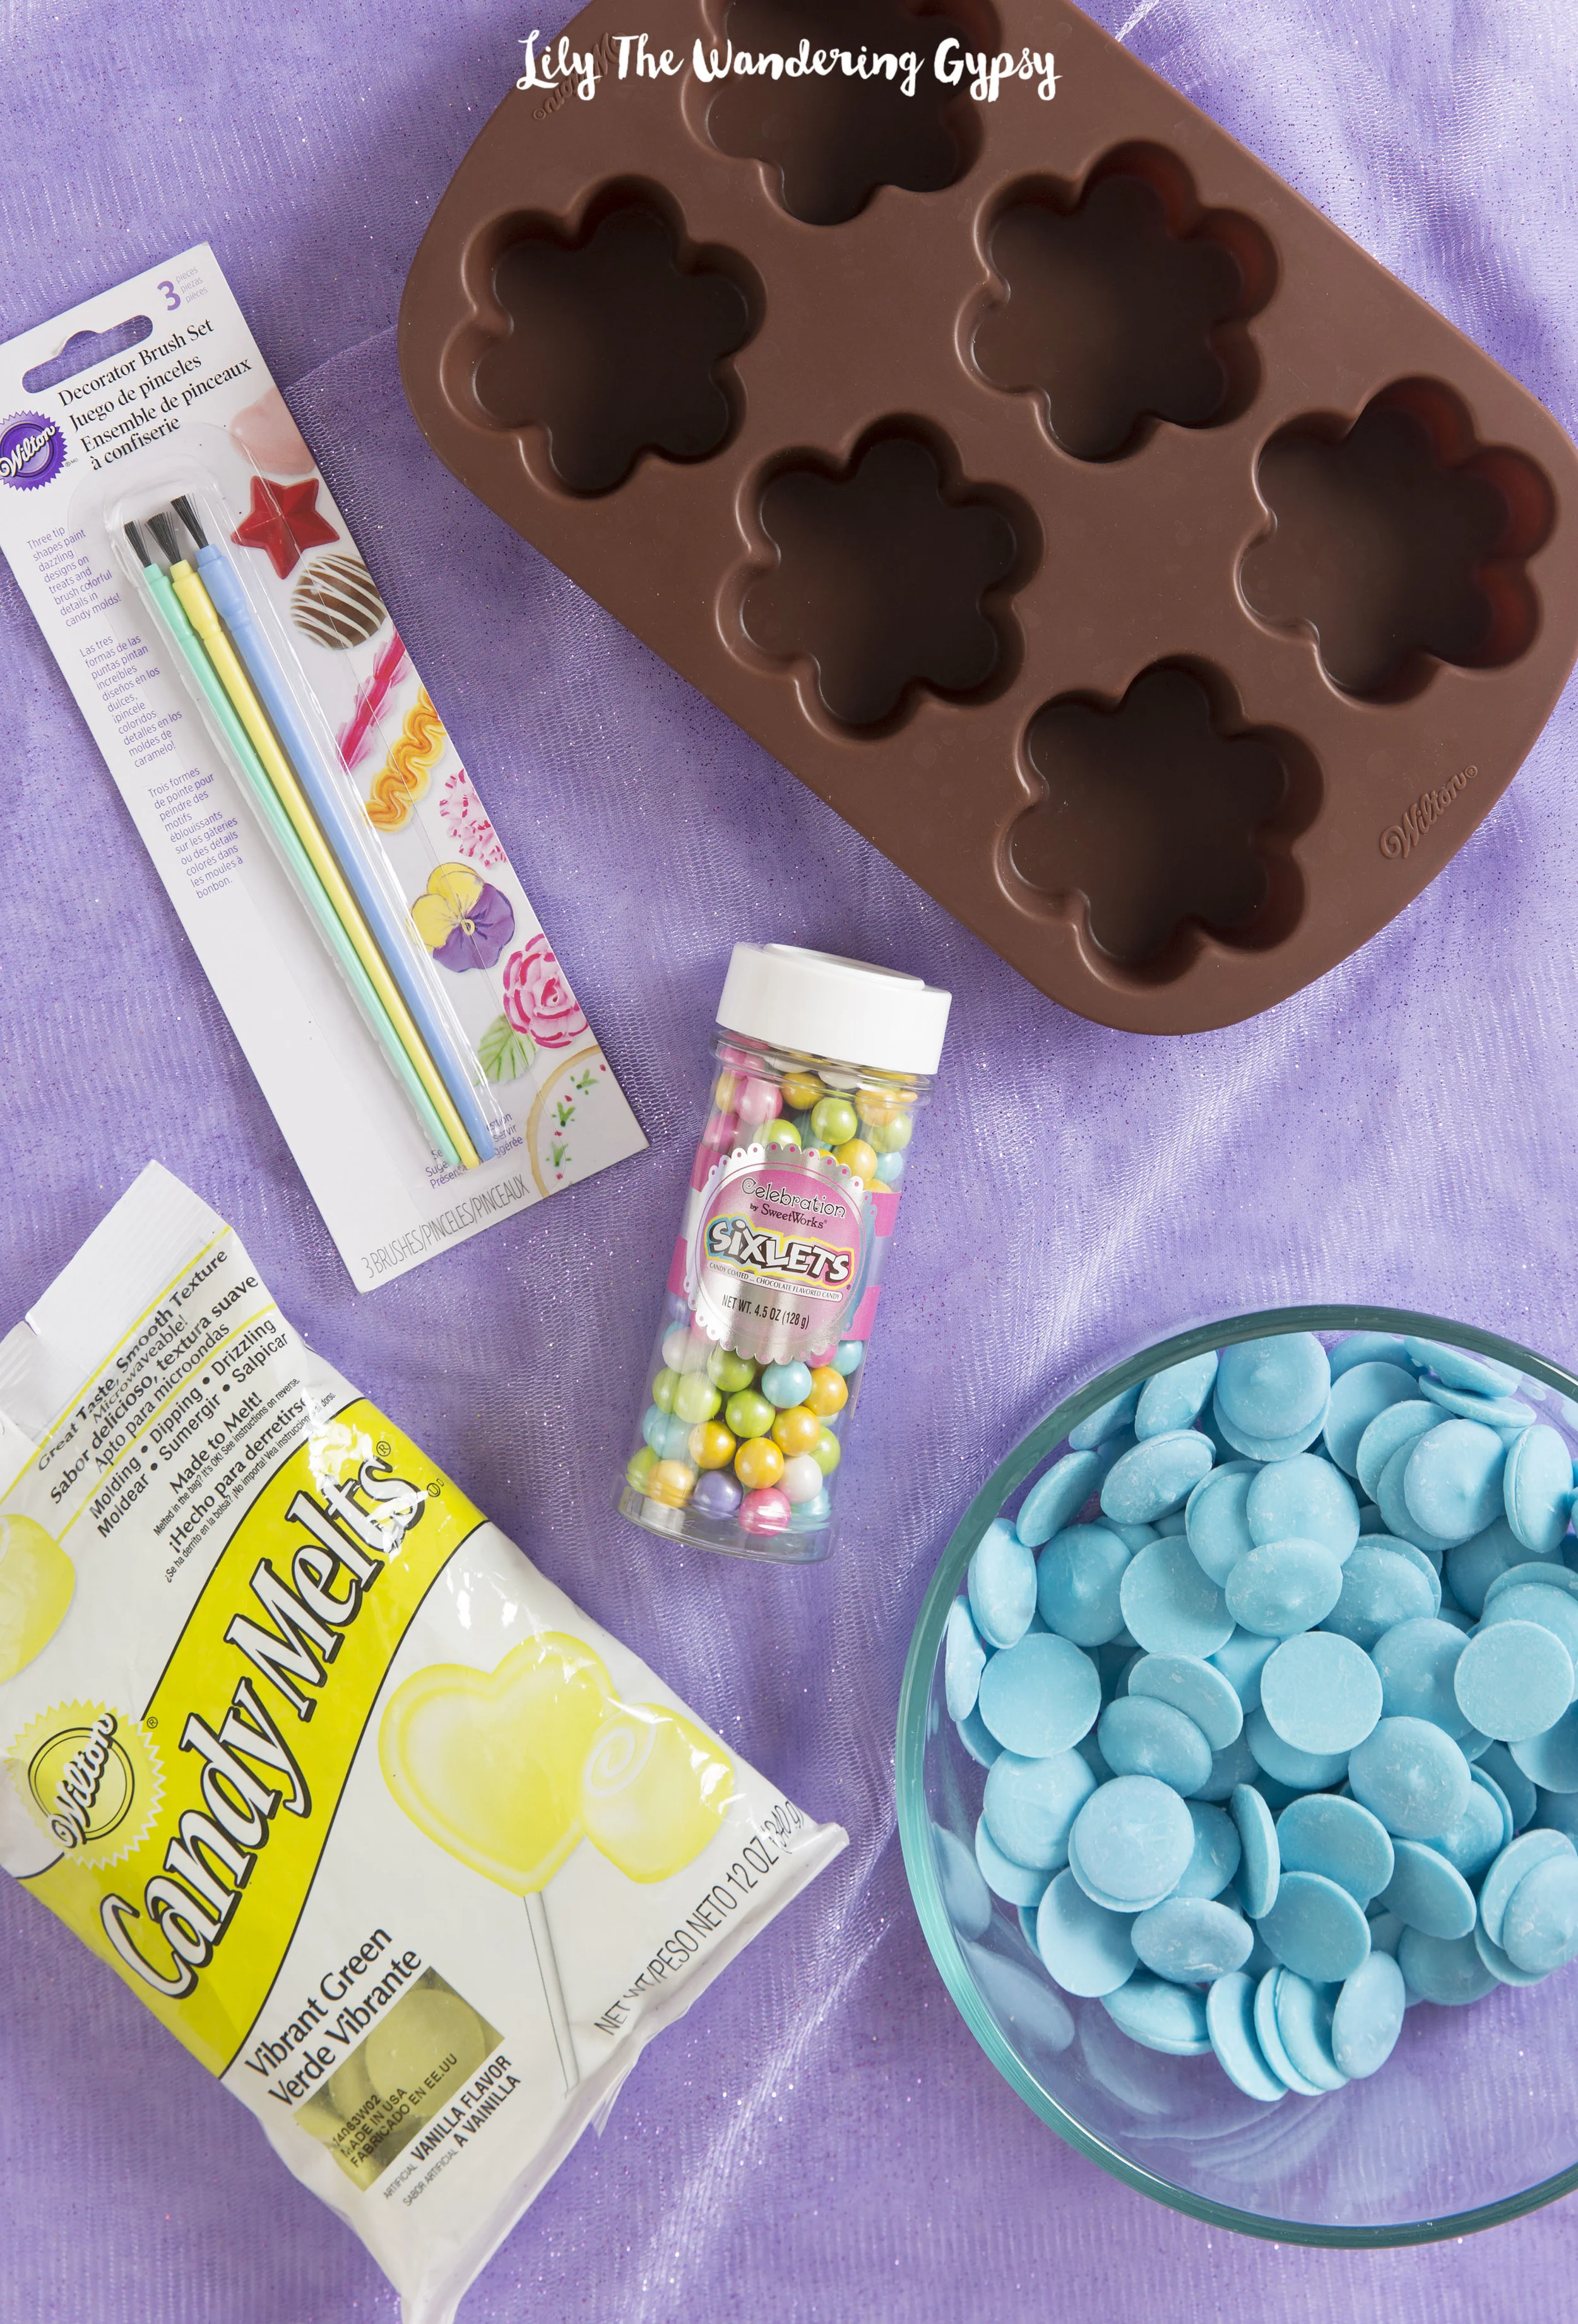
You only need a few simple ingredients! Some Sixlets Candies, candy melts, and a candy mould.
INGREDIENTS (Click Names To Buy)
Vibrant Green Candy Melts - Blue Candy Melts - Filler Candies - Wilton Paintbrushes, Candy/Brownie Molds
1.) Melt your candy melts in 2 separate containers, either in the microwave or in a double boiler method, which I did. I found that using a 2 cup Pyrex measuring cup, which held one package of candy melts worked great! Fill a small saucepan with 2-3 inches of water, and pour your melts into the measuring cup. Insert cup into water, heat water over medium of high heat and stir melts frequently until smooth. (See photo below for tips)...

Texture Test (above) - The blue one looks right, but NOT the green one! If your melts form more of a paste than a smooth and satiny texture, try again.
MY BIGGEST TIP WOULD BE...USE A PAINTBRUSH!!!
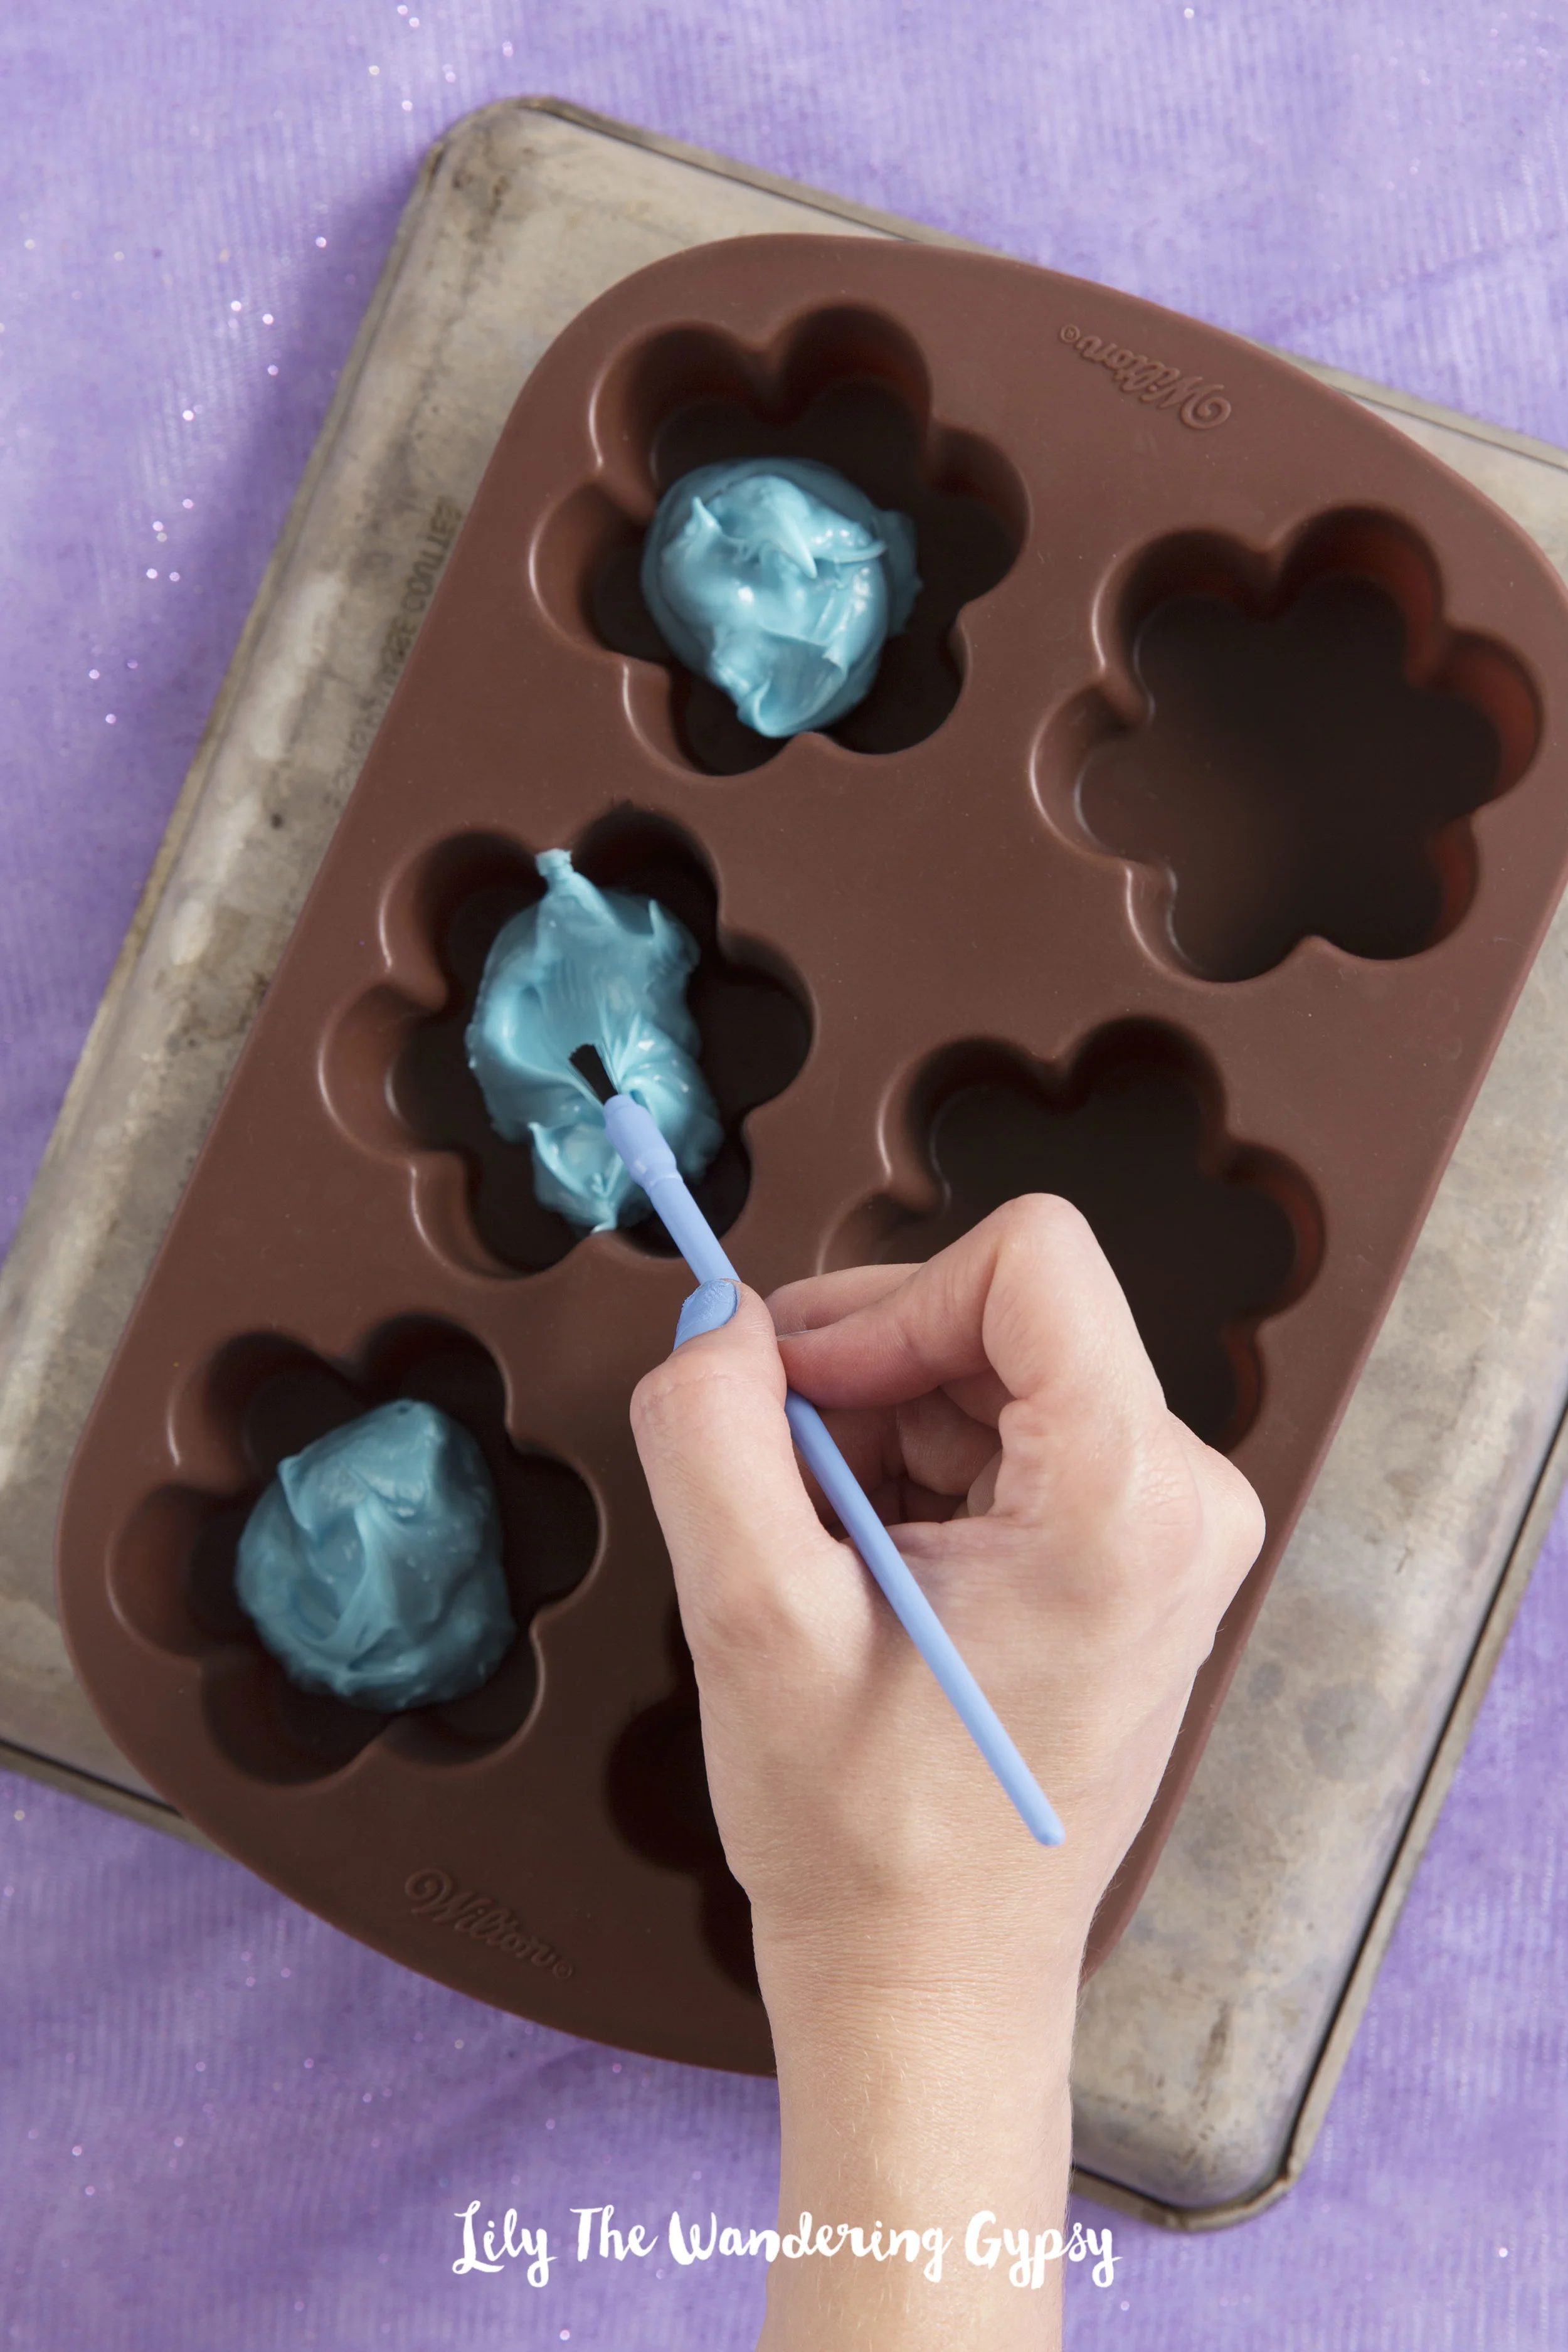
2.) Using a paintbrush to spread the candy molds was a priceless tip! The brush gives you way more control than a knife or spoon. This step took a while, but was definitely fun. I searched around just about every craft store for these brushes, and finally found them at JoAnns! I originally searched for cheap kids' paintbrushes, and found nothing. Luckily I persisted :)
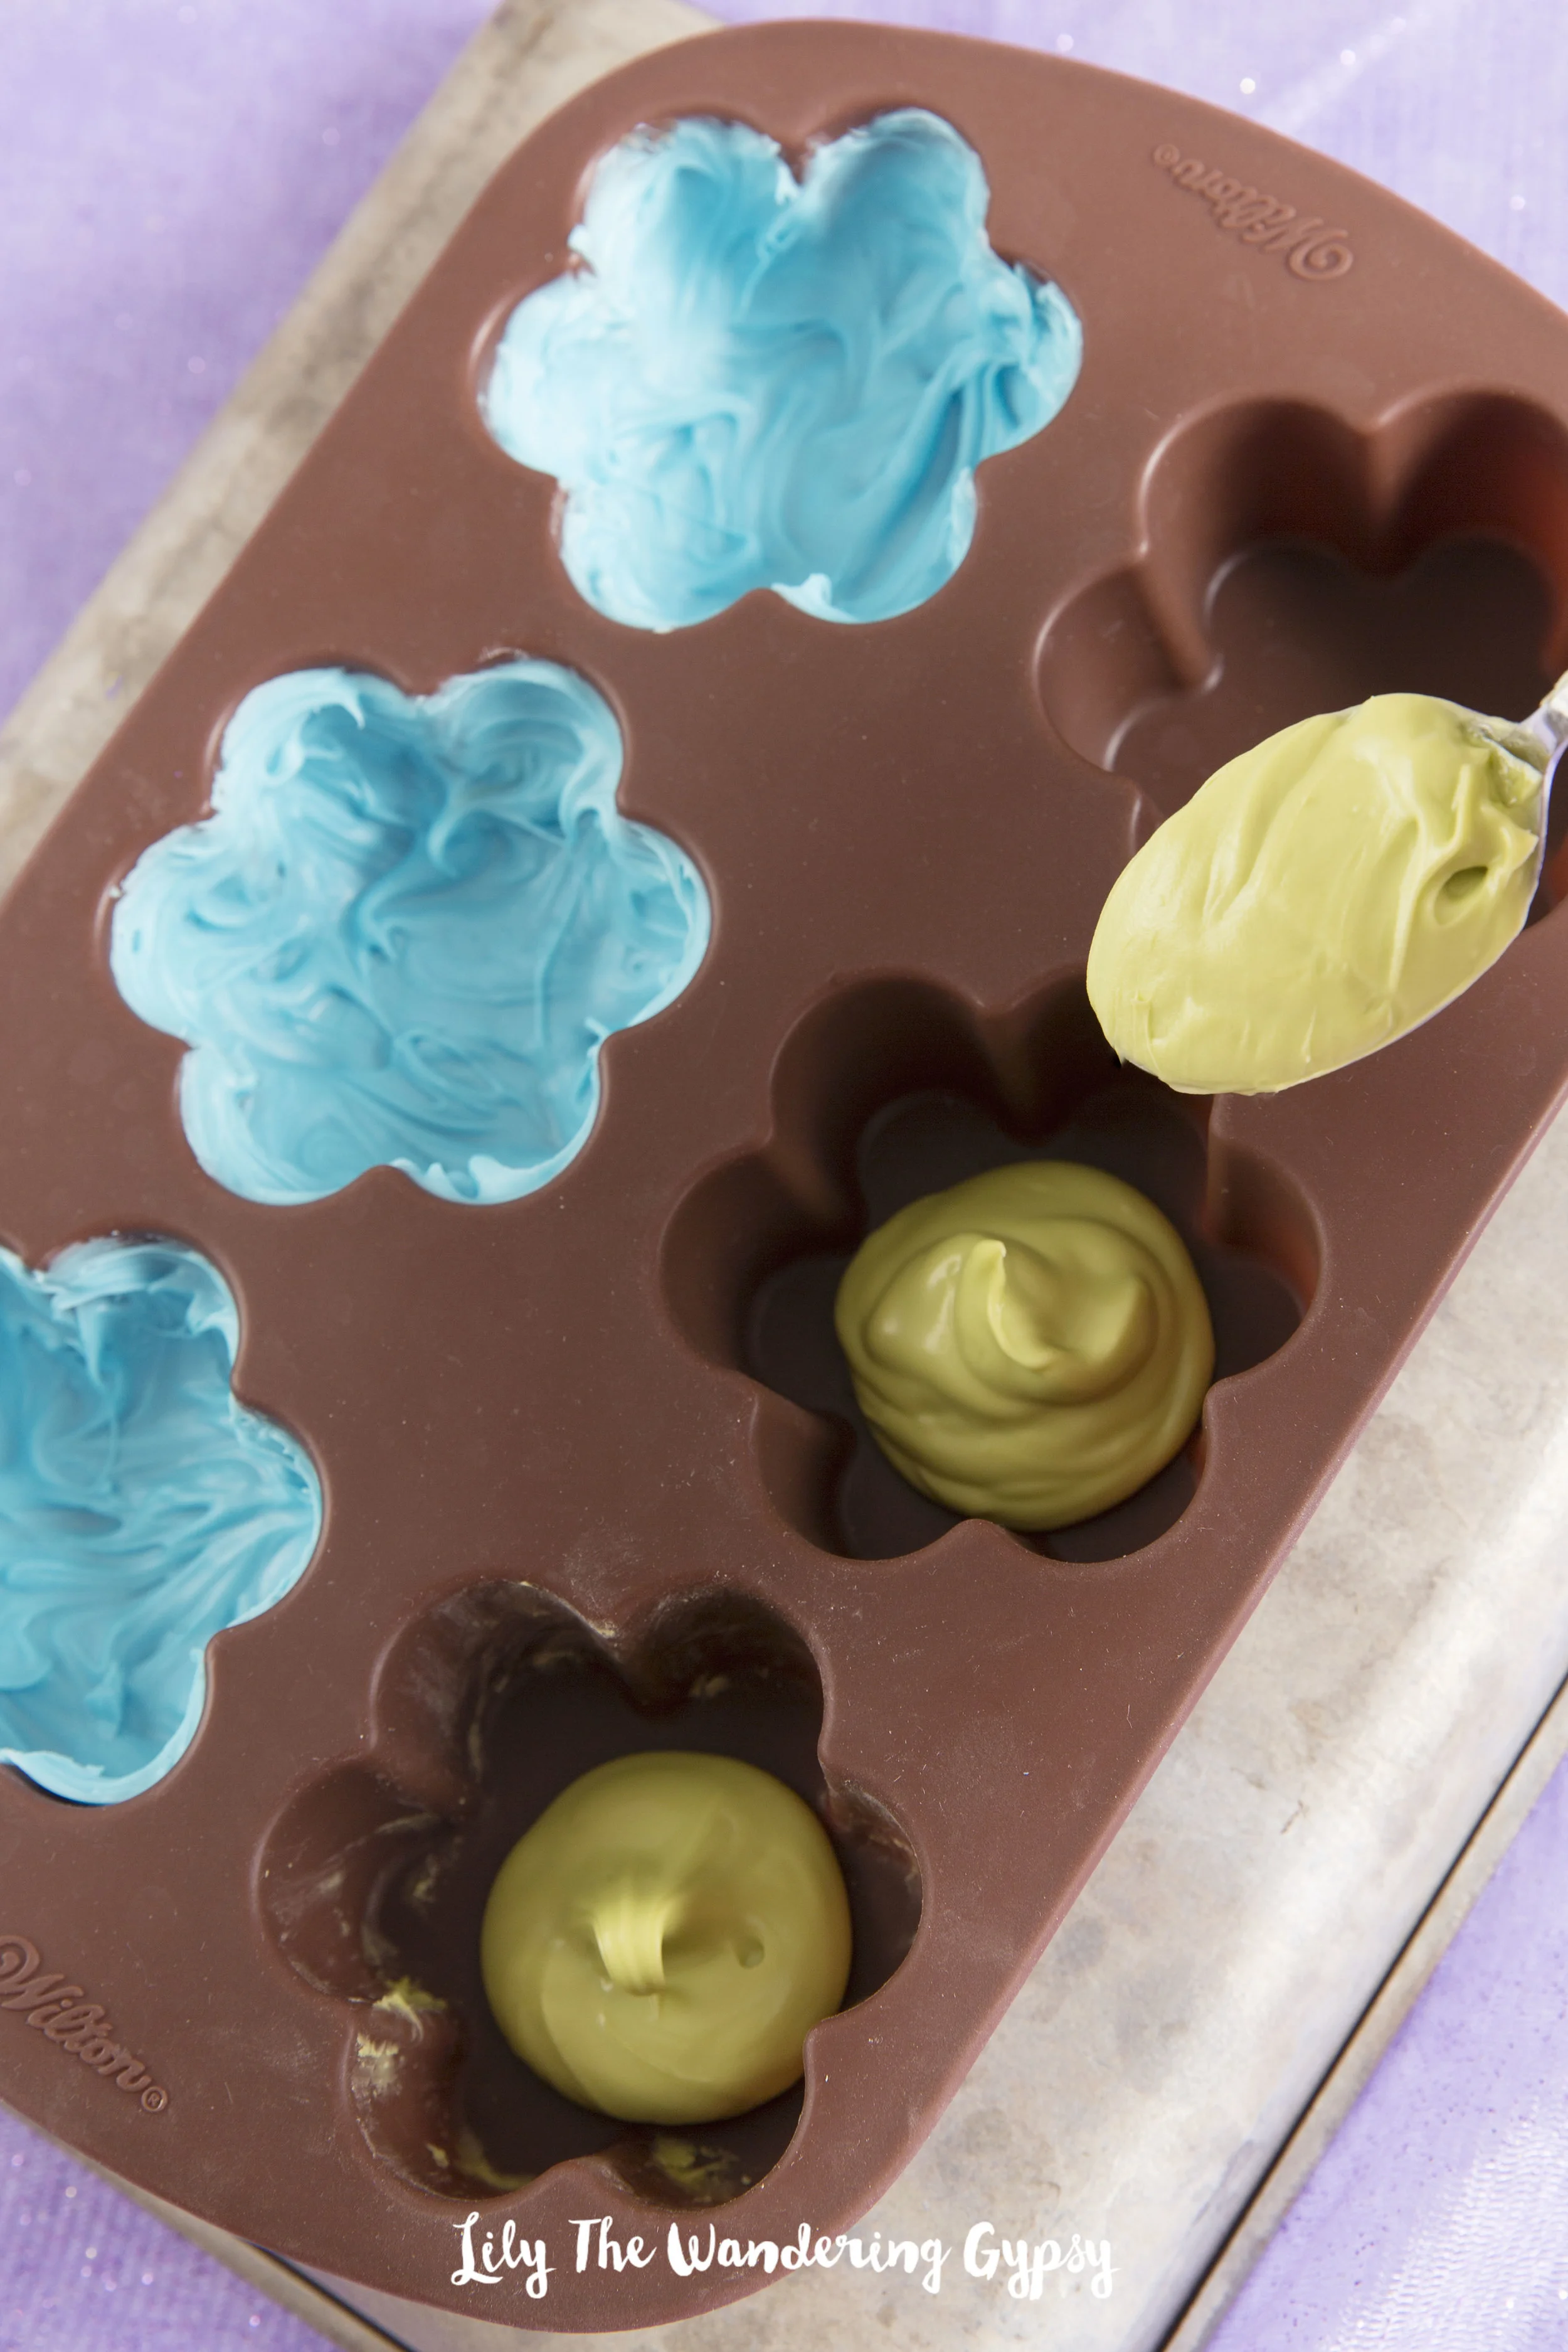
3.) See how I spread the blue candy melts into the molds with a paintbrush, and am about to spread the green candies next. I added about double this amount (that you see in green) to fill the mold at first. After you fill the molds, pop the candies into the freezer for about 5 minutes.
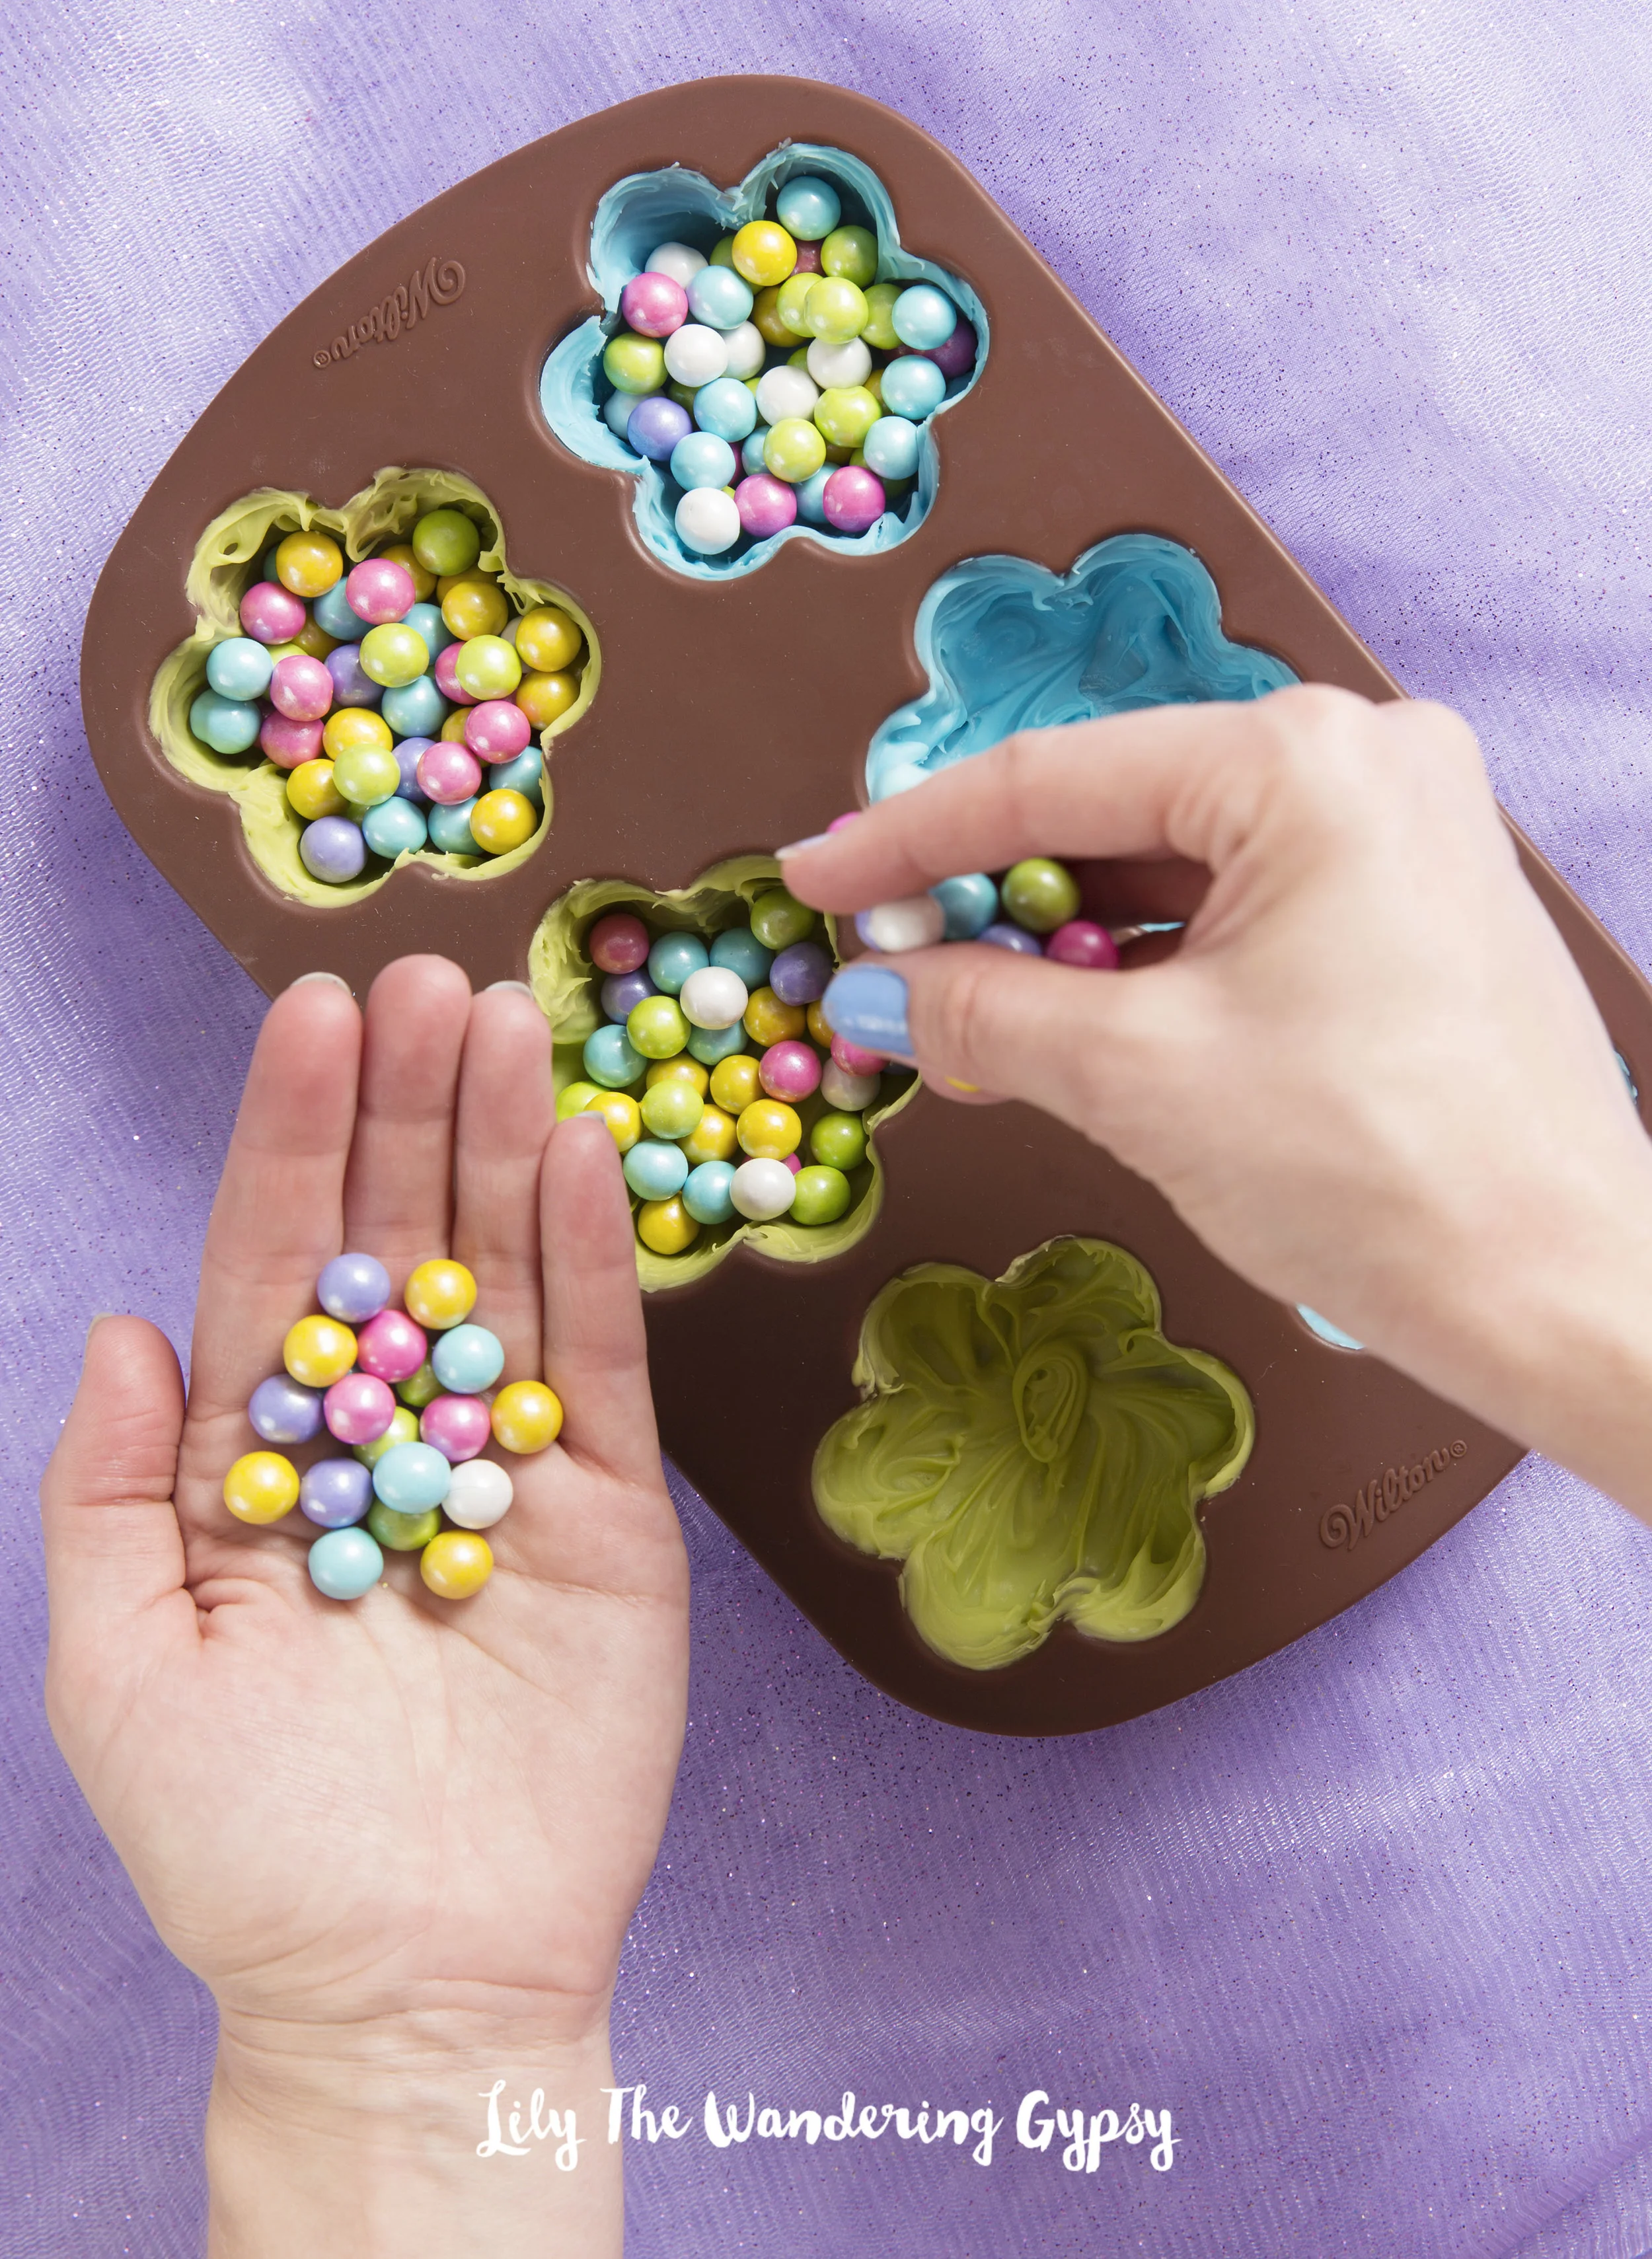
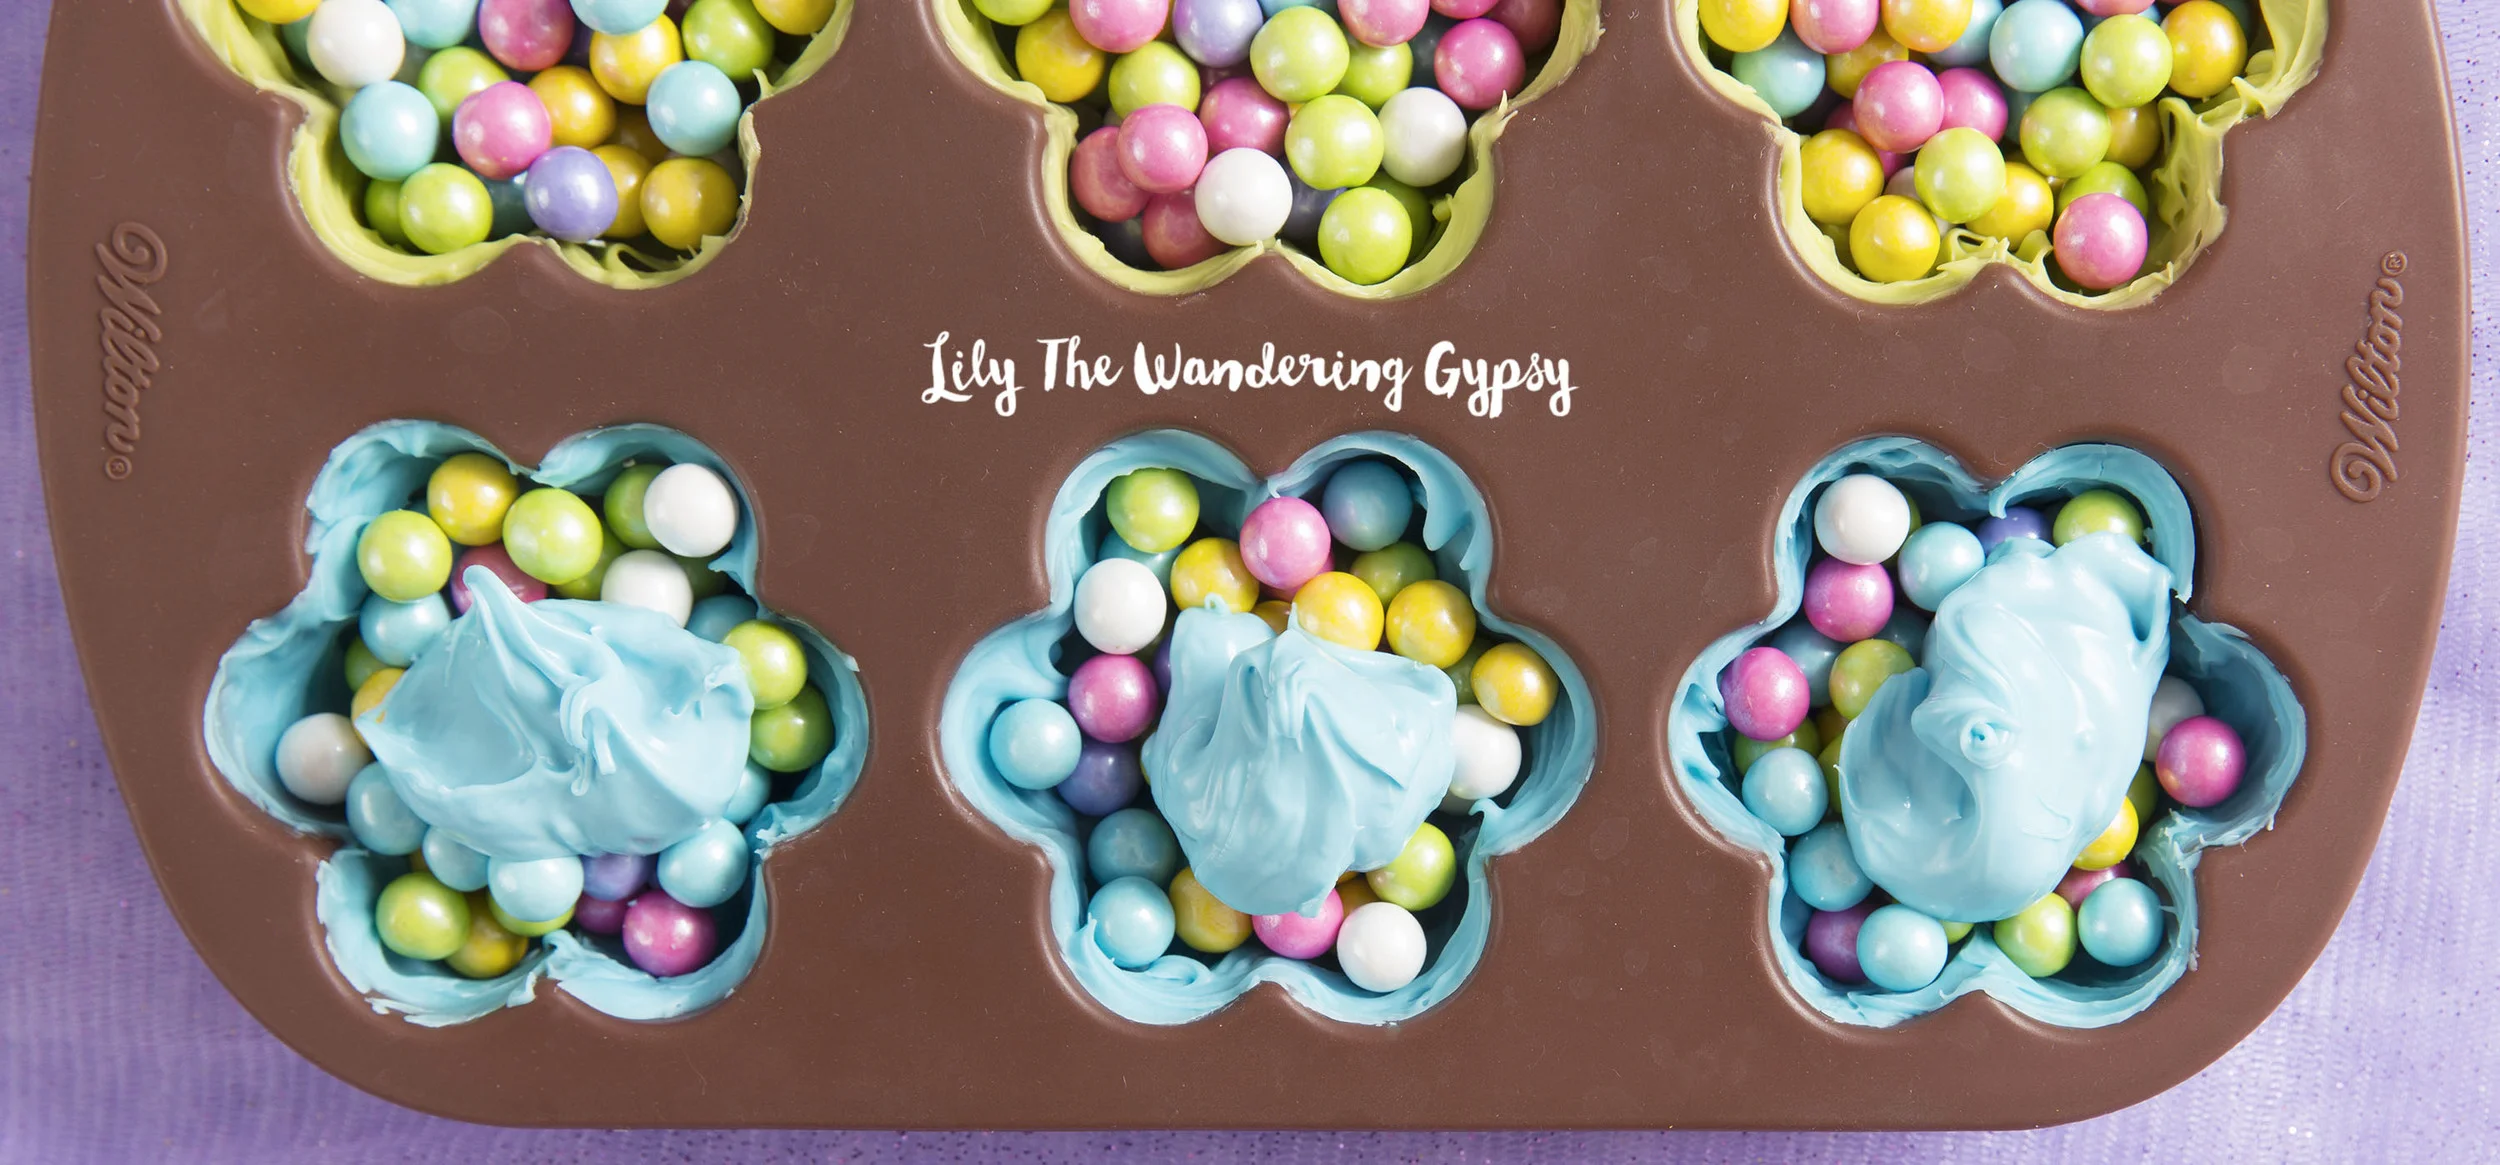
4.) Now, fill the candy shells with Candies, almost to the very top.
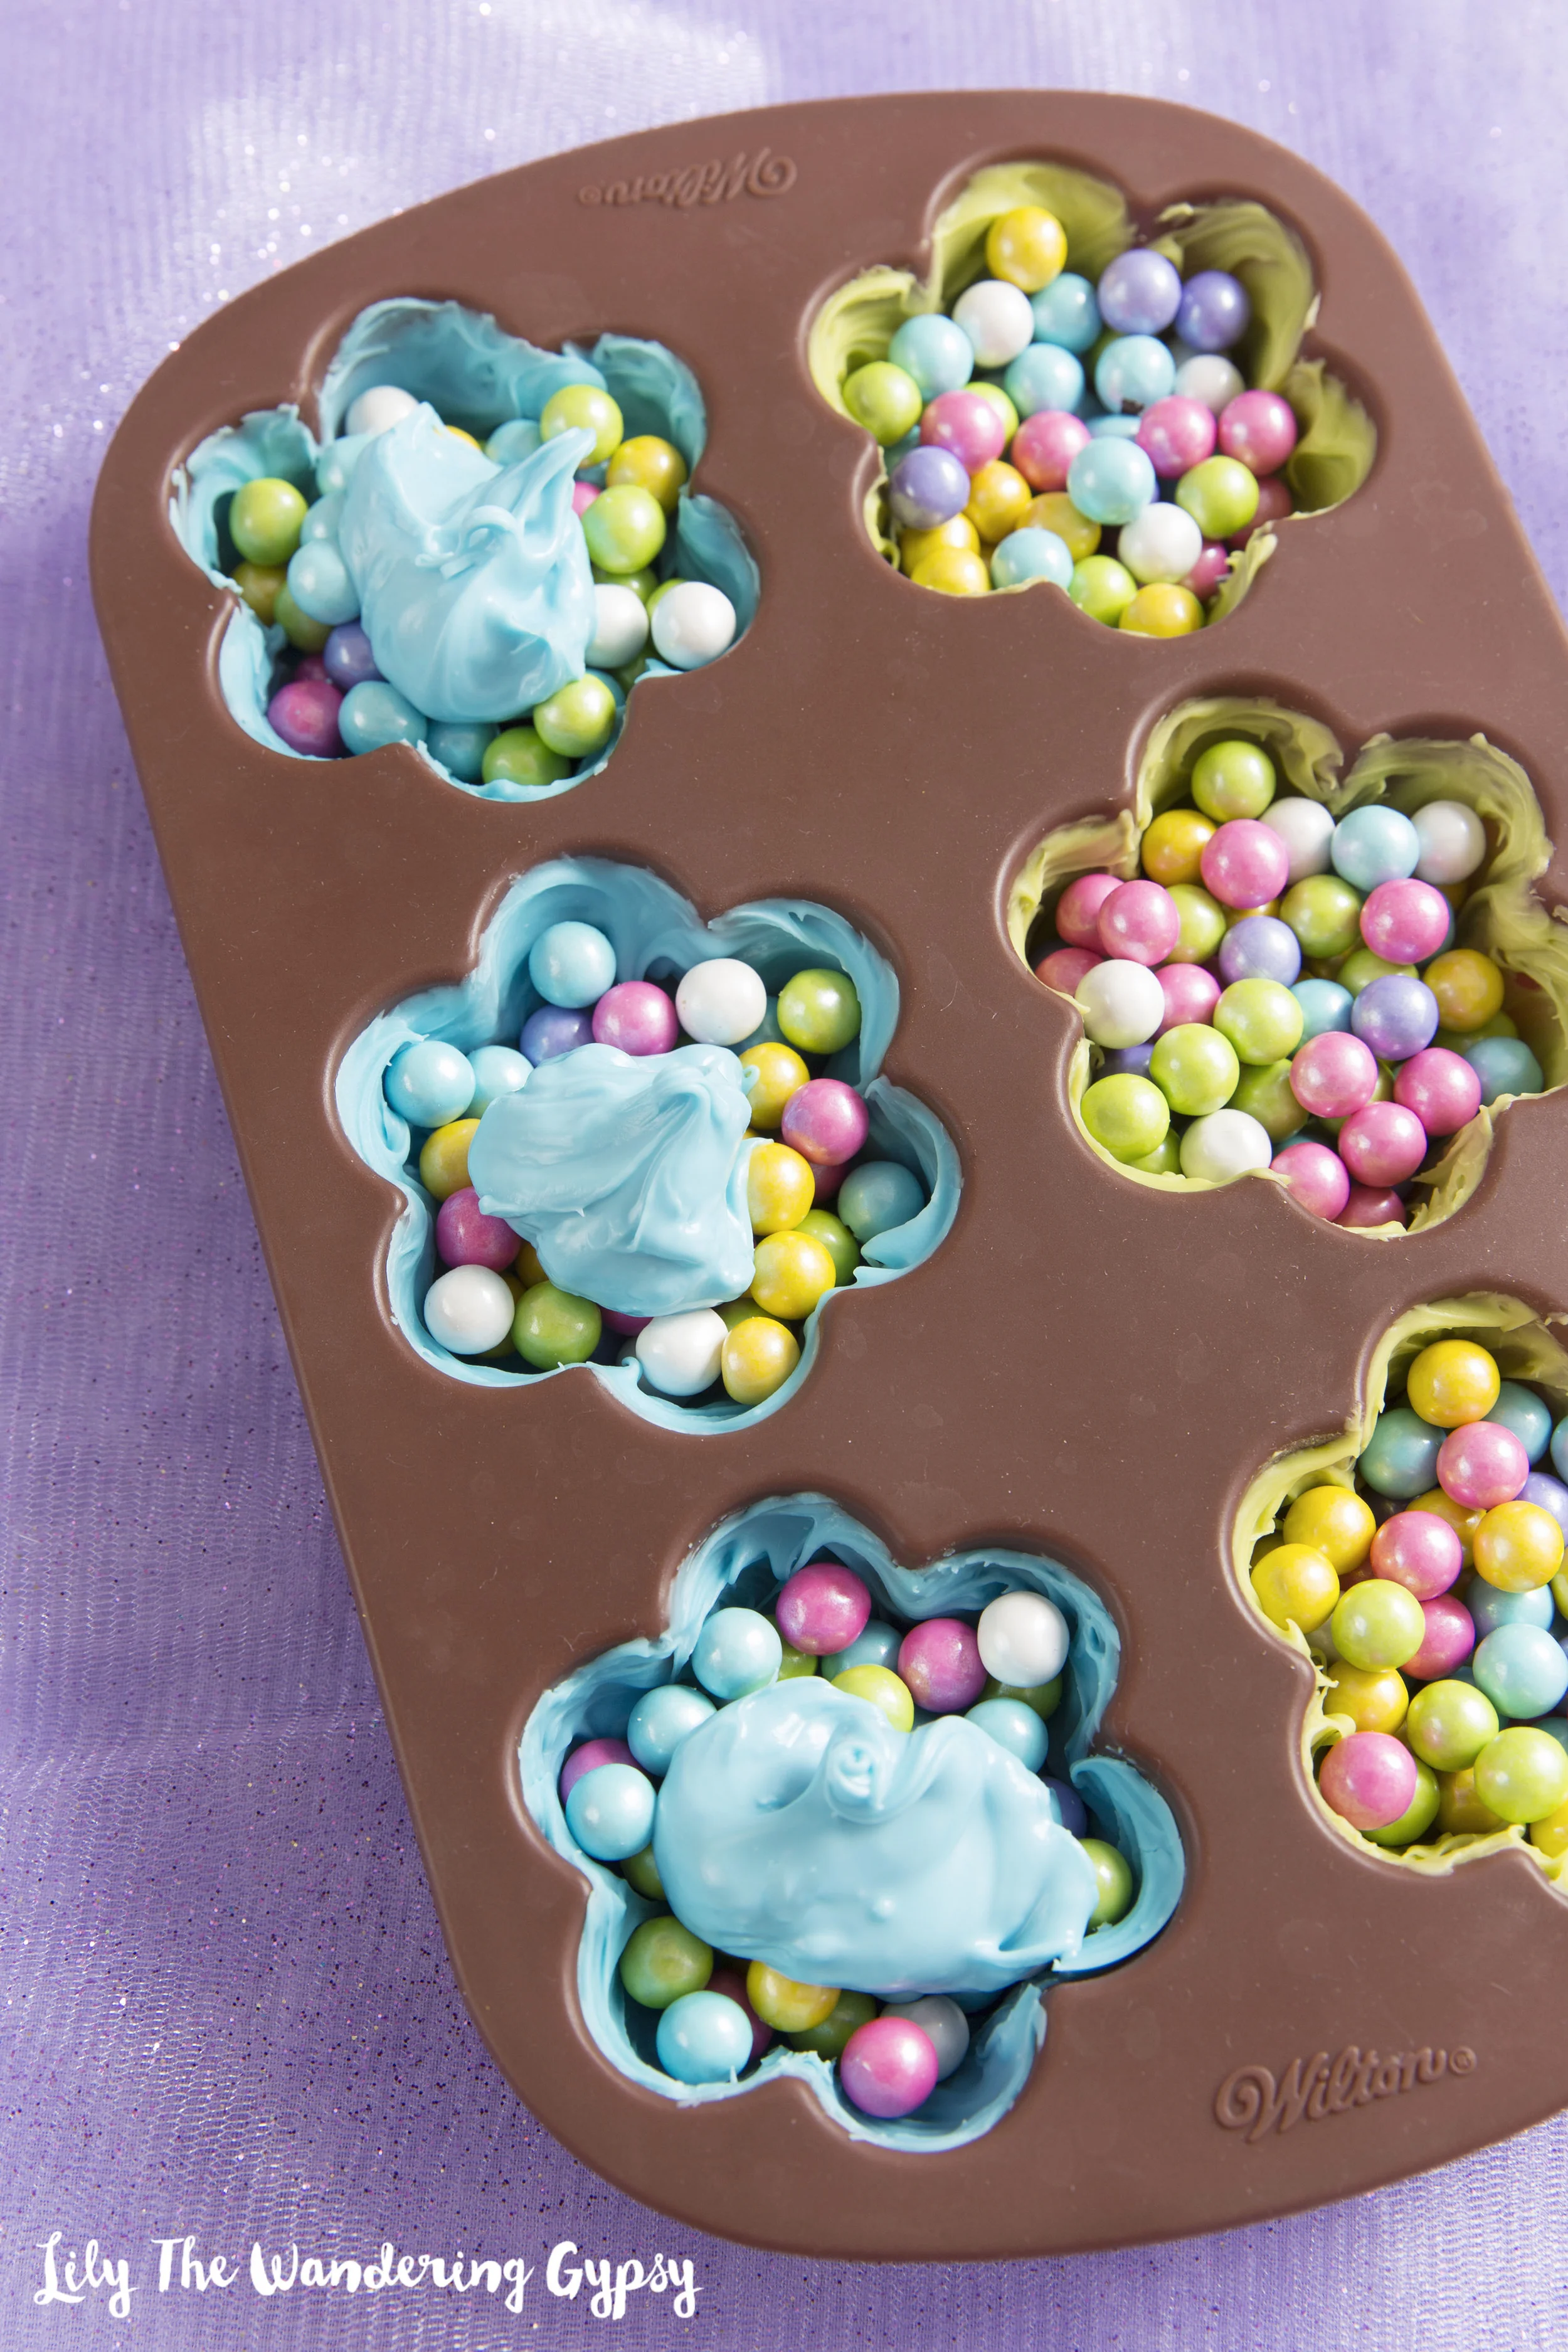
5.) Add a dollop of candy melts on top of your fillers candies, and use the paintbrush to smooth the dollop out, and to create a seal, so the candies stay inside the melts. Throw them back into the freezer, and wait about 30 minutes (or longer), so that everything hardens and seals.
These are so cute!!!
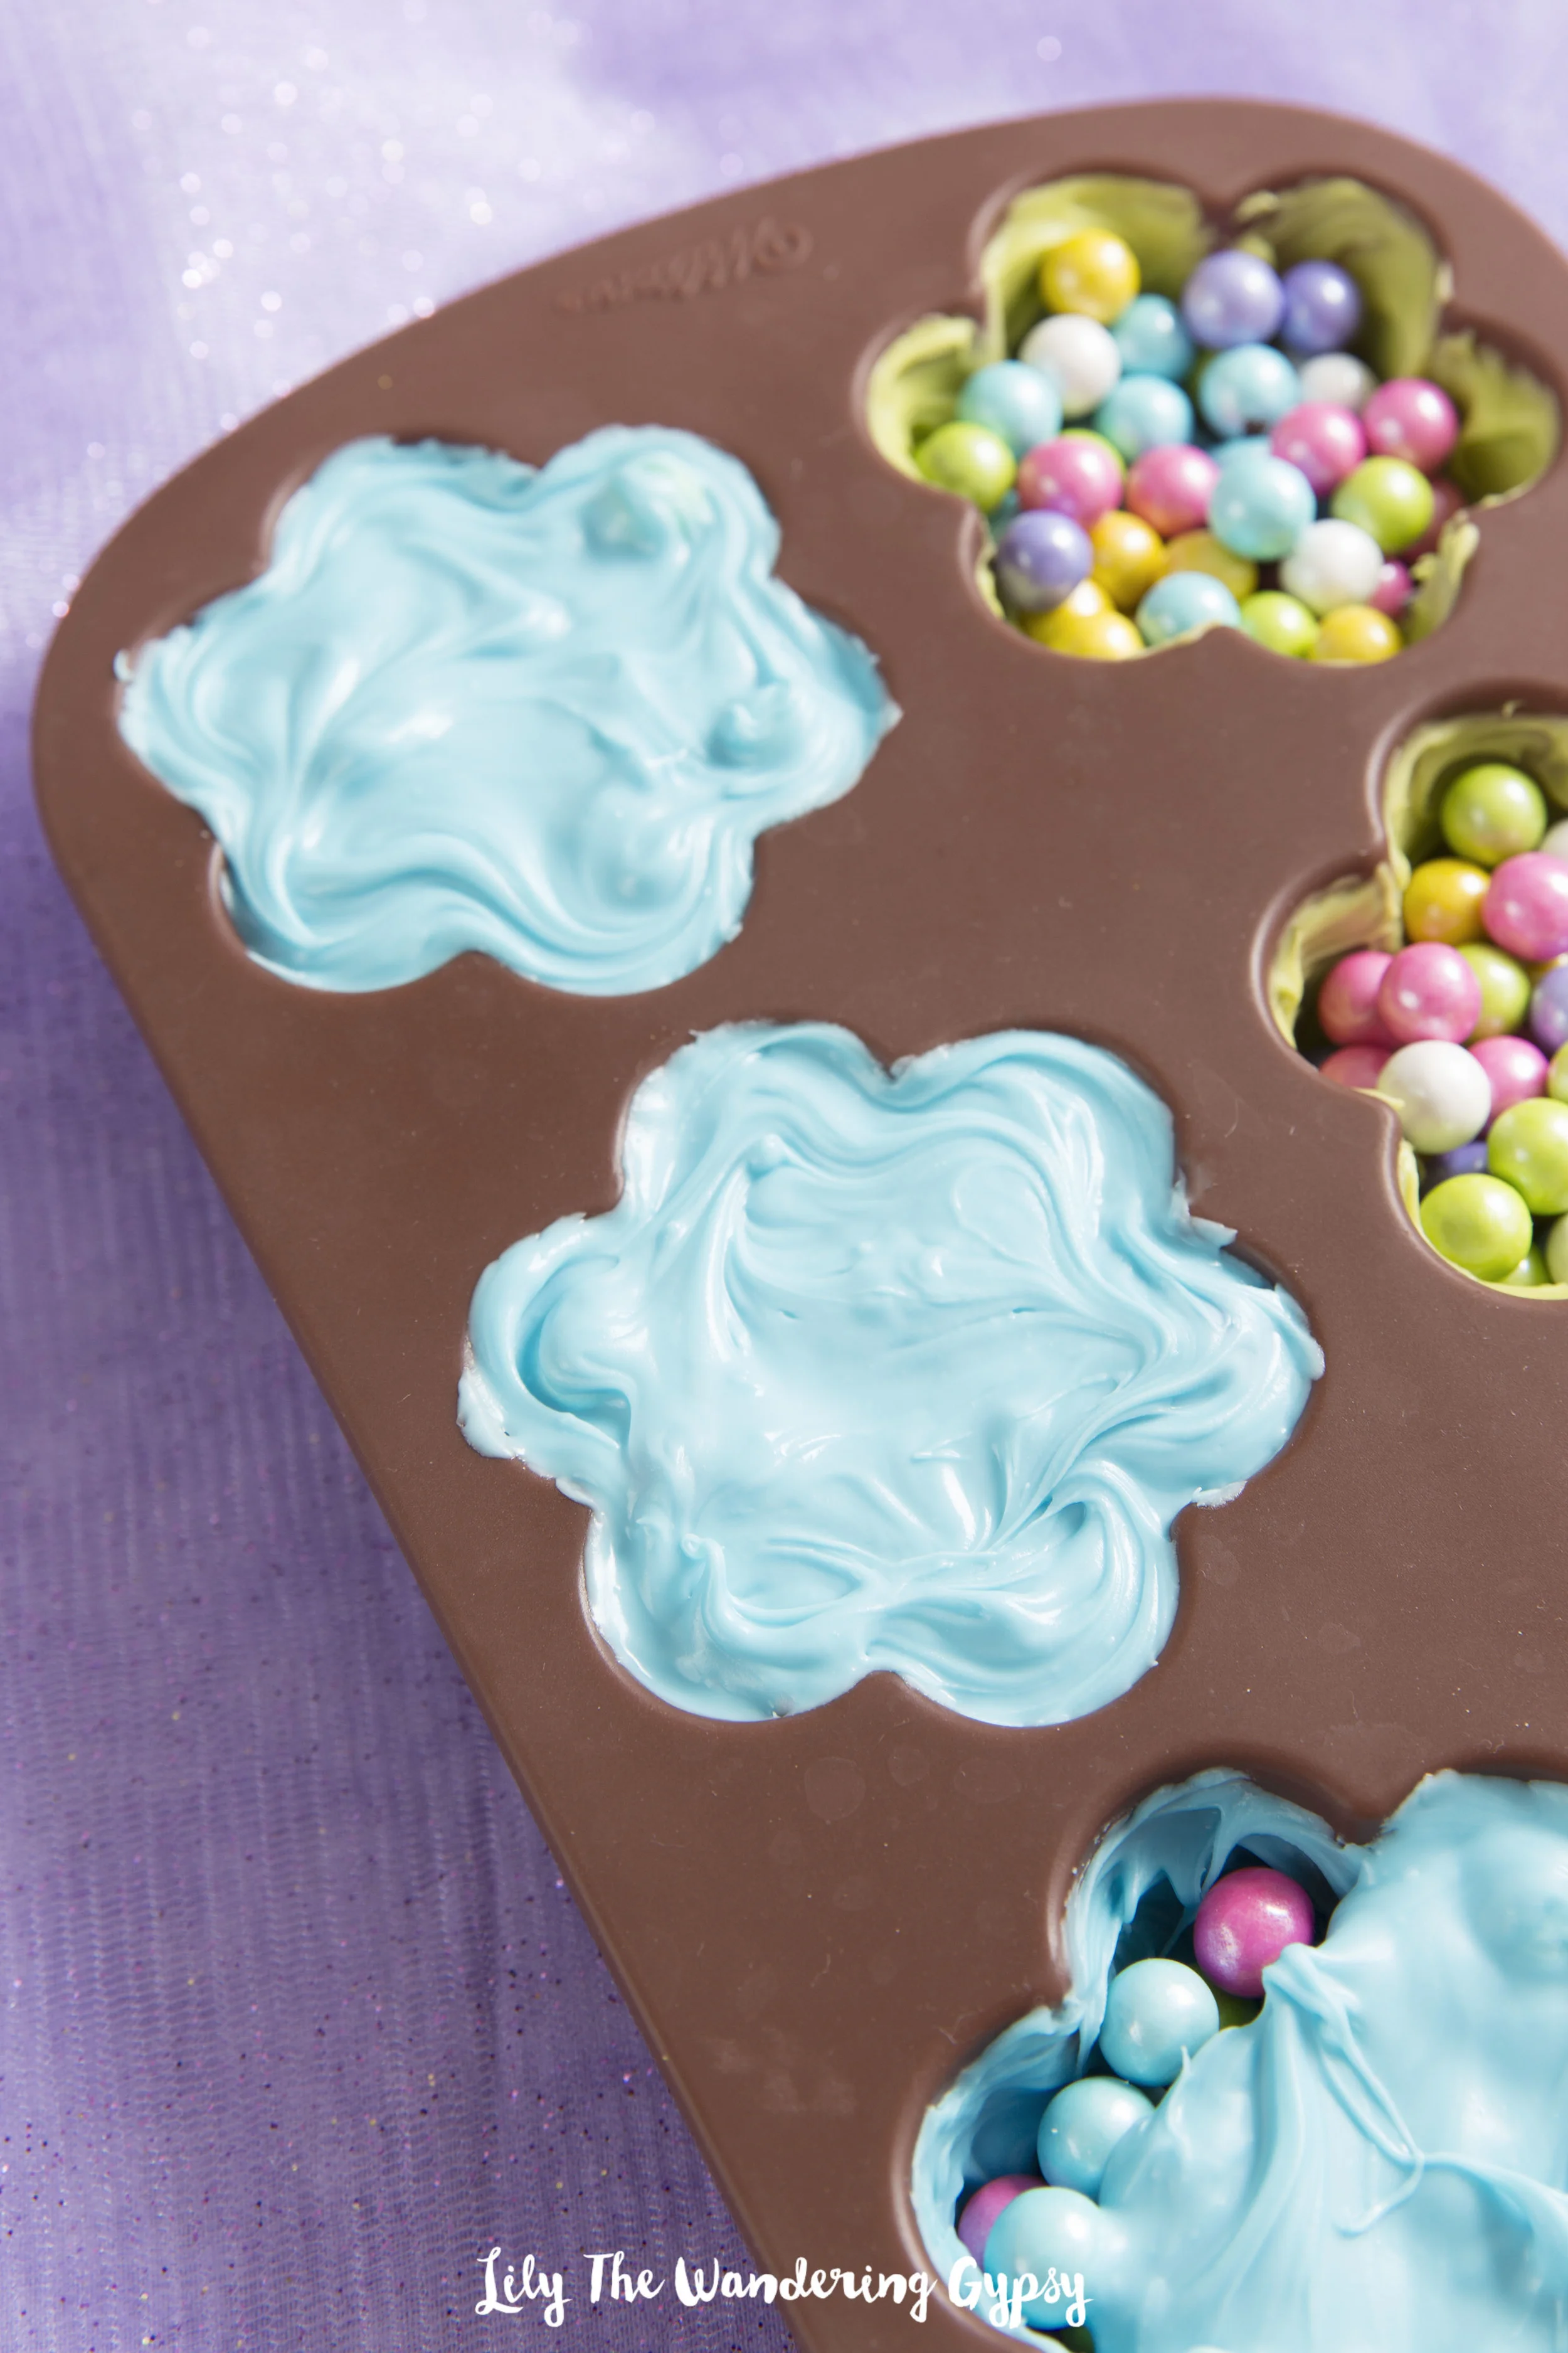
6.) Here is what it looked like after I smoothed the last part of the candy melts over the molds, to close in the Sixlets. Use your brush to make a pretty swirl pattern on the candies if you wish.

7.) Here is what your (almost finished) candies will look like after being in the freezer overnight. You don't have to leave them in this long (2 hours will do), but after all the work I did on this project, I was more than happy to leave these babies in the freezer overnight, and enjoy them the next day :)
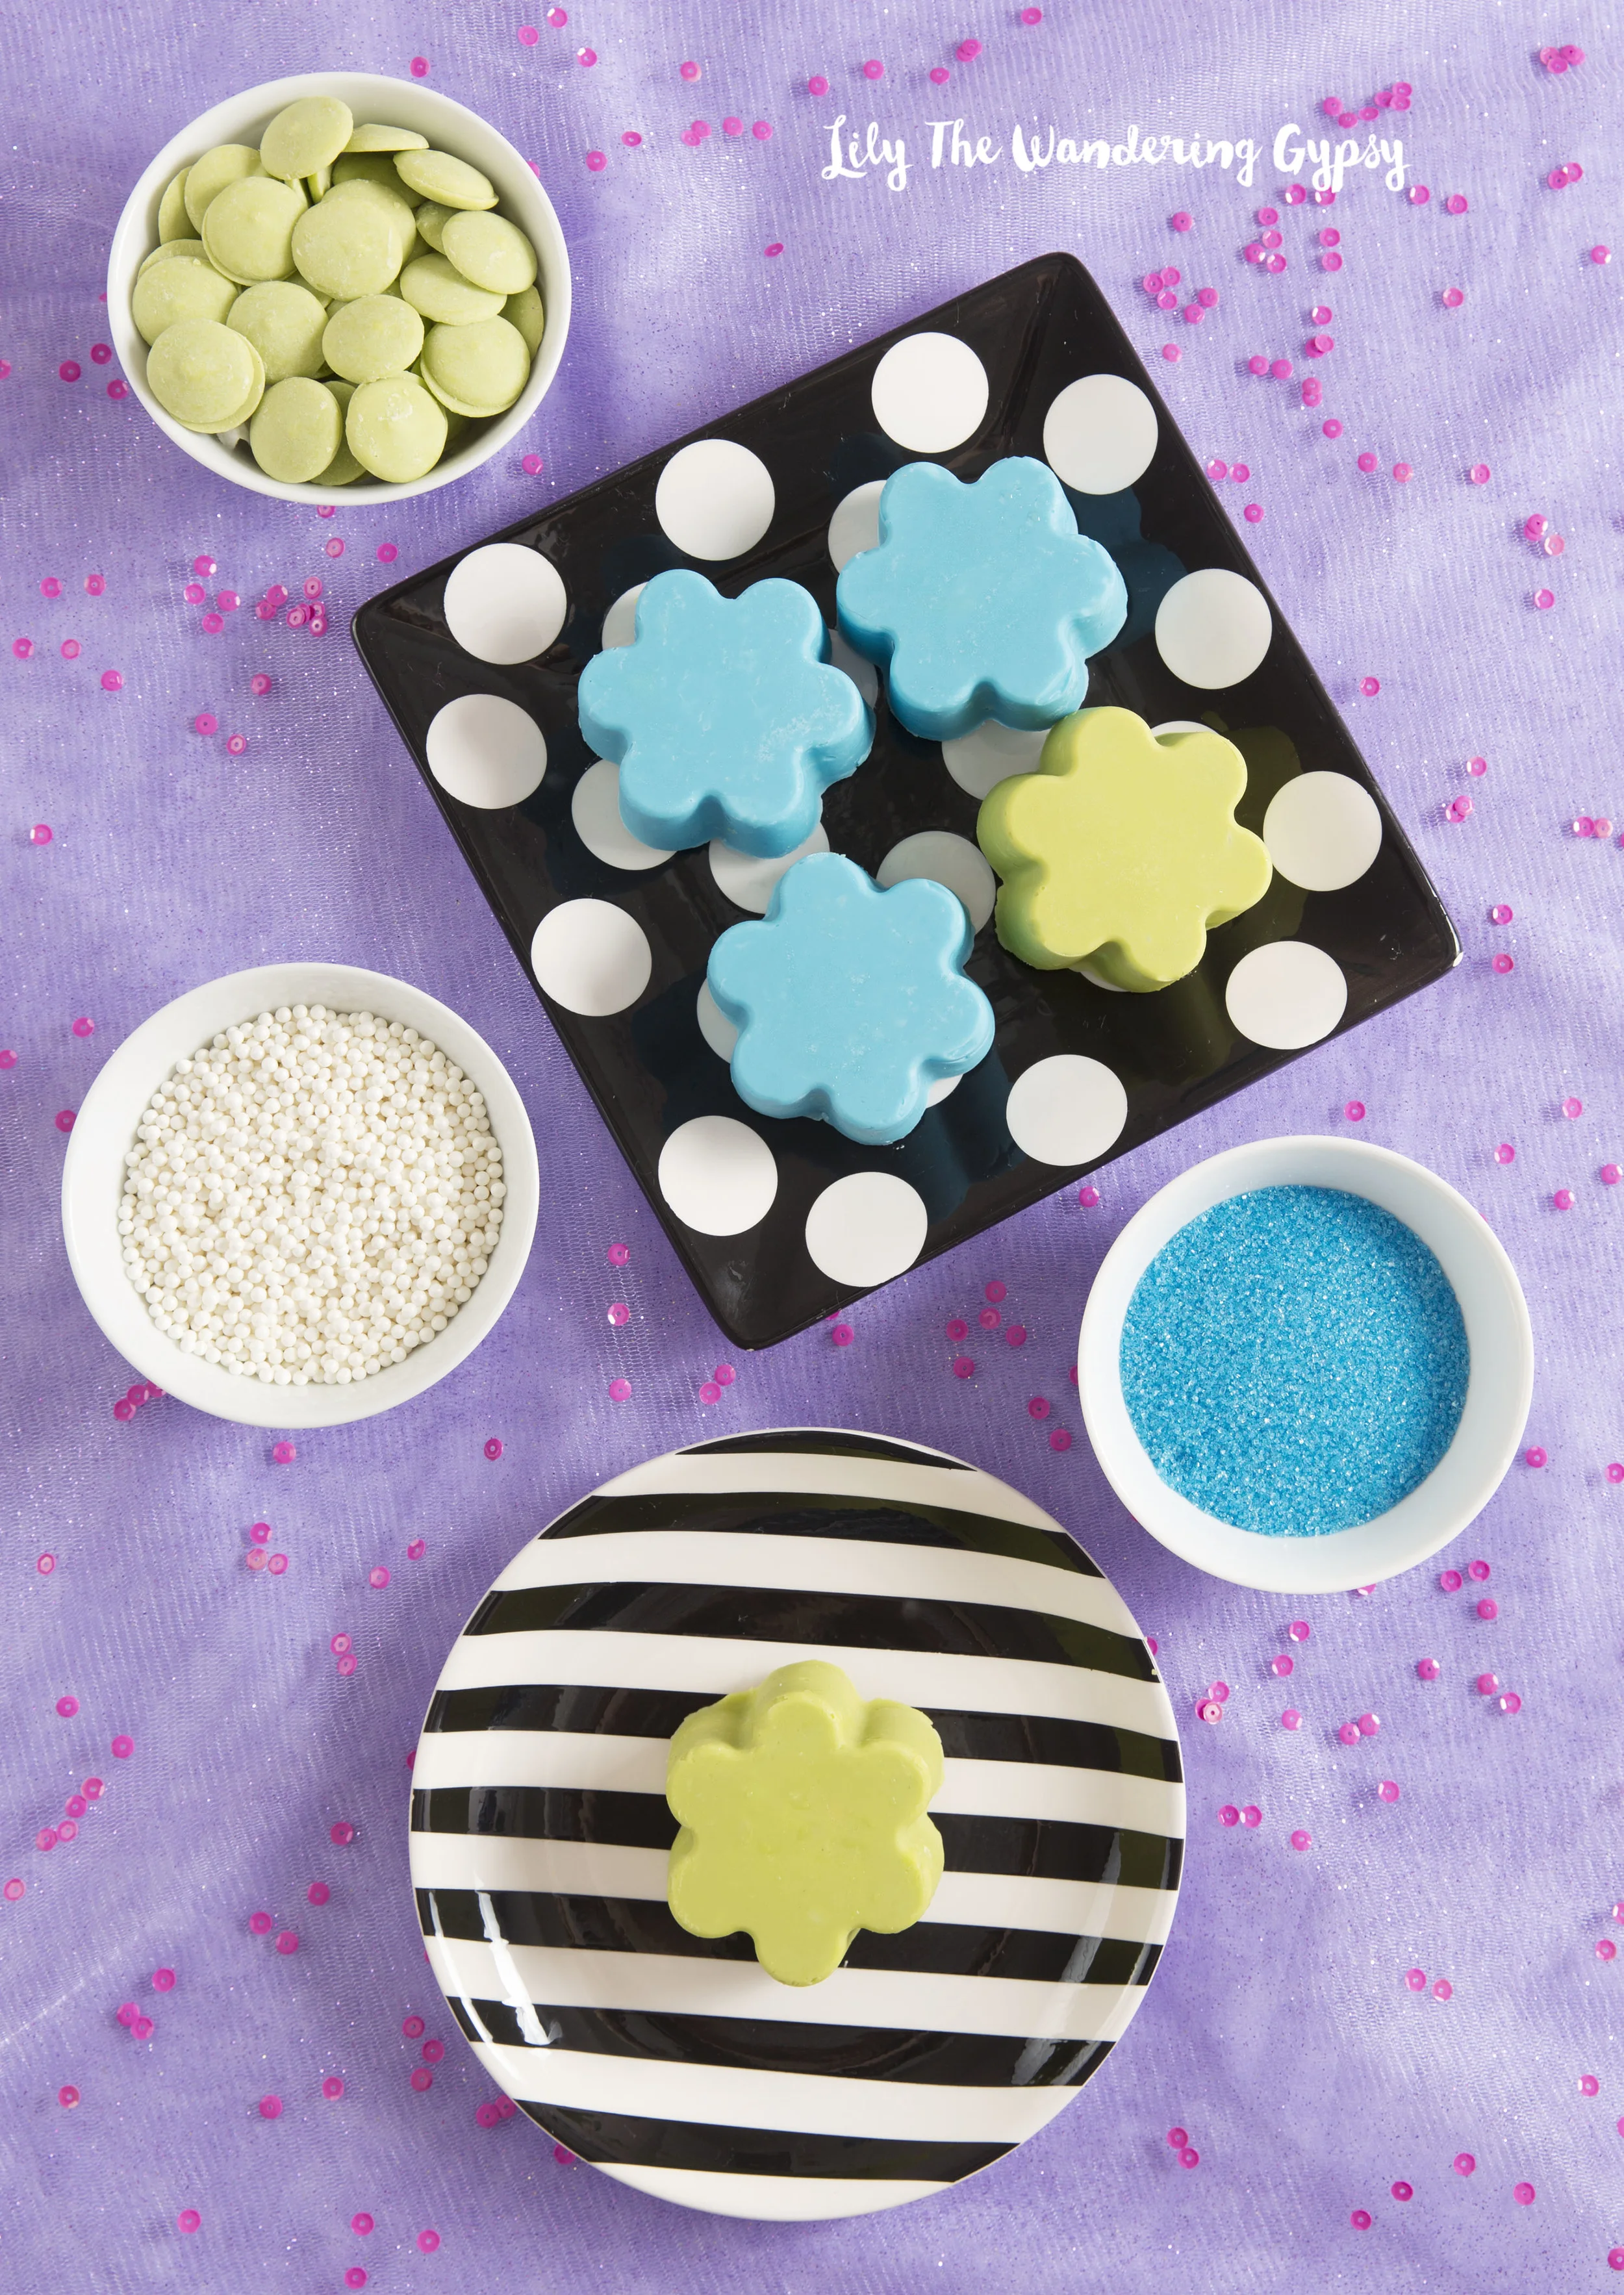
8.) Using a pair of rubber or cotton gloves, carefully peel the mold away from your Blooming Candies. The gloves help prevent finger prints all over your candies. Aren't they adorable? The next photo shows how you open them...

Now you can reveal your surprise candy inside! Just use a sharp kitchen knife, and (very carefully), cut into the candy as if you are cutting a slice of cake.


Spring Is Here!
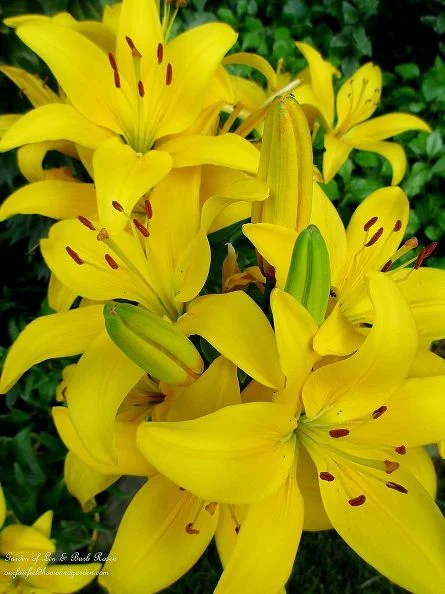
I am so happy Spring is finally showing its face around here in southern Illinois. April showers have been going full force, and now that the rain has subsided for a little bit, and the wind is blowing, things are finally starting to dry out and get to where I want to be outside :) I got to plant a few hostas and a beautiful yellow day lily today, and the ground was nice and moist, making ti super easy to dig right into the soft, rich dirt, find lots of worms, and plant my new babies. This year has been really great so far! We got to visit my parents for about a week in Arizona, which is longer than I have been with them in a very long time, too long actually! We also hung out in Utah for a little while, which was amazing. We had only been there for a day or two last year, and were so happy we got to visit all of the National Parks and a State Park in Utah. I also got to go to California in February and see some wonderful friends from work, and attend a conference. I have been busier than ever creating wonderful graphics, and finding the newest items to share on Pinterest, too. I learned today that I in the Top 100 Most Followed Pinners on the site!!! I am also working on some awesome photos of hair and makeup for a large makeup company, which I will reveal later this month!!! It's been wonderful, and I have lots and lots of projects that

Also, my Facebook Page, HappySolez on Pinterest, has over 3200 Likes! I am sharing some of my favorite fashion trends of the seasons, and people are responding so well to all of my finds! Stop by (here) to check out my (almost) daily, fashionable finds!

My newest blogging adventure is called, She's So Chic, and I have had over 10,000 views since March, which is such a short amount of time, it's awesome!

Well, thanks for stopping by and Happy Spring!!!

J. Crew Lovelies
I am in love with J. Crew's new items for Spring! They use a nice mix of bright colors, along side of pastels, and they look great. I found a few of these images on jadorejcrew.tumblr.com