Dulce De Leche No Bake Dessert Recipe

Do I have a delightfully easy no bake dessert for you! This one would be PERFECT to serve during the holidays, and if you make it in a larger dish, this would be great for a crowd! These desserts are seriously incredible, and I think they would even taste great with chocolate syrup as well.

INGREDIENTS:

1 pint heavy or light whipping cream

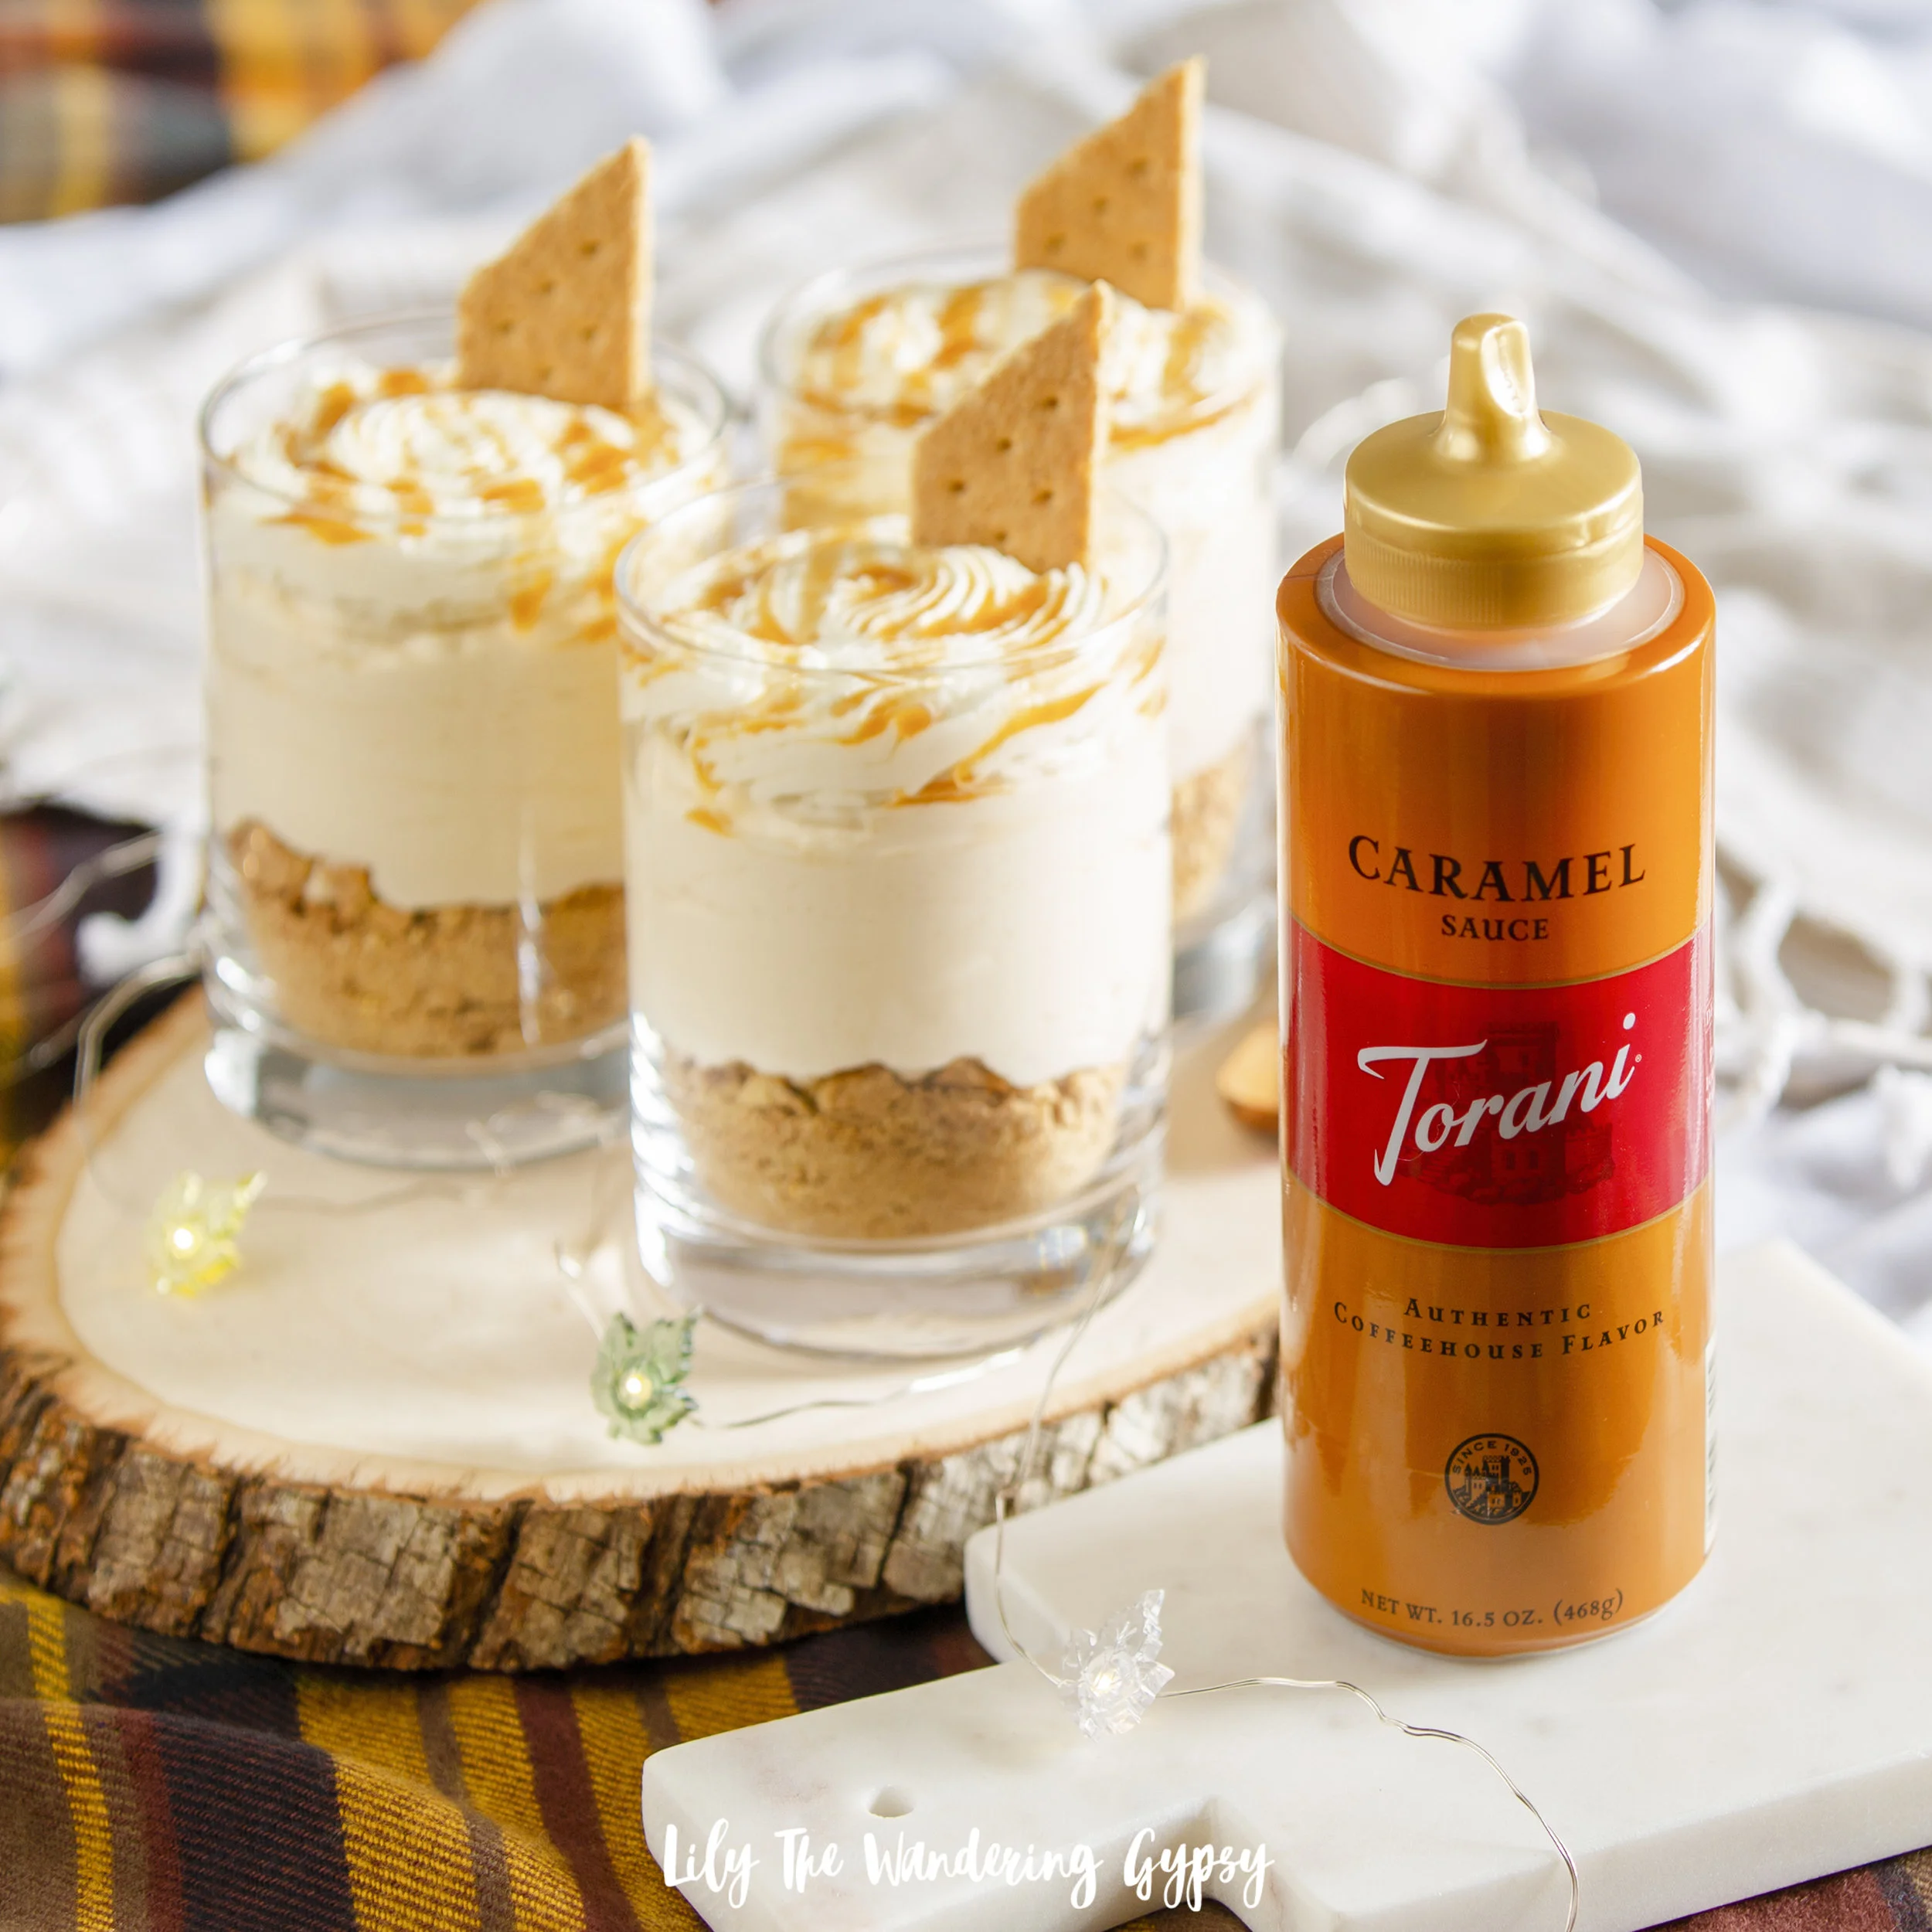
1/2-1 cup Torani Caramel Sauce (found at Walmart in the coffee aisle, near the chocolate sauces)

1 box of graham crackers (reserve several for top garnish)

INSTRUCTIONS:

1.) Place three medium-sized glasses on your work surface, and crush up graham crackers as small as possible. I placed 15 or more graham crackers into a stronger Ziploc bag, closed the bag, and then used a jar to crush up the crackers.

2.) Divide the crushed up crackers between the three glasses. Now, to make your filling! Beat heavy whipping cream for several minutes, until stiff peaks form. Reserve about 1/2 Cup of the whipped cream for your topping, then, add vanilla and Torani Caramel sauce, then finish mixing to combine everything. Divide the filling between the glasses.

3.) For the garnish, I used a sharp knife to carefully cut the graham cracker squares in half, then I cut a diagonal angle as well. This is totally optional, I just thought it was cute. Also drizzle more Torani syrup over the top of the dessert and enjoy.

How To Make A Simple Yet Spooky No-Bake Halloween Ghost Cake

I created the cutest Halloween Cake ever and I am so happy to share it with you. I designed two versions, one in a more black and white color scheme, and also one with a bit more color. You can use the design as inspiration for whatever sort of Halloween decor you may enjoy best.

The most important part of sourcing the Ghost Shaped Peeps. I found mine at Walgreens (not my local grocery store though). I used the Ghost Peeps packs containing 9 pieces each, and two packages fit around the cake with a few to spare. 

Well, let's get spooky and decorate this cake!!! And, please comment below if you're making any special treats inspired by Halloween. I'd love to hear all about them!

No baking is required for this awesome cake! 

- 2 Sour Cream Bundt Cakes in Chocolate or Vanilla

Raspberry Jelly

Dark Chocolate Icing (1-2 containers)

Ghost Peeps

Candy Corn + sour Gummy Worms (Optional, only for more colorful cake design)

Silicone Spatula for icing cake

1.) Remove the plastic top of the first bundt cake's container. Using a serrated bread knife, CAREFULLY slice the top off of the bundt cake to make it as flat on top as possible.

2.) Invert the cut cake onto a plate or cake stand and make sure it's level.

3.) Add a thin layer of raspberry jelly to the top of the first bundt cake.

4.) Carefully slice the top off of the second bundt cake, and invert that to sit it on top of the first layer of cake. 

5.) Add dark chocolate icing to the entire outside of the 2 layer cake. Make it as smooth as you can! The bottom half of the chocolate icing will be covered with Ghost Peeps, so don;t worry too much about how smooth it is, mainly making sure it's not too messy. Wipe off any excess chocolate icing around the bottom of the cake and the plate as possible, with a wet paper towel.

6.) Time to decorate! Open up two packages of Peeps, and keep the Peeps in their sets of three. Support the cake with one hand, and gently apply each set of three ghosts around the bottom edge. I used 12 or 15 Peeps around the bottom plus one extra Peep to fill in the small gap I had. Make sure to keep supporting the cake as you add Peeps or it may fall over! I just LOVE how chic and elegant this cake looks!

But, I had to go a little further with the design. If you're looking for a more colorful version of this cake, here you go.

By carefully adding sour gummy worms one at a time, I was able to make a neat pattern out of them, leaving attractive negative space in between each worm. I kind of shaped them as I stuck each one on. I also added candy corn to the top of the cake, and LOVE how it turned out! What do you think?

PIN IT FOR LATER:

A Peanut Butter Chocolate Fudge Recipe + Stunning Bracelets from Gideon John

I want to share a couple of things with you today - fudge + jewelry - two of my favorite things! I wanted to share a Peanut Butter Fridge Fudge recipe with you (below), and also share some pretty amazing jewelry with you. 

First, the jewelry. Bracelets have always been my go-to jewelry faves. I recently received three absolutely stunning bracelets from Gideon John London, and I could hardly believe my eyes! These bracelets are so well-made, and you can tell that great attention to detail was given, beginning at jewelry design, then into their packaging and presentation. Each bracelet arrives in a personalized black box and a cotton bag, so nothing get scratched during delivery. Even though these traveled all the way from gorgeous London, they looked like someone had hand-delivered them locally! 

I received three bracelets from Gideon John, and featured them all in this post. Find them here:

Rose Gold Cuff Bracelet / Green Sea Jasper Tasseled Opulence / Rose Gold Lux Beads

And, although they already had lovely product photography on their website, I was so fortunate to be able to bring these bracelets to life in this styled photoshoot. 

Now, the Fudge!

This yummy treat turned out so well! This recipe has been adapted from the one I found here - the post that inspired my photos!

1 Bag Peanut Butter Baking Chips

1 Bag Chocolate Chips 

Coconut Oil

Creamy Peanut Butter 

A Pinch of Salt

Glass Container For Fudge

Parchment Paper

1.) You can do each of the two layers in the microwave, or use the double boiler method, like I did. To do the double boiler, fill a sauce pan with about 1 inch of water. Set the glass measuring cup in the saucepan, atop the water, and get turn your burner on medium, to get ready to melt your ingredients.

2.) Prepare water for double boiler method in two different sauce pans. In two heat-safe glass measuring cups (I used my two 2 cup ones), melt 1/4 Cup Coconut Oil, 1 bag of peanut butter ships, a pinch of salt (or a bit more), and 1/2-1 C. Peanut Butter. Feel free to add more Peanut Butter if you want, just until you get a consistency and taste you like. You can also add some powdered sugar to this peanut butter layer if you want. Melt until smooth - make sure you stir frequently!

3.) In the other measuring cup, melt 1/4 C. Coconut Oil, 1and  Bag of Chocolate Chips. Melt and continue to stir until smooth. 

4.) Optionally spray a bit of non-stick spray into your Pyrex container, and then fit a piece of parchment paper into the Pyrex, allowing two sides a few extra inches to hang over. This makes removing the fudge from the container much easier!

5.) Once chocolate has melted, pour it into the Pyrex. Freeze for about 15 minutes, so it hardens all the way through.

6.) Once that layer has hardened, pour the peanut butter mixture over the chocolate layer, make sure it's smooth, and put it back into the freezer. If you're not in a hurry, you can just let the final layer cool in the fridge.

7.) Once both layers are fully firm, grab a cutting board, pull out the fudge block utilizing the parchment paper, and use a ruler to make straight lines on the top of the fudge if presentation matters. Cut fudge into 1" squares, using a large, sharp knife, and enjoy!! 

***Note: This fudge melts pretty fast, so make sure you keep it in the fridge!!! It tastes like peanut butter cups, I just love how this turned out!! You can also use crunchy peanut butter, but I recommend creamy, just because the peanuts could be too hard to eat after being in the freezer or fridge!

What a great no-bake dessert recipe!