Giant Valentine's Day Rice Krispy Treat - a Great Gift Idea

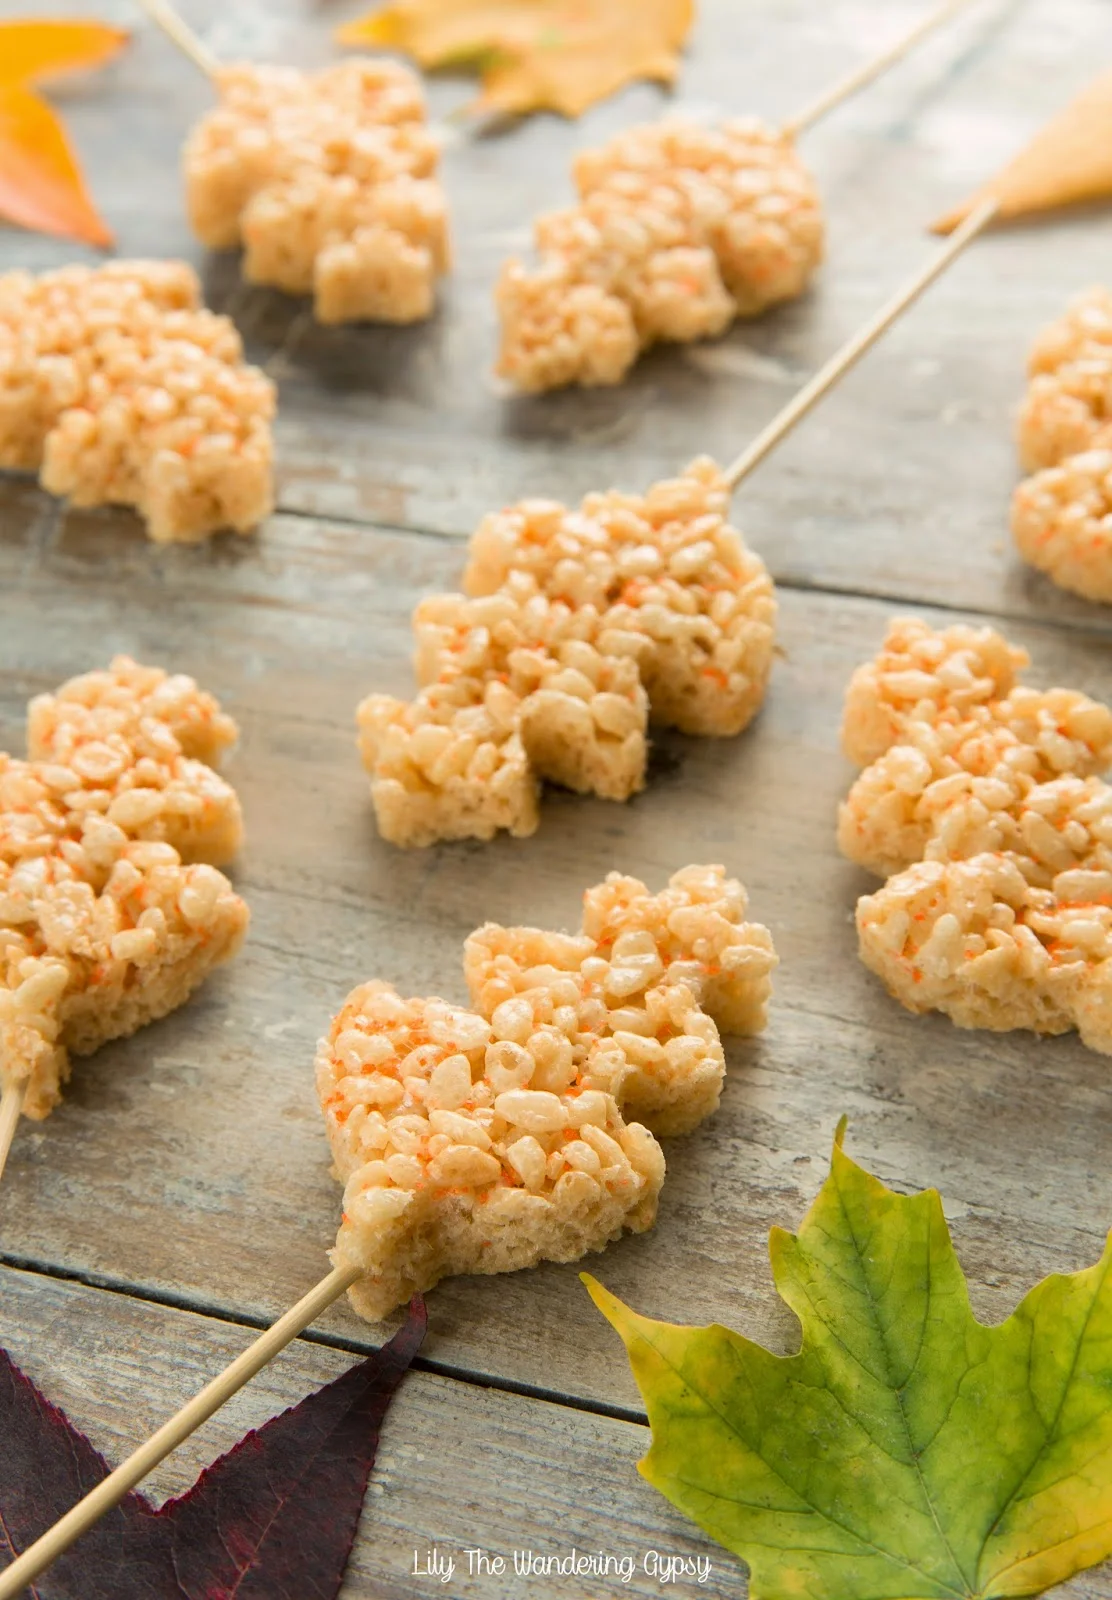
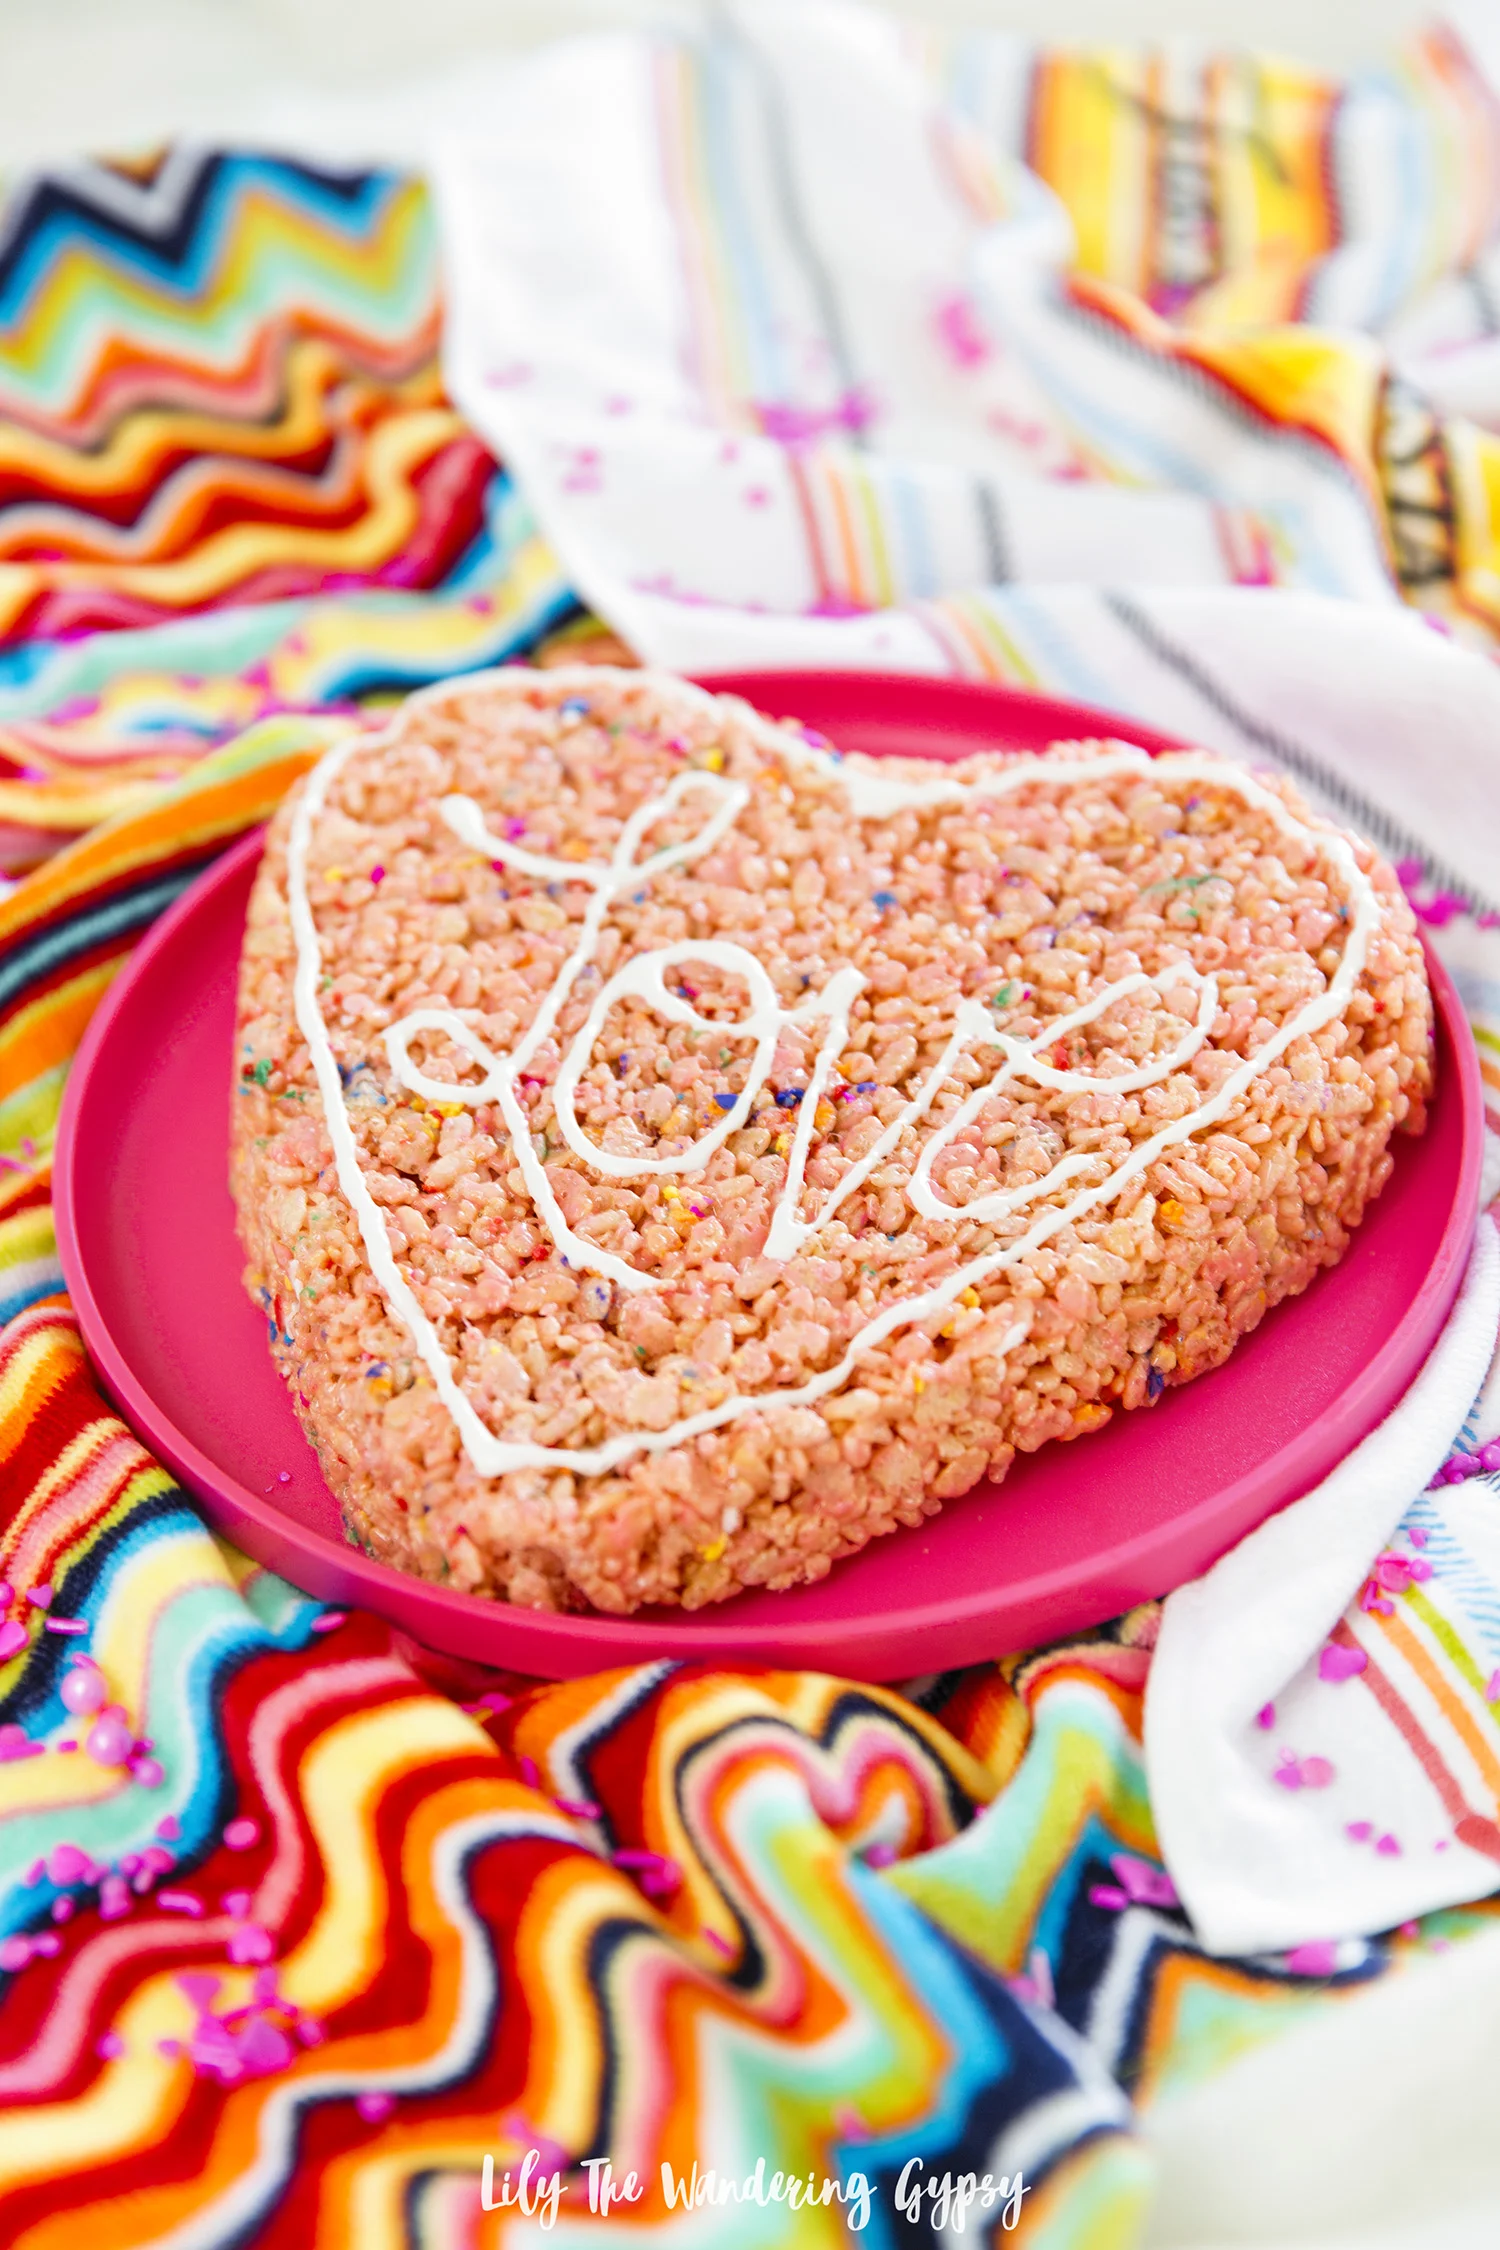
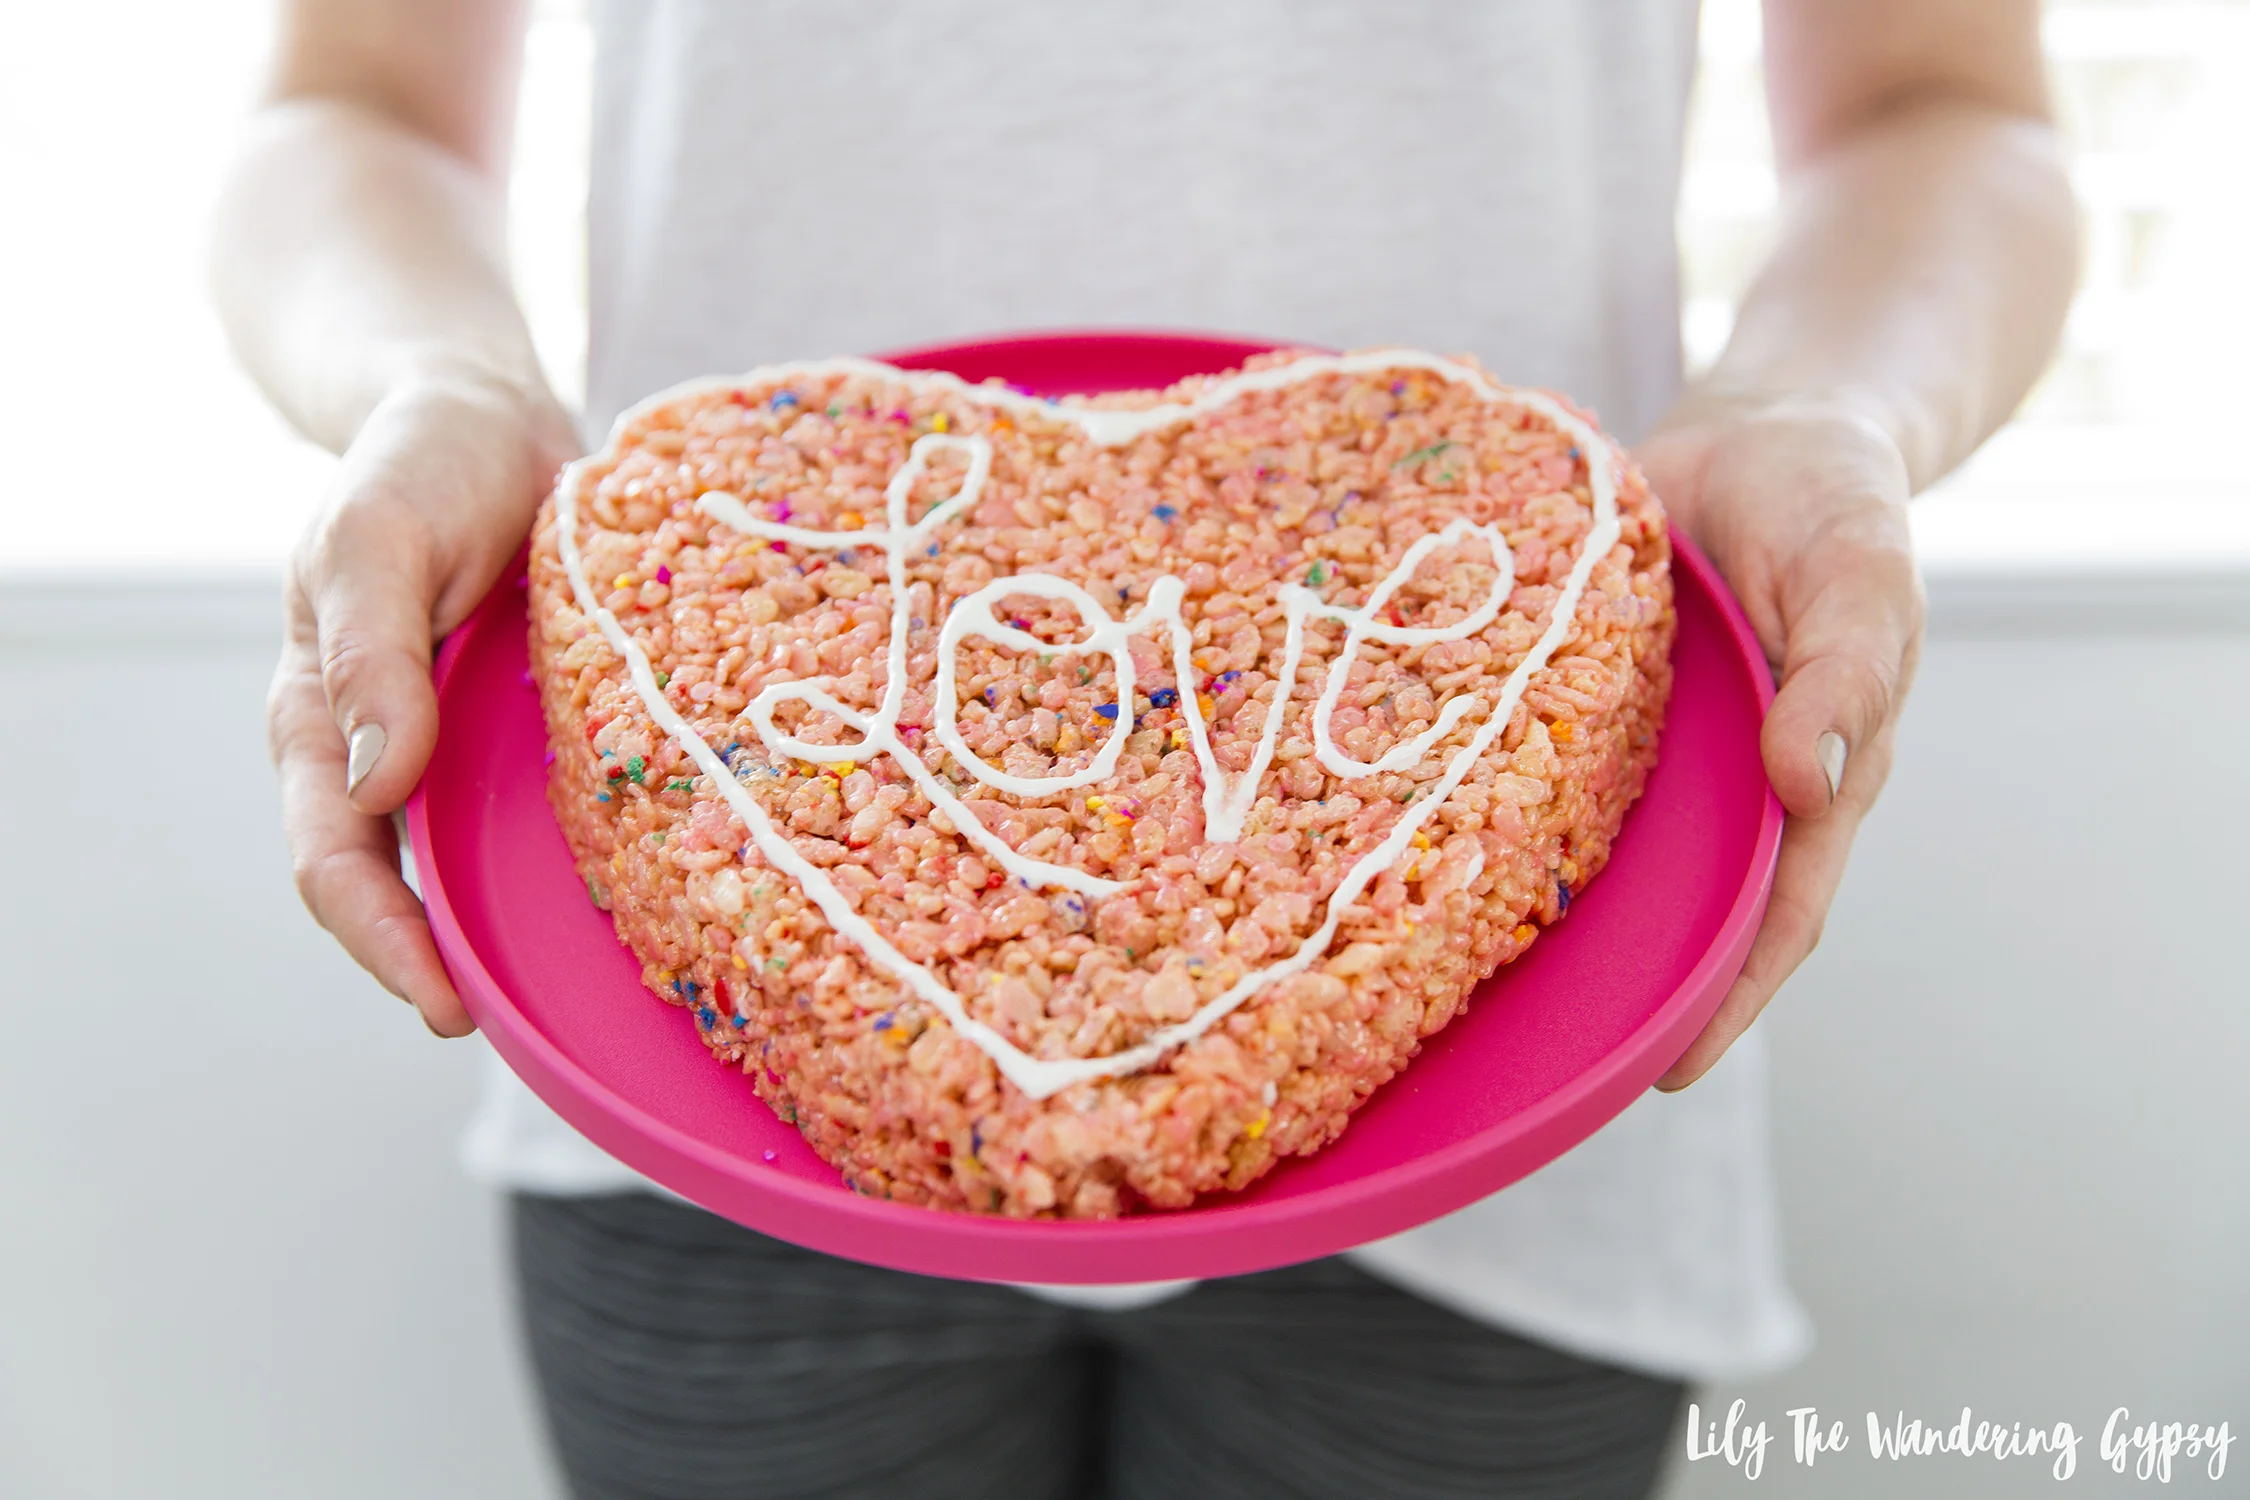
Impress your friends and loved ones with this Giant Heart Shaped Rice Krispy treat! It's super adorable and is an awesome last minute gift idea. This gift takes less than an hour to make, and just a few ingredients and supplies! You could gift this treat atop an adorable pink plate, too!

INGREDIENTS / MATERIALS

6 Cups Rice Krispy Cereal

4 Cups Mini Marshmallows

3 Tbsp Butter (real butter works best)

Heart Shaped Cake Pan (Similar Here from Target

White Writing Icing (I love the Betty Crocker Cookie Icing in White, 7 oz. pouch) - found at grocery stores, not generally found at Walmart or Target

Red Food Coloring

Colorful Sprinkles

Parchment Paper and Scissors

Non Stick Spray

INSTRUCTIONS

1.) Trace heart shape onto parchment paper, using pan as your guide. Cut out the heart out. Spray the pan with lots of non stick spray, then place heart paper cutout into bottom of pan.

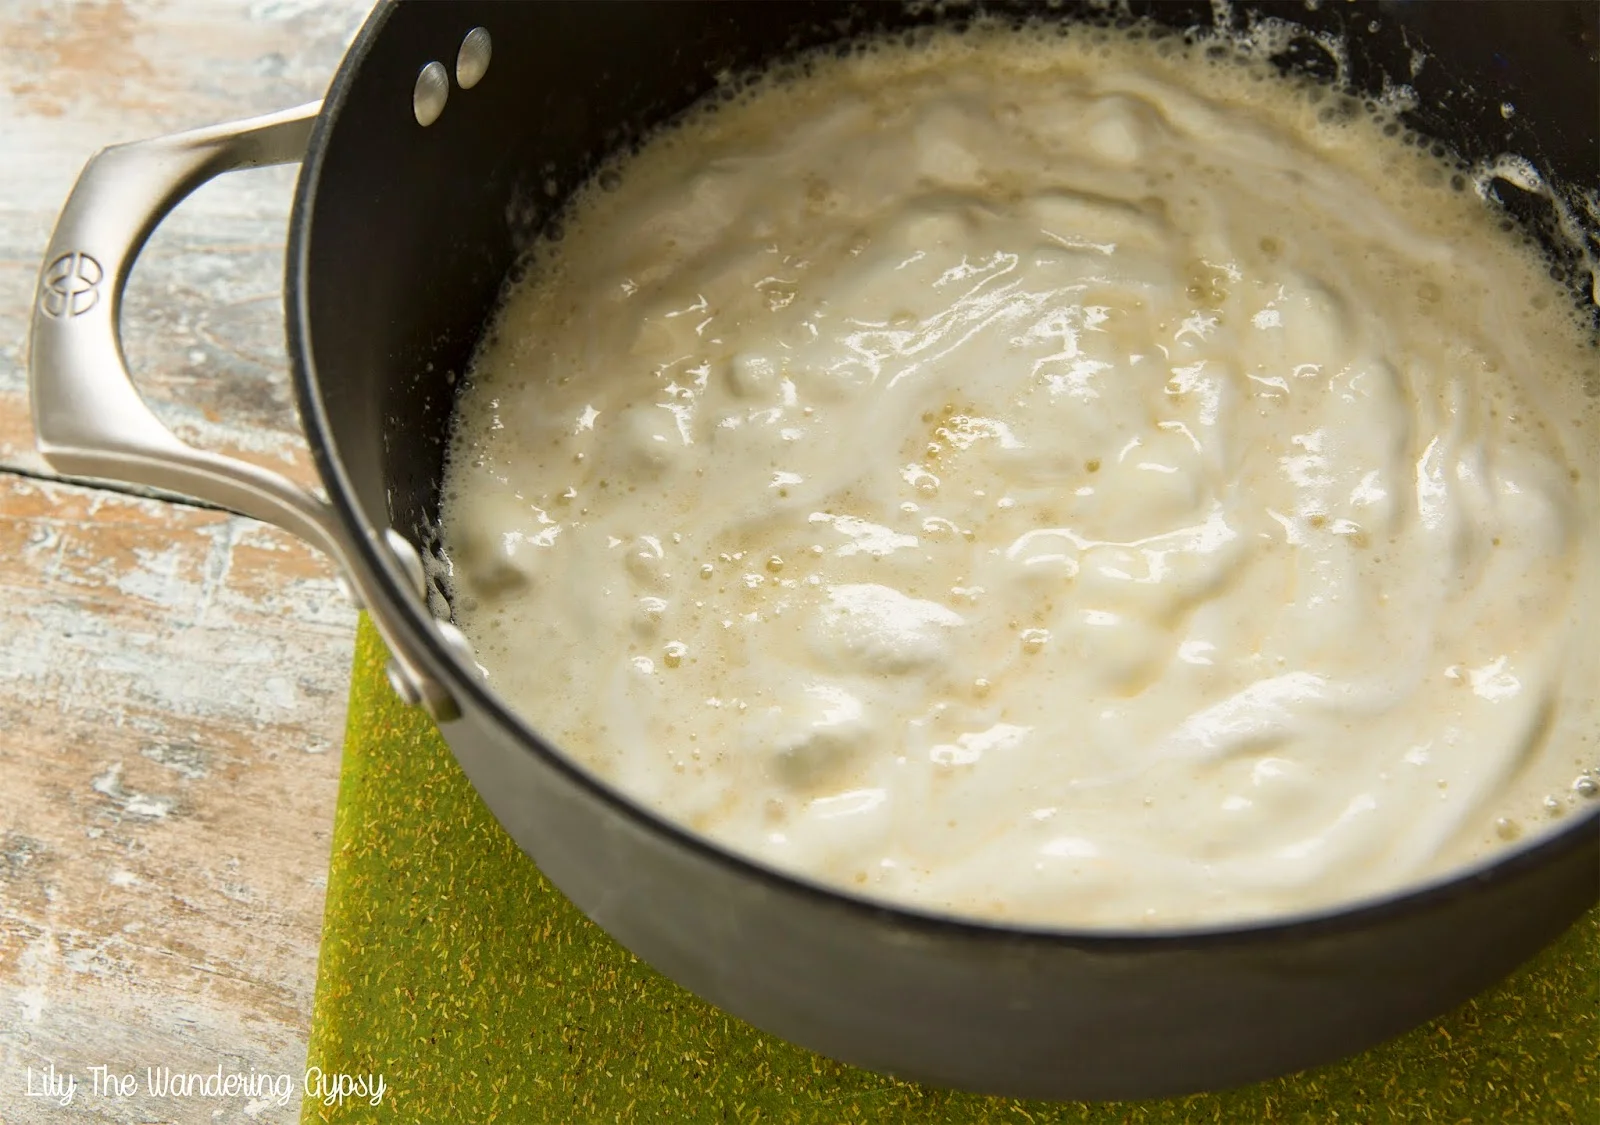
2.) On the stove top in a large sauce pan, melt butter then add marshmallows and melt/stir until smooth. Once completely smooth, add 4-6 drops of red food coloring, until desired color has been reached.

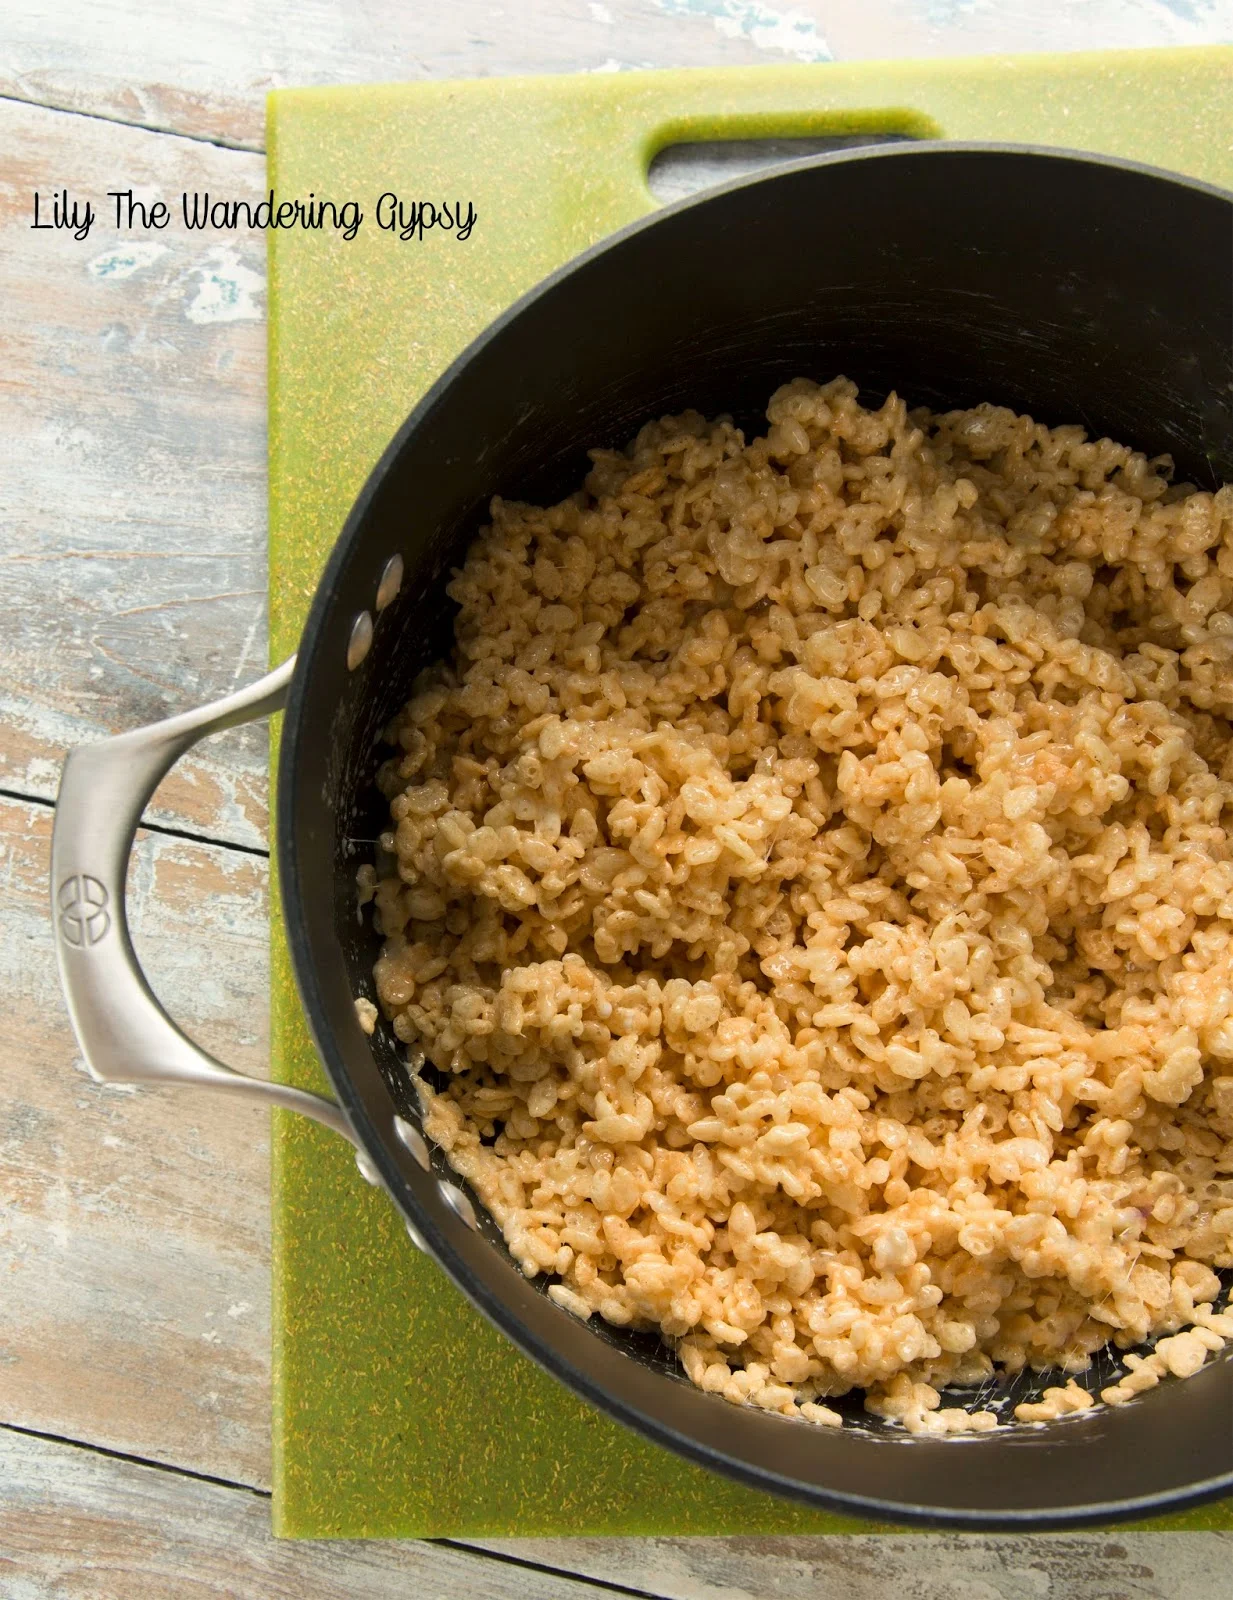
3.) Add in cereal and stir to fully combine. Add optional 1/3 Cup Sprinkles and stir again. 

4.) Using a large spoon or your hands, transfer treats into heart shaped pan. Press as hard as you can, so the cereal treats get packed into the pan. This is to ensure the heart shape is a good shape.

5.) Once cooled, use a butter knife around the sides of the heart pan to loosen the treats. Flip the Heart Shaped Treat over onto a cutting board or similar surface, and tap the pan to help loosen the treat. Peel off the parchment paper and discard.

6.) To decorate, I used the white decorator icing to first outline the heart shape. I applied even pressure to the icing tube as I went around the edges, beginning at the bottom of the heart, working around the edges. Next, I free handed the word "Love" with icing, in cursive, but feel free to write any message you want! I thought of some pretty funny messages but stuck with something more traditional. 

7.) To gift, I found a plate at Target in the kids plates and dishes section for about 80 cents. You could use a cute paper or plastic plate too. I believe it would be adorable to wrap Saran wrap around the treat and secure it in back with tape, so you can see the design. Hope you enjoy!

A Peanut Butter Chocolate Fudge Recipe + Stunning Bracelets from Gideon John

I want to share a couple of things with you today - fudge + jewelry - two of my favorite things! I wanted to share a Peanut Butter Fridge Fudge recipe with you (below), and also share some pretty amazing jewelry with you. 

First, the jewelry. Bracelets have always been my go-to jewelry faves. I recently received three absolutely stunning bracelets from Gideon John London, and I could hardly believe my eyes! These bracelets are so well-made, and you can tell that great attention to detail was given, beginning at jewelry design, then into their packaging and presentation. Each bracelet arrives in a personalized black box and a cotton bag, so nothing get scratched during delivery. Even though these traveled all the way from gorgeous London, they looked like someone had hand-delivered them locally! 

I received three bracelets from Gideon John, and featured them all in this post. Find them here:

Rose Gold Cuff Bracelet / Green Sea Jasper Tasseled Opulence / Rose Gold Lux Beads

And, although they already had lovely product photography on their website, I was so fortunate to be able to bring these bracelets to life in this styled photoshoot. 

Now, the Fudge!

This yummy treat turned out so well! This recipe has been adapted from the one I found here - the post that inspired my photos!

1 Bag Peanut Butter Baking Chips

1 Bag Chocolate Chips 

Coconut Oil

Creamy Peanut Butter 

A Pinch of Salt

Glass Container For Fudge

Parchment Paper

1.) You can do each of the two layers in the microwave, or use the double boiler method, like I did. To do the double boiler, fill a sauce pan with about 1 inch of water. Set the glass measuring cup in the saucepan, atop the water, and get turn your burner on medium, to get ready to melt your ingredients.

2.) Prepare water for double boiler method in two different sauce pans. In two heat-safe glass measuring cups (I used my two 2 cup ones), melt 1/4 Cup Coconut Oil, 1 bag of peanut butter ships, a pinch of salt (or a bit more), and 1/2-1 C. Peanut Butter. Feel free to add more Peanut Butter if you want, just until you get a consistency and taste you like. You can also add some powdered sugar to this peanut butter layer if you want. Melt until smooth - make sure you stir frequently!

3.) In the other measuring cup, melt 1/4 C. Coconut Oil, 1and  Bag of Chocolate Chips. Melt and continue to stir until smooth. 

4.) Optionally spray a bit of non-stick spray into your Pyrex container, and then fit a piece of parchment paper into the Pyrex, allowing two sides a few extra inches to hang over. This makes removing the fudge from the container much easier!

5.) Once chocolate has melted, pour it into the Pyrex. Freeze for about 15 minutes, so it hardens all the way through.

6.) Once that layer has hardened, pour the peanut butter mixture over the chocolate layer, make sure it's smooth, and put it back into the freezer. If you're not in a hurry, you can just let the final layer cool in the fridge.

7.) Once both layers are fully firm, grab a cutting board, pull out the fudge block utilizing the parchment paper, and use a ruler to make straight lines on the top of the fudge if presentation matters. Cut fudge into 1" squares, using a large, sharp knife, and enjoy!! 

***Note: This fudge melts pretty fast, so make sure you keep it in the fridge!!! It tastes like peanut butter cups, I just love how this turned out!! You can also use crunchy peanut butter, but I recommend creamy, just because the peanuts could be too hard to eat after being in the freezer or fridge!

What a great no-bake dessert recipe! 

Peanut Butter Happy ~ Waffle "Cake" Recipe + A Quick and Easy Lunch Idea

I love peanut butter. I could eat it on a spoon straight out of the jar for a snack just about any time. When I had the opportunity to create a fun recipe inspired by Jif Spreads, I jumped on the opportunity! Our household definitely prefers Jif to any other Peanut Butter on the shelf! Also, I was recently introduced to Jif Bars, which are also some of the best granola style bars I've ever eaten. Really, though, add Peanut Butter to just about anything, and I'm a happy woman! Just the thought makes me peanut butter happy! #peanutbutterhappy

Since I wanted to showcase the Peanut Butter as a spread, rather than inside the recipe, I opted to layer up homemade chocolate waffles, Jif Spread, and also a bit of cool whip, and created the most amazing Waffle "Cake" to date. I also realized that this fun recipe was not complete without chocolate syrup drizzled over the whole creation.

- 1 box chocolate cake mix

- water

- vegetable oil

- 3 eggs

- Cool Whip (2 containers)

- Jif Creamy Peanut Butter

- Chocolate Sauce

- Waffle Iron

- Non Stick Spray

TO MAKE THE WAFFLES:

I used a super simple recipe to make the homemade chocolate waffles. Simply mix 1 box of cake mix, 1 C. water, 1/3 C. vegetable oil, and 3 large eggs. Alternately, you can substitute about 1/3 of the cake mix with other waffle batter so they are more fluffy, because the cake mix waffles can be a bit dense. Heat the waffles for about 3 minutes each, and set them aside on a cooling rack if you have one - this way, the waffles won't get soggy while you're working on them. I used 5 waffles here.

After making the waffles, it's time to create your waffle "cake"! Place one waffle on the plate, then add a layer of Cool Whip all across the first waffle, to create a thick layer. I like scooping the Cool Whip into a Ziploc bag, and then cutting off the tip to create a sort of pastry bag. Next, layer another waffle, Jif Creamy Peanut Butter, waffle, Cool Whip, waffle, more Peanut Butter, then your last waffle.

I topped the dish with a big dollop of Cool Whip, and then drenched it in chocolate syrup!

This would be such a fun way to surprise someone on their birthday, or even if they're just having a bad day. Really love how this divine creation turned out!

Here is an Iobatta link where you can find the products I am sharing in this post:

Jif Spread -https://ibotta.com/app/retailer/any/offer/51534

This is a sponsored conversation written by me on behalf of The J.M. Smucker Company. The opinions and text are mine alone. #peanutbutterhappy #ad

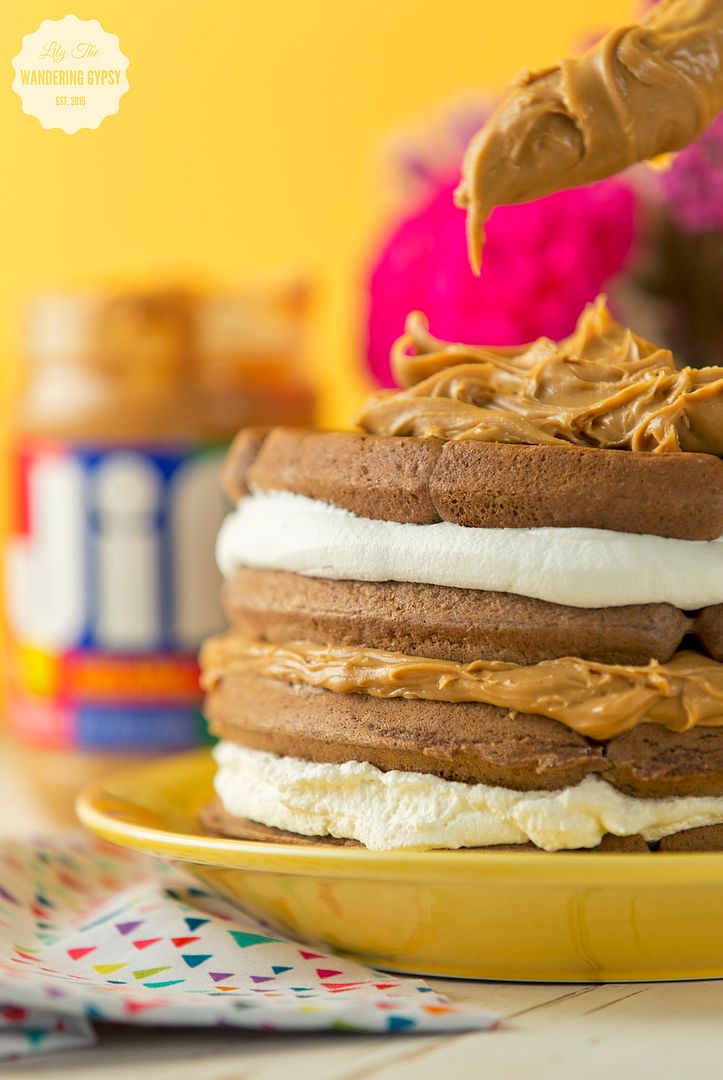
These Jif Bars inspired me to show you a quick and easy lunch idea, that you can prepare in just a few minutes. A jar salad is a great way to jump start your mid day hunger. I also love the idea of bringing a fruit like cherries or grapes in a jar, so they won't get squished or make a mess. And, a classic PBJ (featuring Jif PB of course), and my favorite raspberry jelly. And, I love packing the Jif Bars as my dessert, because they're portable and taste seriously SO good!

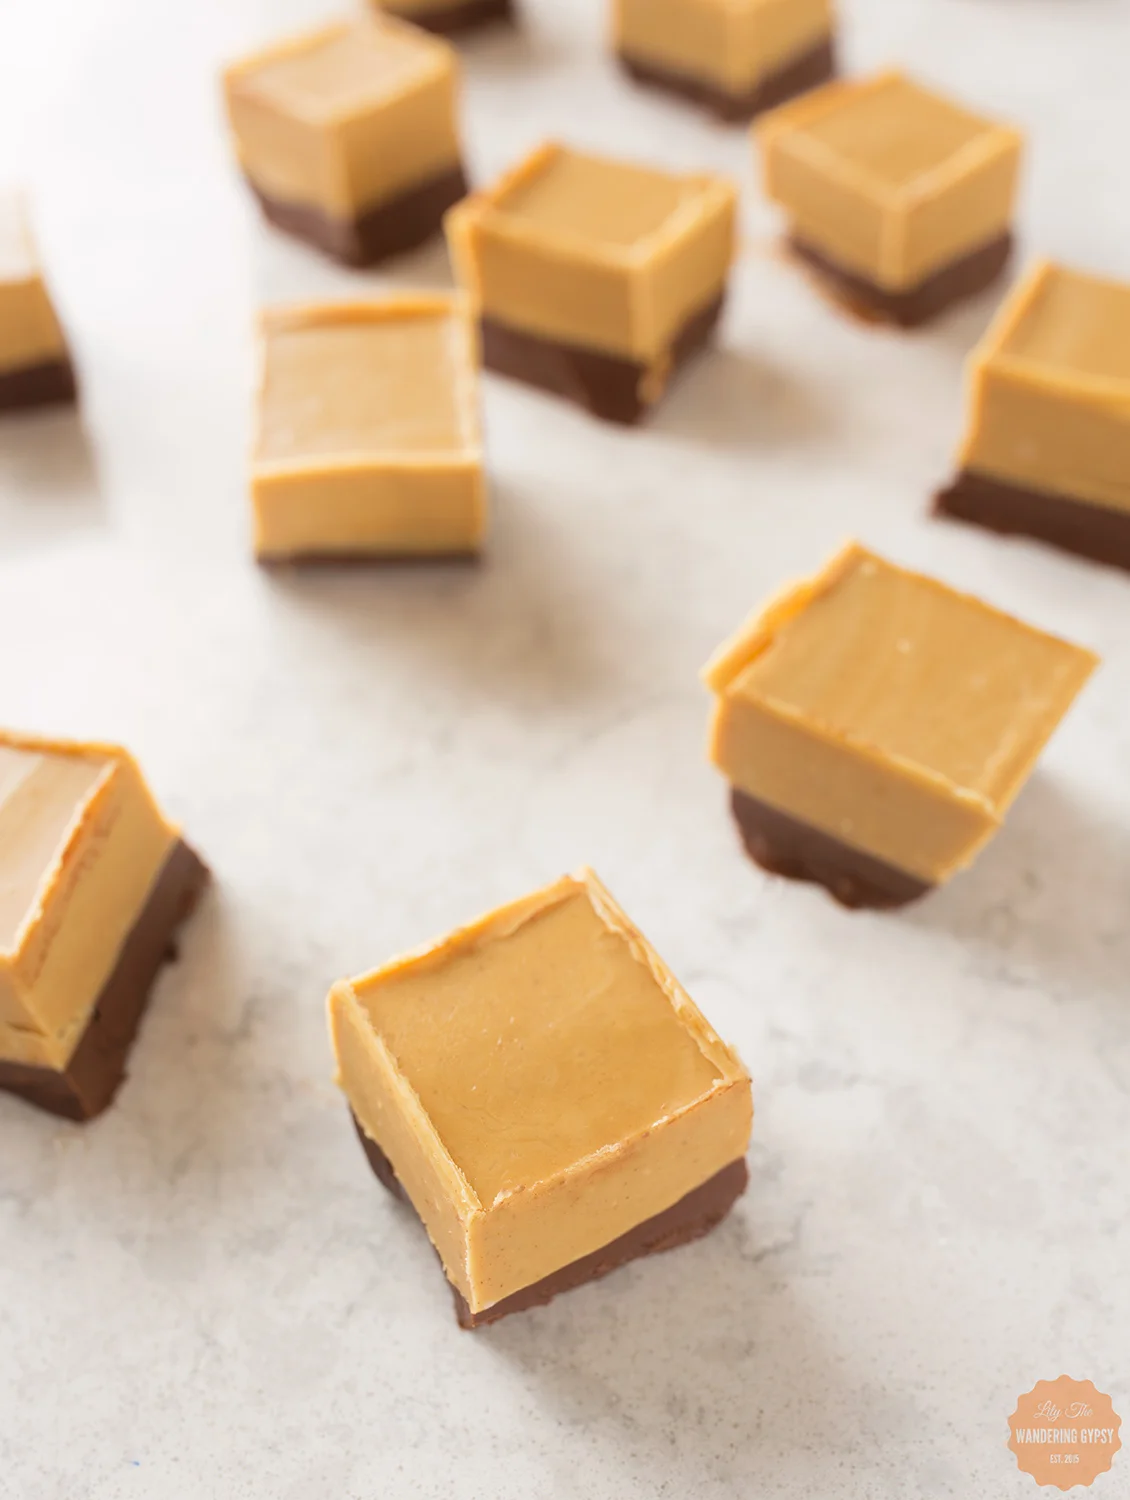
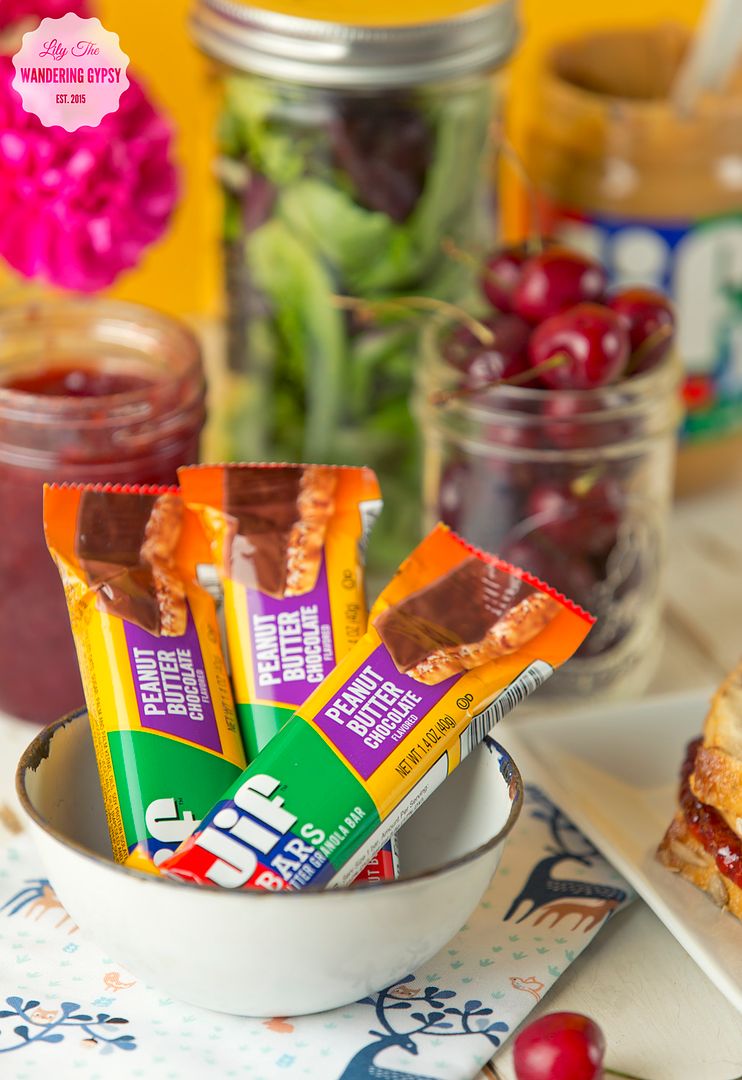
These Peanut Butter Chocolate Bars were the bomb! There are other flavors as well, like Crunchy Peanut Butter, and Creamy Peanut Butter.

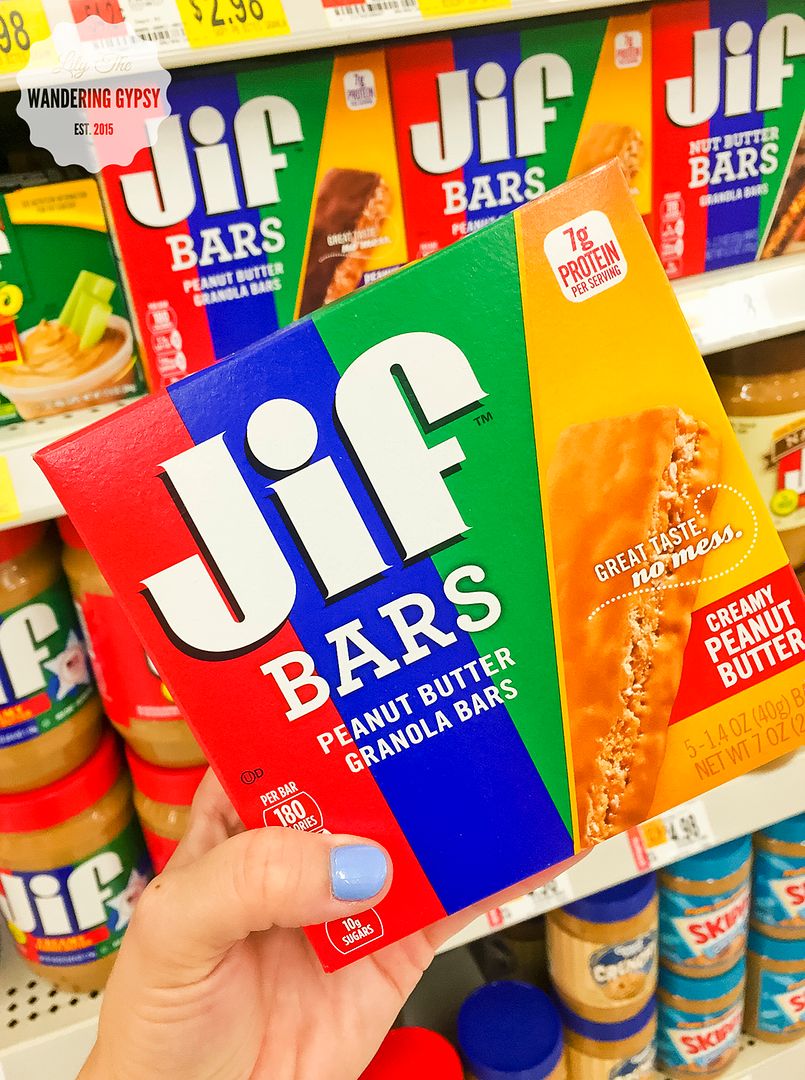
I found the Jif Bars right above the Peanut Butter at Walmart, and their prices are some of the best I've found for these items.

 photo bromello signature.png

This is a sponsored conversation written by me on behalf of The J.M. Smucker Company. The opinions and text are all mine.

Real Strawberry Muffins With Pink Icing

I wanted to make something with strawberries for Valentine's Day and here they are! The muffins don't need the icing, but it sure made them cute. I used mini muffin tins, and they were perfectly bite sized. These muffins were very moist, so make sure you cook them thoroughly. 

Strawberry Muffin Recipe

STRAWBERRY MUFFINS FROM SCRATCH

2 C. all purpose flour


1/3 C. sugar

1 T. baking powder

1/2 t. salt

1 t. cinnamon

2 large eggs

1 C. milk

1/4 C. vanilla yogurt

1/2 t. vanilla extract

1 1/2 C. fresh strawberries, hulled and finely chopped

Strawberry Muffin Recipe

INSTRUCTIONS:

Mix all ingredients except for strawberries. 

Here is my muffin batter before I added the strawberries and sugar. 

Strawberry Muffin Recipe

Below, I pureed the strawberries and added them to my batter. I also added 2 drops of food coloring to enhance the pink color for the photos :)

Strawberry Muffin Recipe

Bake the mini muffins for 15-18. Now, make your icing. 

Strawberry Muffin Recipe

I made a simple icing in my food processor. Add all ingredients, and process until combined. Scrape sides to incorporate any extra ingredients. Pour into smaller bowl to spoon onto muffins. 

ICING INGREDIENTS -  Original Recipe

1 Tbsp Butter - 1 C. Powdered Sugar - 1-2 Tbsp milk - 1/4 tsp vanilla - 2 tsp. fruit - Food Coloring

Strawberry Muffin Recipe

Have fun with this recipe, and enjoy!!

Strawberry Muffin Recipe

Fall Rice Krispy Treat Pops!

Ever wonder why your rice krispy treats don't turn out soft, rich, buttery, and super tasty? You may be using the wrong method. Here, I will show you the old-fashioned way to make Rice Krispy Treats on the stovetop - with real butter.

I love how these little leaf treat pops turned out! They could be customized to just about any holiday or party theme, too! Feel free to add food coloring to them to really customize them in a new, unique way. Here we go!

Fall Rice Krispy Treat Pops - Lily The Wandering Gypsy

Ingredients:

- 3 Tbsp. REAL Butter (Organic Preferred)

- 6 C. Rice Krispy Cereal 

- 6 C. Marshmallows

- Sprinkles in Seasonal Colors

(Not Pictured)

- Parchment Paper

- Baking Dish 

- Smaller Wooden Skewers

- Leaf-Shaped Cookie Cutters

Fall Rice Krispy Treat Pops - Lily The Wandering Gypsy

Instructions: 

In a large pot, melt butter over low heat (slower is better, so the butter doesn't burn.). As that melts, add marshmallows. Continue to melt the ingredients over low-medium heat. Make sure to watch the mixture so it doesn't brown. The mixture should look a little something like this right before you add the cereal.

Fall Rice Krispy Treat Pops - Lily The Wandering Gypsy

Add the cereal and mix well to combine all of the ingredients. 

Fall Rice Krispy Treat Pops - Lily The Wandering Gypsy

1.) Spray baking dish with non-stick spray or butter. Cut a piece of parchment paper to fit inside the dish.

2.) Pour in Gooey Cereal Mix.

3.) Use another piece of parchment paper to pat down the cereal mixture flat into the dish. This will keep your hands WAY less messy.

Once cereal has cooled, remove the cereal and parchment paper, and put it onto a cutting board.

Fall Rice Krispy Treat Pops - Lily The Wandering Gypsy

Use your favorite leaf-shaped cookie cutter, press firmly down into treats. You can use a bit of non-stick spray on the cookie cutter if the treats stick. Carefully insert small skewer sticks into the leaves. Make sure you don't jab your hand. I got about 12-13 leaves out of my batch, and had lots of pieces left over to devour :)

Fall Rice Krispy Treat Pops - Lily The Wandering Gypsy

Enjoy! Happy Fall! Check me out on Pinterest.

How To Make Blooming Candies

I had so much fun creating this project! I was inspired by summer, and all the pretty flowers that are blooming right now! For this recipe, I used silicone brownie molds, so I could fill them with tons of candy. I also used Blue and Vibrant Green Candy Melts. My filler candies were Sixlets, found here. See the list of ingredients below...and have FUN! You can make these in just about any color combo, for special events, holidays, and sporting events. 

How To Make Blooming Candies!

HERE'S HOW YOU MAKE THEM...

You only need a few simple ingredients! Some Sixlets Candies, candy melts, and a candy mould.  

You only need a few simple ingredients! Some Sixlets Candies, candy melts, and a candy mould.  

INGREDIENTS (Click Names To Buy)

Vibrant Green Candy Melts - Blue Candy Melts - Filler Candies - Wilton Paintbrushes, Candy/Brownie Molds

1.) Melt your candy melts in 2 separate containers, either in the microwave or in a double boiler method, which I did. I found that using a 2 cup Pyrex measuring cup, which held one package of candy melts worked great! Fill a small saucepan with 2-3 inches of water, and pour your melts into the measuring cup. Insert cup into water, heat water over medium of high heat and stir melts frequently until smooth. (See photo below for tips)...

How To Make Blooming Candies!
Texture Test (above) - The blue one looks right, but NOT the green one! If your melts form more of a paste than a smooth and satiny texture, try again. 

Texture Test (above) - The blue one looks right, but NOT the green one! If your melts form more of a paste than a smooth and satiny texture, try again. 

MY BIGGEST TIP WOULD BE...USE A PAINTBRUSH!!!

2.) Using a paintbrush to spread the candy molds was a priceless tip! The brush gives you way more control than a knife or spoon. This step took a while, but was definitely fun. I searched around just about every craft store for these brushes, and f…

2.) Using a paintbrush to spread the candy molds was a priceless tip! The brush gives you way more control than a knife or spoon. This step took a while, but was definitely fun. I searched around just about every craft store for these brushes, and finally found them at JoAnns! I originally searched for cheap kids' paintbrushes, and found nothing. Luckily I persisted :) 

3.) See how I spread the blue candy melts into the molds with a paintbrush, and am about to spread the green candies next. I added about double this amount (that you see in green) to fill the mold at first. After you fill the molds, pop the candies …

3.) See how I spread the blue candy melts into the molds with a paintbrush, and am about to spread the green candies next. I added about double this amount (that you see in green) to fill the mold at first. After you fill the molds, pop the candies into the freezer for about 5 minutes. 

4.) Now, fill the candy shells with Candies, almost to the very top. 

4.) Now, fill the candy shells with Candies, almost to the very top. 

5.) Add a dollop of candy melts on top of your fillers candies, and use the paintbrush to smooth the dollop out, and to create a seal, so the candies stay inside the melts. Throw them back into the freezer, and wait about 30 minutes (or longer), so …

5.) Add a dollop of candy melts on top of your fillers candies, and use the paintbrush to smooth the dollop out, and to create a seal, so the candies stay inside the melts. Throw them back into the freezer, and wait about 30 minutes (or longer), so that everything hardens and seals. 

These are so cute!!!

These are so cute!!!

6.) Here is what it looked like after I smoothed the last part of the candy melts over the molds, to close in the Sixlets. Use your brush to make a pretty swirl pattern on the candies if you wish. 

6.) Here is what it looked like after I smoothed the last part of the candy melts over the molds, to close in the Sixlets. Use your brush to make a pretty swirl pattern on the candies if you wish. 

7.) Here is what your (almost finished) candies will look like after being in the freezer overnight. You don't have to leave them in this long (2 hours will do), but after all the work I did on this project, I was more than happy to leave these…

7.) Here is what your (almost finished) candies will look like after being in the freezer overnight. You don't have to leave them in this long (2 hours will do), but after all the work I did on this project, I was more than happy to leave these babies in the freezer overnight, and enjoy them the next day :)

8.) Using a pair of rubber or cotton gloves, carefully peel the mold away from your Blooming Candies. The gloves help prevent finger prints all over your candies. Aren't they adorable? The next photo shows how you open them...

8.) Using a pair of rubber or cotton gloves, carefully peel the mold away from your Blooming Candies. The gloves help prevent finger prints all over your candies. Aren't they adorable? The next photo shows how you open them...

Now you can reveal your surprise candy inside! Just use a sharp kitchen knife, and (very carefully), cut into the candy as if you are cutting a slice of cake. 

Now you can reveal your surprise candy inside! Just use a sharp kitchen knife, and (very carefully), cut into the candy as if you are cutting a slice of cake. 

Blooming Candies

Pinterest  //  Facebook  //  Instagram  //  She's So Chic Blog  //  Twitter  //  Polyvore