
If you're looking for the perfect way to create festive snacks that are fun and easy to prepare, look no further!
Read MoreA Memorial Day Party With Balloon Time! Get These Cute Recipes and Decor Ideas!
This is a sponsored conversation written by me on behalf of Balloon Time Helium Tanks. The opinions and text are all mine.
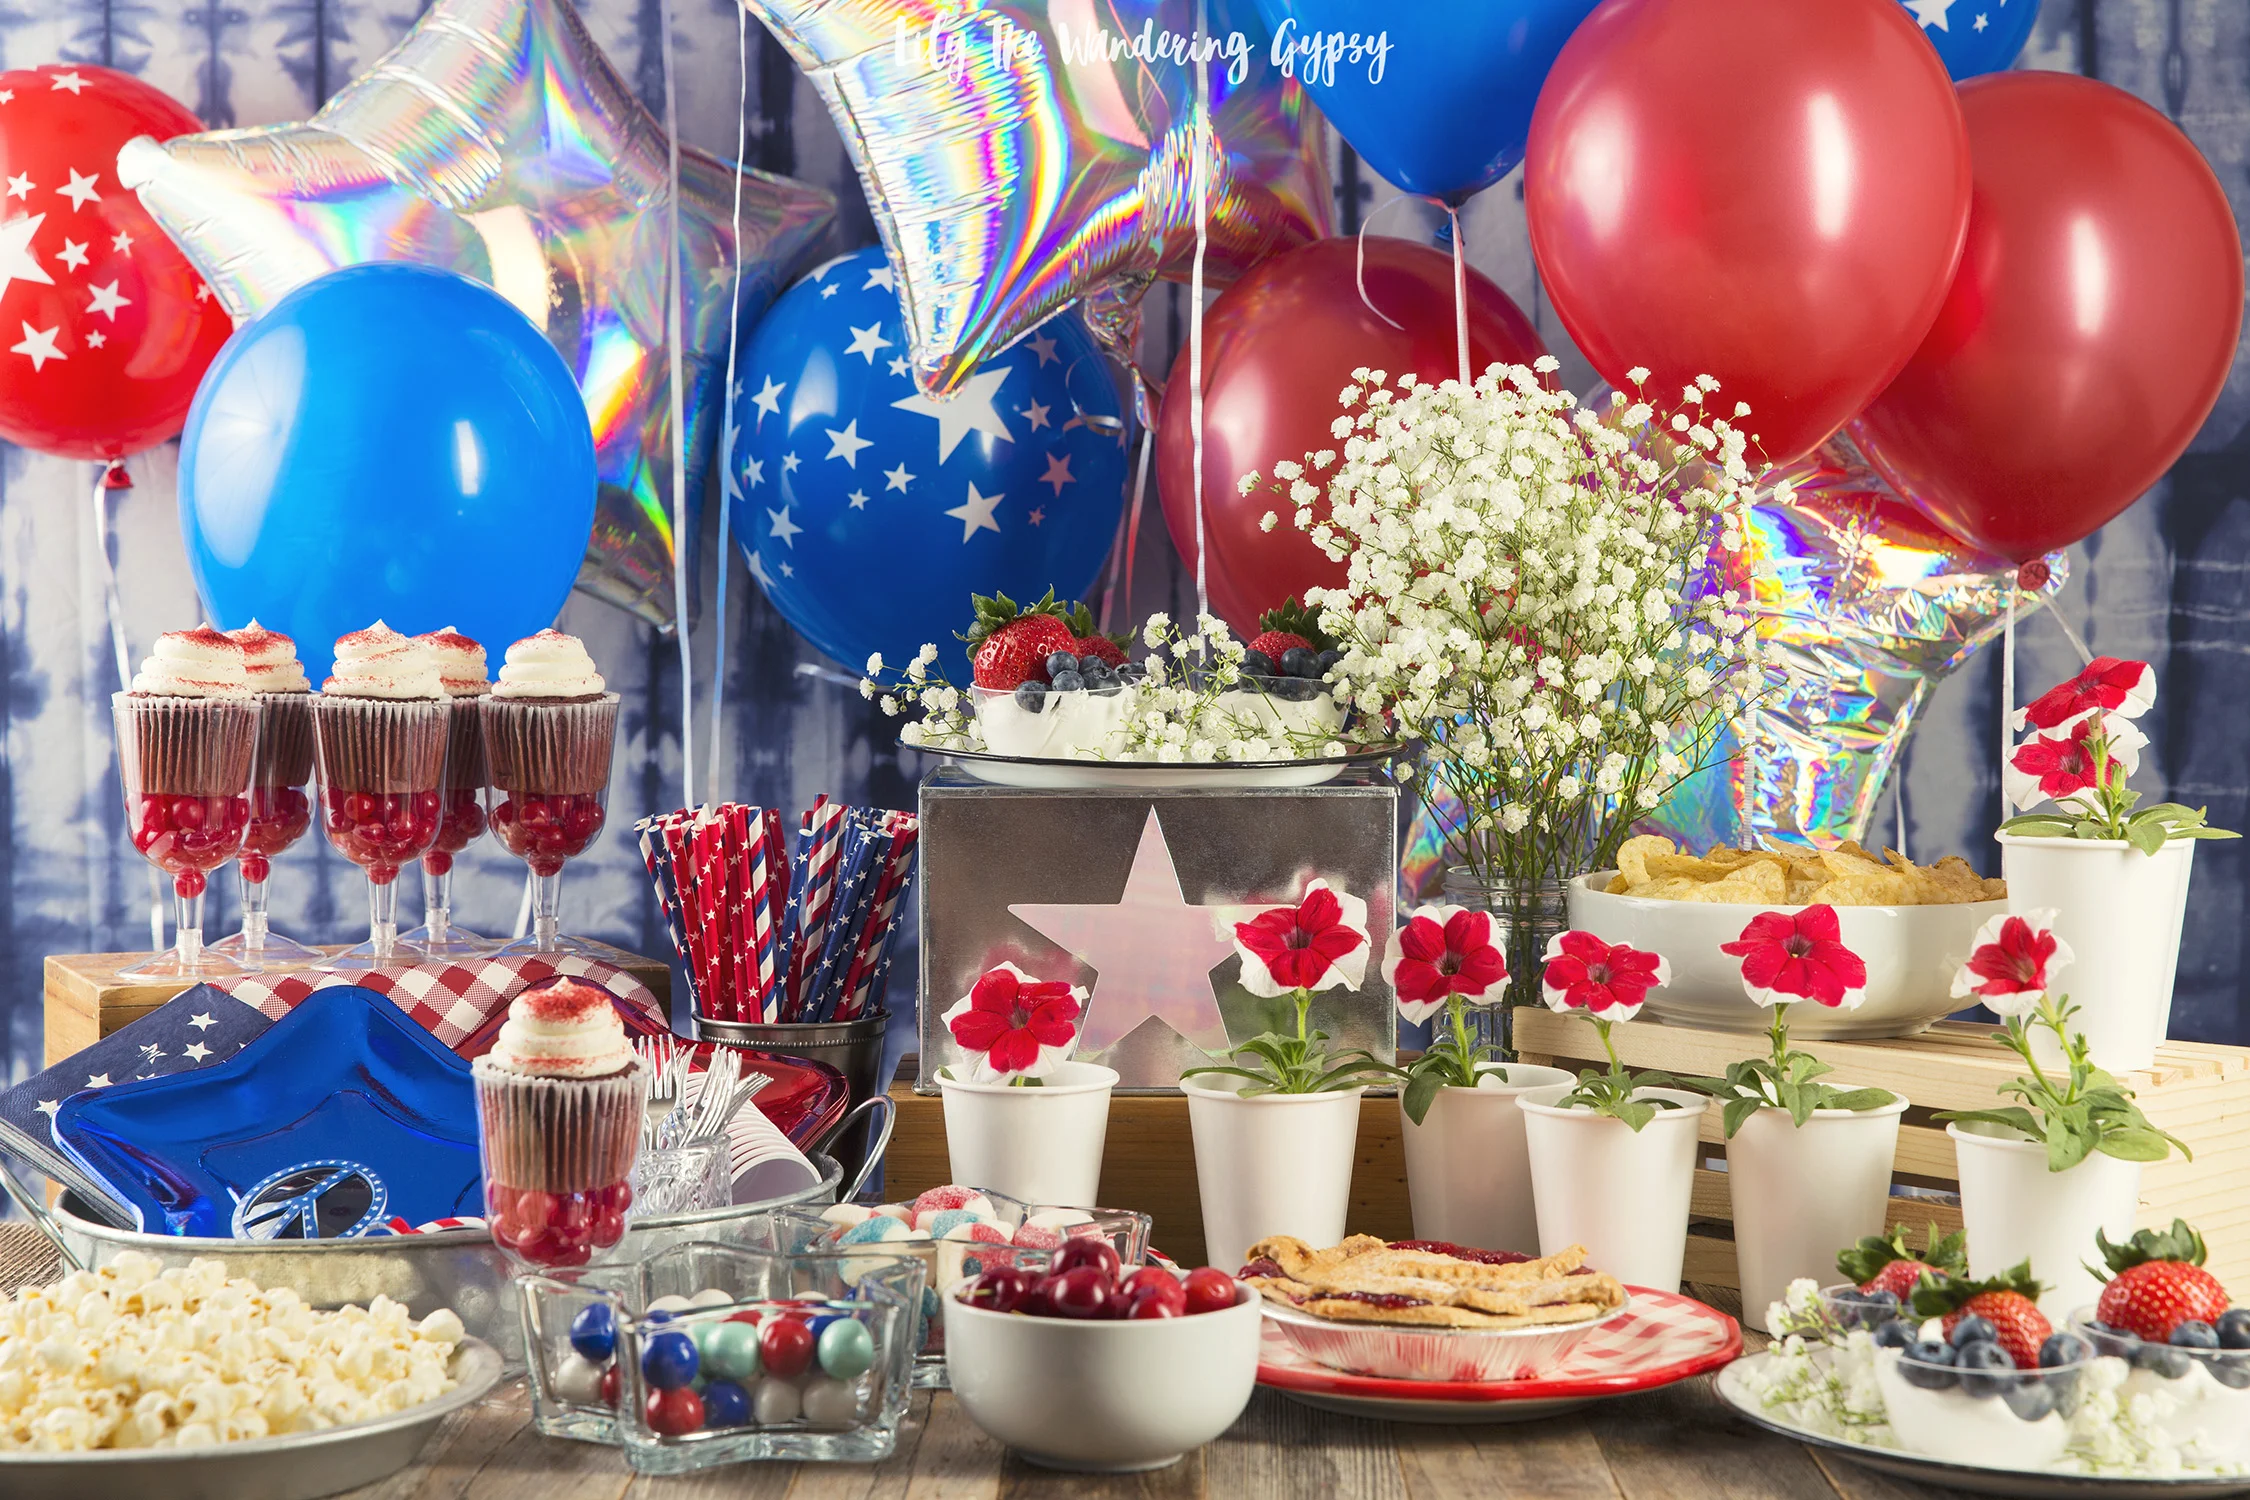
This party would be adorable for guests of any age, and feel free to add a bit more of your favorite food or drinks for your friends and family to enjoy while we celebrate Memorial Day, and other fun holidays in May and the upcoming summer months.


Tie Dyed Fabric In Indigo and White (See My DIY Here)
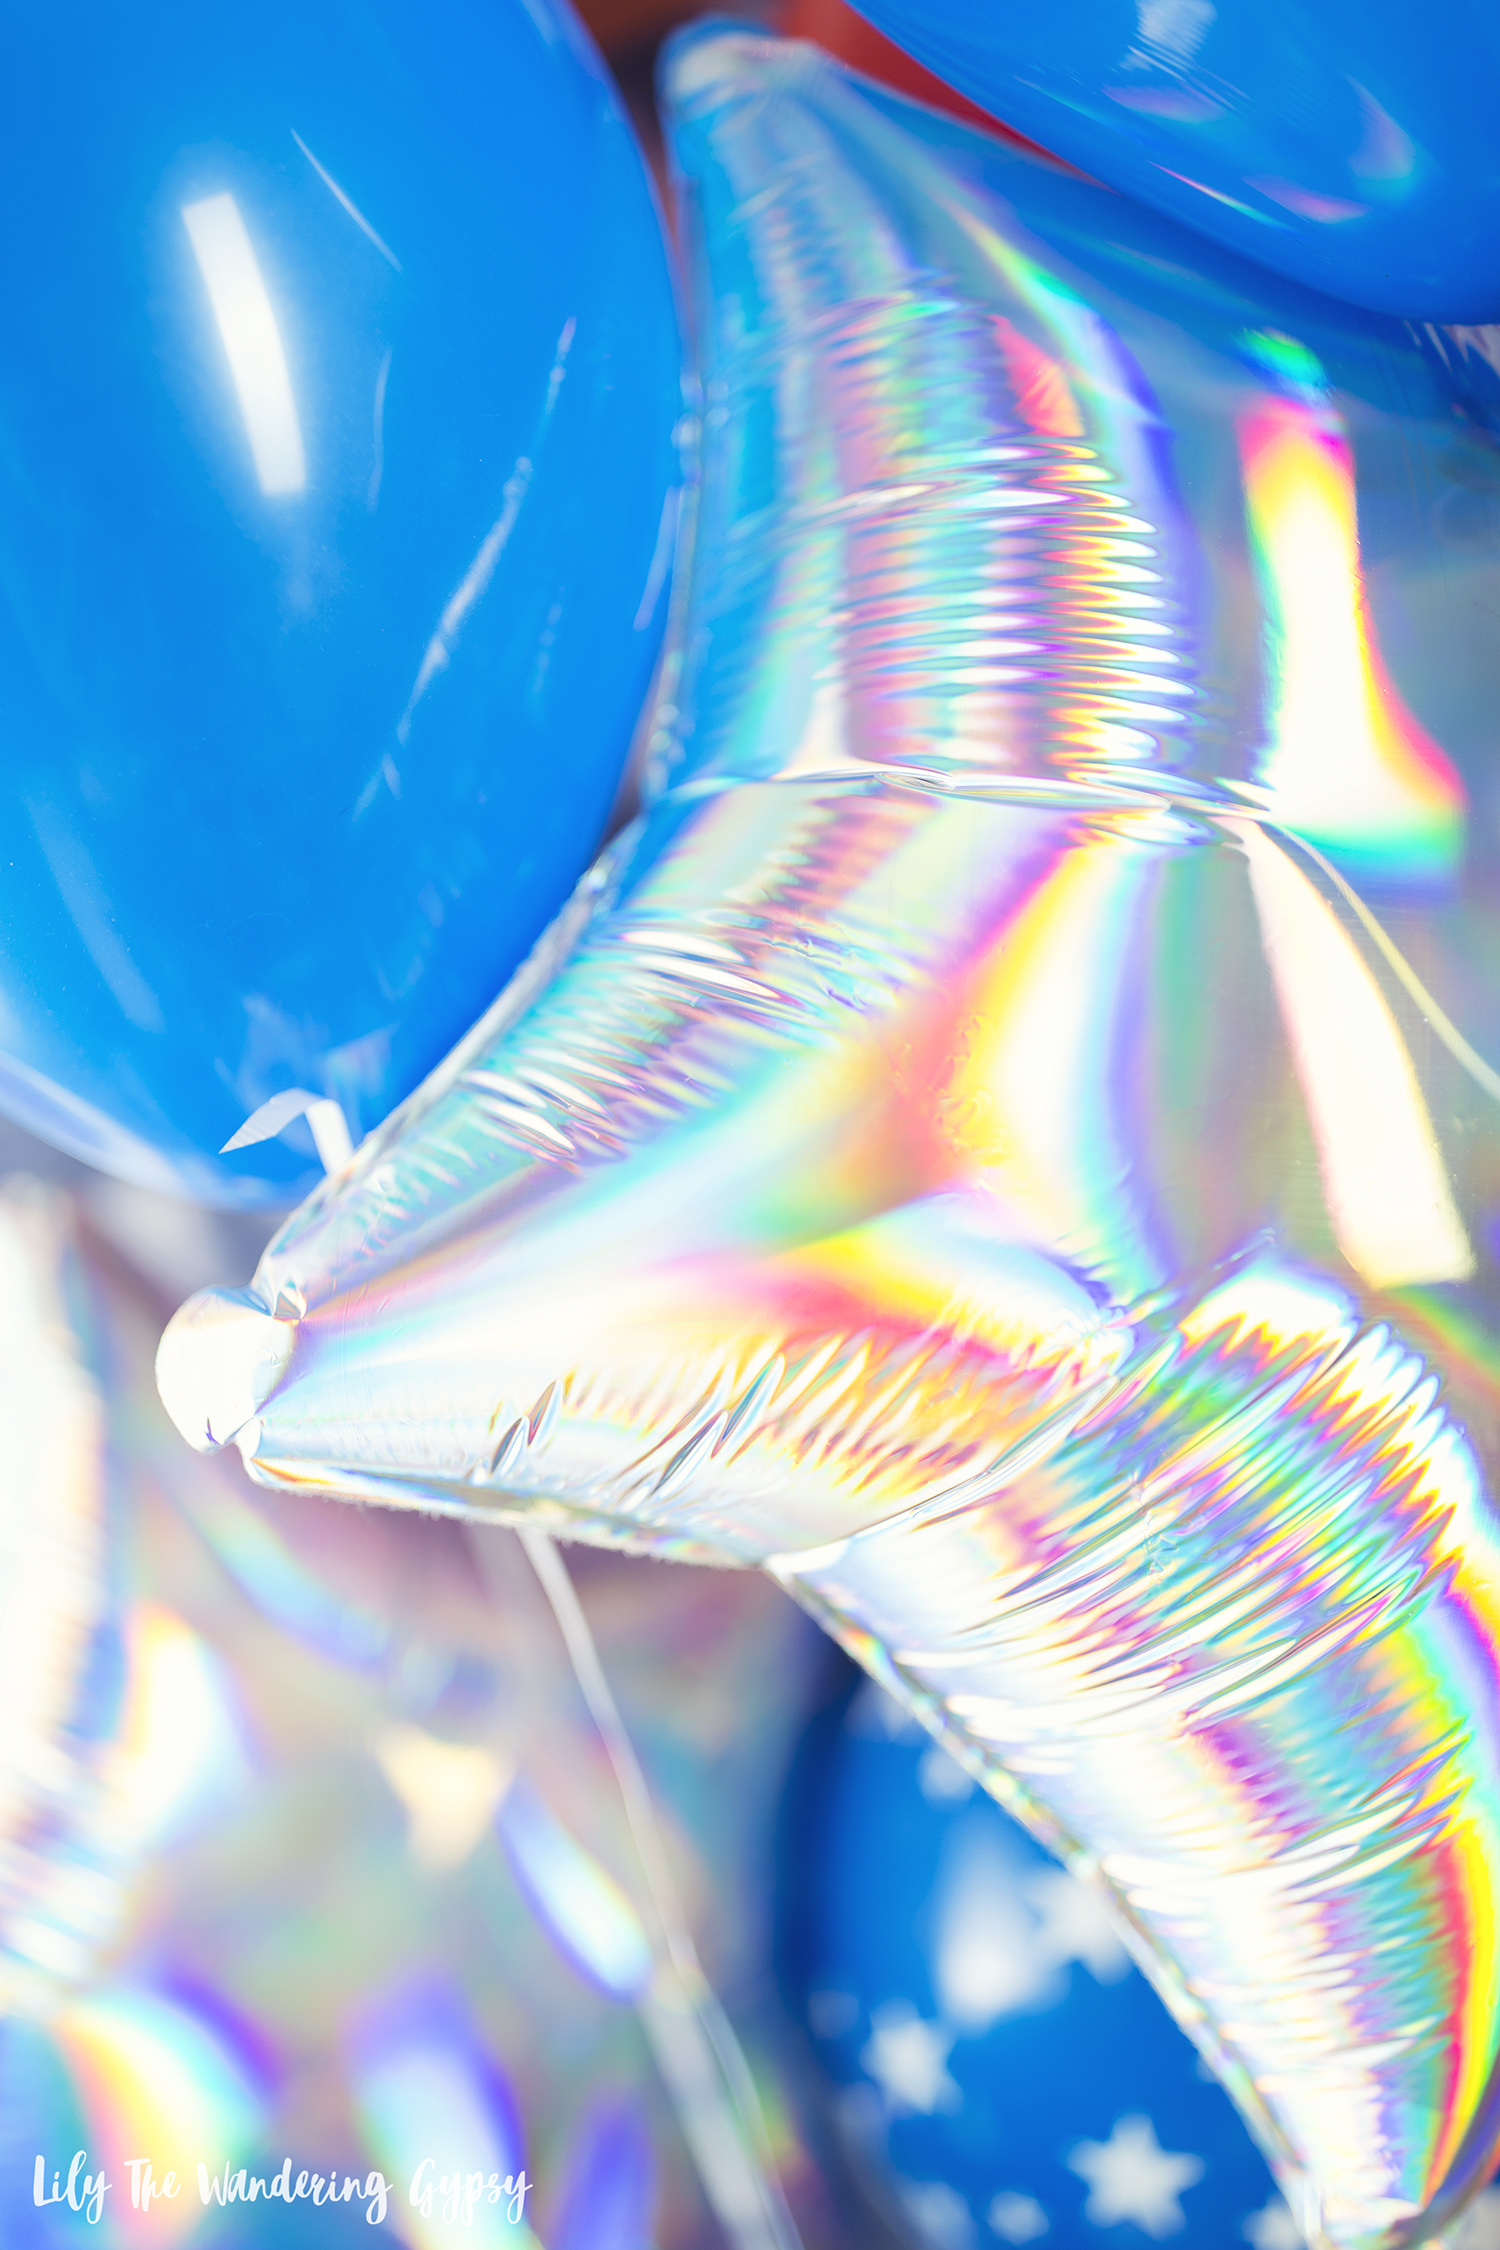
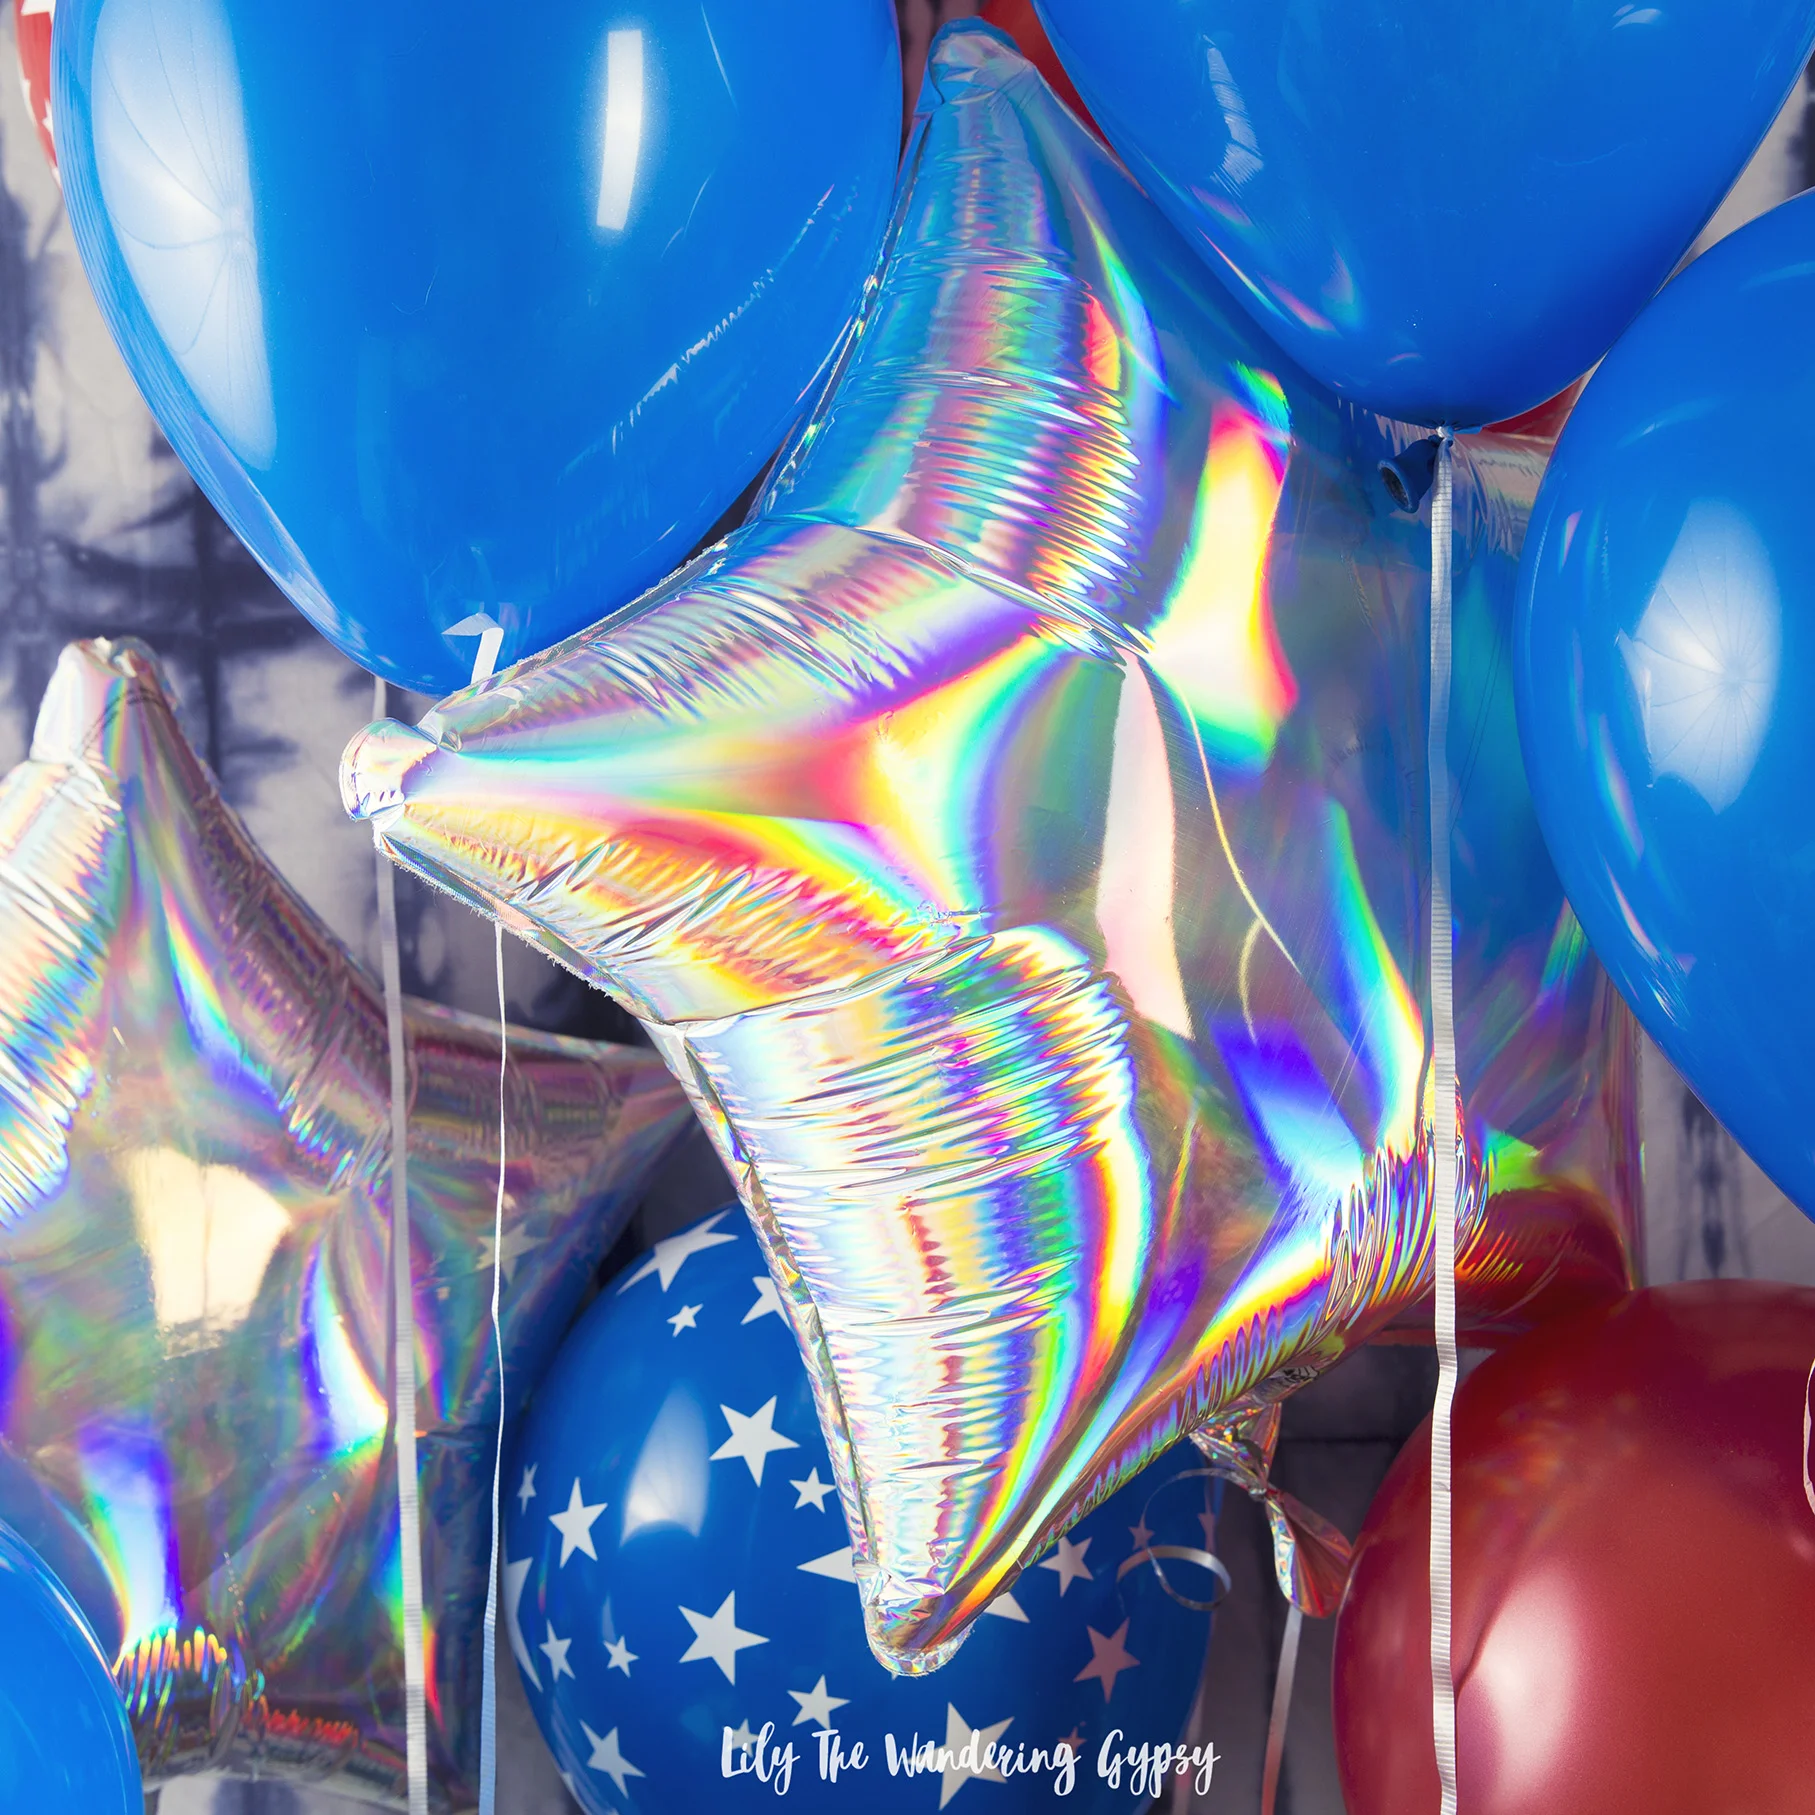
Helium-Safe Balloons (I used red, blue, and star-printed latex ones, and 3 holographic mylar ones in star shapes)
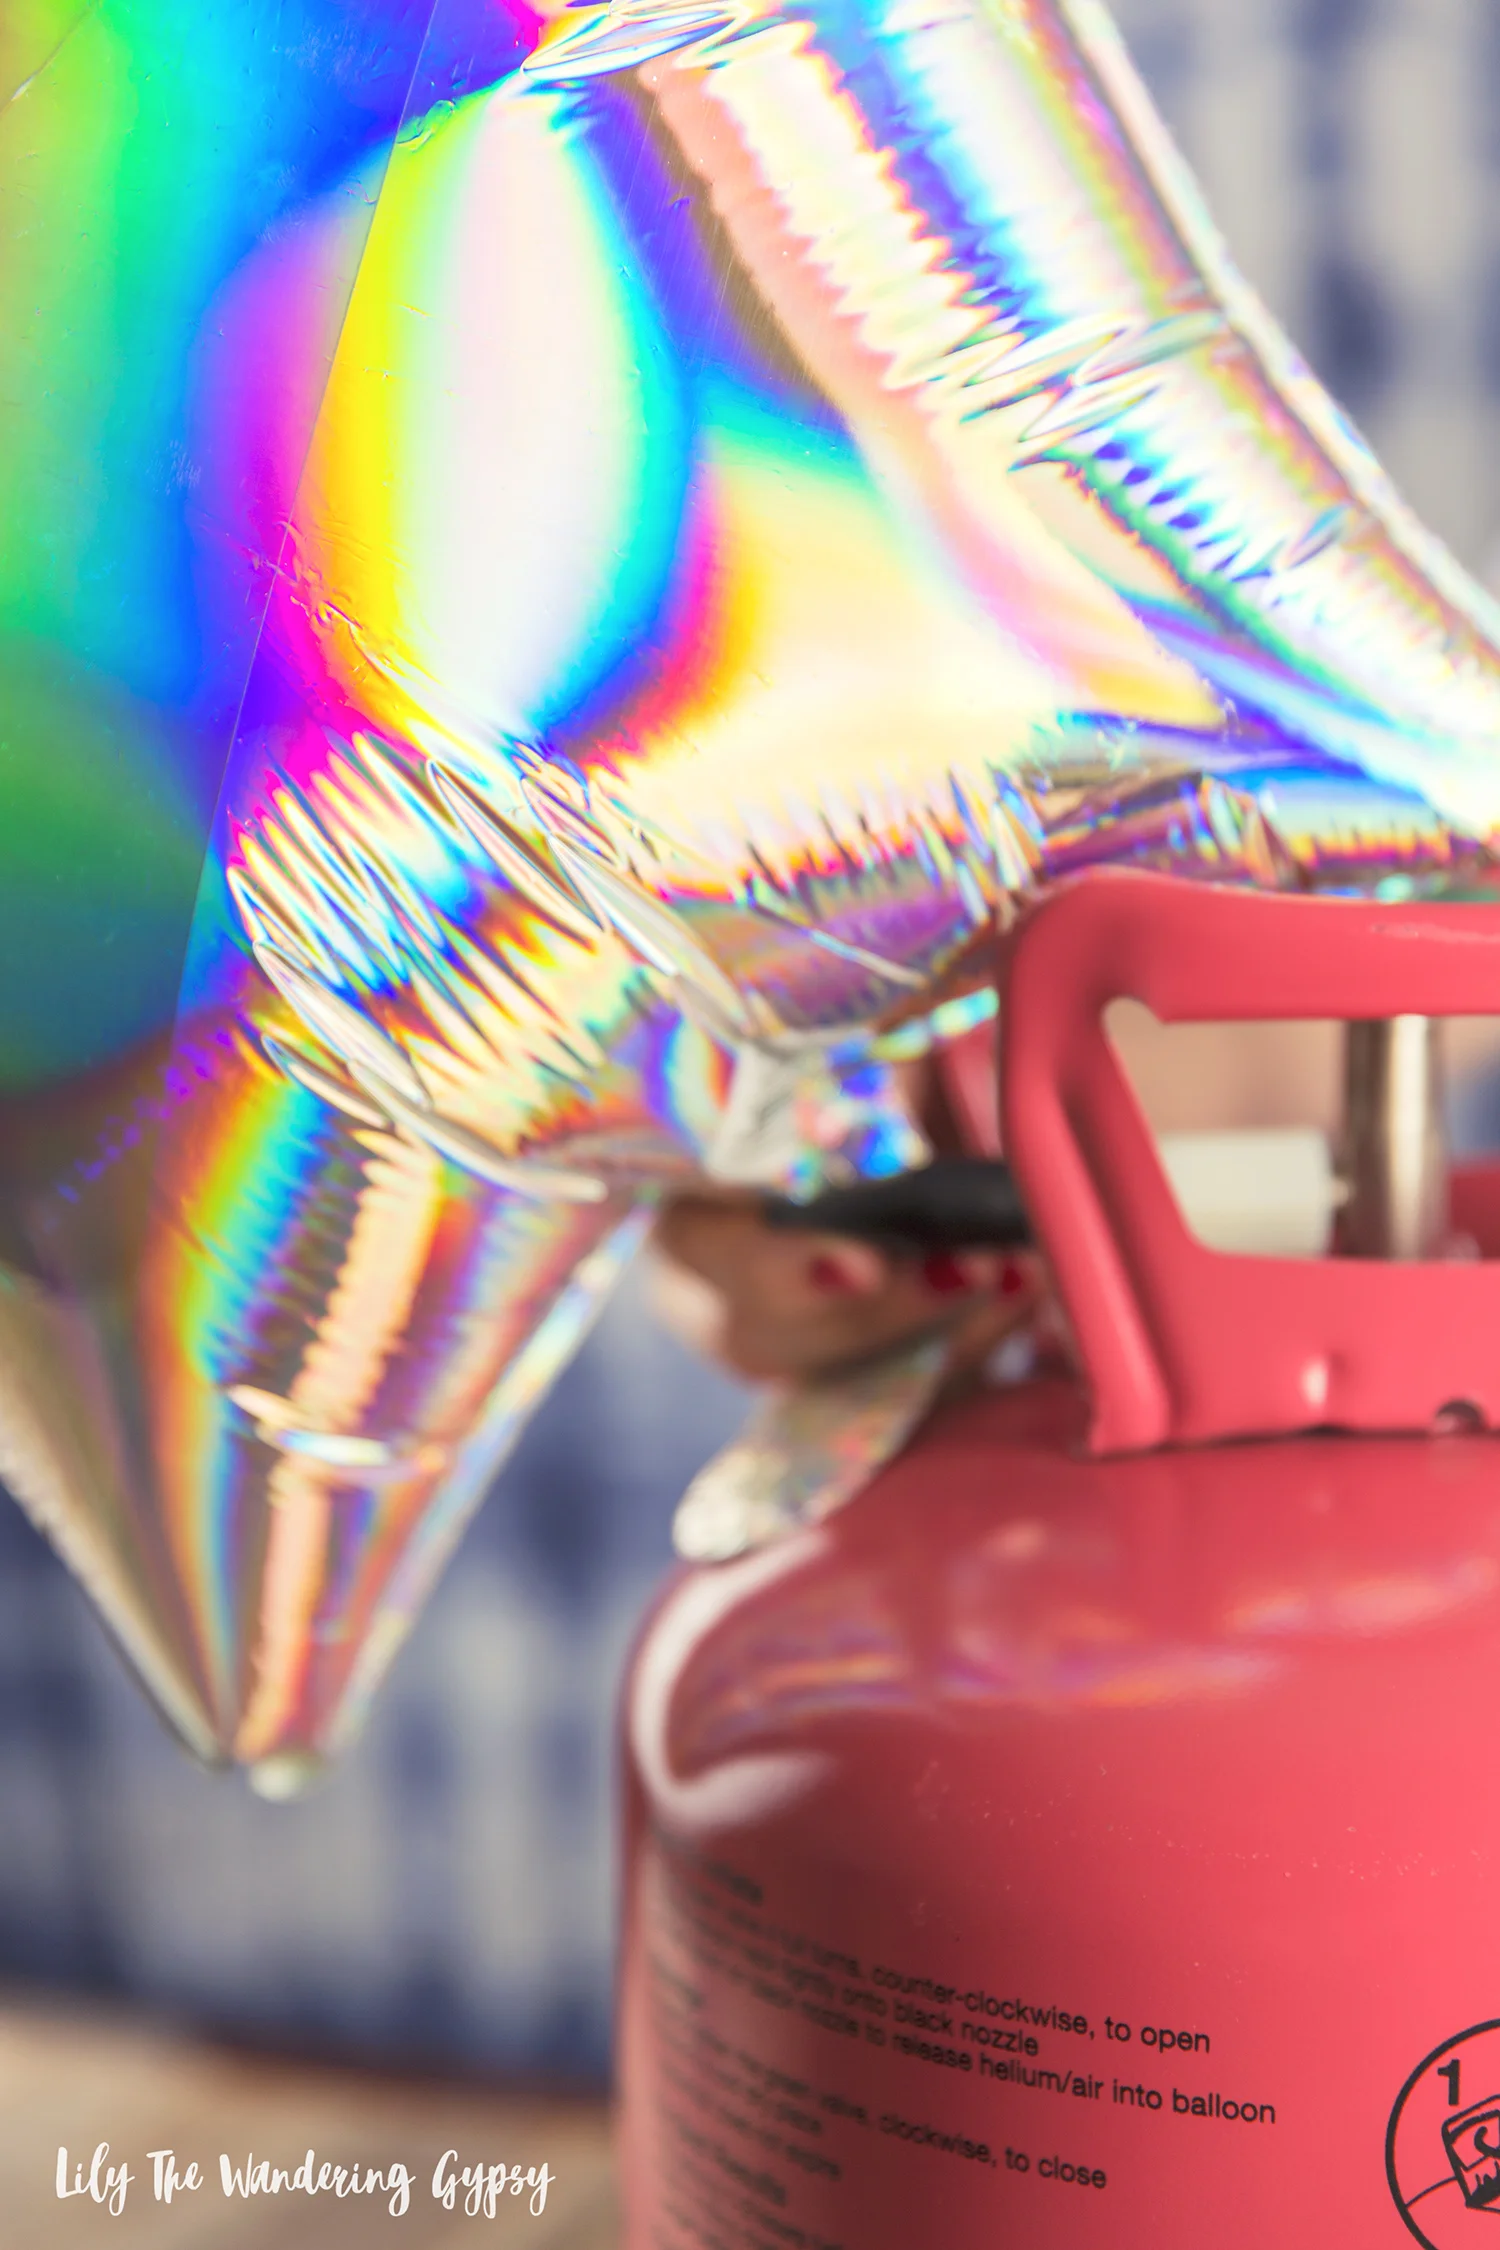
Helium Tank (I used one from Balloon Time)
Curling Ribbon included with helium tank
Weights for Balloons (these can be made from just about anything that is somewhat heavy. Or, tape to attach balloons to the back of your table


1.) Get acquainted with your Balloon Time Helium Tank. At first, I had a bit of trouble realizing that there are two steps to working the tank. FIRST, on your helium tab, you will find a green handle, that you turn about 4 times until it won't turn any longer. SECOND, insert your balloon onto the black nozzle, and push down to release the helium into your balloon. I did not realize to do the second part, and thought my tank was empty - oopsies! It was not :)
2.) Fill your three star balloons, and about 5-10 of each of the other colors, red and blue. Adding some white balloons would also be adorable! After filling each balloon, tie about 3-4 feet of ribbon to them, and attach them to your weights, so they won't float away :) I cut each ribbon to be a bit of a different length, so they would have a more layered effect, which I just loved!
3.) Put up your tie dyed back drop behind where your table will go, and then start filling the background with balloons! I started with my stars, then worked out from there, with the other balloons. Put your table in front of that, and begin styling the party!
4.) I love displaying food at different heights on the table, to create lots of visual interest. For this party setup, I used a mixture of wooden crates, galvanized metal boxes,
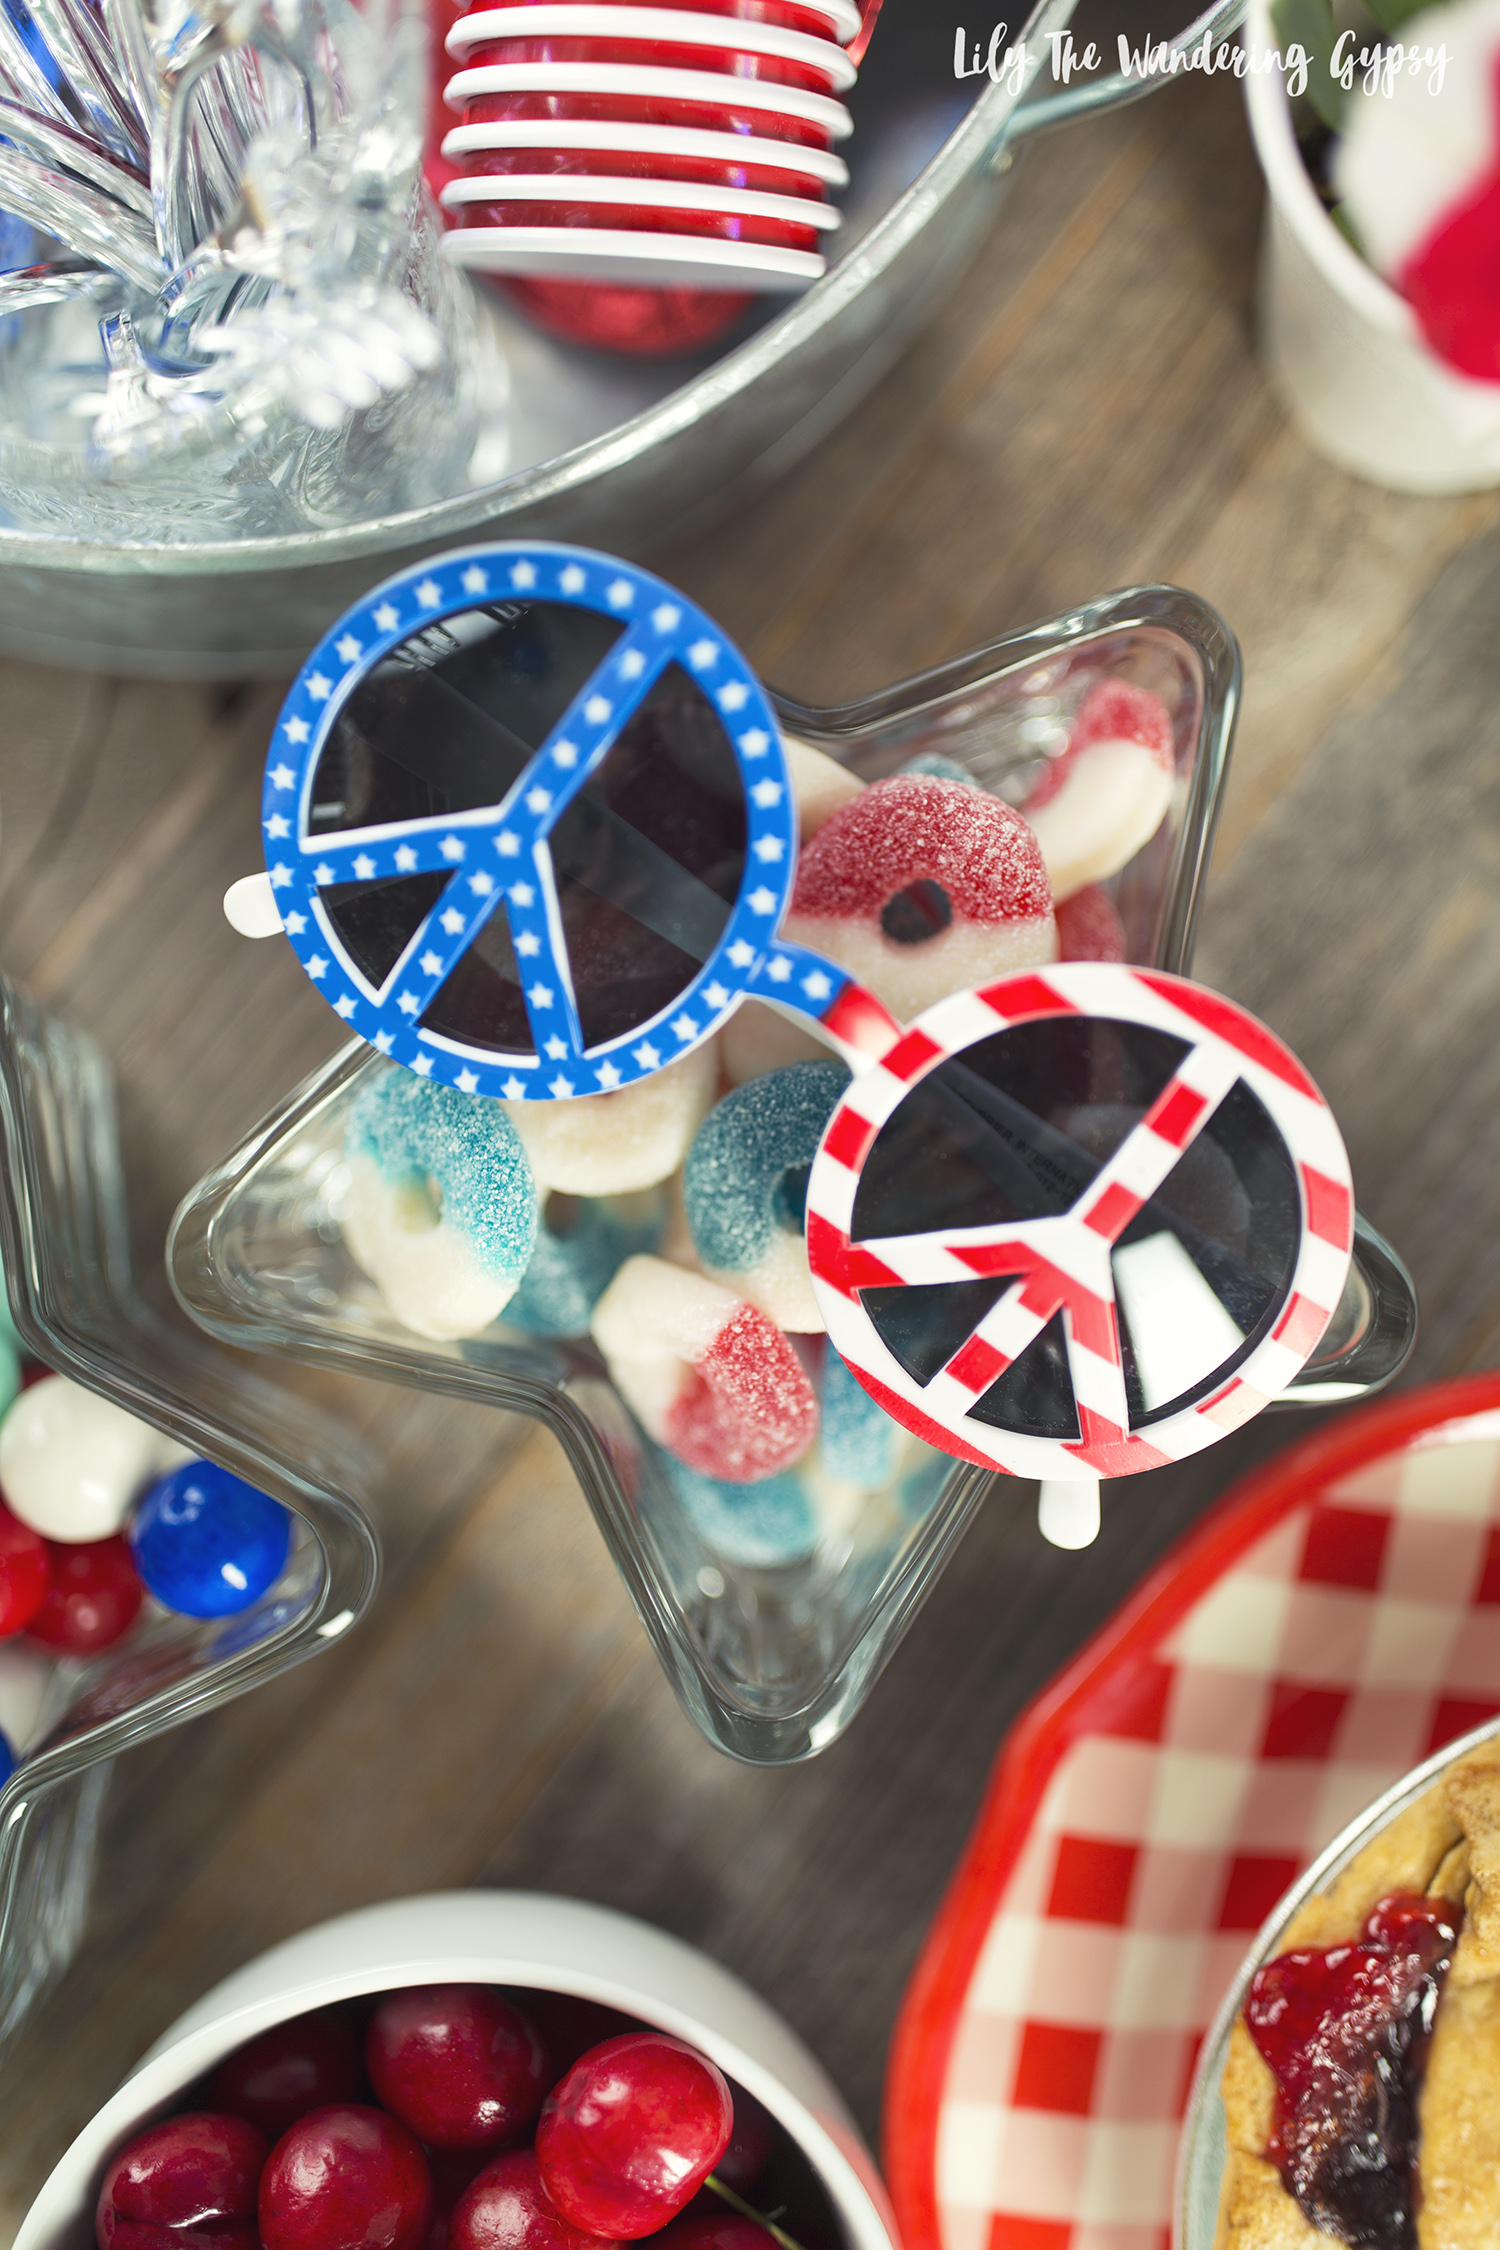
5.) Other cute items you might want to offer include patriotic-themed star plates, napkins, cute paper straws, cute sunglasses, and red/white/blue candies in star-shaped glass dishes.


When I first learned about this project with Balloon Time, I instantly went into research mode. That's how I start every post that I create, so I can learn more about the brands and the products I am about to work with. I also love seeing what other bloggers may have done with and for these brands before, and I was so excited and very honored to be chosen, because Balloon Time has enlisted the DIY and Party Skills of many amazing bloggers that I follow pretty regularly, like Studio DIY, Hostess With The Mostess, A Subtle Revelry, and Confetti Sunshine!
I wanted to put my own spin on this project and include lots of cute dessert ideas, too!

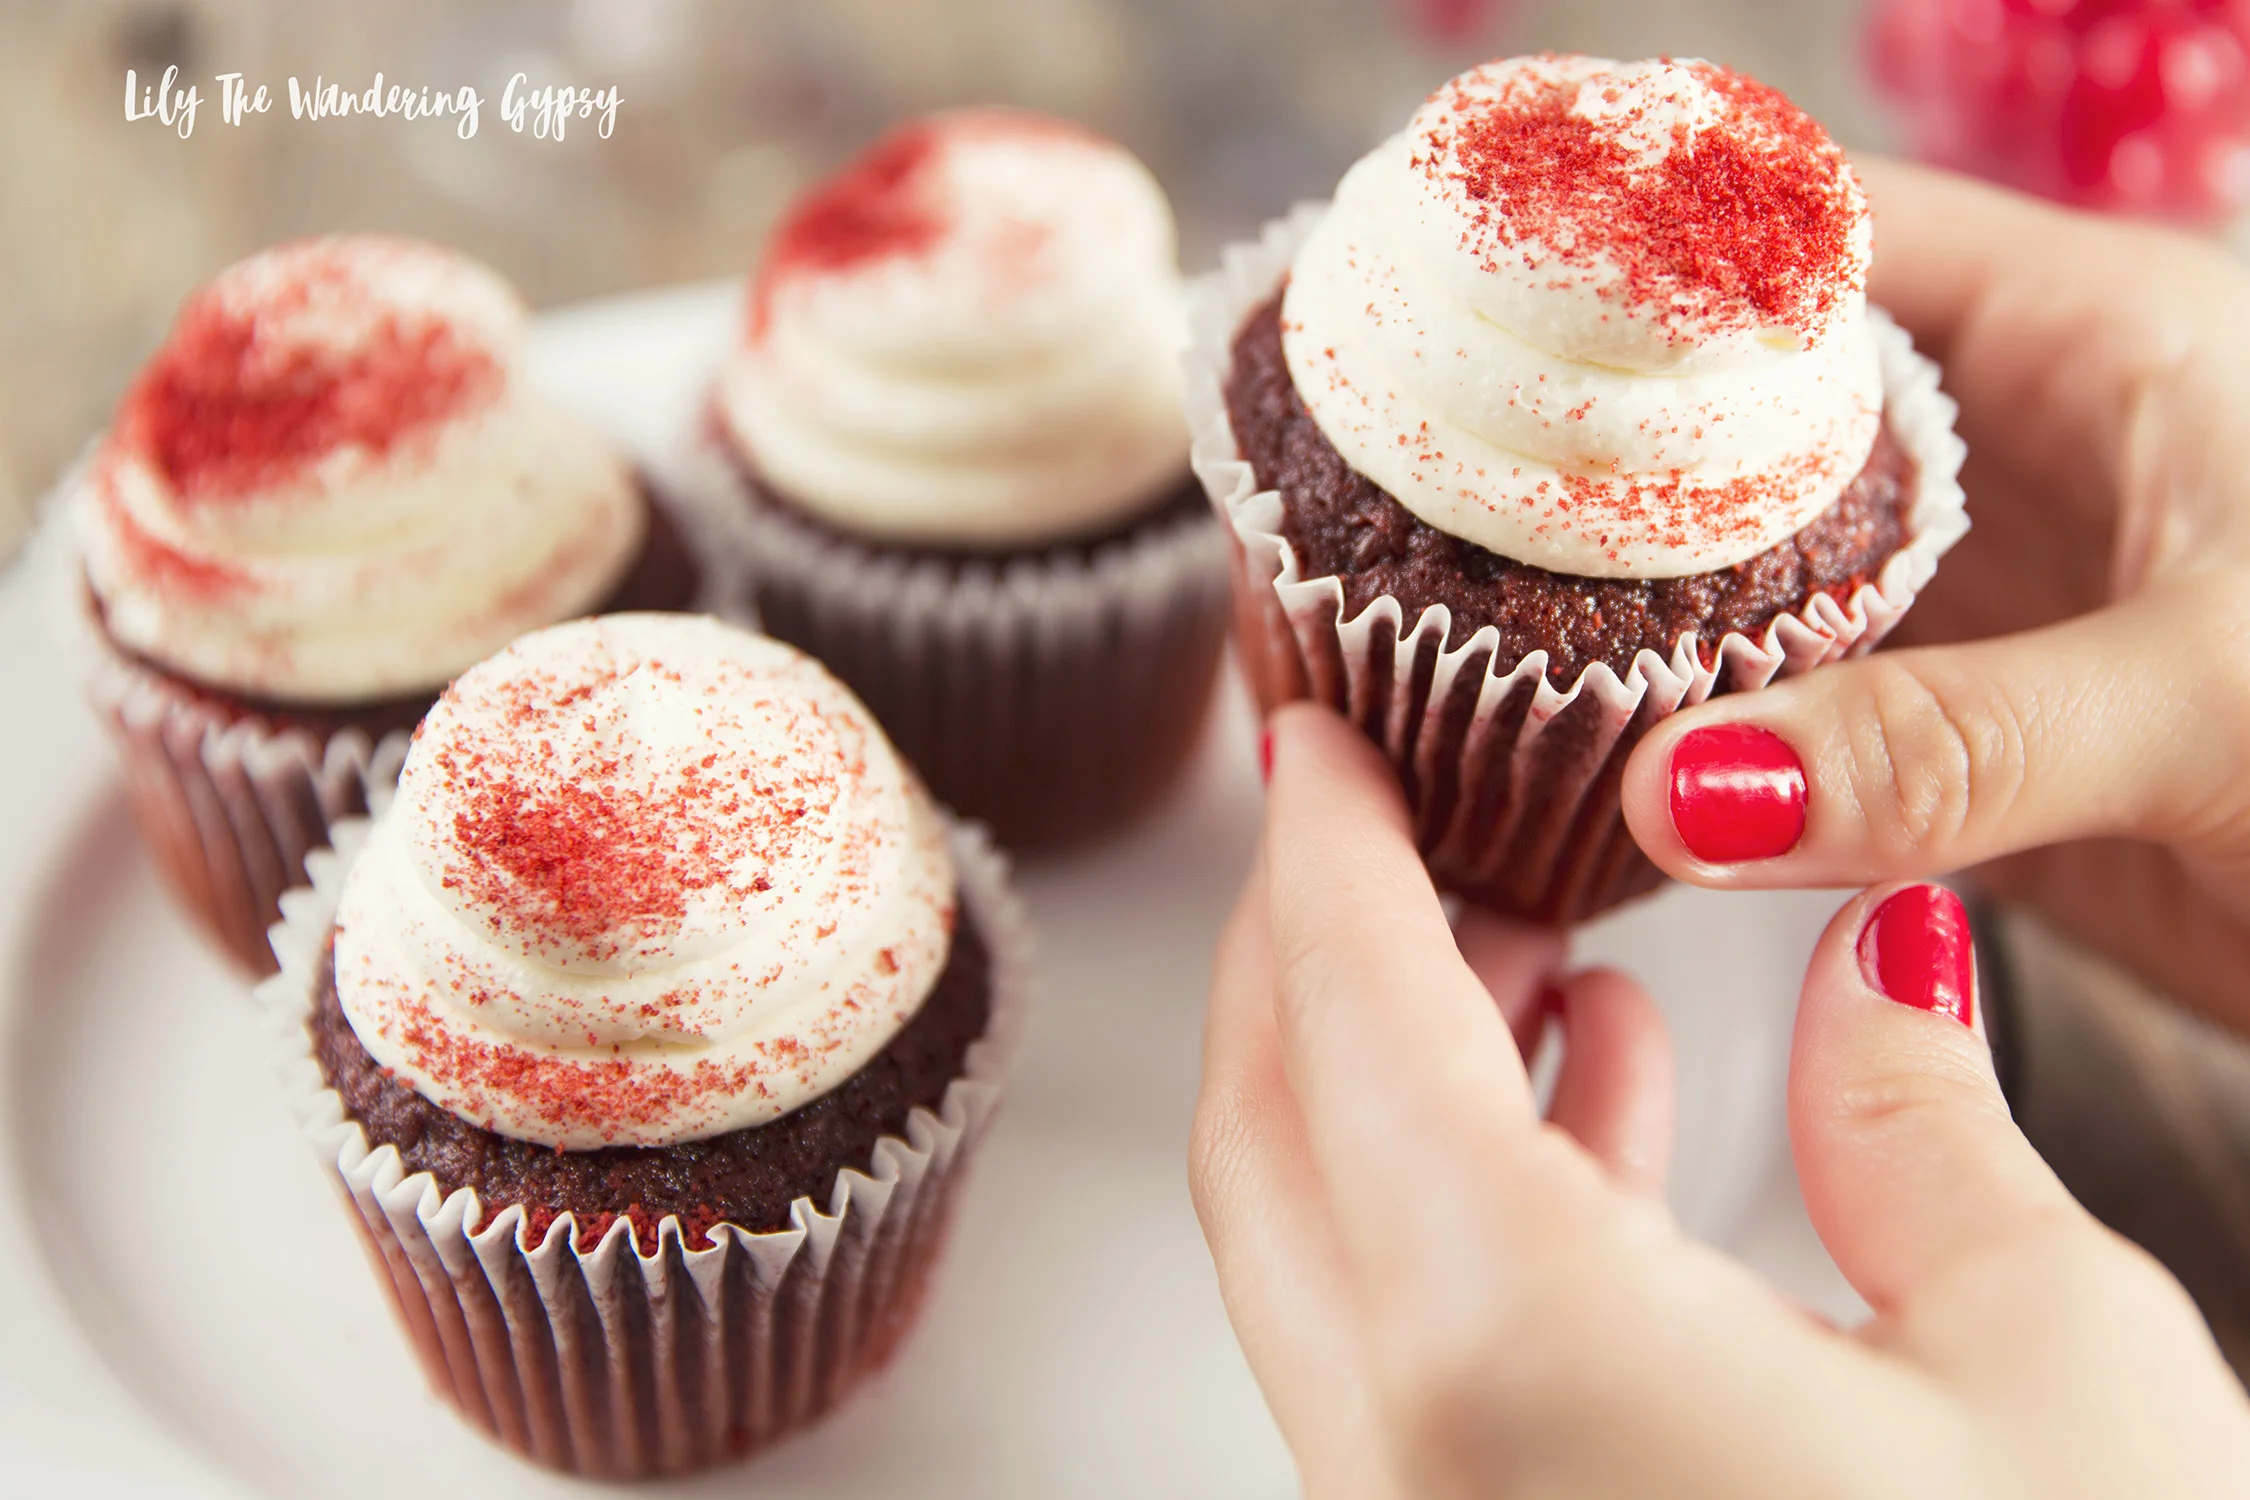
I love these delicious red velvet cupcakes from my local grocery store, which you could use in a pinch, or bake cupcakes from your own favorite recipe.
WHAT YOU NEED:
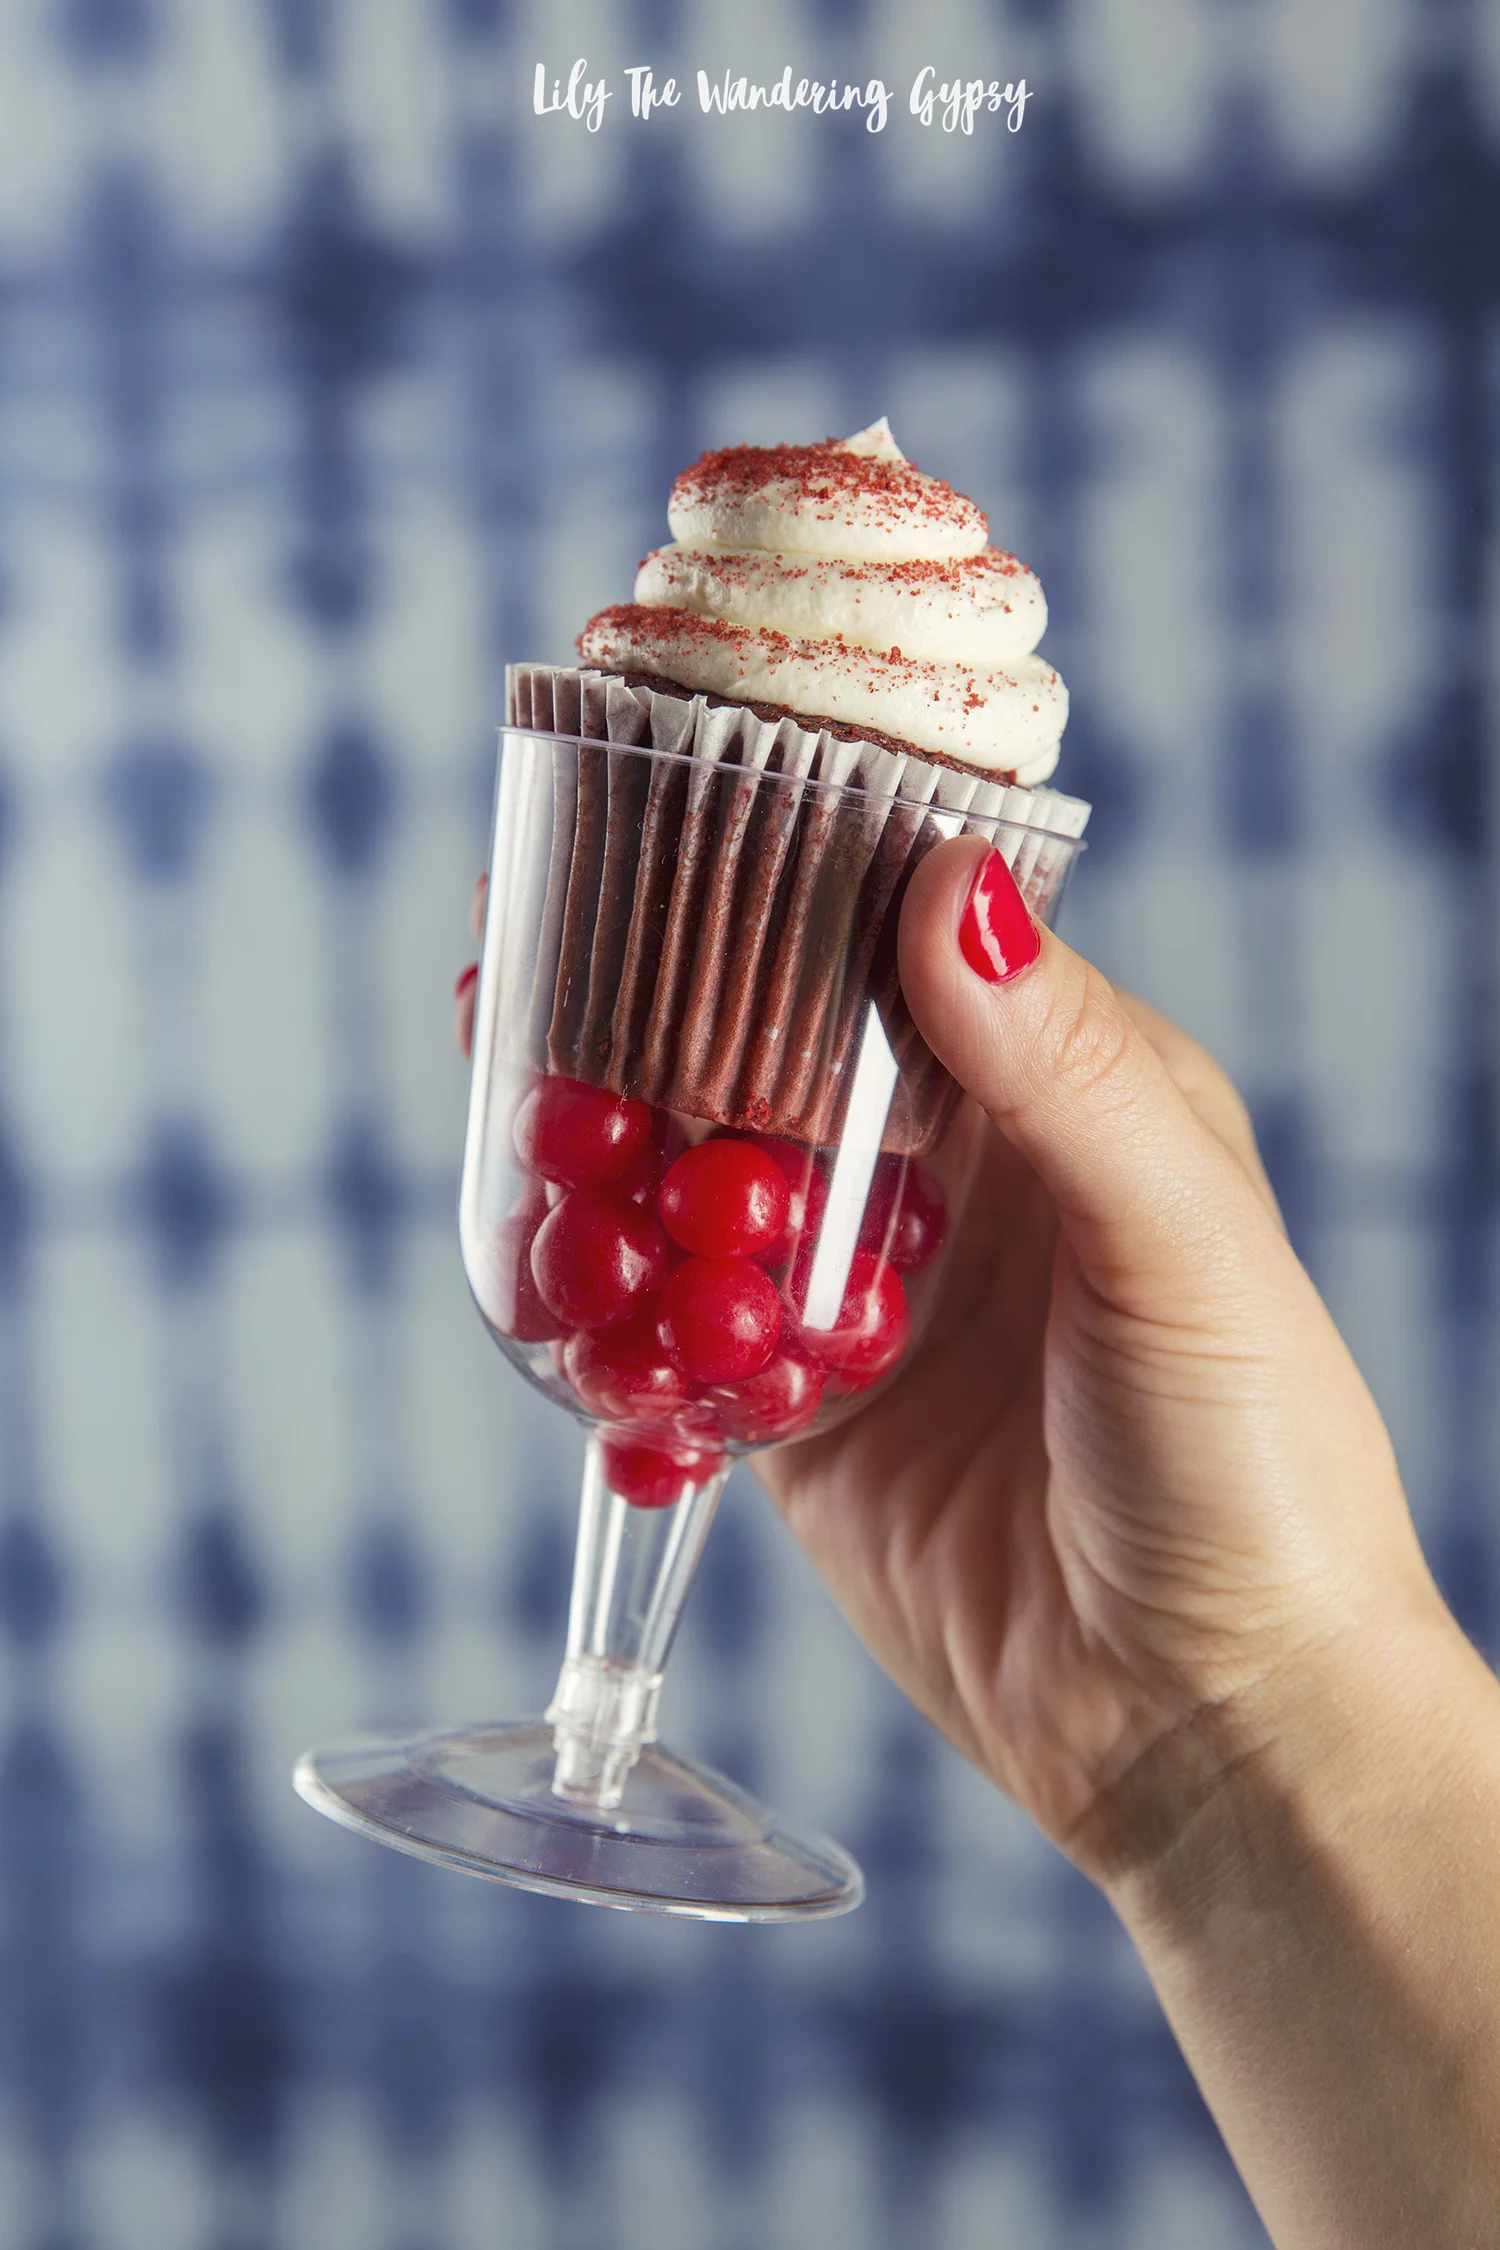
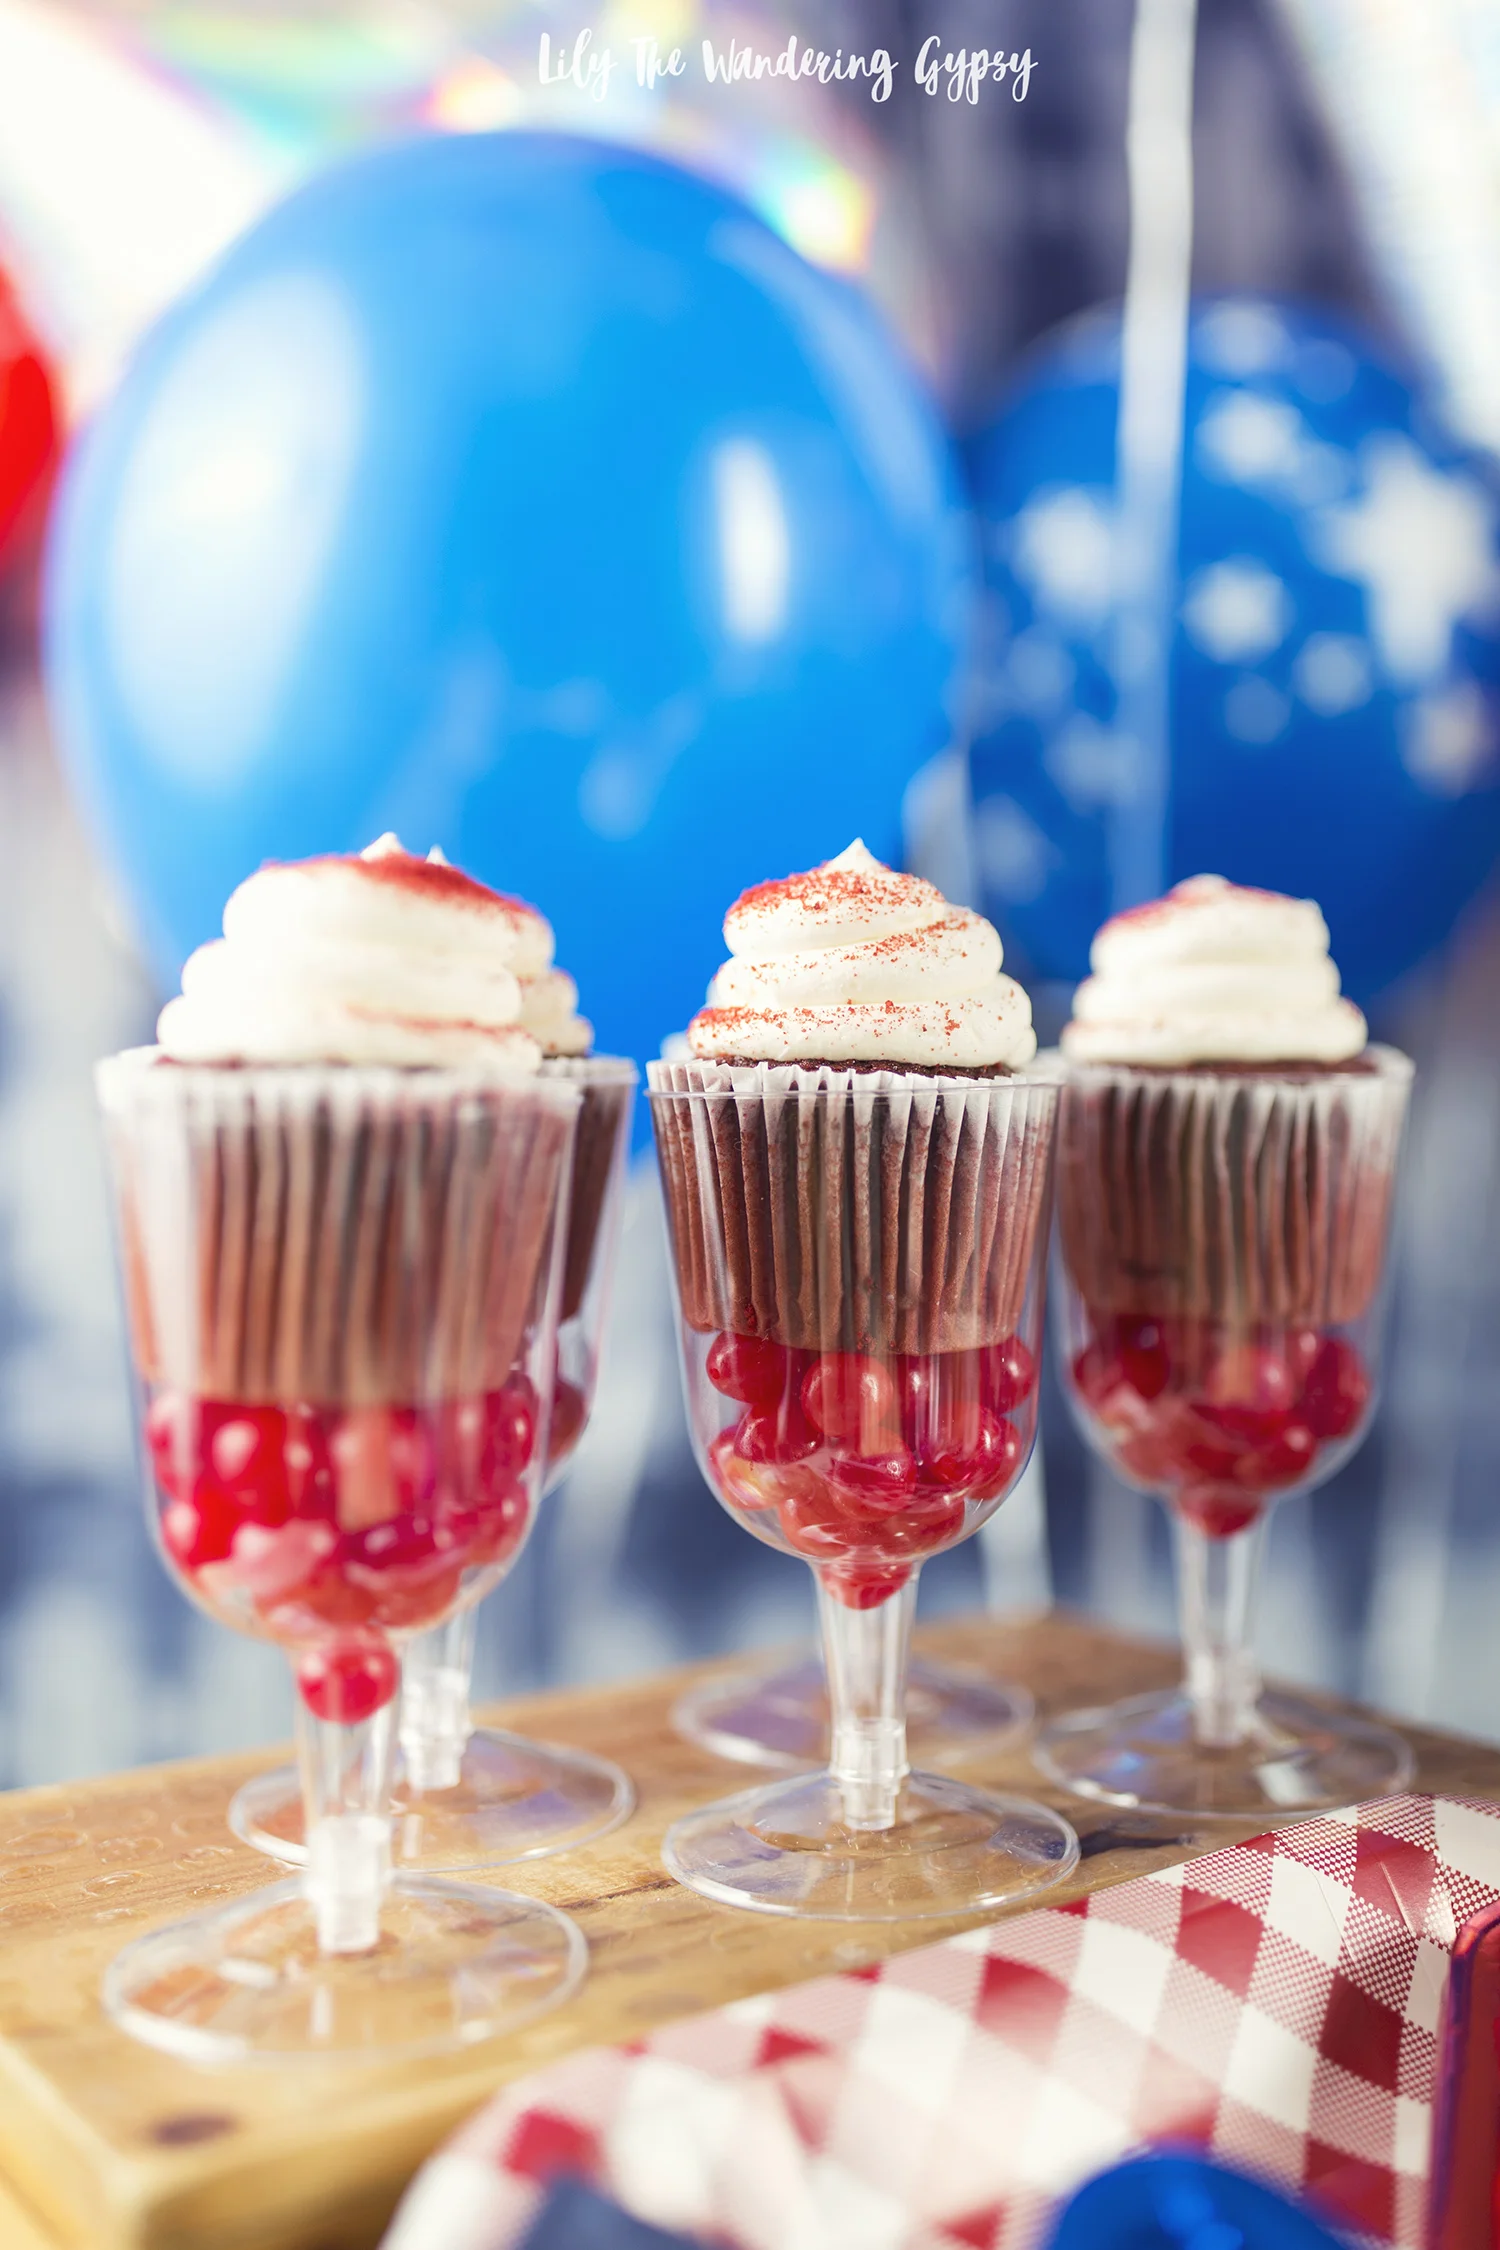
Red Velvet Cupcakes, Plastic Wine Glasses, Candies To Decorate
Simply fill glasses 1/3 full with colorful candies. Next, put the cupcake into each glass, and you have an elevated way to enjoy your cupcakes! This makes dessert very easy to carry around, too.
It's funny. The end of May in Illinois can offer gorgeous weather, chilly weather, rainy weather, or just plain HOT weather. Here in Illinois, we just come to enjoy those years when we get good weather for holidays, but it's never 100% for sure that we will even want to be outside. SO, I designed this party for an indoor OR outdoor gathering!

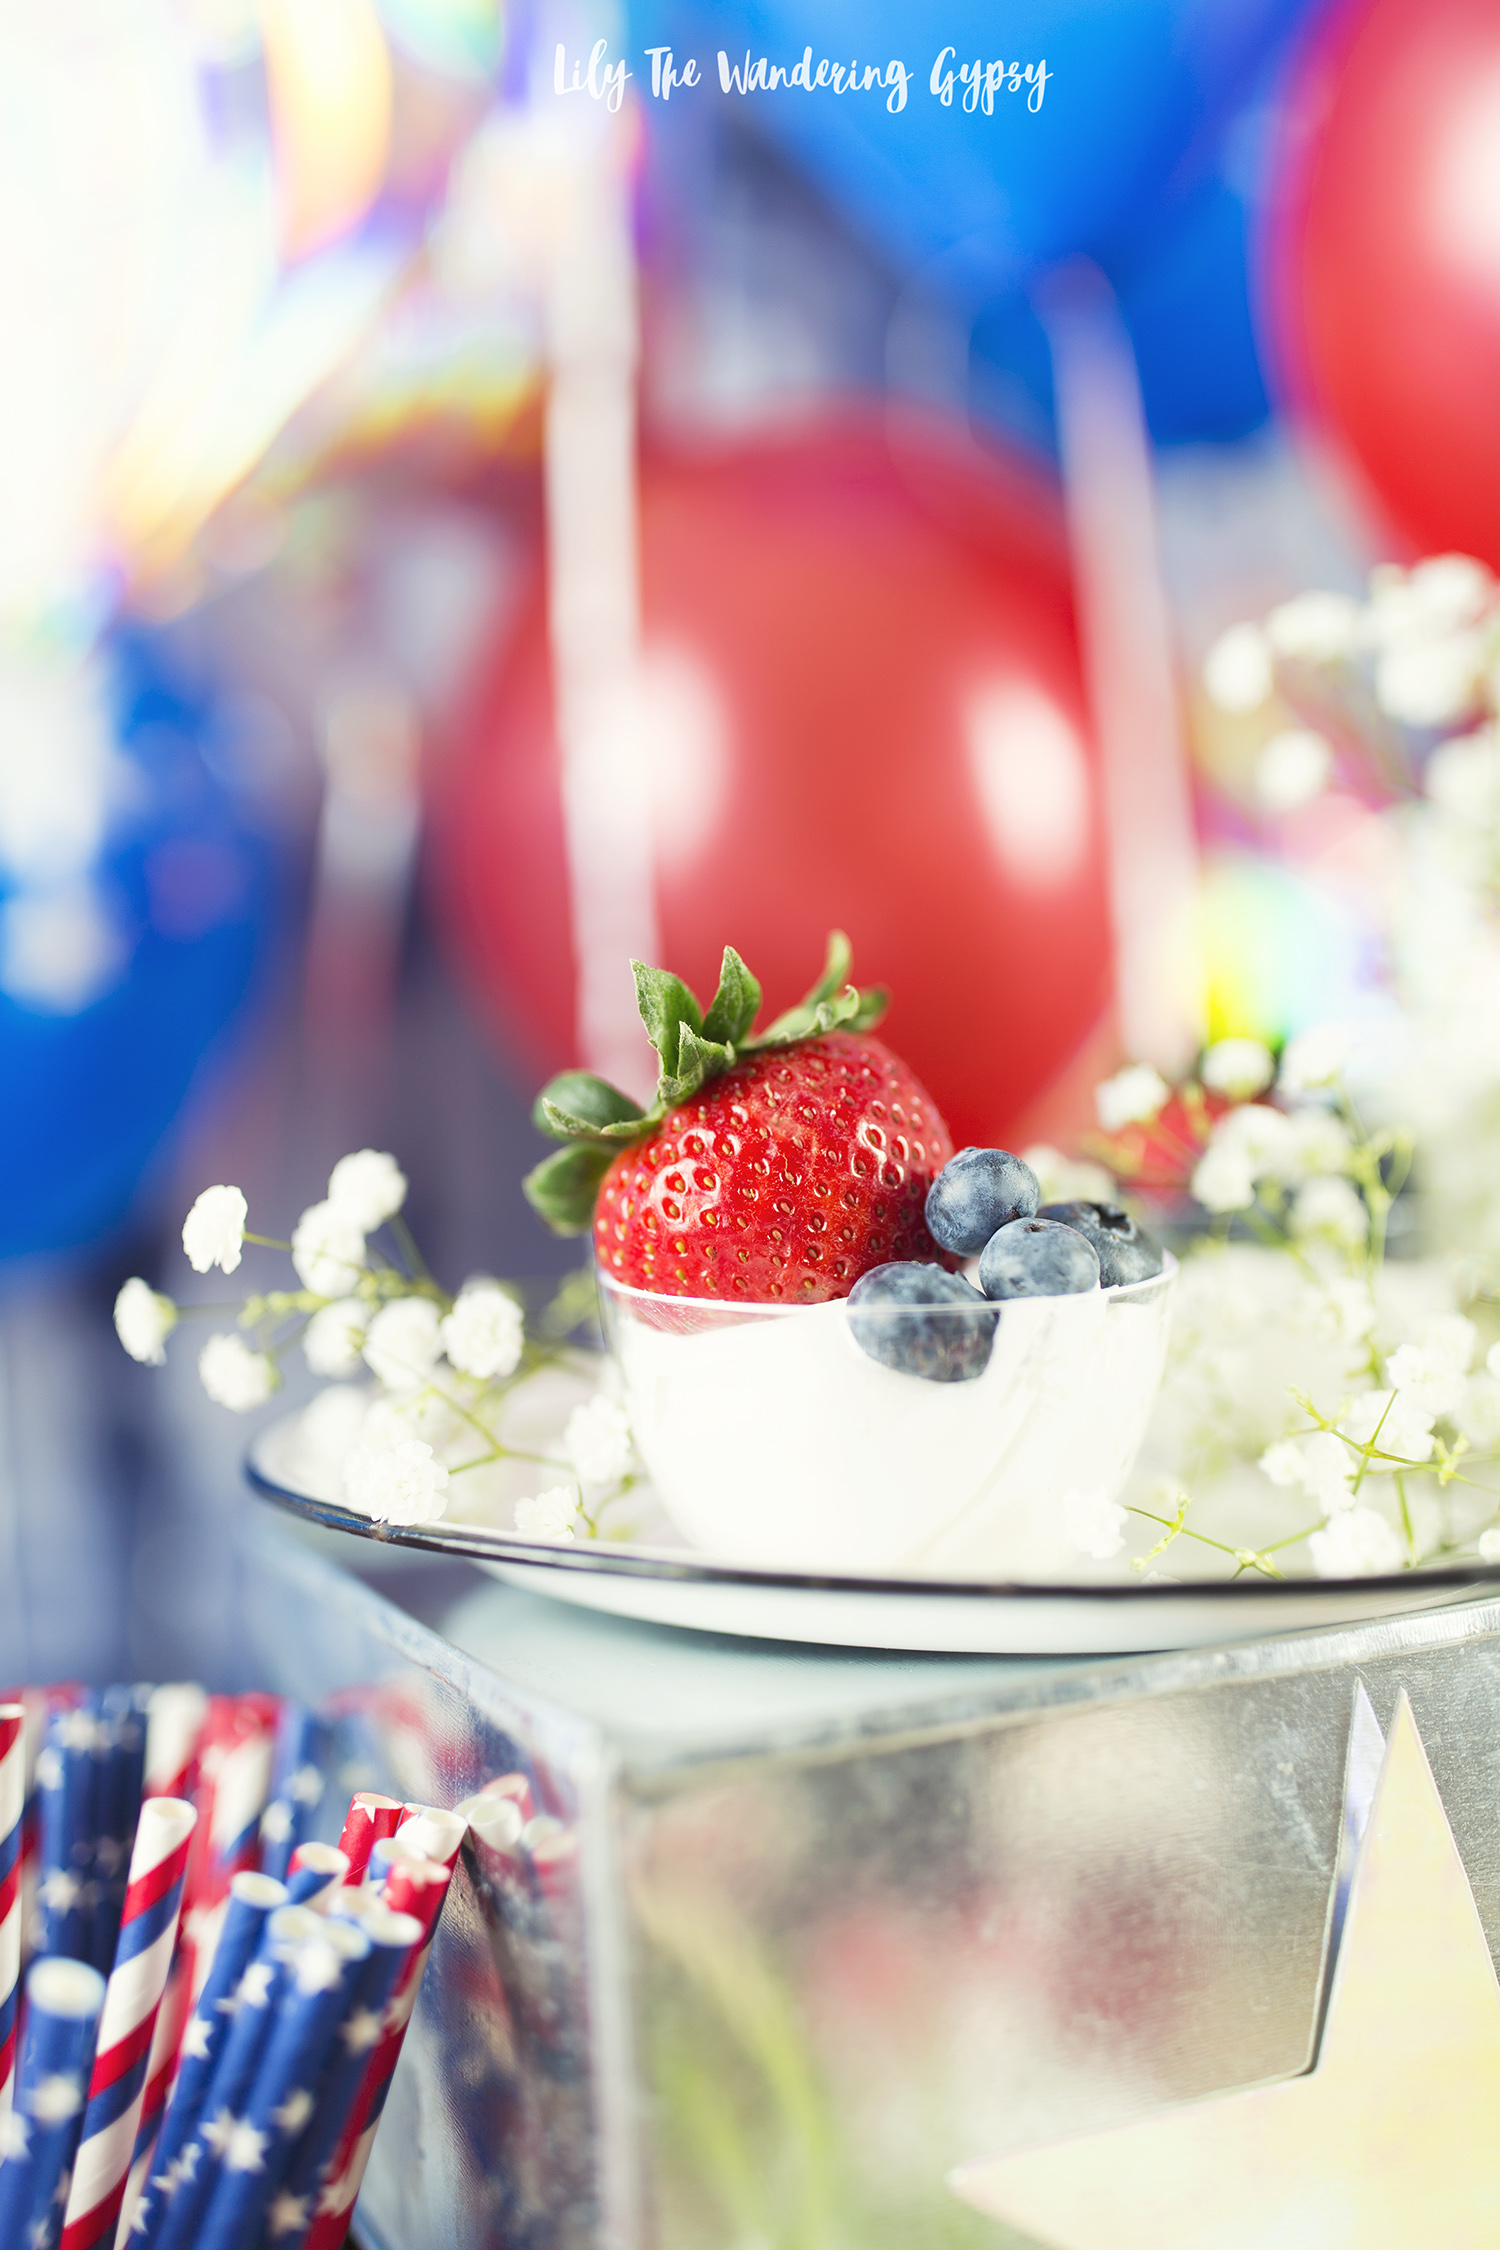
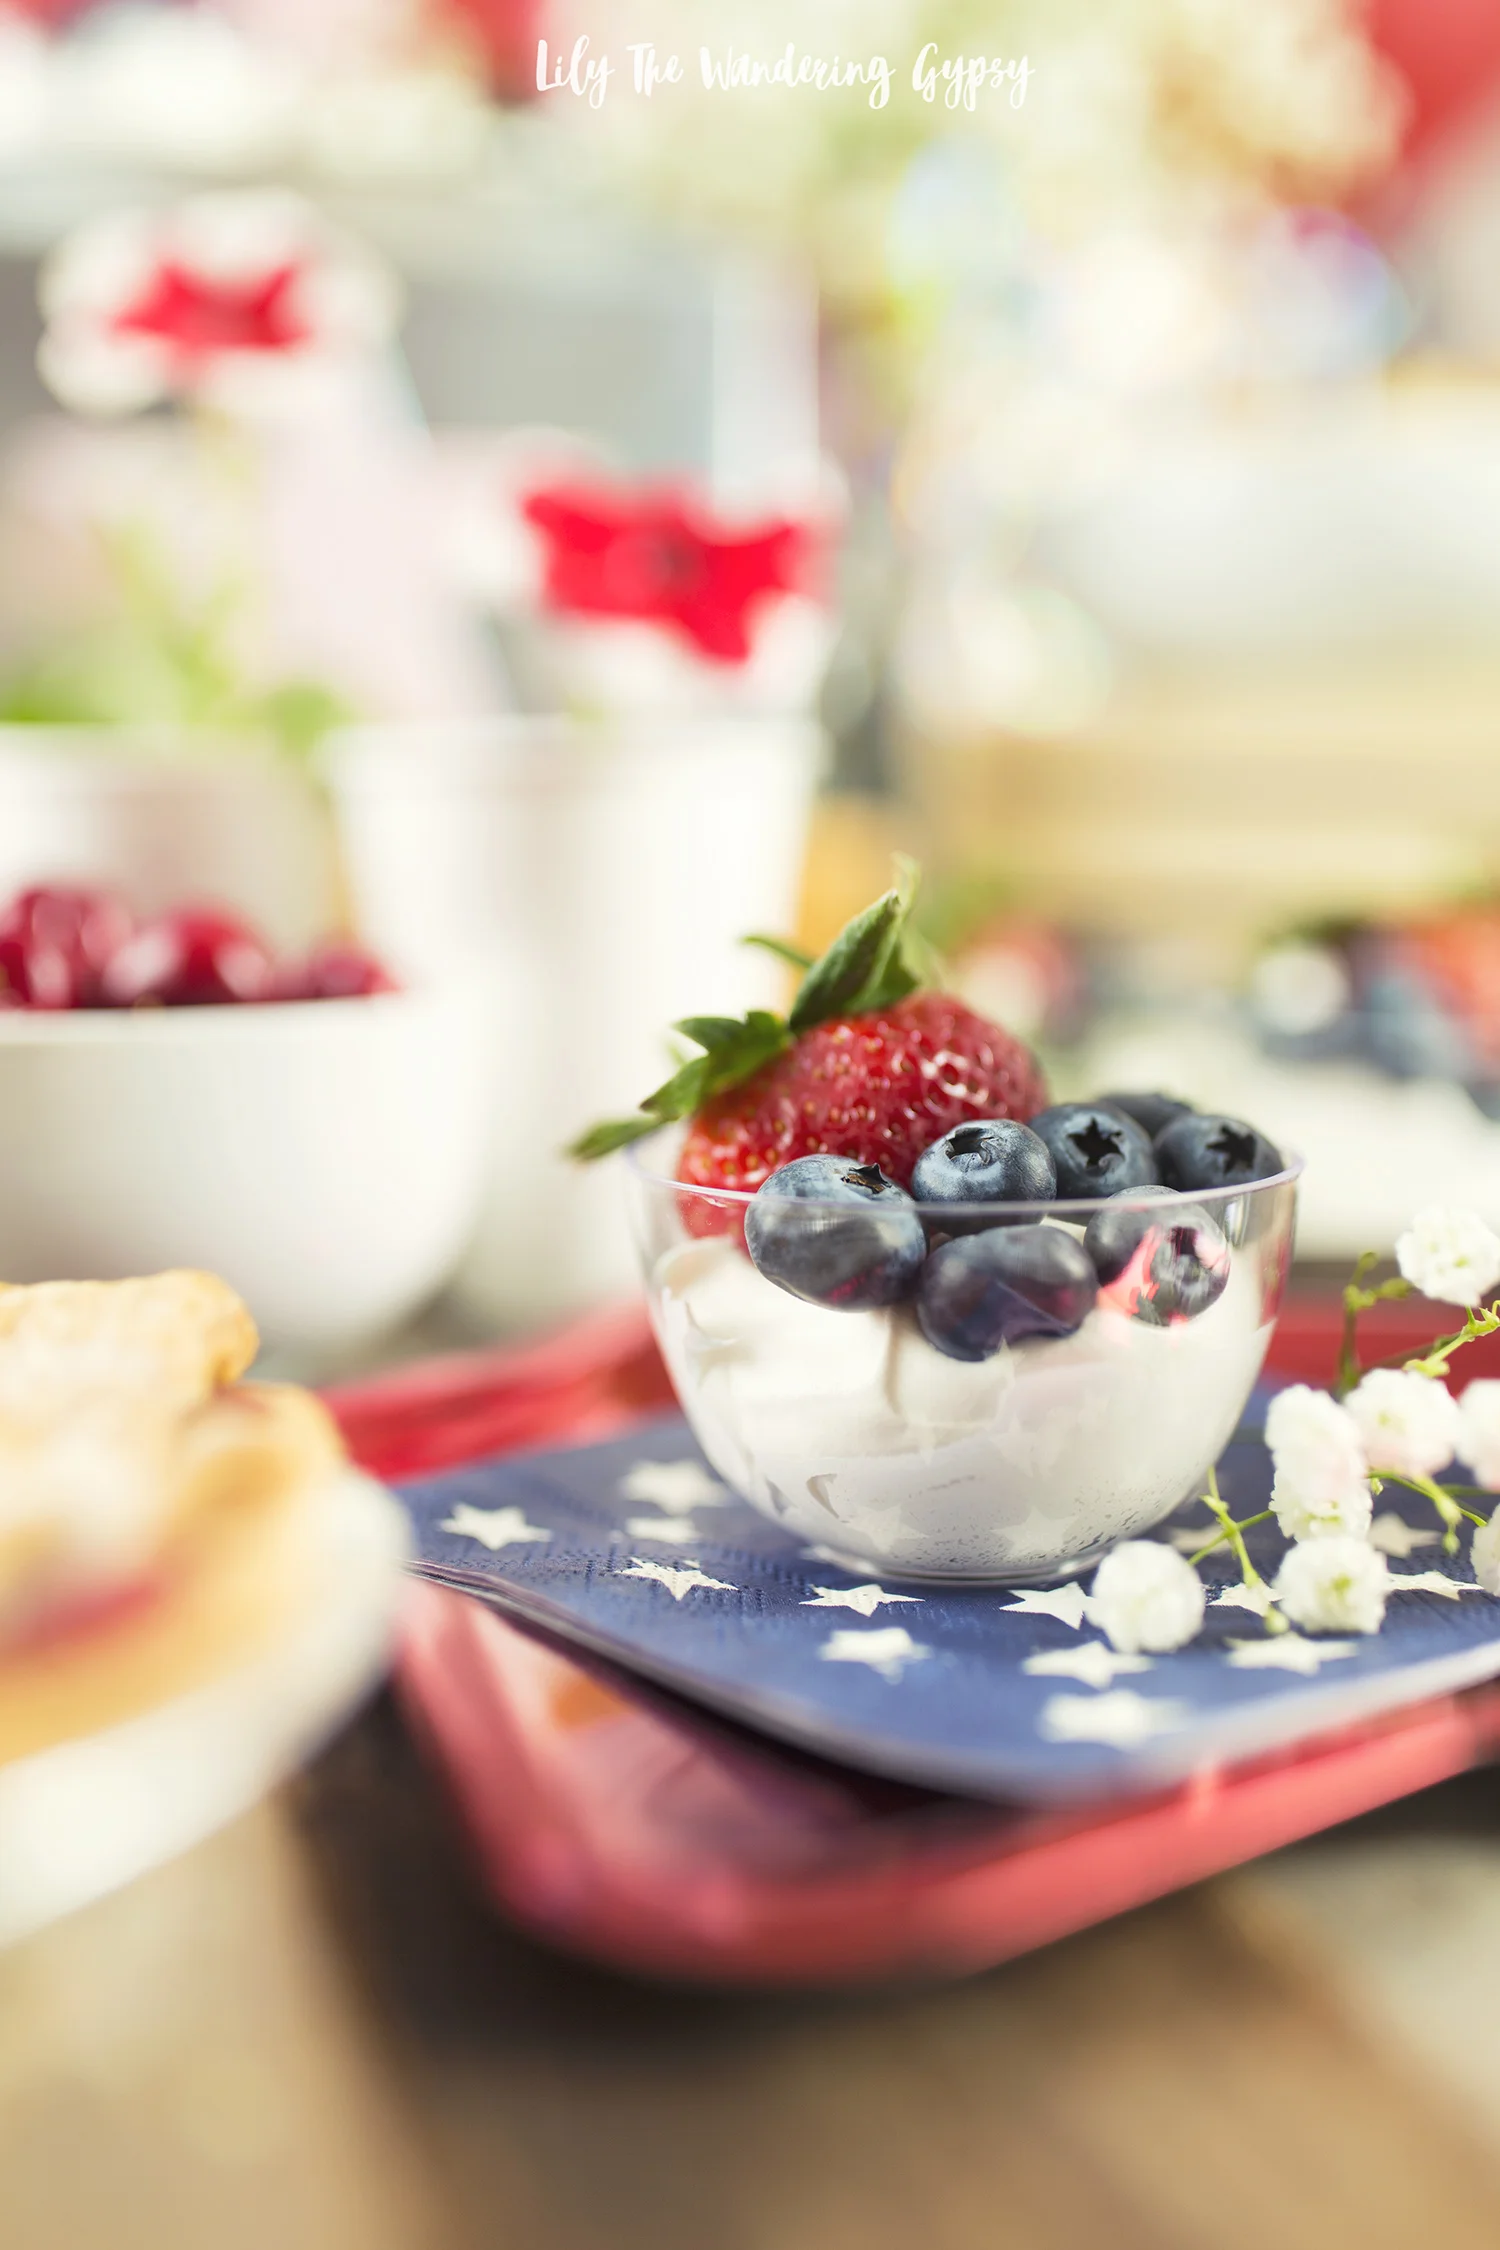
I found this pack of 6 tiny, plastic dessert bowls at the dollar store, and then, using an ice cream scoop, I added a scoop of cool whip to each bowl. Next, I added one full strawberry to each cup, and then about 6-8 blueberries to one side. These taste SO good, and will be easy for guests to enjoy. Also, I would only recommend making these about 30 minutes before serving, because the strawberries get mushy if you wait much longer. But, I love how these turned out so much!

Thanks so much for joining me to learn more about my latest party! I hope you have gotten lots of great party ideas too.

Enjoy!
This is a sponsored conversation written by me on behalf of Balloon Time. The opinions and text are all mine.
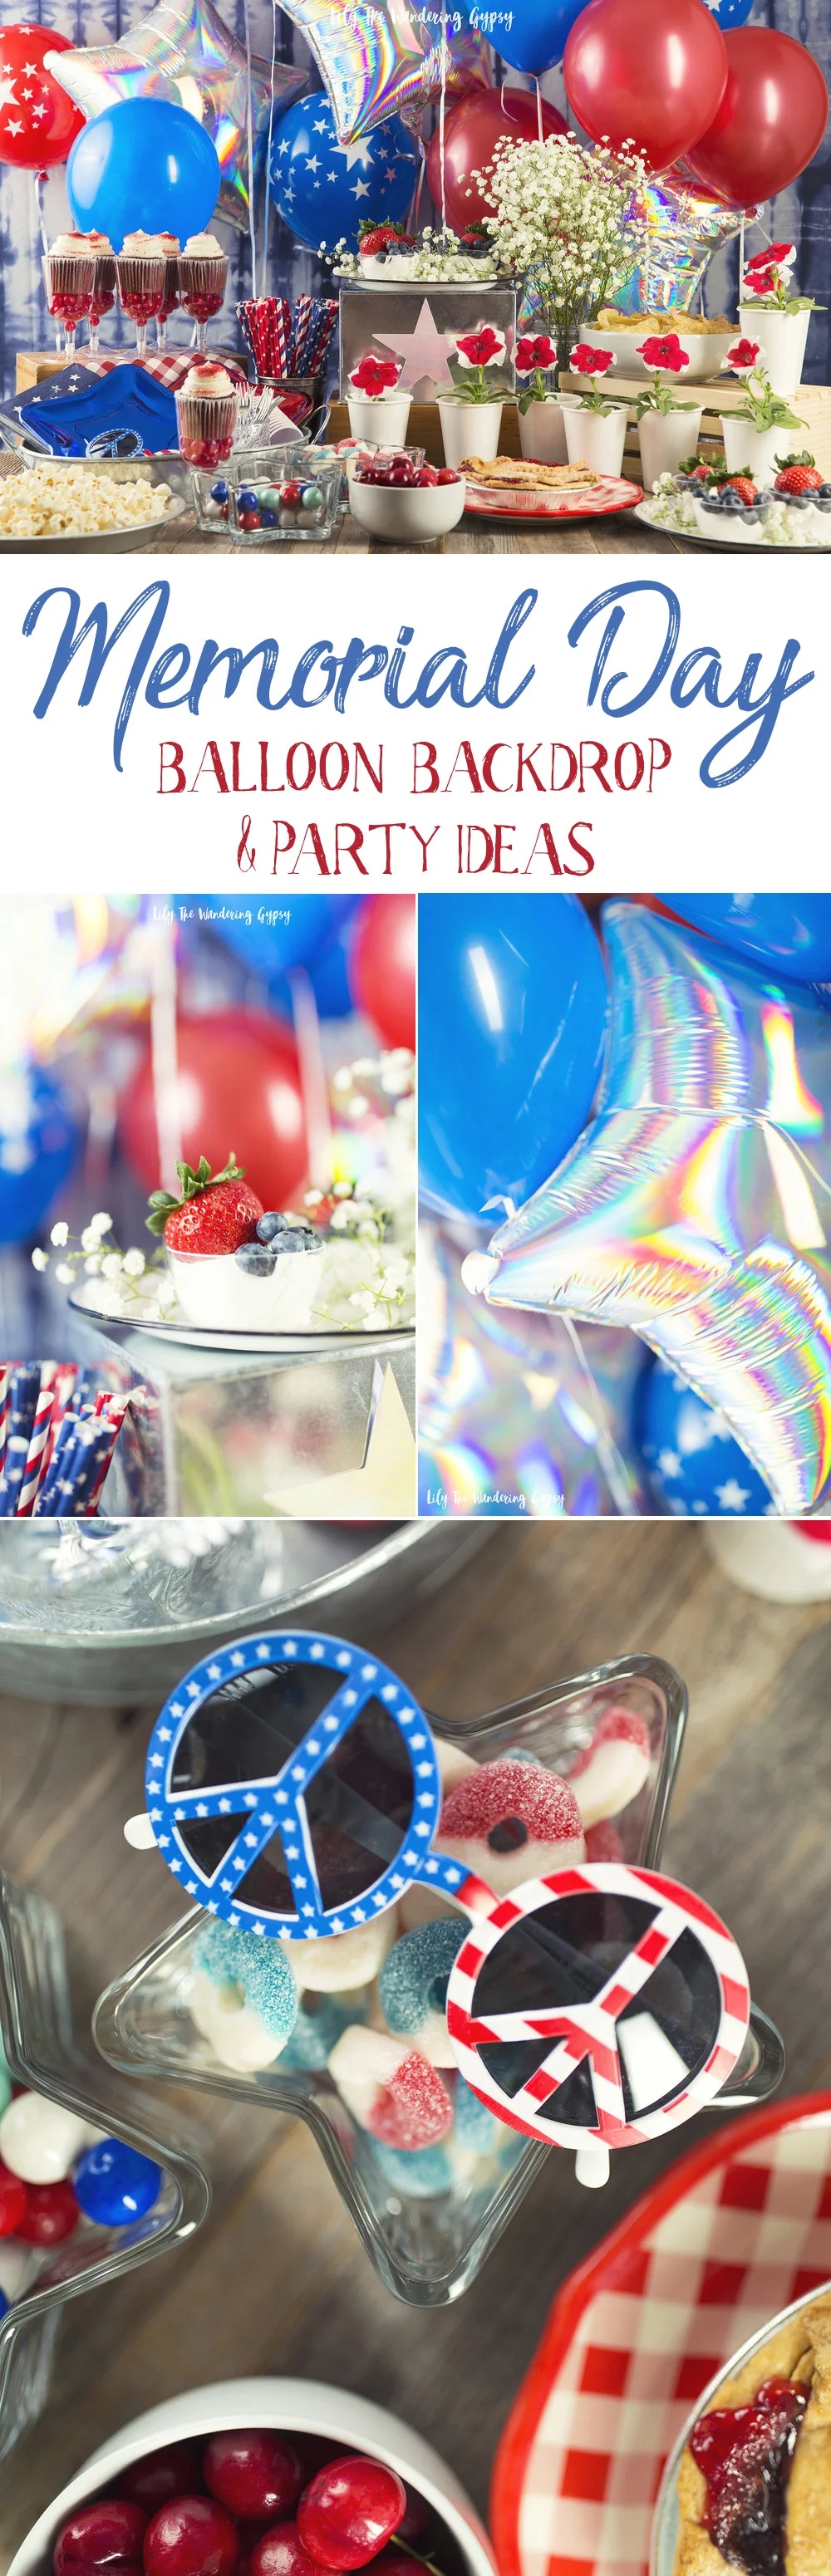
PIN IT FOR LATER:

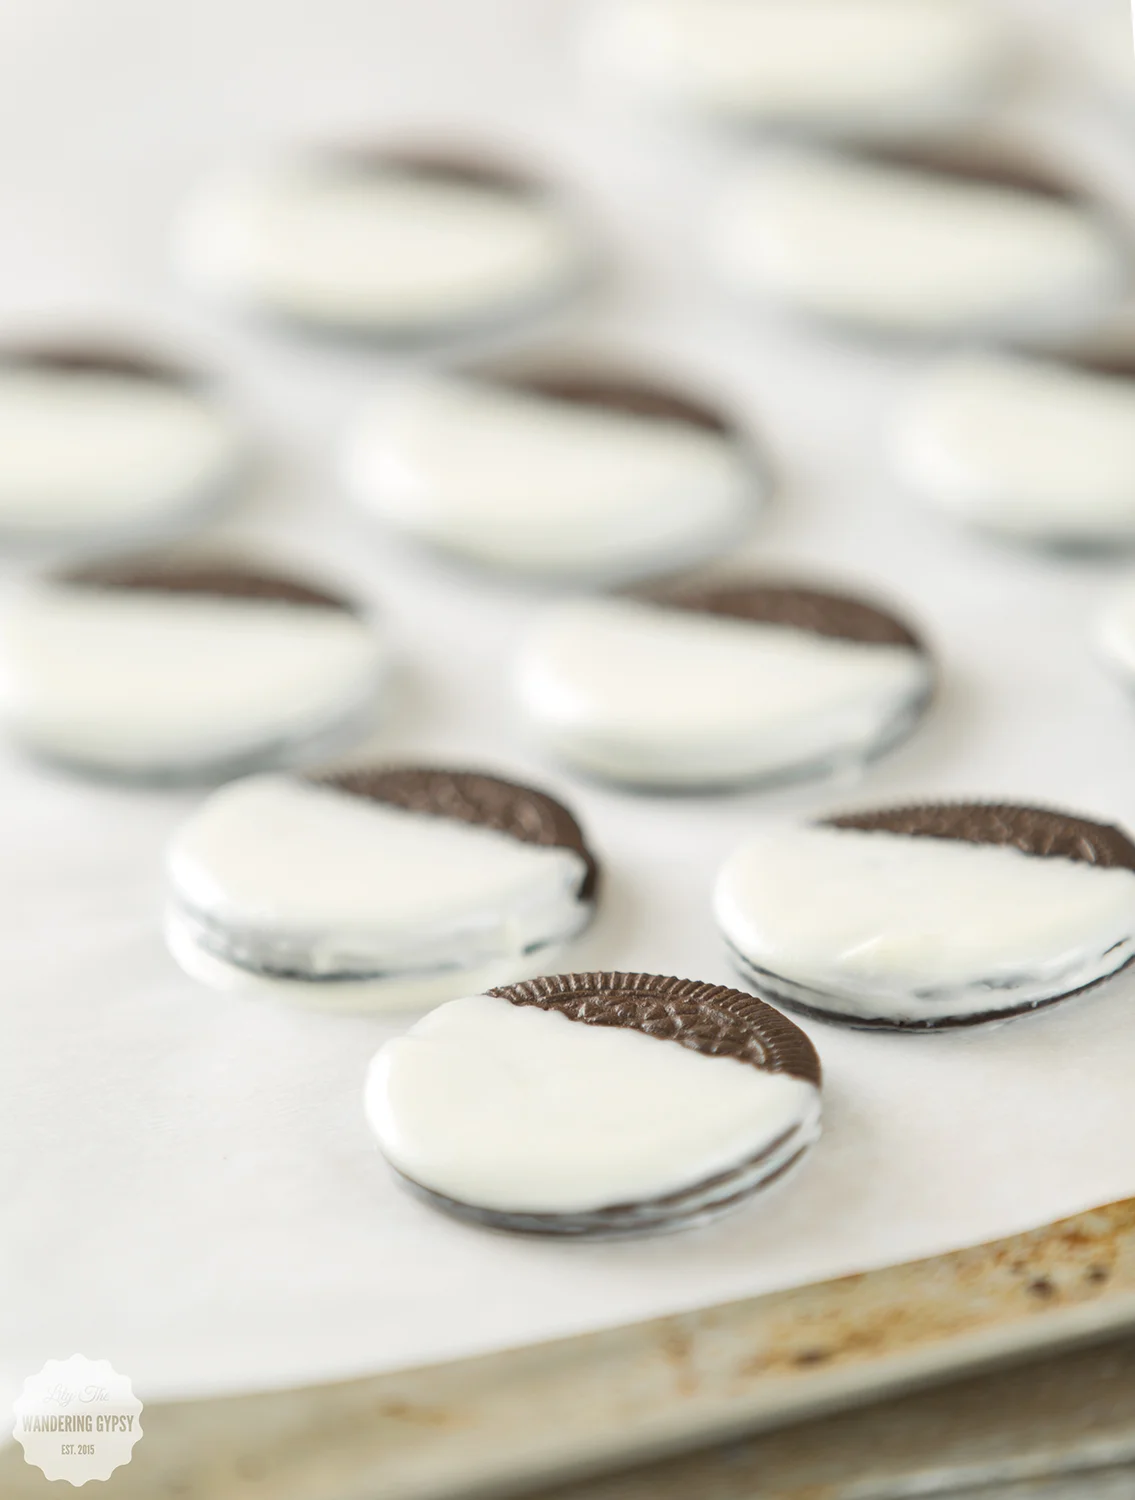
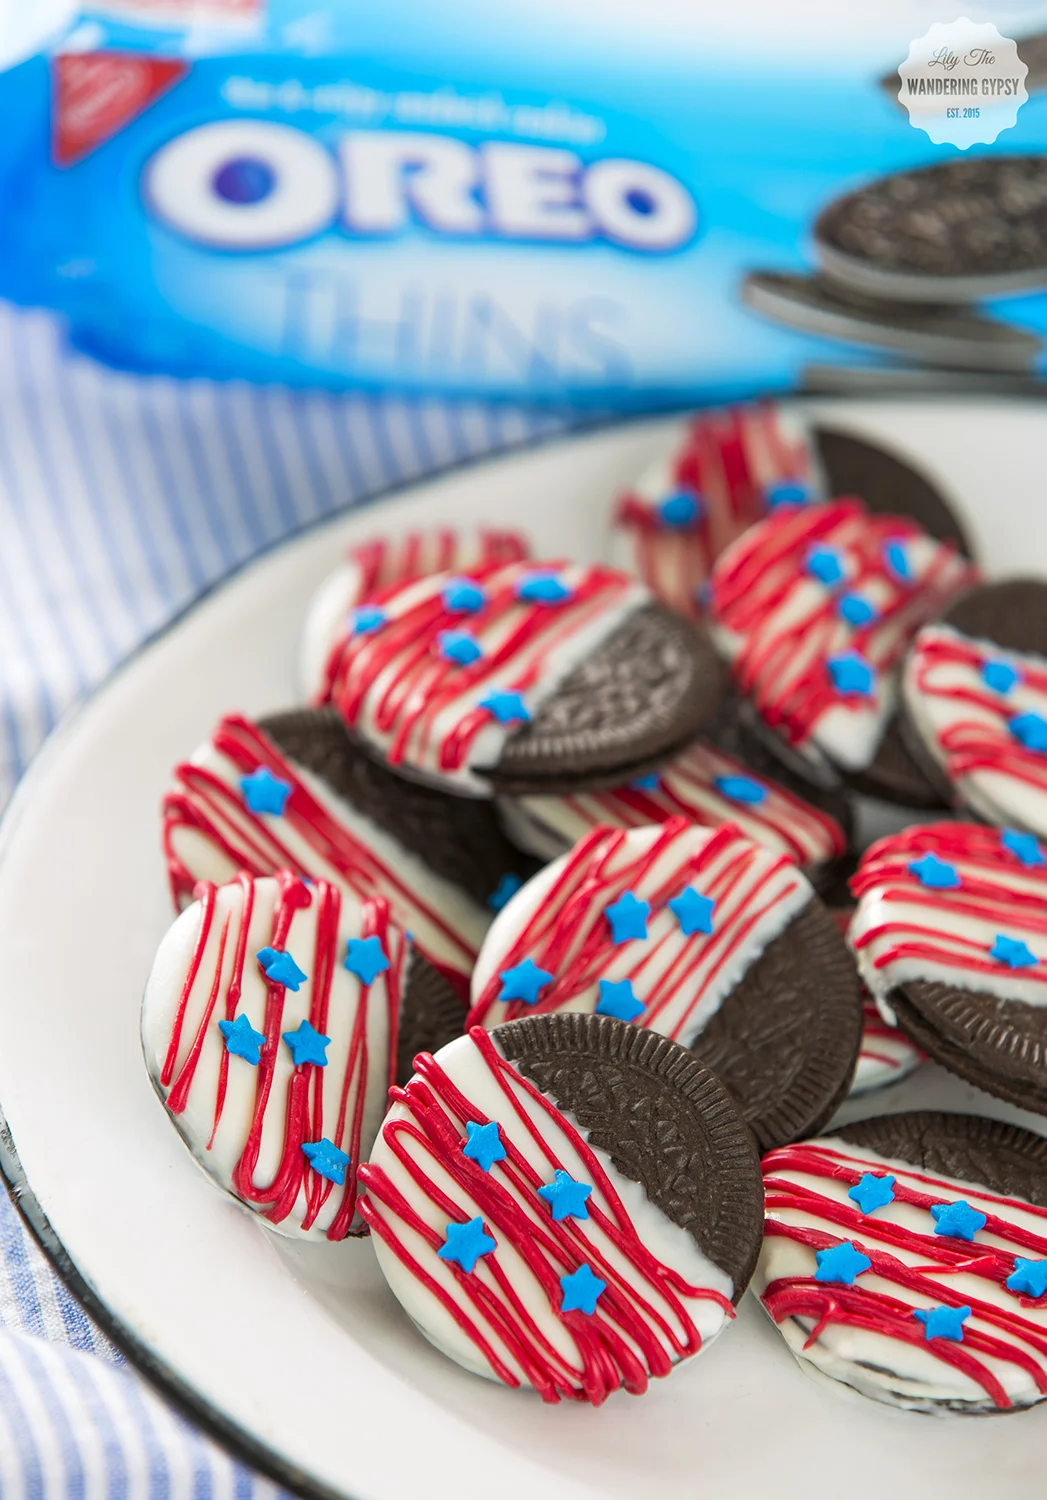
Elegant Chocolate-Dipped Patriotic Oreos

Have you noticed that most candy/chocolate stores offer chocolate-dipped Oreos among their other chocolate bon-bons and other confections? I have always been amazed by this, because they are SO incredibly easy to make. I figure, why not just make some of my own at home! I also wanted an excuse to check out the Oreo Thins that I have been seeing everywhere, so I thought this would be the perfect project!
Without further ado, here are my Elegant White Chocolate-Dipped Oreos, perfect for Labor Day Celebrations, and other times when you just wanna decorate some desserts!

- 1-2 packages of Oreo Thins (find them here)
- Ghirardelli Classic White Melting Wafers or White Chocolate Chips (find them here)
- Red Food Coloring Gel (this is the set I have) or red candy melts
- Blue Sprinkles (similar here)
- Glass jar to dip Oreos into (mine was the 8 oz. size, I believe)
- Skewer Stick
- Parchment Paper

1.) Melt white chocolate in a double boiler method or in the microwave, stirring regularly to make cure it's smooth and fully melted.
2.) Line a baking sheet with parchment paper.
3.) Transfer a portion the melted white chocolate to a jar that is about as deep as the Oreo Thins are wide. Leave about 1/2" of room from the chocolate to the top of the jar.
4.) Dip each Oreo Thin into the white chocolate, and dip in little over half way, leaving space at top.
5.) As you pull the cookie out of the jar of white chocolate, use a skewer stick to scrape excess chocolate off the back of the cookie, and around the sides. This is a great tip, that makes your cookies look way better and less gloppy as they dry.
6.) Put each cookie onto the parchment, and let cool completely.
7.) After you have dipped every cookie, pour more white chocolate into a jar, and add lots of red gel food coloring. This could also be done with red melting wafers.
8.) Transfer to Ziploc bag, and cut a tiny opening in one corner. ***Working one cookie at a time, add lines of red chocolate, then a few blue start sprinkles to each cookie. Practicing first helps!
9.) Enjoy your cookies! These would be perfect for a party or just enjoying at home!!!


An Easy Treat For Labor Day And Beyond
I have an awesome, tasty, and amazingly easy dessert idea for Labor Day festivities and beyond. Definitely want to admit that I did not make my own cupcakes, though - I got some delicious pre-made Red Velvet Cupcakes from our local Schnuck's grocery store, and also found the berries there too. But, the little special touches always make people smile, so you can recreate your own by simply adding some blueberries and raspberries to some cupcakes of your own. You could even grab the 3 ingredients on your way to a party, and decorate the desserts when you arrive! I also love how the seersucker fabric and little silver stars confetti makes for a patriotic yet elegant decor idea for any holiday that's red, white, and blue!

If you do want to make your own Naturally Colored Red Velvet Cupcakes, Food52 has an awesome recipe that uses beets (instead of red food coloring) - which is incredible!
NATURALLY DYED RED VELVET RECIPE FROM FOOD52:
For the cake:
- 1 cup beet purée, from fresh red beets (not cooked)
- 3/4 cup buttermilk
- 1 tablespoon white wine vinegar
- 2 tablespoons lemon juice
- 1 tablespoon vanilla extract
- 2 1/2 cups cake flour
- 3 tablespoons cocoa powder, not Dutch-process
- 2 teaspoons baking powder
- 1 teaspoon cream of tartar
- 1 teaspoon salt
- 1/2 cup neutral-flavored oil
- 1/2 cup unsalted butter, softened
- 2 cups granulated sugar
- 3 large eggs
For the cream cheese frosting:
- 8 ounces cream cheese, at room temperature
- 8 ounces unsalted butter
- 2 tablespoons crème fraîche
- 1 pound confectioners' sugar
- 1/2 teaspoon lemon zest
- 1 teaspoon vanilla extract
- 1 pinch salt
Instructions:
Add the beet purée, buttermilk, vinegar, lemon juice, and vanilla extract to a food processor fitted with the steel blade and process until very smooth.
Sift the cake flour, cocoa powder, baking powder, cream of tartar, and salt together in a bowl. Beat the sugar, oil, and butter together in a large bowl until creamy, then add the eggs one at a time, mixing for 30 seconds after each addition.
Alternate adding the flour mixture and beet mixture to bowl, beginning and ending with the flour mixture. Divide between the cupcake papers and bake until a cake tester inserted into the center of the cake comes out clean, 20 to 22 minutes.
Cool the cupcakes on a rack for 20 minutes or more. Then, get the icing ready.
To make the frosting, beat the butter and cream cheese together on high speed until fluffy and smooth, then add the crème fraîche. Turn the mixer to low and gradually add the confectioners' sugar until just combined, then turn the mixer up to medium-high and beat until fluffy and smooth, making sure to stop the mixer and scrape down to the bottom of the bowl so everything is evenly mixed. Add the lemon zest, vanilla extract, and salt. Enjoy!

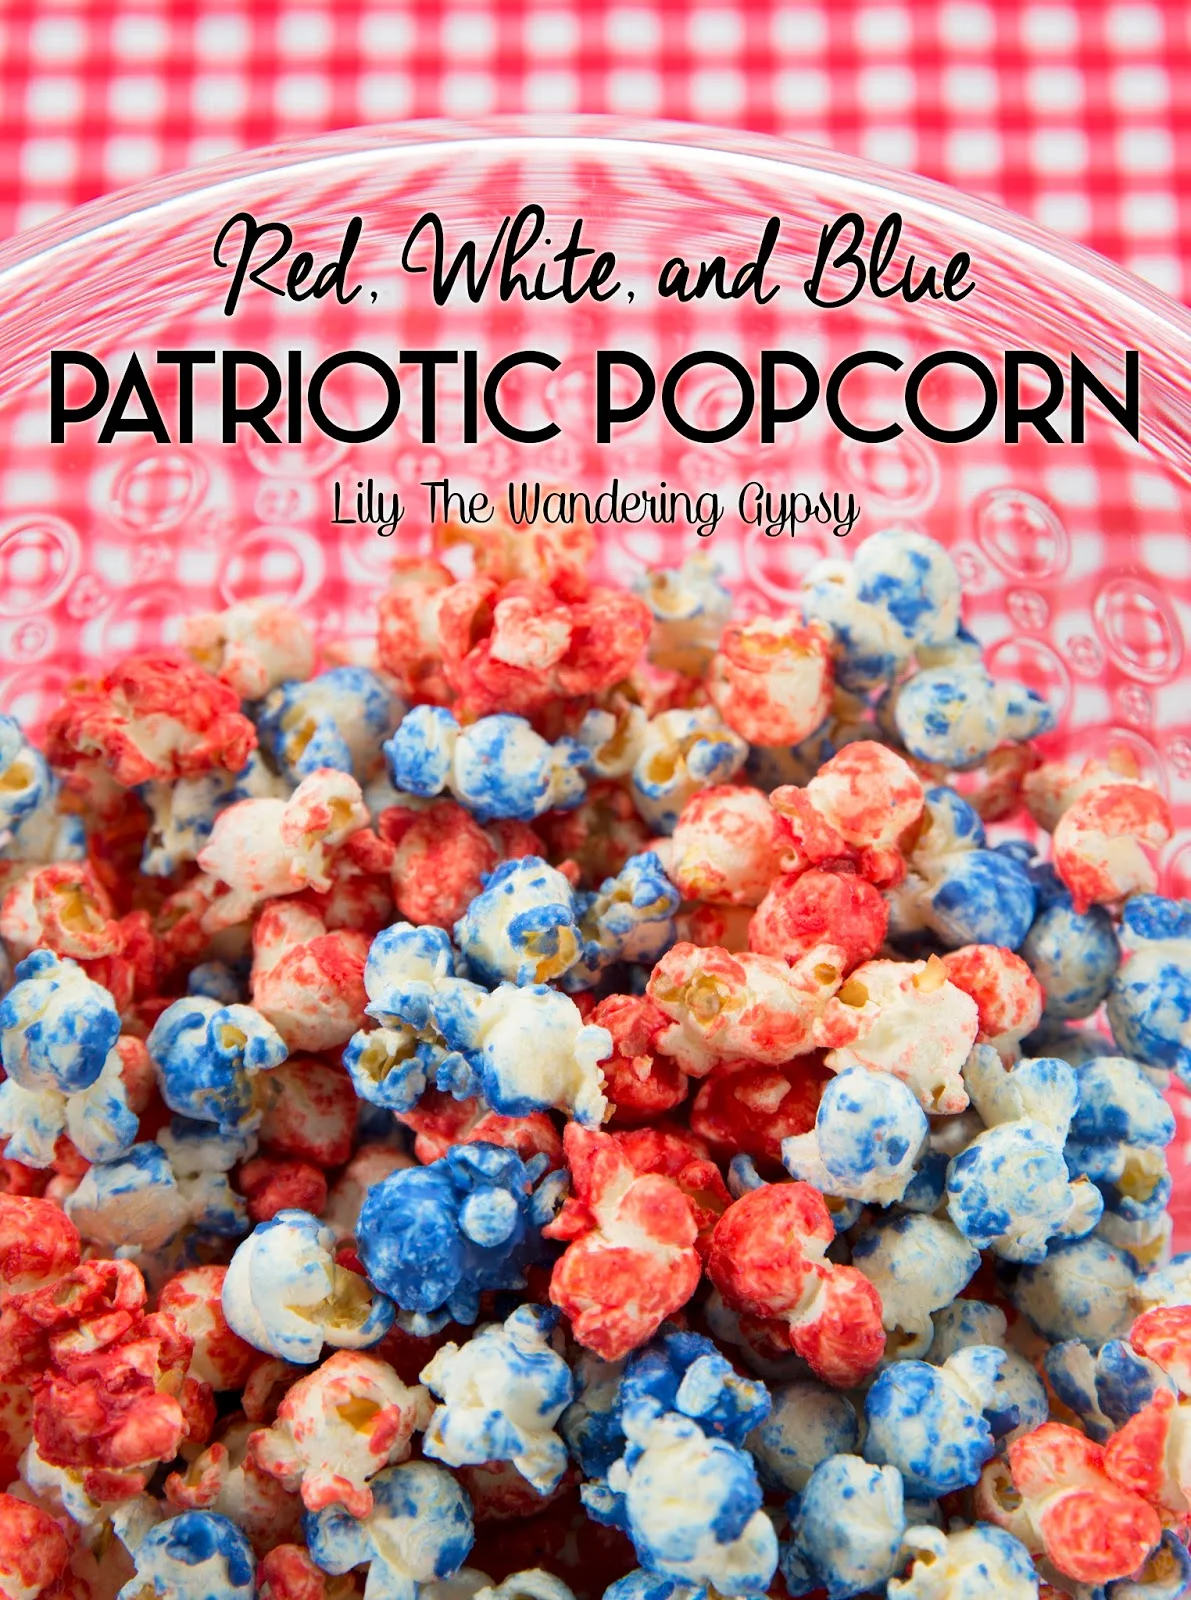
Happy Veteran's Day!
I wanted to share a super quick and easy recipe to add to your Veteran's Day fun! You may already have these two simple ingredients at home, so let's get started!
INGREDIENTS
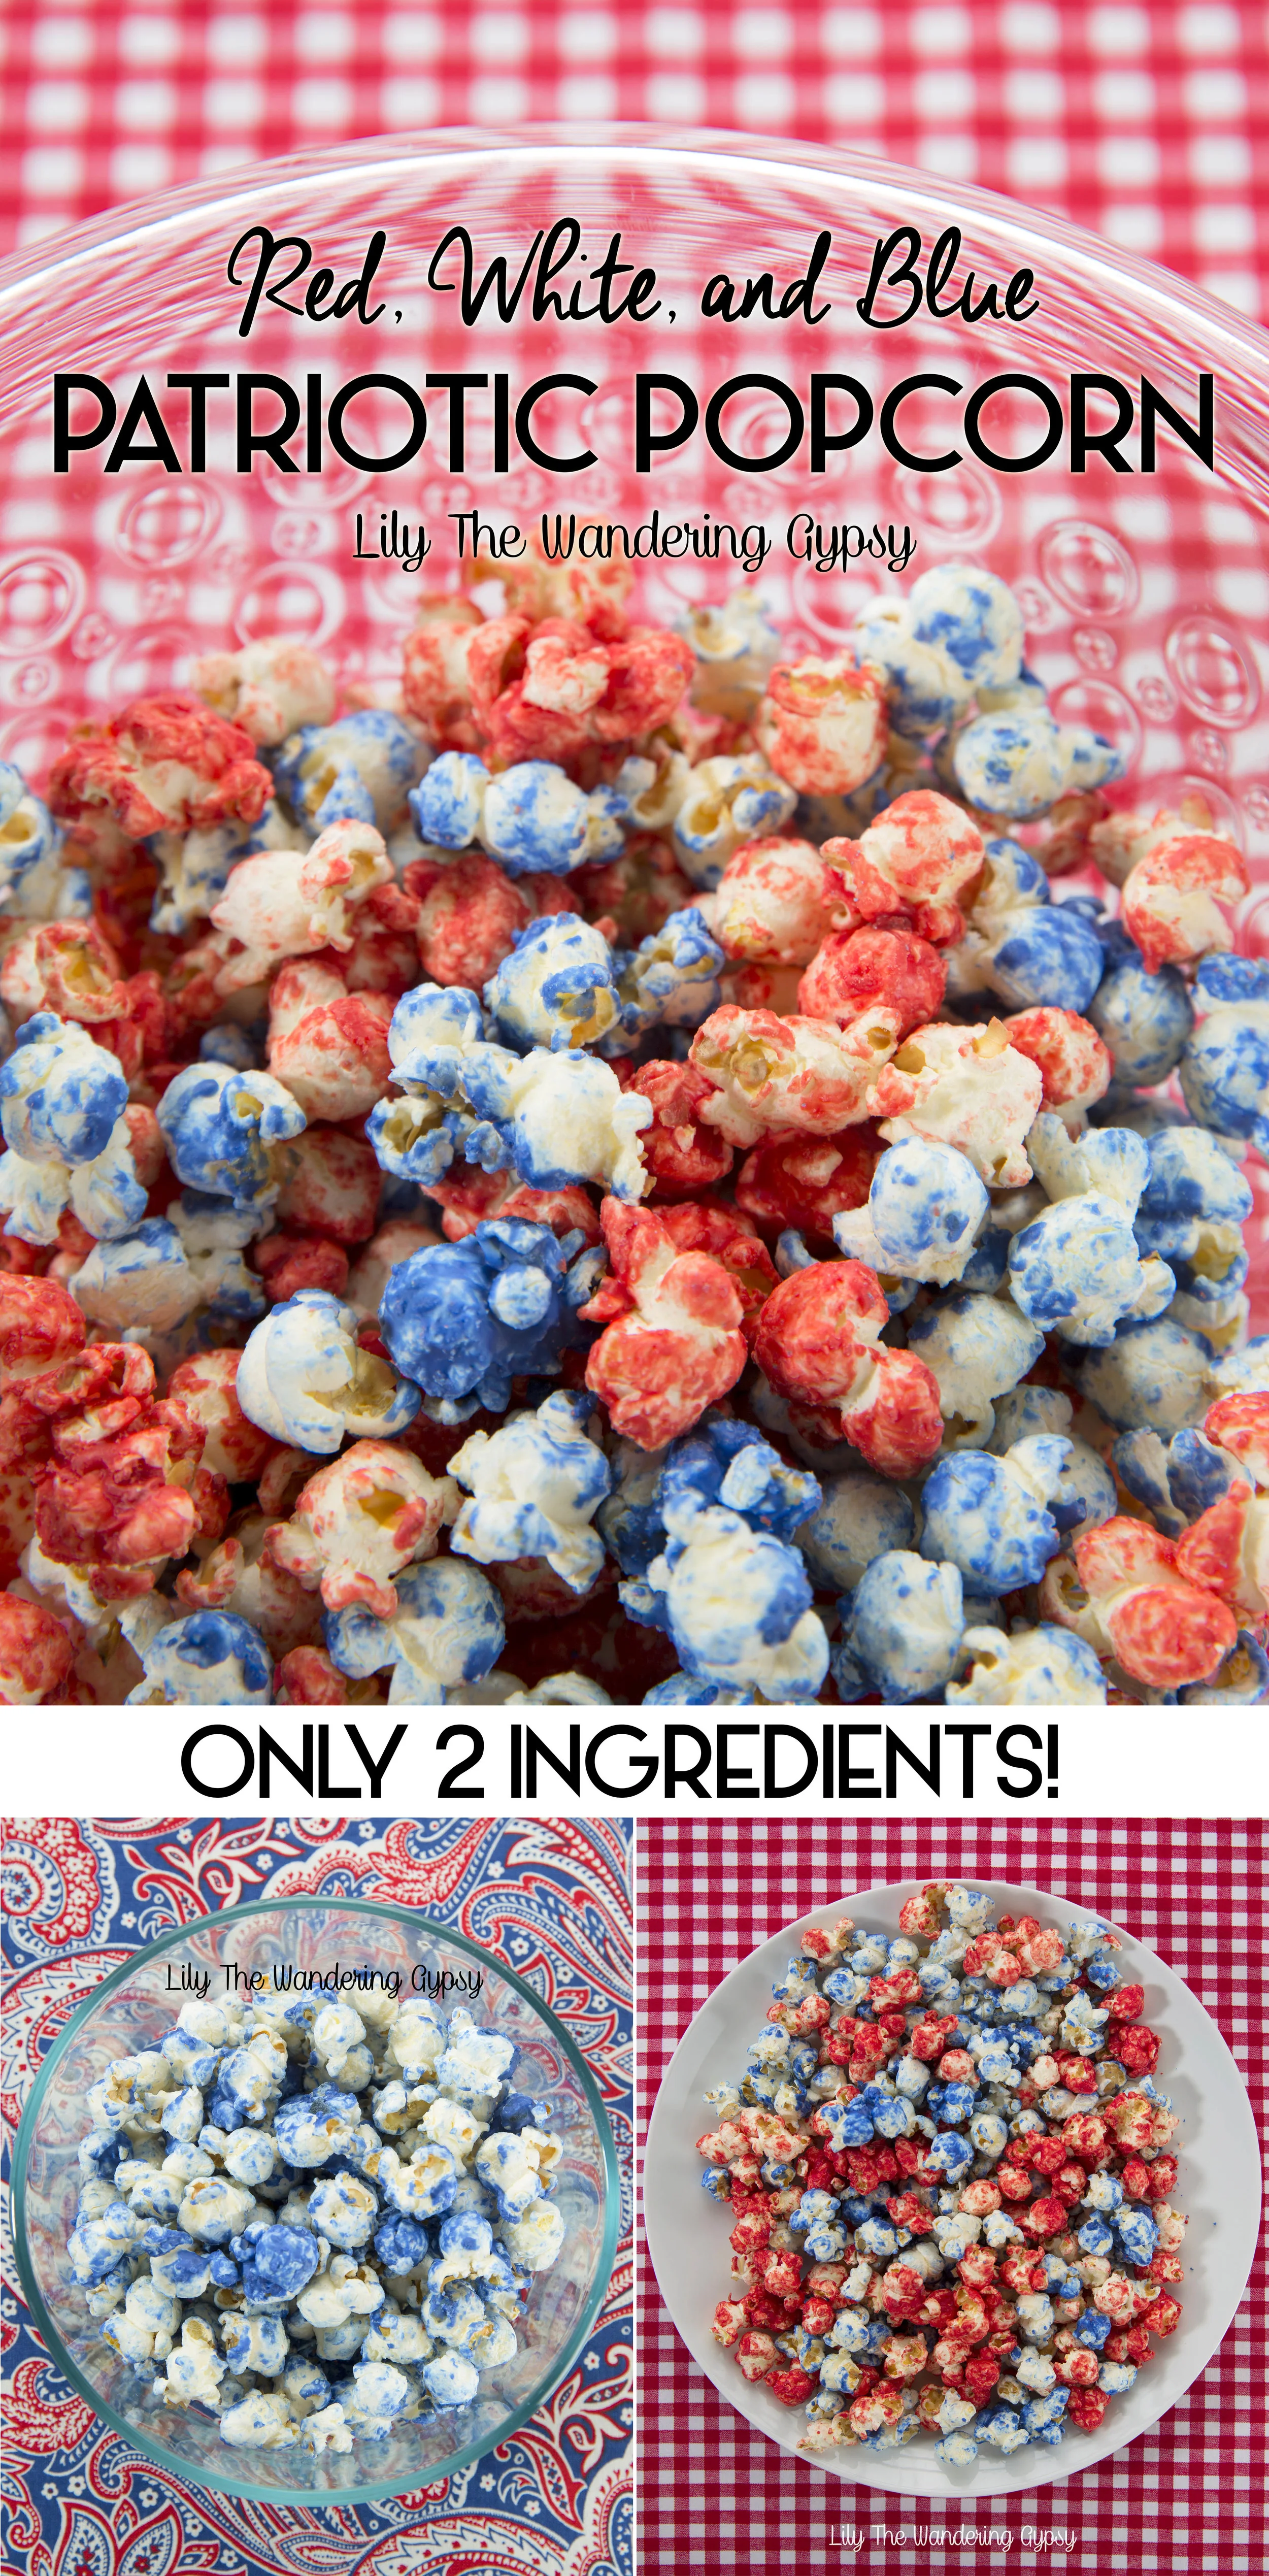
- One Bag of Lightly Salted Pop Corn - I used something like this. *Do not use white cheddar, it won't taste as good* - You can also quickly pop some at home if you prefer!
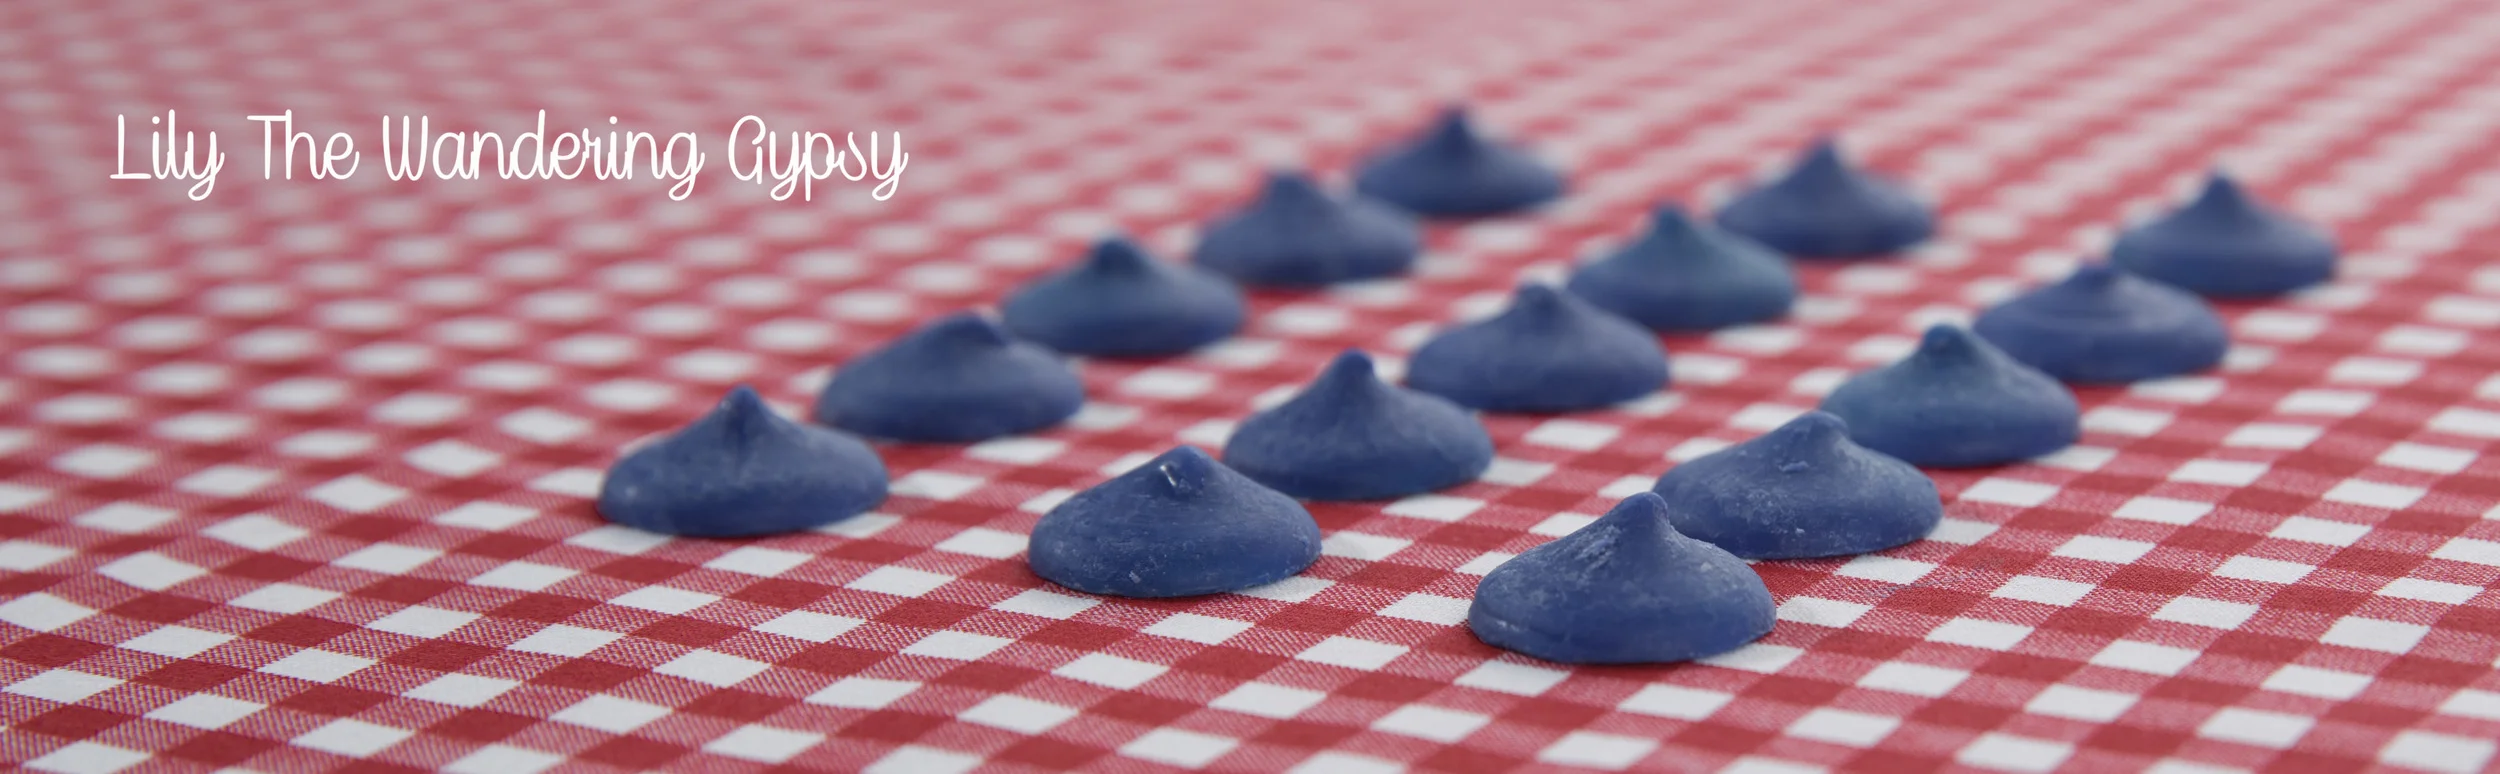
- One Bag Each of Blue and Red Candy Melts (pictured below).
That's it. Here are some blue candy melts, below.
OTHER SUPPLIES
Two medium sized microwave-safe dishes, and two heat-safe spatulas (one for red, one for blue).
INSTRUCTIONS
1.) Decide how much popcorn you want to use. You will need 8 candy melts per 1 cup of popcorn. The red ones coated the popcorn a bit more intensely than the blue ones did.
2.) Melt the candy melts in the microwave at half power for 1 minute and stir. Melt again for 30 second intervals until you are satisfied with the texture. If you don't wish to use a microwave, a stovetop double-boiler method is best. Be very careful, candy will be HOT!!! Let candy sit for a few minutes to cool. Here is more info on melting the candy melts.
3. In each bowl, put desired amount of popcorn. Carefully drizzle the candy melts over top of the popcorn and stir each color with a large spatula.
4. Let popcorn mixtures cool separately for about an hour, until candied popcorn has hardened and cooled to room temperature. Mix the blue and red popcorn together in a fresh serving bowl. Serve and enjoy.

Patriotic Recipes
I created a few recipes - inspired by Red, White, and Blue!
Check out this super-tasty, super-easy Patriotic Popcorn Recipe Here.
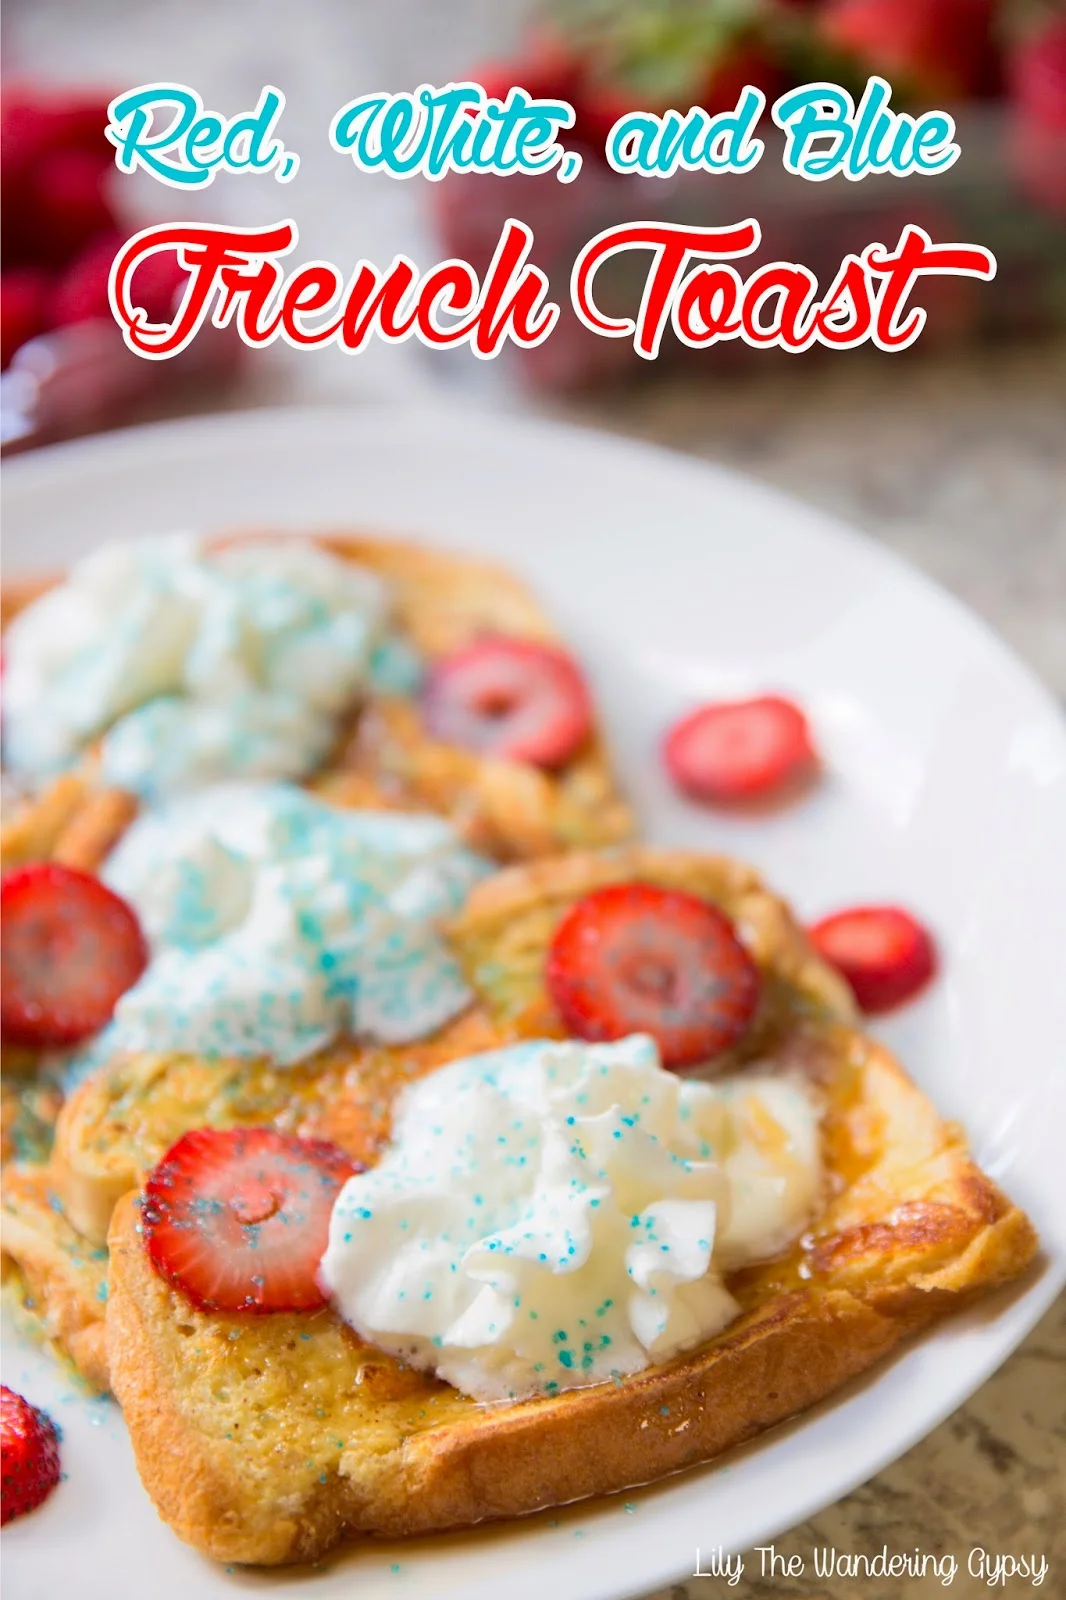
Red, White, and Blue French Toast Recipe - find it here.
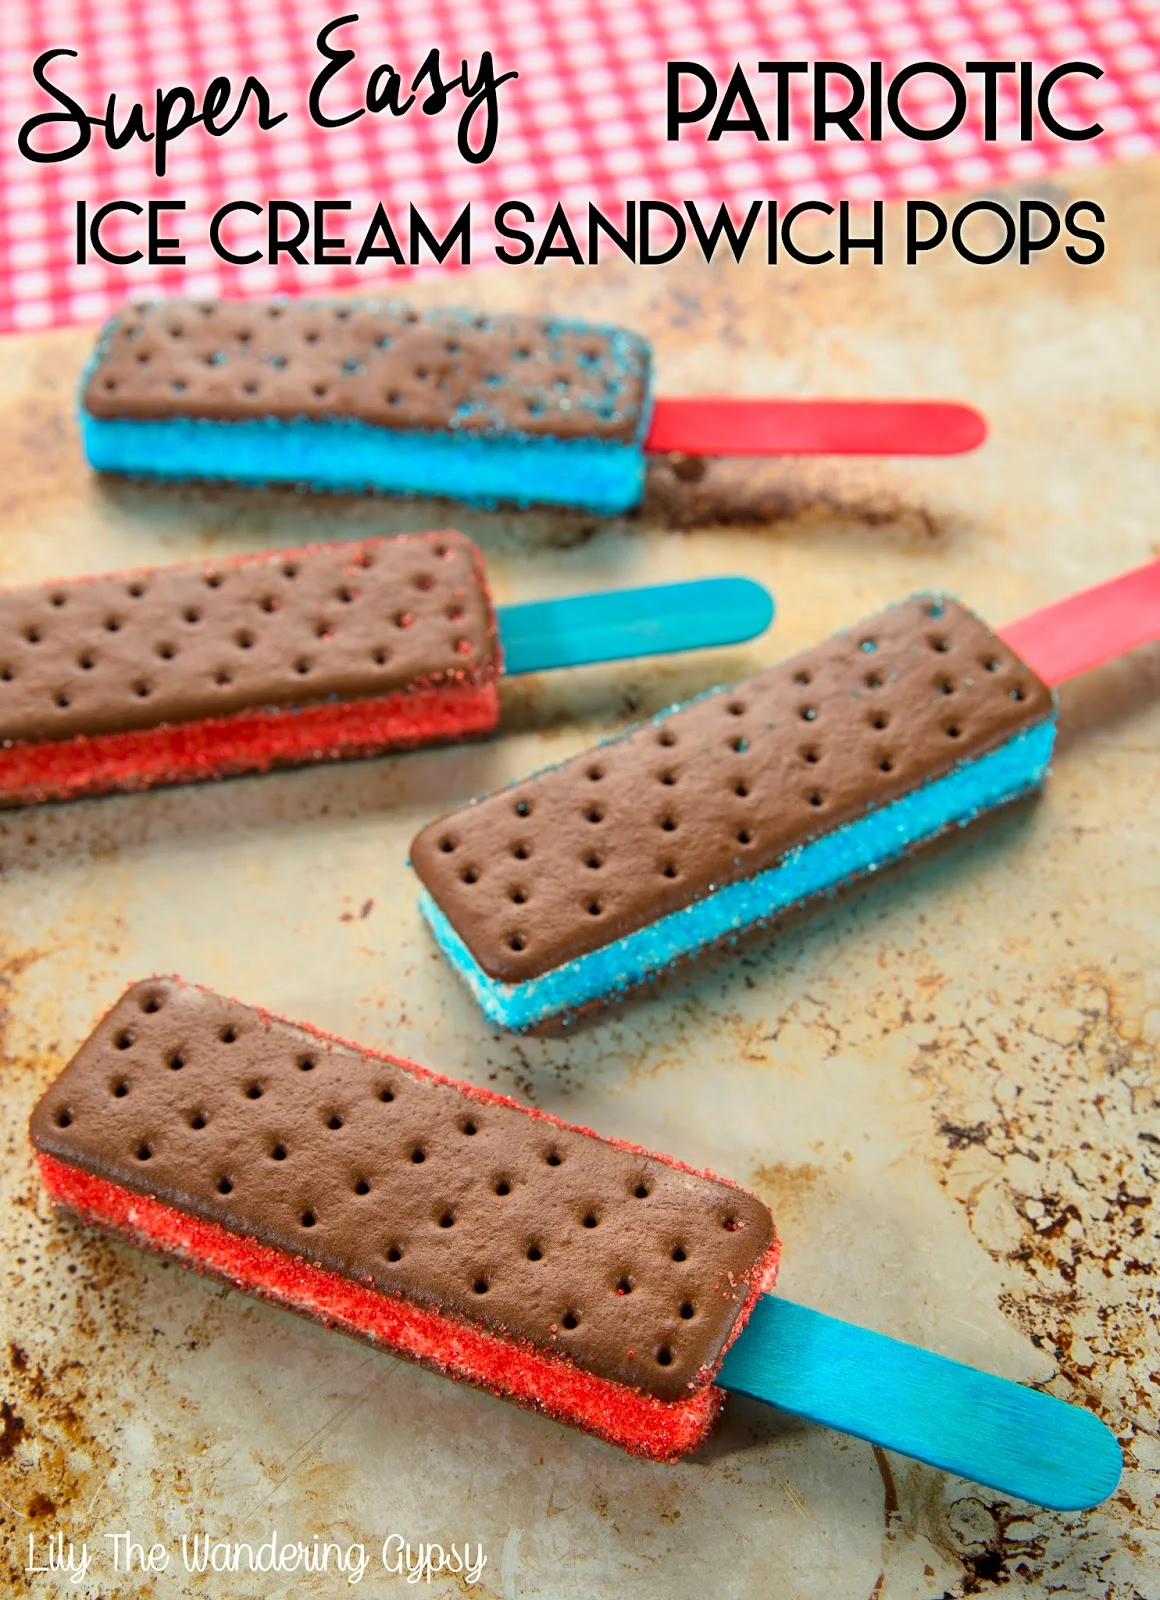
These treats are fun for summer parties. Find them here.
