Oatmeal Peanut Butter Reese's Cookies

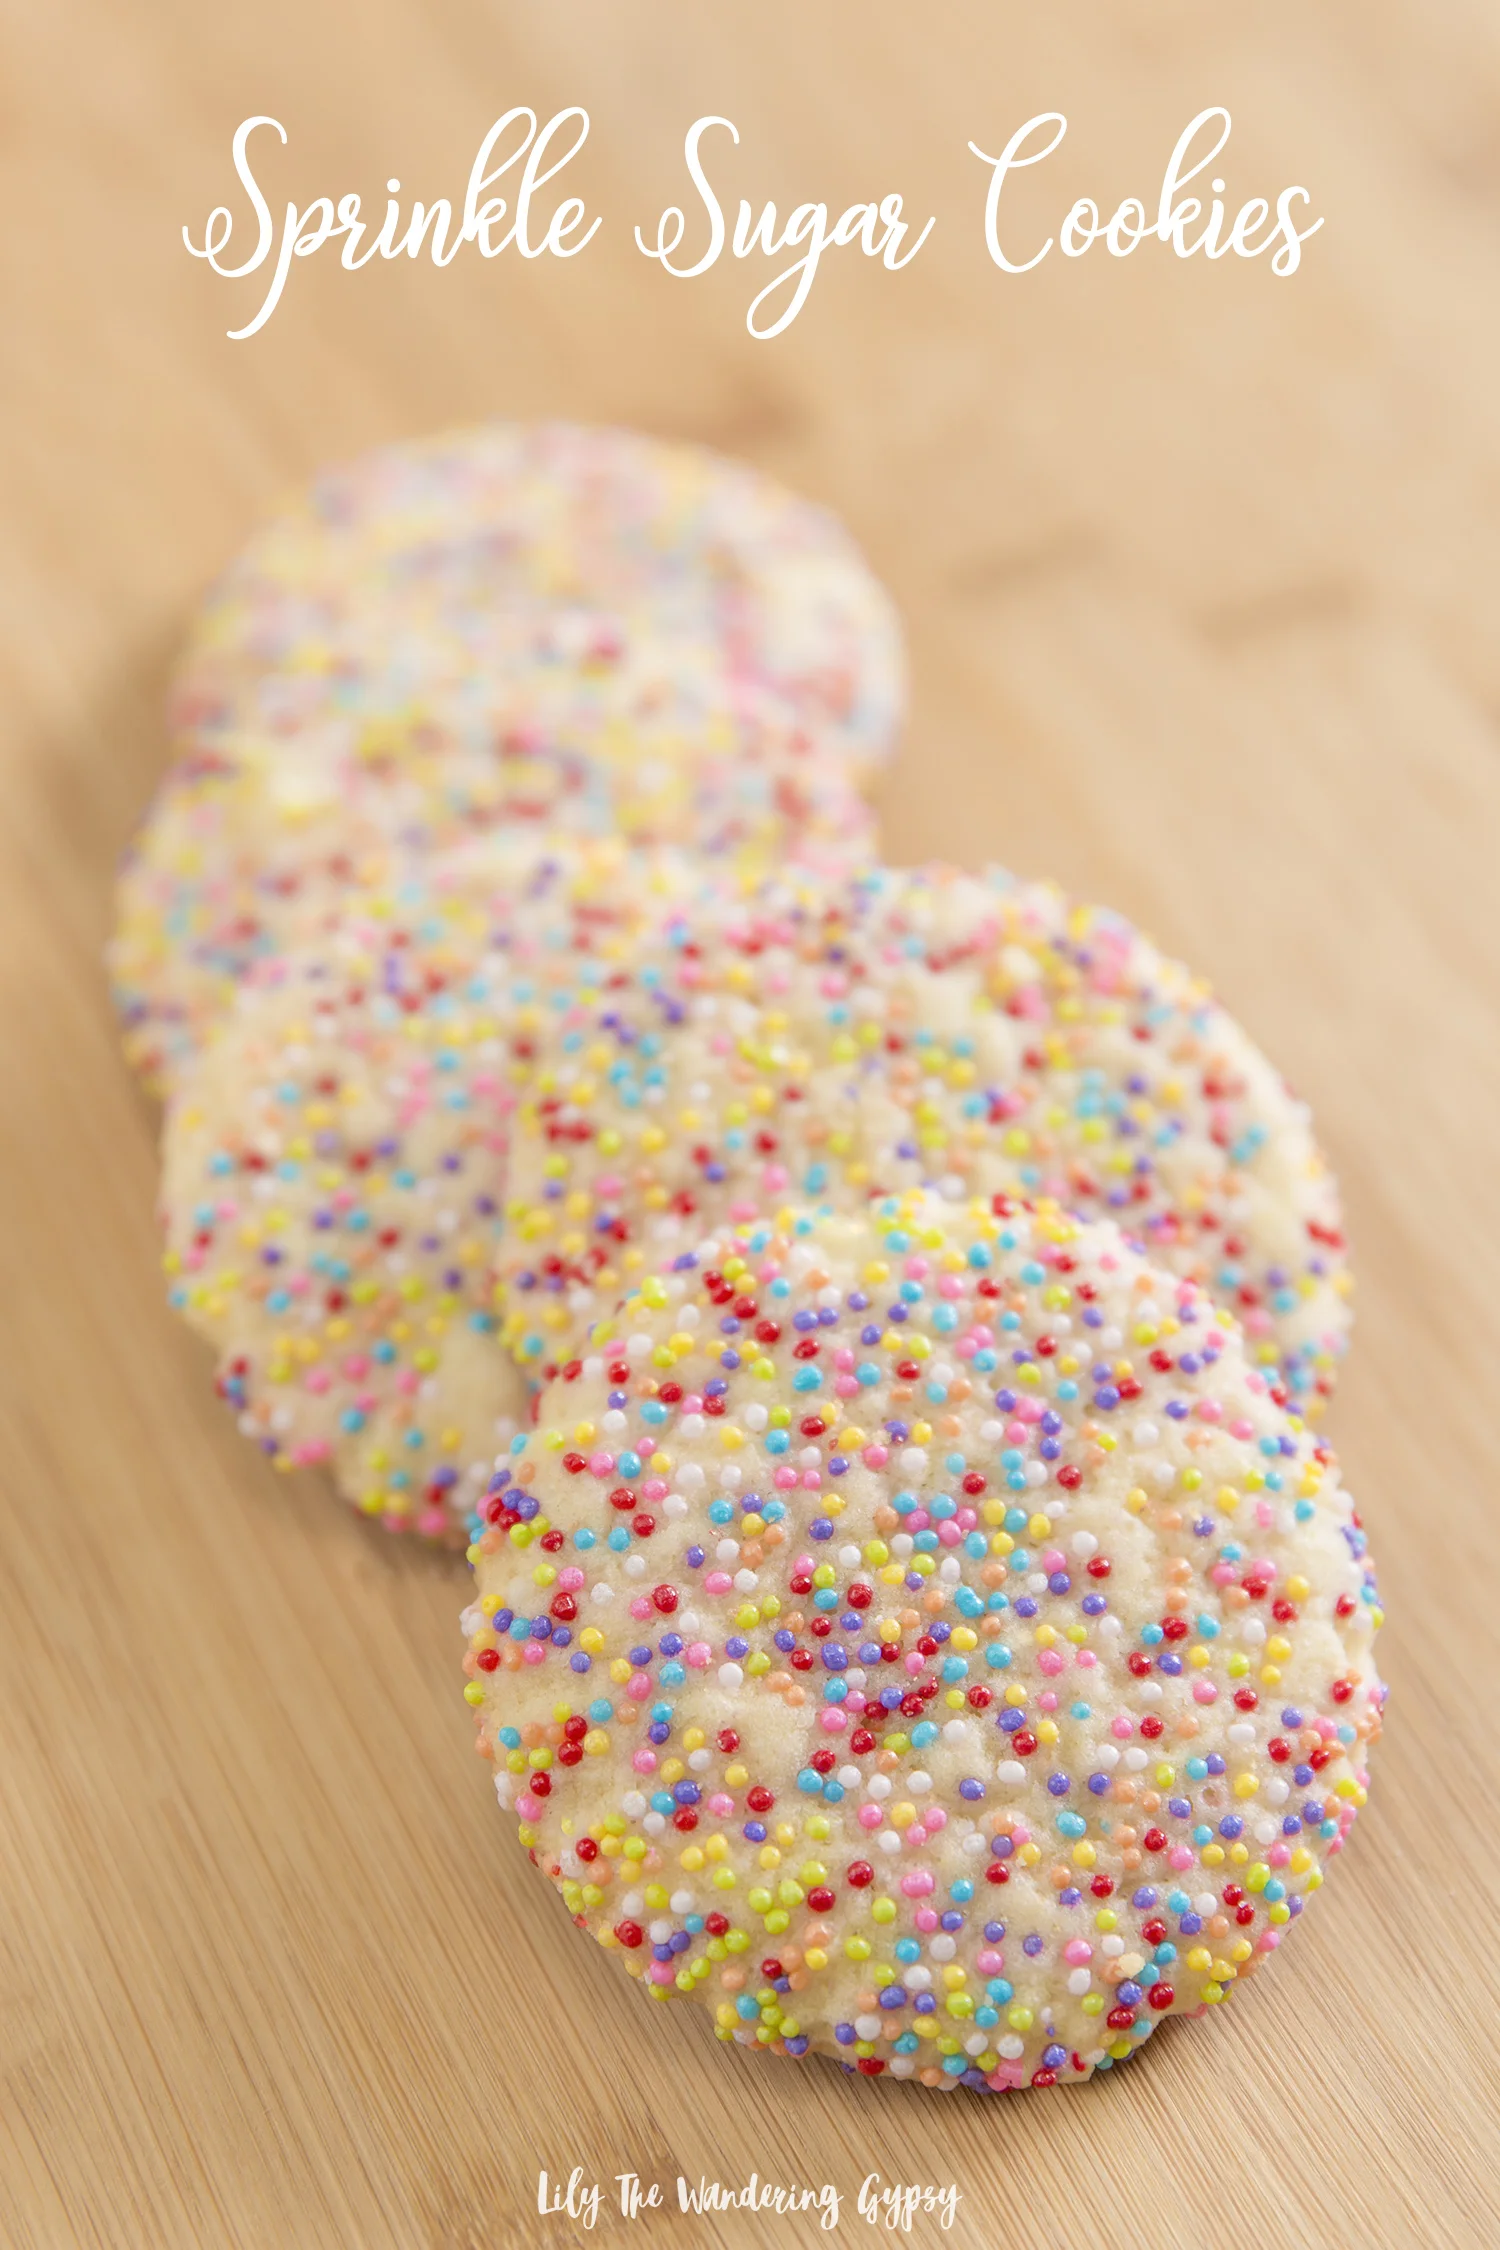
Looking for a recipe to make you smile? Everyone who has tried these has fallen in love with them. They’re delicious eaten around a camp fire, or make a few for a friend who needs some cheering up. These may be hard to share once you try them, just warning you!

Oatmeal Cookies

RECIPE (ORIGINALLY FOUND HERE):
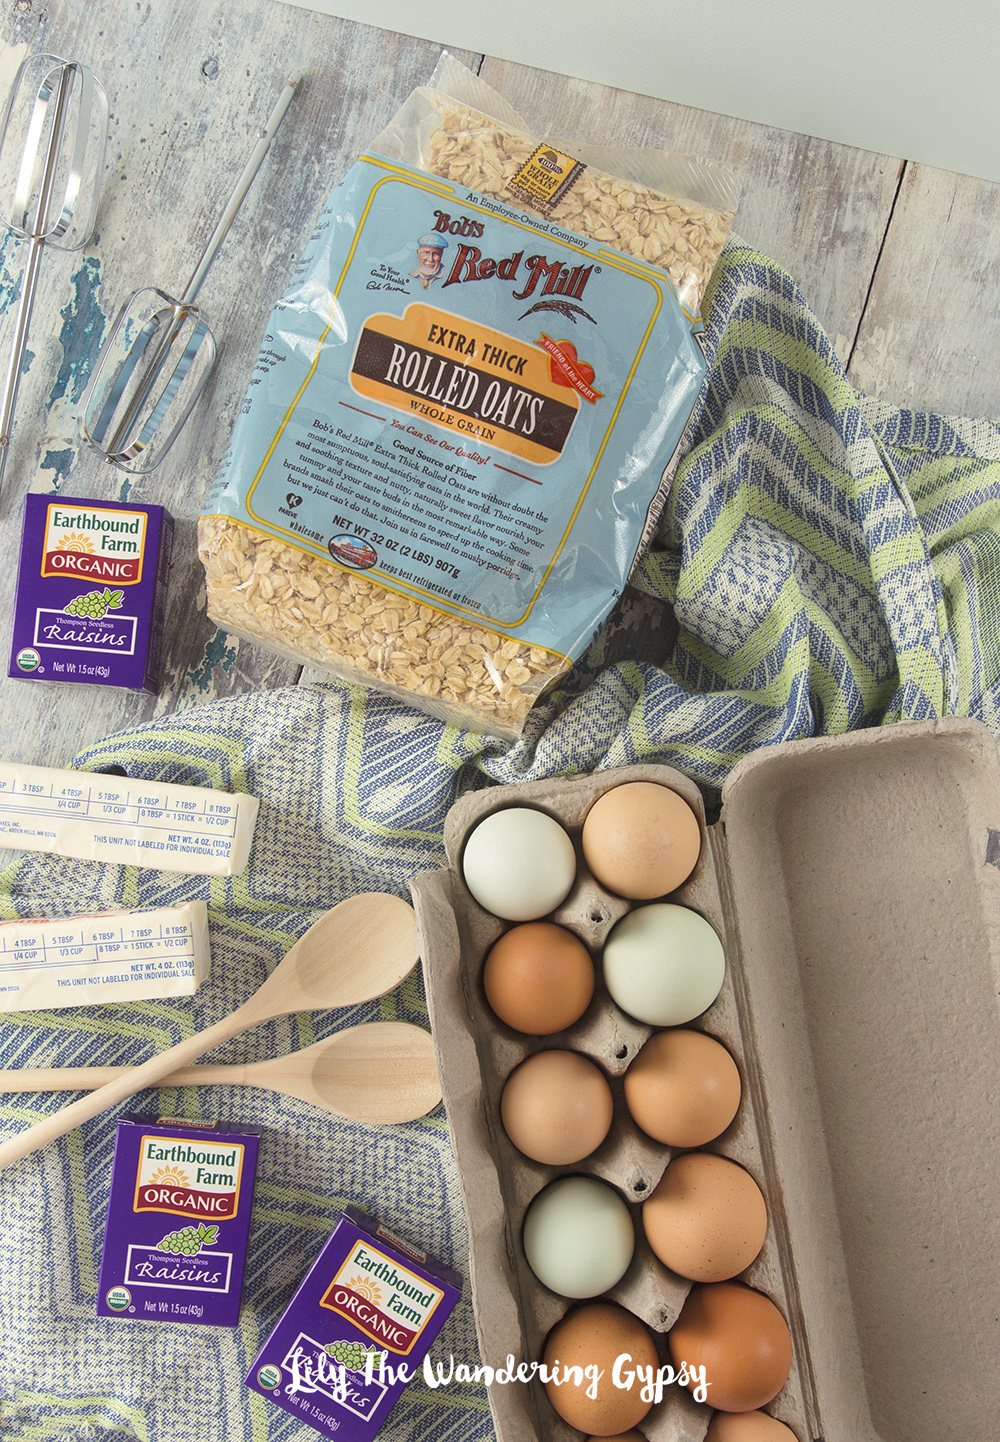
Ingredients

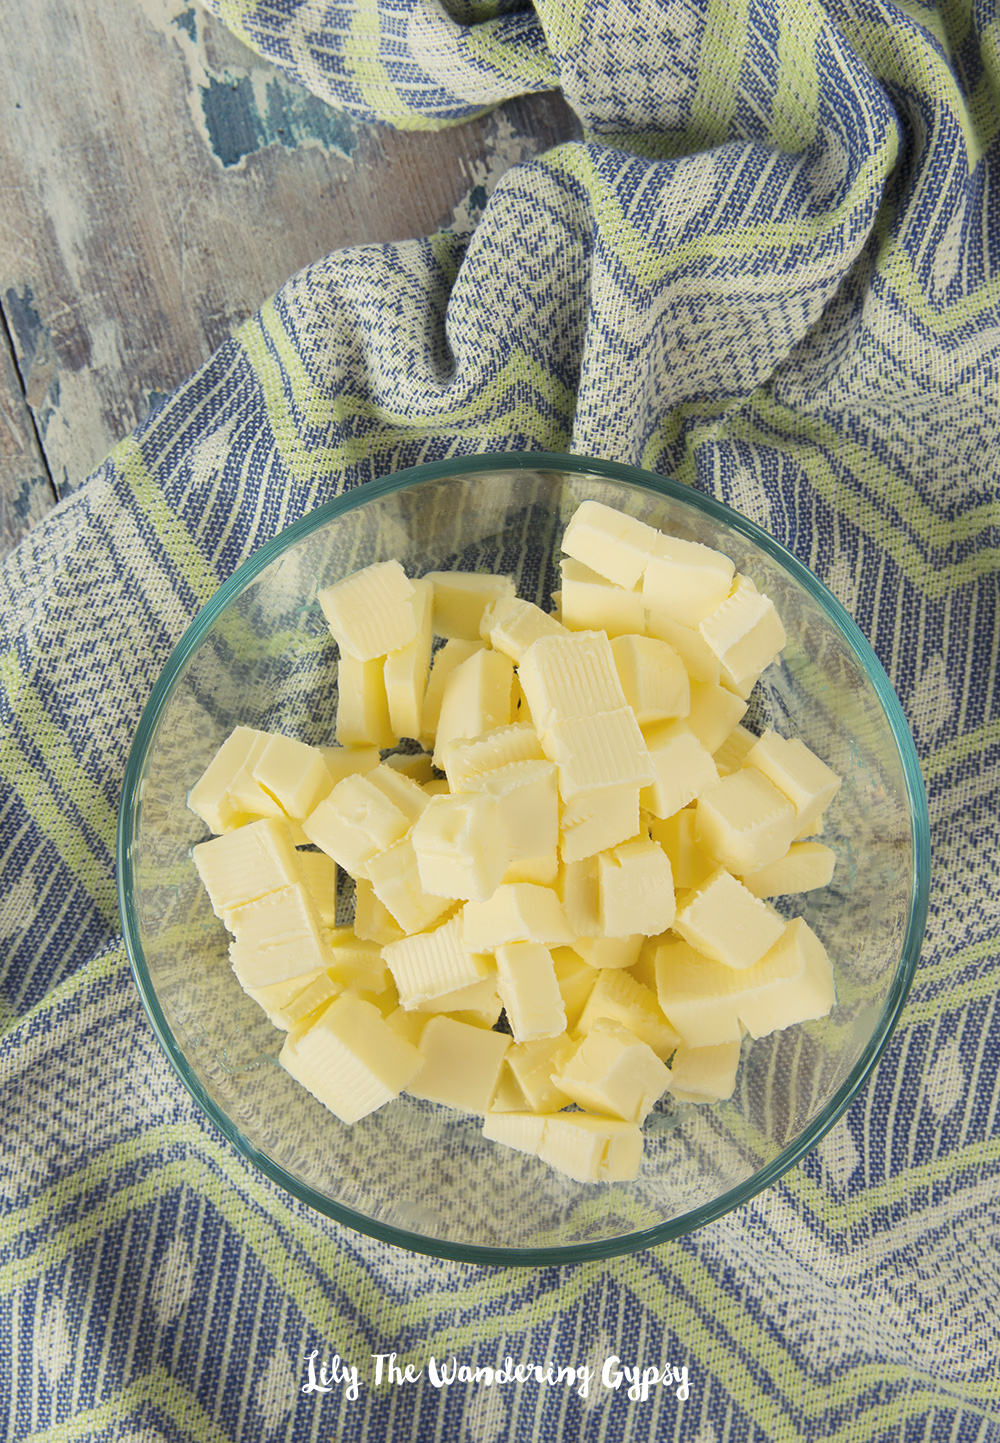
  • 1/2 cup butter, softened

  • 1 cup brown sugar

  • 1/2 cup creamy peanut butter

  • 1 large egg

  • 2 teaspoons vanilla extract

  • 3/4 cup all-purpose flour

  • 1 teaspoon baking soda

  • 1 teaspoon cornstarch

  • 1/4 teaspoon baking powder

  • 1/4 teaspoon salt

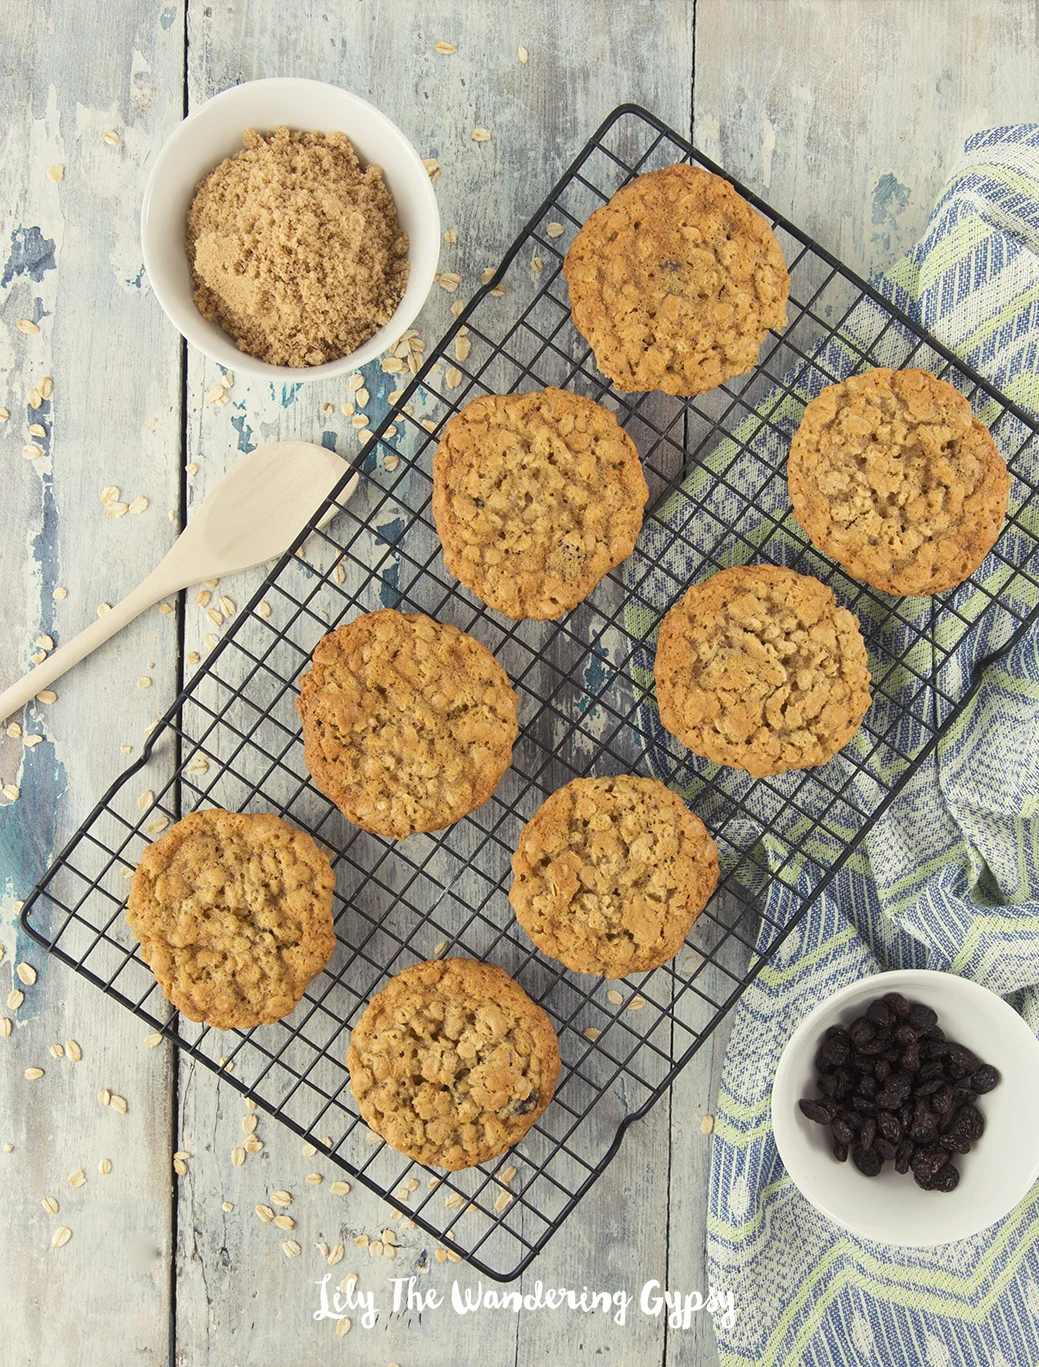
  • 1 1/2 cups quick oats

  • 1/2 cup mini semi-sweet chocolate chips

  • 1 cup REESE’S Pieces or M&M candies

Oatmeal Cookies

Instructions

  1. Preheat oven to 350ºF and line baking sheets with parchment paper and set aside.

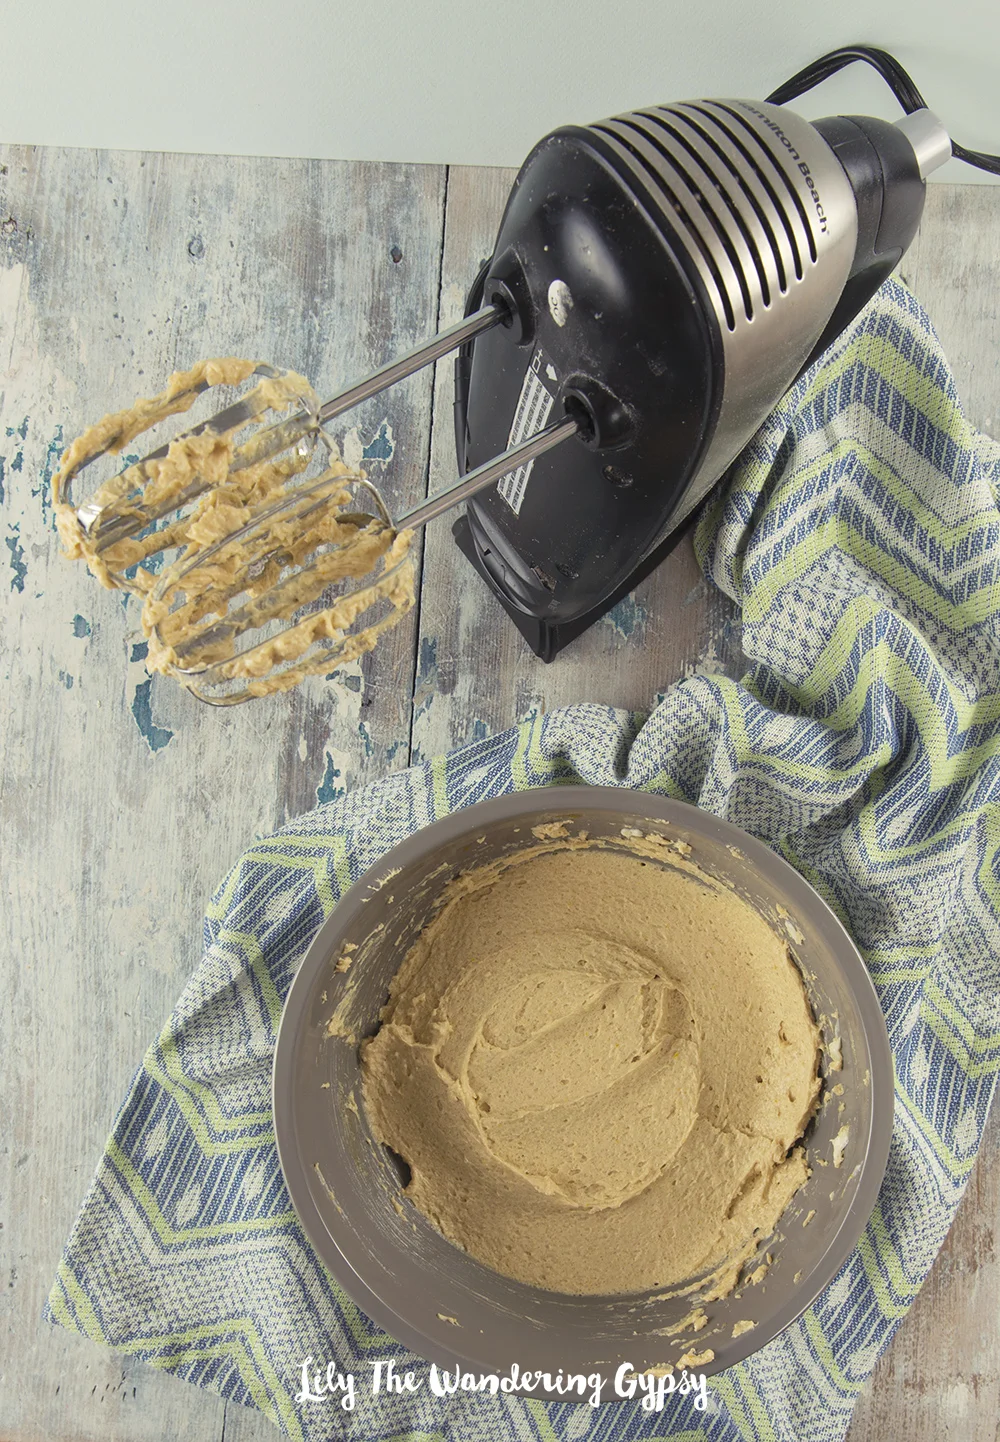
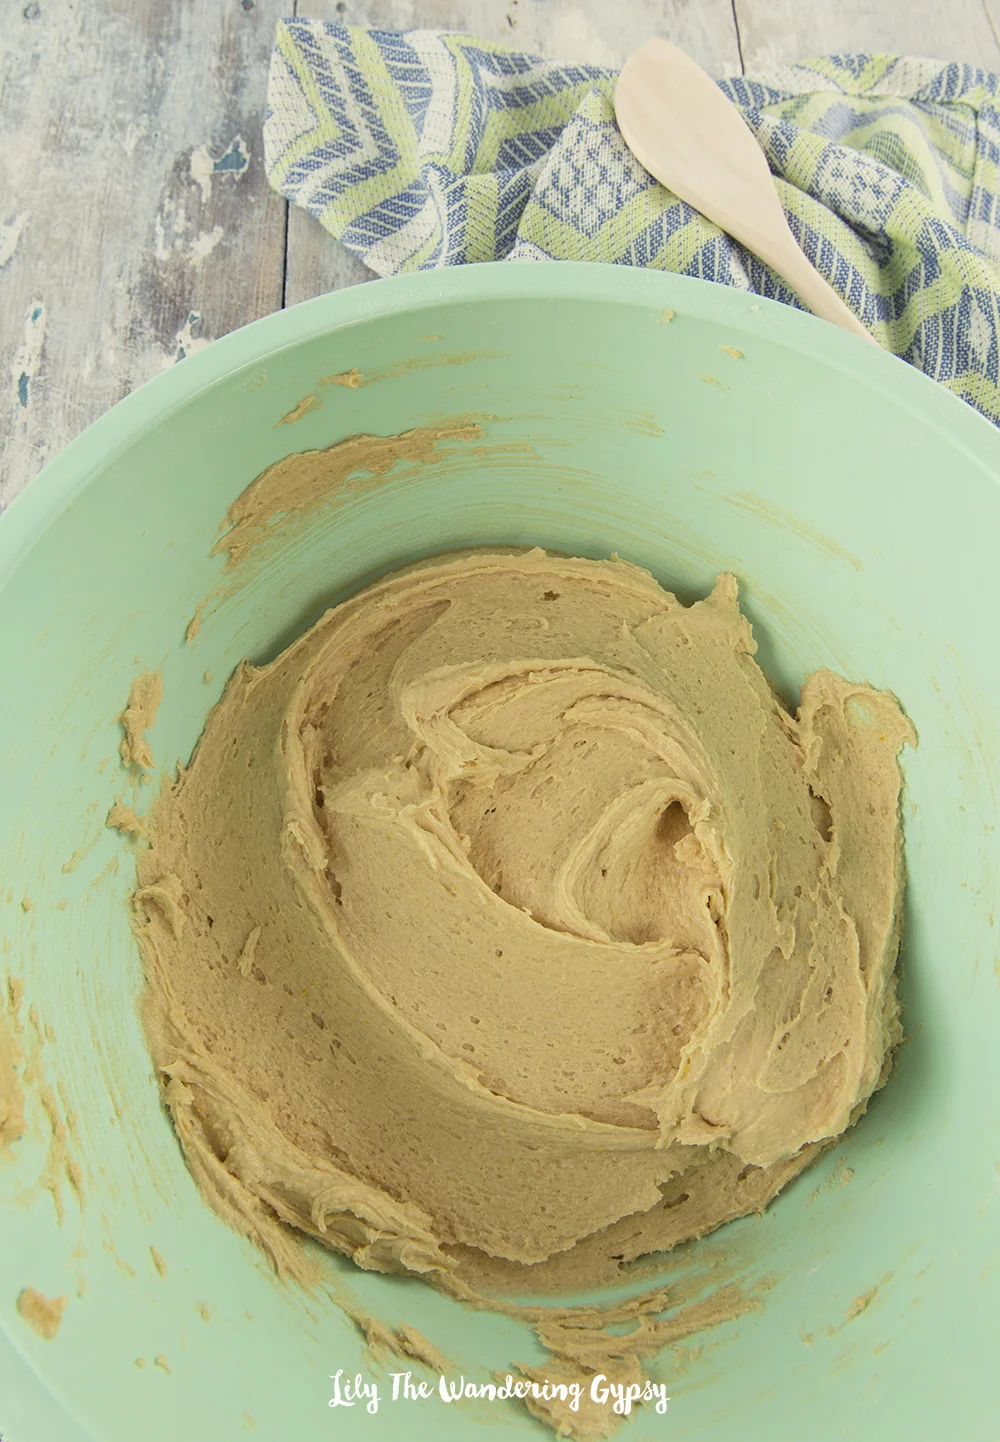
  2. In a large bowl, cream together butter, brown sugar, and peanut butter with a hand or stand mixer until light and fluffy, about 3-4 minutes. Mix in the egg and vanilla, scraping down the sides of the bowl as needed.

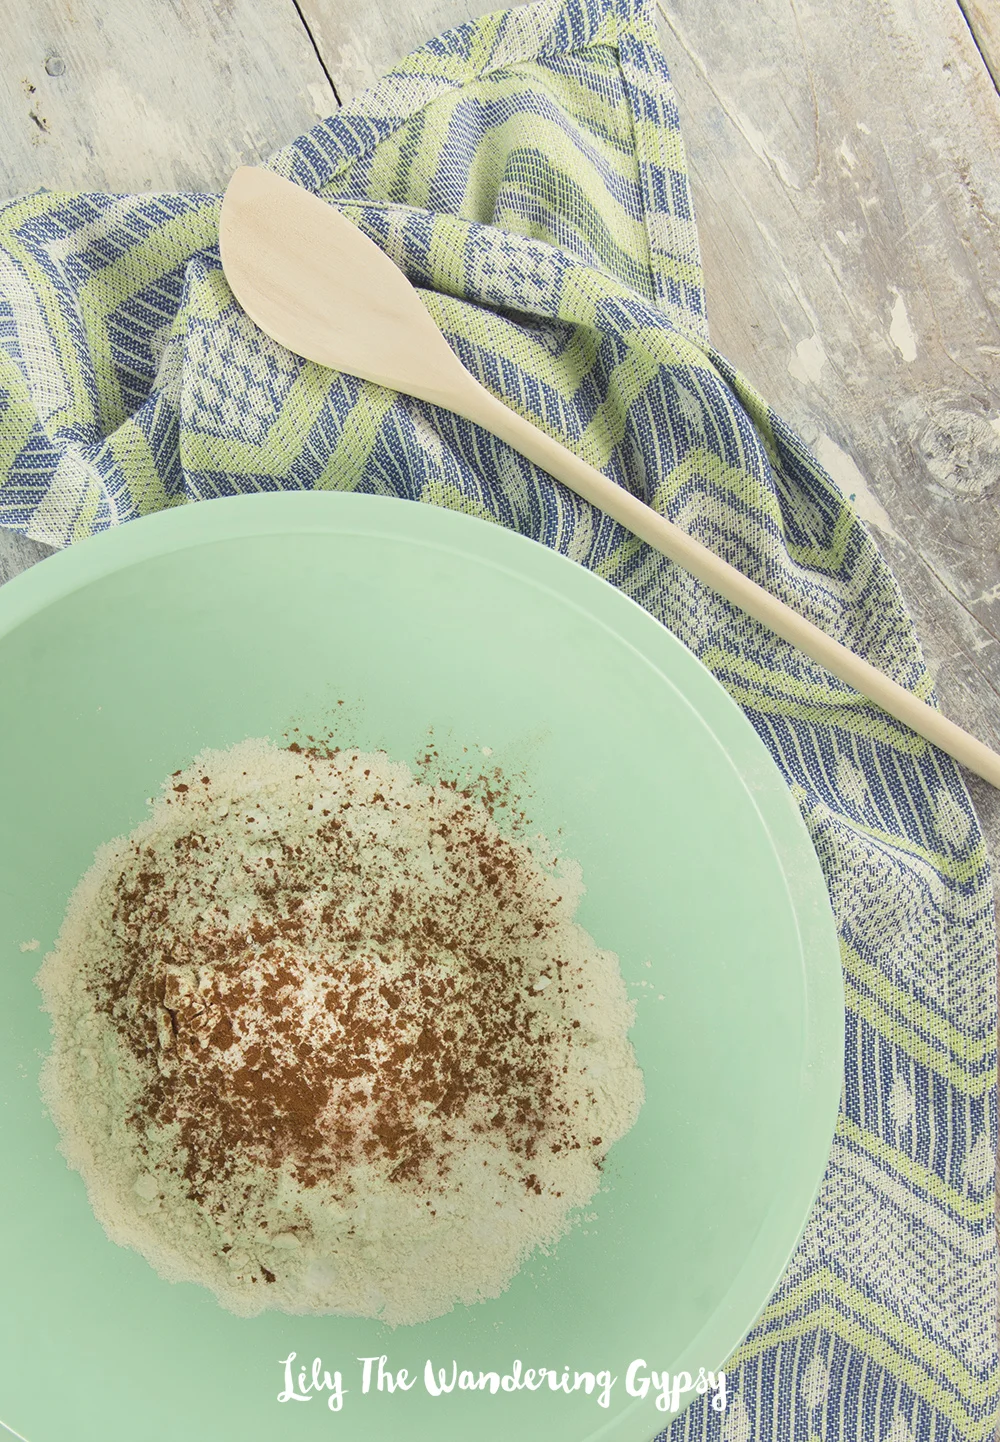
  3. In a separate bowl, add the flour, baking soda, cornstarch, baking powder, salt, and quick oats; whisk to combine. With the mixer on low speed, slowly add the flour mixture to the wet ingredients and mix until just combined. Stir in the chocolate chips and REESE’S Pieces candies by hand.

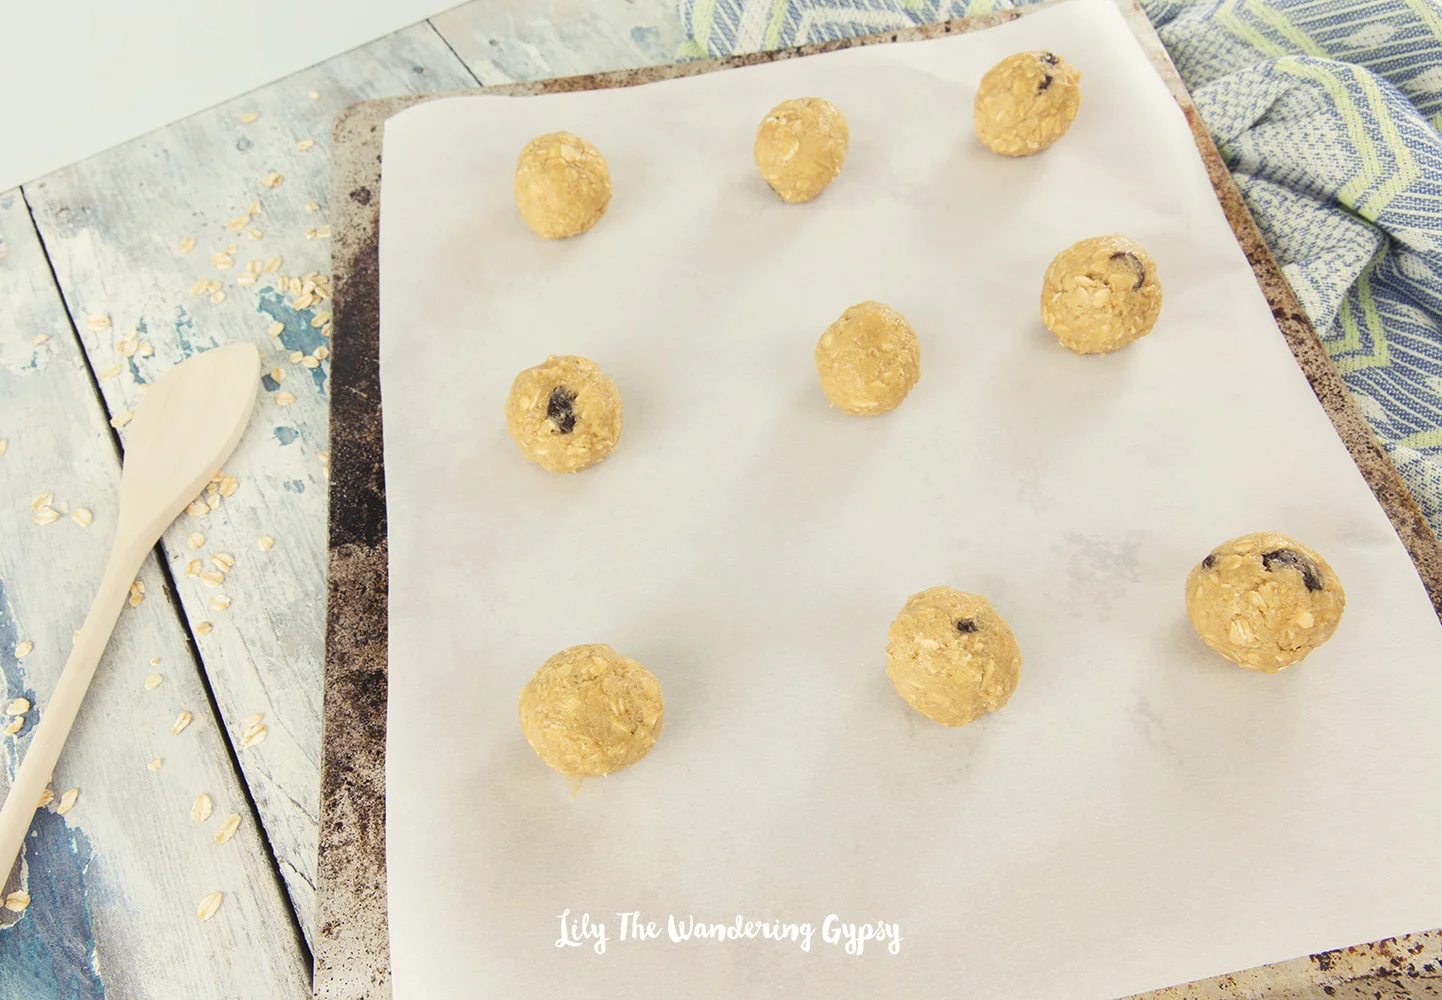
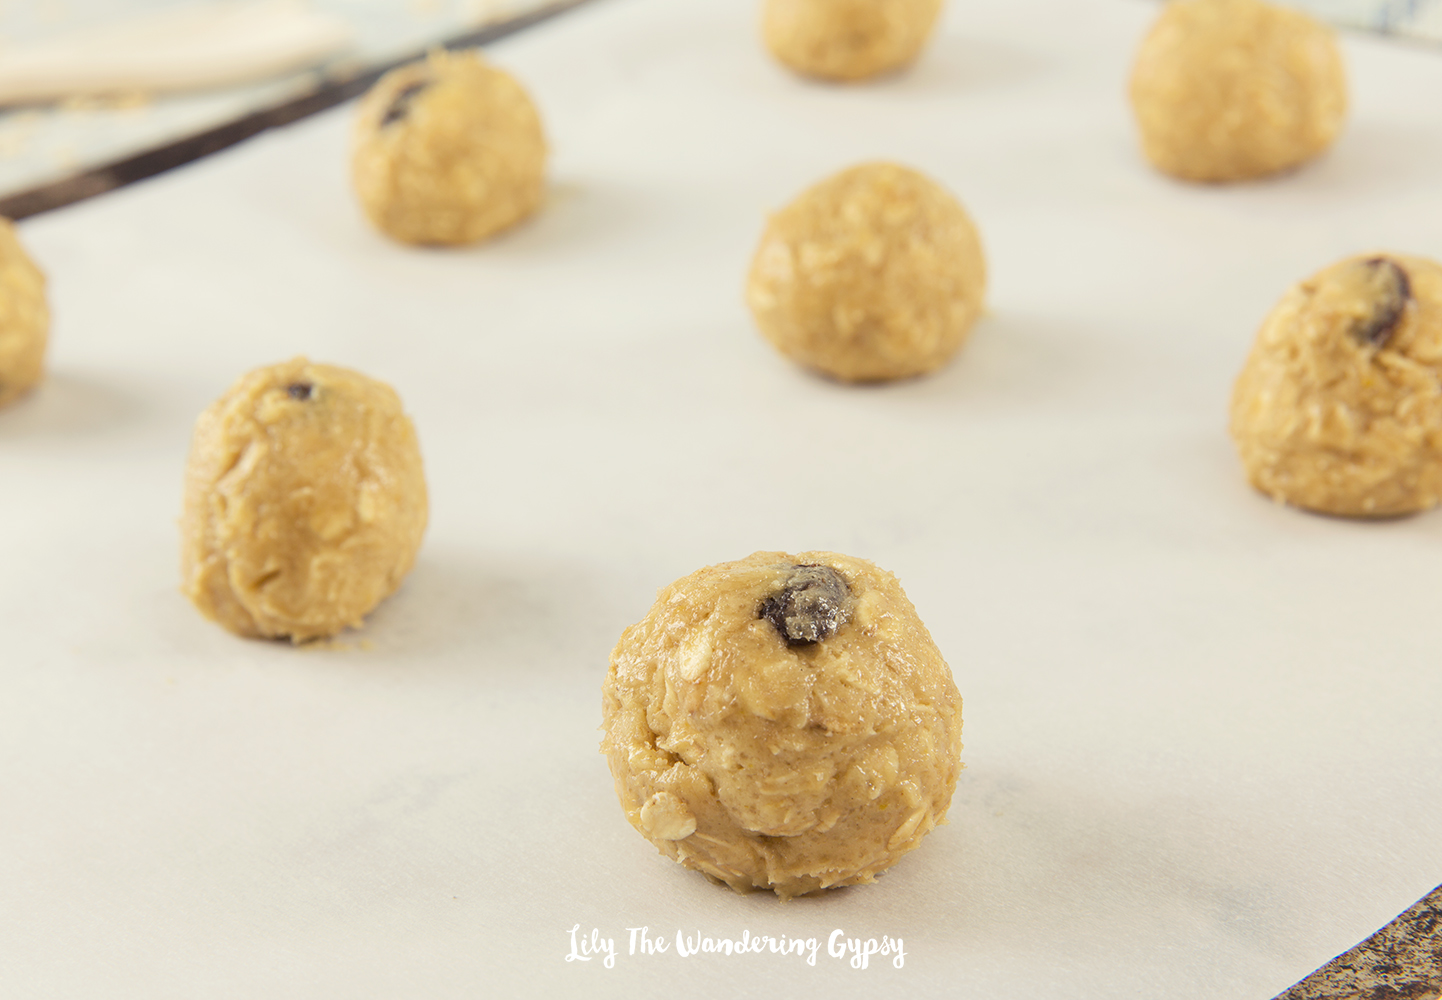
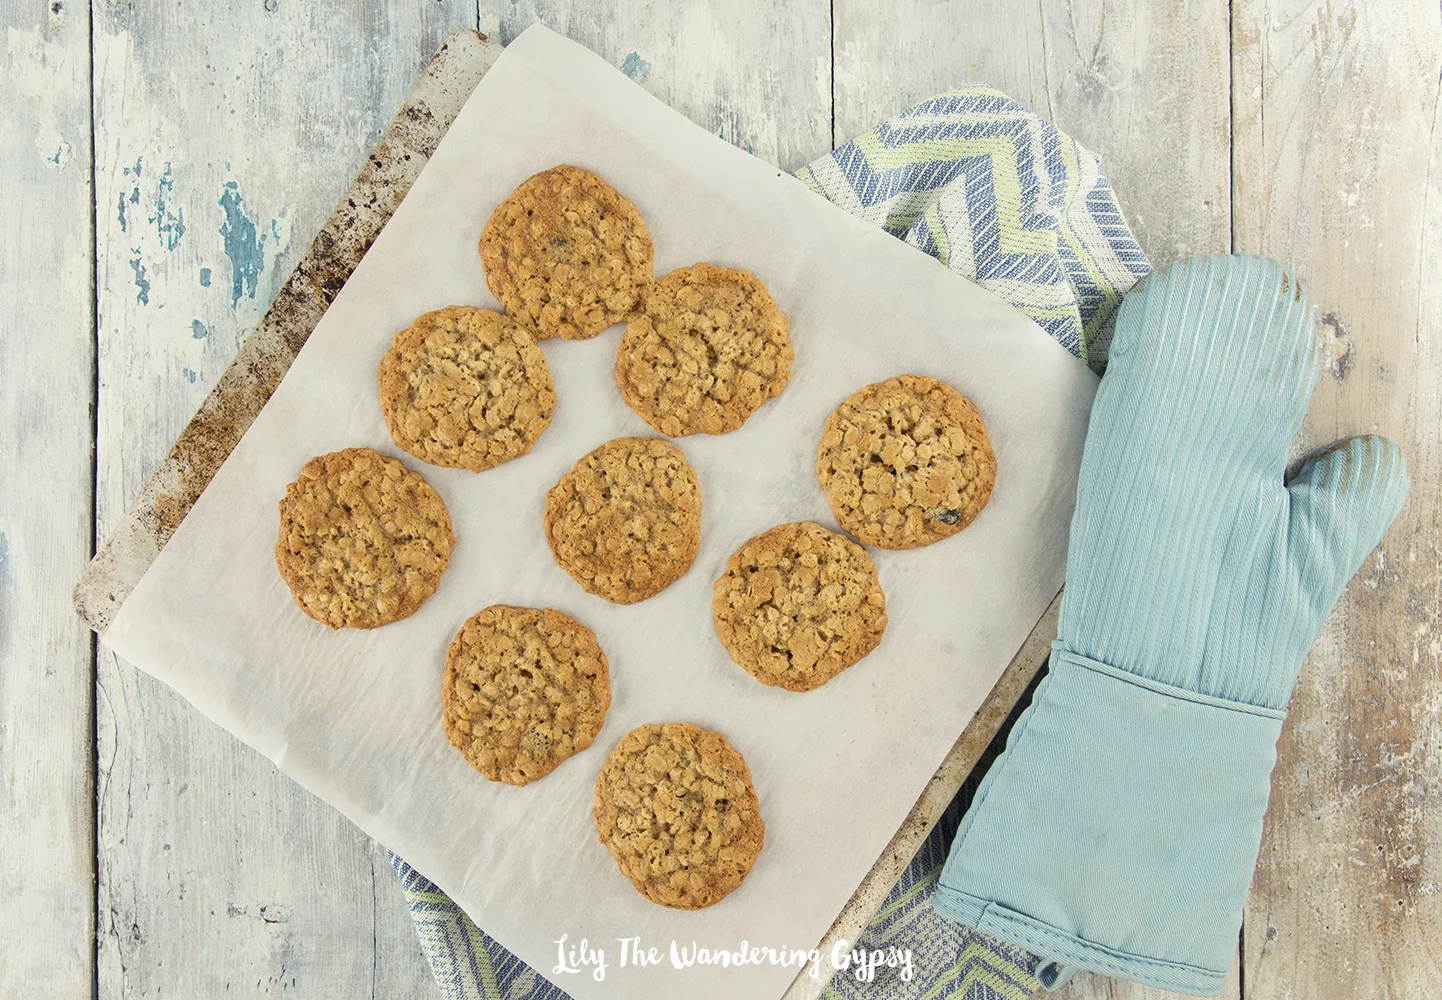
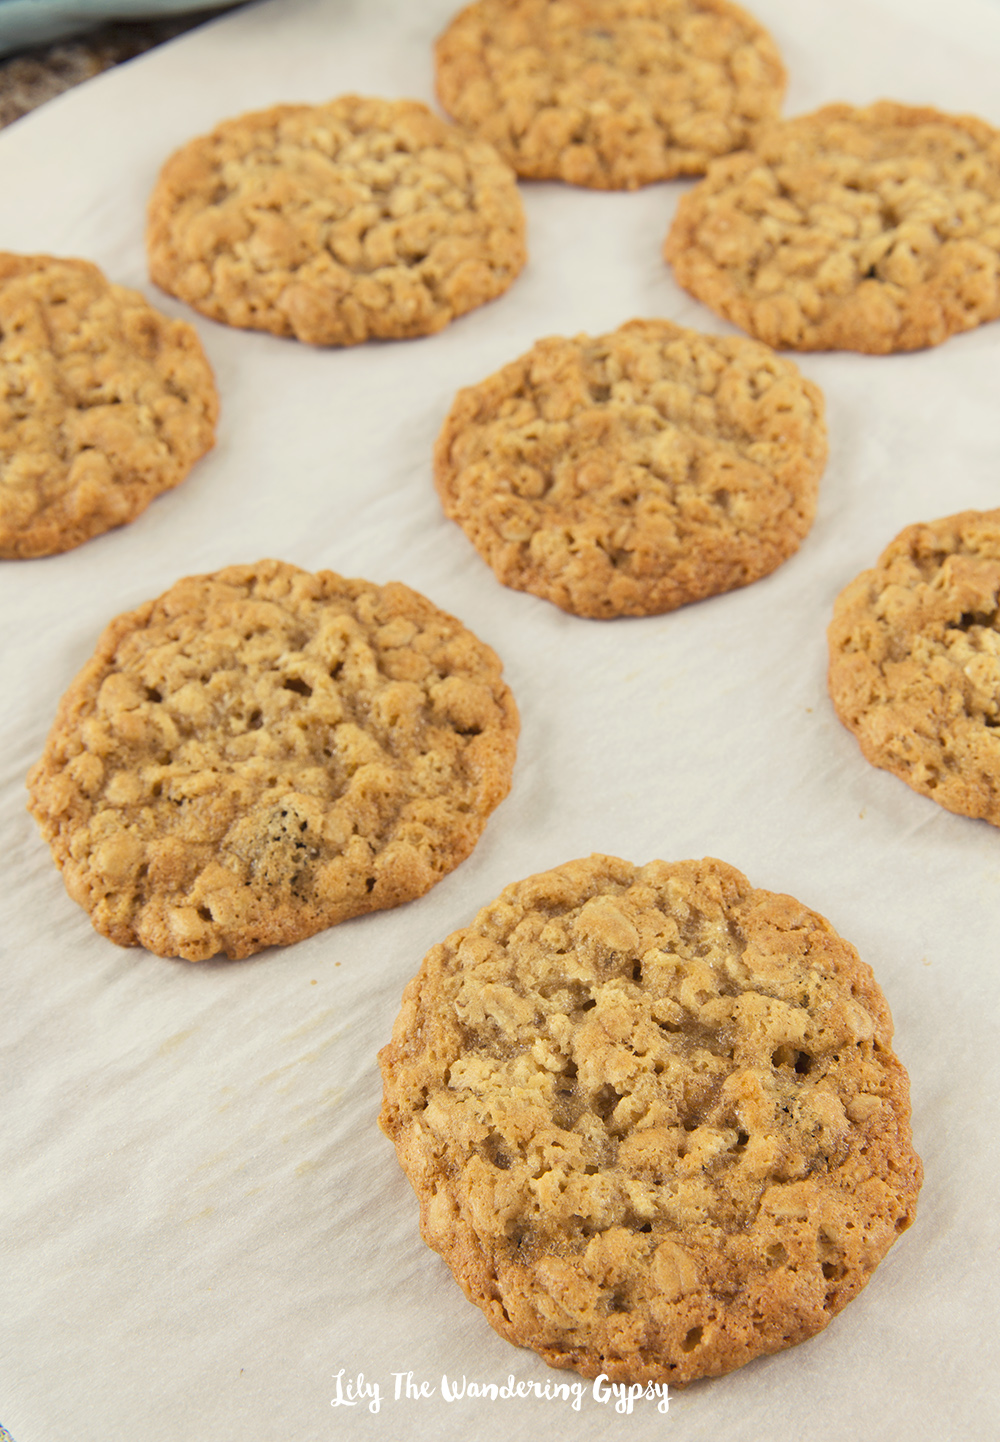
  4. Measure out ¼ cup balls of dough and place them on the baking sheets. Bake the cookies for 11-13 minutes, until the edges are just starting to brown and the top still looks slightly undercooked. Remove from the oven and cool for 5 minutes on the baking sheet before moving them to a wire rack to cool completely. Before these have cooled completely, they will be crumbly. I suggest letting them cool completely before tasting.

  5. Store cookies covered at room temperature for up to 1 week. Enjoy!

Lemon Bar Recipe (With Shortbread Crust)

Hello! Thanks for stopping by to check out my latest recipe. I love lemon bars, and feel like they’re always WAY overpriced at bakeries, and sometimes aren’t tart enough (sometimes they’re way too sweet).

Also, this recipe actually came from a moment where I was baking cutout sugar cookies, but they wound up spreading too much to use. After one sheet pan full of super conjoined cookies, but still a delicious taste, I decided that perhaps, I could use the cookie dough for a crust of sorts. Well, I found a delicious lemon filling to accompany this delicious sugar cookie crust, and WOW, these were amazing!

I even cut them up into small 2” squares and they were a HIT! So fun to keep a little container of these in the fridge for a homemade treat or for an awesome gift, too. Hope you enjoy!

Crust Ingredients (Originally found here)

1 1/2 cups butter salted, softened

1 cup powdered sugar

3 tbsp lemon juice freshly squeezed

1 tbsp lemon zest

3 cups all-purpose flour


Filling Ingredients:

1.5 C. sugar

1/4 C. flour

4 eggs

2 lemons, juiced (feel free to use limes)

Parchment paper

Flour for dusting pan


Instructions:

  1. Preheat oven to 325 F degrees (feel free to bake at 350 if your oven doesn’t run super hot). Prepare 8x8” or 9x9” baking dish with non stick spray. Prepare baking pan by spraying non-stick spray, adding a strip of parchment paper that will help you remove the bars from the pan. Then, feel free to add more non stick spray to the paper, then a light dusting of flour.

  2. Add the butter to the bowl of your mixer and blend until smooth on medium speed. Add the powdered sugar, lemon juice and lemon zest to the mixer bowl and continue mixing on low until fully incorporated. Scrape down the sides of the bowl. Add the flour and mix until well blended. Feel free to gather dough into a ball or round shape to discourage air bubbles while baking.

  3. Press dough into baking pan and smooth out to remove any air bubbles.

  4. Bake crust for 12-15, just until crust is slightly done towards the center.

5. Remove crust from oven, let cool for 5-10 minutes, then pour lemon filing over crust, evening out with a large spoon or spatula. Bake 18-20 minutes longer, until edges begin to get brown. Feel free to cover with foil for last 5-10 minutes of baking time.

6. Let cool completely, then use the overhanging parchment paper to carefully remove the entire baked bar and place it onto a cutting board.

7. Use a knife with a sharp, straight edge to cut the bars in half each way, then two more times on each side (3 cuts per side, 6 cuts total). Feel free to add sifted powdered sugar over the top as well, before cutting.

8. Serve and enjoy!

Light + Crispy Sprinkle Sugar Cookie Recipe

Light, crispy, festive, and delicious cookies you are sure to love! Uncomplicated ingredients and an easy baking process makes these cookies a 10/10 all around! You will love the light, airy crunch that the ingredients offer, and these can be customized to any colors you would like - even holidays or team colors!

INGREDIENTS:

1 c. butter

1 c. vegetable oil

1 cup powdered sugar

1 cup granulated sugar

2 eggs

1 tsp vanilla

4 cups flour (2 cups all purpose flour + 2 self rising flour if you would like)

1 tsp baking soda

1 tsp cream of tartar

1 tsp. salt

ball sprinkles or colorful sanding sugar - almost any sprinkles will do!

baking sheets

parchment paper

INSTRUCTIONS:

1.) Preheat oven to 350 degrees F. Cream butter and sugar until combined

2.) Add vegetable oil + powdered sugar

3.) Add egg + vanilla

4.) Add dry ingredients slowly, blend everything together until fully incorporated.

5.) Pour about 1/4 cup sprinkles into a shallow bowl or dish. Roll dough into 1-1.5” balls, and roll in sprinkles. Coat the dough as much as possible with the sprinkles - you may need to use your fingers to help press sprinkles into dough. Place each ball onto parchment lined baking sheets, and use a glass to flatten the balls a little bit.

6.) Bake 6 cookies per baking sheet for 8-10 minutes each, they will spread a little bit, so this insures the cookies do not touch while baking. Transfer onto cooling rack, and enjoy while still a little warm, or after they have cooled - they will get nice and crunchy! Enjoy.

Merry Christmas! Our Christmas Cookies

Hello! I hope you’re all having a very merry Christmas! It’s pretty warm out today, so it’s not a white Christmas, but I would always prefer to the cold. I got to participate in a fun cookie baking experience this year. The four of us got to take home TONS of cookies and everything turned out so well. The goal was to make enough cookies so we could all bring cookie platters home and also enjoy a few others along the way. I learned SO much about making the perfect cutout sugar cookies too :)

The cookies we created include:

Cutout Sugar Cookies

Shortbread Cookies Dipped in White Chocolate and Dark Chocolate

Chocolate Crinkle Cookies

Oatmeal, White Chocolate Craisin Cookies

Snickerdoodles

(Recipes all coming soon!)

Happy Holidays! I hope you all had a wonderful day!

Hassle-Free Holiday Meal Ideas + Veggie Foil Packets with Del Monte

This post has been sponsored by Del Monte Foods, Inc. All thoughts and opinions are my own.

Each year, I seem to love the holidays more and more. To me, I love any excuse to

make delicious food and have friends and family over. So I thought it would be

fun to share an easy meal idea and show you just how easy this meal was. I

thought it turned out very elegant, and everything was literally devoured

pretty quickly.

These Veggie Foil Packets are a great vegetarian dinner alternative or side dish. These foil packets are so familiar to most people (think campfire dinners) but by adding more unique and colorful ingredients, these veggie packets can be taken to the next level and even enjoyed at a holiday dinner as a side dish! Simply put, these foil packets contain an array of ingredients like potatoes, carrots, garlic, onions, fresh herbs like parsley and oregano, and of course the Del Monte mixed veggies and green beans. Also, if you are put in the position when you need to offer a few vegetarian side dishes during the holidays, the veggie packets and the cornbread would be amazing.

Del Monte is my number one brand for everything canned during the holidays and during every month of the year. You can find them at your nearest retailer using this store locator. This could be a cute meal for Friendsgiving, for a fall or holiday date night, or something special for a smaller crowd during the holidays.

Visit Del Monte’s website to check out TONS more holiday recipes, here!

Ingredients: (Serves 3-4)

 VEGGIE FOIL PACKETS:

1-2 Cans Del Monte® Vegetable & Bean Blends Country Style

1-2 Cans Del Monte® Blue Lake® Cut Green Beans

4-6 pieces of foil (8”-10” squares) – 2 pieces per packet 

CREAMED CORN CORNBREAD CAKE + MUFFINS:

1 package cornbread muffin or cake mix (I used one 15 oz. box but you can also use two 8 oz boxes as well!)

1 egg

1/3 c. oil

1 Cup Del Monte® Cream Style Golden Sweet Corn

½ - 1 c. milk

Muffin tin

Cupcake liners 

WHOLE YOUNG CHICKEN:

1 whole chicken (organic when possible)

2 Tbsp olive oil

1-2 tsp salt

1-2 Tbsp seasoning (I used Greek seasoning, but use anything you would like)

Brush to apply olive oil (optional)

Parsley for garnish 

Instructions:

1.) Preheat oven to 375 degrees and prepare chicken. Place chicken onto a rimmed baking sheet and begin to brush olive oil over chicken. I basically drizzled the oil onto the chicken and then brushed it over. Next, I simply sprinkled seasoning all over the chicken. Cover with foil and bake for at least 1.5 hours. At a little over an hour, I carefully uncovered the chicken, then placed it back into the oven to finish baking. Make sure the breast is not pink anymore. A note on the chicken: there was a lot of juice in the cake pan from the chicken cooking. Be careful not to spill this juice or it may hurt you. Be very careful when handling this pan.

2.) Mid way through cooking chicken, prep for the veggie packets. Strain both cans of Del Monte veggies and divide them equally between 2 or 3 foil packets, To make the packets, simply place two sheets of foil on a baking tray, place veggies in the middle, then season with 1-2 tsp of your favorite seasoning mix and salt if needed. Fold two side of the foil inward, then twist the ends to keep everything inside. Place onto sheet pan and bake for 12-15 minutes or until steaming. Carefully open the packets as the steam can hurt you.

3.) Mix up cornbread ingredients and prepare pan. For my spring form pan, I sprayed it with cooking spray then lightly coated the pan in flour. Fill the springform pan about halfway full then pour the rest of the batter, cover with foil, and bake for approximately 20-25 minutes with foil covering until the last 10-15 mins. Pour the batter into the cupcake cups and bake muffins at 375F for about 15-18 minutes. The springform pan is not necessary, it just made for a wonderful presentation! Feel free to use any size or shape of square or round dish you have.

4.) To serve, place chicken into shallow serving bowl or platter and garnish with parsley. Also, feel free to place cornbread cake onto a cake stand or on a cute dish with a spatula for serving. Lastly, either have guests grab veggies from a serving bowl or straight from the packets!

Cleanup was super easy with this whole process. If you do not want to cook a whole chicken, you can use chicken drumsticks, thighs, or even chicken breasts. I say this because it can take up to 2 hours for the chicken to be fully cooked if the bird is 4 pounds like mine was.

I absolutely LOVED the green beans and the other vegetables in the new Mixed Veggies collection. I actually liked the vegetables more than any other part of this meal, and my friends also raved about each and every part. I had so much fun treating a few of my favorite people to an exceptionally thoughtful dinner during the holidays, which can be a super hectic time when people may forget to eat a “real meal”.

What are your favorite vegetarian side dishes to serve during the holidays?

Look out for these mixed veggies from the brand:

Del Monte® Vegetable & Bean Blends California Style

Del Monte® Vegetable & Bean Blends Classic Style

Del Monte® Vegetable & Bean Blends Country Style

Del Monte® Vegetable & Bean Blends Mexican Style

Connect with Del Monte on social and show off your recipes, too!

LEARN ABOUT MORE BLOGGERS’ RECIPES HERE!

Happy Halloween! Check out this Bloody Glass Cupcake recipe!

Halloween was pretty fun this year! We made all sorts of deliciously spooky food and drinks! Here is one of the recipes which turned out even better than expected! This homemade honey blood made a big impact while the broken pieces of sugar glass looks incredibly realistic is was just incredible!

I used a bow of red velvet cake mix to make the cupcakes then had SO much fun decorating these cupcakes. The black cupcake liners were also so perfect for that dark and mysterious / murderous look I was going for, LOL!

In this post, I will teach you some very exciting techniques!

HOW TO MAKE SUGAR GLASS:

HOW TO MAKE FAKE EDIBLE BLOOD WITH HONEY:

HOW TO MAKE HOMEMADE BUTTERCREAM FROSTING:

Stay tuned! Tips will be published tomorrow. Enjoy!

Mummy Wrapped Jalapeño Poppers

Looking for an eye-catching appetizer that people will love for Halloween? These Mummy Wrapped Jalapeño Poppers are delightfully spooky and you’re going to love them. And, bonus points because these can be made vegetarian or with bacon in the filling - it’s up to YOU!

INGREDIENTS (MAKES ABOUT 20-24 poppers)

1 (8oz.) block of cream cheese

1-1.5 cups shredded cheddar cheese

2-3 Tbsp seasoning - I like Ranch or Mexican seasoning for these

1-2 packages of pizza crust (the thinner the better - I used Wewalka Bistro Crust)

Candy eyes at least 40 pieces (I like these ones)

Baking sheet (I love these Air Bake ones)

Parchment paper - (only suggested if you are not using a baking rack)

Baking rack - optional (similar here and here)

INSTRUCTIONS:

1.) Slice top 1/3 of each pepper off, lengthwise. Carefully remove seeds and other inside material with the back of a kitchen spoon or similar tool. I tend to use rubber gloves when making these, so my hands do not catch any of the spiciness of the peppers.

2.) Using a small spoon to add filling to peppers, or place your filling ingredients into a plastic bag and cut the end off to use to pipe the filling into the peppers for a more polished look. Wipe off excess filling that may have gotten on the edges or the tops.

3.) Cut pizza dough into the thinnest strips you can. I use the dough as cold as possible, or almost frozen so it cuts well and also holds the shape of the strips well. Next, wrap small strips of dough around filled peppers in a “mummy sort of way”. I left room for the eye area, and after they baked I placed candy eyes to give them a good personality + spooky look.

4.) Bake at 350-375 degrees F for 10-15+ minutes on a metal baking sheet, covered in parchment paper. These baked pretty quickly and I just LOVE how they turned out!

Add the candy eyes to the mummy poppers! While poppers are still warm, take two candy eyes in your fingers, and place them on the “mummy face” both nest to each other at once, so they are both looking/pointing in the right direction. You can have a lot of fun with these, and I would love them to be a part of your Halloween celebrations and festivities! Enjoy! Happy Haunting!

Rustic Apple Pie Pizza Recipe + Why I love Fall Baking

This is a sponsored post written by me on behalf of Oregon Chai®. The opinions and text are all mine. #OregonChaiMeTime 

Wow! Have I got an incredible recipe for you today. It embodies the fall spirit, and includes a dessert “pizza!” This delicious and unique recipe is rustic, sweet, and crunchy; an amazing pairing with a nice, warm Oregon Chai® Tea Latte! Make this amazing dessert for your next gathering, dinner with friends and family, or even for a potluck. This dessert will vanish before you know it.

To me, baking is one of the best ways to spend “me time.” I tend to find myself baking the most once the weather cools down, when I have a bit of free time, or even when too many days have passed since I created something delicious.  Any day that includes chai tea and some me time is a GOOD DAY!

I wasn’t always able to bake freely though. Before we got our new furnace this summer, the house would get WAY too hot (83 degrees +) when I turned on the oven, and so it was nearly impossible to justify baking when the house would not cool down from it. I made so many no-bake meals, or even used our awesome toaster oven to try to make complete meals, small casseroles, and even side dishes – baking cookies, pies, or brownies really doesn’t go well in the toaster oven.

I didn’t even realize how strong of a connection I had to baking, until I had limited use of the oven, and realized how sad I was when I looked through Pinterest and saw all of those recipes that I could not even attempt. I now bake every few days (or more) and I am so happy about how cool our house stays finally. Thank goodness for good air conditioning, LOL!

I also tend to LOVE sweet desserts and dishes, so this one is just perfect for me. If you like desserts that are on the more savory or less sweet side of life, then you can majorly reduce the amount of sugar I have suggested. Either way, you’re going to love this apple pie pizza.

Pizza is such a familiar comfort food, and when I had a slice of this Apple Pie Pizza, it took me back to eating some of the best thin crust pizza ever, combined with one of my favorite fall desserts ever.

Since we are surrounded by apple orchards here in southern Illinois, using apples in my recipe came as a very natural solution to eating more local ingredients!

This rustic recipe is crunchy around the edges from this crispy crunchy dough, sweet, tart from the apples, buttery from the dough, and the egg wash and cinnamon sugar topping makes the most excellent crunch when you bite into it.

Perfect for enjoying on a chilly fall day or evening! I was extremely happy with how this recipe turned out, and I know you will be too. I used an organic pie crust from the store, and it held the shape of the lattice just perfectly.

By cutting the lattice into smaller, ½” strips, I was able to make a very intricate pattern on top of this Apple Pie Pizza. Feel free to also cut the strips into 1” pieces to make life much easier! The ½” strips were not incredibly hard to work with, just a little more time consuming. But, patience always pays off when you’re baking.

RECIPE

INGREDIENTS:

1 package refrigerated pie crust (2 per package)

2 apples, I used green apples

4-5 Tbsp.  sugar

1 tsp. cinnamon

1/8 tsp. nutmeg

1 egg, whisked for egg wash

4-6 Tbsp. water in a small bowl to use to attach pie dough together

Round or Rectangular baking sheet

Parchment paper

Oregon Chai Tea Latte Concentrate to enjoy while baking!


INSTRUCTIONS:

1.) Chop 2 apples into tiny pieces and coat with 1 ½ - 2 Tbsp. sugar, ½ tsp. cinnamon, and 1/8 tsp. nutmeg.

2.) Unroll both pie crusts onto a work surface covered in parchment paper. Optional: use a rolling pin to smooth out any creases.

3.) Use a ruler to mark every ½” or 1” on one pie crust. Also, use the ruler and a sharp knife to impress even lines and cut strips from the pie crust. Set aside.

4.) Spread an even layer of apples onto the other pie crust.

5.) Weave dough strips over apples, first laying half of the strips vertically, then weaving the horizontal pieces in next. Feel free to use a little bit of water in each place where the dough strips overlap. Brush top crust with egg wash.

6.) Once done weaving, sprinkle on a mixture of 2 Tbsp. sugar + ½ tsp cinnamon, and bake for 15-20 minutes at 375 degrees F. Slice like a pizza and enjoy! We cut the finished Apple Pie Pizza with a sharp knife, but you could also use a pizza cutter!

Make sure to also grab your Ibotta offer here for 75 cents off any 1 Oregon Chai product at Walmart (9/26/18 – 11/30/18, or until supplies last).

Stock up now! This tea is so delicious you will want to incorporate it into your every day routines and serve it to anyone who visits you.

I was able to easily order the Oregon Chai Tea Latte Concentrate (32 oz.) on Walmart.com using their super easy Online Grocery Pickup service!

Below, you will see how easy it was to search for all of the available Oregon Chai products at Walmart. I spent around $12 to create this entire recipe, and since the Chai Tea was under $4.00 I saved SO much compared to going to a coffee shop for an overpriced drink.

After I went to the checkout page, I simply chose “Pickup” for FREE (see below)! No shipping charges at all, which saved me around $6.00. YAY!! I love a good deal.

The taste of this Oregon Chai Tea was rich, smooth, and has those amazing chai spices that I can’t get enough of. I like to add macadamia milk to my chai tea, instead of traditional dairy milk, and my body loves me for it! What a delicious way to get a little pick-me-up during baking or during any other time of the day.

Once my order was ready, I was able to run by my local Walmart and easily grab the tea in the pickup area. Super easy since I had so many errands to run that day.

Has your local Walmart installed an Online Grocery Pickup station yet? Ours JUST remodeled, and I had an extremely easy experience, let me walk you through it/ 

1.) Visit the Walmart Online Grocery Pickup station and scan the barcode given in your email.

You can also just wait outside and call the phone number on the pickup area. They will bring everything right out to you!

Like I said, baking helps me de-stress and helps me continue to be creative, so after getting a ton of things checked off the to-do list, I relaxed for a bit, then got to baking.

I hope you have an absolutely splendid fall, and please comment below to let me know if you tried making this recipe! This would be so fun with kids, and would be a fun holiday baking activity. Enjoy!

Tres Leches Cupcakes Recipe

These deliciously moist tres leches cupcakes are a new take on a traditional Mexican dessert recipe. 

I was extremely happy with how these Tres Leches Cupcakes turned out. Just as delicious as the traditional Tres Leches Cake, but more easily handled at a party or shower. 

Tres Leches Cake (Recipe originally posted here on the Tastes Better From Scratch Blog)

Prep Time: 1 hr 30 mins  //  Cook Time: 40 mins  //  Total Time: 2 hrs 10 mins

Ingredients

  • 1 cup all-purpose flour
  • 1 1/2 teaspoon baking powder
  • 1/4 teaspoon salt
  • 5 large eggs , separated
  • 1 cup sugar , divided
  • 1/3 cup whole milk
  • 1 teaspoon vanilla
  • 12 oz can evaporated milk
  • 14 oz can sweetened condensed milk
  • 1/4 cup whole milk
  • Metallic cupcake holders (silicone ones would work well too) - paper cupcake liners will not work for this recipe.
  • Alternately, use a 9"x13" cake pan

For the whipped topping:

  • 1 pint Heavy Cream , for Whipping
  • 3 Tablespoons Sugar
  • 1/2 teaspoon vanilla
  • ground cinnamon , for topping

Instructions

  1. Preheat oven to 350 degrees F. Add foil cupcake liners to tin or alternately, lightly spray a 9x13'' pan with non-stick cooking spray.

  2. In a medium bowl combine flour, baking powder, and salt in a large bowl. Separate the eggs into two separate bowls.

  3. Add 3/4 cup sugar to the bowl with the egg yolks and mix on high speed until yolks are pale yellow. Add the 1/3 cup milk and vanilla and stir to combine. 

  4. Pour the egg yolk mixture over the flour mixture and stir gently just until combined (don't over-mix).

  5. Use electric beaters to beat the egg whites on high speed. Gradually add the remaining 1/4 cup of sugar as you mix and continue beating until stiff peaks.

  6. Fold egg whites into the batter gently, just until combined. Pour batter into prepared pan(s). If making cupcakes, fill batter about 2/3 full, if making a cake, make sure to smooth batter into an even layer so your baked cake doesn't have divots in it.

  7. Bake cupcakes for 15-20 minutes, or bake cake for 35 to 40 minutes, or until a toothpick inserted in the center of the cake comes out clean. Remove from the oven and allow cake(s) to cool completely.

8. Combine the evaporated milk, sweetened condensed milk, and whole milk in a small bowl. Once the cake has cooled use a wooden skewer to poke holes all over the top of the cupcakes or cake. 

9. Slowly pour the milk mixture over the the top of the cupcakes - Make sure to poke LOTS of holes into cupcakes, or milk mixture will fall over the sides. Pour slowly to avoid overflow, and you will want to soak the cupcakes 2-3 times each. The foil cupcake liners help a lot here, so the milk stays in the liners, making sure to pour near the edges and all around.

10. Refrigerate the cupcakes or cake for at least 1 hour or overnight, to allow it to soak up the milk.

11. In the meantime, whip the heavy cream, sugar and vanilla until stiff peaks. Smooth over the top of the cake or cupcakes. Optionally, sprinkle cinnamon on top. Serve with fresh sliced strawberries or raspberries, if desired. Enjoy!

This was the first recipe where I made successful, homemade whipped cream and have never looked back since!!! 

An Elegant Fall Bake Sale {Raise Love for Ronald McDonald House Charities}

Who's ready for Fall? I know I am! The weather has finally cooled down a bit at night here, which means it's time to mix up a few ingredients, get out the decorating materials, and perhaps it's time to get ready to give back by hosting a Fall Bake Sale! If you're here looking for ways to make your baked goods look gorgeous, you're in the right place. 

I'm here today with Ronald McDonald House Charities (RMHC) to share some Creative and Elegant Bake Sale Tips. Selling food is all about the presentation - we eat with our eyes first! In order to make the maximum amount of money from anything you're selling, make it cute and make it approachable! 

CUPCAKE INSTRUCTIONS:

Above, I baked a box of chocolate cake mix into 24 cupcakes, using metal liners.

I then grabbed a quart freezer Ziploc bag and a rosette icing tip. I placed the tip into the corner of the bag, cut a tiny bit of the bag corner off, then taped the icing tip into the hole with electrical tape. This worked pretty well, or feel free to use a pre made piping bag and metal icing tip. 

I then applied a swirl of icing to each cupcake and placed Fall Leaves sprinkles carefully onto each one. I thin they look like a little swirl of leaves on a windy, Fall day!  

CHOCOLATE CHIP COOKIE BARS

Also, shown above, I made a batch of chocolate chip cookie dough, spread it into a baking sheet, and followed the instructions on the packaging for best results. I then cut the cookie bars into squares, and set them on top of a slice of decorative wood and set them on a mint cake stand I got from Target. I love how this display turned out!

Did you know that in 2016, RMHC provided 2.4 million overnight stays to families? And in doing so gave the ability to spend more time with their sick children, to interact with their doctors, and to make important decisions about their children’s care?

Below, you will see the juggling balls that Ronald McDonals House Charities sent me! 

Below, you can see a cute way to offer customers a cute gift bag with a Fall leave glued onto the bag, perfect for gifting that special treat!

Through the Ronald McDonald House and Ronald McDonald Family Room programs, RMHC provides places for families with sick children to stay just steps from the hospitals where they are receiving critical medical care.

Starting a fundraiser is simple and gives the fundraiser the freedom to do whatever it is they love to do to in order to help RMHC reach our goal of providing 12,500 more overnight stays to families of sick children this year.


1.) Always keep gloves and several pairs of tongs on the bake sale table, so you can serve customers their food without touching it. Also, make sure to keep plenty of to-go bags and containers for customers to bring their treats home in. 

2.) Always use rubber gloves while baking the items too.

3.) Presentation! Presentation! Presentation! I loved the use of this light pink crushed velvet tablecloth material! I headed to my local craft store and spent around $8-10 for 1.5 yards of it. I was so happy to incorporate one of the year's trendiest fabrics into my bake sale display! 

4.) Find a unique location like a popular, locally owned clothing boutique to have your bake sale in front of. Make sure people know to enjoy their treats before they head into shop, and food may not be allowed in the store. Office buildings, malls, and even breweries are also amazing location ideas because there is a larger amount of foot traffic.

5.) Spruce up desserts by adding bakery-style details like icing piped with icing tips, and seasonally adorable sprinkles! I also loved adding cupcake toppers, which can be made with toothpicks and scrapbooking paper or even pom poms! They can also be purchased for around $2.00.

6.) Place hand painted price signs at eye level, and make items affordable. Feel free to have a range of prices on the table too. For instance, I thought that .50 cents per mini cupcake, $2.00 per large cupcake, and $1.00 per chocolate chip cookie bar would be appropriate. I really, really wanted to make some caramel apples for this bake sale, and I believe you could get around $4.00 for them! 

7.) Display the charity name for which you are fundraising! I made a hand painted sign for FREE with black paper and white paint to showcase the "Raise Love #forRMHC" campaign info. Shoppers may also want to tag your cause on social media, so that is also what inspired me to create that sign.  

Learn more about starting a fundraiser here, and also get the details on Ronald McDonald House Charities here!

#SoFabSeasons - TONS Of Great Apple Recipes For Fall

Apples are such a huge part of the landscape and economy here in southern Illinois, and I love how versatile apples can be - in recipes, decor, and DIY projects. Have you created anything from apples lately? 

You may remenber my Baked Apple Donuts that I created for this apple-themed post roundup for #SoFabSeasons.
 photo donut 1.jpeg

One of my favorite things that brings up memories of fall is Apples! Do you remember apple picking with your family? How about all of those those tasty fall recipes for everything from fresh apple fritters to hot apple cider! We are excited to share with you this collection of amazing apple themed posts from many of our outstanding members here in the Social Fabric community. We know that you will enjoy them and hope that you can create some new fall memories for yourself and the ones you love.
SoFabSeasons Apples  
DESSERT RECIPES (* denotes recipes used in graphic)

*Lily the Wandering Gypsy - Fresh Apple Donuts with Bacon, Caramel Pecan Glaze

Home and Garden Cafe - Apple Pie Coconut Ice Cream

*Joy's Life - Apple Pie Dessert Pizza

*Kitchen Concoctions - Toffee Apple Pie Cookies

The Bandit Lifestyle - Delicious Apple Fritters Perfect for Fall

Roasted Beanz - Easy Crustless Almond Raisin Apple Pie

Wondermom Wannabe - Clean Eating Apple Crisp with Caramel Sauce

Anti June Cleaver - Mini Dutch Apple Pear Pie to Get You Ready for Fall

Basic N Delicious - Apple Cinnamon Bundt Cake

Mostly Homemade Mom - Caramel Apple Pie Fudge

Little Blog in the Country - Pressure Cooker Canned Apple Pie Filling

Diana Rambles - Apple Spice Dump Cake

The Tip Toe Fairy - Apple Plum Skillet Cobbler

Five Marigolds - Sweet and Savory Salted Caramel Apple Dip

Intelligent Domestications - Apple Cinnamon Roll Cake & Apple Cream Cheese Icing

Home Maid Simple - Easy Apple Crisp

More or Less Cooking - Best Apple Fritter Coffee Cake

My Big Fat Happy Life - Skinny Caramel Ice Cream

* An Alli Event - Apple Bundt Cake with Praline Frosting

Tobin's Tastes - Caramel Apple Cheesecake Dip

Ginger Casa - Delicious Apple Cranberry Pecan Crumble

Sweet Sensations - Apple Cobbler with Oatmeal Muffin Crust

A Labor of Life - How to Make Delicious Apple Roses

Julie Is Coco and Cocoa - Fried Cinnamon and Sugar Apple Rings

Polka Dotted Blue Jay - Mini Carmel Apple Bites

Finding Sanity in Our Crazy Life - No Bake Oatmeal Apple Pecan Cookies

Being Tazim - Strawberry Apple Crumble Vegan and Dairy Free

Upstate Ramblings - Caramel Apple Cake

Rebecca Lately - Baked Apple Recipe

Simple Food 365 - Light and Fluffy Apple Cinnamon Coffee Cake

Mama Plus One - Homemade Apple Cider Donuts

Bento Lunch (dot) net - Caramel Apple Pudding Parfaits

MORE APPLE RECIPES

Broken TeePee - Salmon and Rice Noodles on Apples, Carrots & Zucchini

Revel & Glitter - Autumn Cranberry Apple Pear Salad

* Happy Go Lucky - Bacon Cheddar Apple Dip

Honest and Truly - Delicious and Easy Mini Apple Pancakes

Smiling Notes - Healthy Apple Pie Oat Pancakes

Creative Southern Home - Apple Bread

Beyond Mommying - Apple Bacon Grilled Cheese

Momcrieff - Apple Pancake Rings for Breakfast or Snack

Tiaras and Tantrums - Favorite Autumn Apple Snacks

Injenious Life - Gluten Free Applesauce Muffins

Everyday Party - Simple Caramel Apple Cider

A Paper Arrow - Apple Bread for the Fall

Happy and Blessed Home - Delicious Apple Recipes

Mom Saves Money - DIY Dehydrated Apple Rings

Gluesticks Blog - Baked Apple Chips

Life With Lorelai - Caramel Apple Crumbly Bread Recipe

Ava's Alphabet - Baked Apple Pancake

Life with Lovebugs - Spiced Applesauce and Oatmeal Muffins

For the Love of Crust - Homemade Crockpot Apple Cider

Oat & Sesame - Maple Your Applesauce

Southern Mom Loves - Cheddar and Apple Goldfish Snack Mix Recipe

My Life Cookbook - Cinnamon Apple Breakfast Bread (Gluten Free)

ACTIVITIES

Tales of Mommyhood - Apple Picking Favorite Family Activity

Mama Luvs Books - Apple Picking in Rhode Island

Kori at Home - Apple Tot School Unit with FREE Printables

Jenny at Dapperhouse - DIY Apple Basket Sorting Game

To & Fro - Tips for Apple Picking with Your Family

CRAFTS

Little Mama Jama - Apple Stamping Sensory Activity for Preschoolers

Creative Ramblings - Fabulous Fall Wood Apple Sign

Woods of Bell Trees - Quilted Apple Pillow

For What It's Worth - Apple Themed Party with DIY Apple Craft

The Kennedy Adventures - Paper Plate Apple Craft

Babs Projects - Apple Scented Potpourri Pouches

Great Contradictions - Apple Themed Candy Bar Wrapper Printables

BEAUTY

* Momerish - Apple Pie Sugar Scrub Perfect for Fall Pampering

Can you believe all these incredible Apple themed posts? Bookmark this page so you can come back and try out all the recipes, crafts and activities with you and your family! Check back next month when Social Fabric features posts with a pumpkin theme. You can always search the hashtag #SoFabSeasons to find more of what you're looking for!

An Easy Treat For Labor Day And Beyond

I have an awesome, tasty, and amazingly easy dessert idea for Labor Day festivities and beyond. Definitely want to admit that I did not make my own cupcakes, though - I got some delicious pre-made Red Velvet Cupcakes from our local Schnuck's grocery store, and also found the berries there too. But, the little special touches always make people smile, so you can recreate your own by simply adding some blueberries and raspberries to some cupcakes of your own. You could even grab the 3 ingredients on your way to a party, and decorate the desserts when you arrive! I also love how the seersucker fabric and little silver stars confetti makes for a patriotic yet elegant decor idea for any holiday that's red, white, and blue! 

If you do want to make your own Naturally Colored Red Velvet Cupcakes, Food52 has an awesome recipe that uses beets (instead of red food coloring) - which is incredible! 


NATURALLY DYED RED VELVET RECIPE FROM FOOD52:

For the cake:

  • 1 cup beet purée, from fresh red beets (not cooked)
  • 3/4 cup buttermilk
  • 1 tablespoon white wine vinegar
  • 2 tablespoons lemon juice
  • 1 tablespoon vanilla extract
  • 2 1/2 cups cake flour
  • 3 tablespoons cocoa powder, not Dutch-process
  • 2 teaspoons baking powder
  • 1 teaspoon cream of tartar
  • 1 teaspoon salt
  • 1/2 cup neutral-flavored oil
  • 1/2 cup unsalted butter, softened
  • 2 cups granulated sugar
  • 3 large eggs

For the cream cheese frosting:

  • 8 ounces cream cheese, at room temperature
  • 8 ounces unsalted butter
  • 2 tablespoons crème fraîche
  • 1 pound confectioners' sugar
  • 1/2 teaspoon lemon zest
  • 1 teaspoon vanilla extract
  • 1 pinch salt

Instructions:

Add the beet purée, buttermilk, vinegar, lemon juice, and vanilla extract to a food processor fitted with the steel blade and process until very smooth.

Sift the cake flour, cocoa powder, baking powder, cream of tartar, and salt together in a bowl. Beat the sugar, oil, and butter together in a large bowl until creamy, then add the eggs one at a time, mixing for 30 seconds after each addition.

Alternate adding the flour mixture and beet mixture to bowl, beginning and ending with the flour mixture. Divide between the cupcake papers and bake until a cake tester inserted into the center of the cake comes out clean, 20 to 22 minutes.

Cool the cupcakes on a rack for 20 minutes or more. Then, get the icing ready. 


To make the frosting, beat the butter and cream cheese together on high speed until fluffy and smooth, then add the crème fraîche. Turn the mixer to low and gradually add the confectioners' sugar until just combined, then turn the mixer up to medium-high and beat until fluffy and smooth, making sure to stop the mixer and scrape down to the bottom of the bowl so everything is evenly mixed. Add the lemon zest, vanilla extract, and salt. Enjoy!

Soft Gingerbread Cookies Recipe

I know this post is a few days after Christmas, but I absolutely LOVE how these turned out! I could eat them all at once, but they do have a bit of a stronger taste to them than most of the cookies I make, so I have to pace myself :) These cookies were also a little bit involved, so just a warning! They took us working on them throughout the evening, but it was so fun! And the dough need to chill for about 3 hours, so you could let the dough chill overnight if you want. Original Recipe Found Here. 

Lily The Wandering Gypsy

These hardly need any decorating or icing, they are perfect just the way they are! They were so fun to make, and I have always been so enamored by the beautiful color of gingerbread dough. What a beautiful color! 

That amazing color I'm talking about comes from one of the main ingredients - Molasses! This was our first time ever using this stuff in anything, and it was very easy to use.  I found it at our local Co-Op, for about $5.99, but here is the best price I found online. 

Lily The Wandering Gypsy

INGREDIENTS:

3 cups all-purpose flour
1 teaspoon baking soda
3/4 teaspoon ground cinnamon
3/4 teaspoon ground ginger
1/2 teaspoon ground allspice
1/2 teaspoon ground cloves
1/2 teaspoon salt
1/4 teaspoon freshly milled black pepper
8 tablespoons (1 stick) unsalted butter, at room temperature
1/4 cup vegetable shortening, at room temperature (I used more butter here)
1/2 cup packed light brown sugar
2/3 cup unsulfured molasses
1 large egg

Lily The Wandering Gypsy

INSTRUCTIONS:

Position the racks in the top and bottom thirds of the oven and preheat to 350 degrees F.

Sift the flour, baking soda, cinnamon, ginger, allspice, cloves, salt and pepper through a wire sieve into a medium bowl. Set aside.

In a large bowl, using a hand-held electric mixer at high speed, beat the butter and vegetable shortening until well-combined, about 1 minute. Add the brown sugar and beat until the mixture is light in texture and color, about 2 minutes. Beat in the molasses and egg. Using a wooden spoon, gradually mix in the flour mixture to make a stiff dough. Divide the dough into two thick disks and wrap each disk in plastic wrap. Refrigerate until chilled, about 3 hours. (The dough can be prepared up to 2 days ahead.)

To roll out the cookies, work with one disk at a time, keeping the other disk refrigerated. Remove the dough from the refrigerator and let stand at room temperature until just warm enough to roll out without cracking, about 10 minutes. (If the dough has been chilled for longer than 3 hours, it may need a few more minutes.) Place the dough on a lightly floured work surface and sprinkle the top of the dough with flour. Roll out the dough 1/8 inch thick, being sure that the dough isn't sticking to the work surface (run a long meal spatula or knife under the dough occasionally just to be sure, and dust the surface with more flour, if needed). For softer cookies, roll out slightly thicker. Using cookie cutters, cut out the cookies and transfer to nonstick cookie sheets, placing the cookies 1 inch apart. Gently knead the scraps together and form into another disk. Wrap and chill for 5 minutes before rolling out again to cut out more cookies.

Bake, switching the positions of the cookies from top to bottom and back to front halfway through baking, until the edges of the cookies are set and crisp, 10 to 12 minutes. Cool on the sheets for 2 minutes, then transfer to wire cake racks to cool completely. Decorate with Royal Icing. (The cookies can be prepared up to 1 week ahead, stored in airtight containers at room temperature.)

For The Icing - I only had a tiny bit of powdered sugar. So, I basically mixed a few Tbsp of powdered sugar with a splash of milk and a bit of corn syrup to thicken it up. It was more like a glaze, though. For the decorations, I used three sprinkles as buttons. 

Lily The Wandering Gypsy

Well, I hope you enjoy these cookies! They took a lot of work, but wow, did they turn out well! Enjoy!

Amazing Oatmeal Raisin Cookies Recipe

These cookies tasted beyond good, and made the house smell like a cookie candle :) I wanted to share some of my favorite ingredients, so you can make your Oatmeal Raisin cookies the very best ever!

Awesome Oatmeal Cookies! YUM!
5DA_1479 100.jpg

INGREDIENTS (WET):

INGREDIENTS (DRY):

Awesome Oatmeal Cookies! YUM!

INSTRUCTIONS: 

  1. Preheat oven to 350°.
  2. Melt butter in heat safe container. 
  3. Whisk dry ingredients; set aside.
  4. Combine wet ingredients with a hand mixer on low.
  5. To cream, increase speed to high and beat until fluffy and the color lightens.
  6. Stir the flour mixture into the creamed mixture until no flour is visible.
  7. (Over mixing develops the gluten, making a tough cookie.) Now add the oats and raisins; stir to incorporate.
  8. Use a silicone Tablespoon measuring spoon, and scoop out dough
  9. Drop 2-inches apart onto baking sheet sprayed with nonstick spray.
  10. Bake 11-13 minutes (on center rack), until golden, but still moist beneath cracks on top.
  11. Remove from oven; let cookies sit on baking sheet for 2 minutes before transferring to a wire rack to cool.

Awesome Oatmeal Cookies! YUM! - The melted butter and the sugar, eggs, and both sugars.

Awesome Oatmeal Cookies! YUM! - The melted butter and the sugar, eggs, and both sugars.

Here is the cookie dough before the dry ingredients are added.

Here is the cookie dough before the dry ingredients are added.

Awesome Oatmeal Cookies! YUM!

I hope you have enjoyed my process of creating some incredible Oatmeal Raisin Cookies! If you make some, I'd love to see them! Put your link below in the comments! 

https://www.pinterest.com/happysolez/pins/