Football Party Craft Idea

I had so much fun with my #GameDayGrubMatch project earlier this month, and as I was shooting those images, I shot a few extras to show you just how fun and easy it is to customize your party by adding something extra special to the food you're eating!

cute DIY

I used these cute food containers in my project for PepsiCo and their #GameDayGrubMatch contest! They would fit your popcorn chicken, snacks, and more! Read the whole post here.
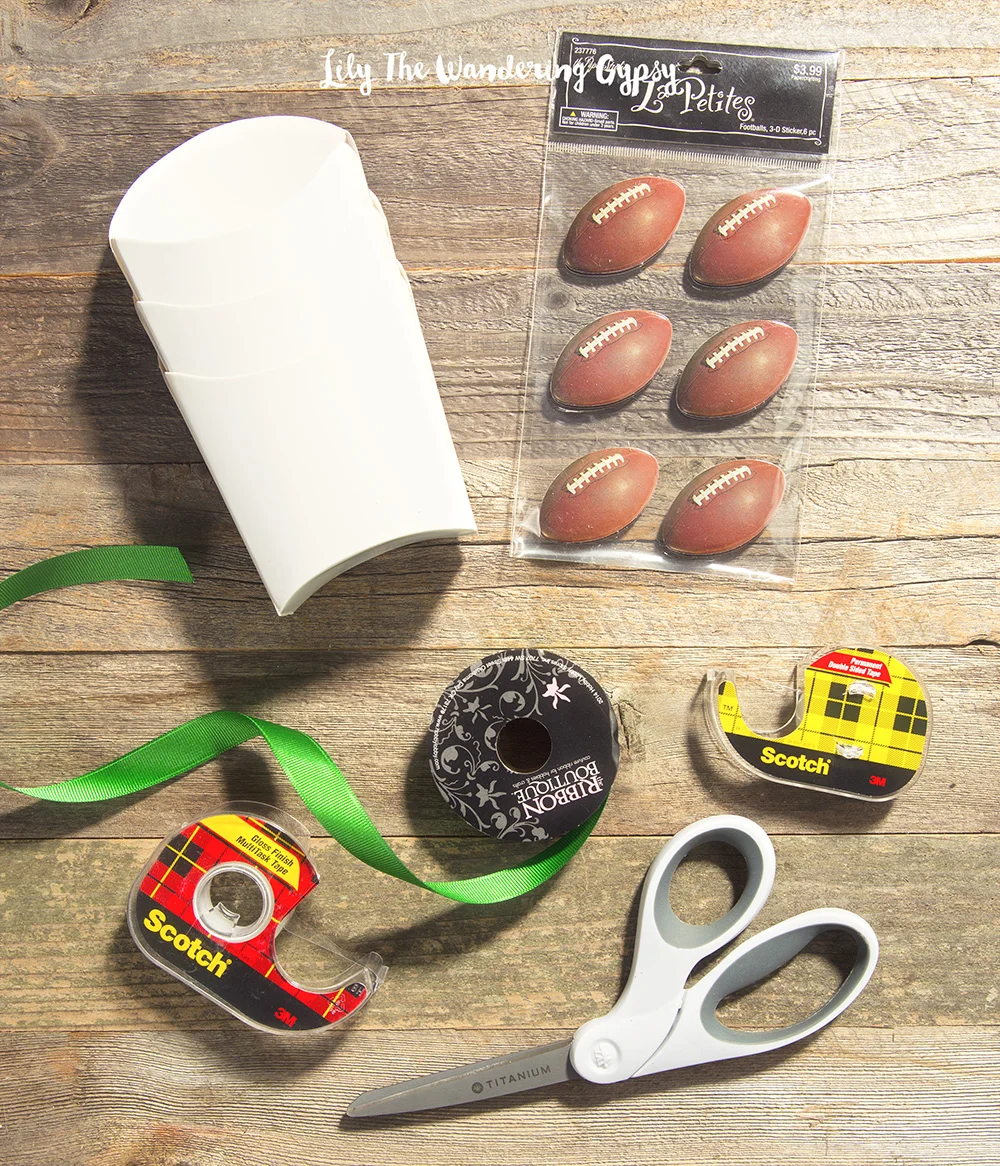
Cute DIY

MATERIALS 

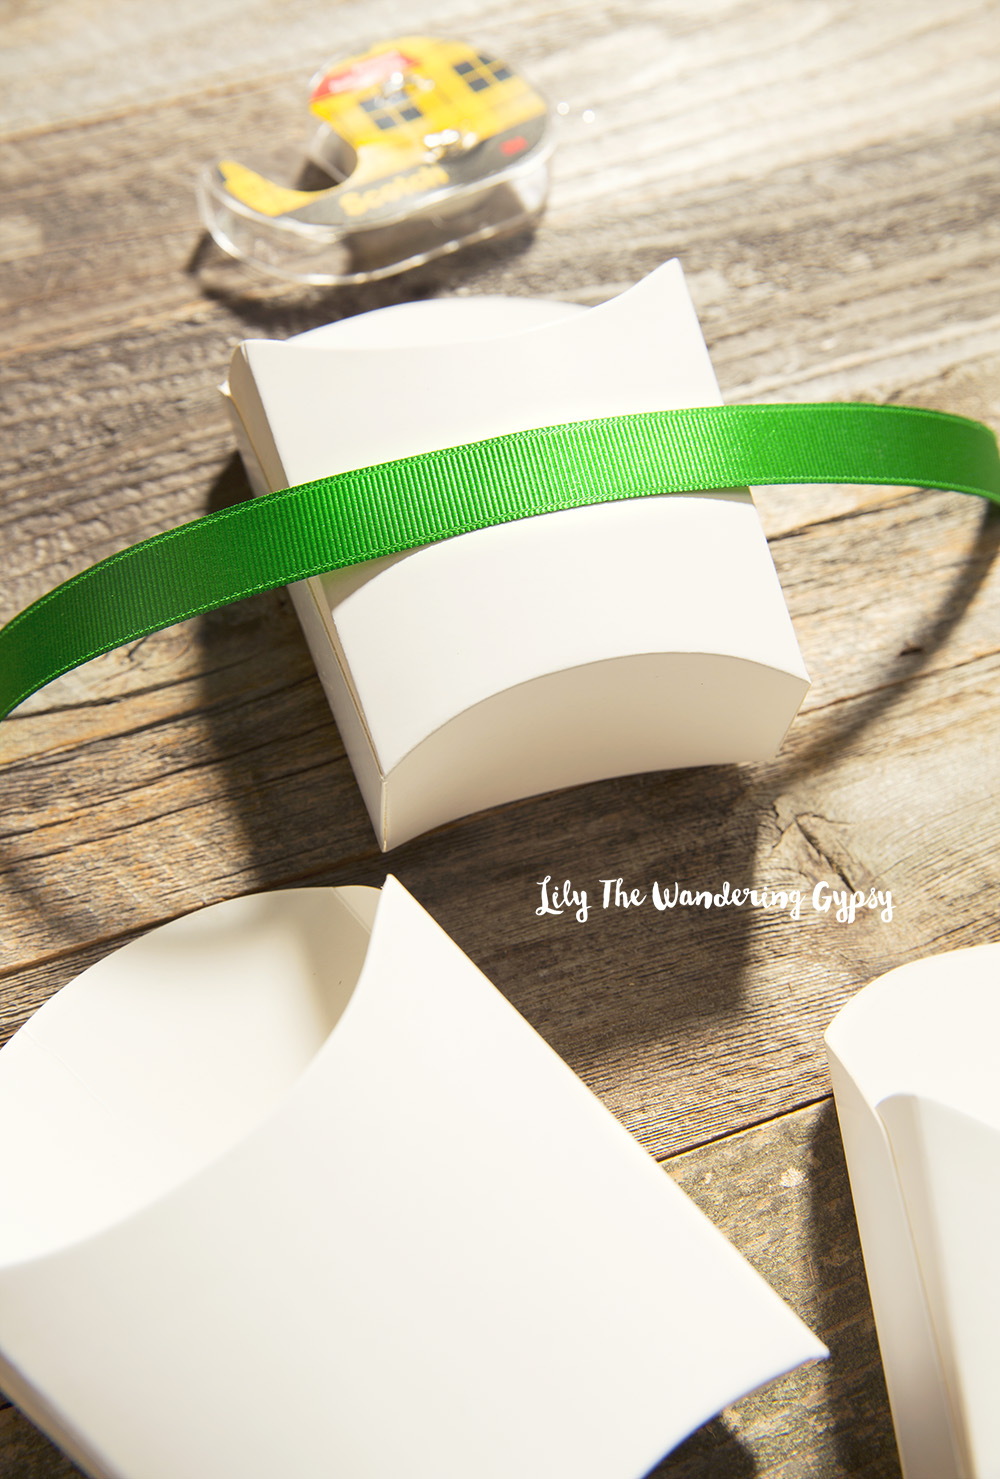
French Fry containers, Football Stickers (I like the 3-D ones), green ribbon, clear tape, double sided tape, and scissors. I found the fry boxes at Hobby Lobby, and they are so cute! 

Cute DIY Idea

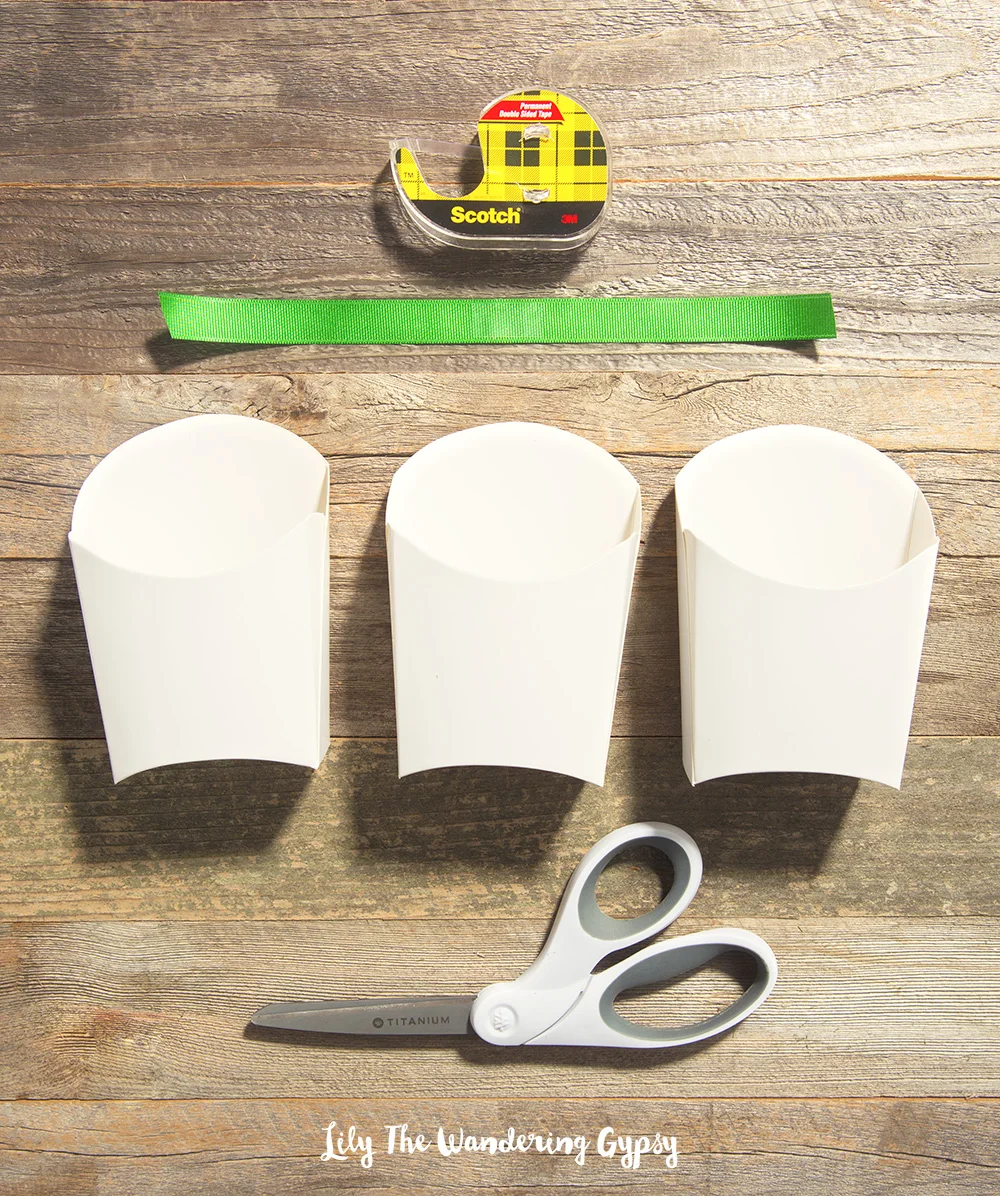
Cut a length of ribbon that will wrap around the fry boxes. 

Cute DIY

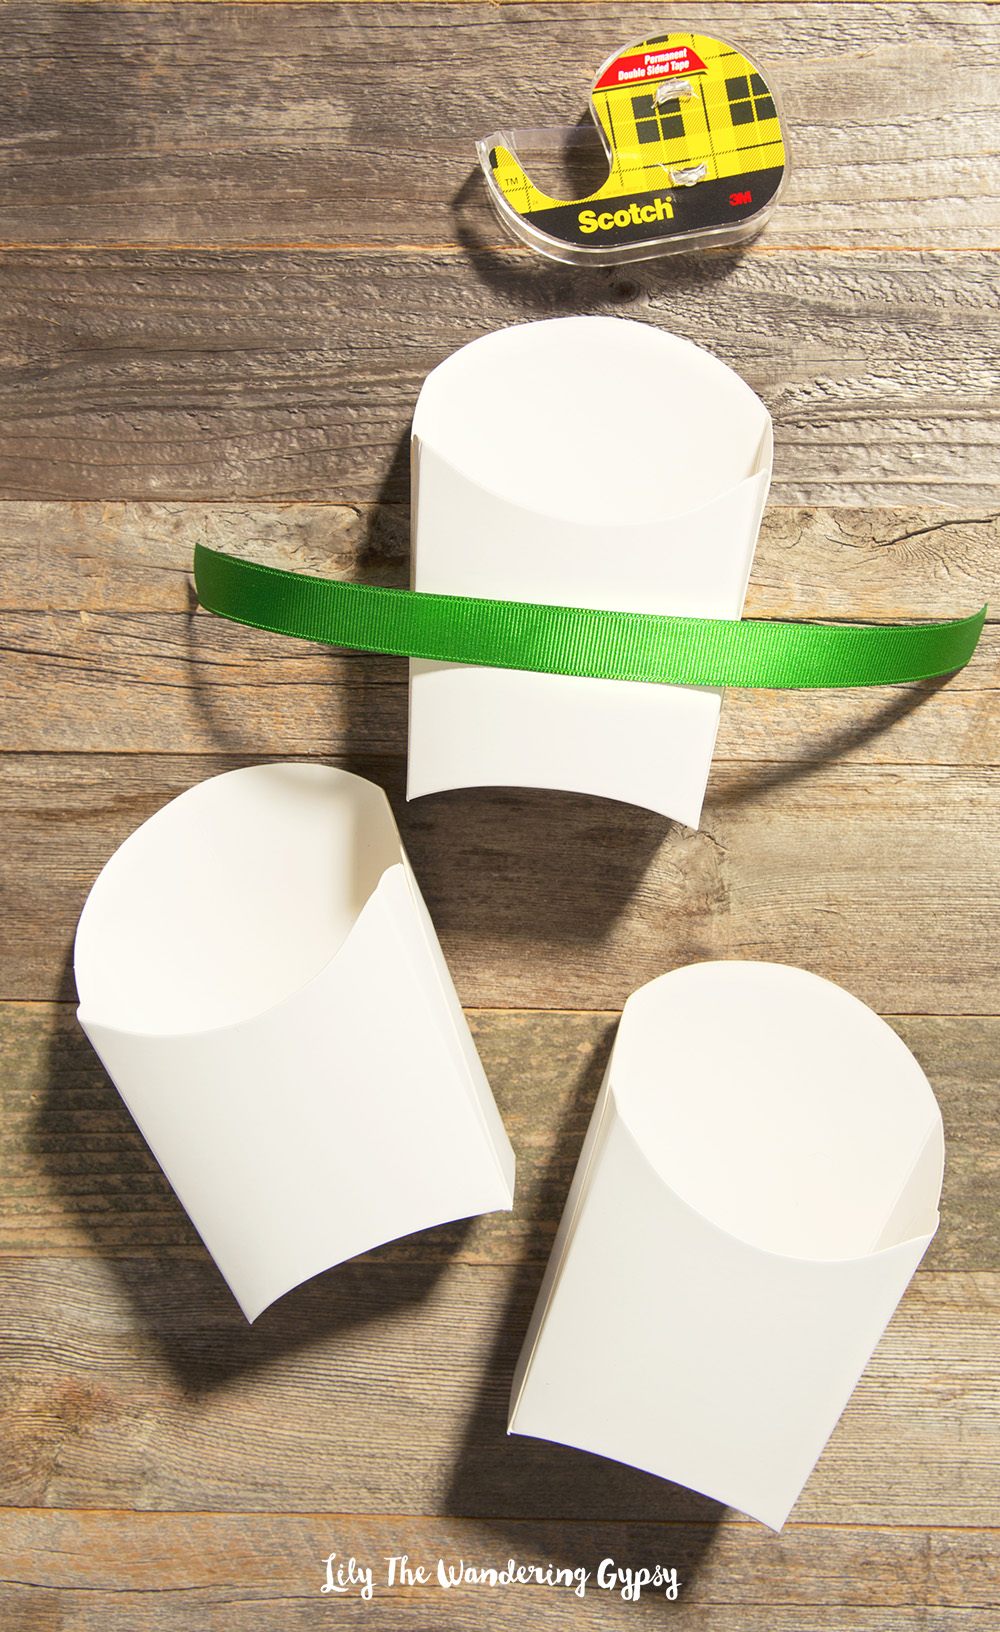
Attach the ribbon to the front of the fry box with double stick tape. Then, wrap the ribbon around to the back, and tape the ribbon with the regular tape. 

Cute DIY
Cute DIY

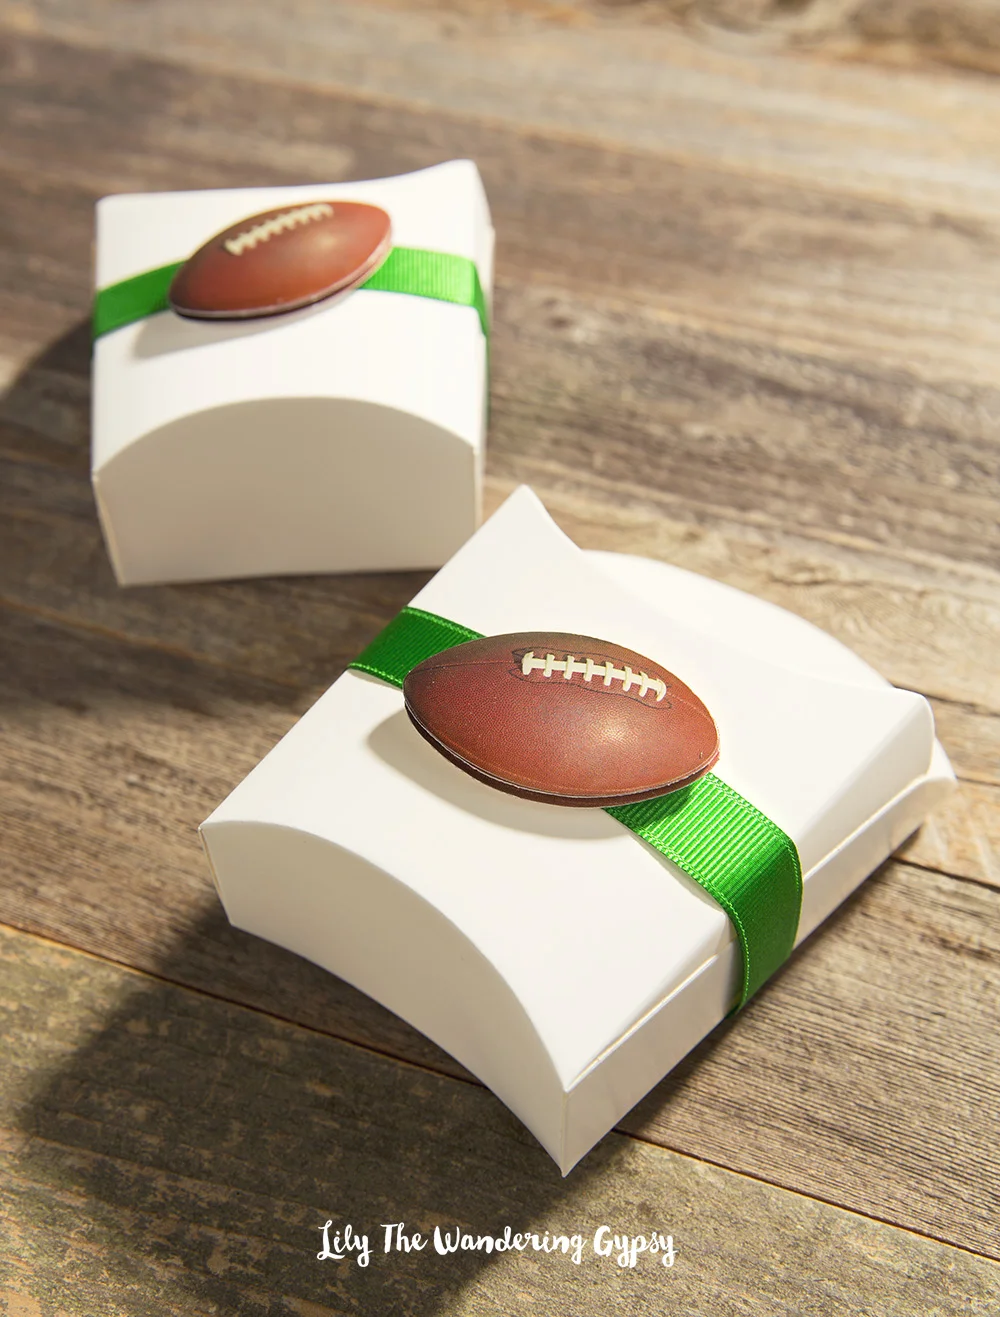
Simply, attach the football stickers to the front of the fry boxes and fill with your game day snacks! 

Cute DIY!

Frozen Hot Chocolate Pie Recipe

I am writing this as I eat a piece of this magical pie! I love how it turned out, and now I have a chocolatey treat for days to come. The best part is that this pie was incredibly easy to make, and the ingredients cost less than $5! 

No-Bake Chocolate Pie Recipe

INGREDIENTS:

1 Pie Crust, Cool Whip, Chocolate Pudding (Instant), Milk

INSTRUCTIONS:

Mix 2 Cups milk into pudding and stir, Let sit for about 5 minutes. 

Add 1 Cup of the Chocolate Pudding into the bottom of the pie crust, and smooth out. 

Mix 1 Cup Cool Whip into the rest of the pudding and stir until well combined. Add this mixture to the pie crust and smooth out.

Now, put some of the extra Cool Whip into a small Ziploc bag and cut end off. Practice first, but dollop little dots of Cool Whip around the edges of the pie. Feel free to decorate with sprinkles for a more festive look! Freeze for 1 hour, and slice yourself some chocolate pie! If you freeze it overnight, it will be more the consistency of a pudding pop. So good either way! Enjoy!!!

No-Bake Chocolate Pie Recipe

Ugly Christmas Sweater Dog Bandana - DIY Tutorial

Looking for a last minute way to get festive this holiday season? Dress your pup in something cute and quirky. This is my take on the Ugly Christmas Sweater, but updated. Cabbie actually loved this bandana! 

Holiday Dog Bandana DIY
Dog Bandana

MATERIALS:

Solid Colored Bandana (or solid colored square of fabric that fits your dog), Sparkly Felt, Tacky Glue or Fabric Glue, Sparkly and Solid Colored Puffy Paint, Other Holiday Embellishments (I used mini flat-backed ornaments), This Template (Here), Scissors, Permanent Marker, Computer and Printer. NOTE: You can also draw your own shapes.

Holiday Dog Bandana

Cut out the paper shapes you want to use. Then, trace them onto the back of the felt. 

Holiday Dog Bandana
Holiday Dog Bandana

Iron the bandana, and position the shapes and other adornments around so they create a cool design. ** Place a newspaper between the folded bandana to catch glue! Glue the pieces down, and wait about 30 minutes to an hour for pieces to be secure. 

Holiday Dog Bandana

Now, get out your puffy paint and outline the edges of the felt shapes. Get as creative as you want with this project, I really had a lot of fun! 

Holiday Dog Bandana
Holiday Dog Bandana
Holiday Dog Bandana

Happy Holidays from Cabbie The Chocolate Lab and Lily The Wandering Gypsy! XOXO!

Dog Bandana

New York City!!

I had SO much fun in New York City last weekend. I was recently working a fun content creation project for Skype, where I shared my Halloween Party Tips and DIY Ideas! This was my first time to New York City (we did visit years ago for like 2 hours, but this was completely different...)

Pumpkins in NYC

So, the images I created for Skype can be found HERE. I had SO much fun creating some holiday content, as this was one of the first projects I have done of this nature. Halloween Tips and Tricks are some of my absolute FAVORITES, so I had a really great time! I also helped with a Pinterest Board (here), and I helped lead a fun, Skype Group Chat (search SkypeHalloween to find us!!). 

One of the best parts of this project came at pretty short notice. Skype personally invited me out to New York City, to help coordinate a Halloween party for The Lower East Side Girls' Club of NYC! Pretty incredible and practically unbelievable. What an amazing opportunity! I am still so fortunate I was the one chosen for this whole thing. I had an absolute blast, my hotel was amazing, I ate some of the best food in my life (and I've eaten food all over the country!!), met some wonderful people, and helped some really amazing kids have the Best Halloween Party Ever! 

 I also learned on this trip, that the earlier you get to the airport, the less stressful your whole trip will be! This really worked out so well, without really any problems!

Flying High...

DAY ONE - Sticky Rice Thai Food + Top Hops

Sticky Rice - NYC

View more photos from Day One, below! I ate at StickyRice, drank craft beer at Top Hops, and stayed at The Holiday Inn - Lower East Side (it was super nice and newly renovated). 


DAY TWO - LOWER EAST SIDE MURALS + ARIEL'S LATIN BISTRO + PARDON MY FRENCH

Lower East Side - NYC

Check out the slideshow, below, to see my mural sightings and awesome NYC food! If you're in the area, I would definitely recommend Ariel's Bistro for lunch and a $5 strawberry margarita, and Pardon My French for a super fancy date night. The whole Skype team was so wonderful to take me out for dinner and cocktails after the Halloween party.

THE SKYPE HALLOWEEN PARTY

So, the main reason I was there was, of course, The Skype Halloween Party at The Lower East Side Girls' Club! The girls absolutely LOVED the party, there was a DJ that played spooky beats, I hosted a craft table featuring Tissue Paper Pumpkins filled with CANDY. Once the candy ran out, the girls practically disowned me :) The whole party will be made into a couple of short movies that will feature yours truly for a short bit, helping the girls make pumpkins, and also myself chatting with influencers from YouTube, Twitter, and Instagram! It all went super well, and I had a blast! It was incredible giving back to the community in this way, and hopefully inspiring the kids!

Until next time! NYC, I really had fun, and hope to be back soon! A very special thanks to HelloSociety and Skype for helping make this project an absolute success!!! 

Halloween Party Invites + A Free Printable

I really love how these adorable invites turned out! I love the fact that you can fill these gift boxes with spooky treats, and include the invite in a really unique way! I included two printables, 

Halloween Invites

MATERIALS NEEDED

5" x 6" Black Jewelry Boxes - I used the type you would put jewelry into, with the cotton inside. 

2 Free Printables - found below this image

Red Paper Crinkles (from Hobby Lobby) - But, I found mine at the Dollar Tree

Plastic Halloween Toys / Rings (small enough to fit into the boxes) - Also found at the Dollar Tree

Halloween Candy that fits into the boxes

Halloween Confetti (found at Hobby Lobby)

Scissors

Plastic Packing Tape and a Glue Stick 

Halloween Invites

Right Click and Save the two images below. You can print them off for this tutorial! 

Spooky Halloween Invites

Print and then cut out the invites below, and insert them into the boxes at the end. 

Spooky Invites - Free Printable

Let's Get Started! Lay out all of your materials for the project. 

Halloween Invites
Halloween Invites
Halloween Invites

Cut out the skull design from the first printable. This will be glued to the front of the boxes. Also, cut out the address labels, which are also on that same page. 

Halloween Invite
Halloween Invites

Next, glue the skull cutouts onto the boxes with a glue stick. When you mail these, you will be covering them with clear tape, so they will stay put during shipping. 

Halloween Invite

Add Red Paper Crinkles to emulate "blood" that is oozing out of the invite...

Halloween Invites

Next, place as many pieces of candy and Halloween toys as will possibly fit into the boxes while allowing the lid to still close. I also added spider confetti here, too. 

Halloween Invites
Halloween Invites
Halloween Invites

Cut out your Get Spooky Invites, fill out the blanks, and add them to the box, on top of the candy! 

Spooky Halloween Invites - Free Printable
Halloween Invites

Add the recipient's address to the back of the invite, and wrap everything up tight with clear packing tape! 

Halloween Party Invites

Aren't they adorable??!!

Halloween Invites
Halloween Invites

Fall Rice Krispy Treat Pops!

Ever wonder why your rice krispy treats don't turn out soft, rich, buttery, and super tasty? You may be using the wrong method. Here, I will show you the old-fashioned way to make Rice Krispy Treats on the stovetop - with real butter.

I love how these little leaf treat pops turned out! They could be customized to just about any holiday or party theme, too! Feel free to add food coloring to them to really customize them in a new, unique way. Here we go!

Fall Rice Krispy Treat Pops - Lily The Wandering Gypsy

Ingredients:

- 3 Tbsp. REAL Butter (Organic Preferred)

- 6 C. Rice Krispy Cereal 

- 6 C. Marshmallows

- Sprinkles in Seasonal Colors

(Not Pictured)

- Parchment Paper

- Baking Dish 

- Smaller Wooden Skewers

- Leaf-Shaped Cookie Cutters

Fall Rice Krispy Treat Pops - Lily The Wandering Gypsy

Instructions: 

In a large pot, melt butter over low heat (slower is better, so the butter doesn't burn.). As that melts, add marshmallows. Continue to melt the ingredients over low-medium heat. Make sure to watch the mixture so it doesn't brown. The mixture should look a little something like this right before you add the cereal.

Fall Rice Krispy Treat Pops - Lily The Wandering Gypsy

Add the cereal and mix well to combine all of the ingredients. 

Fall Rice Krispy Treat Pops - Lily The Wandering Gypsy

1.) Spray baking dish with non-stick spray or butter. Cut a piece of parchment paper to fit inside the dish.

2.) Pour in Gooey Cereal Mix.

3.) Use another piece of parchment paper to pat down the cereal mixture flat into the dish. This will keep your hands WAY less messy.

Once cereal has cooled, remove the cereal and parchment paper, and put it onto a cutting board.

Fall Rice Krispy Treat Pops - Lily The Wandering Gypsy

Use your favorite leaf-shaped cookie cutter, press firmly down into treats. You can use a bit of non-stick spray on the cookie cutter if the treats stick. Carefully insert small skewer sticks into the leaves. Make sure you don't jab your hand. I got about 12-13 leaves out of my batch, and had lots of pieces left over to devour :)

Fall Rice Krispy Treat Pops - Lily The Wandering Gypsy

Enjoy! Happy Fall! Check me out on Pinterest.

How To Make Blooming Candies

I had so much fun creating this project! I was inspired by summer, and all the pretty flowers that are blooming right now! For this recipe, I used silicone brownie molds, so I could fill them with tons of candy. I also used Blue and Vibrant Green Candy Melts. My filler candies were Sixlets, found here. See the list of ingredients below...and have FUN! You can make these in just about any color combo, for special events, holidays, and sporting events. 

How To Make Blooming Candies!

HERE'S HOW YOU MAKE THEM...

You only need a few simple ingredients! Some Sixlets Candies, candy melts, and a candy mould.  

You only need a few simple ingredients! Some Sixlets Candies, candy melts, and a candy mould.  

INGREDIENTS (Click Names To Buy)

Vibrant Green Candy Melts - Blue Candy Melts - Filler Candies - Wilton Paintbrushes, Candy/Brownie Molds

1.) Melt your candy melts in 2 separate containers, either in the microwave or in a double boiler method, which I did. I found that using a 2 cup Pyrex measuring cup, which held one package of candy melts worked great! Fill a small saucepan with 2-3 inches of water, and pour your melts into the measuring cup. Insert cup into water, heat water over medium of high heat and stir melts frequently until smooth. (See photo below for tips)...

How To Make Blooming Candies!
Texture Test (above) - The blue one looks right, but NOT the green one! If your melts form more of a paste than a smooth and satiny texture, try again. 

Texture Test (above) - The blue one looks right, but NOT the green one! If your melts form more of a paste than a smooth and satiny texture, try again. 

MY BIGGEST TIP WOULD BE...USE A PAINTBRUSH!!!

2.) Using a paintbrush to spread the candy molds was a priceless tip! The brush gives you way more control than a knife or spoon. This step took a while, but was definitely fun. I searched around just about every craft store for these brushes, and f…

2.) Using a paintbrush to spread the candy molds was a priceless tip! The brush gives you way more control than a knife or spoon. This step took a while, but was definitely fun. I searched around just about every craft store for these brushes, and finally found them at JoAnns! I originally searched for cheap kids' paintbrushes, and found nothing. Luckily I persisted :) 

3.) See how I spread the blue candy melts into the molds with a paintbrush, and am about to spread the green candies next. I added about double this amount (that you see in green) to fill the mold at first. After you fill the molds, pop the candies …

3.) See how I spread the blue candy melts into the molds with a paintbrush, and am about to spread the green candies next. I added about double this amount (that you see in green) to fill the mold at first. After you fill the molds, pop the candies into the freezer for about 5 minutes. 

4.) Now, fill the candy shells with Candies, almost to the very top. 

4.) Now, fill the candy shells with Candies, almost to the very top. 

5.) Add a dollop of candy melts on top of your fillers candies, and use the paintbrush to smooth the dollop out, and to create a seal, so the candies stay inside the melts. Throw them back into the freezer, and wait about 30 minutes (or longer), so …

5.) Add a dollop of candy melts on top of your fillers candies, and use the paintbrush to smooth the dollop out, and to create a seal, so the candies stay inside the melts. Throw them back into the freezer, and wait about 30 minutes (or longer), so that everything hardens and seals. 

These are so cute!!!

These are so cute!!!

6.) Here is what it looked like after I smoothed the last part of the candy melts over the molds, to close in the Sixlets. Use your brush to make a pretty swirl pattern on the candies if you wish. 

6.) Here is what it looked like after I smoothed the last part of the candy melts over the molds, to close in the Sixlets. Use your brush to make a pretty swirl pattern on the candies if you wish. 

7.) Here is what your (almost finished) candies will look like after being in the freezer overnight. You don't have to leave them in this long (2 hours will do), but after all the work I did on this project, I was more than happy to leave these…

7.) Here is what your (almost finished) candies will look like after being in the freezer overnight. You don't have to leave them in this long (2 hours will do), but after all the work I did on this project, I was more than happy to leave these babies in the freezer overnight, and enjoy them the next day :)

8.) Using a pair of rubber or cotton gloves, carefully peel the mold away from your Blooming Candies. The gloves help prevent finger prints all over your candies. Aren't they adorable? The next photo shows how you open them...

8.) Using a pair of rubber or cotton gloves, carefully peel the mold away from your Blooming Candies. The gloves help prevent finger prints all over your candies. Aren't they adorable? The next photo shows how you open them...

Now you can reveal your surprise candy inside! Just use a sharp kitchen knife, and (very carefully), cut into the candy as if you are cutting a slice of cake. 

Now you can reveal your surprise candy inside! Just use a sharp kitchen knife, and (very carefully), cut into the candy as if you are cutting a slice of cake. 

Blooming Candies

Pinterest  //  Facebook  //  Instagram  //  She's So Chic Blog  //  Twitter  //  Polyvore

Look What's New! Baby Quote Tees

I love the fact that graphic tees are so popular. They're so instagram-worthy and one day while looking at Jawbreaker's Tumblr site, I got super inspired to make some of my own. Not for myself, though, for kids and babies!!! So excited to introduce my newest creations. If you are in need of one of these tees or onesies, for now, please comment below. I will make it so you can purchase them soon! (Please leave your email below so I can get back to you), just let me know what size. The prices are marked below the images. Thanks!!!

To explain my process, I actually iron on each and every letter individually! The letters are old school flocked letters. If you need a different quote, I may be able to accommodate. 

I Woke Up Like This Baby Tee Or Onesie $25.00

I Woke Up Like This Baby Tee Or Onesie $25.00

Happy Camper Onesie $18.00

Happy Camper Onesie $18.00

Mornings Are For Cuddles Tee or Onesie $25.00

Mornings Are For Cuddles Tee or Onesie $25.00

But First, Milk Onesie or Tshirt $25.00

But First, Milk Onesie or Tshirt $25.00

If you are interested in a cute Quote Onesie, just leave a comment with your email below. Thanks!!!