DIY Summer Fun - Washi Tape Everything!

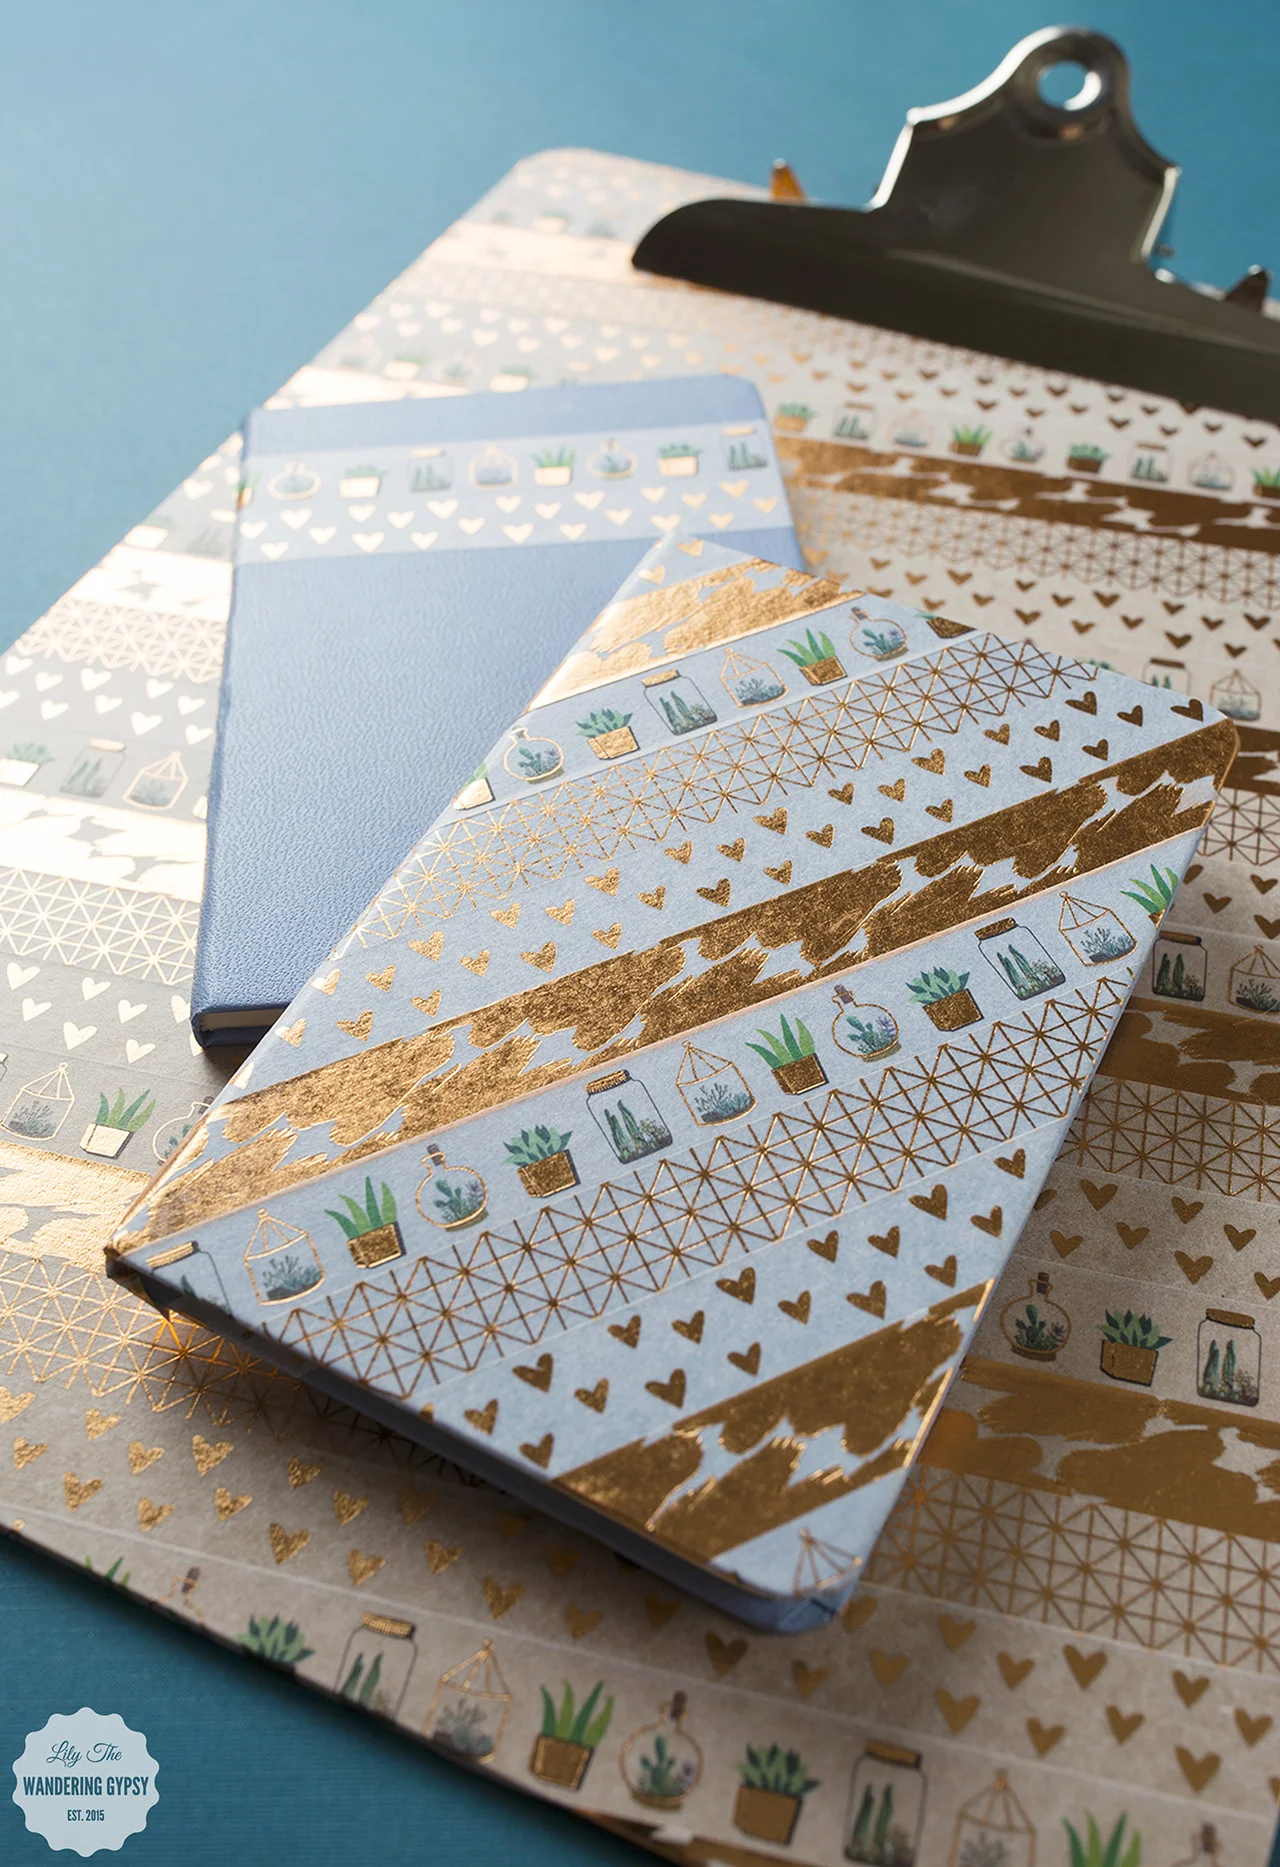
Washi Tape is here to stay, and I absolutely love it! This tape sticks to SO many surfaces, and creates an instant pop of color and a bit of whimsy to anything you adhere it to. 

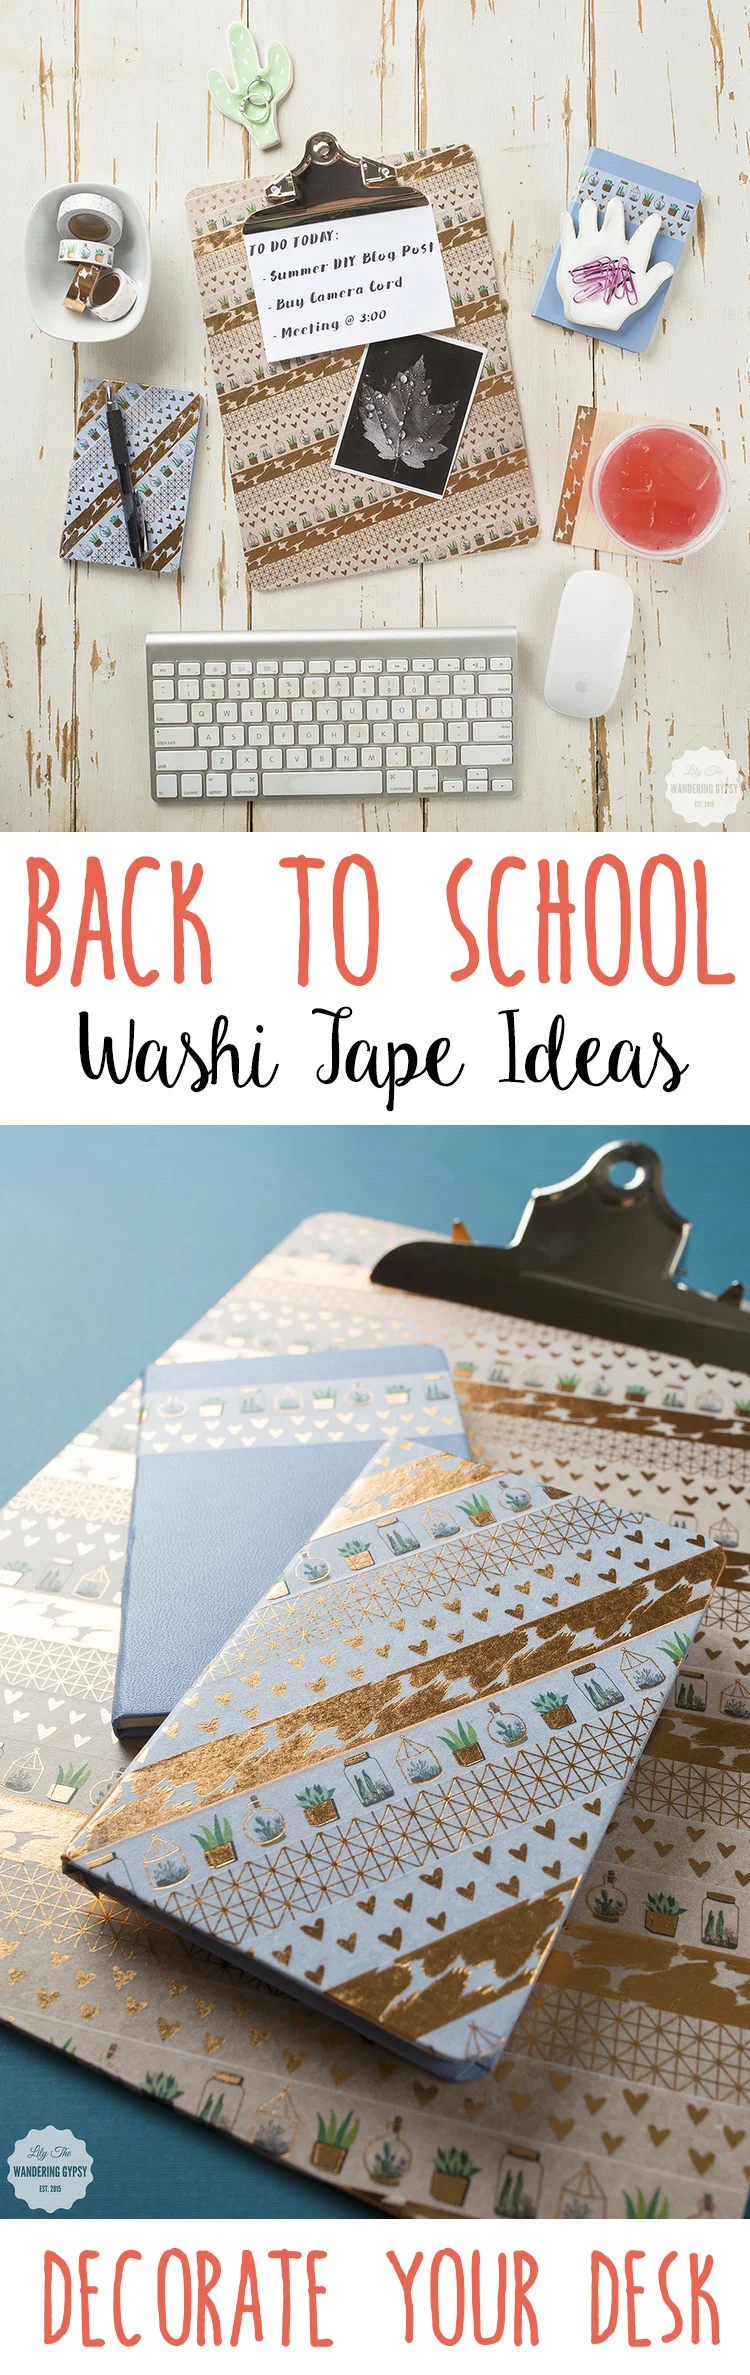
Below, you will find a few items that I covered, to show you how easy it is to update just about anything on your desk and around your home!

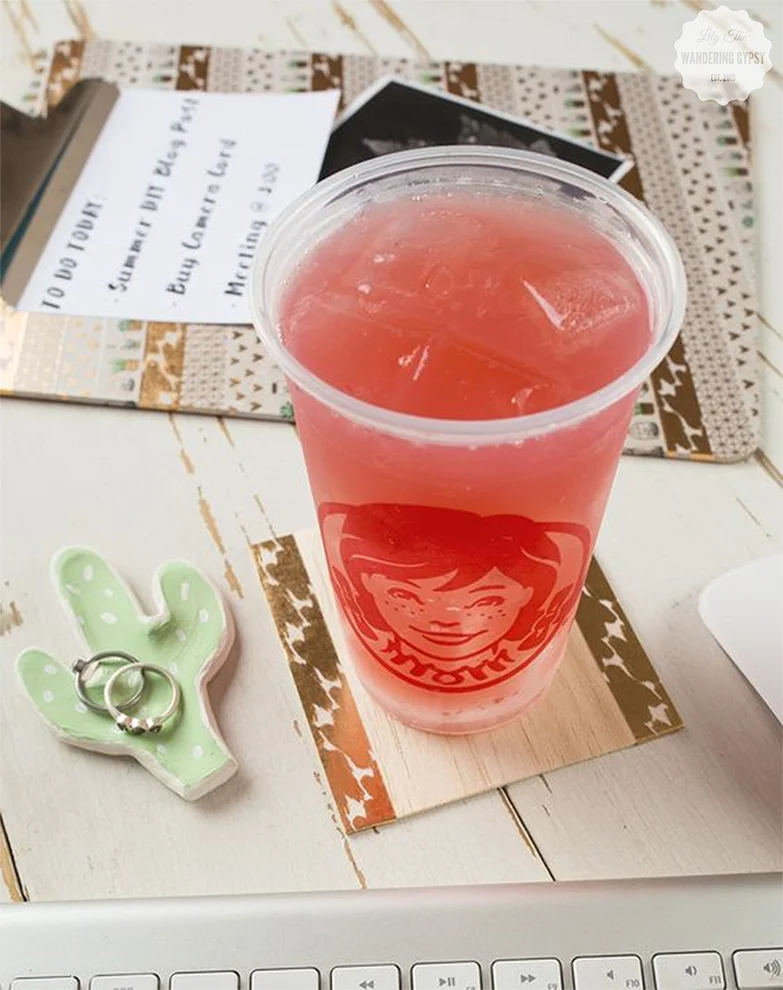
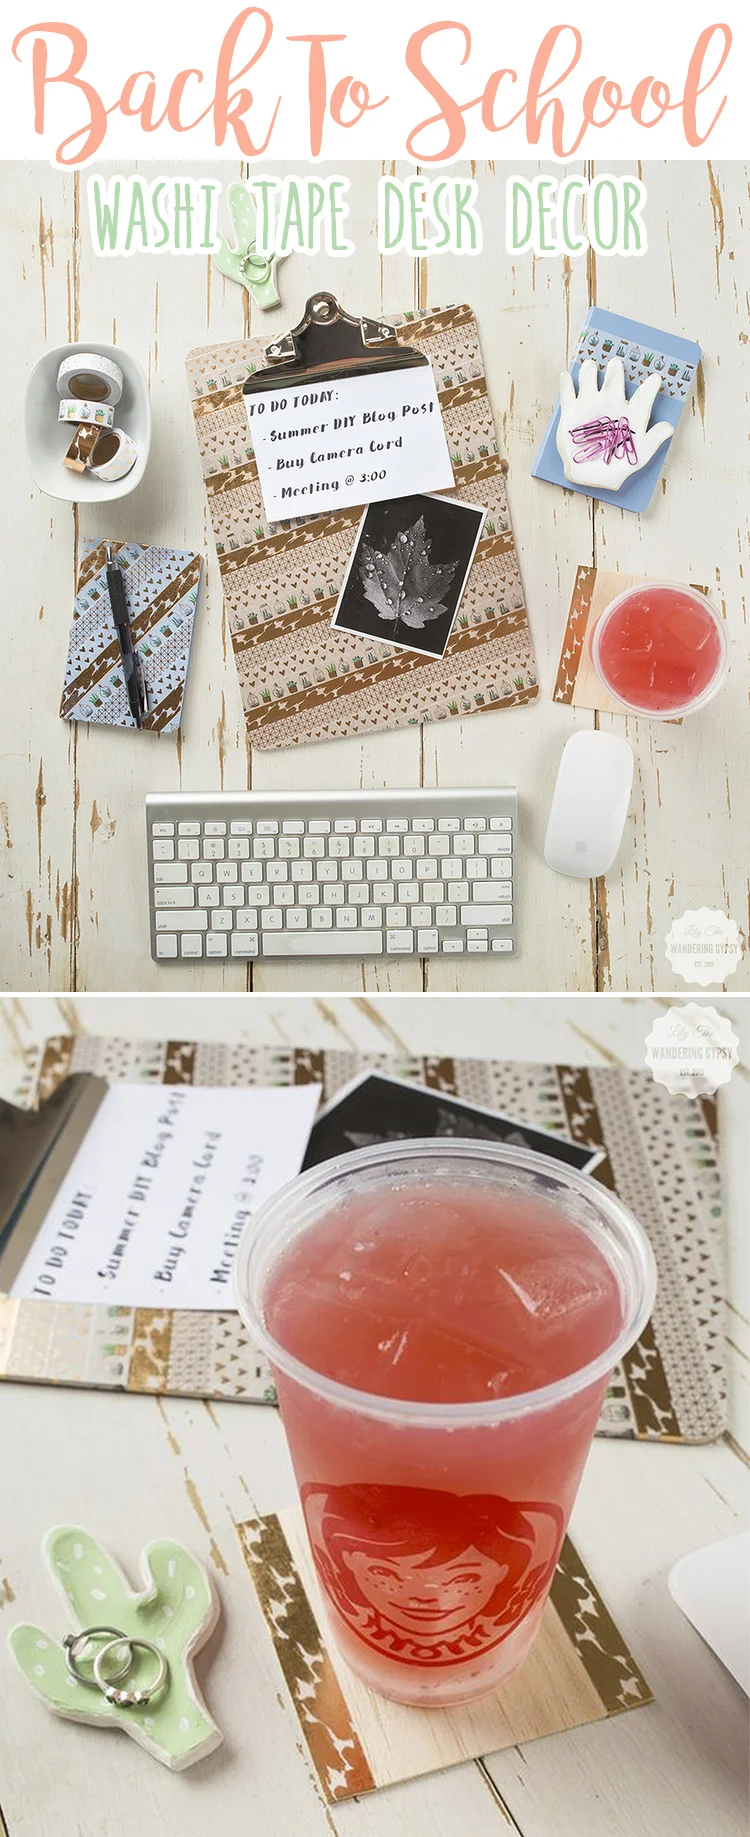
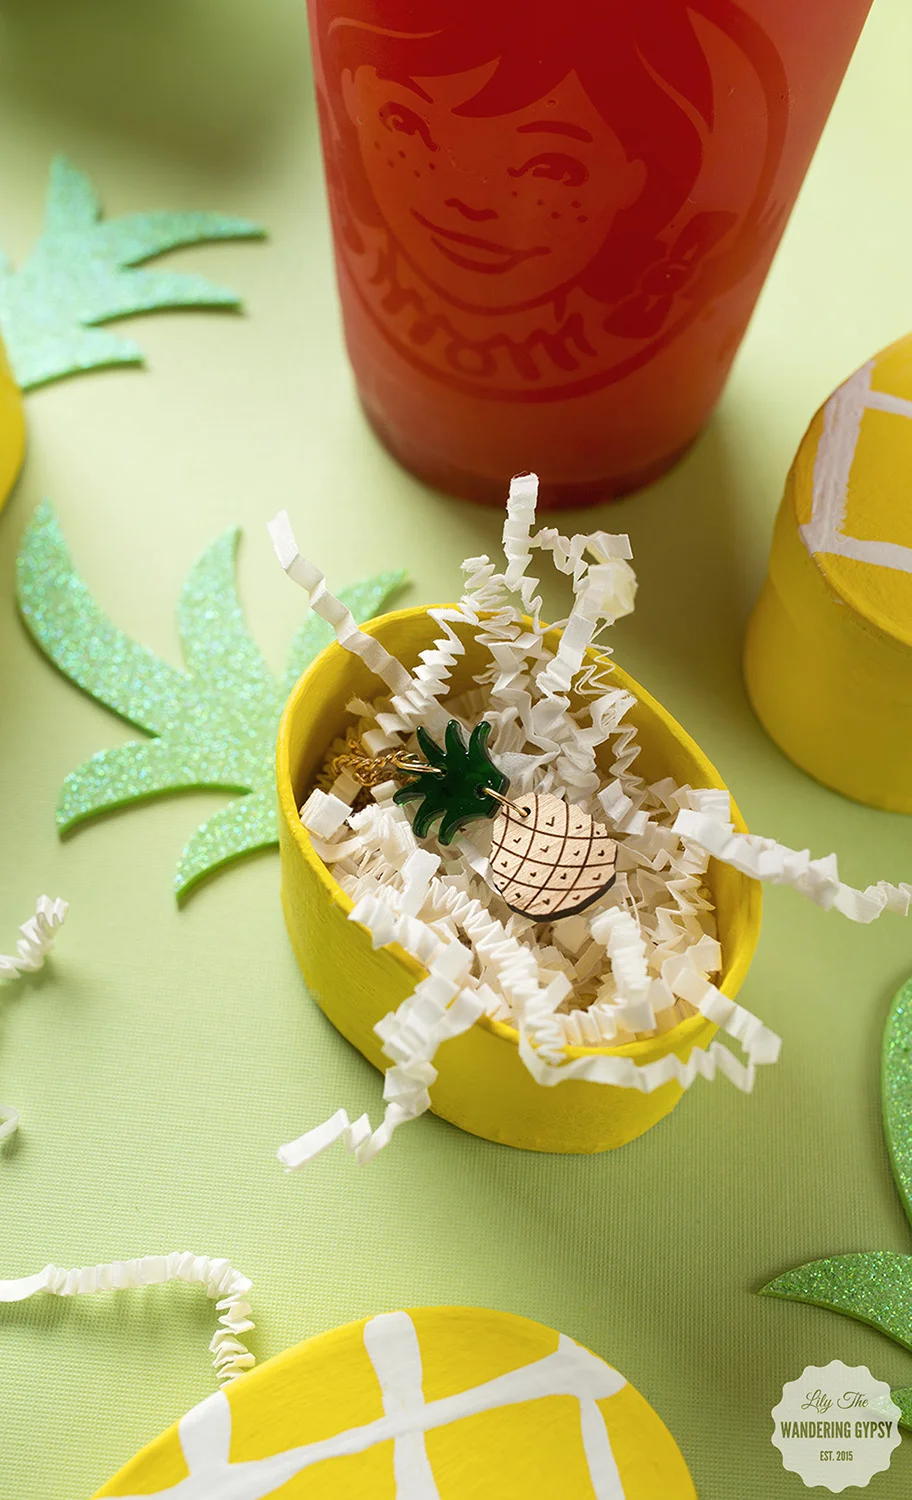
I created these photos for a fun campaign that I helped share for Wendy's Blackberry Lemonade. I loved creating this DIY project for such a well-known brand! 

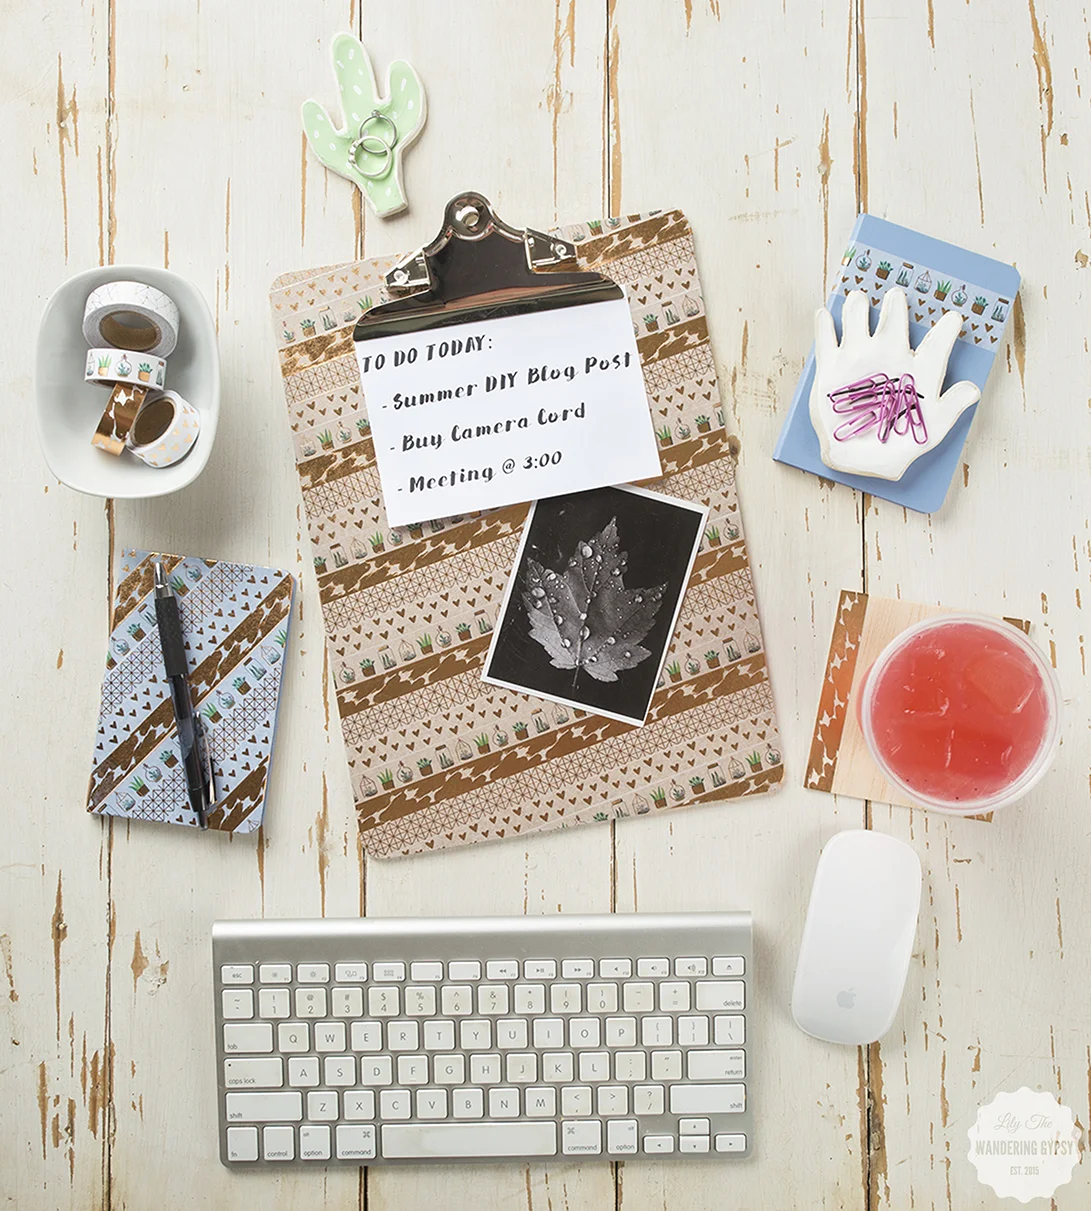
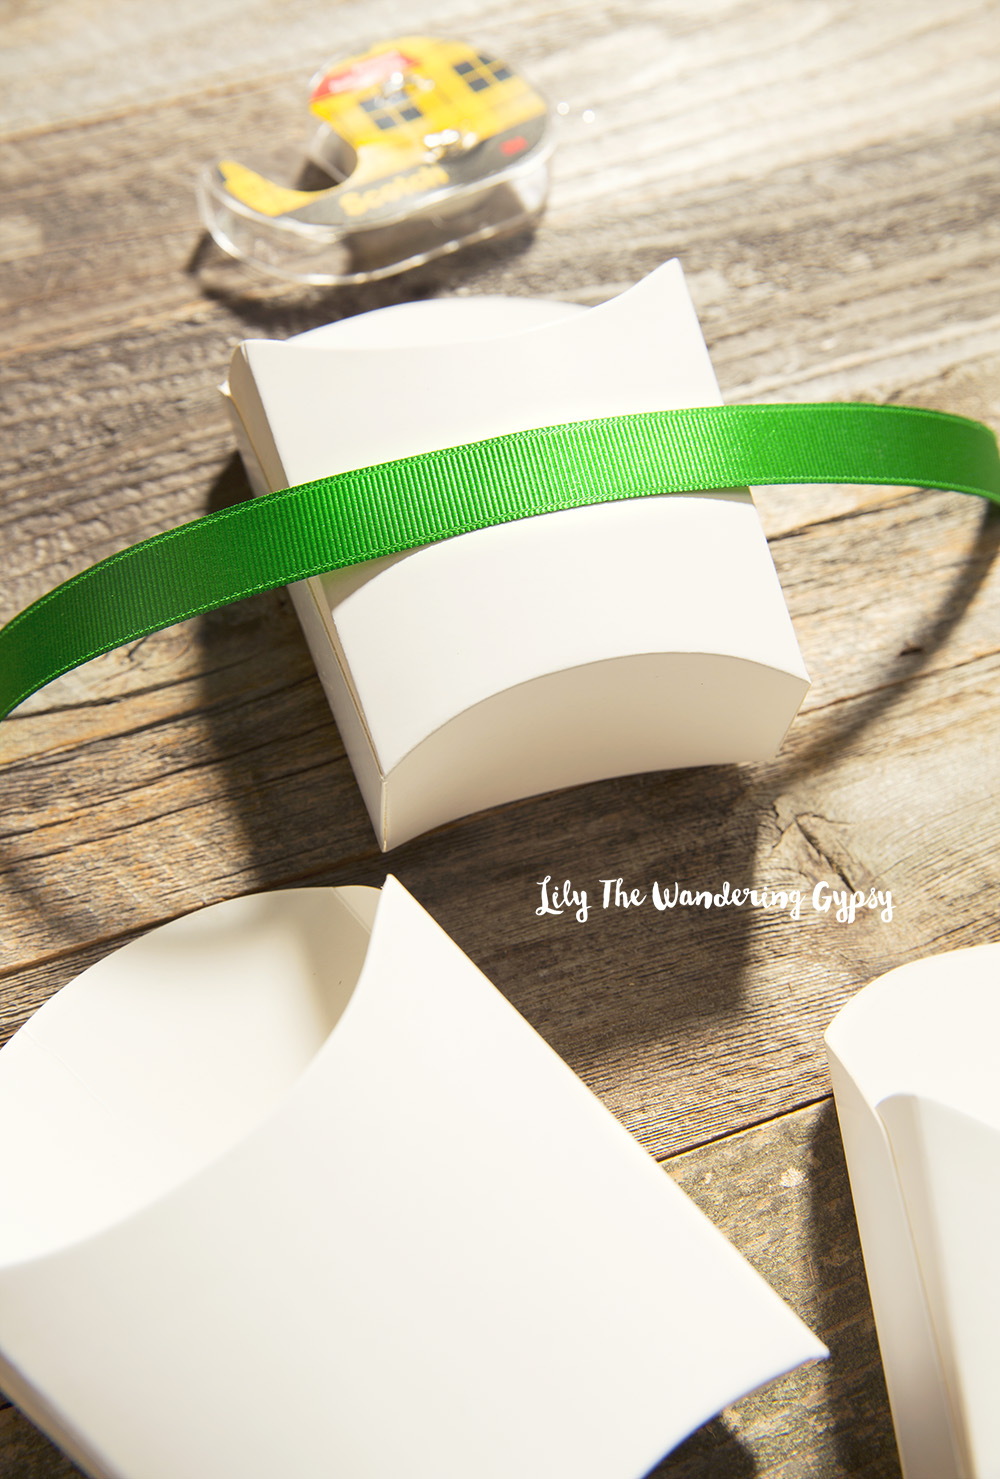
I covered an assortment of items, including: A clip board, wooden utensils, blank journals, and paper gift bags! Seriously, this project was SO fun!!!


DIY Summer Fun - Pineapple Gift Boxes

There's no doubt that it's summer, why not embrace it and make something cute inspired by tropical breezes (wishful thinking), and pineapples! Why not make someone smile by creating a gift box that is a present in itself. I made this project a little while back in order to help Wendy's to help promote their Blackberry Lemonade. It was just the right amount of tart and sweet, wrapped up into one pretty drink! What will you be making and gifting this summer?

This post was totally inspired by the amazingly awesome blog, Damask Love

- Oval-shaped Paper Mache Boxes 

- Yellow Paint, White Paint

- Paint Brush (to paint over entire box)

- Wooden Skewer Sticks (to paint white marks on boxes)

- Paint Brush

- Mint Green Sparkle Foam Sheet 

- Glue

- Gift Items or Candy to fill boxes

1.) Cover your work surface, and paint your boxes yellow. I used 2 coats, but they dried pretty quickly.

2.) Make sure your yellow paint is 100% dry, then with a skewer stick, draw/paint the lines onto the boxes. I basically put the white paint onto a paper plate, then laid the skewer sticks down, covered the end in paint, then drew the lines across the boxes. This helps you create super straight lines, too!

3.) Now, cut out your green top parts. Feel free to print the photo, below, to get the right shapes. I just sort of free-handed one, and traced it on the non-glitter side of the foam. These were so easy to cut out! 

4.) Now, simply glue the little green top pieces onto the boxes, and you're done!! Fill them with paper shreds, and whatever your heart delights! 

Mother's Day Gift Basket with Erin Pelicano Necklaces

I am so honored to be able to share another gorgeous necklace by Erin Pelicano. She has an incredibly wonderful sense of style, and I just love everything she creates! A few (or more) of her pieces are absolutely perfect for Mother's Day! In fact, they say Mother & Daughter right on them :) 

Erin Pelicano Jewelry + Lily The Wandering Gypsy

I thought a fun way to show off her beautiful necklaces would be in a cute, Mother's Day Gift Basket. Indulge Mom this Mother's Day (or any other time of the year), and give her thoughtful gifts, elegantly arranged in a gift basket. Stay tuned for a second blog post with another idea, coming soon!!

The items featured in this gift basket were partially provided by my goodie bag that I received at Create + Cultivate Dallas! Both the Seaweed Bath Co. Detox Cellulite Soap and the Black and White Striped Nora Socks from Richer Poorer Inc. were from C+C! The Poco Dolce Olive Oil Chocolate Bar was purchased in Santa Fe at Chocolate + Cashmere (which I will soon post photos of), and of course, the main attraction is this gorgeous necklace from Erin Pelicano! 

Erin Pelicano + Lily The Wandering Gypsy


Let's Make A Gift Basket! 

I found this shallow basket to be perfect for a gift basket, featuring Erin's beautiful Mother & Daughter Necklace. 

MATERIALS:

- Shallow Wicker Basket

- Tissue Paper

- Moss

- Gerber Daisy Heads

- Various Items To Fill Basket That Mom Will Love

Lightly crumple up a piece of tissue paper and form it to the basket. This will ensure that the moss won't fall out. 

Lightly crumple up a piece of tissue paper and form it to the basket. This will ensure that the moss won't fall out. 

Add some moss to your gift basket for a rustic and Earthy look. 

Add some moss to your gift basket for a rustic and Earthy look. 

Use wire cutters to easily remove flower heads from their stems. 

Use wire cutters to easily remove flower heads from their stems. 

Now, gather your gifts, and begin to place them in the basket in a cute way. I first added the striped socks in back, and the chocolate next to them. Next, I centered the necklace, and placed the detox soap behind it. Lastly, I added the flowers in front left, and the center back. Just play around with the placement to ensure everything can be seen well.

Erin Pelicano + Lily The Wandering Gypsy

A Gift Basket Tip: You can use Shrink Plastic (found at Dollar Tree) around this gift basket to hold everything in place. Stay tuned, as I will likely shrink wrap this basket, to keep it safe so I can send it to my mom! 

Erin Pelicano Jewelry + Lily The Wandering Gypsy

Football Party Craft Idea

I had so much fun with my #GameDayGrubMatch project earlier this month, and as I was shooting those images, I shot a few extras to show you just how fun and easy it is to customize your party by adding something extra special to the food you're eating!

cute DIY

I used these cute food containers in my project for PepsiCo and their #GameDayGrubMatch contest! They would fit your popcorn chicken, snacks, and more! Read the whole post here.

Cute DIY

MATERIALS 

French Fry containers, Football Stickers (I like the 3-D ones), green ribbon, clear tape, double sided tape, and scissors. I found the fry boxes at Hobby Lobby, and they are so cute! 

Cute DIY Idea

Cut a length of ribbon that will wrap around the fry boxes. 

Cute DIY

Attach the ribbon to the front of the fry box with double stick tape. Then, wrap the ribbon around to the back, and tape the ribbon with the regular tape. 

Cute DIY
Cute DIY

Simply, attach the football stickers to the front of the fry boxes and fill with your game day snacks! 

Cute DIY!

DIY Cotton Gift Bags

Check out my cute tutorial, to learn how to make some pretty adorable little gift bags. You can personalize any gift in minutes with these gift bags. 

Check out these adorable gift bags!

MATERIALS: 

Cotton Gift Bags, Rubber Stamps, Ink Pad, Glue (Either Tacky Glue or Fabric Glue), Sequins

Cute DIY Gift Bags

First, I recommend stamping onto a piece of paper before you stamp onto your gift bag, to make sure the design looks good. But, basically just figure out where you want your stamp to go, and carefully apply the inked stamp to your cotton bag. Press pretty hard, and make sure to not double over your design. 

Cute DIY Gift Bags
Cute DIY Gift Bags

Now, gather your glue and sequins, and make dots of glue all over the front of the gift bag. 

Cute DIY Gift Bags

And, make sure to let the gift bag dry for a few hours, before giving this to anyone. 

Cute DIY Gift Bags
Adorable DIY Gift Bag

How To Make Blooming Candies

I had so much fun creating this project! I was inspired by summer, and all the pretty flowers that are blooming right now! For this recipe, I used silicone brownie molds, so I could fill them with tons of candy. I also used Blue and Vibrant Green Candy Melts. My filler candies were Sixlets, found here. See the list of ingredients below...and have FUN! You can make these in just about any color combo, for special events, holidays, and sporting events. 

How To Make Blooming Candies!

HERE'S HOW YOU MAKE THEM...

You only need a few simple ingredients! Some Sixlets Candies, candy melts, and a candy mould.  

You only need a few simple ingredients! Some Sixlets Candies, candy melts, and a candy mould.  

INGREDIENTS (Click Names To Buy)

Vibrant Green Candy Melts - Blue Candy Melts - Filler Candies - Wilton Paintbrushes, Candy/Brownie Molds

1.) Melt your candy melts in 2 separate containers, either in the microwave or in a double boiler method, which I did. I found that using a 2 cup Pyrex measuring cup, which held one package of candy melts worked great! Fill a small saucepan with 2-3 inches of water, and pour your melts into the measuring cup. Insert cup into water, heat water over medium of high heat and stir melts frequently until smooth. (See photo below for tips)...

How To Make Blooming Candies!
Texture Test (above) - The blue one looks right, but NOT the green one! If your melts form more of a paste than a smooth and satiny texture, try again. 

Texture Test (above) - The blue one looks right, but NOT the green one! If your melts form more of a paste than a smooth and satiny texture, try again. 

MY BIGGEST TIP WOULD BE...USE A PAINTBRUSH!!!

2.) Using a paintbrush to spread the candy molds was a priceless tip! The brush gives you way more control than a knife or spoon. This step took a while, but was definitely fun. I searched around just about every craft store for these brushes, and f…

2.) Using a paintbrush to spread the candy molds was a priceless tip! The brush gives you way more control than a knife or spoon. This step took a while, but was definitely fun. I searched around just about every craft store for these brushes, and finally found them at JoAnns! I originally searched for cheap kids' paintbrushes, and found nothing. Luckily I persisted :) 

3.) See how I spread the blue candy melts into the molds with a paintbrush, and am about to spread the green candies next. I added about double this amount (that you see in green) to fill the mold at first. After you fill the molds, pop the candies …

3.) See how I spread the blue candy melts into the molds with a paintbrush, and am about to spread the green candies next. I added about double this amount (that you see in green) to fill the mold at first. After you fill the molds, pop the candies into the freezer for about 5 minutes. 

4.) Now, fill the candy shells with Candies, almost to the very top. 

4.) Now, fill the candy shells with Candies, almost to the very top. 

5.) Add a dollop of candy melts on top of your fillers candies, and use the paintbrush to smooth the dollop out, and to create a seal, so the candies stay inside the melts. Throw them back into the freezer, and wait about 30 minutes (or longer), so …

5.) Add a dollop of candy melts on top of your fillers candies, and use the paintbrush to smooth the dollop out, and to create a seal, so the candies stay inside the melts. Throw them back into the freezer, and wait about 30 minutes (or longer), so that everything hardens and seals. 

These are so cute!!!

These are so cute!!!

6.) Here is what it looked like after I smoothed the last part of the candy melts over the molds, to close in the Sixlets. Use your brush to make a pretty swirl pattern on the candies if you wish. 

6.) Here is what it looked like after I smoothed the last part of the candy melts over the molds, to close in the Sixlets. Use your brush to make a pretty swirl pattern on the candies if you wish. 

7.) Here is what your (almost finished) candies will look like after being in the freezer overnight. You don't have to leave them in this long (2 hours will do), but after all the work I did on this project, I was more than happy to leave these…

7.) Here is what your (almost finished) candies will look like after being in the freezer overnight. You don't have to leave them in this long (2 hours will do), but after all the work I did on this project, I was more than happy to leave these babies in the freezer overnight, and enjoy them the next day :)

8.) Using a pair of rubber or cotton gloves, carefully peel the mold away from your Blooming Candies. The gloves help prevent finger prints all over your candies. Aren't they adorable? The next photo shows how you open them...

8.) Using a pair of rubber or cotton gloves, carefully peel the mold away from your Blooming Candies. The gloves help prevent finger prints all over your candies. Aren't they adorable? The next photo shows how you open them...

Now you can reveal your surprise candy inside! Just use a sharp kitchen knife, and (very carefully), cut into the candy as if you are cutting a slice of cake. 

Now you can reveal your surprise candy inside! Just use a sharp kitchen knife, and (very carefully), cut into the candy as if you are cutting a slice of cake. 

Blooming Candies

Pinterest  //  Facebook  //  Instagram  //  She's So Chic Blog  //  Twitter  //  Polyvore

DIY Daily Planner Tutorial - For Under $10.00

I am the type of person who needs a daily to-do list. I looked at daily planners recently, and they ranged between $50-$100. That's absurd! When I saw that price, I knew I had to make my own. Before I made this official planner, I was using a lined, spiral journal. It was fine, and very portable, but I usually have this on my desk, so that wasn't a huge deal when making this new one. This would also make a cute Mother's Day or graduation gift! 

DIY Daily Planner for Less Than $10

These mini binders were only $3.99 (only available in Target stores), but you can find them at any office store. The mini binder filler paper (also only available in Target stores), was only $1.99 per pack, and I grabbed 2. You could also use the divider sheets, if you need to organize things a bit more. 

Easy day, I just write the date at the top of each page in a thick permanent marker. I do this while looking at a calendar, so I get the dates correct :) It's that simple! Use your favorite color pens to write your daily to-do list and you're set! A fun way to spruce up your desk for under $10.00!

DIY Daily Planner Under $10

How To Make A Festival Ready Flower Crown!

I started making these beautiful flower crowns last year and they are so fun and easy! You can make one in about 20 minutes, and they are so customizable - just add whatever type of flower inspires you, and you have a unique, one of a kind accessory, just in time for festival season! 

How To Make A Festival-Ready Flower Crown
How To Make a Festival Ready Flower Crown

GATHER YOUR MATERIALS // WHAT YOU NEED 

1 Bouquet of Silk Flowers - Make sure the flower heads are easy to remove from the stems, and that a wire can go through the enter of the flower head. 

Cloth Stem Wires - Pliers, Florist Tape, Wire Cutters, Wrapped Grapevine Wire for crown

How To Make A Festival Ready Flower Crown

Next, cut a length of grapevine wire that will wrap around your head plus an extra 4 inches to twist together to form a circle. Now, lay the circle on a table, and set 8 or more flower heads around the crown to see how you want them to look in the end. You can add a few smaller flowers if you want a more full look to your crown. 

How To Make A Festival Ready Flower Crown

PREPARE THE FLOWERS

Cut the Cloth Stem Wires into 4 equal parts with your wire cutters. And, as shown below, the steps are: 1.) fold over the top of the wire about 1/4". 2.) Start to twist the folded part around the rest of the wire. 3.) create a twisted loop in the top of the wire so the flower won't fall off. Thread these looped wires into each flower head you will use. 

How To Make a Festival Flower Crown

Put wires through ever flower head, and get ready to attach them to your crown. 

How To Create A Festival Ready Flower Crown

ATTACH YOUR FLOWERS

Attach the first flower to your crown by twisting the wired stem to the crown. Twist the flower head wire onto the crown, and use a pair of pliers to secure any sharp wire ends, then use florists tape to make sure no wire ends poke you! 

How To Create A Festival Ready Flower Crown

ALMOST DONE!

Now, twist each flower onto the crown, and don't twist each wire all the way until you are happy with the flower placement. Cut the rest of your florists tape pieces, and get ready to wrap each flower stem with tape at the end. 

How To Make A Festival-Ready Flower Crown

Here is the back view of the crown, before taping up wire ends. Use pliers to secure any sharp wire ends to the crown, then tape each end to the crown. Also, tape the rough ends of the crown so they don't come undone or poke you. 

How To Make A Festival Ready Flower Crown

And, here are a few more examples of other flower crowns I created. They're also perfect for a bride, or a little girl who loves flowers! Are you heading to any festivals this year? If so, feel free to comment below. 

How To Make A Festival-Ready Flower Crown