Milkshakes Inspired By M&M’s® New Flavors!

It's that time of year again when ice cream sounds good in just about any form. Check out these amazing milkshakes, inspired by M&M's® flavors! This shop has been compensated by Collective Bias, Inc. and its advertiser. All opinions are mine alone. #MMSFlavorVote #Walmart #CollectiveBias.

Check out this milkshake recipe! #MMsFlavorVote #ad

Here's How It Works.

You can help choose the next flavor of M&M's®!!! 

  • Throughout the voting period of March 1 to June 17, you can purchase and taste each of the new flavors for yourself, and then cast your vote, once a day until June 17.
  • Once you cast your vote for your favorite new M&M's® Peanut flavor, you are entered for the chance to win $100,000 and earn the title of the official M&M's® Taste Tester. The winner will be announced in August, along with the winner of the 'Flavor Vote,' which will remain on retailer shelves nationwide.
  • Vote for your favorite flavor using the hashtag #MMSFlavorVote across social media!

Be sure to visit the M&M's® Flavor Vote page on Facebook to vote for your favorite flavor!

Find The Flavors Here:

M&M's® Coffee Nut
M&M's® Chili Nut
M&M's® Honey Nut

Note: The jars used in these recipes hold a bit over 4 Cups each, so all recipes are formatted to these jars.


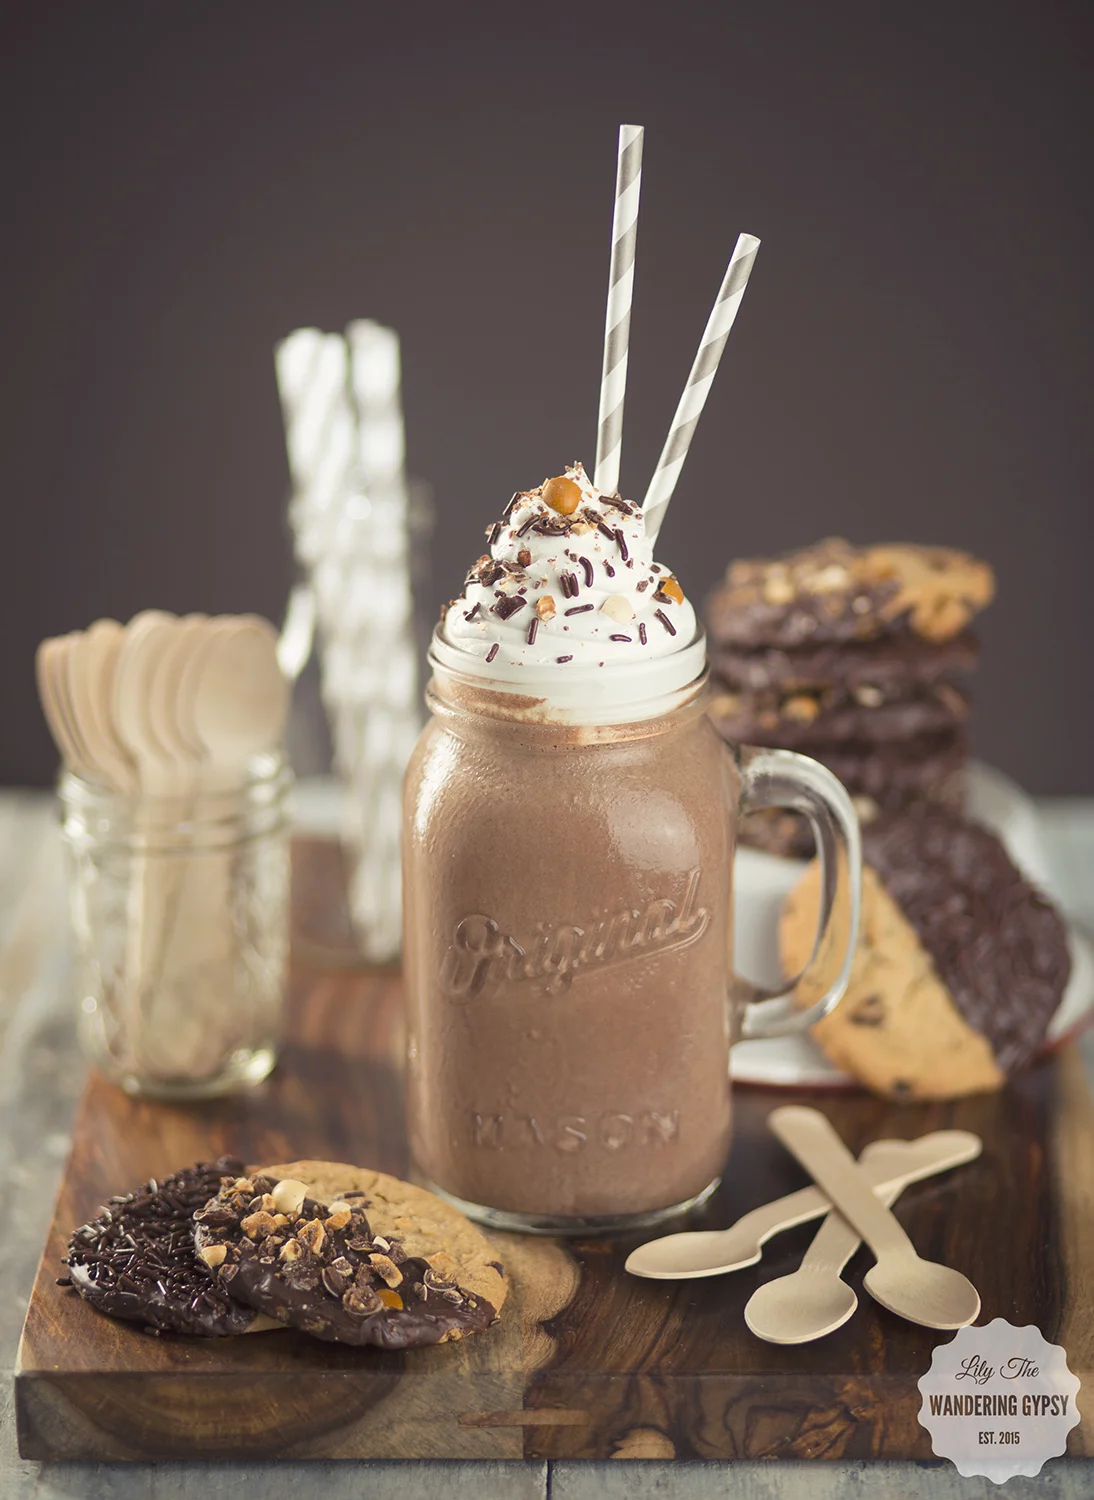
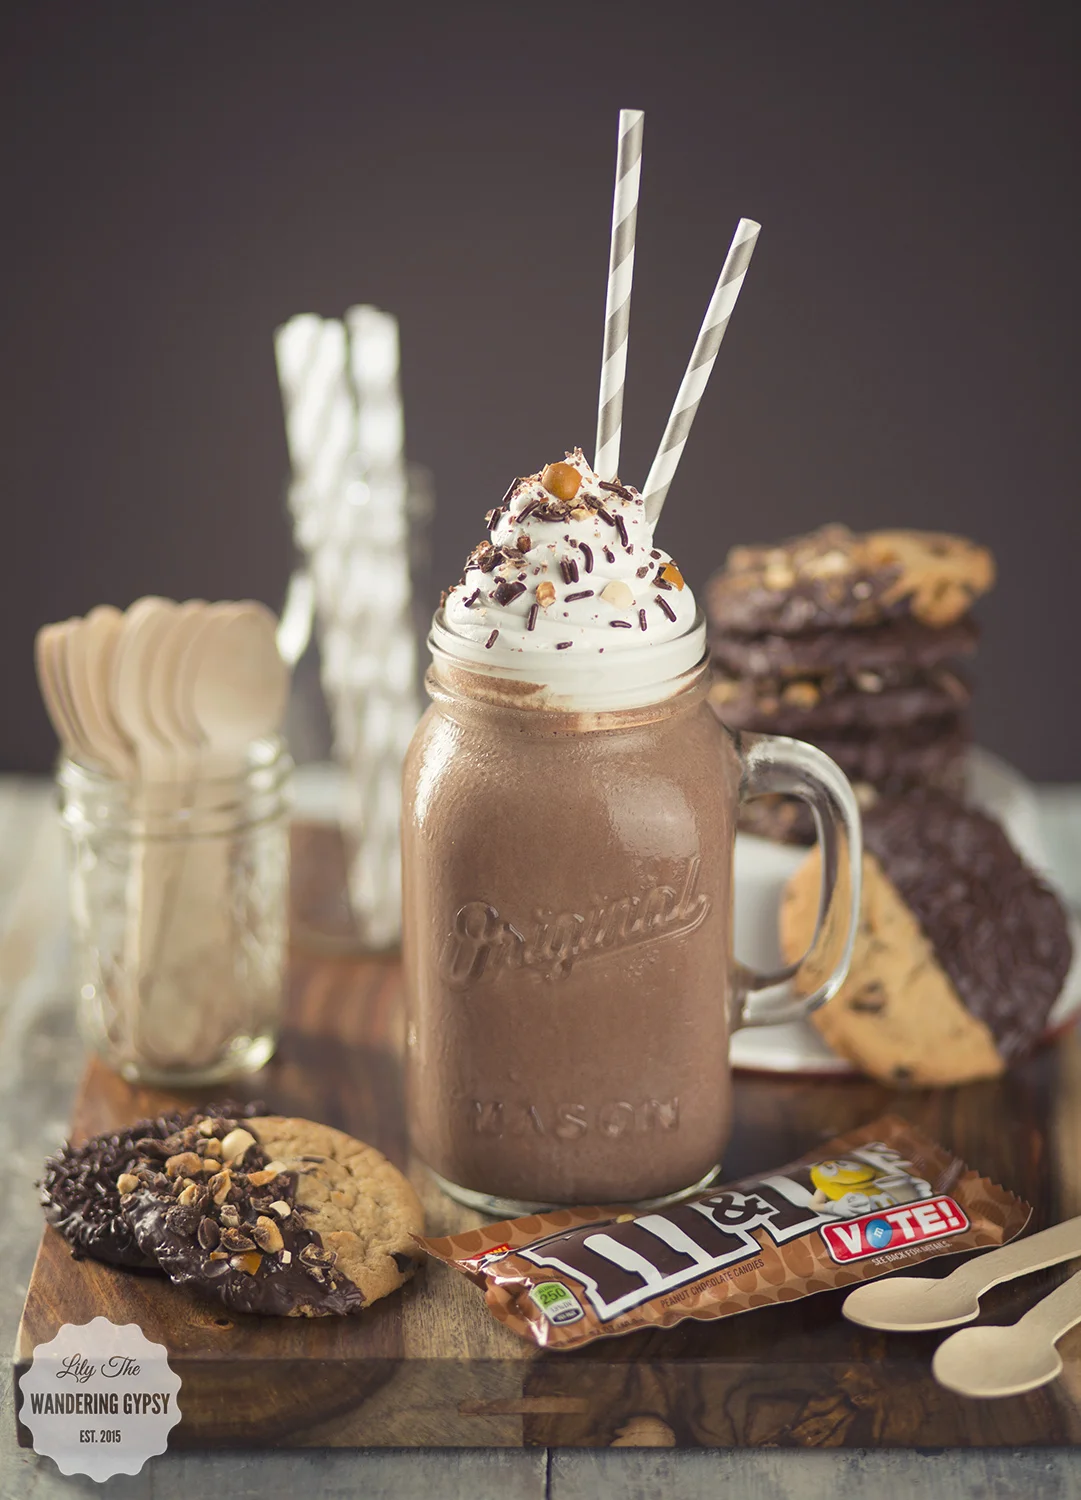
THE CHOCOLATE MOCHA SHAKE - INSPIRED BY M&M’s® COFFEE NUT

Check out this milkshake recipe! #MMsFlavorVote #ad

Ingredients:

M&M’s® Coffee Nut Flavor

2 1/2 -3 C. Chocolate Ice Cream

1/2 C. Cool Whip

1 C. Coffee of any sort (Mine was pre-packaged)

1 Packet of Hot Chocolate Mix (Optional)

Dash of Milk - Optional
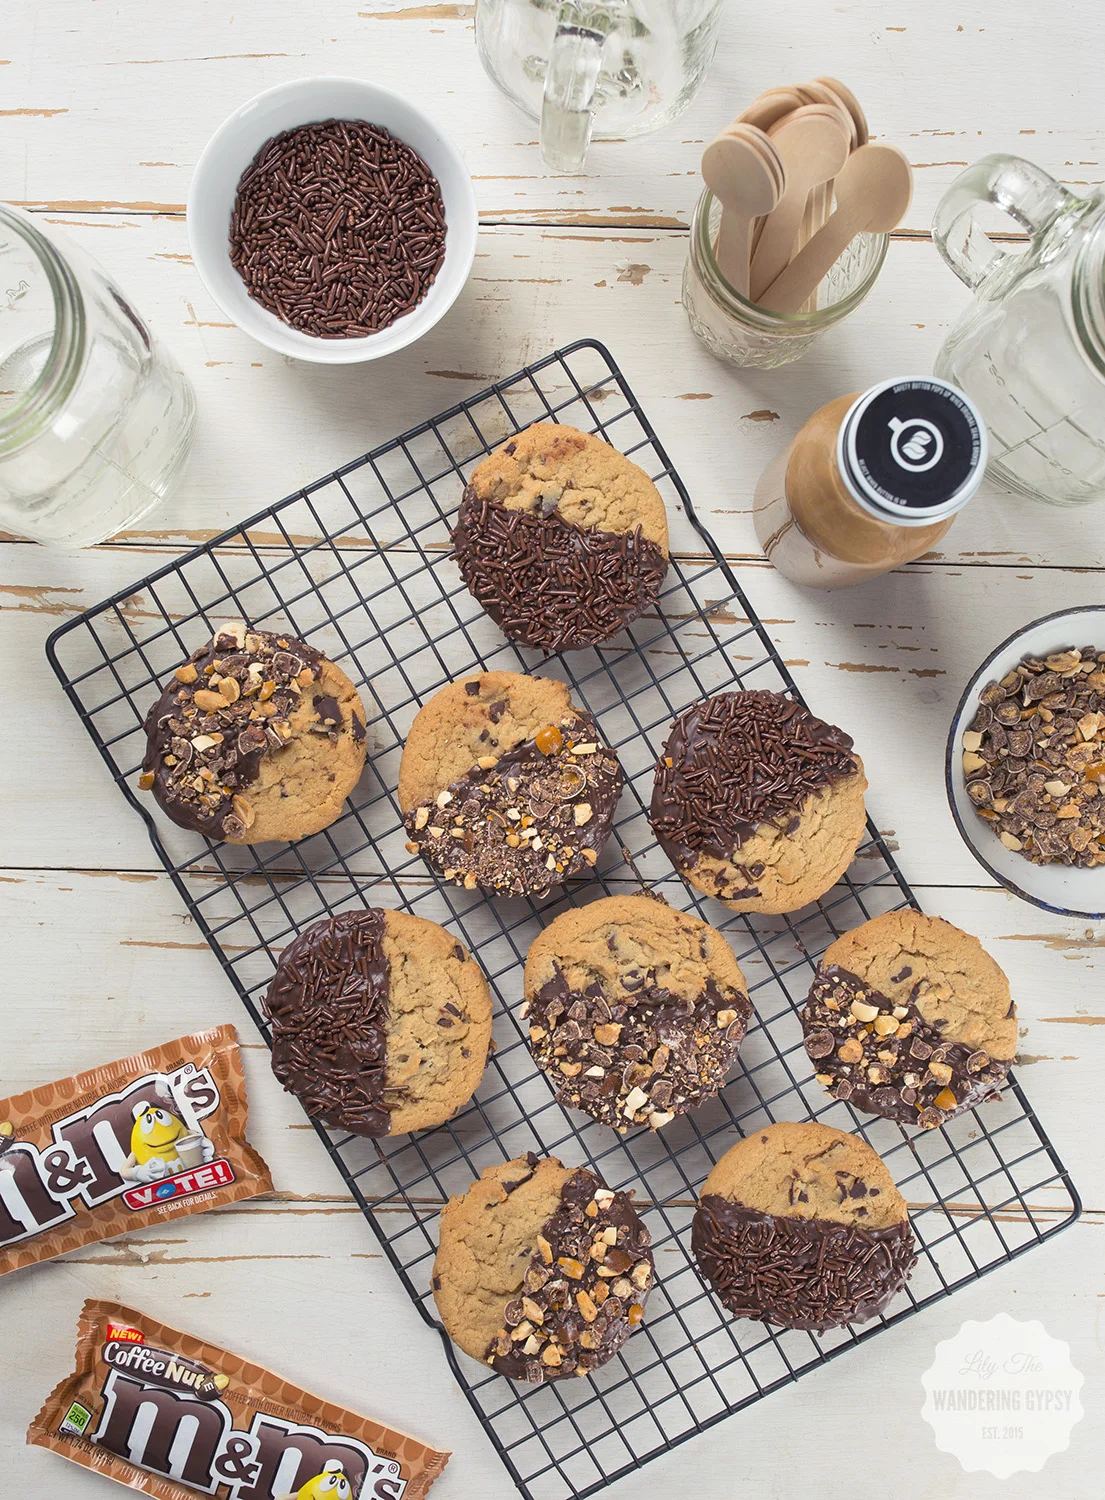
Check out this milkshake recipe! #MMsFlavorVote #ad

FOR THE COOKIES...

Ingredients:

Pre Made or Home Made Chocolate Chip Cookies

Melting Chocolate + Brush To Spread It Onto Cookies

Instructions:

These are so easy! Simply melt chocolate in a double boiler or microwave until smooth. Carefully brush chocolate onto half of the front of each cookie.

In a zip top bag, use a rolling pin to crunch up some of the M&M’s® Coffee Flavor candies. Top half of your cookies with M&M’s® Coffee Nut candy pieces, or chocolate sprinkles. They stick super well to the chocolate. Let cool, and eat separately, or add to your milkshake.

Check out this milkshake recipe! #MMsFlavorVote #ad

THE HONEY NUT PEANUT BUTTER SHAKE - INSPIRED BY M&M’s® HONEY NUT
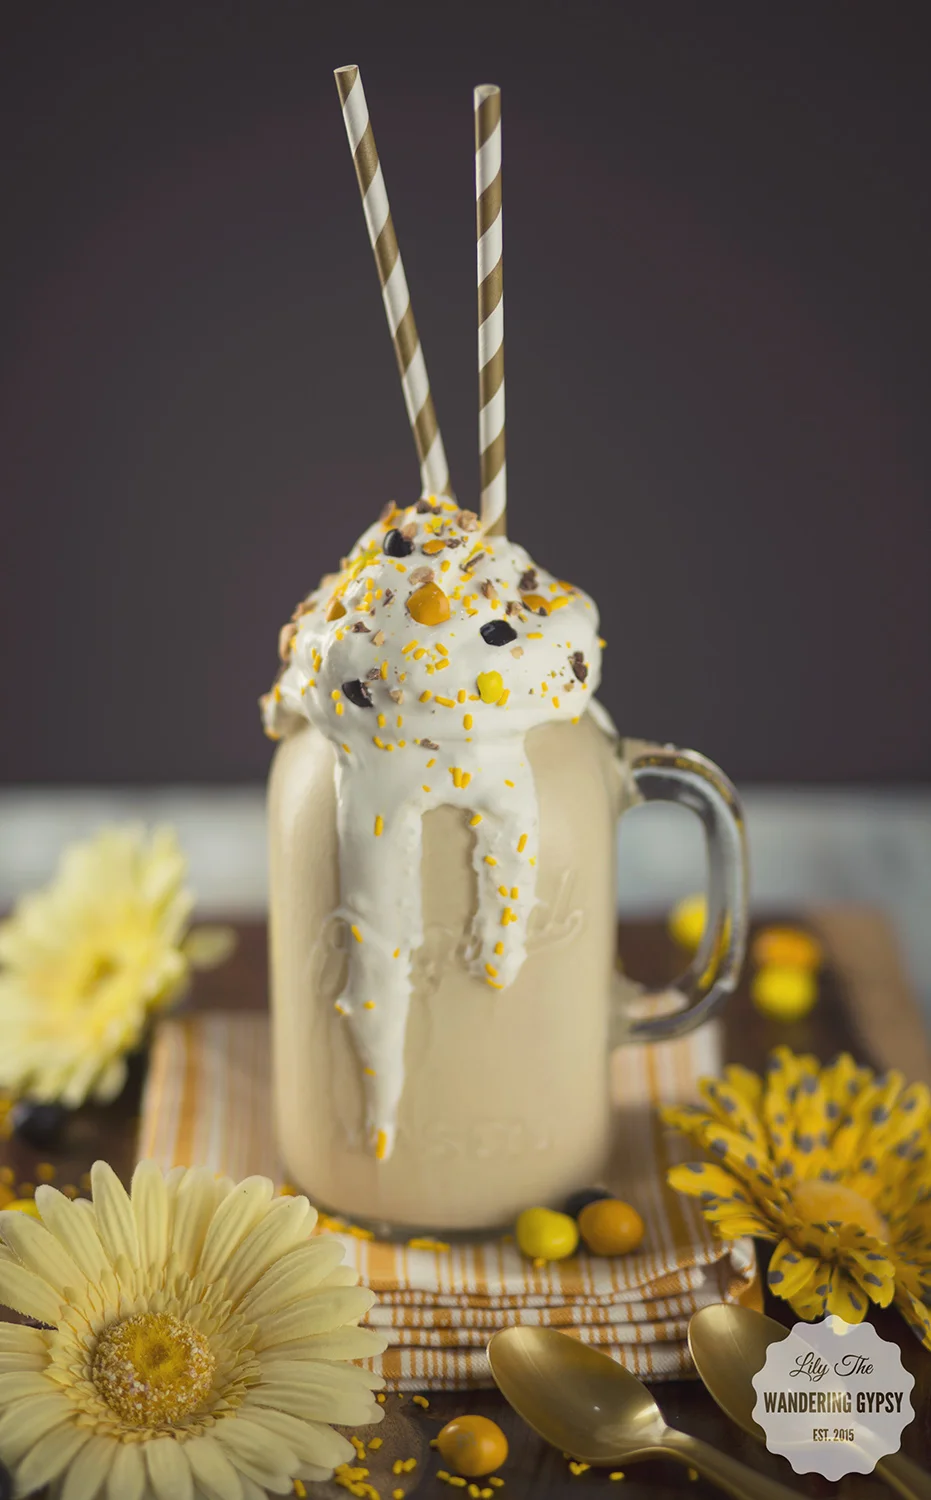
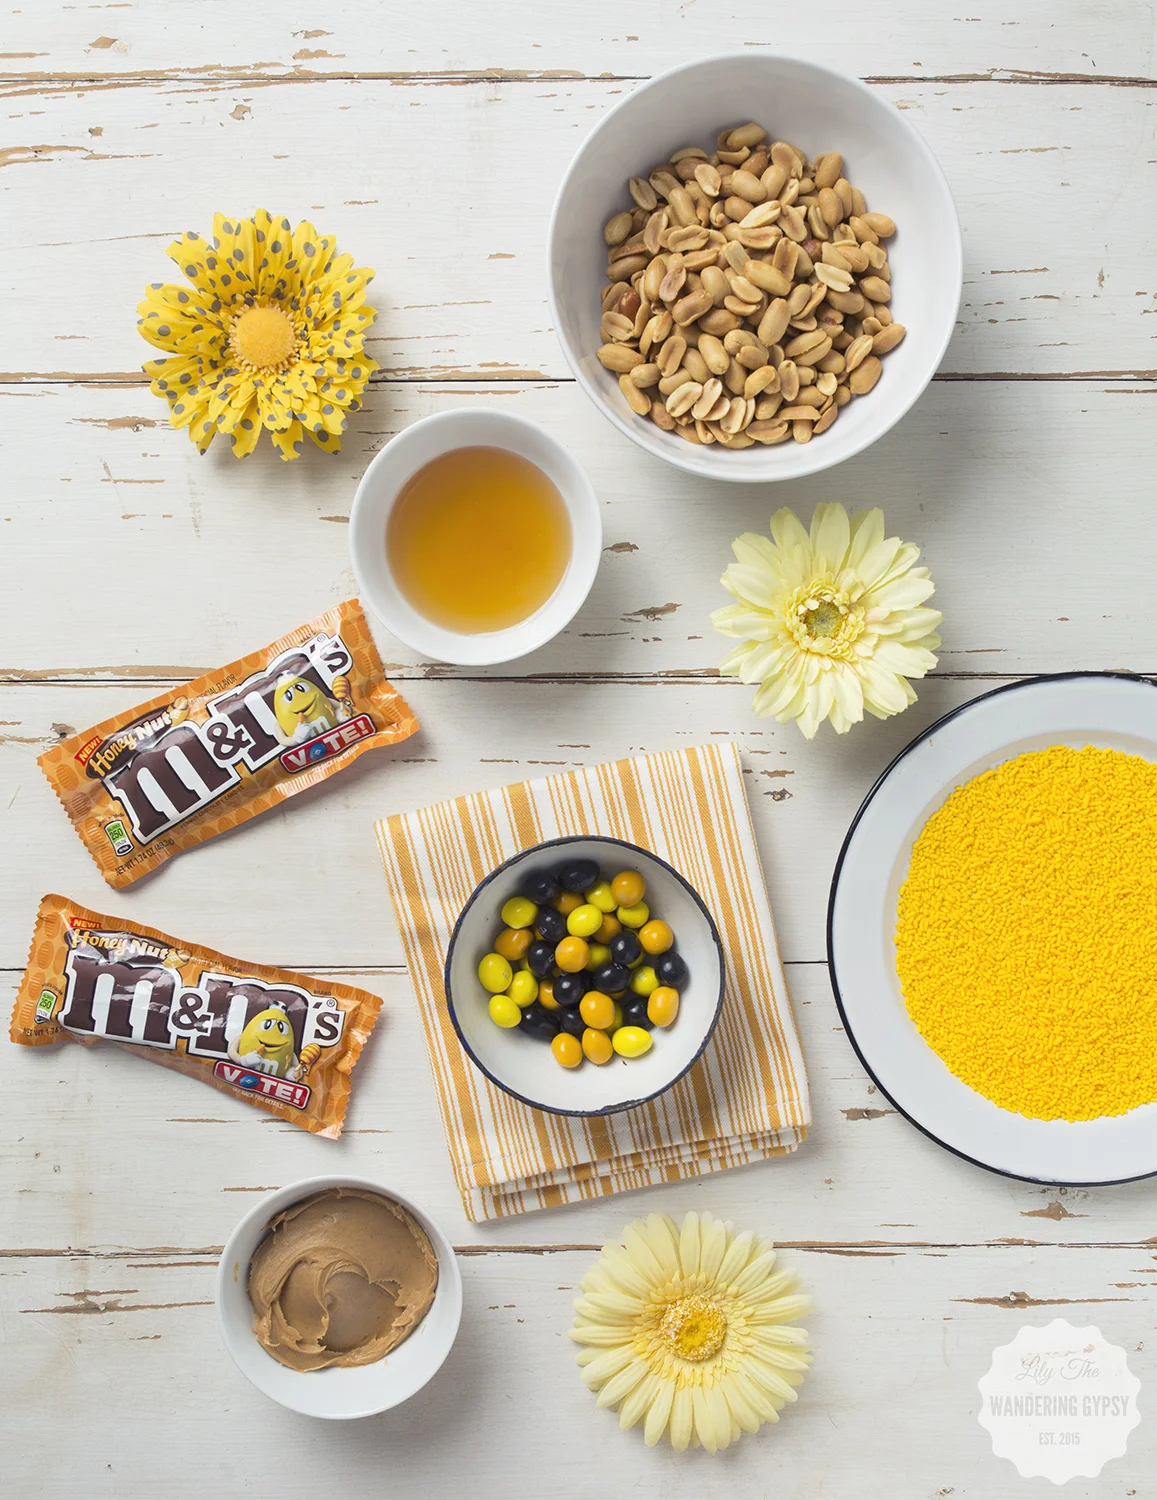
Check out this milkshake recipe! #MMsFlavorVote #ad

Ingredients:

M&M’s® Honey Nut Flavor

2 - 2 1/2 C. Vanilla Ice Cream

1/2 C. Peanut Butter

1 1/4 C. Milk

1 C. Cool Whip (And more for on top)

1 -2 Tbsp Honey (depending on how strong you want the flavor)

Yellow Sprinkles


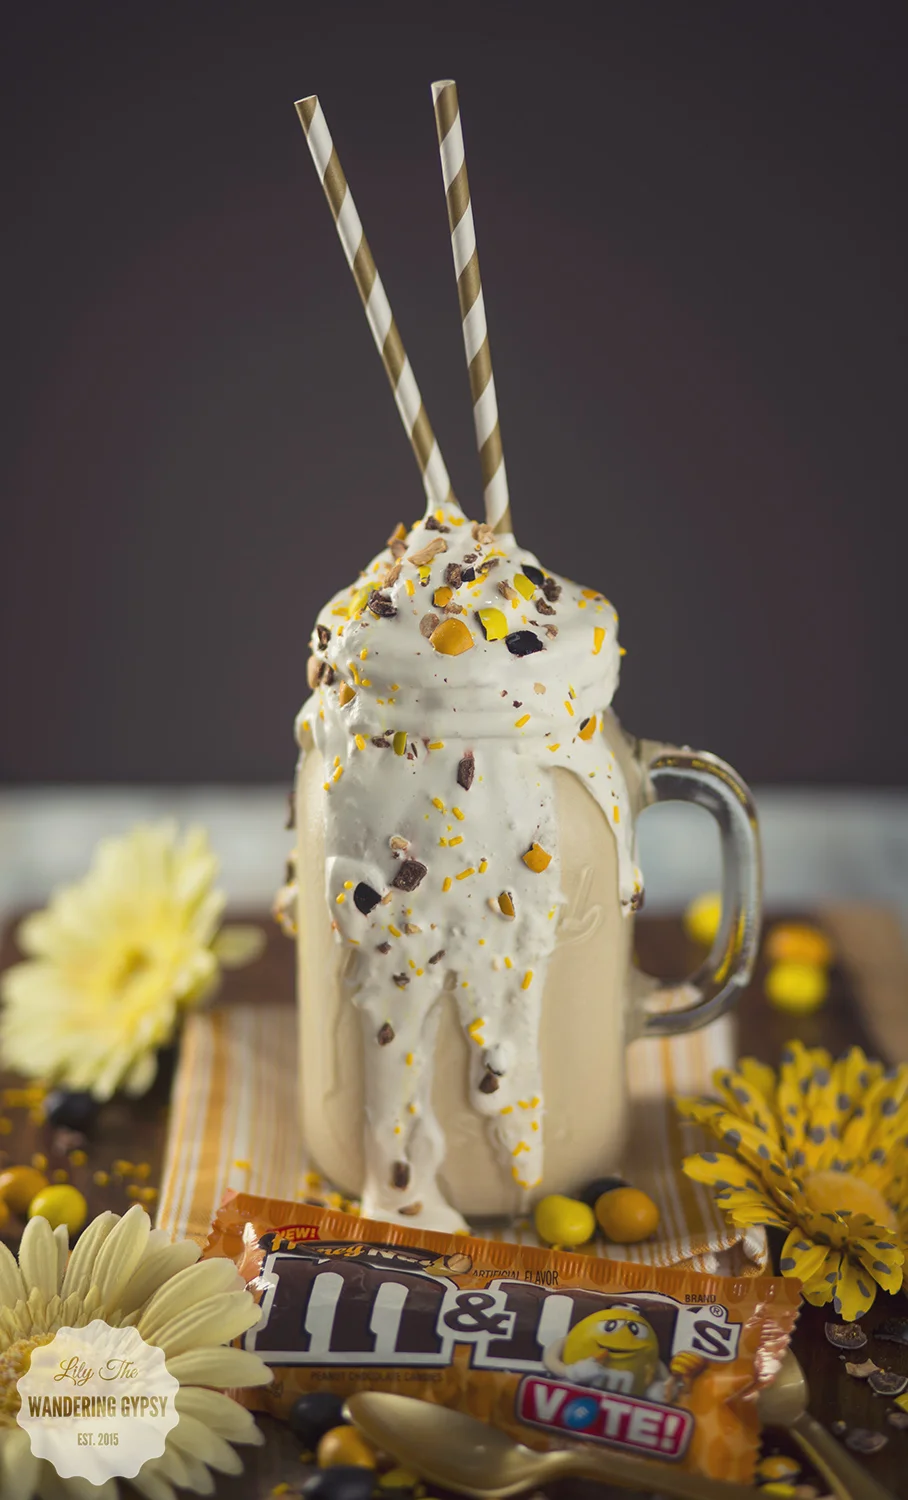
Get ready, this tastes amazing!!


Instructions:  Blend ice cream, peanut butter, milk, honey, and Cool Whip together until smooth.

Instructions:

Blend ice cream, peanut butter, milk, honey, and Cool Whip together until smooth. Add M&M’s® Honey Nut Flavor either as whole pieces, or crushed up into smaller pieces. Stir with a spoon.

Pour into a large glass, and top with whipped cream, yellow sprinkles, and crushed up M&M’s® Honey Nut. 

This one wound up being my absolute favorite!! Enjoy!!

Check out this milkshake recipe! #MMsFlavorVote #ad

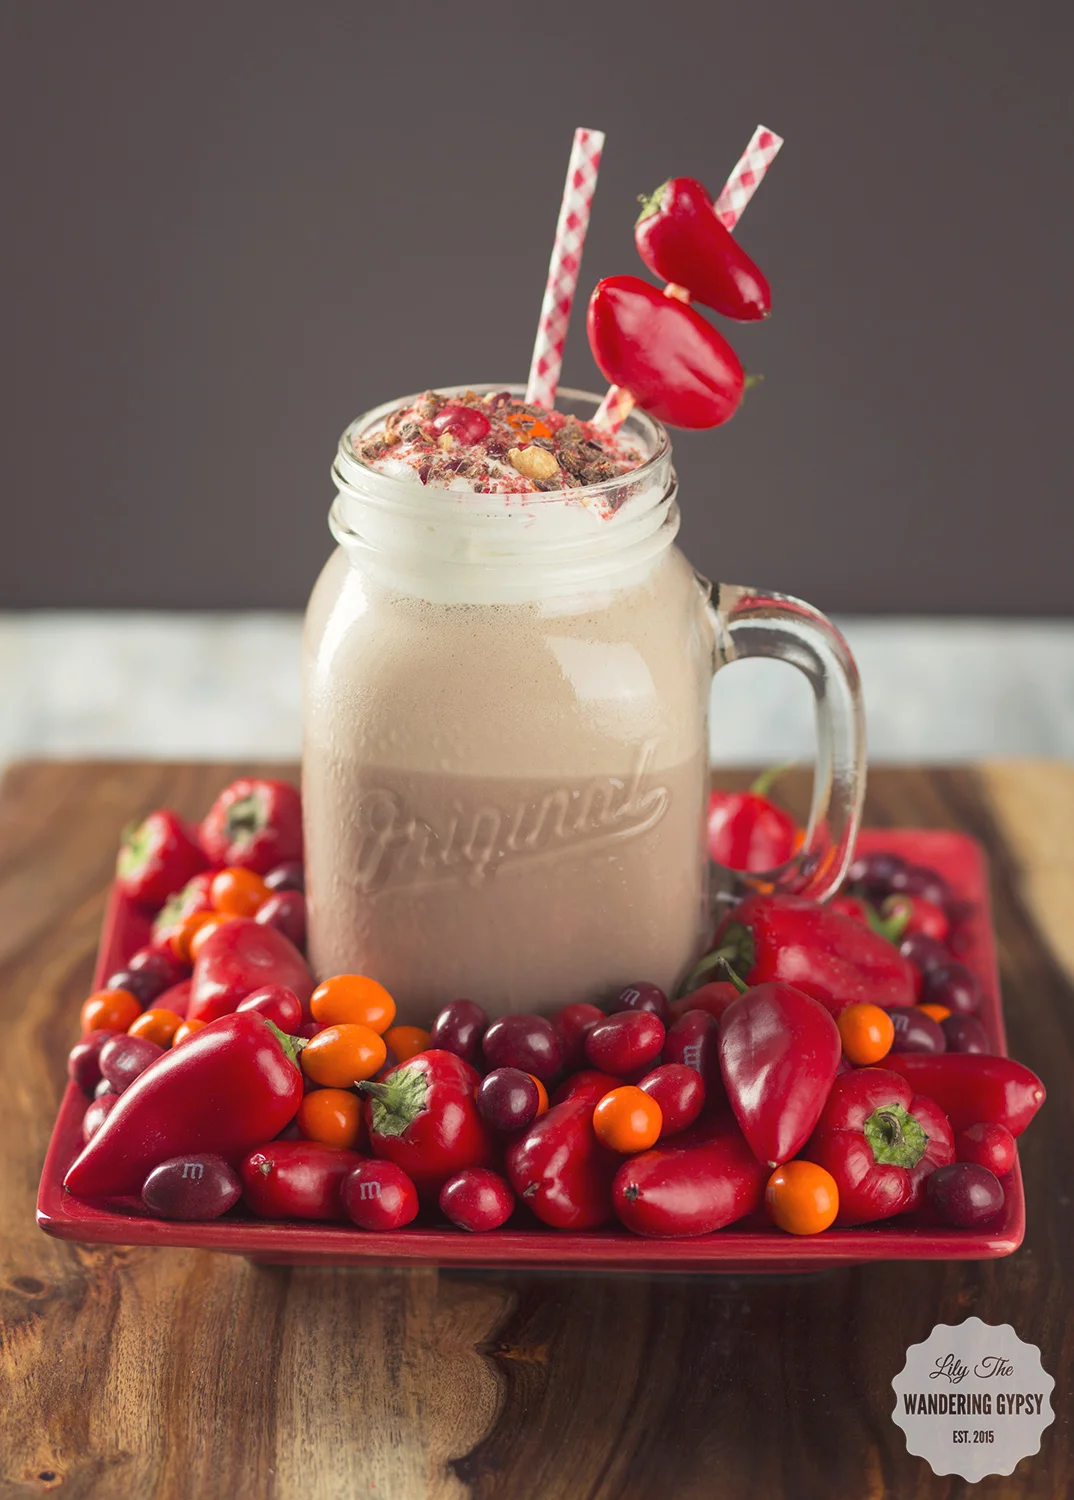
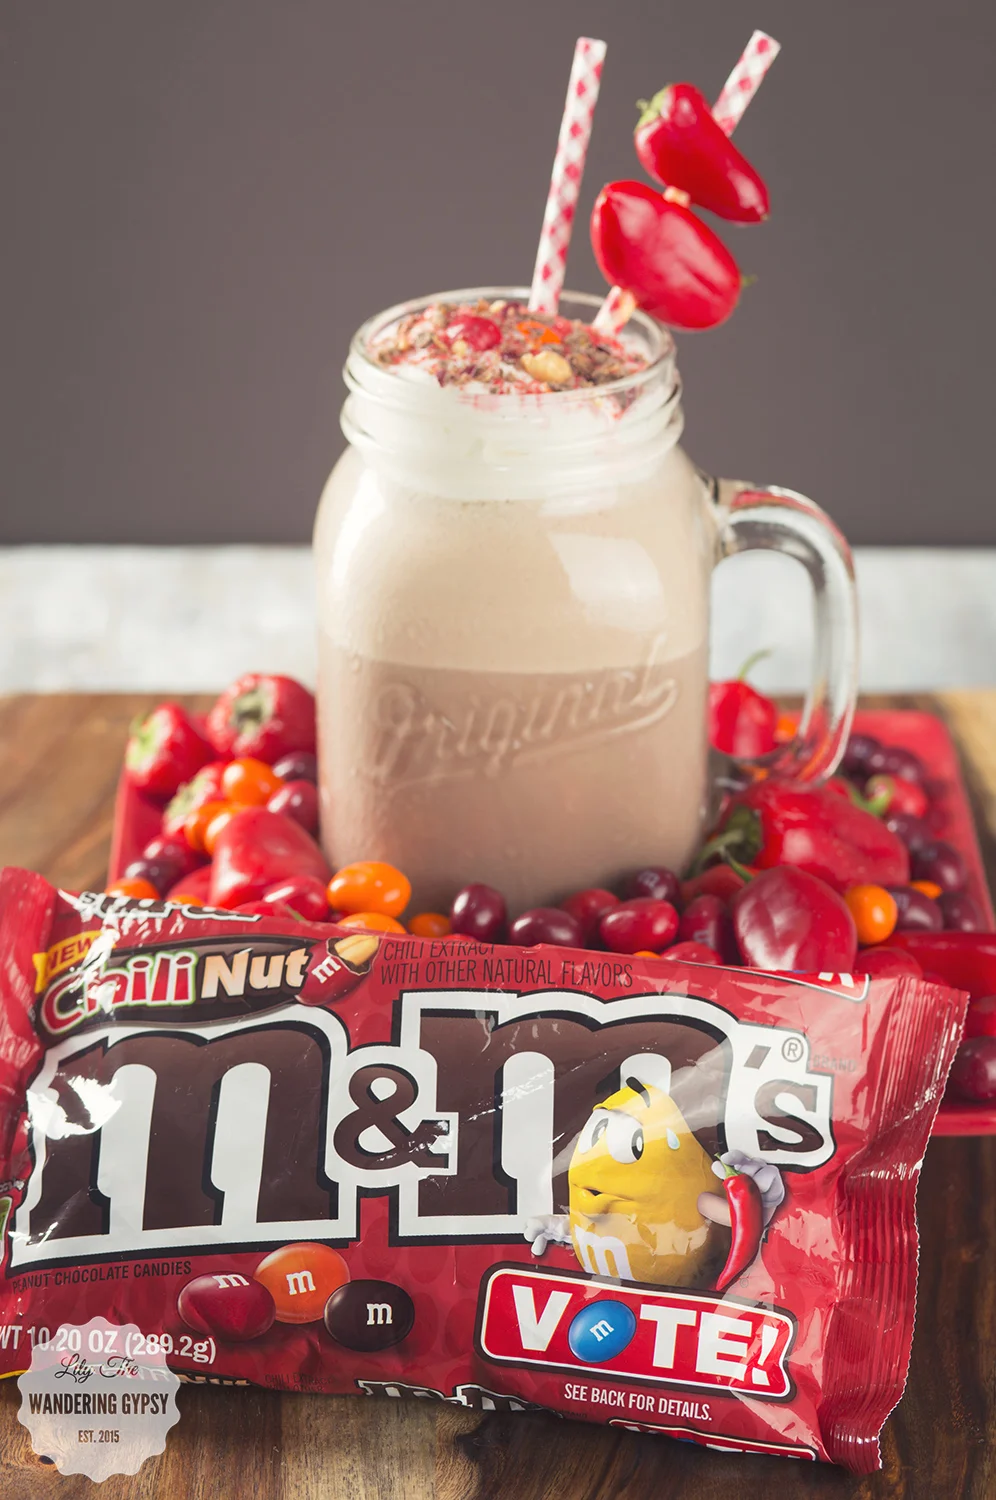
THE CHILI CHOCO SHAKE - INSPIRED BY M&M’s® CHILI NUT

Check out this milkshake recipe! #MMsFlavorVote #ad

Ingredients:

M&M’s® Chili Nut

3 C. Chocolate Ice Cream

1 C. Milk

Red Sprinkles

Red Chilis For Garnish - Optional

Check out this milkshake recipe! #MMsFlavorVote #ad

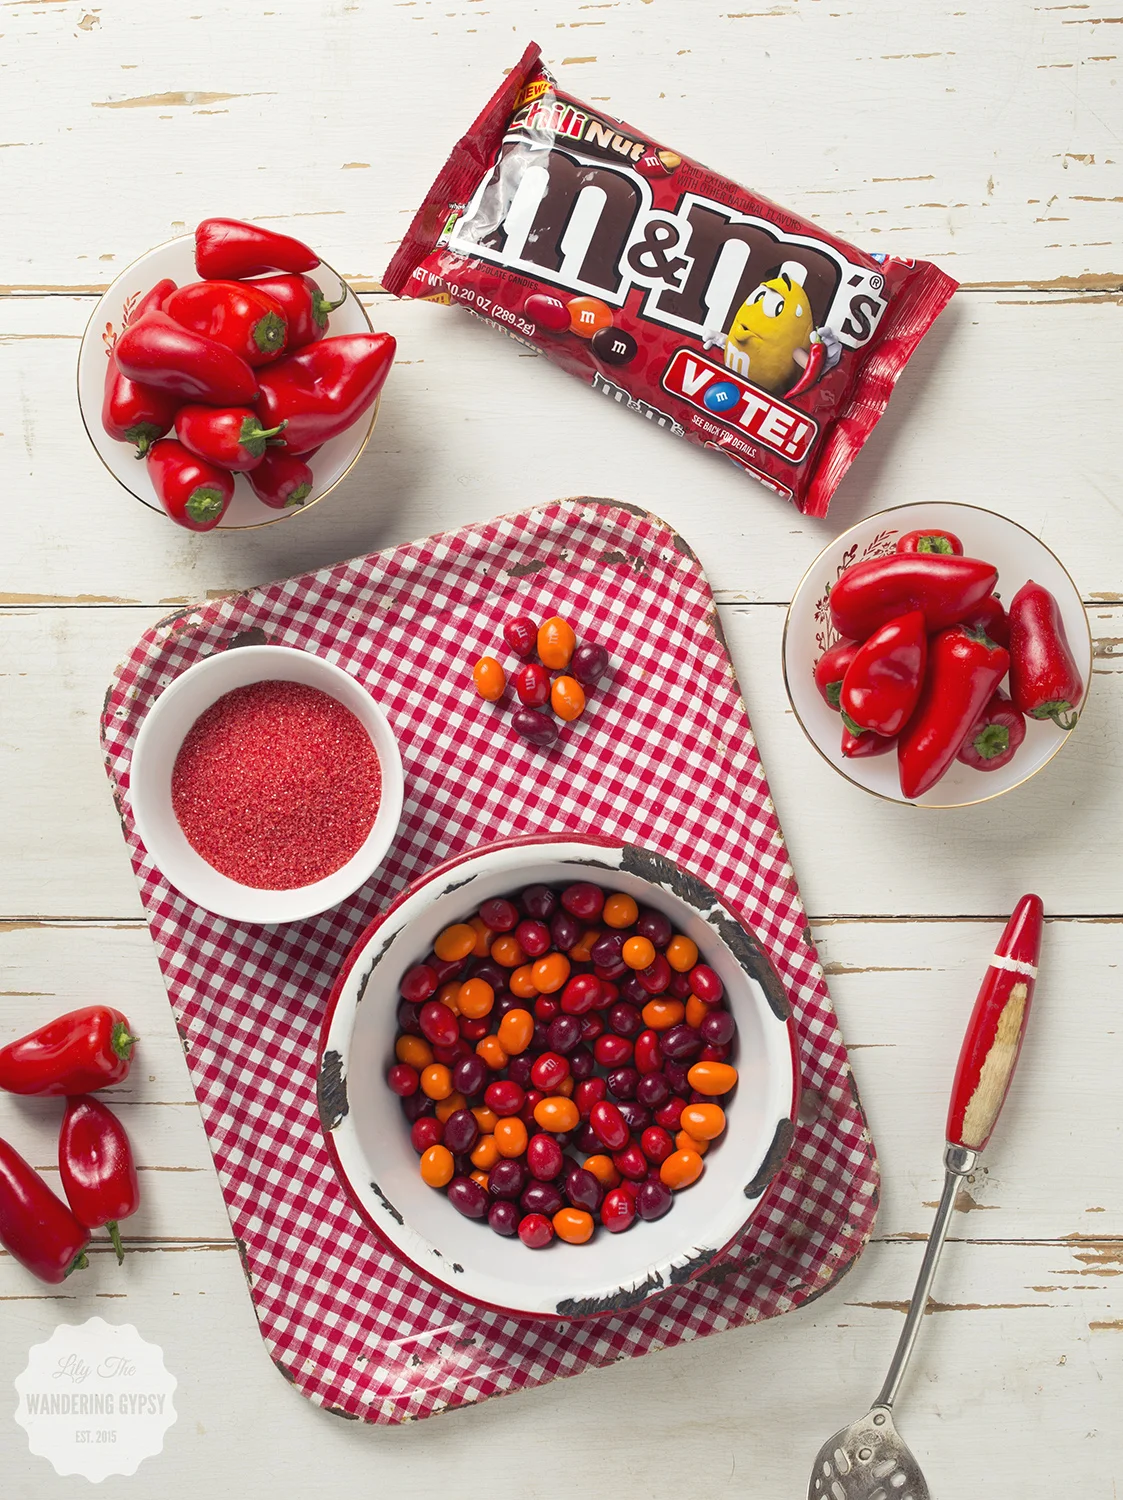
Luckily I got some of the last of the new flavor M&Ms at Walmart! Looks like just about everyone in town wanted a piece of the voting action! 

My local stores were almost sold out, but I found them near the front of the store by the registers. 

Check out this milkshake recipe! #MMsFlavorVote #ad

Instructions:

Mix together chocolate ice cream, milk, and Cool Whip until smooth. Feel free to add a dash of Cayenne pepper for some heat if you want. Also, add some M&M’s® Chili Nut candies, and mix with a spoon.

Pour the mixture into a jar, and top with whipped cream, M&M’s® Chili Nut candies, and red sprinkles. 

To create a fun garnish, take two red chilis (I used ones that weren't spicy, because these candies have some heat), and poke holes in them to make room for the straw to pass through. Love how these turned out!

Check out this milkshake recipe! #MMsFlavorVote #ad

Thanks so much for checking out these fun recipes, inspired by M&M’s® new flavors! 

DIY Super Easy Champagne Flutes

I had a blast working on this fun tutorial! I thought these would be adorable for a party of just about any sort. Whether you actually put champagne or sparkling wine in these glasses, or if you decide to create mocktails, suitable for all ages, these would be great. This of how cute these would be if you made them for a bridal or baby shower, holidays, birthdays, and just fun days you want to be more fancy than usual! You could also find monogram stickers and use those as fun gifts as well. Check out the full New Year's post Here

A Cute DIY Project!
A Cute DIY Project!

So, this project is one of the easiest ones I have ever created. So great that they wound up looking so great on top of being So easy! I wound up finding these amazing sticker/decals at Hobby Lobby. Of course, I couldn't find the exact stickers that I used online, but I used Stick-A-Bilities for this project. They were about $2.49 for the package, and I like the little bits of gold, pale pink, and mint in these stickers. They are kins of retro while still looking elegant and modern! The circle stickers ranged from about 2"-2.5" across, to give you an idea of what worked so well.

I found the plastic party champagne flutes for about $1.00 each at Party City. Here is the link to the cups in Clear and Gold. Whatever you wind up using, just make sure the plastic glasses have straight sides so the stickers fit best. 

A Cute DIY Project!

It's so simple, just make sure you stick the stickers to the flute glasses as straight as possible, and without any bubbles. 

A Cute DIY Project!
A Cute DIY Project!

Until next time, have a happy and healthy 2016!!!

4 DIY Christmas Gift Tutorials - By Lily The Wandering Gypsy

Check out my Pinterest Board here - https://www.pinterest.com/happysolez/a-hankering-to-be-making-this/

This DIY Planner is one of my most popular blog posts! Check out how easy it would be to make one, and give as a gift. 

This DIY Planner is one of my most popular blog posts! Check out how easy it would be to make one, and give as a gift. 

Also, check out my pin board, A Hankering To Be Making This for TONS of ideas! 

Also, check out my pin board, A Hankering To Be Making This for TONS of ideas! 

These amazing No-Bake Cheesecakes are made with animal crackers instead of traditional graham crackers. These would make amazing gifts for the holidays, since they are individually packaged. 

These amazing No-Bake Cheesecakes are made with animal crackers instead of traditional graham crackers. These would make amazing gifts for the holidays, since they are individually packaged. 

All you need is 3 materials for these super easy, Tassel Earrings, and they make a thoughtful gift.

All you need is 3 materials for these super easy, Tassel Earrings, and they make a thoughtful gift.

These Glitzy Tree Earrings are also a cute and festive gift idea you could make for a friend, and then make yourself a matching pair! These turned out really great! 

These Glitzy Tree Earrings are also a cute and festive gift idea you could make for a friend, and then make yourself a matching pair! These turned out really great! 

Pinterest  //  Facebook  //  Instagram  //  She's So Chic Blog  //  Twitter  //  Polyvore

7 Can Soup Recipe

Here is a super easy soup recipe, and requires 7 cans of soup and tomatoes, and a few other ingredients. It tastes amazing! 

7 Can Soup Recipe - SO good!!!

INGREDIENTS

- 2 - 28 oz. cans of diced tomatoes

- 1 - 15 oz. can black beans

- 1 - 15 oz. can pinto beans

- 1 - 15 oz. can garbanzo beans (I used half the can in this recipe)

- 1 - 15 oz. can corn

- 1 - 15 oz. can sweet peas

- 1 or 2 - 32 oz. containers of beef broth - depends on how much broth you like in your soup.

- 1/2 Lb. bacon

- 1 medium yellow onion

1 Lb. ground beef

- 3 Tablespoons olive oil, salt and seasoning to taste.

- sour cream and finely shredded cheese to top soup.  

INSTRUCTIONS

1.) In a large soup pot, begin to heat oil. Add chopped onions, bacon, ground beef, and salt/seasoning. Open and drain cans EXCEPT FOR TOMATOES - while you are waiting. Stir often. 

2.) Once beef has browned, add in all 7 cans, and broth, and stir. everything together and add more seasoning. Taste as you go! 

3.) Let simmer for about 30 minutes, and you're ready to serve! The house smelled amazing because of this soup! 

4.) Serve with a dollop of sour cream and freshly grated parmesan cheese. Crackers would also be good! 

7 Can Soup Recipe

Fall Rice Krispy Treat Pops!

Ever wonder why your rice krispy treats don't turn out soft, rich, buttery, and super tasty? You may be using the wrong method. Here, I will show you the old-fashioned way to make Rice Krispy Treats on the stovetop - with real butter.

I love how these little leaf treat pops turned out! They could be customized to just about any holiday or party theme, too! Feel free to add food coloring to them to really customize them in a new, unique way. Here we go!

Fall Rice Krispy Treat Pops - Lily The Wandering Gypsy

Ingredients:

- 3 Tbsp. REAL Butter (Organic Preferred)

- 6 C. Rice Krispy Cereal 

- 6 C. Marshmallows

- Sprinkles in Seasonal Colors

(Not Pictured)

- Parchment Paper

- Baking Dish 

- Smaller Wooden Skewers

- Leaf-Shaped Cookie Cutters

Fall Rice Krispy Treat Pops - Lily The Wandering Gypsy

Instructions: 

In a large pot, melt butter over low heat (slower is better, so the butter doesn't burn.). As that melts, add marshmallows. Continue to melt the ingredients over low-medium heat. Make sure to watch the mixture so it doesn't brown. The mixture should look a little something like this right before you add the cereal.

Fall Rice Krispy Treat Pops - Lily The Wandering Gypsy

Add the cereal and mix well to combine all of the ingredients. 

Fall Rice Krispy Treat Pops - Lily The Wandering Gypsy

1.) Spray baking dish with non-stick spray or butter. Cut a piece of parchment paper to fit inside the dish.

2.) Pour in Gooey Cereal Mix.

3.) Use another piece of parchment paper to pat down the cereal mixture flat into the dish. This will keep your hands WAY less messy.

Once cereal has cooled, remove the cereal and parchment paper, and put it onto a cutting board.

Fall Rice Krispy Treat Pops - Lily The Wandering Gypsy

Use your favorite leaf-shaped cookie cutter, press firmly down into treats. You can use a bit of non-stick spray on the cookie cutter if the treats stick. Carefully insert small skewer sticks into the leaves. Make sure you don't jab your hand. I got about 12-13 leaves out of my batch, and had lots of pieces left over to devour :)

Fall Rice Krispy Treat Pops - Lily The Wandering Gypsy

Enjoy! Happy Fall! Check me out on Pinterest.

Super Easy 2-Ingredient Ice Box Cake

Yum! This no-bake cake turned out so well! My grandma used to make this for me every time I visited. She didn't cook or bake very often, but I remember when she made this, and her famous meatballs, and they were both some of my favorites EVER! 

I always loved it and finally made some myself. This cake is great to make on a warmer day, because you don't even have to turn on the oven. It only requires 2 ingredients, Chocolate Wafers, and Cool Whip, so that's an added bonus as well! Check out my food blog, Bisque This! for this recipe and lots more! 

Super Easy, 2-Ingredient Ice Box Cake

It's super simple! Grab a loaf tin and your 2 simple ingredients. First, spread 2-3 Tbsp of Cool Whip on the bottom of the tin evenly. Then, add a layer of chocolate wafers. They fit perfectly with 2 across. At the short side of the tin, a whole cookie wouldn't fit, so I added some cookies that were already broken in half.

Super Easy 2-Ingredient Ice Box Cake

Keep layering the Cool Whip and Chocolate Wafers until you are out of ingredients. I liked when the layers of Cool Whip were thicker, but whatever you wind up doing will be great! I also crushed up some of the broken cookies (in my fingers) and lightly sprinkled them on top of the cake for a bit of added cuteness! 

Super Easy 2-Ingredient Ice Box Cake

Pop the "cake" into the fridge or freezer, and let it combine over night. Voila! You have an incredibly easy, no-bake Cookies and Cream Ice Box Cake! I initially let this sit in the fridge overnight, but froze it to take photos of it. I tried it both ways, and liked it frozen a lot better. 

Super Easy, 2-Ingredient Ice Box Cake Recipe