FREE Summer Fun + A Cute DIY Gift Idea!

This post is sponsored by Zynga, but the content and opinions expressed here are my own.

Looking for fun and entertaining ways to enjoy the summer? Well I have teamed up with Zynga Words With Friends 2 to help share some fun and easy ways to have fun for FREE. Hey, we can all use a break, right?!

With this fun gift idea + a brand-new version of the Words With Friends app will help entertain everyone this summer. Help create more winning experiences this year, enjoy the thrill of the game.

Learn more about Words with Friends 2 here.

Download the game here (Apple store) or here (Google Play). Brush up on rules here!

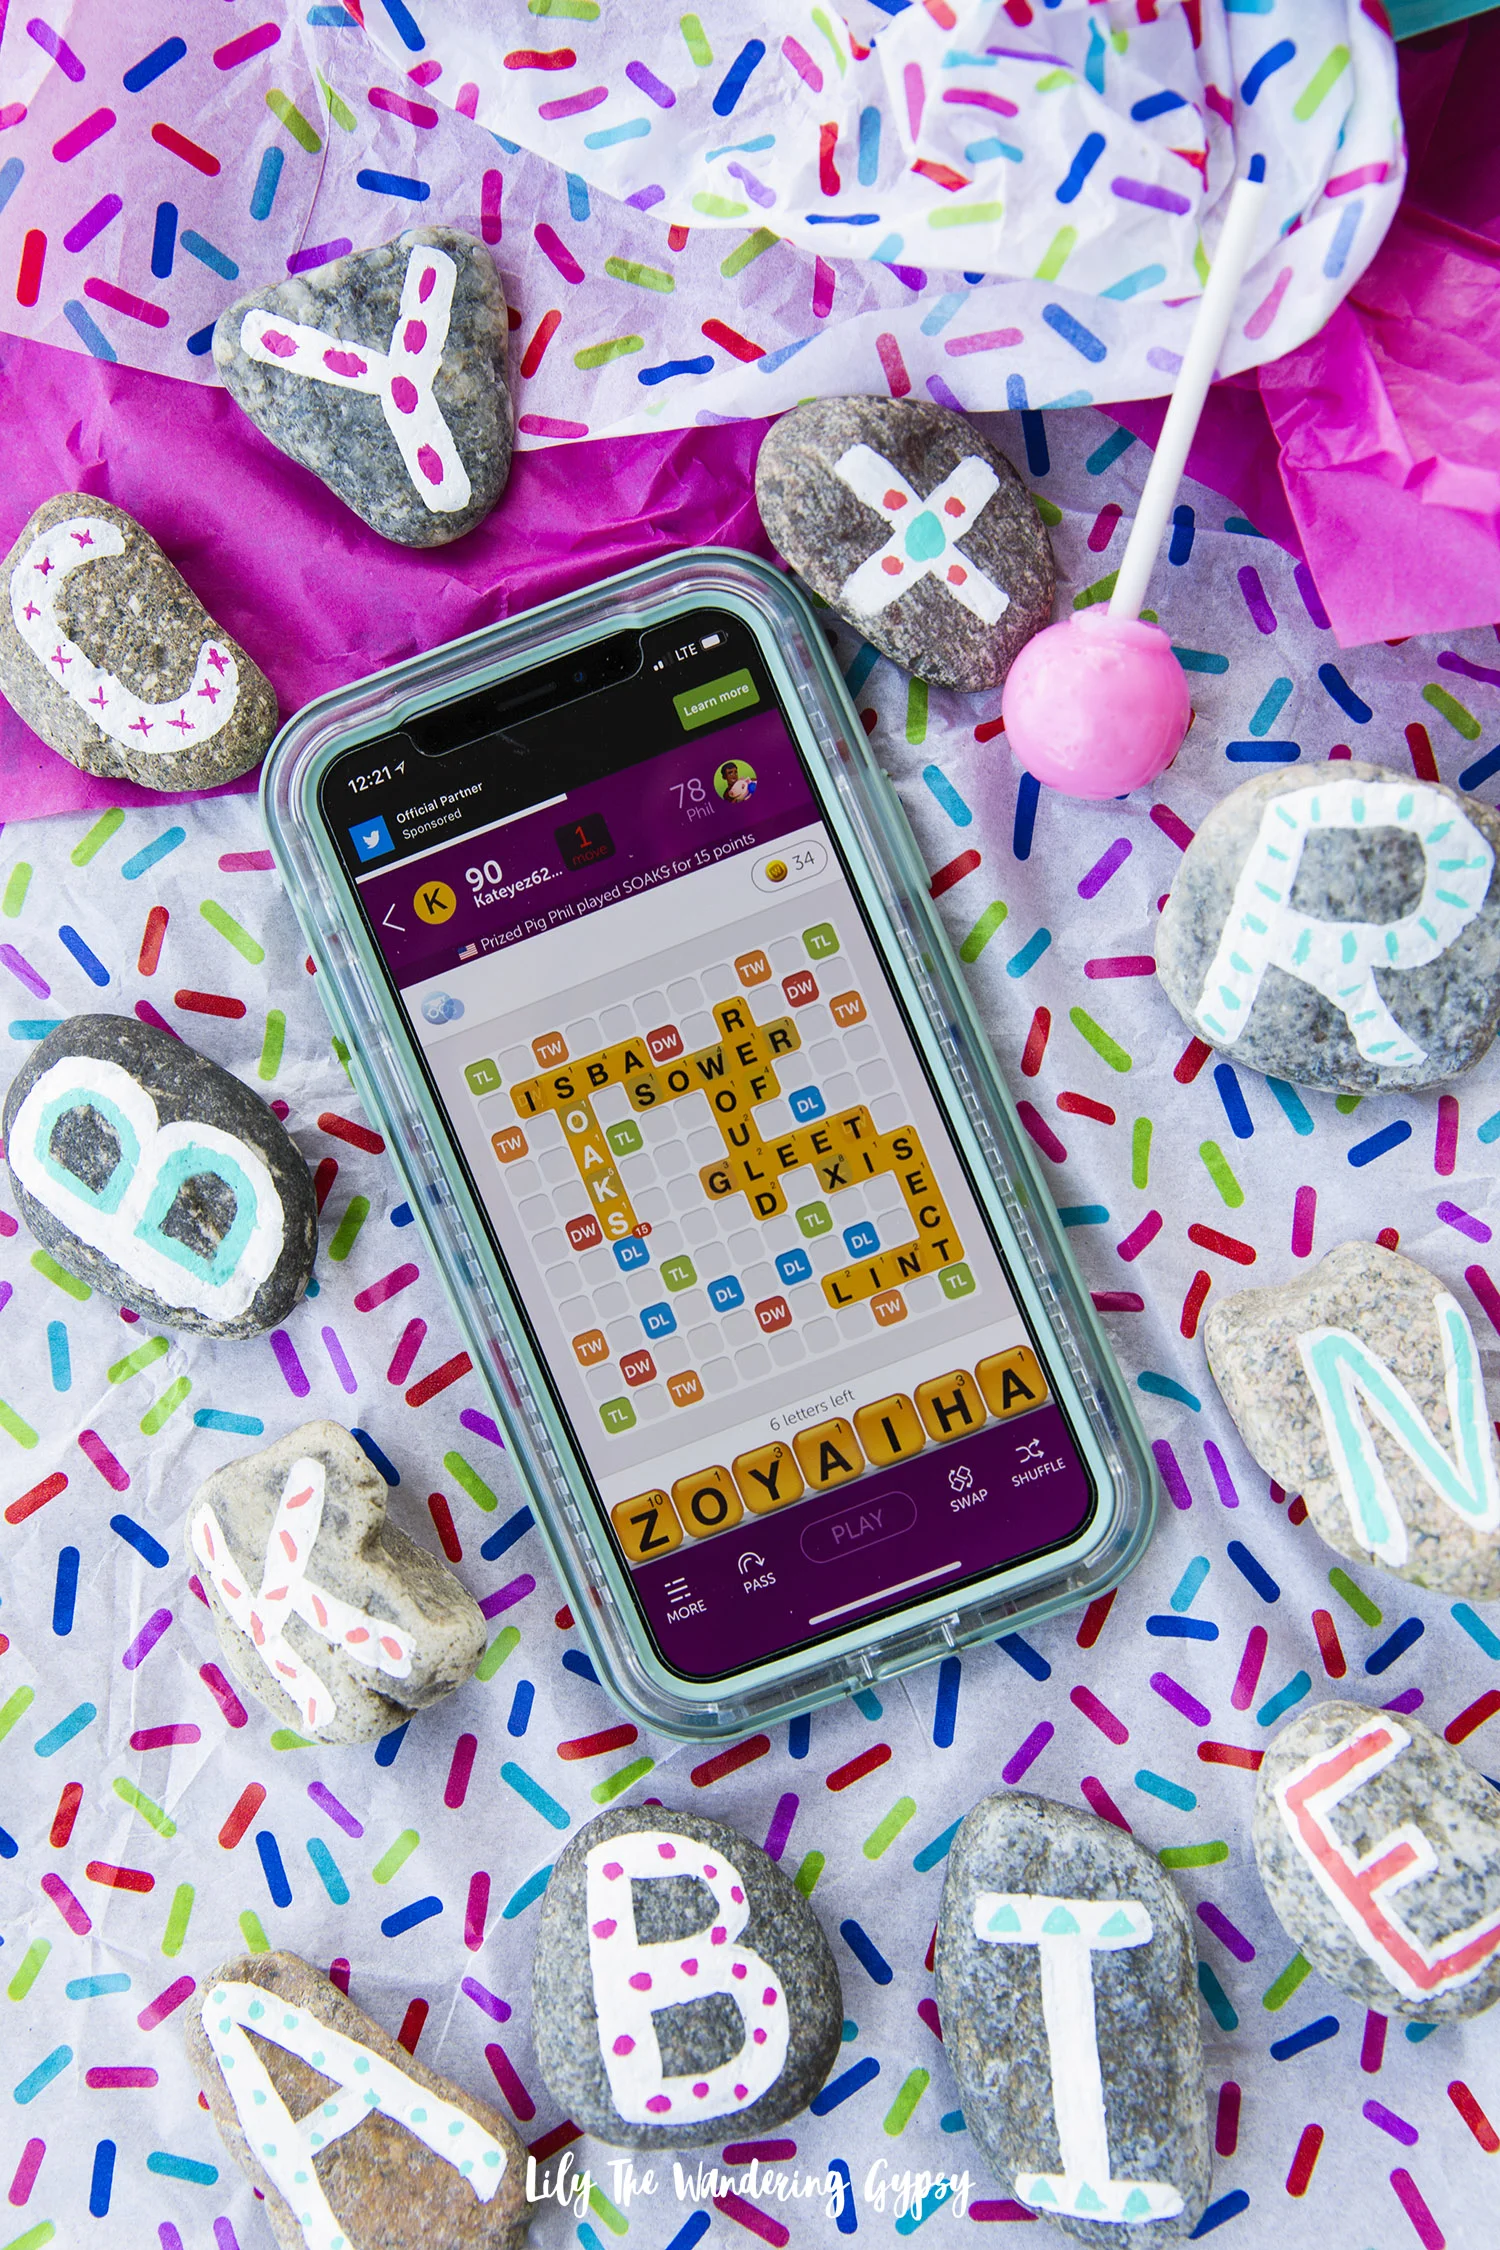
You may be familiar with their first WWF game, but this one is a bit more updated and runs SUPER fast on my phone.

I love how you actually stretch your brain capacity and also learn new words. It’s fun for the whole entire family, and even fun with groups of friends too. I feel smarter during and after playing Words With Friends – I always pull out new words in conversations later that day! The game helps me connect with friends (new and old)!

I have met all sorts of new friends through the WWF app! There are always tons of players ready to start or complete a game with us, every time we login. We play ALL the time, and since we are always on the go, it’s something familiar in each place too.

With all of the Double Letter (DL), Triple Letter (TL), Double Word (DW), and Triple Word (TW) spots on the board, you can really gain a lot of points in just a turn or two.

Some of our highest scoring words are: CLOTS, TAXED, and HANDLED!!

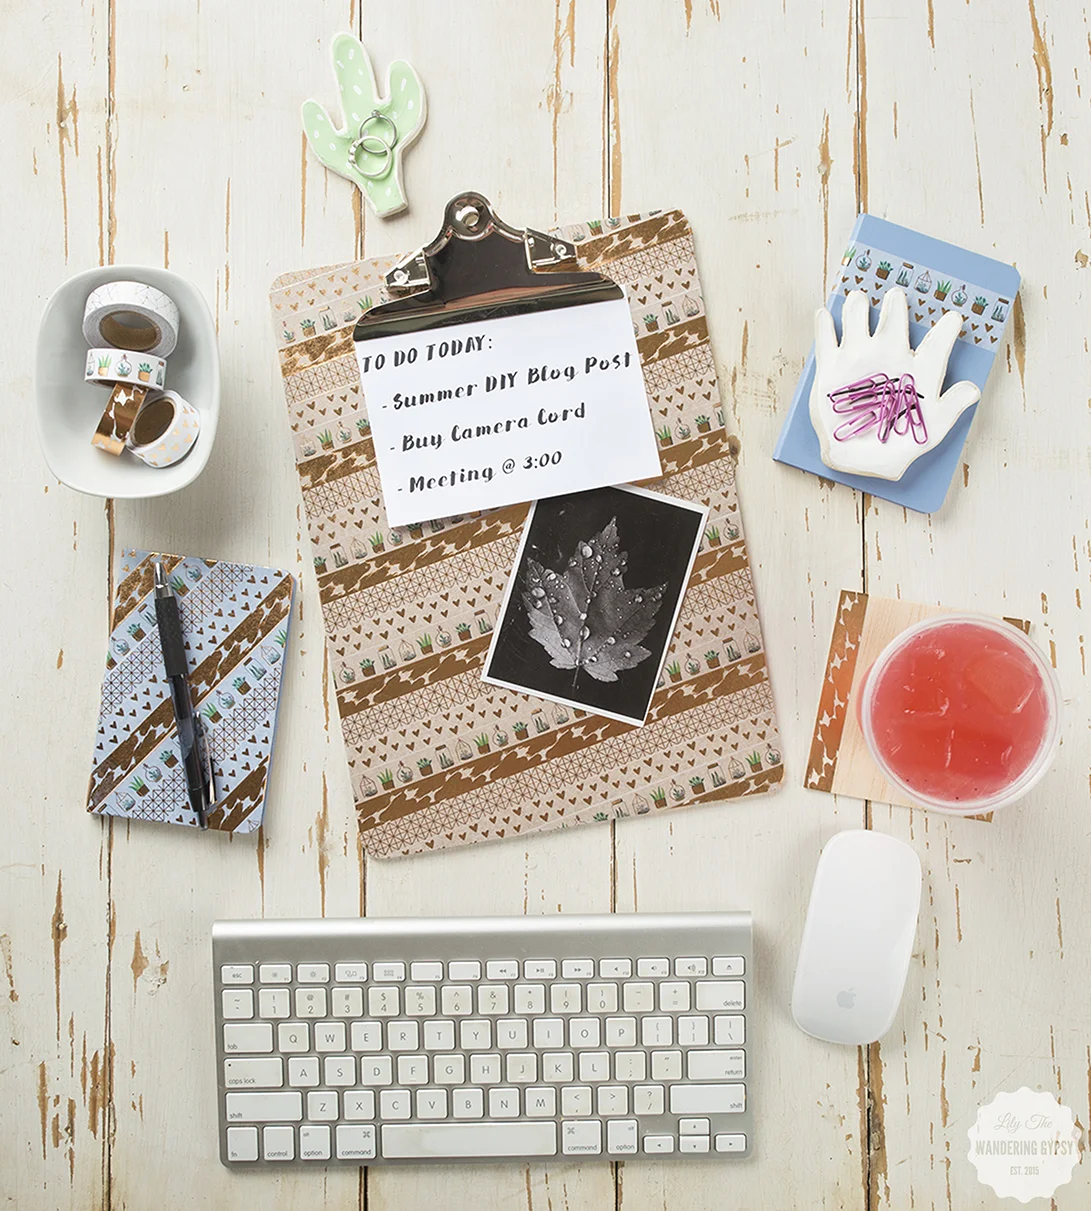
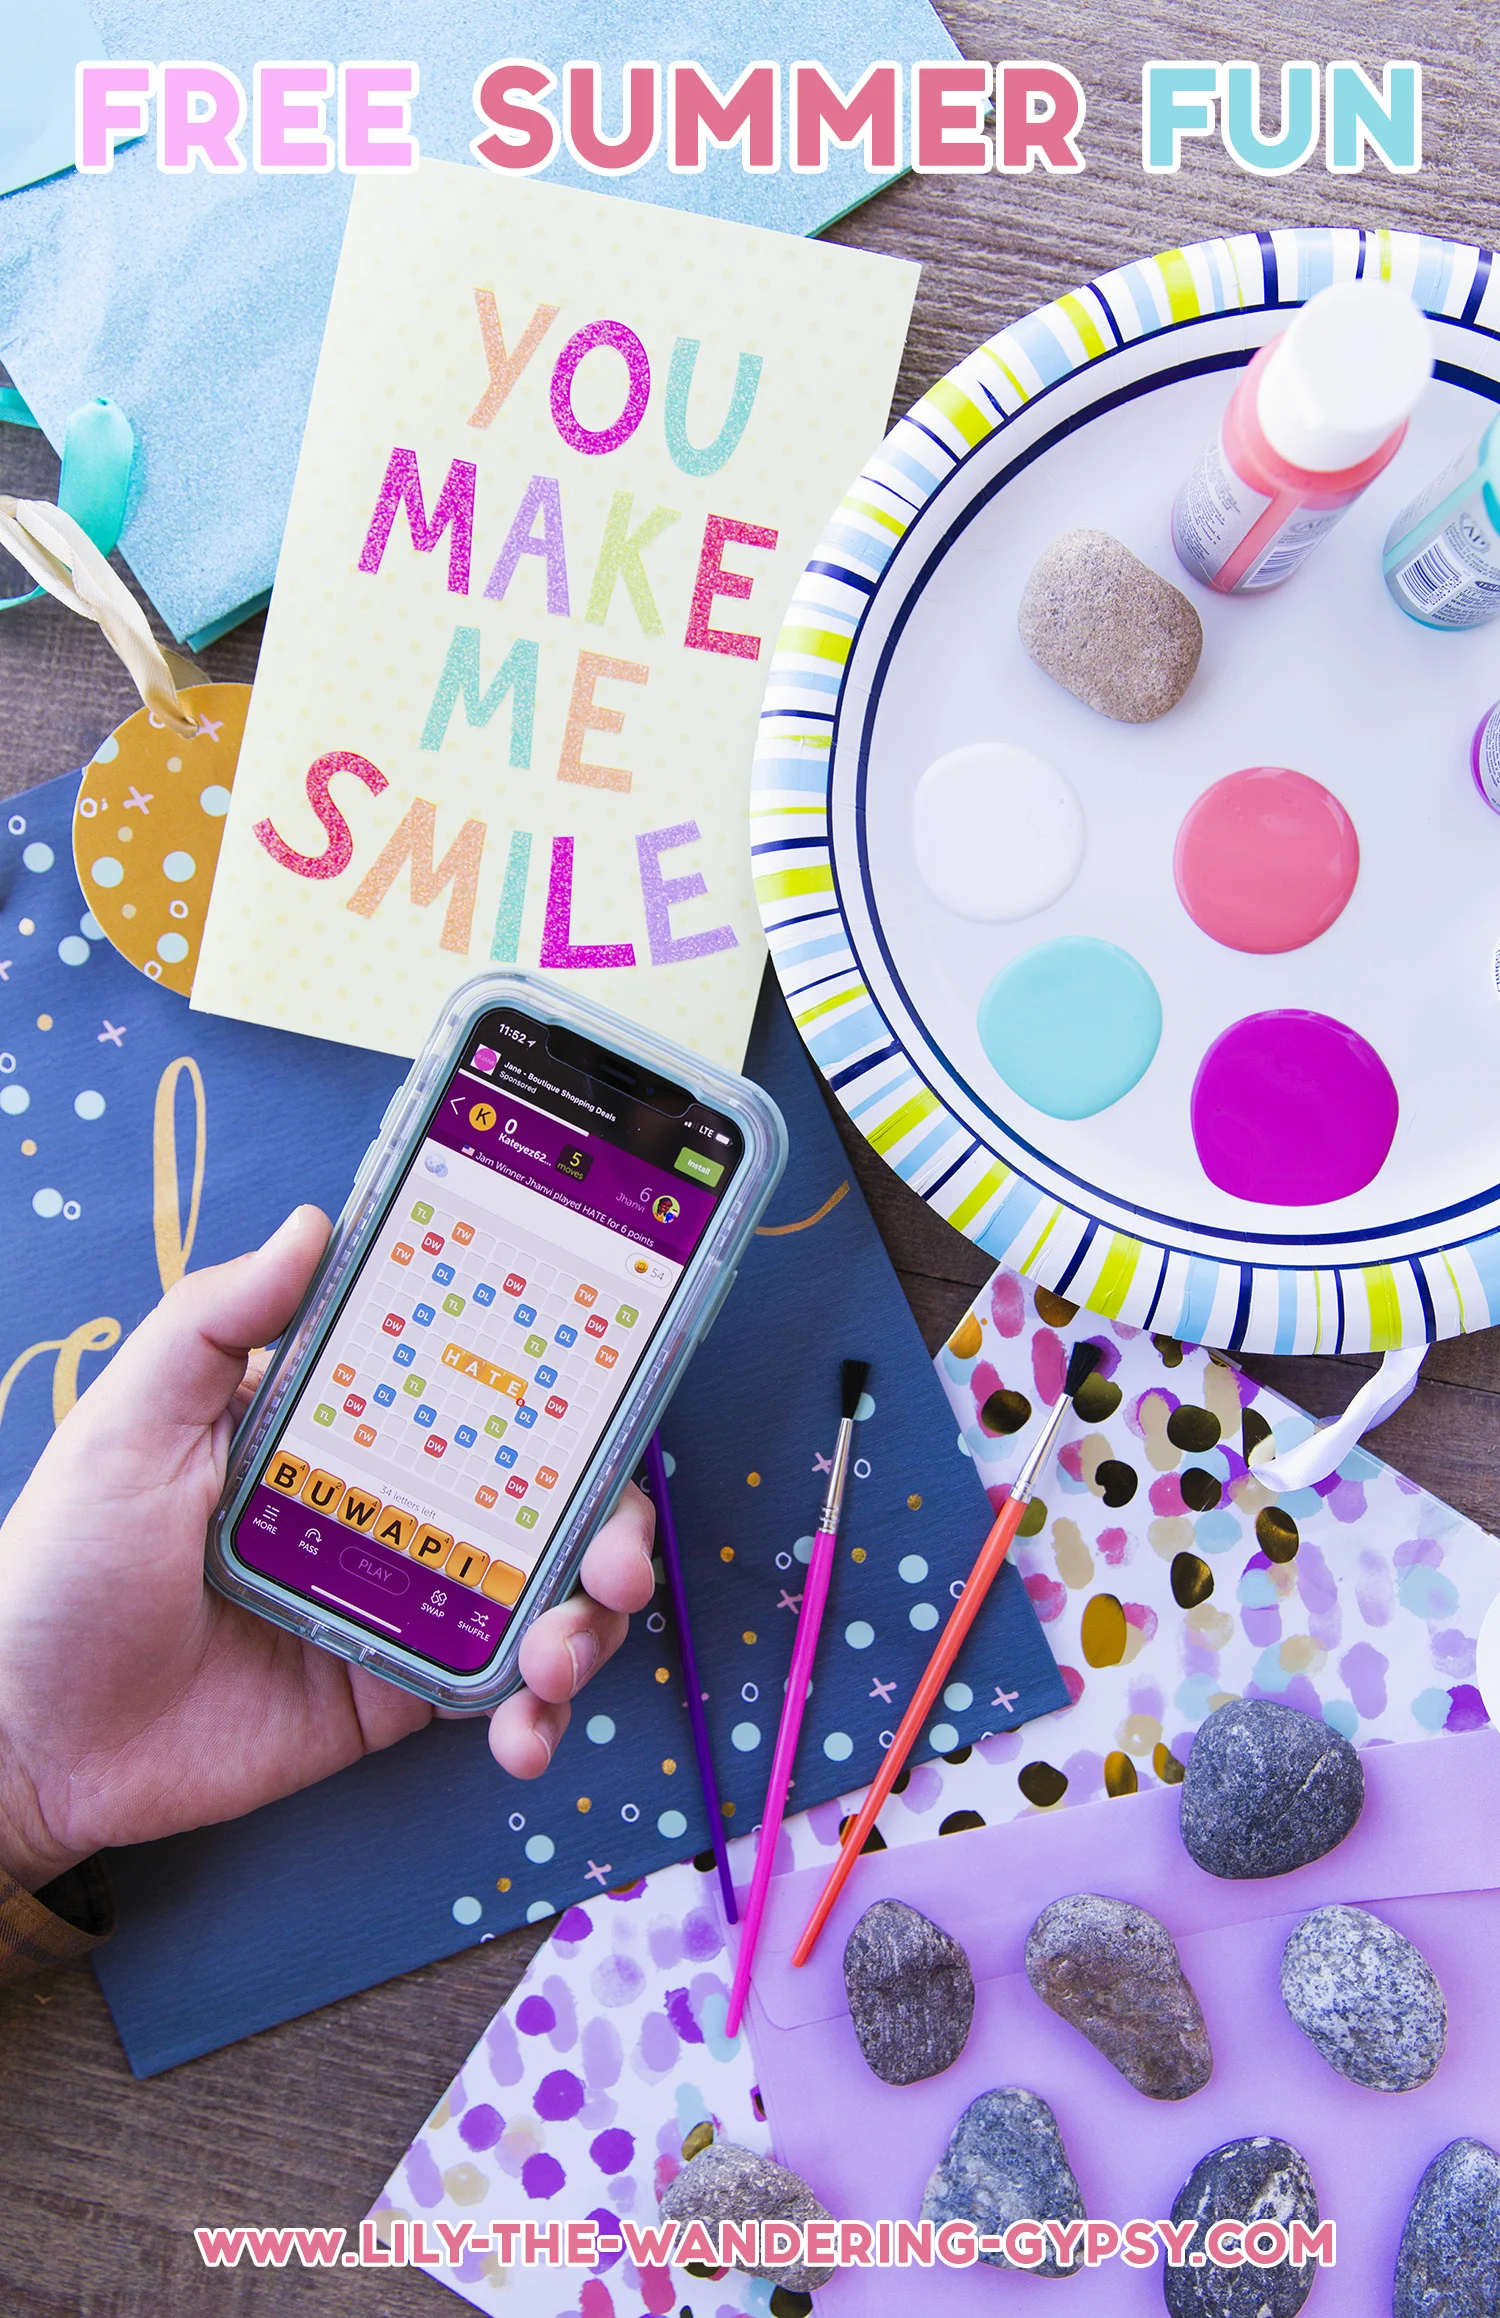
DIY SUMMER GIFT IDEA

I know that rock painting has been around for decades, but I thought that a fun way to commemorate our friendship and share the beauty of the river would be to paint our friends’ names on rocks, then spell out their names in a gift. I had so much fun, and the best part of this crafty activity, is that you may already have everything you need – deeming this a FREE project!

MATERIALS:

Smooth River Rocks

Acrylic Craft Paint in White, Coral, Mint, and Raspberry

2-3 Small Craft Paintbrushes

Paper To Cover Work Surface

INSTRUCTIONS:

1.) Head to your local river to collect rocks, find them at a craft or hardware store, or find them anywhere else you like!

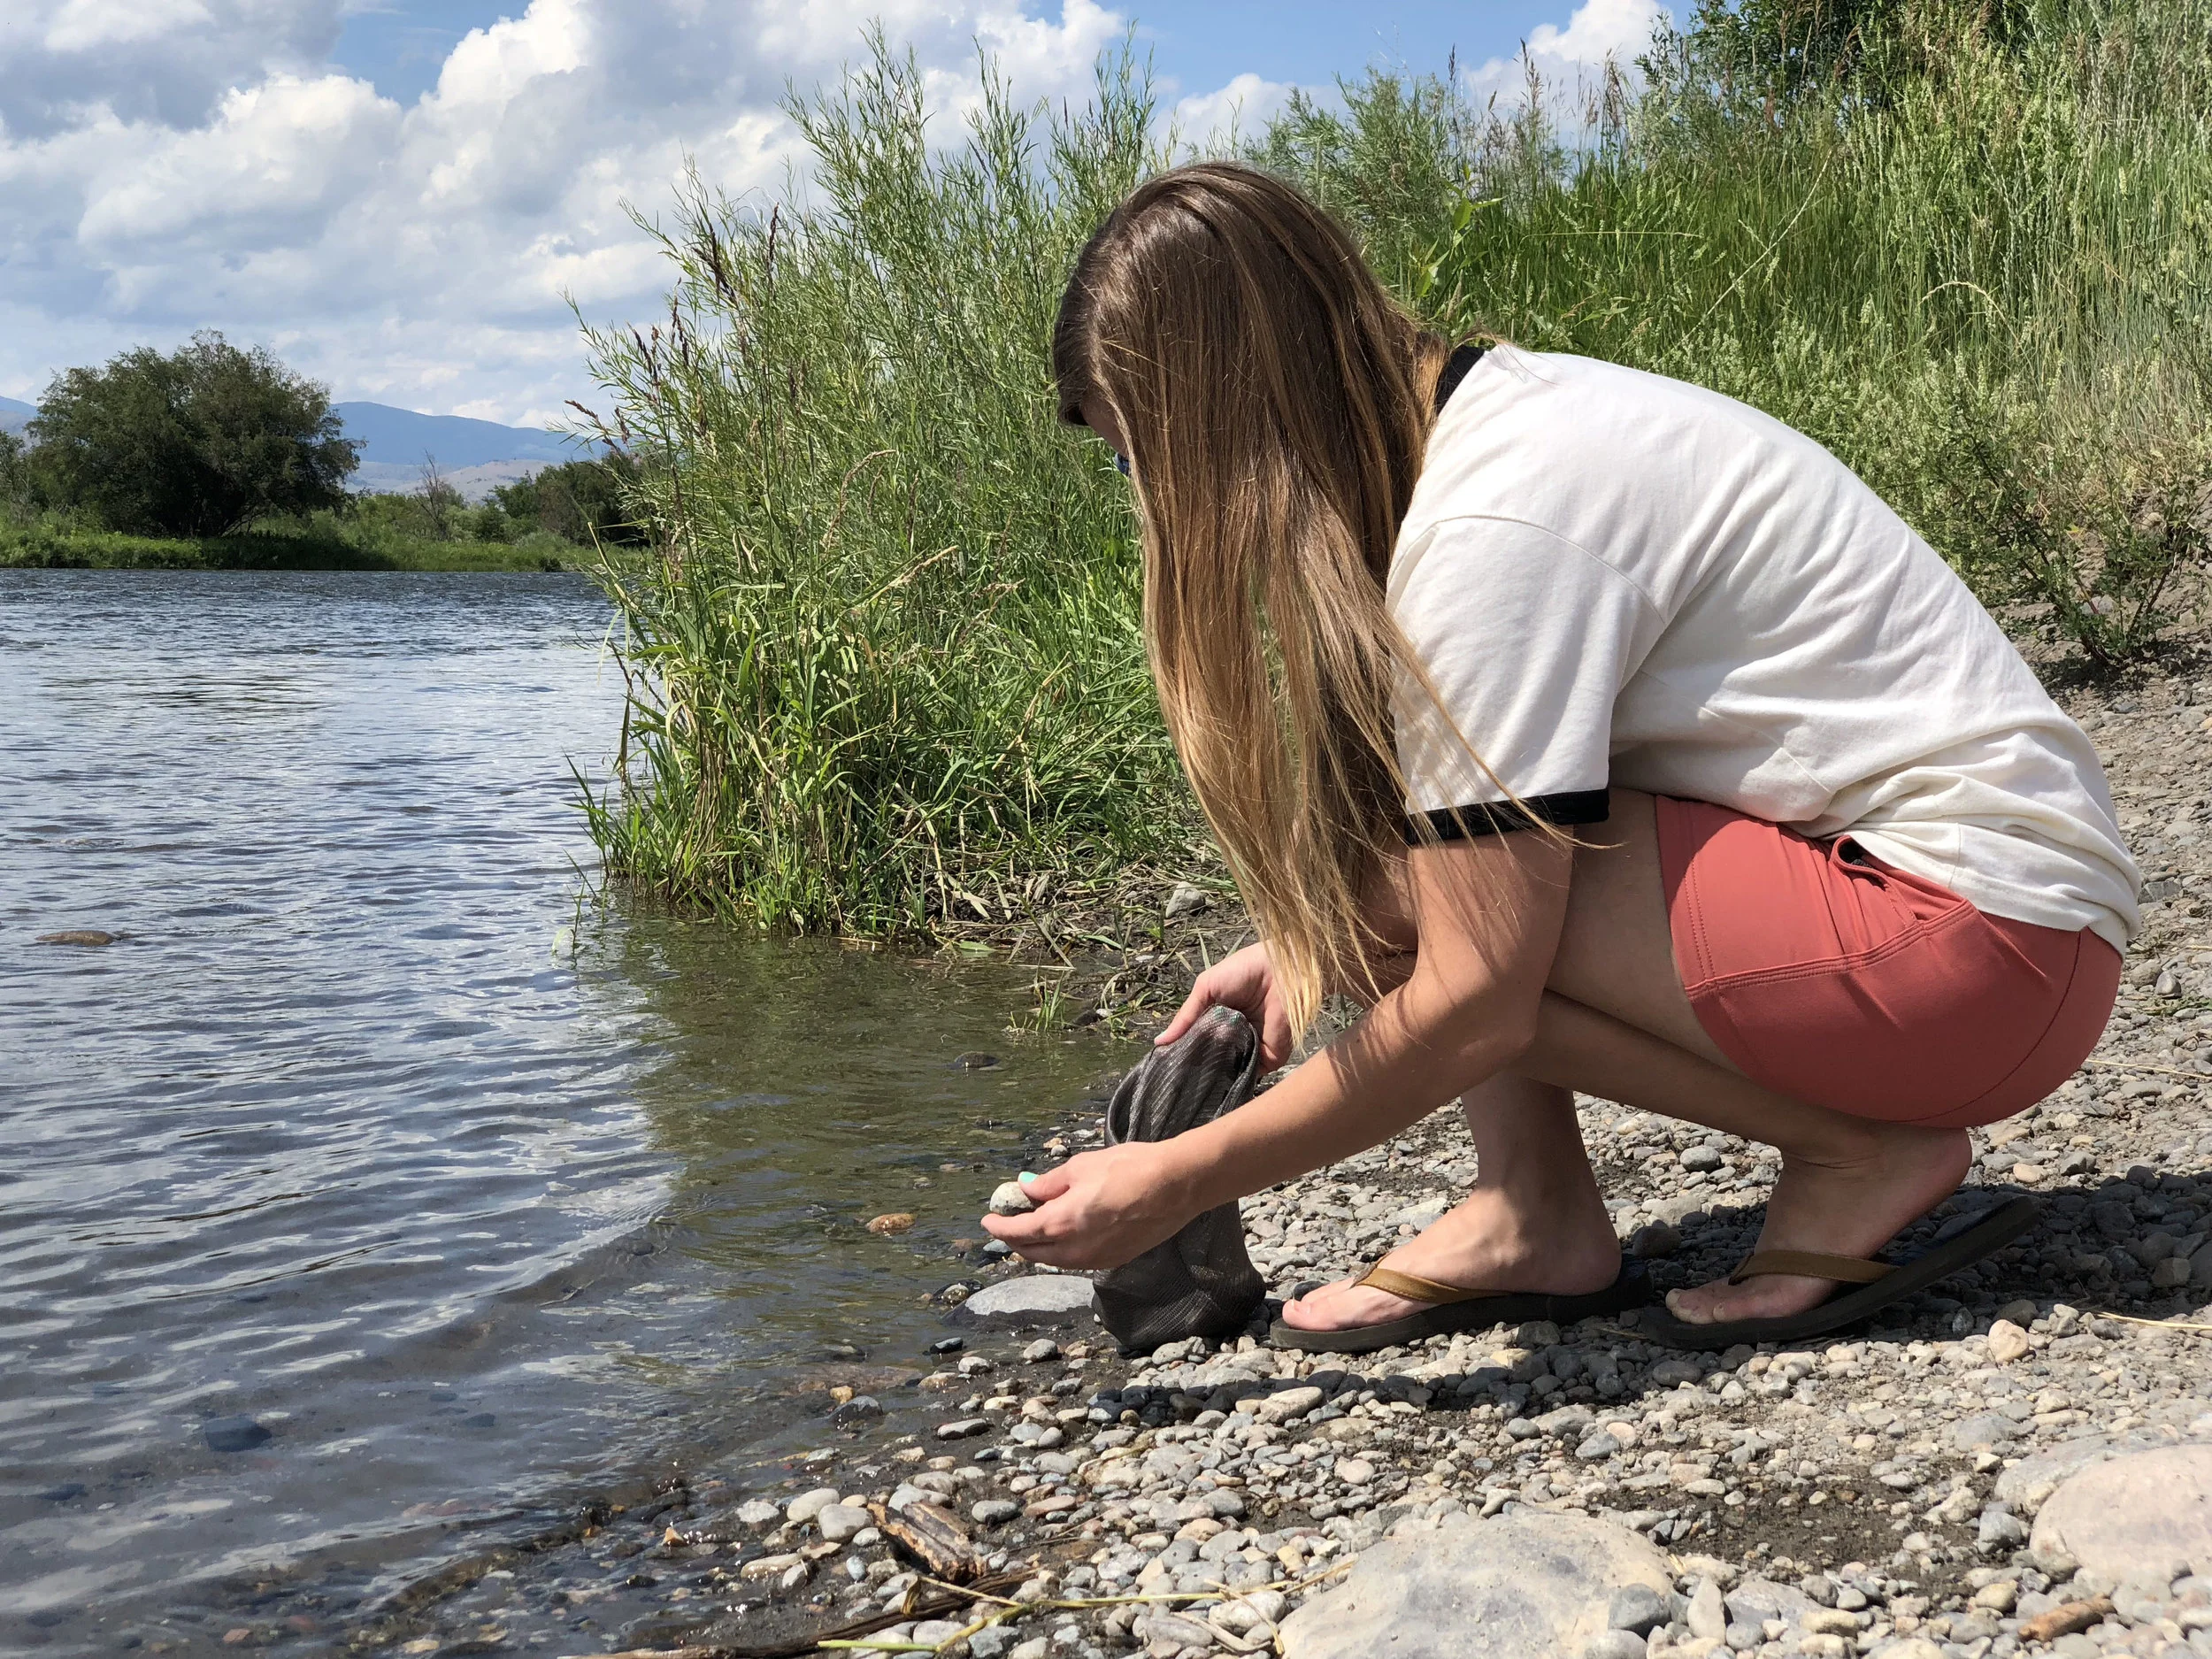
2.) Wipe off excess dirt from rocks with damp washcloth.

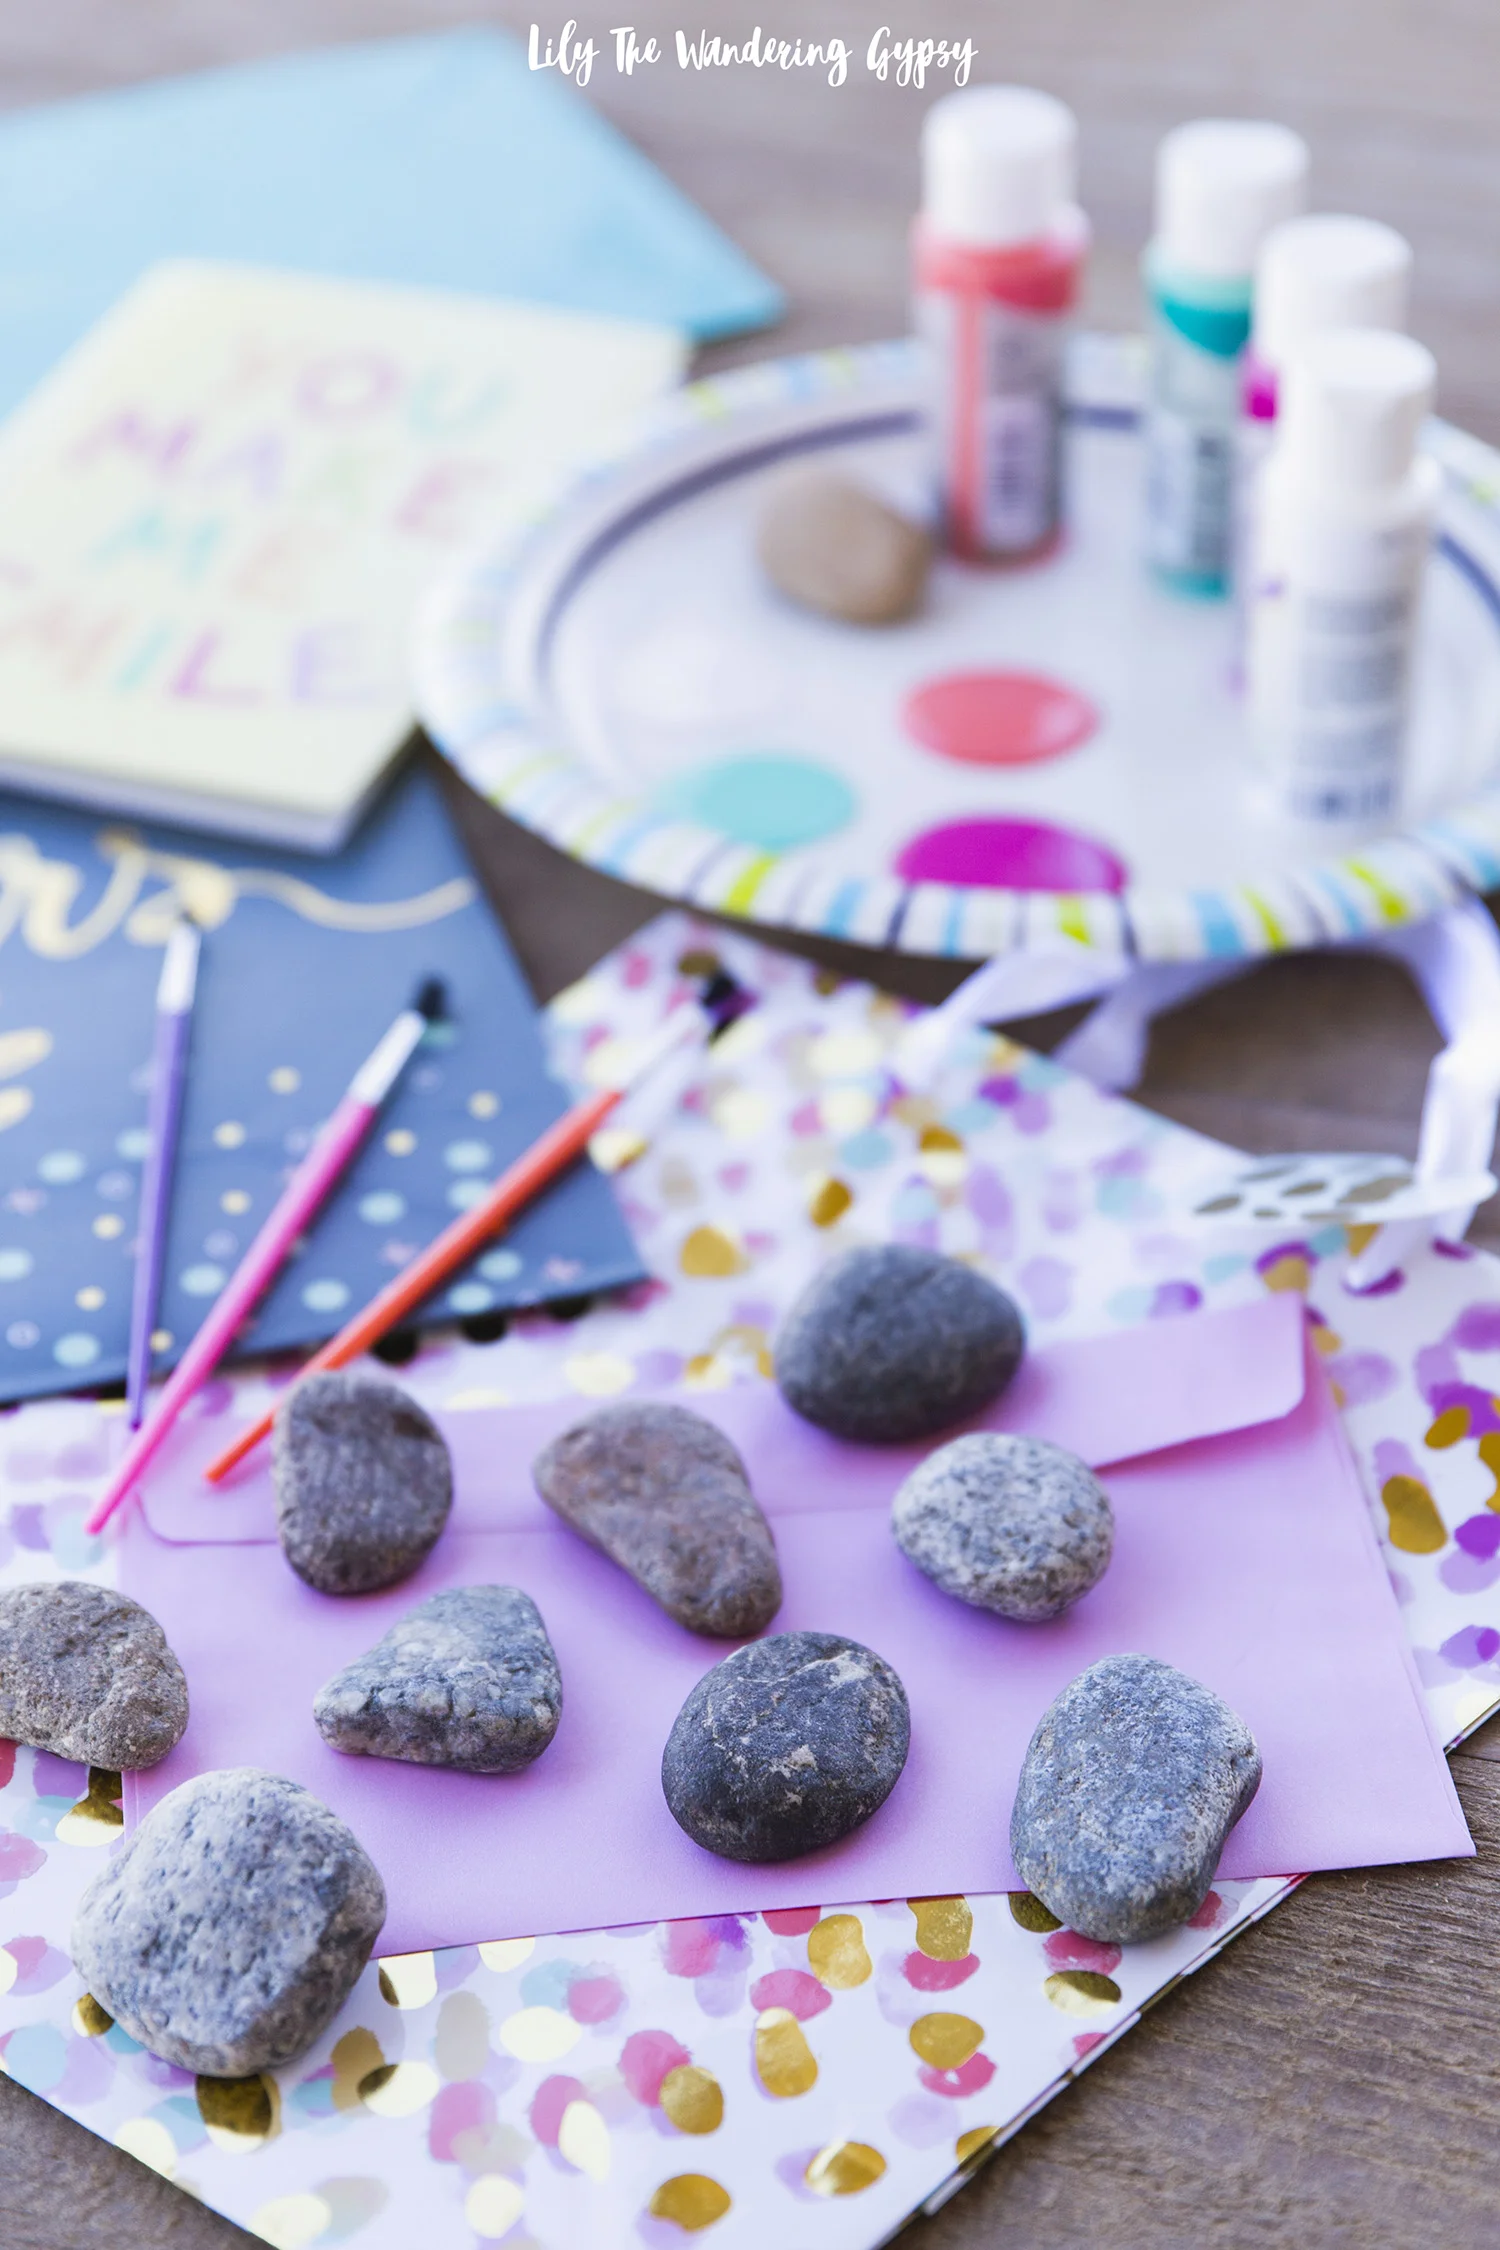
3.) Paint thick, white letters onto each rock. I used two coats of white paint for each letter. Below, you will see some rocks with two coats of white paint and some rocks in-process with only one coat of white paint.

4.) Paint colorful designs on top of white paint, on each rock.

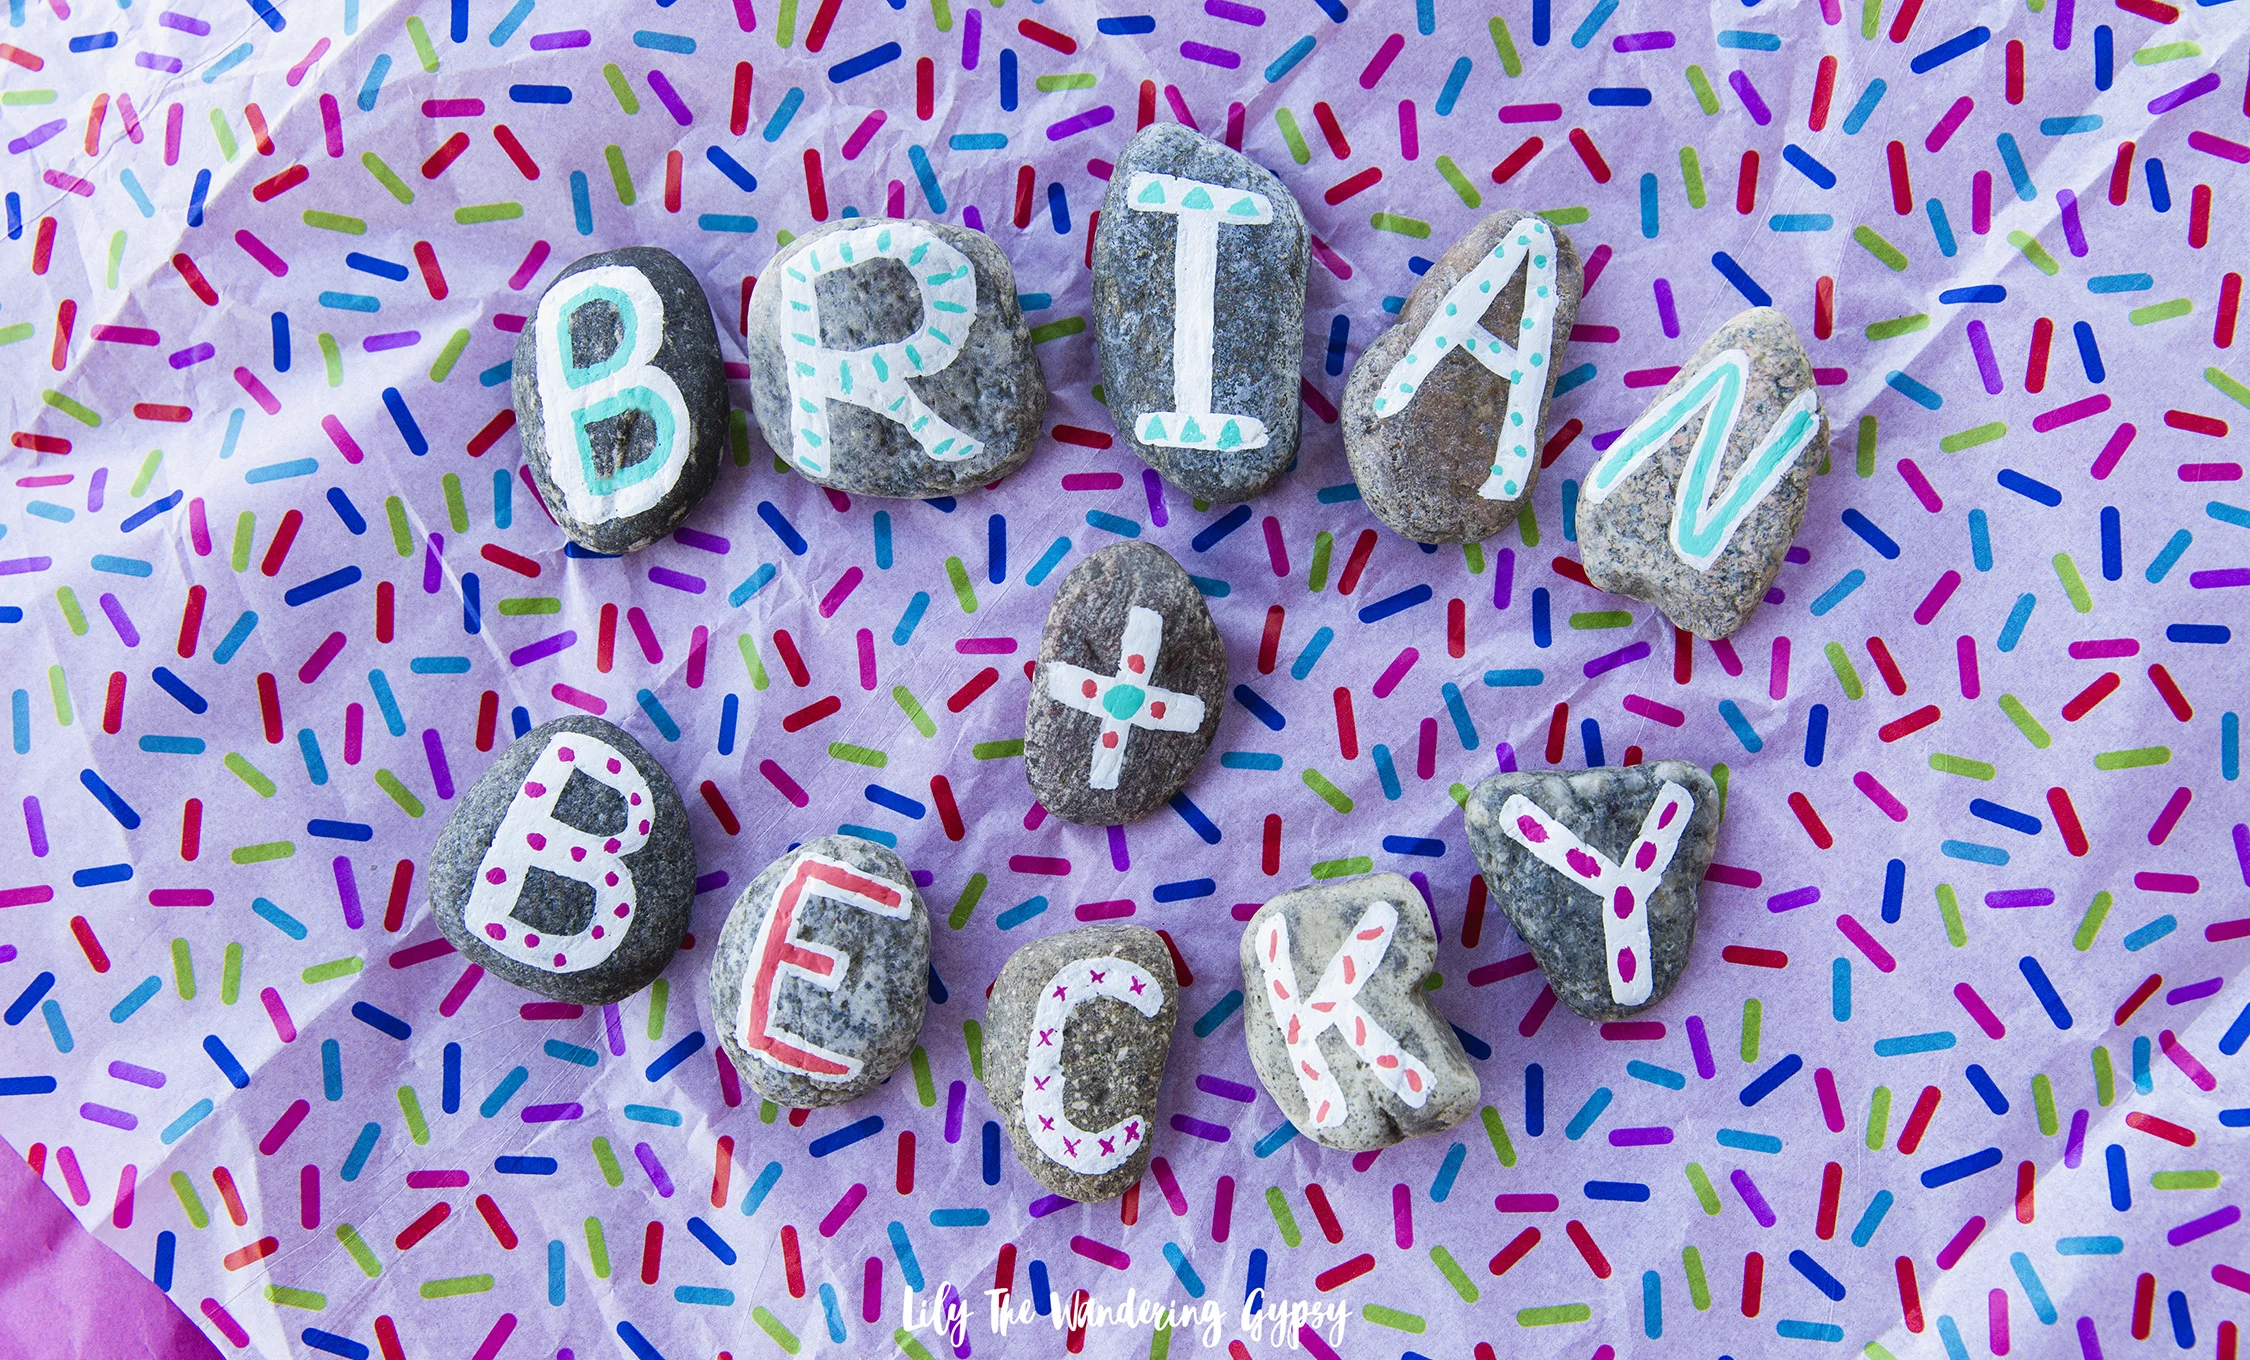
5.) Give rocks as gift and let recipient spell out their names or secret message once they receive your gift! That’s it, and this project was so fun and easy. What a thoughtful gift.

THE FINISHED PRODUCT:

Luckily, The Words With Friends app is free as well, and while I was painting the rocks, my boyfriend Bobby entertained himself with the Words With Friends app on my new phone.

A SENSE OF CONNECTION:

With the weather being so warm and beautiful right now, it was a lot of fun to gather rocks for this project, then gift such a special and thoughtful memento to my friends. I feel like we are even more connected, just like how we will be able to play WWF from afar and know that we are still connecting and interacting.

Do you play Words With Friends yet? If so, what are some of your best words? Do you play with old friends or new ones?

Have a wonderful rest of the summer! Tag me on Instagram with @happysolez if you make this project, and tag the brand, @wordswithfriends on Instagram and as @wordswfriends on Facebook to show them how you spend time playing!!

Olympics Inspired - Candy Flavored Vodkas!

I had a blast creating these 5 flavored vodkas, inspired by the 2016 Olympics! With 5 different types of candy, I created 5 festive flavors of infused vodka, and then created a cute label for the Vodka I used. 

Here is how I got the 5 flavors/colors. Note, I did use a teeny bit of food coloring in the black and green flavors, but the other colors turned out so vibrant. All you have to do is to divide 1-2 bottles of unflavored vodka into 5 jars with lids. In order to really infuse the alcohol, keep these in the fridge overnight, if you can. The longer you wait, the better! I also recommend using as much candy in the jar as you can.

BLUE: Blue Jolly Ranchers - BLACK: Black Licorice + Black Food Dye - RED: Cherry Jolly Ranchers - YELLOW: Lemon Heads - GREEN: Green Apple Jolly Ranchers + Lime Green Food Coloring

You could of course customize these fun flavors and colors for college or pro sports teams, holidays, and more! Let me know if you wind up making these, I'd love to see what you create. 

Also, I grabbed this amazingly tasty Sugar Saucer Cookie from Longbranch Cafe, my favorite restaurant in Carbondale! 

And, if you were wondering how I created the label on the bottle, I found 8.5" x 11" sticker paper at a local print shop, and printed a label I created in InDesign. I found the fonts on dafont.com - love that site! Go Team!!!

DIY Summer Fun - Washi Tape Everything!

Washi Tape is here to stay, and I absolutely love it! This tape sticks to SO many surfaces, and creates an instant pop of color and a bit of whimsy to anything you adhere it to. 

Below, you will find a few items that I covered, to show you how easy it is to update just about anything on your desk and around your home!

I created these photos for a fun campaign that I helped share for Wendy's Blackberry Lemonade. I loved creating this DIY project for such a well-known brand! 

I covered an assortment of items, including: A clip board, wooden utensils, blank journals, and paper gift bags! Seriously, this project was SO fun!!!


DIY Summer Fun - Pineapple Gift Boxes

There's no doubt that it's summer, why not embrace it and make something cute inspired by tropical breezes (wishful thinking), and pineapples! Why not make someone smile by creating a gift box that is a present in itself. I made this project a little while back in order to help Wendy's to help promote their Blackberry Lemonade. It was just the right amount of tart and sweet, wrapped up into one pretty drink! What will you be making and gifting this summer?

This post was totally inspired by the amazingly awesome blog, Damask Love

- Oval-shaped Paper Mache Boxes 

- Yellow Paint, White Paint

- Paint Brush (to paint over entire box)

- Wooden Skewer Sticks (to paint white marks on boxes)

- Paint Brush

- Mint Green Sparkle Foam Sheet 

- Glue

- Gift Items or Candy to fill boxes

1.) Cover your work surface, and paint your boxes yellow. I used 2 coats, but they dried pretty quickly.

2.) Make sure your yellow paint is 100% dry, then with a skewer stick, draw/paint the lines onto the boxes. I basically put the white paint onto a paper plate, then laid the skewer sticks down, covered the end in paint, then drew the lines across the boxes. This helps you create super straight lines, too!

3.) Now, cut out your green top parts. Feel free to print the photo, below, to get the right shapes. I just sort of free-handed one, and traced it on the non-glitter side of the foam. These were so easy to cut out! 

4.) Now, simply glue the little green top pieces onto the boxes, and you're done!! Fill them with paper shreds, and whatever your heart delights! 

DIY Summer Fun - Cookie Cutter Jewelry & Trinket Trays

I recently collaborated with Wendy's to create several Summer Inspired DIY Projects! Throughout the next week or so, I will be sharing instructions to all 5 projects! This project in particular, was inspired by a blog post I found on the Aww, Sam Blog. * Note - this project is kind of messy, so lots of paper towels were needed!!!! So excited to present you with these Cookie Cutter Trinket Trays! Enjoy :)

MATERIALS:

- Air Dry Clay (2 smaller packages will do)

- Cookie Cutters - I got mine here (for 99 cents each!). I got a cactus, hand, lips, pineapple, and teepee.

- CeramCoat Paint in green, white, red, tan, black, and yellow

- Clear Poly waterproof paint-on coating, optional.

- Clay sculpting tools (I found these ones for $2.47 near the clay supplies at Hobby Lobby)

- Water in a small dish to use for smoothing clay with your fingers

- Waxed Paper and Tape to keep surface clean

- 2 Paint Brushes for larger areas, and then one for finer detailed lines

- Paint clean up supplies like water and paper towels

INSTRUCTIONS:

- Prep your work surface. On a smooth, dry table, tape down a piece of parchment paper that will cover the surface well.

- Open your clay, and grab a hand full of clay.

- Roll clay into a smooth ball, and then place it onto the waxed paper. press the clay down with the lid of the clay container, until it is less than 1/2 thick. Alternatively, you can place a second piece of waxed paper on top of the clay, and use your hand and/or a rolling pin to flatten the clay. 

- Once flattened, press one shape at a time out of the clay, and carefully remove the clay from the cutter. I wound up using a clay tool to help with the hand space and the top of the pineapple shape.

- Next, you need to flatten and smooth out the clay shape. I did this by setting the clay shape onto the waxed paper, and then using water on my finger tips to smooth the edges. If you wanted raised edges, apply more pressure to the center, and less around the edges. I used a clay tool to kind of give the teepee dish a ridge around the sides. 

- Also, you can use a plate and paper straws to shape the sides of the clay while it dries. 

- Let dry for at least 3-5 hours, or ideally overnight. I didn't have that much time, so I painted them after about 5 hours and the paint seems to have stuck very well! 

- I just LOVE how these turned out! Remember, check back soon to see what other summer DIY projects I have for you! Have a happy and creative summer :) 

- A special thanks to Wendy's for inspiring me to create this project! Check out their Blackberry Lemonade ASAP, it's good!!!

- Find more summer DIY Ideas On My Blog and On My DIY Pinterest Board

Mother's Day Gift Basket with Erin Pelicano Necklaces

I am so honored to be able to share another gorgeous necklace by Erin Pelicano. She has an incredibly wonderful sense of style, and I just love everything she creates! A few (or more) of her pieces are absolutely perfect for Mother's Day! In fact, they say Mother & Daughter right on them :) 

Erin Pelicano Jewelry + Lily The Wandering Gypsy

I thought a fun way to show off her beautiful necklaces would be in a cute, Mother's Day Gift Basket. Indulge Mom this Mother's Day (or any other time of the year), and give her thoughtful gifts, elegantly arranged in a gift basket. Stay tuned for a second blog post with another idea, coming soon!!

The items featured in this gift basket were partially provided by my goodie bag that I received at Create + Cultivate Dallas! Both the Seaweed Bath Co. Detox Cellulite Soap and the Black and White Striped Nora Socks from Richer Poorer Inc. were from C+C! The Poco Dolce Olive Oil Chocolate Bar was purchased in Santa Fe at Chocolate + Cashmere (which I will soon post photos of), and of course, the main attraction is this gorgeous necklace from Erin Pelicano! 

Erin Pelicano + Lily The Wandering Gypsy


Let's Make A Gift Basket! 

I found this shallow basket to be perfect for a gift basket, featuring Erin's beautiful Mother & Daughter Necklace. 

MATERIALS:

- Shallow Wicker Basket

- Tissue Paper

- Moss

- Gerber Daisy Heads

- Various Items To Fill Basket That Mom Will Love

Lightly crumple up a piece of tissue paper and form it to the basket. This will ensure that the moss won't fall out. 

Lightly crumple up a piece of tissue paper and form it to the basket. This will ensure that the moss won't fall out. 

Add some moss to your gift basket for a rustic and Earthy look. 

Add some moss to your gift basket for a rustic and Earthy look. 

Use wire cutters to easily remove flower heads from their stems. 

Use wire cutters to easily remove flower heads from their stems. 

Now, gather your gifts, and begin to place them in the basket in a cute way. I first added the striped socks in back, and the chocolate next to them. Next, I centered the necklace, and placed the detox soap behind it. Lastly, I added the flowers in front left, and the center back. Just play around with the placement to ensure everything can be seen well.

Erin Pelicano + Lily The Wandering Gypsy

A Gift Basket Tip: You can use Shrink Plastic (found at Dollar Tree) around this gift basket to hold everything in place. Stay tuned, as I will likely shrink wrap this basket, to keep it safe so I can send it to my mom! 

Erin Pelicano Jewelry + Lily The Wandering Gypsy

Itty Bitty Donuts + A Gift Box DIY

I have been wanting to make these Donut Earrings for the longest time, and I figured that Valentine's Day was the perfect day to share them! 

Earrings DIY

MATERIALS:

- Mini Donuts From Dollhouse Section 

- Jump Rings (Size = 

- Matching Earring Hooks 

- Pliers

5DA_4828 100.jpg

READY THE DONUTS

Earrings DIY
Earrings DIY

OPEN THE JUMP RINGS

Take your pliers, and rather than opening the jump rings wider, just twist them up. This helps them go back together better in the end. Open them wide enough to fit around the donuts.

Close the Jump Rings around the donuts, and make sure they are secure. That's it! 

Earrings DIY

AND YOU HAVE DONUT EARRINGS!

Earrings DIY

 A GIFT BOX DIY

- I also had this cute paper mache box that was heart shaped, so I stuck some studs into the top of the box, added some tissue, and put the Donut Earrings inside! How cute :)

Tiny Donut Earrings

How To Make A Cowl Scarf - Fun & Easy!

Let's face it, it is COLD as heck out there and having warm layers make it a little bit easier to endure. When I created this Cowl Scarf tutorial, I envisioned someone riding their bike to and from work or school, without any protection from the cold on their face. Well, this double layer fleece cowl scarf is lightweight but still blocks that wind pretty well, and looks super stylish! You can just keep wearing it to work or school, and even looks cute a little bit more dressed up! Enjoy :) 

Cute Cowl Scarf DIY

MATERIALS

2 Pieces of Fleece (10" x 30"), Sewing Pins, Sharp Scissors, Sewing Machine, Thread.

Choose your fleece fabrics! Hobby Lobby had some lovely fleece prints, and I know JoAnn's does too. 

Choose your fleece fabrics! Hobby Lobby had some lovely fleece prints, and I know JoAnn's does too. 

Pin up both long sides.

Pin up both long sides.

Cute Cowl Scarf DIY
Sew up the sides, leaving a hole in one of the longer sides to turn the cowl right side out. 

Sew up the sides, leaving a hole in one of the longer sides to turn the cowl right side out. 

Trim off excess seam allowance. 

Trim off excess seam allowance. 

Put your arm through the tube, and pull both short sides together, inside out. 

Put your arm through the tube, and pull both short sides together, inside out. 

Pin the short sides together in a tubular shape. 

Pin the short sides together in a tubular shape. 

Cowl Scarf DIY
Sew up the short sides, in a tube shape. I was able to remove a part of my sewing machine that allowed me to slide the tube onto the machine easier. 

Sew up the short sides, in a tube shape. I was able to remove a part of my sewing machine that allowed me to slide the tube onto the machine easier. 

Here is the tube, sewn up on the short sides. 

Here is the tube, sewn up on the short sides. 

Flip the scarf right sides out, through the hole on the long sides, and pin the hole up. You're getting ready to sew the final stitches! 

Flip the scarf right sides out, through the hole on the long sides, and pin the hole up. You're getting ready to sew the final stitches! 

Here is what the final stitches look like! Trim extra threads, and you're DONE!

Here is what the final stitches look like! Trim extra threads, and you're DONE!

Cowl Scarf DIY

DIY Bloggers Who Are Rocking The Holidays

I am constantly inspired by those bloggers who are always making new things, on a daily basis! I do hope to become one of those women some day soon, I am working on it as a major New Year's Resolution. None of these images are mine, but they are some of my current inspirations! If I have missed any super amazing bloggers, please comment below with a link. Thanks! 

Fall For DIY - Star Tree Topper

Fall For DIY - Star Tree Topper

DesignLoveFest - Wooden Beaded Garland

DesignLoveFest - Wooden Beaded Garland

West Elm Blog - Beet Dyed Name Tags

West Elm Blog - Beet Dyed Name Tags

West Elm Blog - Gold Leaf Trees

West Elm Blog - Gold Leaf Trees

Paper N Stitch - Gift Wrap Tutorial 

Paper N Stitch - Gift Wrap Tutorial 

Inspired By This - Gift Wrap Ideas 

Inspired By This - Gift Wrap Ideas 

 Subtle Revelry - Confetti Gift Wrap Party 

 Subtle Revelry - Confetti Gift Wrap Party 

Minted - DIY Serving Tray 

Minted - DIY Serving Tray 

A Special Treat For Your Furry Friends! Organic Pumpkin Oatmeal Dog Treats Recipe

These treats were a real hit with my little Chocolate Lab, Cabbie. We always try to make sure we only give our dog the very best. Whether it be food, we give her Solid Gold Barking At The Moon, or what treats she gets, it is always the best we can possibly get. I was checking out different dog treat recipes, and came across this one. I love how it has only all-natural ingredients and does not contain chicken broth, salt, or sugar - these were much more mild for her tummy. 

Pumpkin Oatmeal Dog Treats Recipe

Cabbie helped me with EVERY step of this project. She absolutely loves these treats! 

Pumpkin Oatmeal Dog Treats Recipe

INGREDIENTS:

  • 3 cups oats
  • ½ cup peanut butter
  • 1 cup pumpkin puree
  • 1 teaspoon cinnamon
  • 1 teaspoon baking powder
  • 2 eggs

INSTRUCTIONS:

  • Place the oatmeal into a food processor and pulse it until it's not so coarse, but it doesn't need to be a fine as flour.
  • Add oatmeal, pumpkin, peanut butter cinnamon baking powder and eggs to bowl on mixer and blend on medium until it's all mixed.
  • Roll out with a little flour and cut with cookie cutters.
  • Bake at 375 degrees for 15-20 minutes.
  • Cool on rack until completely cooled.
  • Place in airtight container to keep them fresh, or in the freezer. I keep them in the freezer, they don't freeze solid as there is little liquid. This is important!!!
Pumpkin Oatmeal Dog Treats Recipe

4 DIY Christmas Gift Tutorials - By Lily The Wandering Gypsy

Check out my Pinterest Board here - https://www.pinterest.com/happysolez/a-hankering-to-be-making-this/

This DIY Planner is one of my most popular blog posts! Check out how easy it would be to make one, and give as a gift. 

This DIY Planner is one of my most popular blog posts! Check out how easy it would be to make one, and give as a gift. 

Also, check out my pin board, A Hankering To Be Making This for TONS of ideas! 

Also, check out my pin board, A Hankering To Be Making This for TONS of ideas! 

These amazing No-Bake Cheesecakes are made with animal crackers instead of traditional graham crackers. These would make amazing gifts for the holidays, since they are individually packaged. 

These amazing No-Bake Cheesecakes are made with animal crackers instead of traditional graham crackers. These would make amazing gifts for the holidays, since they are individually packaged. 

All you need is 3 materials for these super easy, Tassel Earrings, and they make a thoughtful gift.

All you need is 3 materials for these super easy, Tassel Earrings, and they make a thoughtful gift.

These Glitzy Tree Earrings are also a cute and festive gift idea you could make for a friend, and then make yourself a matching pair! These turned out really great! 

These Glitzy Tree Earrings are also a cute and festive gift idea you could make for a friend, and then make yourself a matching pair! These turned out really great! 

Pinterest  //  Facebook  //  Instagram  //  She's So Chic Blog  //  Twitter  //  Polyvore

Polyvore Outfits

I used to play with paper dolls as a kid, and when my dad would bring me to a bookstore, I would choose a book with paper doll cutouts instead of a traditional novel or similar that most people would buy. After I was too old for them, I went on to cutting people and outfit ideas out of magazines. It was fun, my grandma would give me her People magazines (and the tabloid ones, too!), and I would entertain myself for hours creating collages and such. So, Polyvore is basically paper dolls on Steroids, for women in the digital age! Check out my Polyvore Creations.

This comfy outfit and other essentials are great for a road trip. 

This comfy outfit and other essentials are great for a road trip. 

This outfit merges 70s with 90s styles, and would be perfect for a concert! 

This outfit merges 70s with 90s styles, and would be perfect for a concert! 

And, this awesome outfit has Earthy and Bohemian elements while still looking polished. 

And, this awesome outfit has Earthy and Bohemian elements while still looking polished. 

A cute outfit for your next concert or festival!

A cute outfit for your next concert or festival!

Pinterest  //  Facebook  //  Instagram  //  She's So Chic Blog  //  Twitter  //  Polyvore 

How To Make A Festival Ready Flower Crown!

I started making these beautiful flower crowns last year and they are so fun and easy! You can make one in about 20 minutes, and they are so customizable - just add whatever type of flower inspires you, and you have a unique, one of a kind accessory, just in time for festival season! 

How To Make A Festival-Ready Flower Crown
How To Make a Festival Ready Flower Crown

GATHER YOUR MATERIALS // WHAT YOU NEED 

1 Bouquet of Silk Flowers - Make sure the flower heads are easy to remove from the stems, and that a wire can go through the enter of the flower head. 

Cloth Stem Wires - Pliers, Florist Tape, Wire Cutters, Wrapped Grapevine Wire for crown

How To Make A Festival Ready Flower Crown

Next, cut a length of grapevine wire that will wrap around your head plus an extra 4 inches to twist together to form a circle. Now, lay the circle on a table, and set 8 or more flower heads around the crown to see how you want them to look in the end. You can add a few smaller flowers if you want a more full look to your crown. 

How To Make A Festival Ready Flower Crown

PREPARE THE FLOWERS

Cut the Cloth Stem Wires into 4 equal parts with your wire cutters. And, as shown below, the steps are: 1.) fold over the top of the wire about 1/4". 2.) Start to twist the folded part around the rest of the wire. 3.) create a twisted loop in the top of the wire so the flower won't fall off. Thread these looped wires into each flower head you will use. 

How To Make a Festival Flower Crown

Put wires through ever flower head, and get ready to attach them to your crown. 

How To Create A Festival Ready Flower Crown

ATTACH YOUR FLOWERS

Attach the first flower to your crown by twisting the wired stem to the crown. Twist the flower head wire onto the crown, and use a pair of pliers to secure any sharp wire ends, then use florists tape to make sure no wire ends poke you! 

How To Create A Festival Ready Flower Crown

ALMOST DONE!

Now, twist each flower onto the crown, and don't twist each wire all the way until you are happy with the flower placement. Cut the rest of your florists tape pieces, and get ready to wrap each flower stem with tape at the end. 

How To Make A Festival-Ready Flower Crown

Here is the back view of the crown, before taping up wire ends. Use pliers to secure any sharp wire ends to the crown, then tape each end to the crown. Also, tape the rough ends of the crown so they don't come undone or poke you. 

How To Make A Festival Ready Flower Crown

And, here are a few more examples of other flower crowns I created. They're also perfect for a bride, or a little girl who loves flowers! Are you heading to any festivals this year? If so, feel free to comment below. 

How To Make A Festival-Ready Flower Crown