DIY Cheese Markers, Styling A Cheese Plate & Yummy Fruit Bars by Outshine - Live Life Brighter

Sponsored Post: This post is sponsored by Outshine but the content and opinions expressed here are my own. #SnackBrighter.

I had so much fun creating a video for Outshine Bars! I thought that a fun way to create this one was to make a Cheese Plate, create some adorable and customizable Cheese Markers, then show how fun and easy it is to also serve these Outshine Bars to guests (or keep them all for yourselves, it's totally up to you!).

Here, I featured the Lime, Mango, and Grape flavors of Outshine Fruit Bars. I love that they're all made from REAL fruit, and taste super good. I love the lime best of all these flavors, and mango is a close second. Your guests will be pleasantly surprised at their dessert option, too! 


And, remember to check out the Outshine Instagram account, it's adorable :)

Build A Better Breakfast And Help Families In Need (Plus A Laminated Placemat DIY Tutorial)

This shop has been compensated by Collective Bias, Inc. and its advertiser. All opinions are mine alone. #BetterBreakfast #CollectiveBias

Anyone who knows me will agree that I need a good breakfast to start the day right. Are you one of those sorts of people? My breakfast usually includes milk in some way, whether it's in cereal, or as a glass of milk to accompany my meal. I was super excited about the chance to work with The Great American Milk Drive, Lender's Bagels, and Walmart to help with this meaningful cause.  

Now, you can help feed a childhood when you shop at Walmart – by purchasing 1 or more of these products, you are helping Feeding America provide nutrient- rich milk to kids and families in need.

This campaign is supporting The Great American Milk Drive.

There are lots of families who do not get the opportunity to provide a good breakfast for their kids or themselves each morning. I learned recently that you can actually donate milk to families - I had no idea this was even possible! I love spreading the word about good causes, so read on to learn more. I thought that a DIY Laminated Placemat and a fun twist on the usual bagel toppings would be so fun to share here with you today. 

"Childhood should be filled with playing, learning and growing. But for many children who face hunger, even basic staples like milk – and the nutrients that help power childhood activities – are missing".  - MilkLife.com

FUN BAGEL TOPPINGS FOR KIDS + ADULTS:

Strawberry Cream Cheese + Sprinkles

Strawberry Cream Cheese + Fresh Strawberries

Plain Cream Cheese + Sunflower Seeds

- 3 colors of fabric (1/8 yard of the red, 3/8 yard of the deer fabric, and 3/8 of a yard of the black and white plaid for the backing).

- Iron-On Vinyl (Heat & Bond works well)

- Scissors

- Sewing Machine and Thread

- Iron


1.) Cut pieces of fabric as follows:

      - Backing Piece (12" x 18")

      - Red Piece (12" long)

      - Deer Fabric Piece ( 12" x 15")

      - 2 pieces of iron-on vinyl (12" x 18")

2.) Cut and Iron fabrics, and sew the 12" ends of the red fabric and deer fabrics together. Iron and top stitch the seam you just created. 

3.) Peel a bit of the paper backing off of the first piece of vinyl. It's super sticky, so I recommend cutting a 2" wide strip off of the paper backing. Stick this to the exterior of your patchwork piece of fabric, and line the shorter sides up. Press to secure, thankfully it's very easy to reposition. Just make sure no pet hairs make their way under the vinyl :)

4.) Peel the rest of the paper backing off of the vinyl, pressing out any wrinkles as you go. Once vinyl is fully stuck onto the fabric, then take that paper again, grid side up, and iron the vinyl onto the fabric. This works like magic! Slow and steady pressure works best, moving the iron with medium pressure, so it doesn't melt. VINYL IS SUPER HOT, so please be careful!!! 

5.) Iron the vinyl onto the backing material, and line up the fabrics, vinyl sides together, and sew around the edges, leaving a hole about 5" across to turn the placemat right side out.

6.) Turn placemat right side out, then iron with the paper press cloth again. Now, top stitch around the edges, and you are done!! I just LOVE how this project turned out. Perfect for eating breakfast on, and these make for extremely easy cleanup! 

7.) Build A Better Breakfast - Hopefully this awesome new placemat will encourage kids and adults to sit down for a quick breakfast, rather than eating as you rush out the door. Of course, if you are in a hurry, it's a good idea to keep the milk, Lender's Bagels, and Fruit Fusions next to each other in the fridge! 


MORE ABOUT LENDER'S BAGELS:

They're filling – sustaining kids all morning. They have a great range of flavors, like Plain, Blueberry and Cinnamon-Raisin flavors which are kid-friendly & great for the whole family. Lender’s has a bagel for Everyone! Lender's Bagels can help you save time in the mornings, and are easy, tasty, and nutritious! I found these bagels in the refrigerated dairy section. Lender’s bagel products are great as part of a Better Breakfast. Also, great for an after school snack! Crunchy-on-the-outside, everything’s better on a Bagel!

Keep a metal or wicker tray on the counter for easy breakfast prep (see photo above). Add items like Lender's Bagels, Del Monte Fruit + Veggie Fusions, utensils, and cloth napkins. SO easy, because everything is right at hand! 

Now, you can help feed a childhood – by purchasing 1 or more of these products, you are helping Feeding America provide nutrient- rich milk to kids and families in need. Visit milklife.com/give to learn more.

#BuildABetterBreakfast Sweepstakes Learn More On: Facebook: here
Twitter: here
Instagram: here
Pinterest: here
Youtube: here
Lender's Bagels: here , here , and here
  • The combination of milk/bagels/fruit cups give kids protein, carbohydrates, vitamin C and other things that they won’t get with other choices. These 3 products are BETTER TOGETHER.
  • Ease and simplicity should also be part of what makes this a better breakfast. All it takes is to pour a glass of milk, get out a bagel, and open a fruit cup. Everything can be stored in the fridge together.
  • The Lenders’ and Del Monte products also have the benefit of offering so many flavors that every kid can get a “customized” breakfast with all his or her favorites. Lenders can give you cinnamon/raisin, blueberry, etc. Del Monte can give you a dozen varieties of fruits and combinations of fruits. The flavor combinations are huge. 

Fall Favorites with Sahale Snacks - Great For A Fall Adventure

I am so excited that the leaves are changing colors a little bit, and our yard is sprinkled with fallen leaves. Around this time of year, I yearn for Fall adventures here in southern Illinois, and always make sure to bring a bag packed with snacks, bottled water, and a cozy blanket. I love bringing travel sized Sahale Snacks® on my adventures, they're great for grab and go snacking.

Where are your favorite go-to, local places to visit during Fall? Mine would have to be some of our local orchards (Rendleman Orchards and Flamm Orchards are my top picks) here in southern Illinois, Rendleman even has a very nostalgic pumpkin patch - where you can use a red wagon to transport all of your hand-picked pumpkins to the checkout station. J

I’m sharing #SahaleSnackers in my life as part of a Sahale Snacks® sponsored series for Socialstars™.

Another place I love visiting would be one of our wineries, that also serves hand crafted apple cider (life-changing!!). And, when the weather cools down a bit, we love hiking through the Shawnee National Forest (Pomona Natural Bridge is a short hike, but incredibly majestic). I have learned to never leave the house without a snack, so the Raspberry Crumble Sahale Snacks®, and the Pomegranate Vanilla Flavored Cashews would make a great snack, while adventuring to fun places this Fall. 

I like keeping a couple of these grab and go sized packages of Sahale Snacks® in my car, just for spur of the moment adventures, or of course, days when I run a million errands. Just a couple bites of a snack like this will keep me going. 

I also love bringing along a notebook, so I have somewhere to collect my thoughts, project ideas, but have to admit, love snacking while I journal :)

Where will you take your Sahale Snacks® this Fall? 

Live Life Brighter with Outshine Snacks

Sponsored Post: This post is sponsored by Outshine but the content and opinions expressed here are my own. #SnackBrighter.

Do you ever eat a food that literally transports you to another place? Perhaps you tried the best dessert in your whole life, that time you visited Hawaii, and any time you eat something made with lime, it takes you back to that very dessert? Well, these Outshine Fruit Bars in Lime do that to me. These bars bring a rush of taste and chill to my senses, making me think of the awesome food we ate while visiting Waikiki Beach, other places on Oahu, and all around Kauai! This is why Outshine Fruit Bars help me Live Life Brighter! 

Where is your favorite place to escape?

Learn more about Outshine Fruit & Yogurt Bars here! They are made with real fruit juices and are non-GMO, which I find extremely important to the food I eat. 

Find out Where To Buy these bars here - I found mine at Kroger, and I believe they are also available at Walmart and Kroger Banner Stores, like Fry's and others. 

I also LOVE the Outshine Snacks Instagram Account, here. It's full of bright, inspiring images and you can also learn more about the brand's efforts to donate tons and tons of food. 

These Outshine Fruit Bars in Lime taste super good. They are not overly sweet, they are tarty and tangy, just like something made with real lime juice should taste like. I also really enjoyed the consistency and texture of these fruit bars. If you are someone who likes frozen treats that taste like real fruit instead of those fake flavors, these are a great option for you.

Refreshing, lime after lime.

Made with lime juice

Excellent source of Vitamin C

No high fructose corn syrup

Fat-free, Gluten-free

No artificial colors or flavors

70 calories

No GMO Ingredients

Some of my favorite things about these Outshine Fruit Bars are:

Only 70 Calories per bar, 0g Total Fat per bar, and 25% of your daily Vitamin C. 

The Ceramide Difference

Have you ever used a wet-skin lotion before? If not, your'e missing out. Whether you live in a dry climate or a humid one, this Curel® Advanced Ceramide Complex will be a great addition to your skincare routine. I'm also excited to explain Ceramides a bit better to you, so keep reading to learn more. 

I’m sharing #Curel® HYDRA THERAPY WET SKIN MOISTURIZER in my life as part of a Curél sponsored series for Socialstars™. Thank you for supporting the brands that help keep my blog a beautiful place to showcase my work! 

Curel® Advanced Ceramide Complex makes it easy to incorporate a bit of extra moisture to your skin, and since you use this on wet skin after a shower, it's easy to remember to do it every day. The bottle is attractive, and the pump works really well. The bottle is actually designed with ridges on the sides, so it won't slip out of your hands while your skin is wet!! So thoughtful :) 


This product is unscented, which is amazing. I love the fact that a fragrance isn't an addition ingredient. I am not a fan of anything that is heavily scented (unless it's a baked good, haha!).

I am not sure if you have ever experienced this, but sometimes, I will use lotion, and minutes later, it doesn't seem to have even moisturized my skin. Curel® offers an alternative to that problem. Their Hydratherapy Lotion that you use on wet skin, so it is able to penetrate better, and since warm water opens capillaries in your skin, it makes sense that this product would be able to absorb easier. My skin feels soft and smooth, and is moisturized without feeling greasy. 


I was also lucky enough to receive a FREE sample of this Curel® Hydratherapy lotion from Crowdtap, and I am so excited I've got a travel size now!!


Clinical studies have shown that dry and damaged skin is often linked to depleted ceramide levels. Ceramides are naturally found in skin’s vulnerable outer layer and help skin retain moisture. When skin’s ceramide levels are low, skin has difficulty retaining moisture. While traditional lotions only hydrate skin’s surface, Curél® moisturizers work at the source of dryness to strengthen skin's moisture retaining capacity, not just relieving symptoms, but actually, over time, preventing symptoms from recurring.

I have spent time in both dry climates (like Arizona, Colorado, and Utah), and I feel like the arid climate, intense sunshine, and even water in those places dries my skin out. Well, the idea of applying this lotion to wet skin, if you are in those sorts of locations, seems like an absolute win! 


What are ceramides?

Ceramides are natural lipids and are a major component in surface skin structure. They serve as part of the "glue" that holds surface skin cells together.

Why are ceramides important?

Dry, irritated, and sensitive skin often lacks ceramides. As a result, skin's protective barrier is compromised and becomes more susceptible to environmental factors, changes of season, and other irritants.

Curél® Skincare - The Ceramide Difference

When natural ceramide levels are depleted, our formula works to improve moisture retention of the skin. Locking in moisture for all-day hydration, Curél® lotions and creams not only relieve irritated and dry skin instantly, but also replenish and repair skin by forming a protective barrier and keeping future irritants out.

Thanks so much for checking out my latest post for Curel®, and be sure to check them out on Facebook and on their website

How To Create A Halloween BOO Kit (A Dog Gift Basket for Halloween) PLUS 2 DIY Dog Toys

This shop has been compensated by Collective Bias, Inc. and its advertiser, Mars, Incorporated. All opinions are mine alone. #BOOItForward #PawfectBOO #CollectiveBias

So excited to present you with an adorable Halloween Gift Basket, that can be made with a few simple materials, and then given to someone as a surprise. This is all about gifting a fun, dog-related gift basket and then secretly giving it to someone who deserves it. The person I chose to gift mine to is our long-time family veterinarian, Dr. Tally at Central Hospital for Animals here in Carbondale, IL. 


Get tons of inspirations, and to see more of the BOO Kits on the here
And, visit BooItForward page on Walmart.comhere  BOO Kit
 BOO Kit

ADD THESE ITEMS TO YOUR BOO KIT BASKET

American Greetings® has a great selection of Halloween Items like treat/candy bags, stickers, tissue paper, gift bags, and Halloween Cards. These would make for adorable and thoughtful additions to fill any BOO Kit Gift Basket!

MY LITTLE HELPER, PORTER

Of course, my little chocolate Labradoodle and Chocolate Lab wanted to help with absolutely every step of this Halloween Boo Basket. They helped me make the toys, and Porter sat still for about 1 minute to help me shoot s few adorable puppy pics :) She just turned 10 weeks and she follows me everywhere. 


DIY MUMMY GIFT BASKET

MUMMY BASKET HOW TO:

1.) Cut cheesecloth (also called creepy cloth) into 2" strips lengthwise. 

2.) Wrap 2-3 strips around the basket and secure with glue in back.

3.) Cut out eyes from the sparkle foam. You will see that I simply cut two ovals out of the white one, then black pupils from the black foam. Glue the eyes to the front of the basket.

4.) Wrap and glue 2-3 more strips of cheesecloth around the basket, making sure to overlap the eyes just a little bit.

5.) Now, you are ready to fill your basket with all sorts of good things! Read on to learn about 2 Dog Toy DIY's, that are so easy!


DIY HALLOWEEN DOG TOY #1

These toys are simple, but my pups really love them. The fleece also cleans their teeth, and this toy gives dogs a really safe toy to play tug with since it's so soft. Here's how to make them:

1.) Cut 3 strips of fleece (any combo of 1-3 colors will do), and stretch the pieces as long as they will stretch. 

2.) Tie the 3 pieces of fleece together at the top, and use a clip board to hold the pieces, or ask a friend to hold the pieces while you braid them.

3.) Braid the pieces together, and tie the end up so the braid doesn't come loose. That's it!

DIY HALLOWEEN DOG TOY #2

This simple dog toy requires only two materials - 2 tennis balls, and 2 Halloween Socks. Dogs LOVE these toys so much! Make sure to use supervision when allowing a dog to play with any toy. 


SHOPPING FOR BOO KIT SUPPLIES 

I found the majority of the materials in this BOO Kit at Walmart. The MARS Pet supplies are all located in the Pet Care aisle at Walmart. I found these items, below, that I added to my BOO Kit. 

  • PEDIGREE® DENTASTIX™ Fresh Treats Small/ Medium (Doggie Dental Area)
  • PEDIGREE® MARROBONE™ Real Beef Flavor Treats Mini (Dog Treats Area)
  • CESAR® SAVORY DELIGHTS® ROTISSERIE CHICKEN FLAVOR WITH BACON & CHEESE (In the soft dog food area).

GIFTING THE BOO KIT

I decided to surprise my vet with this fun BOO Kit! I am sure she is going to LOVE it! Who will you surprise with the BOO Kit you create? Please tell me in the links below, and if you make your own BOO Kit, then also share that link too :)

Quick N Easy Pesto Pasta

Pasta couldn't get much easier than this. It's nice and light, and super fresh. 

INGREDIENTS:

Green Pesto

Fresh Tomatoes

Thick Spaghetti Noodles

Mozzarella Pearls

Parmesan Cheese, Grated

Extra Virgin Olive Oil

Salt and Italian Seasoning To Taste


INSTRUCTIONS:

Boil noodles as directed. Strain and return to original pot. Scoop about 3-4 tablespoons of Pesto onto noodles. Also add your olive oil, Italian seasoning, and salt. Stir together, combining well. Turn the heat back on to low. Add mozzarella pearls, and stir. They should melt pretty quickly. Once they're melted, sprinkle past with parmesan cheese, and stir once more. 

Serve topped with more parmesan cheese and chopped tomatoes. 

Enjoy! 

Super Easy Chocolate Waffles Recipe

Are you a chocoholic? So much so, that you may be the type to want chocolate for breakfast, lunch, and dinner? Well here is an idea for you! These chocolate waffles are pretty easy because you make them from Chocolate Cake Mix! 

INGREDIENTS:

1 box Betty Crocker™ SuperMoist™ cake mix (any flavor)

1 1/3 cups water

1/3 cup vegetable oil

3 eggs

INSTRUCTIONS:

Heat your waffle iron to medium-high heat. Mix all ingredients, and once the waffle iron is warm enough, pour the batter into the waffle iron. Don't overload the batter into the machine, it will seep out the sides and create a big mess! 

Add a drizzle of your favorite white icing (I used the decorator icing in the tube for this thinner line). I also added some fresh raspberries and  little dollop of cool whip! 

Feel free to add some chocolate syrup, if you need more chocolate! Enjoy!

Peanut Butter Oatmeal Cookies with Coconut Oil

absolutely LOVE these cookies. The recipe (found here) originally called for shortening, and I used coconut oil. 12 minutes at 350° was just perfect. I also created a Steller Story for this recipe, find it here

Here's 1/2 Cup melted organic butter + 1/2 Cup Organic Coconut Oil at room temp. 

Here's my batter before adding the eggs and dry ingredients. pb cookies

Here's the batter with all the ingredients in it. 

I found that my 1 Tbsp. silicone measuring spoon (similar ones here) is perfect for scooping and shaping this dough! 

You can (optionally) press the dough down with a fork in a criss cross pattern, and sprinkle sugar on top. The cookies will spread a bit more if you do this step. 

After baking for 12 minutes at 350, they should look golden brown like this! If you make these cookies and enjoy them, please comment below. Thanks! 

Caprese Salad Recipe

This is one of my absolute all-time favorite dishes! I love any excuse to eat fresh tomatoes, and when the organic and local ones are heirloom, it's even better! I thought that using a mix of yellow and red tomatoes really gave this plate a more vibrant and special look. I actually created this recipe for the Burnt movie, to help promote their movie. Check out my Burnt project, on Pinterest HERE, entitled Food, Romance, Love.

INGREDIENTS (MAKES 2 SERVINGS)

* 10-15 organic yellow and red cherry tomatoes (or other small tomatoes)

* Fresh Organic Basil (I found mine as a plant at the grocery store. Bonus points for ORGANIC!!!

* Fresh Mozzarella Cheese

* Olive Oil

* Balsamic Vinaigrette

* Salt to taste

Cut tomatoes into quarters. Slice mozzarella cheese with a knife, or create small pieces of cheese with your hands, and set aside. On a plate, drizzle a small amount of balsamic, like I did in the above images. Place tomatoes and cheese onto plate. Also top the plate with basil leaves, as many as you can handle! Drizzle some olive oil and salt over the top of the plate, and you are all done! I also like to serve this with an extra plate of small French bread slices and salami. 

This would make an incredible snack, appetizer, or even a light meal! It tastes SO incredibly good, I hope you enjoy it! If you are also a Caprese Salad-lover, comment below to let us know. 

Skinny Whip ~ Caffeinated Body Wash

I grabbed a sample of something really great at The Neighborhood Co-Op recently. This Energizing Grapefruit Smoothing Body Wash with Caffeine by Beautiful Nutrition is amazing! I am not usually one to use very scented products of any sort, but the smell of this body wash smells like someone just opened a real grapefruit right in front of you! I love the consistency of this too - it's more of a gel than anything, making it pretty concentrated, with a great lather, so you don't have to use a lot at once. I love it because it is super moisturizing, but does not leave your skin feeling slick, like there is a lot of product left over. 

This product receives all 5 star reviews, all of them are highlighting similar benefits to what I found, it's really great! 

I notice my arms and legs feeling more moisturized into the next day, even, without using any lotion. I would imagine that this is going to be a great product for harsh winter months, when you are craving soft skin, sunshine, and the smell of tropical fruit. 

caffeinated and clean

"Skinny Whip™ is a rich, foamy, deeply moisturizing body wash that contains caffeine to smooth and energize your body for firmer looking skin as you shower."

"Studies have shown caffeine to be effective at delivering a smoother and firmer appearance of skin. The effectiveness of caffeine is dependent on the amount of time left on the skin prior to rinsing. Follow directions for maximum results.

DIRECTIONS
Apply onto a puff and massage into skin using a circular motion. For best results, allow body wash to remain on skin for several minutes (up to 5 minutes) before rinsing."

Overall, I would recommend this product to anyone who loves the fresh scent of real grapefruit and also loves an ultra-rich body wash that does not leave your skin feeling like there is a bunch of soap still left on them. Find this body wash and other products by Beautiful Nutrition, here. 

Puppy Updates! And a Serta Dog Bed Review

Porter turned 9 weeks this past Tuesday, and she is doing so well! She gets so warm when she sleeps that she has taken a liking to our A/C vents. She still loves to bite, but we have been working diligently with her to make sure she knows that biting is not good. I read that if puppies are biting a lot, you can kind of let out a yelp, and walk away from them, and almost immediately, they will realize that they did something wrong. It is really working well. I also like that the bed has a lot of support because of the couch design, and it seems to be extremely comfortable for them. They both fit in the bed, actually :) Really happy with this purchase! 

I got her this awesome dog bed recently, too. It's the Serta Deluxe Couch Pet Bed, and I got it over the Serta Deluxe Cudler, because I thought she could grown into it. The Delux Cudler seems amazing for dogs around 45 lbs and under. Well, our Cabbie, who's is a full-blooded Chocolate Lab even fits in this bed we got! I know this bed is going to last for a vey long time, and also keep its shape. It's not memory foam, but there is a super thick piece of egg crate foam that you can unzip the bottom part, and just remove the foam, wash the pieces, and put is all back together. 

Her hair is also getting so long, and she loves going on walks. The weather has been like 95% humidity in the 90s, but very, very soon, (like tomorrow), it's supposed to be getting cooler. 

Also, we shot this photo of her a couple of weeks ago, but she has really grown SO much since even this photo! I will add more updates soon :) Porter will be helping me on a Halloween photo project soon too. Looking forward to sharing!! 

Photography Field Trip: Flamm Orchards

Last week, spur of the moment, I drove out to visit Flamm Orchards, in Cobden, IL. I had been wanting to go back for a while now, and I even called ahead to make sure they still had peaches. The peach season has pretty much come to an end, and the apples are almost ready to be picked. It is still a million degrees and also a million % humidity right now, so I am glad I took advantage of the cooler weather we had this day. Heading into September, I always feel like it should be cooling down and feel like Fall, but it sure doesn't just yet. Soon, though! My fingers are crossed that I get to take way more of these Photography Field Trips around southern Illinois soon! 

Here is one gem that we have in southern Illinois. It's super easy to get to, and the drive out there is gorgeous around sunset - rolling hills, orchards upon orchards of fruit trees, and just lots of green space. The day I went, the sky was bright blue with puffy, white clouds everywhere. 

I bought a jar of this Peach Jam, and cannot wait to use it with puff pastry and fresh peaches. What a good time to test out this recipe! Below, you will see their peach pie, a la mode. I snapped a photo of someone else's dessert at the pickup window, but I bought myself a couple of brownies and a couple of slices of the best Zucchini bread I have ever had in my life! I got therm all to-go, and Bobby made an exception to not liking to even eat sweets, and helped me eat them :)

Flamm Orchards already have lots of beautiful gourds and pumpkins!

And, if it had been a little bit cooler out, I would have enjoyed this little outdoor eating area that Flamm offers. All of the flowers looked so wonderful! (below)

Grilled Flank Steak Fajita Nachos Recipe ~ Outdoor Grilling Inspiration

This shop has been compensated by Collective Bias, Inc. and its advertiser. All opinions are mine alone. #AuthenticSalsaStyle#CollectiveBias

A delicious summer grilling recipe, filled with authentic flavor and fresh ingredients! These BBQ Flank Steak Fajita Nachos are the perfect meal to serve at a party, during outdoor grilling season! Read on to learn more about this wonderful recipe and some cute ideas of how to decorate for your next outdoor grilling party. 

 I just love the colors of this outdoor party table setup. I used mainly blues and whites in my design (dishes, napkins, utensils, table covering fabric, etc). I just let the bright, beautiful food shine with a more subtle color scheme.

Also, I love the idea of using large glass jars with lids to hold chips (found in the kitchen section at Walmart). It's eye-catching, and keeps chips fresh while your serving guests. Use small scoops or tongs for guests to serve themselves

By offering self-serve topping, guests can use as many or as few ingredients as they like. If someone is vegetarian or even vegan, they can opt out of the steak, and just use lots of veggies!

Even More Recipe Inspirations, Here: AuthenticSalsaStyle.com.

And, if you are looking for more beef-based recipes, look no further: BeefItsWhatsForDinner.com.

MARINADE:

Olive Oil, Lemon Juice, Taco Seasoning (use half here), Chopped Fresh Onions & Garlic, Pinch of Salt.

FOR THE MEAL:

- HERDEZ® Salsa Casera

- 1 lb. Flank Steak (per 2 people)

- 1 bell pepper each in green, red, orange, and yellow

- 1 purple onion

- Tortilla Chips

- Shredded Cheddar Cheese (We shredded a block of extra sharp cheddar)

- Jalapeños

- Taco Seasoning (use the other half of the package here)

- Limes and/or Lime Juice

- Sour Cream

- Cilantro 

- Grill and Skillet


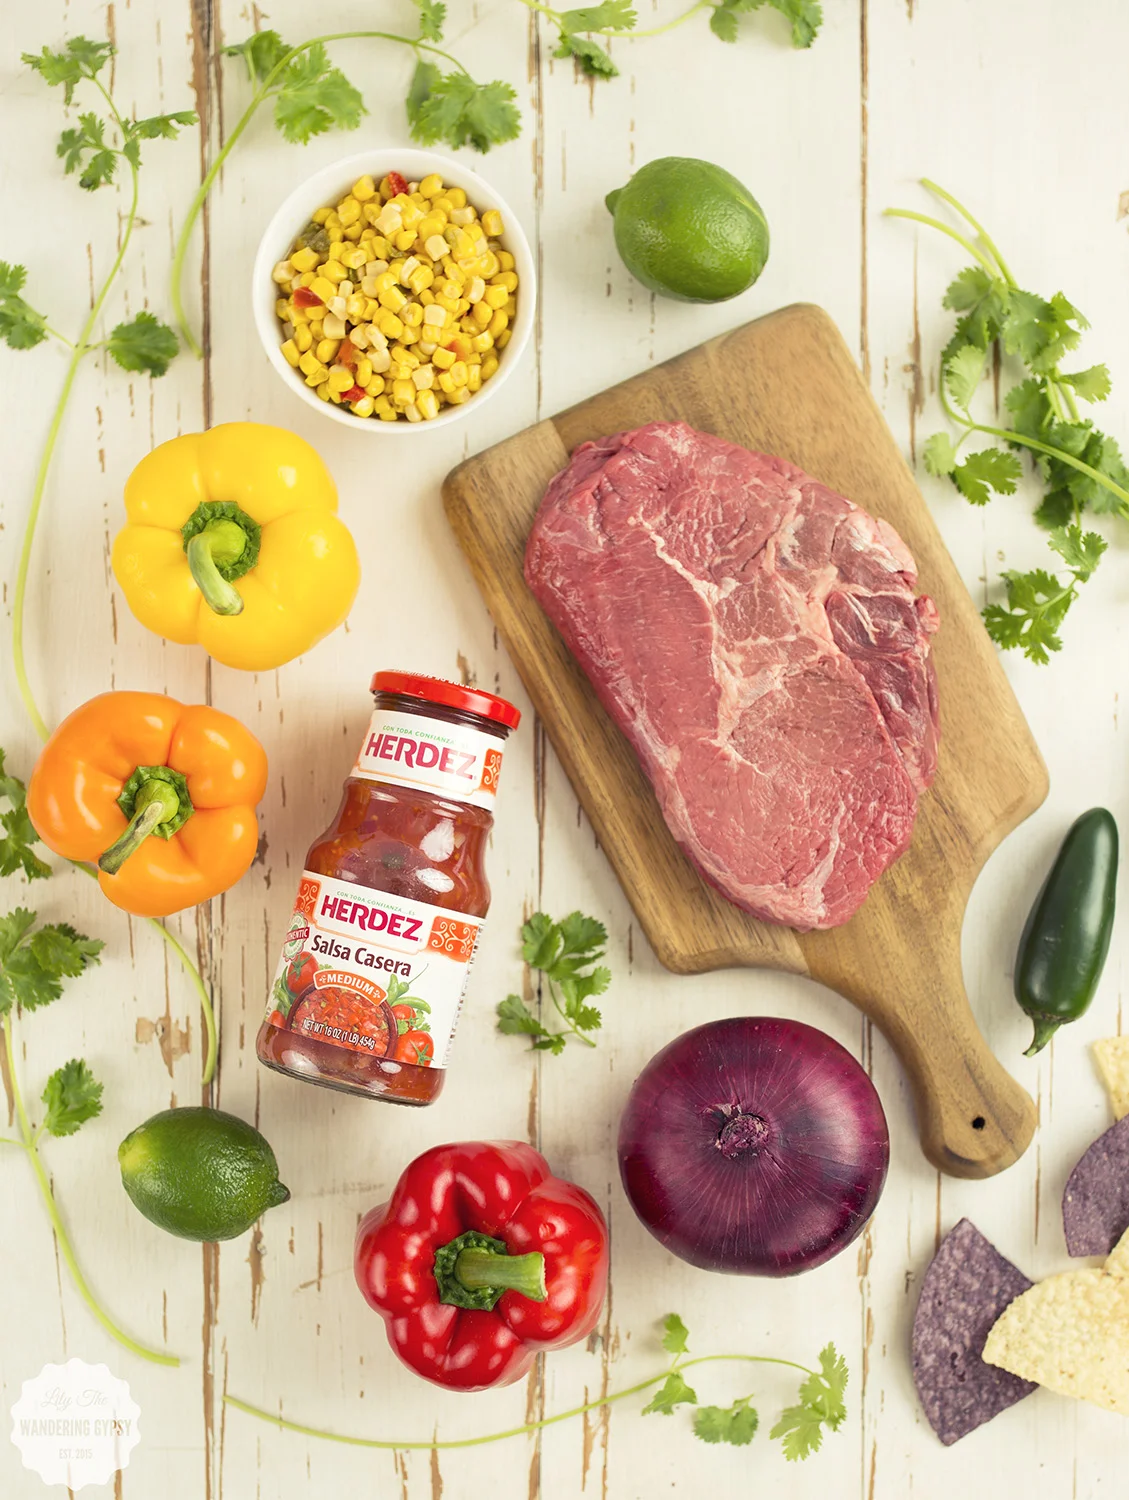
1.) Prepare the marinade in a 9x9 baking pan (I used my brownie pan) by chopping 1/4 of the onion + 1-2 heads of garlic, and mix it with all of the other marinade ingredients. Stir well.

2.) Add steak, cover with plastic wrap or foil, and place in the fridge to and marinade for at least 1-2 hours.

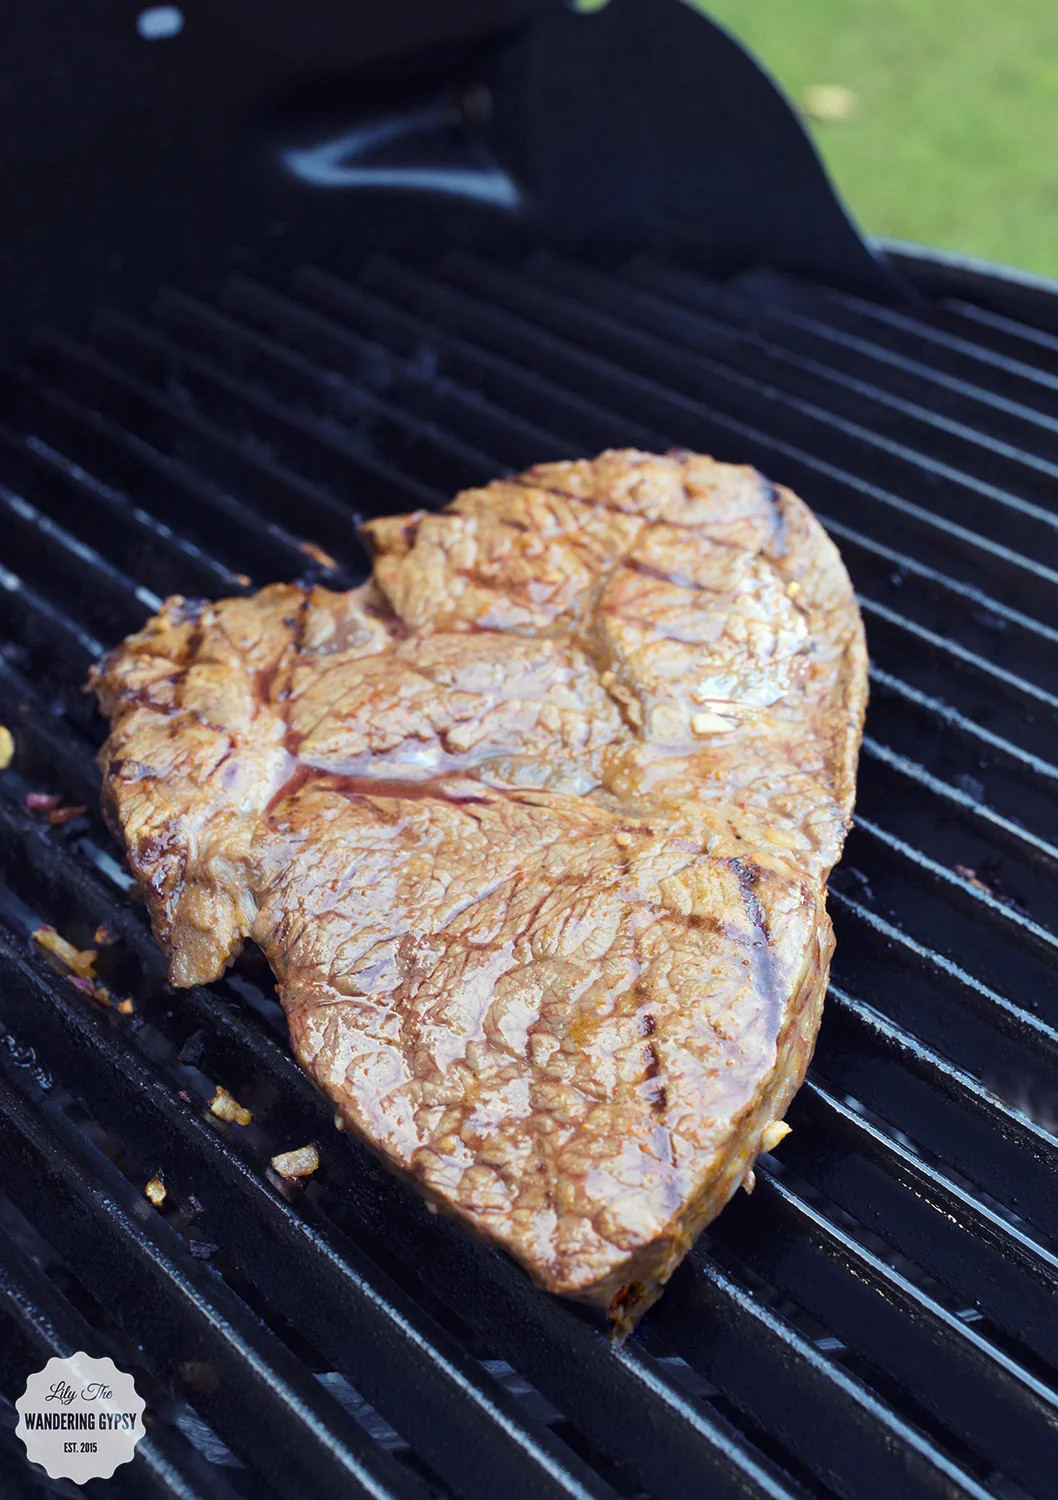
3.) Preheat grill to high heat after steak is done marinading.

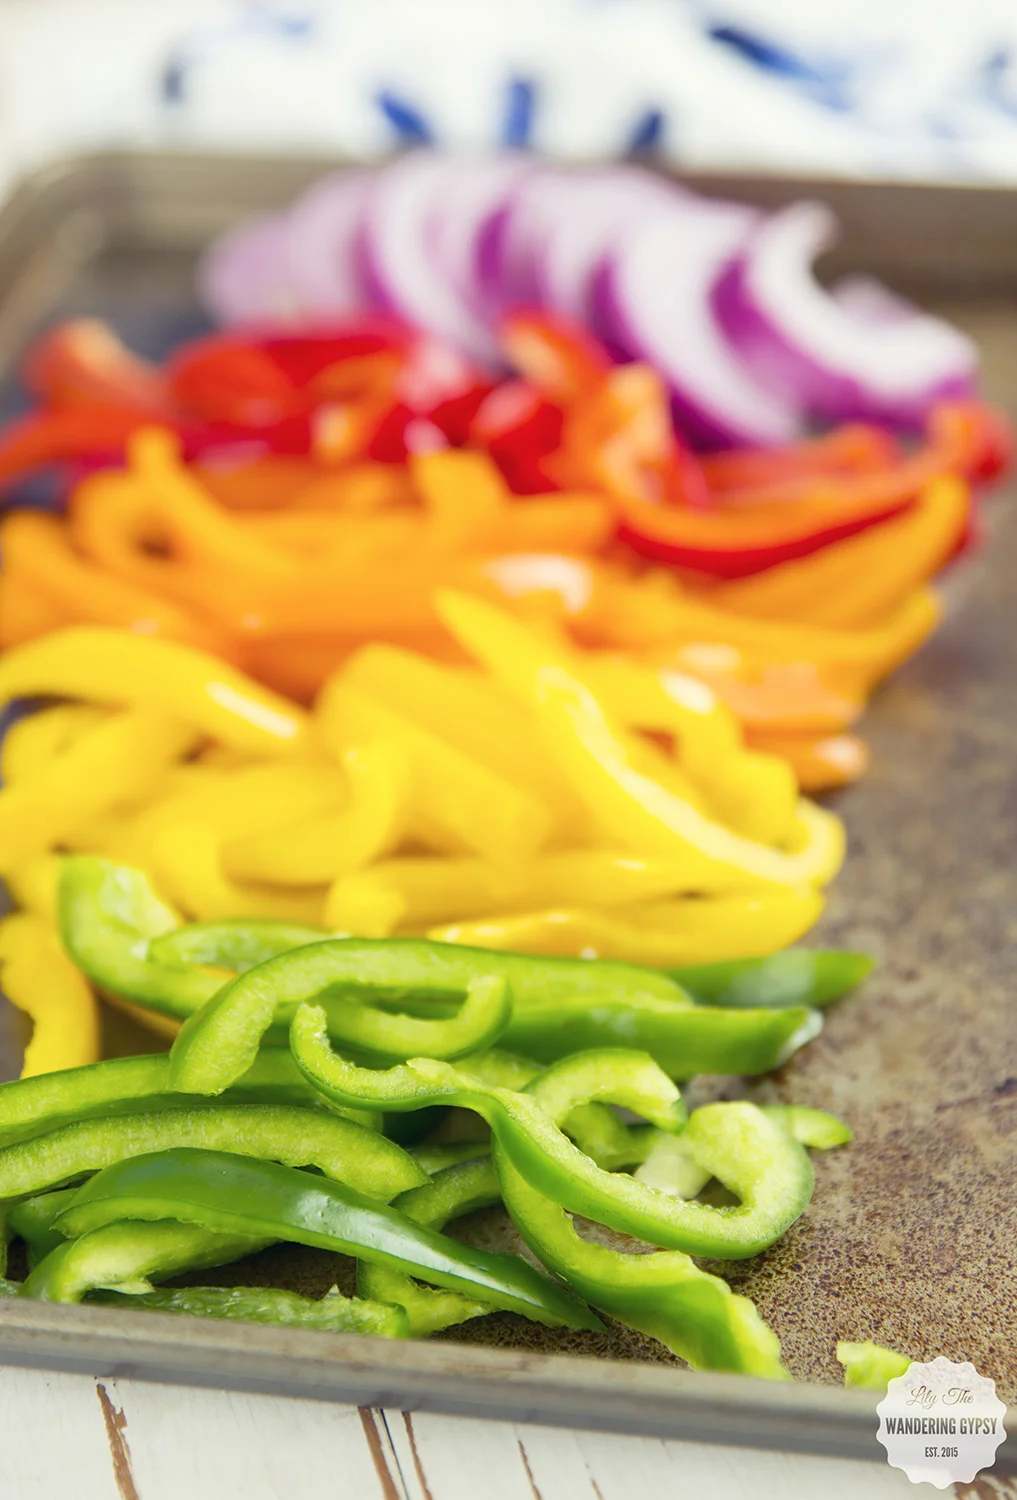
4.) Cut up all 4 bell peppers, and most of the onion, and set aside. Get out a large skillet, and heat a small amount of olive oil. Wait until the oil starts to thin a bit, and add your onions and rest of the taco seasoning. Cook until slightly browned, and then add your peppers. Let these simmer on medium low heat, and let's grill some steak! 

5.) While your peppers are cooking, bring steak out to the grill on a tray of some sort, with tongs and a spatula. Place the marinated steam right onto the grill. After about 4-5 minutes, if you want those pretty grill marks, rotate the steak 90 degrees, and grill for another 1-2 minutes. Flip the steak over and grill for another 2-3 minutes. This timing left a bit of pink but not much - it was perfect! Take it off the grill and let's make some nachos!

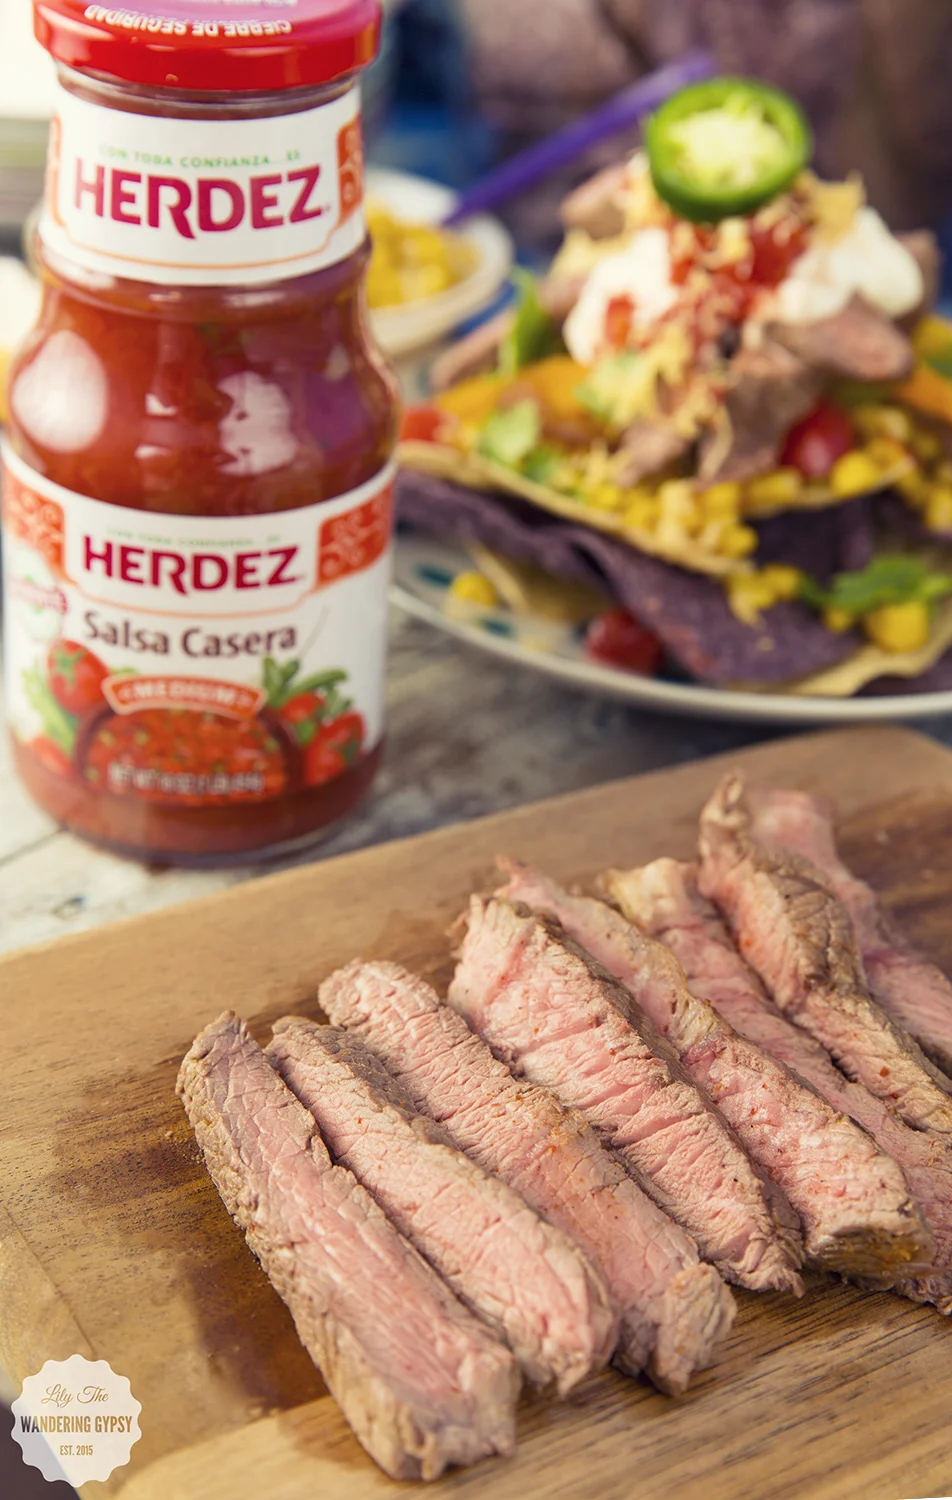
6.) Turn heat off of the peppers and onions when they're cooked, and slice steak into bite-sizes slices or pieces. 

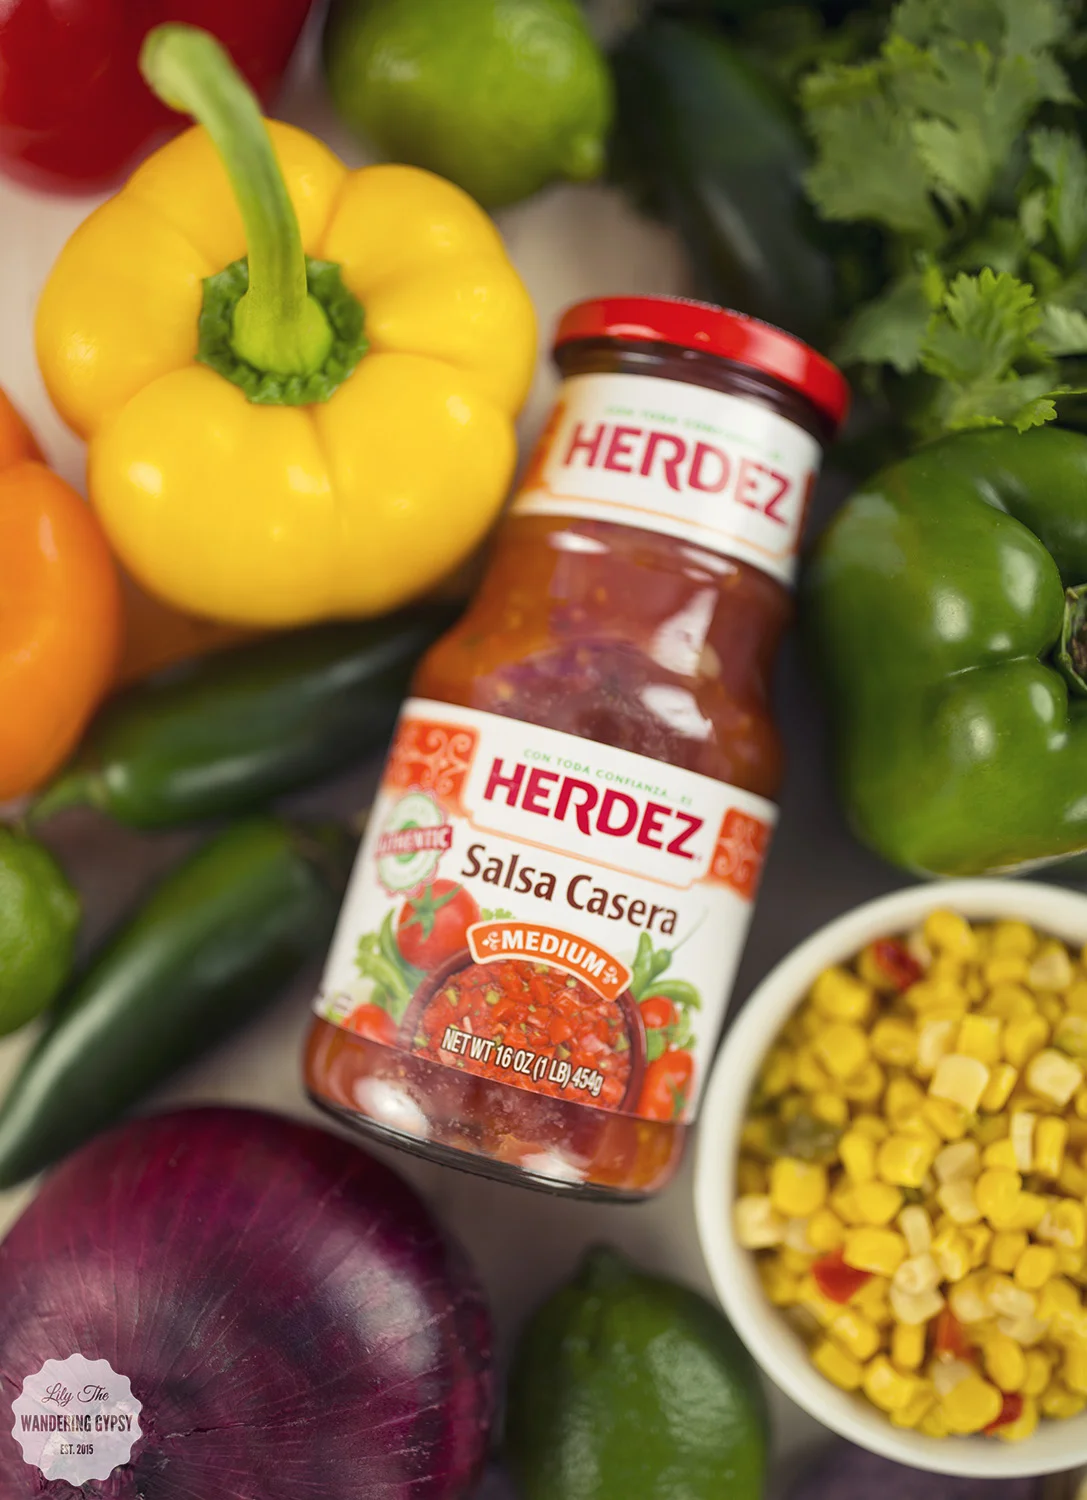
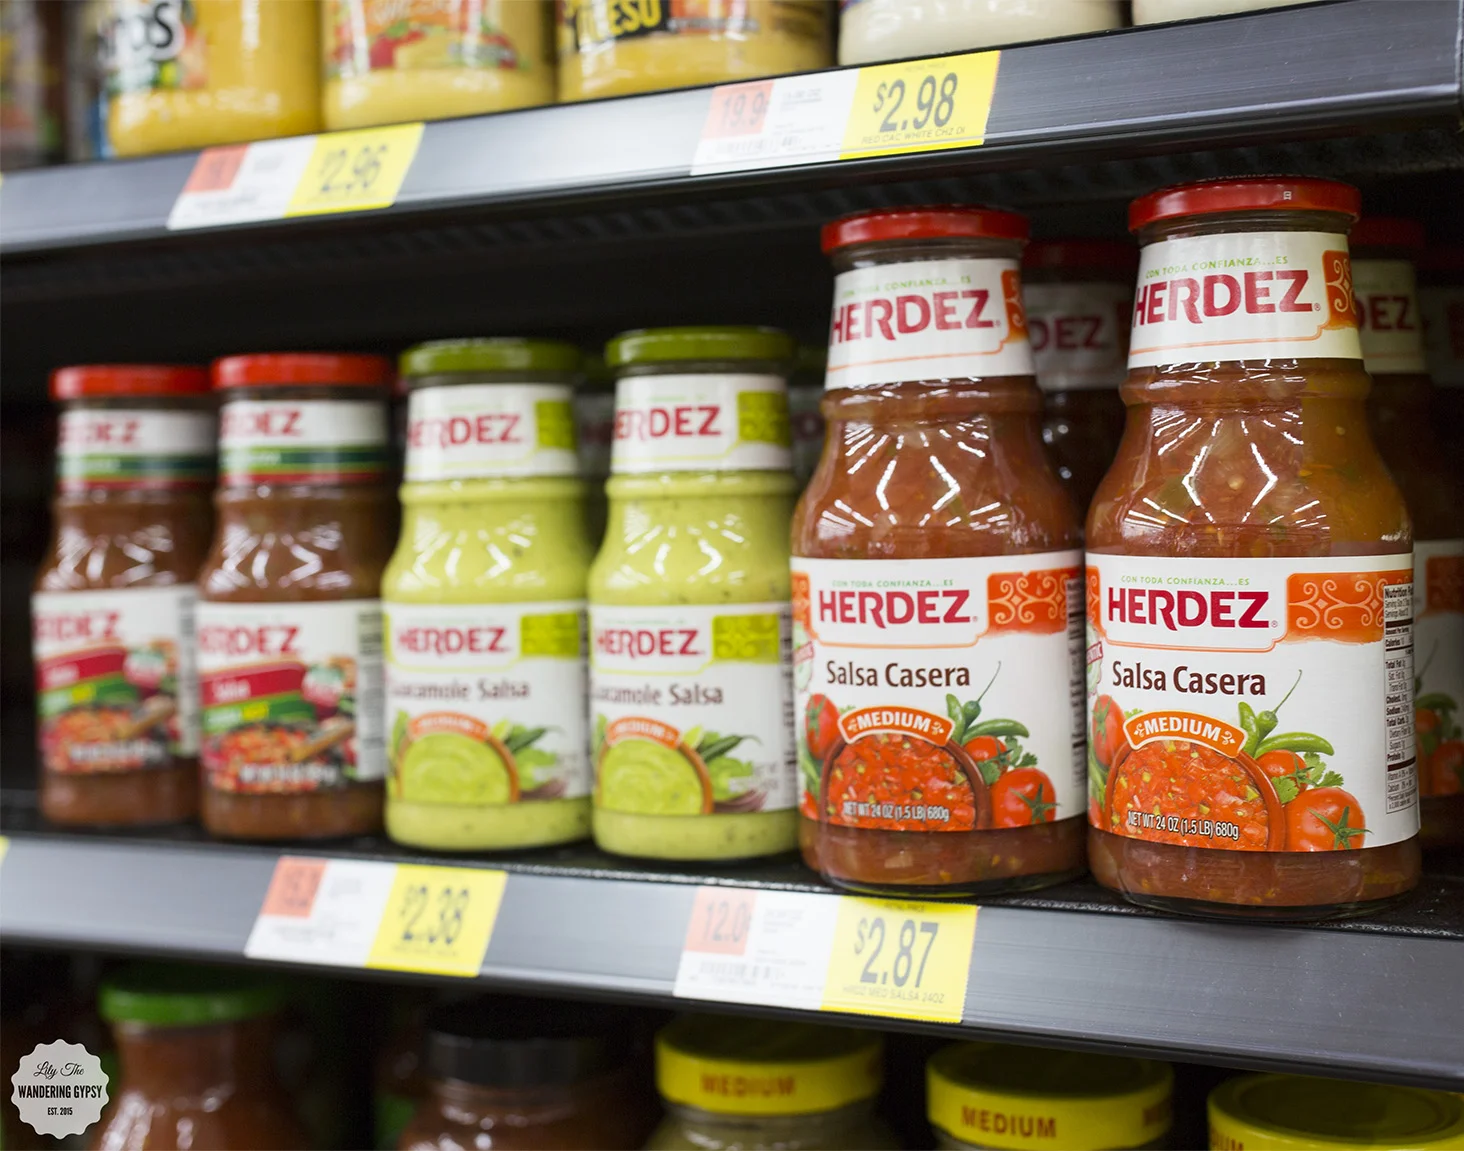
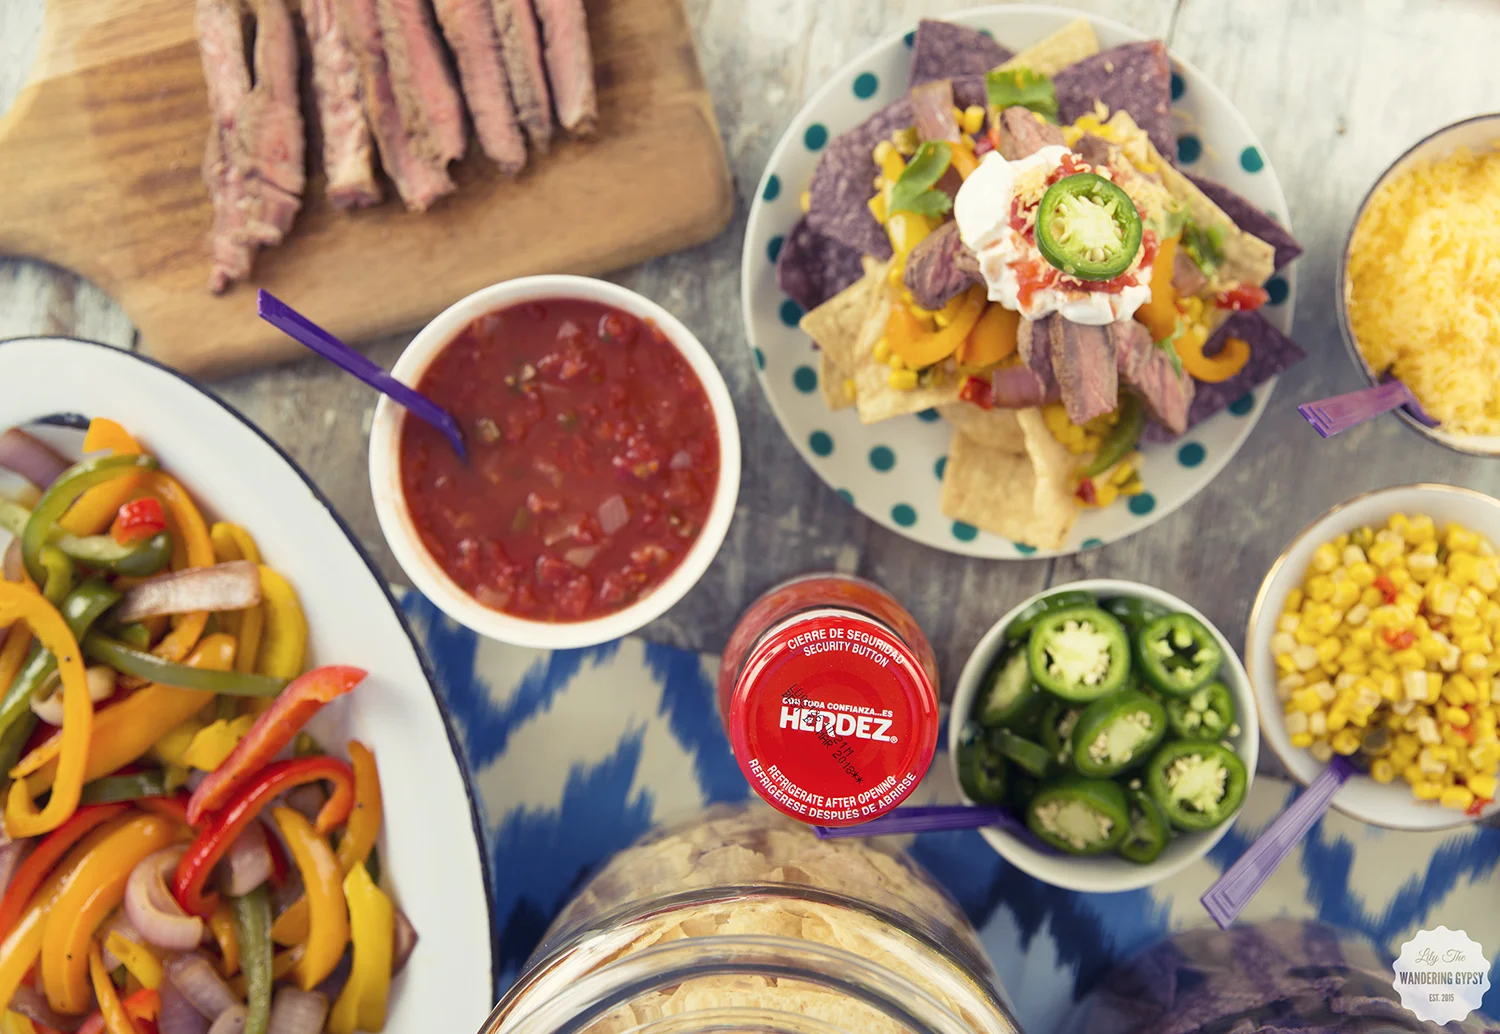
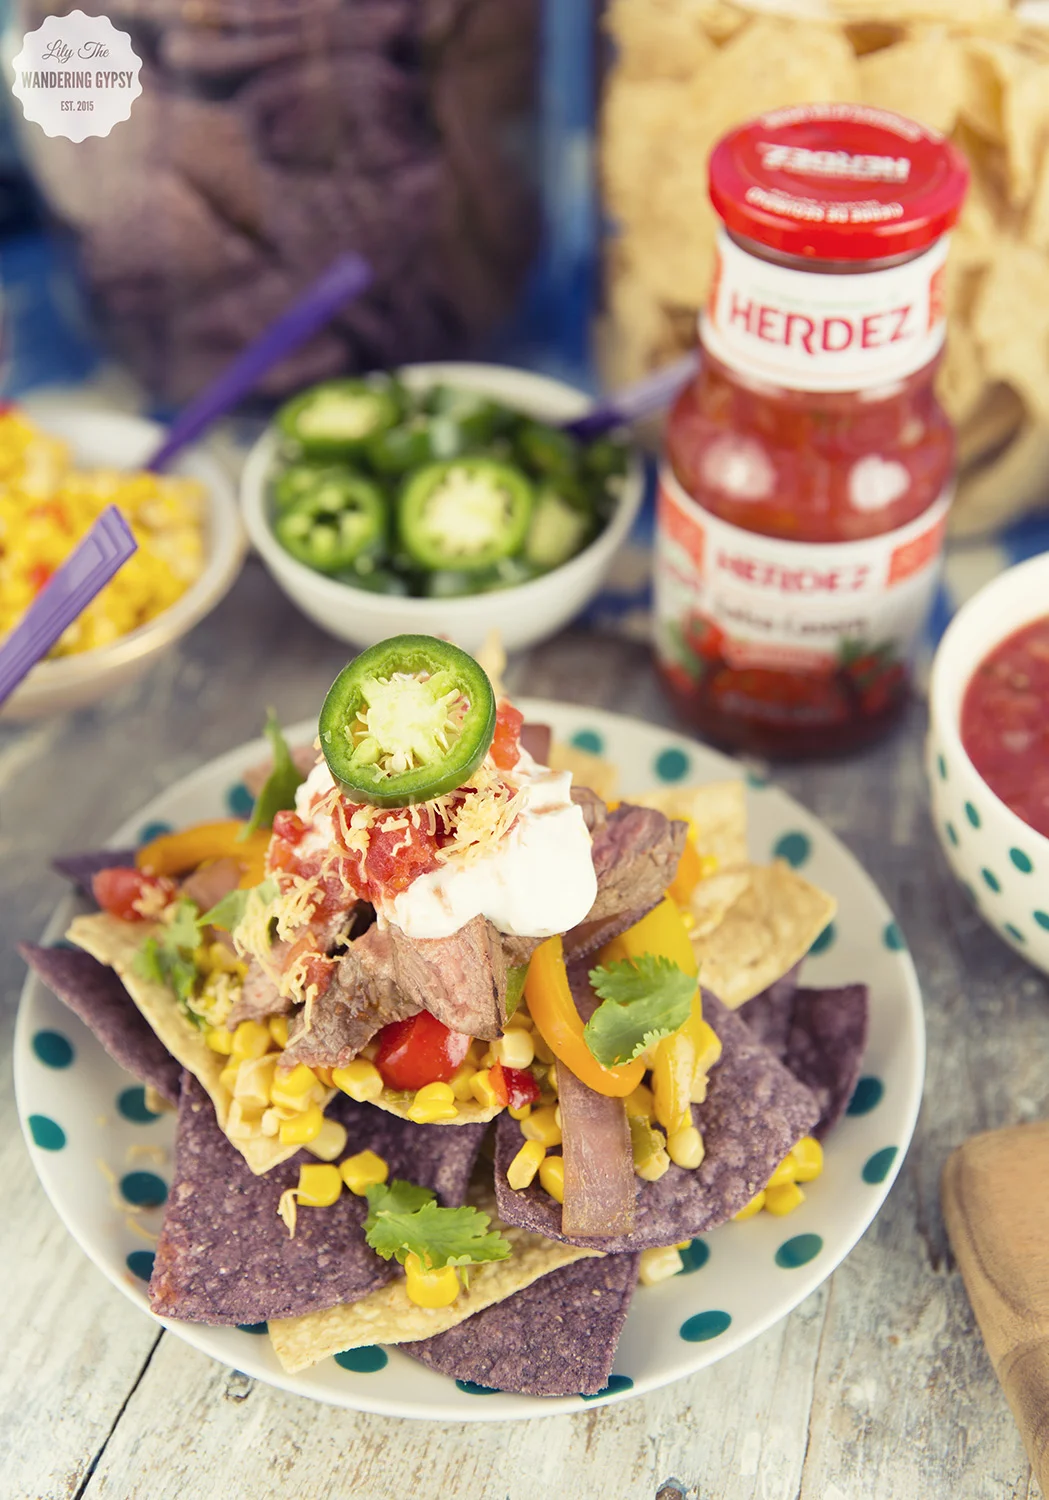
7.) To make your nachos - on a plate, add: chips, cheese, corn, sour cream, grilled steak, cilantro, and top with HERDEZ® Salsa Casera. This has been my go-to nachos recipe, and everyone always loves it! 

I went to Walmart to pick up some of my ingredients and party supplies - you can find the HERDEZ® Salsa Casera and the Beef at Walmart, as well as the jars that I used for holding those tortilla chips. Get recipe inspiration and beef nutrition information at “Beef. It’s What’s For Dinner".

HERDEZ® provides #AuthenticSalsaStyle and it's oh, so good! Thank you so much for checking out my latest recipe, I hope you are inspired by it!! What is your favorite meal to make on the grill? What do you usually grill when you have a crowd? Let me now in the comments, below. 

Elegant Chocolate-Dipped Patriotic Oreos

Have you noticed that most candy/chocolate stores offer chocolate-dipped Oreos among their other chocolate bon-bons and other confections? I have always been amazed by this, because they are SO incredibly easy to make. I figure, why not just make some of my own at home! I also wanted an excuse to check out the Oreo Thins that I have been seeing everywhere, so I thought this would be the perfect project!

Without further ado, here are my Elegant White Chocolate-Dipped Oreos, perfect for Labor Day Celebrations, and other times when you just wanna decorate some desserts!

- 1-2 packages of Oreo Thins (find them here)

- Ghirardelli Classic  White Melting Wafers or White Chocolate Chips (find them here)

- Red Food Coloring Gel (this is the set I have) or red candy melts

- Blue Sprinkles (similar here

- Glass jar to dip Oreos into (mine was the 8 oz. size, I believe)

- Skewer Stick

- Parchment Paper


1.) Melt white chocolate in a double boiler method or in the microwave, stirring regularly to make cure it's smooth and fully melted. 

2.) Line a baking sheet with parchment paper.

3.) Transfer a portion the melted white chocolate to a jar that is about as deep as the Oreo Thins are wide. Leave about 1/2" of room from the chocolate to the top of the jar.

4.) Dip each Oreo Thin into the white chocolate, and dip in little over half way, leaving space at top.

5.) As you pull the cookie out of the jar of white chocolate, use a skewer stick to scrape excess chocolate off the back of the cookie, and around the sides. This is a great tip, that makes your cookies look way better and less gloppy as they dry.

6.) Put each cookie onto the parchment, and let cool completely. 

7.) After you have dipped every cookie, pour more white chocolate into a jar, and add lots of red gel food coloring. This could also be done with red melting wafers. 

8.) Transfer to Ziploc bag, and cut a tiny opening in one corner. ***Working one cookie at a time, add lines of red chocolate, then a few blue start sprinkles to each cookie. Practicing first helps!

9.) Enjoy your cookies! These would be perfect for a party or just enjoying at home!!!

An Easy Treat For Labor Day And Beyond

I have an awesome, tasty, and amazingly easy dessert idea for Labor Day festivities and beyond. Definitely want to admit that I did not make my own cupcakes, though - I got some delicious pre-made Red Velvet Cupcakes from our local Schnuck's grocery store, and also found the berries there too. But, the little special touches always make people smile, so you can recreate your own by simply adding some blueberries and raspberries to some cupcakes of your own. You could even grab the 3 ingredients on your way to a party, and decorate the desserts when you arrive! I also love how the seersucker fabric and little silver stars confetti makes for a patriotic yet elegant decor idea for any holiday that's red, white, and blue! 

If you do want to make your own Naturally Colored Red Velvet Cupcakes, Food52 has an awesome recipe that uses beets (instead of red food coloring) - which is incredible! 


NATURALLY DYED RED VELVET RECIPE FROM FOOD52:

For the cake:

  • 1 cup beet purée, from fresh red beets (not cooked)
  • 3/4 cup buttermilk
  • 1 tablespoon white wine vinegar
  • 2 tablespoons lemon juice
  • 1 tablespoon vanilla extract
  • 2 1/2 cups cake flour
  • 3 tablespoons cocoa powder, not Dutch-process
  • 2 teaspoons baking powder
  • 1 teaspoon cream of tartar
  • 1 teaspoon salt
  • 1/2 cup neutral-flavored oil
  • 1/2 cup unsalted butter, softened
  • 2 cups granulated sugar
  • 3 large eggs

For the cream cheese frosting:

  • 8 ounces cream cheese, at room temperature
  • 8 ounces unsalted butter
  • 2 tablespoons crème fraîche
  • 1 pound confectioners' sugar
  • 1/2 teaspoon lemon zest
  • 1 teaspoon vanilla extract
  • 1 pinch salt

Instructions:

Add the beet purée, buttermilk, vinegar, lemon juice, and vanilla extract to a food processor fitted with the steel blade and process until very smooth.

Sift the cake flour, cocoa powder, baking powder, cream of tartar, and salt together in a bowl. Beat the sugar, oil, and butter together in a large bowl until creamy, then add the eggs one at a time, mixing for 30 seconds after each addition.

Alternate adding the flour mixture and beet mixture to bowl, beginning and ending with the flour mixture. Divide between the cupcake papers and bake until a cake tester inserted into the center of the cake comes out clean, 20 to 22 minutes.

Cool the cupcakes on a rack for 20 minutes or more. Then, get the icing ready. 


To make the frosting, beat the butter and cream cheese together on high speed until fluffy and smooth, then add the crème fraîche. Turn the mixer to low and gradually add the confectioners' sugar until just combined, then turn the mixer up to medium-high and beat until fluffy and smooth, making sure to stop the mixer and scrape down to the bottom of the bowl so everything is evenly mixed. Add the lemon zest, vanilla extract, and salt. Enjoy!

Fall Tailgating + Football Party Tips!

I cannot wait for Fall, and one fun part of Fall is tailgating! Football season, and cooler temperatures make a great excuse to get together with friends and enjoy some good food and drink! Below, are some ideas on making your tailgating and football parties so much more elegant and grown-up. Most of these ideas, from some of my favorite bloggers, are just creative DIY ideas, that don't have to be expensive or time consuming. So, let's get ready for some football...

Serve Drinks From A Pumpkin (Waiting On Martha) - You can simply add some ice to a hollowed-out pumpkin and add beer, or line a smaller pumpkin with a plastic container and add dip for chips or veggies! Learn how Waiting On Martha styled an adorable tailgate party of her own here. 

Use Eco-Friendly Plates (Food 52) - If you must use disposable plates and food holders, there are more Eco-friendly options like these compostable wooden hot dog trays and more from Food52.

Create A Hydration Station (Style Me Pretty Vault) - Provide guests with inexpensive drinks like fruit-infused water, lemonade, and tea. Learn more about this incredible party, in the Style Me Pretty Vault Files.

DIY Flannel Napkins (Hey Wanderer) - Follow this cute DIY Tutorial from Hey Wanderer, or simply cut or rip a couple of yards of inexpensive plaid flannel fabric into 16" x 16" squares to provide guests with something more substantial thank those flimsy paper napkins. 

Style Me Pretty & Author Ngoc Nguyen Lay really know how to tailgate in style! This image, below, really shows a great overall party setup! Incorporating vintage items like an ice cream cone holder (used for fries and veggies in the photo), Picnic baskets, metal buckets, and pom-poms makes this setup look elegant instead of over the top. Learn more, here

Serve Elegant & Unexpected Treats (Happy Wish Company) - I just love how these macarons, cup of strawberries, wooden utensils, cloth napkin, and sandwich in a spotted paper party favor bag. Find fun party ideas like this one, from Happy Wish Company

I'm hoping to put together my own set of Tailgating Ideas in an upcoming post, so stay tuned!!

How To Keep Your Skin Hydrated in Late Summer ~ Early Fall {Plus: Tips on Making Guests Feel At Home}

I'm so happy to bring you another amazing post today, incorporating the Curel® Hydratherapy Wet Skin Moisturizer. As the seasons change, humidity levels do too. This can mean going from 90% humidity, down to 50% in a matter of days here in southern Illinois, so it's best to get ahead of the game, and stay moisturized!

I also wanted to share a few tips on making your visitors and house guests feel right at home when visiting you! It's as simple as leaving fresh, new towels rolled up in a decorative basket. Also, provide guests with spa-like bath products, like the Curel® Hydratherapy Wet Skin Moisturizer. This is perfect for guests, because it smells amazing, and contains a water-activated moisturizer - perfect for any weather conditions. Another important tip is to help your guests stay hydrated (first with the Moisturizer, then with a welcoming array of fresh, chilled water, ready for them after their long travels. These are some ways you can add a touch of welcoming into your guests' experience while staying at your home.  


I’m sharing #Curel® HYDRA THERAPY WET SKIN MOISTURIZER in my life as part of a Curél sponsored series for Socialstars™. Thank you for supporting the brands that help keep my blog a beautiful place to showcase my work! 

I also created this beautiful candle holder with a terrarrium I found at a craft store, white decorative sand, and a scented candle in a tin. I love how this turned out!! (see below)

Below, I used some flip-top bottle I found at a craft store, and this amazing, vintage glass bottle that a family member gave me. It's so pretty, and little touches like this will make your guests not have to even ask where they can find a glass - they will have everything they need some place in their room. 

Learn More About The Moisturizer

Curél is debuting their new Hydra Therapy product which helps combat dry skin and helps you look your best during warmer weather and beyond! Be sure to check out Curél® on Facebook to get updates and to learn more. 

  • Curel® HYDRA THERAPY WET SKIN MOISTURIZER is activated by water on freshly-showered skin and penetrates deeply into the surface to heal dryness

  • After showering, your skin cells expand, which provides an easy pathway for Curel® HYDRA THERAPY WET SKIN MOISTURIZER to penetrate into just showered skin, healing the moisture barrier where it counts and helping replenish skin’s ceramide levels

  • Curel® HYDRA THERAPY WET SKIN MOISTURIZER is not greasy or sticky and has powerful healing ingredients that restore the moisture barrier

  • Apply daily & experience the end of dry skin

I also love the colors I got to incorporate into this thoughtful set of images. The bright, white towels, rustic metal basket, white, decorative box with gold spots, the terrarium that features gold accents, and the pretty glass vases - the hints of metallics really shine nicely here. Love this color combo for a bathroom or guest room. 

Have you gotten a chance to check out the Curel® Hydratherapy Wet Skin Moisturizer yet? Let me know in the comments below! 

YOU MAY ALSO LIKE...

Clinique Lip Pop