A Cute Desk Decor DIY & Celebrate Back To College With Big Lots

This shop has been compensated by Collective Bias, Inc. and its advertisers. All opinions are mine alone. #BigLotsReady #CollectiveBias

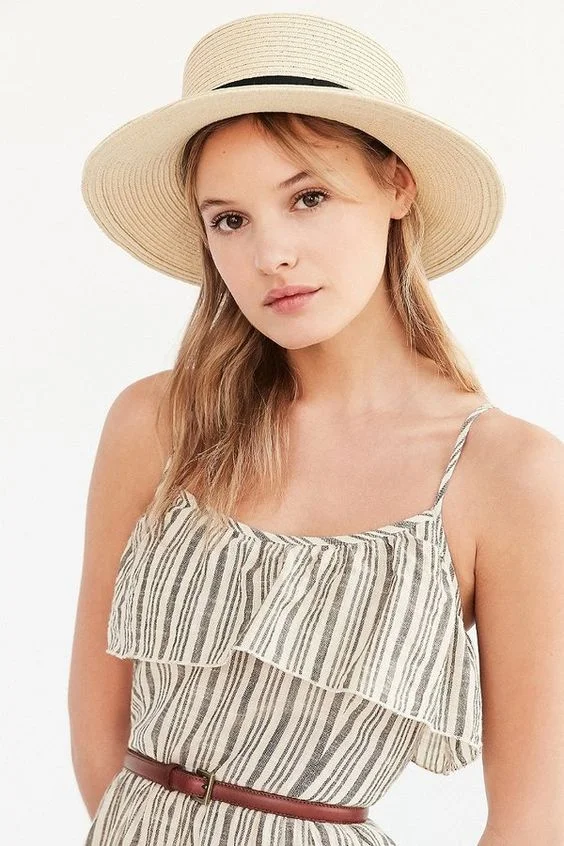
I am here today with a cute DIY idea, and tips on how to design a space for a woman who is shopping for back-to college items, and wants to learn how to maker her space her own. My sister, Ellen is such a talented person. She is going to be a Junior at the University of Louisville, KY in the nursing program this Fall semester, and I couldn't be more proud of her! She will be receiving her BSN in no time at all! She is my complete inspiration for this post! She is so talented, and she is a gifted artist and designer. 

Ellen lived in a dorm her first year, and it was super cute. She did the best she could with the furniture she was given, but last year, her design style really had a chance to blossom. She moved into a beautiful house with some of her sorority sisters, and her bedroom was beyond adorable. Now, she is moving into a house with a bit more space, and I can't wait to see how she designs the place.

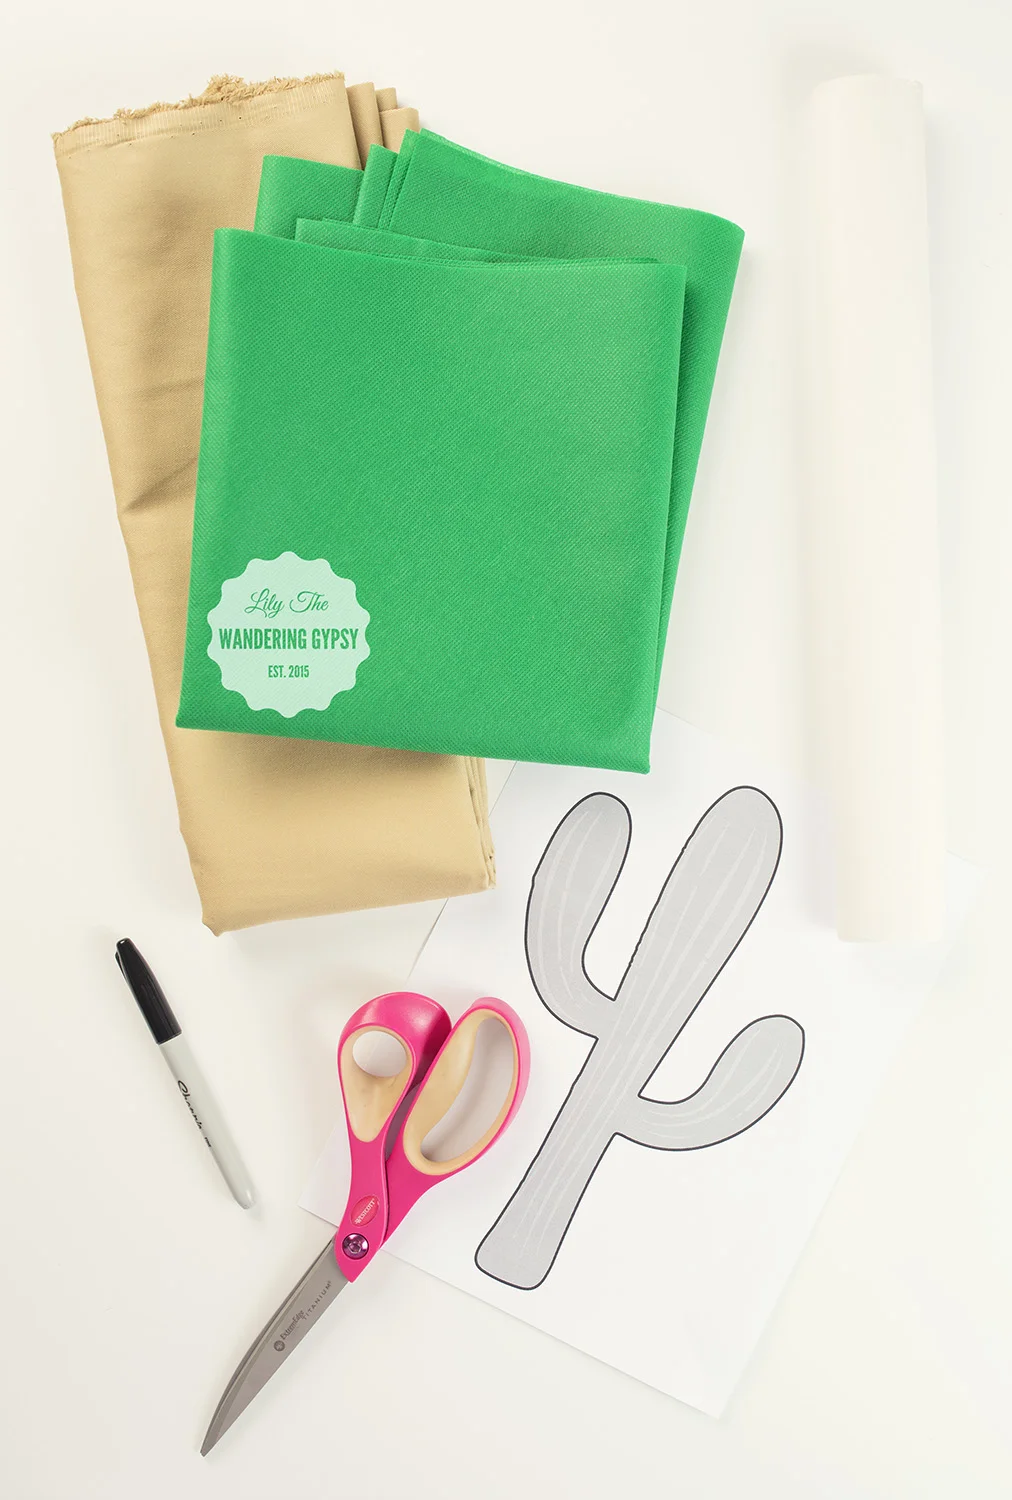
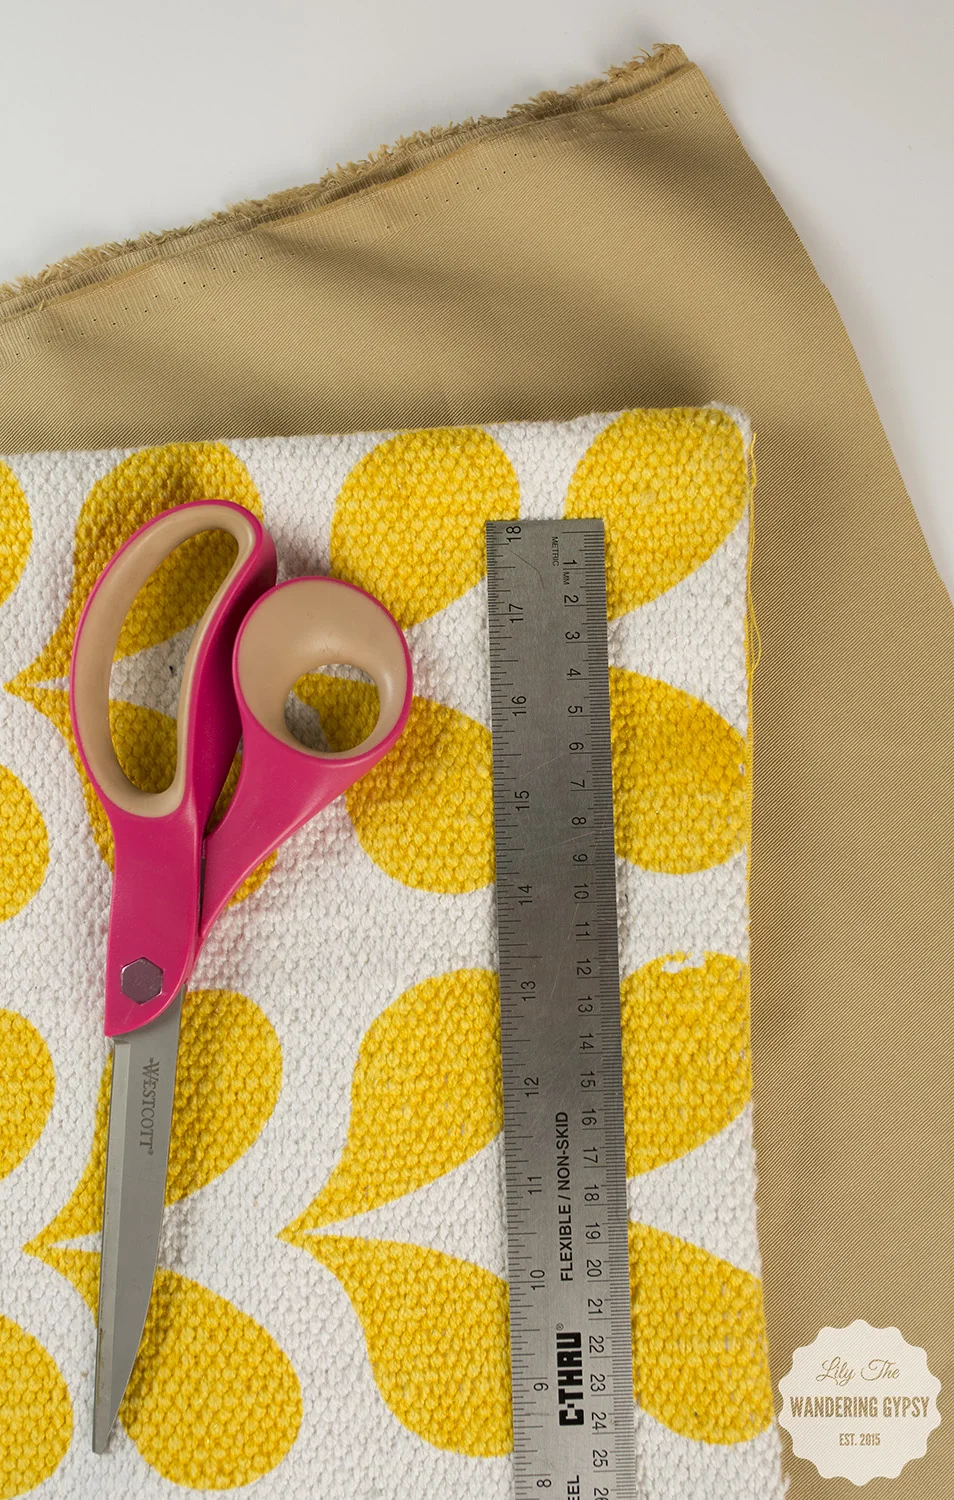
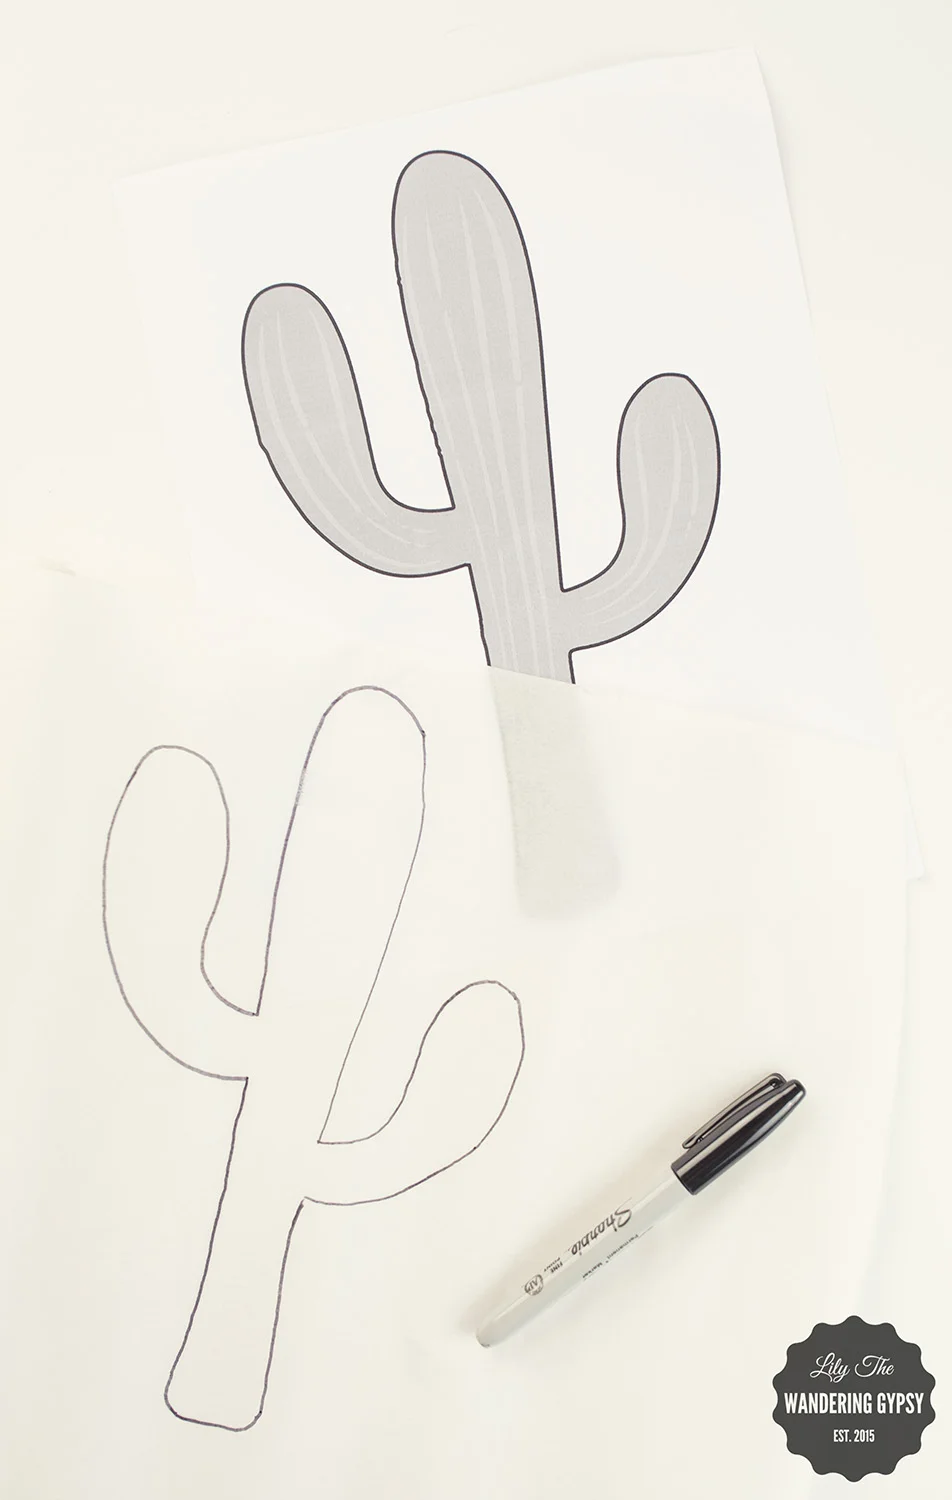
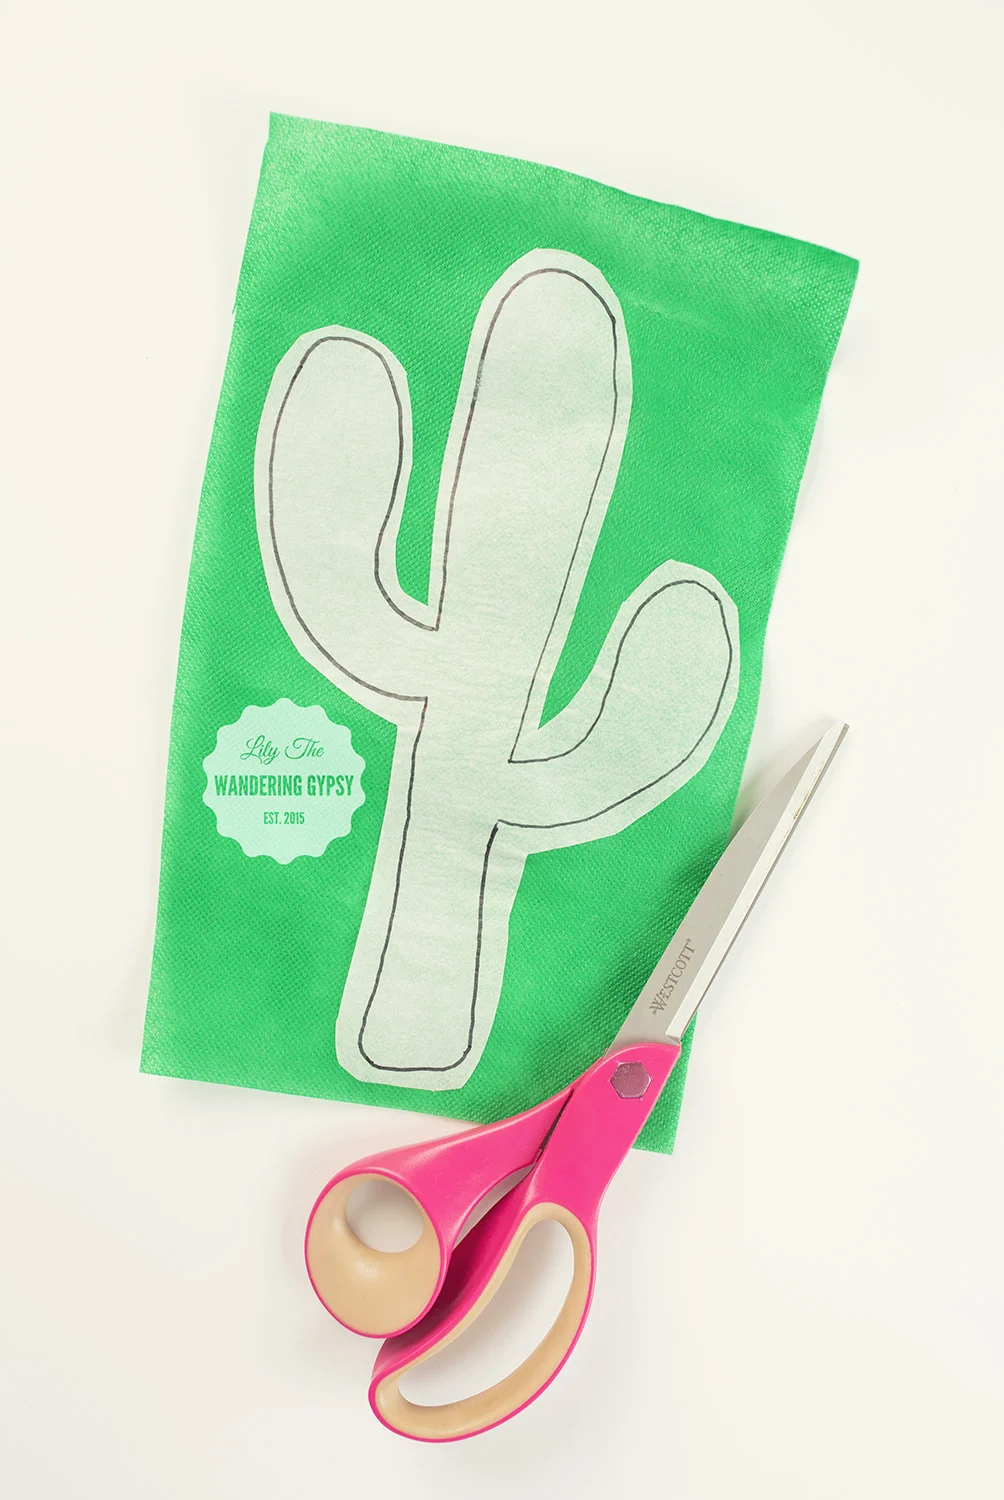
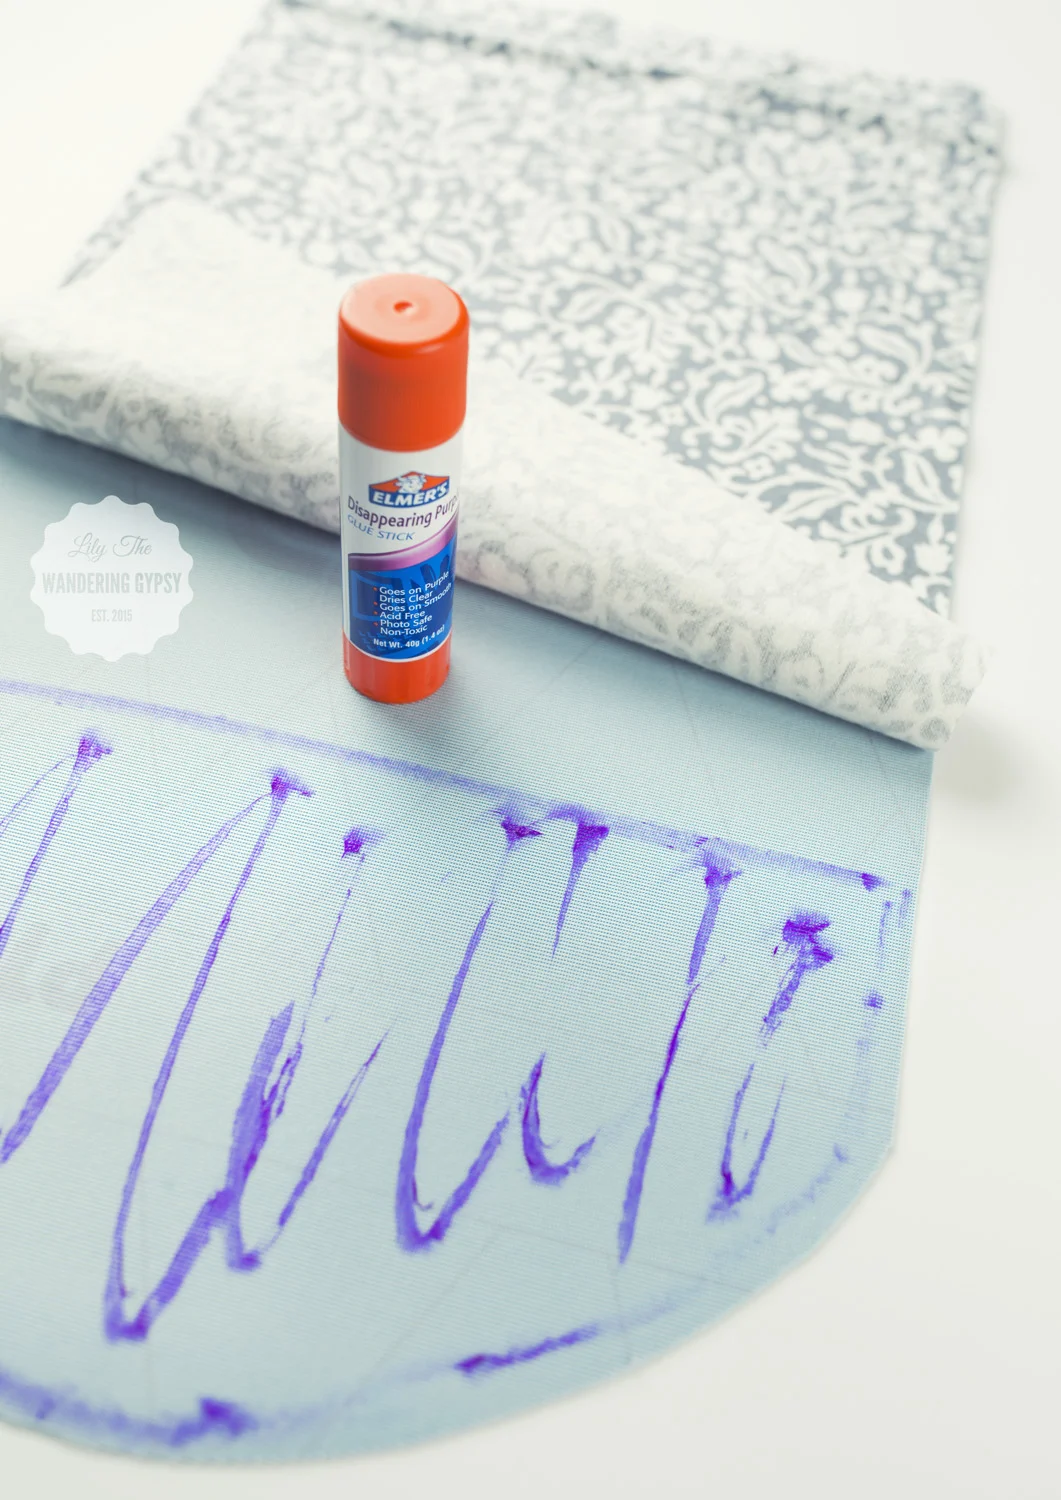
Read on to see more about the space I designed for a woman who is in college and needs a beautiful space to work! The directions for a DIY Background Inspiration Board are below.

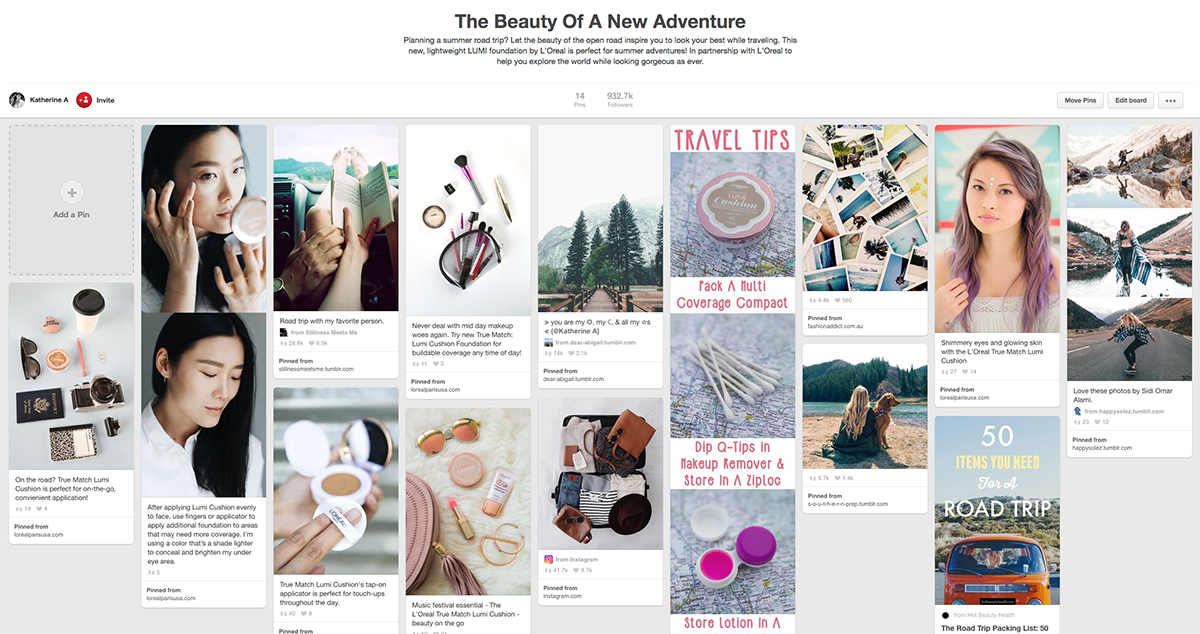
Get tons more inspirations, and shop all of the Back-To-College items here. And, click around on the image below, it's shoppable!

Meet my sister, Ellen!

I shopped at my local Big Lots for many of these items, and I could not believe hoe friendly and helpful everyone was! The main cashier knew exactly right where everything was, and I was happy to find so many of the items available in-store. I also found lots of items that coordinated with my coral and mint theme, so I grabbed a few extra items while there. Another option is to shop on biglots.com, if you want an even broader selection of colors or want to see the entire line of back to college gear. 

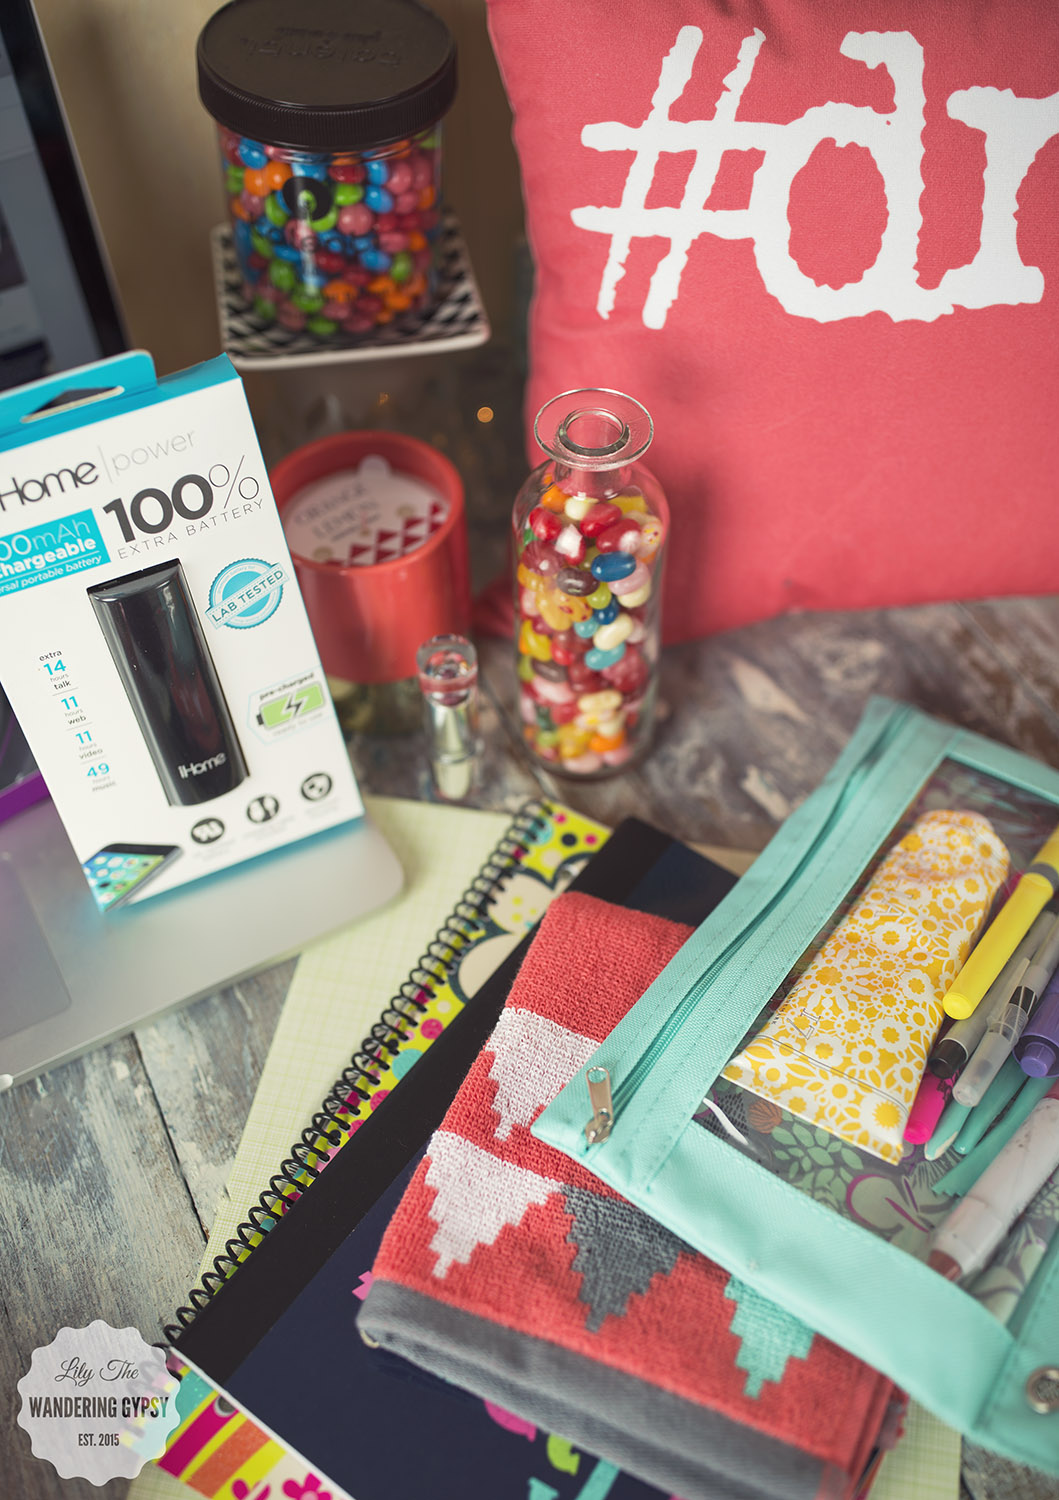
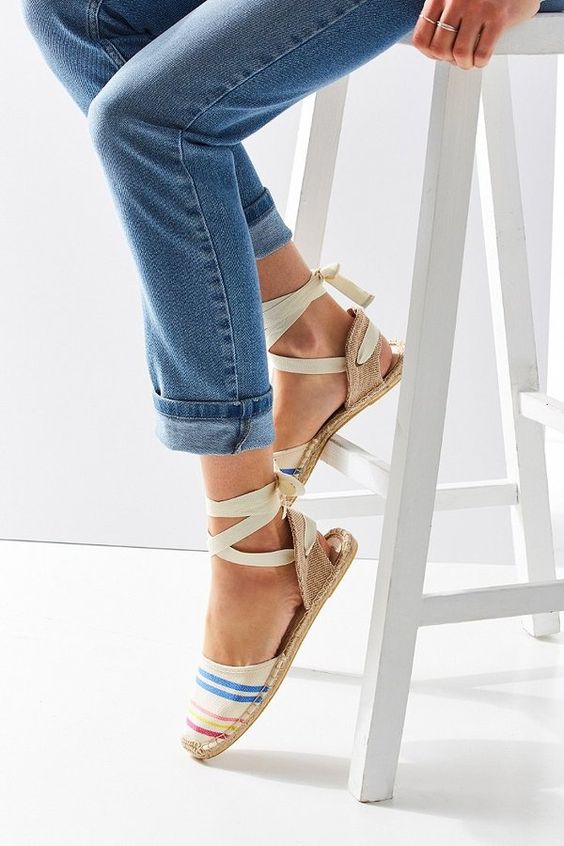
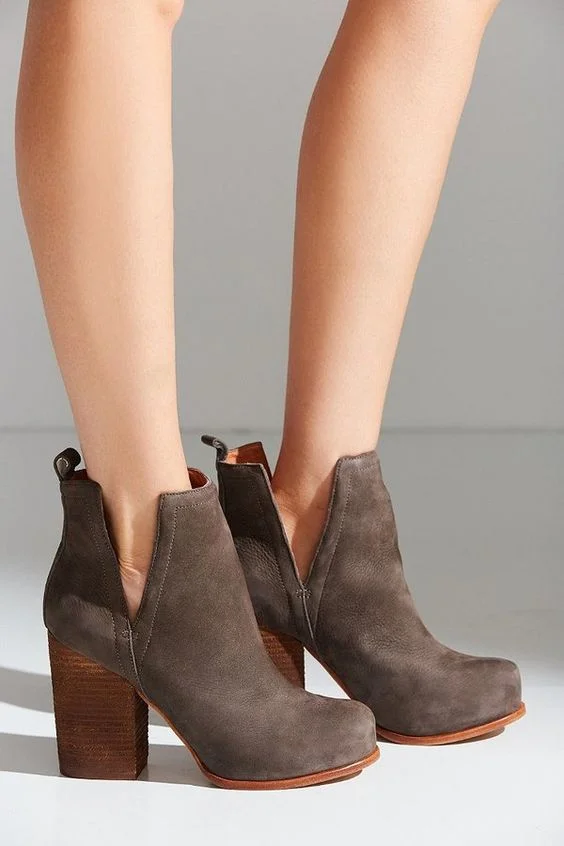
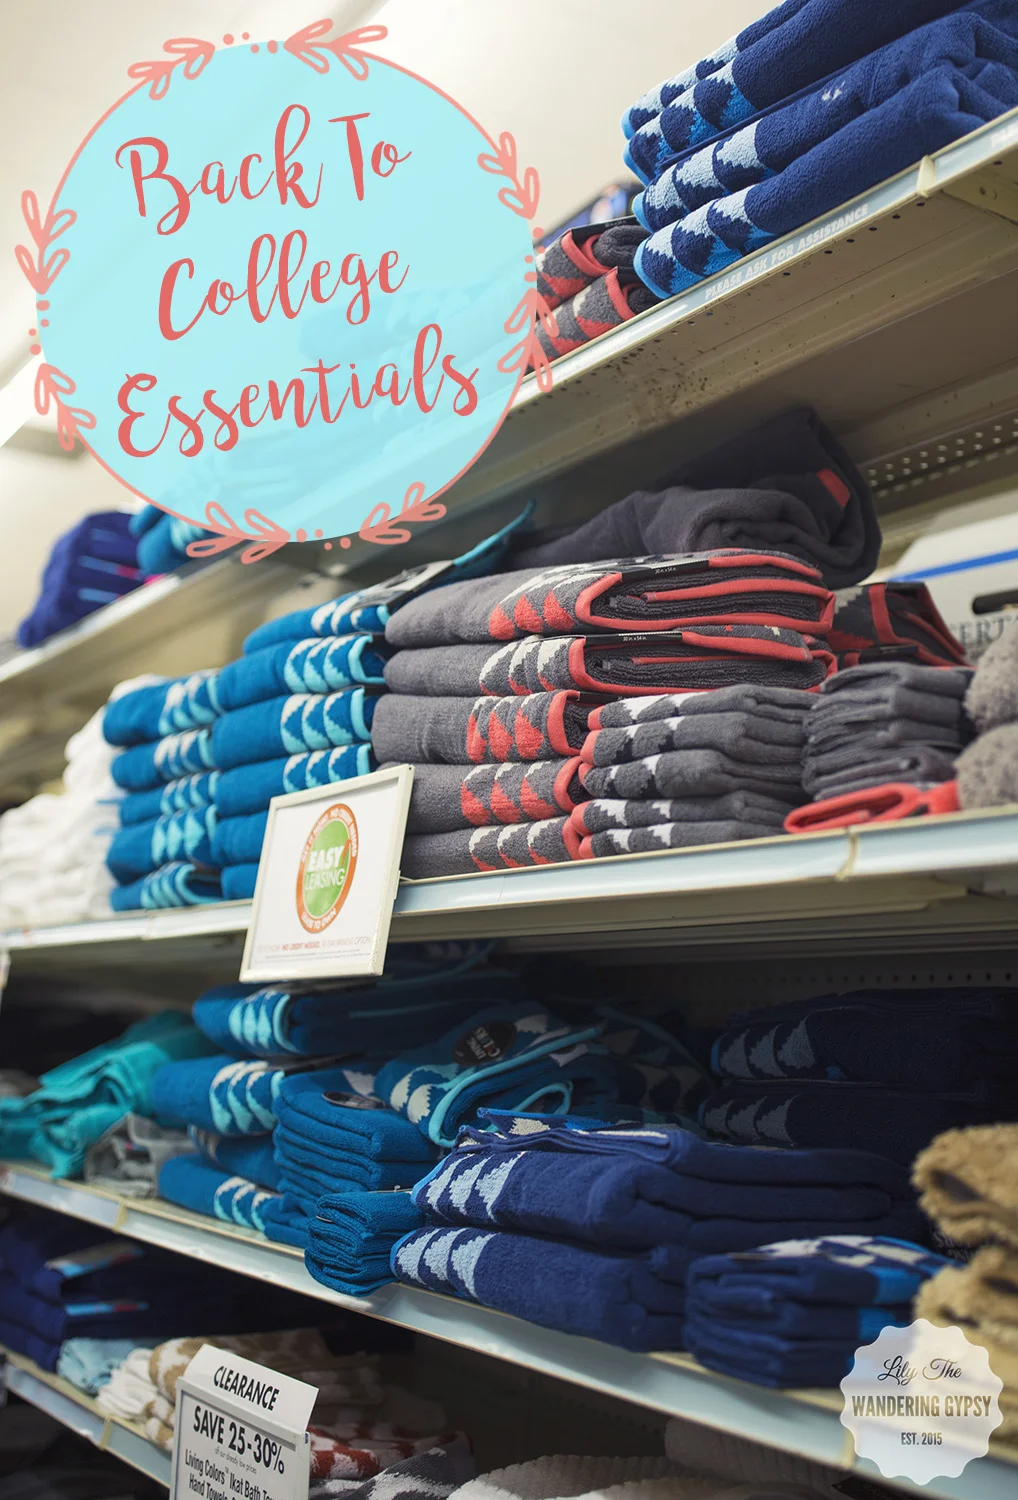
No matter what your style, Big Lots has some super cute home decor items that will inspire a cute color combo, or even an overall theme to your new space, from college dorms, new apartments, or any work space. In addition to the items I featured here, Big Lots also has: mattresses, furniture, small appliances, bedding, sheets, pillows & throws. These items will fit into lots of popular decor trends, for both guys and girls. 

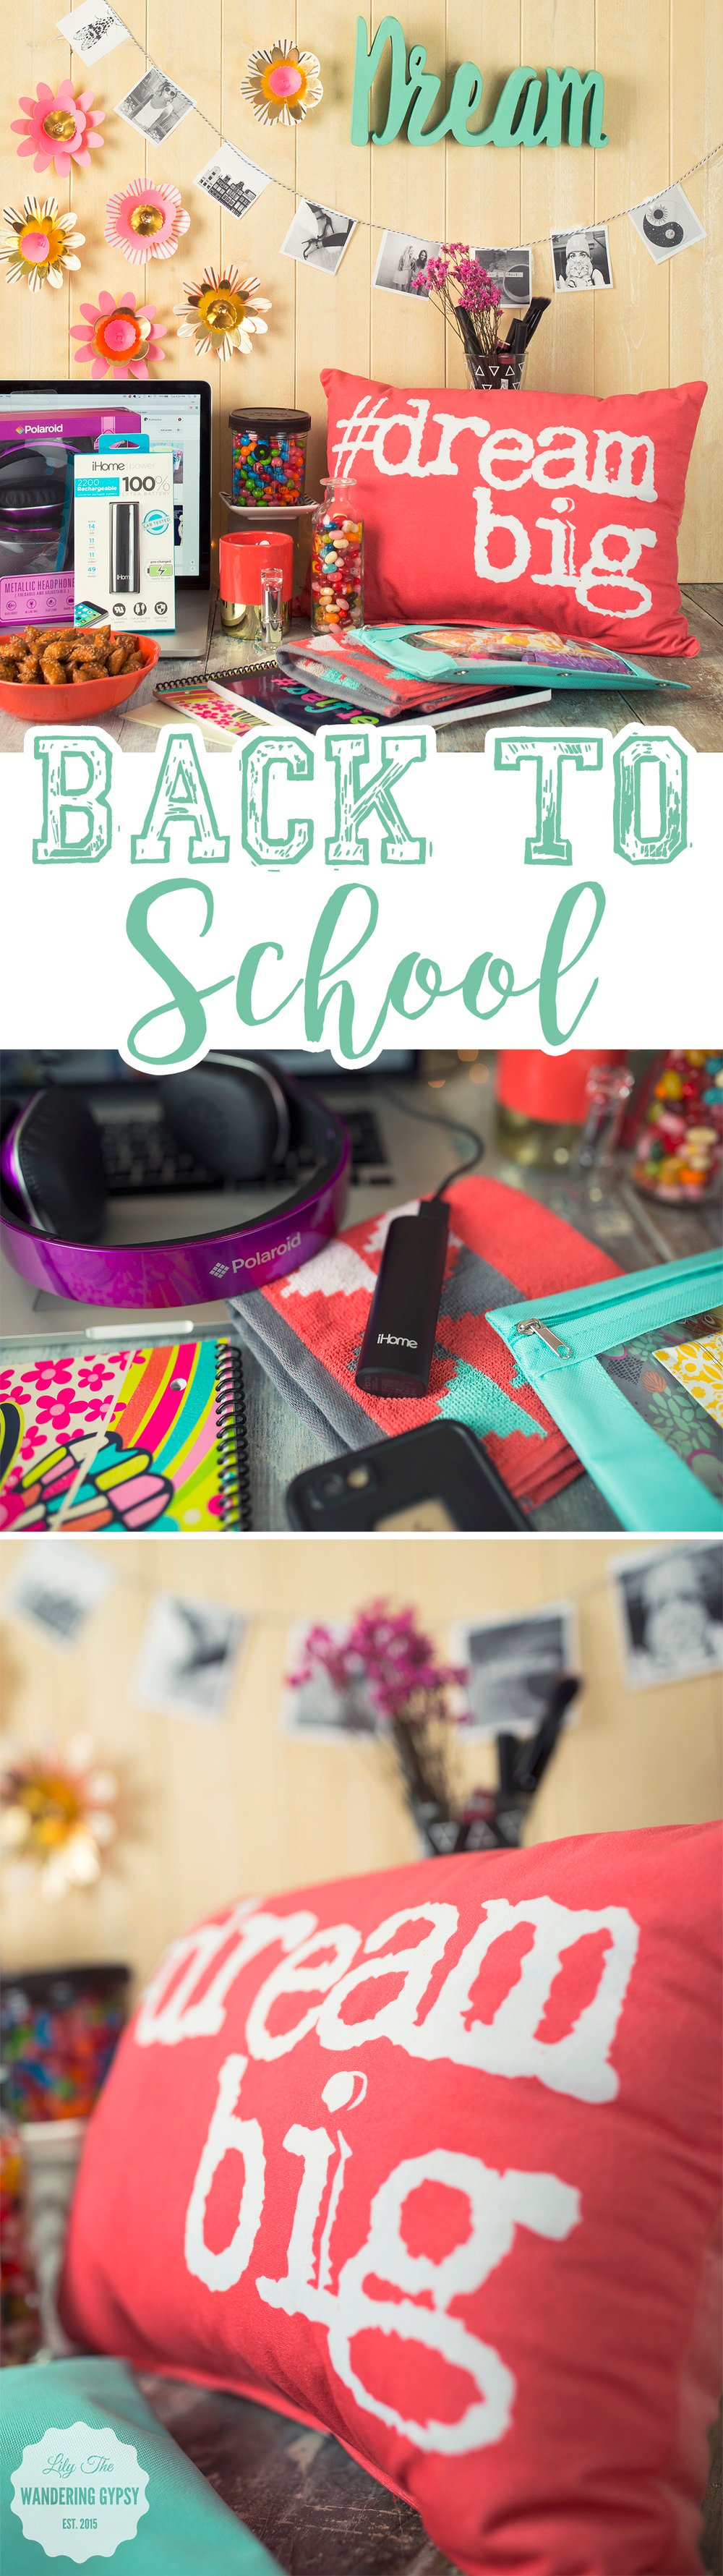
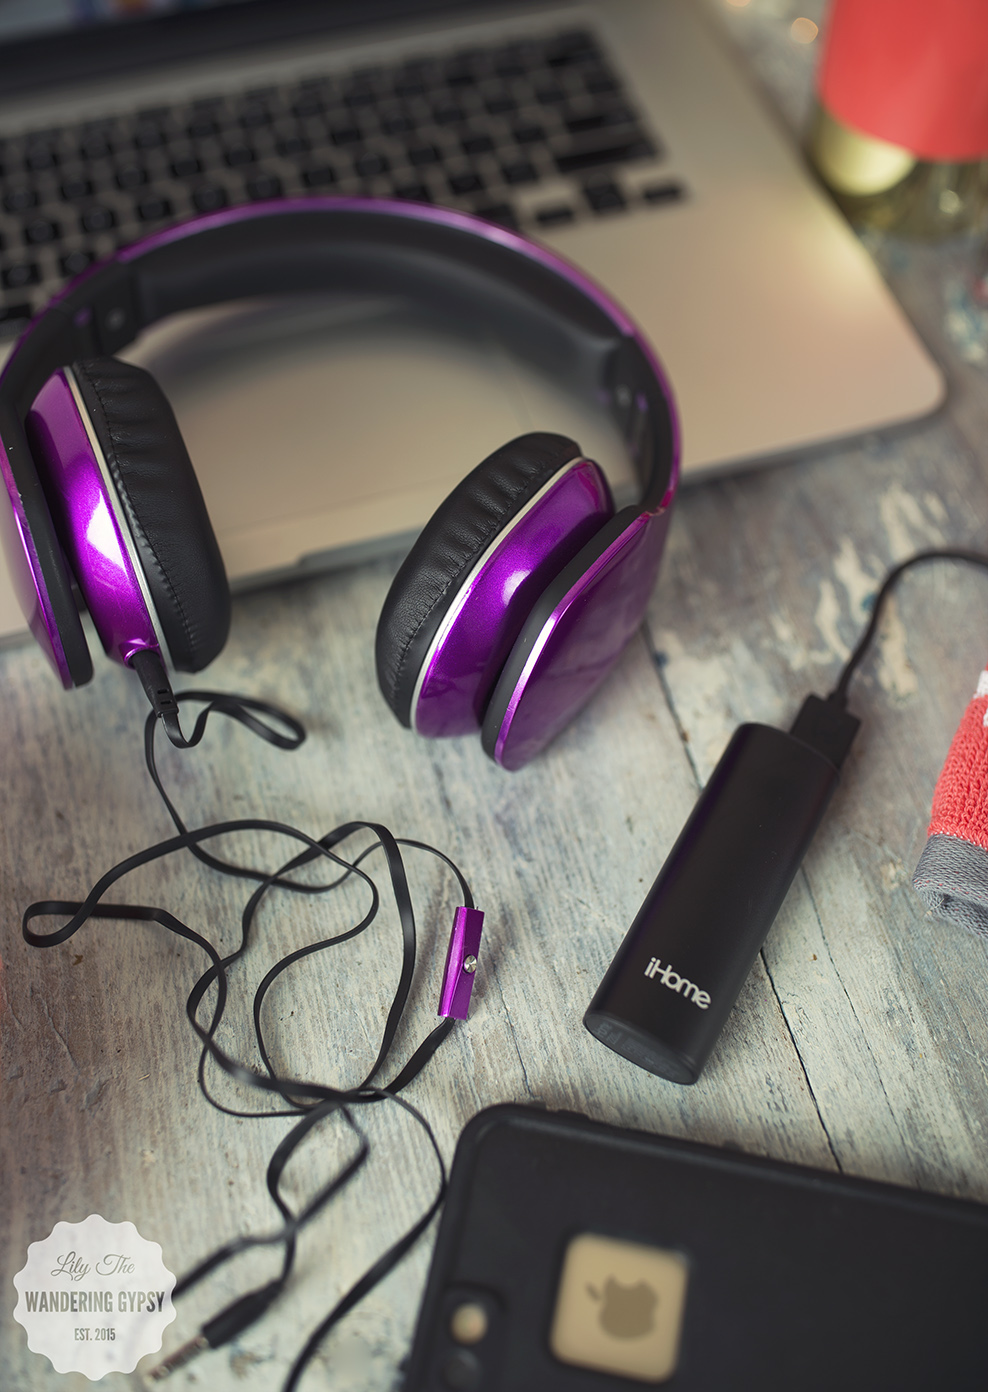
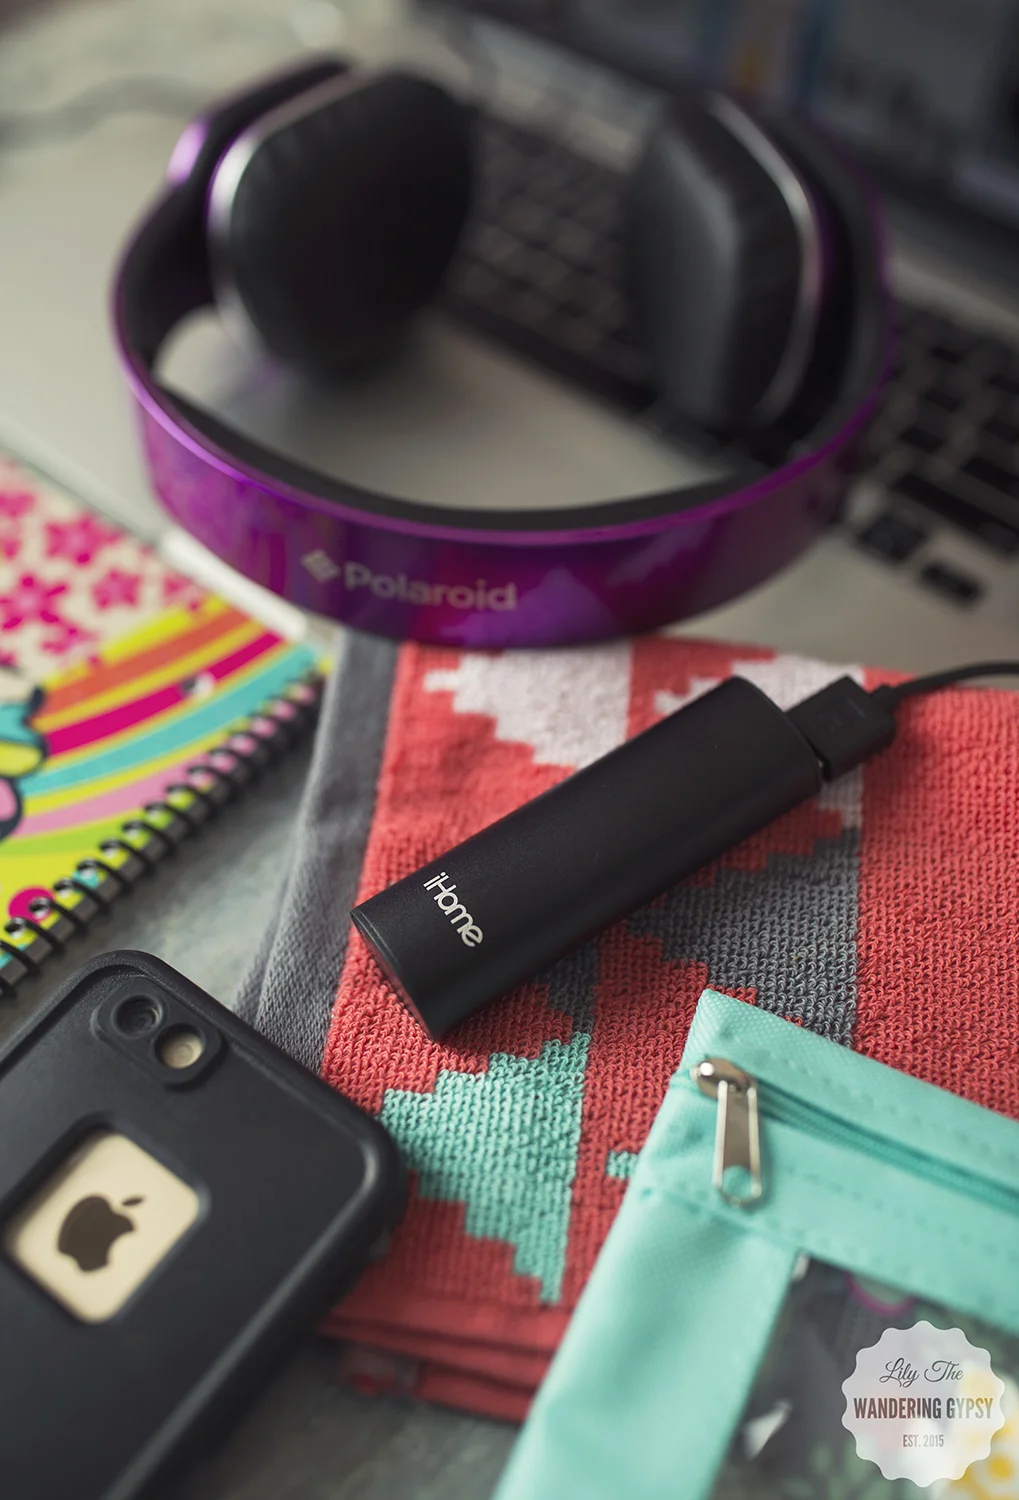
And, there were way more electronics than I could have imagined! They're all stocked up on items like extra battery packs for charging your phone and small devices (see photo, right), as well as cute headphones in literally every color imaginable. 

I also found a ton of other apartment/dorm/new place ready items like Ninja blender, lots of vacuums, toasters, pots and pan sets, plates, dishes, cups, silverware sets, and a good selection of curling irons, and other bathroom items. I always like checking out the beauty aisle, you never know what sorts of hair products, lotions, and even gift items for your new roomies! 

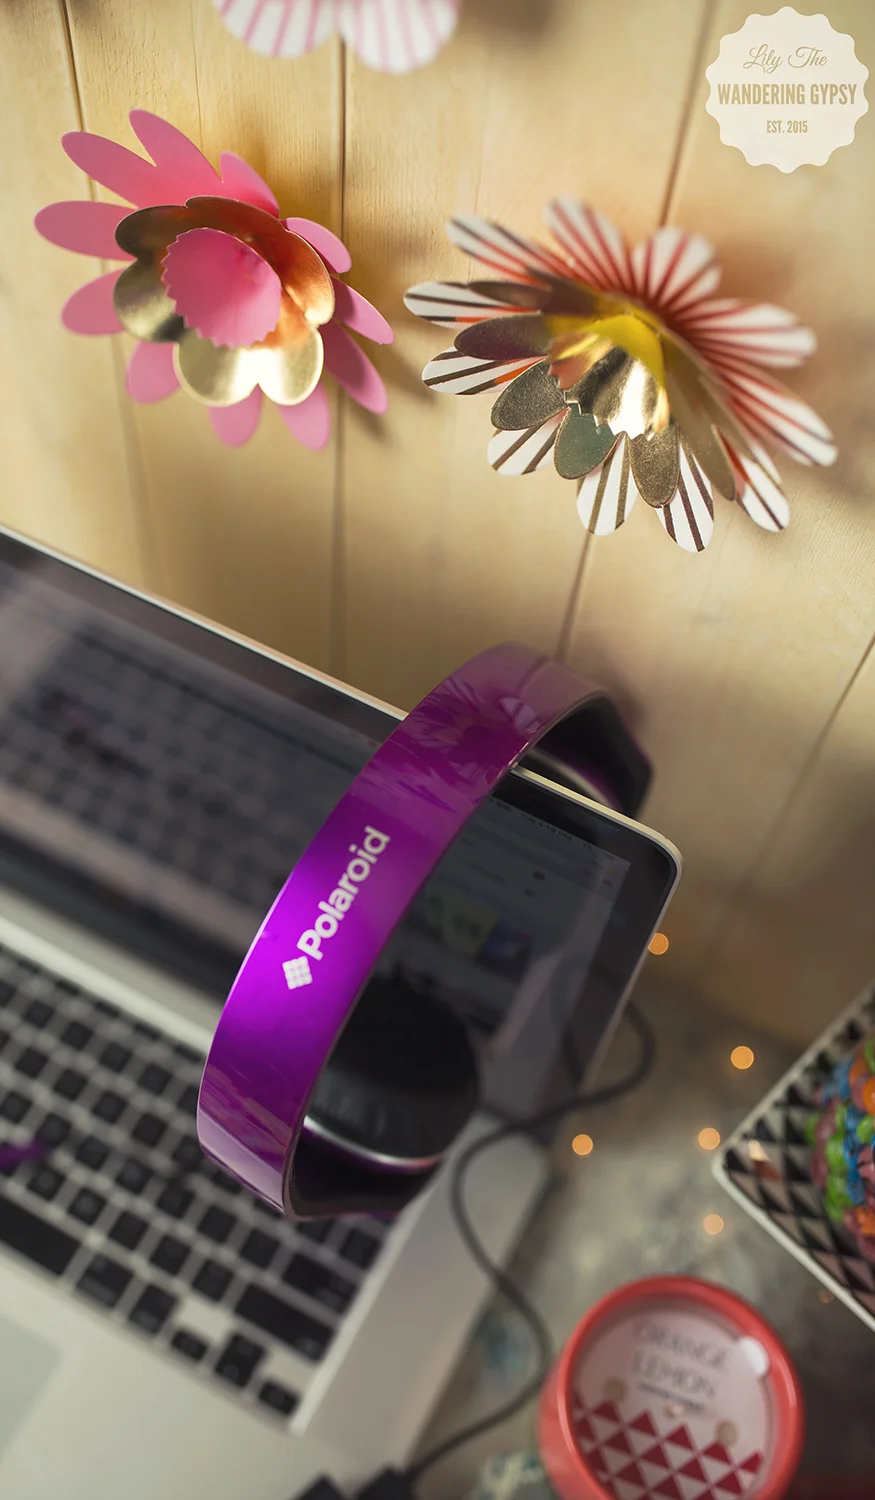
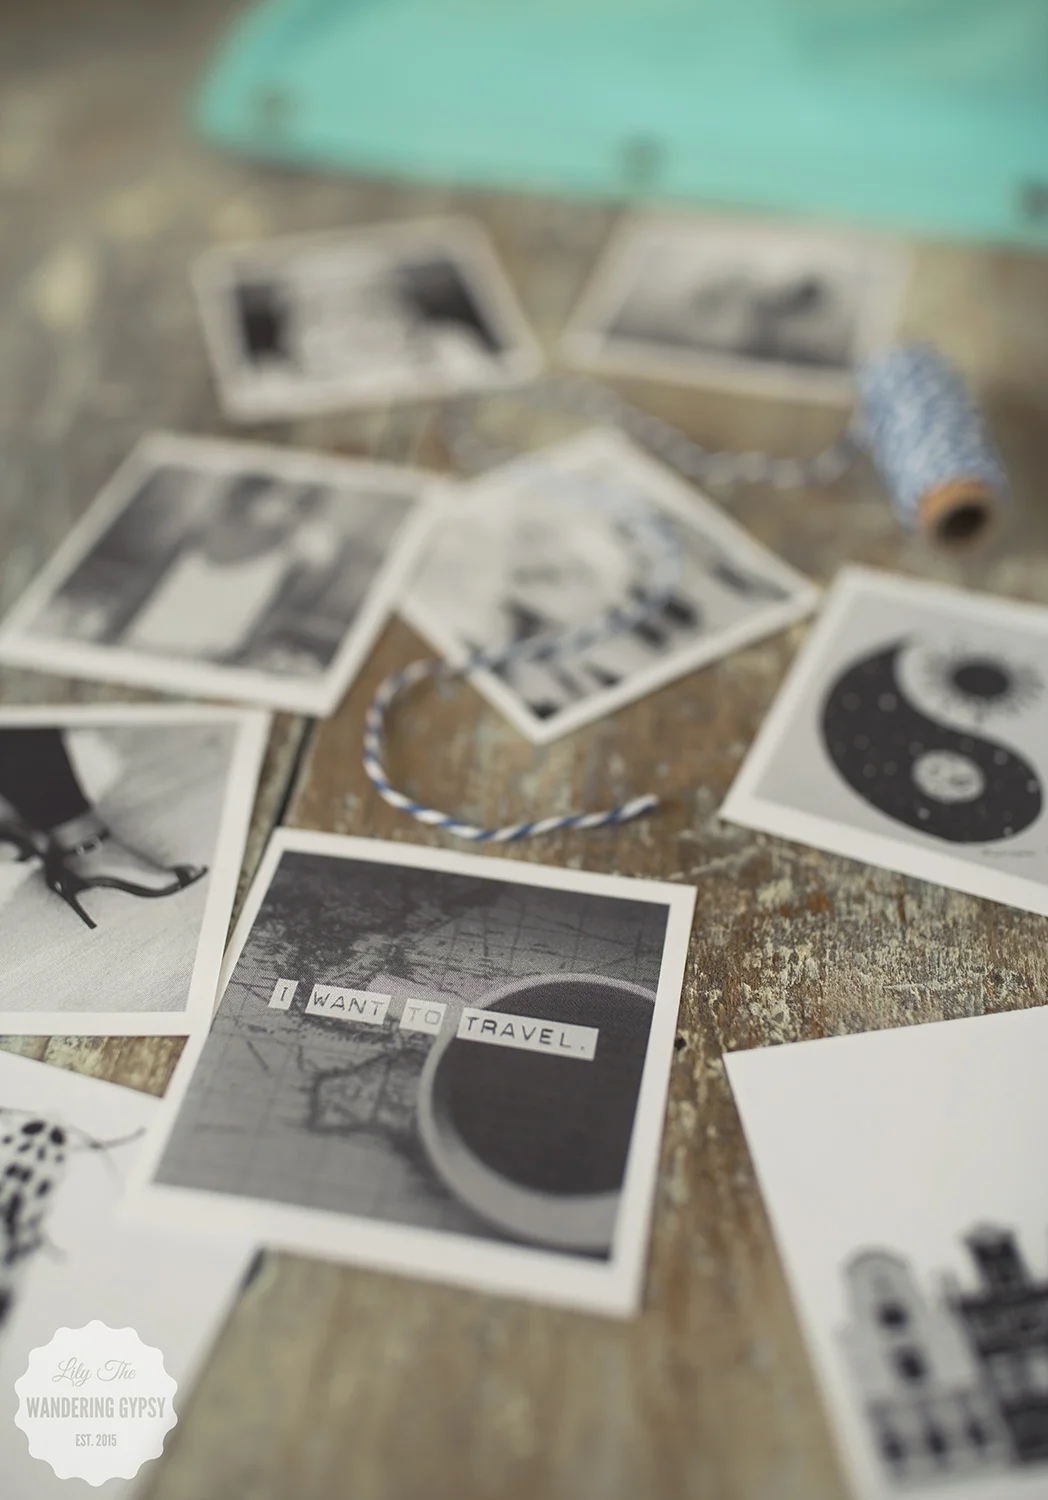
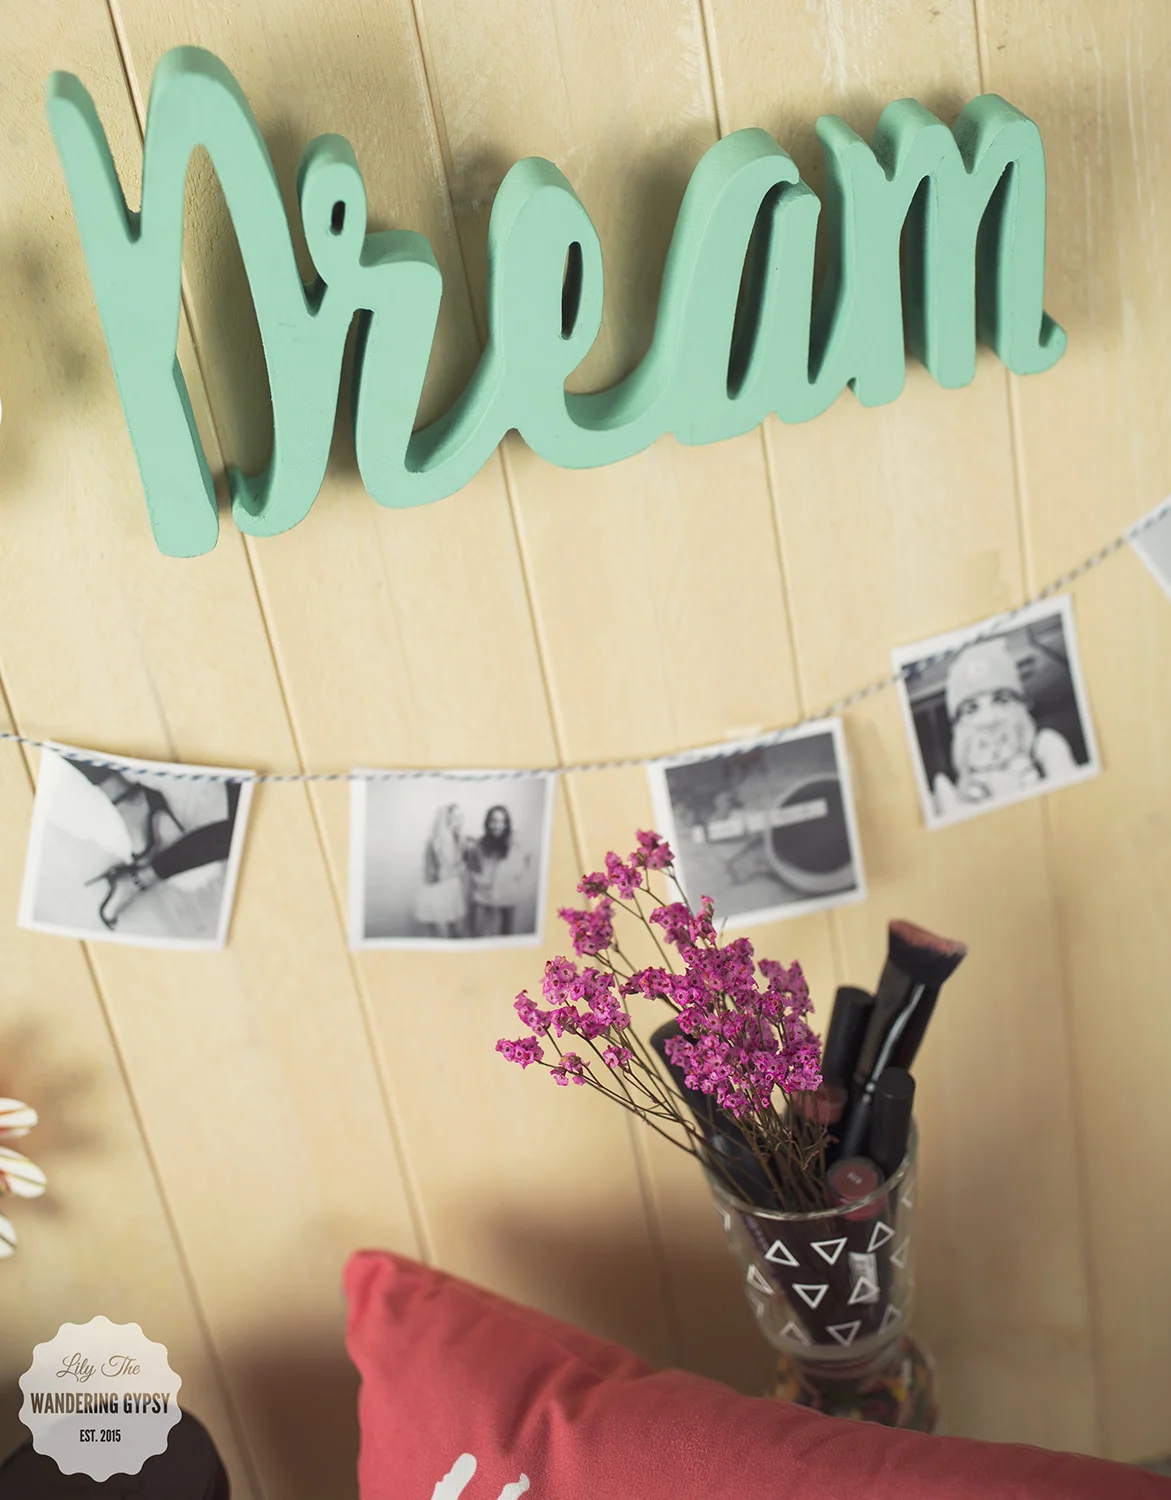
Rather than staring at a blank wall while you type away at your term papers, decorate the wall behind your computer with something cute and meaningful! All you need is some black and white photos. You can use your own photos and print them in black and white), or you can grab some from Tumblr, like I did! I used a bit of colorful twine and clear tape, to adhere the decor to the wall.

TO DIY YOUR SPACE:

1.) Cut a length of twine and drape it in a wide U-shape across the wall, behind your computer. 

2.) Tape up the twine on both ends. Now, tape each photo to your wall with clear tape, then tape the twine down onto it, making it appear as if the photos are strung from the twine. 

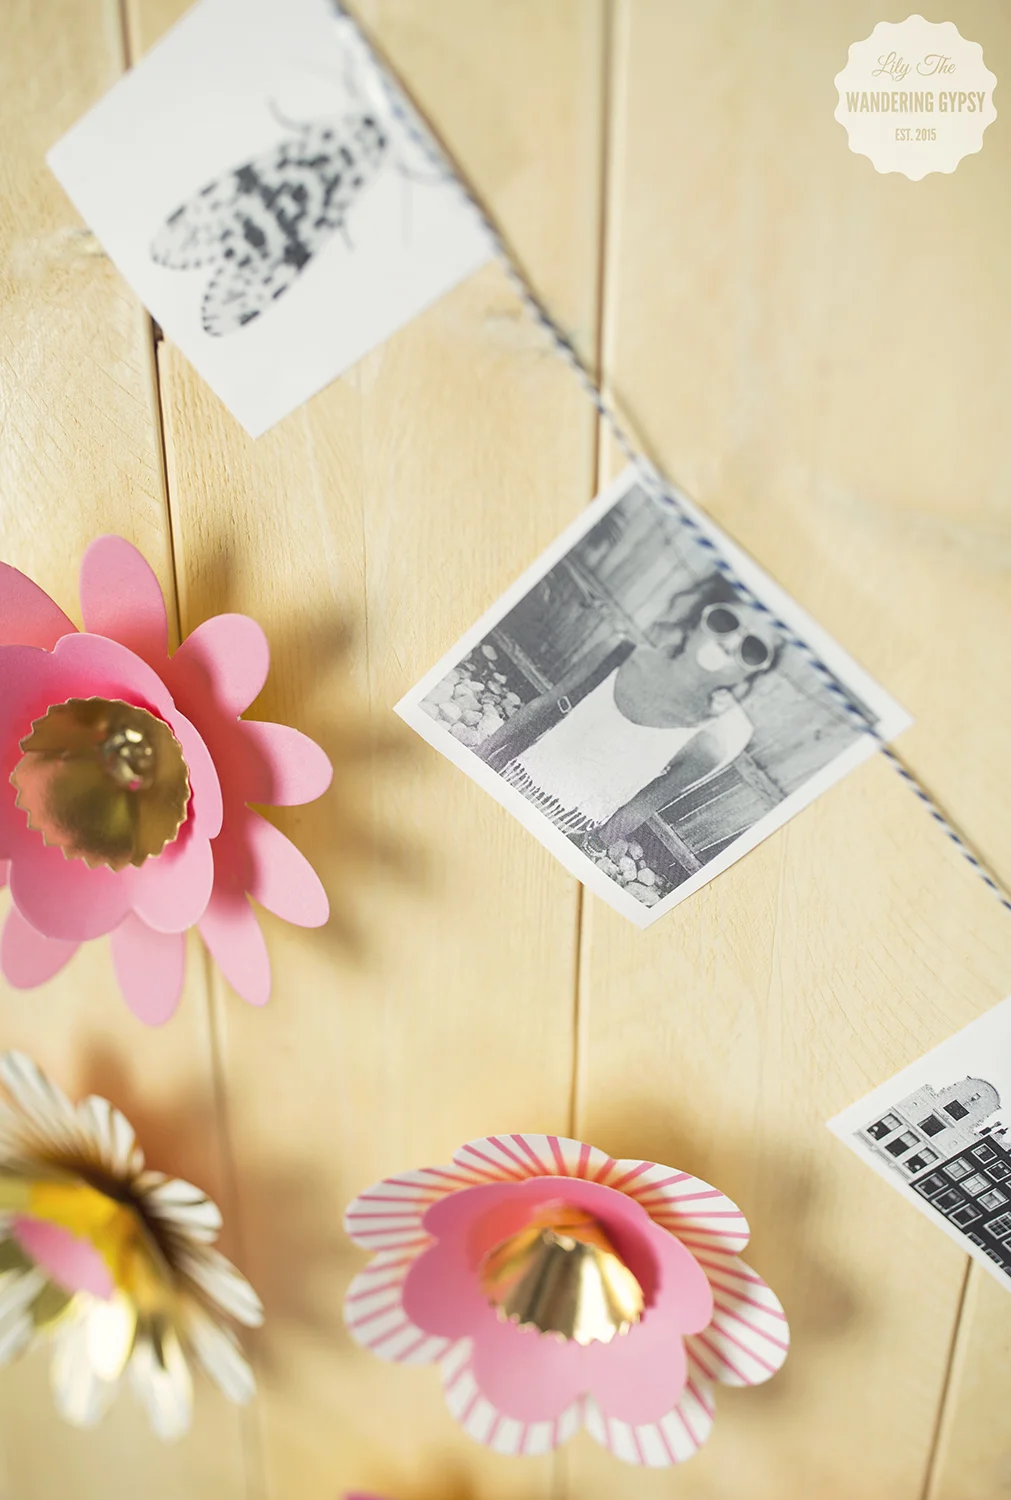
3.) Add 3-D paper flowers (which I found at a craft store) - you can also make these from scrapbooking supplies that you find at Big Lots! That's it! A super simple DIY decor idea for your work space. 

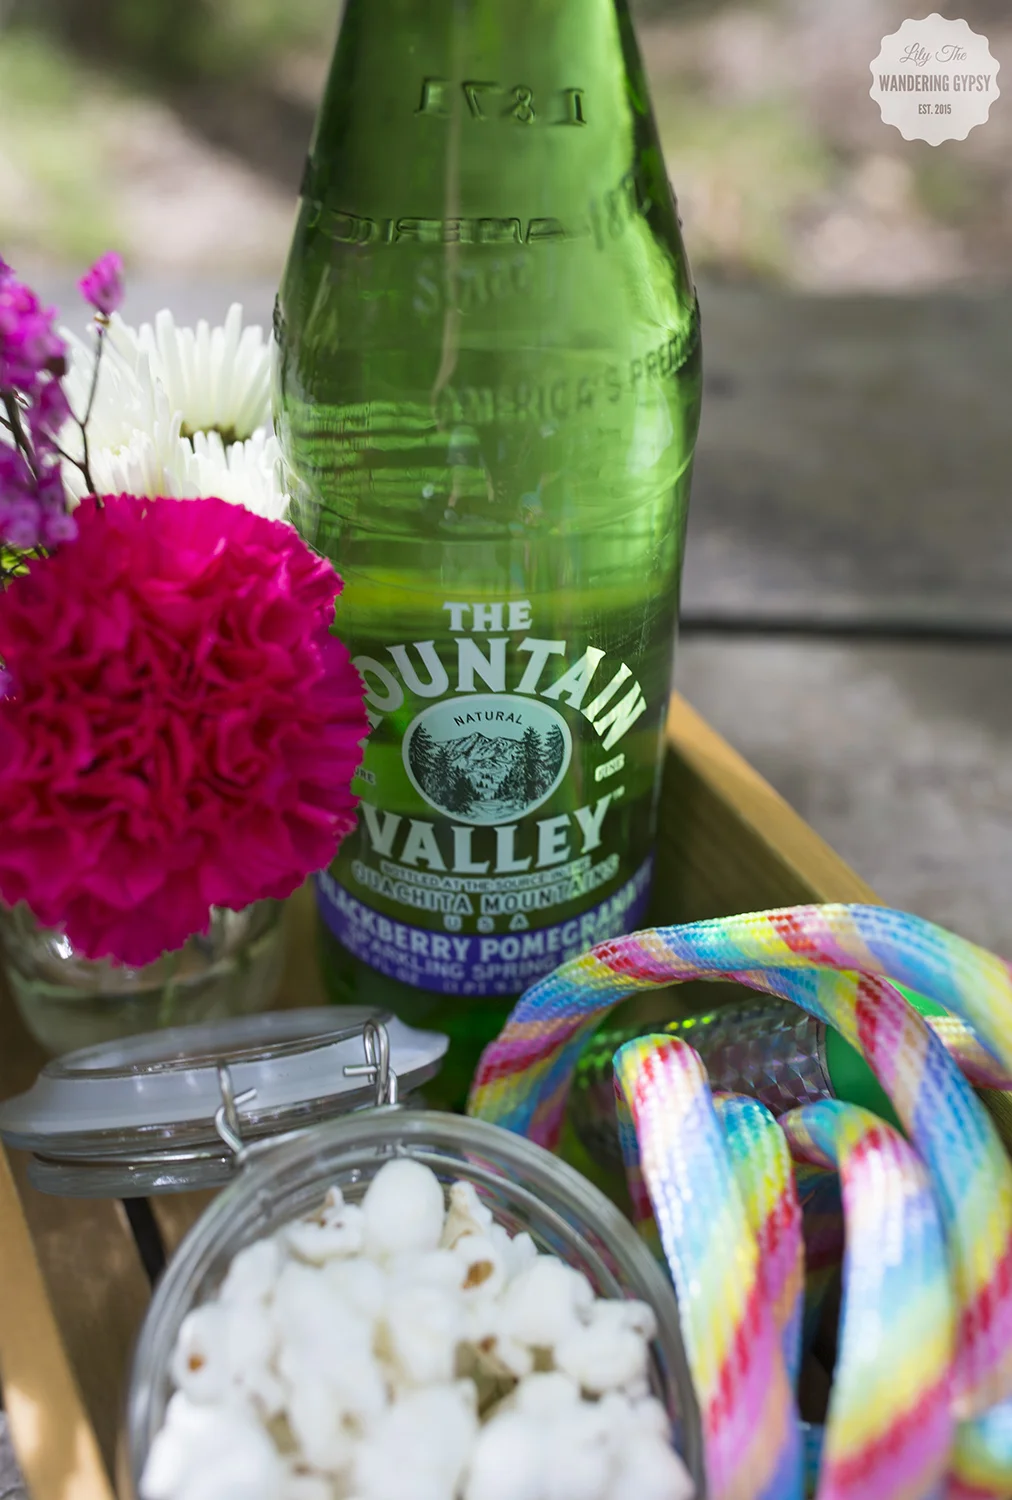
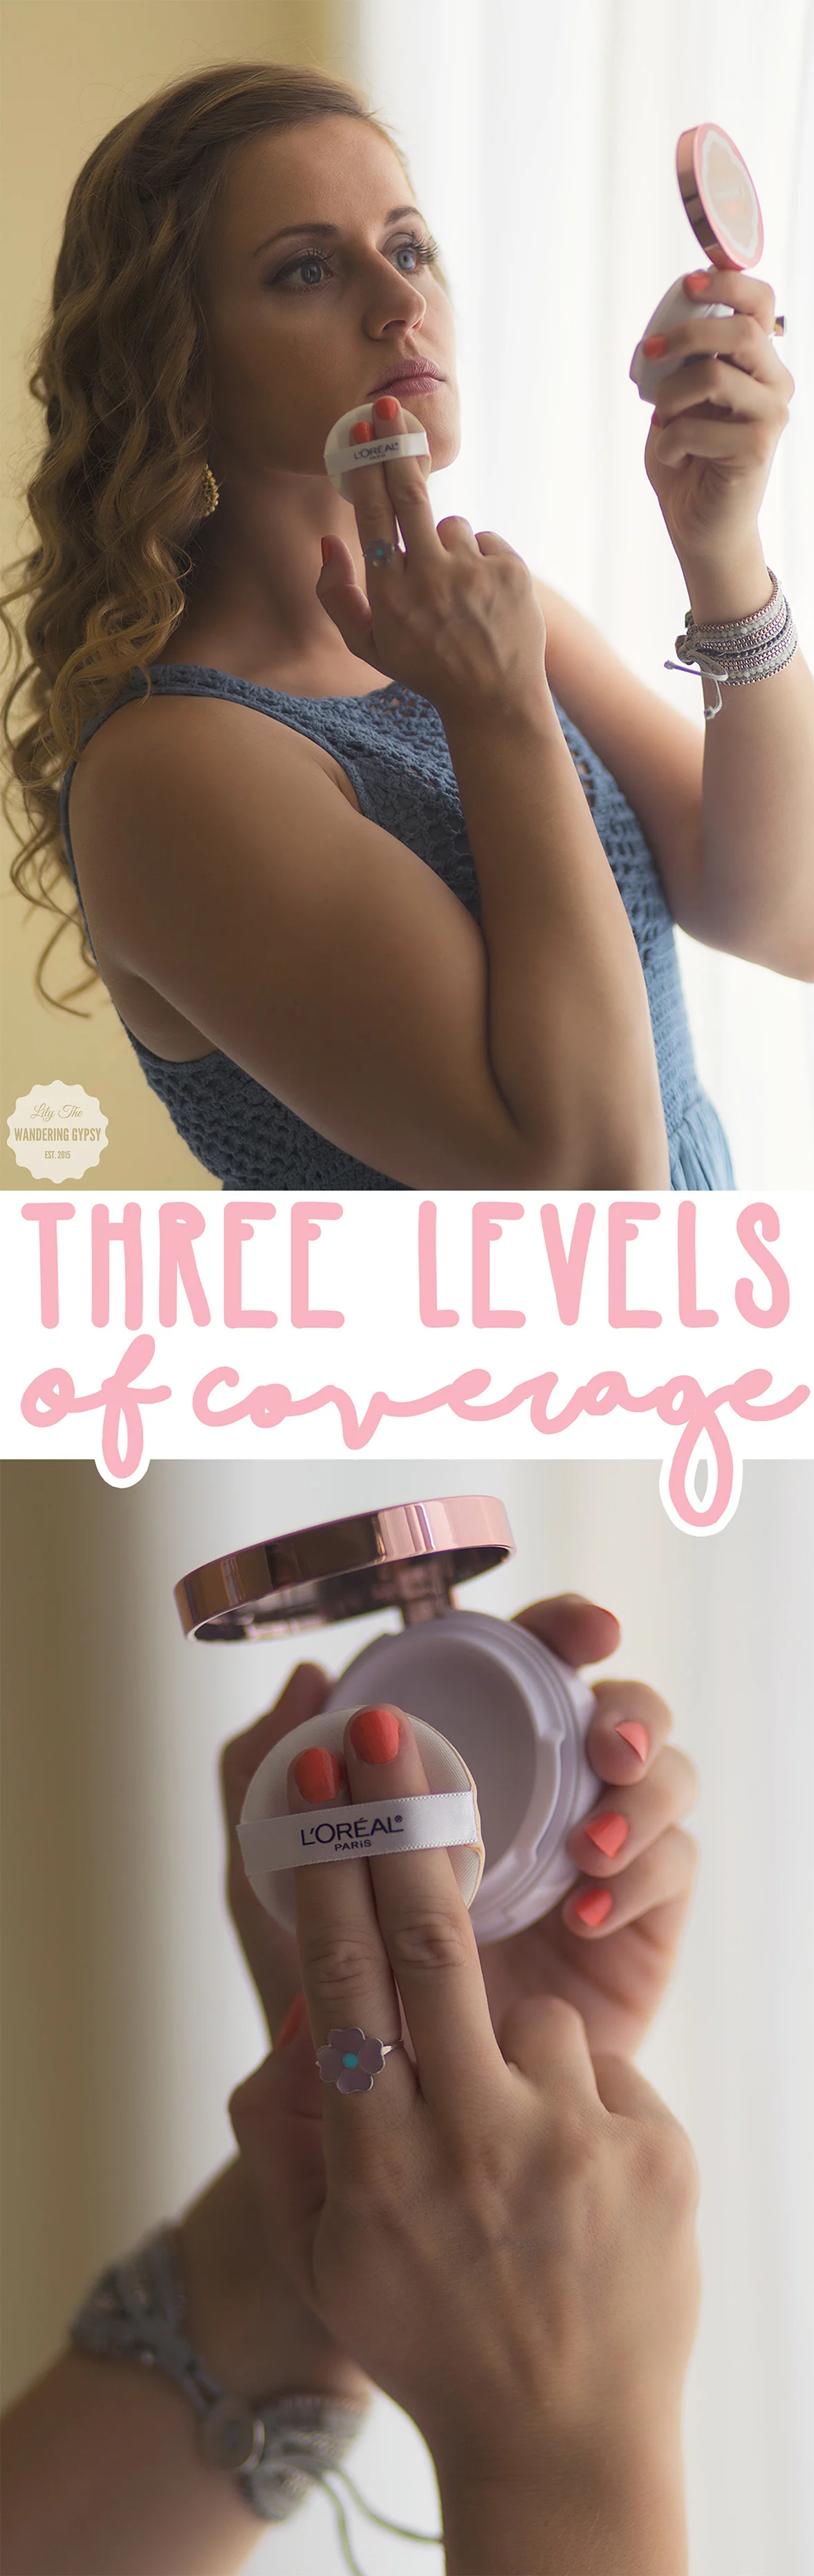
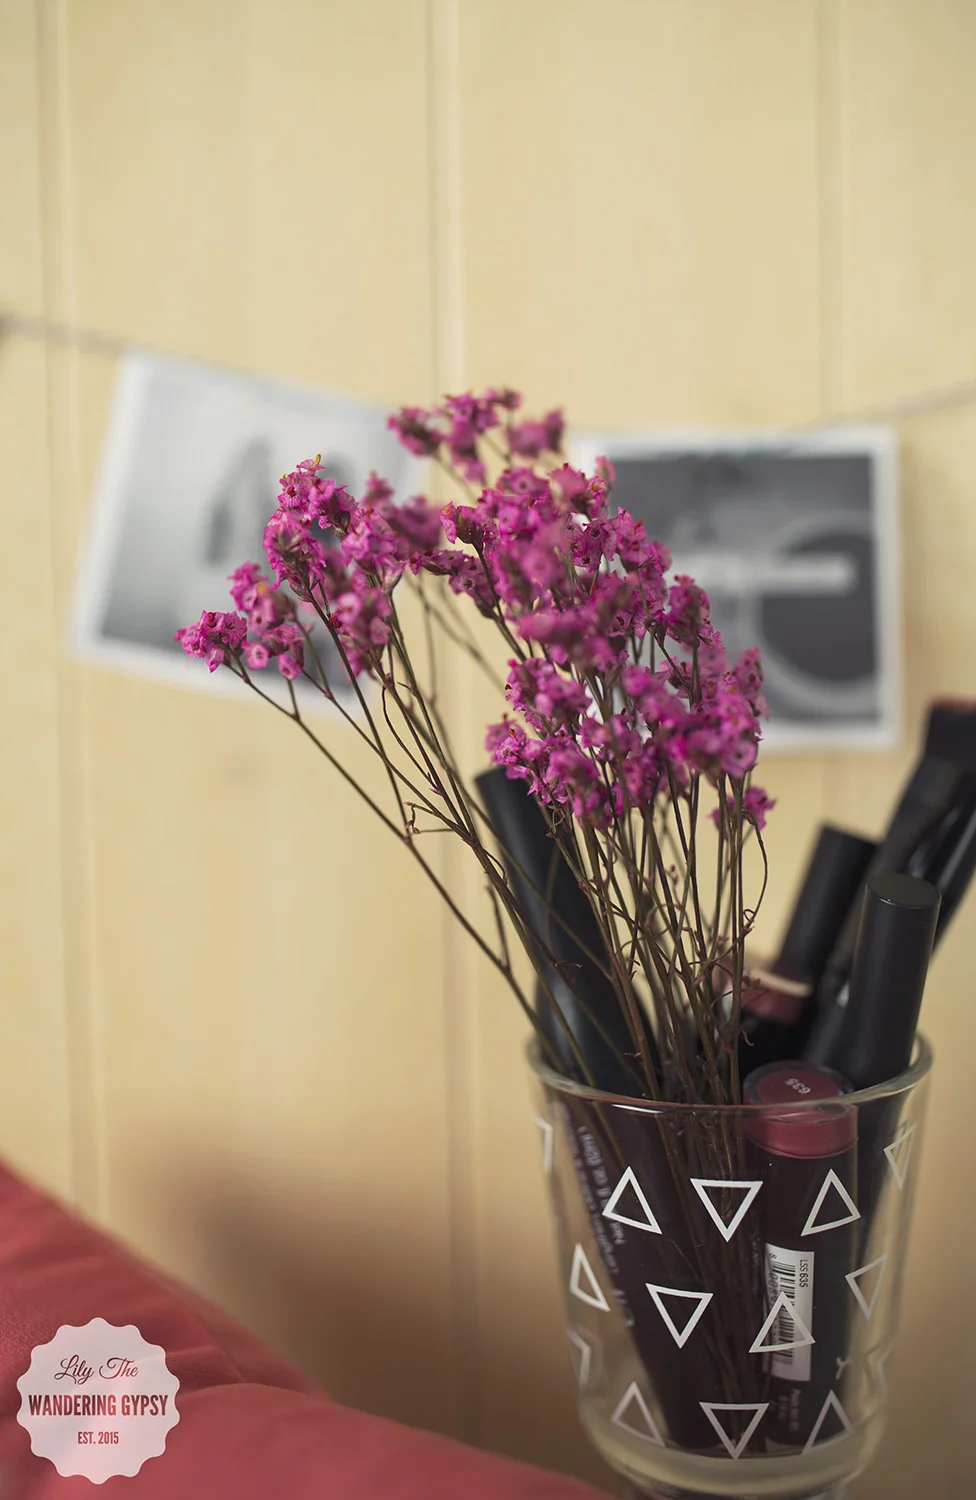
Also, creating varied heights on your work surface makes a more visually-pleasing look. You can use a candle holder, or a stack of books to create height, and then add a picture frame, vase full of flowers, or jars full of colorful candy to add inspiration. I also really love the idea of using a small candle holder or glass to hold makeup and makeup brushes. Keep the daily essentials at close reach! A mirror would also be a great addition to this design.

And, a scented candle will definitely help keep your space smelling fresh, and could even help you concentrate! Choose a more relaxing scent for studying at night, and a more lively, fresh scented one like this Orange Lemon one, below. 

How will you decorate your new space this Fall? Thanks so much for stopping by!!

Easy No-Sew Summer Wardrobe Solutions with Scotch™ Essentials At Target

Looking for a fun way to update your summer wardrobe? Here are a couple ideas to get you started! This shop has been compensated by Collective Bias, Inc. and its advertiser. All opinions are mine alone. #WardrobeSolutions #CollectiveBias

I just love altering and upcycling clothing items! Especially to update my summer wardrobe. We all may have that pair of pants that is way too long, or fits well in one place, but not another. I also know many people enjoy super quick and simple DIY projects that take less than ten minutes, too. If you are someone who doesn't want to be bothered by sewing in order to refashion your wardrobe, here is an amazing, new solution that I am so glad I found! Seriously, NO SEWING, it's great. And, I would definitely recommend packing these products for your next vacation or night out, just in case you have a wardrobe malfunction and need to fix something on the spot. 

Here are two Summer DIY wardrobe solutions, making updating your summer wardrobe so much easier!


Scotch™ Essentials Adjustable Hem Tape (Used on shirt)

I loved this hem tape. I have only used the iron-on kind in the past, and it is a pain to use. But, these adjustable hem tape strips are just perfect for a projects like adding fringe to a top, because you may want to remove the fringe once you wear the shirt, or even remove the fringe before washing. Who knows, you may love the fringe one day, and want to remove it the next. 

More traditionally, this adjustable hem tape can also be used to shorten a hem length on a pair of pants depending on your shoe height (heels vs. flats), or if you have a child that is growing an inch a day, well here is a way to really extend the life of those pants!

Scotch™ Essentials Permanent Hem Bonding Strips (used on shorts)

My overall impression of these permanent bonding strips is really great. I wish so badly that I had known about these, because they are SO incredibly strong and would bond just about any fabric to another fabric. Caution - they are insanely sticky, so be careful what is on your work space, so nothing sticks to it that shouldn't. I was extremely happy with how well this material bonded denim to itself, like in this rolled cuff shorts DIY. You could even create a little pocket, or applique fabric onto a shirt with these bonding strips. 

I really liked the ribbon detail on the back of the jean shorts, which allowed me to cover up the old label, and customize the shorts to have something much cuter.

More traditionally, this material would be used on shortening curtains, so you don;t have to pull the sewing machine out, or make sure that you have the correct needles and materials if you do want to sew. Seriously, these strips are SO sticky, I can see this bond lasting for a very long time. Also, it is recommended that you use these permanent bonding strips with fabrics like denim, canvas, cotton, etc - as long as the fabric is not extremely lightweight (just because you could possibly see where the bonding strips are hiding). I just love these strips! I am so impressed.

Scotch™ Essentials Wardrobe Tape Strips

Last but not least, these wardrobe tape strips are skin-safe, so if you have a dress or top that has a neckline that always shows a bit too much, you can simply adhere a bit of this tape to the inside of a neckline (or problem area), and your garments will stay exactly where they need to be! 


I headed to Target in order to find some of the items I needed for this project. I found all of the Scotch™ Essentials in the sewing section by the irons and hampers. I love that aisle :) 


You only need a few materials for this fun summer no-sew DIY! 

- Jeans to cut into shorts

- Sewing pins (or you can mark with a marker)

- Scissors that will cut through jeans

- Ruler

- Scotch™ Essentials Permanent Hem Bonding Strips (Used On Shorts)

- Scotch™ Essentials Adjustable Hem Tape (Used For Fringe On Shirt)

- Scotch™ Essentials Wardrobe Tape (Just In Case Of Wardrobe Malfunctions)

Get tons of inspirations, and shop all of the Back-To-College items here

LOOKING FOR MORE?

SAVE $1.00 on any Scotch™ Essentials product here (Expires 9/2/16)
Visit The Scotch™ Essentials Social Hub here

Scotch Wardrobe Tips Page here.

Find Scotch Essentials On Social:
Scotch Facebook
Scotch Twitter @ScotchProducts
Scotch Pinterest
Scotch Instagram

FOR THE SHORTS

1.) Lay jeans onto table, and measure 16-17" down from the waist. This will tell you where to mark the fabric to cut. I actually folded up the pant leg to get a straighter line to cut across.

Keep reading to learn how to upcycle some of your clothing and make sure you look super cute this summer! 

2.) Cut the first leg off where you marked your measurements, and then fold the jeans in half, and cut the other leg. I actually like how they look already! 

3.) Remove permanent bonding strips from package. and peel 1 paper sticker off of the backing. Careful - it's SUPER sticky! Press the sticky side onto the shorts (1 in front, and 1 in back), just near the hem line you cut. 

Remove the paper backing off of the front of the jeans, and leave the paper on the one in back.

4.)  Fold, or roll the hemline up about 2". Press to secure bonding strip. Now, remove the paper off the back of the jeans cuff, and again, press firmly to adhere. 

ANOTHER QUICK DIY PROJECT: ADD FRINGE TO ANY SHIRT

And, one more way you can customize your clothes for a no-sew DIY project is to use the - Scotch™ Essentials Adjustable Hem Tape to add a bit of flair to any top or garment!

1.) Cut Scotch™ Essentials Adjustable Hem Tape strips in half lengthwise. Peel the sticker strips off of the backing, and apply the bonding strips to the entire bottom hem of the INSIDE of the shirt. The image, below, shows the strips cut in half lengthwise. 

2.) Now, peel off the paper backing left on the strips, and begin to press the top of the fringe to the inside of the shirt. 

3.) Make sure everything is secured and dance the night away in your new fringe top!!!

Happy National Ice Cream Day! Recipe Roundup + Food Photography Inspirations

While I didn't get a chance to create any ice cream recipes for you, I wanted to share some of the most mouth-watering ice cream I have ever seen! I am so inspired by the food styling, backgrounds, lighting, and overall layout of these recipe hero images. Which one will you be trying to make today? Happy #NationalIceCreamDay!!!

Roasted Blueberry Balsamic Goats Cheese Ice Cream - via The Kitchen McCabe

Cereal Milk Soft Serve Ice Cream Recipe - via Erin Made This

Roasted Strawberry Ice Cream - Via The Novice Housewife 

Matcha Mint Chip Ice Cream - via Bojon Gourmet

No-Churn Ice Cream (5 Ways) - via Half Baked Harvest

Tahini Ice Cream With Caramel Sauce - via Butterlust

Backyard Mint Ice Cream - via For The Love Of The South

Bacon & Sweet Corn Ice Cream Sandwiches - via My Name Is Yeh

Blueberry Cheesecake Ice Cream - via Take A Megabyte

Peanut Butter Happy ~ Waffle "Cake" Recipe + A Quick and Easy Lunch Idea

I love peanut butter. I could eat it on a spoon straight out of the jar for a snack just about any time. When I had the opportunity to create a fun recipe inspired by Jif Spreads, I jumped on the opportunity! Our household definitely prefers Jif to any other Peanut Butter on the shelf! Also, I was recently introduced to Jif Bars, which are also some of the best granola style bars I've ever eaten. Really, though, add Peanut Butter to just about anything, and I'm a happy woman! Just the thought makes me peanut butter happy! #peanutbutterhappy

Since I wanted to showcase the Peanut Butter as a spread, rather than inside the recipe, I opted to layer up homemade chocolate waffles, Jif Spread, and also a bit of cool whip, and created the most amazing Waffle "Cake" to date. I also realized that this fun recipe was not complete without chocolate syrup drizzled over the whole creation.

- 1 box chocolate cake mix

- water

- vegetable oil

- 3 eggs

- Cool Whip (2 containers)

- Jif Creamy Peanut Butter

- Chocolate Sauce

- Waffle Iron

- Non Stick Spray

TO MAKE THE WAFFLES:

I used a super simple recipe to make the homemade chocolate waffles. Simply mix 1 box of cake mix, 1 C. water, 1/3 C. vegetable oil, and 3 large eggs. Alternately, you can substitute about 1/3 of the cake mix with other waffle batter so they are more fluffy, because the cake mix waffles can be a bit dense. Heat the waffles for about 3 minutes each, and set them aside on a cooling rack if you have one - this way, the waffles won't get soggy while you're working on them. I used 5 waffles here.

After making the waffles, it's time to create your waffle "cake"! Place one waffle on the plate, then add a layer of Cool Whip all across the first waffle, to create a thick layer. I like scooping the Cool Whip into a Ziploc bag, and then cutting off the tip to create a sort of pastry bag. Next, layer another waffle, Jif Creamy Peanut Butter, waffle, Cool Whip, waffle, more Peanut Butter, then your last waffle.

I topped the dish with a big dollop of Cool Whip, and then drenched it in chocolate syrup!

This would be such a fun way to surprise someone on their birthday, or even if they're just having a bad day. Really love how this divine creation turned out!

Here is an Iobatta link where you can find the products I am sharing in this post:

Jif Spread -https://ibotta.com/app/retailer/any/offer/51534

This is a sponsored conversation written by me on behalf of The J.M. Smucker Company. The opinions and text are mine alone. #peanutbutterhappy #ad

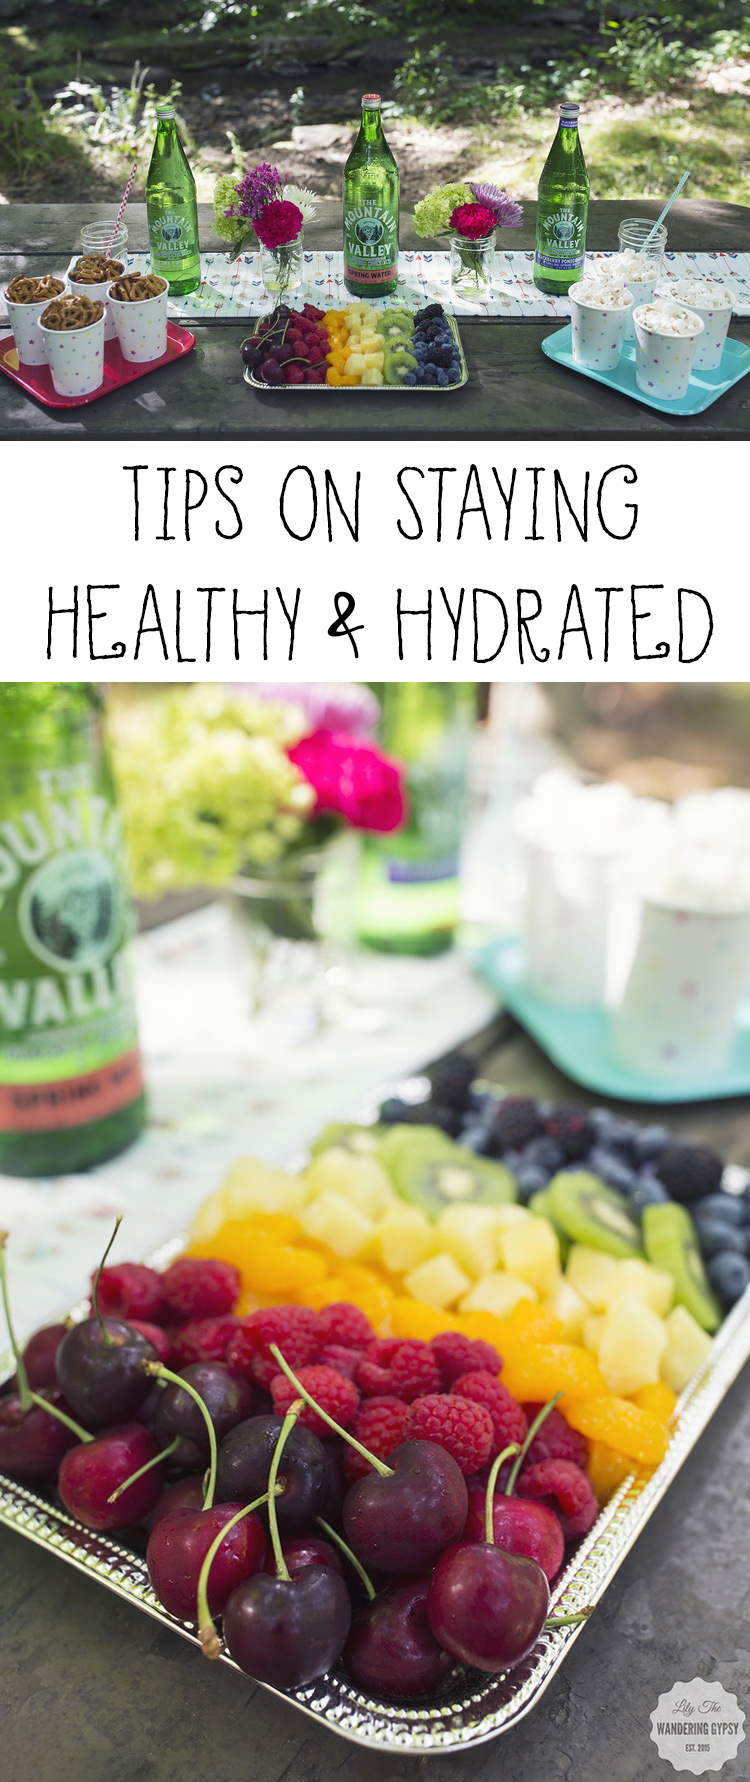
These Jif Bars inspired me to show you a quick and easy lunch idea, that you can prepare in just a few minutes. A jar salad is a great way to jump start your mid day hunger. I also love the idea of bringing a fruit like cherries or grapes in a jar, so they won't get squished or make a mess. And, a classic PBJ (featuring Jif PB of course), and my favorite raspberry jelly. And, I love packing the Jif Bars as my dessert, because they're portable and taste seriously SO good!

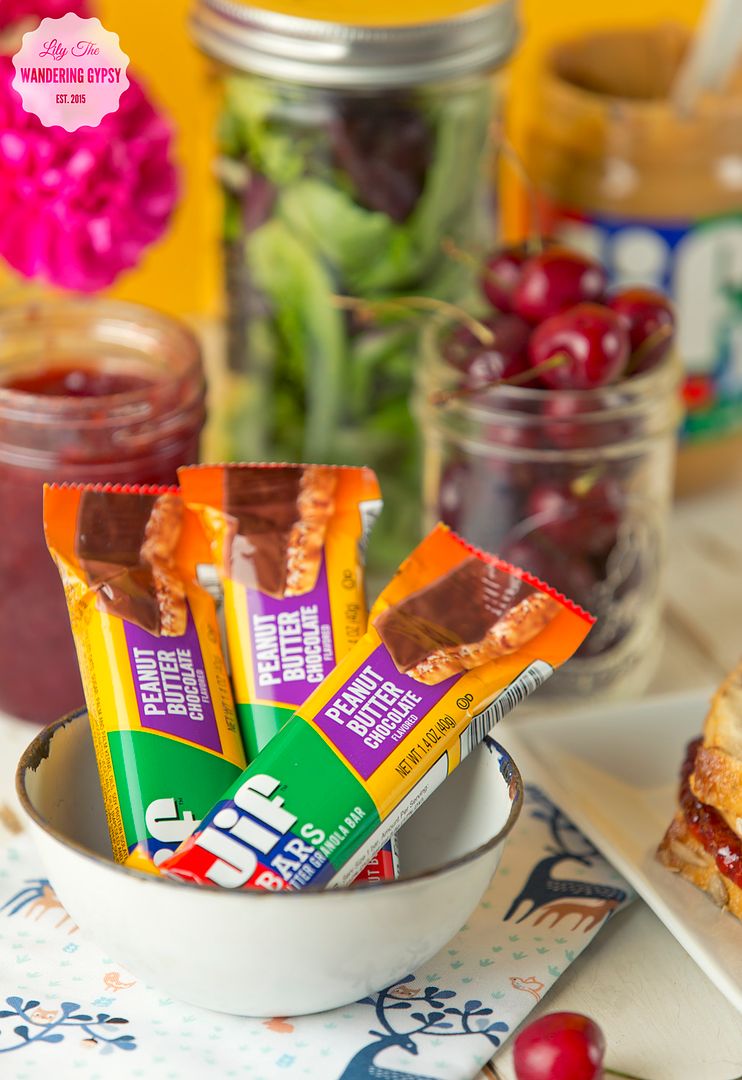
These Peanut Butter Chocolate Bars were the bomb! There are other flavors as well, like Crunchy Peanut Butter, and Creamy Peanut Butter.

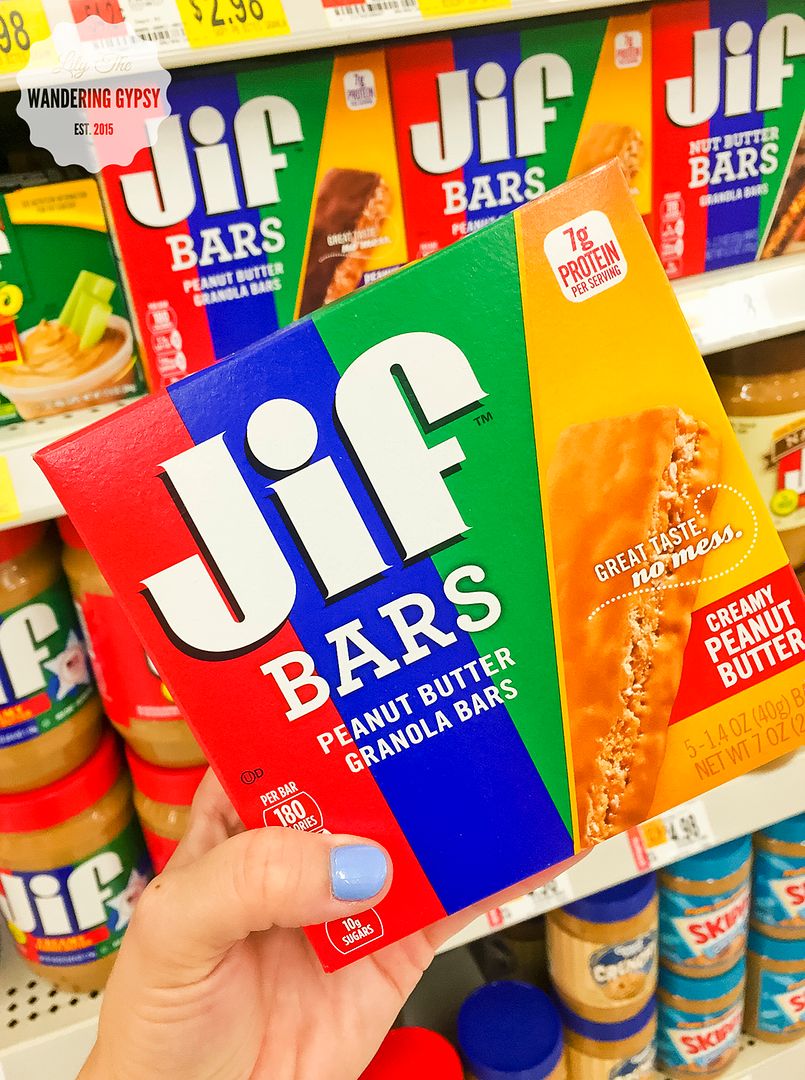
I found the Jif Bars right above the Peanut Butter at Walmart, and their prices are some of the best I've found for these items.

 photo bromello signature.png

This is a sponsored conversation written by me on behalf of The J.M. Smucker Company. The opinions and text are all mine.

Bluegrass + The Farmer's Market

I have written about the new Carbondale Community Farmer's Market before, but this week, I was so inspired by the live music that Hey Honey played! I created this fun video to showcase how vibrant this market is, so check it out here, or on my YouTube channel! 

Visit the Carbondale Community Farmer's Market every Wednesday from 3-6 pm, next to the Town Square Market, at the 200 block of Washington Street in Carbondale, IL. You will have access to seasonal produce, meat, eggs, bread, hand crafted sodas, sandwiches, baked goods, and more. You can even pick up some dinner at the market from Longbranch Cafe (I had the most amazing Sloppy Joes this week), and you can bring something home to snack on, or use for your meals throughout the rest of the week. I always like visiting each and every booth to see what's in season! 

Hope you can stop by the market soon! 

Cactus Pillow DIY

This is an amazingly awesome DIY project! Perfect to make for yourself, or to give to someone else. In this tutorial, I used a pillow form from an existing pillow (which was cheaper than buying a pillow insert by itself! I got a pillow that was on super sale at Hobby Lobby - I thought that was pretty great! 

My Step Mom was kind enough to take photos of a similar pillow, that I sent to my dad for Father's Day

MATERIALS NEEDED:

Right click this image to save it, then print at 100%.

- Pillow Form

- Solid Tan Canvas (or similar) material That will cover your pillow 1.5 times (I will explain below)

- Green Cotton Fabric (for cactus) - Note - Only 100% Cotton Material works, because you will be ironing it. 

- Fusible Webbing (the only kind I would EVER suggest would be Heat N Bond Lite Iron-On Adhesive. It's hard to see, but it's the paper-like material in the top right of the image, right. 

- Iron + Ironong Board

- Sewing Machine, Thread, Scissors

- Printed out image of cactus, right. 


INSTRUCTIONS:

1.) Iron canvas material if needed. Remove pillow case from pillow form, and lay it down onto the canvas fabric. Cut one piece the exact same shape as the pillow case - this will be the front of your pillow. Alternately, measure your pillow form, and use those measurements instead. 

- Next, to cut the back part of the pillow, you need two pieces to create the envelope flaps. 

- Using the same width as the front piece, cut a second piece of fabric about 1.5 times the length of the front piece. For instance - if my front piece measured 10" x 10", my second fabric piece would measure 10" x 15".

- Cut the long piece into two pieces, a bit off center, so one piece is longer then the other by a few inches. 

2.) Next, you will create a nice hem line for the two back pieces. With an iron, fold down one edge of each piece (going horizontally), over twice. This will create a nice finished edge. Sew the hem line down a couple of times to secure it. Iron again, if you want. 

3.) Now, let's make an applique!! 

- Trace the cactus shape onto the paper/smooth side of the fusible webbing material with a permanent marker.

- Cut out the cactus shape you drew, and iron it onto the green fabric. Like I mentioned before, only 100% cotton can be used for this! The green material I chose wound up being 10% polyester and got stuck to my iron, and melted! No fun!

- Cut out the cactus shape you ironed onto the green fabric, and peel the paper backing off of the shape. One trick I use, is to slightly score the paper backing, to start the "peeling" process :) 


4.) Time to iron on the cactus. Fold the front piece of tan material in half and then half again, to find the center. Use this to line up your cactus shape. Then, iron the shape onto the front of the fabric. Iron the whole piece of fabric, and get ready to sew on the applique!

5.) Using a zig zag stitch or a straight stitch, sew all around the cactus shape. Tie any loose thread ends on the back side of the fabric. 

6.) Time to sew and construct the pillow case! This is such a great way to make a pillow case - it's removable and washable, too! 

- Pin the shorter back piece with the hem line going horizontally in the middle. Pin the front panel and the first back section together - right sides together. Pin, and sew around the edges. Clip loose threads.

7.) Now, pin the longer back piece up to the ones you just sewed. Line raw edges up, and again, pin and sew around the edges

8.) Trim any excess fabric around the edges, and turn your pillow right side out. Iron, if you want, and you're DONE!!!

I hope you enjoyed this tutorial! If you wind up making one of your own, please link to it in the comments below! Happy Sewing, friends!!

Mayil Scarves & Which Queen Are You?

Mayil reached out to me and asked for a bit of help photographing her products. The products she offers are stunning, and I had a great time capturing the beauty of these scarves, bracelets, and pendant necklaces she sent me. 

Mayil Scarves are absolutely gorgeous, and you must check them out!!! Check her out on Facebook, Instagram, Pinterest, and her website

Trail To Tavern - San Diego & Escondido // Breweries & Bottleshops (And What To Wear To A Brewery)

I know I am only scratching the surface of where to drink in and around the San Diego area, but we found some pretty incredible breweries, bottle shops, and other places that I am so excited to share with you! And, since Toad&Co. was kind enough to inspire me to write this post, I wanted to do a brewery + outfit pairing! Check out my absolute favorite Toad&Co. suggestions, below. 

We drove to California this past March, during our month in Arizona. We decided to visit my friends at HelloSociety Santa Monica, and then head to the San Diego/Escondido area. We only had about 5-6 days in California, but definitely made the most of it! 

We knew there was a plethora of good beer in the San Diego area, so we decided to stay as close  as we could, which would up being the Best Western in Escondido, CA. March Madness completely filled all of the hotels in the San Diego area, so Escondido was the closest and coolest place we could find at short notice. Funny enough, any time you mention "Escondido" to anyone in the area, they say, "You're going to visit Stone Brewing, right?". 

Below, you will learn about the 4 breweries we visited, Stone Brewing, Toolbox Brewing, Modern Times, and Council Brewing.

At Stone Brewing, we were astounded by the immense scale of the tap room. The ceiling must go 2-3 stories up, and there are live  plants and water features throughout the building. There is also a lovely outdoor area, where you can grab a drink and food with friends, or even let your kids run around in the gardens. 

This pace was almost hard to find, because it's in a business park area, around nothing but office buildings. Also, the sign is rather small, so park near the hiking trail, and follow the intoxicating scent of hops through the bamboo garden walkway into either the store, brewery, or tap room(s). 


And, if you don't wind up eating at Stone Brewing, we also ate at this incredibly wonderful restaurant called Spices Thai Cafe! 

Since I promised you a list of Bottle Shops to visit (a.k.a. places to get insanely good, rare, and unique beer), here they are!

- Bottlecraft, Servall Liquors, Best Damn Beer Shop, Bine & Vine, Chip's Liquor, Holiday Wine & Spirits, Clemm's Bottle Shop, Fletcher Bottle Shop, Oak & Craft, and SO MANY MORE!!!


Toolbox Brewing Company is one of the most unique and special breweries we have ever visited. Their tap handles were made of tools (reminiscent of the San Diego Skyline), and the overall design of the place reminded me of an extremely clean mechanic's shop with lots of great merchandise to bring home with you. We had such a nice conversation with the brewery owner/founder, and learned so much about the local beer scene. They are making an effort to use their own experimental recipes, and I loved the Bog Sauce! Definitely stop by and take a look at all of those beautiful barrels!


At Modern Times Flavordome, located at  3000 Upas St. in San Diego, you will find some absolutely incredible beer and coffee! There is a second location as well. Their beer is superior to so many others, so if you are anywhere near this bar, please, please visit! If beer isn't your thing, you can always order a cold brew coffee, in a stemmed glass, like the one above, poured over ice.  

Lamp shades hang from the ceiling of the tap room. 

If you order a flight here, they serve it to you in the top of a wooden cigar box. 

The best thing about Toad&Co clothing, is that it all looks incredibly polished, but is very, very comfortable! That is the exact sort of outfit I would recommend wearing to a brewery when it's nice and warm outside. Dresses are so versatile, and make sure you wear semi comfy shoes, because you never know where the day may take you when you're hunting for breweries to visit in the San Diego area! 

Palmira Dress

Rosemarie Dress

Cold Brew Coffee, below, available if you don't want to get a beer - so smart! 

Their tap list - I'm sure they've switched a few things up by this point :)

Mouth Watering Taps!

Several of the walls were completely covered in floppy discs! I guess their other location has a giant sticky note mural that features Michael Jackson + Bubbles. 

Their bar was made of stacks and stacks of VHS tapes! So freaking cool! Definitely check out Modern Times if you get a chance, it's such a fun place.


Council Brewing greeted us with a gigantic wall of barrels - a very good sign, meaning they take lots of time to age their beers, as well as make lots of sour beers (yum)!!

The bartender was super nice and helpful, and did a great job managing the requests of everyone in the space. This brewery provides wide open space, ample seating, and a very relaxed environment. We tried several sour fruit beers, under their Beatitude line, and loved absolutely everything we had. I wish we could find their beer in Illinois. 

A brighter dress is also a great option for a brewery visit in California! I would also recommend bringing a sweater or denim jacket as well, because so many of these breweries had their doors open at night, letting fresh air into the space - such a wonderful thing!

Sama Sama Dress

Palmira Dress

Such good beer! I love their fruit-based beers best. 

Two of their special edition beers. 

A flight of as many beers as you want! I think their glasses are adorable. 

Where the magic happens...

Note** More photos will be added very soon! Stay Tuned :) 

A Healthy Day At Giant City State Park - Tips On Staying Healthy & Hydrated This Summer!

I'm here today, with some tips about staying healthy and hydrated this summer! This shop has been compensated by Collective Bias, Inc. and its advertiser. All opinions are mine alone. #NaturalAmericanGoodness #CollectiveBias

This summer seems to be hotter than any other one I can remember in a long time! It is so incredibly important to stay hydrated when the temps rise, especially if you are going to be doing anything outside. Here are a few tips on staying hydrated while having fun outside this summer!

HOST AN IMPROMPTU FUN DAY AT A STATE PARK

I am lucky to live near Giant City State Park here in southern Illinois. I chose this as the perfect setting for my hydration station, which I think turned out so well! I had pretty much every picnic spot to choose from, so I went with a shaded spot near a pretty stream. This would be an amazing backdrop for a healthy-inspired gathering, when you are just wanting to enjoy the outdoors! 

I always try to shop for fruits and other fresh ingredients at a health food-oriented store like Whole Foods whenever possible! They have the absolute freshest selection! I just love it all :)

TIPS FOR STAYING HEALTHY AND HYDRATED

- Provide guests with lots of water! Mountain Valley Spring Water comes in these awesome bottles, and lots of new flavors, so be sure to check them out! It's natural, American spring water. I also love being able to use small jars and adorable paper straws adds a whimsical touch. 

- Offer lots of fruits (and veggies if you like). Arrange cherries, raspberries, strawberries, canned Mandarin oranges, chopped pineapple, kiwi, blueberries, and blackberries in a rainbow, and look at people flock to that fruit!

- Offer healthy and low-fat snacks like pretzels and low salt popcorn. I thought these cute cups would be perfect for hand held snacks (see above)! 

- Get active! If you live somewhere it's not blazing hot, or if you can handle the heat, provide friends with activities to play like a soccer ball, volley ball, hula hoops, and jump ropes - games that will help them rekindle their inner child. 

- Don't forget a few extra items like: bug spray, sunscreen, paper towels, utensils, fresh flowers, music of some sort, and lots of water!  

 photo MountainValleyLink.jpg
Visit the Mountain Valley website to see the history of their beautiful bottles, here

Giant City State Park was the perfect setting for these photos! Now, let me tell you a bit more about Mountain Valley Water. 

  • Mountain Valley Spring Water rises naturally to the surface of the earth where it is bottled – untouched – since established in 1871
  • Unique blend of minerals, providing a clean, crisp, refreshing taste revered by foodies and chefs alike.
  • Mountain Valley Spring Water is also highly regarded for its ease on digestion. With a 7.8 ph, the naturally high alkalinity of Mountain Valley Spring Water helps offset the stress of modern acidic diets.
  • Mountain Valley Water is sodium free, naturally ionized and rich in minerals.
  • Mountain Valley's spring is an invaluable natural resource and is an ancient part of the Ouachita Mountains in Arkansas.

The water made for a perfect companion for just about any adventure around the park! Hiking, Horse Back Riding, and Scenic Drives are the best activities to do in Giant City. 

Yandy Summer Arrivals

I had such a great time photographing these summer bras, underwear, and swimsuits for Yandy.com. This time, I wanted to elevate the products even more, so I used fresh flowers, brighter backgrounds, and soft lighting.

Each time I receive anything from Yandy, I am thrilled to see how beautiful their items are. Everything I have in this blog post is generally under $15-20! I added a link and item name below each image, so you can shop for these featured items! Hope you enjoy your summer!

The Fabulace Floral Bra & Bikini Panty.

The Fabulace Floral Bra & Bikini Panty.

Market Fresh Ratatouille Recipe

Are you looking for a fresh, tasty recipe that you can make with items you find at the Farmer's Market? Here's a recipe you will love! This shop has been compensated by CollectiveBias, Inc. on behalf of its advertiser. All opinions and ideas are my own. #PickedAtPeak  #CollectiveBias

By incorporating fresh vegetables, and Prego® Farmers' Market sauces, your family will be eating more vegetables, and asking for seconds! This dish smells absolutely delicious while it is baking, and you can also make this dish ahead of time, and even freeze it to bake at a later date. Win-Win in my mind! 

I love the fact that we have two farmer's markets here in Carbondale, IL, and since the soil in Illinois is SO fertile, we are lucky enough to have lots of options as to what local foods we want to use. 

LET'S TALK SAUCE:

- New Prego® Farmers' Market Sauces have market-fresh ingredients, like vine-ripened tomatoes, garlic, and basil, that are picked at the peak of freshness. These new sauces are available at Walmart in the pasta aisle, my favorite aisle of all...

When I first began researching this ratatouille recipe, I found that every recipe traditionally called for a lengthy process of creating a sauce of your own. This recipe will save you so much time, by simply incorporating a jar of Prego® sauce, which makes this dish taste amazing. 

This Cotton Market Bag, above, was printed and designed by my friend at Bodega Press. It's one of my favorites! 

INGREDIENTS FOR 2-3 SERVINGS:

Squash At The Carbondale Market

- 1 Jar of new Prego® Farmers' Market sauce. I loved the Classic Marinara and the Tomato & Basil.

- 1 Zucchini, sliced very thin

- 1 Yellow Squash

- 1 Chinese Eggplant (the skinny kind)

- Olive Oil & Brush to apply oil

- Fresh Parsley, chopped finely

- Salt and other seasonings as desired

- Circular Baking Dish & Non Stick Cooking Spray

- Foil

Note: The above image shows more vegetables you can add to this recipe, but you can definitely make this with just the few ingredients I have listed. 

- Also, you can slice up onions and tomatoes, and layer them in between the other slices. 

To purchase these sauces, visit your local Walmart store, or shop online, here.

INSTRUCTIONS:

1.) Slice all 3 vegetables (zucchini, squash, and eggplant) very thinly (You can also include slices of onion and tomato here ). I used a Mandolin Slicer, which worked incredibly well for this recipe. CAUTION - Please, please use the guard piece that comes with the machine, because this took a small part of my boyfriend's pinky off and caused a big mess! Poor Bobby...Anyway! He's doing fine now :)

Set veggie slices aside and grab your sauce! It's already time to prepare your dish. 

2.) Spray your baking dish with non-stick cooking spray. Spread a thin layer of sauce, roughly 1/4" - 1/2" around the bottom of the dish. I used about 2/3 of the jar of sauce, but ideally 1/2 of a jar would be perfect!

3.) "Shingle" your vegetables, see below. I loved this part! Get about 4-6 veggie rounds in your hand, and alternate colors. 

4.) Put the shingled veggies into the baking dish, over the sauce, making sure not to press too hard, because you don't want the sauce on top of the veggies while baking.

5.) Continue the veggie spiral all the way to the center of the dish.

6.) Chop the parsley to sprinkle on top of the dish.

7.) Brush olive oil onto the veggies, carefully as to not get sauce on top of the veggie slices. Add salt and any other seasonings you want to the top of the dish. Garnish with chopped, fresh parsley - this adds so much to the look of your dish! 

8.) Lastly, bake the dish at 375 degrees, for roughly 30 minutes covered in foil, then for another 10-20 minutes with the foil off. Once the vegetables have browned, and the sauce has cooked down to a desirable amount, you're done! 

Enjoy!

The Beauty Of A New Adventure With The L'Oreal LUMI Compact

I was absolutely thrilled when I was asked if I wanted to collaborate with L'Oreal again! This time, the theme was Summer Travel + Travel Makeup Tips, to help promote their new LUMI Compact! Of course, that was also really exciting for me, because we travel so much, so I have packed for lots of road trips, and have actually experienced how hard it is to stay looking cute while traveling! It's sometimes more work than at home, because you don't have your regular setup. 

Another fun fact about these photos, is that we would up shooting them while we were in the Port St. Joe and Cape San Blas area! It was absolutely gorgeous, and the place we stayed was the perfect setting for the shoot. If course, we probably had onlookers, but whatever! 

I got my hair and makeup done professionally at a cute salon in Port St. Joe, called Salt Air Beauty and Hair Salon. I met one of the two owners that day, Angela, who did such incredible work! She is so inspiring and talented, and I definitely recommend her if you are ever in the area and need literally anything done! I even got eyelash extensions (for the first time, ever), which I think added a lot to the photos. Check out our images below, and visit the Dedicated Pinterest Board, here


DIY Summer Clutch Purse - 20 Minutes Or Less "Give Extra, Get Extra"

I have an absolutely incredible DIY project for you today! Here is a fun way to spruce up your summer wardrobe. This shop has been compensated by CollectiveBias, Inc. on behalf of its advertiser. All opinions and ideas are my own. #GIVEEXTRAGETEXTRA #Walgreens #CollectiveBias

I always have this problem - I have a great outfit picked out to wear to visit friends or family, and am happy with my jewelry, then I have NO purse to match my outfit! Sure, I have my every day purse, that would work, but I always want something a bit more suited for the occasion. 

It's always a good idea to bring along a pack of gum with you for a night out, so your breath is fresh! Fun Fact - these new Extra® 35-stick packs have lots of gum to supply your friends as well. You never know what conversation or new friend you could make by sharing a stick of gum with someone!! By simply giving Extra, you may get Extra! 

So, here is one way to solve the problem. Sew yourself a quick and easy clutch purse, that takes less than 20 minutes! If you have never, ever sewn before, it could of course take you a tiny bit longer. But, I am very happy with how quickly this project came together!


The Flavors Featured In This Post Include:

Extra® Gum Spearmint

Extra® Gum Polar Ice®


MATERIALS:

- 1/3 yard of vinyl (found in the home decor area of the JoAnn's)

- 1/3 yard of flannel or felt

- Scissors

- 2 small binder clips

- Sewing Machine with Needle and Thread

- Glue Stick

- Hand Sewing Needle and Thread

- Button For Closure


INSTRUCTIONS:

1.) Cut 1 piece of vinyl and 1 piece of flannel. 

* Each piece should be roughly 12" across, and 30" tall.

* To round the top pieces, I folded them each in half lengthwise, and created a rounded edge. 


2.) Using a glue stick, carefully glue both pieces together so they line up as well as possible. 


3.) Measure roughly 10" from the straight edge of the pieces, and sew a straight line across, to create a crease, where the bottom of the clutch will fold up. 


4.) Fold up the flat edge to create an envelope shape, and sew all the way around the outside edges of the materials. I keep the edge of the presser foot right against the right edge of the fabrics. Double stitch where the pieces meet, see below. 


5.) Sew along the open edge of the clutch to add yet another crease, on the flap part of the material. 


6.) To mark where your button should go, place it onto the flap, and push sewing pins through the layers. This will transfer 4 dots to the layer beneath, which will tell you where to sew your button. Mark the 4 holes with a permanent marker, and sew the button onto the purse. 


7.) Sew on your button very securely!


8.) Make your button hole. Here's a tip - fold the flap over the button you just sewed on. Mark how long the button is, and then clip a hole the proper length. Test this out, to make sure the button fits through the button hole without any resistance, but is not too large where it won't hold.

* Sew around the button hole a couple of times, and snip any loose threads. 


9.) That's it! Get ready to fill your new clutch purse with some essentials like gum, lipstick, lotion, and other goodies, and you're ready to go! 


To learn more, and to see what other people created, check out the Social Hub Here. Visit the Wrigley Extra® Gum Page, Here.
 photo moments grn.png

Extra® Gum 35-stick packages at Walgreens have more gum than you may be used to seeing! The case is super durable, and can actually be reused or recycled after you are done with the gum (see the image below). These larger stick packages ensure that you will run out of gum less often, and there is more gum to go around! 

DIY Summer Fun - Cookie Cutter Jewelry & Trinket Trays

I recently collaborated with Wendy's to create several Summer Inspired DIY Projects! Throughout the next week or so, I will be sharing instructions to all 5 projects! This project in particular, was inspired by a blog post I found on the Aww, Sam Blog. * Note - this project is kind of messy, so lots of paper towels were needed!!!! So excited to present you with these Cookie Cutter Trinket Trays! Enjoy :)

MATERIALS:

- Air Dry Clay (2 smaller packages will do)

- Cookie Cutters - I got mine here (for 99 cents each!). I got a cactus, hand, lips, pineapple, and teepee.

- CeramCoat Paint in green, white, red, tan, black, and yellow

- Clear Poly waterproof paint-on coating, optional.

- Clay sculpting tools (I found these ones for $2.47 near the clay supplies at Hobby Lobby)

- Water in a small dish to use for smoothing clay with your fingers

- Waxed Paper and Tape to keep surface clean

- 2 Paint Brushes for larger areas, and then one for finer detailed lines

- Paint clean up supplies like water and paper towels

INSTRUCTIONS:

- Prep your work surface. On a smooth, dry table, tape down a piece of parchment paper that will cover the surface well.

- Open your clay, and grab a hand full of clay.

- Roll clay into a smooth ball, and then place it onto the waxed paper. press the clay down with the lid of the clay container, until it is less than 1/2 thick. Alternatively, you can place a second piece of waxed paper on top of the clay, and use your hand and/or a rolling pin to flatten the clay. 

- Once flattened, press one shape at a time out of the clay, and carefully remove the clay from the cutter. I wound up using a clay tool to help with the hand space and the top of the pineapple shape.

- Next, you need to flatten and smooth out the clay shape. I did this by setting the clay shape onto the waxed paper, and then using water on my finger tips to smooth the edges. If you wanted raised edges, apply more pressure to the center, and less around the edges. I used a clay tool to kind of give the teepee dish a ridge around the sides. 

- Also, you can use a plate and paper straws to shape the sides of the clay while it dries. 

- Let dry for at least 3-5 hours, or ideally overnight. I didn't have that much time, so I painted them after about 5 hours and the paint seems to have stuck very well! 

- I just LOVE how these turned out! Remember, check back soon to see what other summer DIY projects I have for you! Have a happy and creative summer :) 

- A special thanks to Wendy's for inspiring me to create this project! Check out their Blackberry Lemonade ASAP, it's good!!!

- Find more summer DIY Ideas On My Blog and On My DIY Pinterest Board

Sunday Riley - LUNA Sleeping Night Oil

I recently received a fun little sample of this incredible night time retinal oil. It's BLUE as can be, and when you rub it into your skin, it's completely clear. It does have a fragrance, but it's not overpowering, but definitely very, very floral. 

This oil is meant to be used on your skin after cleaning your face for the night. I am going to be testing it out on a sun spot that I should not have, but do, so we will see how it goes! 

Fins LUNA at Sephora! The bottle shown here is a small sample size, which Sephora is so famous for :) Check out @Sephora on Instagram, and share your favorite Sephora products!! 

More info from Sephora.com

Which skin type is it good for?
✔ Normal
✔ Oily
✔ Combination
✔ Dry
✔ Sensitive

What it is:
A next-generation retinoid oil that improves skin plumpness and helps fight the appearance of wrinkles, redness, and pores for visibly clearer, younger-looking skin. 

Solutions for:
- Wrinkles
- Firmness
- Pores

If you want to know more…
Luna Sleeping Night Oil contains high potency, purified grade lactic acid to instantly correct dullness, plump the look of lines, and exfoliate the skin. With continued use, the appearance of stubborn hyperpigmentation, imperfections, and the visible signs of aging are reduced for a healthy-looking complexion. Enhanced with licorice for brightening, it helps to clarify and correct the appearance of imperfections for immediate, smooth radiance. 

What it is formulated WITHOUT:
- Parabens
- Sulfates
- Phthalates

What else you need to know:
This product is cruelty-free. Luna's deep blue color goes from blue to clear when it is rubbed into the skin. 

"Luna Sleeping Night Oil is my personal ‘holy grail,’ must-have product. It instantly calms and smooths my skin and I see results overnight in my fine lines and wrinkles. I'm a mother of three, I work full time, and I don't get as much sleep and exercise as a I should. Luna is my secret weapon to keep people from knowing that!”—Sunday Riley

Research results:
Proven via in-vivo testing (silicone replicas) and expert visual grading:
- Luna Sleeping Night Oil is clinically proven to improve skin radiance, fine lines, and smoothness in 4 weeks

After an independent consumer testing panel used Luna Sleeping Night Oil for 4 weeks:
- 100% felt the product absorbed well into the skin
- 96% of women felt their skin looked brighter and more radiant
- 96% of women felt their skin looked healthier and revitalized
- 92% of women felt their skintone looked more even, calmer, smoother
- 92% would recommend Luna to a family member or friend
- 88% felt their pores looked smaller
- 85% felt their fine lines and wrinkles around the forehead were visibly improved

Amazing Homemade Meatballs Recipe

Want a great recipe for someone special? I think this would make an awesome Father's Day recipe for Dad, grandpa, husbands, boyfriends, or whatever guy is special in your life, deserves this amazing dish!

INGREDIENTS:

- 1 lb. ground pork

- 1 egg

- 1 C. breadcrumbs

- Seasonings: salt, pepper, garlic powder, Van Zandt's seasoning mix

INSTRUCTIONS:

1.) Preheat oven to 425 degrees F, and line a baking sheet with foil. 

2.) Spray a cooling rack with non-stick spray, and place it onto the foil lined baking sheet.

3.) Let's make the food! Combine sausage, breadcrumbs, parmesan cheese, egg, and seasonings in a medium bowl. Mix with hands (I always use rubber gloves), until well-combined.

4.) Roll mixture in hands to form 1"-1.5" balls, and place each one on the rack. Space them apart a bit, they won't change in shape, so you can bake quite a few at once.

5.) Bake for 16-20 minutes, and more if they aren't done yet. 

6.) While baking, boil your noodles, and heat your sauce separately. 

7.) To Serve: Place noodles on a plate, add meatballs, and then cover with sauce! Garnish with more parmesan cheese, and dinner is served! These are so incredibly easy to make, and reheat well. 

Other ideas for these meatballs:

- Meatballs, Peppers, and Penne Noodles

- Meatball Sandwiches

- Slice meatballs thin to put onto pizzas

- Dip them in sauce, without noodles

- Make ahead of time, and freeze these for dinner in advance! 

Man Crates - A Father's Day Gift Idea

Father's Day is fast approaching (June 19th to be exact), and I am helping to promote Man Crates. I added a little bit of text to their images, and made them even more pin-worthy! I hope you love this fun idea, or even get inspired to DIY one of your own...

BEER CAN CHICKEN - MAN CRATES GIFT BOX

BEARD WRANGLER KIT / BEARD GROOMING KIT 

To check out lots more Father's Day Gift Ideas, visit my Pinterest board, Gifts For Guys

Savor Your Summer Recipe With Aidells® Sausage + The Wine Group's Cupcake® Wines

I had an amazing time creating this delicious summer recipe, featuring tasty ingredients like mozzarella chicken sausage, colorful peppers, and basil pesto. I then paired the dish with two styles of wine! How could things get any better? I tend to like lighter wines in the summer, so I chose to feature two varieties from The Wine Group's Cupcake® - Chardonnay and Sauvignon Blanc. For this recipe, I used Aidells® Sausage. I chose Italian Style Smoked Chicken Sausages with Mozzarella Cheese - they were absolutely perfect!

I originally tried this recipe with friends, and they went up for seconds and thirds, so I know this one goes over well with a crowd! I loved it too, and I also thought the sausage and peppers mixture would taste incredible in an omelet for breakfast. This dish is so versatile! Make it for two, make it for lunch or dinner, or incorporate it into your next party menu!

This is a sponsored conversation written by me on behalf of Aidells® & The Wine Group. The opinions and text are all mine.

- 1-2 Packages of Aidells Italian Style Chicken Sausages

- 1 Box Penne Noodles

- Red, Green, and Yellow Pepper (1 each)

- 1 Onion

- Green Pesto (either store bought or homemade)

- Olive Oil

- Fresh Grated Parmesan Cheese

TO MAKE THE NOODLES:

Boil noodles as directed. Drain them, and return them to the pot you boiled them in. Add 2-3 tablespoons of olive oil, and also stir in around 4-5 tablespoons of pre-made or homemade pesto. Stir until well incorporated, and then top with parmesan cheese. These noodles compliment the sausage and peppers so well!

Below, the perfect mix of ingredients. Italian Style Chicken Sausage, peppers, and onions! YUM!!!

TO MAKE THE SAUSAGE & PEPPERS

1.) Cut up chicken sausages into thin slices, around 1/4" thick or less.

2.) Chop onions into tiny pieces (or larger if you like)

3.) Chop peppers into small pieces and set aside.

4.) In a skillet, heat 1-2 tsp of olive oil, and add onions. Salt and season, and continue cooking and stirring onions until they are soft.

5.) Time to add the sausage! Add your sausage slices to the pan, and stir. I used tongs to turn the pieces, and continually check the status of the sausage. I let them brown on both sides before I decided they were done. They taste SO good!

6.) Turn down the heat to very low, and add peppers into the sausage mixture. Stir, and cover with a lid, to just basically steam the peppers. They should be done in 4-5 minutes. Stir again to incorporate one last time.

7.) Place noodles onto a plate, and then top with sausage and pepper mixture. This could also be served atop rice of any sort! Enjoy!! Scroll down to learn more about these wines.

Some great things about Aidells® Sausage:

* Each sausage is made with naturally smoked, all-natural chicken, real fruits & vegetables, and herbs & lively spices
* Gluten Free
* No Nitrites
* No Added Hormones
* All sausages are hand-crafted with real, hand-picked ingredients in small batches with care
* Fully cooked and ready in just 8-10 minutes: sauté or grill over medium heat or bake at 375 degrees F.

The Wine Group's Cupcake® Wines are great! Both styles featured in this post are under $10 per bottle (I got them at Kroger - in fact, I got all of my ingredients there). I really do prefer white wine to red wine any day, but especially in the summer. I opted to get the Chardonnay and the Sauvignon Blanc because they are not overly sweet, and are very well-balanced.

Luscious, creamy, silky, zesty, intense, elegant, complex wines!
Great for celebrating the good and genuine things in life & simply making life delicious!


What sorts of dishes do you prepare during the summer months? And, what is your favorite style of wine? Do you prefer white wine or red wine? Let us know in the comments!

This is a sponsored conversation written by me on behalf of Aidells® & The Wine Group. The opinions and text are all mine.