Winnie The Pooh Mini Bear Sandwiches

These little mini grilled cheese sandwiches are inspired by Disney’s new movie, Christopher Robin. I found these to be incredibly fun and easy to make and can even be partially prepped ahead of time if you will be making a lot of them for a crowd. #WisdomByPooh

INGREDIENTS (makes 10 sandwiches)

  • 20 pieces of sliced bread

  • cookie cutter in your favorite shape

  • up to 2 cups shredded cheddar cheese

  • butter spread or my favorite dairy free option, Earth Balance

  • skillet

INSTRUCTIONS:

1.) Simply use a cookie cutter to cut shapes from your favorite sliced bread. Those can be cut out up to one day in advance, then stored in an air tight bag.

2.) Heat skillet over medium heat, and add butter to each piece of bread, set aside.

3.) When skillet is hot, add as many pieces of bread as you can, butter side down. Sprinkle approximately 1 TBSP of shredded cheese per piece of bread. To avoid a mess, try to make sure the cheese stays on the bread, rather than getting it all over the skillet to burn.

4.) Place other pieces of buttered bread shapes on top, and let the cheese melt. Use a spatula to VERY CAREFULLY flip over the sandwiches to then heat the other side evenly, until cheese has melted.

5.) serve on a cute platter and enjoy!

I styled these in a Thanksgiving theme, but they would be amazing for just about any holiday. I thought they would be amazing for little ones, to tide them over as the full meal is being made. These could be a fun way to get picky eaters to try something new also.

Chocolate Lover's Gift Guide with GODIVA

I am sure we all have that special friend or family member who loves chocolate and deserves a little treat this holiday season1 Everyone who has had the pleasure of trying these new #GodiaGCubes has absolutely LOVED them and cannot wait to have more. I am so honored to have had the chance to help promote these delicious G Cubes for GODIVA! Here are a few of the cutest and most incredible gift ideas for the Chocolate Lover in your life!

Holiday Entertaining Kahlúa Cold Brew Martini Recipe

This shop has been compensated by Kahlúa. All opinions are mine alone. The following content is intended for readers who are 21 or older. #ColdBrewMartini 

The Season To Shine

We had an amazing holiday party recently and enjoyed chocolate fondue AND a crowd pleasing Kalhúa Cold Brew Martini Recipe, featuring the brand’s original liqueur. Kalhúa is easy to find at Target and Walmart and many other retailers! If you enjoy coffee, then this martini is going to quickly become your new favorite cocktail! We all texted each other the day after the party, wishing we could get together again soon and have a few more cocktails together. It was a great night.

With lots of shimmering details, we set the mood with metallic trees, ornaments, gold tinsel, candy canes, velvet fabrics, faux fur, and of course, Kahlúa and chocolate fondue.

We really loved how the Kalhúa Cold Brew Martinis paired so well with both the warm, rich and creamy chocolate of the fondue and the dippable items. We want to also have a cheese fondue for our next get together because it’s such a fun and interactive way to host friends and family, because it’s all self serve, and people can get as creative as they want. Hover over the image below to shop for Kalhúa.

Kahlúa Cold Brew Martini Recipe

This is one of those 1-2-3 cocktail recipes, making it fun and easy to remember!

Ingredients

1 Part Absolut Vodka

2 Parts Kalhúa Original

3 Parts Cold Brew Coffee

Instructions

Ok, you’ll need shaker. Got it? Good. Now fill it with ice. Add one part Absolut Vodka, two parts Kahlúa and 3 parts cold brew coffee. Easy as 1-2-3. Shake the ingredients hard for at least 10 seconds to create a nice foam. Strain into a cocktail glass to get rid of all the small ice chips. Garnish with coffee beans if you would like. Enjoy!

Party + Fondue Details

Before everyone arrived, I prepped the space by lighting my tall, metallic silver tree, and also setting up a few other white and silver one-foot trees. I loved the color scheme, and I believe it would translate for so many of you, as well! With a more neutral and shimmering color scheme, your party decor gives a more timeless, nostalgic, and elegant feel to any event or holiday.

For the fondue, we melted 2 bags of 60% cacao chocolate chips + 2-3 tbsp heavy cream. We dipped in lots of foods we cut up ahead of time like strawberries, marshmallows, apples, graham crackers, and more!

Lower lighting also helps the strands of lights make an even more magical feeling for the evening. I had so much luck finding gold items in the holiday aisles at Target and Walmart and was so inspired by this year’s finds, as well as a few items I already had from years past.

I even found a couple of yellow trees to use in my decor, that closely matched the color of the globally recognized Kahlúa label. It was a great jumping off point and really made everyone smile.


Kahlúa goes great in so many cocktails, not only coffee-based drinks. It’s one of the most versatile liqueurs. It’s perfect for a casual night in, casual night out with friends, and even brunch, too! Sweet and refreshing to the last sip.

By placing cut fruits onto a holiday themed platter, the holiday mood was set instantly. Feel free to create a gorgeous spread of whatever items you want to dip.

Happy holidays, friends! We really hope you enjoy the amazing as well! This #ColdBrewMartini was a huge hit!
BONUS! Looks like we are featured as the VERY TOP POST for this hashtag! Check us out :)

Welcome Home Gift Basket with Hallmark Signature Cards

This shop has been compensated by Collective Bias, Inc. and its advertiser. All opinions are mine alone. #CollectiveBias #HallmarkHolidayMoments


I love the holidays. It's my favorite time of year because it’s the time to spread cheer to those we love and appreciate! I have always loved Hallmark Cards and they have been a part of every holiday since I was born. My grandmother would send Hallmark Cards to me for every single holiday (Christmas, Thanksgiving, Halloween, Easter, and more!), and I have a box of cards and photos that are a memento to my grandma, Pat.


This year's collection of Hallmark Greeting Cards at Walmart is extremely special to me, and I am so happy to be able to think of her as I look back through the cards she sent me. This gets me thinking about how important of a role greeting cards play in our lives. They help us spread a smile, words of kindness, words of consideration, and sometimes words of sympathy. It seems like there is really a card for every occasion now.

I also love how these greeting cards can be almost a gift in themselves, or accompany an amazing gift and put that final special touch on something like a Welcome Home Gift Basket. Above, I absolutely adore the woodland scene that is set! This gift basket I have created would be the perfect welcome home gift for family and friends who are visiting you during the holidays. I actually used the Hallmark Signature Cards as my color inspiration, which helped me tie a few really beautiful items together into one awesome gift. I found nearly everything at Walmart, including a Hallmark Signature Card, a pair of slippers, a fuzzy blanket, a winter candle, gloves, and more!

Perhaps you could create a set of his and hers gift baskets – Hallmark had TONS of cards for men, too, which I just loved. I would probably use colors like reds and blacks, plaids, and a rustic wooden basket for the container. Oh the possibilities!!!

Perhaps a plate of cookies would be inviting to someone who is visiting! I applied white frosting and some gingerbread decorations to traditional sugar cookies.

Hallmark Greeting Cards are incredibly enchanting and sophisticated, and they have such intricate designs. I could tell the designers and artists paid so much attention to every last detail. When I say little detail, I mean itty bitty, teeny tiny little details!

Speaking of gingerbread, this 3D Pop Up Card actually folds up into a little gingerbread house and is also an ornament! It’s really cute and folds up super easily. No glue was required at all!

DEAL ALERT!!!

I saw in-aisle coupons in the store, for buy 2 Hallmark cards, get one free. The other offer is a cute plush Holiday bear for only $3.97 when you purchase 3 Hallmark Cards priced at $1.97 or higher (offers available through 12/25/18 while supplies last). 

There’s also an Ibotta offer:  Earn $1 off a card purchase of $2.97 or more (offer available through 12/25/18 while supplies last)!
Hallmark has a couple of beautiful display at Walmart right now. It’s enchanting browsing all of their beautiful cards in the Holiday aisle, or the greeting card aisle... In this post, I featured two of the cards from Hallmark Signature Cards, and I also found that I loved a lot of the Hallmark Paper Wonder Cards as well. I was drawn more towards their whimsical greeting cards, the ones that made me want to be a kid again, and that had a lot of dimension to them. And, I thought it was fun to add a candle to the gift basket as well. It went so well with all of my colors.

I just love the enchanted woodland scene on this card, and my mom is going to LOVE it! I was so impressed by all of those little details that the layers of paper and glitter make. I actually used this card for some holiday decor inspiration around my home too! 

Hallmark’s latest designs are incredibly inspiring and will make the holidays and other occasions even more special. They are sure to help you continue to share thoughtful and meaningful moments and memories that will last a very long time.

Spinach and Sausage Stuffed Mushrooms Recipe

These delicious stuffed mushrooms are not only delicious, they are very easy to make, and really make an impressive dish. Bring a platter of these stuffed mushrooms to your next party or potluck, or make them for dinner.

I was surprised by how easy these stuffed mushrooms were to make! Sure, I have enjoyed stuffed mushrooms in the past, but I have always been under the impression that they were hard to make because they looked so fancy and upscale. While there are several steps to this recipe, the finished product is well worth the time spent making a deliciously creamy spinach and sausage filling, which tasted incredible baked inside of these organic mushrooms.

INGREDIENTS (MAKES ABOUT 20 mushrooms)

1 lb. ground sausage or chorizo

2 (8-10 oz.) packages of button mushrooms (organic when possible)

1.5 - 2 cups chopped fresh spinach (chopped into very small pieces with scissors or a knife)

6-8 oz. cream cheese

1.5 cups shredded mozzarella cheese

1/4 cup parmesan cheese (to sprinkle on top of mushrooms)

1/3 - 1/2 cup breadcrumbs

1/2 - 1 cup red pepper - chopped into small pieces

Salt

Italian Seasoning

1/2 - 1 cup onion - chopped into small pieces

Baking sheet

Parchment paper - optional

INSTRUCTIONS:

1.) In a skillet, sauté onions and 2 tsp Italian seasoning 4-5 minutes. Add entire package of ground sausage, and then cook until brown (10-12 minutes). Use strainer in sink to remove as much grease as possible. Return to skillet, and add red pepper. Cook about 4 minutes, see mine above.

2.) Next, add cream cheese and shredded cheese and heat over medium low heat until everything has melted and is well combined. Add in your spinach and cover to steam for about 2 minutes. Lastly, stir in breadcrumbs and mix until combined. Remove from heat and grab a kitchen teaspoon.

3.) Begin to fill mushrooms with filling. I found that for these smaller button mushrooms, it doesn’t even take much to fill them, but you get a great 2-3 bite treat.

4.) Place mushrooms on a baking sheet, optionally lined with parchment paper and bake 12-18 minutes, until mushrooms are tender and you see some liquid leaking out. That means they’re ready!

My boyfriend said this was one of the best dishes I have ever made, and that really meant a lot to me! I hope you all enjoy these stuffed mushrooms as much as we did. Enjoy!!

New Godiva G Cubes

Make it a GODIVA Holiday! Indulge and savor each bite of these @Godiva G Cubes, which are

available in flavors like Dark Chocolate Mint, Milk Chocolate Salted Caramel Ganache, White

Chocolate Coffee and MORE! These individually wrapped, gourmet chocolates make an

amazing gift or the perfect offering for a holiday party. Get yours today! #GodivaGCubes

Winnie The Pooh + Christopher Robinson Inspired Recipe

Enjoy family movie nights? If you are a lover of all things Winnie The Pooh, then this Pooh Approved Snack Mix and DIY Hunny Pot are exactly what you could to make! Perfect for family movie nights, because sometimes doing nothing leads to the very best of something! Simply mix up teddy bear shaped crackers and other health-conscious snacks to please the entire family!

My heart is overwhelmed by this fun opportunity I had to create this recipe and one more for WINNIE THE POOH and DISNEY and HELLO SOCIETY!!!!!

Hassle-Free Holiday Meal Ideas + Veggie Foil Packets with Del Monte

This post has been sponsored by Del Monte Foods, Inc. All thoughts and opinions are my own.

Each year, I seem to love the holidays more and more. To me, I love any excuse to

make delicious food and have friends and family over. So I thought it would be

fun to share an easy meal idea and show you just how easy this meal was. I

thought it turned out very elegant, and everything was literally devoured

pretty quickly.

These Veggie Foil Packets are a great vegetarian dinner alternative or side dish. These foil packets are so familiar to most people (think campfire dinners) but by adding more unique and colorful ingredients, these veggie packets can be taken to the next level and even enjoyed at a holiday dinner as a side dish! Simply put, these foil packets contain an array of ingredients like potatoes, carrots, garlic, onions, fresh herbs like parsley and oregano, and of course the Del Monte mixed veggies and green beans. Also, if you are put in the position when you need to offer a few vegetarian side dishes during the holidays, the veggie packets and the cornbread would be amazing.

Del Monte is my number one brand for everything canned during the holidays and during every month of the year. You can find them at your nearest retailer using this store locator. This could be a cute meal for Friendsgiving, for a fall or holiday date night, or something special for a smaller crowd during the holidays.

Visit Del Monte’s website to check out TONS more holiday recipes, here!

Ingredients: (Serves 3-4)

 VEGGIE FOIL PACKETS:

1-2 Cans Del Monte® Vegetable & Bean Blends Country Style

1-2 Cans Del Monte® Blue Lake® Cut Green Beans

4-6 pieces of foil (8”-10” squares) – 2 pieces per packet 

CREAMED CORN CORNBREAD CAKE + MUFFINS:

1 package cornbread muffin or cake mix (I used one 15 oz. box but you can also use two 8 oz boxes as well!)

1 egg

1/3 c. oil

1 Cup Del Monte® Cream Style Golden Sweet Corn

½ - 1 c. milk

Muffin tin

Cupcake liners 

WHOLE YOUNG CHICKEN:

1 whole chicken (organic when possible)

2 Tbsp olive oil

1-2 tsp salt

1-2 Tbsp seasoning (I used Greek seasoning, but use anything you would like)

Brush to apply olive oil (optional)

Parsley for garnish 

Instructions:

1.) Preheat oven to 375 degrees and prepare chicken. Place chicken onto a rimmed baking sheet and begin to brush olive oil over chicken. I basically drizzled the oil onto the chicken and then brushed it over. Next, I simply sprinkled seasoning all over the chicken. Cover with foil and bake for at least 1.5 hours. At a little over an hour, I carefully uncovered the chicken, then placed it back into the oven to finish baking. Make sure the breast is not pink anymore. A note on the chicken: there was a lot of juice in the cake pan from the chicken cooking. Be careful not to spill this juice or it may hurt you. Be very careful when handling this pan.

2.) Mid way through cooking chicken, prep for the veggie packets. Strain both cans of Del Monte veggies and divide them equally between 2 or 3 foil packets, To make the packets, simply place two sheets of foil on a baking tray, place veggies in the middle, then season with 1-2 tsp of your favorite seasoning mix and salt if needed. Fold two side of the foil inward, then twist the ends to keep everything inside. Place onto sheet pan and bake for 12-15 minutes or until steaming. Carefully open the packets as the steam can hurt you.

3.) Mix up cornbread ingredients and prepare pan. For my spring form pan, I sprayed it with cooking spray then lightly coated the pan in flour. Fill the springform pan about halfway full then pour the rest of the batter, cover with foil, and bake for approximately 20-25 minutes with foil covering until the last 10-15 mins. Pour the batter into the cupcake cups and bake muffins at 375F for about 15-18 minutes. The springform pan is not necessary, it just made for a wonderful presentation! Feel free to use any size or shape of square or round dish you have.

4.) To serve, place chicken into shallow serving bowl or platter and garnish with parsley. Also, feel free to place cornbread cake onto a cake stand or on a cute dish with a spatula for serving. Lastly, either have guests grab veggies from a serving bowl or straight from the packets!

Cleanup was super easy with this whole process. If you do not want to cook a whole chicken, you can use chicken drumsticks, thighs, or even chicken breasts. I say this because it can take up to 2 hours for the chicken to be fully cooked if the bird is 4 pounds like mine was.

I absolutely LOVED the green beans and the other vegetables in the new Mixed Veggies collection. I actually liked the vegetables more than any other part of this meal, and my friends also raved about each and every part. I had so much fun treating a few of my favorite people to an exceptionally thoughtful dinner during the holidays, which can be a super hectic time when people may forget to eat a “real meal”.

What are your favorite vegetarian side dishes to serve during the holidays?

Look out for these mixed veggies from the brand:

Del Monte® Vegetable & Bean Blends California Style

Del Monte® Vegetable & Bean Blends Classic Style

Del Monte® Vegetable & Bean Blends Country Style

Del Monte® Vegetable & Bean Blends Mexican Style

Connect with Del Monte on social and show off your recipes, too!

LEARN ABOUT MORE BLOGGERS’ RECIPES HERE!

Vegetarian Pot Pies Recipe with Amy’s Kitchen

Thank you Amy’s for sponsoring this post. #StartWithAmys this Soup Season.

With cooler weather on the horizon, it’s time to incorporate comfort food that will make you happy about what you are serving and eating. For over 30 years, Amy’s Kitchen has been cooking up vegetarian meals made with high-quality ingredients. As fall quickly approaches, it’s time to get your soup on!

I found a unique way to incorporate three varieties of Amy’s Kitchen soups into a Vegetarian Pot Pie, and I hope you love it! Since Amy’s Soups already taste delicious on their own, I was able to allow those flavors to shine, while simply complimenting them with a few more veggies and a flaky, puff pastry woven lattice crust. This dish can be made as individual pot pies, or as one large casserole – it’s completely up to you! And, feel free to use this lattice technique, or simply use a full sheet of puff pastry crust right across the top.

This homemade, vegetarian dish is waiting to be served at your next weeknight dinner, holiday meal, or even as a make-ahead meal that can be frozen and baked in just a short time, making dinner exceptionally easy AND delicious!

The phrase “comfort food” definitely comes to mind with this dish. It’s filled with an array of veggies, plus Amy’s Organic Cream of Mushroom Soup, Organic Chunky Vegetable Soup, and their Organic Vegetable Barley Soup. This dish is literally brimming with vegetables, you are going to love it. Even super picky eaters will enjoy this food. It’s a great idea to stock up for the cooler months with Amy’s soups! Keep a few soup cans stashed in your pantry (or desk!) for those times when you want something tasty that will warm you up as well. I always feel better after a warm meal, and these soups make an exceptional meal all on their own!

I love this cream of mushroom soup - it could surely be enjoyed on its own, warmed up with a handful of oyster crackers in the bowl for some crunch. I have never found a cream of anything soup that I am happy with. I have found that most canned cream soups are all way too thick and just full of unnecessary ingredients, and I have found too some have a sort of strange aroma. This has always turned me away from using condensed cream soups, but now I have a newfound hope thanks to Amy’s Kitchen! The Cream of Mushroom Semi-Condensed Soup worked super well for the base of this recipe, and would even be super delicious heated and enjoyed on its own, or with a handful of soup crackers.

I have fond memories of my mom making chicken pot pie many, many times as a child. She would use a traditional recipe that incorporated chicken and a small portion of veggies. It was always amazing, but as I grew older, and realized the importance of eating plant-based, I knew I needed to adapt a few of my most treasured family recipes into vegetarian versions.

Luckily, all of Amy’s products contain high-quality ingredients. That is extremely important for me, and I am so happy I have made a small lifestyle switch to considering each and every ingredient in the foods I eat and prepare for those I love. At Amy’s, they choose the best ingredients for each recipe. They cook with ingredients that people use in their own kitchens and trust, like carrots, beans, flour and spices! They don’t use a lot of starches and thickeners (which I do notice when I open their soups and other foods. They rely instead on slow simmering and cooking to develop soups and creamy sauces. This is very apparent as I was using the Amy’s Cream of Mushroom soup, it’s a really smooth texture without being overly thick, like other cream canned soups.

PRINTABLE RECIPE BELOW - RIGHT CLICK TO SAVE OR PRINT

INGREDIENTS:

1 can Amy’s Organic Cream of Mushroom Soup

1 can Amy’s Organic Chunky Vegetable Soup

1 can Amy’s Organic Vegetable Barley Soup (any of their other vegetable soups will work well too)

1 sheet of puff pastry

½ red onion - chopped

1-2 cloves garlic – minced

1-2 TBSP olive oil

½ of a red potato – chopped into very small pieces

1 c. broccoli – chopped into small pieces

½ c. corn (frozen or canned)

½ c. frozen peas

2-4 TBSP seasoning (I use a mixture of low sodium seasoned salt and a Greek spice blend)

1 TBSP butter or butter alternative

3 TBSP flour

salt

Optional 1 egg for egg wash (simply use which to stir up one egg in a small bowl)

INSTRUCTIONS:

1.)   Sautee olive oil, onions, and garlic, and 1-2 TBSP seasoning for 2-3 minutes. Once onions are soft, add potatoes and cook at medium heat for about 3 minutes with the pan’s lid on. Carefully stir the potatoes once during cooking, and replace lid.

2.)   Add 1 cup broccoli, corn, and frozen peas, and simmer another 3 minutes. Add up to 2 tsp more seasoning at this point, and stir to coat all veggies.

3.)   Turn off heat, and transfer all veggies from skillet to another heat safe bowl and set aside. Do not clean or wipe out skillet yet.

4.)   In this same skillet, melt 1 TBSP butter. Once melted, stir in 3 TBSP flour, and stir until combined. This helps to thicken the sauce. It will look “chunky”, but that’s ok!

5.)   Add 1 can of Amy’s Organic Cream of Mushroom soup, and stir to combine. Turn heat back onto medium, and add the bowl of veggies back into the skillet. Stir to combine, and heat for 2-3 minutes while stirring, to combine and thicken everything.

6.)   Preheat oven to 400 degrees for Transfer into prepared baking dish(es) – make sure to spray them with non-stick spray first!

7.)   Time to do the crust! Either place one sheet of puff pastry across the top of the baking dish and trim the sides and cut vents at top, OR use the lattice technique I have shown in this post!

8.)   To lattice: cut ½” or 1” strips out of your puff pastry sheet and weave them across the top of the pie. I start by placing three strips vertically, then working on weaving in the three horizontal strips. From there, I can then place the remaining strips of puff pastry into the top of the pie. Cut excess dough hanging over sides of baking dish, and if you want, use your fingers to gently press the dough strips down onto the baking dish so it does not move while baking.

9.)   Brush top of pie with an optional egg wash, and bake small pies for 17-22 minutes or one pie for 25-35 minutes. The puff pastry need to be pretty crunchy on top to ensure that the dough touching the filling is not doughy.

What a fun and comforting vegetarian meal to make for your favorite people! Perhaps you could even surprise a busy family with a frozen version of this pie, and they can enjoy a vegetarian meal in a less than a half hour of baking time! Enjoy!

I was selected for this opportunity as a member of CLEVER and the content and opinions expressed here are all my own.

Football Party Ideas + Updated Pigs In A Blanket Recipe

This shop has been compensated by Collective Bias, Inc. and its advertiser, Dr Pepper® and Eckrich®. All opinions are mine alone. #MyMeijerWin

Time to reinvent a classic, well-loved recipe that tastes better than ever! College football season it the perfect time to try out a few new recipes for guests, friends, and family alike! This grown up, more sophisticated version of Pigs In A Blanket will delight guests! Serve with ice cold Dr Pepper® for a pairing with Eckrich® Smoked Sausage, sure to be out of this world delicious! A true crowd-pleaser during your college football celebration - who will YOU be rooting for? 

Check out this mperks offer to save $1 on any TWO (2) Dr Pepper® 6pk 7.5oz cans or 8pk 12 oz bottles at Meijer (while supplies last).

I used one of my favorite ingredients, Eckrich® Smoked Sausage, to make this delicious creation, which would be AMAZING for your next game day or holiday celebration. People rave about these and always ask when I’ll be making more. Read on to learn more about my latest college football celebration, and get the details on how to make your next celebration a success. Our college's colors are maroon and white, so actually Dr Pepper is a fun choice to celebrate locally. PLUS, every single one of my friends is slightly obsessed with Dr Pepper, so offering this refreshment at any of my parties tends to go over well. The smoked sausage worked super well for this project too. 

I thought it was super clever to cut up the smoked sausages for this recipe, compared to using traditional small cocktail weenies. This made for a much better bite! ​

Whenever I begin to plan a design for a college football party, I immediately think of which vintage elements I want to incorporate. For some reason, I associate football with the nostalgia of times (and games) past, PLUS I believe that a vintage style theme and set of decorations will appeal to all age ranges, which I love. If someone who can have a sort of connection to my decor, whether they are actually attending my parties OR viewing the recaps on my blog, it means a lot to me.​

PRINT THE RECIPE:

RIGHT CLICK AND SAVE OR PRINT

GAME DAY PARTY DETAILS: 

To choose your colors, decide what color metallic you like best. I chose gold here, but silver or copper would be your other common choices. The gold accents really catch the light so well, and can make any party décor look more classy. These metallic gold, plastic utensils almost look real, and the gold shimmering tinsel (found in the gift wrap section at a craft store) really made things shimmer. I thought that the gold tinsel reminded me of pom poms!

Next, I used lots of rustic wooden surfaces, and one small vintage crate to get some of the items on the table up at eye level. I love setting up the food and drink table(s) with items being served at different heights. This adds SO much visual interest to the party offerings! This is such a better alternative than simply laying all the food on an uninviting table.Taking a few extra moments to consider the design of your food and refreshment table seems to at least make party setup more exciting on my side as well.

Let people serve themselves by offering Dr Pepper and other drinks in nice containers or a cooler, so you do not have to serve each guest individually. This gives you way more time to enjoy your company rather than stressing out by hosting so much. 

I incorporated football themed cups, plates, and napkins wherever I could! I loved this rather vintage look for the party, with rustic woods, plaid patterns, and even a vintage looking font for the Tailgates and Traditions can carrier, above. In addition to being a cute way to display Dr Pepper at your college football parties, this carrier (or some other fun 6 pack holder) would be perfect to tote your soft drinks to the game or to tailgate.

As soon as I begin to see football related party items in stores. I tend to pick them up. We celebrate all football season long, and so having a lot of different party items on hand makes life a little bit more fun, in my opinion! 

Do you tend to go all out when decorating for football parties / game days, or do you tend to scale things back a bit and just stick to the essentials? Either way, offering guests Dr Pepper and these updated Pigs In A Blanket will make your next get together a win!

I offered guests three different flavors of mustard to compliment the Pigs In A Blanket - I used a traditional yellow one, a creamy dijon, and a stone ground. But, whatever you have will likely work! Just serve the mustards in small glass bowls or anything that spruces up the presentation, and you're set. I definitely consider that a #MyMeijerWin

If I am having a party, I tend to offer lots of dips, making each meal a little bit more unique and delicious. Above, you will see three different mustards that I shared. Simply use whatever you already have in your home, or head to Meijer and take a few minutes to see just how many varieties of mustard there are. I chose a yellow, a stone ground, then a creamy stone ground variety. Whatever mustard(s) you choose, they will pair super well with these Pigs In A Blanket! YUM!!! This celebration and these recipes turned out SO well, and I cannot wait for you to try something this delicious. Enjoy!! 

PIN THIS POST FOR LATER:

Veggie Lovers’ Club Sandwich Recipe with Pepperidge Farm

This post has been sponsored by Pepperidge Farm®, all thoughts and opinions are my own.

If you’re wanting to find more ways to connect with family or friends, I often find that food brings people together better than nearly anything else. I recently created the most delicious Veggie Lovers’ Club Sandwich with Pepperidge Farm Farmhouse® Butter Bread, and it’s quickly becoming my go-to bread for sandwiches, breakfast recipes, and even making toast, which I love so dearly.

This sandwich contains ingredients in all sorts of colors; I just love to eat as many different colored veggies as possible each day. I hope you enjoy!

I find that sandwiches with fresh and delicious ingredients that can be made ahead of time really helps save time and brings families closer together. I absolutely love providing my friends and family with fresh, nourishing meals that in turn give them energy and encouragement to inspire wonderful days ahead. Whether you’re making this Club Sandwich for two or you’re making brunch for a whole house full of family and guests, I would definitely recommend the thick, rich, buttery taste of this awesome, slow baked Butter Bread – you’re going to love its fresh-from-the-oven taste!

When I visit the bread aisle at the grocery store, I see SO many choices for white bread. But even with all of those choices, few actually compare to this Butter Bread. I love how thick the slices are. Since I am already a huge fan of anything from Pepperidge Farm and I saw that this new flavor was available at a wide range of stores, I was instantly relieved to finally find a white bread with thicker slices and a bit of a buttery taste! YUM!

My boyfriend always jokes that any product that has butter in the name, I will love. Well, he is completely correct about that – I was seriously SO excited when I found out that one of my recipes contained butter bread, I nearly jumped for joy. That’s how much I love butter!

Find new Pepperidge Farm Farmhouse® Butter Bread at retailers like Target and Kroger here! This product may quickly become your FAVORITE new bread for every recipe you can imagine.

This Veggie Lovers’ Club Sandwich is such a fun way to spend more time together and also experience new and different ingredients and flavors – which is a super fun way to bond with those you love. Find joy in the simple flavors of these all-natural sandwich toppings!

INGREDIENTS (MAKES 2 SANDWICHES)

FOR THE SANDWICH:

6 slices of Pepperidge Farm Butter Bread

8 spinach leaves

10 slices of English cucumber

½ - 1 Cup sprouts (any flavor you like)

Toaster for bread

Food processor for beet spread

FOR THE BEET SPREAD:

1 package of pre-cooked beets or 1 can of beets (remove any liquid)

2-3 tsp olive oil

3 tsp balsamic vinaigrette

½ tsp salt

1 tsp Italian seasoning

(topped with chives – optional)

FOR THE GREEN GODDESS SANDWICH SPREAD:

¼ C. Greek yogurt (use non-dairy alternative for vegan)

1/8 C. mayo (use non-dairy alternative for vegan)

¼ C. finely chopped chives

2-3 Tbsp freshly chopped tarragon

1-2 tsp salt

1 tsp garlic powder

INSTRUCTIONS:

1.) Make Beet Sauce by putting all ingredients into food processor or blender, and pureeing until smooth. Add more salt if desired.

2.) Make Green Goddess Sandwich Spread by mixing all ingredients in a small bowl with a spoon until well combined. Feel free to add more salt, garlic powder, or any other seasonings you enjoy.

3.) Toast 6 slices of Butter Bread and get ready to make the Club Sandwich.

4.) To construct each sandwich – add Beet Spread on one slice of bread, then top with sprouts. On another slice of bread, add Green Goddess Spread and 5 slices of cucumbers (and a bit of salt on top of cucumbers if desired). One piece of bread will remain without any toppings.

5.) Lastly, layer the pieces like this – Beet Spread + Sprout slice, topped by the Green Goddess and Cucumber slice, then the final top slice of bread, and cut in half to serve! The beautiful layers of bread and ingredients are just so colorful and delicious. This toast also held up very well with all of these ingredients!

I hope you enjoy this vegetarian recipe with those you love! Good food brings people together, and that time with loved ones is what keeps me happy every day! Please let me know if you wind up making this recipe!

Rustic Apple Pie Pizza Recipe + Why I love Fall Baking

This is a sponsored post written by me on behalf of Oregon Chai®. The opinions and text are all mine. #OregonChaiMeTime 

Wow! Have I got an incredible recipe for you today. It embodies the fall spirit, and includes a dessert “pizza!” This delicious and unique recipe is rustic, sweet, and crunchy; an amazing pairing with a nice, warm Oregon Chai® Tea Latte! Make this amazing dessert for your next gathering, dinner with friends and family, or even for a potluck. This dessert will vanish before you know it.

To me, baking is one of the best ways to spend “me time.” I tend to find myself baking the most once the weather cools down, when I have a bit of free time, or even when too many days have passed since I created something delicious.  Any day that includes chai tea and some me time is a GOOD DAY!

I wasn’t always able to bake freely though. Before we got our new furnace this summer, the house would get WAY too hot (83 degrees +) when I turned on the oven, and so it was nearly impossible to justify baking when the house would not cool down from it. I made so many no-bake meals, or even used our awesome toaster oven to try to make complete meals, small casseroles, and even side dishes – baking cookies, pies, or brownies really doesn’t go well in the toaster oven.

I didn’t even realize how strong of a connection I had to baking, until I had limited use of the oven, and realized how sad I was when I looked through Pinterest and saw all of those recipes that I could not even attempt. I now bake every few days (or more) and I am so happy about how cool our house stays finally. Thank goodness for good air conditioning, LOL!

I also tend to LOVE sweet desserts and dishes, so this one is just perfect for me. If you like desserts that are on the more savory or less sweet side of life, then you can majorly reduce the amount of sugar I have suggested. Either way, you’re going to love this apple pie pizza.

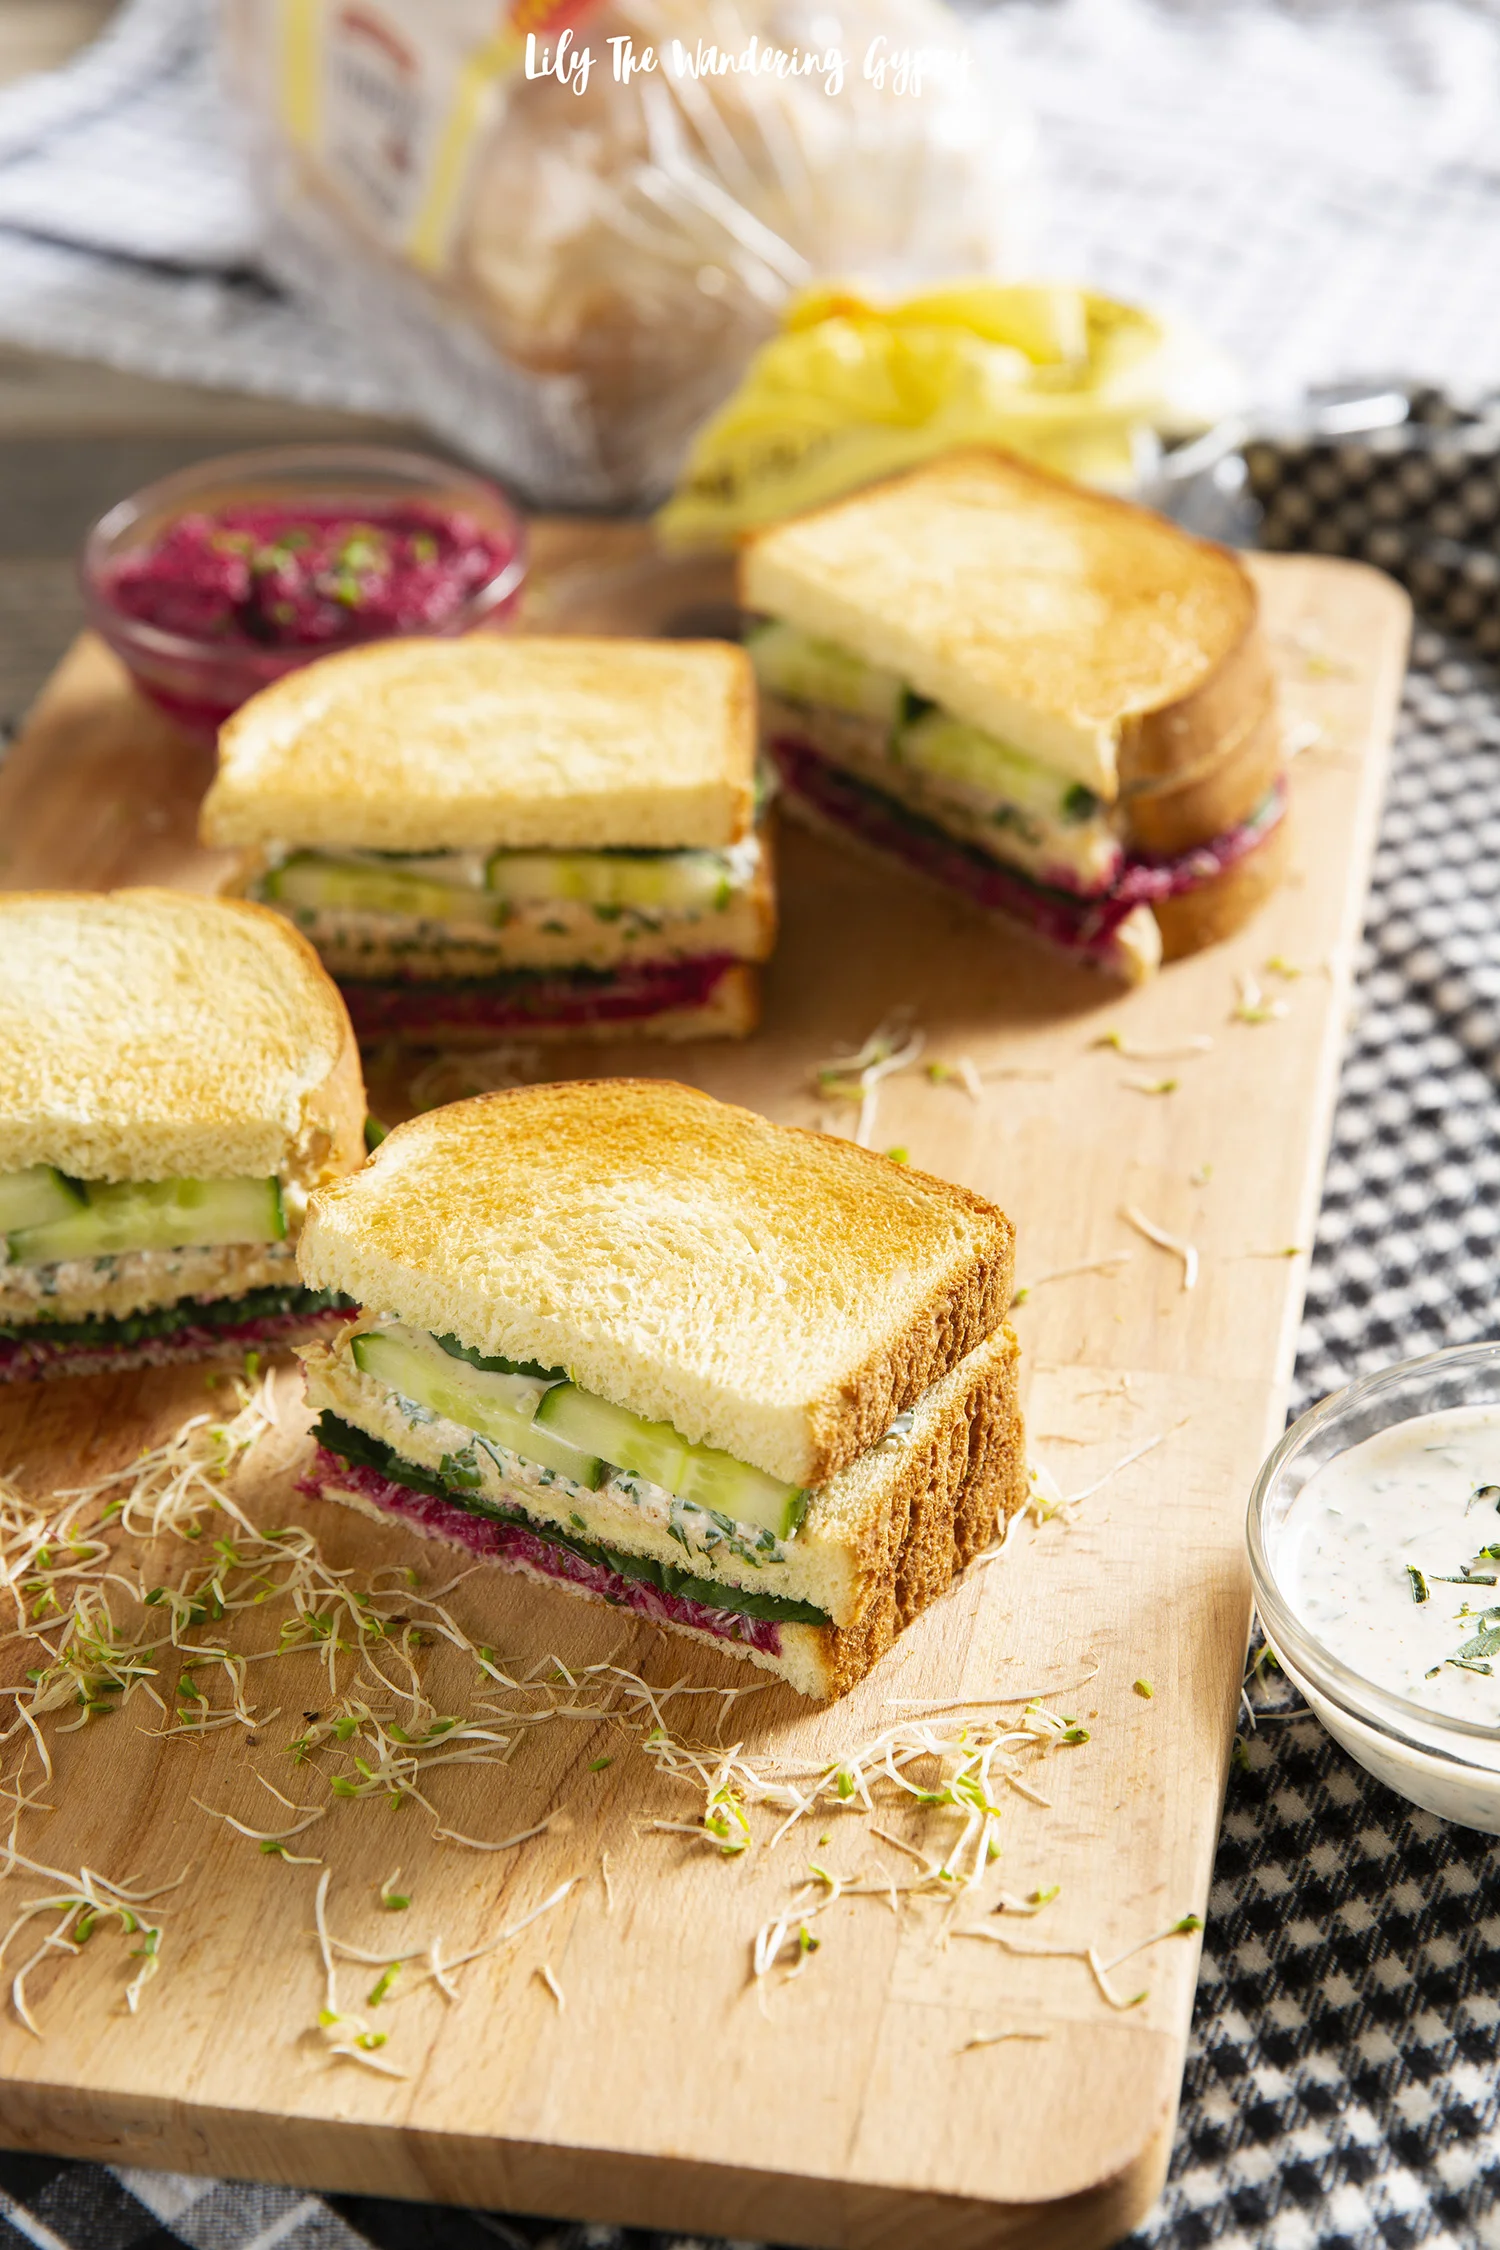
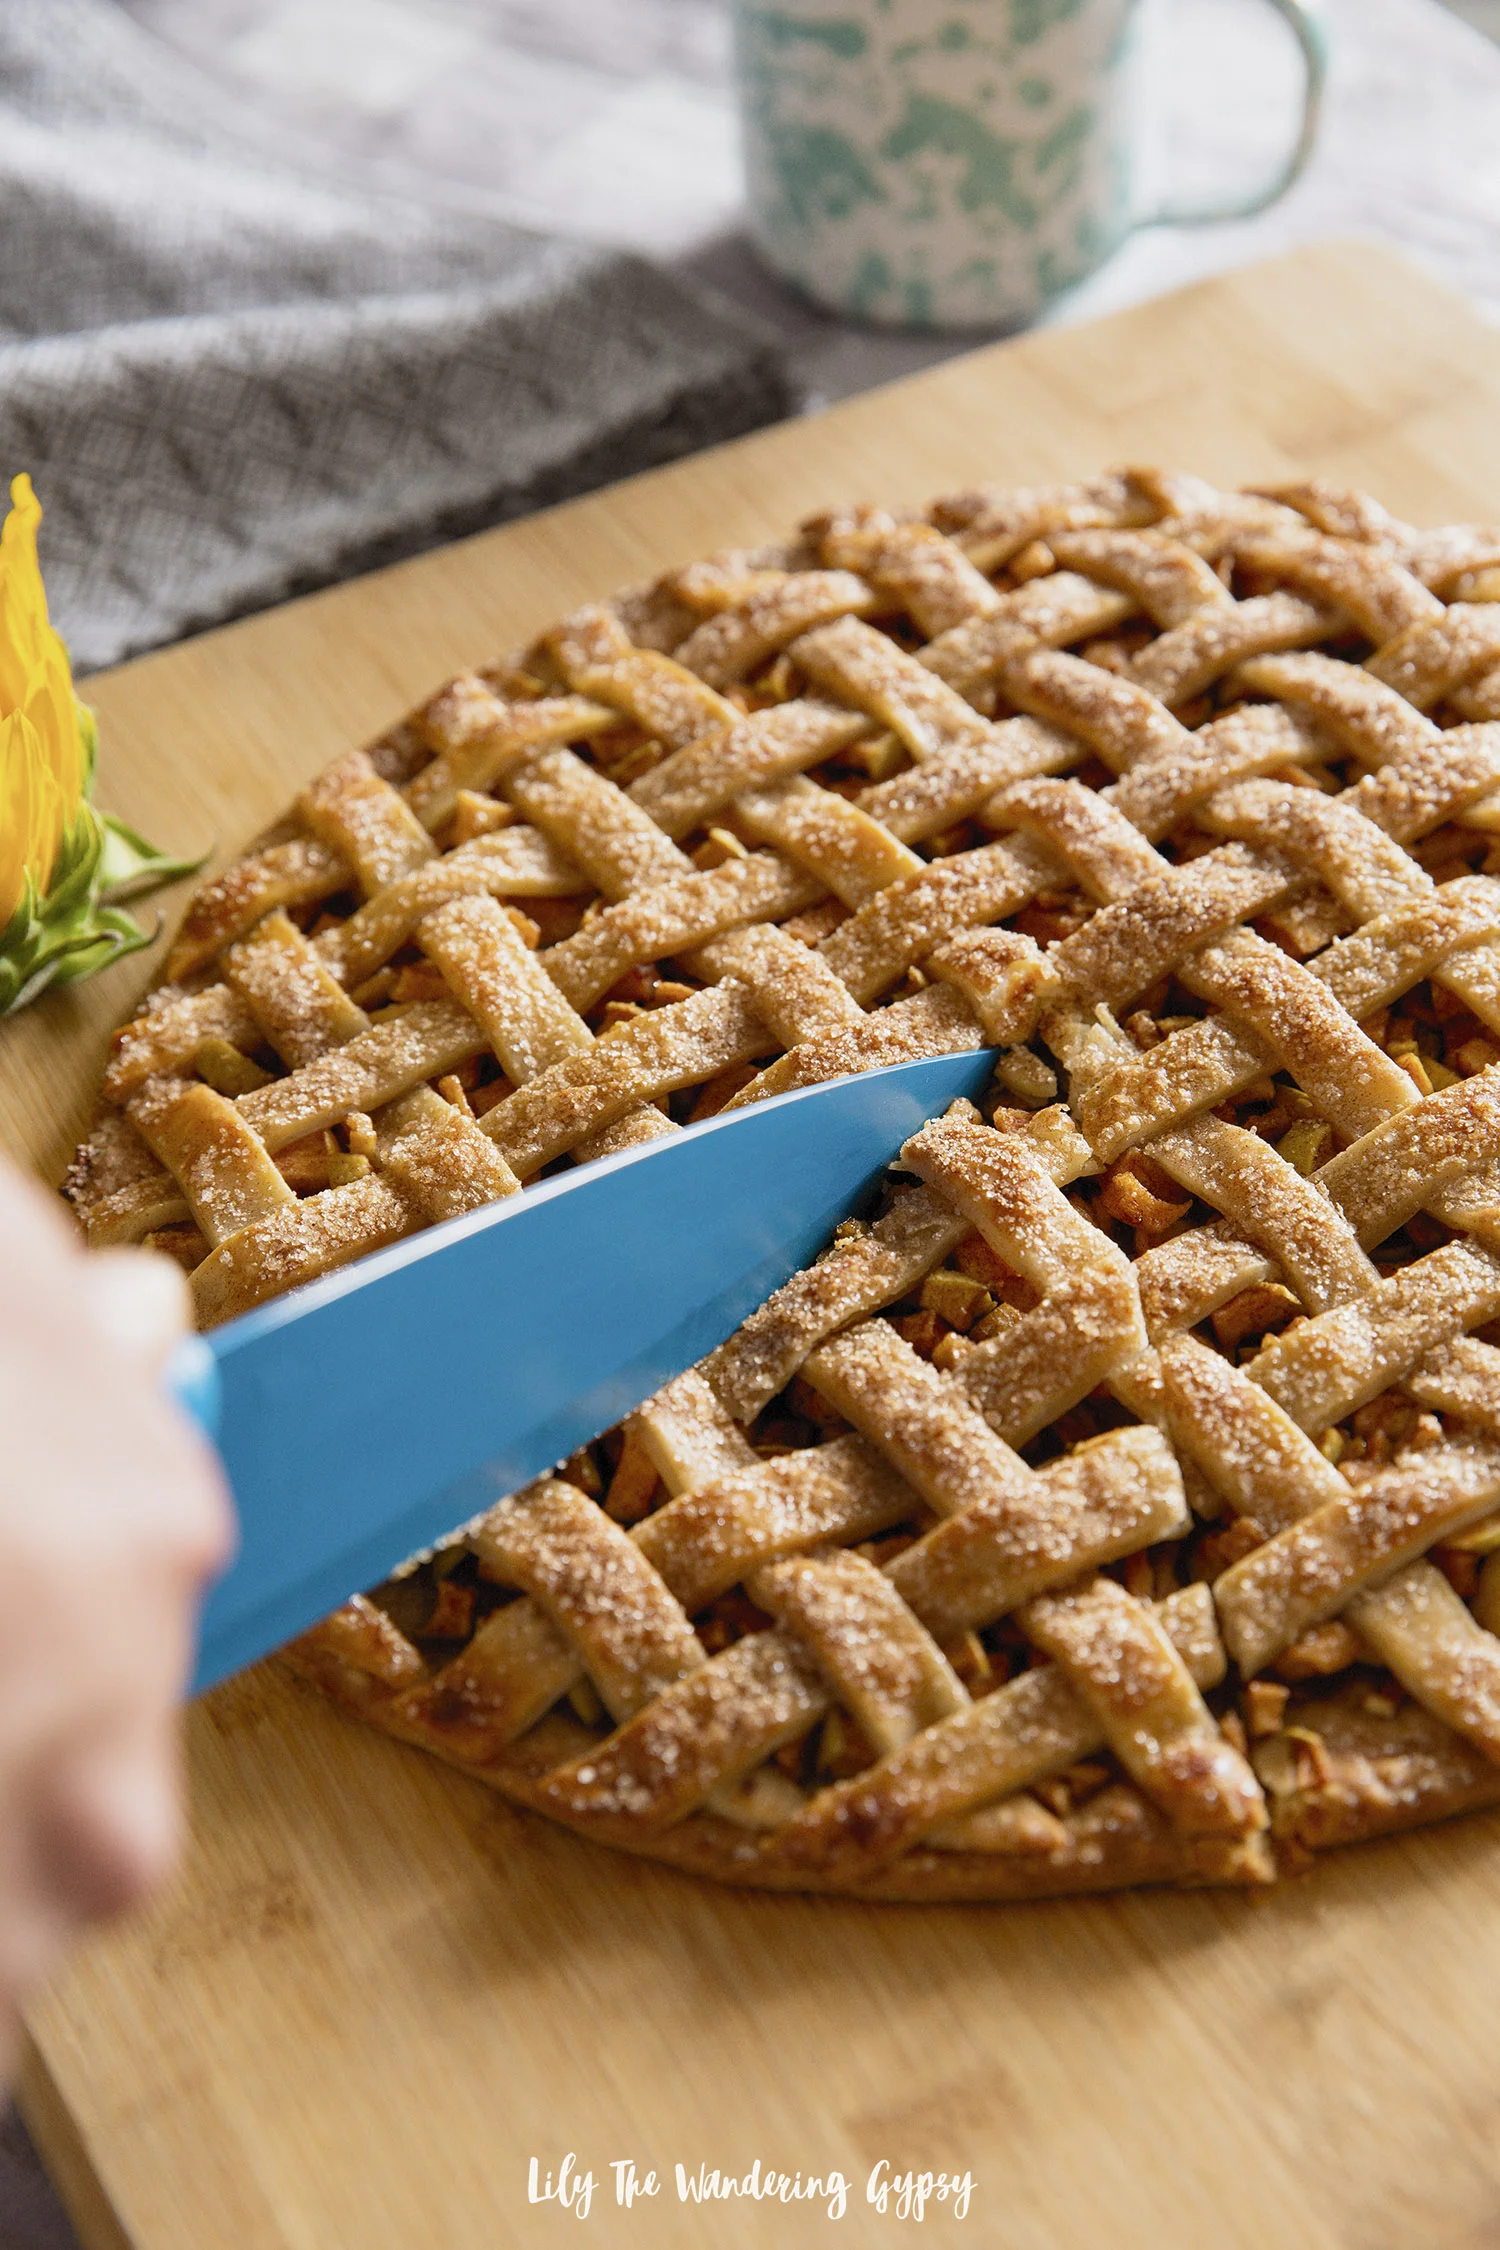
Pizza is such a familiar comfort food, and when I had a slice of this Apple Pie Pizza, it took me back to eating some of the best thin crust pizza ever, combined with one of my favorite fall desserts ever.

Since we are surrounded by apple orchards here in southern Illinois, using apples in my recipe came as a very natural solution to eating more local ingredients!

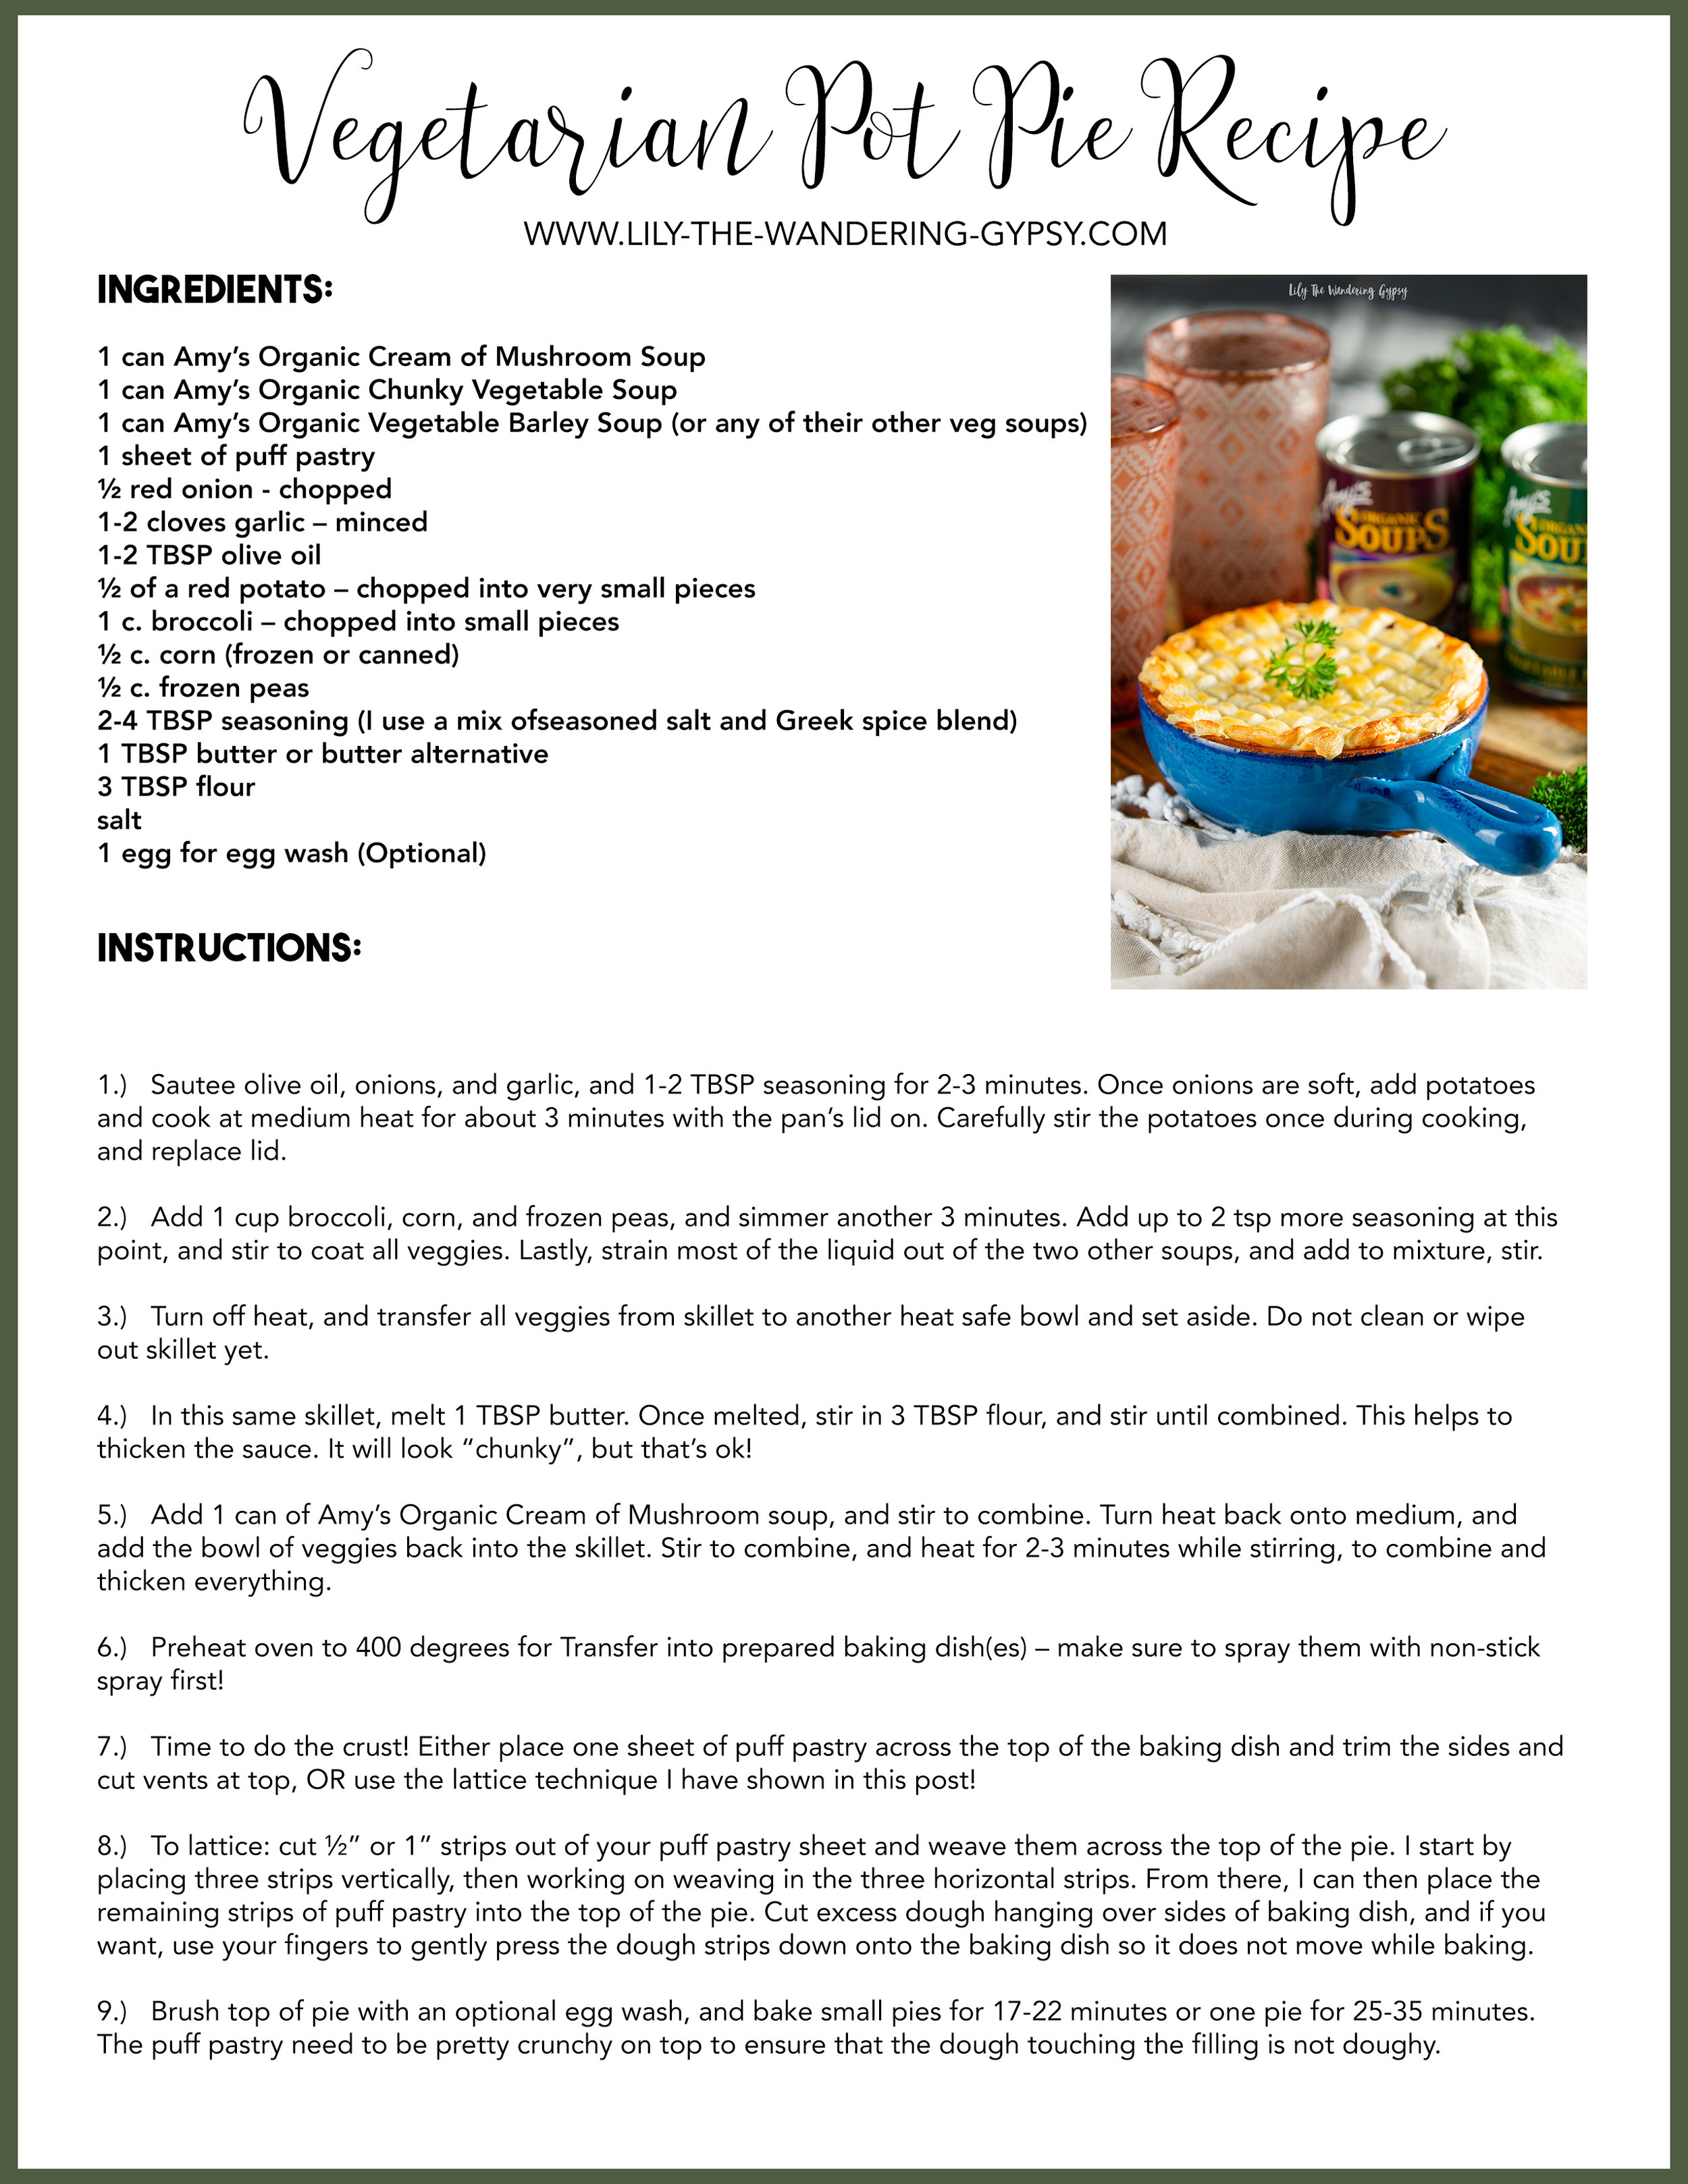
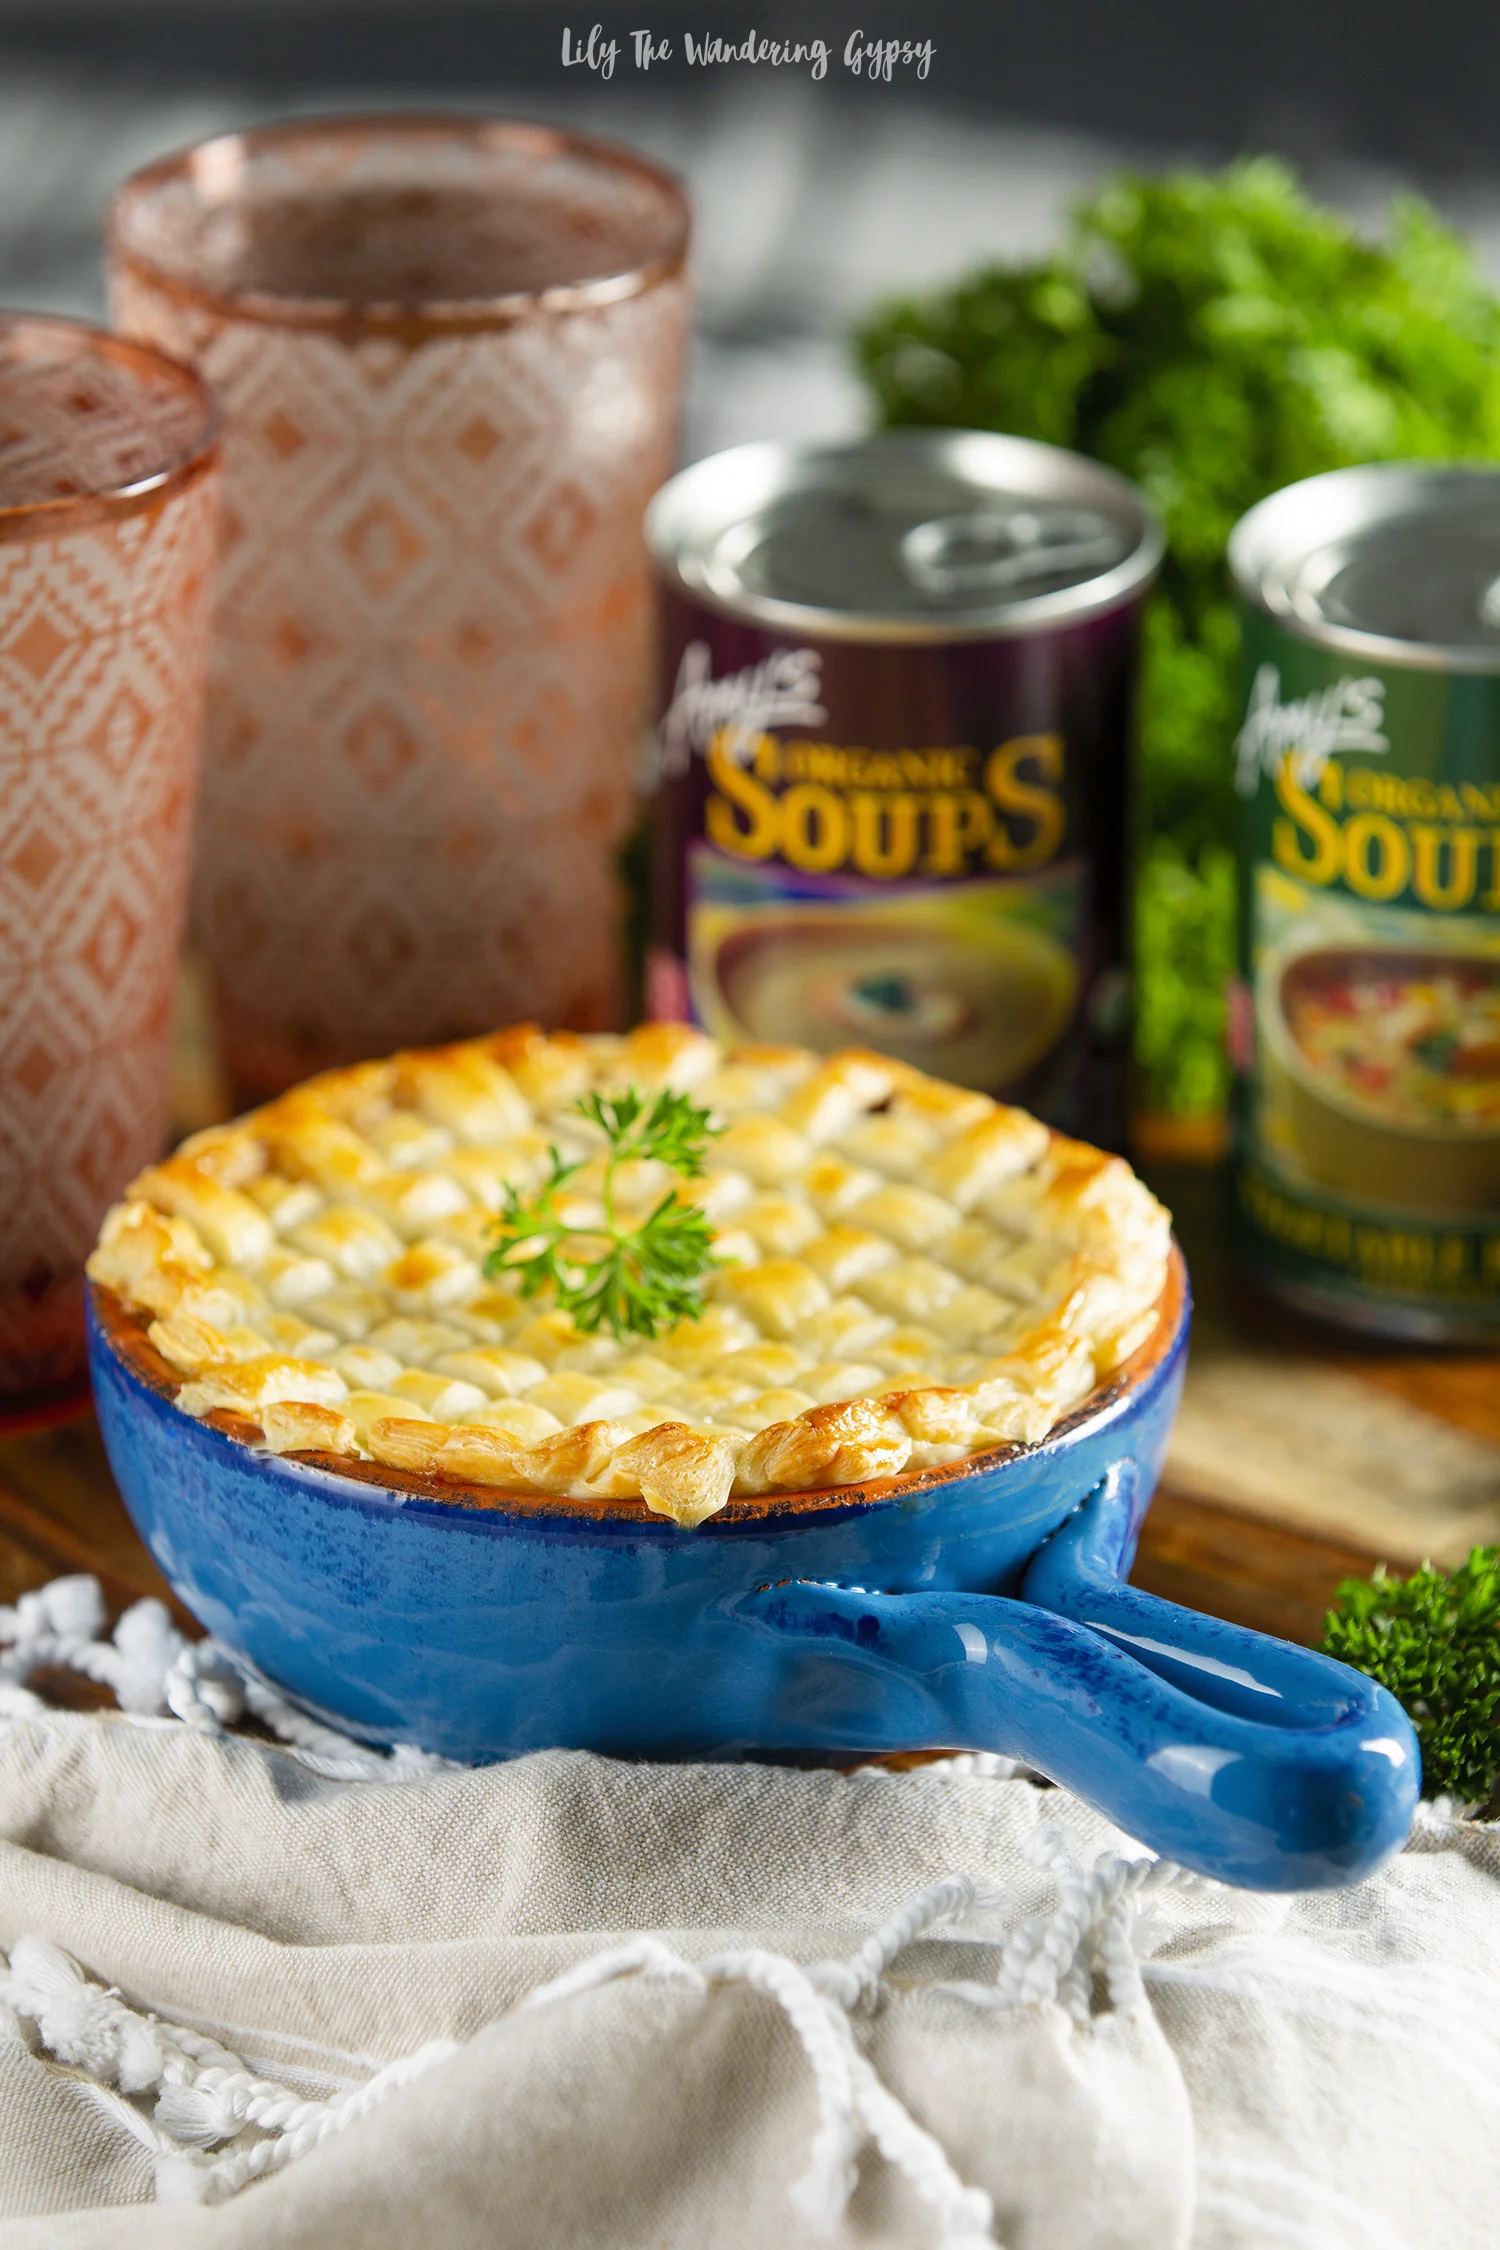
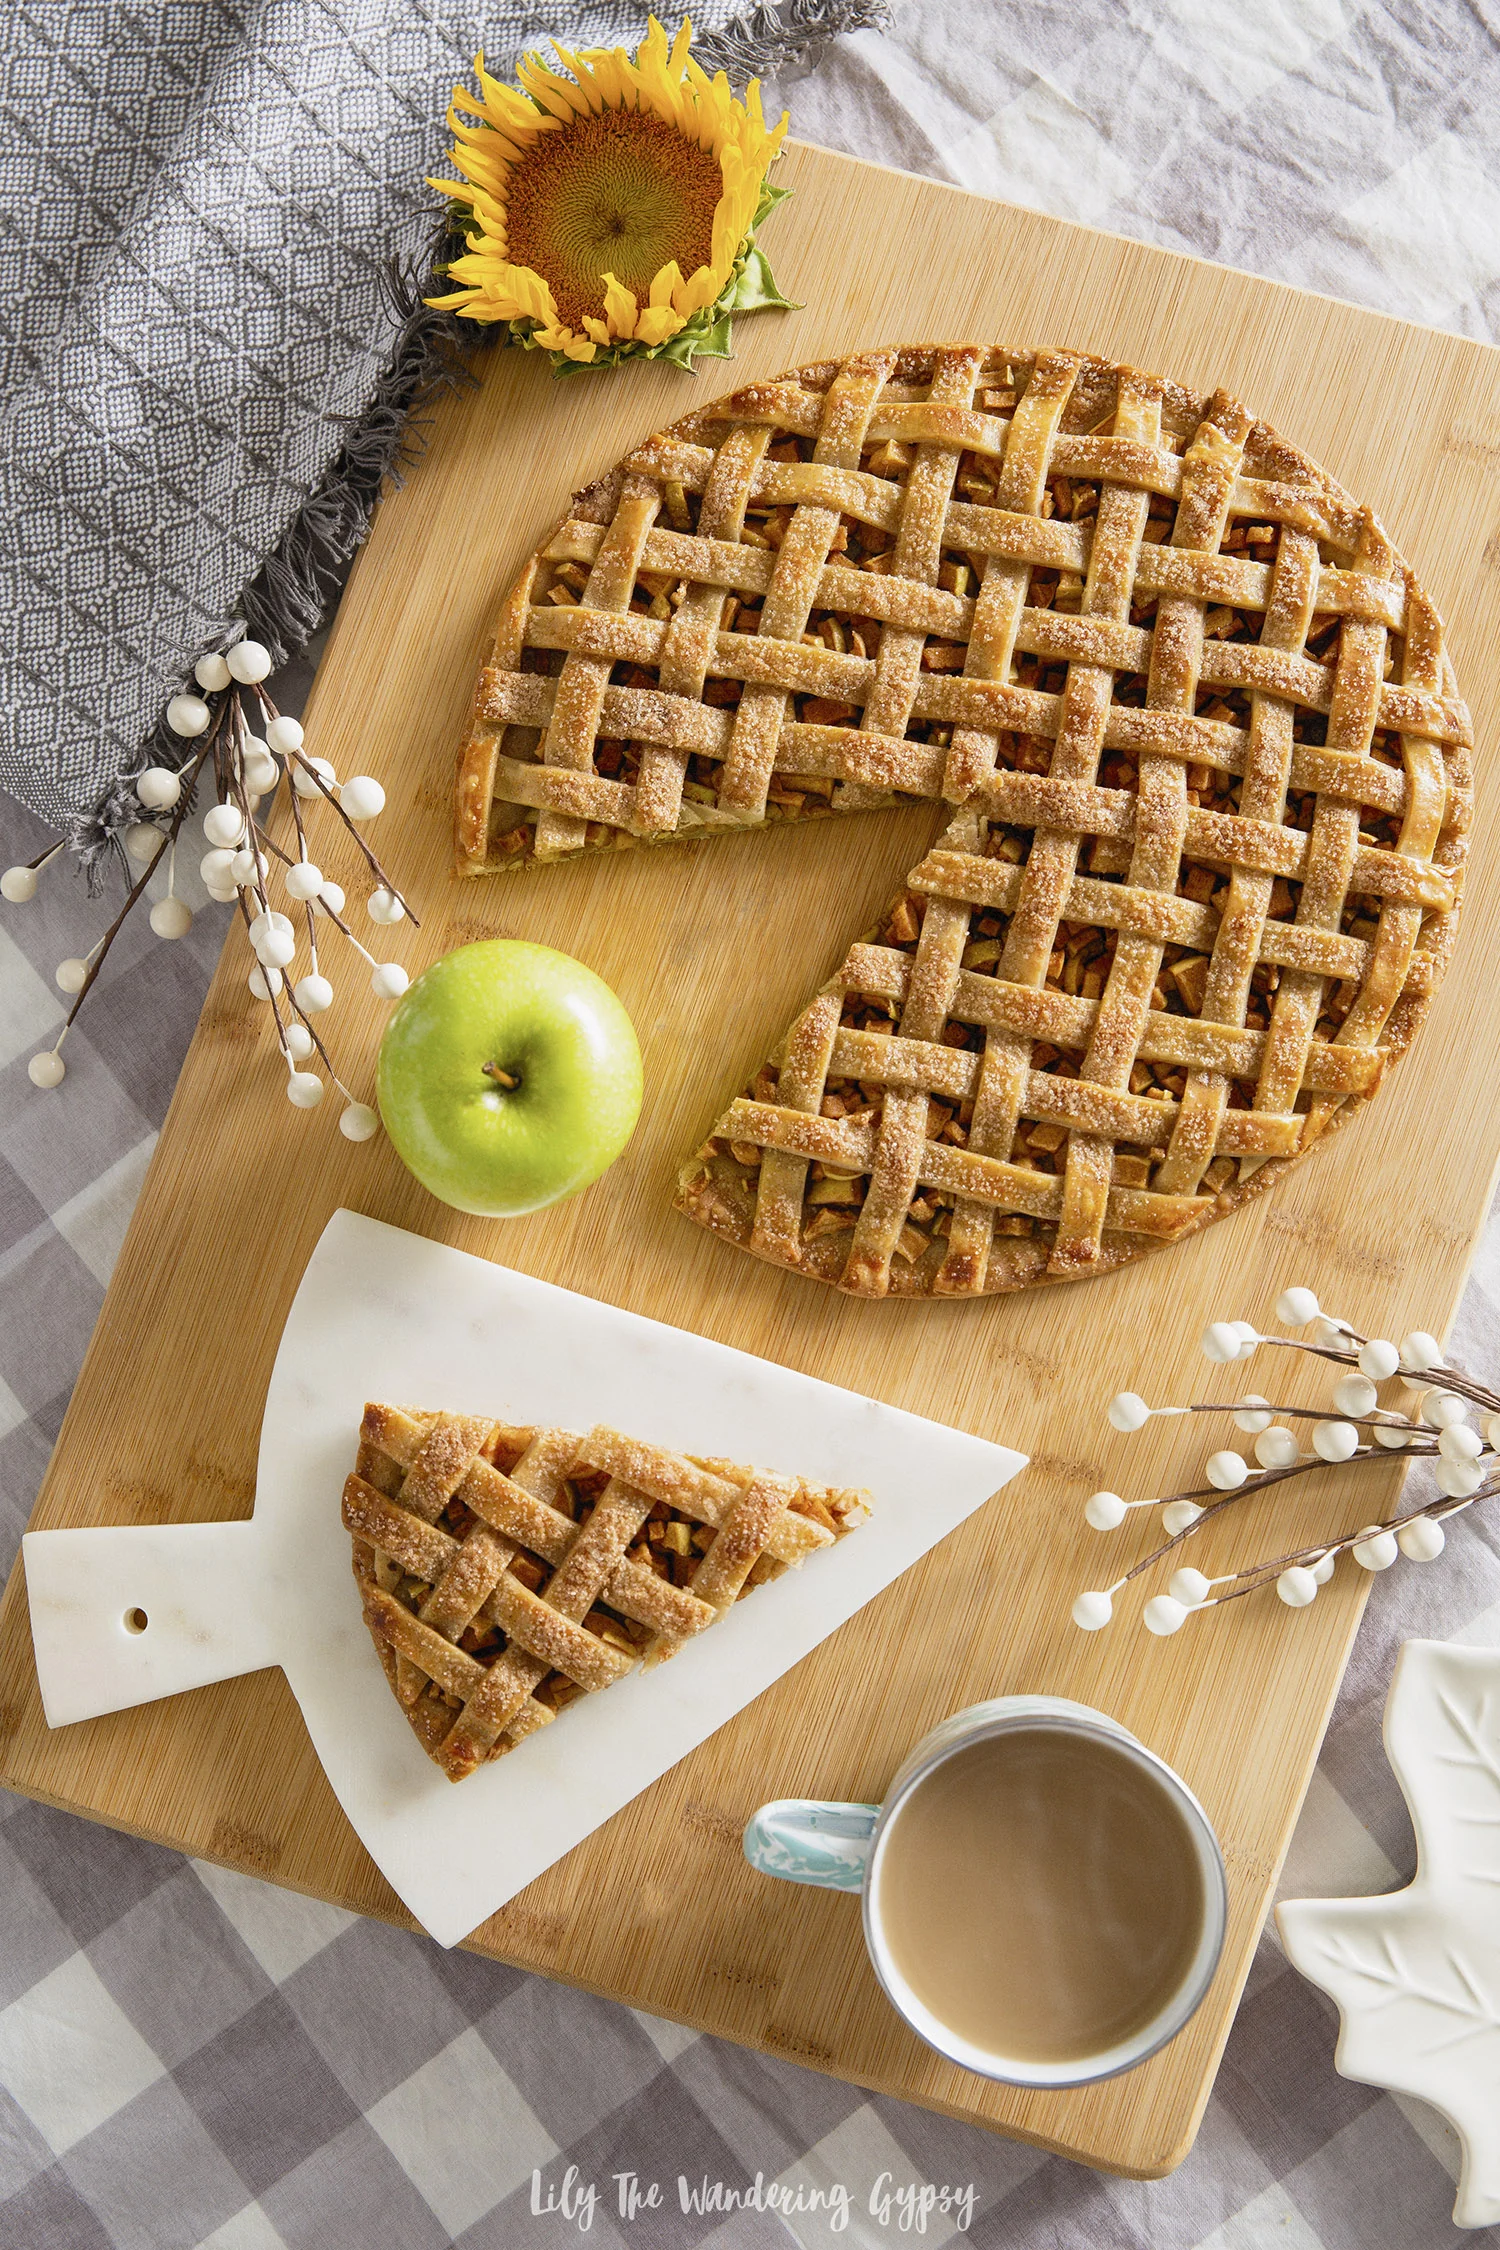
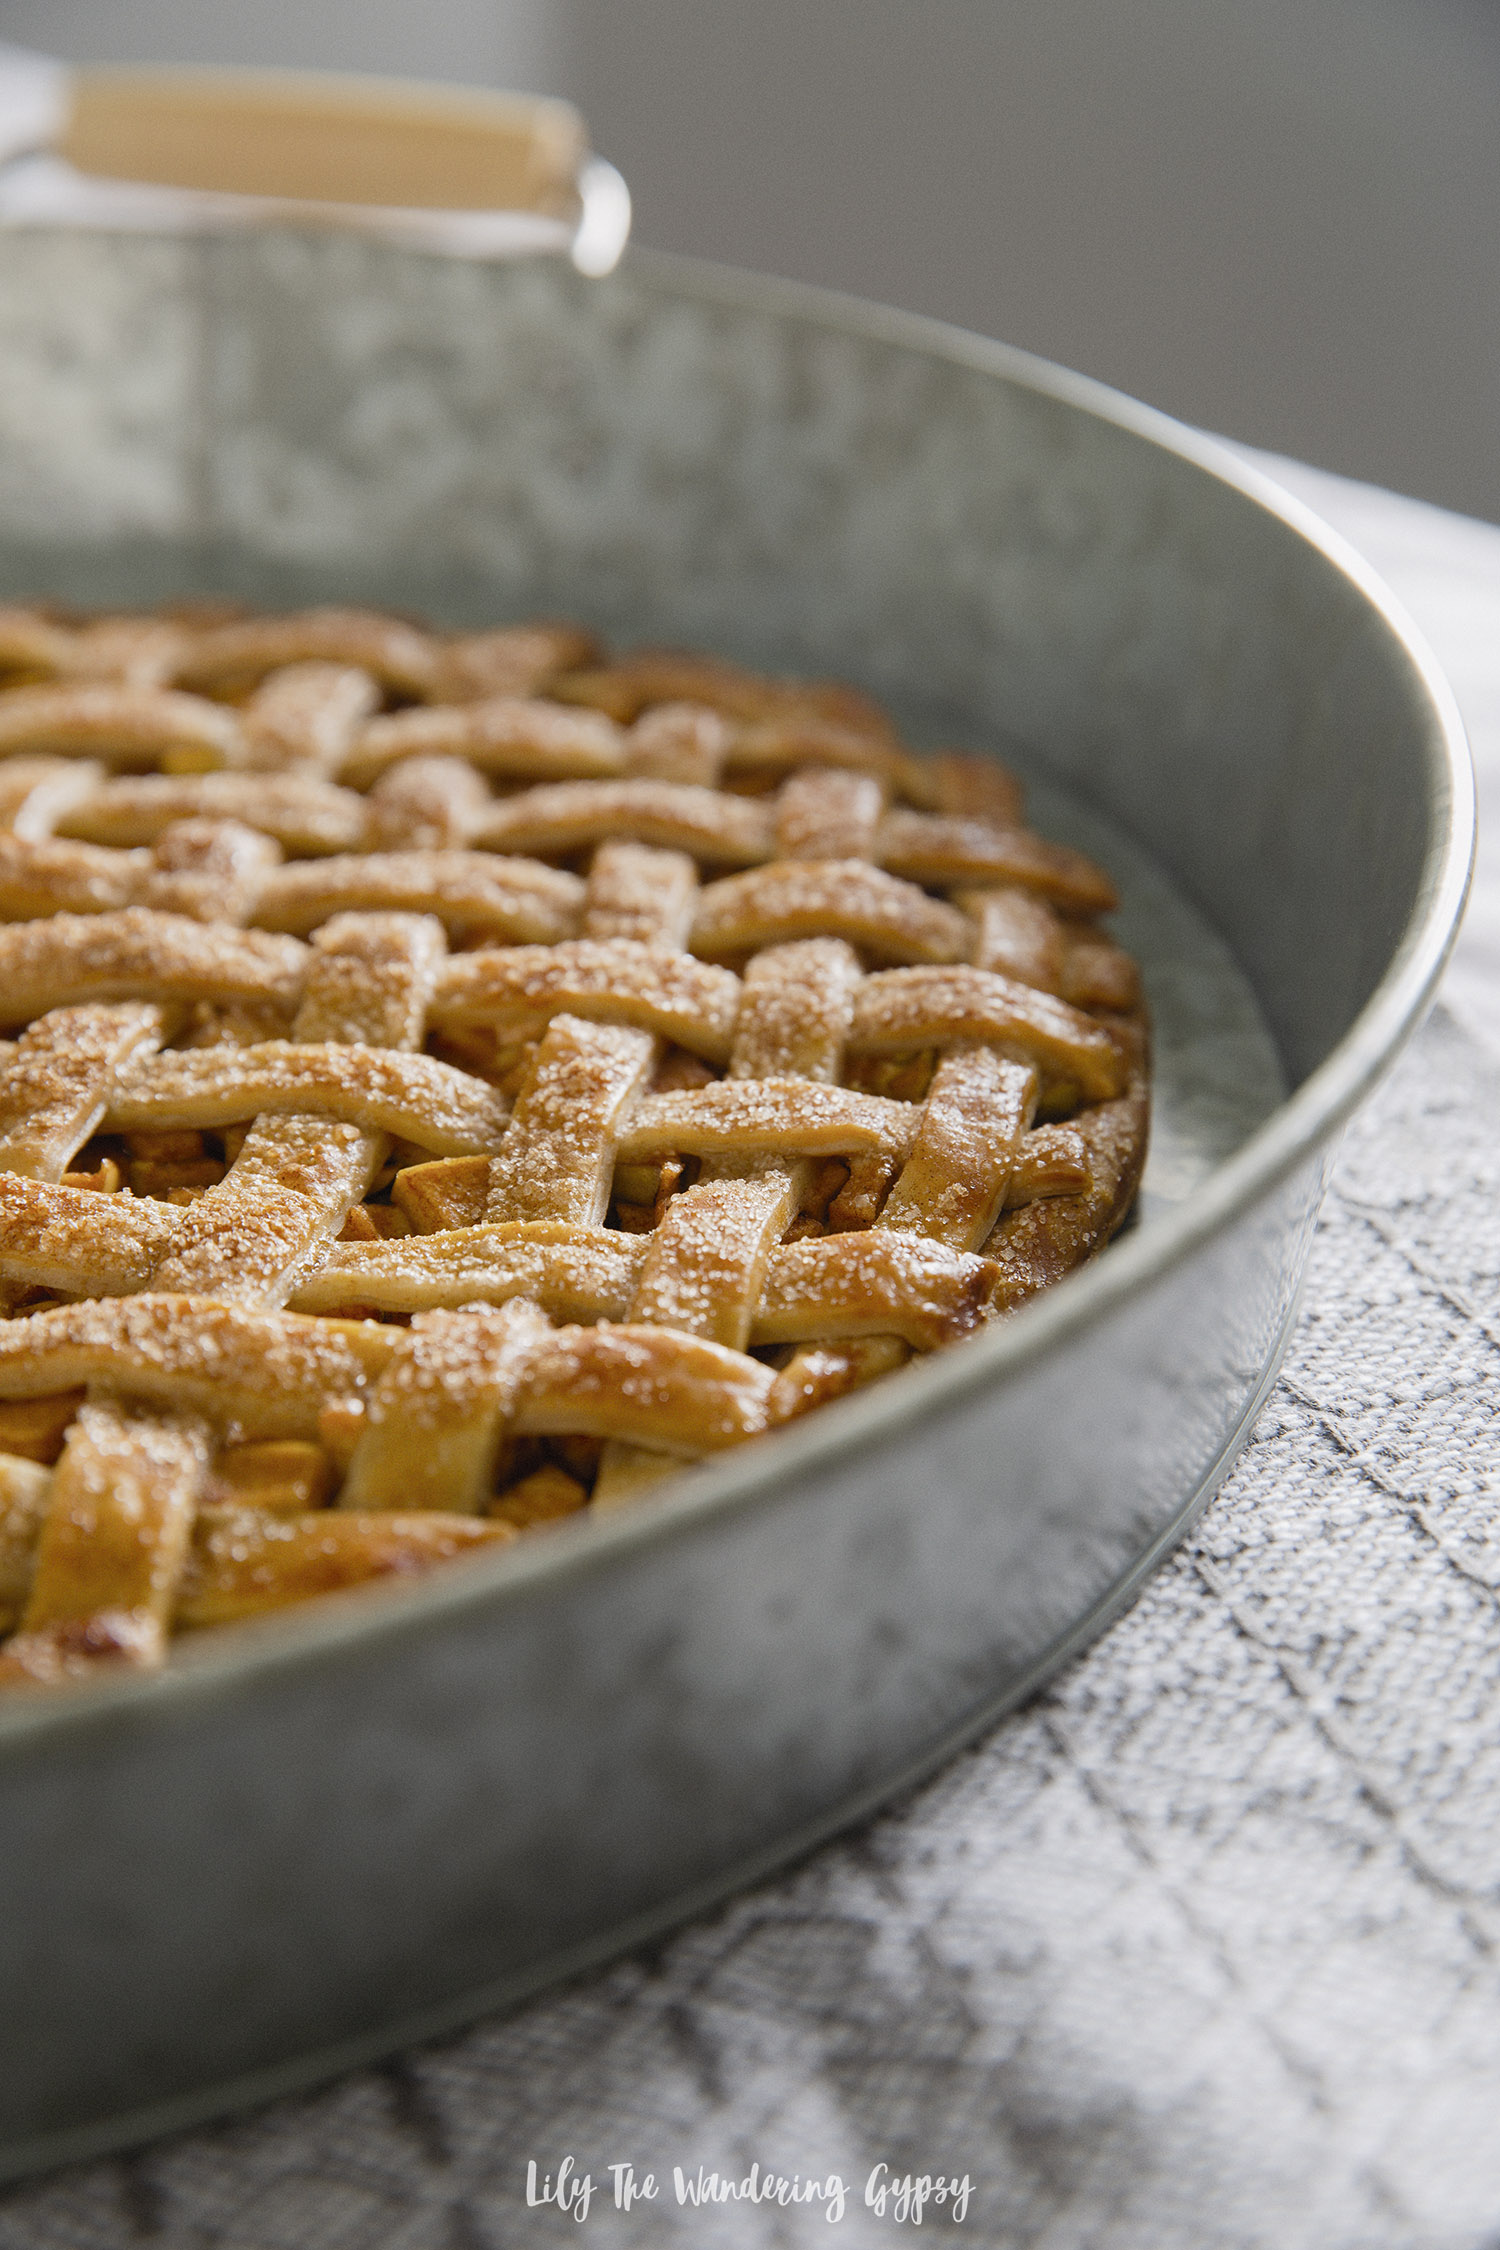
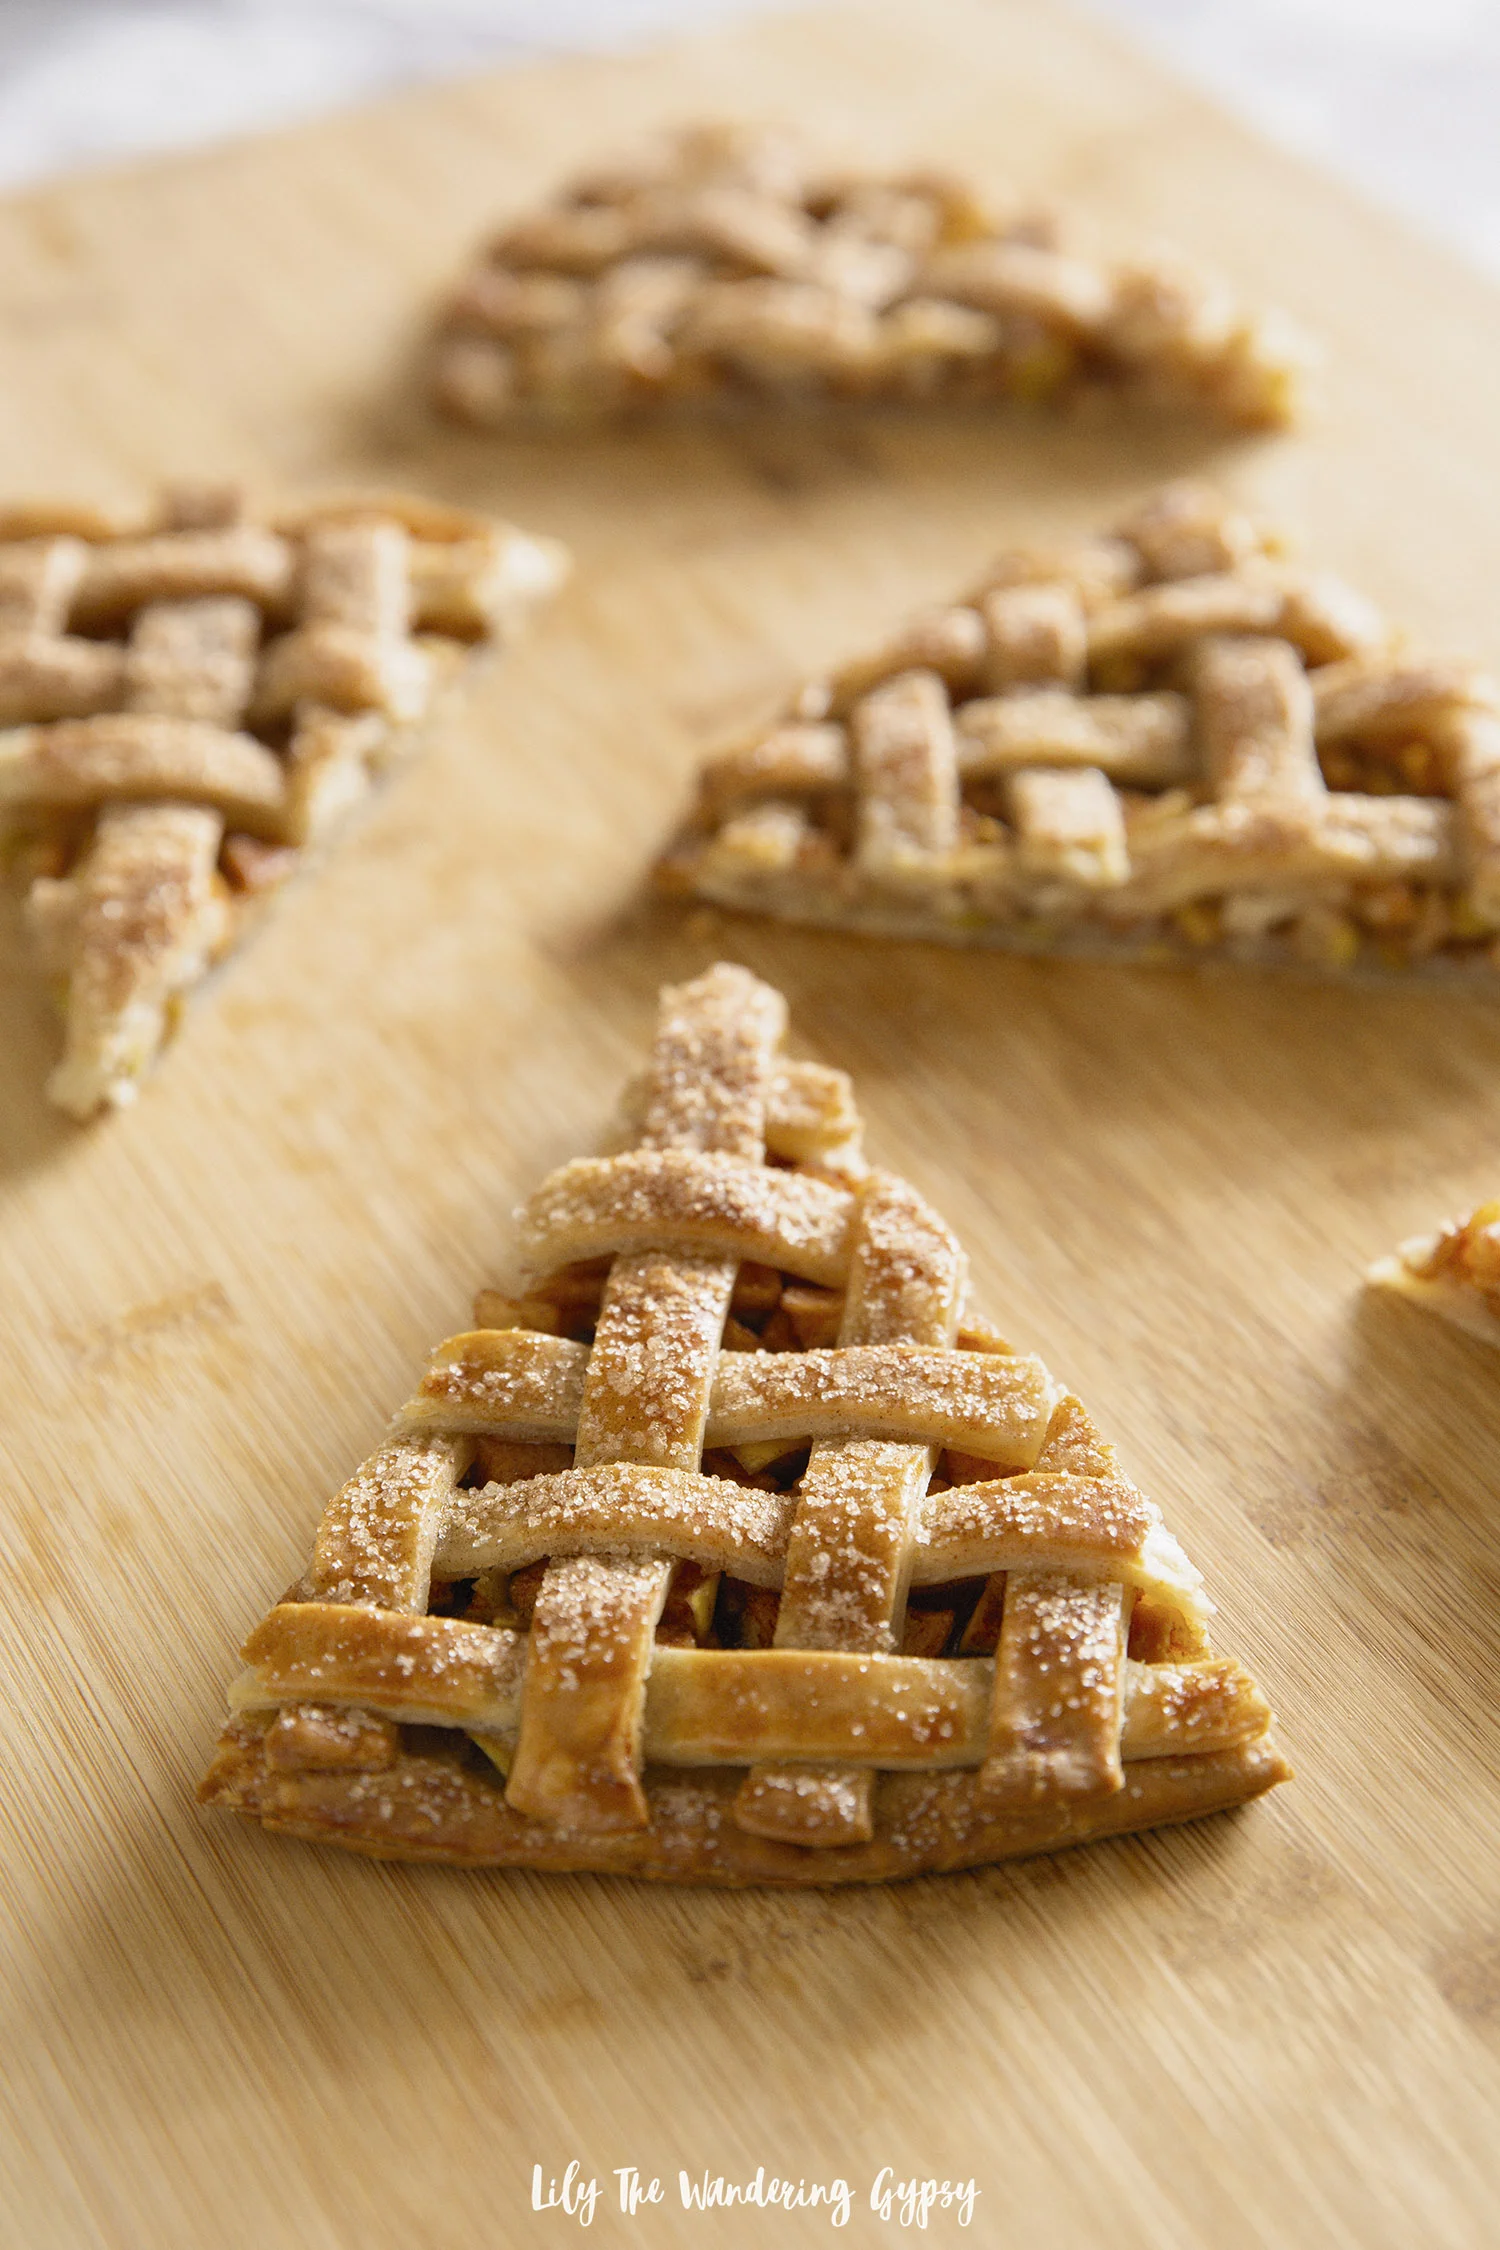
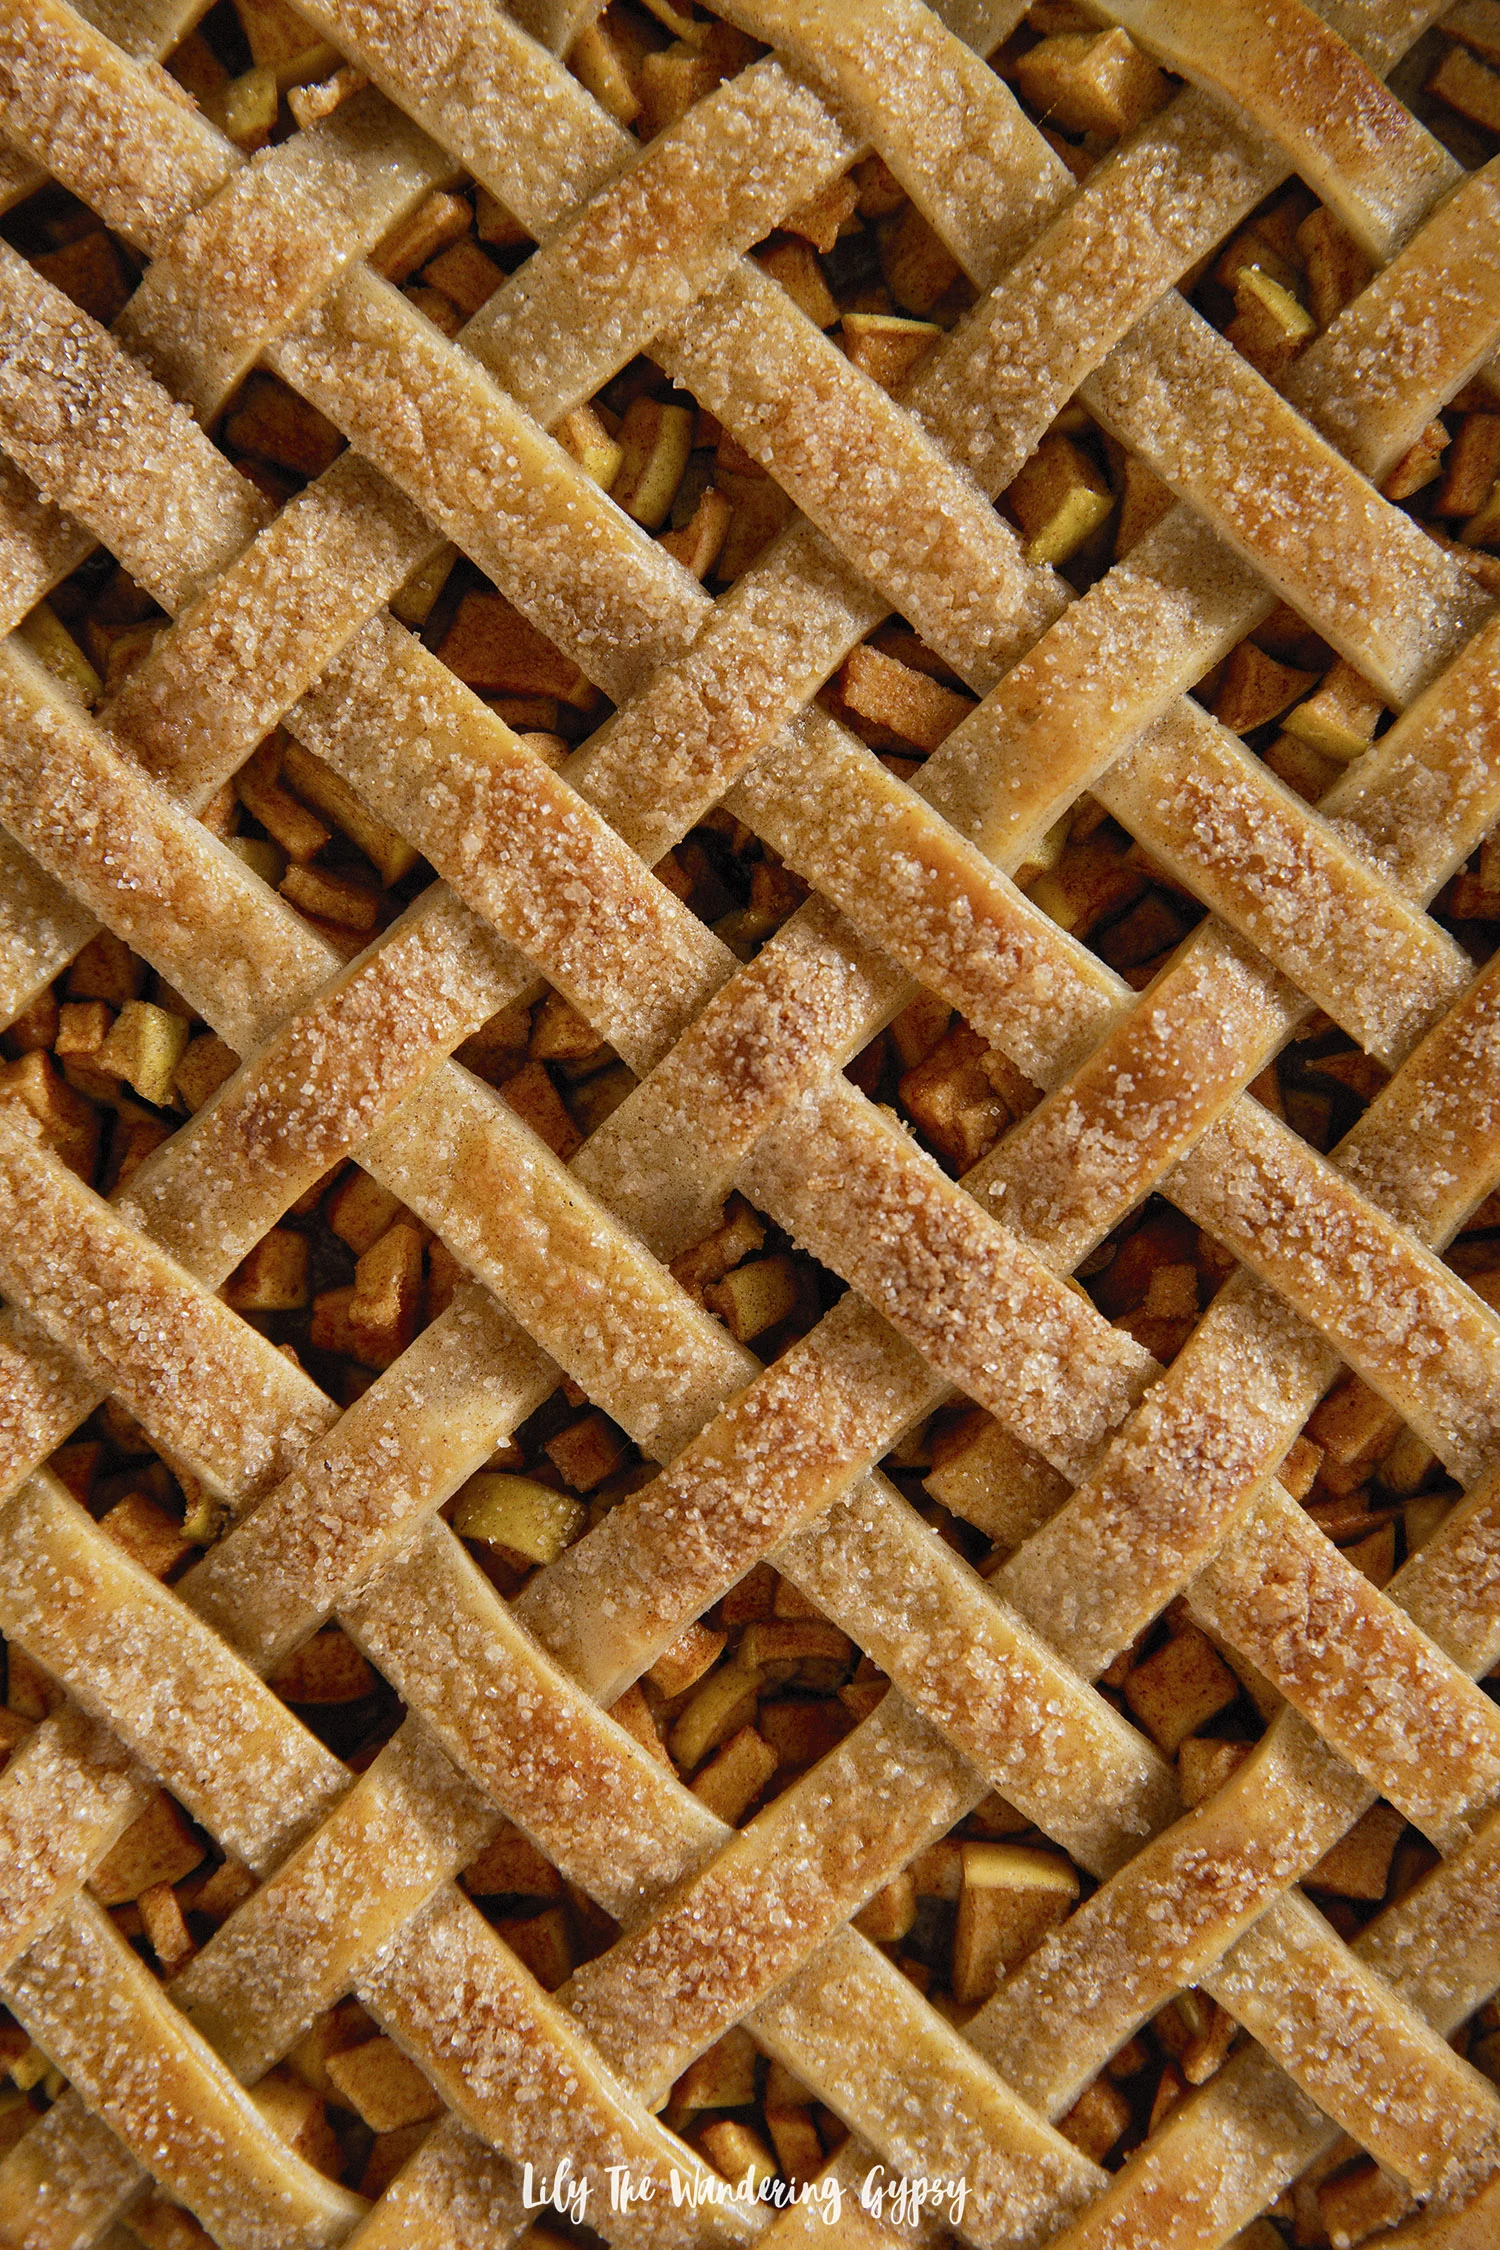
This rustic recipe is crunchy around the edges from this crispy crunchy dough, sweet, tart from the apples, buttery from the dough, and the egg wash and cinnamon sugar topping makes the most excellent crunch when you bite into it.

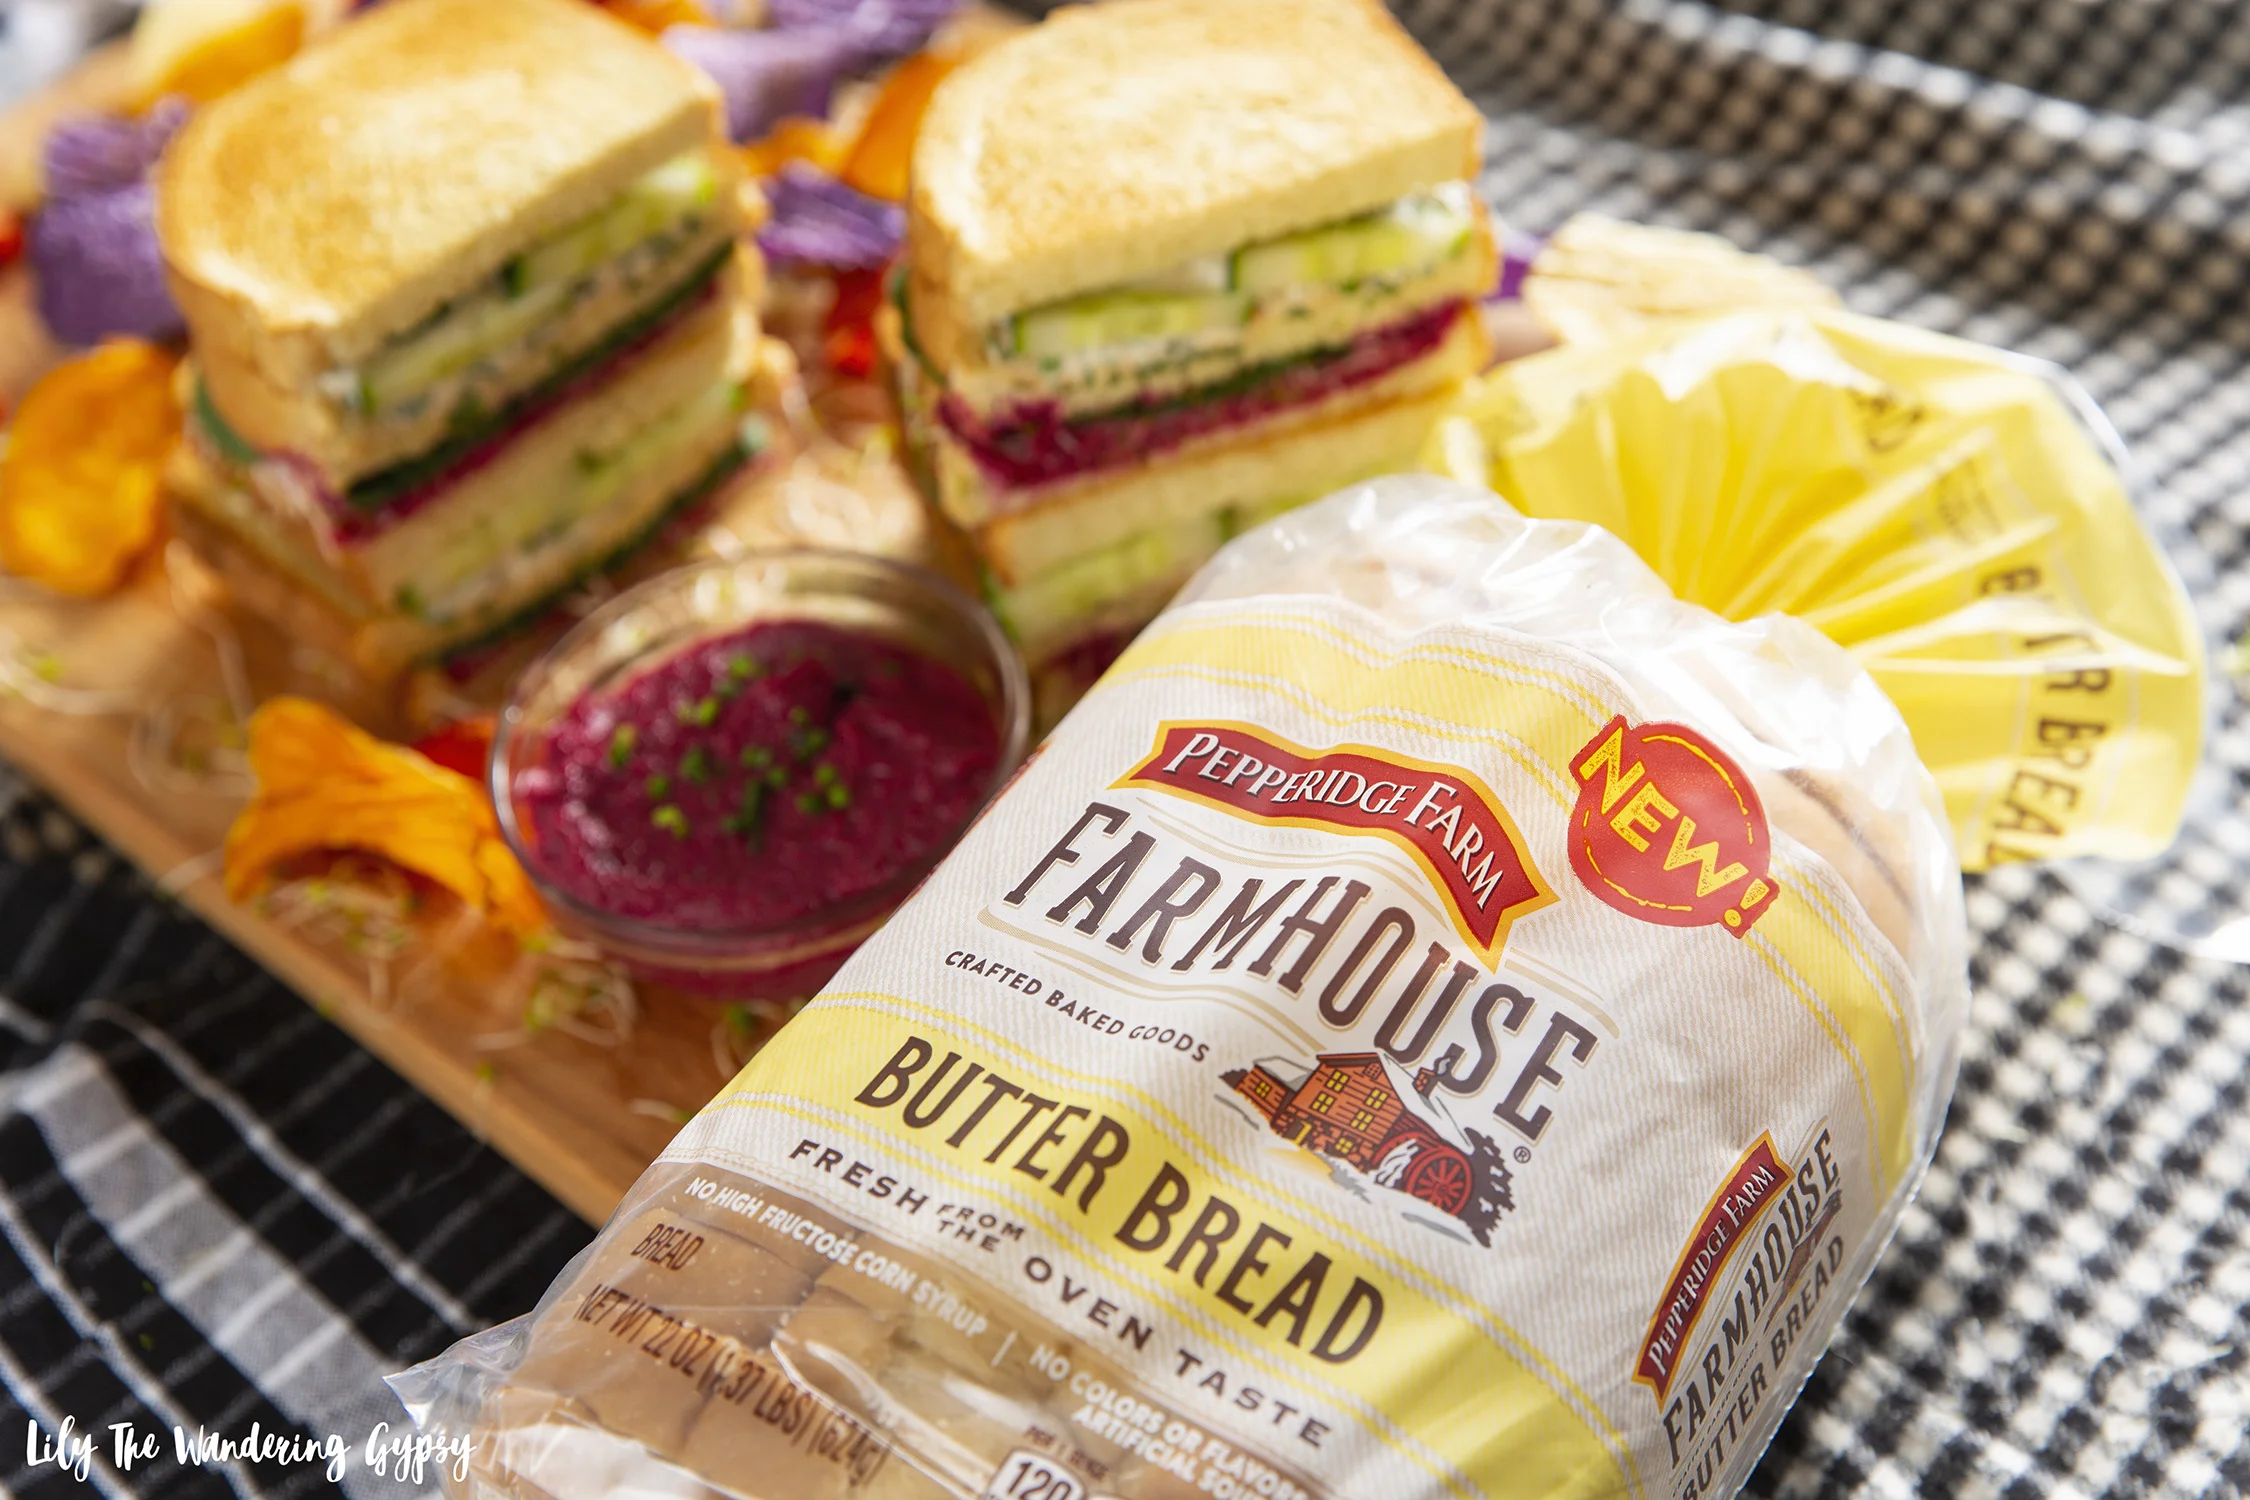
Perfect for enjoying on a chilly fall day or evening! I was extremely happy with how this recipe turned out, and I know you will be too. I used an organic pie crust from the store, and it held the shape of the lattice just perfectly.

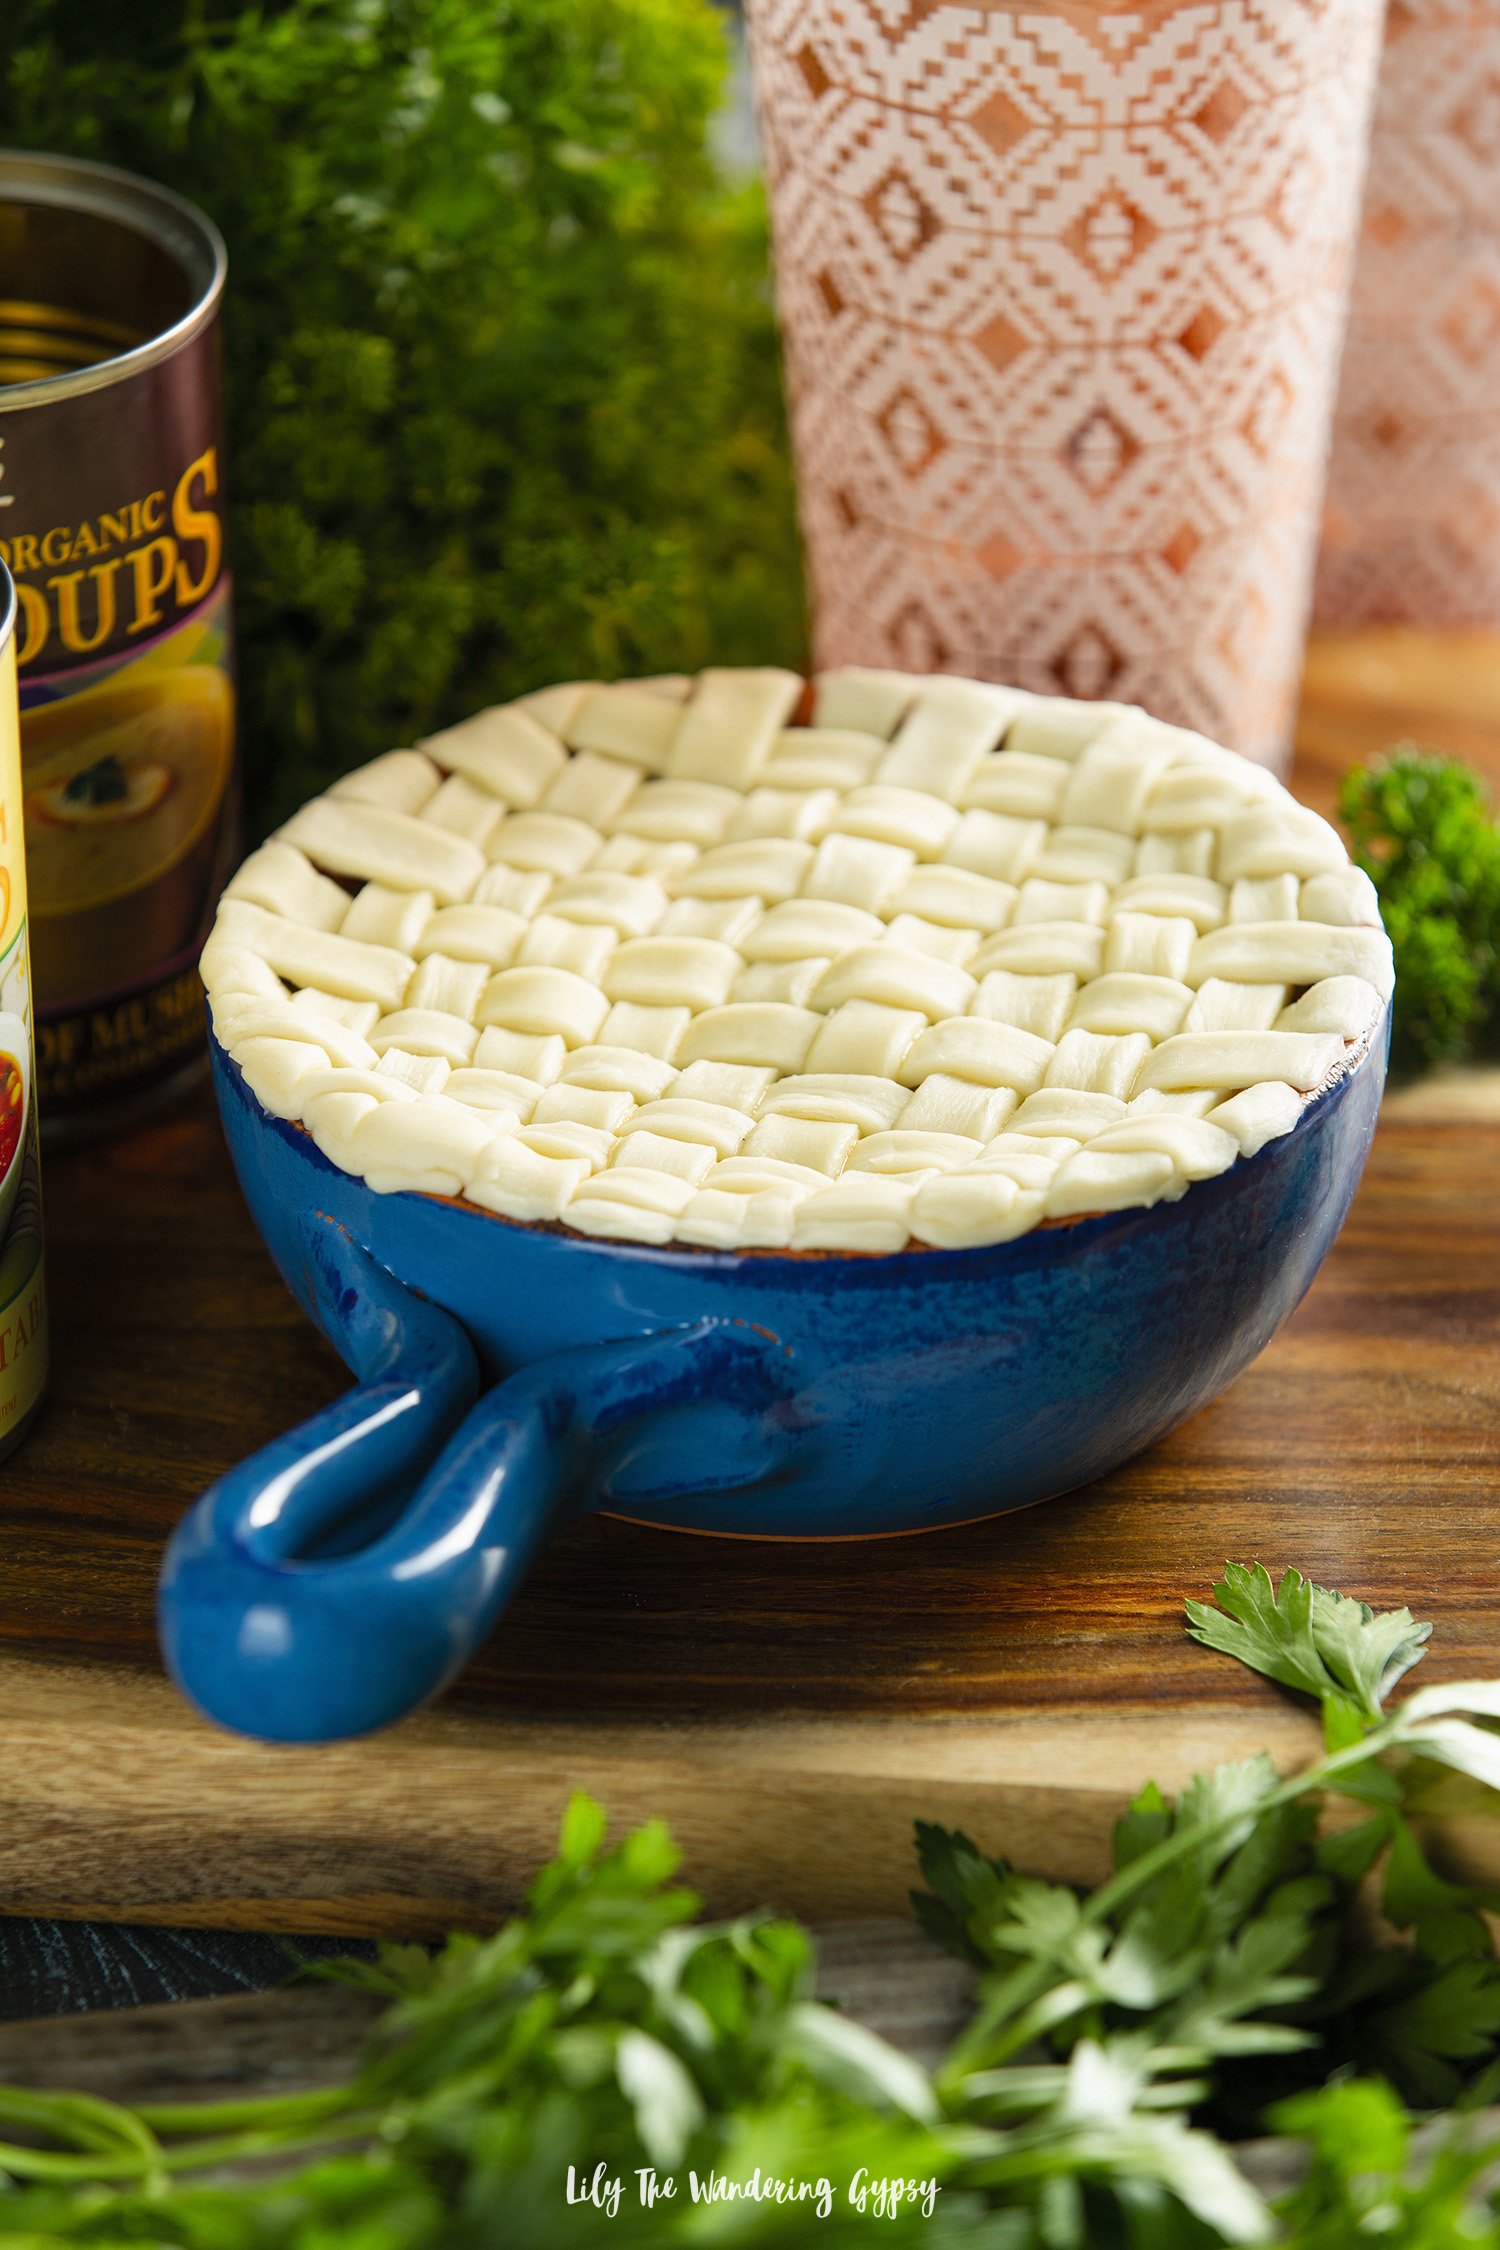
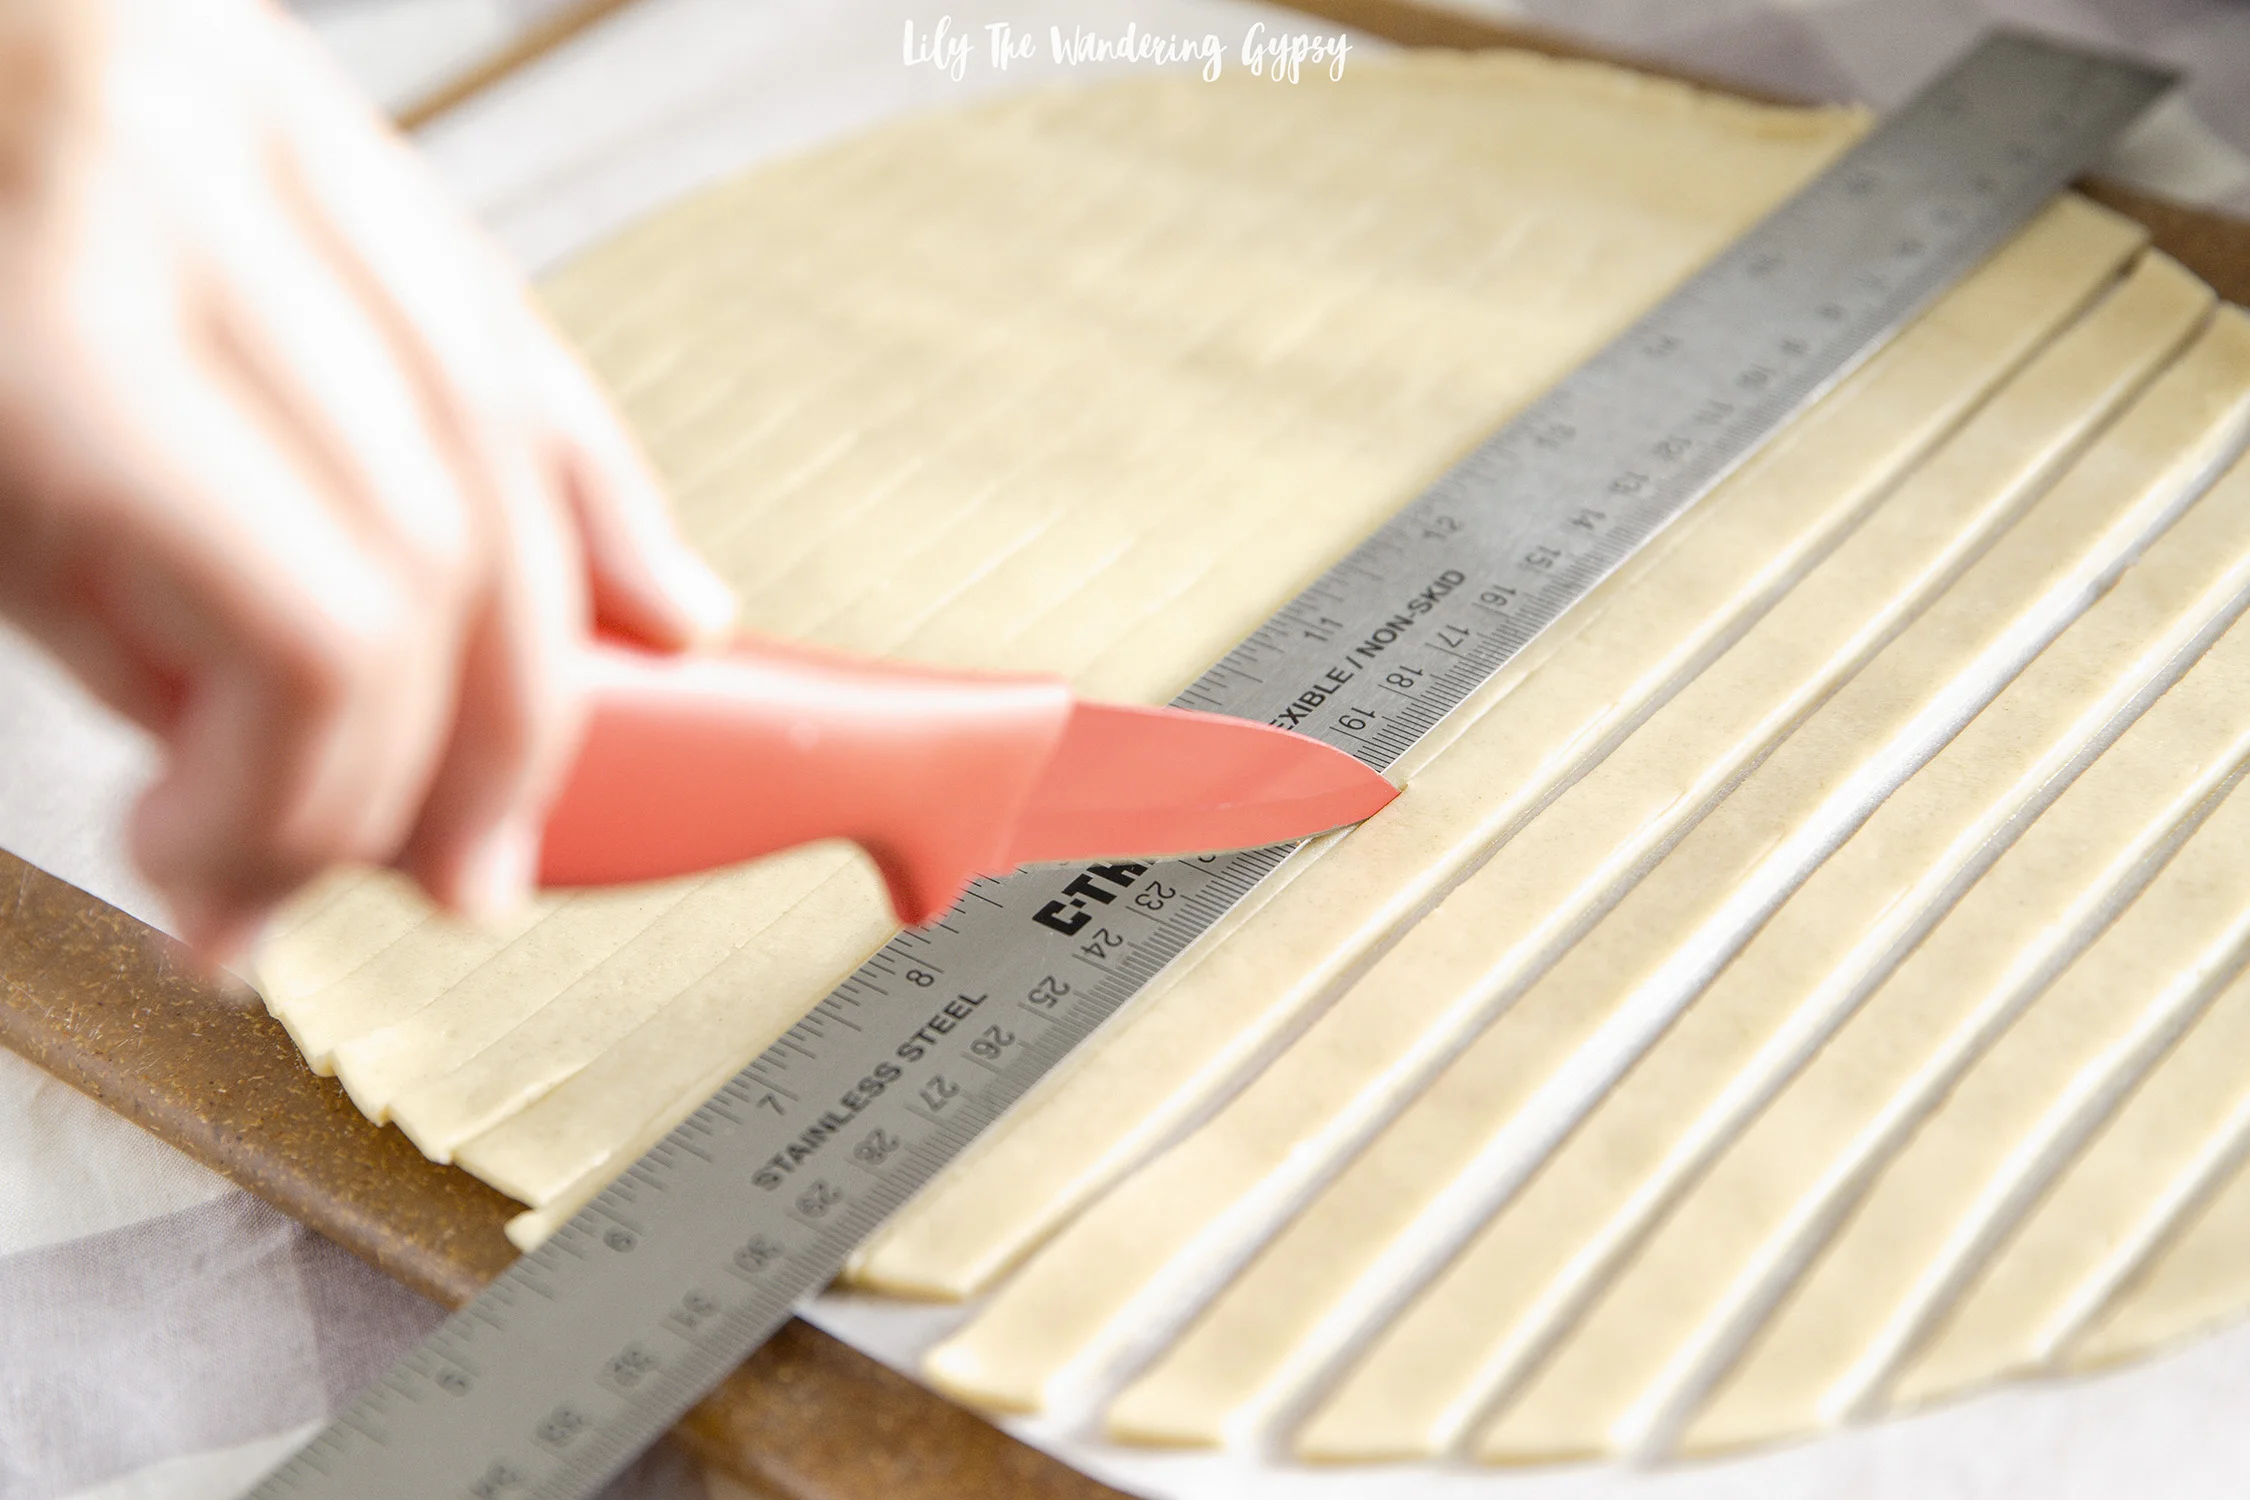
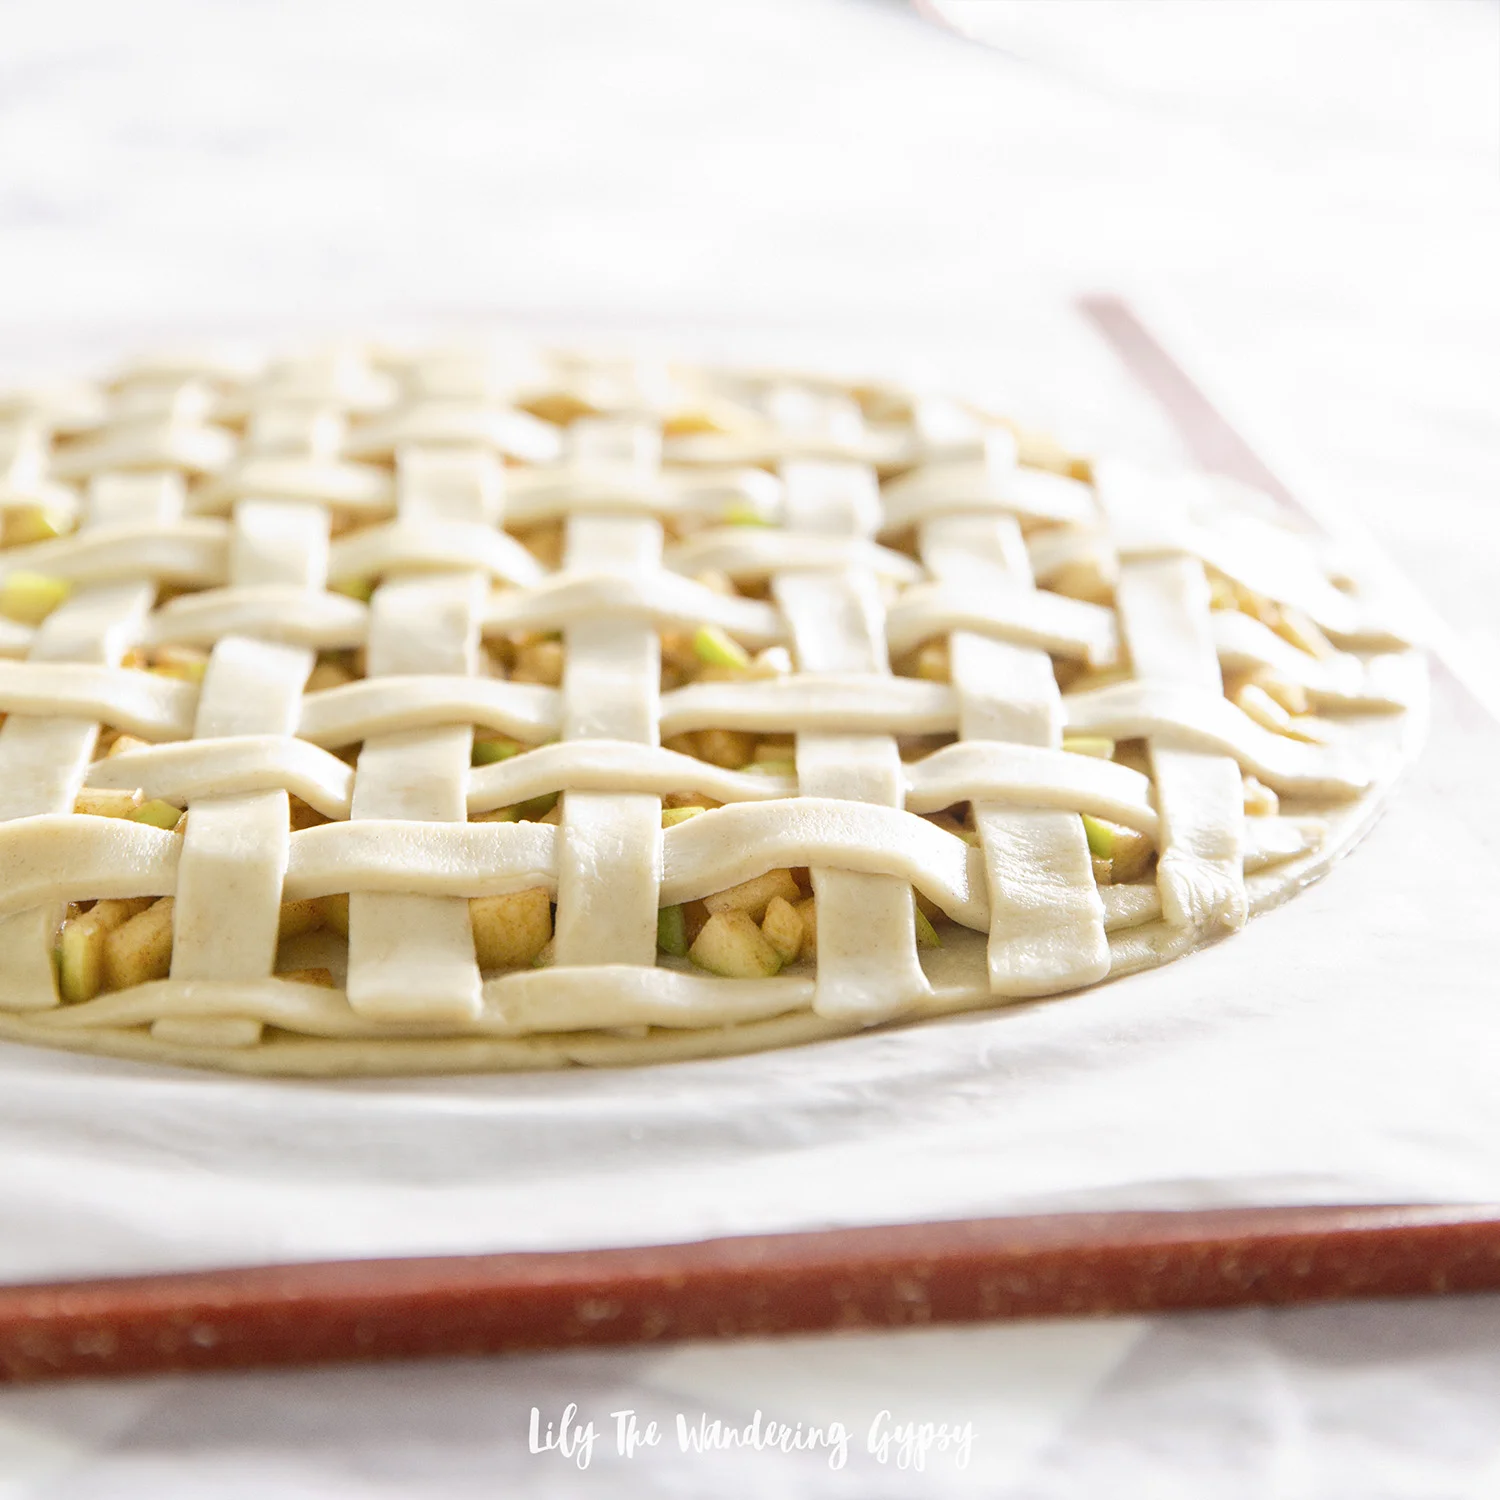
By cutting the lattice into smaller, ½” strips, I was able to make a very intricate pattern on top of this Apple Pie Pizza. Feel free to also cut the strips into 1” pieces to make life much easier! The ½” strips were not incredibly hard to work with, just a little more time consuming. But, patience always pays off when you’re baking.

RECIPE

INGREDIENTS:

1 package refrigerated pie crust (2 per package)

2 apples, I used green apples

4-5 Tbsp.  sugar

1 tsp. cinnamon

1/8 tsp. nutmeg

1 egg, whisked for egg wash

4-6 Tbsp. water in a small bowl to use to attach pie dough together

Round or Rectangular baking sheet

Parchment paper

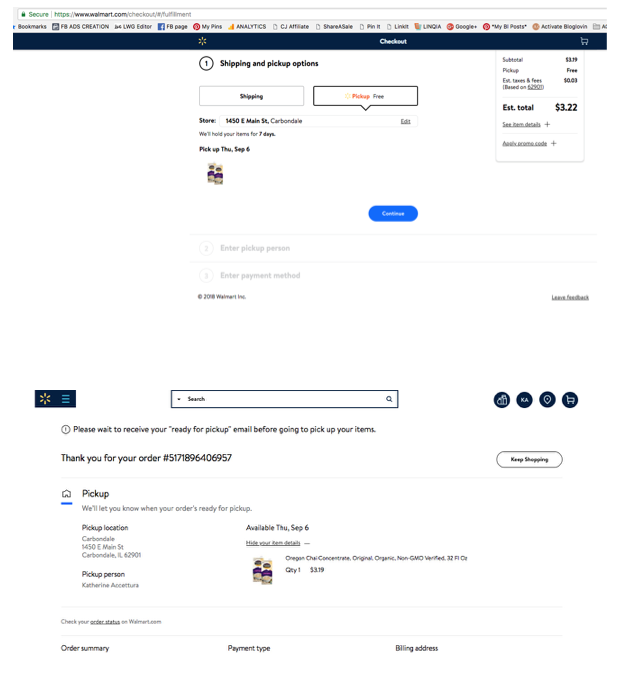
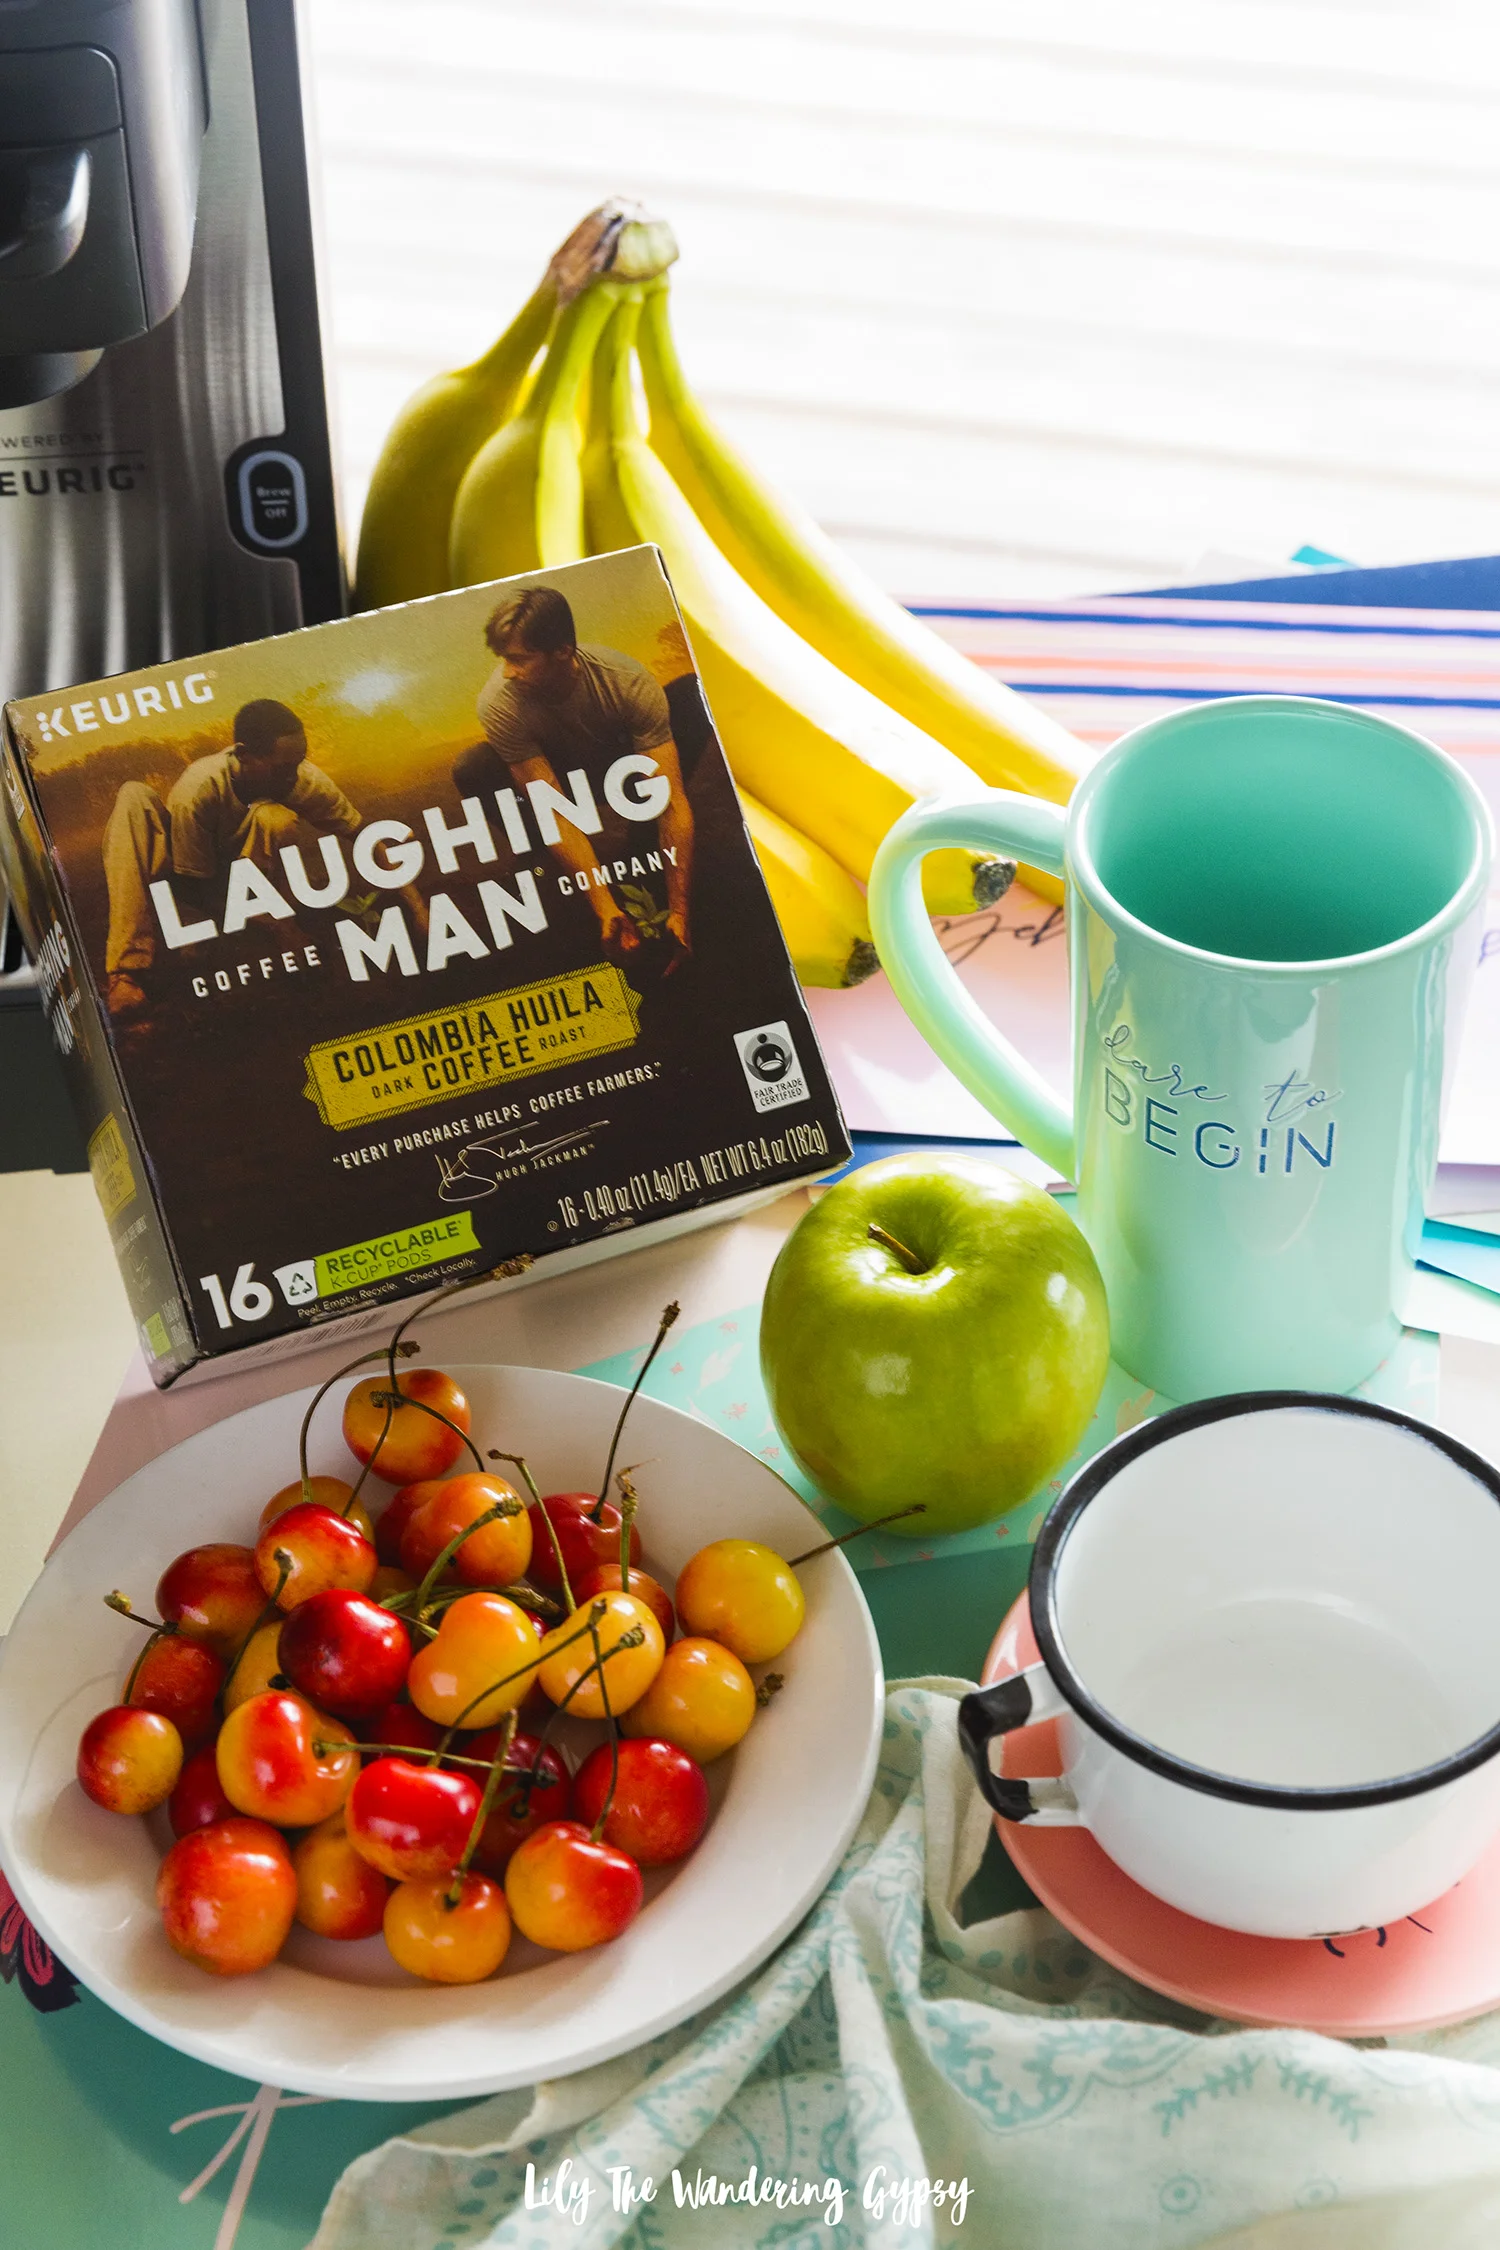
Oregon Chai Tea Latte Concentrate to enjoy while baking!


INSTRUCTIONS:

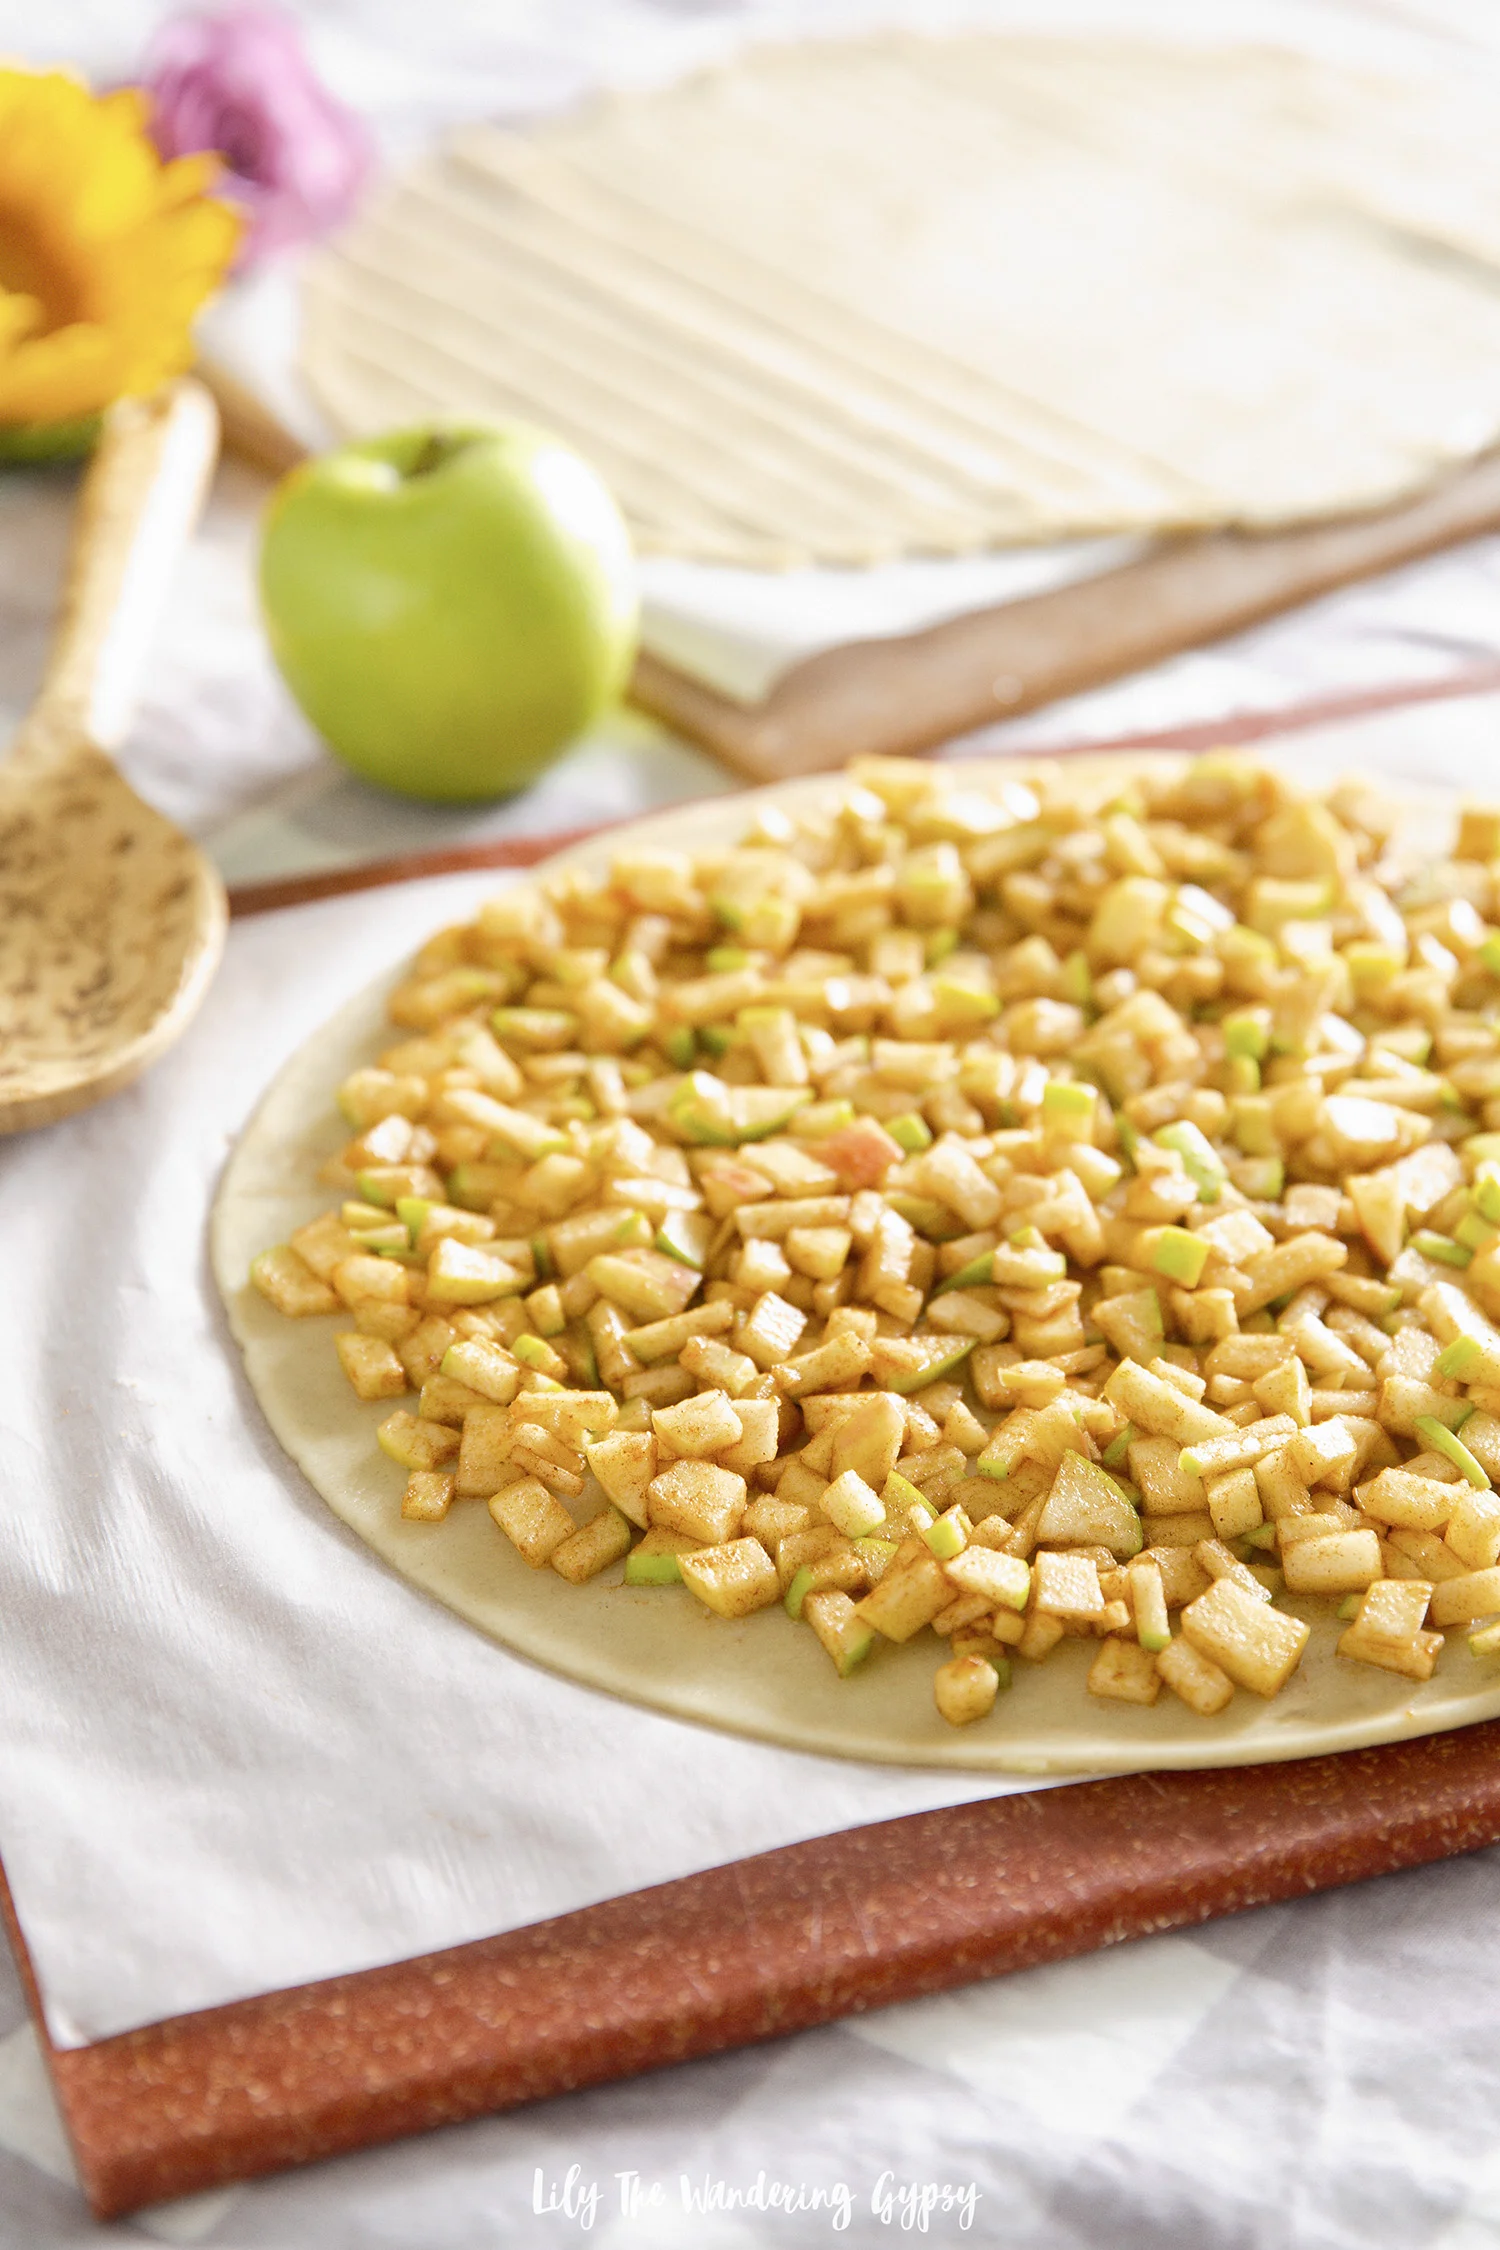
1.) Chop 2 apples into tiny pieces and coat with 1 ½ - 2 Tbsp. sugar, ½ tsp. cinnamon, and 1/8 tsp. nutmeg.

2.) Unroll both pie crusts onto a work surface covered in parchment paper. Optional: use a rolling pin to smooth out any creases.

3.) Use a ruler to mark every ½” or 1” on one pie crust. Also, use the ruler and a sharp knife to impress even lines and cut strips from the pie crust. Set aside.

4.) Spread an even layer of apples onto the other pie crust.

5.) Weave dough strips over apples, first laying half of the strips vertically, then weaving the horizontal pieces in next. Feel free to use a little bit of water in each place where the dough strips overlap. Brush top crust with egg wash.

6.) Once done weaving, sprinkle on a mixture of 2 Tbsp. sugar + ½ tsp cinnamon, and bake for 15-20 minutes at 375 degrees F. Slice like a pizza and enjoy! We cut the finished Apple Pie Pizza with a sharp knife, but you could also use a pizza cutter!

Make sure to also grab your Ibotta offer here for 75 cents off any 1 Oregon Chai product at Walmart (9/26/18 – 11/30/18, or until supplies last).

Stock up now! This tea is so delicious you will want to incorporate it into your every day routines and serve it to anyone who visits you.

I was able to easily order the Oregon Chai Tea Latte Concentrate (32 oz.) on Walmart.com using their super easy Online Grocery Pickup service!

Below, you will see how easy it was to search for all of the available Oregon Chai products at Walmart. I spent around $12 to create this entire recipe, and since the Chai Tea was under $4.00 I saved SO much compared to going to a coffee shop for an overpriced drink.

After I went to the checkout page, I simply chose “Pickup” for FREE (see below)! No shipping charges at all, which saved me around $6.00. YAY!! I love a good deal.

The taste of this Oregon Chai Tea was rich, smooth, and has those amazing chai spices that I can’t get enough of. I like to add macadamia milk to my chai tea, instead of traditional dairy milk, and my body loves me for it! What a delicious way to get a little pick-me-up during baking or during any other time of the day.

Once my order was ready, I was able to run by my local Walmart and easily grab the tea in the pickup area. Super easy since I had so many errands to run that day.

Has your local Walmart installed an Online Grocery Pickup station yet? Ours JUST remodeled, and I had an extremely easy experience, let me walk you through it/ 

1.) Visit the Walmart Online Grocery Pickup station and scan the barcode given in your email.

You can also just wait outside and call the phone number on the pickup area. They will bring everything right out to you!

Like I said, baking helps me de-stress and helps me continue to be creative, so after getting a ton of things checked off the to-do list, I relaxed for a bit, then got to baking.

I hope you have an absolutely splendid fall, and please comment below to let me know if you tried making this recipe! This would be so fun with kids, and would be a fun holiday baking activity. Enjoy!

Pull Apart Cupcake Cake Recipe

This recipe is PERFECT for parties and holidays, because it's easy to eat! Everyone has their own individual cupcake to share the joy, no need to cut THIS cake. 

We were ecstatic when we learned that we had the opportunity to collaborate with Martha Stewart to promote her baking items at Macy's. It's quite the honor, and several times throughout this process I exclaimed, "I am shooting recipes for Martha Stewart"!!! 

In order to creatively incorporate her Essentials collection into pins that would encourage people to want to learn more, I thought that a sweet treat would obviously be perfect, so I found a fun recipe on marthastewart.com and creates it! Below, you will find that very recipe, and I hope you are inspired by this fun post to make your very own cupcake cake!

MARTHA STEWART RECIPE (originally found here):

Pull-Apart Vanilla-Wafer Cupcake Cake with Berries

Talk about a fun dessert! It looks like a sheet cake on top, but there are actually vanilla-coconut cupcakes underneath the fresh berries and fluffy whipped-cream frosting. It's easy to make and even easier to serve -- no slicing required.

Source: Martha Stewart Living, May 2018

INGREDIENTS

  • 45 vanilla-wafer cookies, pulsed in a food processor until finely ground (1 1/2 cups)
  • 1/2 cup unbleached all-purpose flour
  • 1 teaspoon baking powder
  • 1/4 teaspoon kosher salt
  • 1 stick unsalted butter, softened
  • 3/4 cup granulated sugar
  • 2 large eggs, room temperature
  • 3/4 cup whole milk
  • 1 cup sweetened shredded coconut
  • 1 teaspoon unflavored gelatin
  • 1 cup cold heavy cream
  • 2 tablespoons confectioners' sugar
  • 1/4 teaspoon pure vanilla extract
  • 1 1/2 cups mixed fresh berries, such as blueberries, raspberries, and blackberries

DIRECTIONS

  1. 1. Preheat oven to 350 degrees. Line a standard muffin tin with paper liners. Whisk together cookie crumbs, flour, baking powder, and salt.

  2. 2. Beat butter with granulated sugar on medium speed until pale and fluffy, about 1 minute. Beat in eggs, one at a time. Reduce speed to low and add flour mixture in 3 batches, alternating with milk, beginning and ending with flour mixture and beating until combined after each addition. Fold in coconut.

  3. 3. Divide batter among cups. Bake until cupcakes are golden brown and centers bounce back when gently pressed, 22 to 24 minutes. Let cool completely in tin on a wire rack.

  4. 4. Add 2 tablespoons water to a small saucepan. Sprinkle with gelatin; let stand until thick, about 5 minutes. Gently heat over medium until gelatin has dissolved. Remove from heat; let cool 5 minutes (but don't let it set).

  5. 5. Beat together cream, confectioners' sugar, and vanilla on medium speed until very soft peaks form, 1 to 2 minutes. Add gelatin mixture; beat on medium until stiff peaks form, about 1 minute more.

  6. 6. Remove cupcakes from tin and arrange on a platter in a three-by-four rectangle. Spoon frosting over each row of cupcakes; using an offset spatula, smooth to cover tops, forming a rectangular shape. Refrigerate at least 1 hour and up to 3 hours. Sprinkle with berries before serving.

‘Make Every Cup Count’ with Laughing Man® Coffee from Target

This post is sponsored by Laughing Man® Coffee but the content and opinions expressed here are my own.This post is sponsored by Laughing Man® Coffee but the content and opinions expressed here are my own. #LaughingManCoffee #MakeEveryCupCount #Target

Sometimes I notice, that at the tail end of any season (the end of summer, for example), I sometimes get into a little slump. As a blogger, we are always having to think a month or more in advance for projects, and while it’s always fun to think about the new season ahead, I do sometimes need a little boost of caffeine in the mornings to get me through it and to stay motivated! A cute coffee cup never hurts, either! ‘Make Every Cup Count,’ friends – the motivating power of coffee is really amazing.

I recently tried delicious offerings from Laughing Man® Coffee, which I found at my local Target, and also on Target.com. I really, truly enjoyed this coffee! Bobby tends to prefer his coffee more black than I do, and wow, that fresh coffee aroma was absolutely intoxicating! We drink coffee almost every day, sometimes multiple times a day – who’s with me?! The flavors we loved most include the Columbia Huila and Hugh’s Blend. Have you ever tried this brand before?

Laughing Man® Coffee was actually co-founded by Hugh Jackman after an inspiring visit to Ethiopia, where he met a young farmer named Dukale. Inspired by Dukale’s optimism and determination, Hugh was committed to helping improve the lives of coffee farmers and share their Fair Trade Certified™ coffees with the world.

Since its inception, Laughing Man® Coffee has always strived to ‘Make Every Cup Count’ by donating a portion of proceeds from each purchase to the Laughing Man® Foundation, which supports coffee farming communities and programs that clear the way to health, growth and success for coffee farmers and their families. In addition to being available in recyclable K-Cup® pods, consumers can now purchase the brand in ground bagged coffee.

It’s important to have something to keep you fresh and alert, especially when a lot of my projects seem to be due all at the same time. That encourages me to try to burn the candle at both ends, and while I’d love to take a midafternoon (or admittedly a mid-morning nap), I know that’s just not always possible. If I have a warm cup of java nearby, then I can actually get through those rough work days.

LEARN MORE ABOUT THE COFFEE FEATURED HERE:

Colombia Huila – A dark roast coffee of uncommon complexity, Colombia Huila is produced from beans of great character, resulting in an intense, deep-roasted flavor with a black cherry sweetness, and a dark chocolate finish.

Hugh’s Blend™ – With contrasting, yet complementary notes of tart green apple and toasted graham cracker, this smooth and balanced blend represents the cheerful embodiment of the Laughing Man® coffee mission and a reminder that true fellowship knows no borders.

Both available in recyclable K-Cup® pods and bagged from Target.

I also like to enjoy a cup of coffee on the weekends – after all, a blogger’s job is never really done after Friday at 5pm, it’s a constant and very fulfilling job and I do love it!

What sorts of ways do you try to prep for the seasons ahead? I am finishing up lots of late summer and back to school projects, but soon enough, Fall and Winter projects will be in the works.

Whether you’re a blogger or not, I am sure we all feel the motivation to look ahead. It’s sometimes hard to create Fall projects when it’s still warm out, but I love having a delicious cup of coffee nearby, so I can get that extra boost of motivation!

Learn more about these amazing coffees here! Thanks for stopping by, friends!

Fresh Vegan Mushroom Tacos Recipe (Awesome in Cast Iron)

If you're looking for a new way to incorporate those fresh, local, Farmer's Market ingredients into a recipe, here's a good one! These Vegan Mushroom, Onion, and Pepper Tacos are super delicious and you definitely won't even miss the meat! 

Even more special, is the fact that we got to create this recipe for Martha Stewart Essentials available at Macy's. It's been SUCH an honor creating a set of four recipes for Martha! It's definitely a food blogger's dream :)

Keep reading to get the full details on this delicious, vegan recipe (but, feel free to add some cheese or sour cream if you like!!).

We found all of the fresh ingredients at our local Farmer's Market here in Carbondale, IL.

As soon as I learned about this amazing opportunity, I went searching through all of the items and decided upon four very delicious recipes, which I will link you to as soon as they are live! 

I was encouraged to use recipes right from MarthaStewart.com, so I used her basic recipes, then embellished and modernized them to make them extremely appealing for my Pinterest fans. Well, everyone has loved them so far, and now all of the cast iron skillets are SOLD OUT on the MAcy's website! Perhaps my recipes helped, but the fact that they were each around $15.00 might also be the reason these have all sold out. Nonetheless, find your favorite cast iron or other skillet, and let's get started!

Ingredients / Materials: 

- 1-2 lb. Fresh Mushrooms 

- 1 red onion

- 1 medium bell pepper (we used several small ones)

- 2 Tbsp. or more Mexican Seasoning

- 1/2 bunch of cilantro

- Small Flour Tortillas

- Martha Stewart Cast Iron Skillet 

Instructions:

1. Prepare and chop mushrooms, red onions, and bell peppers. 

2. Heat olive oil in a Cast Iron Skillet, add chopped onions, then belle peppers, then lastly, mushrooms.

3.) Season veggies generously with Mexican seasoning, a tiny bit of salt, and any other seasoning you would like. Also, add chopped cilantro at the end and stir everything one last time. 

4.) Warm tortillas, then add the veggie filling, and enjoy! They're so delicious, I hope you love them! 

FLYWAY FAMILY FARM MUSHROOMS (MAKANDA, IL)

As I mentioned, I got to use local ingredients from our Farmer's Market! We loved finally being able to utilize three different varieties of mushrooms from Flyway Family Farm. They have different mushrooms at the market almost every weekend!

Also, I used the red onions and colorful bell peppers from Country Sprout Organics, my other favorite booth at our local market! 

Hopefully, you have enjoyed this recipe! Stay tuned for several more recipes inspired by Martha Stewart! 

Our Montana Road Trip with Expedia Add-On Advantage

Thank you Expedia for sponsoring this post. Book your travel on Expedia.com to save with the Add-On Advantage!

We just got back home from an amazing adventure out west in Montana! We have a soft spot in our hearts for Montana and cannot seem to stay away! Travel fuels our creativity, inspires our work, and helps us bond in ways words cannot describe!

We love driving around the mountains and small towns of Montana, and renting a car from the new Expedia Advantage Add-On program is an excellent choice for a fun road trip like this, through southwestern Montana! 

When you book a flight, you can get awesome deals on add-ons like car rentals and hotels. Keep reading to learn more about their awesome deals AND see lots of photos from our recent vacation out west!

Downtown Virginia City, MT.

Montana is a magical place. "Keep Montana Majestic" is a fitting slogan I thought of as we were leaving this time, because it's such a gorgeous and majestic place that has only 1 million residents - one . We spent a lot of time in southwestern Montana this past month, visiting the areas around Yellowstone including Big Sky, Bozeman, Hebgen Lake, and Ennis, MT. We also spent time in the Missoula area for an awesome rafting trip on the Clark Fork River Gorge. Keep reading to learn more about some of our favorite places in Montana and get insights on these awesome travel deals.

BOOK A FLIGHT, CAR, OR PACKAGE AND UNLOCK UP TO 43% OFF SELECTED HOTELS!

So, if you already have a trip planned, and want to access a SUPER GREAT price on a hotel, this is a great opportunity! 

I checked on car rental prices around Missoula, which also unlocked deals on hotels! There were some awesome cars available, and all of the hotels in the screenshot below (with a yellow stripe above their name) offer additional discounts to those who use Expedia Add-On Advantage! I just love saving on travel, so I can use that part of the travel budget for something more fun. Like a rafting trip, which you will see below. We had SO much fun!!

Below, we spent one particularly fun Sunday on the water with a river guide. As a team, we worked together to get the inflatable raft through rapids. We had no clue how much fun we would have, since we generally never plan trips with any sort of guide or service - we love just driving and exploring places that way.

See the car rental deals I found, below, plus more suggestions of awesome places in and around Missoula to visit. 

If you ever have the chance to visit downtown Missoula, you will love it! I would even suggest 2-3 days to fully experience a couple of days of shopping plus being able to eat and drink at the MANY bars and restaurants is so much fun. The city is walking friendly but a little spread out, and luckily parking is super easy here in the summer, so feel free to use that rental car to get around town.

We have been so fortunate to visit Ennis, MT several times in the past couple of years. We love the gorgeous mountain vistas in the Madison Valley and I absolutely love how free you feel when you're in such a beautiful place. It's a very small town, but the Madison River runs right through town, as well as being one way people get to Yellowstone, the town's rather small population gets over a million visitors. It's very popular to fly fish in this area, and we love finding a place to let the dogs swim too. 

When you're in Ennis, you must check out the Gravel Bar (aka G Bar - see beers in the image below), which has lots of local MT beers and spirits, and their food is really pretty good. They are also opening a brewery next year, which should be really neat. Across the street from G Bar is Willie's Distillery. Deemo's Meats is a place to stop and grab groceries (they specialize in amazing meats and cheeses), and make sure to grab some of their frozen brats near the register - the green onion ones are AMAZING)! Perfect for roasting over a campfire too. 

Below, I thought this was so funny. Your typical Monday, with a Side By Side just leisurely driving through town! Some of our other favorite places to visit in Ennis include Plain Jane's (clothing, shoes, and the best Montana gifts ever), Nacho Mama, and Shedhorn, which sells outdoor gear, really nice quality women's shoes and clothing and also hunting and camping gear.

A historic gold mining town situated high above the Madison Valley. This is always a fun place to stop and shop or stroll through the wooden boardwalks that used to be hustling and bustling. 

Sure, since Big Sky, Montana sits at around 7200 feet in elevation, it's a great place to ski, snowboard, and snow mobile But, it's an amazingly vibrant and fun place to be in the summer as well. We spent several different days in Big Sky, and saw local music at their free Thursday Night Concert Series, drank a few local Montana beers at their bars, and visited the Big Sky Farmer's Market. The shopping in this area is really wonderful, if you like that sort of thing! There are also amazing restaurants in almost every style of food, so you can please everyone with something delicious!

These Thursday Night concerts are packed - especially this one weekend when the rodeo was also in town. If the line for the beer vendor is too long for your liking, just run into the Hungry Moose grocery store and grab something to drink - you can have open containers in the unincorporated town of Big Sky during these events. Grizzly Outfitters also has the most impressive selection of the latest women's clothing from the best outdoors brands. Yay! During the summer, people also love to mountain bike here, as well as fish the surrounding rivers. The Gallatin River runs through and all around town and is surrounded by huge pine trees.

The Big Sy Farmer's Market was really impressive. While around 90% of the vendors had art, I felt that the quality of most everything was nearly art gallery quality jewelry and decor, made with antlers, beads, and other local materials. This flower vendor was also incredible - I wanted to bring home a huge, rainbow colored array of Montana grown flowers, but that was a bit unrealistic :) There was live music which was also super great, and then you could walk to grab some food in a nearby restaurant or food vendor after walking around. This Montana Alpaca at the Farmer's Market was rather cute too! 

Montana Flathead Cherries are in season during the summer, so grab up as many of these as you can if you are in Montana! They're SO sweet and delicious and I would love to bake a cherry pie from them. Huckleberries are also in season, but way, way harder to find than these cherries.

Hebgen Lake was formed in 1959 when an earthquake occurred, causing part of the mountainside to fall into the water, creating a rather amazing lake that is unlike any other place we have ever been. Our friend has a boat slipped on this lake, so we drove out and spent time over several different days in the sunshine! The water is absolutely gorgeous and great for tubing and water skiing too.

This lake is situated along the drive from Ennis to Big Sky. You can also drive through Bozeman instead, but this drive avoids the traffic altogether and it absolutely stunning! You even drive partially through the western part of Yellowstone. making this one of the most scenic cruises you can do in this part of southwestern Montana.

There are so many rivers in Montana, and we loved fishing various places to pull over and get in the water. Below, the Ruby River.

We loved driving around Montana this summer, and if you want any more travel advice, please leave questions or comments in the section below!

I hope you enjoyed this recap of our recent vacation to Montana! Have you ever been to any of these towns pr places in Montana? Comment below to let me know!

I was selected for this opportunity as a member of CLEVER and the content and opinions expressed here are all my own.

Two Amazing Recipes for Summer Get-Togethers with Mission® Tortillas

This is a sponsored post written by me on behalf of Mission®. All opinions are entirely my own.

If summer get-togethers make you giddy with joy and excitement, then you’re not alone! I too love brainstorming recipes with friends, then planning, prepping, and preparing the food, then finally getting everyone together to enjoy the bounty. Food always brings people together, and is great shared with old friends and new ones! This summer, I am going to make it my mission to enjoy the company of others over great food as much as possible!

I love how these Mission® Super Soft Flour Tortillas really made my two recipes even better than I could have ever imagined. I have tried all sorts of tortillas, and these are the softest, tastiest ones yet. They were so versatile, and absolutely perfect for my Vegetarian Southwest-Inspired Pinwheels AND for my Grilled Steak Tacos. I always feel like the tortillas make or break a recipe, and I was so happy to find a new favorite. You can use the store locator on the Mission website to find Mission tortillas at stores near you, and find even more delicious recipes as well.

I’m not sure if you’ve ever experienced this, but I am always let down when tortillas kind of get dried out super quickly, then kind of crack when you roll anything out of them (like the pinwheels). Well, these were perfect. They held together super well, and worked amazingly well for this 4 ingredient appetizer!

And, since I wanted to offer lots of delicious toppings for these Grilled Steak Tacos, my first thought was fresh ingredients of course!

I thought it would be so fun to offer guests some handmade pickled jalapeños as party favors. Every time we serve these to guests or bring them to someone’s house, we always get lots of compliments on them.

PICKLED JALAPENOS

(Making 1 day in advance is recommended)

I think it’s time to start sharing them with people, so I filled mini jars with a mixture of fresh ingredients like jalapeño slices, garlic cloves, and mini red onions. Now, it’s time to pickle!

I heated a solution of 1.5 cups white vinegar plus 1 cup water, and 1-2 tbsp salt until the salt has dissolved. Let it cool a bit, then carefully pour the vinegar solution over the ingredients, leaving a little bit of room at the top of the jar so it does not spill out. Place lids back on, and gift as soon as the next day.  

These turned out SO cute, and you could even tie cute ribbons around the jars for an even more festive look.

In addition to the pickled jalapeños, I offered pickled red onions (get my recipe here), plus a guacamole tomatillo sauce and a traditional red salsa too.

The lettuce even came right out of my own garden! This was my first year to try growing lettuce, and while it may be almost at the end of its season, I love treating friends to things I grew!

GRILLED STEAK TACOS

INGREDIENTS:

1/3 cup olive oil

2-3 tbsp soy sauce

2-3 tbsp or more taco seasoning

Juice from 1 lime

1 tsp salt

1-2 lbs flank steak or similar

INSTRUCTIONS:

Simply marinate each pound of steak in 1/3 cup olive oil, 2-3 tbsp soy sauce, 2-3 tbsp or more taco seasoning + the juice from 1 lime + 1 tsp salt for at least 1-2 hours or overnight. Simply grill for 3 or so minutes per side if your steak is thin like mine was. Slice and serve with fresh sides and warmed Mission Super Soft Flour Tortillas (they taste best warmed).

Slice up the steak and set out the toppings, the tacos are ready to eat!!!

SOUTHWEST INSPIRED VEGETARIAN PINWHEELS

I searched for vegetarian pinwheel recipes and hardly found anything! These are so great tasting, and you will never miss the meat.

Ingredients:

1 package Mission® Super Soft Flour Tortillas

Plus 1-2 bunches of cilantro

1 head of green lettuce

To create the sauce:

1 (8 oz.) box of cream cheese, softened

½ cup (or more) taco sauce or red enchilada sauce

½ - 1 cup cream cheese

¼ - ½ tsp salt, optional

INSTRUCTIONS:

1.    Mix all sauce ingredients together, and stir until smooth. I used a hand mixer

2.    Lay one tortilla out onto your work surface, and spread 1.5 -2 tbsp sauce in an even layer on tortilla.

3.    Add a line of cilantro and a line of small pieces of lettuce towards one side of the tortilla, then roll up into an even roll.

4.    Cut in 2” sections, and display on a cute tray. I used cactus pieces from a local market.

Enjoy!


The bottom line - I would definitely recommend Mission Super Soft Flour Tortillas to anyone who loves superior taste and excellent ingredients!

Happy summer, friends!

Brunch Party - Vegan Avocado and Egg Toast Board

Brunching ain't always easy, but I found a way to make it so :) Try setting up a toast board, where everyone can choose their own toppings! It's such a fun and interactive way to have guests gather around a giant array of great food and drinks! 

If you're a fan of hard boiled eggs, then here is one way to enjoy these protein packed, brunch-worthy hard boiled eggs from Great Day Farms, available at Walmart!

To make this amazing spread, you head to the produce section and grab as many colorful fresh ingredients as you possibly can. Make sure you do stick to a budget, as fresh veggies can sometimes items can weigh a bit more than expected and then ring the bill up quite a bit. I found these amazing heirloom tomatoes for around $2.99 per pound - which made them incredibly reasonable. 

Embrace anything that is in season (via the farmer's market or local grocer), like jalapeños, basil, avocados, red onions, and other delicious vegetarian ingredients. 

This is a great idea for hosting friends who are in town for the weekend, and all have different tastes - this toast board embraces just about everyone!

Also, you could prep these ingredients for lunch at work, or even for a summer picnic. These ingredients are 100% natural, and actually offer energy and so much inspiration for the day ahead. 

By offering fresh, wholesome ingredients to those you love, you can truly help nourish them with a seriously fulfilling meal. Feel free to add sliced turkey or even lox to add a really elegant vibe to this rather upscale meal.

FREE Summer Fun + A Cute DIY Gift Idea!

This post is sponsored by Zynga, but the content and opinions expressed here are my own.

Looking for fun and entertaining ways to enjoy the summer? Well I have teamed up with Zynga Words With Friends 2 to help share some fun and easy ways to have fun for FREE. Hey, we can all use a break, right?!

With this fun gift idea + a brand-new version of the Words With Friends app will help entertain everyone this summer. Help create more winning experiences this year, enjoy the thrill of the game.

Learn more about Words with Friends 2 here.

Download the game here (Apple store) or here (Google Play). Brush up on rules here!

You may be familiar with their first WWF game, but this one is a bit more updated and runs SUPER fast on my phone.

I love how you actually stretch your brain capacity and also learn new words. It’s fun for the whole entire family, and even fun with groups of friends too. I feel smarter during and after playing Words With Friends – I always pull out new words in conversations later that day! The game helps me connect with friends (new and old)!

I have met all sorts of new friends through the WWF app! There are always tons of players ready to start or complete a game with us, every time we login. We play ALL the time, and since we are always on the go, it’s something familiar in each place too.

With all of the Double Letter (DL), Triple Letter (TL), Double Word (DW), and Triple Word (TW) spots on the board, you can really gain a lot of points in just a turn or two.

Some of our highest scoring words are: CLOTS, TAXED, and HANDLED!!

DIY SUMMER GIFT IDEA

I know that rock painting has been around for decades, but I thought that a fun way to commemorate our friendship and share the beauty of the river would be to paint our friends’ names on rocks, then spell out their names in a gift. I had so much fun, and the best part of this crafty activity, is that you may already have everything you need – deeming this a FREE project!

MATERIALS:

Smooth River Rocks

Acrylic Craft Paint in White, Coral, Mint, and Raspberry

2-3 Small Craft Paintbrushes

Paper To Cover Work Surface

INSTRUCTIONS:

1.) Head to your local river to collect rocks, find them at a craft or hardware store, or find them anywhere else you like!

2.) Wipe off excess dirt from rocks with damp washcloth.

3.) Paint thick, white letters onto each rock. I used two coats of white paint for each letter. Below, you will see some rocks with two coats of white paint and some rocks in-process with only one coat of white paint.

4.) Paint colorful designs on top of white paint, on each rock.

5.) Give rocks as gift and let recipient spell out their names or secret message once they receive your gift! That’s it, and this project was so fun and easy. What a thoughtful gift.

THE FINISHED PRODUCT:

Luckily, The Words With Friends app is free as well, and while I was painting the rocks, my boyfriend Bobby entertained himself with the Words With Friends app on my new phone.

A SENSE OF CONNECTION:

With the weather being so warm and beautiful right now, it was a lot of fun to gather rocks for this project, then gift such a special and thoughtful memento to my friends. I feel like we are even more connected, just like how we will be able to play WWF from afar and know that we are still connecting and interacting.

Do you play Words With Friends yet? If so, what are some of your best words? Do you play with old friends or new ones?

Have a wonderful rest of the summer! Tag me on Instagram with @happysolez if you make this project, and tag the brand, @wordswithfriends on Instagram and as @wordswfriends on Facebook to show them how you spend time playing!!

Dr Pepper Pick Your Pepper Summer ~ Indoor Picnic Ideas

While summer is all about enjoying the outdoors, here in southern Illinois / most of the Midwest, the heat and humidity sometimes keep us indoors. I am not incredibly sensitive to the heat, but if you’re having guests over, not everyone is going to enjoy it or even be able to tolerate temps in the 90s, so you could always consider hosting an indoor picnic!

The theme/inspiration for this picnic was a bountiful French picnic that features ice cold Dr Pepper Pick Your Pepper theme bottles (a personal fave), and lots of delicious snacks. Nothing super heavy as far as food, just smaller bites that you and your guests can feast on throughout the evening.

Keep reading to learn more about how you can win fun and festive prizes for Summer.

Each 20 oz. Dr Pepper bottle features over 40 artistic and inspiring labels that contain a Snapchat code on them. To unlock this fun filter, simply open Snapchat, take a photo of the Snapchat logo / code on the side of the bottle, then a little notification will appear, giving you access to the filter. Below, two of my favorite Snapchat filters were outdoors themed.

YOU CAN WIN!

Callout that the fun, unique Pick Your Pepper packaging and how it’s fun, individualized, and designed by millennials, for millennials. Available in stores starting 6/15/18.

Call out the prize reward and drive to  http://bit.ly/2pts8Qo

When you buy Dr Pepper 6/15-8/15 this summer, you can upload your reciept at http://bit.ly/2pts8Qo  to get the prize featured in my blog here and/or other prizes like:

Spend $5 get 5 bottles = Dr Pepper Retro Specs

Spend $10 get 10 bottles = Dr Pepper Copper Lined Mug

Spend $20 get 20 bottles = Dr Pepper Bluetooth Speakers

Spend $30 get 30 bottles = Dr Pepper Pool Float

CHECK OUT THE RETRO SPECS, BELOW…

Scan the Snapchat code on any Dr Pepper Pick Your Pepper to reveal a unique filter you can use! I then save the image and share it wherever you want! Below, two of my favorites!

My boyfriend Bobby and I love being outdoors, so these filters are super cute. He adores fishing, so the Snapchat filter, shown above that says, “Keepin’ It Reel” is perfect for him!

While this particular picnic I hosted for this post was indoors, I loved bringing traditional outdoor picnic elements into the evening with galvanized metal trays to hold food, easy to eat bites of a huge assortment of foods, and even cozy floor pillows, rugs and lightweight picnic blankets. I still love incorporating rustic elements into my events no matter where I host!

There are so many benefits to hosting this picnic indoors - Think of it, no bugs, no heat, and all the food and drinks one can possibly snack on throughout the evening without having to leave the elevated comforts of home. It’s such a fun way to enjoy time with friends or have a date night!

TO SET A COZY SCENE:

I love the idea of reminiscing about days past, where we would put pillows and blankets onto the floor and have a sleepover. Now that I’m older, we don’t really do that anymore, so it’s fun and nostalgic to reminisce and more or less make a soft place on the floor to settle in for the evening! It could be super fun to set this up in the living room, where everything is centrally located. Or, even on a porch!

I also added upscale touches like French-inspired textiles in stripes and plaids of white and blue. I packed some of the 20 oz. bottles of Dr Pepper into a metal “picnic basket”, which was a great way to carry the bottles plus lots of other necessities.

FOR THE FOOD:

I am always drawn to bountiful plates of fruits and other bite sized foods, so this was the perfect opportunity to try my hand at not one but three snack trays!

For one platter, I used a large, round galvanized tray with handles to hold everything. I then placed a white charger plate in there, plus a marble cutting board to hold the meats and cheeses (this was the least messy way to display them), then placed items like croissants, red and green grapes, strawberries, and more.

For another tray, I placed mini chocolate chips, blueberries, and blackberries. For the last tray, I placed a bit of herbed goat cheese dip, sliced baguettes, and crackers to dip into the goat cheese.

I was so happy with how upscale everything looked!

TO SERVE YOUR GUESTS:

I used lightweight linens, gold plates, and gold plastic utensils (that almost looked real!!), which added a bit of shimmer and glitz to the picnic. The gold and white looked really lovely.

It would definitely be fun to host a similar picnic outdoors if you live somewhere the weather is nice all the time! I love this particular color scheme, and I know those party platters would really look great at so many of your summer events.

Connect with Dr Pepper across social media!

Facebook / Twitter / Pinterest /Instagram

PIN IT FOR LATER...