How To Create A Halloween BOO Kit (A Dog Gift Basket for Halloween) PLUS 2 DIY Dog Toys

This shop has been compensated by Collective Bias, Inc. and its advertiser, Mars, Incorporated. All opinions are mine alone. #BOOItForward #PawfectBOO #CollectiveBias

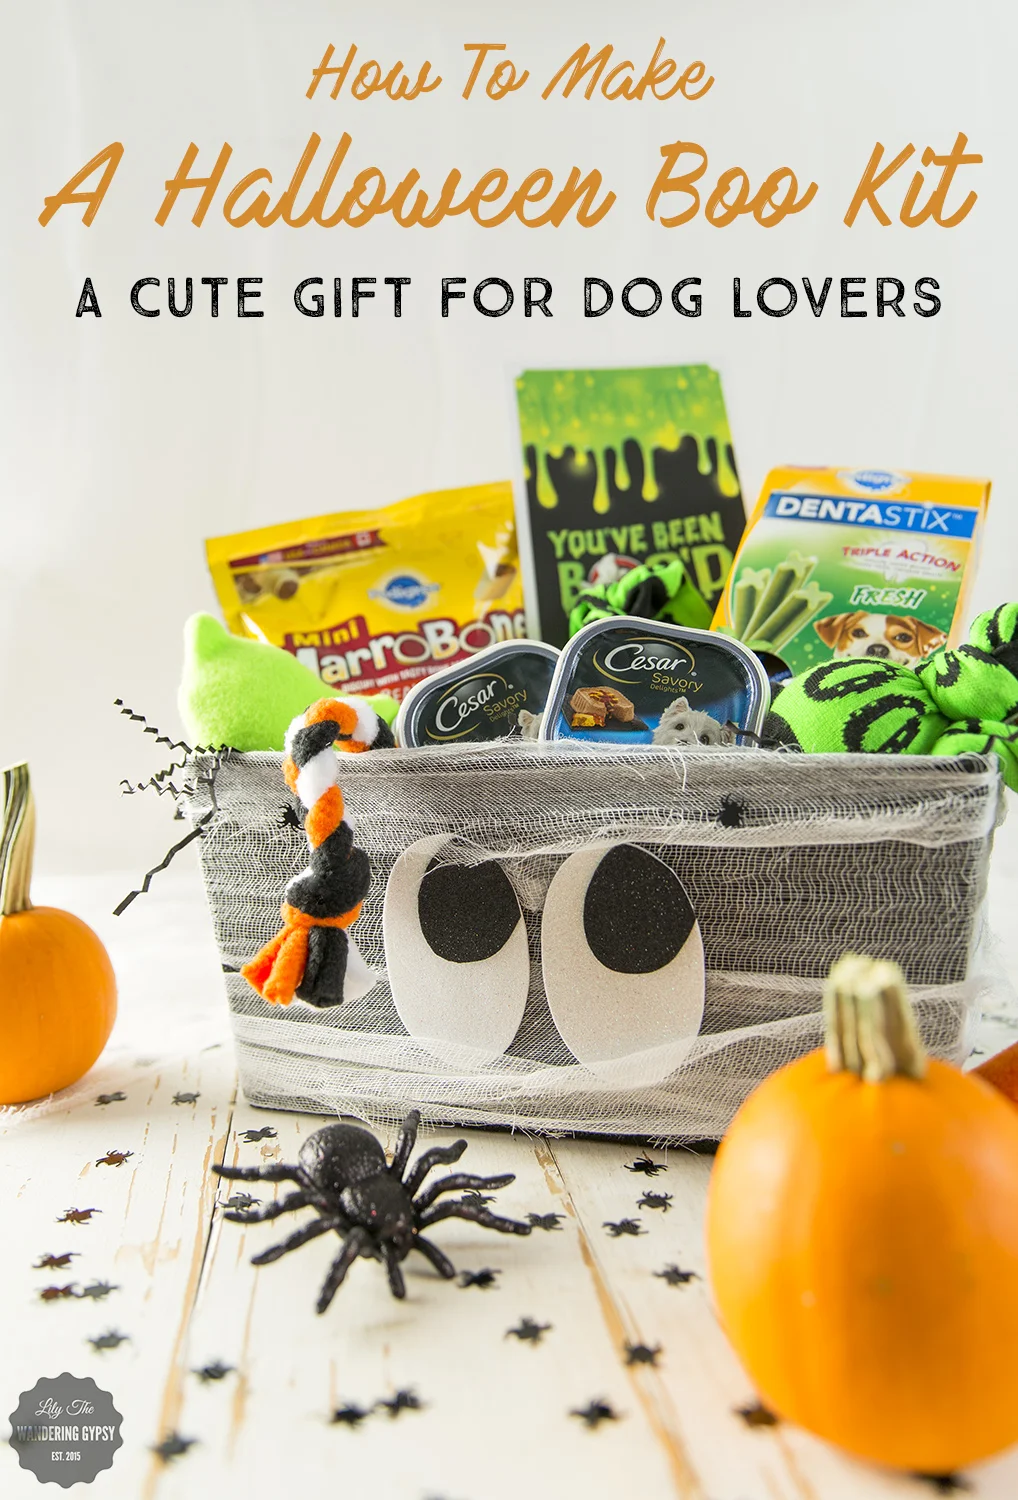
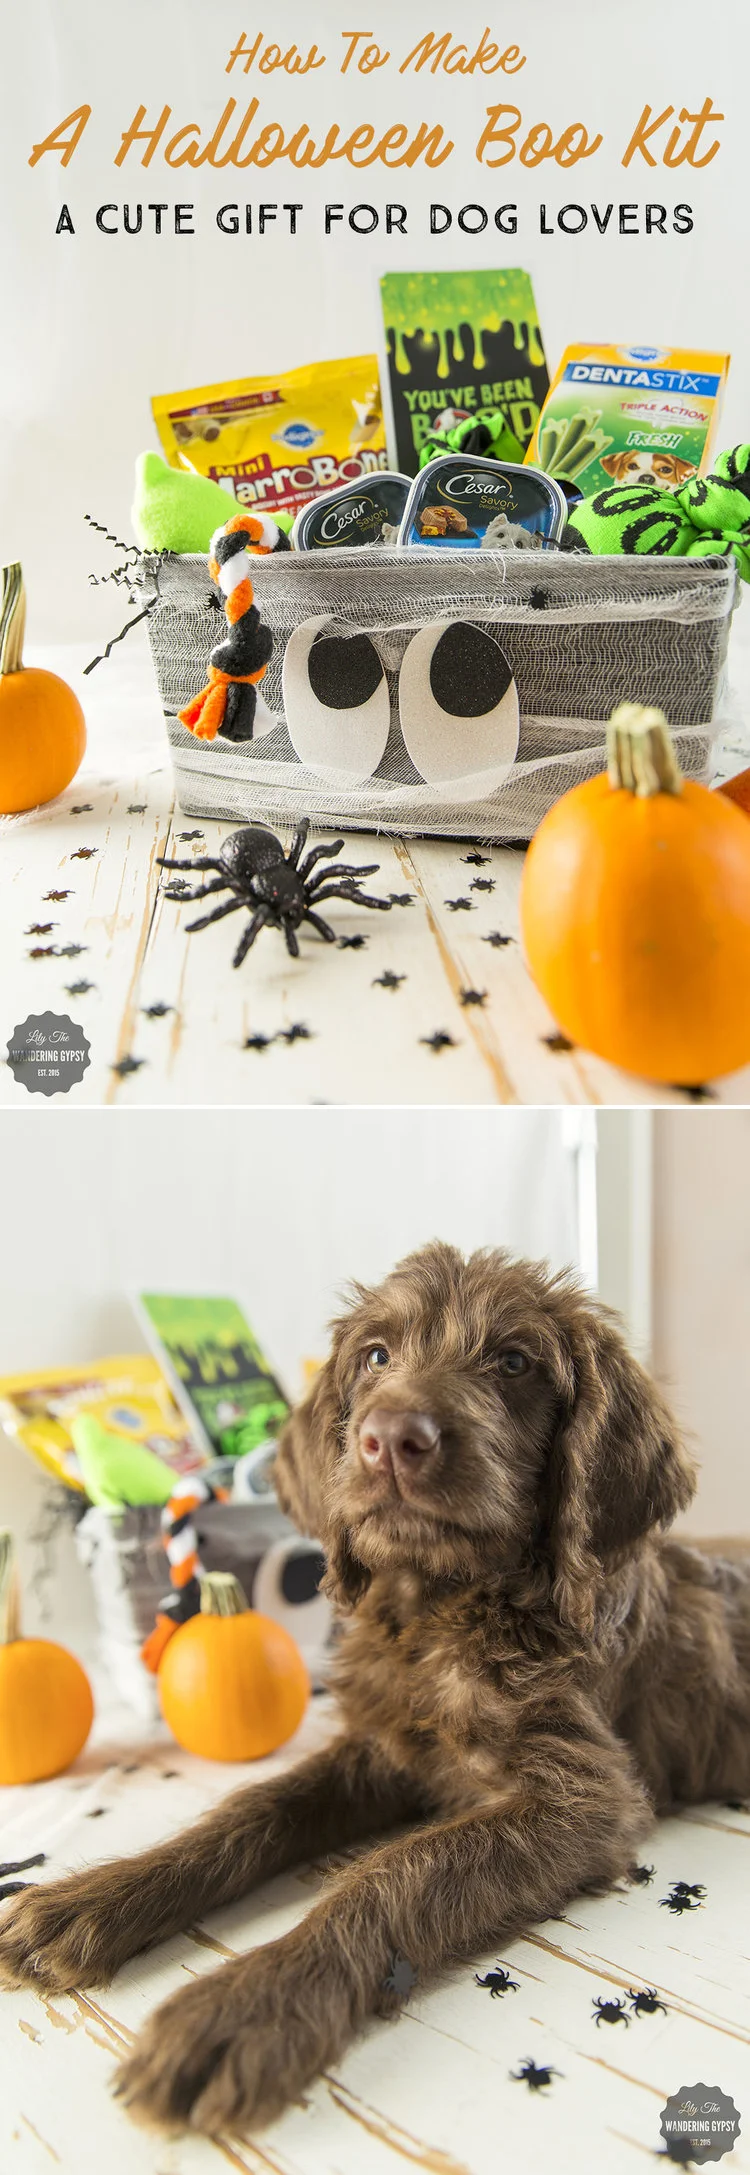
So excited to present you with an adorable Halloween Gift Basket, that can be made with a few simple materials, and then given to someone as a surprise. This is all about gifting a fun, dog-related gift basket and then secretly giving it to someone who deserves it. The person I chose to gift mine to is our long-time family veterinarian, Dr. Tally at Central Hospital for Animals here in Carbondale, IL. 


Get tons of inspirations, and to see more of the BOO Kits on the here
And, visit BooItForward page on Walmart.comhere  BOO Kit
 BOO Kit

ADD THESE ITEMS TO YOUR BOO KIT BASKET

American Greetings® has a great selection of Halloween Items like treat/candy bags, stickers, tissue paper, gift bags, and Halloween Cards. These would make for adorable and thoughtful additions to fill any BOO Kit Gift Basket!

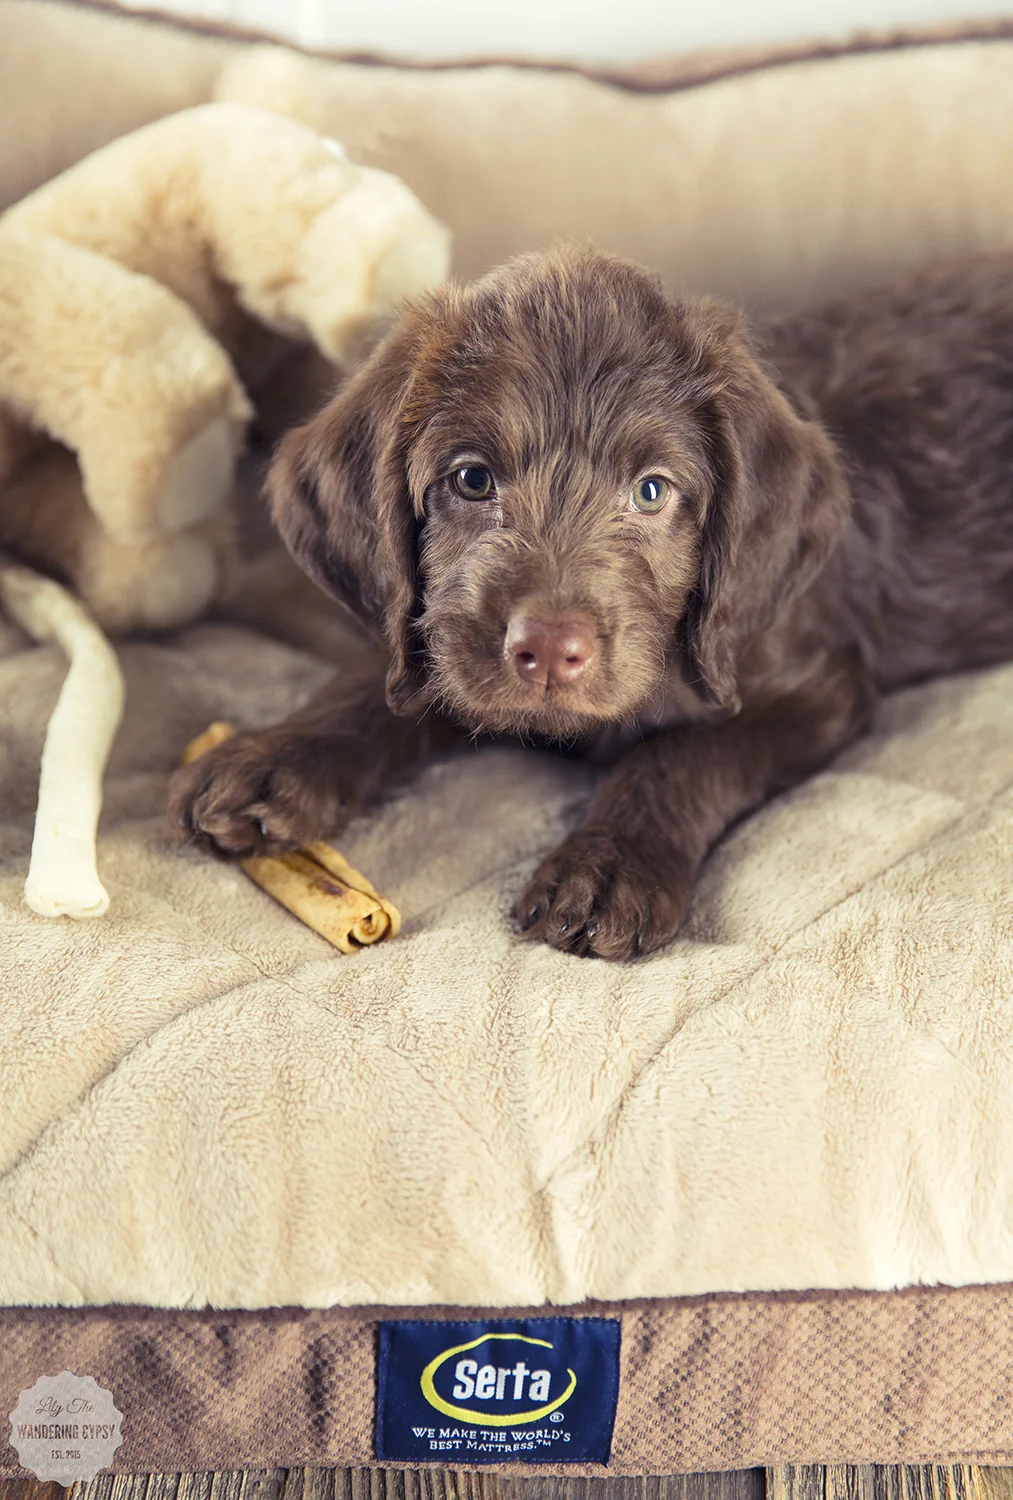
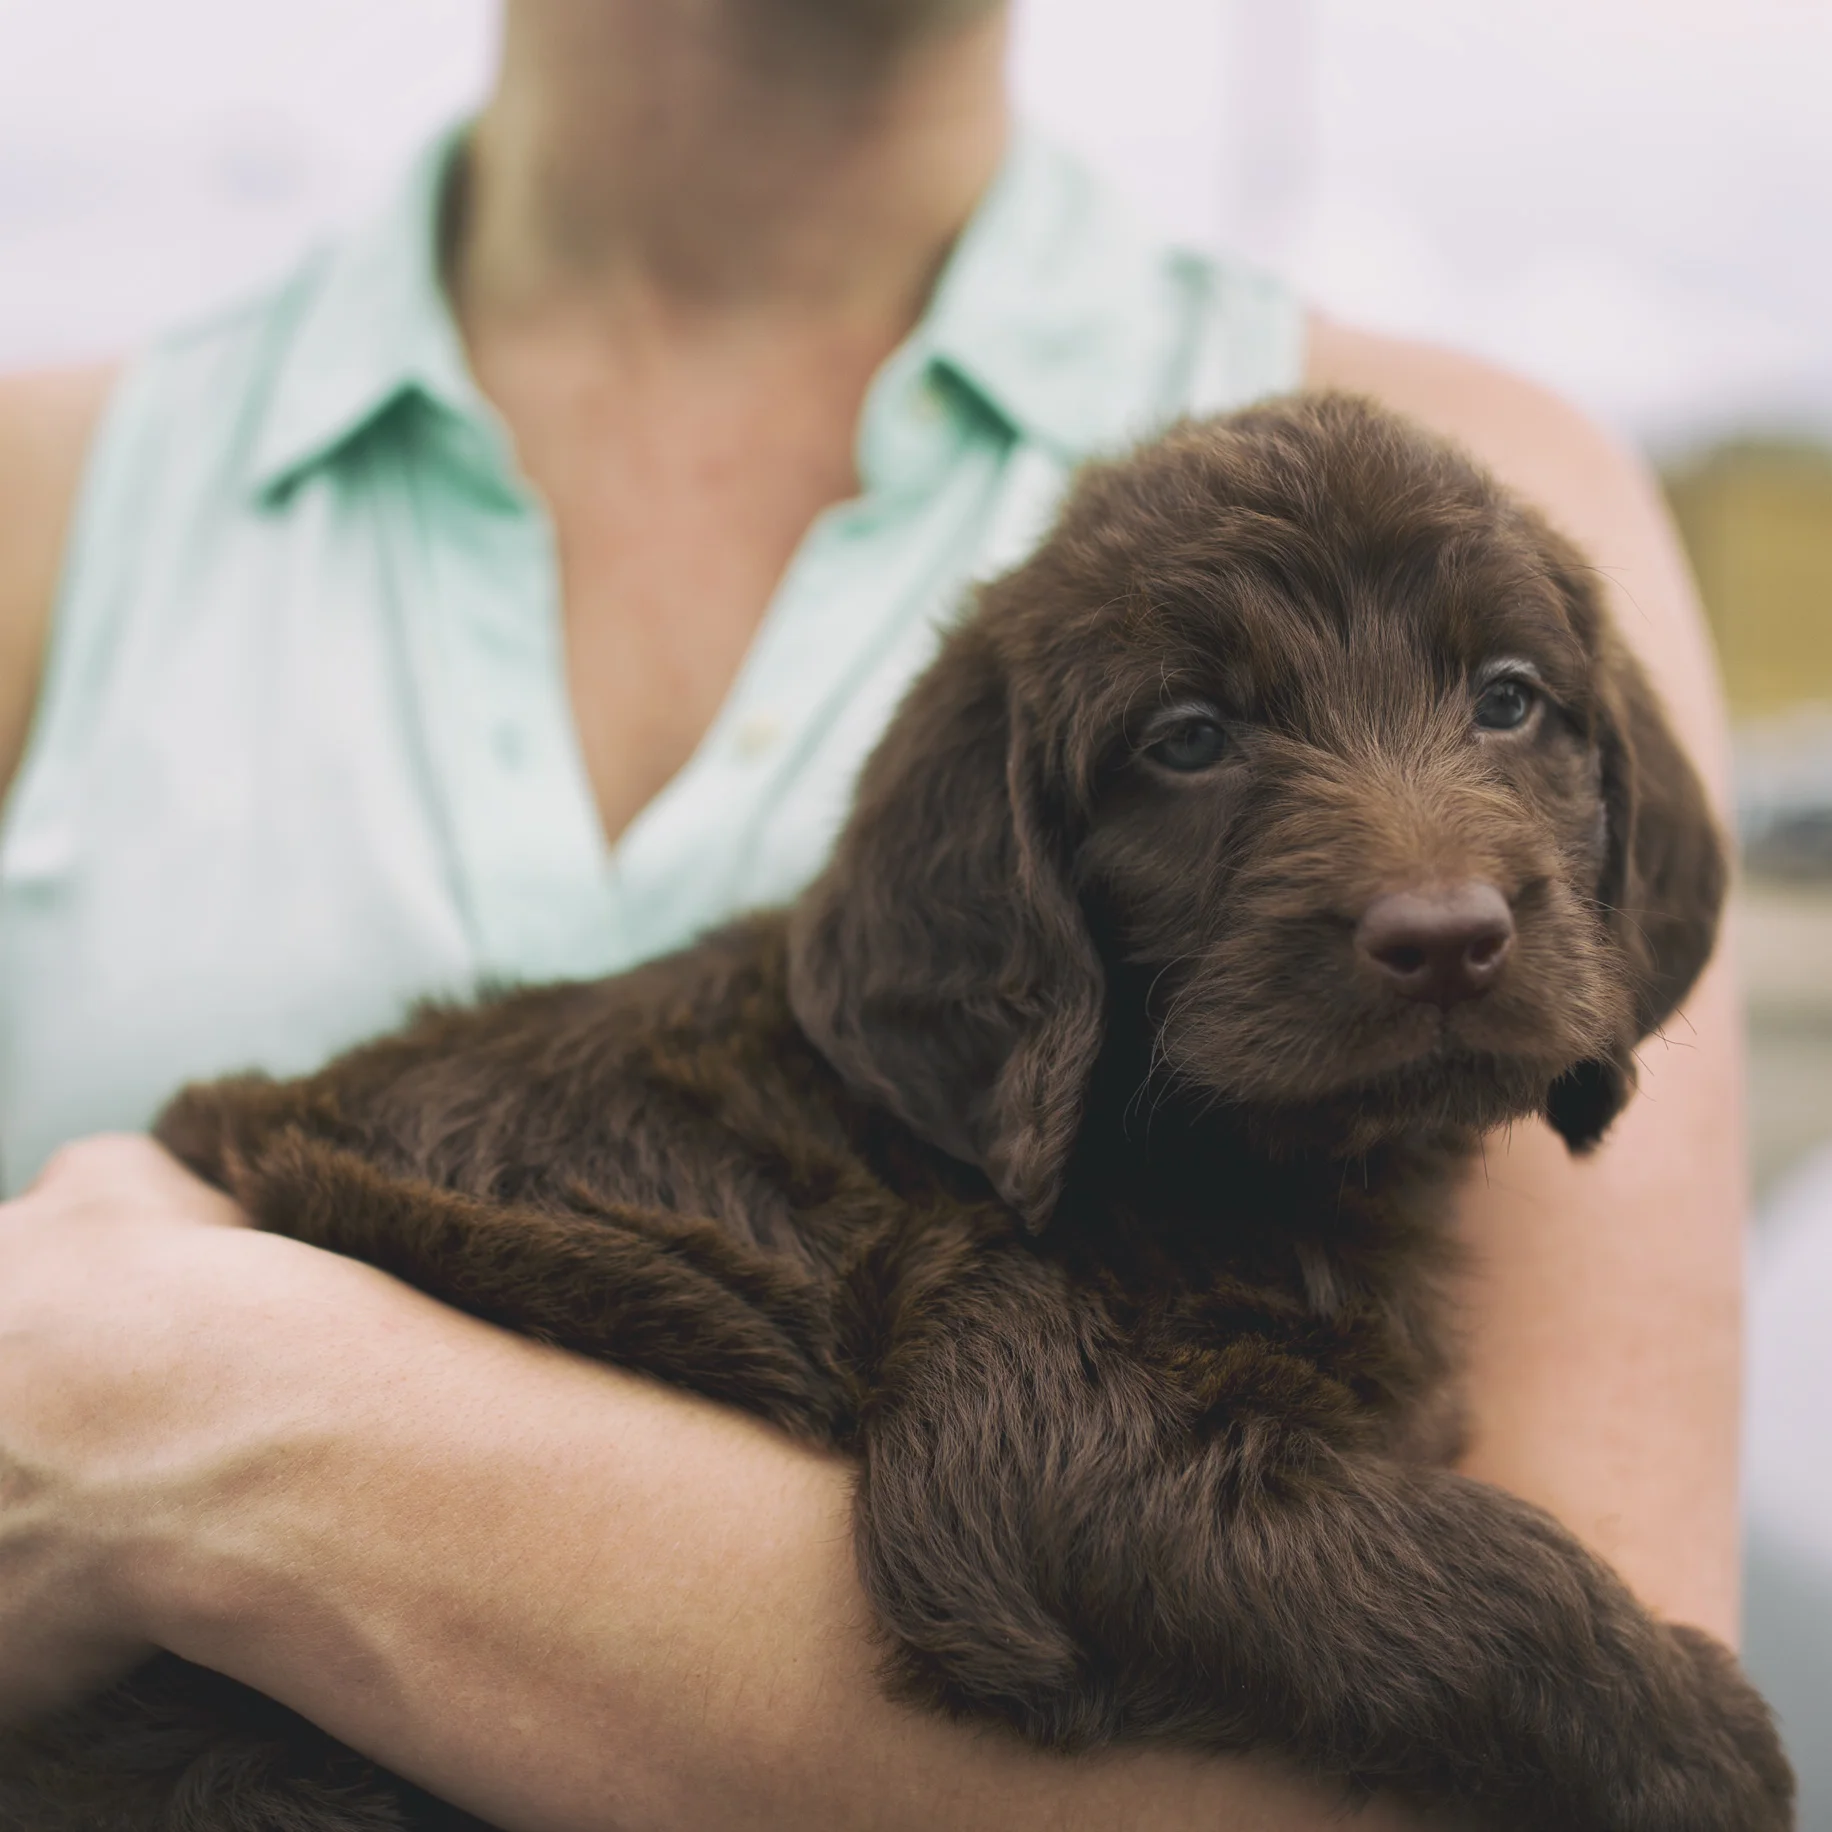
MY LITTLE HELPER, PORTER

Of course, my little chocolate Labradoodle and Chocolate Lab wanted to help with absolutely every step of this Halloween Boo Basket. They helped me make the toys, and Porter sat still for about 1 minute to help me shoot s few adorable puppy pics :) She just turned 10 weeks and she follows me everywhere. 


DIY MUMMY GIFT BASKET

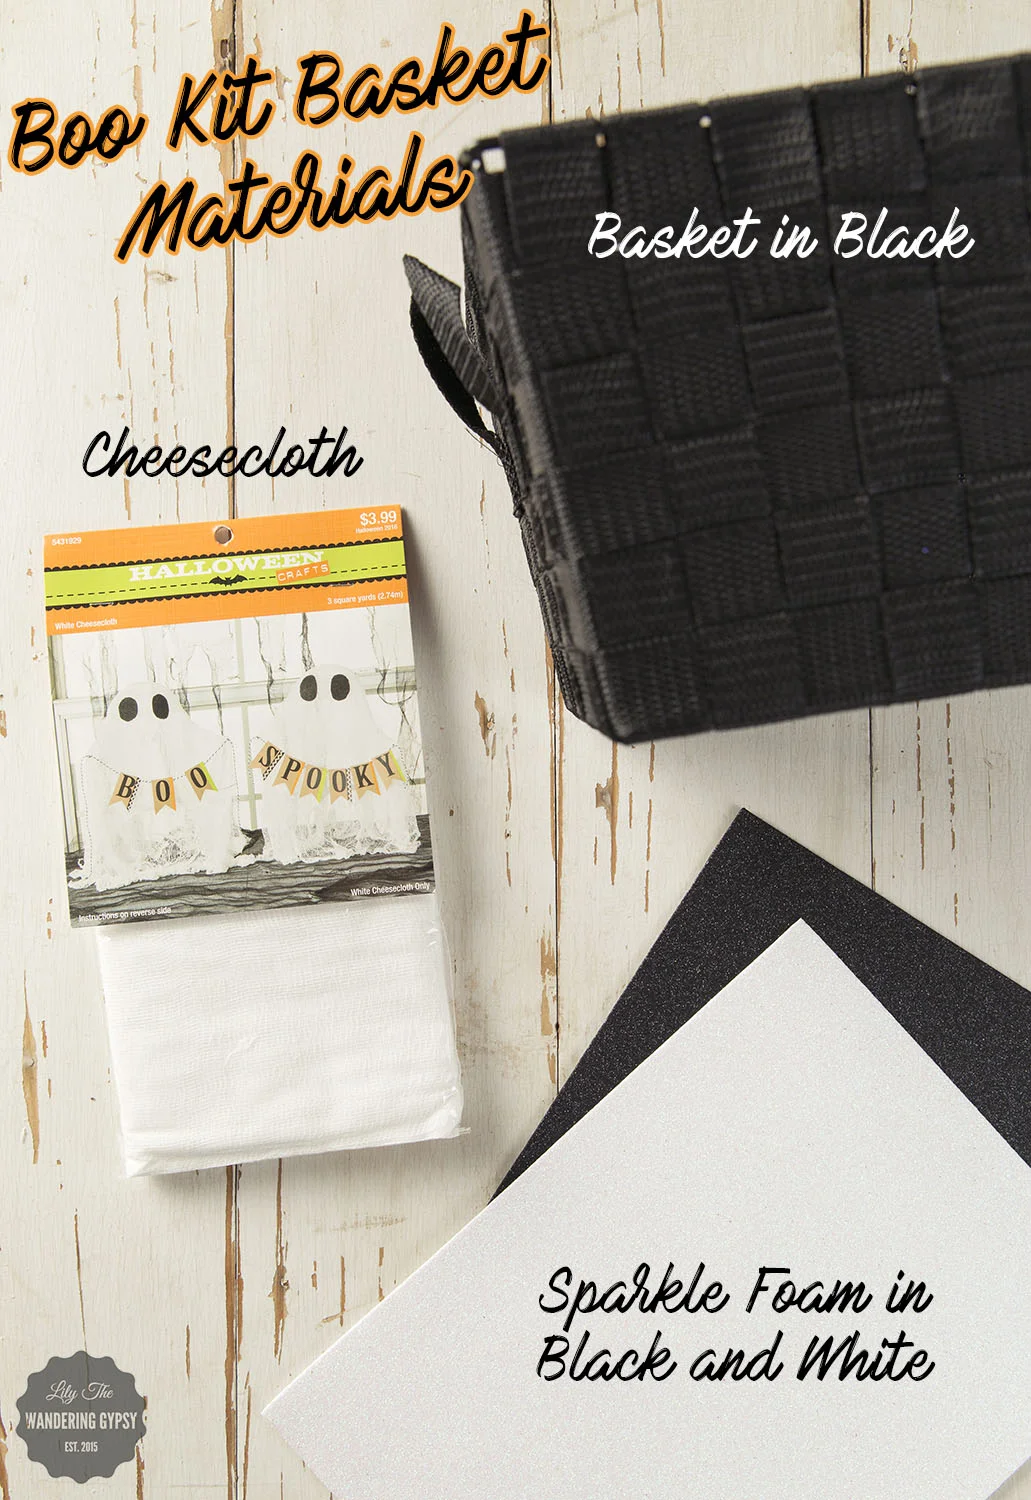
MUMMY BASKET HOW TO:

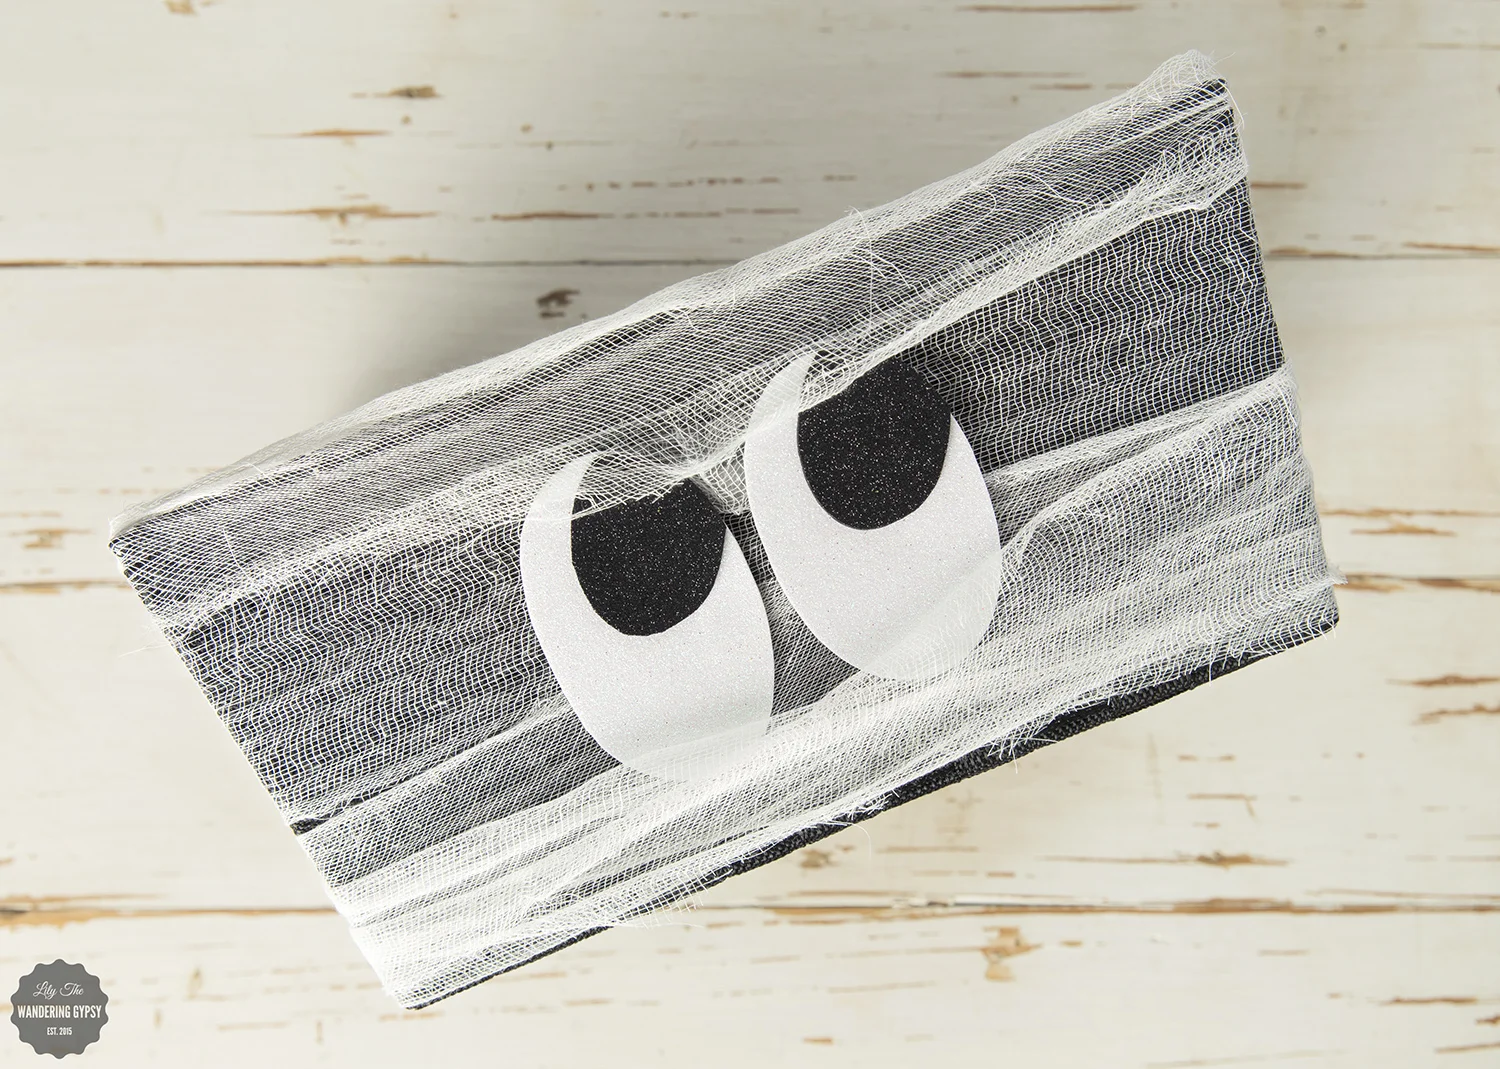
1.) Cut cheesecloth (also called creepy cloth) into 2" strips lengthwise. 

2.) Wrap 2-3 strips around the basket and secure with glue in back.

3.) Cut out eyes from the sparkle foam. You will see that I simply cut two ovals out of the white one, then black pupils from the black foam. Glue the eyes to the front of the basket.

4.) Wrap and glue 2-3 more strips of cheesecloth around the basket, making sure to overlap the eyes just a little bit.

5.) Now, you are ready to fill your basket with all sorts of good things! Read on to learn about 2 Dog Toy DIY's, that are so easy!


DIY HALLOWEEN DOG TOY #1

These toys are simple, but my pups really love them. The fleece also cleans their teeth, and this toy gives dogs a really safe toy to play tug with since it's so soft. Here's how to make them:

1.) Cut 3 strips of fleece (any combo of 1-3 colors will do), and stretch the pieces as long as they will stretch. 

2.) Tie the 3 pieces of fleece together at the top, and use a clip board to hold the pieces, or ask a friend to hold the pieces while you braid them.

3.) Braid the pieces together, and tie the end up so the braid doesn't come loose. That's it!

DIY HALLOWEEN DOG TOY #2

This simple dog toy requires only two materials - 2 tennis balls, and 2 Halloween Socks. Dogs LOVE these toys so much! Make sure to use supervision when allowing a dog to play with any toy. 


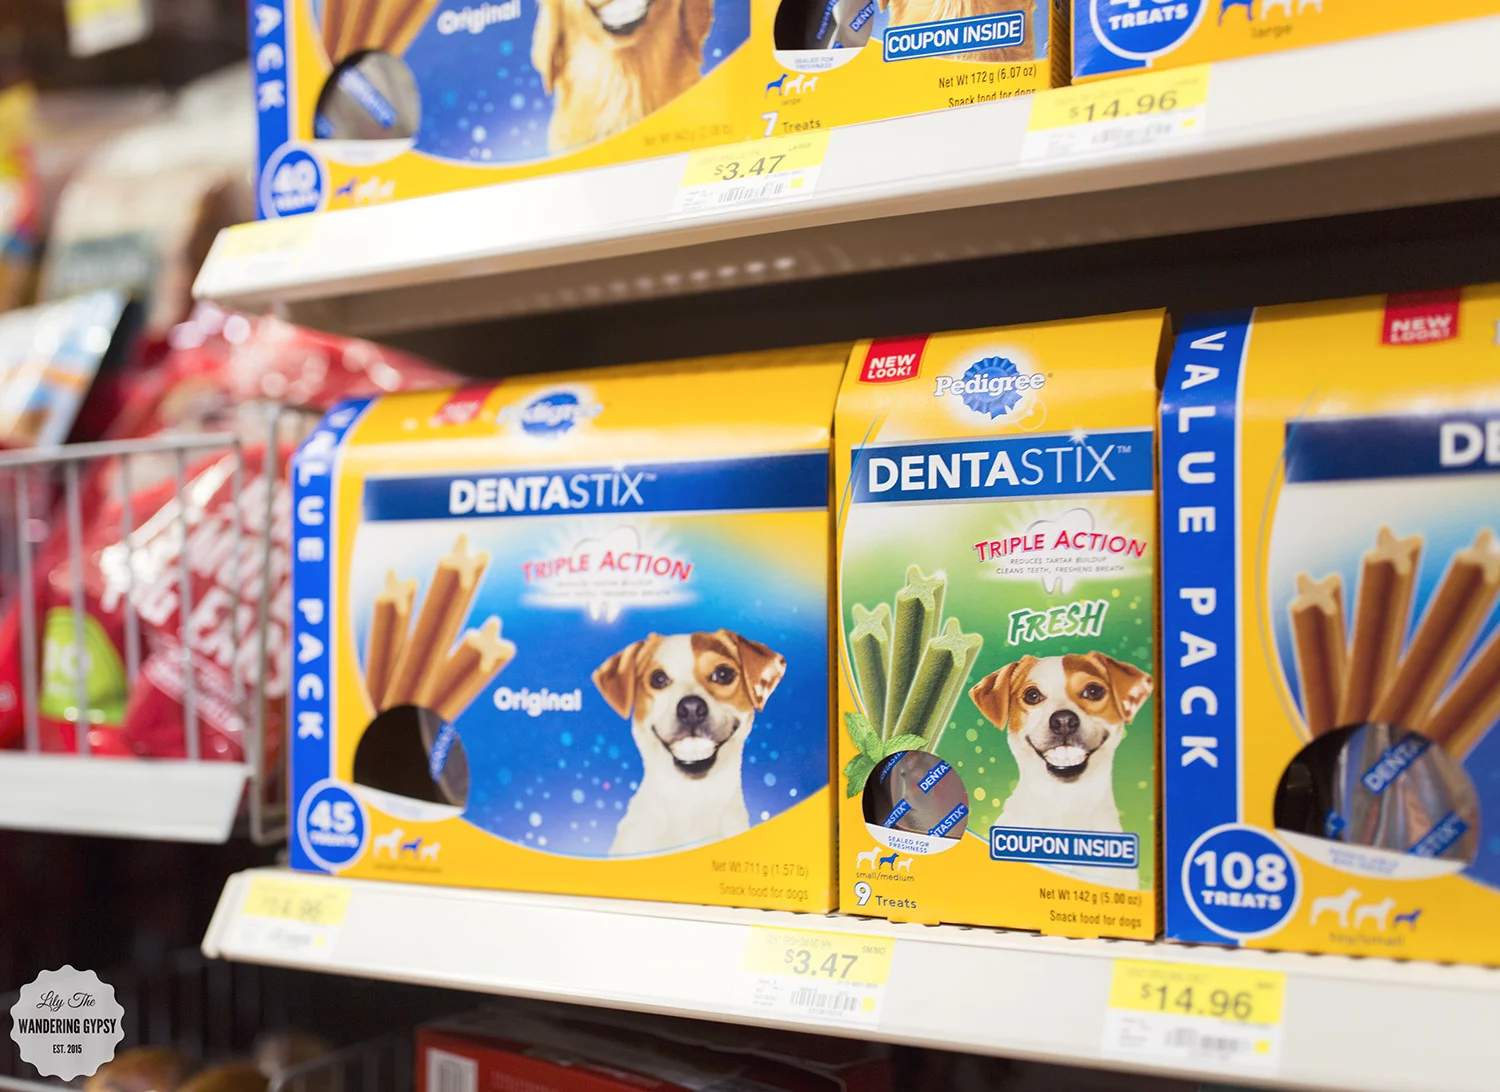
SHOPPING FOR BOO KIT SUPPLIES 

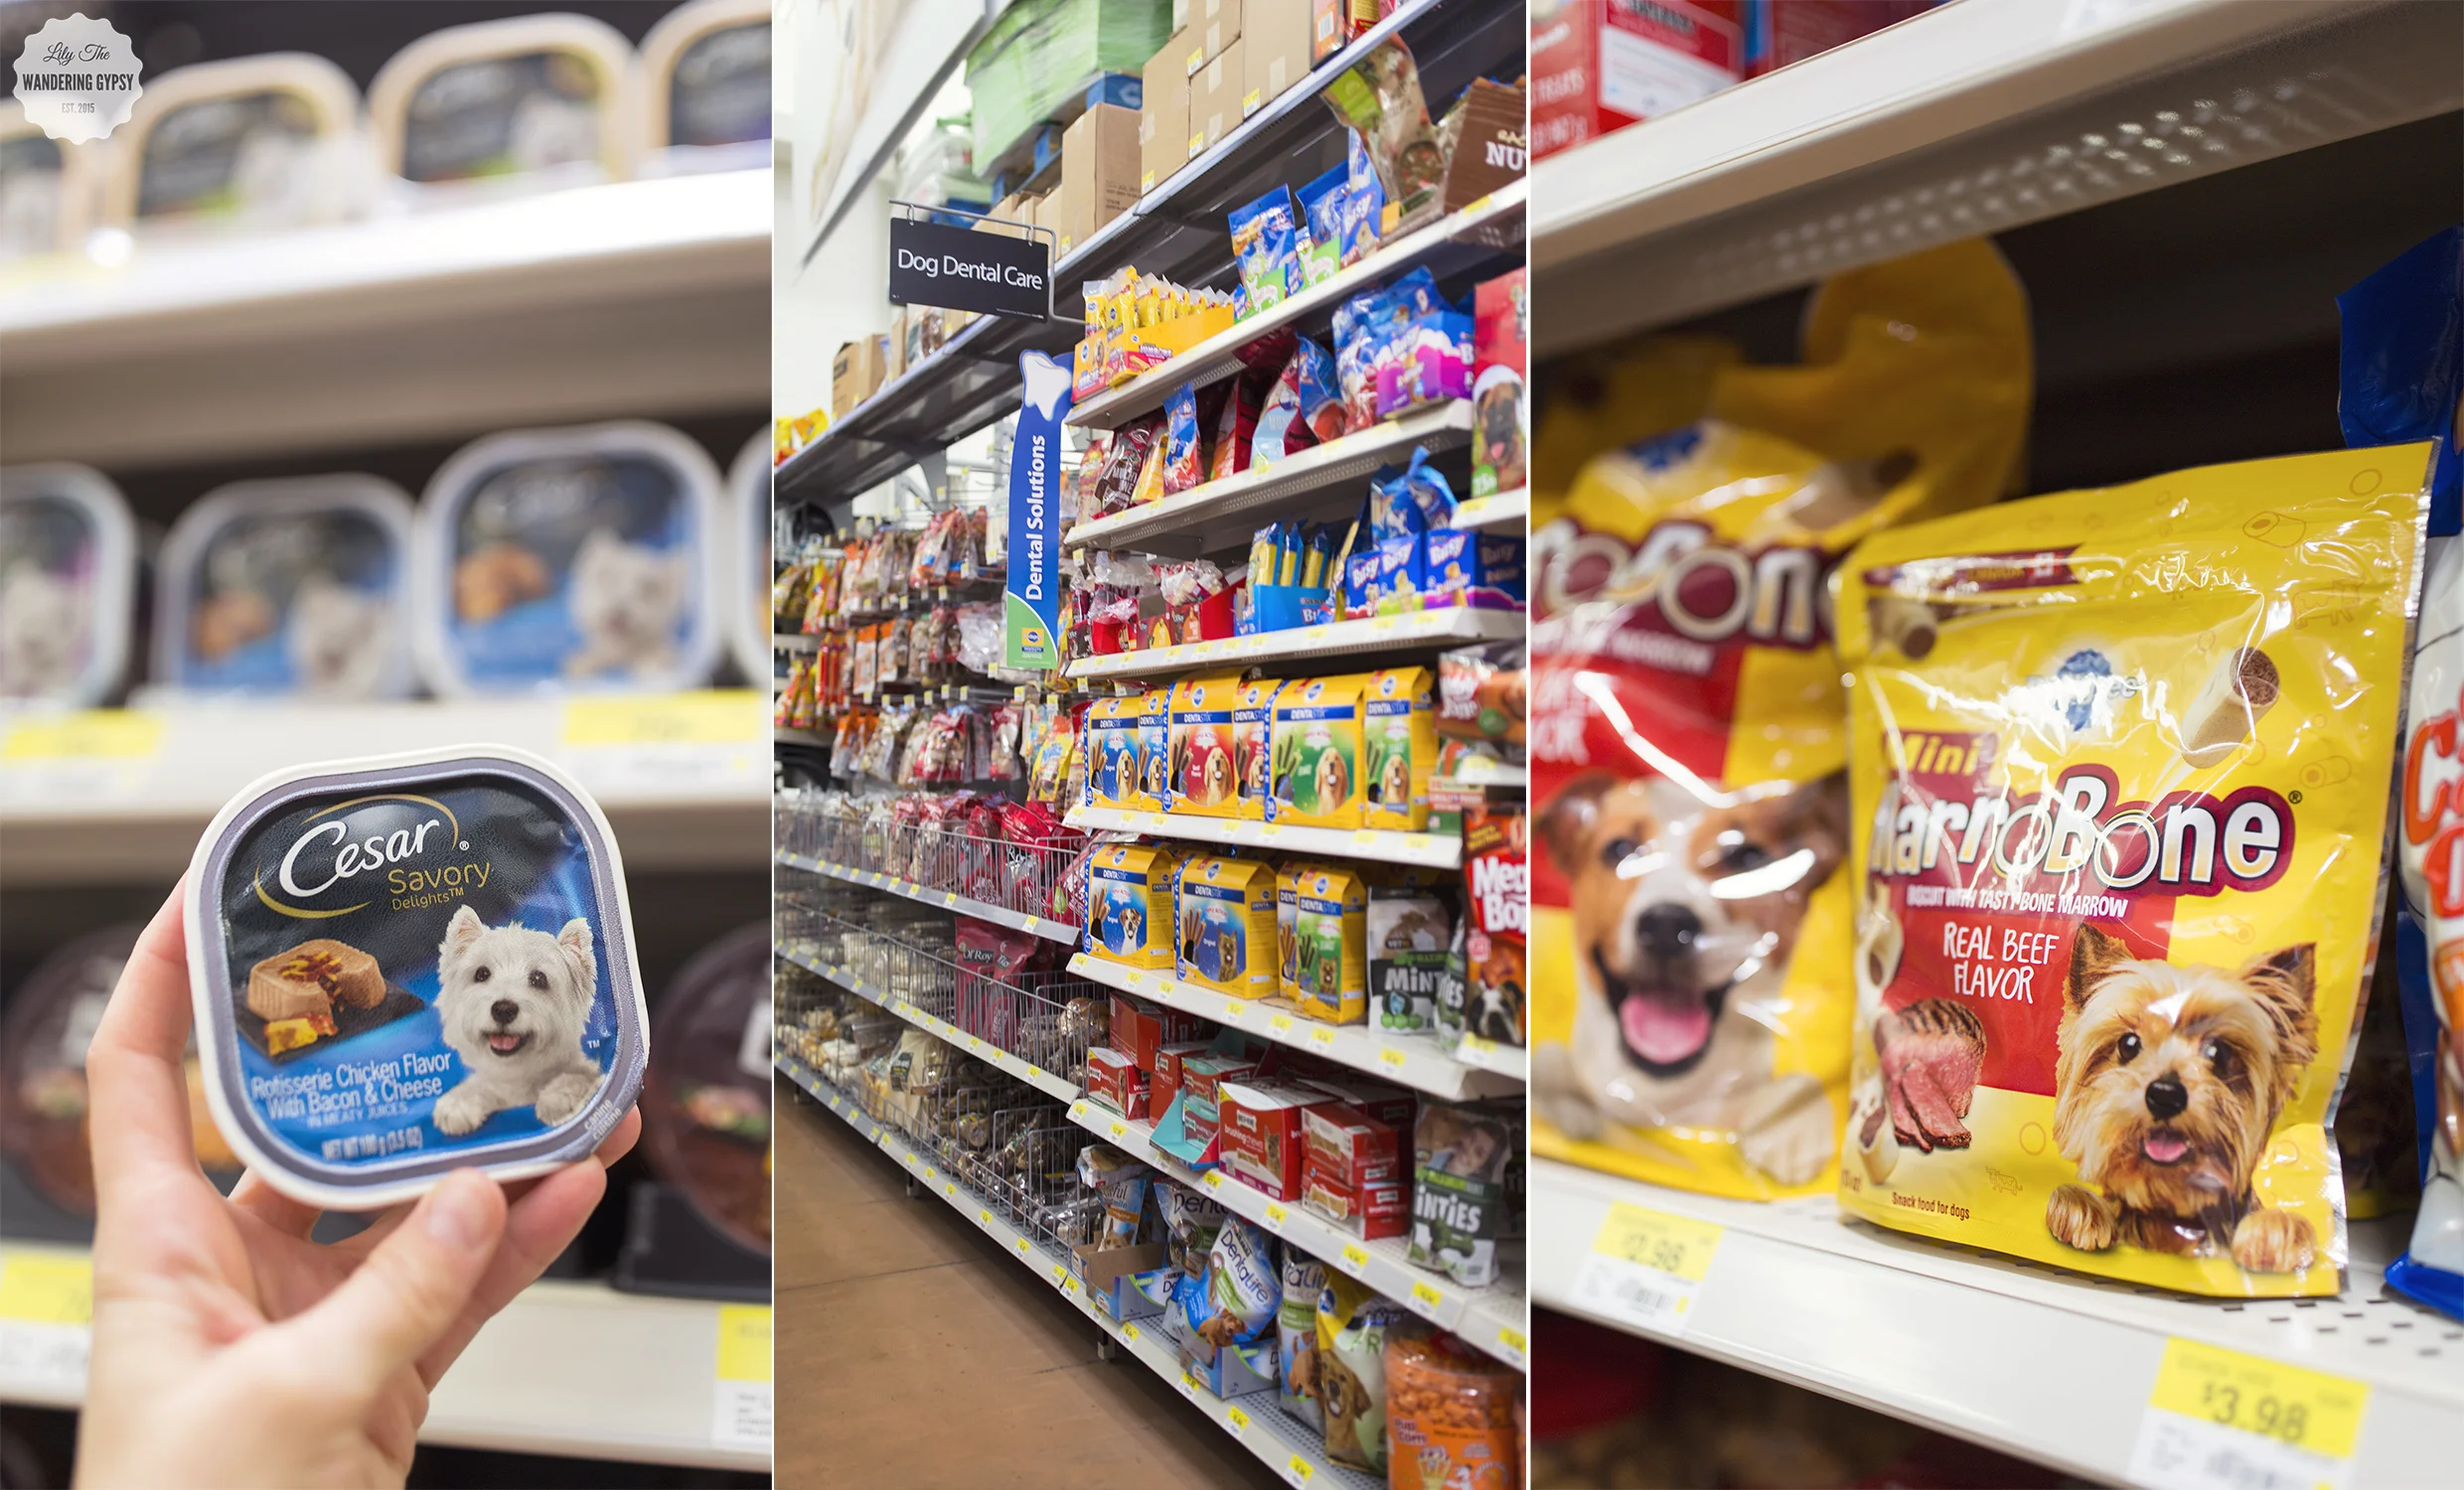
I found the majority of the materials in this BOO Kit at Walmart. The MARS Pet supplies are all located in the Pet Care aisle at Walmart. I found these items, below, that I added to my BOO Kit. 

  • PEDIGREE® DENTASTIX™ Fresh Treats Small/ Medium (Doggie Dental Area)
  • PEDIGREE® MARROBONE™ Real Beef Flavor Treats Mini (Dog Treats Area)
  • CESAR® SAVORY DELIGHTS® ROTISSERIE CHICKEN FLAVOR WITH BACON & CHEESE (In the soft dog food area).

GIFTING THE BOO KIT

I decided to surprise my vet with this fun BOO Kit! I am sure she is going to LOVE it! Who will you surprise with the BOO Kit you create? Please tell me in the links below, and if you make your own BOO Kit, then also share that link too :)

Quick N Easy Pesto Pasta

Pasta couldn't get much easier than this. It's nice and light, and super fresh. 

INGREDIENTS:

Green Pesto

Fresh Tomatoes

Thick Spaghetti Noodles

Mozzarella Pearls

Parmesan Cheese, Grated

Extra Virgin Olive Oil

Salt and Italian Seasoning To Taste


INSTRUCTIONS:

Boil noodles as directed. Strain and return to original pot. Scoop about 3-4 tablespoons of Pesto onto noodles. Also add your olive oil, Italian seasoning, and salt. Stir together, combining well. Turn the heat back on to low. Add mozzarella pearls, and stir. They should melt pretty quickly. Once they're melted, sprinkle past with parmesan cheese, and stir once more. 

Serve topped with more parmesan cheese and chopped tomatoes. 

Enjoy! 

Super Easy Chocolate Waffles Recipe

Are you a chocoholic? So much so, that you may be the type to want chocolate for breakfast, lunch, and dinner? Well here is an idea for you! These chocolate waffles are pretty easy because you make them from Chocolate Cake Mix! 

INGREDIENTS:

1 box Betty Crocker™ SuperMoist™ cake mix (any flavor)

1 1/3 cups water

1/3 cup vegetable oil

3 eggs

INSTRUCTIONS:

Heat your waffle iron to medium-high heat. Mix all ingredients, and once the waffle iron is warm enough, pour the batter into the waffle iron. Don't overload the batter into the machine, it will seep out the sides and create a big mess! 

Add a drizzle of your favorite white icing (I used the decorator icing in the tube for this thinner line). I also added some fresh raspberries and  little dollop of cool whip! 

Feel free to add some chocolate syrup, if you need more chocolate! Enjoy!

Peanut Butter Oatmeal Cookies with Coconut Oil

absolutely LOVE these cookies. The recipe (found here) originally called for shortening, and I used coconut oil. 12 minutes at 350° was just perfect. I also created a Steller Story for this recipe, find it here

Here's 1/2 Cup melted organic butter + 1/2 Cup Organic Coconut Oil at room temp. 

Here's my batter before adding the eggs and dry ingredients. pb cookies

Here's the batter with all the ingredients in it. 

I found that my 1 Tbsp. silicone measuring spoon (similar ones here) is perfect for scooping and shaping this dough! 

You can (optionally) press the dough down with a fork in a criss cross pattern, and sprinkle sugar on top. The cookies will spread a bit more if you do this step. 

After baking for 12 minutes at 350, they should look golden brown like this! If you make these cookies and enjoy them, please comment below. Thanks! 

Caprese Salad Recipe

This is one of my absolute all-time favorite dishes! I love any excuse to eat fresh tomatoes, and when the organic and local ones are heirloom, it's even better! I thought that using a mix of yellow and red tomatoes really gave this plate a more vibrant and special look. I actually created this recipe for the Burnt movie, to help promote their movie. Check out my Burnt project, on Pinterest HERE, entitled Food, Romance, Love.

INGREDIENTS (MAKES 2 SERVINGS)

* 10-15 organic yellow and red cherry tomatoes (or other small tomatoes)

* Fresh Organic Basil (I found mine as a plant at the grocery store. Bonus points for ORGANIC!!!

* Fresh Mozzarella Cheese

* Olive Oil

* Balsamic Vinaigrette

* Salt to taste

Cut tomatoes into quarters. Slice mozzarella cheese with a knife, or create small pieces of cheese with your hands, and set aside. On a plate, drizzle a small amount of balsamic, like I did in the above images. Place tomatoes and cheese onto plate. Also top the plate with basil leaves, as many as you can handle! Drizzle some olive oil and salt over the top of the plate, and you are all done! I also like to serve this with an extra plate of small French bread slices and salami. 

This would make an incredible snack, appetizer, or even a light meal! It tastes SO incredibly good, I hope you enjoy it! If you are also a Caprese Salad-lover, comment below to let us know. 

Skinny Whip ~ Caffeinated Body Wash

I grabbed a sample of something really great at The Neighborhood Co-Op recently. This Energizing Grapefruit Smoothing Body Wash with Caffeine by Beautiful Nutrition is amazing! I am not usually one to use very scented products of any sort, but the smell of this body wash smells like someone just opened a real grapefruit right in front of you! I love the consistency of this too - it's more of a gel than anything, making it pretty concentrated, with a great lather, so you don't have to use a lot at once. I love it because it is super moisturizing, but does not leave your skin feeling slick, like there is a lot of product left over. 

This product receives all 5 star reviews, all of them are highlighting similar benefits to what I found, it's really great! 

I notice my arms and legs feeling more moisturized into the next day, even, without using any lotion. I would imagine that this is going to be a great product for harsh winter months, when you are craving soft skin, sunshine, and the smell of tropical fruit. 

caffeinated and clean

"Skinny Whip™ is a rich, foamy, deeply moisturizing body wash that contains caffeine to smooth and energize your body for firmer looking skin as you shower."

"Studies have shown caffeine to be effective at delivering a smoother and firmer appearance of skin. The effectiveness of caffeine is dependent on the amount of time left on the skin prior to rinsing. Follow directions for maximum results.

DIRECTIONS
Apply onto a puff and massage into skin using a circular motion. For best results, allow body wash to remain on skin for several minutes (up to 5 minutes) before rinsing."

Overall, I would recommend this product to anyone who loves the fresh scent of real grapefruit and also loves an ultra-rich body wash that does not leave your skin feeling like there is a bunch of soap still left on them. Find this body wash and other products by Beautiful Nutrition, here. 

Puppy Updates! And a Serta Dog Bed Review

Porter turned 9 weeks this past Tuesday, and she is doing so well! She gets so warm when she sleeps that she has taken a liking to our A/C vents. She still loves to bite, but we have been working diligently with her to make sure she knows that biting is not good. I read that if puppies are biting a lot, you can kind of let out a yelp, and walk away from them, and almost immediately, they will realize that they did something wrong. It is really working well. I also like that the bed has a lot of support because of the couch design, and it seems to be extremely comfortable for them. They both fit in the bed, actually :) Really happy with this purchase! 

I got her this awesome dog bed recently, too. It's the Serta Deluxe Couch Pet Bed, and I got it over the Serta Deluxe Cudler, because I thought she could grown into it. The Delux Cudler seems amazing for dogs around 45 lbs and under. Well, our Cabbie, who's is a full-blooded Chocolate Lab even fits in this bed we got! I know this bed is going to last for a vey long time, and also keep its shape. It's not memory foam, but there is a super thick piece of egg crate foam that you can unzip the bottom part, and just remove the foam, wash the pieces, and put is all back together. 

Her hair is also getting so long, and she loves going on walks. The weather has been like 95% humidity in the 90s, but very, very soon, (like tomorrow), it's supposed to be getting cooler. 

Also, we shot this photo of her a couple of weeks ago, but she has really grown SO much since even this photo! I will add more updates soon :) Porter will be helping me on a Halloween photo project soon too. Looking forward to sharing!! 

Photography Field Trip: Flamm Orchards

Last week, spur of the moment, I drove out to visit Flamm Orchards, in Cobden, IL. I had been wanting to go back for a while now, and I even called ahead to make sure they still had peaches. The peach season has pretty much come to an end, and the apples are almost ready to be picked. It is still a million degrees and also a million % humidity right now, so I am glad I took advantage of the cooler weather we had this day. Heading into September, I always feel like it should be cooling down and feel like Fall, but it sure doesn't just yet. Soon, though! My fingers are crossed that I get to take way more of these Photography Field Trips around southern Illinois soon! 

Here is one gem that we have in southern Illinois. It's super easy to get to, and the drive out there is gorgeous around sunset - rolling hills, orchards upon orchards of fruit trees, and just lots of green space. The day I went, the sky was bright blue with puffy, white clouds everywhere. 

I bought a jar of this Peach Jam, and cannot wait to use it with puff pastry and fresh peaches. What a good time to test out this recipe! Below, you will see their peach pie, a la mode. I snapped a photo of someone else's dessert at the pickup window, but I bought myself a couple of brownies and a couple of slices of the best Zucchini bread I have ever had in my life! I got therm all to-go, and Bobby made an exception to not liking to even eat sweets, and helped me eat them :)

Flamm Orchards already have lots of beautiful gourds and pumpkins!

And, if it had been a little bit cooler out, I would have enjoyed this little outdoor eating area that Flamm offers. All of the flowers looked so wonderful! (below)

Grilled Flank Steak Fajita Nachos Recipe ~ Outdoor Grilling Inspiration

This shop has been compensated by Collective Bias, Inc. and its advertiser. All opinions are mine alone. #AuthenticSalsaStyle#CollectiveBias

A delicious summer grilling recipe, filled with authentic flavor and fresh ingredients! These BBQ Flank Steak Fajita Nachos are the perfect meal to serve at a party, during outdoor grilling season! Read on to learn more about this wonderful recipe and some cute ideas of how to decorate for your next outdoor grilling party. 

 I just love the colors of this outdoor party table setup. I used mainly blues and whites in my design (dishes, napkins, utensils, table covering fabric, etc). I just let the bright, beautiful food shine with a more subtle color scheme.

Also, I love the idea of using large glass jars with lids to hold chips (found in the kitchen section at Walmart). It's eye-catching, and keeps chips fresh while your serving guests. Use small scoops or tongs for guests to serve themselves

By offering self-serve topping, guests can use as many or as few ingredients as they like. If someone is vegetarian or even vegan, they can opt out of the steak, and just use lots of veggies!

Even More Recipe Inspirations, Here: AuthenticSalsaStyle.com.

And, if you are looking for more beef-based recipes, look no further: BeefItsWhatsForDinner.com.

MARINADE:

Olive Oil, Lemon Juice, Taco Seasoning (use half here), Chopped Fresh Onions & Garlic, Pinch of Salt.

FOR THE MEAL:

- HERDEZ® Salsa Casera

- 1 lb. Flank Steak (per 2 people)

- 1 bell pepper each in green, red, orange, and yellow

- 1 purple onion

- Tortilla Chips

- Shredded Cheddar Cheese (We shredded a block of extra sharp cheddar)

- Jalapeños

- Taco Seasoning (use the other half of the package here)

- Limes and/or Lime Juice

- Sour Cream

- Cilantro 

- Grill and Skillet


1.) Prepare the marinade in a 9x9 baking pan (I used my brownie pan) by chopping 1/4 of the onion + 1-2 heads of garlic, and mix it with all of the other marinade ingredients. Stir well.

2.) Add steak, cover with plastic wrap or foil, and place in the fridge to and marinade for at least 1-2 hours.

3.) Preheat grill to high heat after steak is done marinading.

4.) Cut up all 4 bell peppers, and most of the onion, and set aside. Get out a large skillet, and heat a small amount of olive oil. Wait until the oil starts to thin a bit, and add your onions and rest of the taco seasoning. Cook until slightly browned, and then add your peppers. Let these simmer on medium low heat, and let's grill some steak! 

5.) While your peppers are cooking, bring steak out to the grill on a tray of some sort, with tongs and a spatula. Place the marinated steam right onto the grill. After about 4-5 minutes, if you want those pretty grill marks, rotate the steak 90 degrees, and grill for another 1-2 minutes. Flip the steak over and grill for another 2-3 minutes. This timing left a bit of pink but not much - it was perfect! Take it off the grill and let's make some nachos!

6.) Turn heat off of the peppers and onions when they're cooked, and slice steak into bite-sizes slices or pieces. 

7.) To make your nachos - on a plate, add: chips, cheese, corn, sour cream, grilled steak, cilantro, and top with HERDEZ® Salsa Casera. This has been my go-to nachos recipe, and everyone always loves it! 

I went to Walmart to pick up some of my ingredients and party supplies - you can find the HERDEZ® Salsa Casera and the Beef at Walmart, as well as the jars that I used for holding those tortilla chips. Get recipe inspiration and beef nutrition information at “Beef. It’s What’s For Dinner".

HERDEZ® provides #AuthenticSalsaStyle and it's oh, so good! Thank you so much for checking out my latest recipe, I hope you are inspired by it!! What is your favorite meal to make on the grill? What do you usually grill when you have a crowd? Let me now in the comments, below. 

Elegant Chocolate-Dipped Patriotic Oreos

Have you noticed that most candy/chocolate stores offer chocolate-dipped Oreos among their other chocolate bon-bons and other confections? I have always been amazed by this, because they are SO incredibly easy to make. I figure, why not just make some of my own at home! I also wanted an excuse to check out the Oreo Thins that I have been seeing everywhere, so I thought this would be the perfect project!

Without further ado, here are my Elegant White Chocolate-Dipped Oreos, perfect for Labor Day Celebrations, and other times when you just wanna decorate some desserts!

- 1-2 packages of Oreo Thins (find them here)

- Ghirardelli Classic  White Melting Wafers or White Chocolate Chips (find them here)

- Red Food Coloring Gel (this is the set I have) or red candy melts

- Blue Sprinkles (similar here

- Glass jar to dip Oreos into (mine was the 8 oz. size, I believe)

- Skewer Stick

- Parchment Paper


1.) Melt white chocolate in a double boiler method or in the microwave, stirring regularly to make cure it's smooth and fully melted. 

2.) Line a baking sheet with parchment paper.

3.) Transfer a portion the melted white chocolate to a jar that is about as deep as the Oreo Thins are wide. Leave about 1/2" of room from the chocolate to the top of the jar.

4.) Dip each Oreo Thin into the white chocolate, and dip in little over half way, leaving space at top.

5.) As you pull the cookie out of the jar of white chocolate, use a skewer stick to scrape excess chocolate off the back of the cookie, and around the sides. This is a great tip, that makes your cookies look way better and less gloppy as they dry.

6.) Put each cookie onto the parchment, and let cool completely. 

7.) After you have dipped every cookie, pour more white chocolate into a jar, and add lots of red gel food coloring. This could also be done with red melting wafers. 

8.) Transfer to Ziploc bag, and cut a tiny opening in one corner. ***Working one cookie at a time, add lines of red chocolate, then a few blue start sprinkles to each cookie. Practicing first helps!

9.) Enjoy your cookies! These would be perfect for a party or just enjoying at home!!!

An Easy Treat For Labor Day And Beyond

I have an awesome, tasty, and amazingly easy dessert idea for Labor Day festivities and beyond. Definitely want to admit that I did not make my own cupcakes, though - I got some delicious pre-made Red Velvet Cupcakes from our local Schnuck's grocery store, and also found the berries there too. But, the little special touches always make people smile, so you can recreate your own by simply adding some blueberries and raspberries to some cupcakes of your own. You could even grab the 3 ingredients on your way to a party, and decorate the desserts when you arrive! I also love how the seersucker fabric and little silver stars confetti makes for a patriotic yet elegant decor idea for any holiday that's red, white, and blue! 

If you do want to make your own Naturally Colored Red Velvet Cupcakes, Food52 has an awesome recipe that uses beets (instead of red food coloring) - which is incredible! 


NATURALLY DYED RED VELVET RECIPE FROM FOOD52:

For the cake:

  • 1 cup beet purée, from fresh red beets (not cooked)
  • 3/4 cup buttermilk
  • 1 tablespoon white wine vinegar
  • 2 tablespoons lemon juice
  • 1 tablespoon vanilla extract
  • 2 1/2 cups cake flour
  • 3 tablespoons cocoa powder, not Dutch-process
  • 2 teaspoons baking powder
  • 1 teaspoon cream of tartar
  • 1 teaspoon salt
  • 1/2 cup neutral-flavored oil
  • 1/2 cup unsalted butter, softened
  • 2 cups granulated sugar
  • 3 large eggs

For the cream cheese frosting:

  • 8 ounces cream cheese, at room temperature
  • 8 ounces unsalted butter
  • 2 tablespoons crème fraîche
  • 1 pound confectioners' sugar
  • 1/2 teaspoon lemon zest
  • 1 teaspoon vanilla extract
  • 1 pinch salt

Instructions:

Add the beet purée, buttermilk, vinegar, lemon juice, and vanilla extract to a food processor fitted with the steel blade and process until very smooth.

Sift the cake flour, cocoa powder, baking powder, cream of tartar, and salt together in a bowl. Beat the sugar, oil, and butter together in a large bowl until creamy, then add the eggs one at a time, mixing for 30 seconds after each addition.

Alternate adding the flour mixture and beet mixture to bowl, beginning and ending with the flour mixture. Divide between the cupcake papers and bake until a cake tester inserted into the center of the cake comes out clean, 20 to 22 minutes.

Cool the cupcakes on a rack for 20 minutes or more. Then, get the icing ready. 


To make the frosting, beat the butter and cream cheese together on high speed until fluffy and smooth, then add the crème fraîche. Turn the mixer to low and gradually add the confectioners' sugar until just combined, then turn the mixer up to medium-high and beat until fluffy and smooth, making sure to stop the mixer and scrape down to the bottom of the bowl so everything is evenly mixed. Add the lemon zest, vanilla extract, and salt. Enjoy!

Fall Tailgating + Football Party Tips!

I cannot wait for Fall, and one fun part of Fall is tailgating! Football season, and cooler temperatures make a great excuse to get together with friends and enjoy some good food and drink! Below, are some ideas on making your tailgating and football parties so much more elegant and grown-up. Most of these ideas, from some of my favorite bloggers, are just creative DIY ideas, that don't have to be expensive or time consuming. So, let's get ready for some football...

Serve Drinks From A Pumpkin (Waiting On Martha) - You can simply add some ice to a hollowed-out pumpkin and add beer, or line a smaller pumpkin with a plastic container and add dip for chips or veggies! Learn how Waiting On Martha styled an adorable tailgate party of her own here. 

Use Eco-Friendly Plates (Food 52) - If you must use disposable plates and food holders, there are more Eco-friendly options like these compostable wooden hot dog trays and more from Food52.

Create A Hydration Station (Style Me Pretty Vault) - Provide guests with inexpensive drinks like fruit-infused water, lemonade, and tea. Learn more about this incredible party, in the Style Me Pretty Vault Files.

DIY Flannel Napkins (Hey Wanderer) - Follow this cute DIY Tutorial from Hey Wanderer, or simply cut or rip a couple of yards of inexpensive plaid flannel fabric into 16" x 16" squares to provide guests with something more substantial thank those flimsy paper napkins. 

Style Me Pretty & Author Ngoc Nguyen Lay really know how to tailgate in style! This image, below, really shows a great overall party setup! Incorporating vintage items like an ice cream cone holder (used for fries and veggies in the photo), Picnic baskets, metal buckets, and pom-poms makes this setup look elegant instead of over the top. Learn more, here

Serve Elegant & Unexpected Treats (Happy Wish Company) - I just love how these macarons, cup of strawberries, wooden utensils, cloth napkin, and sandwich in a spotted paper party favor bag. Find fun party ideas like this one, from Happy Wish Company

I'm hoping to put together my own set of Tailgating Ideas in an upcoming post, so stay tuned!!

How To Keep Your Skin Hydrated in Late Summer ~ Early Fall {Plus: Tips on Making Guests Feel At Home}

I'm so happy to bring you another amazing post today, incorporating the Curel® Hydratherapy Wet Skin Moisturizer. As the seasons change, humidity levels do too. This can mean going from 90% humidity, down to 50% in a matter of days here in southern Illinois, so it's best to get ahead of the game, and stay moisturized!

I also wanted to share a few tips on making your visitors and house guests feel right at home when visiting you! It's as simple as leaving fresh, new towels rolled up in a decorative basket. Also, provide guests with spa-like bath products, like the Curel® Hydratherapy Wet Skin Moisturizer. This is perfect for guests, because it smells amazing, and contains a water-activated moisturizer - perfect for any weather conditions. Another important tip is to help your guests stay hydrated (first with the Moisturizer, then with a welcoming array of fresh, chilled water, ready for them after their long travels. These are some ways you can add a touch of welcoming into your guests' experience while staying at your home.  


I’m sharing #Curel® HYDRA THERAPY WET SKIN MOISTURIZER in my life as part of a Curél sponsored series for Socialstars™. Thank you for supporting the brands that help keep my blog a beautiful place to showcase my work! 

I also created this beautiful candle holder with a terrarrium I found at a craft store, white decorative sand, and a scented candle in a tin. I love how this turned out!! (see below)

Below, I used some flip-top bottle I found at a craft store, and this amazing, vintage glass bottle that a family member gave me. It's so pretty, and little touches like this will make your guests not have to even ask where they can find a glass - they will have everything they need some place in their room. 

Learn More About The Moisturizer

Curél is debuting their new Hydra Therapy product which helps combat dry skin and helps you look your best during warmer weather and beyond! Be sure to check out Curél® on Facebook to get updates and to learn more. 

  • Curel® HYDRA THERAPY WET SKIN MOISTURIZER is activated by water on freshly-showered skin and penetrates deeply into the surface to heal dryness

  • After showering, your skin cells expand, which provides an easy pathway for Curel® HYDRA THERAPY WET SKIN MOISTURIZER to penetrate into just showered skin, healing the moisture barrier where it counts and helping replenish skin’s ceramide levels

  • Curel® HYDRA THERAPY WET SKIN MOISTURIZER is not greasy or sticky and has powerful healing ingredients that restore the moisture barrier

  • Apply daily & experience the end of dry skin

I also love the colors I got to incorporate into this thoughtful set of images. The bright, white towels, rustic metal basket, white, decorative box with gold spots, the terrarium that features gold accents, and the pretty glass vases - the hints of metallics really shine nicely here. Love this color combo for a bathroom or guest room. 

Have you gotten a chance to check out the Curel® Hydratherapy Wet Skin Moisturizer yet? Let me know in the comments below! 

YOU MAY ALSO LIKE...

Clinique Lip Pop

We Got A Puppy!

We have been wanting to add a puppy to our household for a while now. We lost our dear, sweet Lily a little over a year ago, August 19th, and ever since then, our Chocolate Lab, Cabbie has been a bit lonely. It was alright with only one dog for a while, but we figured this was the very best time to introduce a puppy into our lives, because Cabbie needed a playmate! Last Tuesday, August 16th, we took a little road trip and picked up our NEW PUPPY, Porter! 

We already had her name picked out, I was determined that I wanted a dog the same color as Cabbie. Porter, named after the style of dark beer, seemed perfect! It really took Cabbie a few days to get used to the puppy. Cabbie didn't really want much of anything to do with her at first. But, Bobby's mom came to visit us and meet the puppy pretty quickly, and Cabbie has been extremely interested in Porter ever since! 

We of course, had to start an Instagram account for her, @TheImperialPorter :) It's going to be so fun watching her grow!

Currently, she is about 10 pounds, loves biting a LOT (which we are discouraging), is extremely good about telling us when she need to go out, and sleeps just as hard as she plays. She prefers lying on our pillows against the wall, and hates being disturbed while sleeping. Such a particular little girl who seems to always get her way She reminds me of a little living stuffed animal, and is extremely soft! I just love her crested fur on her head and curly tail, making her poodle qualities show way more than I could have expected! Cabbie is going to be a wonderful teacher for Porter, and we are so happy we have completed our little family once again! 

A Peanut Butter Chocolate Fudge Recipe + Stunning Bracelets from Gideon John

I want to share a couple of things with you today - fudge + jewelry - two of my favorite things! I wanted to share a Peanut Butter Fridge Fudge recipe with you (below), and also share some pretty amazing jewelry with you. 

First, the jewelry. Bracelets have always been my go-to jewelry faves. I recently received three absolutely stunning bracelets from Gideon John London, and I could hardly believe my eyes! These bracelets are so well-made, and you can tell that great attention to detail was given, beginning at jewelry design, then into their packaging and presentation. Each bracelet arrives in a personalized black box and a cotton bag, so nothing get scratched during delivery. Even though these traveled all the way from gorgeous London, they looked like someone had hand-delivered them locally! 

I received three bracelets from Gideon John, and featured them all in this post. Find them here:

Rose Gold Cuff Bracelet / Green Sea Jasper Tasseled Opulence / Rose Gold Lux Beads

And, although they already had lovely product photography on their website, I was so fortunate to be able to bring these bracelets to life in this styled photoshoot. 

Now, the Fudge!

This yummy treat turned out so well! This recipe has been adapted from the one I found here - the post that inspired my photos!

1 Bag Peanut Butter Baking Chips

1 Bag Chocolate Chips 

Coconut Oil

Creamy Peanut Butter 

A Pinch of Salt

Glass Container For Fudge

Parchment Paper

1.) You can do each of the two layers in the microwave, or use the double boiler method, like I did. To do the double boiler, fill a sauce pan with about 1 inch of water. Set the glass measuring cup in the saucepan, atop the water, and get turn your burner on medium, to get ready to melt your ingredients.

2.) Prepare water for double boiler method in two different sauce pans. In two heat-safe glass measuring cups (I used my two 2 cup ones), melt 1/4 Cup Coconut Oil, 1 bag of peanut butter ships, a pinch of salt (or a bit more), and 1/2-1 C. Peanut Butter. Feel free to add more Peanut Butter if you want, just until you get a consistency and taste you like. You can also add some powdered sugar to this peanut butter layer if you want. Melt until smooth - make sure you stir frequently!

3.) In the other measuring cup, melt 1/4 C. Coconut Oil, 1and  Bag of Chocolate Chips. Melt and continue to stir until smooth. 

4.) Optionally spray a bit of non-stick spray into your Pyrex container, and then fit a piece of parchment paper into the Pyrex, allowing two sides a few extra inches to hang over. This makes removing the fudge from the container much easier!

5.) Once chocolate has melted, pour it into the Pyrex. Freeze for about 15 minutes, so it hardens all the way through.

6.) Once that layer has hardened, pour the peanut butter mixture over the chocolate layer, make sure it's smooth, and put it back into the freezer. If you're not in a hurry, you can just let the final layer cool in the fridge.

7.) Once both layers are fully firm, grab a cutting board, pull out the fudge block utilizing the parchment paper, and use a ruler to make straight lines on the top of the fudge if presentation matters. Cut fudge into 1" squares, using a large, sharp knife, and enjoy!! 

***Note: This fudge melts pretty fast, so make sure you keep it in the fridge!!! It tastes like peanut butter cups, I just love how this turned out!! You can also use crunchy peanut butter, but I recommend creamy, just because the peanuts could be too hard to eat after being in the freezer or fridge!

What a great no-bake dessert recipe! 

Blueberry Granola Parfait - A Great Snack On The Go!

Well, it's back to busy schedules for so many people, with school starting back up for the year, and seasons changing. If your days seem to be going by a mile a minute, here is a great recipe for you that will definitely satisfy that sweet tooth, help keep you full for hours, and because there are so many flavors and textures in this recipe, it makes eating better enjoyable. These parfaits contain layers of granola, covered with blueberry yogurt, then topped with fresh blueberries and Sahale Snacks in Berry Macaron Almond Mix. This awesome mix is Non-GMO, gluten free, and contains Blueberries, Cashews, Lemon-Infused Apples, Whole Roasted Almonds, and Toasted Coconut. No artificial flavors of any sort, making this a wonderful option for breakfast, lunch, or a snack. 

Elevate your everyday snacks or light meals by adding the very best ingredients possible, while not overthinking it. Simple can definitely be better, so why not work smarter and not harder. 

My parfait recipe was inspired by breakfast on-the-go or afternoon snacks, and the flavor of these snacks was inspired by a walk into a neighborhood bakery. Just one bite of a delicious, freshly made macaron inspired the creation of lightly toasted coconut, crunchy almonds, and creamy cashew. 

About The Brand: "It all started with a climb up Mount Rainier in Washington State in August 2003. We had some beautiful views but nothing delicious to eat. The trail mix and stale nuts we brought on our trip helped to replenish lost energy, but did nothing to satisfy our desire for something great tasting, nutritious and as adventurous as our travels. That experience inspired us to create Sahale Snacks". This is why Sahale Snacks make such a great Grab & Go Snack!

Find Sahale Around The Web: Facebook, Instagram, and Twitter

I’m sharing #SahaleSnackers in my life as part of a Sahale Snacks® sponsored series for Socialstars™ - Thank you for supporting the brands that make this blog possible! #BeyondOrdinary

Passion Defined - Rémy Refined (Event Recap)

Last week, I was invited to a concert in St. Louis by Rémy Martin! The event was held at Hollywood Casino Amphitheater (formerly called Riverport Amphitheatre). There was a HUGE crowd, and everyone was having a great time. I was put on a list to do a Meet & Greet with Jhene Aiko, who opened for Snoop Dogg and Wiz Khalifa on The High Road Tour, as well as helped Rémy Martin promote their mentorship sweepstakes. 

I waited in line to meet the woman of the hour, and she was super sweet and very personable. She's so beautiful!!! I even scored an awesome photo with her! What a unique experience this was. A special thanks to SoFabRocks for connecting me with this awesome brand, talented artist, and fun experience. 

Also, if you didn't get a chance to check out my Rémy Martin Watermelon Cocktail Cooler Recipe, you can find that blog post, here. Until next time, cheers, friends!

Don't Quit Your Daydream

For some reason, I am always in love with inspiration quote t-shirts. I love this one, by Doc Shorty, because it really gets me thinking about my daydreams and how I work so hard to make them a reality. I swoon over them on Pinterest, and when Doc Shorty offered to send me one, I jumped at the opportunity to help them promote their cause. Part of the proceeds from their site go towards multiple sclerosis research. Learn more about my journey to never quite my daydream below, and find this adorable tee, here

I have been on this journey, literally since I was 14-15 years old, to work for myself. I always held hourly jobs while in school, but was sewing goods and selling them at shows and online in addition. I went through college, trying to make some sort of connection in almost every class and job I had, in order to work towards that dream of mine - thinking of how I could apply the lessons I learned to either making things that would make me money, or using the skills in my own business, even when the class was not specifically a production or business class.

I am so incredibly happy I had that mindset all through school, because, in addition to always holding at least two jobs while going to college full-time, I have always had my own company, where I have created goods or work for a client. 

Little did I know, I was on the path to being an Influencer and a Content Creator! These terms didn't even really exist on the same level that they do today. I work just about every day to develop this wonderful blog, that I am so proud of, and I just love creating content for brands and for myself. 

In addition to business dreams, the biggest daydream I am "obsessing over" is the dream to move to somewhere in the Olympic Peninsula, and live somewhere that inspires me beyond my wildest dreams. To just be a bit closer to nature as far as pine forests, mountain views, the ocean, and a damp cool climate, that is my next dream I am working towards! I am sure it's going to take a bit more time, to make enough money to be comfortable for us to make such a big move will be a huge task, but it can be done! 

So, what daydream are you currently working towards? Maybe you have a similar story to mine, or maybe something completely different. I cant wait to learn more about your dreams and aspirations, and at what point you are in your own journey.