Feel Love. Feed Life. Feed Side By Side.

This post was sponsored by Side By Side as part of a Two-Post Influencer Activation for Influence Central and all opinions expressed in my post are my own.

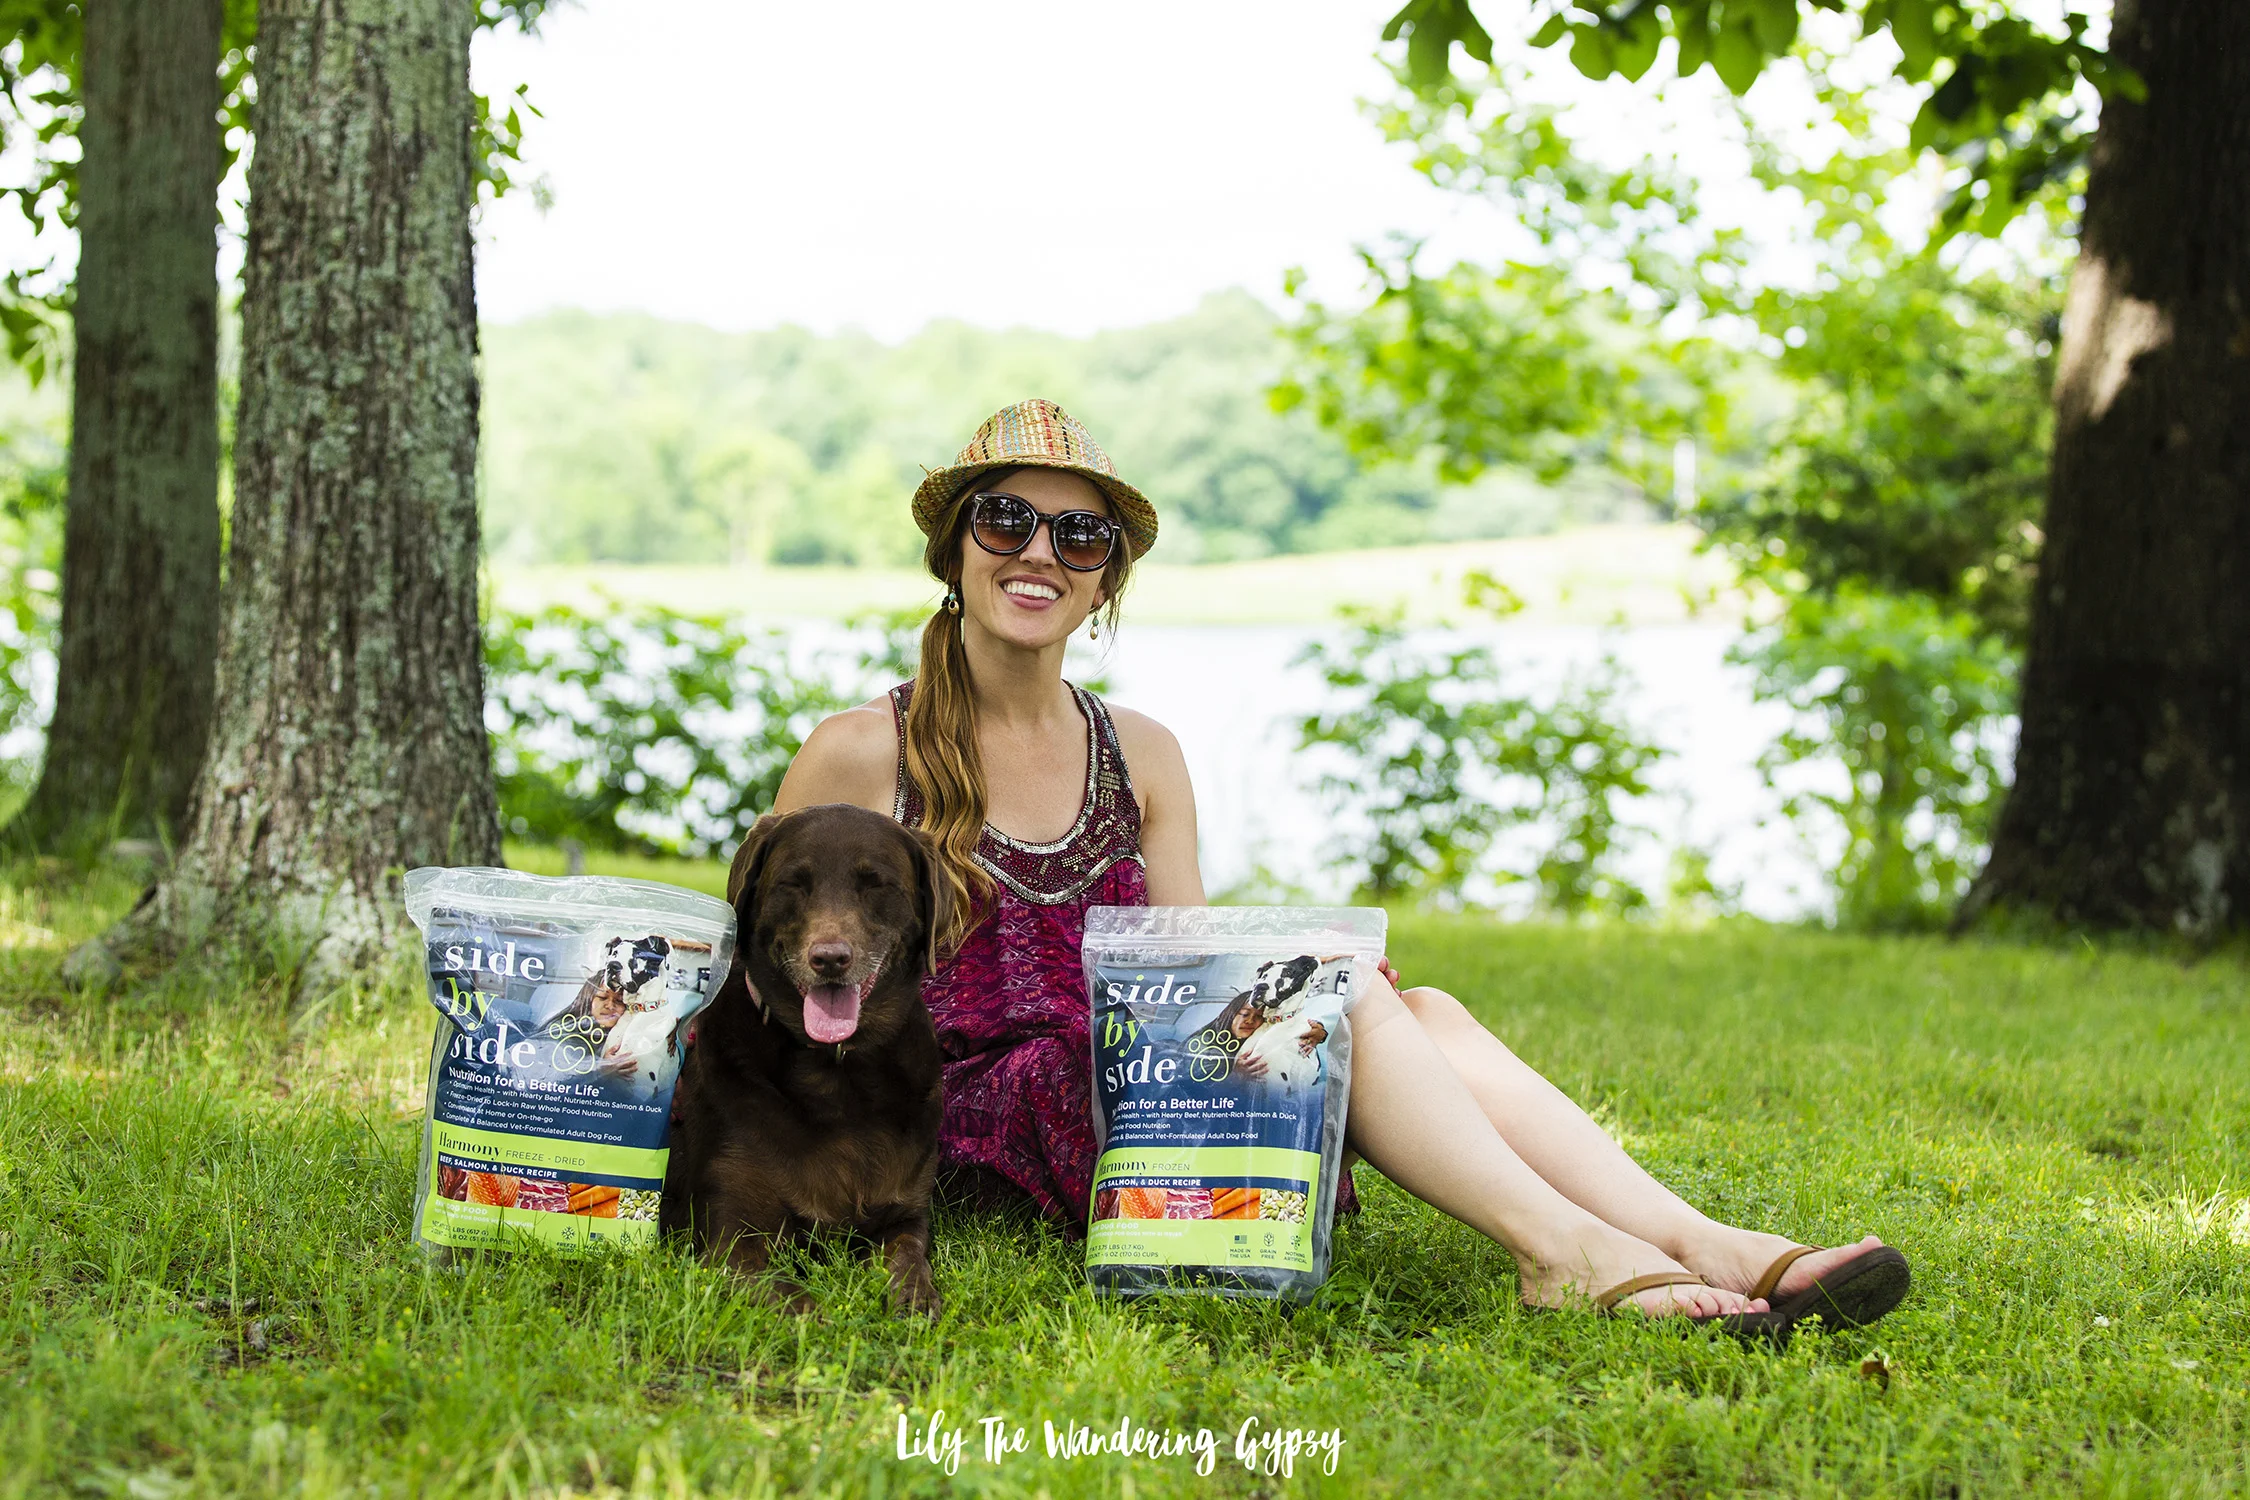
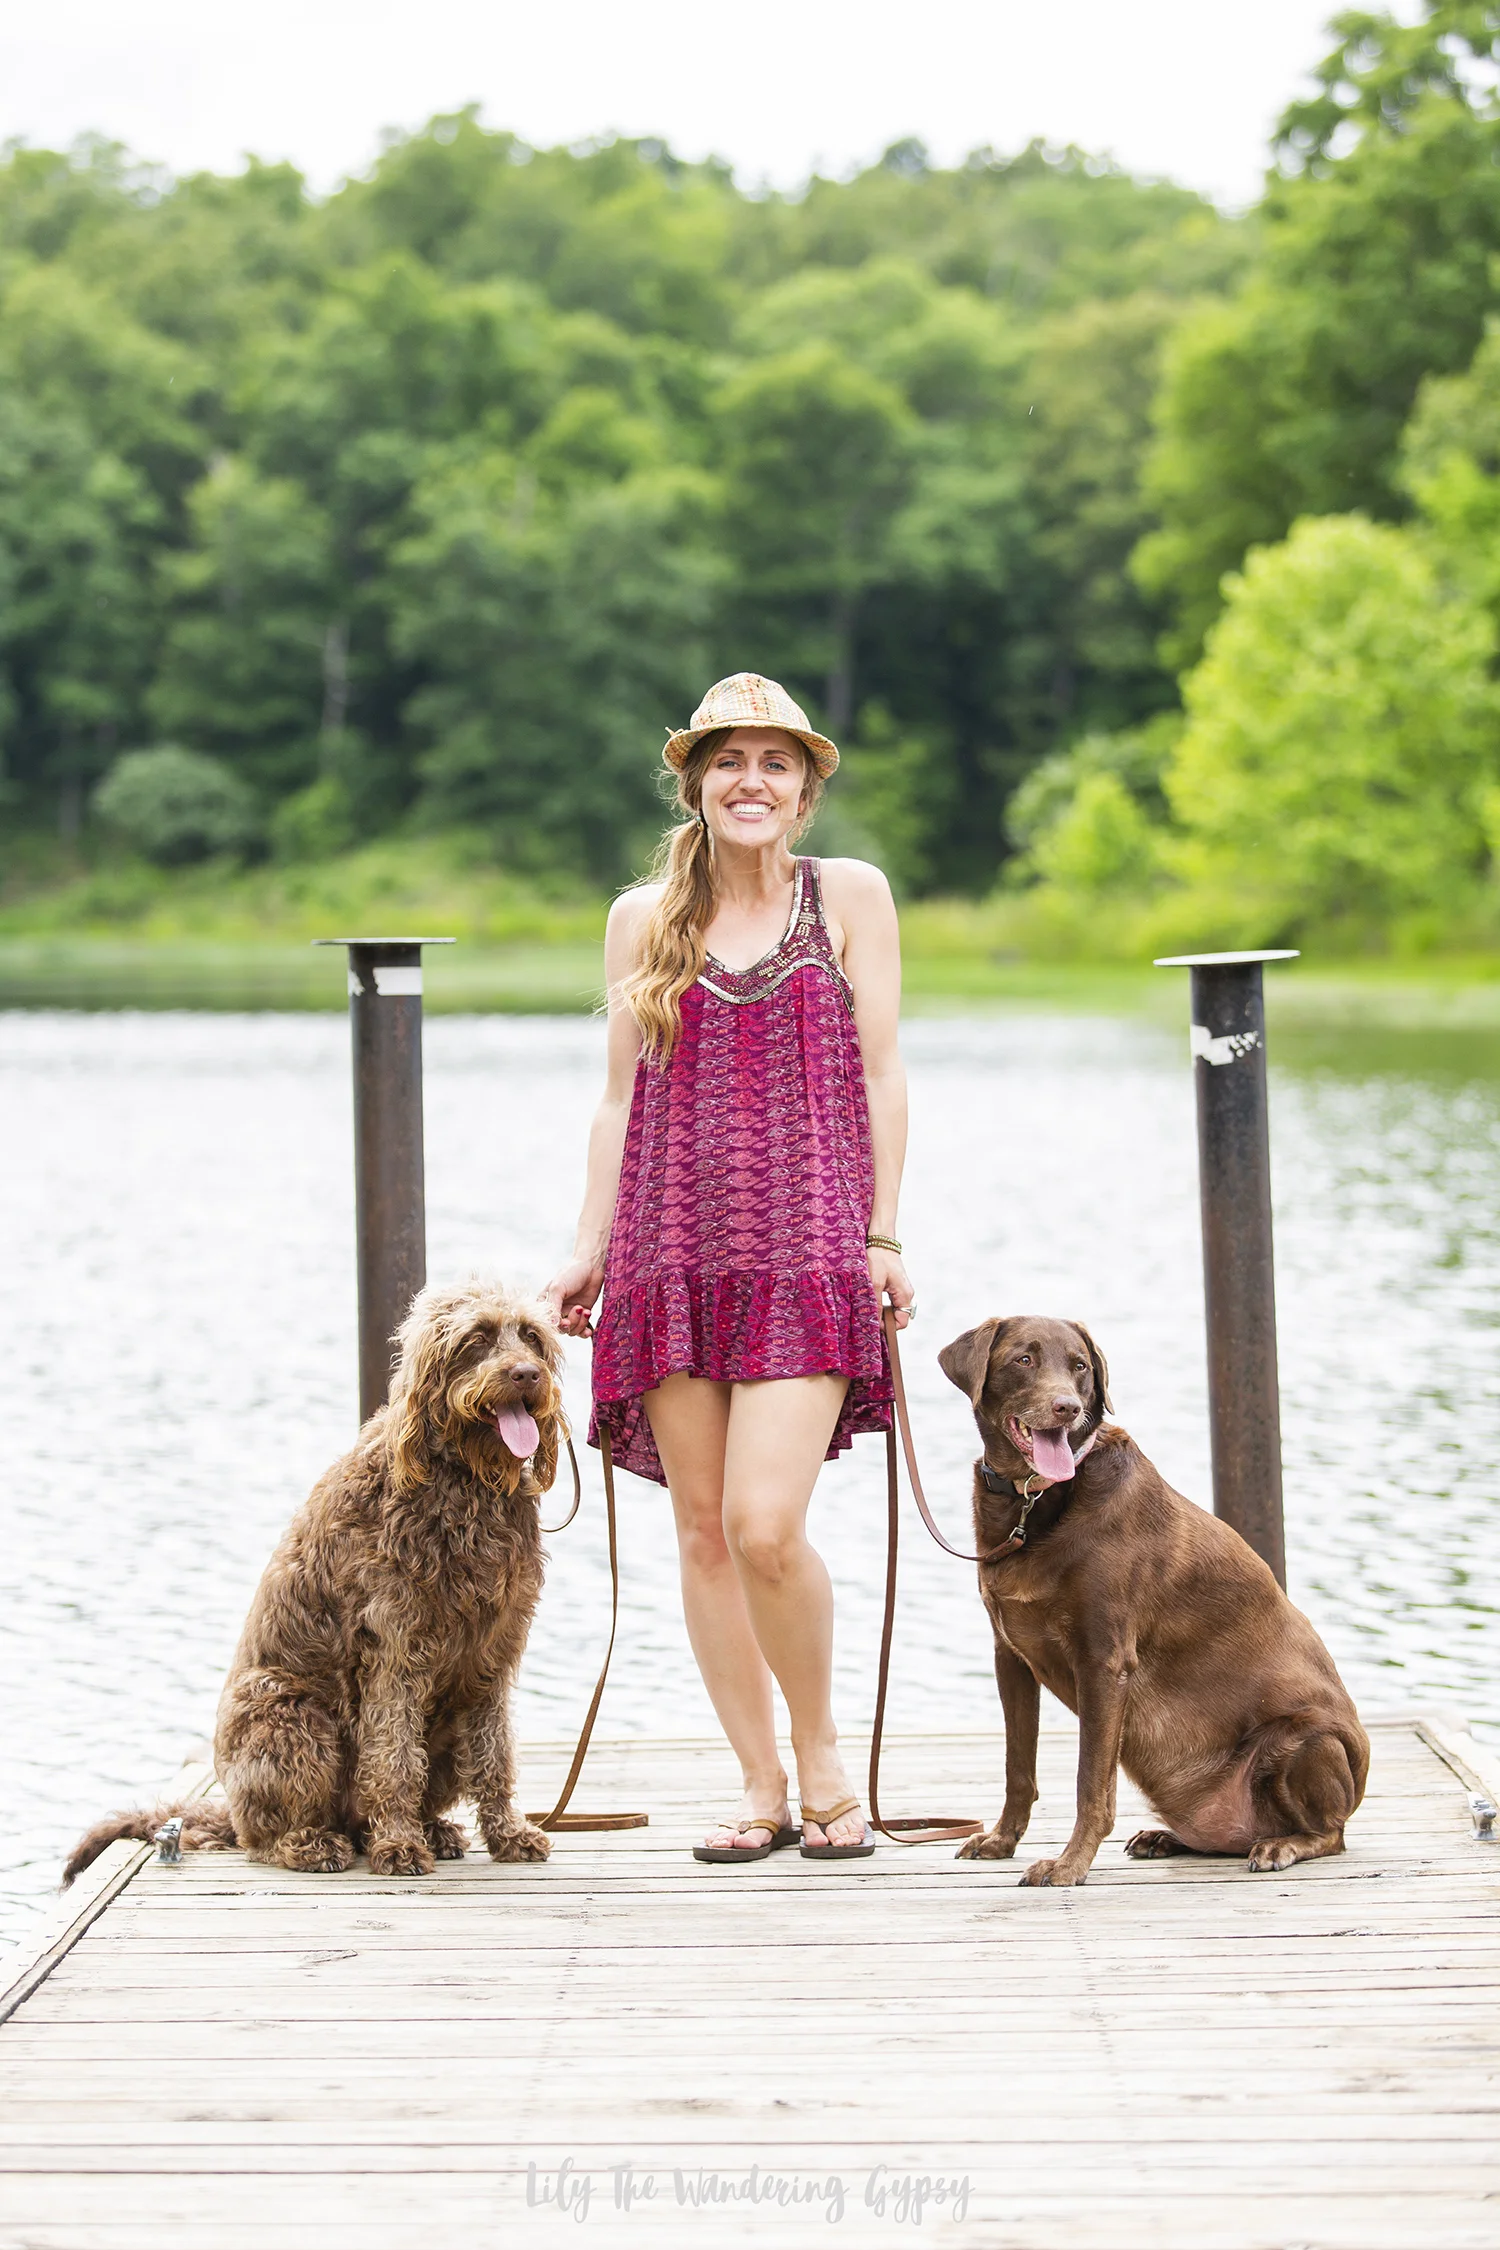
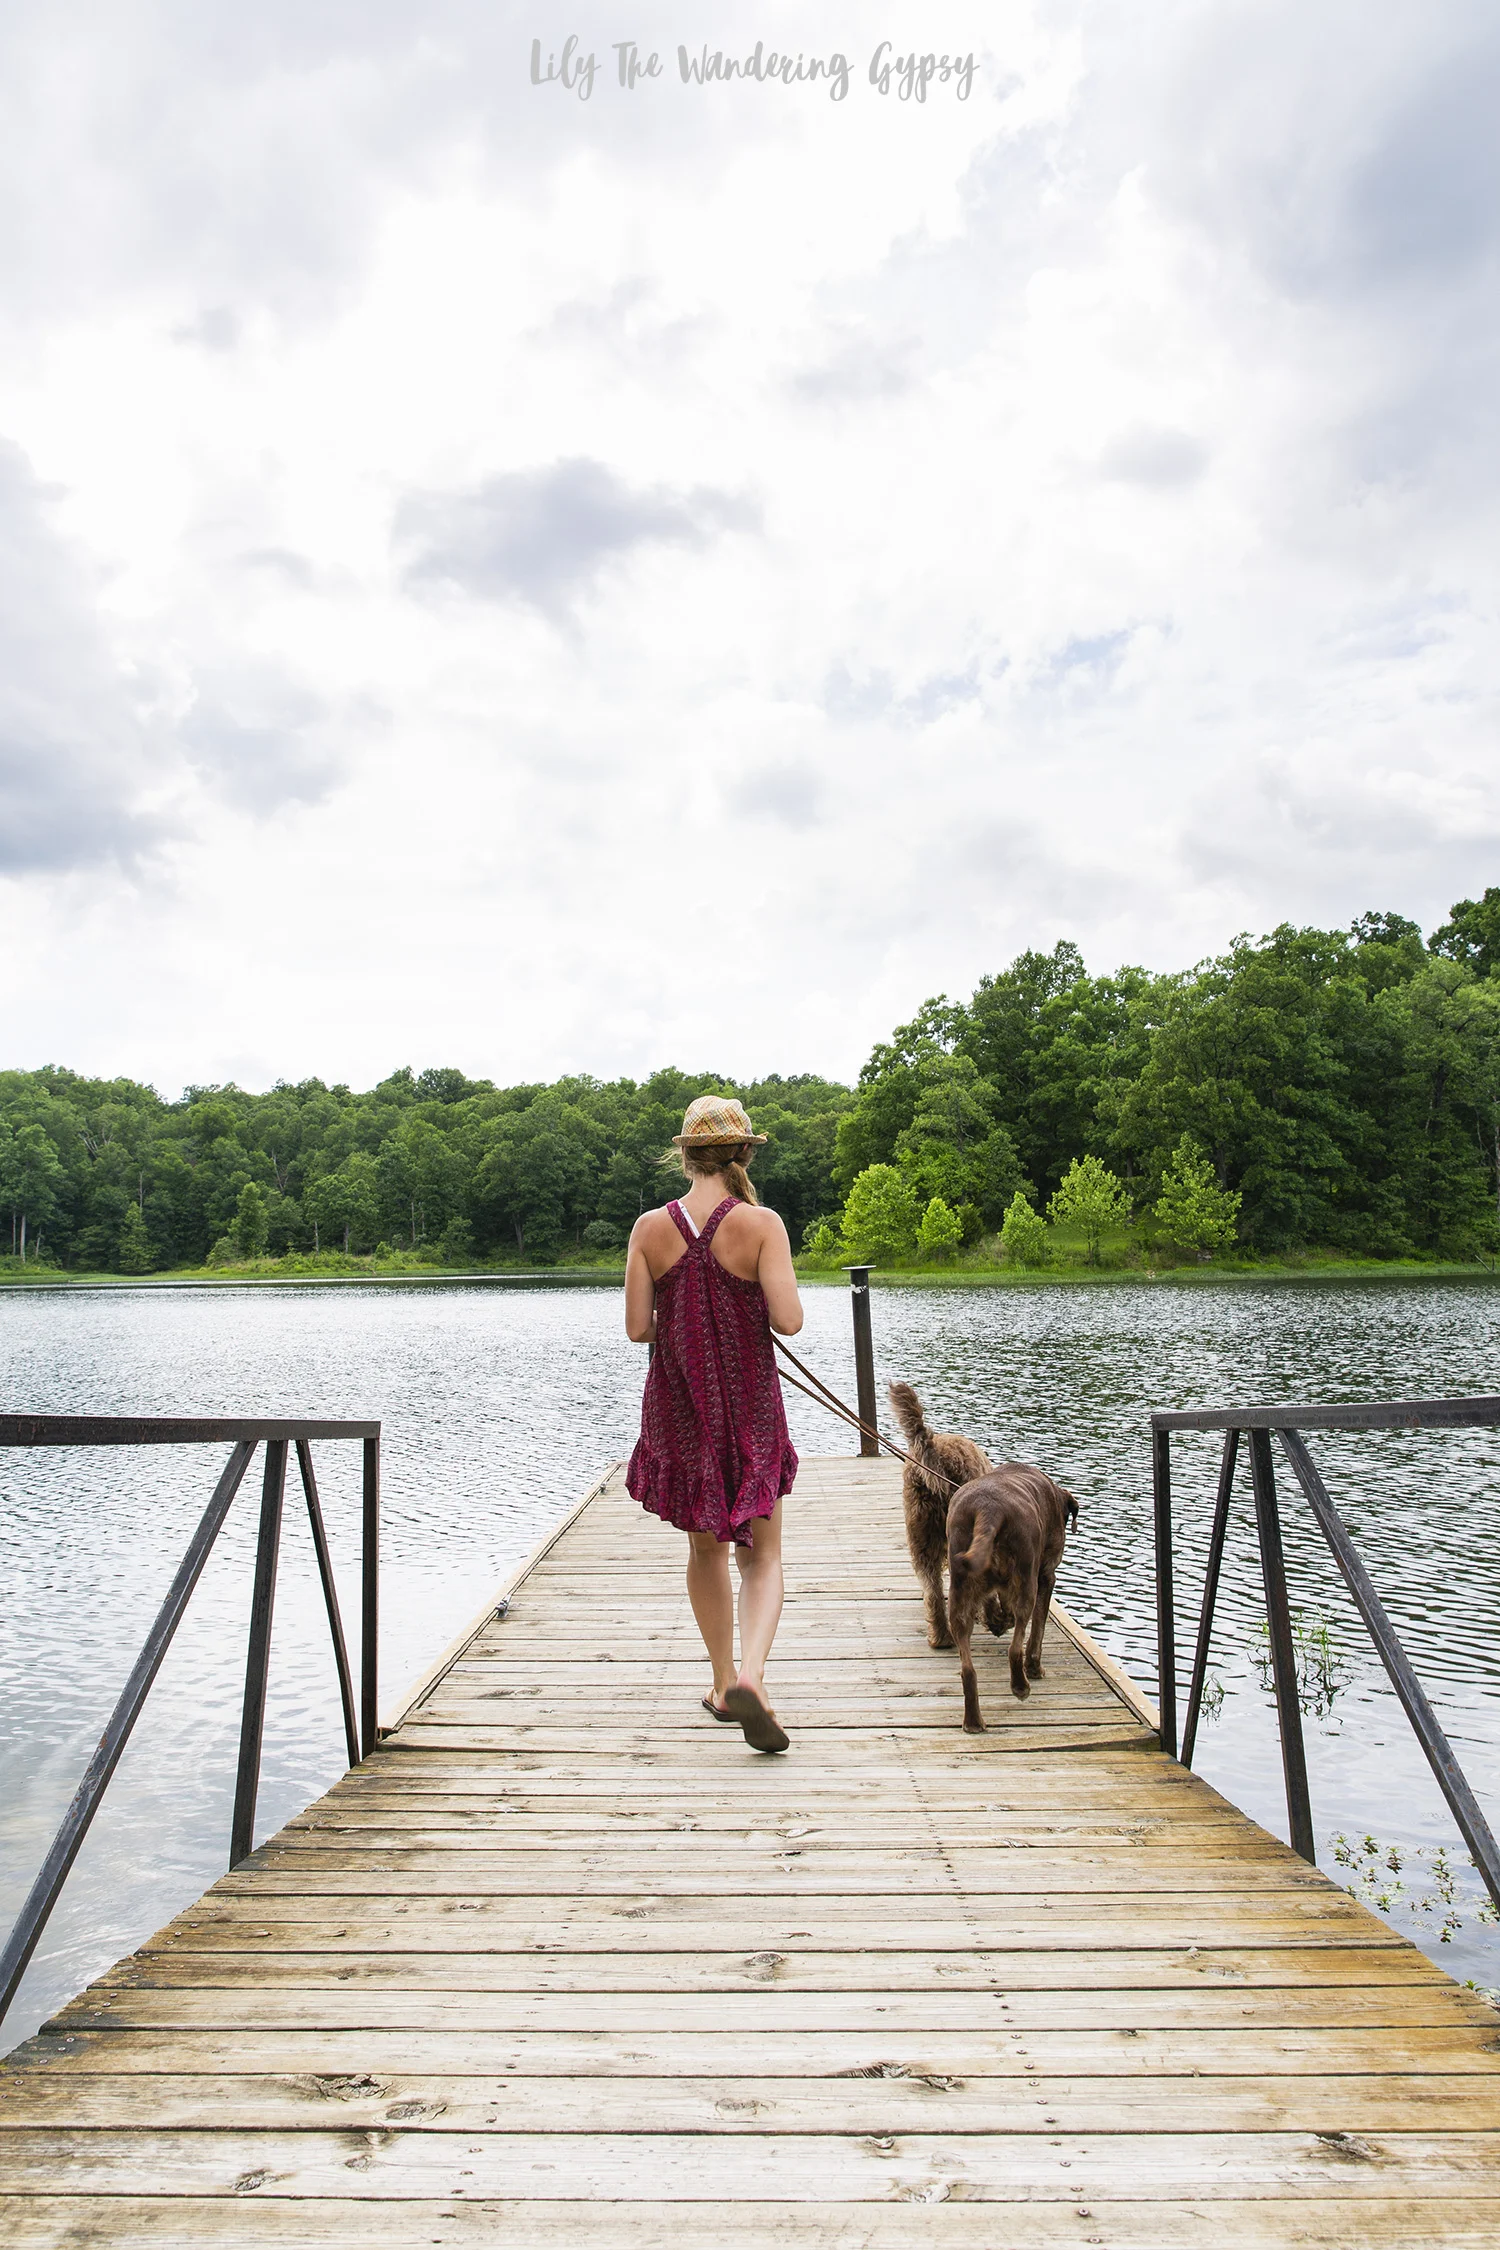
If you read this blog for even a few seconds, you may notice I have an affinity for my two dogs, Cabbie and Porter. They are the loves of our lives, and I recently had the chance to spend some good, quality time with the girls. We brought some of our new favorite dog food called Side By Side, a Telluride-based brand of holistic dog food and treats, where they take a new approach to pet nutrition that cherishes each individual pet. These ingredients are used to deliver the best in whole food nutrition.

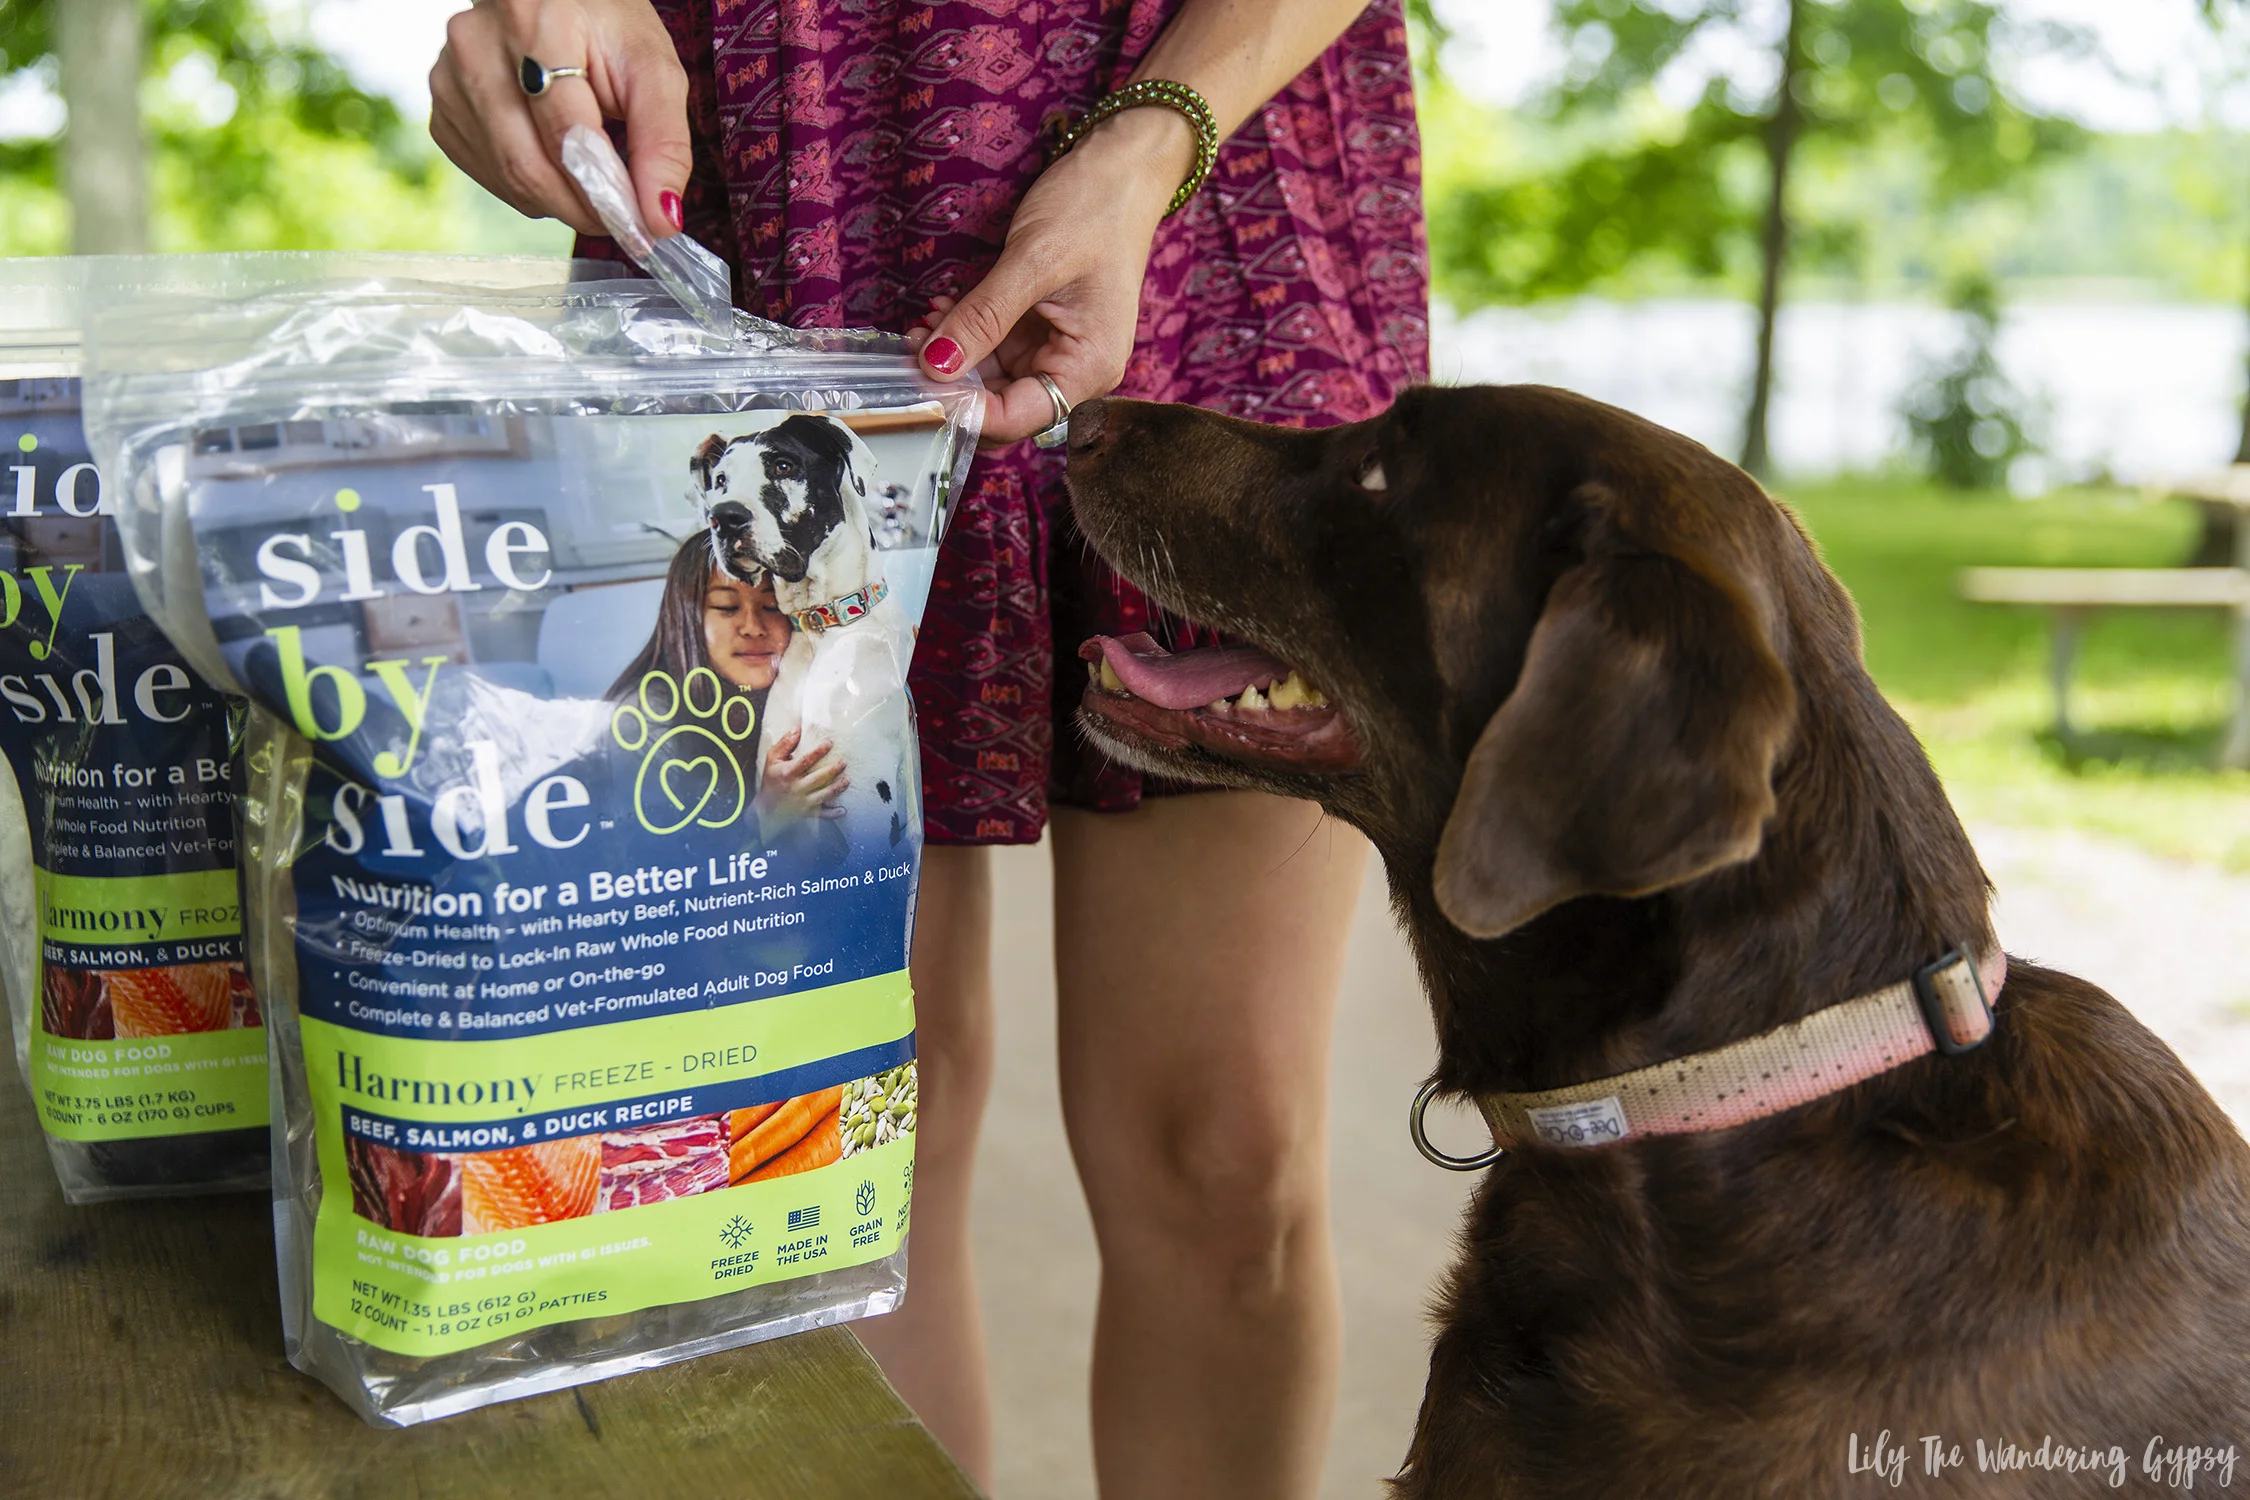
I was so lucky to have a recent consultation with one of the most knowledgeable individuals regarding pet nutrition that I have ever met, and also the Founder of Side By Side. Marney Prince explained the importance of feeding raw and/or freeze-dried food and treats to your  dogs, and I couldn’t agree more! Side By Side believes the best way to cherish our pets it to honor them with premium whole food nutrition made with love in small batches.

Side By Side even offers their proprietary Pet Assessment process, an online tool (found here) that allows the brand to make nutrition recommendations curated to meet your pets’ individual needs.

Since my first introduction to Side by Side, I immediate felt the passion and caring commitment displayed in all that they do., I received a phone call from the Founder of Side by Side, Marney Prince to discuss her personal recommendation on products!  During our phone conversation, I immediately knew that Marney truly cares for all animals, and I felt her compassion for my dogs as if they were her own.  I talked with her for about 45 minutes about my two dogs, Cabbie and Porter. She was extremely thorough when asking about my dogs, like what issues my dogs were having, and more lifestyle questions pertaining to how much and what types of activities we do each day, how much we interact with them, and even asked about their personalities and eating habits. I left my conversation feeling extremely good from her positive comments about my dogs and me as a dog owner.

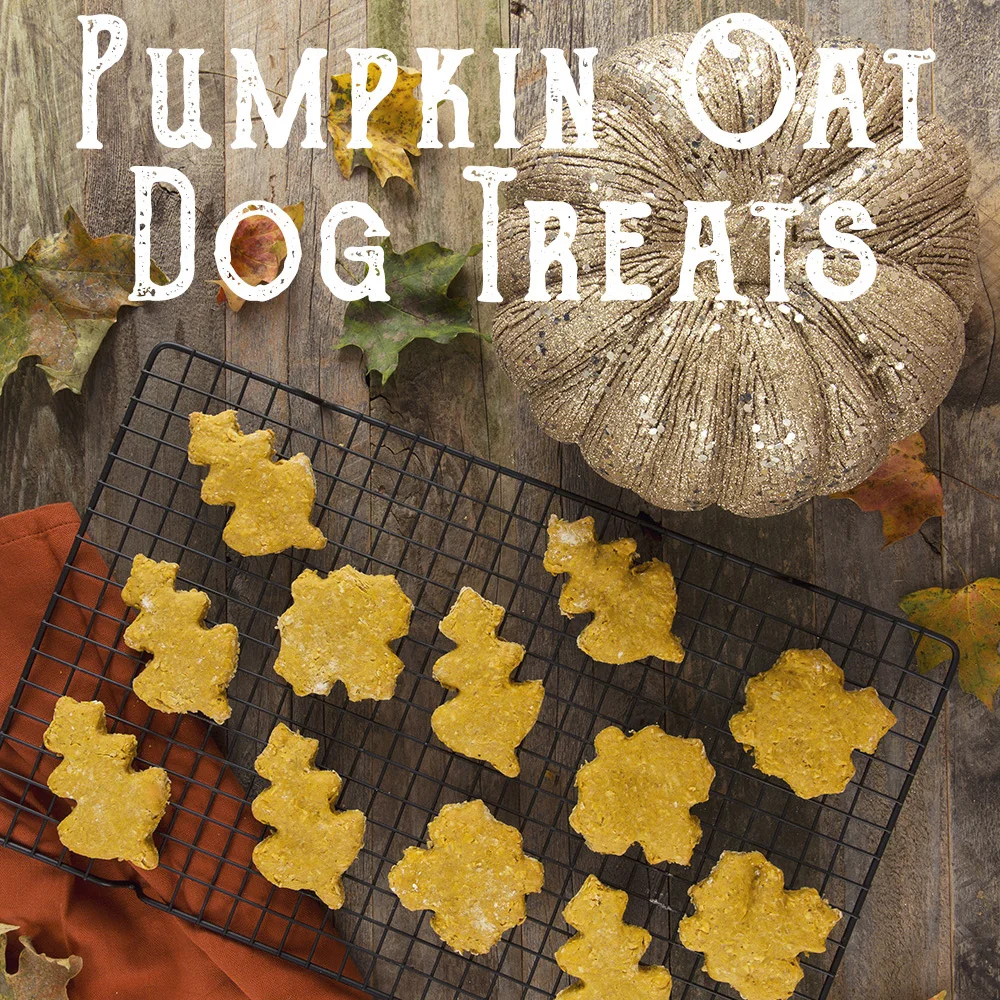
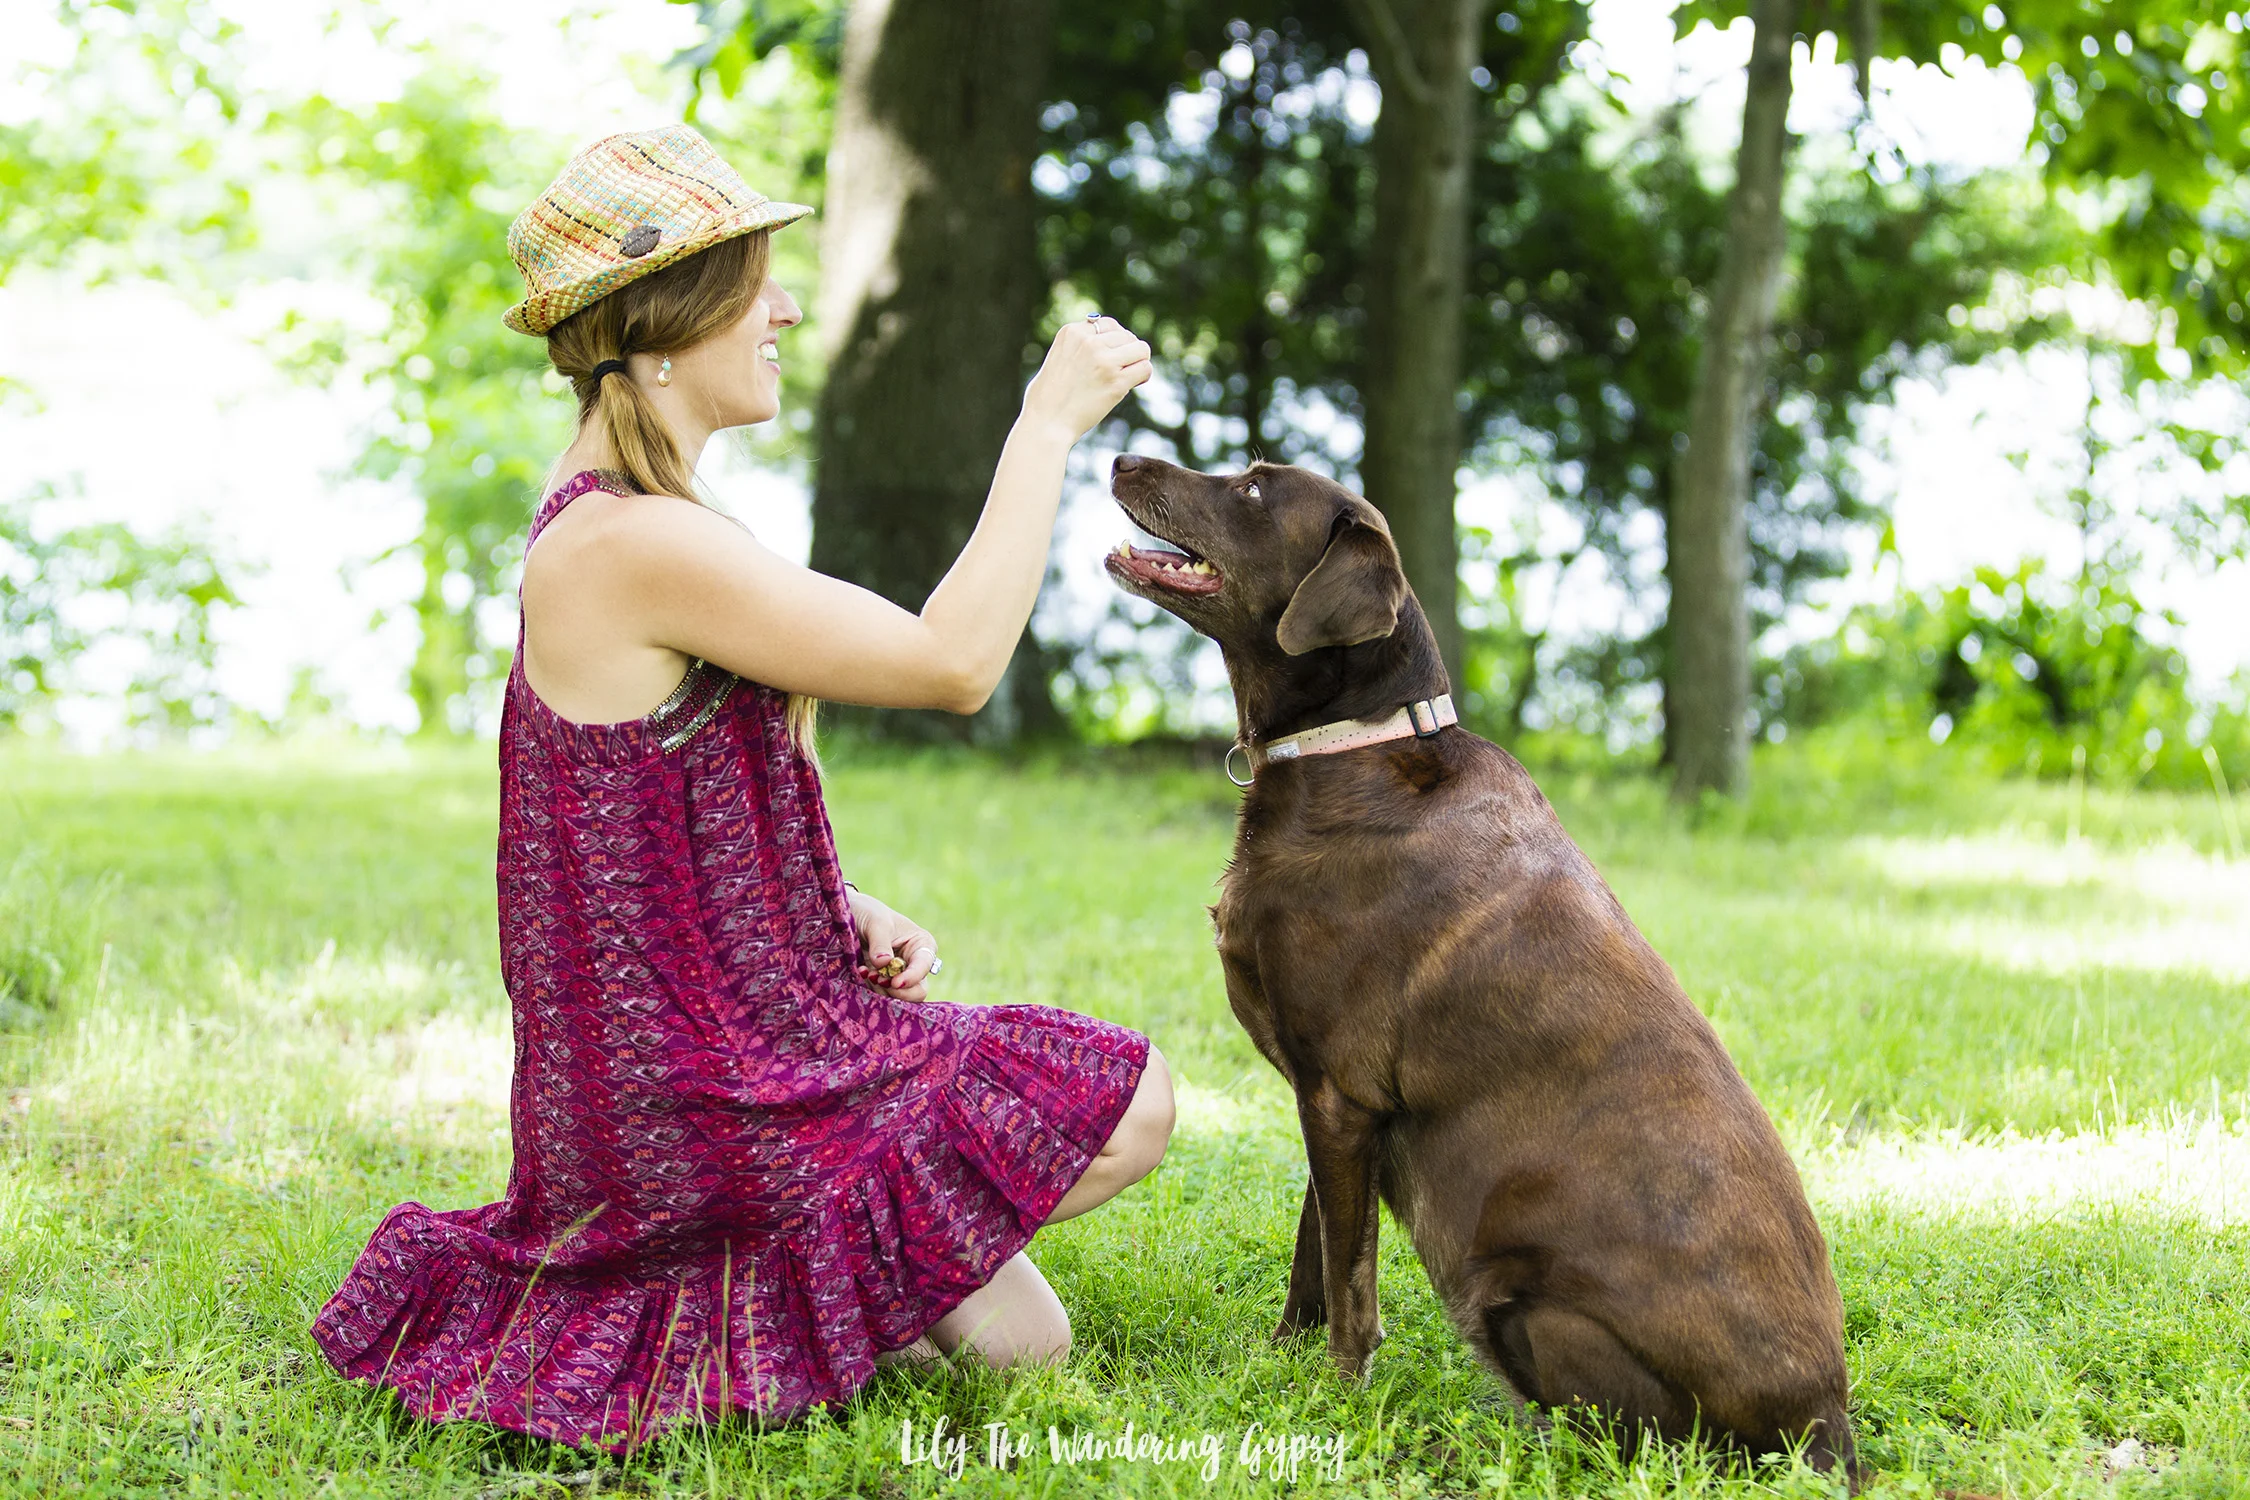
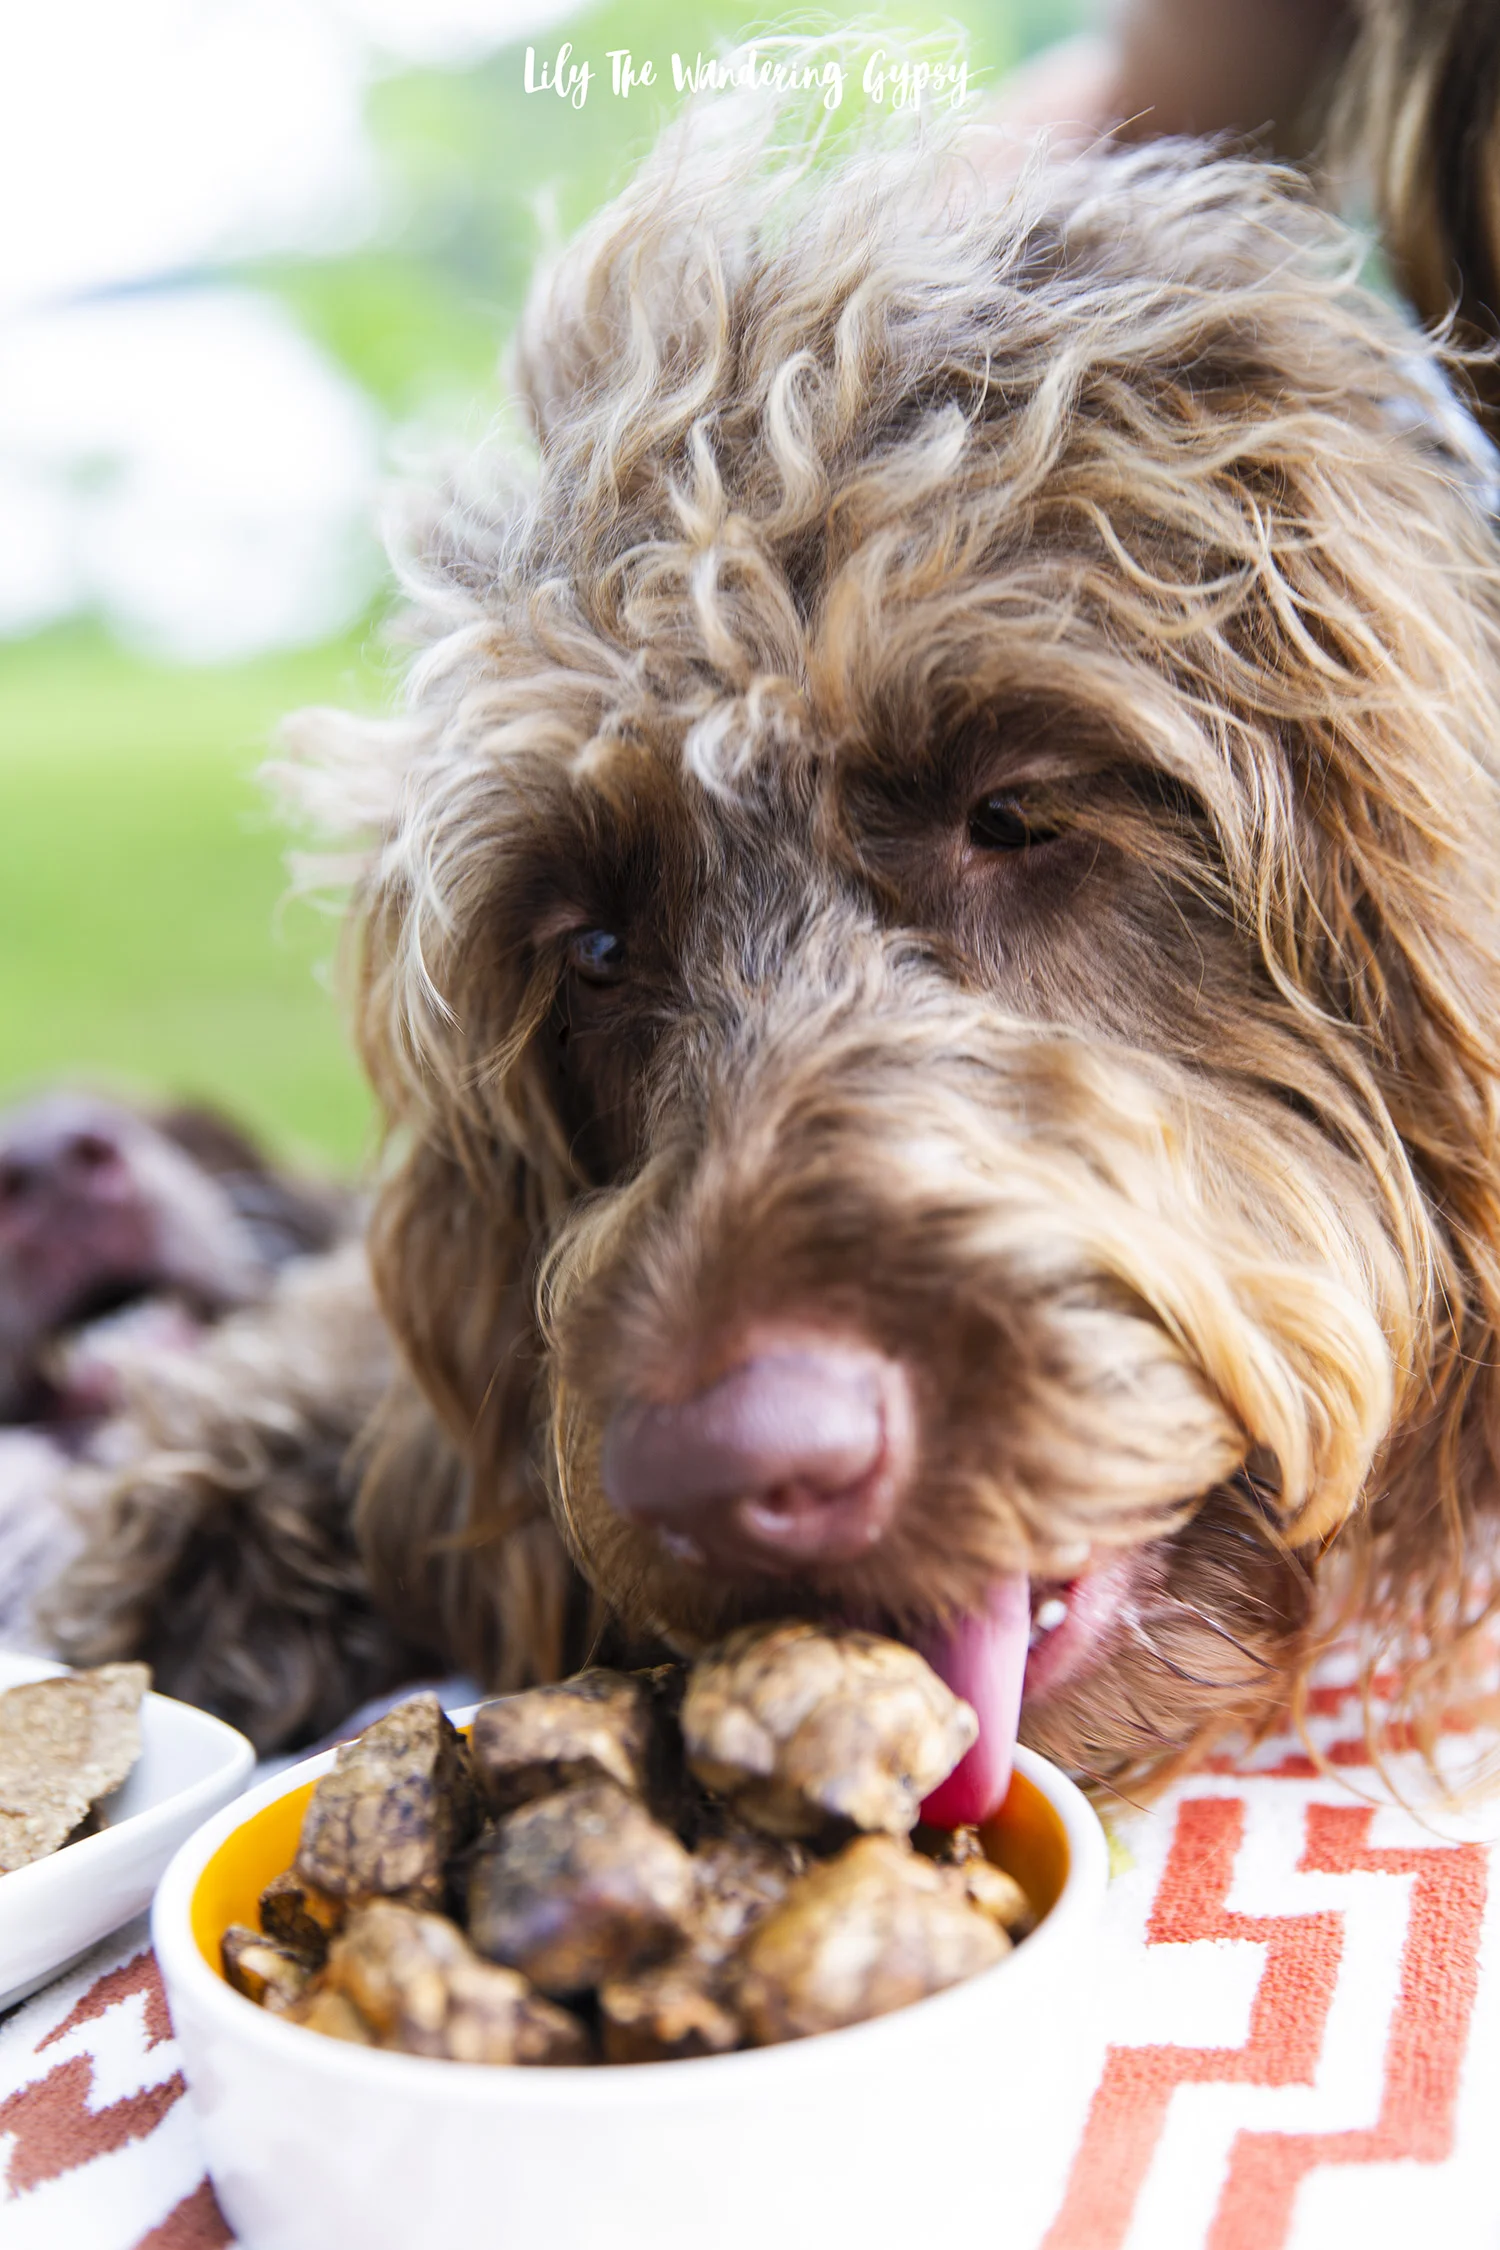
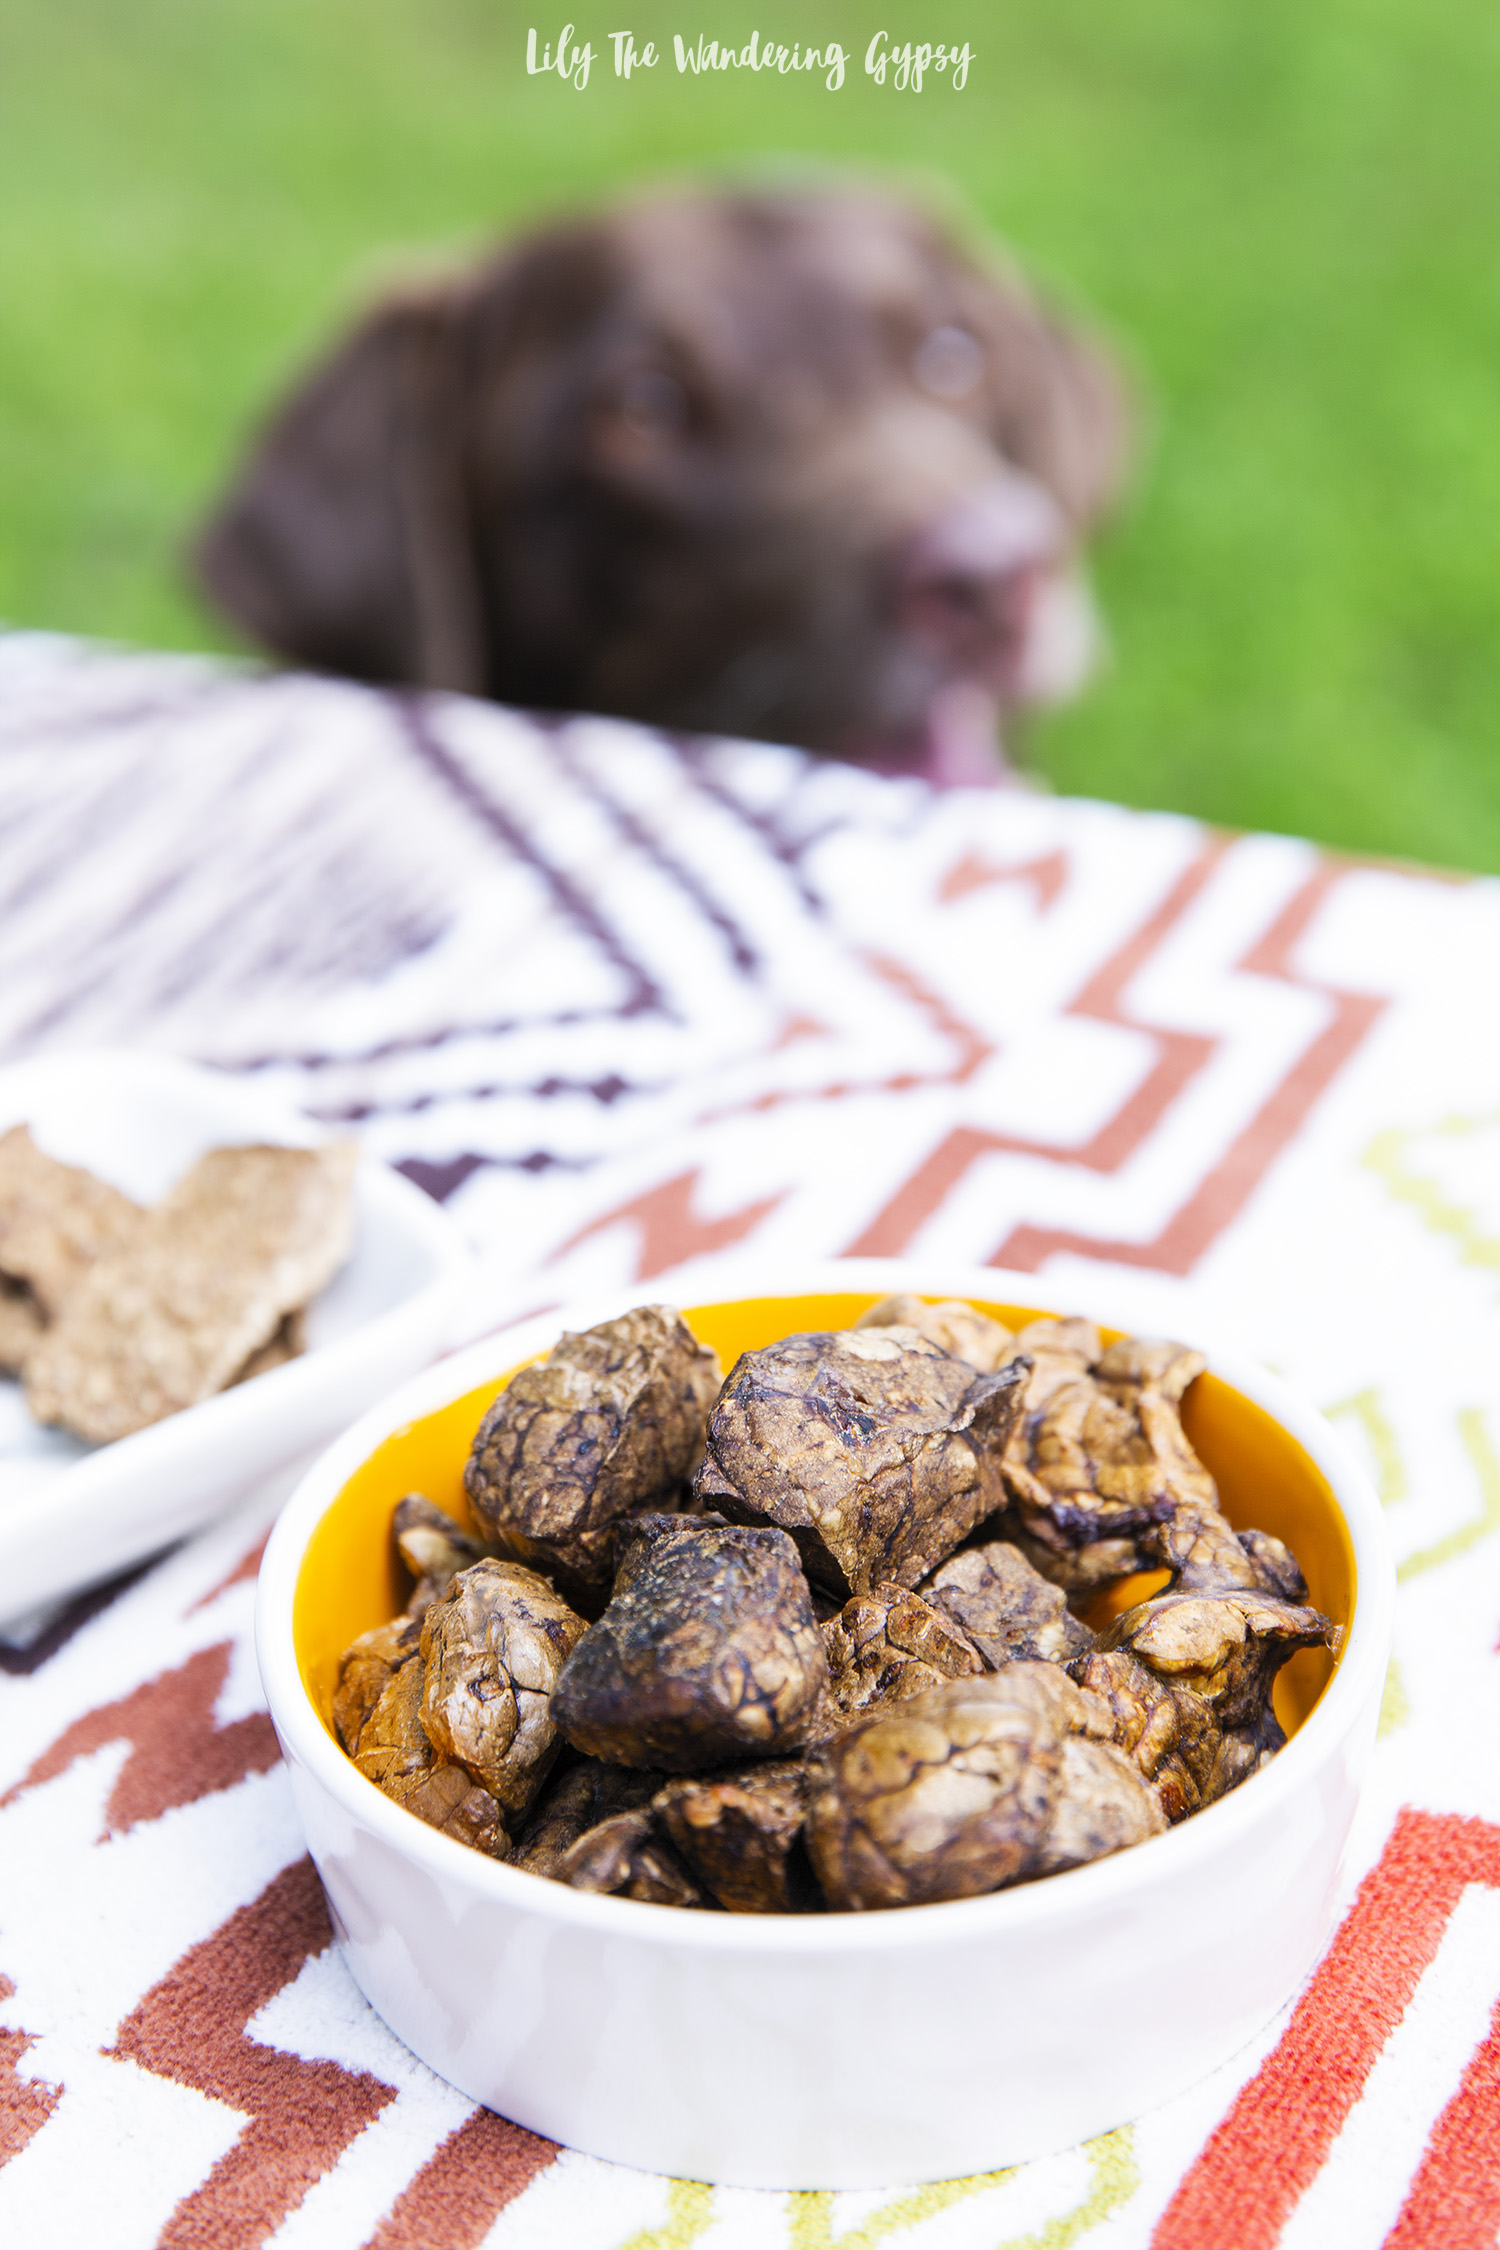
The food and treats are amazing! Since these three varieties of treats are freeze-dried, they make for an excellent treat with very few ingredients. The dogs seemed to like the  Duck l’Orange  treats the very best; they were a great size for even our large dogs.

Here is a brief write up of what Marney told me during our assessments for the pups:

PORTER’S REVIEW:

“Porter sounds like a super fun, energetic girl that tends to hold onto a little internal heat but overall appears very balanced. I think our main concern is preventing to onset of joint degradation, since she loves to play hard, has boundless energy and is a large breed dog. As far as the allergic reaction she gets on her tummy; this sounds like a seasonal allergy, not food related but once she's on a whole food diet that moves through her body at the appropriate speed (the 24 hr/12 hr ratio of kibble/real food), you will see a reprieve in the bumps. We are releasing a supplement called Cool Down Dog the first week of June for seasonal allergies and we can certainly try that if the food alone doesn't remedy the reaction. It's a bunch of eastern and western herbs. Otherwise, we would recommend that Porter transitions to our Harmony raw, either freeze-dried or frozen, because it will provide a little higher protein for our athlete, has beautiful whole wild Alaskan salmon, duck necks, yucca (cassava root), and turmeric in it for her joints, and it is considered a neutral recipe, which is ideal for a sweet natured, happy dog. I'm going to recommend our Beef lungs and Duck L'Orange treats but she'd do great on any of our options. I love that you give her yogurt regularly, please continue”.

CABBIE’S REVIEW:

“And, for Cabbie, who sounds like an absolute doll! Again, she sounds happy, healthy and balanced. The only change I'd really like to make is to slow her aging process and prevent the onset of disease. For Cabbie, our Genial recipe, either frozen or freeze-dried, would be wonderful. It is a cooked recipe, which more appropriate for a mature woman, and contains a small amount of whole oats which support the thyroid gland and metabolic system, whole Alaskan salmon for joints and beef heart which in Chinese Medicine promotes self-confidence and Shen (heart/love) energy. I'd also like to suggest our So Hip  supplement to increase the protection of her joints, plus this formula helps the body to clear toxins and free radicals within the existing joints. Cabbie is welcome to enjoy any of our treats, but just for fun, let's try the Chicken Hearts first”.

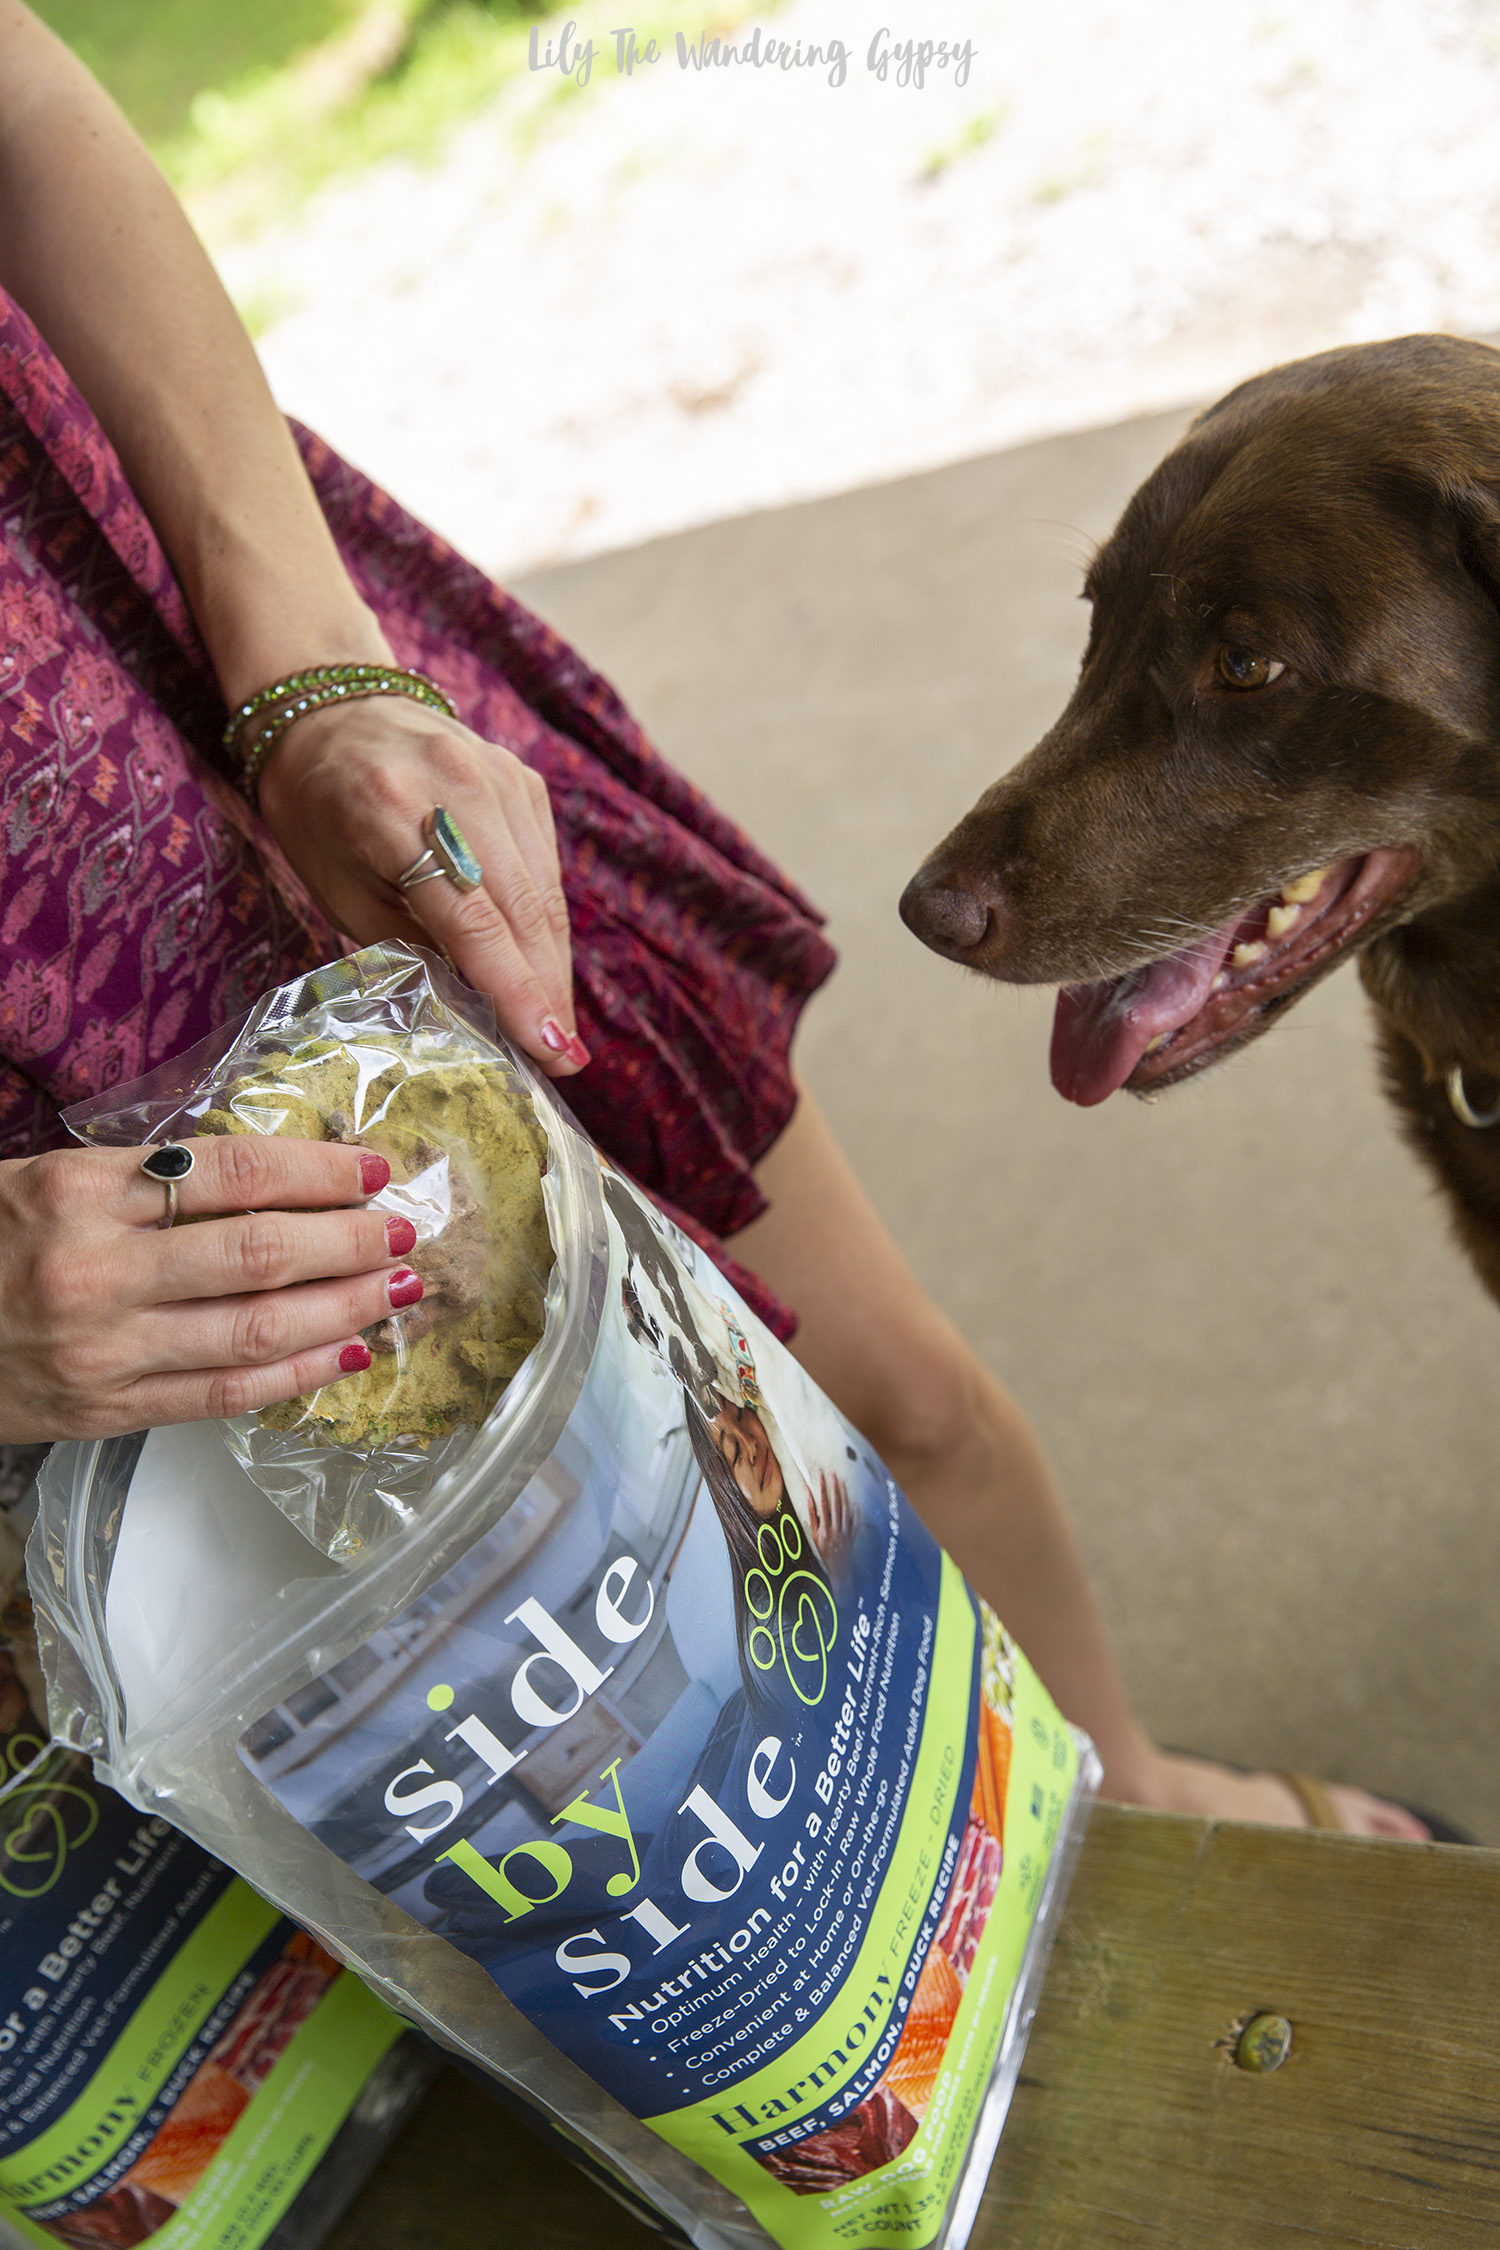
This food far exceeded our expectations, and I loved the convenience of the individually wrapped so they are basically mess free, and we were able to recycle some of the containers too! It really looks like everything is made with extremely high quality ingredients, which is of top importance to me.

If feeding your dog ingredients you trust is important to you, then I would absolutely recommend Side By Side dog food and treats! Side By Side is dedicated to the preservation of the nutrients, from sourcing the best ingredients, to minimal processing, to development of a complementary line of food diets, treats, supplements, broths, and toppers –with carefully crafted recipes utilizing only natural sources of protein, vitamins, minerals, fiber and the purest herbs, to provide a personalized nutrition plan for your pet.

Take the free Side by Side personalized Pet Assessment for a personalized nutrition plan today! Also, you can get 25% off your first order and 15% the subscription service with code: LILY

Delicious No Bake Tiramisu Recipe

This Italian inspired dessert has been described as "sexual" and will make your tastebuds go crazy! Perhaps this recipe will start off your weekend just right! But in all seriousness, since this is a no-bake treat, and can be served in individual jars, it's perfect for summer parties, and everyone is going to love this recipe. 

Both rich and somehow light at the same time, the homemade whipped ricotta filling and the familiar taste of coffee really make for a decadent treat.

Easy Eggless No-Bake Tiramisu

Prep Time: 20 min + chill time

Yield: 9

INGREDIENTS

·       1 cup (250ml) whipping cream

·       1 cup (250g) mascarpone, softened

·       1/4 cup (50g) granulated sugar

·       1 tsp (5ml) vanilla extract

·       1&1/2 cups espresso or very strong coffee, cooled

·       2 tbsp (30ml) coffee liquor (I used Kahlua)

·       2 dozen lady fingers

·       2 tbsp cocoa powder

INSTRUCTIONS

1.   Beat the whipping cream until stiff peaks form. Set aside.

2.   Mix the mascarpone, sugar and vanilla until combined. Add in the whipped cream and beat again until smooth.

3. Prep small Ball jars by removing all lids, rinsing and drying thoroughly, and setting them all out onto a tray or surface.

3.   Stir the coffee and liqueur together. Lightly dip 2-3 lady fingers into the coffee mixture, then place the 2-3 lady fingers into the jars to create the bottom layer of the dessert. Make sure not to soak the lady fingers too much or there will be lots of coffee left in the bottom of the jars. Repeat in all jars.

The Kahlua is optional but adds a nice kick and authentic flavor to the flavor of this dessert!

4. Using the small ice cream scooper, scoop a generous amount of the ricotta mixture over each jar, making them look as much like a perfect scoop of ice cream as possible.

5. Sprinkle cocoa powder (or even hot cocoa mix) through a metal strainer over top of each jar. A light dusting of the cocoa powder really gives them a nicer, upscale look. Enjoy!

The other fun thing about this post is that I get to show off my new kitchen update, we painted and I installed new "tiles" from The Smart Tiles, here!

PRINT THE RECIPE...

PIN IT FOR LATER...

DIY Bottle Koozies + Vegetarian Taco Bowl Recipe

This shop has been compensated by Collective Bias, Inc. and Constellation Brands. All opinions are mine alone. The following content is intended for readers who are 21 or older. #CelebratorySips #CoronaSummer #CollectiveBias

Summer is here and what a better way to celebrate all the hard work you have done this year with a Beer + Craft Night with friends? I’ve been really wanting to make some customized / embellished drink koozies for some time, and when I learned about this amazing opportunity with Corona®, I jumped at the opportunity to celebrate all that Corona embodies - offering a passport to carefree enjoyment and refreshing, delicious refreshments! With a refreshing, smooth taste balanced between heavier European imports and lighter domestic beer, Corona Extra is an even-keeled cerveza with fruity-honey aromas and a touch of malt. The flavor is crisp, clean and well balanced between hops and malt.


What a perfect way to celebrate summer with a snazzy new way to keep your drinks cold and to liven up the party...even if it is a craft night that turns into a party :)


These bottle and can koozies really make a statement. They will also help you identify which beer belongs to each person. For only $3-4 you can make your very own Summer Drink Koozie - keep reading to get the instructions and design ideas!

KOOZIE MATERIALS:

Foam Koozies (found in the foam aisle at a craft store)

Ribbons and trim of various colors

Low temp glue gun

Glue sticks (I used fabric glue sticks)

Cardboard for use as your work surface, or a heat-safe work surface (the glue can get messy!)

KOOZIE INSTRUCTIONS:


  1. Plug in your glue gun and get it ready to use. Cut ribbons and trims to fit around your koozies, leaving a little extra just in case.

  2. Once glue is hot enough, on a heat-safe work surface, add a bit of hot glue to the end of one ribbon, and begin to glue it around the top of the koozie. For the more patterned koozies, I used 4 strips of woven ribbon around. See steps below.

Notice the raw edges of the ribbons, above. We will cover those in the next image, with one more strip of ribbon, glued up the back.

3. For the tassel koozie (below), I glued on my tassel trim first, then covered that with a more tie dyed looking ribbon for a more finished look. See steps below.

4. Feel free to embellish further with stick on jewels and more ribbons - let your creativity run wild! Note - I tried using sticky-backed jewels, but I needed to glue them on, or they would fall off after a short use. Still super cute either way!

FOR THE VEGETARIAN TACO SALADS:

Ingredients:

2 Sweet potatoes (chopped)

2-3 TBSP Olive Oil

2-4 TBSP Mexican Seasoning

1-2 tsp salt

(Other toppings include: lettuce, shredded cheddar, tomatoes, sour cream, guacamole, cilantro, and more!)

Note - this can be made vegan if you use all vegan toppings, like vegan sour cream.

Taco Salad Instructions:


  1. Preheat oven to 375-400 degrees.

  2. Cut sweet potatoes into cubes, and chop onions into small pieces. Place into a mixing bowl, and toss with 1-2 TBSP Olive Oil.

  3. Bake potatoes and onions for 15-20 minutes, then add sliced peppers on top, and bake another 10 minutes or until the ingredients are baked soft enough to enjoy.

  4. To create your bowls, add a bed of lettuce, then top with sweet potatoes, and any other toppings you like. Enjoy with a Corona Extra®!

Have an amazing summer, friends!

PIN IT FOR LATER...

Mediterranean Food + More

Looking for a fun way to spice up dinners? We had some of the most delicious Mediterranean-inspired food recently, and our friends really came together to make the night special. Below, you will see all sorts of amazing foods like chicken shwarma, warmed pita pockets, all the amazing sauces, and fallafel (which we found at an international grocery store and fried on the stove top).

We love hosting and attending potluck dinners, where we choose a theme and everyone brings their favorite, homemade, made from scratch, or whatever food or drink they love, and we all feast!

This photo was one of the only ones I have captured with out studio lights, and it was one of our most successful and most delicious potlucks yet! Here's to more...

Music Festival Camping Tips with Coleman at Target

This post has been sponsored by Coleman®. All thoughts and opinions are my own.

Happy Memorial Day Week!

This weekend, I am attending the Summer Camp Music Festival and I am so excited. It’s been almost ten years since I first attended, so I am really looking forward to seeing old friends and listening to some live music. (I will share some photos of the event in this post throughout the weekend!!)

It’s important to set up a cute campsite to have as your home base for the weekend, and the NEW Coleman® Dark Room Tent is a great option you might want to consider! Head to Target to find everything you need for all of your upcoming adventures, and save on Coleman products with this Ibotta rebate offer here!

Since music festival season is upon us, I wanted to share some tips and tricks on how to make camping at a music festival even better, beginning with considering your tent.

This tent comes with a convenient carrying bag too!

Head to Target to get inspiration for your upcoming festivals and summer gatherings!

One of the features I find most appealing about the Coleman® Dark Room Tent would be the roomy interior, which is great for holding everything during the festival - plus, being able to change in the tent is priceless! There is more than enough room for us in here.

I love the dark outer fabric (which is considered their Dark Room Technology), that blocks light! Since you will likely be camping around a lot of other people, it’s so sweet that this tent’s rainfly blocks 90% of sunlight so you can sleep in past sunrise. Since a lot of music festivals have festival goers camp in open fields without trees, shade is very important. If your tent gets super hot in the morning the moment the sun shines on it, think of just how HOT you would be when you’re trying to get some good rest before another big festival day. Getting a little extra sleep is really amazing.

This tent is pretty easy to set up. I would recommend at least having two people on the job, but it’s pretty easy to find a friend to help you set up your tent in this situation. There are three poles, two that go into the actual tent, and one pole that gives the rainfly a nice awning, which would reduce any water dripping into your tent.

Speaking of rainy weather, you never know what to expect here in the Midwest, but this tent will keep you nice and dry because of the WeatherTec system, which uses a tub-like floor with welded corners and protected seams.

One of my favorite parts of any camping trip is actually when we get to head to bed. I do love that part of the night where we get to retire into our ultra comfy sleeping bags, cots, and our awesome, sunlight blocking tent.

In addition to awesome camping gear, we have lots of fun ideas of how to decorate our campsite, a few of which are shown throughout the post.

A dream catcher was so adorable and easy to hang, plus it brings that whimsical element into your campsite.

My favorite décor item would probably be adding an extra large sunflower (from a craft store), which I attached with zip ties.

Use 2 white twin sized sheets and zip ties or ribbons to add inviting softness and volume to your tent. I first folded one sheet in half to find the center. I then attached that to the sheets in an arched pattern. I used two sheets, but you could use a few more to get an even more festive and inviting look.

Think of your campsite as a living room of sorts, and try to create a relaxed, comfortable environment for your group, or for friends you might meet at the festival. Use outdoor rugs, tapestries, solar lights and more to personalize your campsite and make it stand out.
 

Prepare for the summer with the Coleman® Dark Room Tent and enjoy!

Revamping My Studio with California Closets X Marie Kondo

Learn more about my home studio renovation and tips on how to create a smart space of your own, inspired by California Closets and Marie Kondo! Schedule your own consultation today!

Thank you California Closets for sponsoring this post. #MarieKondoXCaClosets

I recently had a very inspiring online consultation with Jessica Ballesteros, a very talented Design Consultant for California Closets. She and California Closets recently teamed up with Marie Kondo, the author of "The Life-Changing Magic of Tidying Up" and creator of The KonMari Method. 

I sent Jessica a brief explanation of what I wanted from my space, and she gave me lots of amazing suggestions and explained what one could expect from an in--home consultation, which I will explain further into this post. After that, she inspired me to completely re paint, and then overhaul the closet in my home studio / photo studio space. I am so excited to share my experience and new space with you!

The company's professional design consultants will collaborate with you to create custom designs at a range of styles and budgets.

THE STUDIO

To explain the space a bit better, this is one of our three bedrooms, and we had nice Pergo flooring installed a few years ago, but never got around to painting it. We use the space for our photo studio and any other fun and creative projects we come across.

It's a great size space for our photo studio, and the space basically needs to be kept very neat and tidy because when one project is done, we start the next, The space has to be versatile, and changes depending upon what we are working on. These projects range from food and drink recipes to product photography and home decor projects and more!

BEFORE + AFTER

Below, you can see my studio before the transformation. While it definitely wasn't stuffed to the gills with things (yes, it was at one time), it was not very tidy or inspiring. There are things that had been in this closet for years and years, and I would just keep adding thins to it because I didn't have any place else to put them. That should have indicated to me to get rid of some things, but I never gave myself enough time to really dive into making a more inspiring space.

While I did not install actual pieces from California Closets, I did use their mission to inspire my own design.

WHAT I DID

Painting really did help so much. I chose a light grey color called Filtered Shade from Valspar in an eggshell finish.

I also added a metal shelf to the closet, which holds a lot of weight per shelf. This will be amazing to hold props, my cameras, and anything I am using for current projects. This shelf even now has a few empty spaces that can be utilized in the near future for lots of upcoming projects. 

I also hung my fabric pieces on hangers, which I use for backdrops or as tablecloths in lots of my photos. I like having a smaller selection of fabrics hung, because then it sets the color scheme for lots of my images, making my posts look more coordinated.

I made sure to keep everything in view, without crowding the shelves too much. I was able to easily store the two large camera cases in the closet and this will overall just be great because I will have everything at my fingertips during photoshoots, instead of having to run to different rooms of the house, which does waste time and energy (which never brought me joy).

IN PROCESS / BEHIND THE SCENES

THE KONMARI METHOD

After reading more into the KonMari Method, here are some key points.

Step 1: Decide what you want to get out of your space.

Ask yourself, what is your ideal lifestyle, and how can this space help you attain that? For me, I want to be a professional, very organized lifestyle blogger, and so this closet space needed to help me with that mission.

Step 2: Declutter and divide like items into groups

Take everything out of the space and organize it into piles of similar items. If there are certain items that do not actually make you feel happy, or that distract you from your initial goal(s), then it may be time to pass those items along. Then, you will be able to better organize those things that you do need.

Step 3: Decide what "sparks joy".

Marie Kondo explains what it means to spark joy. Ask yourself questions like

- Does the item contribute to making you feel good about yourself, your job, and your space? 

- Will it help you with that particular job?

If not, then time to remove that item from the space and either discard, donate, or recycle it.

Step 4: Say Thank You and Discard (or Donate)

This is probably the most important and hardest of all of the steps. It's important to first realize how much space you even have for things, because if there are things we just never have room for, it may be time to just simply purge things. It can definitely be "scary" getting rid of things that you are so sentimental or that you have had for along time, but if it's something that you never use, or keep moving back and forth without using or having space for, then it may be time to let it go. 

As suggested by Marie Kondo, say a little "thank you" to the items which have served you in the past, and send the items on their way. Discard, recycle, or donate those items which are not fulfilling your mission to "spark joy" in your life, and then give a quickly tidy up or reorganize to the space to now suite your needs better.

For me, I have gotten rid of tons of clothing, old papers, and other photography and food/drink styling related props by asking myself, would I ever really use this again, or is is outdated? Or, is this s timeless piece that I will be able to use again and again?

The Design Consultation with Jessica

As I mentioned, Jessica is a Design Specialist for California Closets, and you can read more about her in the below articles:

https://www.californiaclosets.com/expert-tips-for-displaying-and-organizing-everything-in-your-new-closet/

https://www.californiaclosets.com/blog/whats-your-organizing-style/

She gave me some expert advice, as stated below:

"If you were wanting to try the KonMari method of organizing your office closet you would first start by removing every single item, and I mean everything.  One by one you would hold each item deciding what to keep (things that Spark Joy) and what to get rid of. Then putting everything back in an organized way. Using bins or baskets is always encouraged to help compartmentalize items by category if no drawers are available. Mari Kondo loves using boxes inside boxes to help divide things into categories."

I loved her ideas, and utilized as many as I could.

What an inspiring project this has been! I know that going forward, my new space will be an amazing home studio that inspires me each and every time I see it! 

Learn more about California Closets Here! And again, check out my studio space after the revamp, below!

California Closets has an extensive range of beautiful finishes to choose from, from clean and simple white, to proprietary textures imported from Italy, all of which are environmentally sustainable and California Air Resources Board (CARB) compliant. You can really go wild and create a dream space of your own.

I was selected for this opportunity as a member of CLEVER and the content and opinions expressed here are all my own.

Vegetarian Cashew and Superior Green Filled Cheesecake Recipe

This post is sponsored by FoodScience of Vermont. All opinions and content are my own.

#LiveSuperior

Looking to add more Superfoods to your diet? Learn how to infuse a cashew-based “cheesecake” with health-boosting ingredients!

This delicious cashew-based version of a traditional cheesecake is filled with all natural ingredients thanks to FoodScience of Vermont Superior Greens, which contains whole fruits and vegetables, promotes healthy aging and radiant skin, mental clarity, and a healthier immune system while offering a boost of healthy enzymes to support your immune system, plus probiotics. It’s amazing how this one line of Superior Powder products can offer so much!

Try it, you’ll love it. Find the product at Rite Aid® and RiteAid.com here!

I love incorporating unique and health conscious ingredients into my recipes, like the FoodScience of Vermont Superior Greens, which contains three servings of fruits and vegetables in each ½ scoop – which means that this ultra concentrated version of some of the healthiest ingredients on Earth really will work quickly and efficiently!

This recipe is divine! I believe this would be great for someone looking for healthier alternatives to dessert recipes, or someone who has never ever tried a cashew based cheesecake before. It’s fun to introduce friends and family to things like that.

I have been very interested in the detox process as well as considering eating as many whole foods as possible. This FoodScience of Vermont Superior Greens is a great step, in addition to more exercise and lots of water intake, towards reaching my nutrition and other health goals I have set for myself.

While the product can be enjoyed in a smoothie or mixed into a glass of cold water, I thought it would be exciting to introduce this product to my wonderful readers, friends, and family through a mouth-watering dessert recipe.

Perfect for summer when you don’t want to bake a ton, or when you want something that’s not overly sweet but deliciously frozen, this is the recipe that will check all of those boxes! Bring this to an event, or serve it to friends at a summer gathering and just look at everyone’s faces light up when they realize that this is not the “cheesecake” they were expecting, but one that is WAY, WAY better for them, but still tastes indulgent.

Now, as for the crust, I know the traditional vegan cheesecakes are made with dates, and are basically no bake, but my favorite part of a cheesecake IS the crust, so I wanted to keep it traditional with lots of additional natural ingredients to sweeten things up naturally. Feel free to use a date crust here too.

Food Science of Vermont provides us with ways to get 3 servings of fruits and vegetables in each ½ scoop. The scoop is provided, so it’s very easy to measure out just how much you will need.

While the traditional use for this product is mixed into smoothies, cold water, and other drinks, I thought it would be genius to use the delicious taste and the nourishing super food ingredients to infuse this recipe with a unique taste and twist.

The crust is made from a delicious mixture of coconut, walnuts, oats, graham crackers and vegan “butter”. I used a spring form pan, similar to a traditional cheesecake, but really modernized this recipe with almost all vegan ingredients and that extra boost of has helpful enzymes and probiotics, making this an all around awesome dessert or snack. Give it a try, I bet you’ll enjoy it!

INGREDIENTS:

(Makes “Cheesecake” in 6 in x 3 in spring form pan):

Crust Ingredients:

10 - 12 full graham cracker rectangles

¼ c. oats

¼ - ½ C. or more walnuts

½ C. or more dried coconut pieces/flakes

¼ tsp. cinnamon, optional

6-8 (or more) TBSP salted Vegan Butter or regular butter

¼ C. Sugar

*Note: Feel free to use less graham crackers and more of the oats, nuts, or coconut if you prefer and even healthier crust.

Filling Ingredients:

3 C. soaked cashews (soak for at least 3-5 hours)

1 can chilled coconut milk (use the top thicker part and save or discard water)

¾ - 1 C. macadamia milk, coconut milk, or similar

4 – ½ C. agave or maple syrup

½ - 1 tsp. vanilla

2 TBSP FoodScience of Vermont Superior Greens Powder


INSTRUCTIONS:

For The Vegan Filling:

1. Soak cashews for 3-5 hours, and strain. Add to a blender with coconut milk, and process until smooth. If the mixture does not pour well, then add a bit more macadamia milk or agave. Taste the filling to make sure it is to your liking. Time to make the crust!

For The Crust:

1.    Preheat oven to 350 degrees F, and prepare your spring form pan by using non stick spray inside, and using a paper towel to wipe pan for a more even finish. Also, you may cover the bottom of the pan so the butter does not drip out while baking. Alternately, bake on top of a sheet pan to prevent spills in the oven.

2.    In a food processor, blend up graham crackers (use hands to make pieces smaller before processing), coconut, walnuts, and oats. Feel free to mix in some whole oats after processing for that “whole oat” look in your crust.

1.    Once processed to an even powder, mix with melted butter, sugar, and pour 2 ½ cups into pan. Use a flat bottomed glass or candle holder to press and flatten the crust down, making sure to clean up the edges with a knife for a neater look once the spring form pan is removed.

4.    Bake crust for 15-20 minutes, until edges begin to brown. The crust will firm up quite a bit once cooled, so even if it’s soft after baking, it may already be done. Let crust cool completely, and fill with filling until there is about ½-1/4” until the top of the spring form pan. Freeze for 2-3 hours or overnight.

5.    Time to CAREFULLY remove it from the spring form pan. I would recommend using a sharp knife or skewer along the top edge to break the seal with the pan. At first, mine looked like it was cracking, so I re-tightened the outside of the spring form pan, ran a skewer along the top edge, and once I loosened the pan again, it removed pretty easily. Just be patient with it. At this point, feel free to place it back into the freezer

6.    Place “cheesecake” onto a plate to decorate. Top with fruits like blackberries, strawberries and blueberries (the two latter are actually ingredients in the FoodScience of Vermont Superior Greens powder). I sliced the strawberries in half and left the green parts on because the full strawberries just looked too big. The “cheesecake” would be fine to serve right now, or place back into the freezer for 2-4 hours so the berries begin to freeze and they get a beautiful frosty look to them.

FoodScience of Vermont offers three uniquely designed powdered drink supplements loaded with phytonutrients, stabilized probiotics, and many other beneficial natural ingredients. I really hope you enjoy!

Head to your local Rite Aid® or visit bit.ly/FSSuperiorPowders to get your Superior Powders.

Follow FoodScience of Vermont on social:

Follow the brand’s hashtag on Instagram #livesuperior

Facebook: https://www.facebook.com/FoodScienceVT

Twitter: @FoodScienceVT

Pinterest: https://www.pinterest.com/foodsciencevt/

Instagram: @foodscienceofvermont

Setting the Pace for Summer

This post was sponsored by Reebok as part of an Influencer Activation for Influence Central and all opinions expressed in my post are my own.

This past month or so has been filled with SO many amazing opportunities with work, home projects and great meals with friends, I can definitely tell summer is just about here. This productive and busy month will surely set the pace for a great summer, and to kick things off I found my new favorite pair of shoes, the Reebok Trilux shoes available at Academy Sports

Tomorrow I head to Louisville, KY to visit my sister who graduates with her nursing degree this Saturday. We are beyond excited for her, and we are so very proud of her. We also expect lots of travel and hopefully some live music along the way. All of that along with fun summer get togethers, leaves me wanting to look and feel my best. I will also have the opportunity to celebrate Mother's Day and see lots of extended family whom I don't ever get to see enough. 

Train in comfort with the Reebok Women's Trilux Run Training Shoes, which offer stretchy forefoot areas for a snug, personalized fit. The carbon-rubber heels guard against wear, and the single-density midsoles deliver a cushioned, responsive ride.

Whether you're wearing these for light exercise, or with a cute and casual outfit, these shoes are extremely versatile and will make you feel like a million bucks!

With all of these fun things taking place, and lots more to look forward to in the coming months, it's absolutely a great time to get in better shape. I always find that I feel more confident when I am eating better and being as active as possible. 

One thing that motivates me is to have cute and comfy workout clothes that allow me to move with easy and don't hold me back. I hate wearing anything that I am constantly having to adjust or is super constricting, and I found that these (SHOES) are perfect for light exercise and lots of day to day activities like grabbing lunch with a friend, shopping, running around with the kids, hanging out with friends, and so much more. 

Why not treat yourself to a pair of new shoes! I find that having so many fun things to look forward to definitely has a positive effect on me. While things can get a bit hectic when the schedule is filled to the brim, it also encourages me to exercise more, and stay looking my best! After all, it's that time of year when we are wearing cuter clothes, and showing a bot more skin, so this is the best time to get out more than ever.

Some ways to cope with that hectic schedule include meditation, breathing, walks, being outdoors in general, and being with those who make you your happiest!

In fact, since Mother's Day is this weekend, and if you haven't found a gift yet, or just feel your mom would enjoy shoes like this, order her a pair, or grab her a pair over the weekend from Academy Sports.

These Reebok Trilux shoes are super comfortable, and I would recommend sizing down 1/2 size if you will be wearing socks, and one whole size if you prefer to wear them without socks. They come in two colors, one as shown in this post, and one pair that is a darker grey and also super sweet (see both colors here).

CONNECT WITH ACADEMY ON SOCIAL:

Academy on Facebook: https://facebook.com/academy

Academy on Twitter: https://twitter.com/academy

Academy on Instagram: https://instagram.com/academy

Academy on Pinterest: https://pinterest.com/academy/

Recipe For The Perfect Mother's Day #SpreadTheLove #ButterChardonnay 

Thank you JaM Cellars for sponsoring this post. Looking for Butter Chardonnay near you? Check out their easy-to-use Store Locator! Just pop in your zip code and the Butter will be waiting! This wine melts in your mouth, is creamy-licious, and everything is certainly Better with Butter! 

I am so inspired by the warmer weather that is finally here, gracing us with sunshine and more reasons to celebrate the ones we love. One sip of Butter Chardonnay will transport you to a more relaxing and uplifted place! This Chardonnay is easy drinking wine that has light, crisp flavors that will surely please moms everywhere!

I have lots of mother figures in my life and I am extremely grateful for each and every one of them! My mom, my step mom, Bobby's mom, and my friend who just became a mom for the first time. I don't have any grandmother figures in my life anymore, but they are always in my heart! There are a few ways to treat any mother figure to something special for Mother's Day Weekend, so here are a few ideas to treat them well.

I also thought that making sugar cookie bars would be perfect, because they travel well and are such a versatile treat for Mom. 

It's fun how wine can also accompany some great times. It's seriously so fun to sip a glass of wine with my mom and sister and do some baking. We do tend to love doing projects together, so this whole post was just such an incredible inspiration for me!

I will also be heading to Louisville, KY this weekend to see my sister graduate college AND to celebrate Mother's Day with a brunch to end the weekend. I will definitely be bringing one of these bottles of wine to that celebration as well. I am SO excited!!! 

Butter Chardonnay melts in your mouth just like smooth, rich butter!

This wine is made from California grown grapes, is cold fermented, and is aged in oak. 

 If you sip this delicious Butter Chardonnay, you might even taste hints of stone fruit or baked lemon with a vanilla finish.

This wine is best served chilled and has such a nice, complex flavor without being too sweet. This is the perfect choice for summer and beyond!

Keep reading to get the full recipe for these amazing Sugar Cookie Bars with Edible Flowers!

Jump to the bottom of this post to grab the recipe for these sugar cookie bars. A couple of other fun ideas for making Mother's Day great would be some thoughtful gift ideas. Check out my ideas, below!

Why not give mom a gift basket with all of these items inside?! That would make her smile for sure. 

SUGAR COOKIE BAR WITH EDIBLE FLOWERS RECIPE

{Adapted from a recipe, found here}

Ingredients:

  • Dough:
  • 1 1/2 cups butter, softened to room temperature
  • 2 cups sugar
  • 4 eggs
  • 1 tsp vanilla
  • 1 tsp almond extract
  • 5 cups flour
  • 1 1/2 tsp salt
  • 1/2 tsp baking powder

Frosting:

  • 8 oz cream cheese, softened to room temperature
  • 1/2 cup butter, softened to room temperature
  • 5 cups powdered sugar
  • 1 tsp vanilla
  • 1/2 tsp almond extract
  • dash of salt
  • Food coloring (optional)
  • 2-3 tsp milk if needed
  • 8-10 edible flower heads, I used violas, but marigolds, violets, and others would work too.

TIPS ON FINDING EDIBLE FLOWERS:

To find the best edible flowers, look no further than your local hardware store or garden center. I found Violas on sale for about $2 per container. Look for the package with the most blooms on it. Cut the flowers off to garnish your sugar cookie bars or any other treat for Mom, even cocktails. The great thing about buying flowers this way, is that you can then plant them in a sunny spot in your yard and they will keep growing throughout the year, just as love for Mom grows all the time.

Alternately, I have seen a cute package of edible flowers at our local Co-Op, packaged similarly to the refrigerated herbs.

Instructions:

  1. Cookie bars: Cream butter and sugar in a large mixing bowl. Add the eggs, vanilla, and almond extract. Beat till well blended. Whisk together the flour, salt, and baking powder in a small bowl. Add to the wet ingredients and stir till well combined.
  2. Press into a 17" x 12" rimmed baking sheet that has been sprayed with non-stick spray. Bake at 350° for 15-20 minutes or until barely light brown. Cool completely, then get ready to frost. See frosting instructions in next step.
  3. To Make Frosting: Beat softened cream cheese and butter in a large bowl until smooth. Add powdered sugar, extracts, salt, and food coloring. Beat till smooth and creamy, adding milk as needed. 

4. Carefully cut edges of sugar cookie bars with a large, sharp knife so the edges are straightened up, as shown below. 

5. To evenly cut sugar cookie bars, cut down the middle both ways, then cut each of those sections in half again. To ensure a cleaner cut, always wipe off the excess cake and icing between each slice. After slicing, add edible flowers and serve! These stay good a few days left out at room temp or in the fridge. Enjoy!

Aren't these just so beautiful?! 

I hope you enjoy theButter Chardonnay and these sugar cookie bars as much as my mom and I will! Have a wonderful Mother's Day, friends!

Make sure to check out more from JaM Cellars Butter Chardonnay here!

I was selected for this opportunity as a member of CLEVER and the content and opinions expressed here are all my own.

PIN IT FOR LATER...

Unicorn Cookie Bouquet from Cookies by Design

Look at this adorable Unicorn Cookie Pop Bouquet from Cookies By Design. I can think of so many people who would love this!

I received a well designed cookie bouquet, which contained 4 unicorn cookies, 2 over the rainbow cookies, and one star shaped cookie that read, Have A Magical Birthday!

This Unicorn Sugar Cookie Bouquet is an absolute show stopper. 

If you bring this bouquet to an event, or have it shipped to someone for their special day, you will be remembered forever! Think of how many photos will be posted of this awesome, edible gift. 

It's also pretty east to find other Unicorn themed party supplies at most stores, or make your own from scrapbooking paper, sequins, and tinsel. 

Cookies By Design is one of my awesome affiliate partners. If you purchase any cookie bouquet or other fun items from Cookies By Design, I make a small commission. Thank you so much for supporting the brands that help make my blog an inspiring space!

Check out this Mother's Day Sugar Cookie Bouquet. It's really lovely and Mom or Grandma would LOVE to receive such a delightful, thoughtful gift! 

Springtime Ideas for Mother's Day and Cinco de Mayo

This post is sponsored by My/Mo Mochi Ice Cream but the content and opinions expressed here are my own.

I'm so thankful for warmer weather, which also makes me want more cold snacks lately. I am so excited to have another opportunity to work with such a fun brand! Let's get Spring and Summer off to a sweet start...

WHAT IS MY/MO MOCHI ICE CREAM?

Mochi ice cream is a small, round dessert ball consisting of a soft, pounded sticky rice cake (mochi) formed around an ice cream filling. The ice cream flavors the confection while the mochi adds sweetness and texture. (from Wikipedia)

I recently grabbed FIVE different flavors of My/Mo Mochi Ice Cream at Lucky's Market in St. Louis. They had all of my favorite flavors and a few I hadn't tried before, which made me pretty happy!

These little treats makes life a sweeter. I thought that since Mother's Day AND Cinco de Mayo are fast approaching, that My/Mo Mochi Ice Cream could be the perfect solution to both holidays. 

First, I thought that putting together an adorable gift box for Mother's Day would be such a fun idea! 

TO MAKE THE GIFT BOX:

1.) Find a paper mache gift box, a sheet of card stock, and some tissue paper. Create a divider from cardboard or a piece of card stock folded in half, then cut to fit. 

2. Place tissue paper on each side, and fill one side with homemade or bakery cookies, and then fill the other side with My/Mo Mochi Ice Cream! Make sure to keep the gift in the freezer until you give it to that lucky recipient!

TO CELEBRATE CINCO DE MAYO

Everyone who I tell about this My/Mo Mochi Ice Cream is always so interested to try it. With flavors like strawberry, mango, green tea, cookies and cream, double chocolate, and more, everyone will find a flavor they love. My personal faves are always fruit, so I adore the strawberry and mango flavors.

I also found these incredible napkins from Meri Meri at TJMaxx, which I have had my eye on for a while now :) 

The flowers are actually edible wafer flowers that I found at Party City.

Prepare a platter of My/Mo Mochi Ice Cream ahead of time, for your Cinco de Mayo celebration, save it in the freezer, and after dinner is winding down, grab the My/Mo Mochi Ice Cream and watch everyone smile! People love having all of those flavor options, too. 

Below, I cut each piece of My/Mo Mochi Ice Cream open with a sharp knife. Make sure to only cut one piece at a time, and put it back into the freezer right away if you want it to hold its shape.

MY FAVORITE FLAVORS:

Sweet Mango

Take an instant trip to tropical delicioustown with Sweet Mango My/Mo Mochi Ice Cream! The tangy and sweet taste of premium mango ice cream combined with mouthfuls of mochilicious dough gives your cravings their own craving. Sweet mango My/Mo – the perfect, handheld getaway.

Ripe Strawberry

Bite into the center of Mmmm. Made with real fruit, and bursting with sweet bits of strawberry love. Premium strawberry ice cream is wrapped in a pillowy layer of chewy mochi dough. Discover an entirely new experience around your favorite ice cream flavor.

HISTORY OF MOCHI FROM MY/MO MOCHI:

"Creating Mochi, the Fusion Dessert Sensation"

In the 1990s, the predecessors to My/Mo created mochi ice cream in its modern form. With a secret family recipe in their arsenal, they had the brilliant idea of wrapping delicious mochi dough around dollops of real ice cream. Over twenty years later, mochi is widely available across the United States. in modern flavors like sweet mango, ripe strawberry,  mint chip and double chocolate, mochi ice cream has become America’s favorite handheld frozen treat.

Connect with My/Mo Mochi Ice Cream on Instagram and find a retailer near you!

Festive Chocolate Bark Recipe

A deliciously sweet and festive treat that only takes a few minutes to create! You will absolutely love how great the flavors of the white chocolate and dark chocolate meld together to satisfy your sweet tooth. Customize the colors and decorations to suit your holiday, team colors, or other special occasions!

INGREDENTS:

1 bag of dark chocolate chips (I used a darker chocolate from Ghiradelli)

1 bag of white chocolate chips (I like Ghiradelli white melting wafers) 

Sprinkles of your choice (At least 3 Tablespoons or more)

INSTRUCTIONS:

Melt dark chocolate either in the microwave or a double boiler. Line a baking sheet with parchment paper and pour chocolate on. You can smooth it with a spatula to the thickness you desire. Stick in the freeze for 20 minutes.

Melt while chocolate.  Let it set for 3 full minutes (or at least until it slightly thickens). Remove baking sheet with chocolate from the freezer and immediately pour white chocolate on top. Sprinkle on sprinkles. Freeze for 20 minutes.

Once set, break into pieces with your hands (or rubber gloves). Keep refrigerated.

Tres Leches Cupcakes Recipe

These deliciously moist tres leches cupcakes are a new take on a traditional Mexican dessert recipe. 

I was extremely happy with how these Tres Leches Cupcakes turned out. Just as delicious as the traditional Tres Leches Cake, but more easily handled at a party or shower. 

Tres Leches Cake (Recipe originally posted here on the Tastes Better From Scratch Blog)

Prep Time: 1 hr 30 mins  //  Cook Time: 40 mins  //  Total Time: 2 hrs 10 mins

Ingredients

  • 1 cup all-purpose flour
  • 1 1/2 teaspoon baking powder
  • 1/4 teaspoon salt
  • 5 large eggs , separated
  • 1 cup sugar , divided
  • 1/3 cup whole milk
  • 1 teaspoon vanilla
  • 12 oz can evaporated milk
  • 14 oz can sweetened condensed milk
  • 1/4 cup whole milk
  • Metallic cupcake holders (silicone ones would work well too) - paper cupcake liners will not work for this recipe.
  • Alternately, use a 9"x13" cake pan

For the whipped topping:

  • 1 pint Heavy Cream , for Whipping
  • 3 Tablespoons Sugar
  • 1/2 teaspoon vanilla
  • ground cinnamon , for topping

Instructions

  1. Preheat oven to 350 degrees F. Add foil cupcake liners to tin or alternately, lightly spray a 9x13'' pan with non-stick cooking spray.

  2. In a medium bowl combine flour, baking powder, and salt in a large bowl. Separate the eggs into two separate bowls.

  3. Add 3/4 cup sugar to the bowl with the egg yolks and mix on high speed until yolks are pale yellow. Add the 1/3 cup milk and vanilla and stir to combine. 

  4. Pour the egg yolk mixture over the flour mixture and stir gently just until combined (don't over-mix).

  5. Use electric beaters to beat the egg whites on high speed. Gradually add the remaining 1/4 cup of sugar as you mix and continue beating until stiff peaks.

  6. Fold egg whites into the batter gently, just until combined. Pour batter into prepared pan(s). If making cupcakes, fill batter about 2/3 full, if making a cake, make sure to smooth batter into an even layer so your baked cake doesn't have divots in it.

  7. Bake cupcakes for 15-20 minutes, or bake cake for 35 to 40 minutes, or until a toothpick inserted in the center of the cake comes out clean. Remove from the oven and allow cake(s) to cool completely.

8. Combine the evaporated milk, sweetened condensed milk, and whole milk in a small bowl. Once the cake has cooled use a wooden skewer to poke holes all over the top of the cupcakes or cake. 

9. Slowly pour the milk mixture over the the top of the cupcakes - Make sure to poke LOTS of holes into cupcakes, or milk mixture will fall over the sides. Pour slowly to avoid overflow, and you will want to soak the cupcakes 2-3 times each. The foil cupcake liners help a lot here, so the milk stays in the liners, making sure to pour near the edges and all around.

10. Refrigerate the cupcakes or cake for at least 1 hour or overnight, to allow it to soak up the milk.

11. In the meantime, whip the heavy cream, sugar and vanilla until stiff peaks. Smooth over the top of the cake or cupcakes. Optionally, sprinkle cinnamon on top. Serve with fresh sliced strawberries or raspberries, if desired. Enjoy!

This was the first recipe where I made successful, homemade whipped cream and have never looked back since!!! 

Mini Cinnamon Rolls with Puff Pastry Recipe

This post was sponsored by Pepperidge Farm® Puff Pastry. All thoughts and opinions are my own. #InspiredByPuff

Puff Pastry adds a unique twist to recipes. It’s light and airy, and also a bit crispy, and you’ve likely never had cinnamon rolls like these before! After you eat these cinnamon rolls, you will never want to go back to the pre-made ones. This more homemade version can also be made (prepared and sliced) ahead of time, then baked just a few minutes before needed. Check out this delicious recipe for crispy, crunchy cinnamon rolls with an ooey gooey center. They’re perfect for brunch, holidays, and everyday meals!

If you’re seeking new and innovative recipes, try incorporating Pepperidge Farm® Puff Pastry Sheets! They add an elegant touch and a very upscale taste to nearly any dish you can imagine.

One of my favorite ways to connect with friends and family is through food. I enjoy creating special treats for these people, and when I use Puff Pastry, I feel like I am providing a meaningful experience as well as a valued connection. If you’re someone who likes to plan ahead and make that extra effort to offer food that is a little bit more elevated (yet still simple), this recipe would be perfect for you! The crispy, flaky outer layer comes from the light and flaky texture of the Puff Pastry, while the interior of the cinnamon rolls stays soft and warm. I chose to use Puff Pastry in this recipe because it’s the most delicious ingredient I can incorporate without being too overly complicated. This recipe is delicious beyond words.

Also, since this recipe uses only a few ingredients, it’s great for a last minute treat too. The Puff Pastry Sheets do need to be thawed, so that would be the only other prep work required. I always make sure to have 1-2 packages of Puff Pastry in the freezer, because it makes life easy! Not only will your creations turn out beautifully, you know that the versatility of Puff Pastry means that it’s a top choice for just about any occasion.

INGREDIENTS:

(Makes 9-10 cinnamon rolls, or more if you slice them thinner):

(For The Dough)

½ Package of Pepperidge Farm® Puff Pastry Sheets, thawed*

*To that at room temperature, remove the pastry sheets from the box and outer wrapping; thaw for no more than 40 minutes. To thaw in the microwave, remove 1 pastry sheet from the box and outer wrapping and wrap in a paper towel; microwave on HIGH for 15 seconds, turn it over and repeat!

(For The Cinnamon Filling)

½ cup butter

1-2 tbsp. cinnamon

½-3/4 cup brown sugar

(For The Icing)

1 tsp. maple syrup

1 tbsp. milk or cream

¾ cup powdered sugar

INSTRUCTIONS:

  1. Preheat oven to 375 degrees, and open your Pepperidge Farm® Puff Pastry Sheets. Grab one of the sheets of Puff Pastry, and save the other one for later in a gallon size zip top bag. Prepare your mini muffin tin by spraying it with non-stick spray, then spread with paper towel to disperse evenly.

  2. On a board covered with parchment paper, place the dough, and pinch any seams/folds together so they are as flat as possible. You can also use a rolling pin during this step.

3. Using a silicone or wooden spatula, spread a thin layer of the cinnamon, brown sugar, and butter spread as evenly as possible. Make sure you do not go all the way to the edges, to prevent a mess.

4. Use both hands to carefully and evenly roll the sheets into a “log” shape. For best results, freeze the log for about ten minutes.

5. Using a sharp knife, carefully make marks ¾” apart, then cut slices from the log. Try to keep the slices as round as possible. If the dough log becomes soft during cutting, then place it back into the freezer for 5-10 minutes and cut the rest of the slices.

Note – if you want to make more cinnamon rolls, simply cut thinner slices from the dough and bake for 5 less minutes.

6. Place each slice into the prepared muffin tin, and bake (on top of another baking sheet to prevent butter from spilling out when baking) for 15-18 minutes, until outer pastry is golden and puffy (not wet or doughy).

7. Once cinnamon rolls are baked, carefully remove them from the muffin tin with a fork, and place on plate to serve.

8. Make your icing while they are baking, by combining powdered sugar, maple syrup, and milk in a bowl and stirring with a spoon until smooth.

9. Drizzle icing onto cinnamon rolls and enjoy!

Learn more about Pepperidge Farm® Puff Pastry Sheets and connect on social!

Facebook: @Pepperidge Farm Puff Pastry

Twitter: @PFPuffPastry

Instagram: @pfpuffpastry

Pinterest: @puffpastry

Hashtag: #InspiredByPuff


YOU MAY ALSO LIKE THESE RECIPES…

Apple Pie Pizza Recipe

Easy Holiday Meal Idea

Pumpkin Oat Dog Treats

Creamy Tomato Basil Soup

Veggie + Prosciutto Sandwich Recipe (Healthier Lunch Idea)

Sometimes you just want a deliciously decadent and healthier sandwich! Here is a delicious recipe that could even be made without the prosciutto to make a vegetarian sandwich too. Loaded with goat cheese, vegetables, and all sorts of toppings, this sandwich is sure to please!

INGREDIENTS:

- Whole Grain Bread of choice (4 slices)

- Goat Cheese Crumbles (3-4 Tablespoons)

- Red Pepper Slices (We used 1/8 of a red pepper, cut into slices)

- Pickled Red Onions (get our recipe here)

- 1/3 of a Jalapeno - sliced very thinly

- Seasoning like salt and pepper

- Panini Maker (we love this one from Cuisinart, which has removable, dishwasher-safe plates)

INSTRUCTIONS:

1. Add a layers of ingredients onto each piece of bread. One side has dijon mustard and prosciutto, the other side has red peppers, pickled red onions, goat cheese crumbles, and also slices of jalapeno, and optional seasoning (like a pinch of salt and pepper). Turn on panini maker

2.) Carefully close sandwich sides together, and place into panini maker. Toast for 3 or so minutes, to ensure the bread does not burn, but that the cheese is nice and melty inside. Remove from panini maker with a spatula, cut in half, and ENJOY!!!

Note - this panini maker heats up pretty quickly, so there is no need to preheat for more than a few minutes. Also, make sure that the plates are sitting flat on your sandwich, compared to sitting at an angle, so the entire sandwich cooks evenly.

CUISINART PANINI MAKER, NOW ON SALE AT MACY'S!

Dressed to grill. This panini & griddler in one brings the best of all worlds straight to the convenience of your countertop. Opening flat to double the cooking surface, this commanding essential features preset temps for grilling everything from burgers to steaks to sandwiches. Plus, this smart cooker puts health first—the front feet adjust to increase the amount of grease drained away from food. Model GR-11.

  • Dimensions: 12.8" x 10.9" x 6"
  • Power on & ready-to-cook indicator lights
  • Removable nonstick grill plates measures 10 1/4" x 6 1/2"
  • 3-year limited warranty
  • Brushed stainless steel
  • Dishwasher safe plates

Soft Batch Iced Pecan Cookies Recipe

These Soft Iced Pecan Brown Sugar Cookies are absolutely delightful! They retain so much of their softness and the added pecan on top adds a natural crunch that really makes these cookies incredible. Good luck eating just one!

INGREDIENTS:

(Makes about 20 cookies)

FOR THE COOKIES:

  • 2 cups (283g) all-purpose flour(scoop and level to measure)
  • 1/2 tsp baking soda
  • 1/2 tsp salt
  • 1 cup (226g) unsalted butter, softened
  • 1 cup (210g) packed light brown sugar
  • 1 large egg
  • 1 tsp vanilla extract
  • 1 cup pecans, toasted, cooled and chopped into bits 
  • 20 extra toasted pecans to top cookies (save the pretty ones for the tops)

Note - to toast your pecans, either place them onto a skillet on medium heat for about 6-7 minutes (see below), or bake them in the oven while oven is preheating - check at 5 minutes, then every 2 minutes after so they do not burn! 

FOR THE ICING:

  • 1 tsp vanilla extract
  • 1 1/2 Tbsp cream
  • pinch salt
  • 2 C. powdered sugar (or more for thicker icing)
  • 4 oz (1/2 Cup) cream cheese at room temperature

INSTRUCTIONS

1. Preheat oven to 350 degrees, and in the bowl of a stand mixer, beat butter and sugars until they are light and fluffy. Add egg and vanilla and beat until combined. 

2. Add sifted flour, baking soda, and salt, and beat again until just combined. Lastly, add chopped pecans and stir by hand until incorporated. 

3. Shape 1" round balls of dough, and bake for about 10-12 minutes, until centers of cookies are fully cooked and edges begin to brown. (The tops will not be shiny anymore). Bake closer to ten minutes if you want softer cookies.

4. Meanwhile, make frosting and get ready to decorate cookies. Let cookies cool completely, then use a spoon to layer on a circle of icing. The icing was super smooth and easy to work with. Top each cookie with a pecan right after icing them. Enjoy!

I'm so happy with how these cookies turned out...

How To Make Cold Brew Coffee For Spring with Dunkin’ Donuts

This is a sponsored conversation written by me on behalf of The J.M. Smucker Company. The opinions and text are all mine.

Spring is here, and I am so excited for warmer weather. I will admit, we were lucky to get such a mild winter, but getting ready for warmer weather means that I have more projects on the to do list and that calls for coffee! I am someone who has to stay organized, so I have been working on my spring to do list for over a month now!

Do you start planning for spring ahead of time, or do you wait until the weather is for sure perfect to get started? Either way, Dunkin’ Donuts® Cold Brew is here to help! Get that craft coffee experience right in your own home with very minimal effort – it’s SO easy!

Check out the mPerk Offer from Meijer, here!

Dunkin' Donuts Cold Brew coffee packs provide a more balanced & blended coffee forward taste as a result of its craft brewing method.

By steeping the coffee packets in water for 8-12 hours, every little nuances of rich, delicious flavor has a chance to come forth and satisfy your taste buds! Drink it black, or enjoy a simple coffee recipe, which I have provided in this post.

Just imagine all of the amazing iced coffee recipes you can create from Dunkin’s Cold Brew.

INSTRUCTIONS + RECIPE:

Step 1: Put 2 Coffee Filter packs (1 pouch) into a pitcher

Step 2: Fill the pitcher with 4 cups of cold water

Step 3: Steep it in the fridge overnight, or for 8–12 hours

Step 4: When it’s done steeping, remove the filters and add 3 more cups of cold water. Customize and enjoy! I added 1-2 Tbsp of sweetened vanilla syrup, also located in Meijer’s coffee aisle, plus about ¼ cup or more of your favorite creamer, all poured over ice. Feel free to add more sweetener if you like, but this tasted amazing!

Watch my video, below, to see how simple it is!

I have been really cherishing coffee a lot more lately than I used to. Maybe it’s because I am inspired by the creative boost it gives me, and perhaps that means a LOT to me :)

In the last few years, I have been training my taste buds to love coffee and all its wonderful, energizing benefits! The added boost is actually what has drawn me to enjoying coffee in the first place, but I also love the fact that I have had some of the best and most meaningful conversations over a cup of coffee. While it’s still a bit chilly out right now, I have been checking the forecast and there are glimpses of warm days ahead in less than two weeks! Here in southern Illinois, we are already starting to see green blades of grass popping out of the leaves, tulip buds and other flowers in their beginning stages, and I am SO excited to get the house and garden ready for spring.

Last year, we really began to invest more time and money into our garden. It was almost a bit sad to prep everything for winter, but each year, I know that I will learn more, and also understand what vegetables, herbs, plants, and flowers will grow on our property. What works well in shade, what works well in full sun, what works best in early spring, and what works best in the crazy heat and humidity of our southern Illinois summers. It’s all such a fun learning experience, and I documented our garden as mush as possible so that this year, I would be able to approach the garden in more of an educated manner.

I am also going to help my mom get her garden ready for spring, too, so I plan on bringing a box of the Dunkin’ Cold Brew with me, brewing the coffee in the fridge overnight, then experimenting with several different coffee recipes, which will make our gardening day even more fun and productive. My mom has ALWAYS been a coffee drinker, as long as I can remember, so it’s going to be super fun to bond over something I made for her!

I began with premixed coffee drinks, then started ordering coffee at coffee shops. Well, those options are great when you are in a rush, but I found that the process of making and brewing coffee is one of my favorite parts of the experience, so I make it at home a lot more now.

My mom is actually the person who taught me about gardening. She would save the plants at the garden center that were on their last leg, and then a few weeks later, when I saw her garden again, the plants looked like they were happier than ever. This year should be a fun time to bond over gardening, and it’s going to be great. My mom is going to LOVE this cold brew coffee too – she said she has never tried it before and is eager to learn more.

Did you know that freshly brewed Dunkin’ Donuts Cold Brew coffee packs allow a customizable, craft experience that highlights the smooth and rich notes that taste amazing? I’d definitely hold the taste of Dunkin’s Original Cold Brew up there with those made by very talented baristas. Now I’m a barista in my own home, and I just love it!


Located in the coffee aisle at Meijer, the Dunkin’ Donuts Cold Brew packaging is orange, and a bit larger, and is found near the other cold brew coffee section. I do love shopping at Meijer because of the huge selection of grocery items PLUS those awesome mPerks offers save me a ton.

I’ve always been so drawn to the cold brew process. It’s more of a craft process that a lot of coffee shops are preparing these days. Well, I understand why! The cold brew process draws out the flavor, and also allows the coffee to be less bitter and offer smoother taste. It’s almost like making a pitcher of sun tea, with a longer steeping process. Although the process is longer, the actual work involved is hardly anything. Open the packets, place in your pitcher with water, and wait overnight – that’s about it!

If you try a traditionally brewed cup of iced coffee next to a cup of iced cold brew, it’s amazing. I found that the cold brew was so smooth and wonderful, and by adding just a little bit of sweetened vanilla syrup and coffee creamer, I had a high end coffee drink that I created myself! WINNING!!

It’s so wonderful. A traditionally brewed pot of coffee sometimes starts to taste less appealing after an hour or so. Well, since this Dunkin’ Cold Brew actually steeps for around 8-12 hours, the delicious nuances of flavor get more time to develop. This coffee was not bitter, but more of a rich, smooth, fulfilling flavor! I never drink black coffee by itself, but WOW, this cold brew style of coffee is actually a good way to not have to really add so many ingredients because the flavor is so rich and balanced.  (unless you want to, of course!!)

 I’ve always been intrigued by cold brew coffee, and this was my first time trying it out myself. I loved how easy it was to brew an entire pitcher of coffee all at once, providing endless joy and drink recipe options.

Let me know what you plan to check off on your spring to do list in the comments below. I’d love to hear what you’re up to these days.

© The J.M. Smucker Company © 2018. DD IP Holder LLC (as to Dunkin’ Donuts and all other trademarks, logos and trade dress of DD IP Holder LLC) used under license.

Ombre Oreo Cake Recipe with New COOL WHIP Mix-Ins, Oreo

This post has been sponsored by COOL WHIP. All thoughts and opinions are my own.

Oreo is one of my favorite flavors of all time. I would always go for a cookies and cream cone in a store with a million flavor options. I was extremely excited to be able to create a decadent, three layer ombre cake to show my love for all things Oreo!

FULL VIDEO INSTRUCTIONS:

Two iconic foods – COOL WHIP and Oreo are mixing together for the ultimate dessert! I am considering this my new “secret ingredient” because it tastes like something that an upscale bakery would use. Everyone who tries this cake is definitely going to ask what makes it taste so delicious and unique.

If I had created this layer cake with traditional icing, it would be very heavy and not anywhere near as delicious. The light, airy texture of new COOL WHIP Mix-

Ins, Oreo makes you feel like you can indulge a little without the calories.

I was extremely impressed with this product, it’s going to become a staple ingredient in my home!

The Oreo Mix-Ins worked so well to add the finishing touches to my cake – I used an icing bag fitted with a star tip and added little dollops around the bottom of the cake. Next, I added a few dollops on top and finished with a mini Oreo cookie! What a perfect homage to my favorite cookie ever!

This cake reminds me so much of the birthday cakes that my grandparents would treat me to each year as a child. They came from an Italian bakery in the Chicagoland area, and was something I looked forward to each year, and now I can nourish that tradition in my own family and friends. I am seriously excited for whichever one of my friends has the next birthday because I cannot wait to make another one of these cakes already.

I hope you enjoy this cake as much as I did. This cake tastes like it was made from scratch, when in reality, this cake took just around an hour to make!

OMBRE OREO CAKE

PREP TIME: 30-40 minutes

TOTAL TIME: 1 hour – 1.5 hours depending upon decorating time

INGREDIENTS:

3-4 containers of COOL WHIP Mix-Ins, Oreo (found at Walmart or your local retailer)

1 box of white cake mix, plus ingredients to make cake

1 box of Devil’s food cake mix, plus ingredients to make cake (use the same brand for both)

Mini Oreo cookies to decorate cake

OTHER MATERIALS:

3 round cake pans

Hand Mixer

Parchment paper, cut into circles to fit into round pans

Rotating cake decorating stand

Flat icing spatula

Icing Bag + Large Star Icing Tip

INSTRUCTIONS:

  1. Bake cakes. To create the ombre effect, I mixed up both of my cake mixes according to the packages, then added 3 cups of vanilla batter to one pan, 3 cups of chocolate batter to another pan, then in my third pan, I swirled the remaining batters. It created a gorgeous middle layer. I made sure to use two cake mixes of the same brand so that they contained the same ratio of ingredients for each layer.

  2. Once cakes have completely cooled, carefully slice the cakes so they are flat on top (they tops will have rounded during baking). I used a serrated bread knife and it worked super well.

3. Remove the paper from the first layer, and place the chocolate layer onto the cake stand, upside down. Cover that layer with ½-1 container of Cool Whip Mix Ins Oreo. Smooth out the Oreo Mix-Ins and place the second “swirled” middle layer onto that. Again, cover the top of the second layer with Oreo Mix-Ins, then place the vanilla layer on top UPSIDE DOWN, to ensure a flat cake on top. Note – when I first opened the product, it had a lot of fluffy light texture. Once I stirred it and started icing the cake with it, the COOL WHIP got a lot smoother.

4. Cover the top of the cake with a smooth layer of Oreo Mix-Ins, then add a thin layer to the entire outside of the cake, smoothing several times with the icing spatula. Make sure this layer is as smooth as possible, then place cake into freezer for around 1 hour.

5. Time to decorate the cake! Using that same delicious COOL WHIP Mix-Ins, Oreo as before, pipe little shapes along the entire bottom of the cake. Make sure to keep as consistent of shapes as you can.

6. Lastly, add dollops of icing swirls around the top of the cake (I did 8 total), and add mini Oreo cookies on top. I also added one larger dollop in the middle of the top of the cake and it all turned out so well!

I was SO happy to see how the layers stayed perfectly together with the help of the Cool Whip Oreo layers. I am thrilled to share this recipe because it’s practically fool proof.

Thank you so much for taking the time to check out this recipe. I hope it has inspired you! This cake would be perfect for birthdays, Mother’s Day, Father’s Day, graduation parties, and even just because!

Learn more about this wonderful new COOL WHIP Mix-Ins,Oreo here and retailers near you carrying it, and connect with COOL WHIP on social!

FACEBOOK

INSTAGRAM

PINTEREST

Peeps Milkshakes

Easter is this Sunday, April 1, and I thought it would be adorable to create a beautiful set of treats for the occasion! Hope you enjoy! 

First, find some cute jars and dip the rims into melted white chocolate. Holding the glass over the sink or a large bowl (to catch the sprinkles), apply sprinkles in festive colors to the chocolate. Cover as much as possible.

RECIPE:

2 cups all natural vanilla ice cream (I prefer Breyer's extra creamy vanilla)

2 cups frozen blueberries

2 cups milk

1 tbsp honey

INSTRUCTIONS:

  1. Put all the ingredients in a blender and blend on high until smooth and creamy.
  2. Pour into decorated glasses and add your garnish - carefully poke a skewer stick through the bunny Peeps, and use a jelly bean to make the end look more finshed off.
  3. Enjoy!

How To Make Any Vacation More Relaxing with NEW Canada Dry Ginger Ale and Lemonade

This post was sponsored by Canada Dry®. All thoughts and opinions are my own.

With Spring Break nearly upon us, and with the weather getting better by the week, it’s that time of year when people are planning their vacations! Planning and prepping for a vacation can be stressful, but I have a few amazing tips on how to make any vacation more relaxing. Canada Dry is making it their mission to spread relaxation to you this year and beyond. The NEW Canada Dry Ginger Ale and Lemonade is absolutely delicious! We stocked up on supplies at Kroger before our most recent adventure, and could not be more excited to bring you along for the ride.

What is the most relaxing place you have ever been? Would it be sitting on a beach, listening to the waves? Perhaps you enjoy spending time in a spa with a gorgeous view, being pampered? Maybe it would be spending time looking at mountains, sipping a warm mug of coffee, smelling the crisp fresh air? Whatever your preference, keep reading to learn more about making any travel a little bit more relaxing.

You can win prizes in the upcoming Canada Dry Ginger Ale and Lemonade sweepstakes. Details are at the very bottom of this post. Enjoy!

When I was younger, the majority of my travel was with my mom. She loved to pack lots of fun into each day, from sunup to sundown. There was no landmark, theme park, thrift store, or local boutique we left off the list each day. We never really drove anywhere, but we always flew. I have such great memories of visiting places like Los Angeles and Chicago with her, and I believe that traveling as a kid got me a little more comfortable with travel into my adult years.

Once I met my boyfriend, Bobby, many years ago, we began to travel a ton by car. First we would travel to see live music and to go camping, then once we got into our mid- twenties, we craved finding places without any people nearby, like a secluded campground or a little boutique hotel in a small town in the middle of Utah or New Mexico. Over the past twelve years, my boyfriend and I have traveled over 250,000 miles together, adventuring around the country. We love planning the next trip, and we are so lucky to be able to continue working on photography and making projects along the way, letting the immense amount of travel inspire and nurture new ways of thinking about life along the way.

Some of my favorite travel memories include: driving to or through nearly 40 states, spending time in Kauai, Hawaii photographing gorgeous locations during every season of the year - Aspens in the Fall in Colorado are amazing as well as the snow covered mountains of Montana in late Fall are my very favorites. We have met countless amazing people on these travels, and also enjoyed some of the best, local food we could ever imagine. Just thinking back on these locations really makes my mind at ease.

Travel is full of so many opportunities to enjoy oneself, but there are also a million things that can “go wrong” that make a vacation super stressful. Even the smallest thing can be made into a much bigger deal than it should be due to being out of one’s comfort zone and being underprepared.

Here are a few I can think of off the top of my head: taking the wrong highway an hour or more in the wrong direction, missing a flight or connecting flight, booking a hotel room for the wrong night, finding out that a campground is completely full and having literally nowhere to stay for the night, having an air mattress pop when you’re over an hour from the nearest store, have your car broken into, getting into fights over where to eat or what to do for the day (so focused energy on arguing instead of just going out and exploring the location) a car battery dying THREE times in two days and being stranded on the highway after dark, and many more crazy things that would have never happened if we had just stayed home. I am sure I’m not alone in admitting that travel can be hard and overwhelming and anything but relaxing.

But, I feel that those occurrences make us stronger people and better travelers! What is life without a little bit of adventure? Many of the “travel gone wrong” scenarios happened because we were not fully prepared. I wanted to write this post in order to help you, my wonderful readers, to avoid as many situations as possible, and have more time to actually relax on vacation! Whether you’re flying, driving, or taking other forms of transportation, there are a few key tips that I am excited to share with you today.

RELAXING TRAVEL TIPS:

1.) Pack refreshments (snacks and drinks). I like to have a variety of drinks on hand, one of my newest favorites includes the NEW Canada Dry Ginger Ale and Lemonade. There’s nothing more relaxing than having an ice cold drink in hand while on the open road, on the beach, or in another beautiful location.

I also have lots of fresh water on hand, to refill my water bottle. Sometimes, I also find that two-part snacks like carrots and ranch dip or pita chips and hummus hold my interest longer than other snacks like a simple bag of chips.

2.) Dedicate one specific notebook or journal to be your Travel Journal. I prefer one with grid pages or regular lined pages, and at any moment, I can jot down more ideas on my upcoming vacation(s). I will go online and search for, “best restaurants in…”, “best vintage and thrift stores in…”, “best shopping in…”, and more. I also love using social media geolocation tags on Instagram to search for a more visual and unique point of view for each place. YouTube is also a super fun way to research locations, which I just started utilizing a year or so ago. Keep your travel journal nearby when you are doing your research and you will have a great way to prepare in advance and avoid stress.

3.) One of the best ways to save time on a trip is to find a local map prior to your arrival so you have some time to study the area you’re visiting. Mark off the places that are a must see for you. There’s nothing worse than missing out on a beautiful location because you didn’t have your location researched ahead of time. I love using my phone for maps too, but sometimes businesses are not found unless you do more extensive research. If you’re driving, we always like to have an atlas in the car, because sometime cell signal does cut out, so a good old fashioned paper map is always comforting and valuable. If you’re flying, simply print out a few smaller maps to keep in your carry on. Keep maps in your travel journal as well.

4.) Make sure everyone in your party knows the plans and has familiarized themselves with the maps and area. It’s important to get comfortable with your surroundings and general location, rather than just being on their phones the whole time (not paying attention).

5.) Treat yourself to a few relaxing items, specifically for your trip. We brought a hammock to the beach, and it was a great purchase! I loved being able to lay under the palm trees and let the breeze more me back and forth. The sound of the ocean is magical and did us wonders in feeling relaxed and stress free.

6.) Speak to locals and get suggestions of where to eat, drink, and explore. They are the best people to tell you what is worth your time, or what is not worth the time and trouble. You will save so much time if you ask locals how convenient it is to actually get to a certain location. Oftentimes, there are SO many closer than you’d even imagine.
Below, check out this cute cooler that Canada Dry sent me! They are so kind to make my beach visit a little bit cooler :)

Find NEW Canada Dry Ginger Ale and Lemonade at your local Kroger in both 12 pack cans and 2-liter bottles!

The combination of two wonderful drinks mixed together gives us a new way to relax and enjoy the day.

SWEEPSTAKES:

Enter the sweeps to win branded prizes, including: a corn hole set, a BBQ set, a bicycle, Adirondack chairs, thermoses and glassware sets.

ENTER HERE

Where are you heading this year? I would love to hear all about your travel plans and prepping tips! Feel free to leave your thoughts in the comments, below. Happy Travels!