Springtime Ideas for Mother's Day and Cinco de Mayo

This post is sponsored by My/Mo Mochi Ice Cream but the content and opinions expressed here are my own.

I'm so thankful for warmer weather, which also makes me want more cold snacks lately. I am so excited to have another opportunity to work with such a fun brand! Let's get Spring and Summer off to a sweet start...

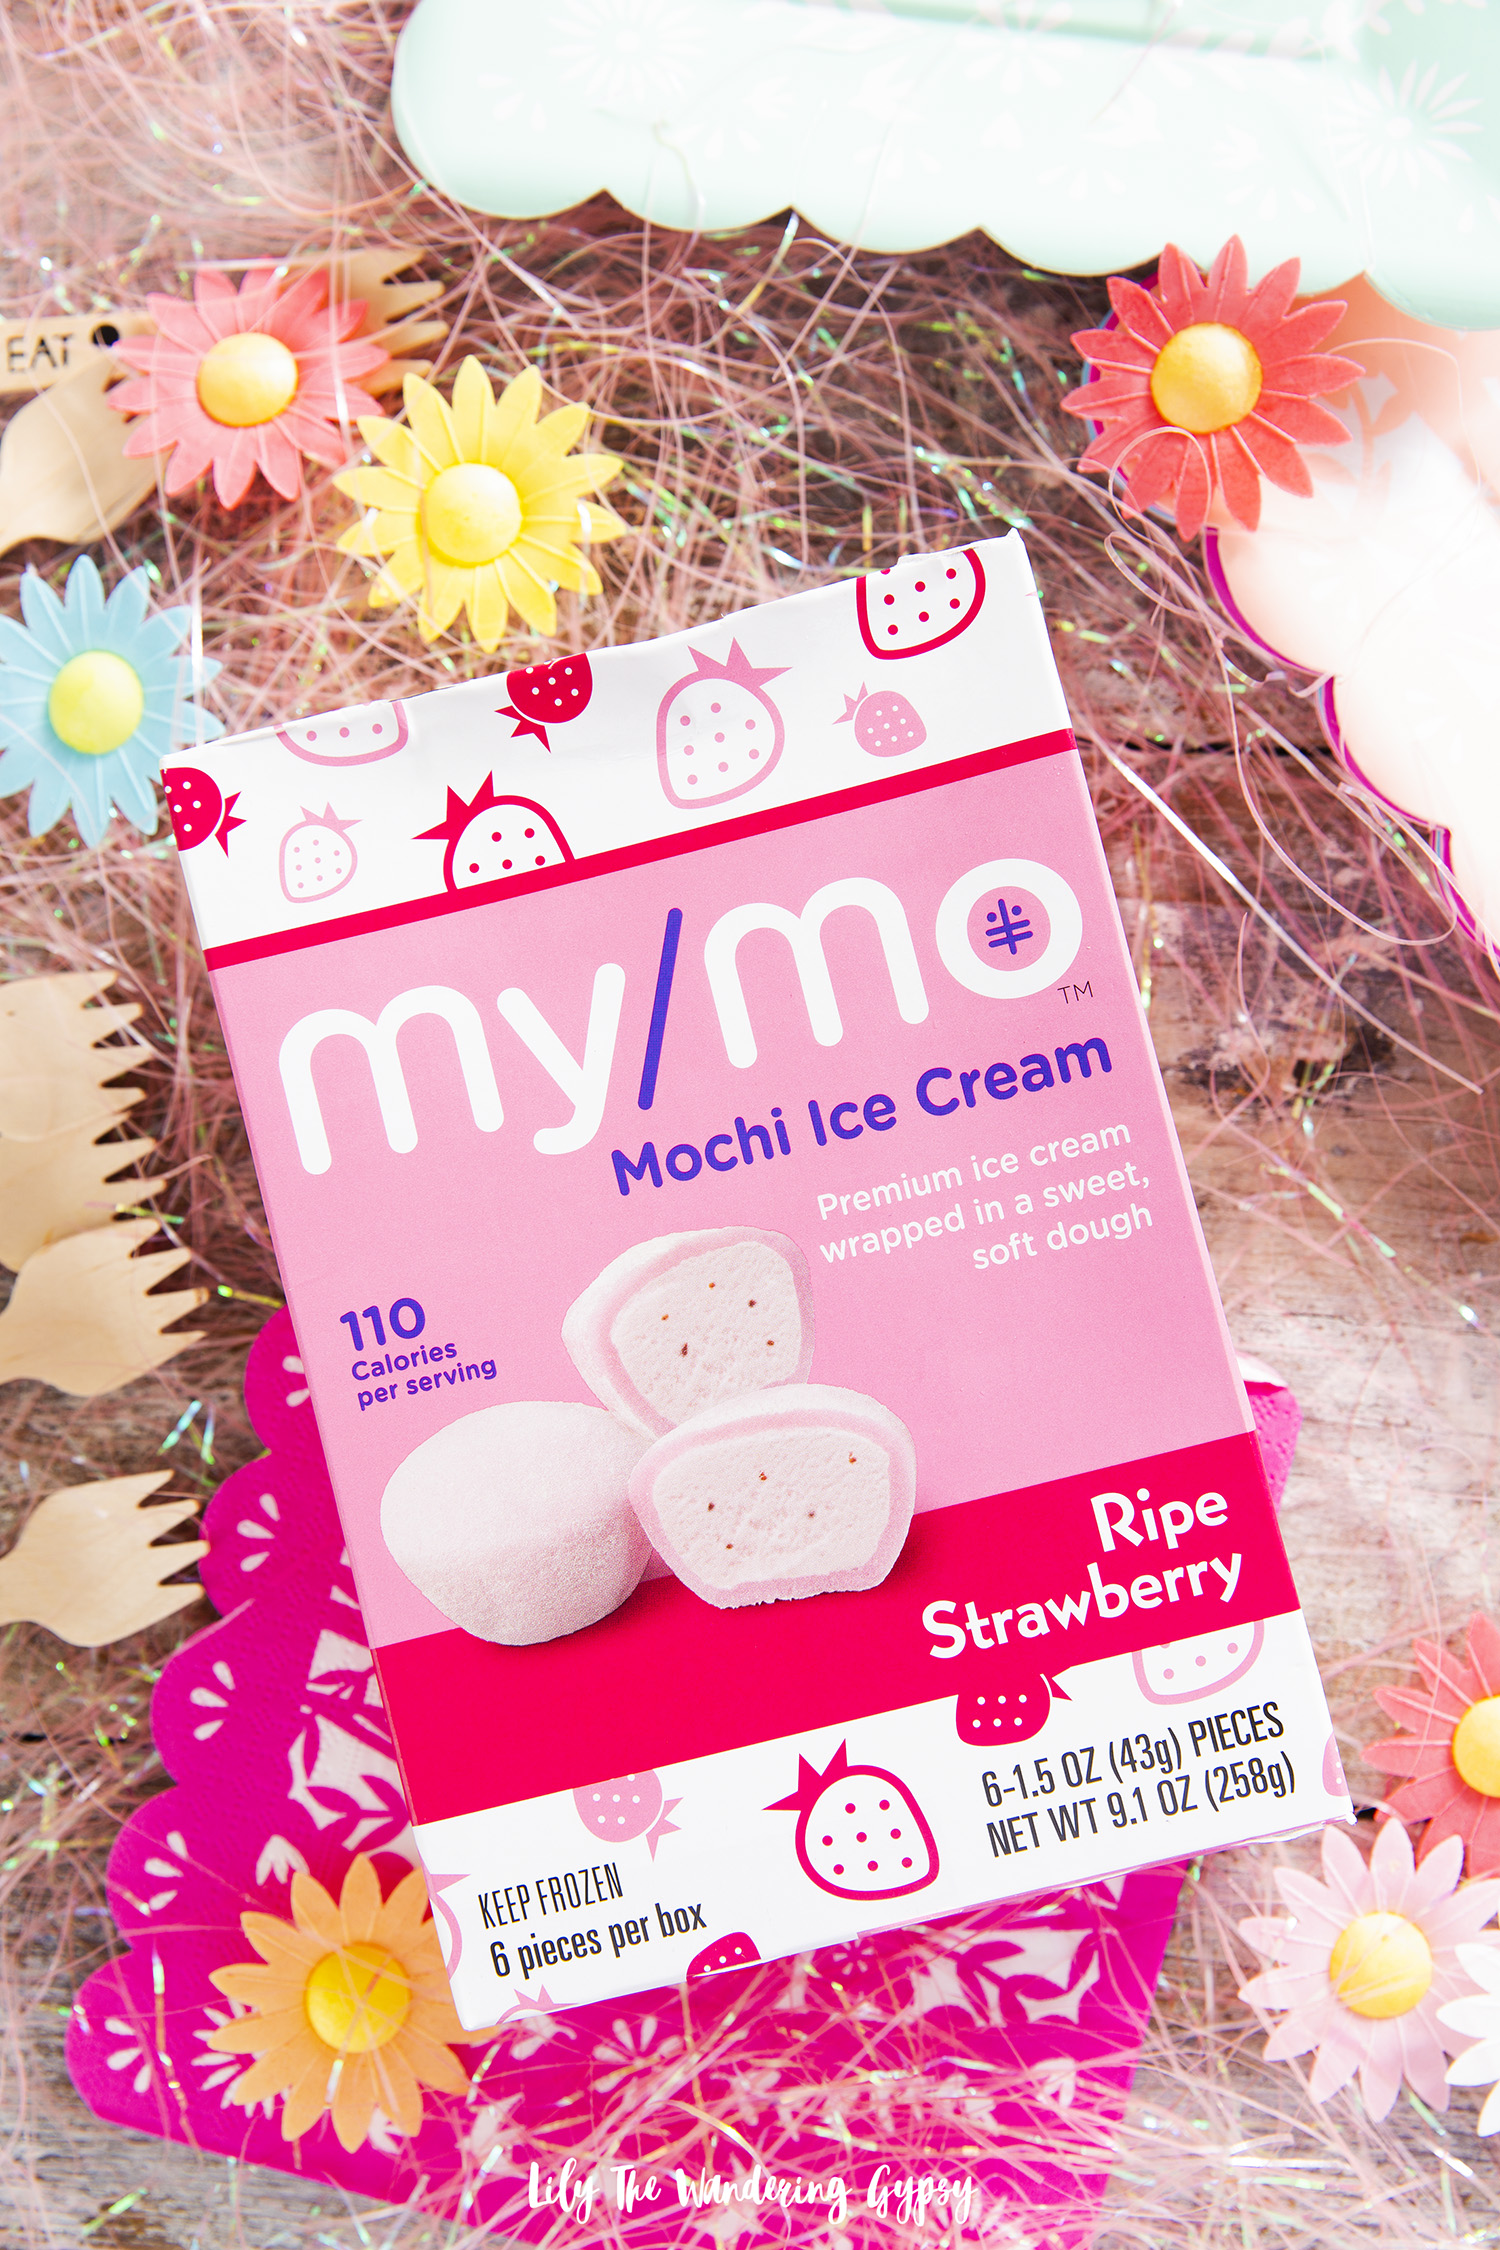
WHAT IS MY/MO MOCHI ICE CREAM?

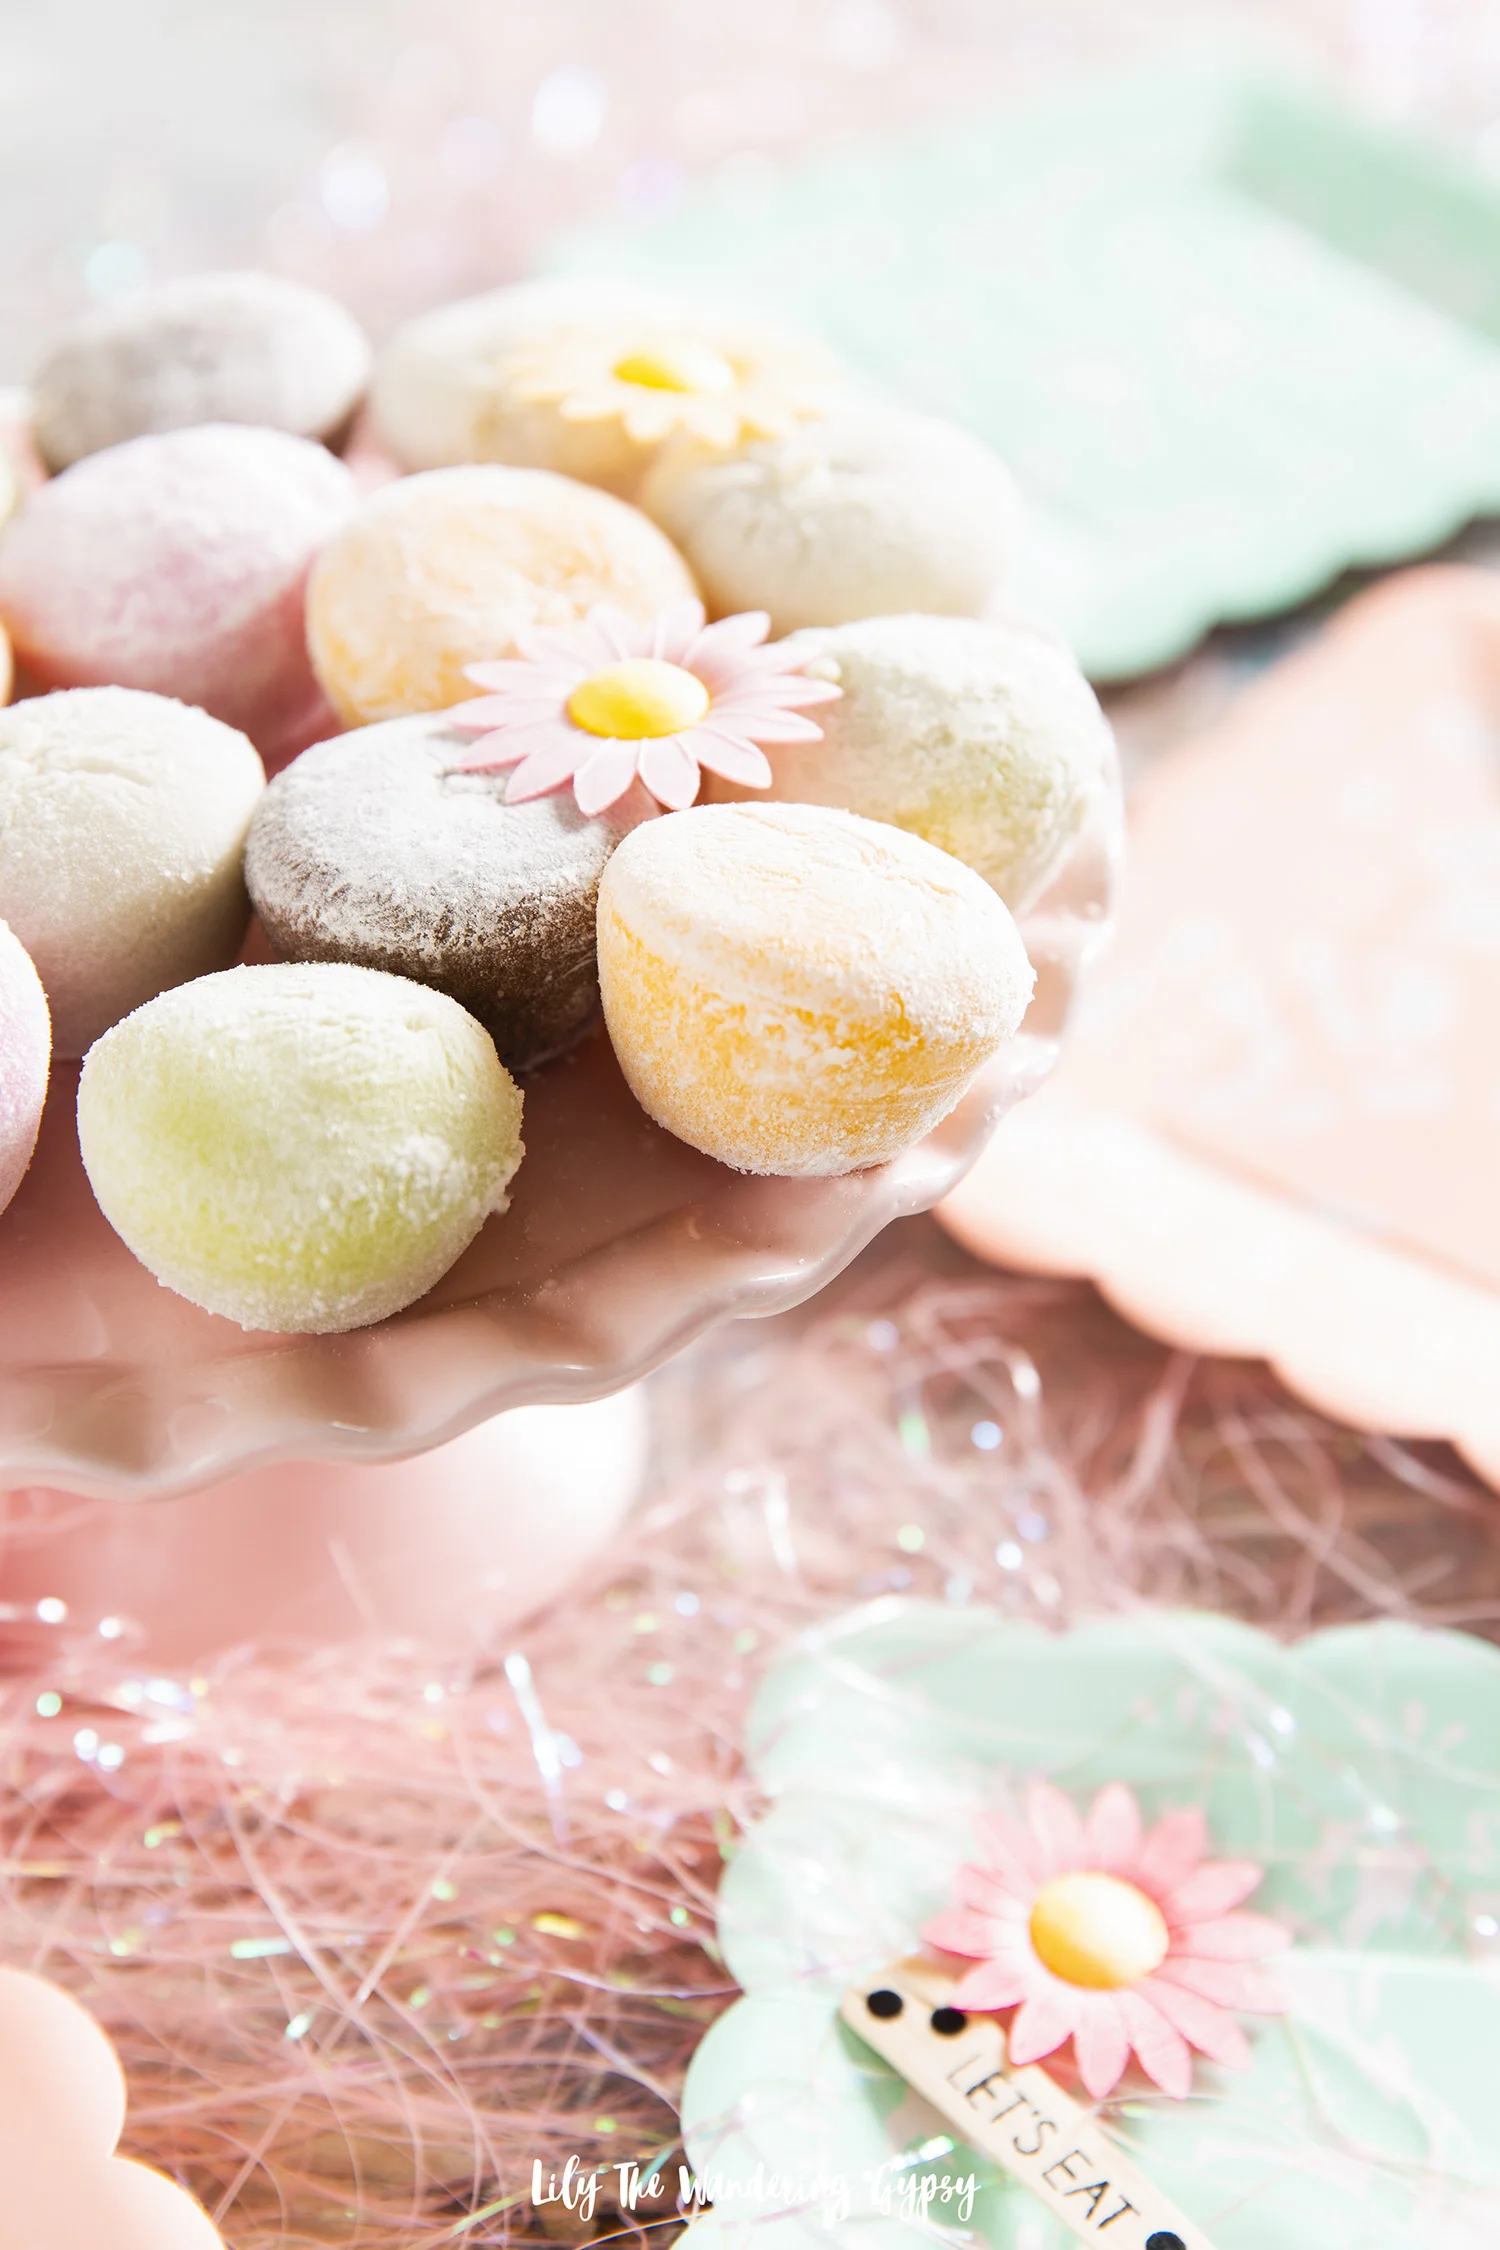
Mochi ice cream is a small, round dessert ball consisting of a soft, pounded sticky rice cake (mochi) formed around an ice cream filling. The ice cream flavors the confection while the mochi adds sweetness and texture. (from Wikipedia)

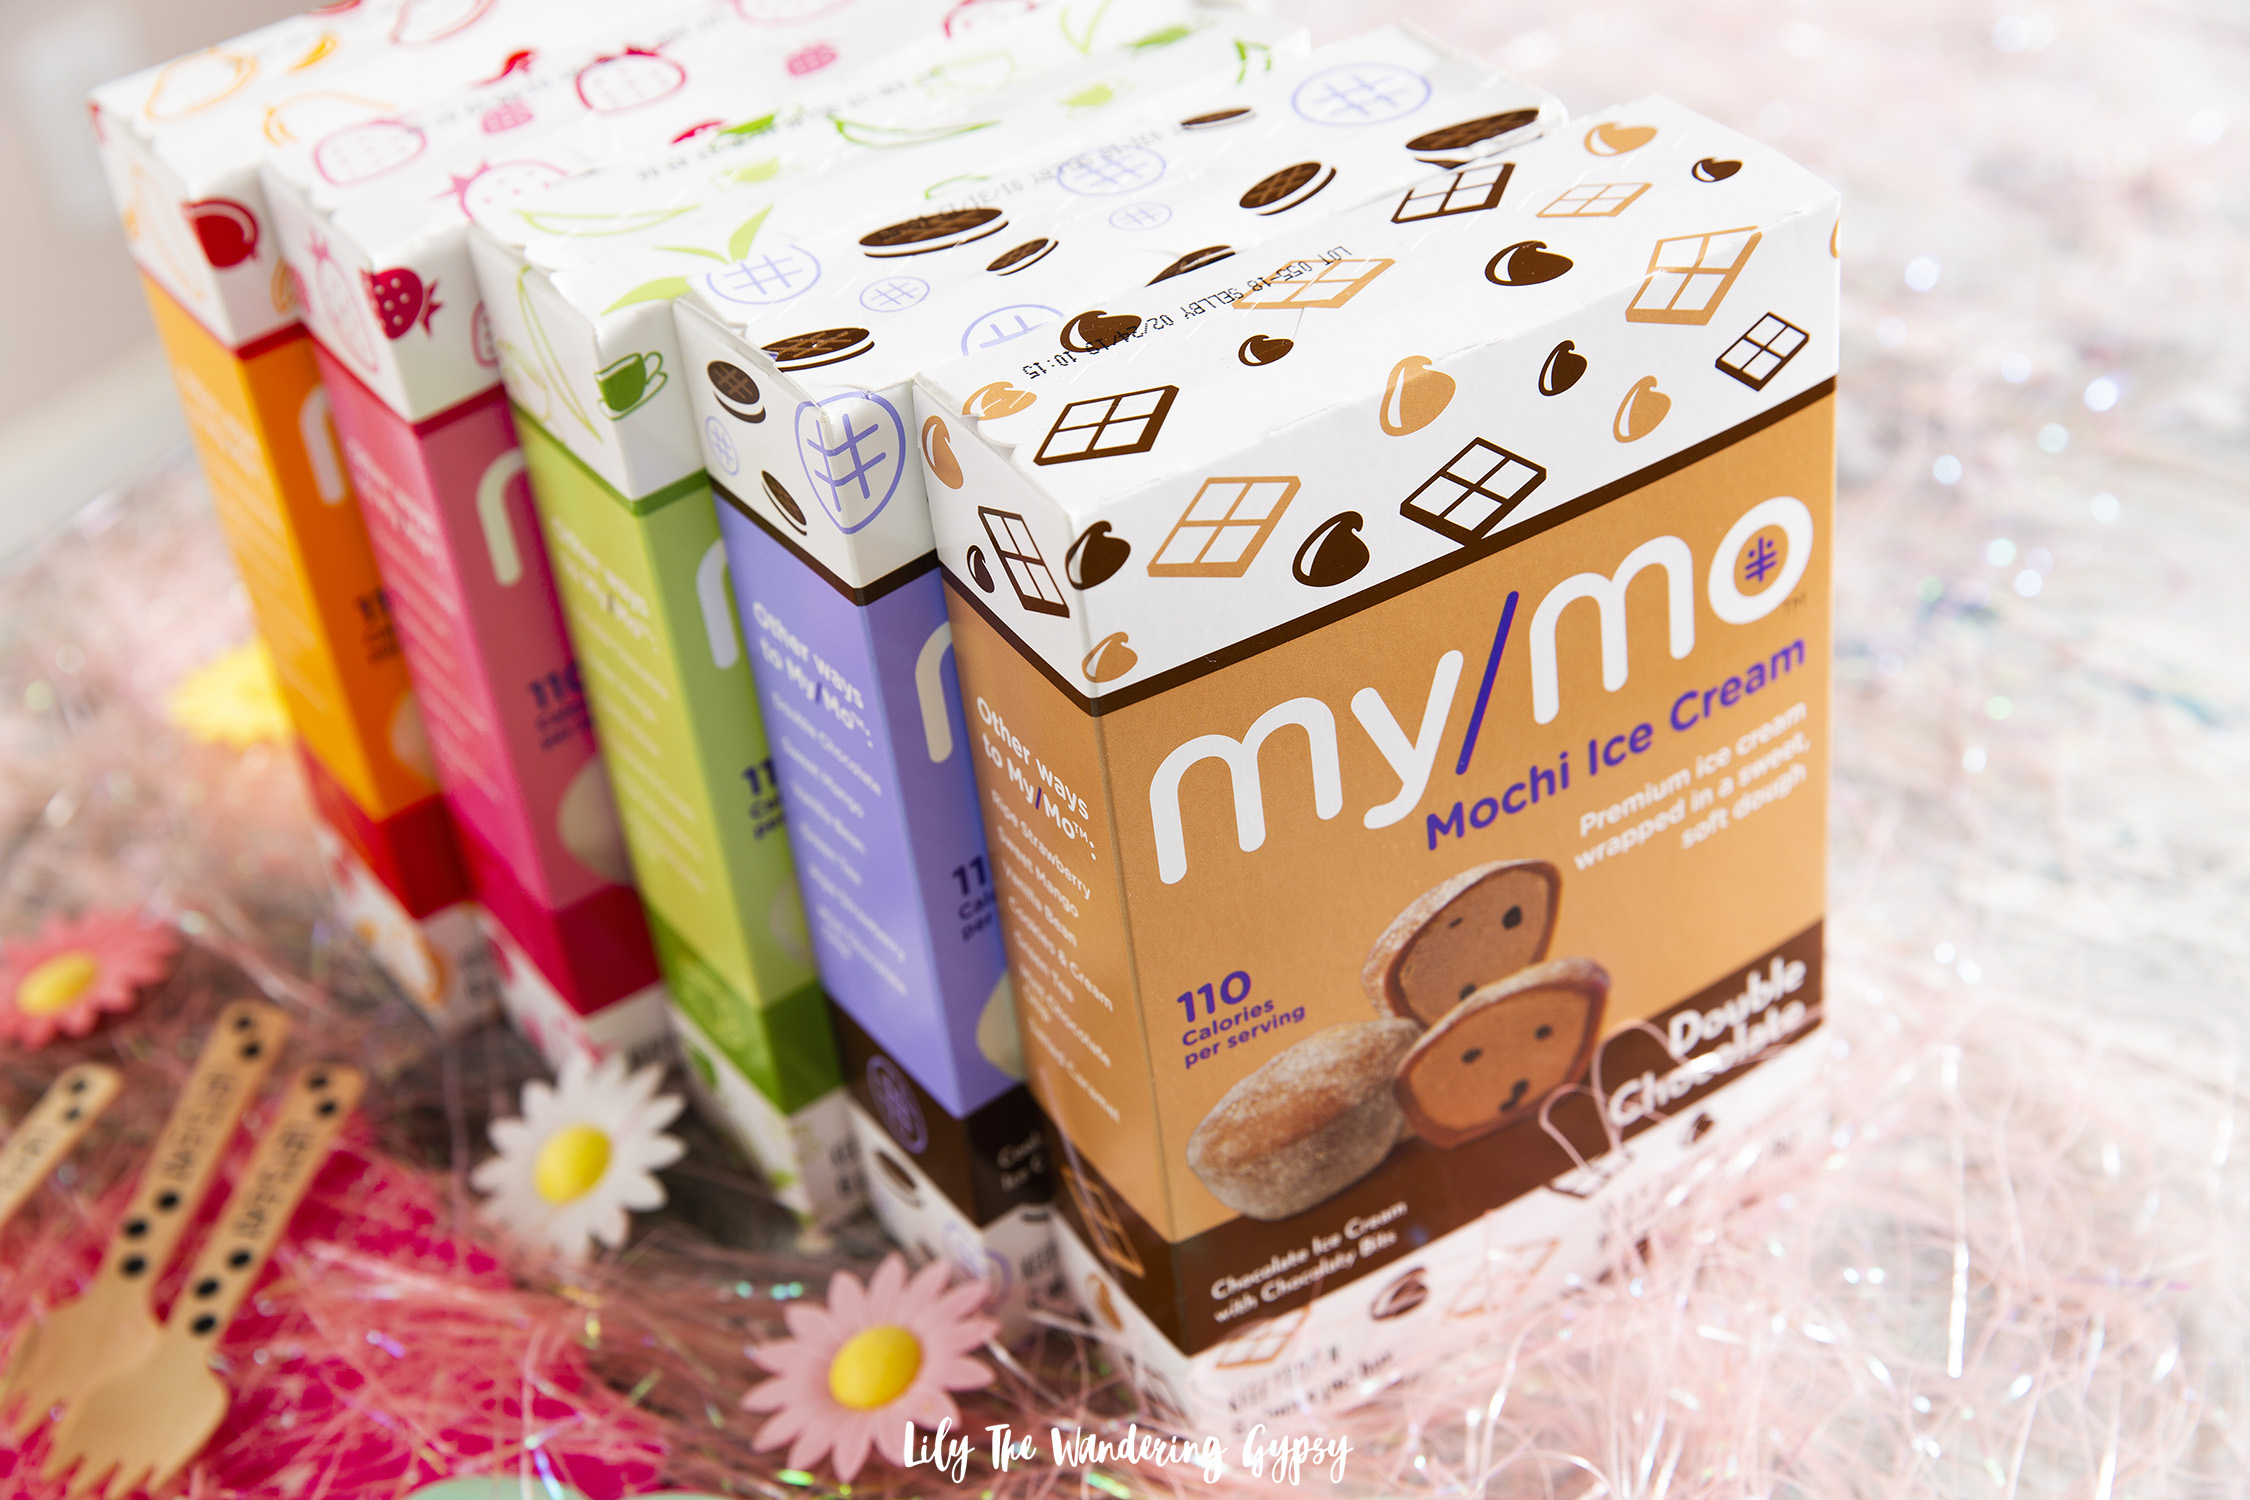
I recently grabbed FIVE different flavors of My/Mo Mochi Ice Cream at Lucky's Market in St. Louis. They had all of my favorite flavors and a few I hadn't tried before, which made me pretty happy!

These little treats makes life a sweeter. I thought that since Mother's Day AND Cinco de Mayo are fast approaching, that My/Mo Mochi Ice Cream could be the perfect solution to both holidays. 

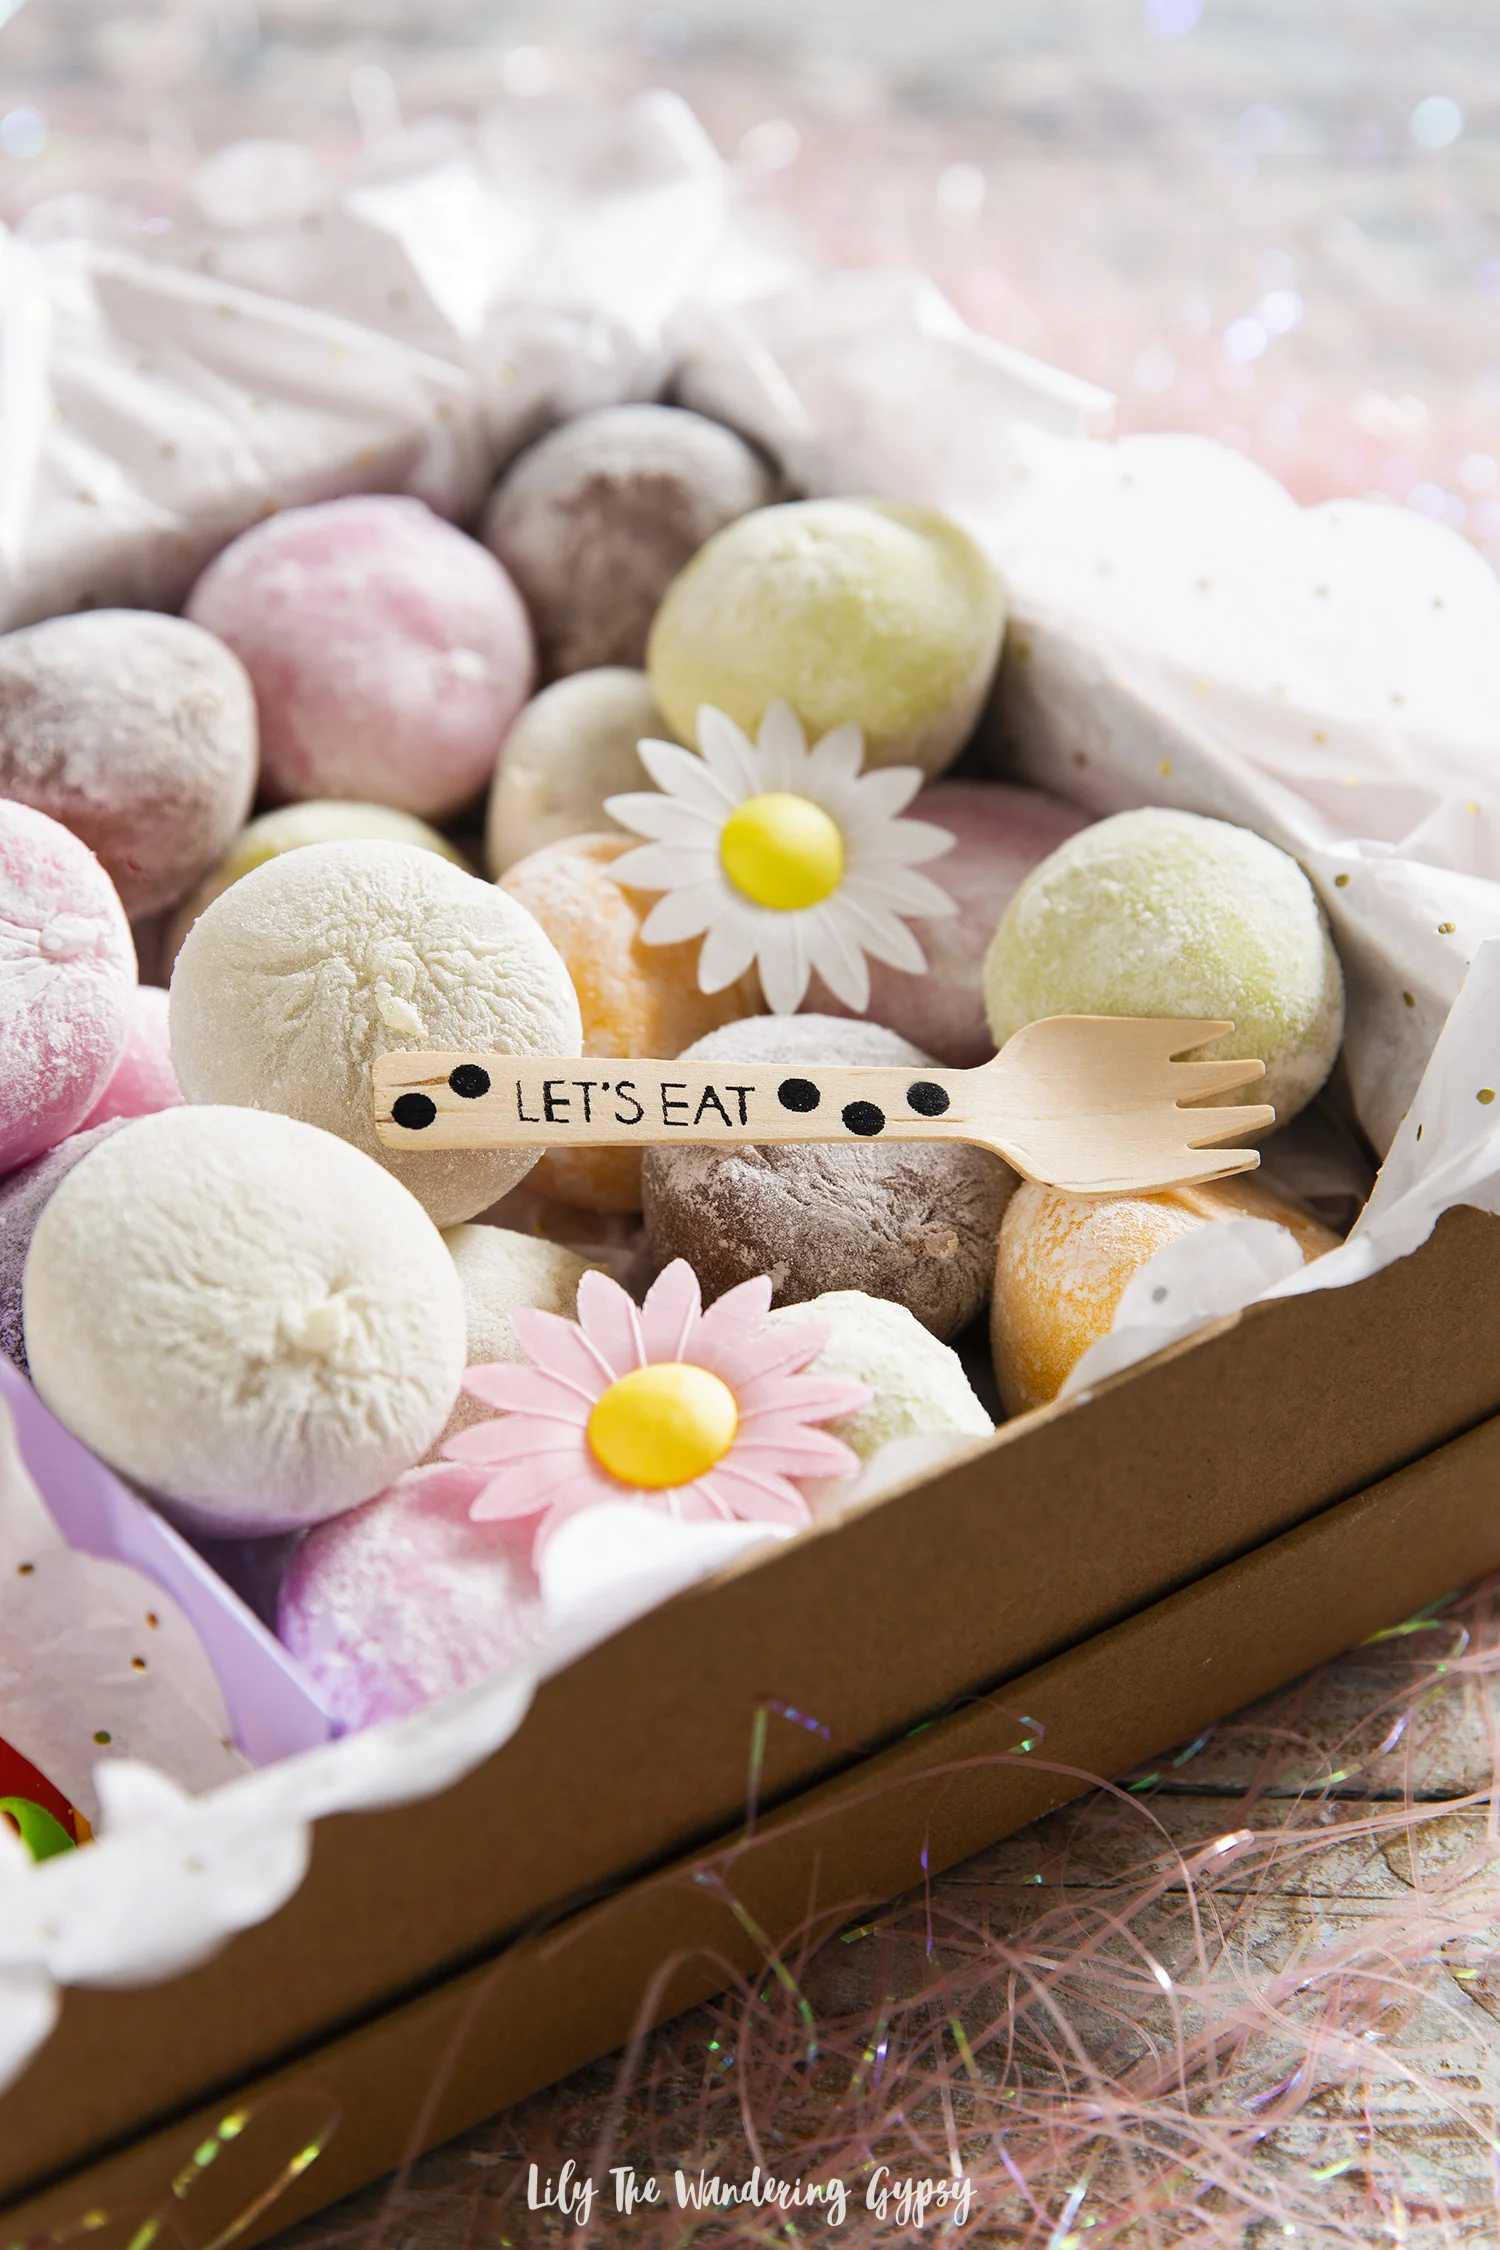
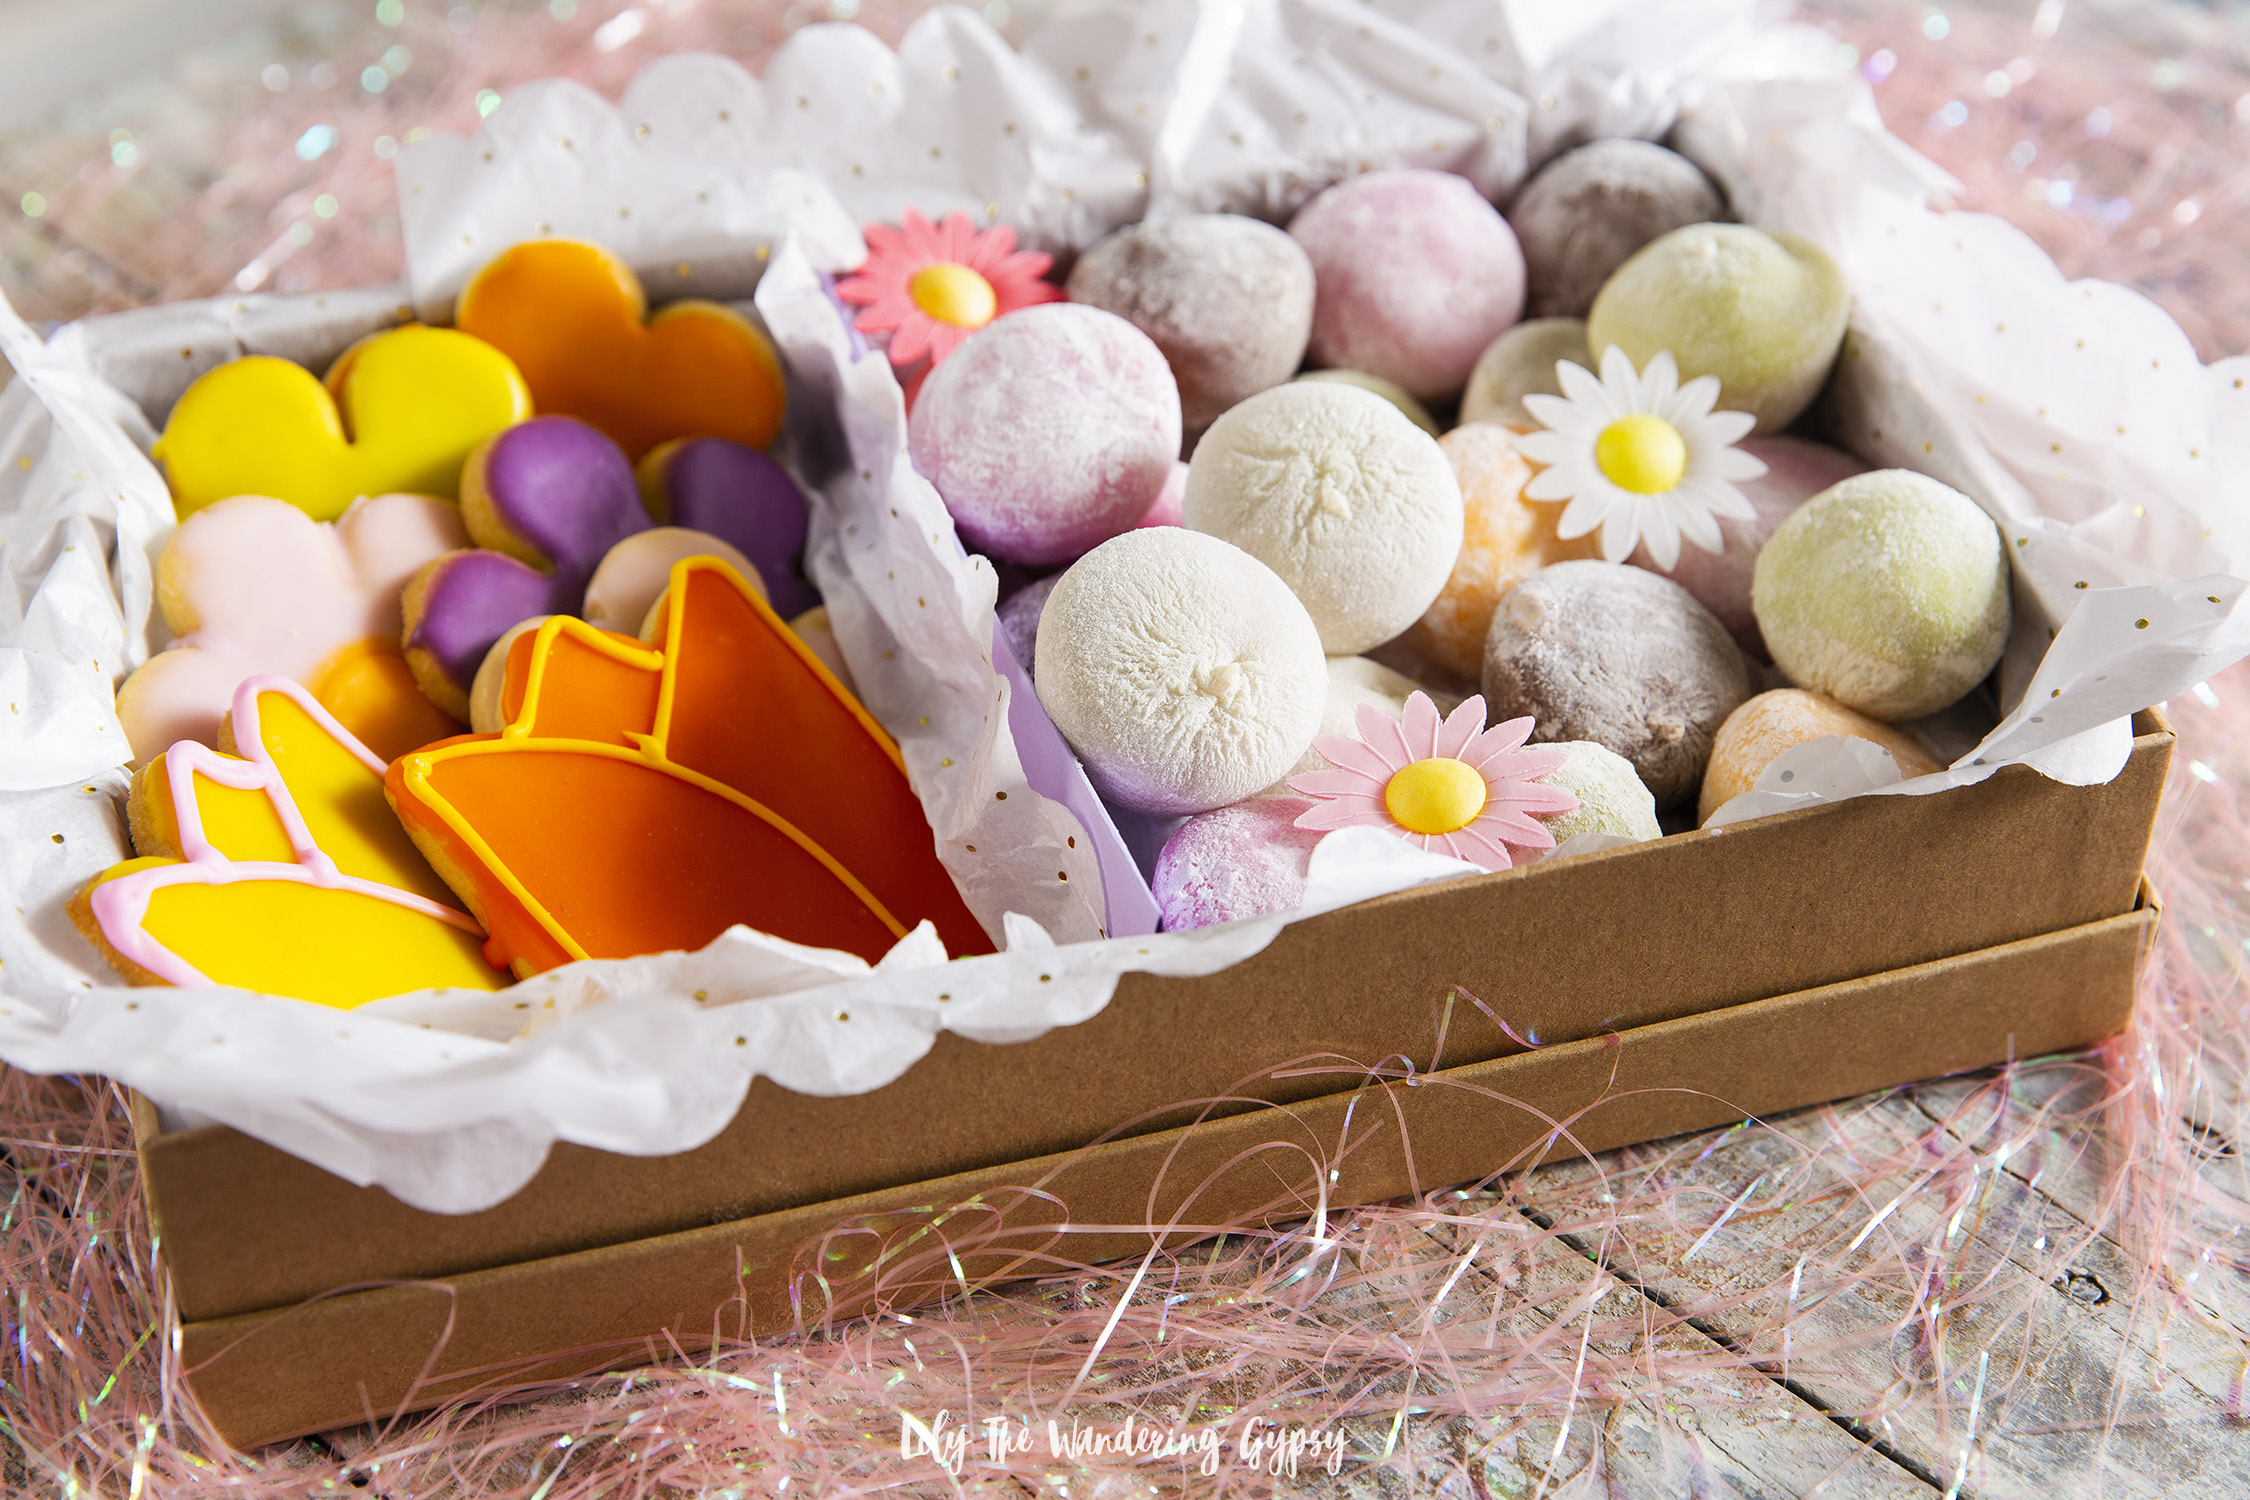
First, I thought that putting together an adorable gift box for Mother's Day would be such a fun idea! 

TO MAKE THE GIFT BOX:

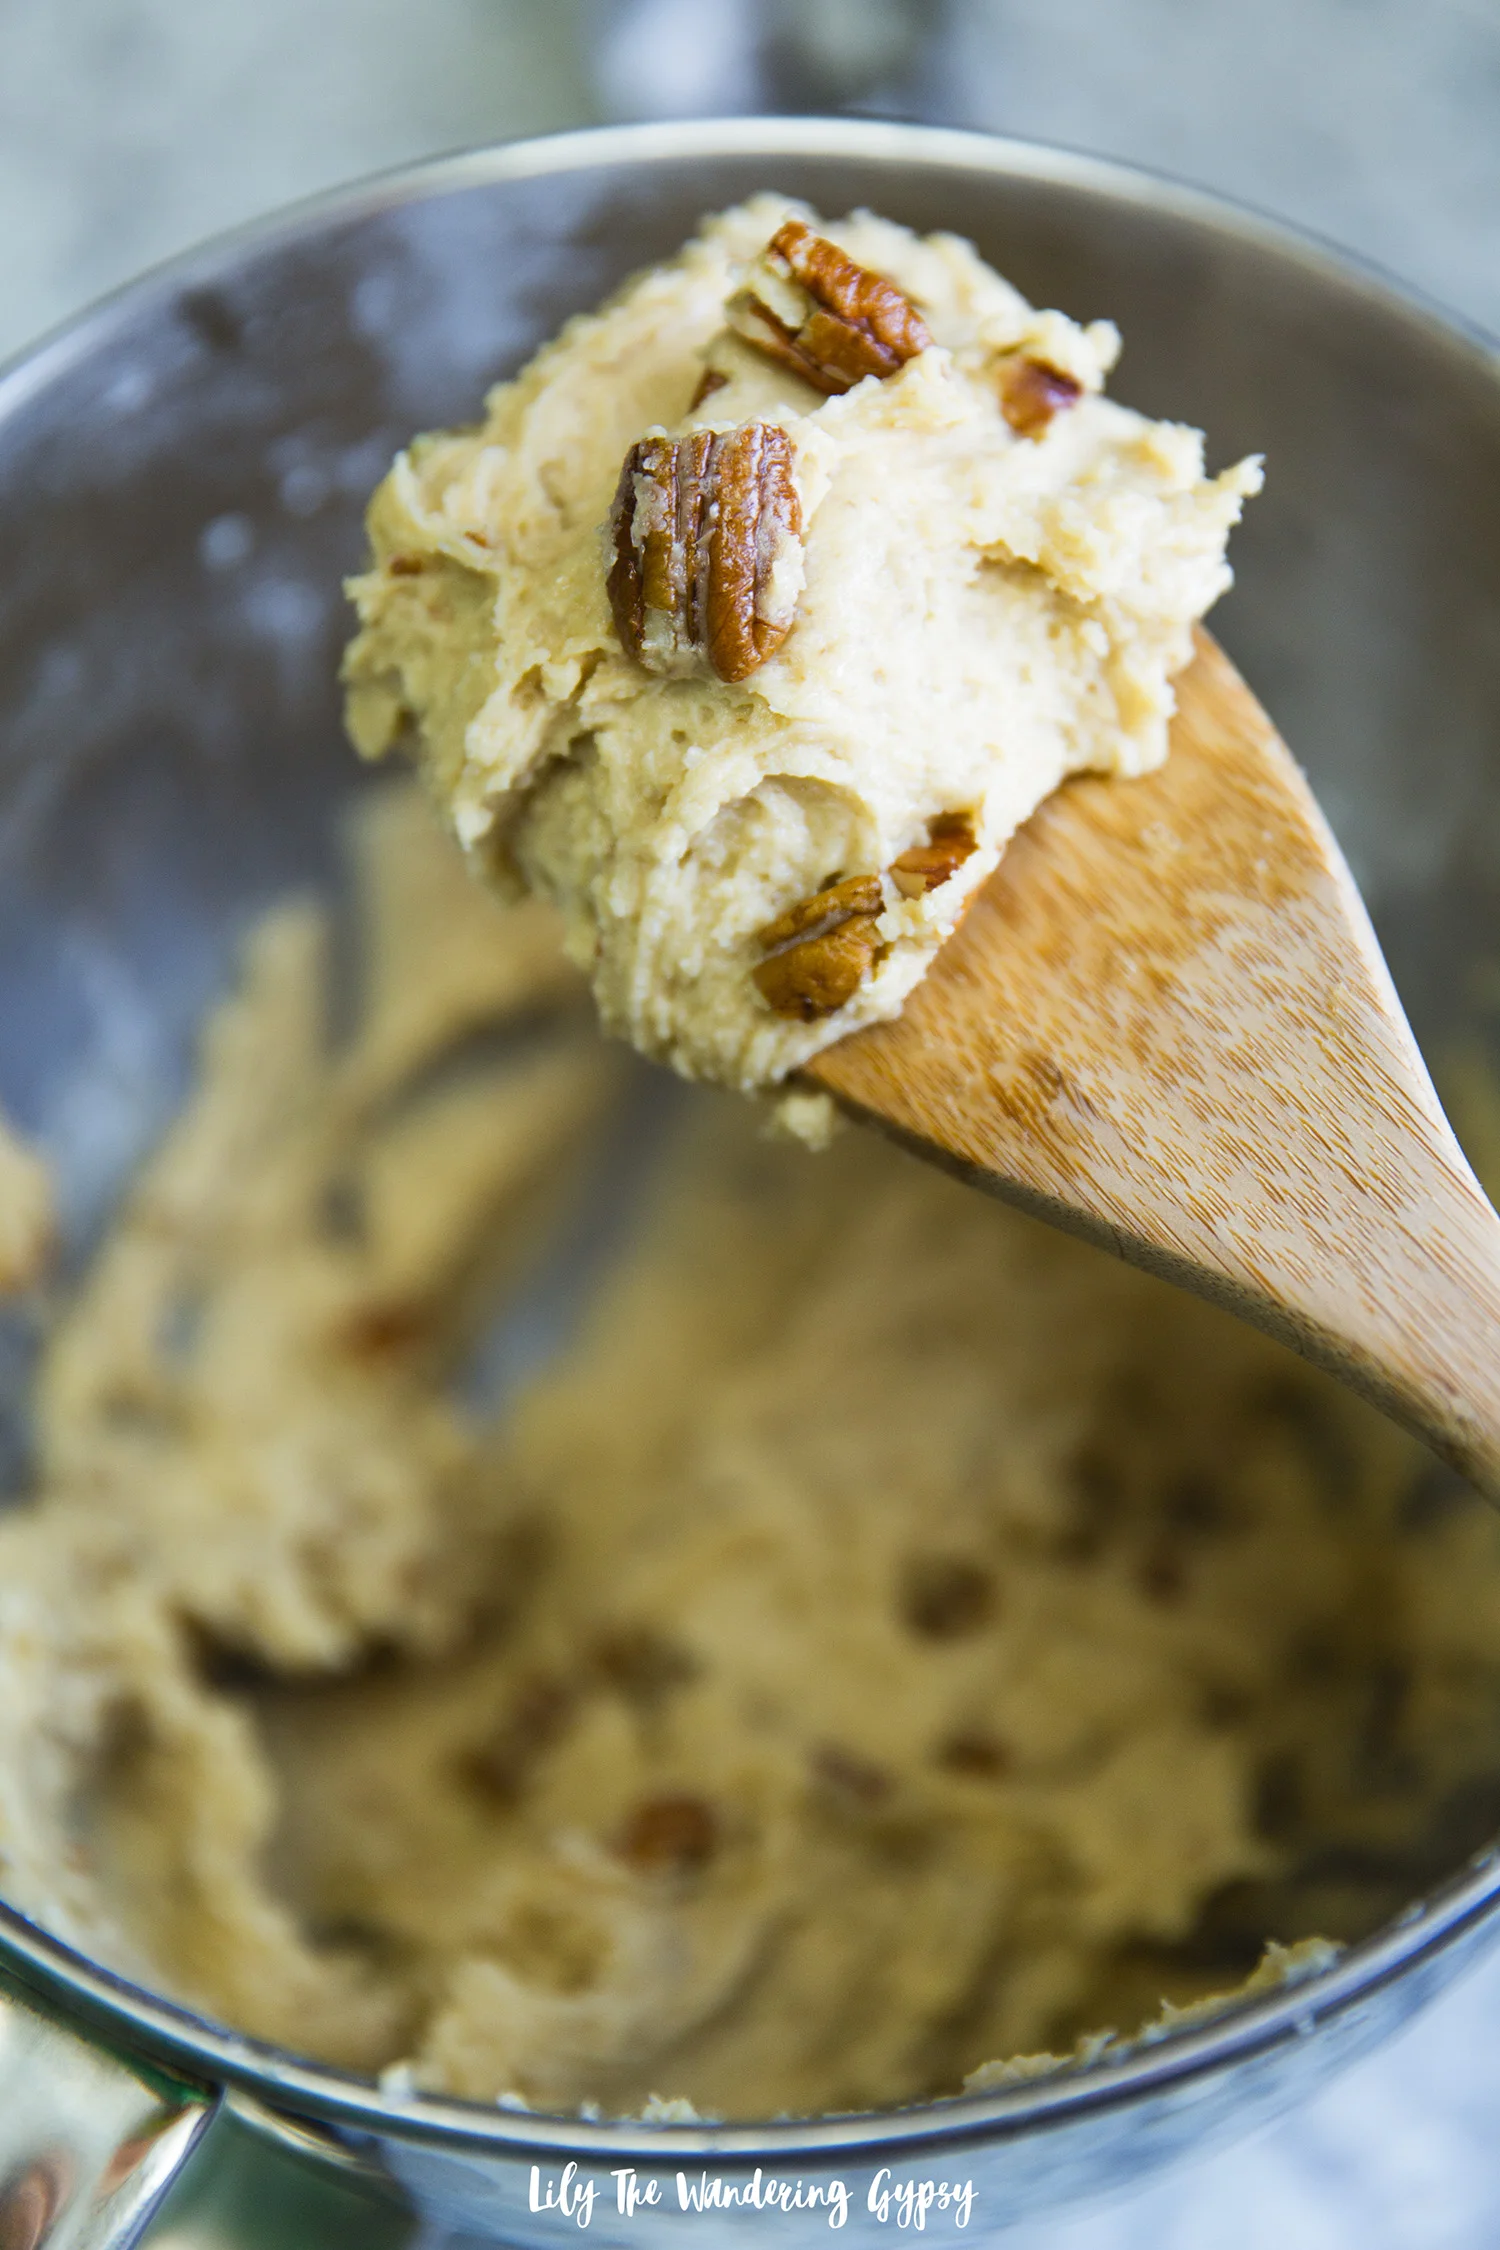
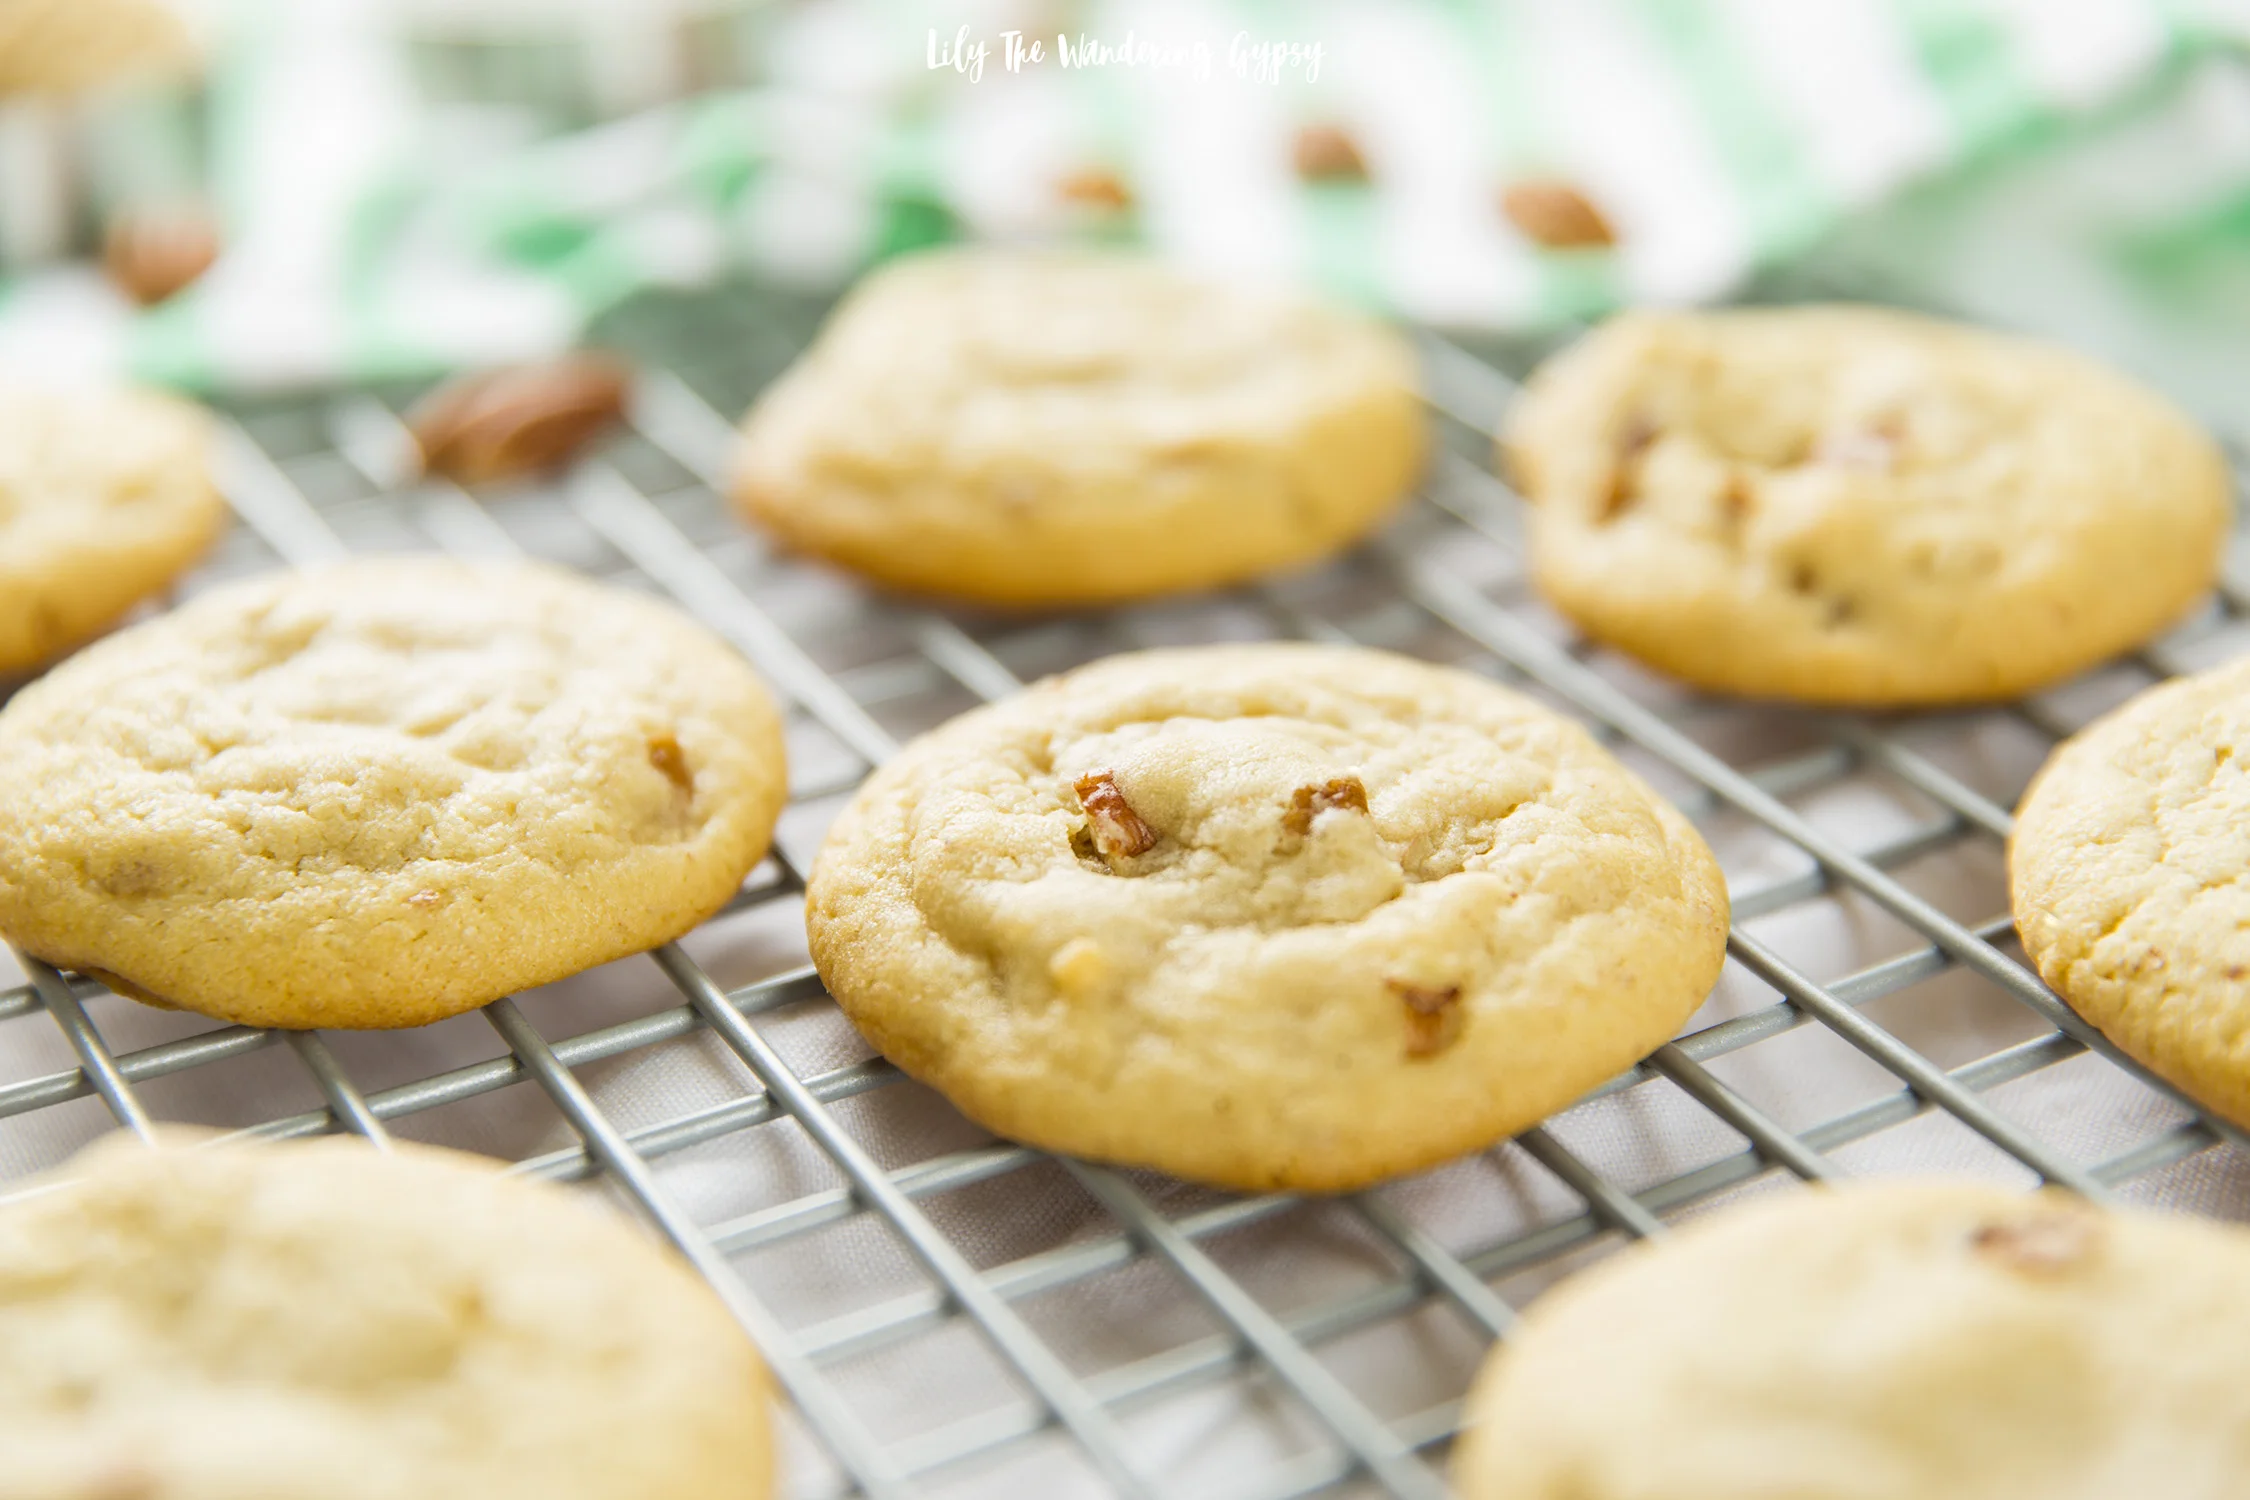
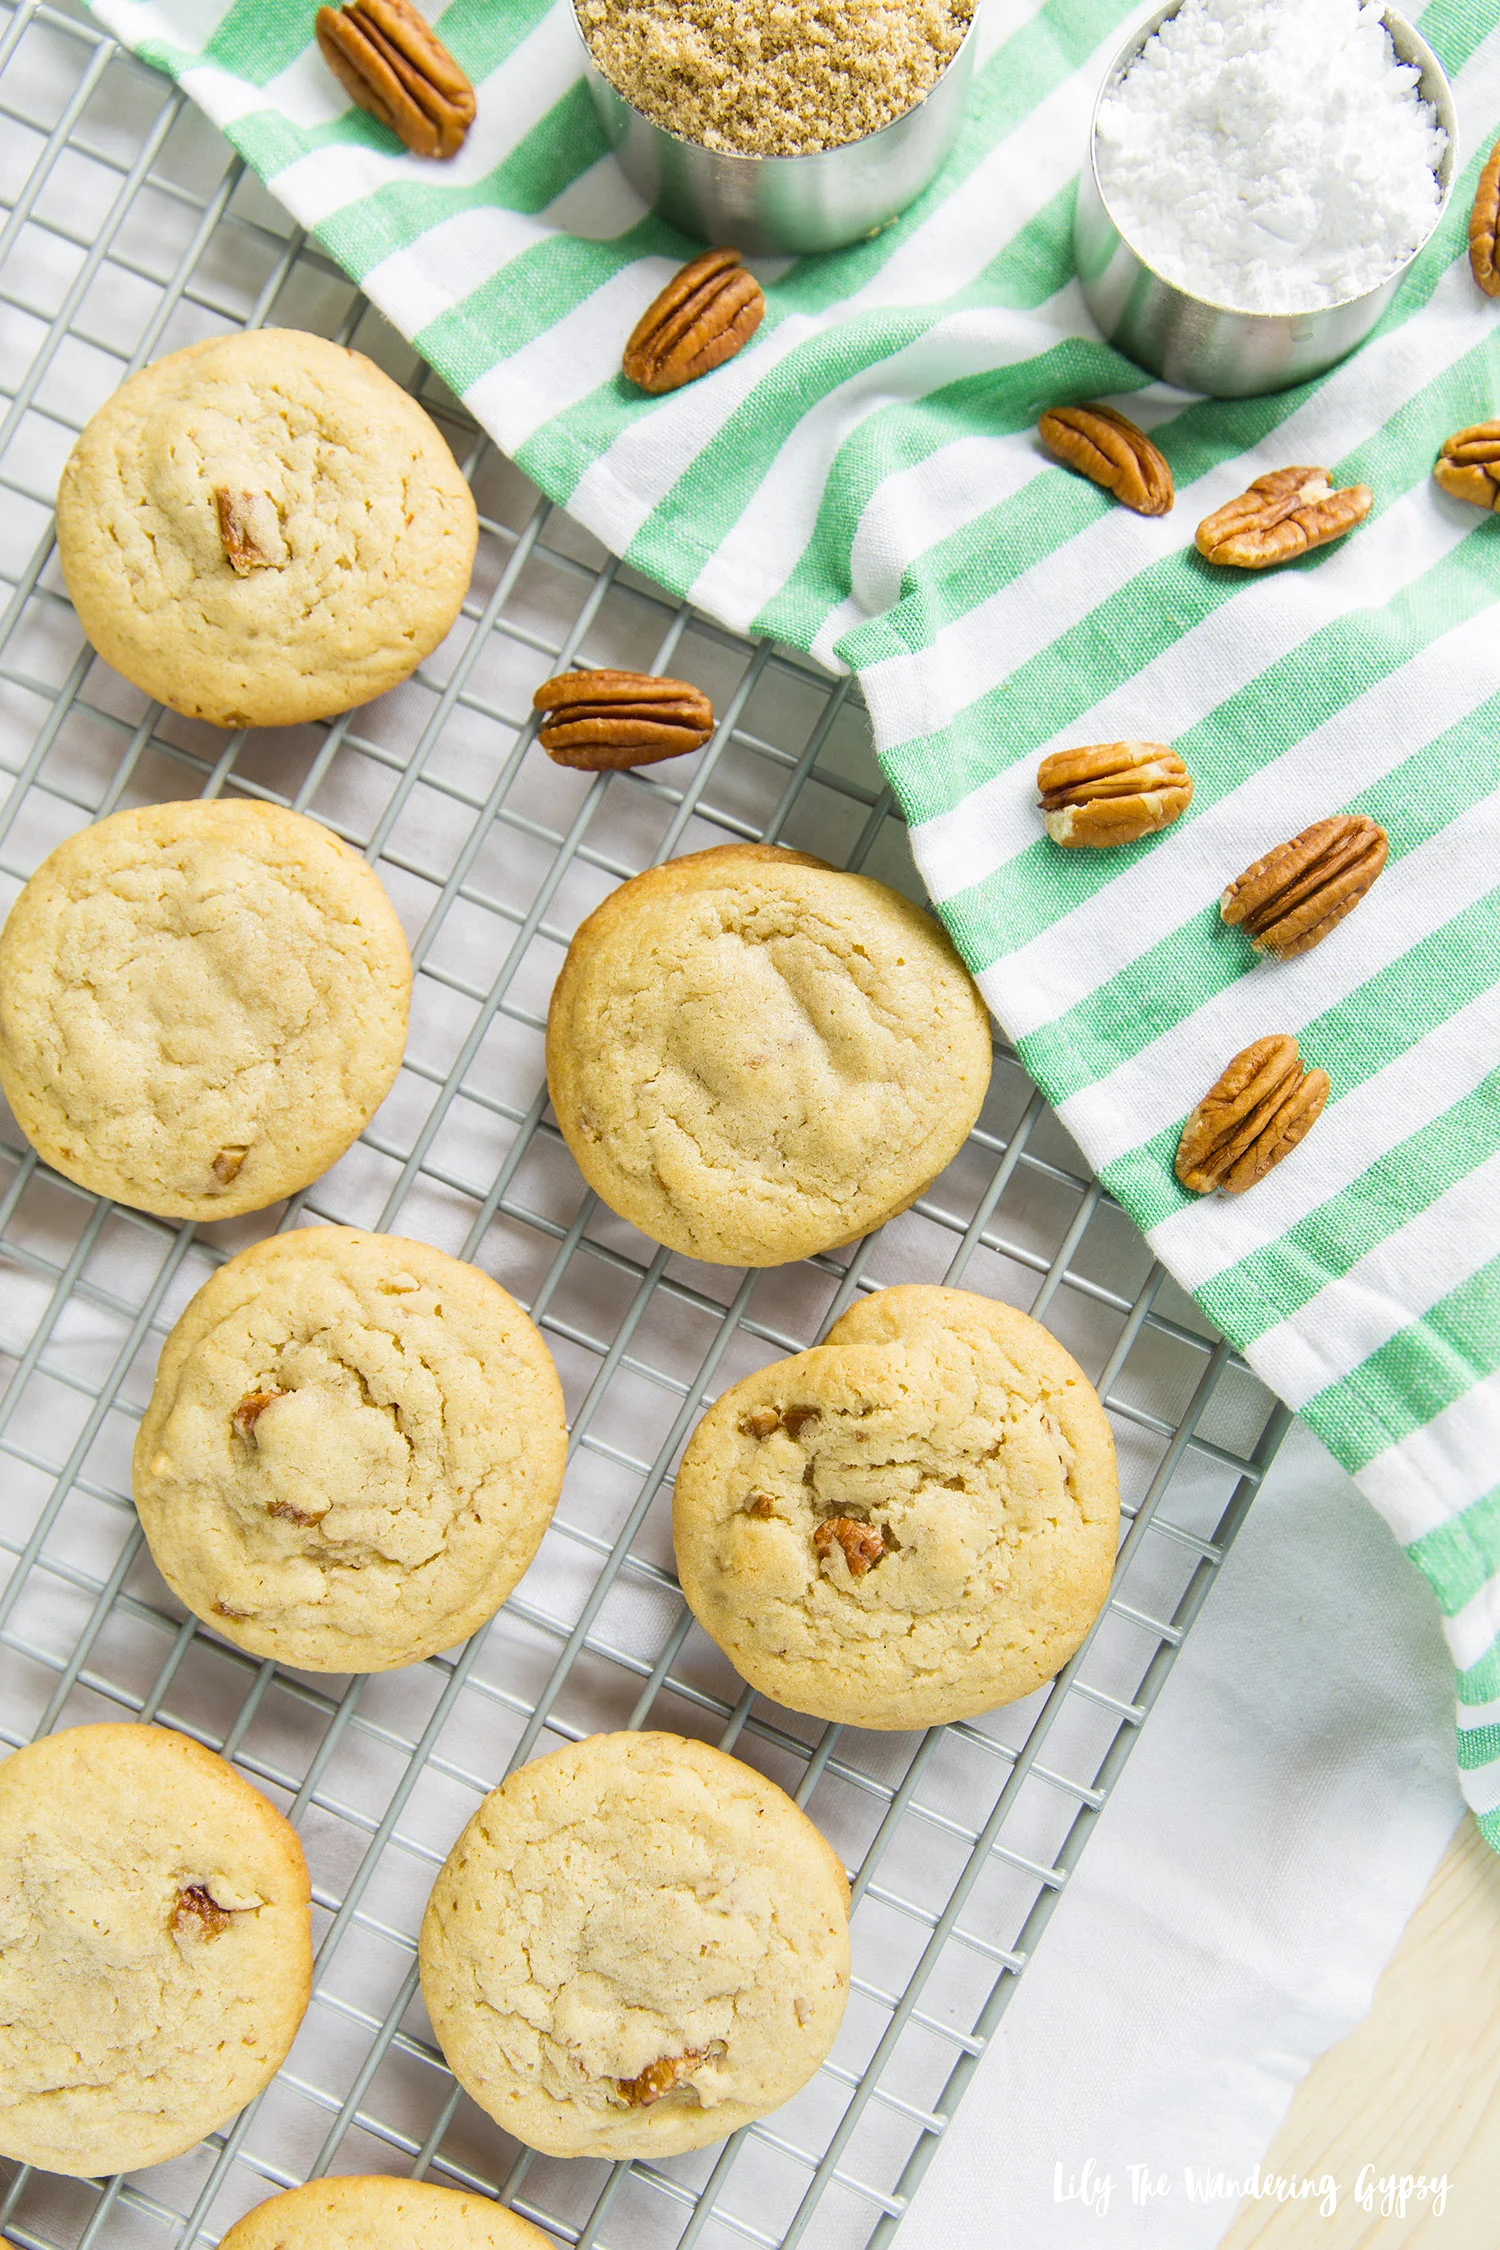
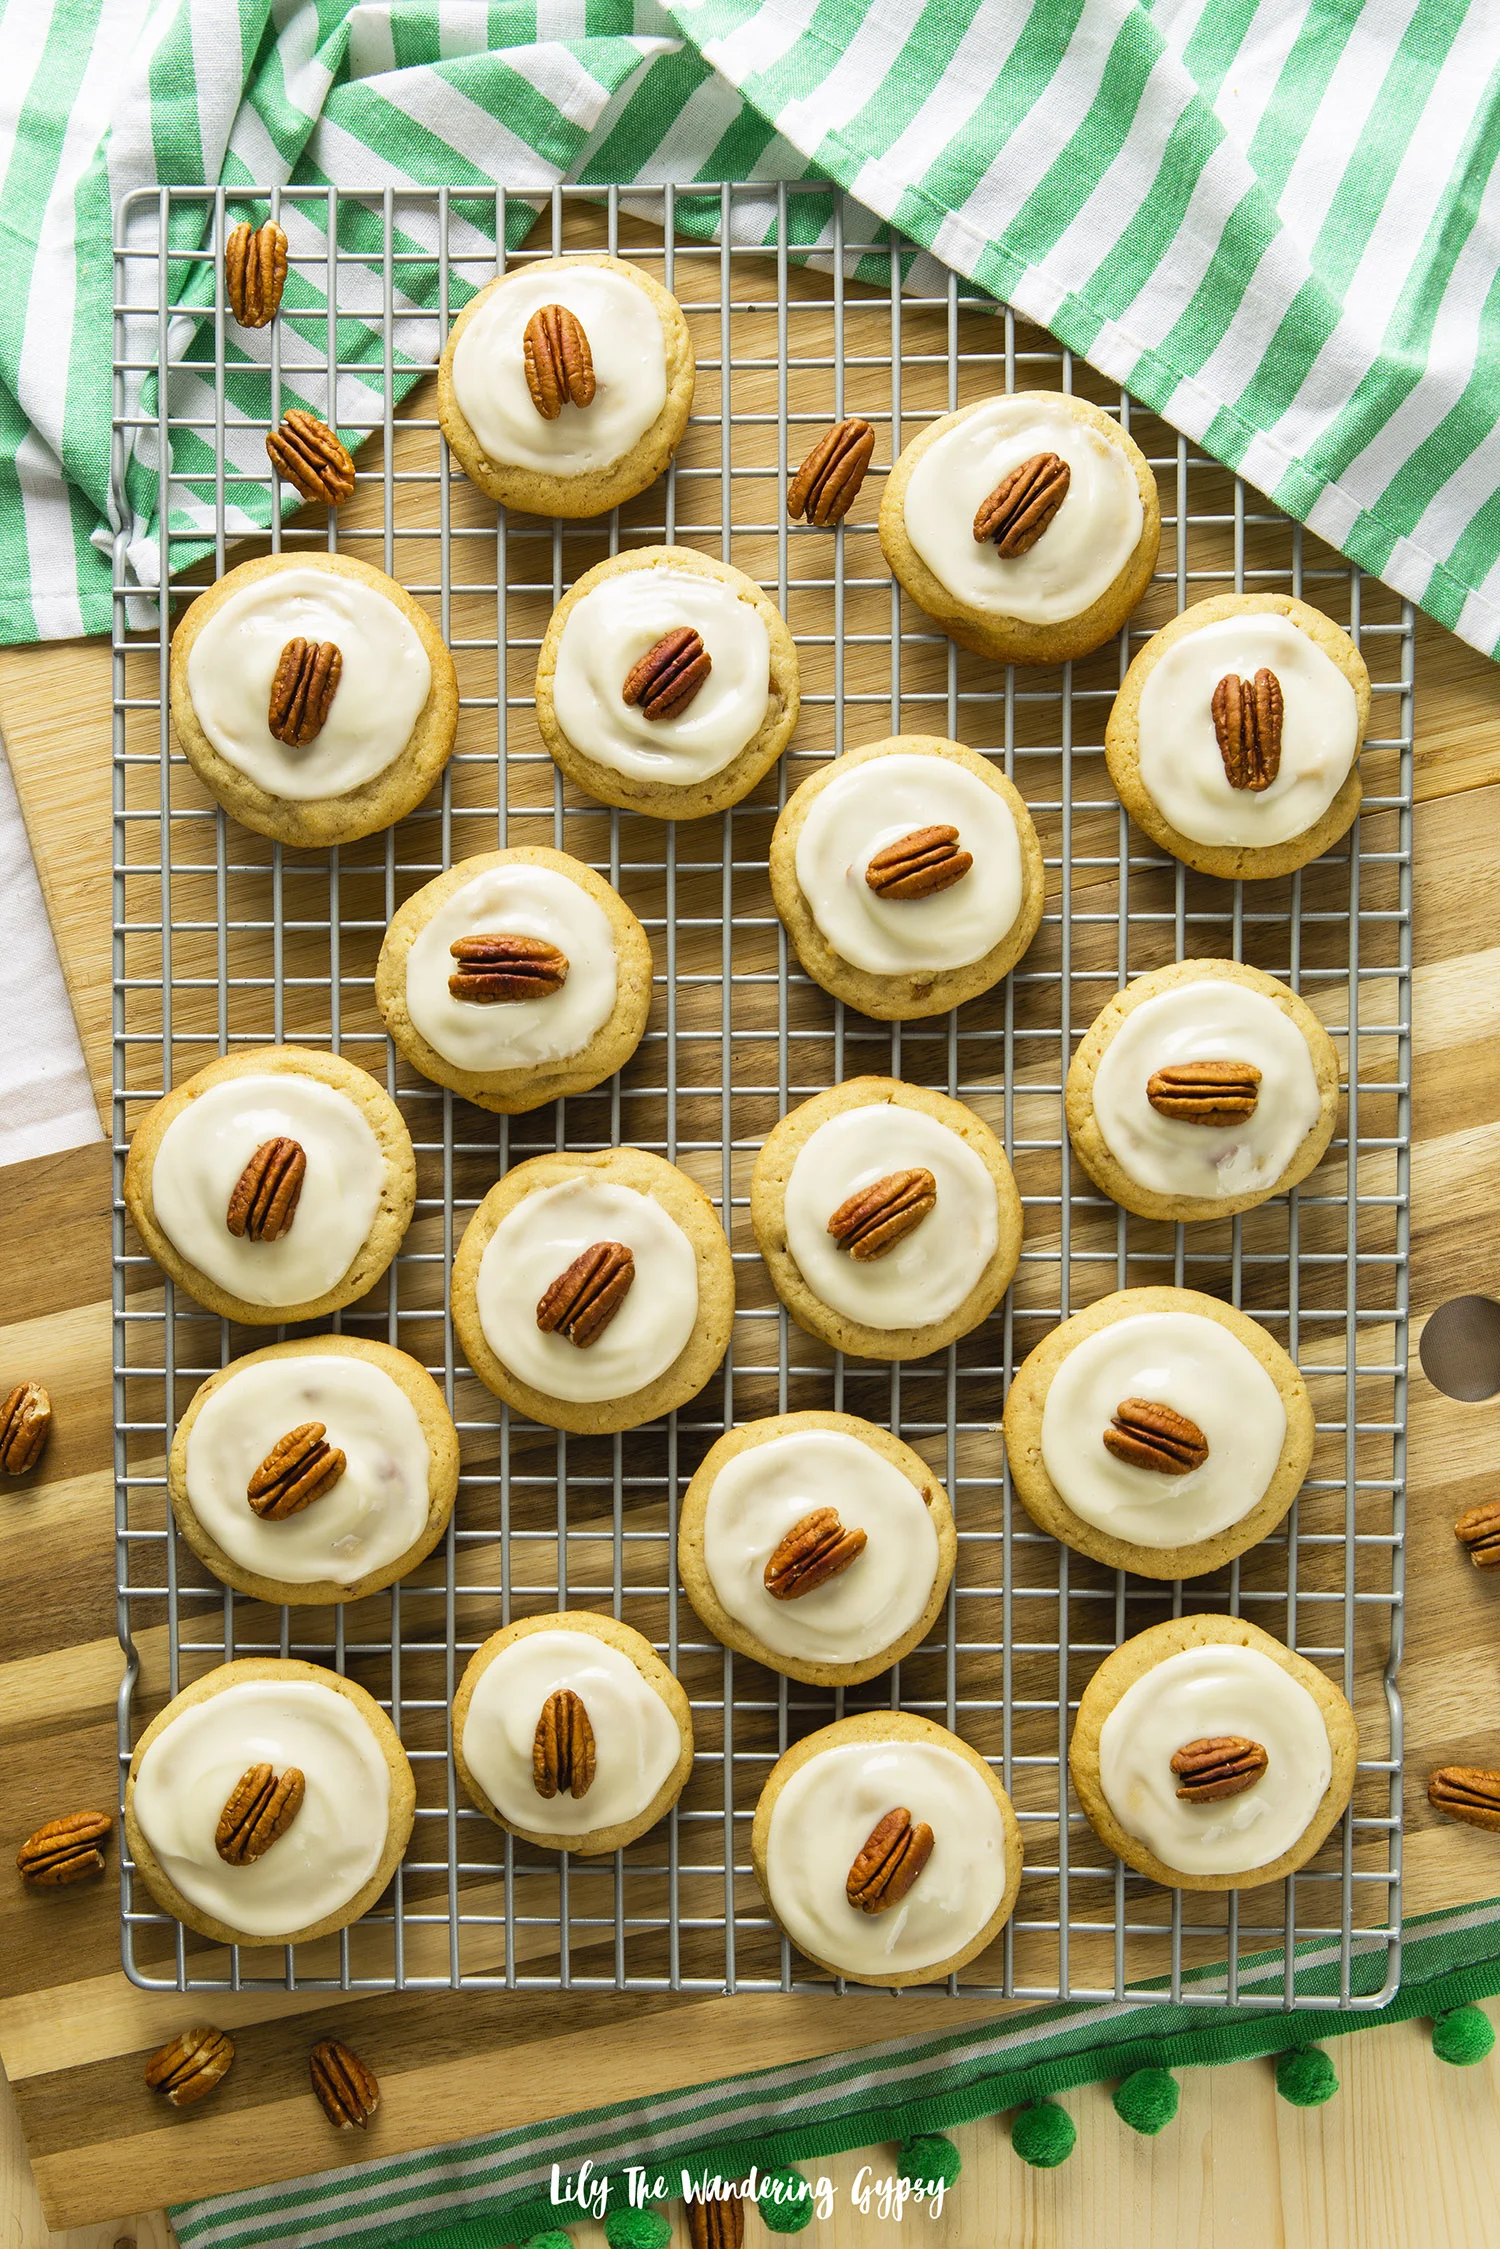
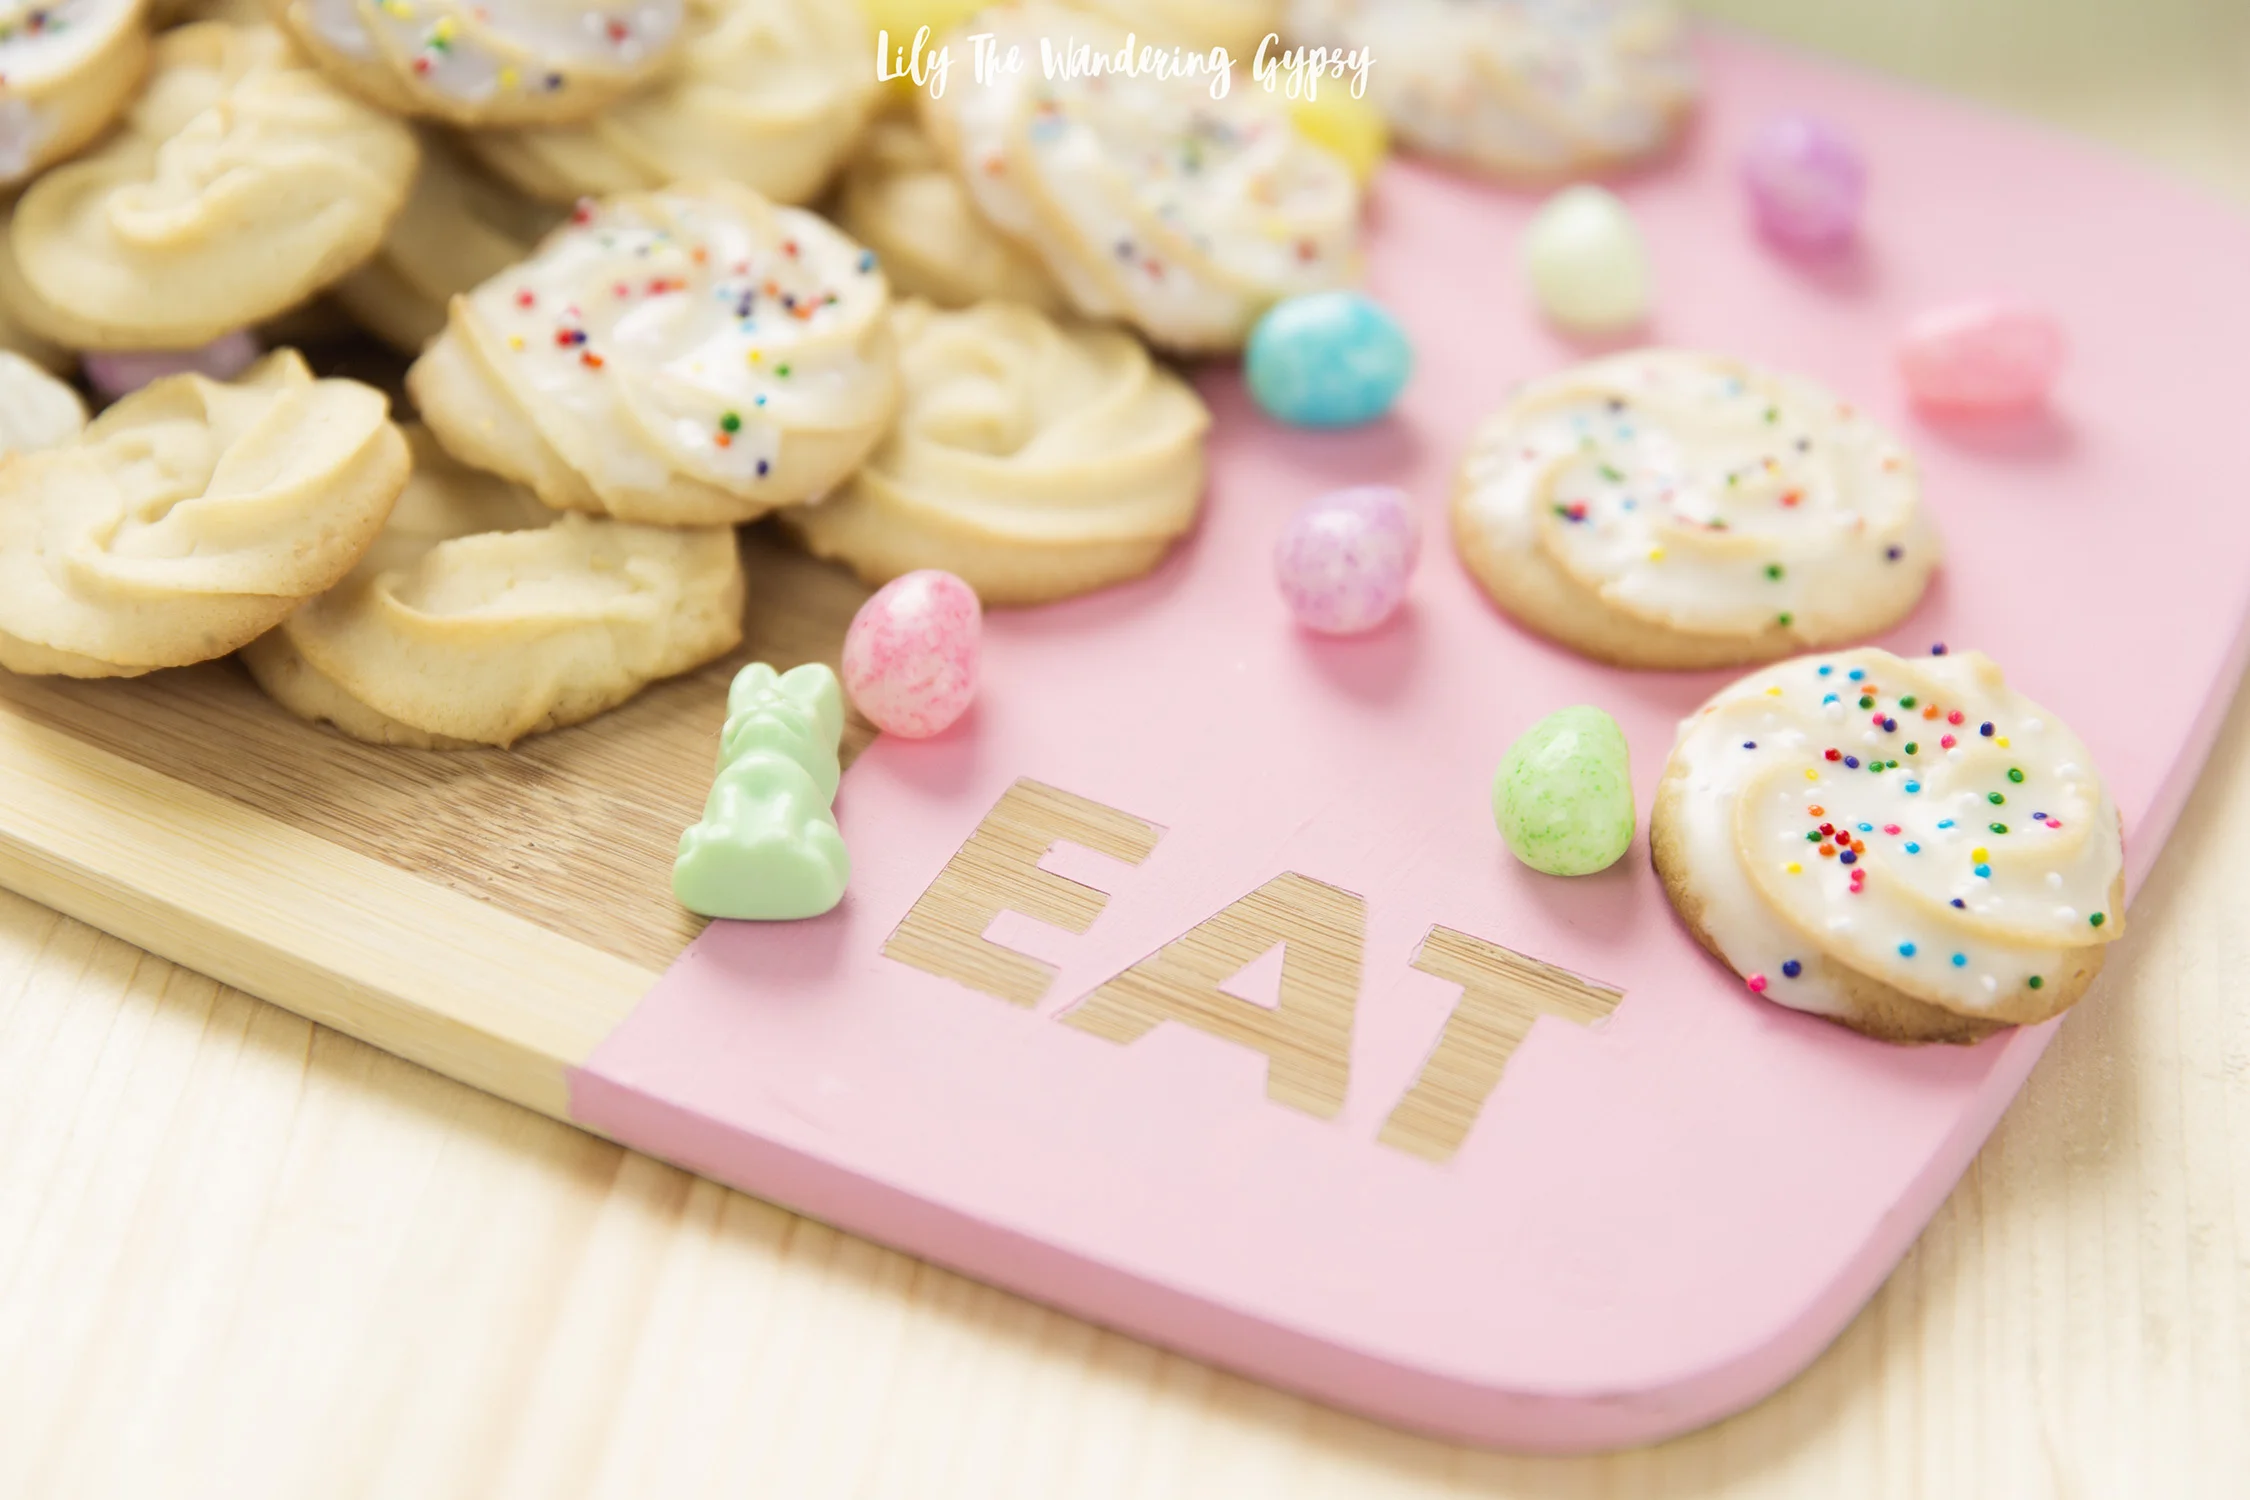
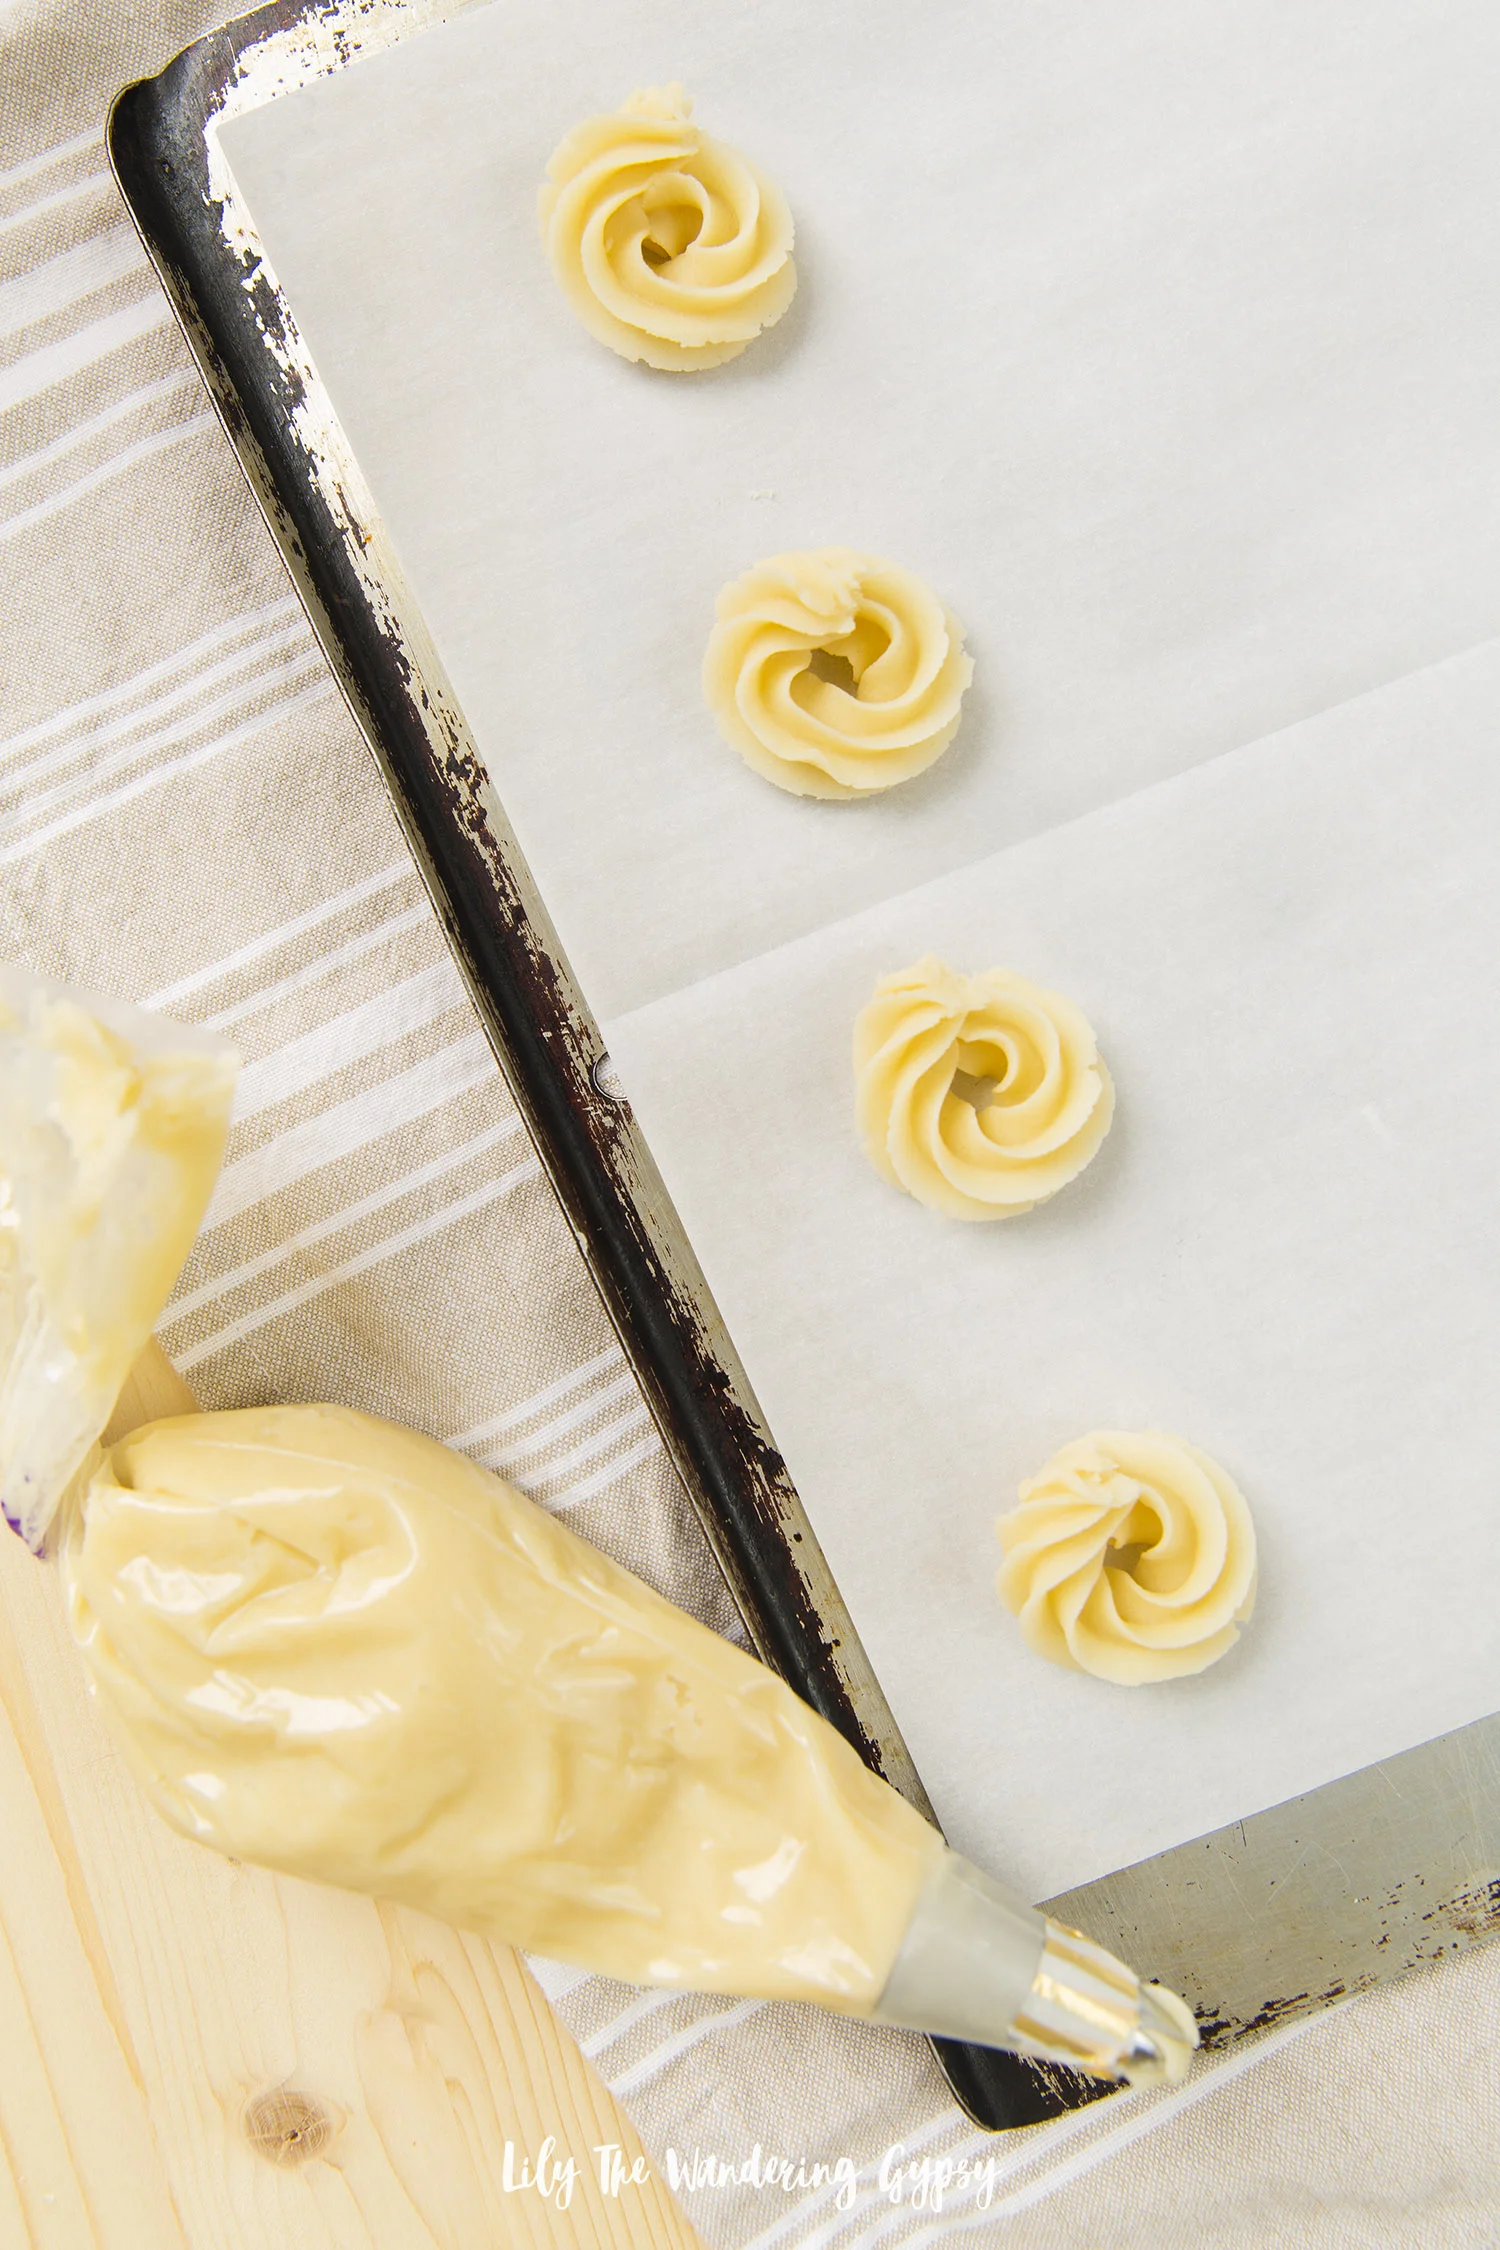
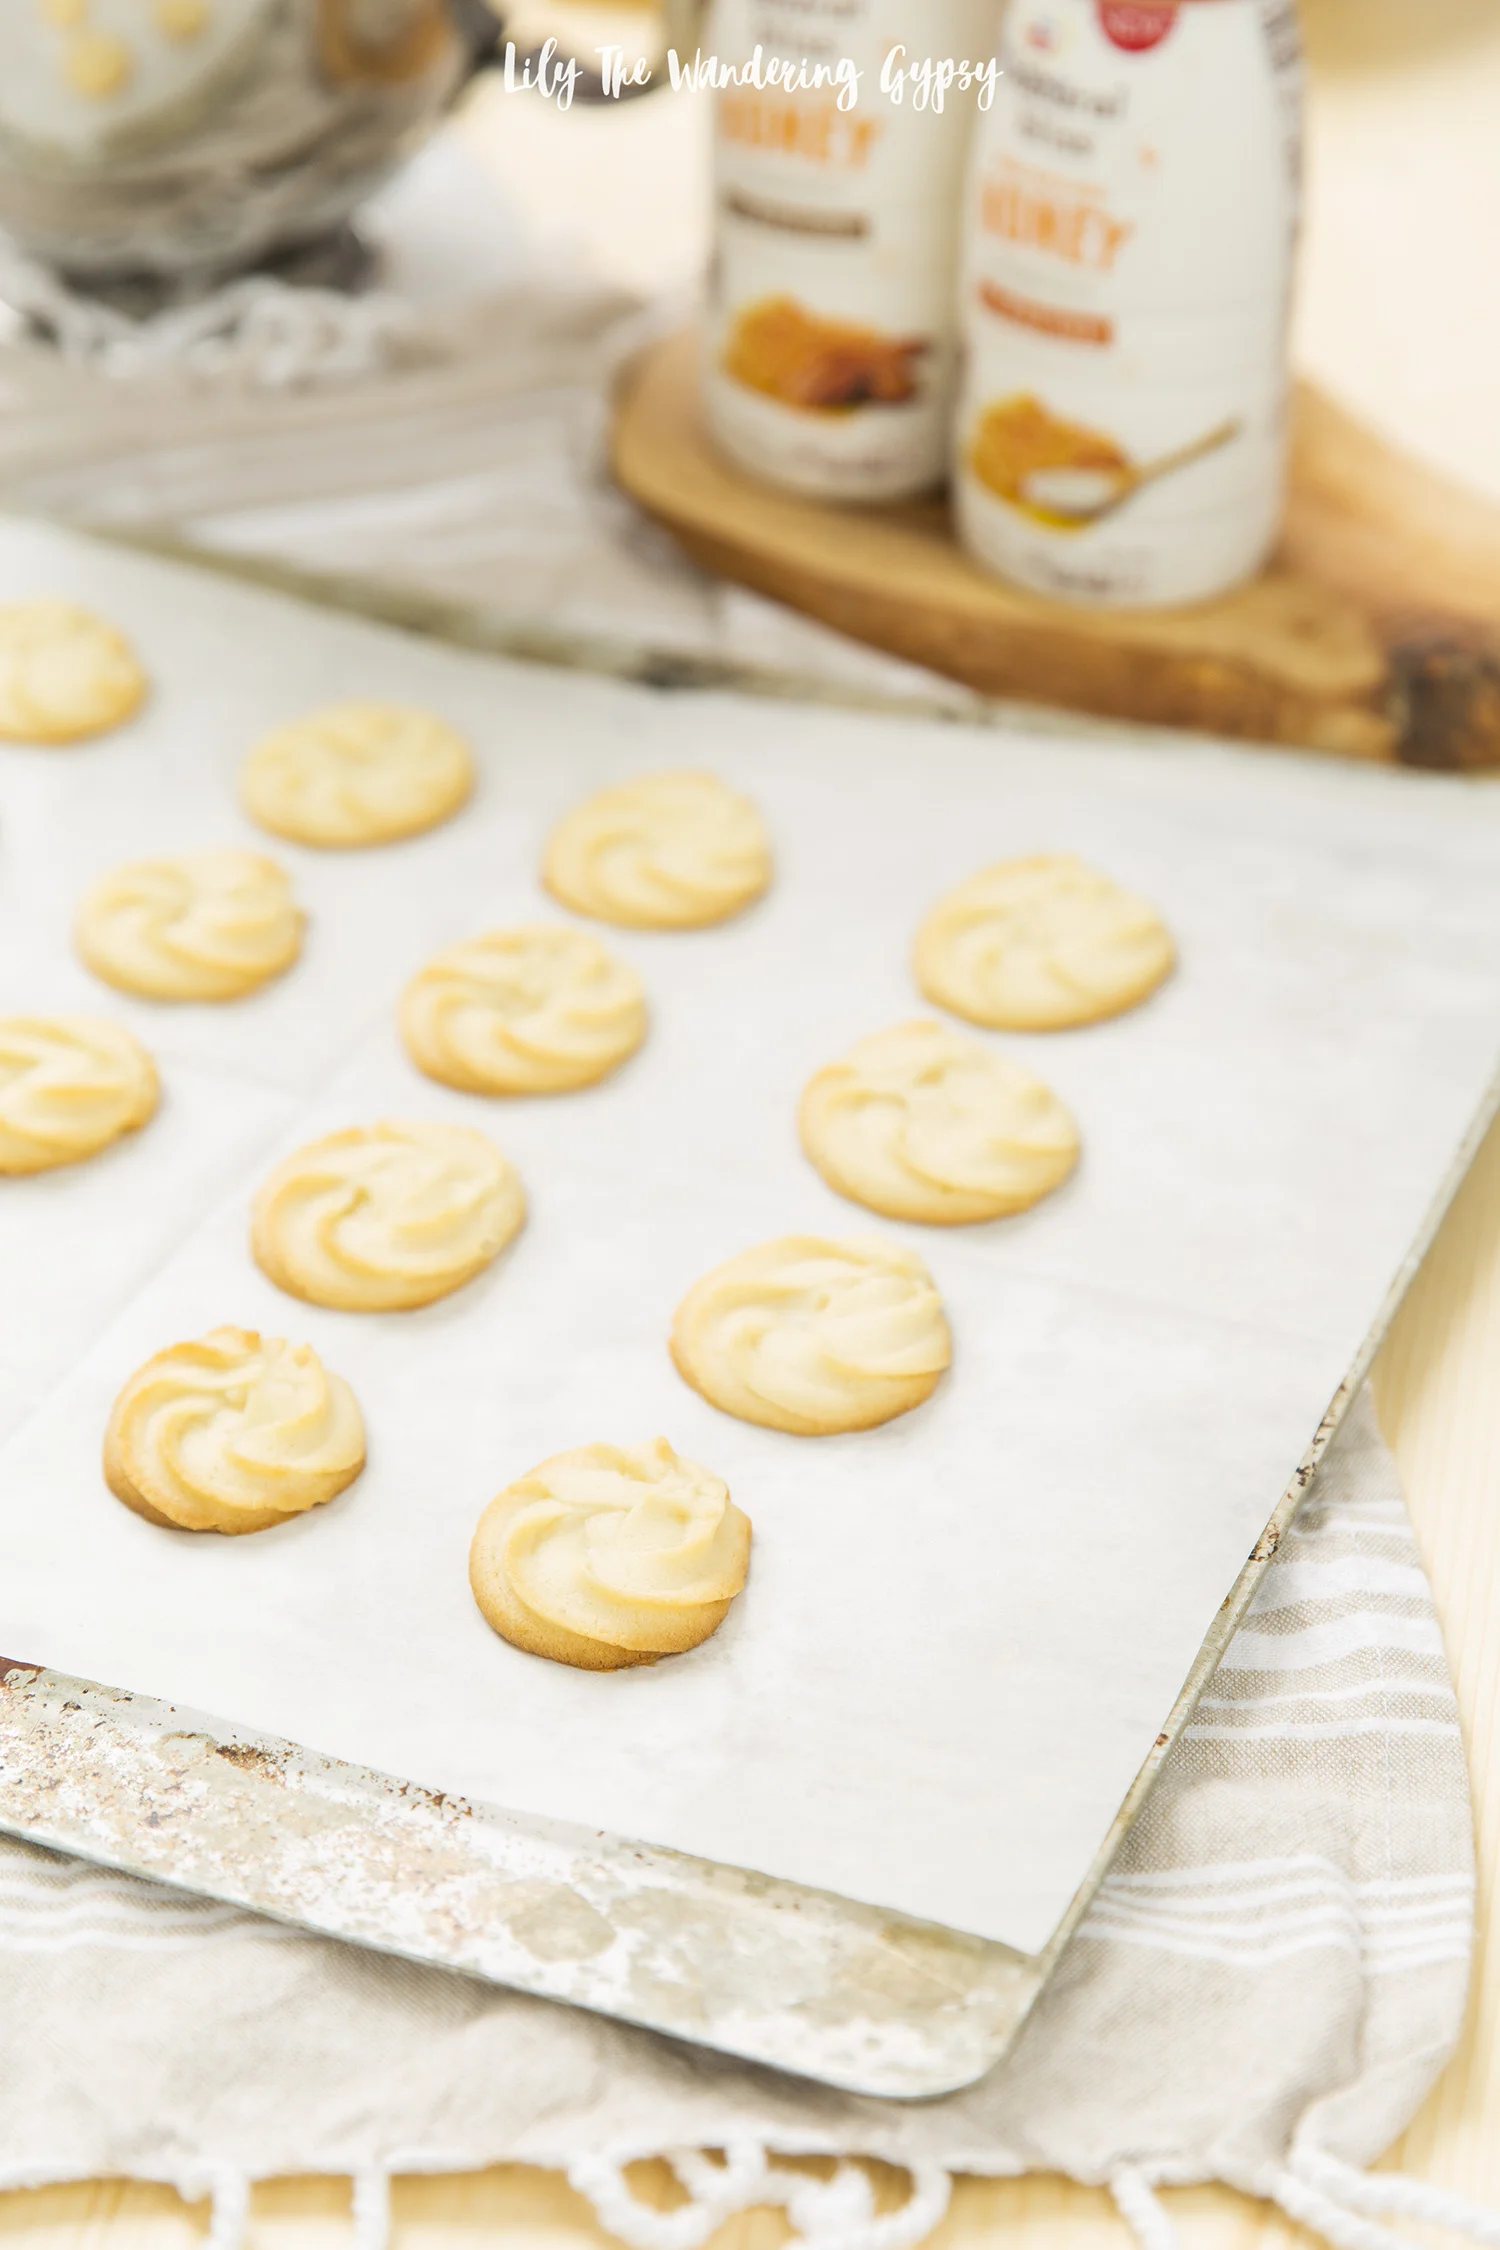
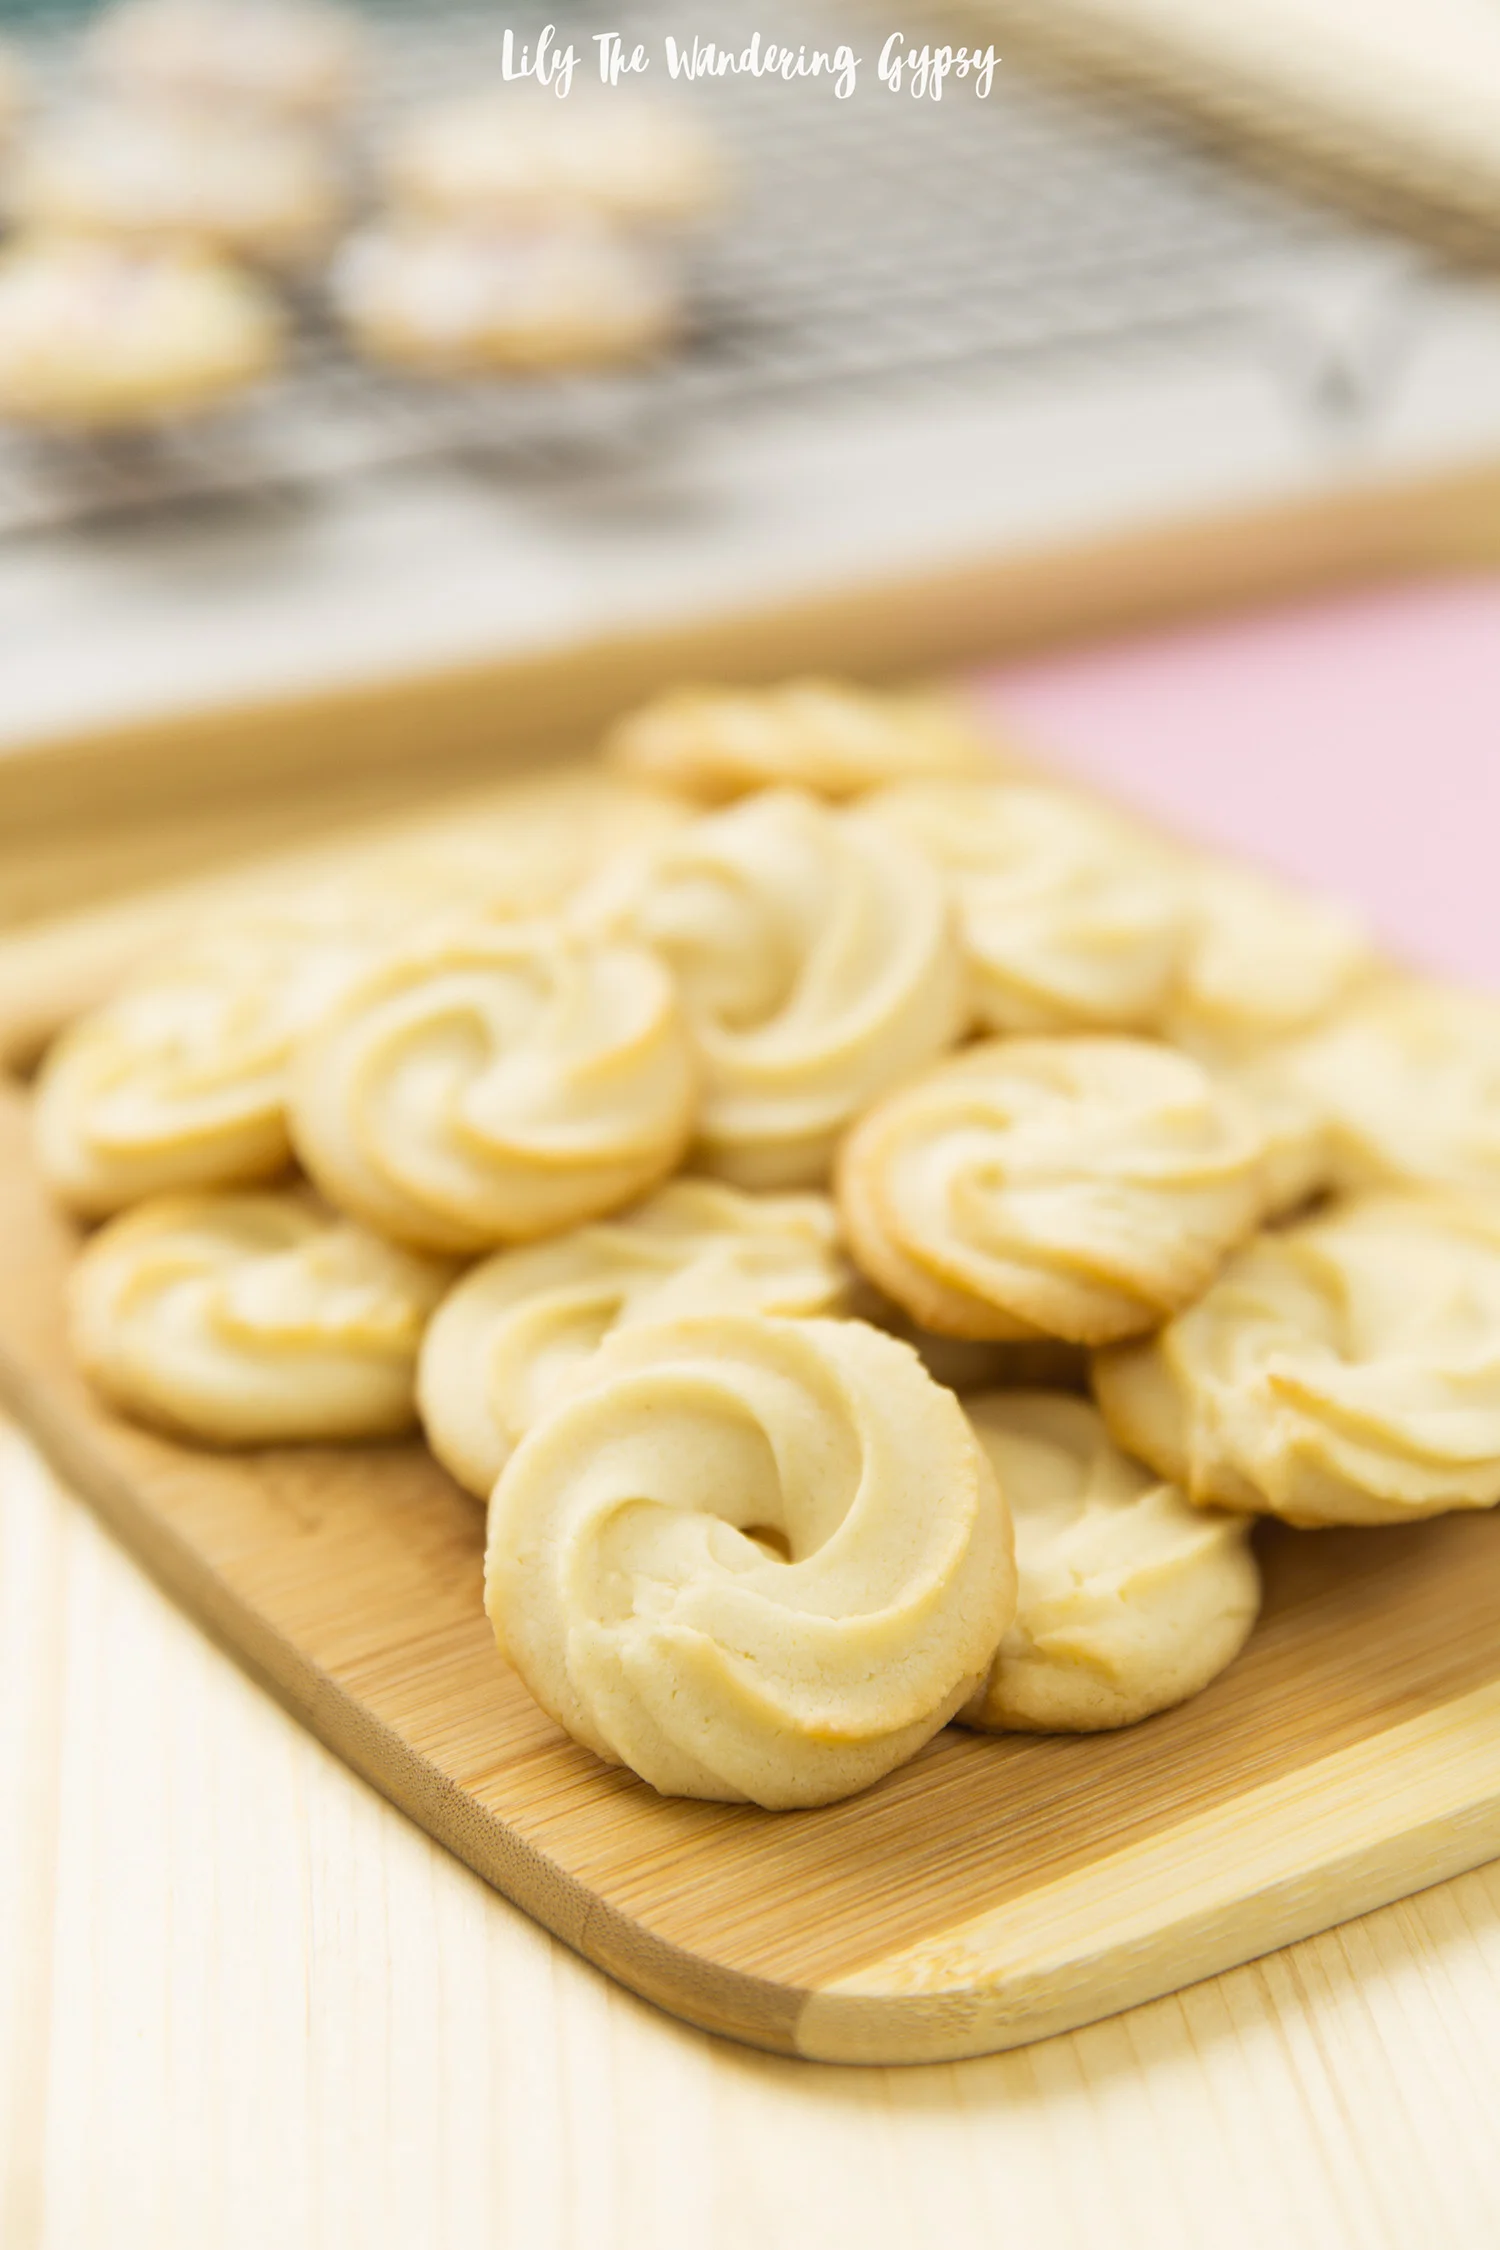
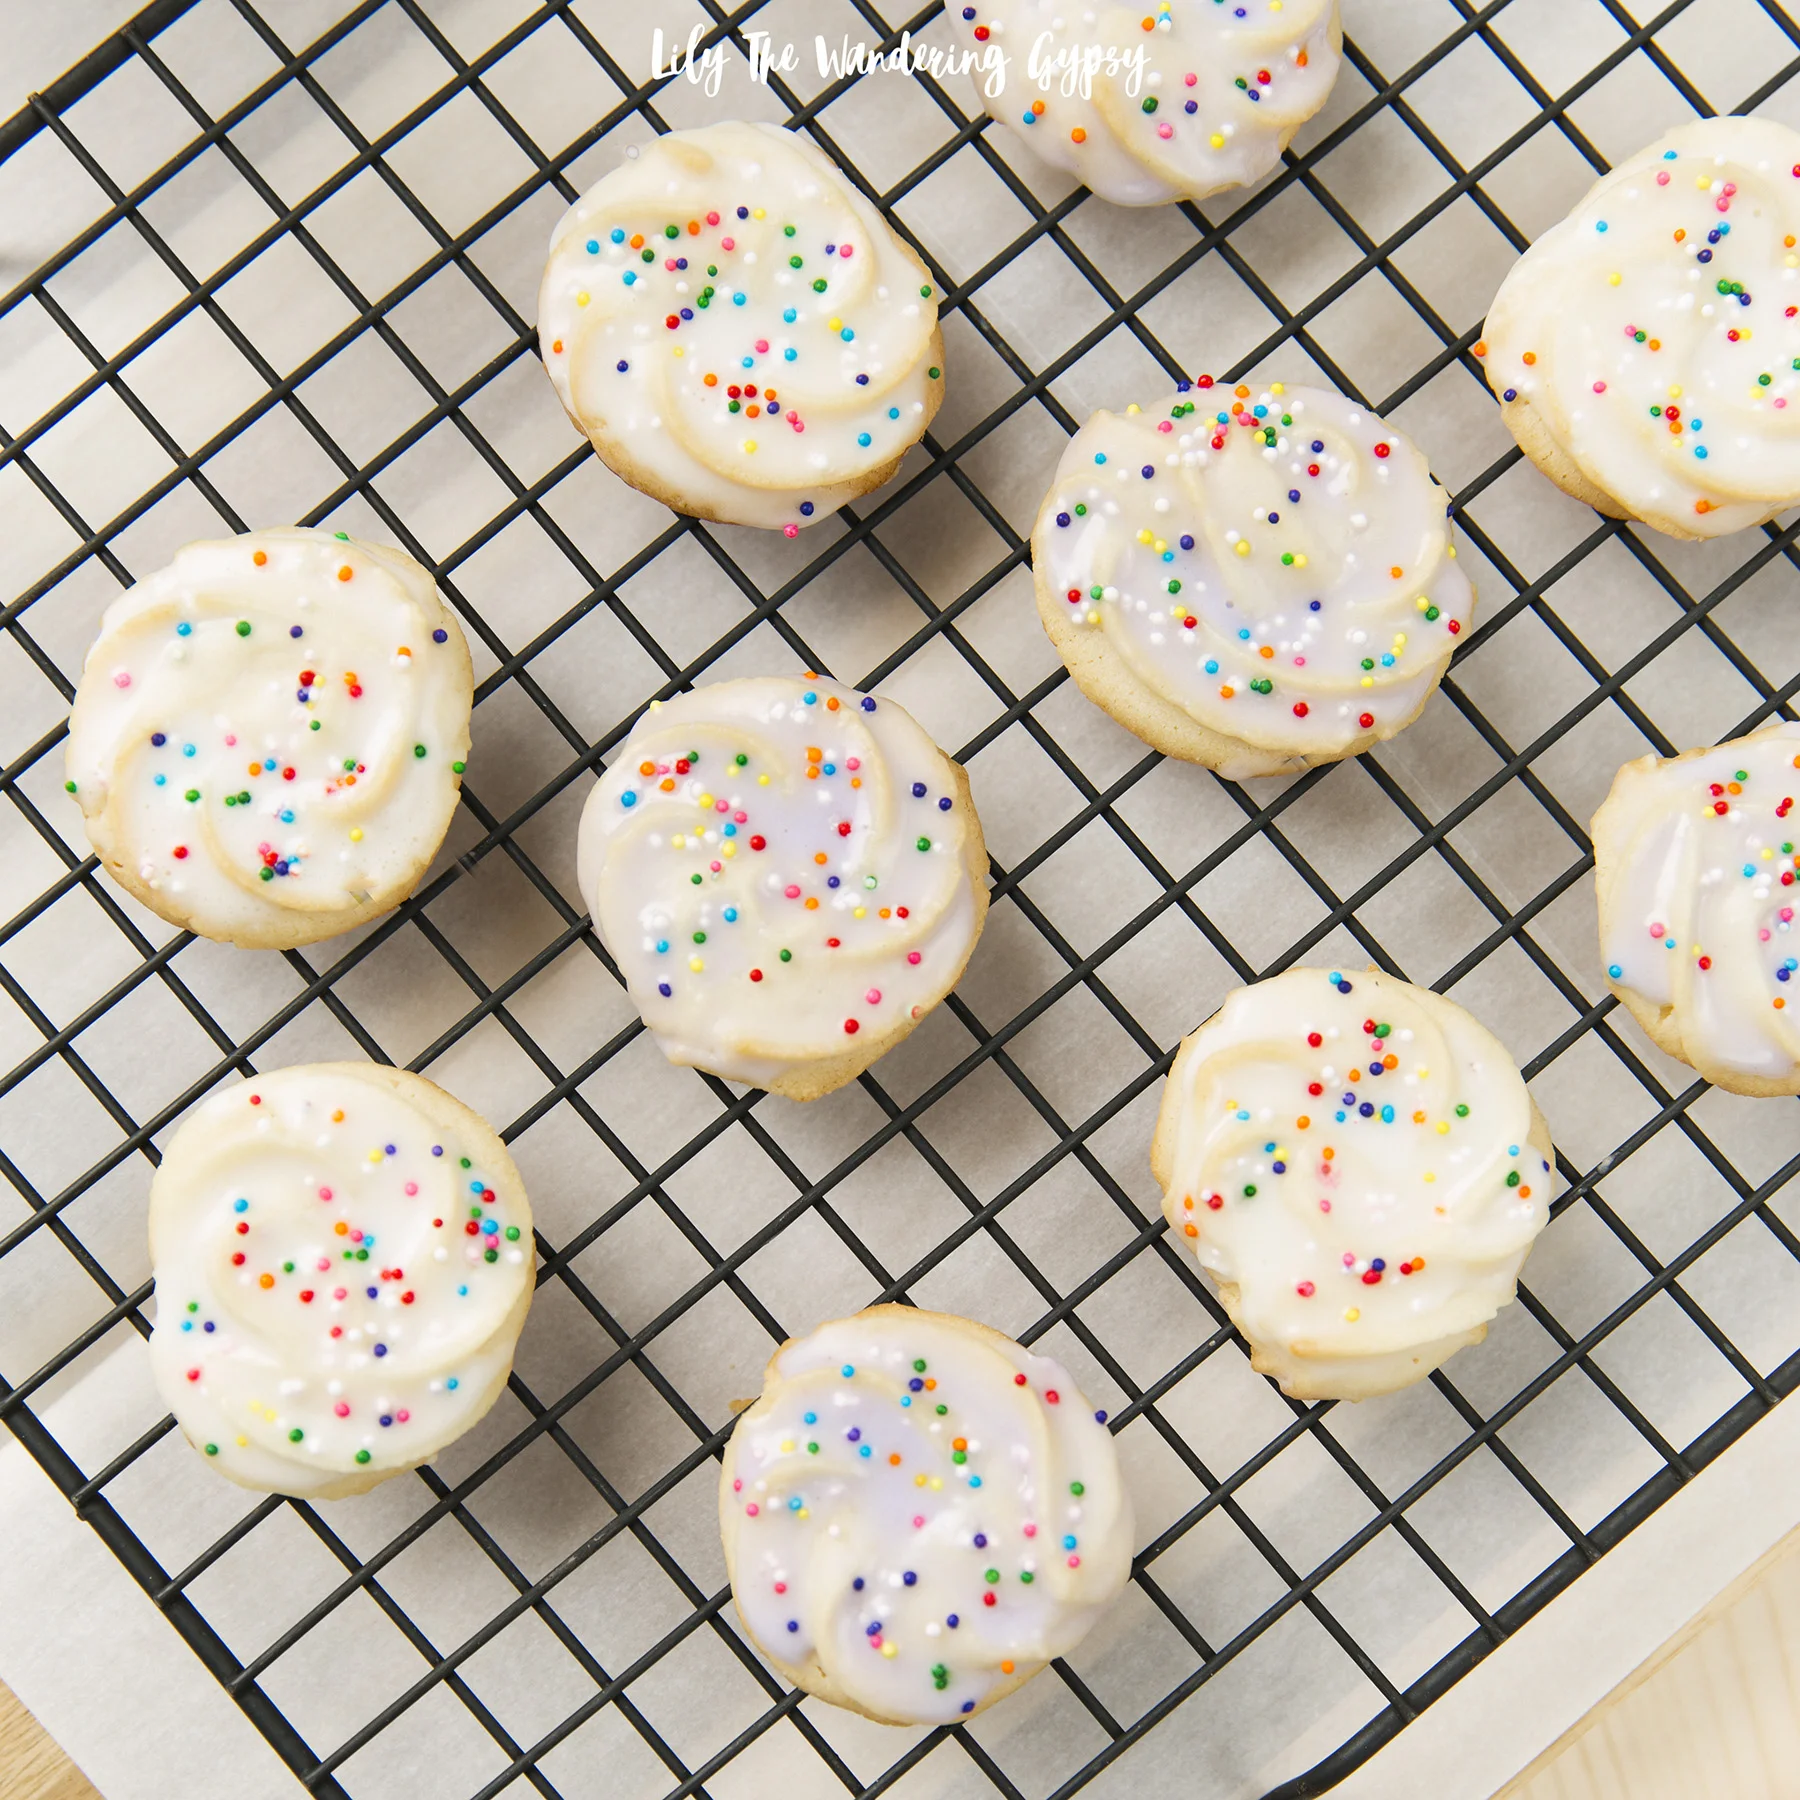
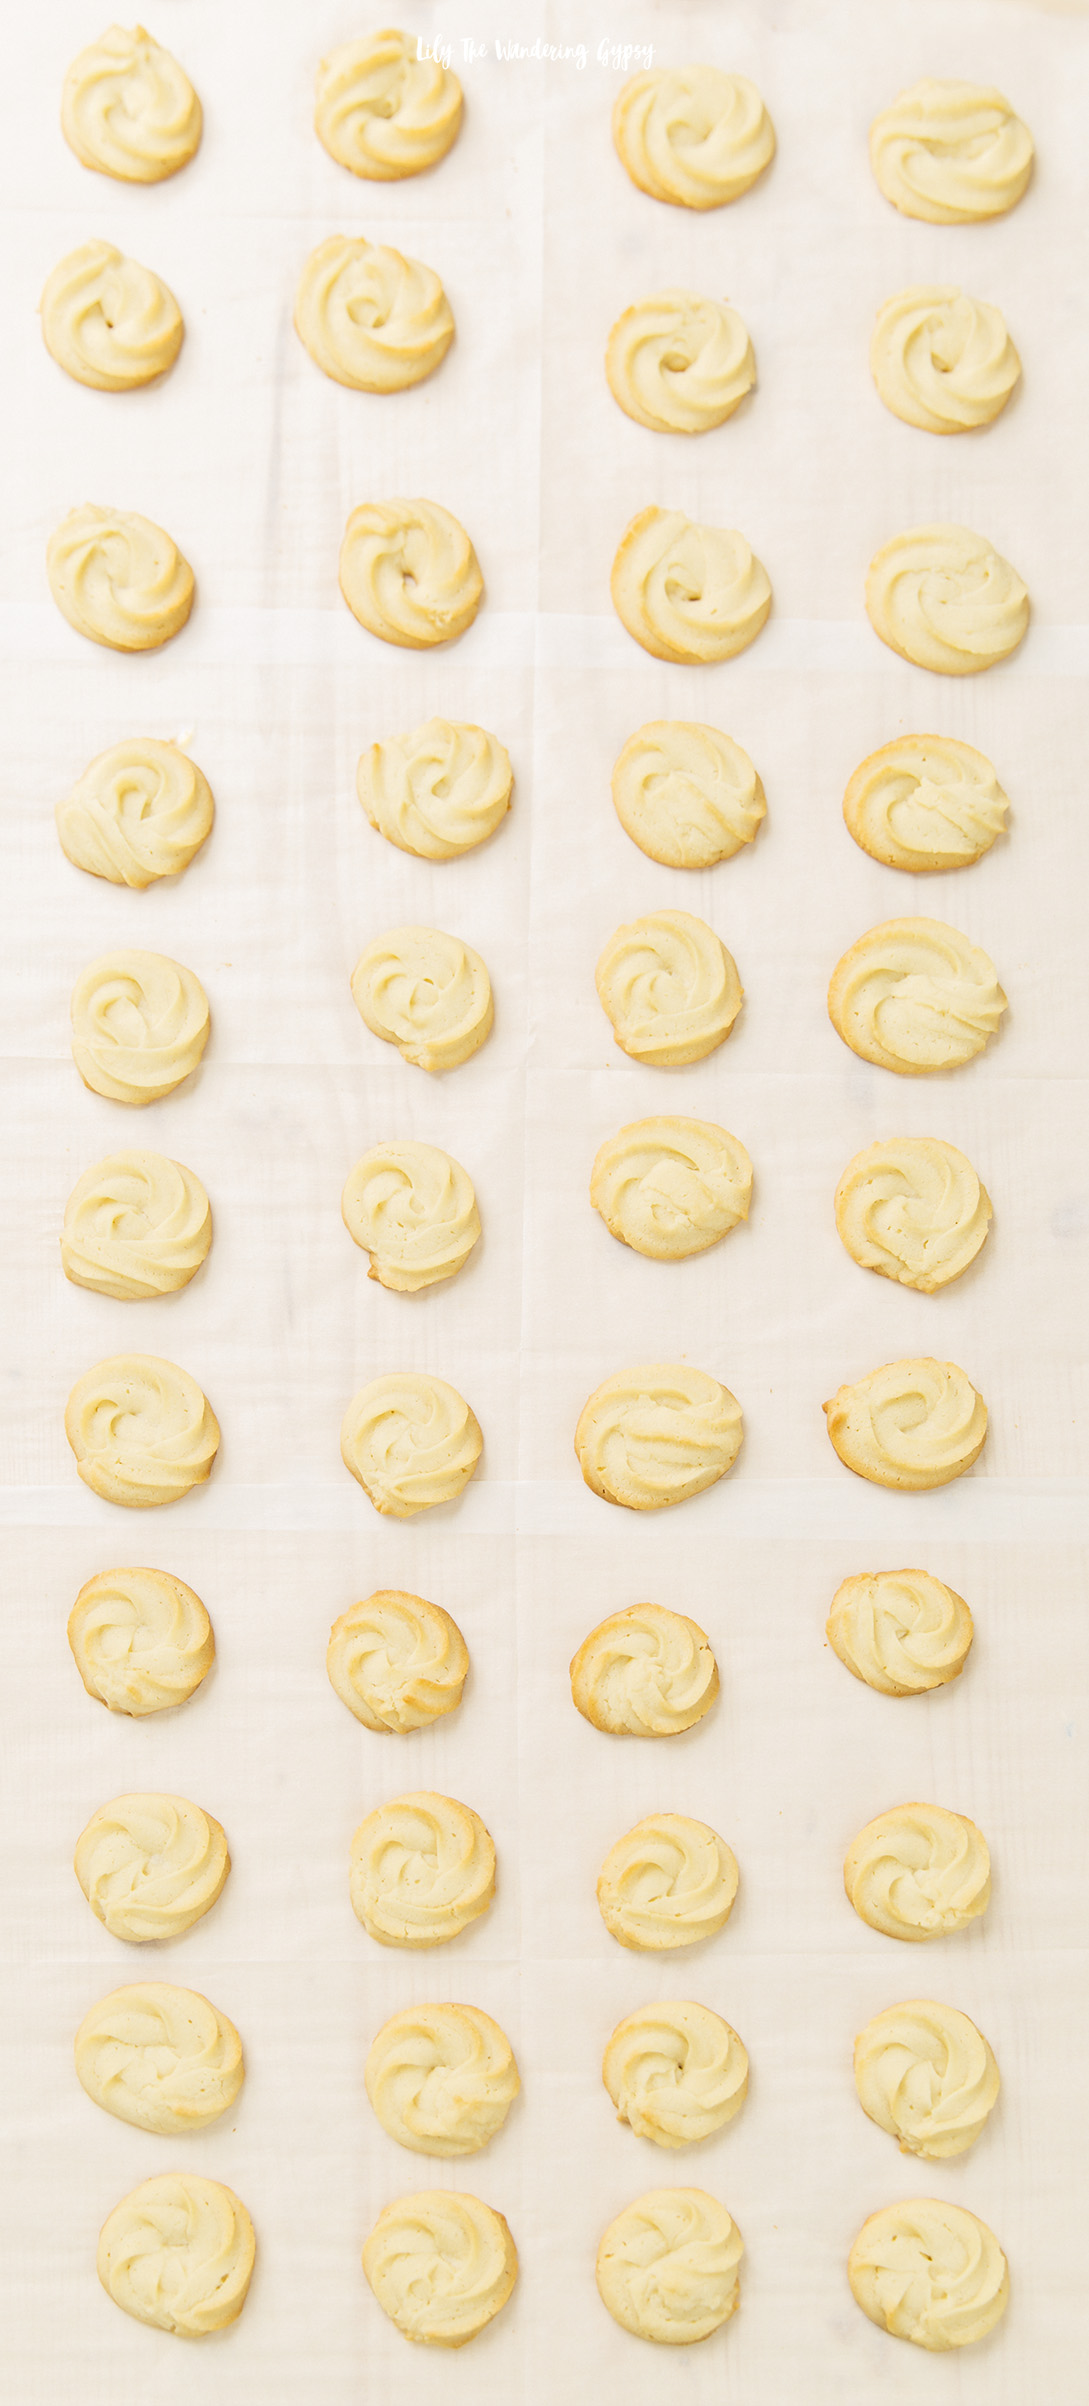
1.) Find a paper mache gift box, a sheet of card stock, and some tissue paper. Create a divider from cardboard or a piece of card stock folded in half, then cut to fit. 

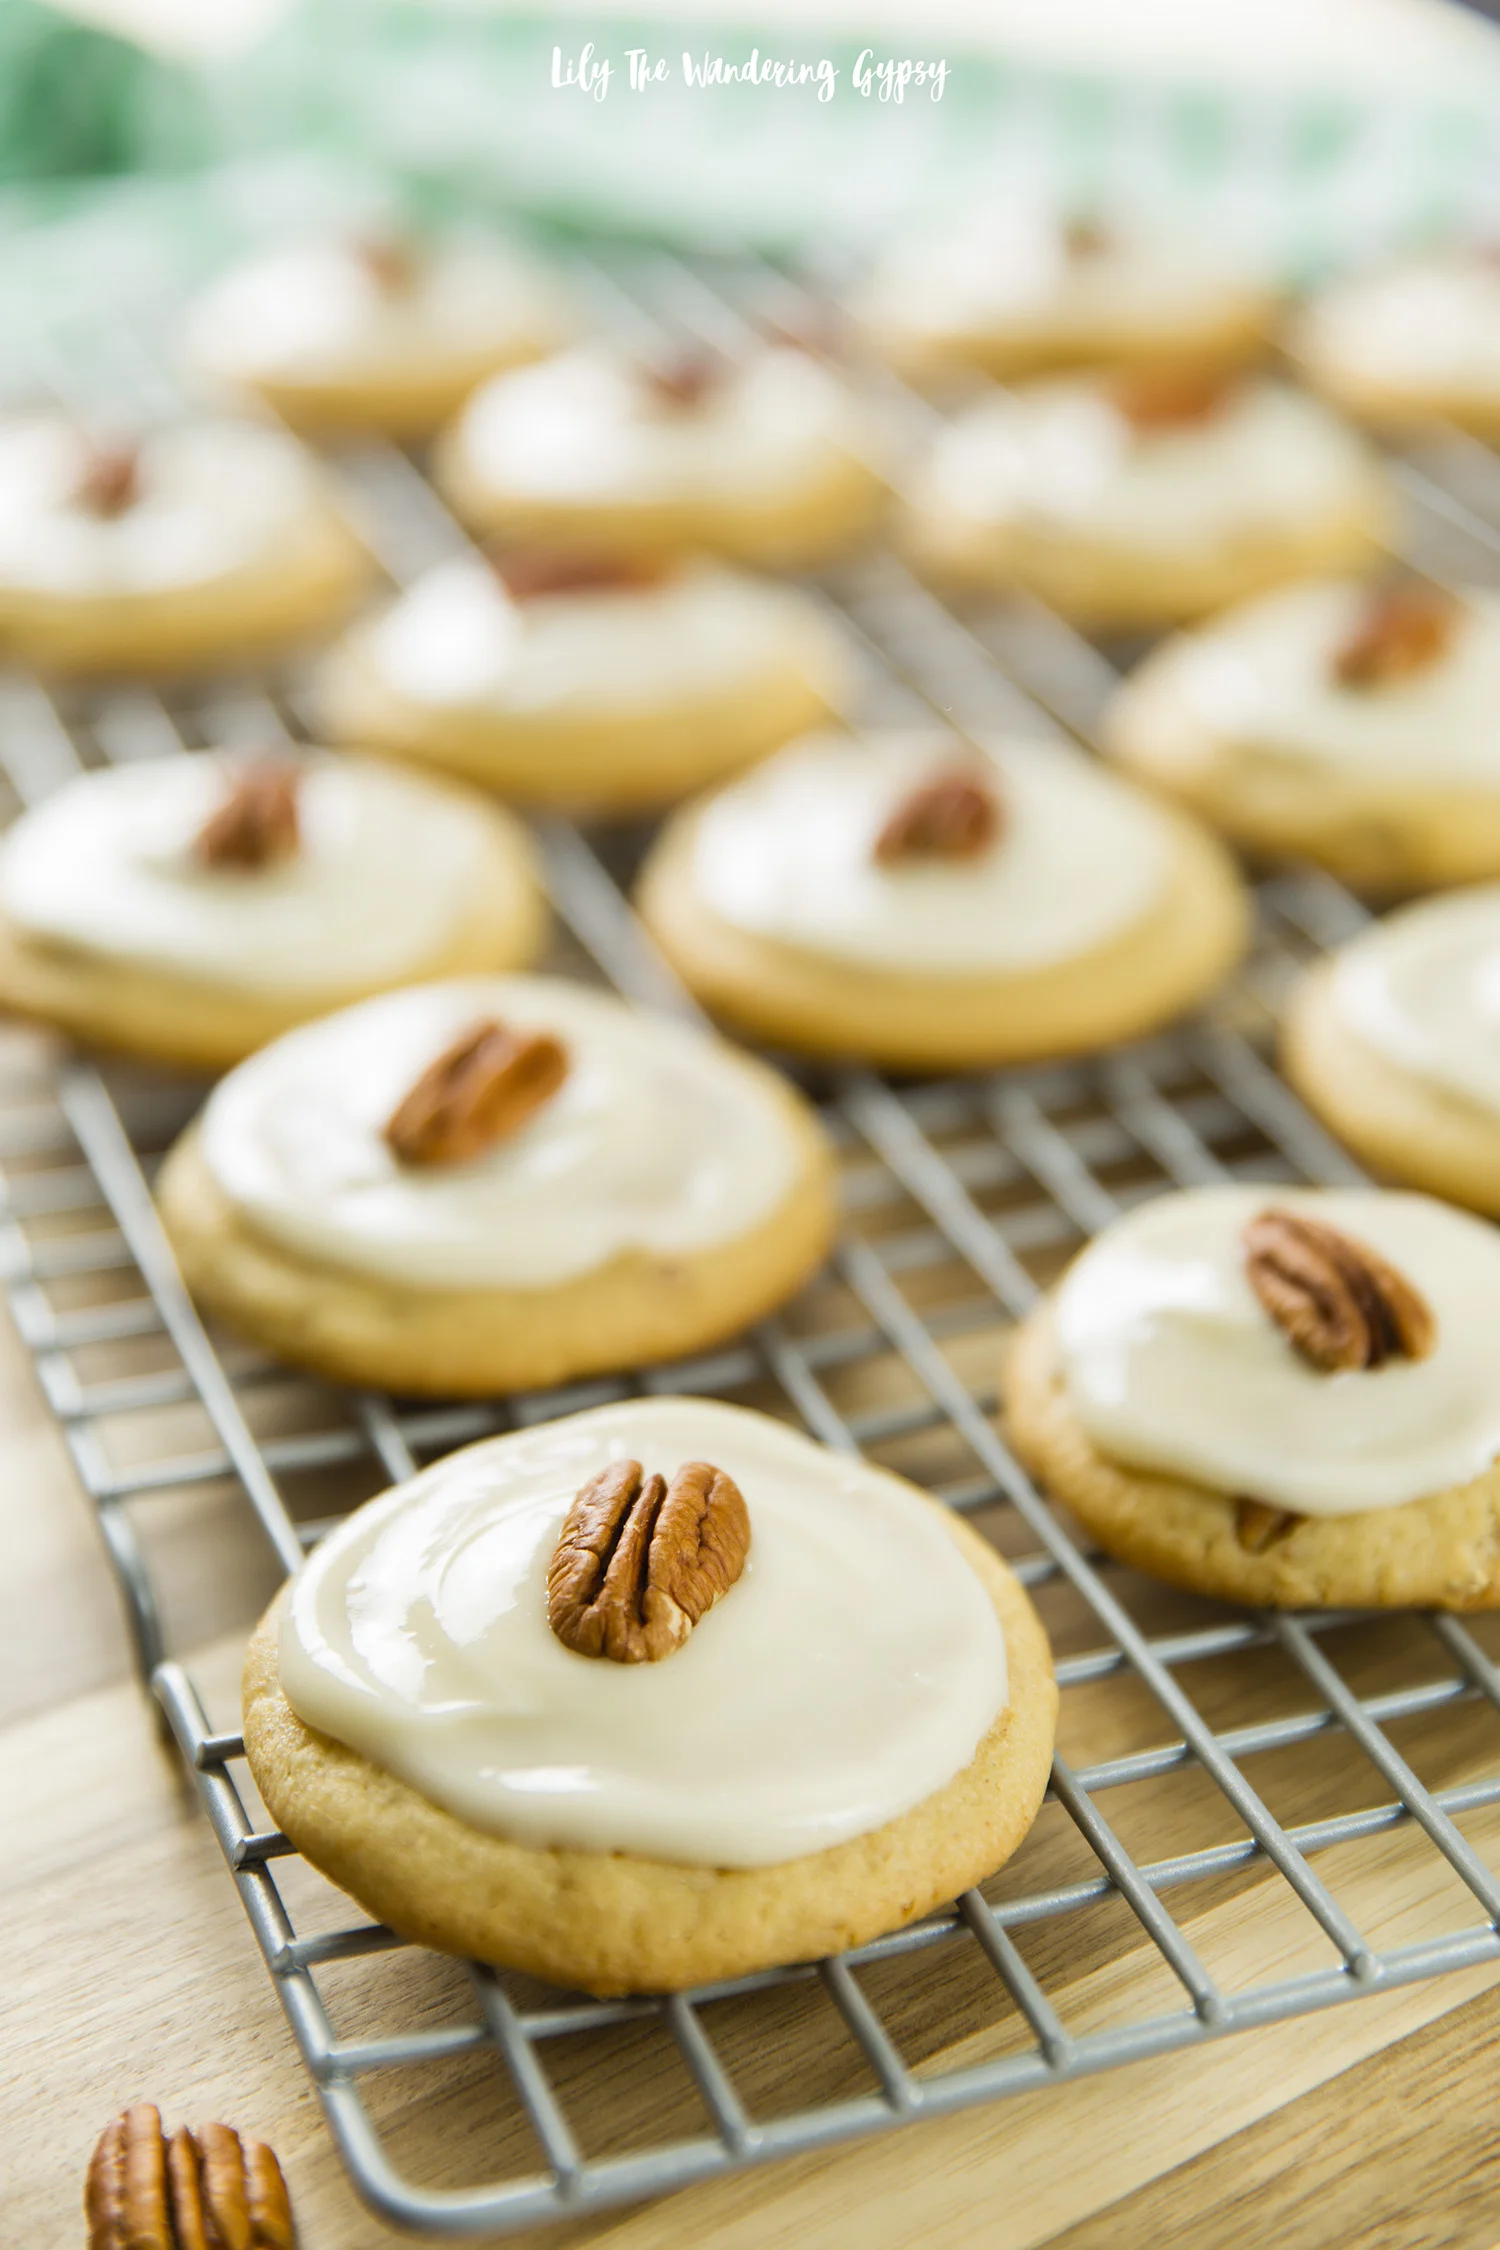
2. Place tissue paper on each side, and fill one side with homemade or bakery cookies, and then fill the other side with My/Mo Mochi Ice Cream! Make sure to keep the gift in the freezer until you give it to that lucky recipient!

TO CELEBRATE CINCO DE MAYO

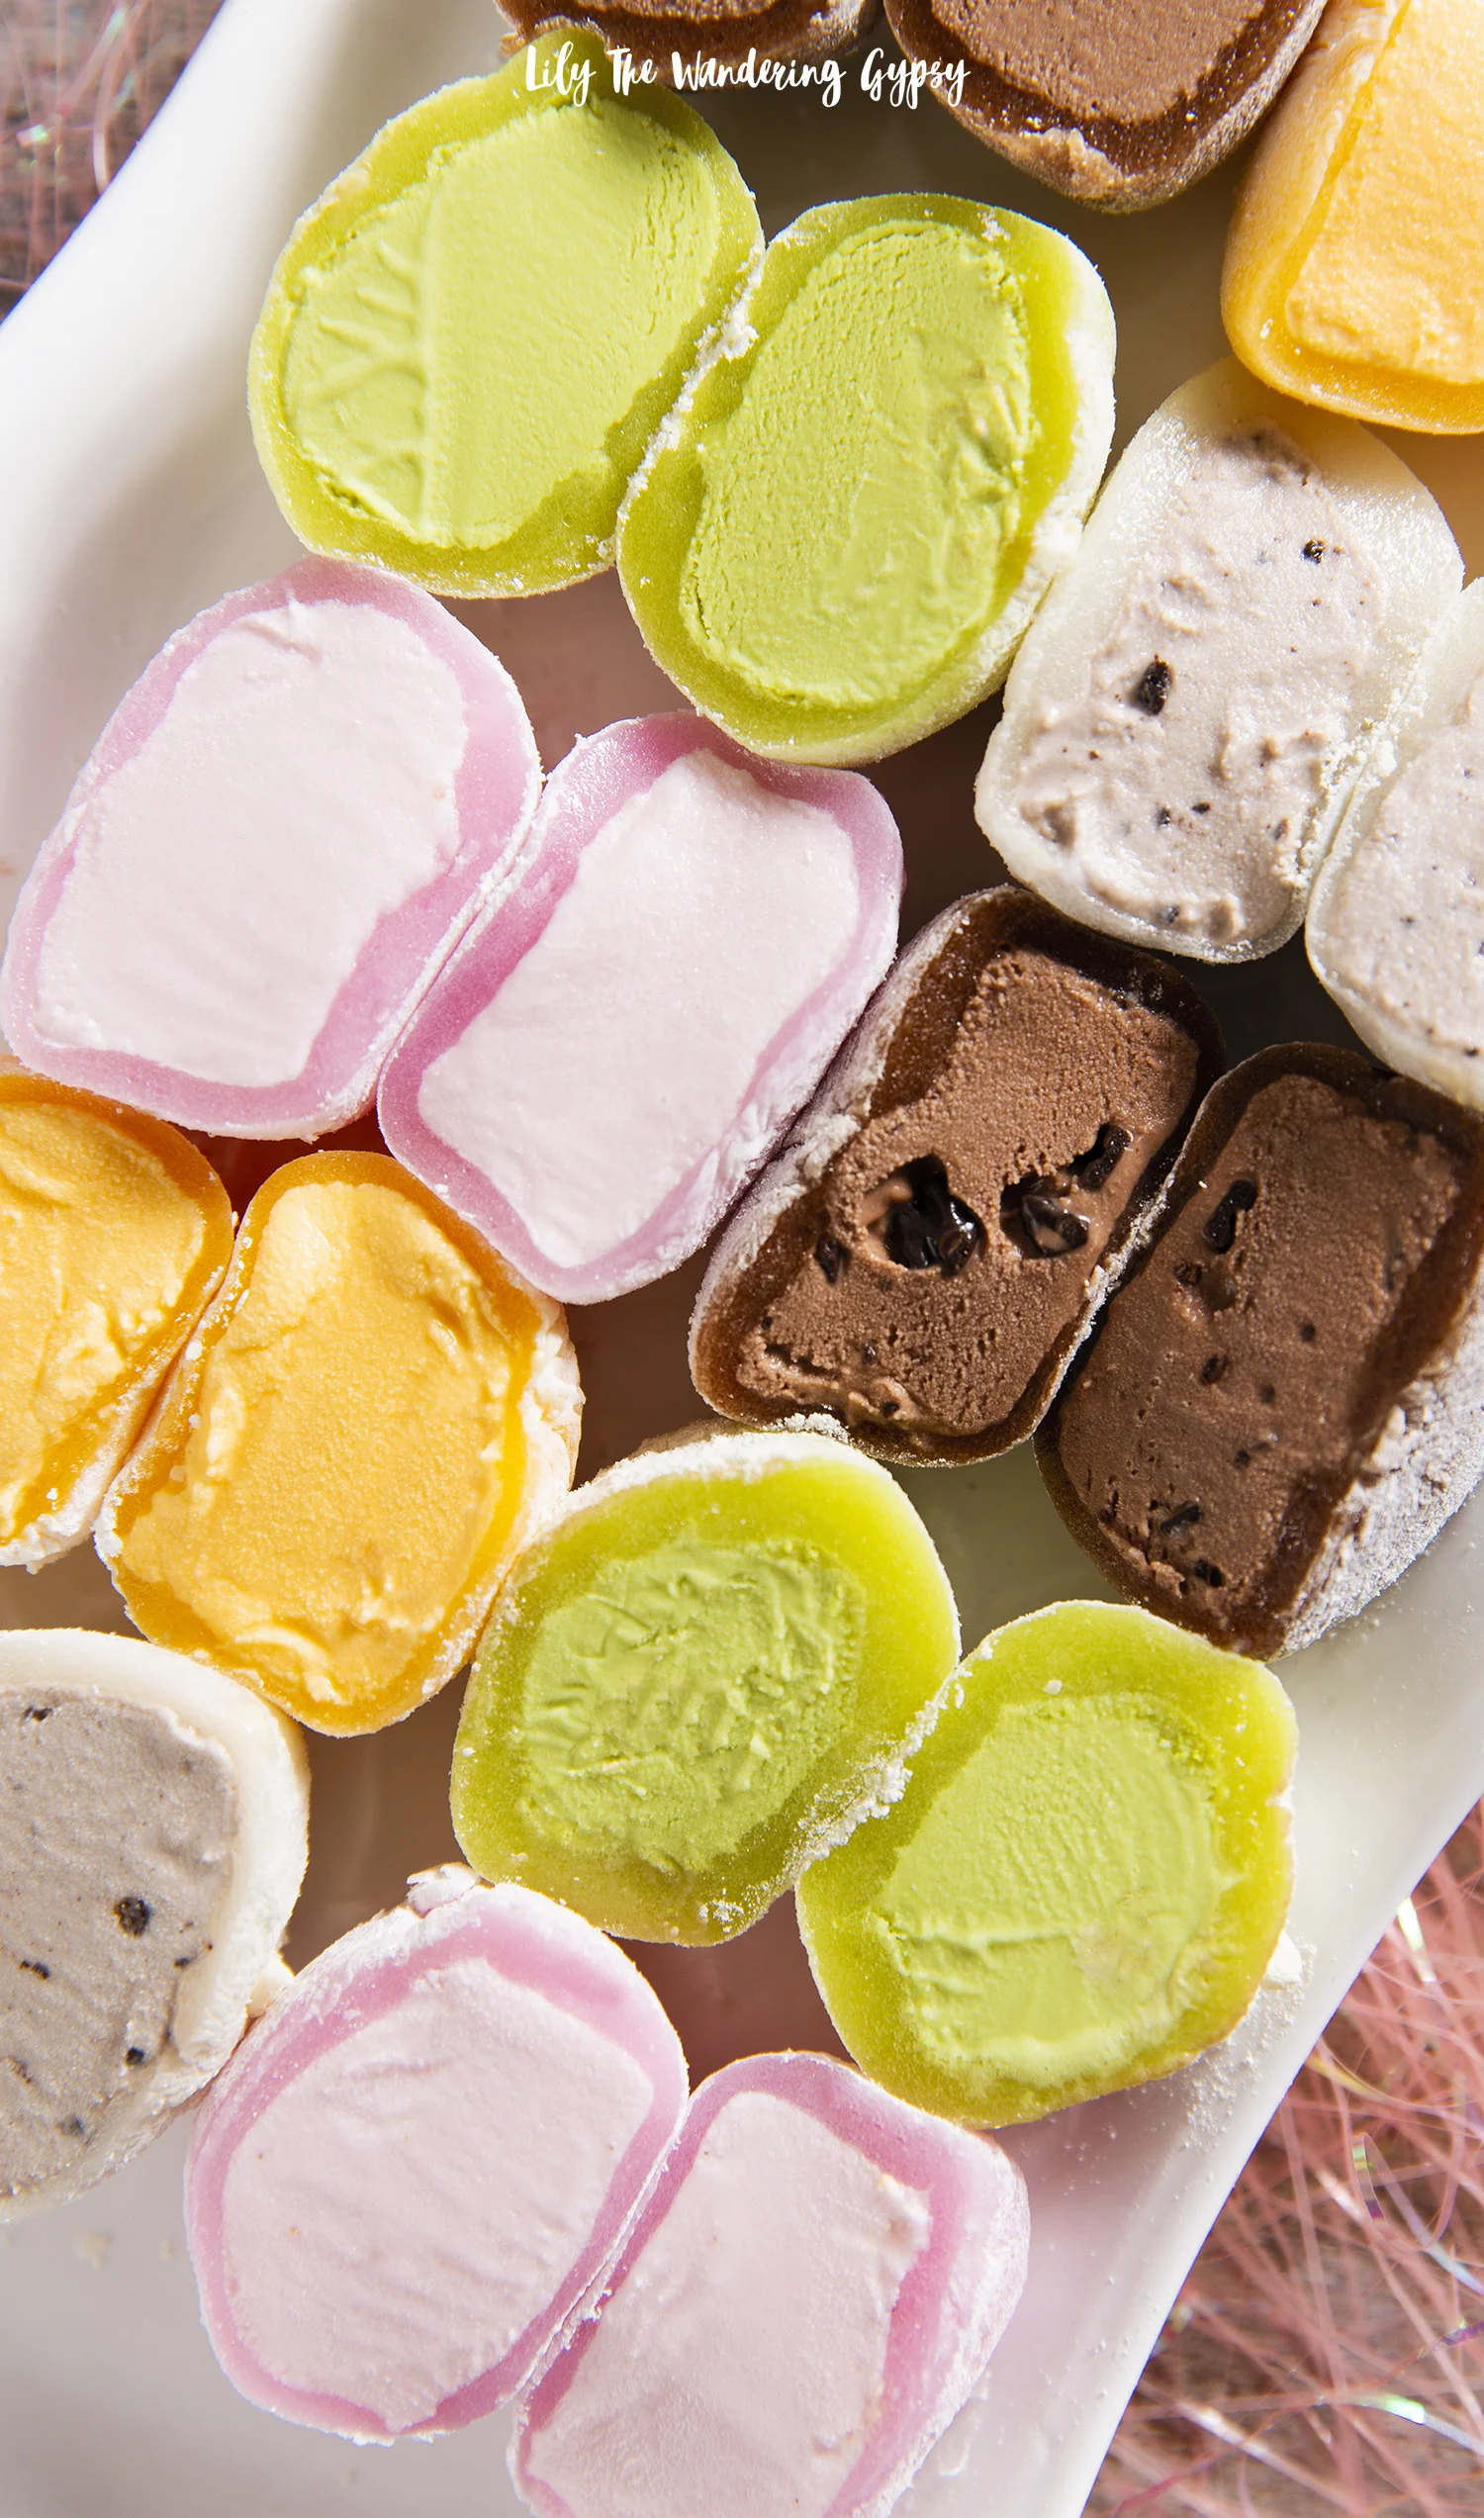
Everyone who I tell about this My/Mo Mochi Ice Cream is always so interested to try it. With flavors like strawberry, mango, green tea, cookies and cream, double chocolate, and more, everyone will find a flavor they love. My personal faves are always fruit, so I adore the strawberry and mango flavors.

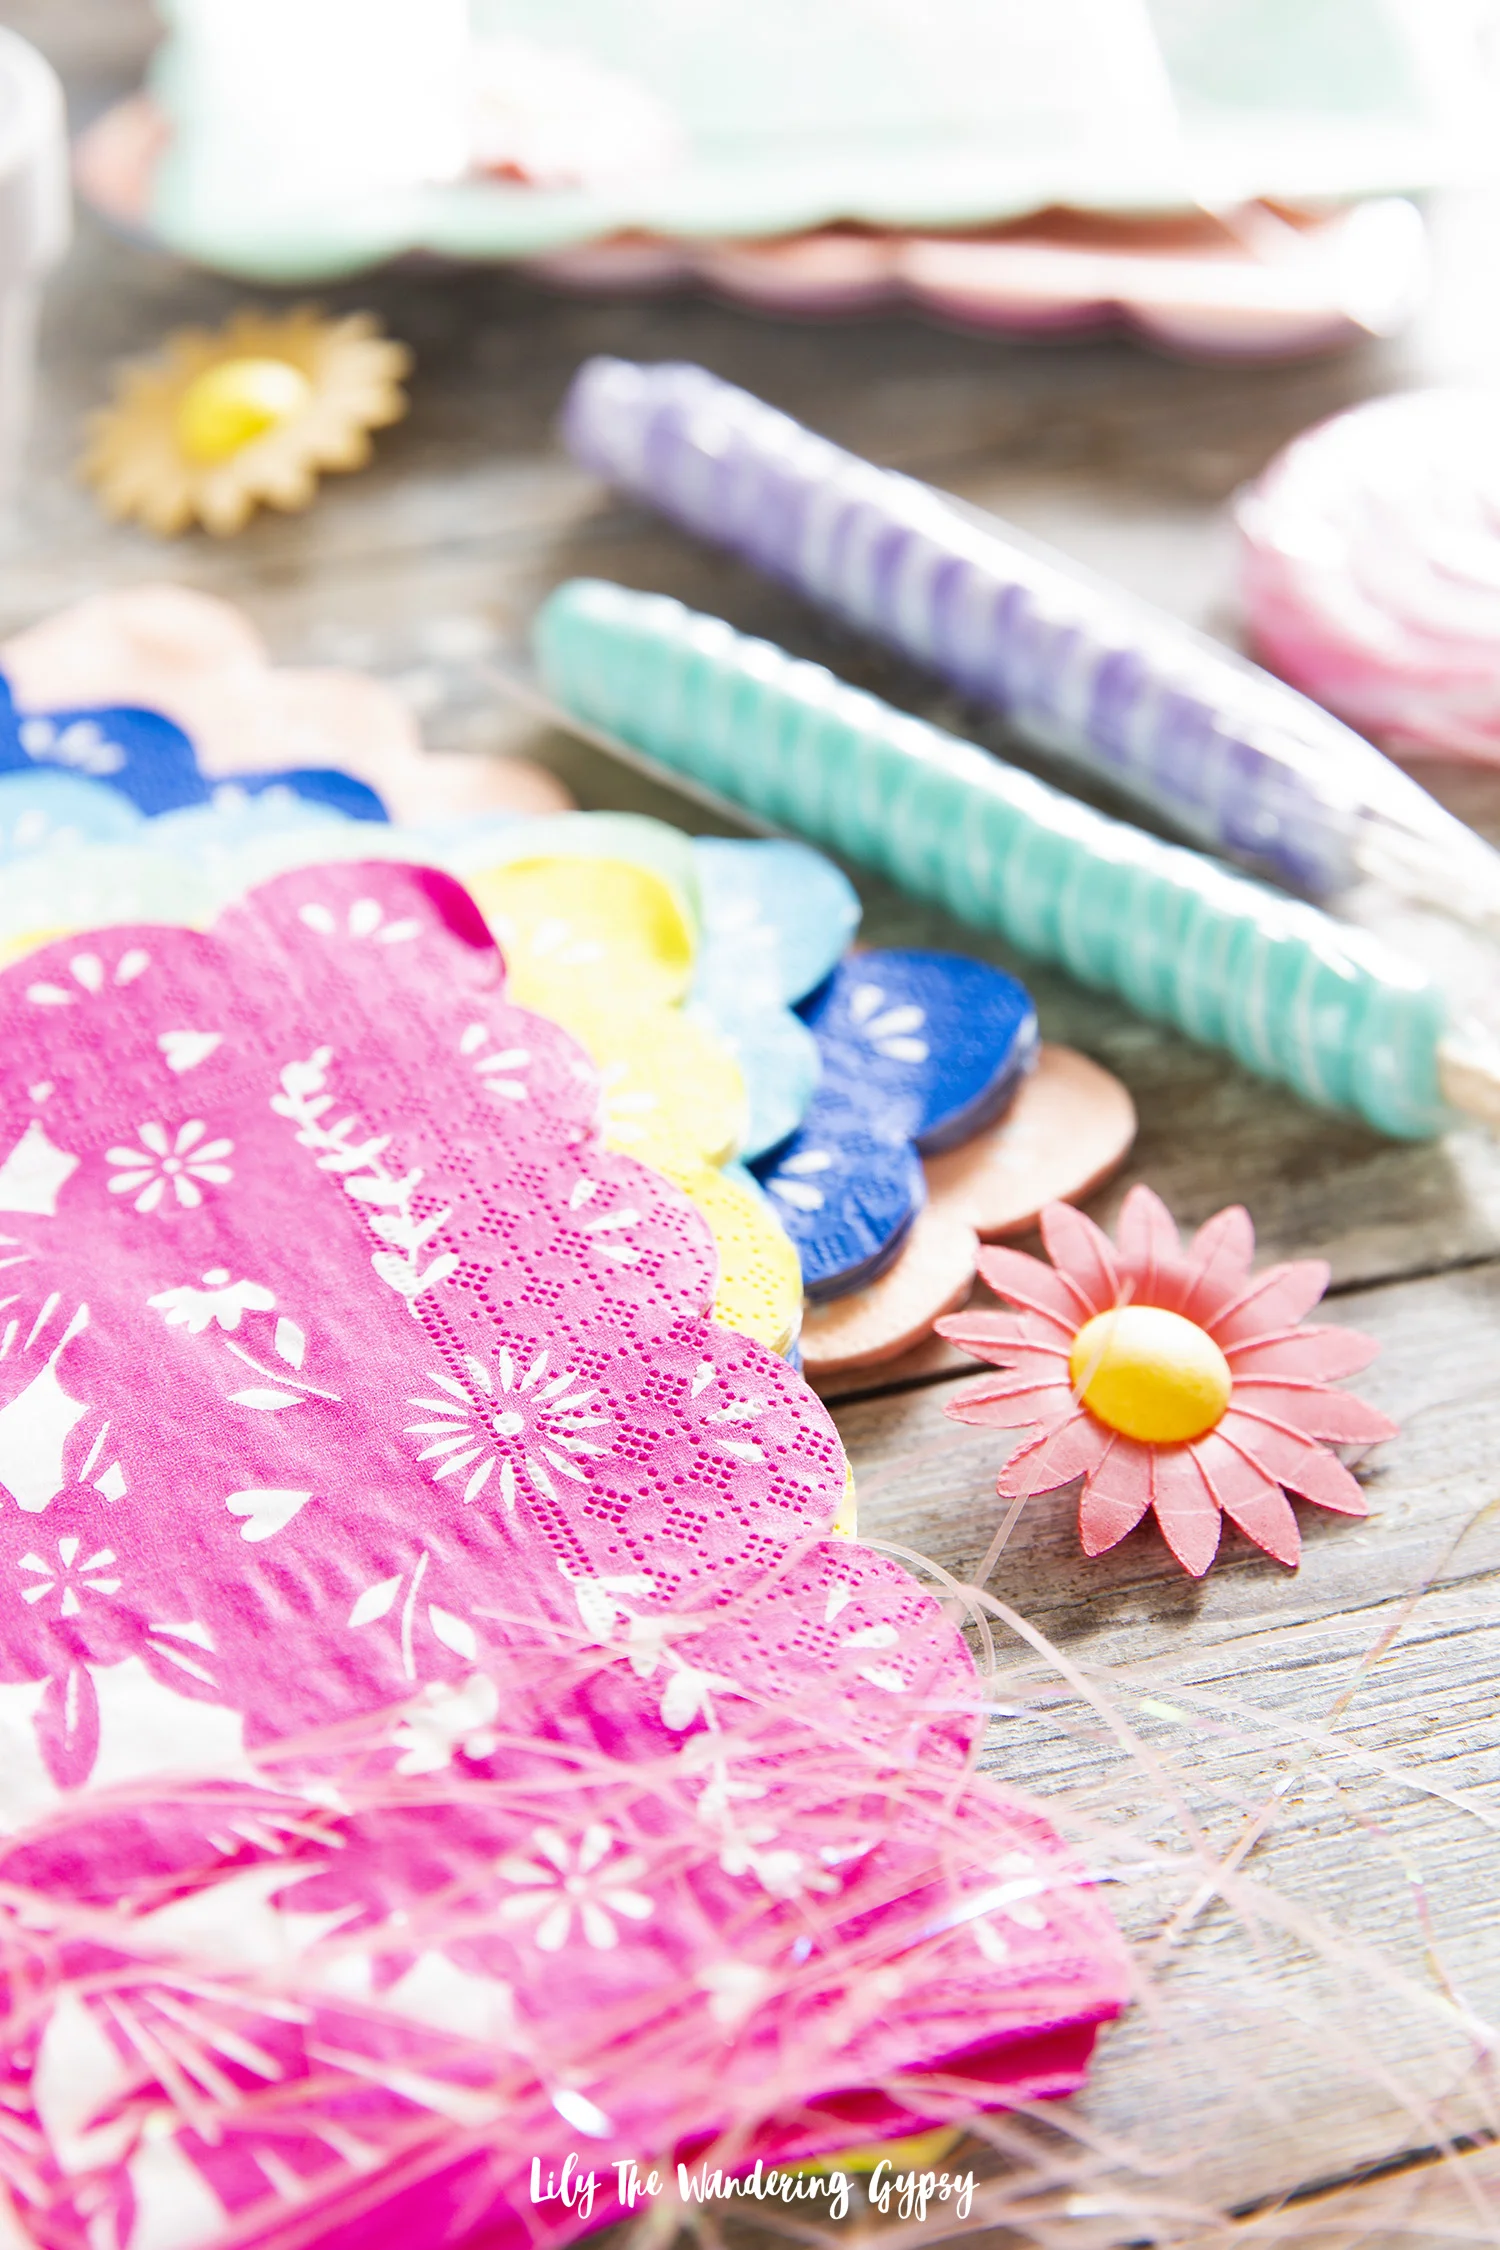
I also found these incredible napkins from Meri Meri at TJMaxx, which I have had my eye on for a while now :) 

The flowers are actually edible wafer flowers that I found at Party City.

Prepare a platter of My/Mo Mochi Ice Cream ahead of time, for your Cinco de Mayo celebration, save it in the freezer, and after dinner is winding down, grab the My/Mo Mochi Ice Cream and watch everyone smile! People love having all of those flavor options, too. 

Below, I cut each piece of My/Mo Mochi Ice Cream open with a sharp knife. Make sure to only cut one piece at a time, and put it back into the freezer right away if you want it to hold its shape.

MY FAVORITE FLAVORS:

Sweet Mango

Take an instant trip to tropical delicioustown with Sweet Mango My/Mo Mochi Ice Cream! The tangy and sweet taste of premium mango ice cream combined with mouthfuls of mochilicious dough gives your cravings their own craving. Sweet mango My/Mo – the perfect, handheld getaway.

Ripe Strawberry

Bite into the center of Mmmm. Made with real fruit, and bursting with sweet bits of strawberry love. Premium strawberry ice cream is wrapped in a pillowy layer of chewy mochi dough. Discover an entirely new experience around your favorite ice cream flavor.

HISTORY OF MOCHI FROM MY/MO MOCHI:

"Creating Mochi, the Fusion Dessert Sensation"

In the 1990s, the predecessors to My/Mo created mochi ice cream in its modern form. With a secret family recipe in their arsenal, they had the brilliant idea of wrapping delicious mochi dough around dollops of real ice cream. Over twenty years later, mochi is widely available across the United States. in modern flavors like sweet mango, ripe strawberry,  mint chip and double chocolate, mochi ice cream has become America’s favorite handheld frozen treat.

Connect with My/Mo Mochi Ice Cream on Instagram and find a retailer near you!

Festive Chocolate Bark Recipe

A deliciously sweet and festive treat that only takes a few minutes to create! You will absolutely love how great the flavors of the white chocolate and dark chocolate meld together to satisfy your sweet tooth. Customize the colors and decorations to suit your holiday, team colors, or other special occasions!

INGREDENTS:

1 bag of dark chocolate chips (I used a darker chocolate from Ghiradelli)

1 bag of white chocolate chips (I like Ghiradelli white melting wafers) 

Sprinkles of your choice (At least 3 Tablespoons or more)

INSTRUCTIONS:

Melt dark chocolate either in the microwave or a double boiler. Line a baking sheet with parchment paper and pour chocolate on. You can smooth it with a spatula to the thickness you desire. Stick in the freeze for 20 minutes.

Melt while chocolate.  Let it set for 3 full minutes (or at least until it slightly thickens). Remove baking sheet with chocolate from the freezer and immediately pour white chocolate on top. Sprinkle on sprinkles. Freeze for 20 minutes.

Once set, break into pieces with your hands (or rubber gloves). Keep refrigerated.

Tres Leches Cupcakes Recipe

These deliciously moist tres leches cupcakes are a new take on a traditional Mexican dessert recipe. 

I was extremely happy with how these Tres Leches Cupcakes turned out. Just as delicious as the traditional Tres Leches Cake, but more easily handled at a party or shower. 

Tres Leches Cake (Recipe originally posted here on the Tastes Better From Scratch Blog)

Prep Time: 1 hr 30 mins  //  Cook Time: 40 mins  //  Total Time: 2 hrs 10 mins

Ingredients

  • 1 cup all-purpose flour
  • 1 1/2 teaspoon baking powder
  • 1/4 teaspoon salt
  • 5 large eggs , separated
  • 1 cup sugar , divided
  • 1/3 cup whole milk
  • 1 teaspoon vanilla
  • 12 oz can evaporated milk
  • 14 oz can sweetened condensed milk
  • 1/4 cup whole milk
  • Metallic cupcake holders (silicone ones would work well too) - paper cupcake liners will not work for this recipe.
  • Alternately, use a 9"x13" cake pan

For the whipped topping:

  • 1 pint Heavy Cream , for Whipping
  • 3 Tablespoons Sugar
  • 1/2 teaspoon vanilla
  • ground cinnamon , for topping

Instructions

  1. Preheat oven to 350 degrees F. Add foil cupcake liners to tin or alternately, lightly spray a 9x13'' pan with non-stick cooking spray.

  2. In a medium bowl combine flour, baking powder, and salt in a large bowl. Separate the eggs into two separate bowls.

  3. Add 3/4 cup sugar to the bowl with the egg yolks and mix on high speed until yolks are pale yellow. Add the 1/3 cup milk and vanilla and stir to combine. 

  4. Pour the egg yolk mixture over the flour mixture and stir gently just until combined (don't over-mix).

  5. Use electric beaters to beat the egg whites on high speed. Gradually add the remaining 1/4 cup of sugar as you mix and continue beating until stiff peaks.

  6. Fold egg whites into the batter gently, just until combined. Pour batter into prepared pan(s). If making cupcakes, fill batter about 2/3 full, if making a cake, make sure to smooth batter into an even layer so your baked cake doesn't have divots in it.

  7. Bake cupcakes for 15-20 minutes, or bake cake for 35 to 40 minutes, or until a toothpick inserted in the center of the cake comes out clean. Remove from the oven and allow cake(s) to cool completely.

8. Combine the evaporated milk, sweetened condensed milk, and whole milk in a small bowl. Once the cake has cooled use a wooden skewer to poke holes all over the top of the cupcakes or cake. 

9. Slowly pour the milk mixture over the the top of the cupcakes - Make sure to poke LOTS of holes into cupcakes, or milk mixture will fall over the sides. Pour slowly to avoid overflow, and you will want to soak the cupcakes 2-3 times each. The foil cupcake liners help a lot here, so the milk stays in the liners, making sure to pour near the edges and all around.

10. Refrigerate the cupcakes or cake for at least 1 hour or overnight, to allow it to soak up the milk.

11. In the meantime, whip the heavy cream, sugar and vanilla until stiff peaks. Smooth over the top of the cake or cupcakes. Optionally, sprinkle cinnamon on top. Serve with fresh sliced strawberries or raspberries, if desired. Enjoy!

This was the first recipe where I made successful, homemade whipped cream and have never looked back since!!! 

Mini Cinnamon Rolls with Puff Pastry Recipe

This post was sponsored by Pepperidge Farm® Puff Pastry. All thoughts and opinions are my own. #InspiredByPuff

Puff Pastry adds a unique twist to recipes. It’s light and airy, and also a bit crispy, and you’ve likely never had cinnamon rolls like these before! After you eat these cinnamon rolls, you will never want to go back to the pre-made ones. This more homemade version can also be made (prepared and sliced) ahead of time, then baked just a few minutes before needed. Check out this delicious recipe for crispy, crunchy cinnamon rolls with an ooey gooey center. They’re perfect for brunch, holidays, and everyday meals!

If you’re seeking new and innovative recipes, try incorporating Pepperidge Farm® Puff Pastry Sheets! They add an elegant touch and a very upscale taste to nearly any dish you can imagine.

One of my favorite ways to connect with friends and family is through food. I enjoy creating special treats for these people, and when I use Puff Pastry, I feel like I am providing a meaningful experience as well as a valued connection. If you’re someone who likes to plan ahead and make that extra effort to offer food that is a little bit more elevated (yet still simple), this recipe would be perfect for you! The crispy, flaky outer layer comes from the light and flaky texture of the Puff Pastry, while the interior of the cinnamon rolls stays soft and warm. I chose to use Puff Pastry in this recipe because it’s the most delicious ingredient I can incorporate without being too overly complicated. This recipe is delicious beyond words.

Also, since this recipe uses only a few ingredients, it’s great for a last minute treat too. The Puff Pastry Sheets do need to be thawed, so that would be the only other prep work required. I always make sure to have 1-2 packages of Puff Pastry in the freezer, because it makes life easy! Not only will your creations turn out beautifully, you know that the versatility of Puff Pastry means that it’s a top choice for just about any occasion.

INGREDIENTS:

(Makes 9-10 cinnamon rolls, or more if you slice them thinner):

(For The Dough)

½ Package of Pepperidge Farm® Puff Pastry Sheets, thawed*

*To that at room temperature, remove the pastry sheets from the box and outer wrapping; thaw for no more than 40 minutes. To thaw in the microwave, remove 1 pastry sheet from the box and outer wrapping and wrap in a paper towel; microwave on HIGH for 15 seconds, turn it over and repeat!

(For The Cinnamon Filling)

½ cup butter

1-2 tbsp. cinnamon

½-3/4 cup brown sugar

(For The Icing)

1 tsp. maple syrup

1 tbsp. milk or cream

¾ cup powdered sugar

INSTRUCTIONS:

  1. Preheat oven to 375 degrees, and open your Pepperidge Farm® Puff Pastry Sheets. Grab one of the sheets of Puff Pastry, and save the other one for later in a gallon size zip top bag. Prepare your mini muffin tin by spraying it with non-stick spray, then spread with paper towel to disperse evenly.

  2. On a board covered with parchment paper, place the dough, and pinch any seams/folds together so they are as flat as possible. You can also use a rolling pin during this step.

3. Using a silicone or wooden spatula, spread a thin layer of the cinnamon, brown sugar, and butter spread as evenly as possible. Make sure you do not go all the way to the edges, to prevent a mess.

4. Use both hands to carefully and evenly roll the sheets into a “log” shape. For best results, freeze the log for about ten minutes.

5. Using a sharp knife, carefully make marks ¾” apart, then cut slices from the log. Try to keep the slices as round as possible. If the dough log becomes soft during cutting, then place it back into the freezer for 5-10 minutes and cut the rest of the slices.

Note – if you want to make more cinnamon rolls, simply cut thinner slices from the dough and bake for 5 less minutes.

6. Place each slice into the prepared muffin tin, and bake (on top of another baking sheet to prevent butter from spilling out when baking) for 15-18 minutes, until outer pastry is golden and puffy (not wet or doughy).

7. Once cinnamon rolls are baked, carefully remove them from the muffin tin with a fork, and place on plate to serve.

8. Make your icing while they are baking, by combining powdered sugar, maple syrup, and milk in a bowl and stirring with a spoon until smooth.

9. Drizzle icing onto cinnamon rolls and enjoy!

Learn more about Pepperidge Farm® Puff Pastry Sheets and connect on social!

Facebook: @Pepperidge Farm Puff Pastry

Twitter: @PFPuffPastry

Instagram: @pfpuffpastry

Pinterest: @puffpastry

Hashtag: #InspiredByPuff


YOU MAY ALSO LIKE THESE RECIPES…

Apple Pie Pizza Recipe

Easy Holiday Meal Idea

Pumpkin Oat Dog Treats

Creamy Tomato Basil Soup

Veggie + Prosciutto Sandwich Recipe (Healthier Lunch Idea)

Sometimes you just want a deliciously decadent and healthier sandwich! Here is a delicious recipe that could even be made without the prosciutto to make a vegetarian sandwich too. Loaded with goat cheese, vegetables, and all sorts of toppings, this sandwich is sure to please!

INGREDIENTS:

- Whole Grain Bread of choice (4 slices)

- Goat Cheese Crumbles (3-4 Tablespoons)

- Red Pepper Slices (We used 1/8 of a red pepper, cut into slices)

- Pickled Red Onions (get our recipe here)

- 1/3 of a Jalapeno - sliced very thinly

- Seasoning like salt and pepper

- Panini Maker (we love this one from Cuisinart, which has removable, dishwasher-safe plates)

INSTRUCTIONS:

1. Add a layers of ingredients onto each piece of bread. One side has dijon mustard and prosciutto, the other side has red peppers, pickled red onions, goat cheese crumbles, and also slices of jalapeno, and optional seasoning (like a pinch of salt and pepper). Turn on panini maker

2.) Carefully close sandwich sides together, and place into panini maker. Toast for 3 or so minutes, to ensure the bread does not burn, but that the cheese is nice and melty inside. Remove from panini maker with a spatula, cut in half, and ENJOY!!!

Note - this panini maker heats up pretty quickly, so there is no need to preheat for more than a few minutes. Also, make sure that the plates are sitting flat on your sandwich, compared to sitting at an angle, so the entire sandwich cooks evenly.

CUISINART PANINI MAKER, NOW ON SALE AT MACY'S!

Dressed to grill. This panini & griddler in one brings the best of all worlds straight to the convenience of your countertop. Opening flat to double the cooking surface, this commanding essential features preset temps for grilling everything from burgers to steaks to sandwiches. Plus, this smart cooker puts health first—the front feet adjust to increase the amount of grease drained away from food. Model GR-11.

  • Dimensions: 12.8" x 10.9" x 6"
  • Power on & ready-to-cook indicator lights
  • Removable nonstick grill plates measures 10 1/4" x 6 1/2"
  • 3-year limited warranty
  • Brushed stainless steel
  • Dishwasher safe plates

Soft Batch Iced Pecan Cookies Recipe

These Soft Iced Pecan Brown Sugar Cookies are absolutely delightful! They retain so much of their softness and the added pecan on top adds a natural crunch that really makes these cookies incredible. Good luck eating just one!

INGREDIENTS:

(Makes about 20 cookies)

FOR THE COOKIES:

  • 2 cups (283g) all-purpose flour(scoop and level to measure)
  • 1/2 tsp baking soda
  • 1/2 tsp salt
  • 1 cup (226g) unsalted butter, softened
  • 1 cup (210g) packed light brown sugar
  • 1 large egg
  • 1 tsp vanilla extract
  • 1 cup pecans, toasted, cooled and chopped into bits 
  • 20 extra toasted pecans to top cookies (save the pretty ones for the tops)

Note - to toast your pecans, either place them onto a skillet on medium heat for about 6-7 minutes (see below), or bake them in the oven while oven is preheating - check at 5 minutes, then every 2 minutes after so they do not burn! 

FOR THE ICING:

  • 1 tsp vanilla extract
  • 1 1/2 Tbsp cream
  • pinch salt
  • 2 C. powdered sugar (or more for thicker icing)
  • 4 oz (1/2 Cup) cream cheese at room temperature

INSTRUCTIONS

1. Preheat oven to 350 degrees, and in the bowl of a stand mixer, beat butter and sugars until they are light and fluffy. Add egg and vanilla and beat until combined. 

2. Add sifted flour, baking soda, and salt, and beat again until just combined. Lastly, add chopped pecans and stir by hand until incorporated. 

3. Shape 1" round balls of dough, and bake for about 10-12 minutes, until centers of cookies are fully cooked and edges begin to brown. (The tops will not be shiny anymore). Bake closer to ten minutes if you want softer cookies.

4. Meanwhile, make frosting and get ready to decorate cookies. Let cookies cool completely, then use a spoon to layer on a circle of icing. The icing was super smooth and easy to work with. Top each cookie with a pecan right after icing them. Enjoy!

I'm so happy with how these cookies turned out...

Ombre Oreo Cake Recipe with New COOL WHIP Mix-Ins, Oreo

This post has been sponsored by COOL WHIP. All thoughts and opinions are my own.

Oreo is one of my favorite flavors of all time. I would always go for a cookies and cream cone in a store with a million flavor options. I was extremely excited to be able to create a decadent, three layer ombre cake to show my love for all things Oreo!

FULL VIDEO INSTRUCTIONS:

Two iconic foods – COOL WHIP and Oreo are mixing together for the ultimate dessert! I am considering this my new “secret ingredient” because it tastes like something that an upscale bakery would use. Everyone who tries this cake is definitely going to ask what makes it taste so delicious and unique.

If I had created this layer cake with traditional icing, it would be very heavy and not anywhere near as delicious. The light, airy texture of new COOL WHIP Mix-

Ins, Oreo makes you feel like you can indulge a little without the calories.

I was extremely impressed with this product, it’s going to become a staple ingredient in my home!

The Oreo Mix-Ins worked so well to add the finishing touches to my cake – I used an icing bag fitted with a star tip and added little dollops around the bottom of the cake. Next, I added a few dollops on top and finished with a mini Oreo cookie! What a perfect homage to my favorite cookie ever!

This cake reminds me so much of the birthday cakes that my grandparents would treat me to each year as a child. They came from an Italian bakery in the Chicagoland area, and was something I looked forward to each year, and now I can nourish that tradition in my own family and friends. I am seriously excited for whichever one of my friends has the next birthday because I cannot wait to make another one of these cakes already.

I hope you enjoy this cake as much as I did. This cake tastes like it was made from scratch, when in reality, this cake took just around an hour to make!

OMBRE OREO CAKE

PREP TIME: 30-40 minutes

TOTAL TIME: 1 hour – 1.5 hours depending upon decorating time

INGREDIENTS:

3-4 containers of COOL WHIP Mix-Ins, Oreo (found at Walmart or your local retailer)

1 box of white cake mix, plus ingredients to make cake

1 box of Devil’s food cake mix, plus ingredients to make cake (use the same brand for both)

Mini Oreo cookies to decorate cake

OTHER MATERIALS:

3 round cake pans

Hand Mixer

Parchment paper, cut into circles to fit into round pans

Rotating cake decorating stand

Flat icing spatula

Icing Bag + Large Star Icing Tip

INSTRUCTIONS:

  1. Bake cakes. To create the ombre effect, I mixed up both of my cake mixes according to the packages, then added 3 cups of vanilla batter to one pan, 3 cups of chocolate batter to another pan, then in my third pan, I swirled the remaining batters. It created a gorgeous middle layer. I made sure to use two cake mixes of the same brand so that they contained the same ratio of ingredients for each layer.

  2. Once cakes have completely cooled, carefully slice the cakes so they are flat on top (they tops will have rounded during baking). I used a serrated bread knife and it worked super well.

3. Remove the paper from the first layer, and place the chocolate layer onto the cake stand, upside down. Cover that layer with ½-1 container of Cool Whip Mix Ins Oreo. Smooth out the Oreo Mix-Ins and place the second “swirled” middle layer onto that. Again, cover the top of the second layer with Oreo Mix-Ins, then place the vanilla layer on top UPSIDE DOWN, to ensure a flat cake on top. Note – when I first opened the product, it had a lot of fluffy light texture. Once I stirred it and started icing the cake with it, the COOL WHIP got a lot smoother.

4. Cover the top of the cake with a smooth layer of Oreo Mix-Ins, then add a thin layer to the entire outside of the cake, smoothing several times with the icing spatula. Make sure this layer is as smooth as possible, then place cake into freezer for around 1 hour.

5. Time to decorate the cake! Using that same delicious COOL WHIP Mix-Ins, Oreo as before, pipe little shapes along the entire bottom of the cake. Make sure to keep as consistent of shapes as you can.

6. Lastly, add dollops of icing swirls around the top of the cake (I did 8 total), and add mini Oreo cookies on top. I also added one larger dollop in the middle of the top of the cake and it all turned out so well!

I was SO happy to see how the layers stayed perfectly together with the help of the Cool Whip Oreo layers. I am thrilled to share this recipe because it’s practically fool proof.

Thank you so much for taking the time to check out this recipe. I hope it has inspired you! This cake would be perfect for birthdays, Mother’s Day, Father’s Day, graduation parties, and even just because!

Learn more about this wonderful new COOL WHIP Mix-Ins,Oreo here and retailers near you carrying it, and connect with COOL WHIP on social!

FACEBOOK

INSTAGRAM

PINTEREST

Honey Butter Pecan Swirl Cookies Recipe

#FlavorYourSpring with Nestlé® Coffee-mate® Creamers, and you'll be so happy with your Springtime creations! Imagine the all natural flavors of vanilla and pecan, with a touch of sweetness is added with honey.

These cookies taste like real pecans, and they're so light, crunchy, and delicious. They're in fact, very addictive too! You're going to love them! I loved how easy it was to infuse these cookies with pecan flavor thanks to the Coffee-mate® natural bliss® creamer without having to add pecan flour or chopped pecans. 

INGREDIENTS (COOKIES):

·       2 sticks unsalted butter, at room temperature (1 cup/8 ounces)

·        1 cup confectioner's sugar (4 ounces by weight)

·        1 teaspoon vanilla extract

·        2 cups all-purpose flour (10 ounces by weight)

·        1/4 teaspoon salt

·        2 tbsp Coffee-mate® natural bliss® Creamer in Pecan

INGREDIENTS (ICING):

·       1 cup confectioners sugar

·       2 tbsp + 2 tsp Coffee-mate® natural bliss®  Coffee Creamer in Pecan

·       sprinkles + large star shaped icing tip

INSTRUCTIONS:

1.     Preheat the oven to 350 degrees F.

2.     Place the butter, confectioner’s sugar and vanilla in a large bowl, and beat with an electric mixer until it looks combined, light, and fluffy. Add the flour and salt, and mix until it’s crumbly and looks like it can’t be mixed more. Add the creamer, then keep mixing, and the dough should clump together after about 1 minute of mixing.

3.     Place the dough into a pastry bag fitted with a very large star tip, and pipe onto a parchment paper lined baking sheet. Depending upon the size of your star shaped pastry tip, this will determine whether you can have 12 or 18 cookies per sheet. Bake the cookies for 10-12 minutes or until lightly golden.

4.    Let the cookies cool completely, and feel free to make yourself some icing with the confectioners sugar and creamer. I preferred to make my icing more of a glaze, so it's pretty thin, to allow the beauty of the shape of the cookie show through. 

Use Spring or Easter colored sprinkles and candies to decorate your cookies if you like, and enjoy!

Learn more about all the Nestlé® Spring Lineup of Easter candies, new coffee creamers, and more, here!

Top Travel Snack Ideas for Road Trips with Nonni’s!

A special thanks to Nonni's Artisan Cookies for sponsoring this post.

Spring and Summer are popular times to travel, and if you’re hitting the open road this season, here are a few of our favorite Top Travel Snacks for Road Trips, and how to pack those snacks like a champ. Bringing a variety of deliciously convenient and interesting foods can make a road trip run more smoothly to avoid frequent stops for fast food.

Nonni’s new Chocolate Chip Artisan Thin Cookies are going to be the star of our next road trip, and since the cookies come in individual portion packs of three cookies each, they make amazing road trip snacks. I like the convenience of the packs, and wow, the brand isn’t kidding when they talk about how addictive their new Double Chocolate and Almond Chocolate Artisan Thin Cookies can be. They are superbly crunchy, have a wonderful taste and aroma, and are going to make this year’s travels a whole lot sweeter!

If you’re a regular reader of my blog, or even new to my blog, you will see that we are incredibly inspired by travel. My boyfriend and I have been together nearly 13 years, and we absolutely love to travel to places all over the country together – especially by car!

We road trip for many reasons, first and foremost, so that we can take our dogs, and also because we love the freedom to pack whatever we want in the car with us. Having everything with us always makes traveling easier and we love stopping off at a picnic area or rest area to have a snack or lunch al fresco. The below make great options for that break when you’re on-the-go!

LEARN MORE ABOUT NONNI’S COOKIES HERE:

Almond Chocolate (http://nonnis.com/chipthinaddictives/almond-chocolate/)

Double Chocolate (http://nonnis.com/chipthinaddictives/double-chocolate/)

TOP ROAD TRIP SNACKS

Nonni’s Chocolate Chip Artisan Thin Cookies

These cookies taste delicious and they satisfy my sweet tooth while I’m on the road. They’re unique because they’re made with real ingredients like 55% cacao, whole almonds (in some varieties), and coconut oil. Each box contains six convenient portion packs of three cookies that average 100 calories each.

The individual cookie packs also ensure freshness, compared to opening a whole box or bag of cookies that might go stale that same day.

Pita Chips and Hummus

This is one healthy snack that I find to be easy to eat in the car, and is way more satisfying than stopping through a drive through!

Veggies and Ranch Dip

Use half pint mason jars to contain ranch dressing or ranch dip in one, then, add vegetables like chopped broccoli, rainbow carrots, celery sticks, cherry tomatoes, and more in other jars.

It’s always fun to have a few assorted candies, in their individual jars. This will also severely reduce the need to make a candy run at the gas station. Also, chocolate tends to melt in the car, no matter if it’s winter or summer in our experience. Choose candies that are more fruity like gummies or jelly beans.

Almonds or Mixed Nuts

The satisfying crunch of almonds or mixed nuts can be very perfect for a road trip! I love how the Nonni’s cookies have almonds and chocolate chips in them. Oh my, they’re good!

The great part of using glass jars for snacks is that they hardly ever leak  and keep ingredients fresh. We store them in our cooler and the jars are great to have a picnic on the road, or enjoy once you get to your hotel or destination

If you’re heading anywhere fun this year, please let me know in the comments below! I also love to live vicariously through other people’s travel photos, and I hope you all have something super fun planned this year!

If you loved this post, PIN IT FOR LATER...

5 Ingredient Super Moist Pistachio 7UP Layer Cake with Pistachio Frosting Recipe

This shop has been compensated by Collective Bias, Inc. and its advertiser. All opinions are mine alone. #JustAdd7UP

Looking to create a delicious pistachio themed dessert for St. Patrick’s Day and beyond? I have a fun and unique idea for you that looks super elegant but only took a little bit of time to create. This would also make an excellent cake for a birthday, Mother’s Day, Father’s Day, other holiday, or just because! In fact, I will be making another one tomorrow evening for a friend’s birthday and she is SO excited!!

I was honored when 7UP asked me to create something special for a holiday that means everything to me. My late grandmother, Pat, was born on St. Patrick’s Day and was one of my very favorite people in the whole wide world. She taught me lots of her recipes and I use several of them quite regularly, and I think of her all the time. She instilled such amazing values on me, and I love her so very much! So, with her in mind, and the luck of the Irish on my side, I present you with this Super Moist Pistachio 7UP Layer Cake with Pistachio Frosting. It’s quite possibly the MOST delicious creation on Earth!

It’s really quite impressive that the base of this cake contains only 5 ingredients, one of them being a can of 7UP. This versatile ingredient adds a lot of moisture to the cake, and with the homemade frosting on top, the two flavors mesh together just perfectly.

If you like pistachio, then you are going to LOVE this delicious and easy-to-create cake! It turned out very elegantly too, which I was very happy with! I didn’t use any super special decorating tools, which made things even easier.

Luckily, I was able to grab all of my supplies at Walmart (I always love when life is easy!)

CAKE INGREDIENTS:

Serving Size: 8-10, Prep Time: 25 Minutes, Total Time: 1 hour 25 Minutes

1 can 7UP®

1 box of vanilla cake mix

1 (3.4 oz) box of pistachio pudding mix

3 eggs

1 cup Vegetable Oil

FROSTING INGREDIENTS:

1 (3.4 oz) box of pistachio pudding mix

8 oz softened cream cheese

½ cup softened butter (1 stick)

5 Tbsp milk

5-5 ½ cups powdered confectioners sugar

1 Tbsp vanilla or almond extract


INSTRUCTIONS:


  1. To make the cake, preheat oven to 350 degrees F. Grease two 9” round pans with non-stick spray and add a circle of waxed paper or parchment paper to the bottom of each pan. Spray the paper circle, then add a little bit of flour to your pans. Use your fingers to help move the flour around and coat the pans, and knock out any excess flour.

  2. In a large bowl, combine all cake ingredients and mix on medium to high speed for 4 minutes. Scrape sides of mixing bowl at 2 minutes.

3. Using a measuring cup, add half of the batter to each cake round. Bake for 30-35 minutes, or until cake springs back when you press onto it.

4. While the cake is baking, make your icing. In a large mixing bowl, first add pudding mix, then butter, cream cheese, and vanilla or almond extract. Beat with a mixer until smooth.

5. Now, to finish your icing, add powdered confectioner one cup at a time, first folding it in with a spoon, then mixing with your mixer so sugar doesn’t fly everywhere. Lastly, add 4-5 Tbsp of milk to begin to thin your icing. Once it’s at your desired consistency, set aside.

6. Once cakes have completely cooled, remove them from the round pans, remove the paper off of the cakes, and add feel free to even out the tops of the layers very carefully with a sharp knife.

7. Add icing to one layer of the cake, smooth into an even layer, then add the second cake round on top. Lastly, cover the top and sides of the cake with a smooth layer of icing with a silicone spatula. Lastly, feel free to use an icing tip or icing in a zip top bag with the corner cut off to draw more designs and textures to the top of the cake. Finish the cake with pistachio pieces around the sides and sprinkled on top! Enjoy!

If you are lucky enough to create this recipe, I would absolutely LOVE to see what you make! Tag me on Instagram as @happysolez, or share the link in the comments below to let me know how it turned out. And, if you have any questions, leave them below too.

Beer Cheese Potato Soup Recipe

Thank you Potatoes USA for sponsoring this post. Make a delicious and convenient meal for your family tonight with potatoes!

A delicious beer cheese and potato forward soup that is sure to please just about anyone! The taste of the dark, robust stout really shines through while the potatoes add an element of creaminess that makes it hard to not go up for seconds! I always thought that creamy soups had to be cream-based and I was completely wrong! This potato soup only contains a very small volume of cream, and the rest is made creamy with pureed potatoes! 

Find the printable recipe at the very bottom of this post. 

Ultimate Potato Cheese Soup Recipe (Serves 8+)

Prep Time: 15-20 minutes // Cook Time: 30-40 minutes

Cuisine: American


Ingredients

  • 8 cups chopped russet or baking potatoes
  • 2 tablespoons butter
  • 1 cup chopped or grated carrot
  • 1 cup chopped or grated white onion
  • 3 ounces chopped lean ham, cubed
  • 3 cups chicken stock
  • 1 cup beer
  • 3 ouncesgrated cheddar cheese
  • 3 ounces grated gruyere cheese
  • 1/2 cup reduced fat milk

Potatoes are a culinary canvas with limitless possibilities!

Note - we chose an Imperial Stout, pictured below, and it was delicious! If you wanted to tone down the taste of the beer, then use a dark beer like a Porter that is under 5% ABV.

Another note - if you want your soup to me way more yellow, then choose a yellow cheese like cheddar and even colby jack. 

Directions

  1. In large pot, heat butter over medium until bubbly.
  2. Add carrot, onion and ham. Saute 5-10 minutes.
  3. Add potatoes and chicken stock, stir to combine. Simmer for 20 minutes, covered.
  4. Put about half the soup in a blender and process until smooth. Add back to pot.
  5. Add beer, cheese and milk. Stir to combine.

Additional Info

Blending only half of the soup smooth gives it a great texture. If you’d like to make this soup vegetarian, simply skip the ham and use vegetable stock instead of chicken – it will still be rich and delicious!

I really hope you enjoy this recipe! If you use more of an Irish Stout, then you could utilize the St. Patrick's Day theme even more! 

Check out the Potato Goodness Facebook page here, and the Potatoes USA website here.

PRINT THE RECIPE BELOW:

I was selected for this opportunity as a member of CLEVER and the content and opinions expressed here are all my own.

Easy Rustic Fruit Pizza Recipe (Fresh Raspberries and Almond Cream Cheese Icing)

With Spring right around the corner, it's fun to create dishes with fresh fruits! This rustic and simple Fruit Pizza is delicious. The crispy, crunchy sweet crust reminds me of churros, and this homemade almond frosting is divine topped with fresh, tart raspberries!

INGREDIENTS FOR CRUST

1 - 7.8 oz. package of Wewalka Bistro Pizza Crust (I used rectangular but round would work too)

1-2 Tbsp melted butter + brush or silicone spatula to spread onto crust

1/2 - 1 tsp cinnamon

2-3 Tsp sugar

INGREDIENTS FOR FROSTING

1/3 C. Cream Cheese (at room temperature)

3-4 Tbsp powdered confectioners 

1/2 tsp almond extract 

1-2 6 oz. containers of fresh raspberries

INSTRUCTIONS:

1.) Preheat oven to 400* F and roll out your pizza dough onto a floured surface. This is optional, but it really makes the crust look great. 

2.) Apply melted butter to your unbaked crust with a brush or silicone spatula, then sprinkle on your sugar and cinnamon. Bake for 12-14 minutes until crust is crispy and lightly browned. 

3.) During the baking process, create your frosting. simply beat the mixture of softened cream cheese, confectioner's sugar, and almond extract until smooth. Add more powdered sugar if you want a thicker frosting. 

4.) Lastly, apply your frosting, then top with 1-2 containers of fresh raspberries. I spaced them out a little bit, and found the most attractive side of each berry to place upward. 

Parmesan Garlic Knots Recipe - Easy and Delicious

These deliciously easy and impressive parmesan Garlic Knots are sure to please just about anyone! I used only a few ingredients to create these high end appetizers, perfect for so many occasions!

Prep Time 5 minutes // Cook Time 20 minutes // Total Time 25 minutes // Servings 12

Ingredients

1 11 ounce can breadsticks found in the refrigerated section

5 tablespoons butter melted

1/2 teaspoon garlic powder

1/2 teaspoon dried oregano

1 tablespoon finely chopped fresh parsley can also use 1 teaspoon dried parsley

3 tablespoons finely grated parmesan cheese

cooking spray

Instructions

  1. Preheat the oven to 400 degrees F. Coat a sheet pan with cooking spray.

  2. Open the can and place it onto a floured cutting board. Use a rolling pin to even out the dough, and use a pizza cutter to cut the dough into 12 even slices. Tie each breadstick into a knot shape, tucking the ends underneath each roll. This techniques makes the knots look way better!

  3. In a small bowl, mix together the butter, garlic powder, oregano, and parsley. Reserve 1 1/2 tablespoons of the butter mixture for later use.

  4. Brush the remaining butter mixture over the rolls. Then, sprinkle parmesan cheese on top.

  5. Bake for 10-12 minutes or until golden brown. Optionally, brush with reserved butter mixture, then serve. I did not do the second butter part, which did reduce the mess. 

Recipe Notes

1. You can use biscuit dough instead of breadstick dough if you prefer.
2. If you're a big garlic fan, you can increase the amount of garlic powder to 3/4 teaspoon or substitute 1 teaspoon of fresh minced garlic.
3. I like to serve my garlic knots with a side of marinara sauce for dipping.

Adapted from this post, from Dinner At The Zoo, found here.

Giant Valentine's Day Rice Krispy Treat - a Great Gift Idea

Impress your friends and loved ones with this Giant Heart Shaped Rice Krispy treat! It's super adorable and is an awesome last minute gift idea. This gift takes less than an hour to make, and just a few ingredients and supplies! You could gift this treat atop an adorable pink plate, too!

INGREDIENTS / MATERIALS

6 Cups Rice Krispy Cereal

4 Cups Mini Marshmallows

3 Tbsp Butter (real butter works best)

Heart Shaped Cake Pan (Similar Here from Target

White Writing Icing (I love the Betty Crocker Cookie Icing in White, 7 oz. pouch) - found at grocery stores, not generally found at Walmart or Target

Red Food Coloring

Colorful Sprinkles

Parchment Paper and Scissors

Non Stick Spray

INSTRUCTIONS

1.) Trace heart shape onto parchment paper, using pan as your guide. Cut out the heart out. Spray the pan with lots of non stick spray, then place heart paper cutout into bottom of pan.

2.) On the stove top in a large sauce pan, melt butter then add marshmallows and melt/stir until smooth. Once completely smooth, add 4-6 drops of red food coloring, until desired color has been reached.

3.) Add in cereal and stir to fully combine. Add optional 1/3 Cup Sprinkles and stir again. 

4.) Using a large spoon or your hands, transfer treats into heart shaped pan. Press as hard as you can, so the cereal treats get packed into the pan. This is to ensure the heart shape is a good shape.

5.) Once cooled, use a butter knife around the sides of the heart pan to loosen the treats. Flip the Heart Shaped Treat over onto a cutting board or similar surface, and tap the pan to help loosen the treat. Peel off the parchment paper and discard.

6.) To decorate, I used the white decorator icing to first outline the heart shape. I applied even pressure to the icing tube as I went around the edges, beginning at the bottom of the heart, working around the edges. Next, I free handed the word "Love" with icing, in cursive, but feel free to write any message you want! I thought of some pretty funny messages but stuck with something more traditional. 

7.) To gift, I found a plate at Target in the kids plates and dishes section for about 80 cents. You could use a cute paper or plastic plate too. I believe it would be adorable to wrap Saran wrap around the treat and secure it in back with tape, so you can see the design. Hope you enjoy!

Amazing Pickled Red Onions and Garlic Recipe

If you're a fan of onions, garlic and pickled anything, chances are, you'll love this recipe! We are eating them on everything we possibly can, and they they only require a few hours (or overnight) in the fridge until they are READY to enjoy! This is such a rewarding and long lasting delicacy that costs only a few dollars to make. You may already have everything you need, so let's get started.

INGREDIENTS:

1 large red onion, sliced into small strips

7-10 cloves of garlic, peeled and left whole (or cut into pieces)

1.5 Cups rice vinegar or similar

1 Cup water

1 tsp salt

1/4-1/2 tsp sugar, optional (only if you like a sweeter pickled taste but we did not use it)

1 (32 oz) Quart Ball Mason Jar (I bought this one for about $2.00 at Target)

INSTRUCTIONS:

1.) Add onion slices and garlic cloves to Ball Mason Jar. Pack it full, up to the very top. We made sure to sort of layer ingredients in the jar so they would look pretty. You may have a few onions left over that do not fit, but you can save them for something else or toss them.

2.) On the stovetop in a small saucepan, add vinegar, water, and salt (and optional sugar), and heat until salt has dissolved. 

3.) Carefully pour the warm vinegar mixture into the jar. At first, it seemed like it wouldn't be enough liquid, but it was perfect! 

4.) Securely fasten lid onto jar and flip the jar over a few times in your hand to make sure there are not too many air bubbles. Refrigerate for at least 3 hours, but we checked them after about 12-15 hours and they were already ready to eat! We had them on our breakfast the next morning, and everyone raved about them!  

You can use these pickled onions to top breakfast bagels, scrambled eggs, sandwiches, or just eat them on their own! These are better than any other pickles or pickled anything I have ever eaten, and knowing that we made them ourselves might just make them even more delicious. 

You can even use them as an ingredient in your favorite recipes, like potato salad, guacamole, Cuban sandwiches, and other recipes that require onions. I would not assume that they would be super great when heated or cooked, but there are still so many ideas to play around with. Below, we topped a seeded bagel with homemade guacamole, prosciutto, and our pickled red onions. 

It's amazing how the red onions colored themselves such a vibrant purple color. They're just gorgeous and make so many recipes more elegant and colorful. And, as odd as it sounds, these would even make a good gift for someone special. 

Next, we will be making pickled jalapenos! What is your favorite ingredient to pickle?

Well, I hope you enjoy this recipe! If you wind up making some for yourself, I would LOVE to know how they turned out. Feel free to leave a comment below, or tag me on Instagram as @happysolez

Valentine's Day - Adorable Heart Shaped Rice Krispy Treats

If you're looking for a stunning yet easy way to create theseAdorable Heart Shaped Rice Krispy Treats, you have come to the right place! I've been envisioning making these for a few weeks now, ever since I started seeing the Valentine's Day baking supplies at stores for the season. They only contain around 6 ingredients/materials, and prep work is also pretty minimal! 

INGREDIENTS/MATERIALS:

Pink colored Wilton or other candy melts (similar here)

Lollipop Sticks (found here)

6 Cups Rice Krispies Cereal

4 Cups mini marshmallows

Red Food Coloring

Colorful Sprinkles

Silicone Heart Shaped Candy mold from Walmart (similar here)

INSTRUCTIONS (MAKES 6):

1.) Begin making Rice Krispy treats. In a no-stick pot or pan, melt butter and marshmallows until smooth. Add 4-5 drops of red food coloring until the marshmallow mixture is desired color (a darker pink). Now add 1/4 -1/2 C. sprinkles and stir again. Lastly, add Rice Krispies and stir until combined!

2.) During the rice krispy treat making process, melt half the bag of pink candy melts in a microwave safe bowl until smooth. 

3.) Using a large tablespoon, spoon equal amounts of melted candy melts into the heart shaped molds, filling them 1/4 full.

4.) Once candy melts have set for 1-2 minutes but before they are completely hardened, fill the rest of the heart molds with ooey gooey Rice Krispy treats. Press down into mold so they are flat on top.

5.) Once everything has hardened, remove from molds. If the pink candy toppings have separated from the Krispies, simply melt 4-5 more candy melts and attach them back together with a spoon full of melted candy.

6.) Lastly, optionally insert lollipop sticks into the heart krispies (they go in VERY easily). Enjoy!

Think of how cute these would be to gift in a big "bouquet" for Valentine's Day! You could wrap them in small celophane treat bags and tie them up with festive ribbons too. 

Top Places We Visited in 2017 + Healthy Travel Tips

This is a sponsored conversation written by me on behalf of Walgreens. The opinions and text are all mine.

I was so thankful to be asked by Carusele to participate in a second #SimplyNice campaign, sponsored by Walgreens. Although I have been compensated, all opinions are my own.

As I reflect on the past year, I can’t help but think of how lucky I am to have had the opportunity to visit so many wonderful places in the US. When Walgreens asked me to write a second inspirational post about their new line of revamped Nice! snacks, I was elated! I love their new packaging and some of their treats even inspired me to start thinking about snacking healthier while we travel.

I love that I can find something that is always delicious at Walgreens, and since they’re located all across the country, it’s easy to shop for healthy Nice! snacks while on the road, making our way towards our next destination. Nice! snacks while on the road, making our way towards our next destination.

Since travel has become SUCH a huge part of our lives, one major goal for 2018 is to incorporate even more travel tips and healthy eating tips into this blog. I cannot wait to see what the rest of the year holds! Here’s to a new year!

Travel can definitely take it out of you as well, so eating healthier while traveling, and drinking lots of water makes a huge difference in how smoothly any trip goes. Our first vacation of 2018 is here in Florida, so I definitely wanted to take the first part of the year to eat healthier and get ready for the beach! Walgreens actually makes it affordable and super convenient to eat healthier! You can even find a huge assortment of vegetarian and vegan baking ingredients like Raw Cashews, Pistachios, and many other nut varieties.

If you’re gluten free, try the AMAZING Organic White Cheddar Puffs – they’re life changing, and perfect for the road since they don’t get your hands (or car for that matter) too messy. Plus, they’re USDA Organic and Non-GMO, which I love.

Nice! products help you live a balanced life to stay on track and indulge without guilt by providing great tastes you can feel good about. Plus, the upfront, labeling and the shopping convenience of Walgreens make Nice! a win.

Below, you can see how we normally pack the car. We always travel with healthy snacks. I tend to get bored with snacks pretty quickly, so I find that if I bring a wider variety of goodies, I am not tempted to run into a gas station to grab something unhealthy.

Below is a list of the top places we visited in 2017, and what I’d recommend in each place. Thanks for following along on our adventures!

The Florida Keys

The Florida Keys are filled with all sorts of wonderful opportunities to get outside and enjoy the fresh air while getting a bit of exercise too. If you are staying in Key West, make it a goal to walk a few miles each day. It’s super easy to get in the miles in just a few hours, it’s definitely a walking city. Check out shops and restaurants on Duval Street (try Caroline’s Café for a big salad, The Porch for a refreshment, or The Butterfly House to mingle with butterflies, tropical flowers and plants.

If you’re looking for more action and adventure, the Keys offer lots of kayaking, boating, and excursions.

Me, kayaking near Sugarloaf Key, FL

Bobby and Cabbie sitting on dhe dock off our vacation home on Sugarloaf Key, FL

Our kayaks at the Sugarloaf Boat Launch

Cave Creek, AZ (Phoenix/Tucson)

I am so fortunate that my dad lives in such a beautiful location. If you’re visiting this area of Arizona, there are hiking trails, as well as tons of great restaurants, bars, and shopping opportunities! Closer to Tucson, check out Saguaro National Park, Tap and Bottle, or walking around downtown! If you’re closer to Phoenix, Scottsdale, and Cave Creek, try spending the day walking around Old Town Scottsdale (their historic downtown area, with beautifully renovated buildings and a man riding a horse playing guitar). Cave Creek also has a fun downtown area where you can walk to almost every bar and restaurant, and on Saturdays and Sundays, even catch a rodeo! There is also a vibrant motorcycle culture there unlike anywhere else we have ever been.

Saguaro At Sunset

Citrus fruit grows abundantly in Spring and into Summer. Adding a splash of lemon to your water will help you want to drink more water and stay healthy and hydrated! Arizona is very, very dry, so dehydration makes your body work harder to perform.

By walking around areas like Cave Creek, Downtown Scottsdale (both the historic districts and the Scottsdale Fashion Square will make for some amazing exercise)!!

There are lots of golf courses in the Phoenix area, which would be an excellent way to spend the day outdoors and get exercise!

And, if you are more for swimming, May-October would be perfect timing to swim! Our dogs are the only ones brave enough to get into the pool in March, though ☺

Chicago, IL

You will DEFINITELY get your miles in for the weekend when you shop in Chicago. The food culture is amazing in Chicago, and there are actually a ton of healthier restaurants that you can check out.

Chicago is also home to tons of breweries and enough public transportation to get to anywhere in the city. If you’re trying to avoid calories from drinking, try a sampler glass of beer at each one, it’s generally only a few ounces of liquid, and you will get a great taste of what flavors the breweries are all about! A few notable places we love to visit in Chicago include: Revolution Brewing, The Bean, Game At Wrigley Field, Navy Pier, Shopping on State Street (possibly better than Michigan Ave! It’s way less crowded than Michigan Avenue, and has some incredibly amazing stores.

Binny's Beverage Depot in Chicago

The food and drink options are nearly limitless in Chicago!

Beygle Brewing, which was also hosting an art show – another good excuse to walk around and explore a new location. Dovetail Brewing, which features 100% lager beers was also close by and super delicious!

Denver, CO Area

Some of our best friends live in the Denver area, and we love visiting them whenever we are in town! It’s always fun having a local tour guide, and they love showing us fun places to hike in the mountains, as well as where to visit in the actual city of Denver. It’s a gorgeous area of the country, and if you enjoy the outdoors, it’s a fun place to be. There are so many camp grounds and hiking trails, and many of them are either free or very reasonably priced. Taking along healthy snacks and TONS of water really does make a huge difference, since it is so arid and at a very high elevation.

Hiking at Guanellas Pass

We love traveling with the dogs – they do encourage us to get outdoors and get active!

The dogs LOVE the endless fresh water, mountain fed streams all over the state.

Healthier food options are everywhere We love visiting a place called The Source, that houses restaurants, bars, gift shops and fine grocery markets.

Ennis, MT

Last but definitely not least, Ennis, Montana has stolen a big part of our hearts! We love the abundant mountain views, the fresh clean air, and the fact that you can hike, fish, four wheel, and visit a ghost town all in one day! We love the Madison Valley and hope to wind up there some day. It’s such an inspirational location, and there are SO many opportunities to get out, get active, and get healthy! Bring your snacks along on a hike and enjoy your day. You might even see a herd of Elk or even antelope – they’re quite majestic.

A great way to make sure you keep healthy and happy on your vacations is so stock up on snacks like the Fruit & Nut Trail Mix from Walgreens.

Our dogs love snow days more than anything in the world. 2017 provided the Madison Valley and surrounding areas with way more snow than other years, something we learned from the locals.

Lake Ennis is fun in the summertime, and almost more beautiful in winter. We explored the lake and the surrounding areas in late Fall, and ice washed up on shore in rhythmic patterns. The sound reminded me of being near the ocean.

While the area is remote, the beauty of the surrounding area is really all I’d need :)

Walking around down town Ennis, MT is great. The city has really done a wonderful job of preserving the past and offering updated bars restaurants, and shops for a huge influx of visitors in Spring, Summer, and Fall.

Remember, pack healthy snacks like Nice! From Walgreens, and always have plenty of water – you won’t want to reach for unhealthy options anymore!

Choose Nice! From Walgreens to stay on track with a healthy new year.

Happy adventuring!

Big Game Celebrations with French's® @ Kroger (Jalapeño Pretzel Dogs Recipe)

This is a sponsored conversation written by me on behalf of McCormick & Company. The opinions and text are mine. #RealFlavorsHaveCrunch #Frenchs

Looking to make Game Day even more special? Offer guests these French’s® Jalapeño Pretzel Dogs, and everyone will be asking for the recipe! Your home may just become the new entertaining spot for football games this season.

I had a blast creating this recipe, which I found on the French’s website, here. Better yet, there is a recipe video that made this recipe extremely easy to follow. I love when things work out like that, especially when I am prepping to host people for football games or any other occasion.

Below, I served the French’s Ketchup and Classic Yellow Mustard in mini red cups, which I thought was so appropriate for a football party.

I was also able to shop at my local Kroger for everything, which made for a one-stop shopping trip – also a win! Starting on January 21, 2018 there will be coupon inserts in your local newspaper for the French’s products.

I love the taste that the French's Crispy Fried Jalapeños, French's Classic Yellow Mustard, and the French's Ketchup added to this recipe. This was my third time using these crispy fried jalapeños, and WOW, they were so perfect for this (and great for so many other meals too).

They added a crunchy, spicy kick because they’re made with real jalapeños! Be sure to let guests know that they are a tad bit on the spicy side, and possibly even use the French’s Crispy Fried Onions if you are not partial to spicy foods.

Jalapeño Pretzel Dogs

INGREDIENTS (Makes 12 Servings):

USER RATING:

❉ ❉ ❉ ❉ ❉

Prep Time: 15 Minutes  Cook Time: 10 Minutes

1 Can Refrigerated Pizza Dough (11 oz.)

12 Hot Dogs (I used the ones with cheddar inside)

3 Tbsp. baking soda
water
5 oz. French's Crispy Fried Jalapeños , crushed (I used almost one whole container)
 

DIRECTIONS:

1.) PREHEAT oven to 400°F. Spray a baking sheet with nonstick spray.


2.) BRING a large pot of water to a boil. Add hot dogs and boil for 3 minutes. Once hot dogs are cooked, allow to cool enough to handle.


3.) WHILE cooking hot dogs, roll out pizza dough and cut into 12 - 1/2 inch strips lengthwise. (There may be dough leftover; twist into bread sticks and bake – I coated these breadsticks with butter when they came out of the oven and they were great). Spread the crushed jalapeños in a pie dish.


4.) LADLE one cup of the boiling water from the hot dogs into a bowl big enough to fit hot dogs. Add baking soda and stir until dissolved.


5.) WRAP each hot dog with one strip of dough, twisting it around and back. Leave a 1/2 inch space at each end. When hot dogs are wrapped, carefully dip each into water mixture being sure to cover. I rolled the hot dogs around in the baking soda water and it worked great.


6.) GENTLY roll each hot dog in crushed jalapeños and place on baking sheet. Bake for 10-13 minutes. Bake until browned on top. Serve with French’s Ketchup and Classic Yellow Mustard.


I loved how these Jalapeño Pretzel Dogs turned out and I hope you do as well! I consider them the more interesting version of pigs in a blanket, and they made for a wonderful solution for a unique and tasty game day recipe. With French’s Ketchup offering qualities like non-GMO, no high-fructose corn syrup, no gluten and no artificial flavors and preservatives, you can actually feel good about your condiments and what you are offering guests.

PLUS leftovers are always delicious! French’s Classic Yellow Mustard is considered America’s best loved mustard, and is made with #1 grade mustard seeds – perfect to pair with these Jalapeño Pretzel Dogs and so many other delicious game day treats.

So many people have asked me for this recipe, and I was more than happy to share it with them.

Enjoy this recipe for game day, after school, other occasions, and more!

PIN IT FOR LATER...

Making Game Day Cleanup A Breeze with Glad ForceFlex Plus Advanced Protection

This post has been sponsored by Glad. All thoughts and opinions are my own.

This football season, make Game Day cleanup a breeze! Glad has a NEW and improved version of their already superior trash bags called Glad ForceFlex Plus Advanced Protection – now available at Target! If you’re looking for a trash bag that will not leak, and will hold ALL of the mess that can accumulate during a Game Day celebration, then Glad can help. Featuring reinforced side seams, RipGuard™ AND LeakGuard™ I am happy to introduce Glad’s Best Bag Ever!

I styled the most gorgeous Game Day party last Sunday, while watching the playoff games, and had so much fun decorating and hosting friends. I used an aqua and red color scheme, but feel free to use your favorite team colors. The Target party aisle provided nearly everything I needed to keep the color scheme looking perfect throughout all of my décor.

Entertaining friends and family can be a bit of a mess afterwards, but I was not at all concerned with cleanup, because I had made a Target run the day before to stock up on everything. From Glad bags to treats and party décor, I was set to host the cutest celebration of the season.

Target had almost everything I needed. I first headed to one of the aisle labeled Trash Bags, and grabbed a box of Glad ForceFlex Plus Advanced Protection trash bags. Next, I perused their party and celebration aisles and their Dollar Spot at the front of the store (my favorite area of Target) and found red and white cake stands, aqua colored paper plates, red cups, clear treat bags, and aqua colored napkins. I thought that a non team-specific color scheme would be fresh and exciting. I also found my juice bottles to cover with paper, and a few other food items as well.

Since these Glad ForceFlex Plus Advanced Protection bags are so new to the market, click any of my images or the graphic below, to buy now! 

I’ve always used some form of Glad ForceFlex trash bags in the past, so I was super pleased to be able to feature such a high quality product in this celebration. I can’t stand when a garbage bag breaks on me, because that’s seriously no fair! I have to take the super full garbage bags all the way outside (let me tell you, we stretch them until they’re FULL at our house – (I call it being conservative, not lazy), and if anything were to get on my clothes from the bag, I get all squeamish. I am sure I’m not alone on this one? So, these Glad ForceFlex Plus Advanced Protection trash bags are always in my house.

Back to the festivities! I also provided some super delicious football-inspired food at this party. I was so happy when I found cookies at a bakery called San Francisco Cookies! They were already shaped like footballs, so I simply outlined them in chocolate decorator icing, and then I drew the football laces with white decorator icing. It was way easier than making them myself and it saved so much time to not bake cookies.

I also found little chocolate creme sandwich cookies and used that same white icing to draw threads on them too.

I always try to incorporate chocolate desserts for football parties because I love how the color of chocolate reminds me of the football itself. So, I offered guests a few more bakery items like a chocolate layer cake (perfect to feature on the middle cake stand), plus mini chocolate muffins with chocolate chips in them.

I made some wings in my crock pot and found an awesome homemade BBQ sauce recipe that contained brown sugar, ketchup, red wine vinegar, stone ground mustard, and soy sauce. When they were ready to serve, I placed them on another cake stand, and sprinkled sesame seeds on top.

I placed football shaped bowls of BBQ potato chips around, and also filled little clear treat bags with snacks like popcorn and pretzels, then tied them up with a twist tie and football printed ribbons. Everyone likes something a little different, so I offer as many flavors as I possibly can!

I always love seeing customized refreshments, so you can remove the original drink wrappers, and simply cut a piece of scrapbooking paper into 2.5” tall strips, and cut them to fit around the bottles. I used a brown and white football printed design!

I also found the cutest “chalkboard” paper bunting that I wrote on with chalk. I used a pencil to sketch out footballs and “GO TEAM” then went back over that with chalk. They turned out so cute!

Thinking about all this food and décor might sound like it makes for a messy house afterwards, but I know thatGlad ForceFlex Plus Advanced Protection trash bags can hold a ton, and won’t leak or rip  – YAY!

I hope I have inspired your next Game Day gathering, and if you share any photos, feel free to leave the link(s) in the comments below! I would LOVE to see how you celebrate and decorate for the big game.

Remember to shop at Target for all of your Game Day and clean up essentials! 

PIN IT FOR LATER...

Delicious Slow Cooker Honey Ginger Chicken Drumsticks Recipe with NAKANO Rice Vinegar

This post was sponsored by NAKANO® Rice Vinegars as part of an Influencer Activation for Influence Central and all opinions expressed in my post are my own. #NAKANONewYear, #NewYearSwaps, #IC

I am thrilled with how these chicken drumsticks turned out. My family is STILL raving about them, and I cannot wait to make them again soon. Perhaps for Sunday football this weekend?! The Big Game is near :) I am really excited to be able to utilize Rice Vinegar in more recipes lately. It really enhances the flavors of the other ingredients. I was able to incorporate a delicious ingredient into this recipe, which I know really made a huge difference in depth of flavor, NAKANO® Rice Vinegar. 

Visit the NAKANO Swaps website here, and get the NAKANO coupon here!

INGREDIENTS:

3 Tbsp soy sauce (low sodium or regular)

2-3 pounds chicken drumsticks

3 Tbsp honey

1 Tbsp sesame oil

1-2 Tablespoons NAKANO rice vinegar

1/4-1/2 tsp black pepper

3 cloves garlic, minced

1 (2" piece) minced fresh ginger (I peeled an actual piece of ginger and then minced it)

1-2 teaspoons black pepper

3-4 teaspoons toasted sesame seeds (I found mine already toasted in the baking aisle)

2-3 chopped green onions

Other materials: slow cooker, non stick cooking spray, serving dish for final recipe

INSTRUCTIONS:

1.) Mix NAKANO rice vinegar, soy sauce, honey, sesame oil, and black pepper in a small bowl, and set aside.

2.) Spray non stick cooking spray into slow cooker, and heat to low. 

3.) Place chicken into slow cooker (I used tongs), and pour sauce evenly over the drumsticks, and make sure the chicken is covered completely. 

4.) Cook on low for 4-8 hours, or overnight on the lowest setting on your slow cooker. Feel free to flip the drumsticks every couple of hours with a pair of tongs. When the chicken begins to fall apart, it's almost ready! 

5.) 30 minutes before you are ready to serve, turn slow cooker up to high, and let the sauce thicken. It will be thin before this step. Sautee the drumsticks in their sauce for 30 or so more minutes, and then to serve, place the drumsticks onto a cute serving platter, spoon the sauce over top, and then top with toasted sesame seeds and chopped green onions. Enjoy! 

NAKANO Rice Vinegar is available nationwide in seven clean-label varieties and two organic offerings, NAKANO is a flavorful ingredient to have on hand in the kitchen and to use as a healthy substitute following the indulgent holiday season., and help you find healthier ways to incorporate good ingredients into your meals.

The Roasted Garlic variety has real minced garlic in the bottle - yum!

MORE BENEFITS OF USING RICE VINEGAR

+ WHERE TO FIND

When preparing winter meals, splash on any of the NAKANO Seasoned Rice Vinegars as a savory, low-calorie alternative to high-fat dressings, marinades, oils or butter.  

Available nationwide in seven delicious and tangy varieties, you can purchase any of the NAKANO Rice Vinegars clean-label and organic offerings at Kroger, Publix and Walmart.