Vegetarian Pot Pies Recipe with Amy’s Kitchen

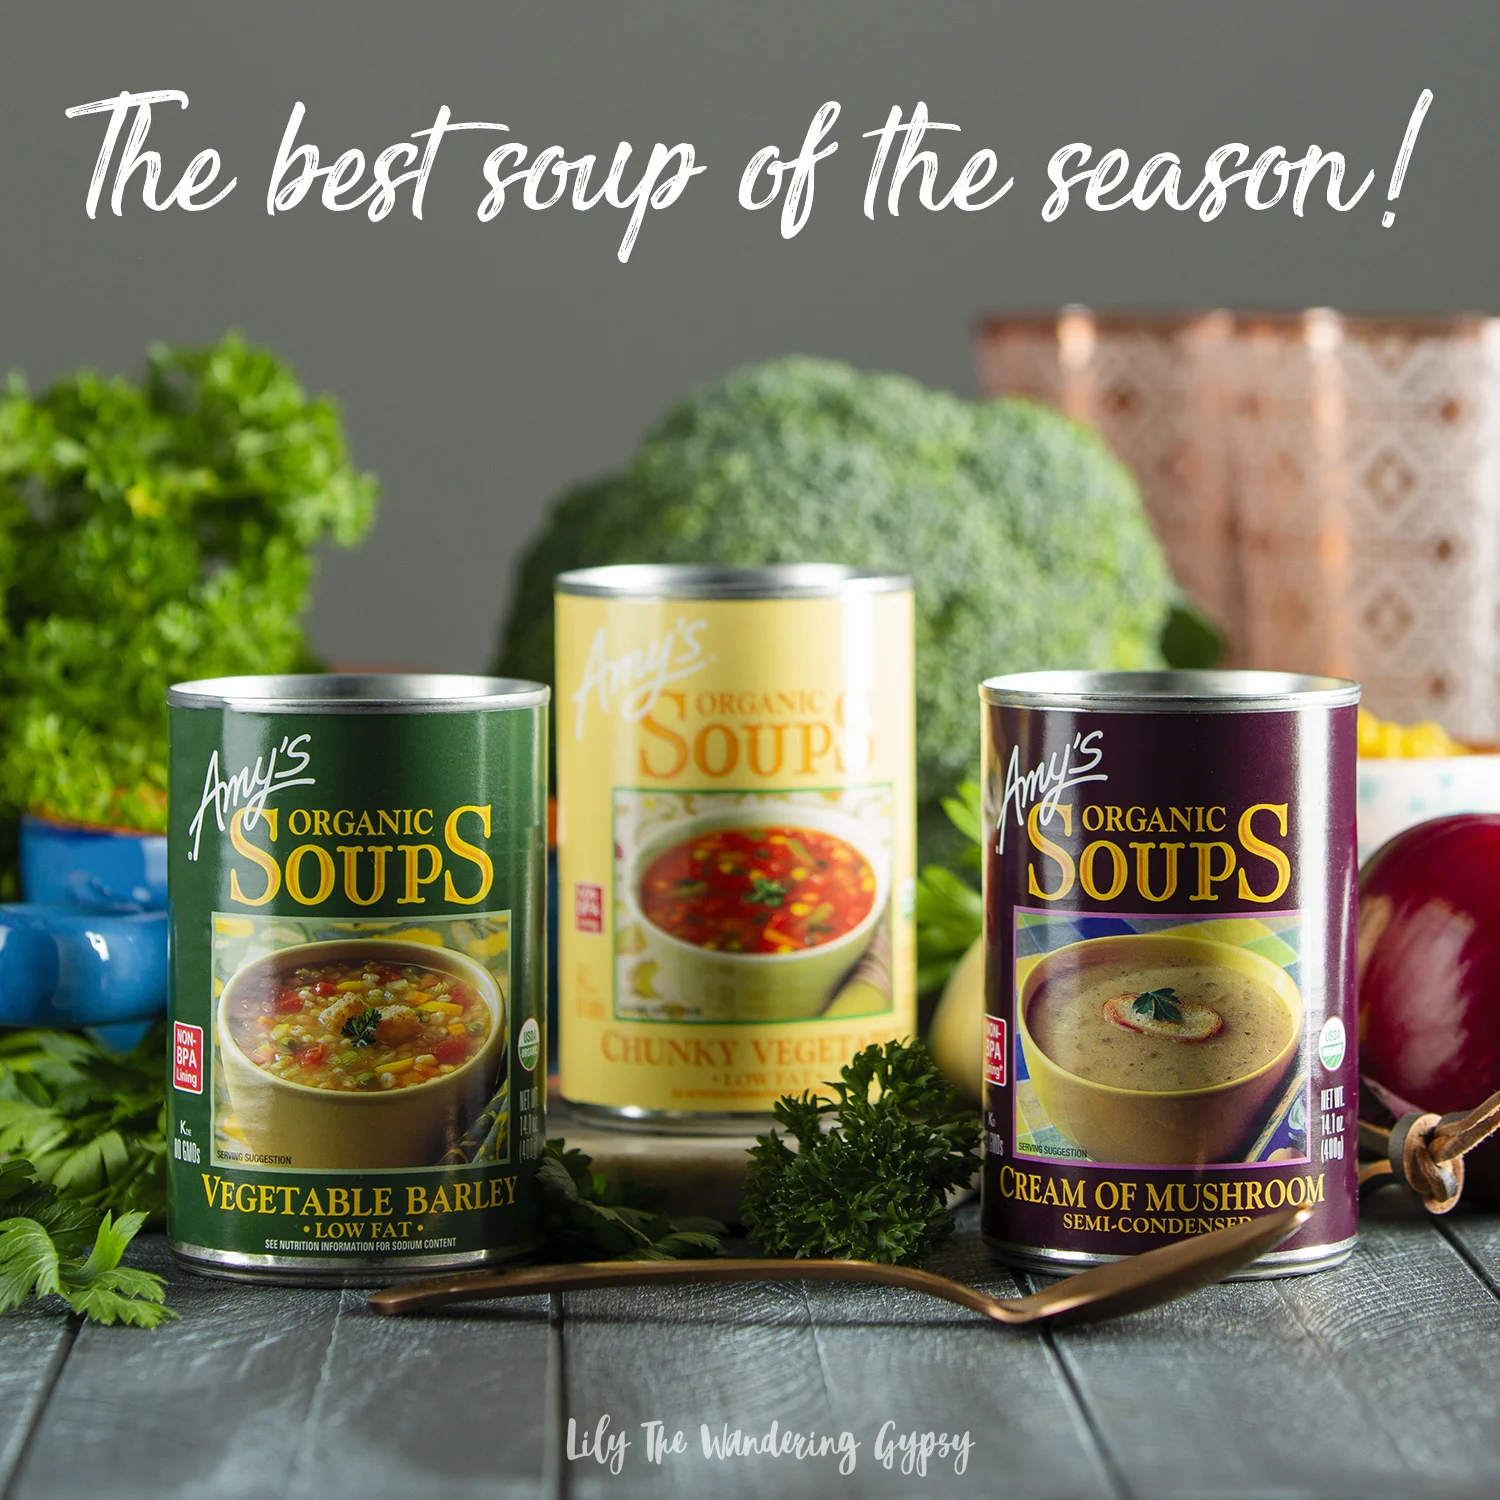
Thank you Amy’s for sponsoring this post. #StartWithAmys this Soup Season.

With cooler weather on the horizon, it’s time to incorporate comfort food that will make you happy about what you are serving and eating. For over 30 years, Amy’s Kitchen has been cooking up vegetarian meals made with high-quality ingredients. As fall quickly approaches, it’s time to get your soup on!

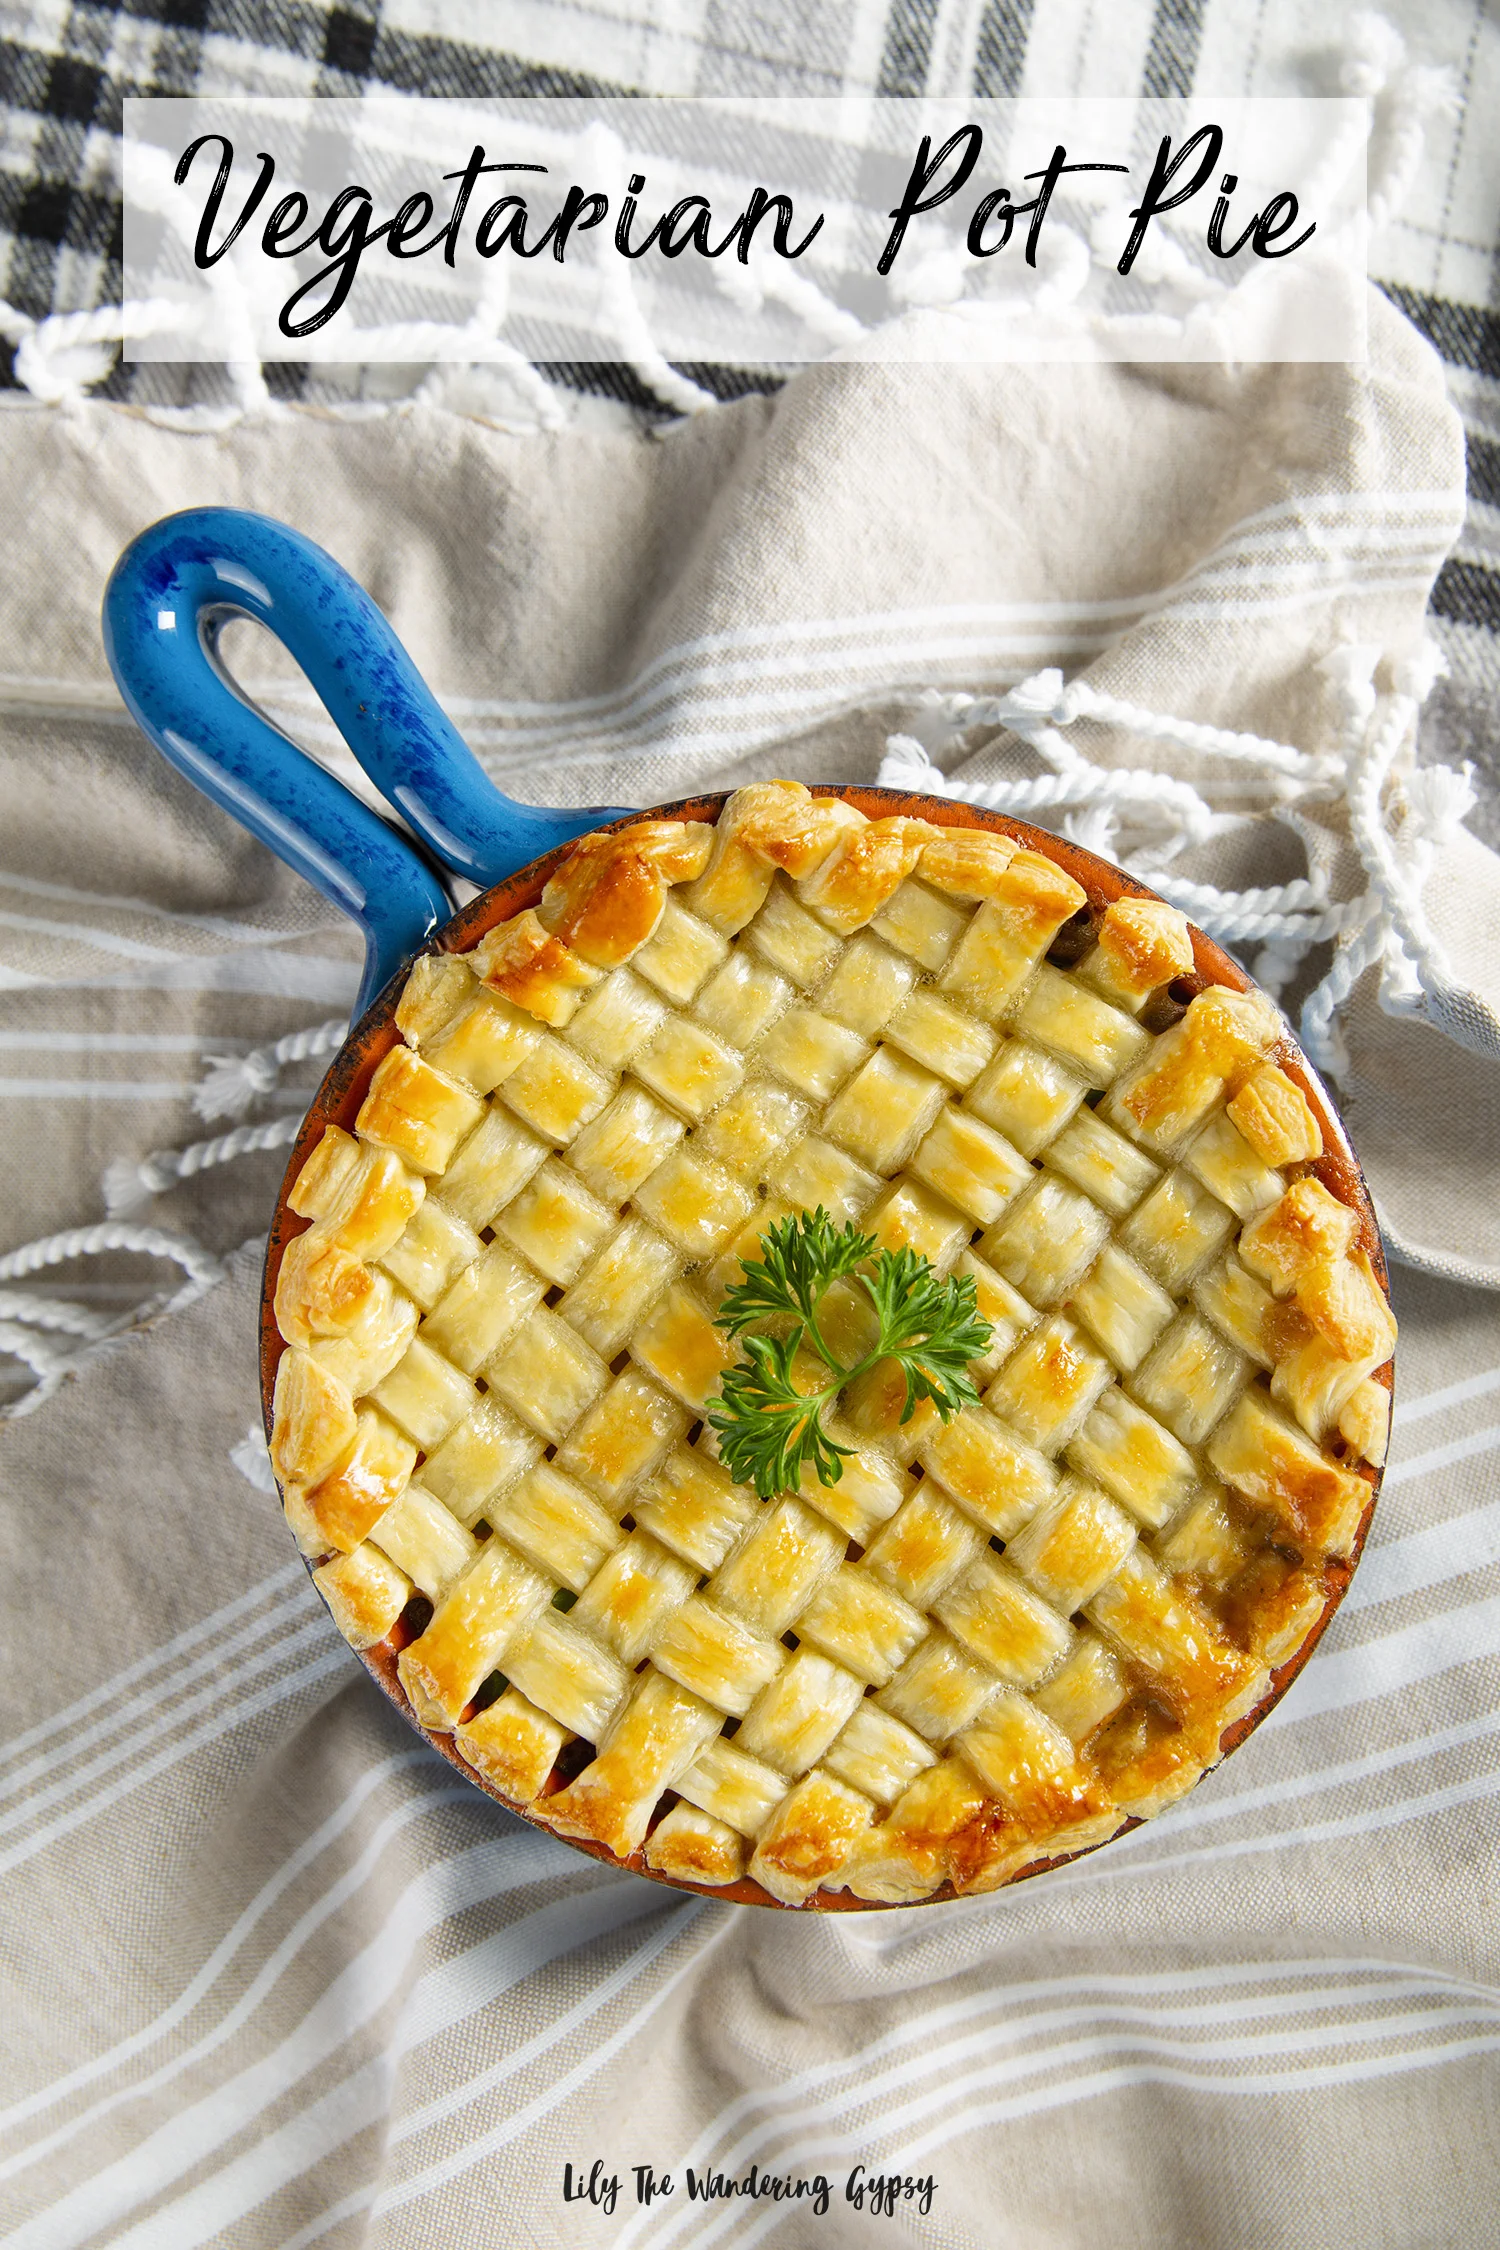
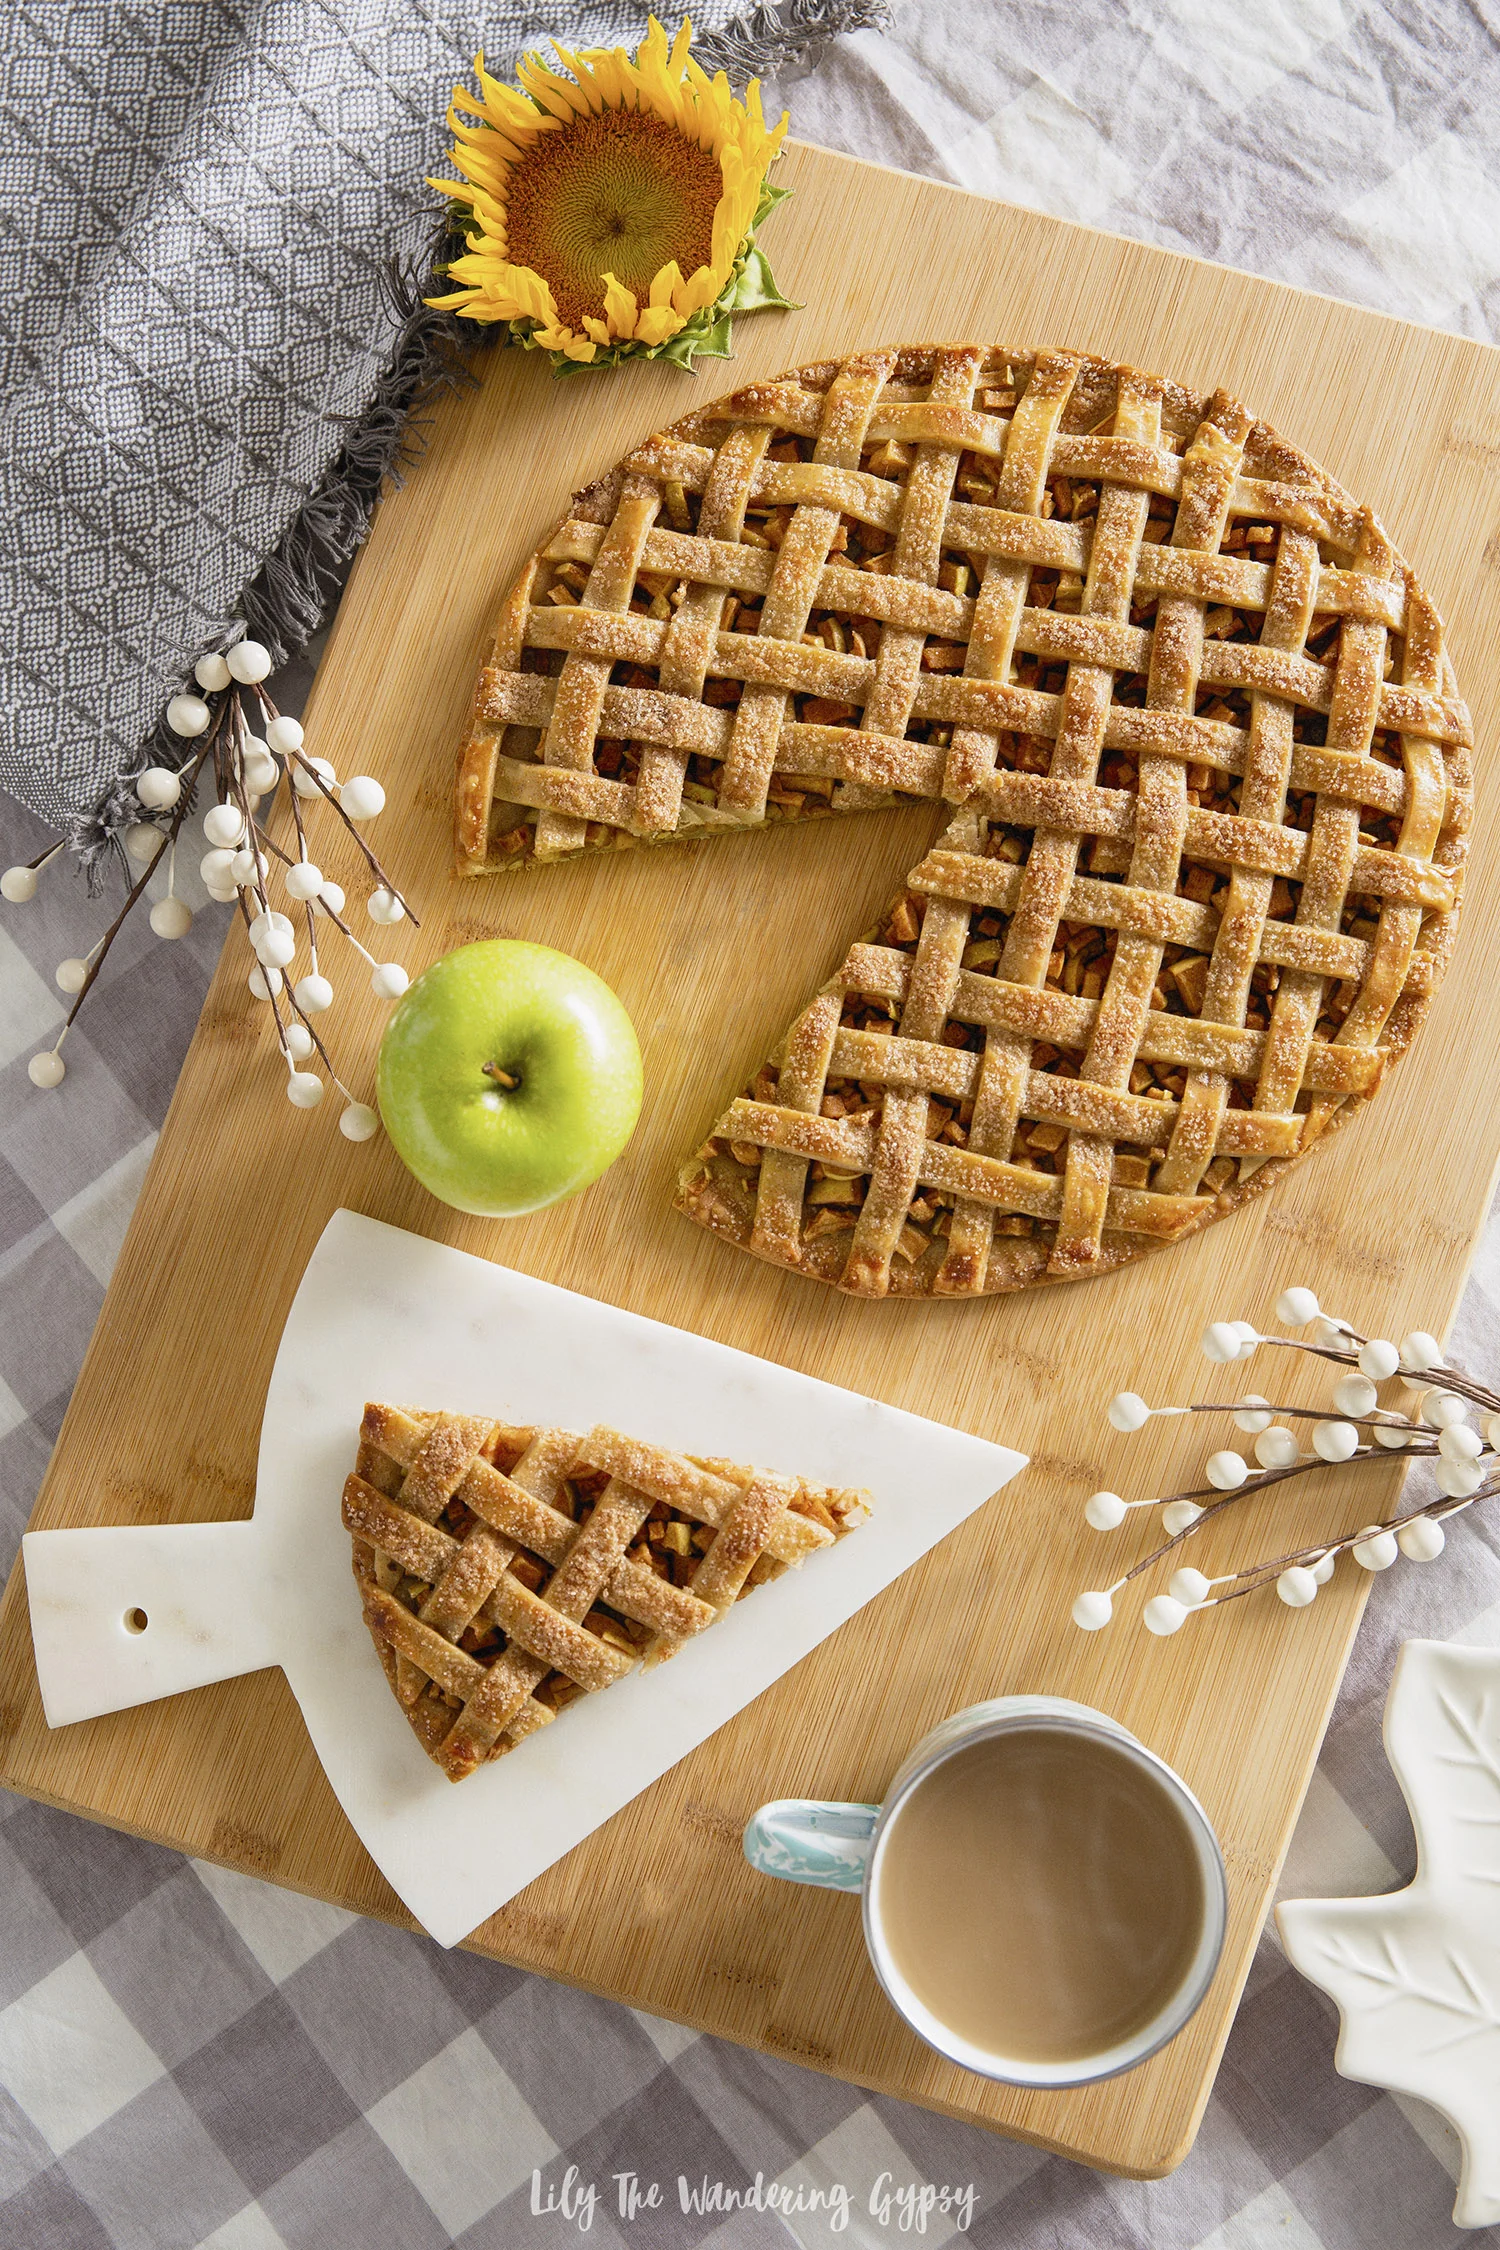
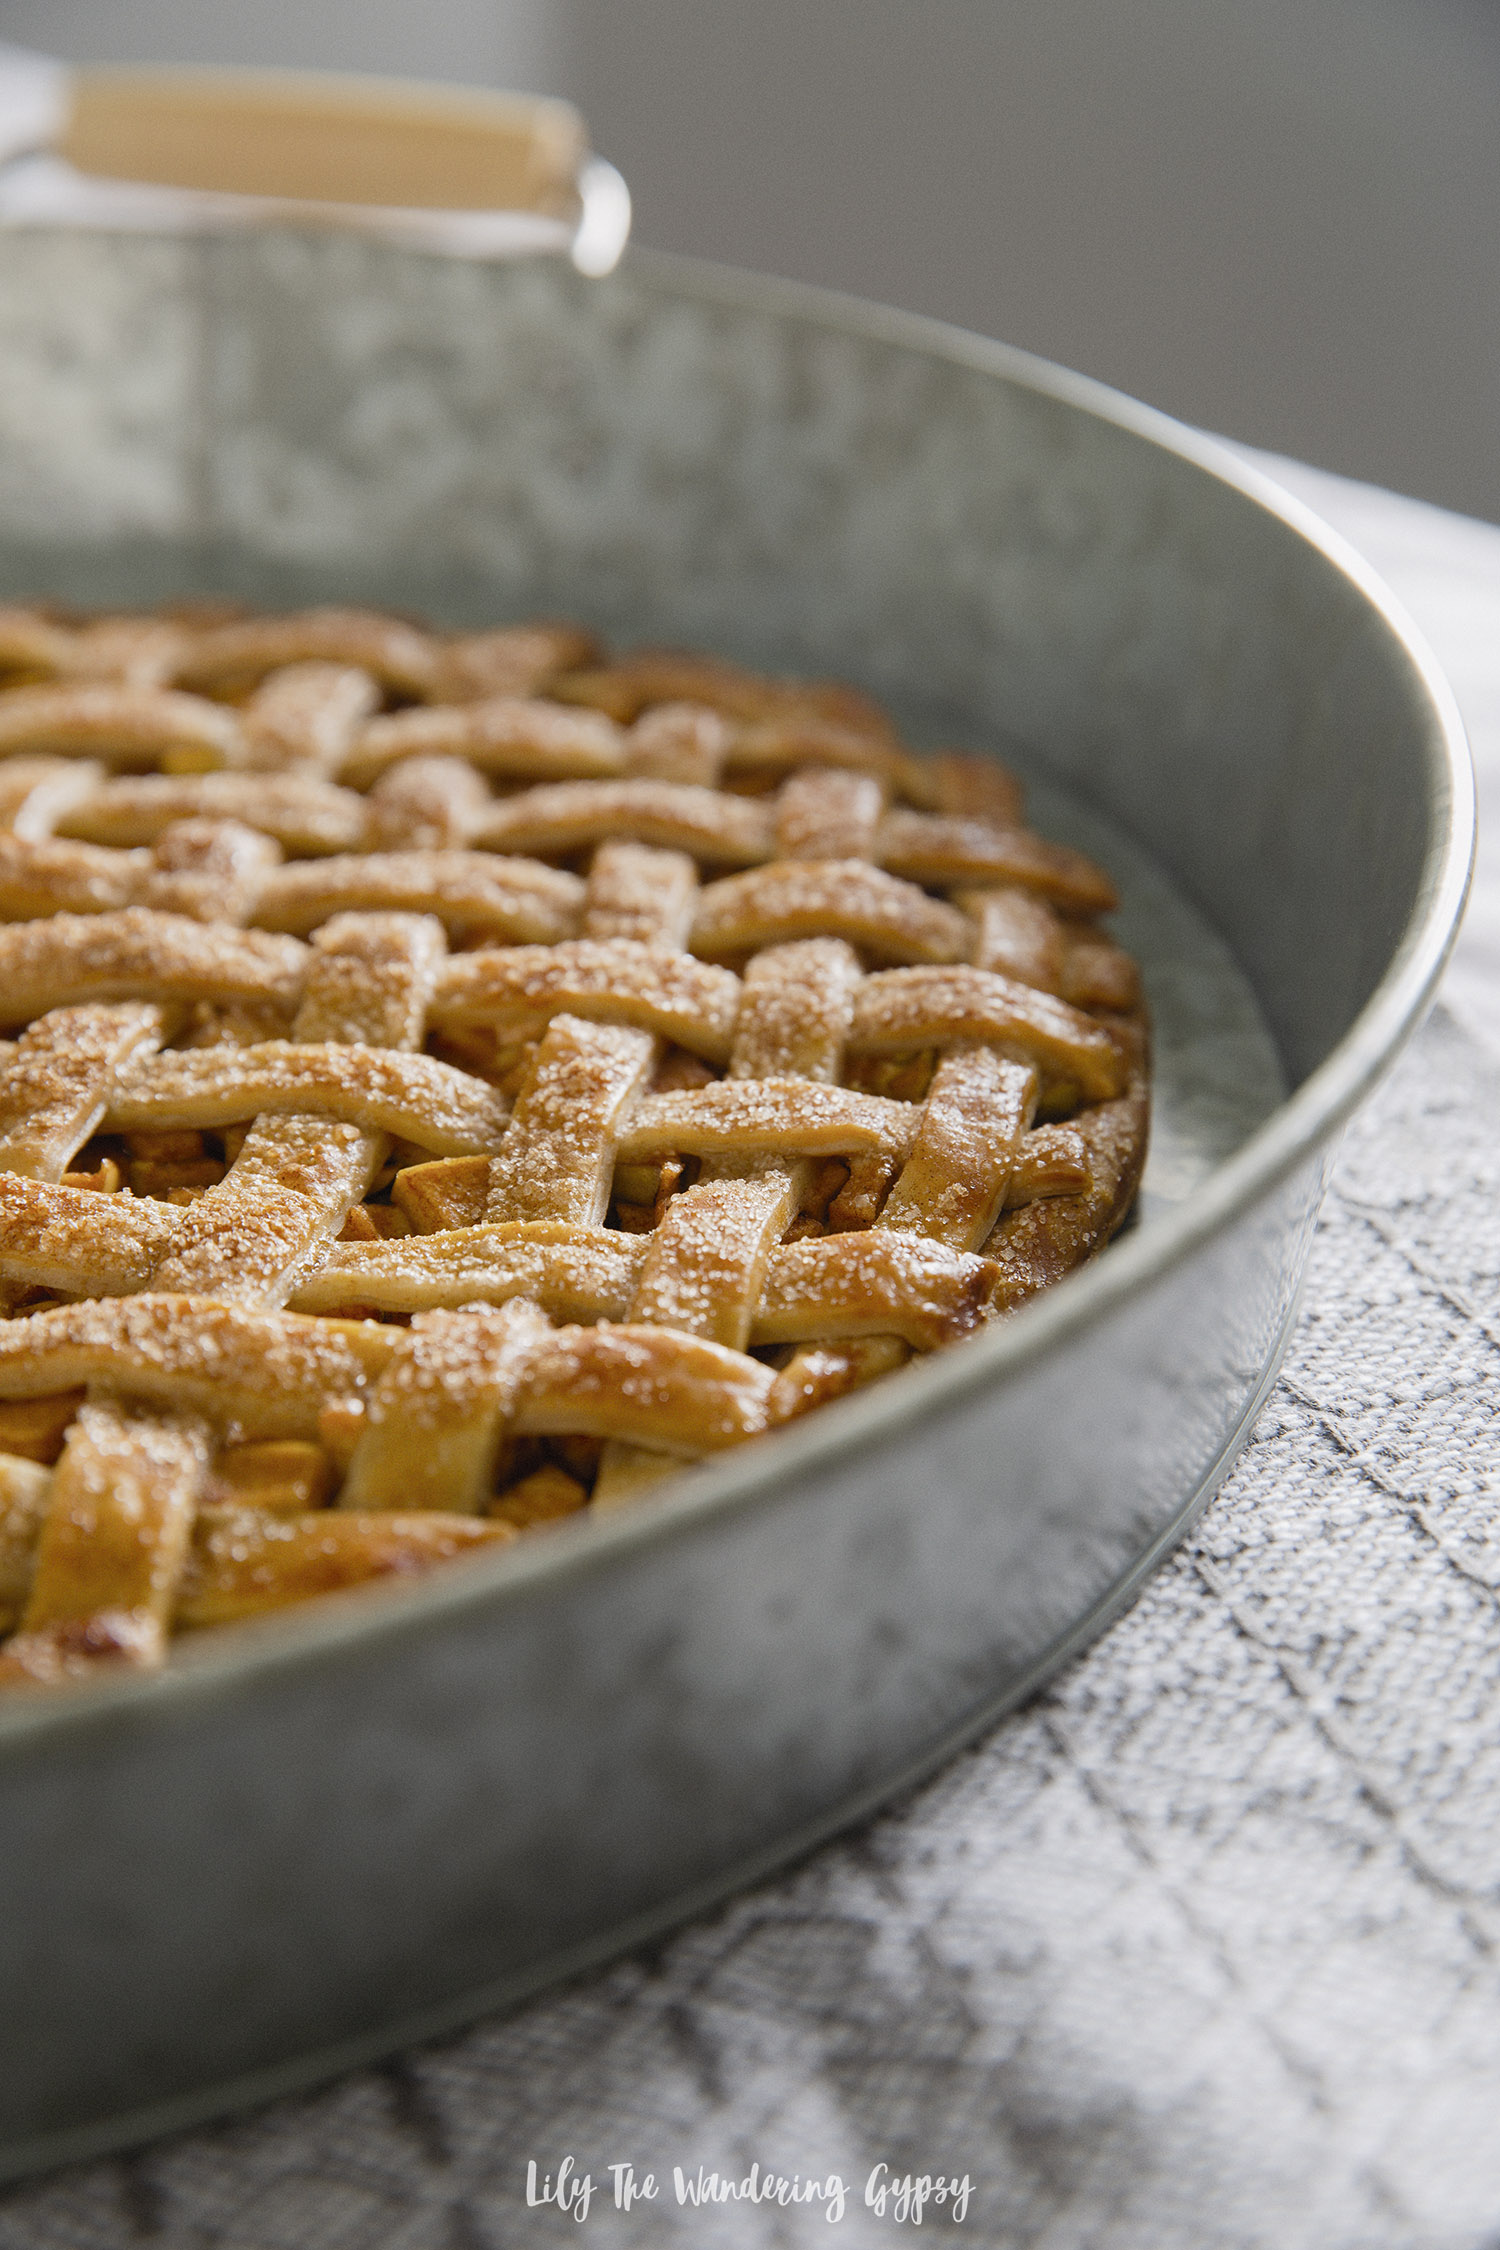
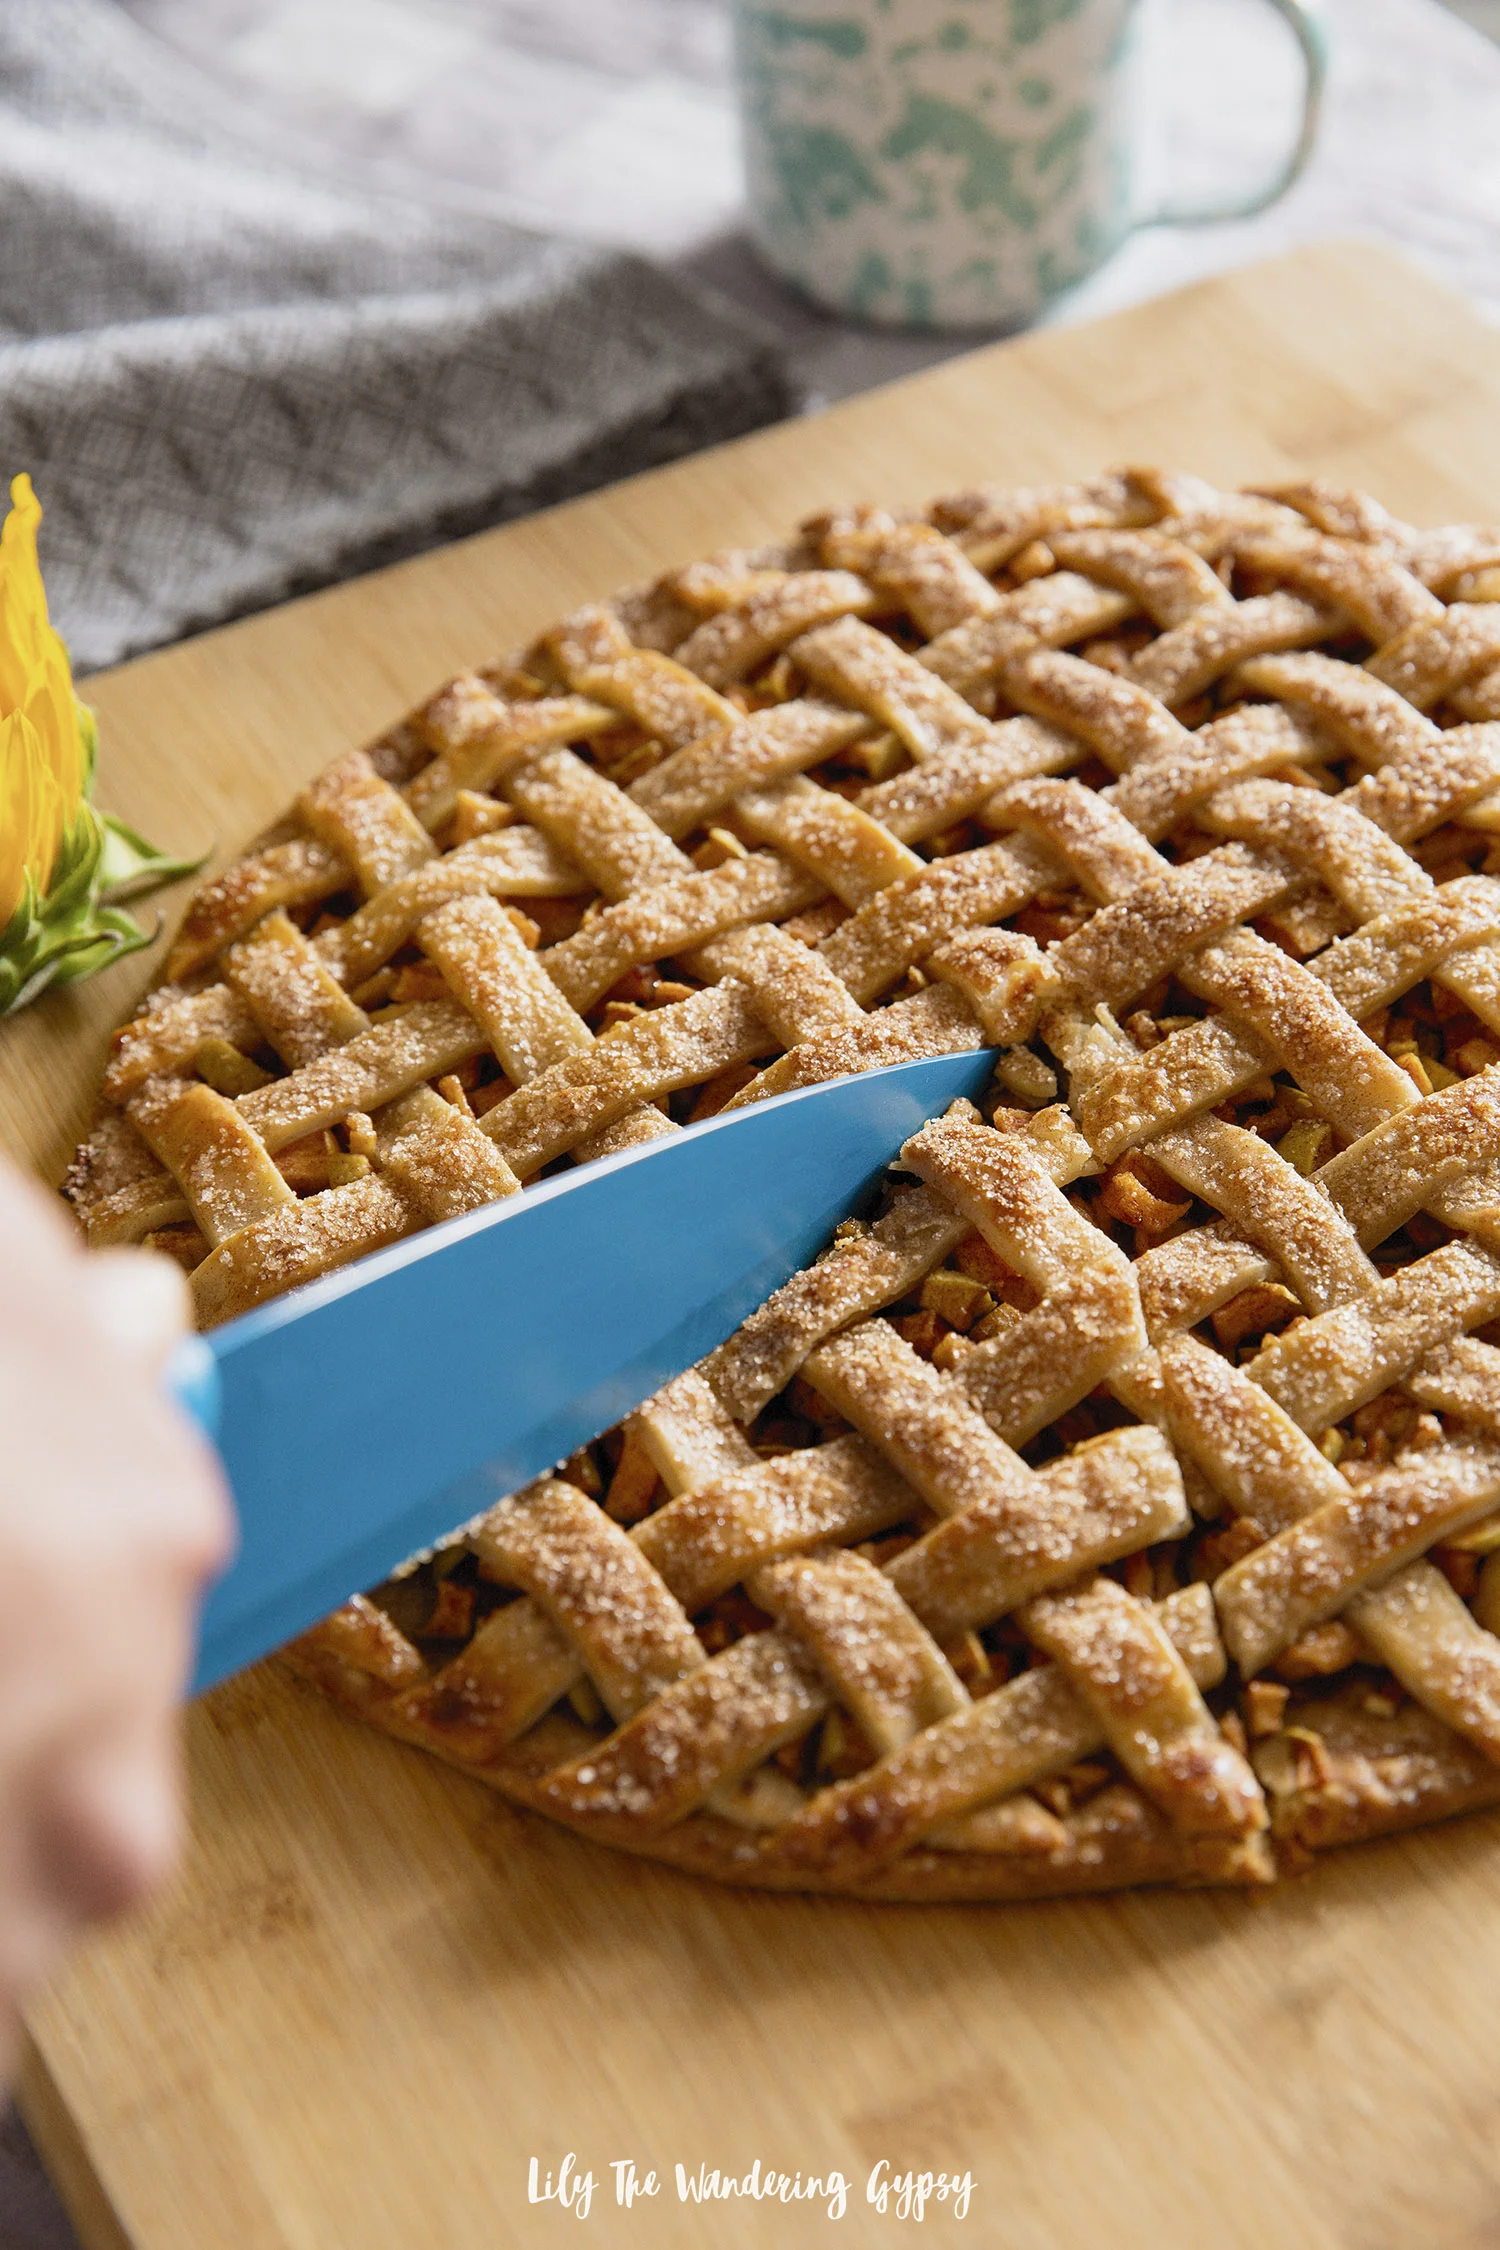
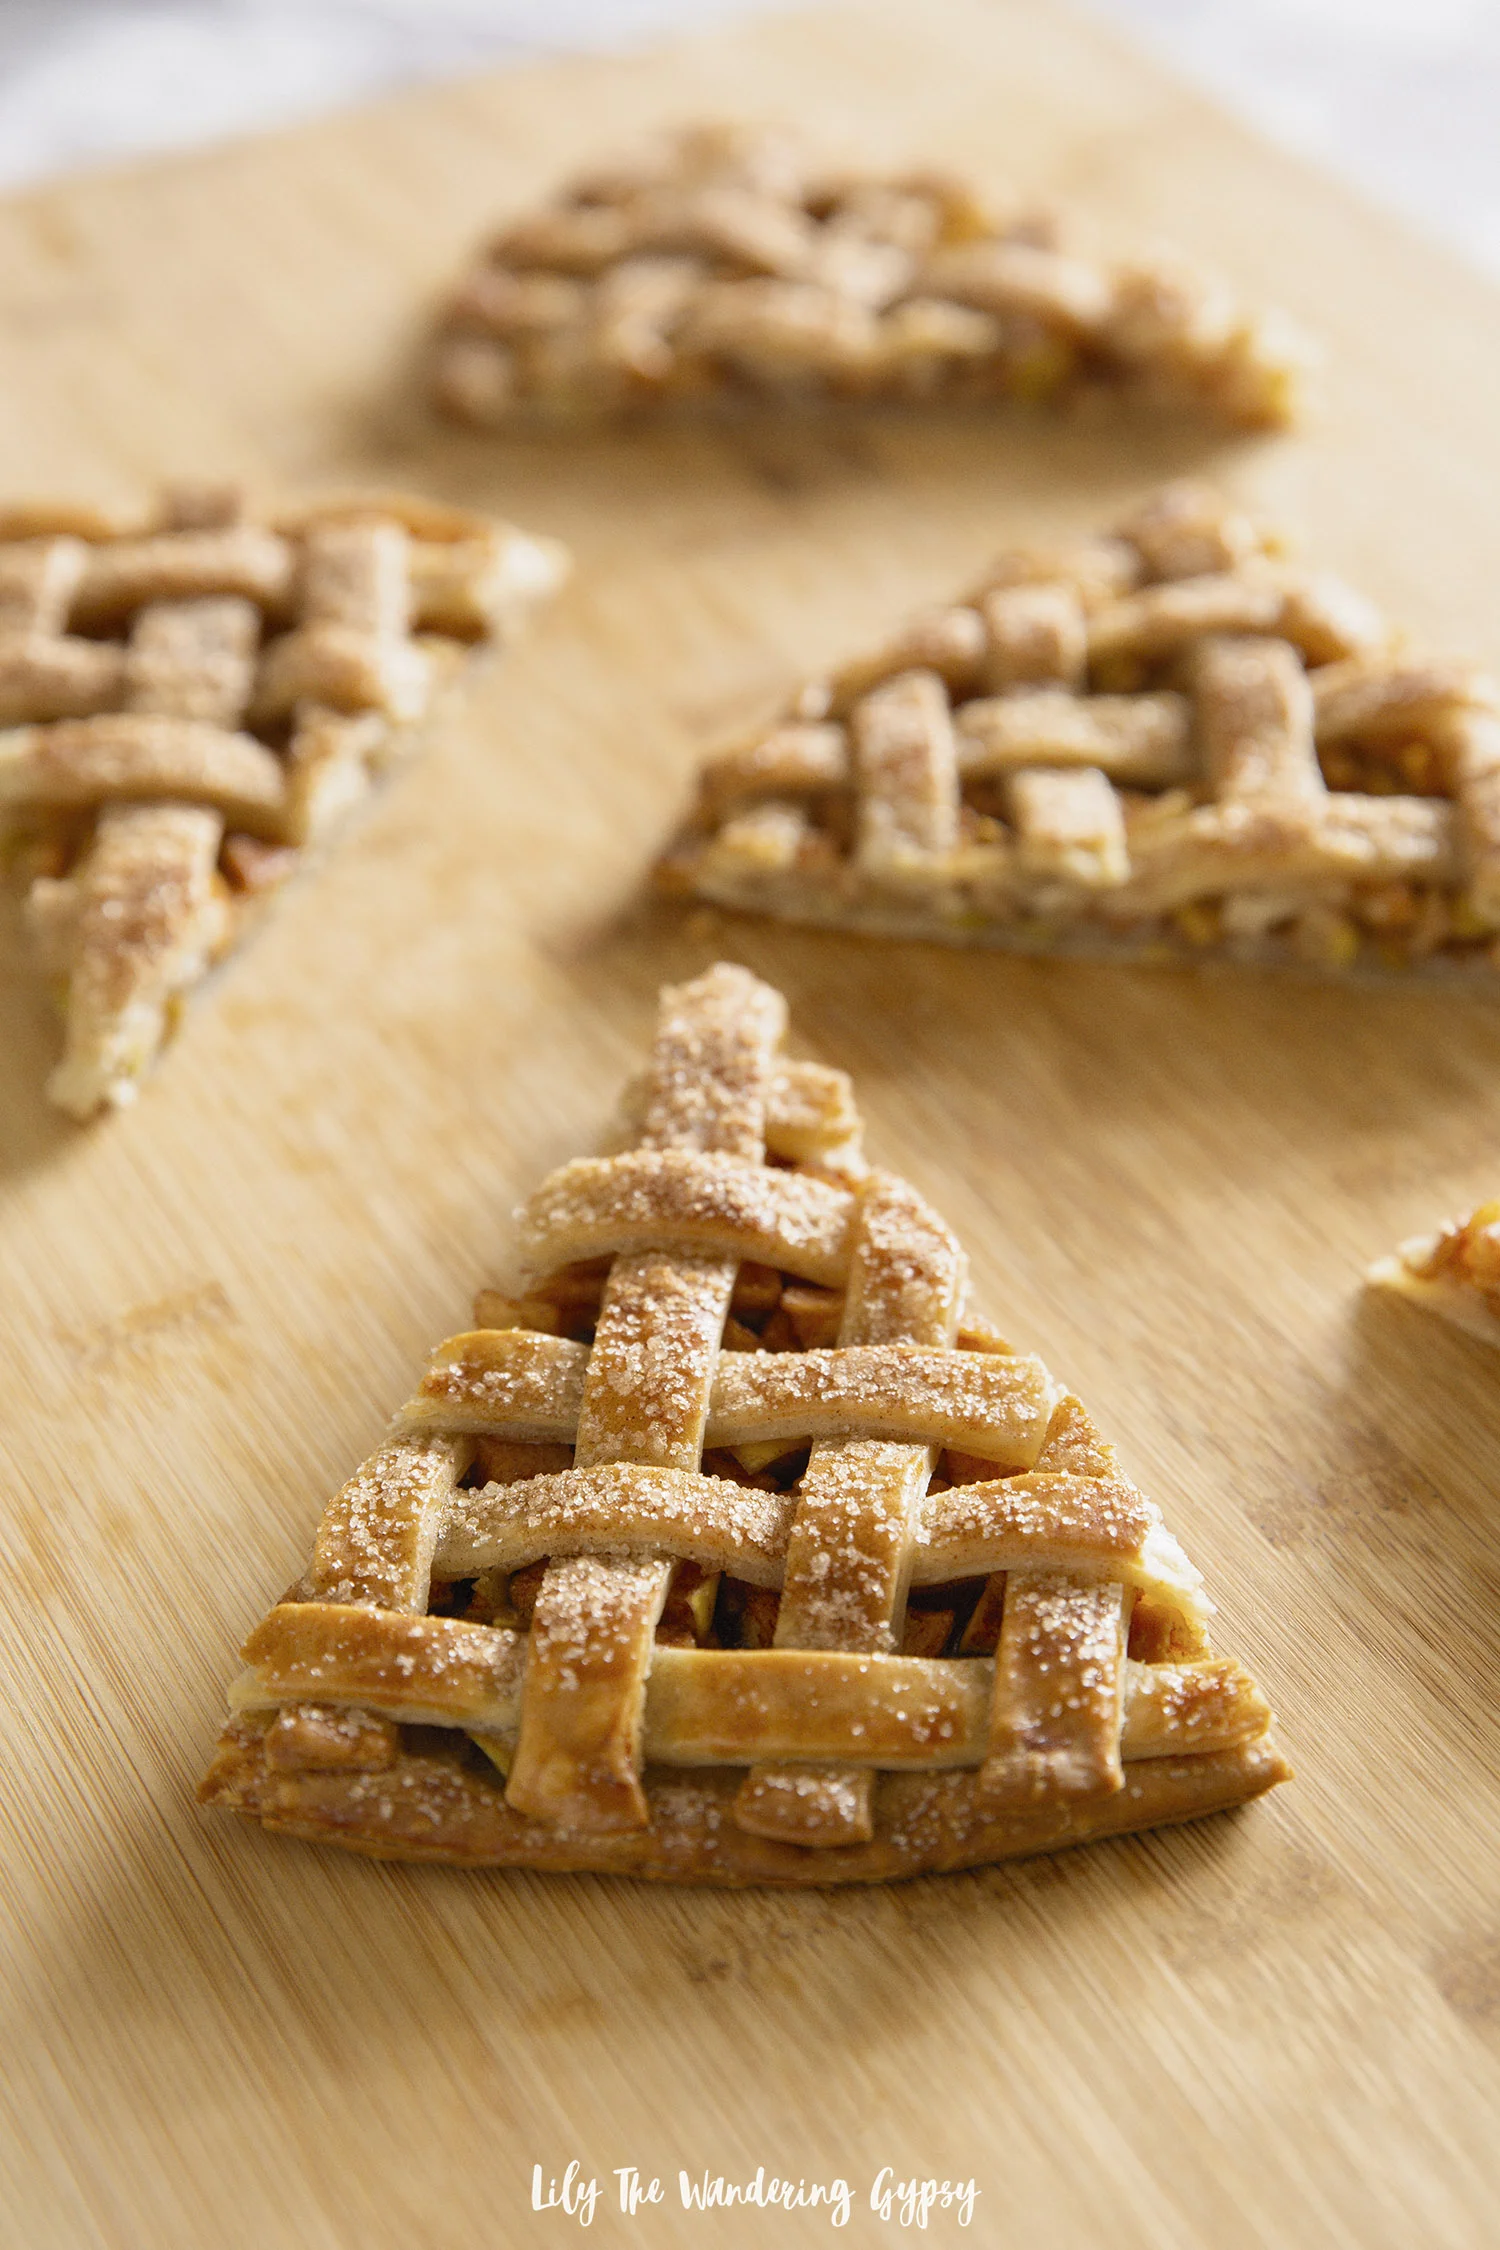
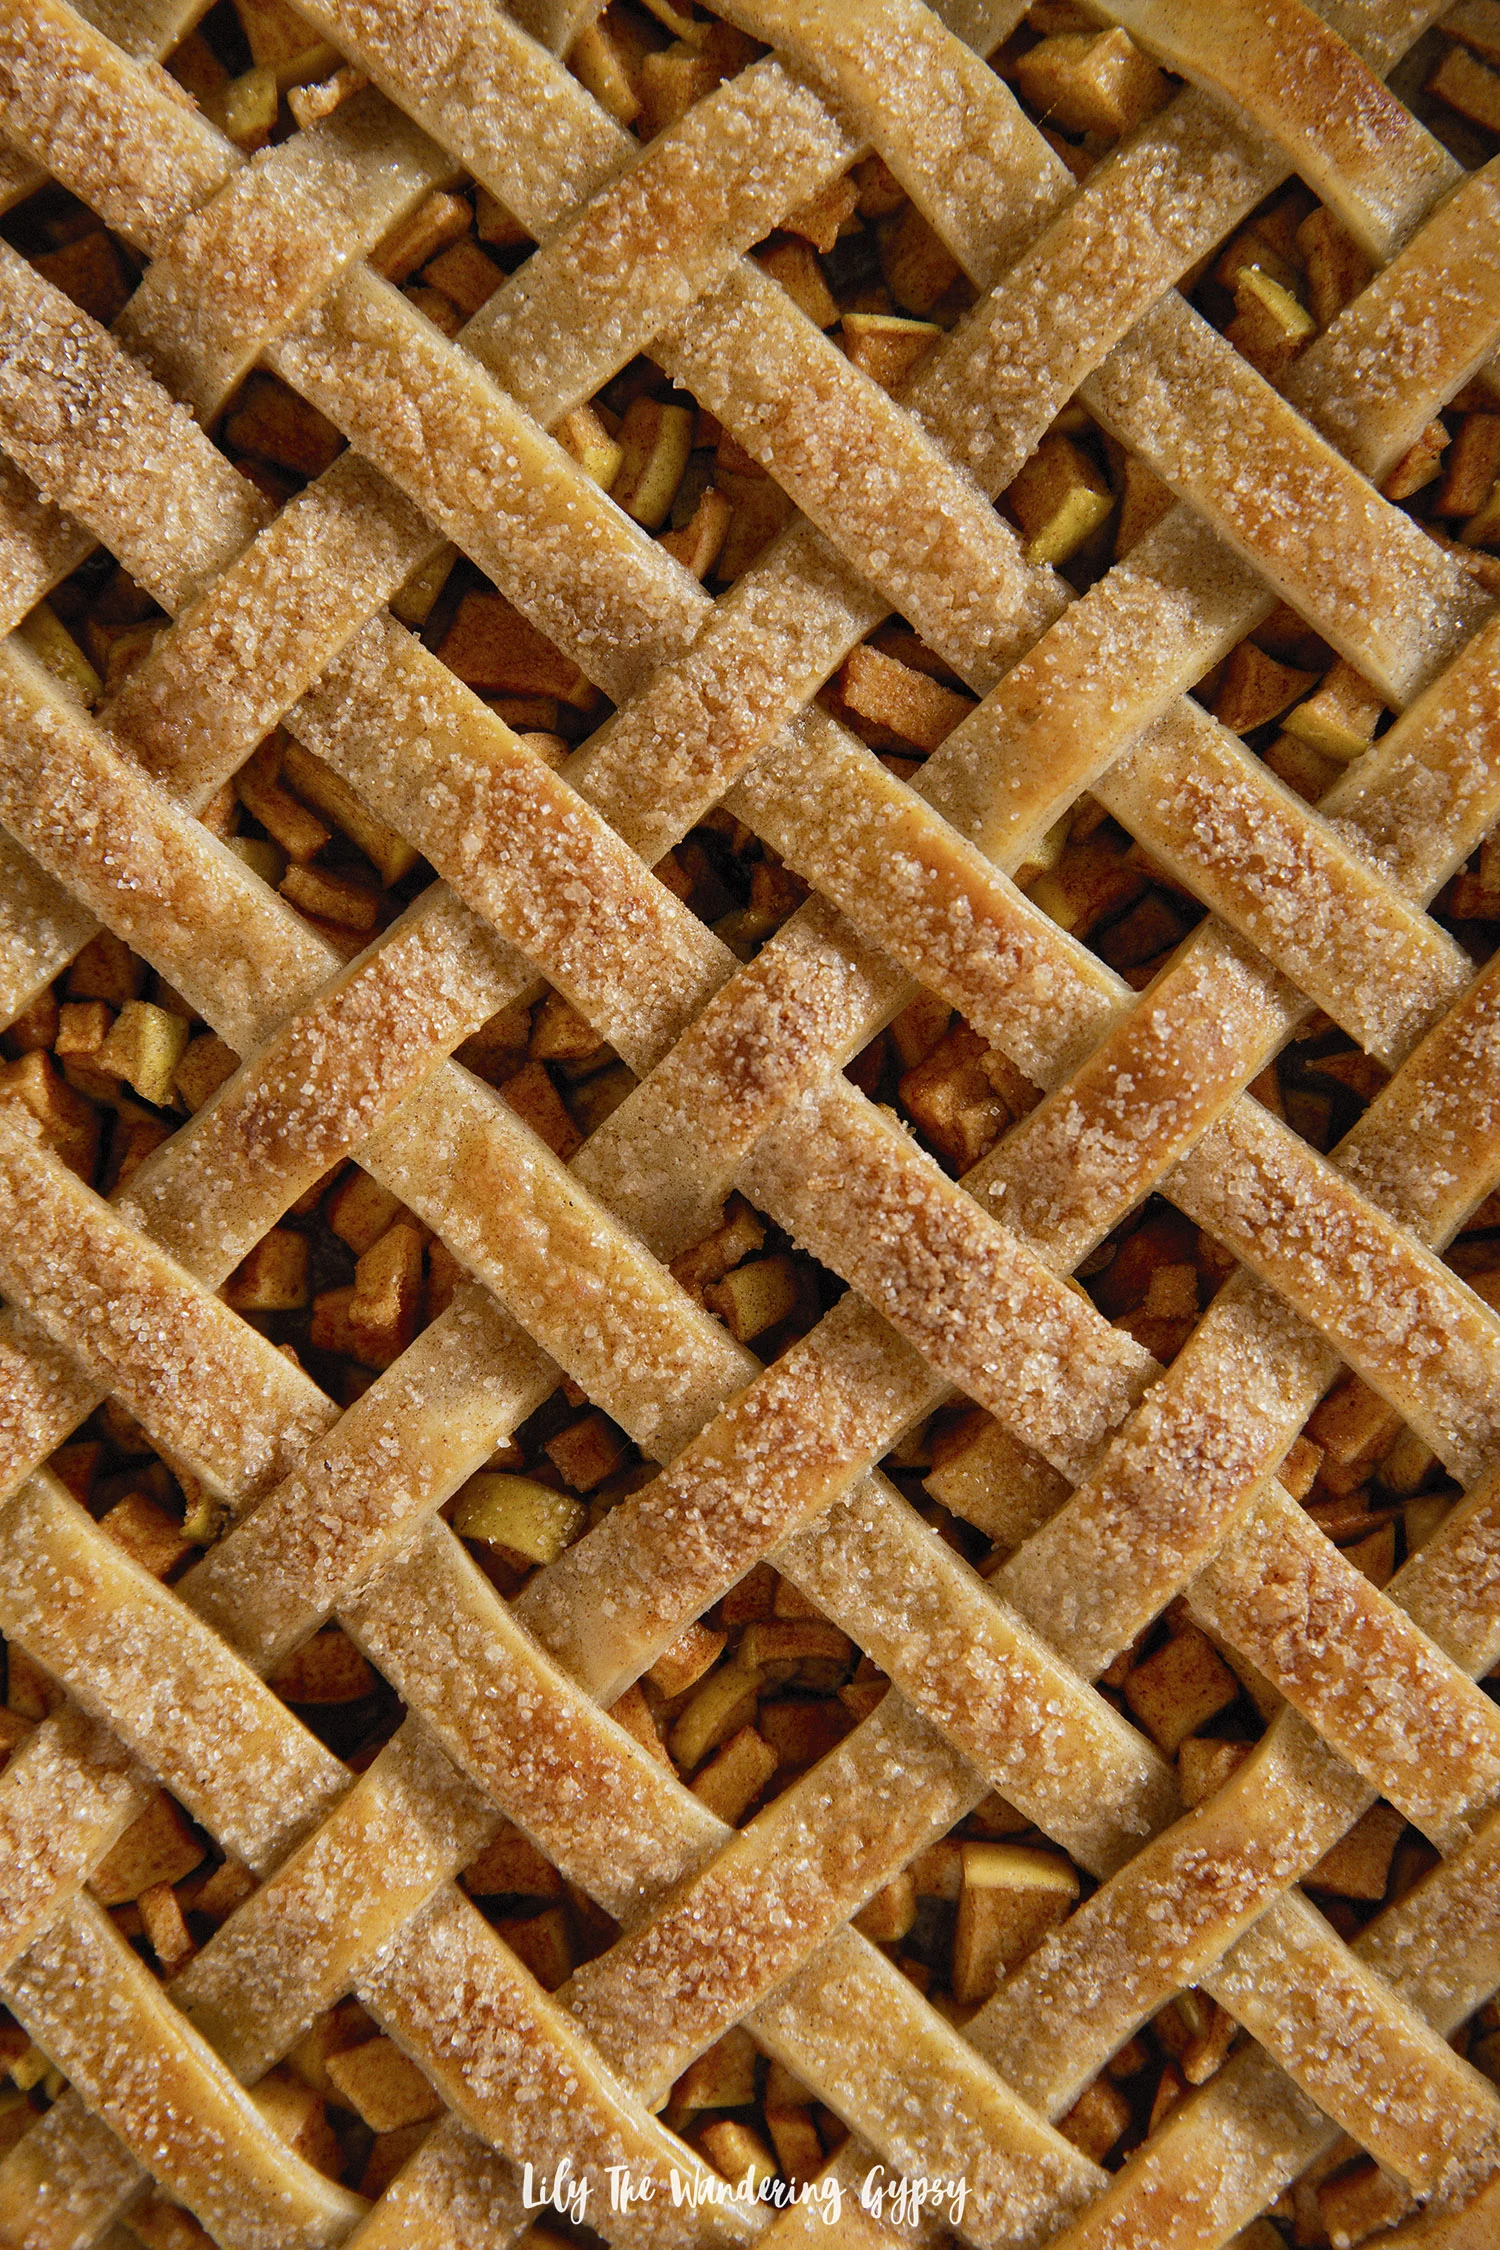
I found a unique way to incorporate three varieties of Amy’s Kitchen soups into a Vegetarian Pot Pie, and I hope you love it! Since Amy’s Soups already taste delicious on their own, I was able to allow those flavors to shine, while simply complimenting them with a few more veggies and a flaky, puff pastry woven lattice crust. This dish can be made as individual pot pies, or as one large casserole – it’s completely up to you! And, feel free to use this lattice technique, or simply use a full sheet of puff pastry crust right across the top.

This homemade, vegetarian dish is waiting to be served at your next weeknight dinner, holiday meal, or even as a make-ahead meal that can be frozen and baked in just a short time, making dinner exceptionally easy AND delicious!

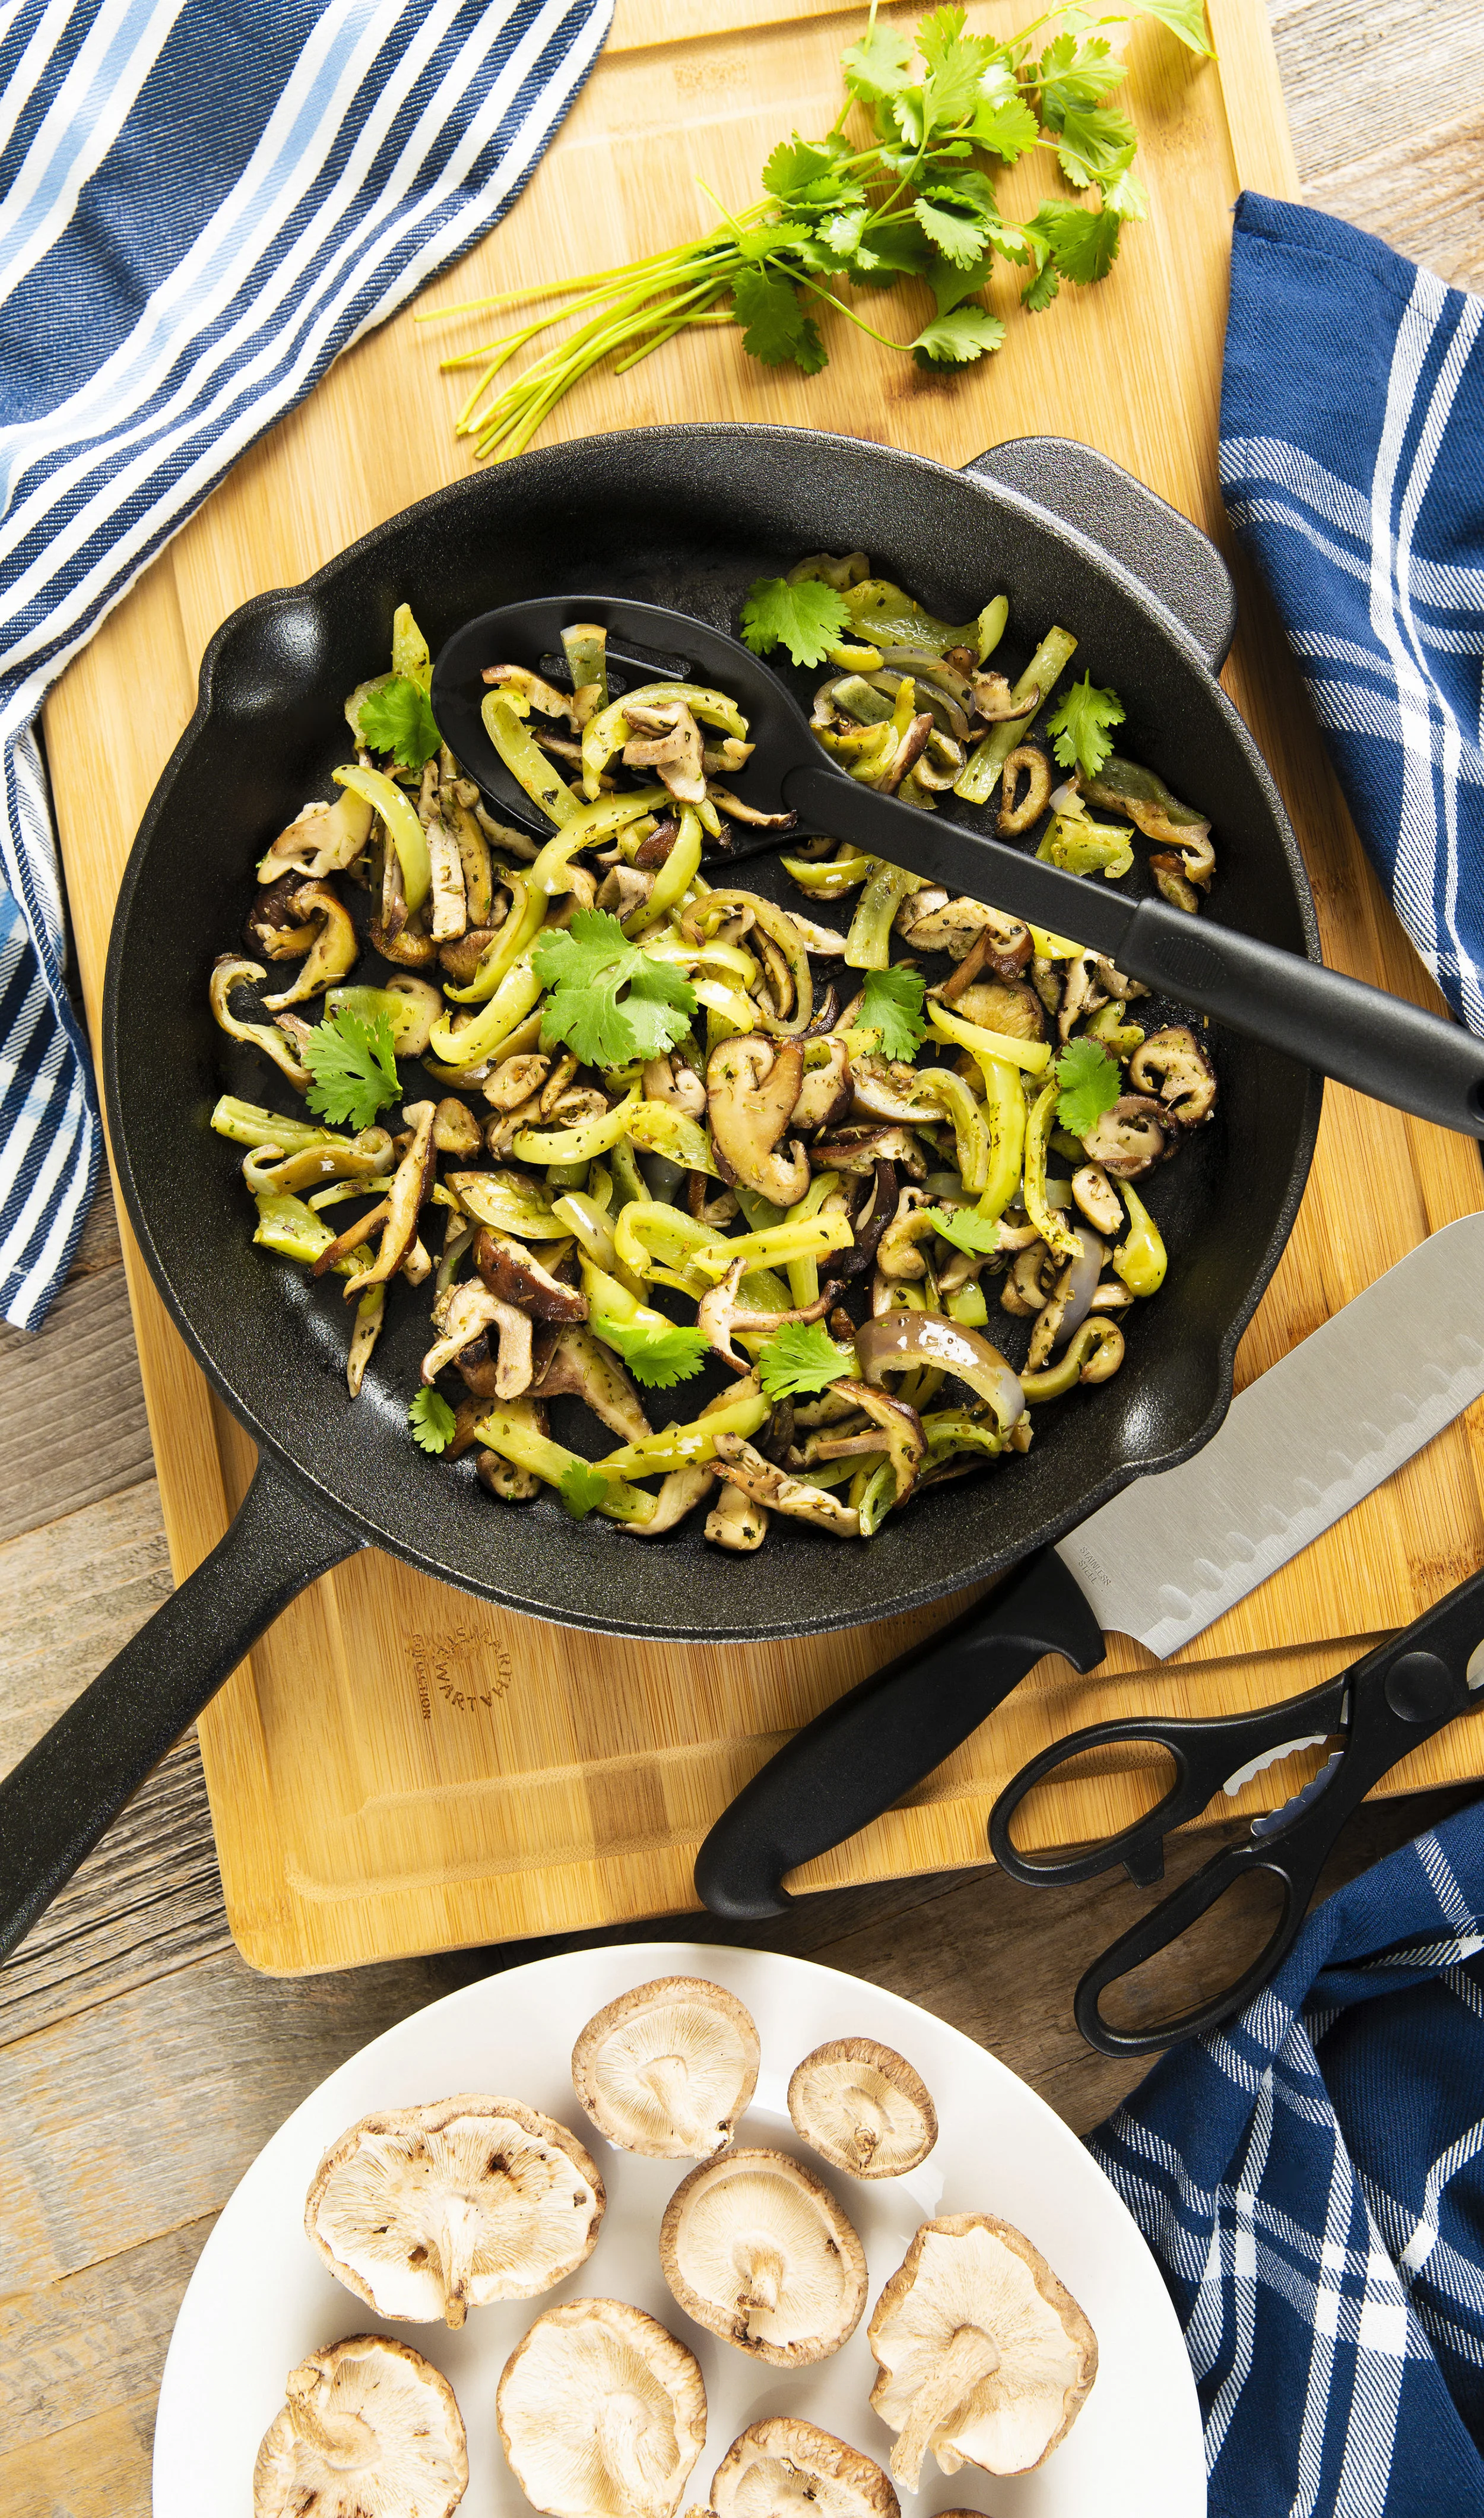
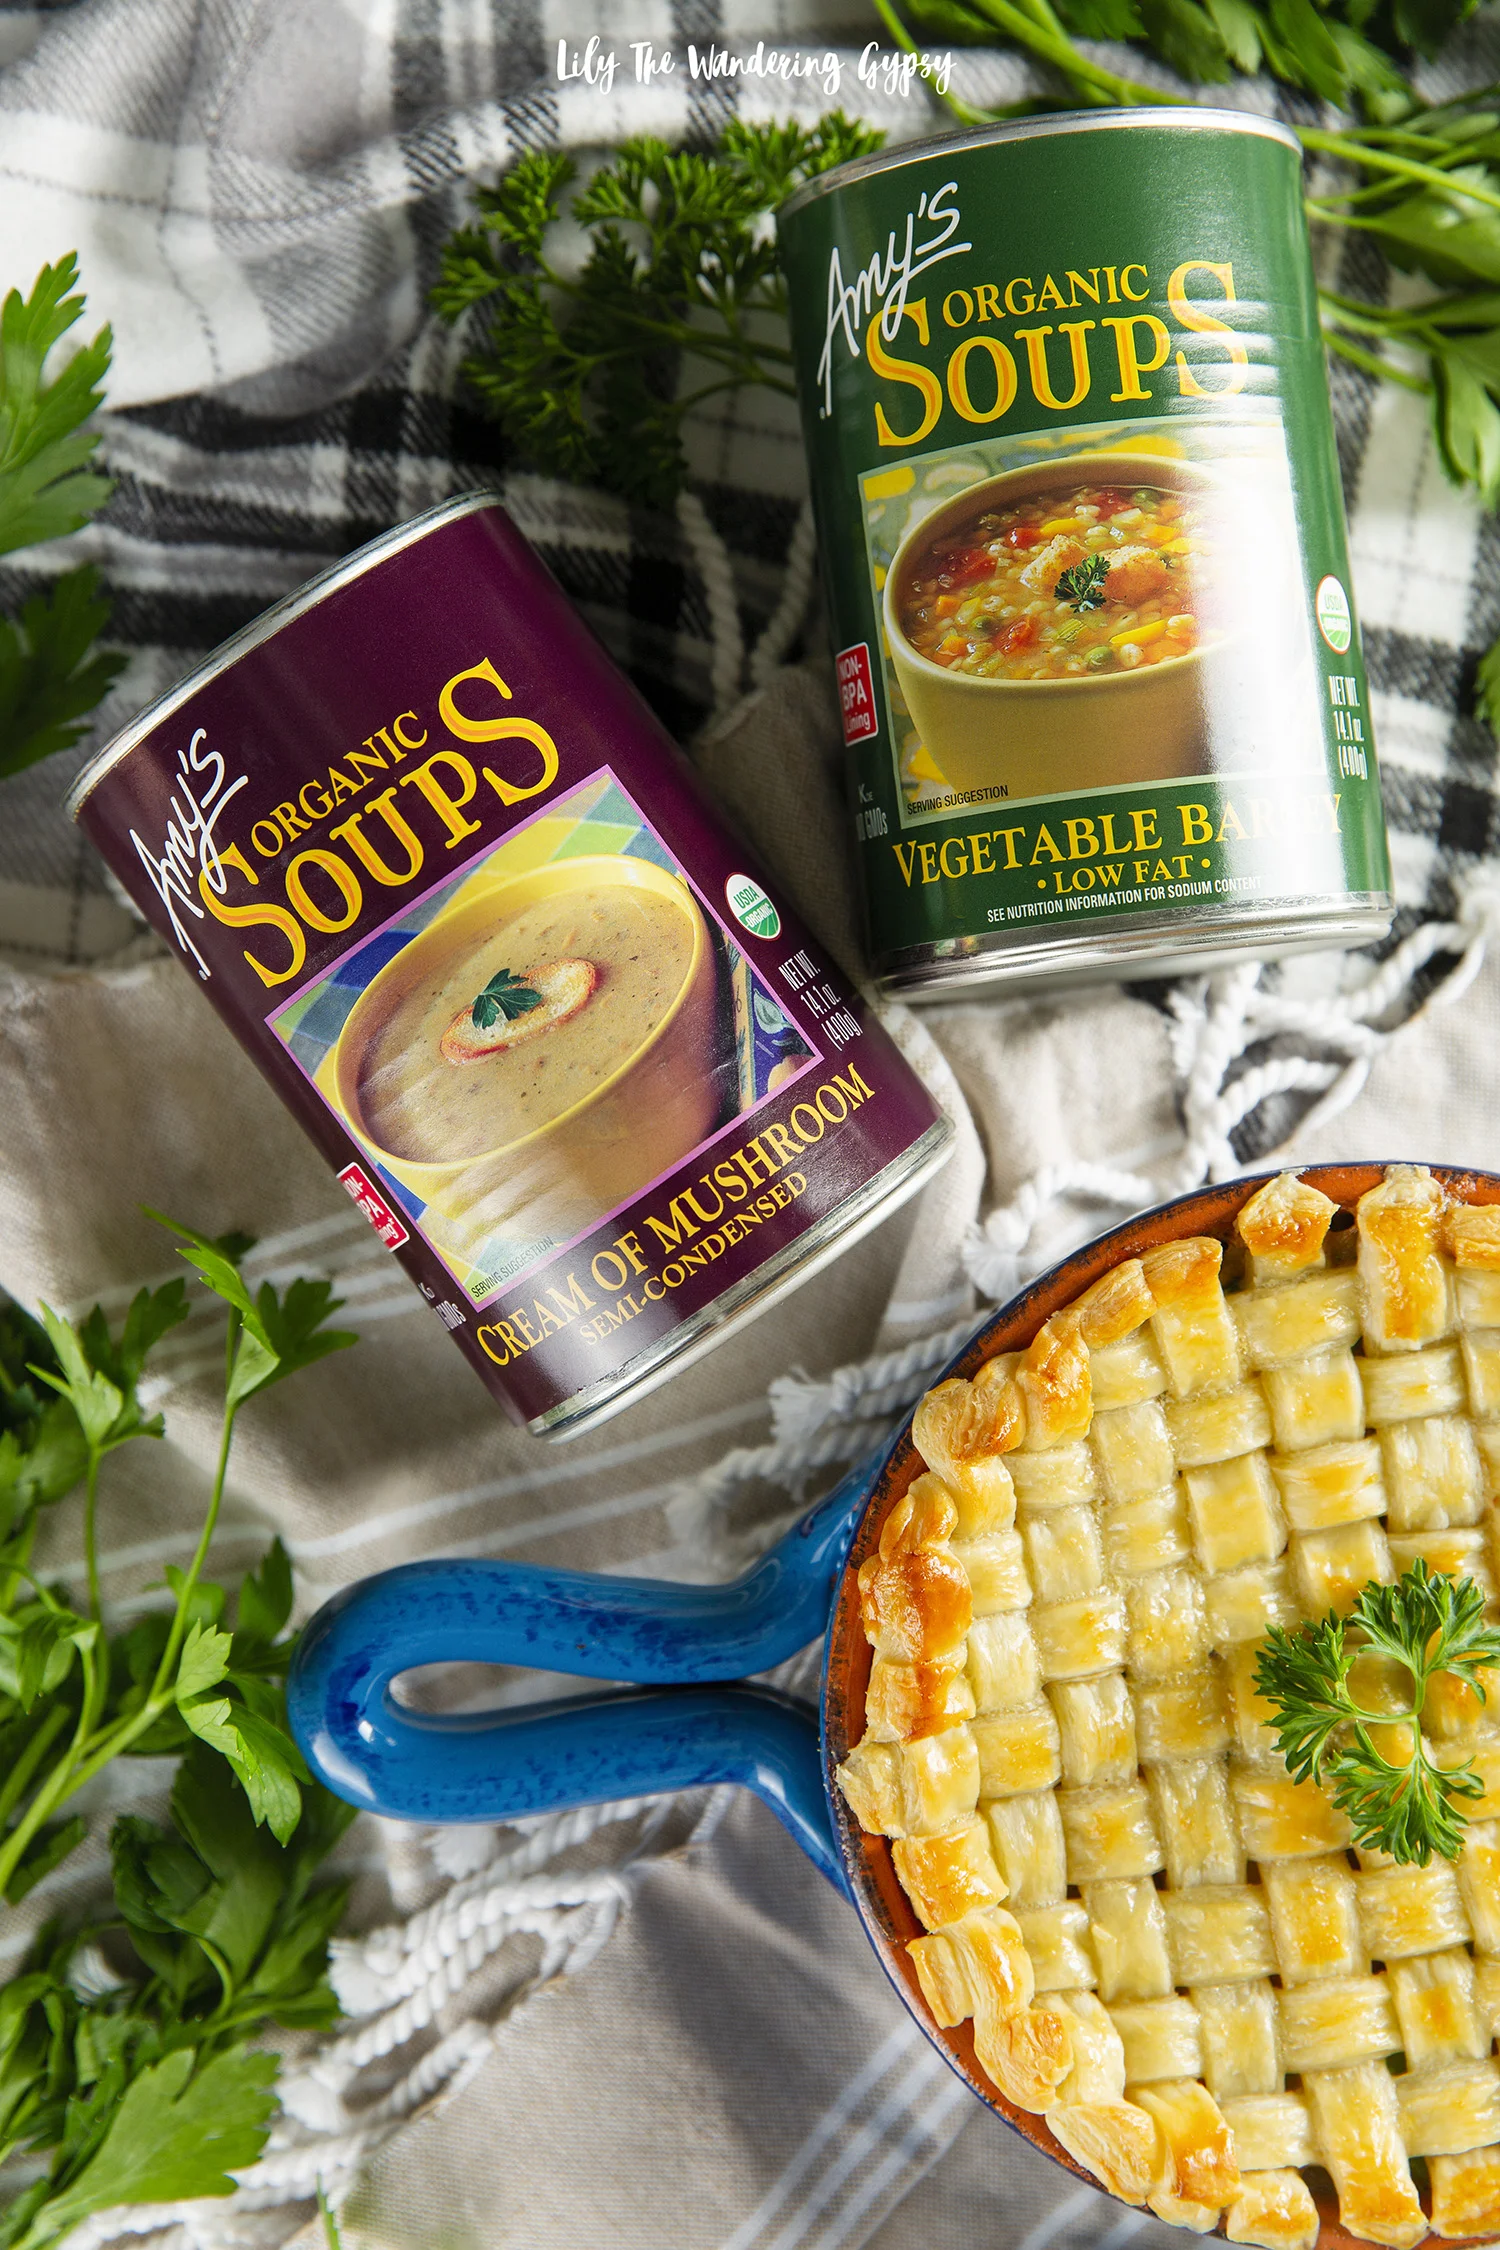
The phrase “comfort food” definitely comes to mind with this dish. It’s filled with an array of veggies, plus Amy’s Organic Cream of Mushroom Soup, Organic Chunky Vegetable Soup, and their Organic Vegetable Barley Soup. This dish is literally brimming with vegetables, you are going to love it. Even super picky eaters will enjoy this food. It’s a great idea to stock up for the cooler months with Amy’s soups! Keep a few soup cans stashed in your pantry (or desk!) for those times when you want something tasty that will warm you up as well. I always feel better after a warm meal, and these soups make an exceptional meal all on their own!

I love this cream of mushroom soup - it could surely be enjoyed on its own, warmed up with a handful of oyster crackers in the bowl for some crunch. I have never found a cream of anything soup that I am happy with. I have found that most canned cream soups are all way too thick and just full of unnecessary ingredients, and I have found too some have a sort of strange aroma. This has always turned me away from using condensed cream soups, but now I have a newfound hope thanks to Amy’s Kitchen! The Cream of Mushroom Semi-Condensed Soup worked super well for the base of this recipe, and would even be super delicious heated and enjoyed on its own, or with a handful of soup crackers.

I have fond memories of my mom making chicken pot pie many, many times as a child. She would use a traditional recipe that incorporated chicken and a small portion of veggies. It was always amazing, but as I grew older, and realized the importance of eating plant-based, I knew I needed to adapt a few of my most treasured family recipes into vegetarian versions.

Luckily, all of Amy’s products contain high-quality ingredients. That is extremely important for me, and I am so happy I have made a small lifestyle switch to considering each and every ingredient in the foods I eat and prepare for those I love. At Amy’s, they choose the best ingredients for each recipe. They cook with ingredients that people use in their own kitchens and trust, like carrots, beans, flour and spices! They don’t use a lot of starches and thickeners (which I do notice when I open their soups and other foods. They rely instead on slow simmering and cooking to develop soups and creamy sauces. This is very apparent as I was using the Amy’s Cream of Mushroom soup, it’s a really smooth texture without being overly thick, like other cream canned soups.

PRINTABLE RECIPE BELOW - RIGHT CLICK TO SAVE OR PRINT
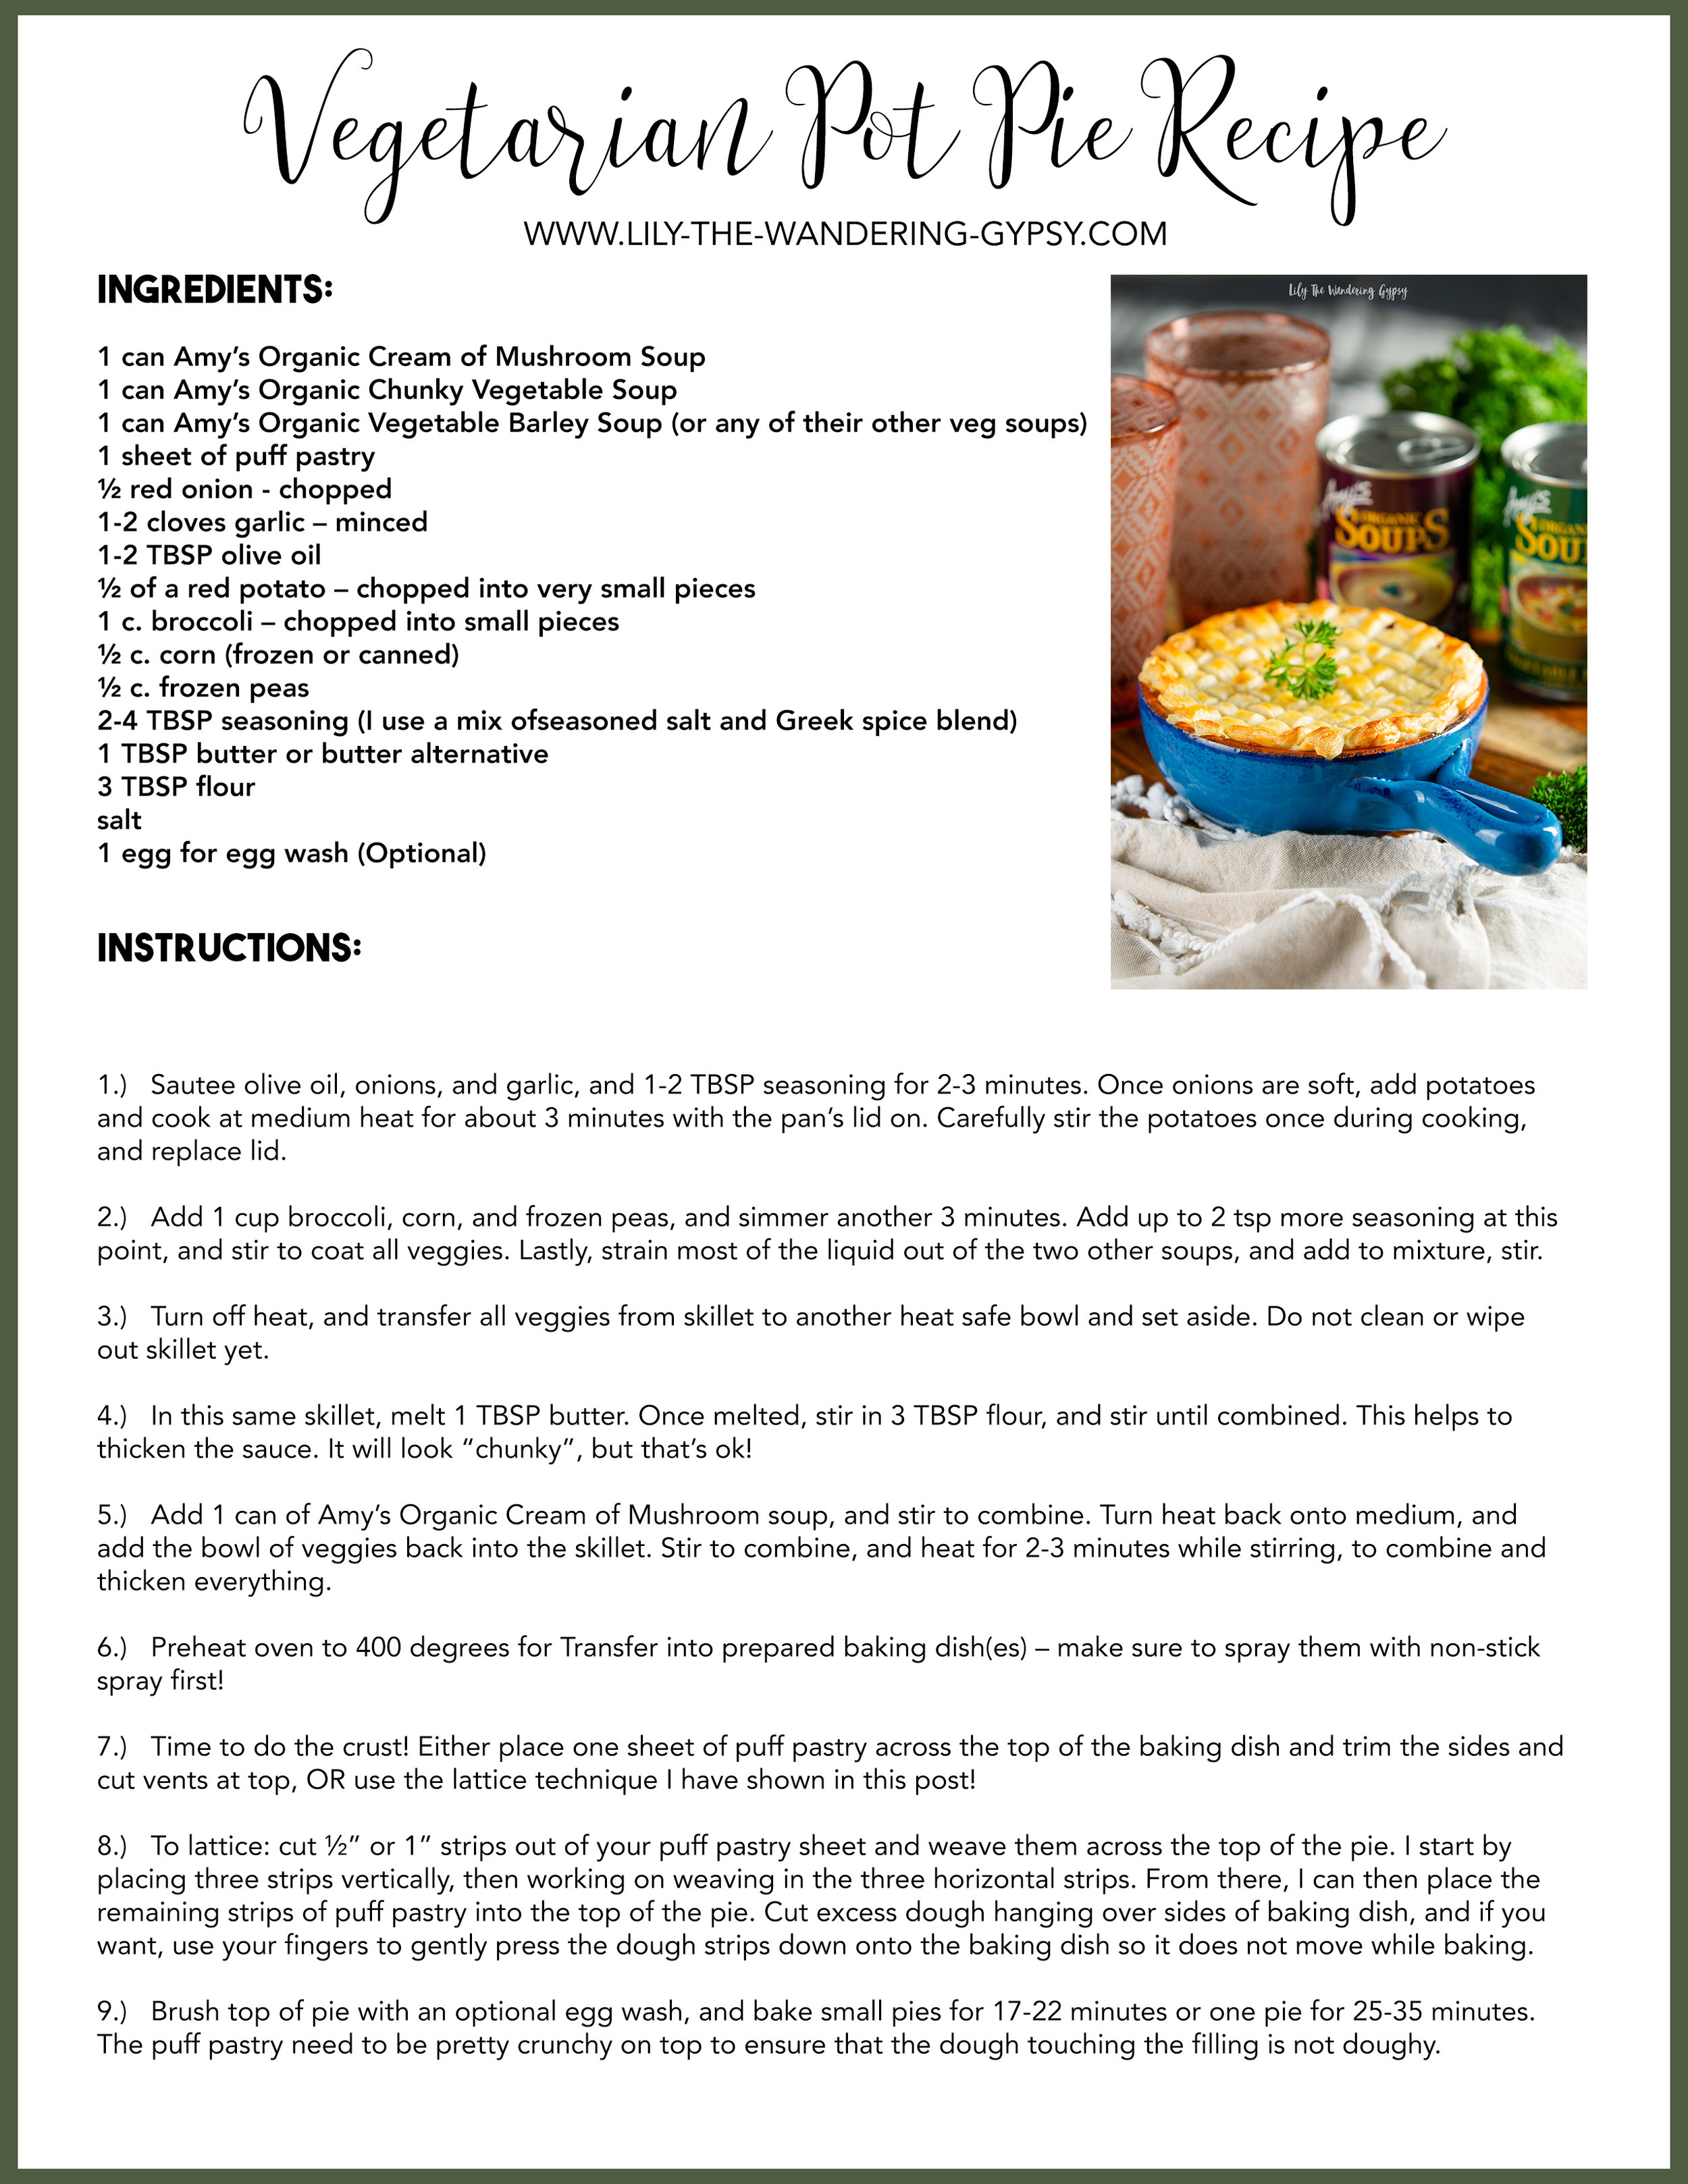
INGREDIENTS:

1 can Amy’s Organic Cream of Mushroom Soup

1 can Amy’s Organic Chunky Vegetable Soup

1 can Amy’s Organic Vegetable Barley Soup (any of their other vegetable soups will work well too)

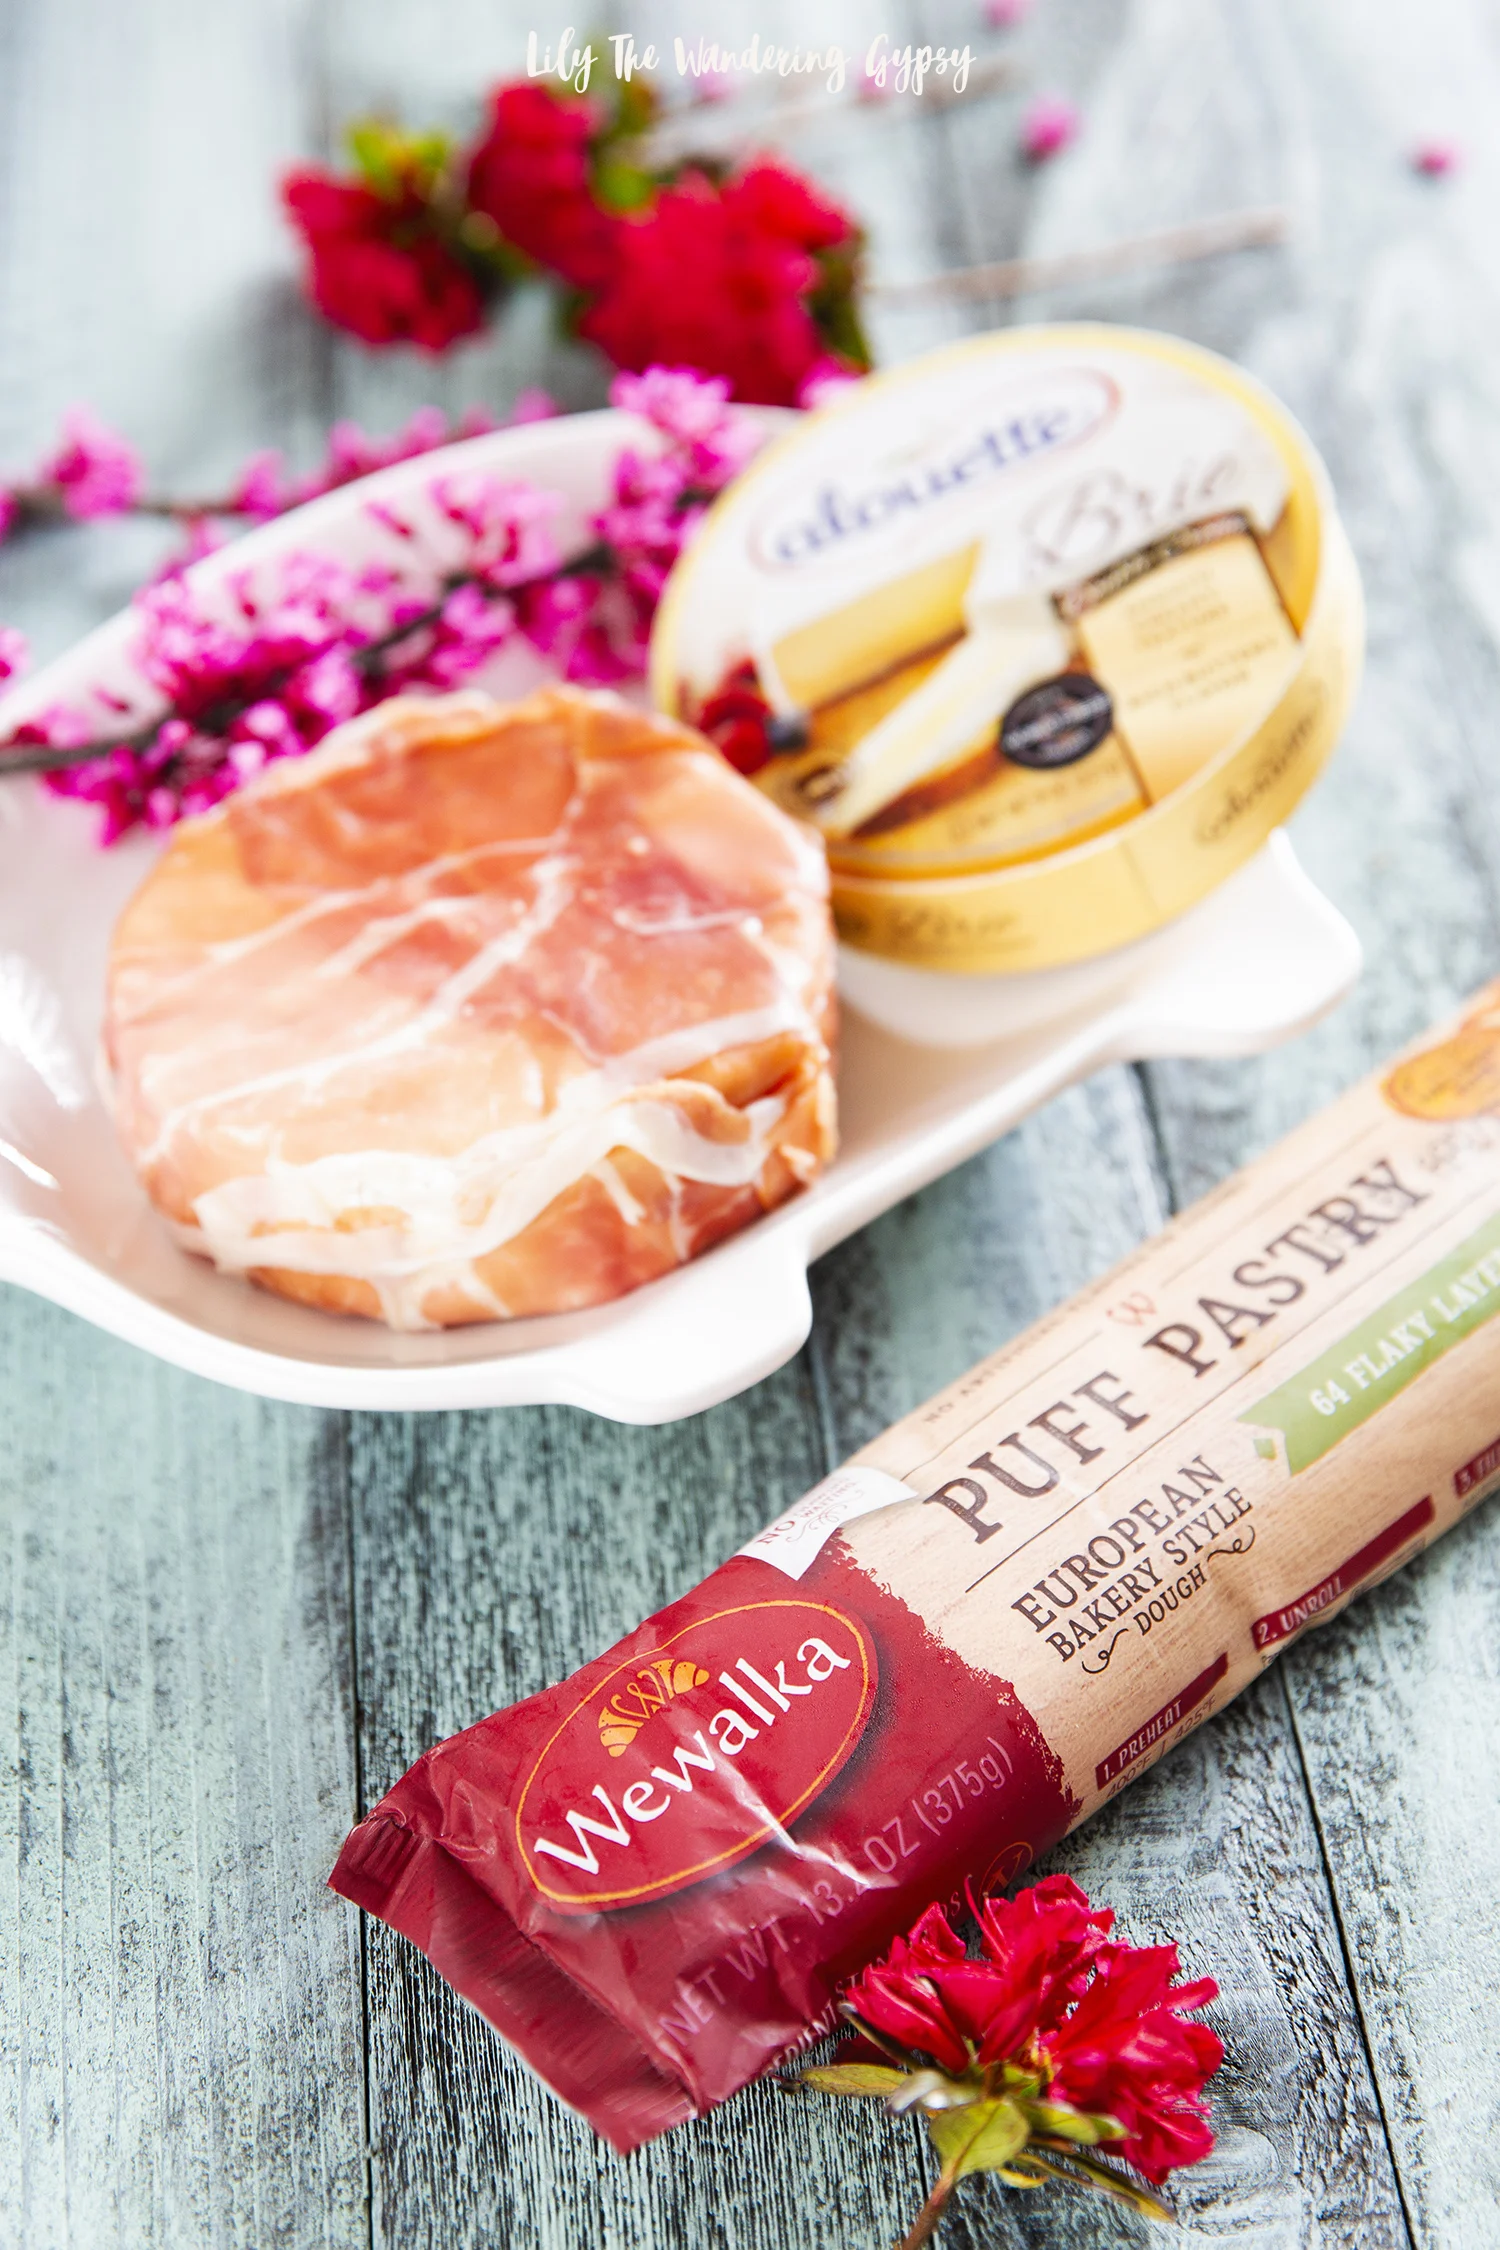
1 sheet of puff pastry

½ red onion - chopped

1-2 cloves garlic – minced

1-2 TBSP olive oil

½ of a red potato – chopped into very small pieces

1 c. broccoli – chopped into small pieces

½ c. corn (frozen or canned)

½ c. frozen peas

2-4 TBSP seasoning (I use a mixture of low sodium seasoned salt and a Greek spice blend)

1 TBSP butter or butter alternative

3 TBSP flour

salt

Optional 1 egg for egg wash (simply use which to stir up one egg in a small bowl)

INSTRUCTIONS:

1.)   Sautee olive oil, onions, and garlic, and 1-2 TBSP seasoning for 2-3 minutes. Once onions are soft, add potatoes and cook at medium heat for about 3 minutes with the pan’s lid on. Carefully stir the potatoes once during cooking, and replace lid.

2.)   Add 1 cup broccoli, corn, and frozen peas, and simmer another 3 minutes. Add up to 2 tsp more seasoning at this point, and stir to coat all veggies.

3.)   Turn off heat, and transfer all veggies from skillet to another heat safe bowl and set aside. Do not clean or wipe out skillet yet.

4.)   In this same skillet, melt 1 TBSP butter. Once melted, stir in 3 TBSP flour, and stir until combined. This helps to thicken the sauce. It will look “chunky”, but that’s ok!

5.)   Add 1 can of Amy’s Organic Cream of Mushroom soup, and stir to combine. Turn heat back onto medium, and add the bowl of veggies back into the skillet. Stir to combine, and heat for 2-3 minutes while stirring, to combine and thicken everything.

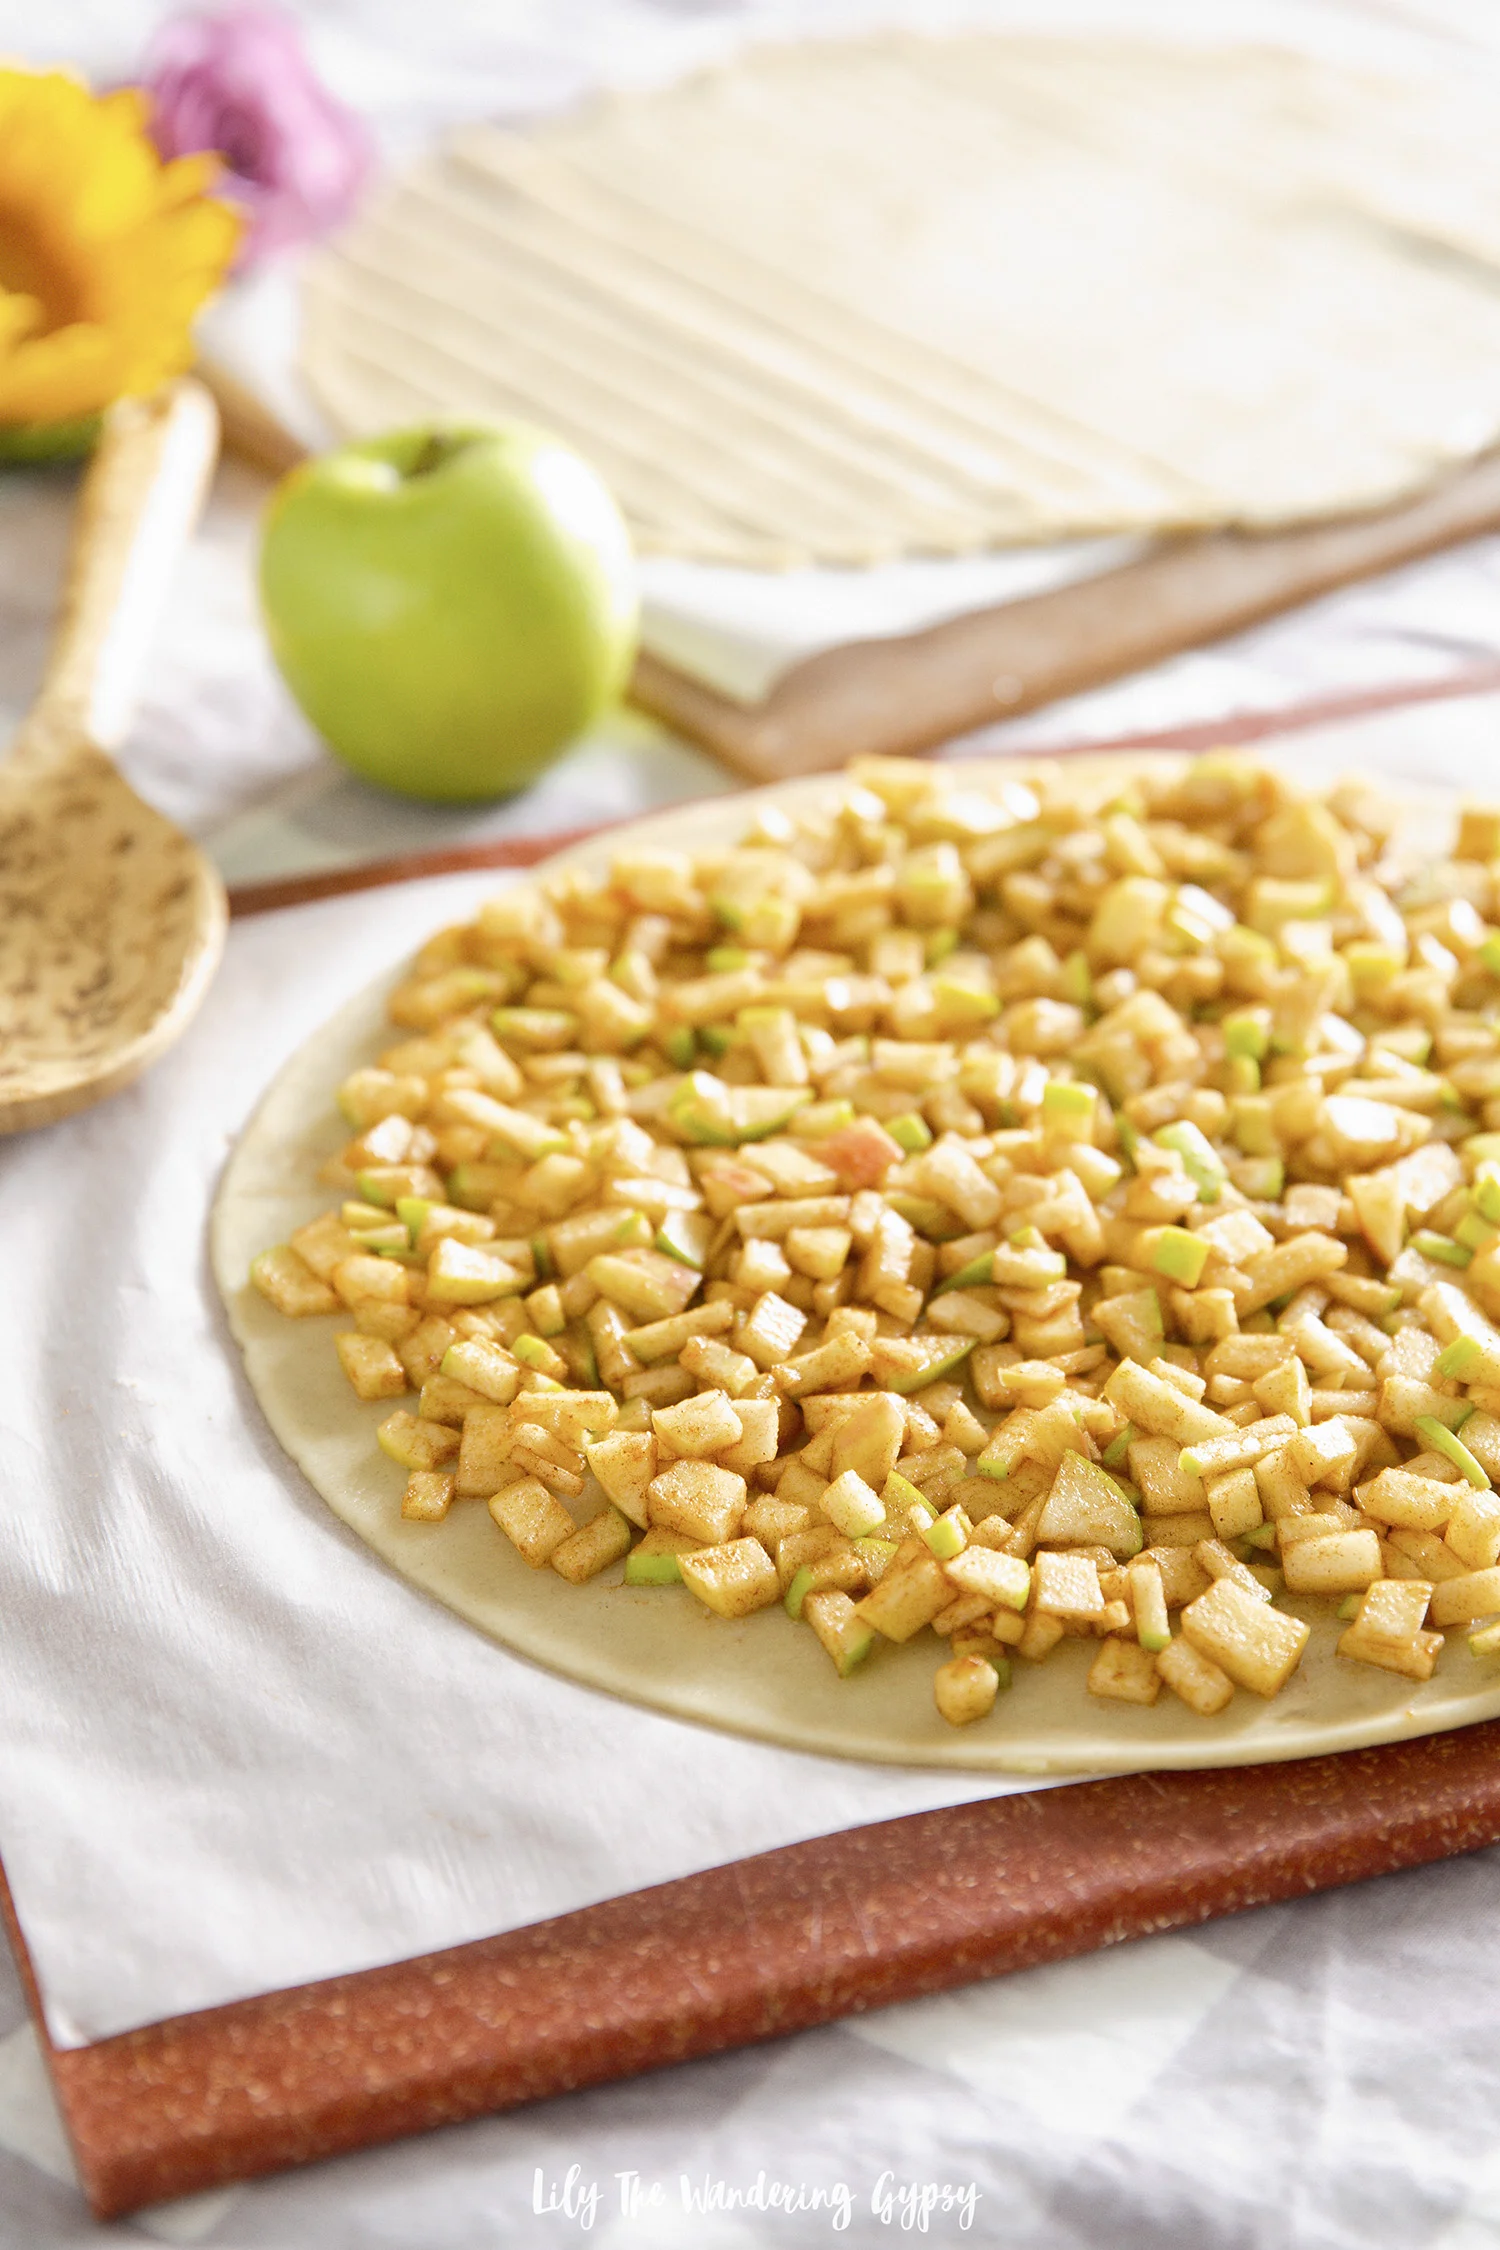
6.)   Preheat oven to 400 degrees for Transfer into prepared baking dish(es) – make sure to spray them with non-stick spray first!

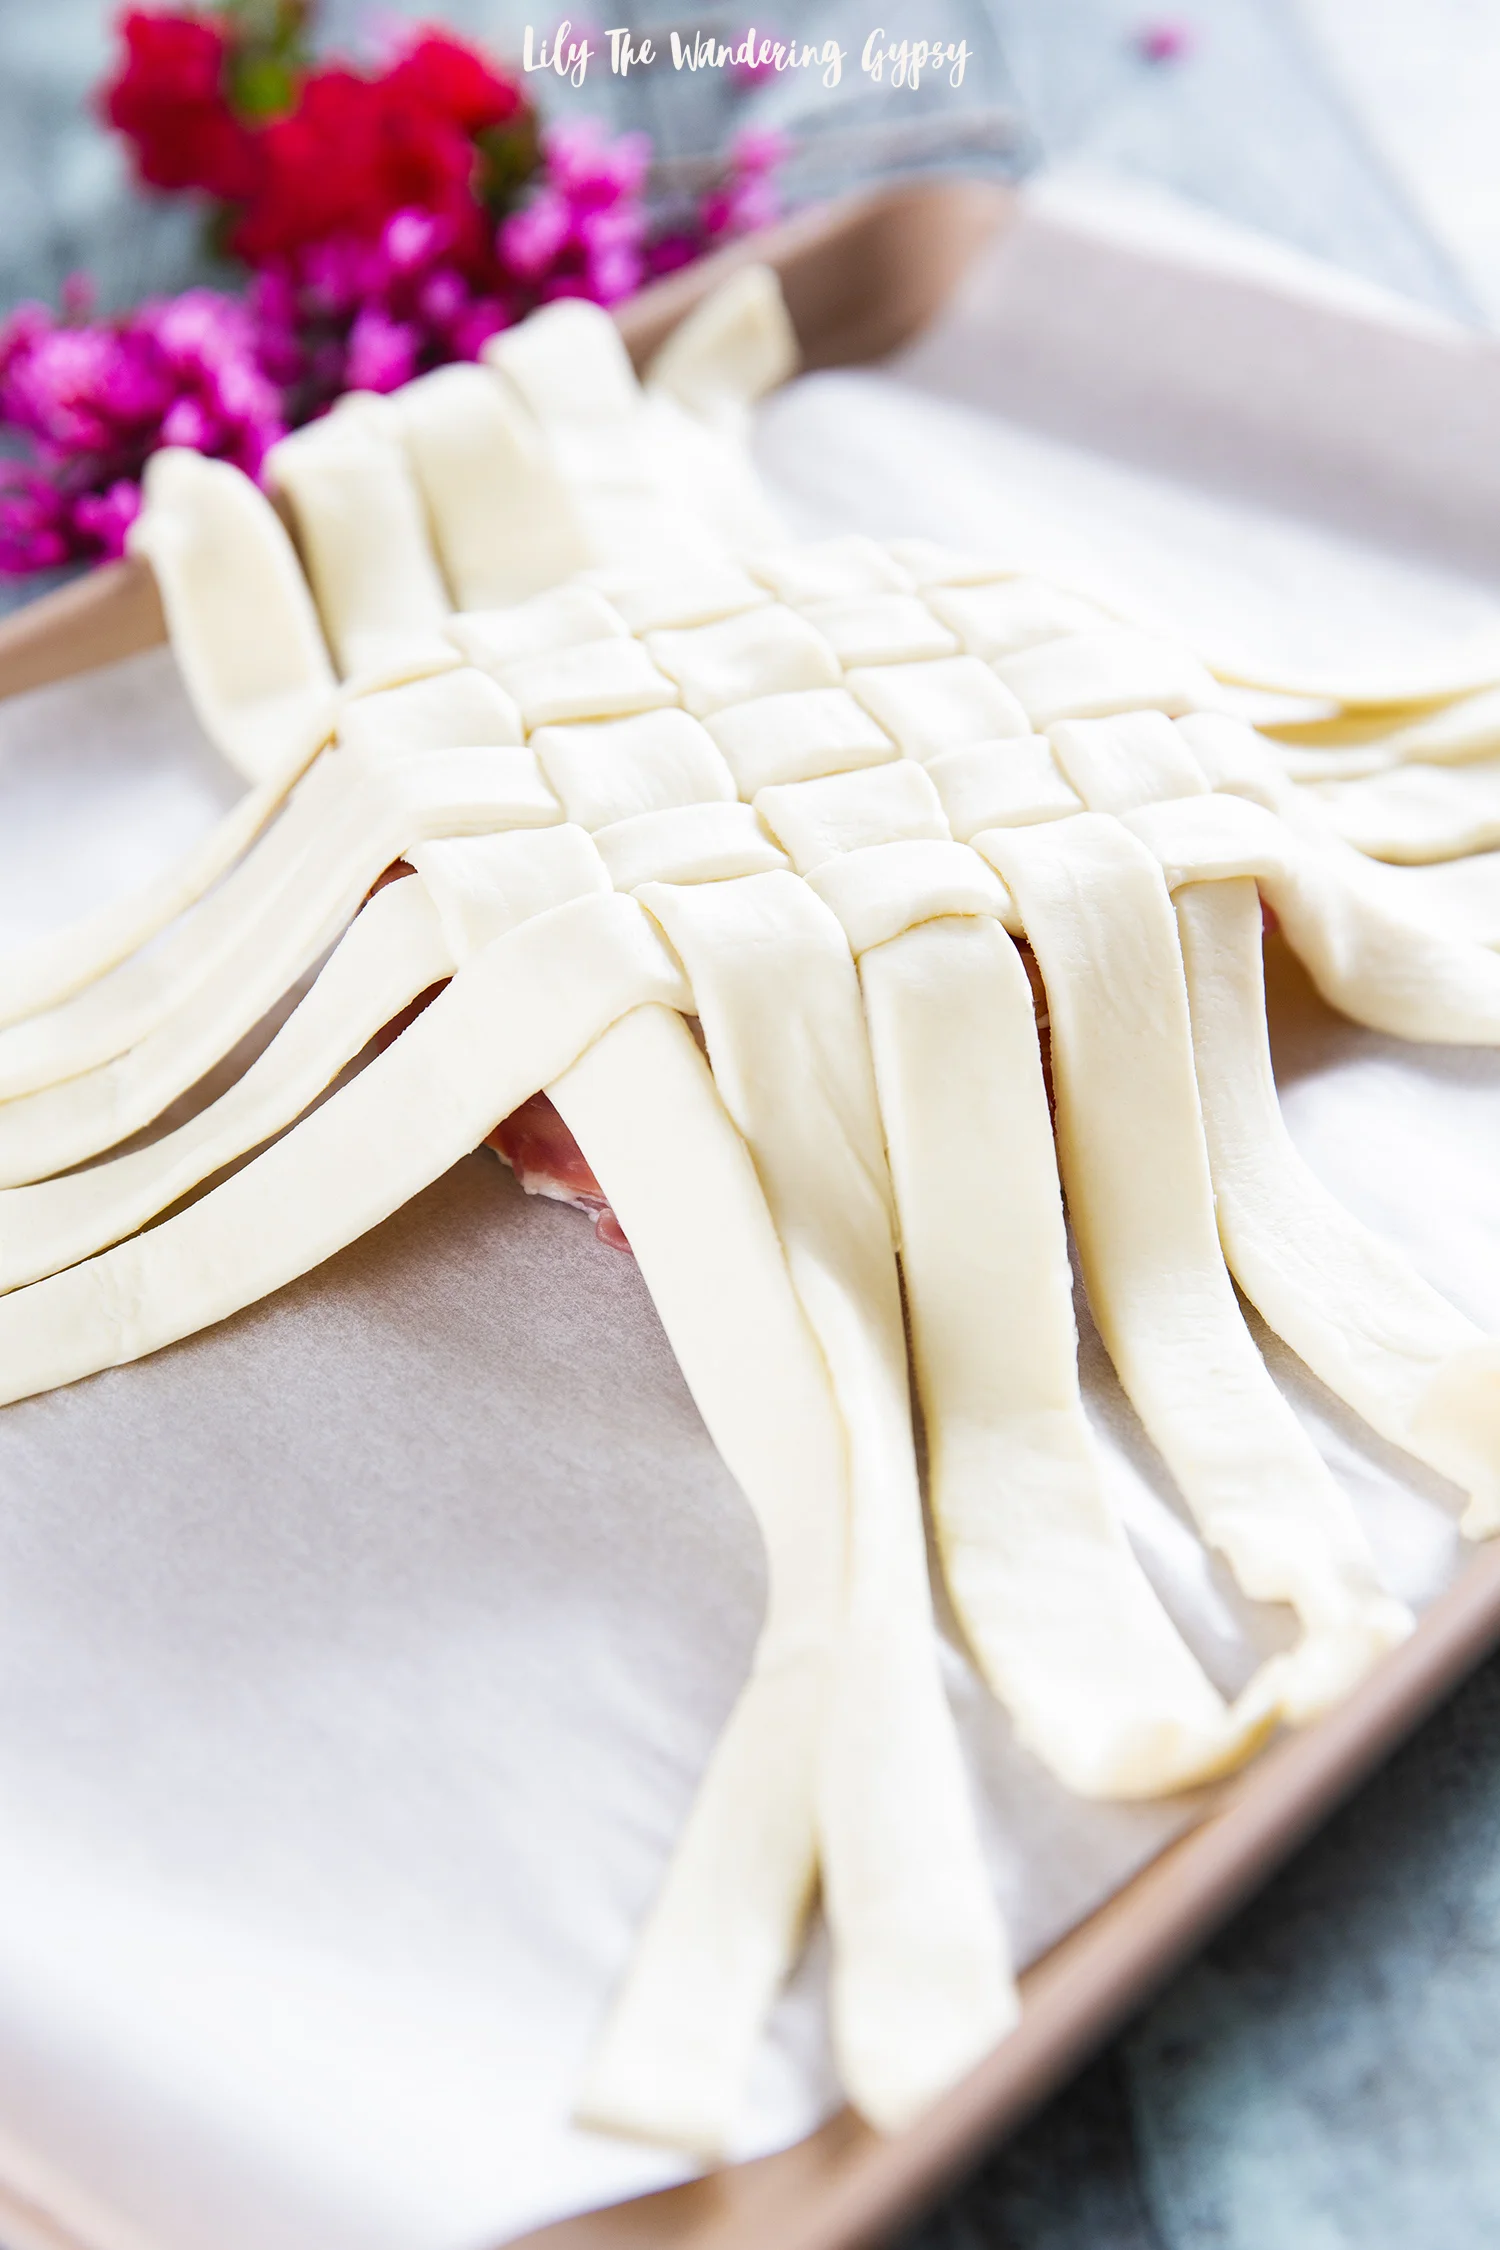
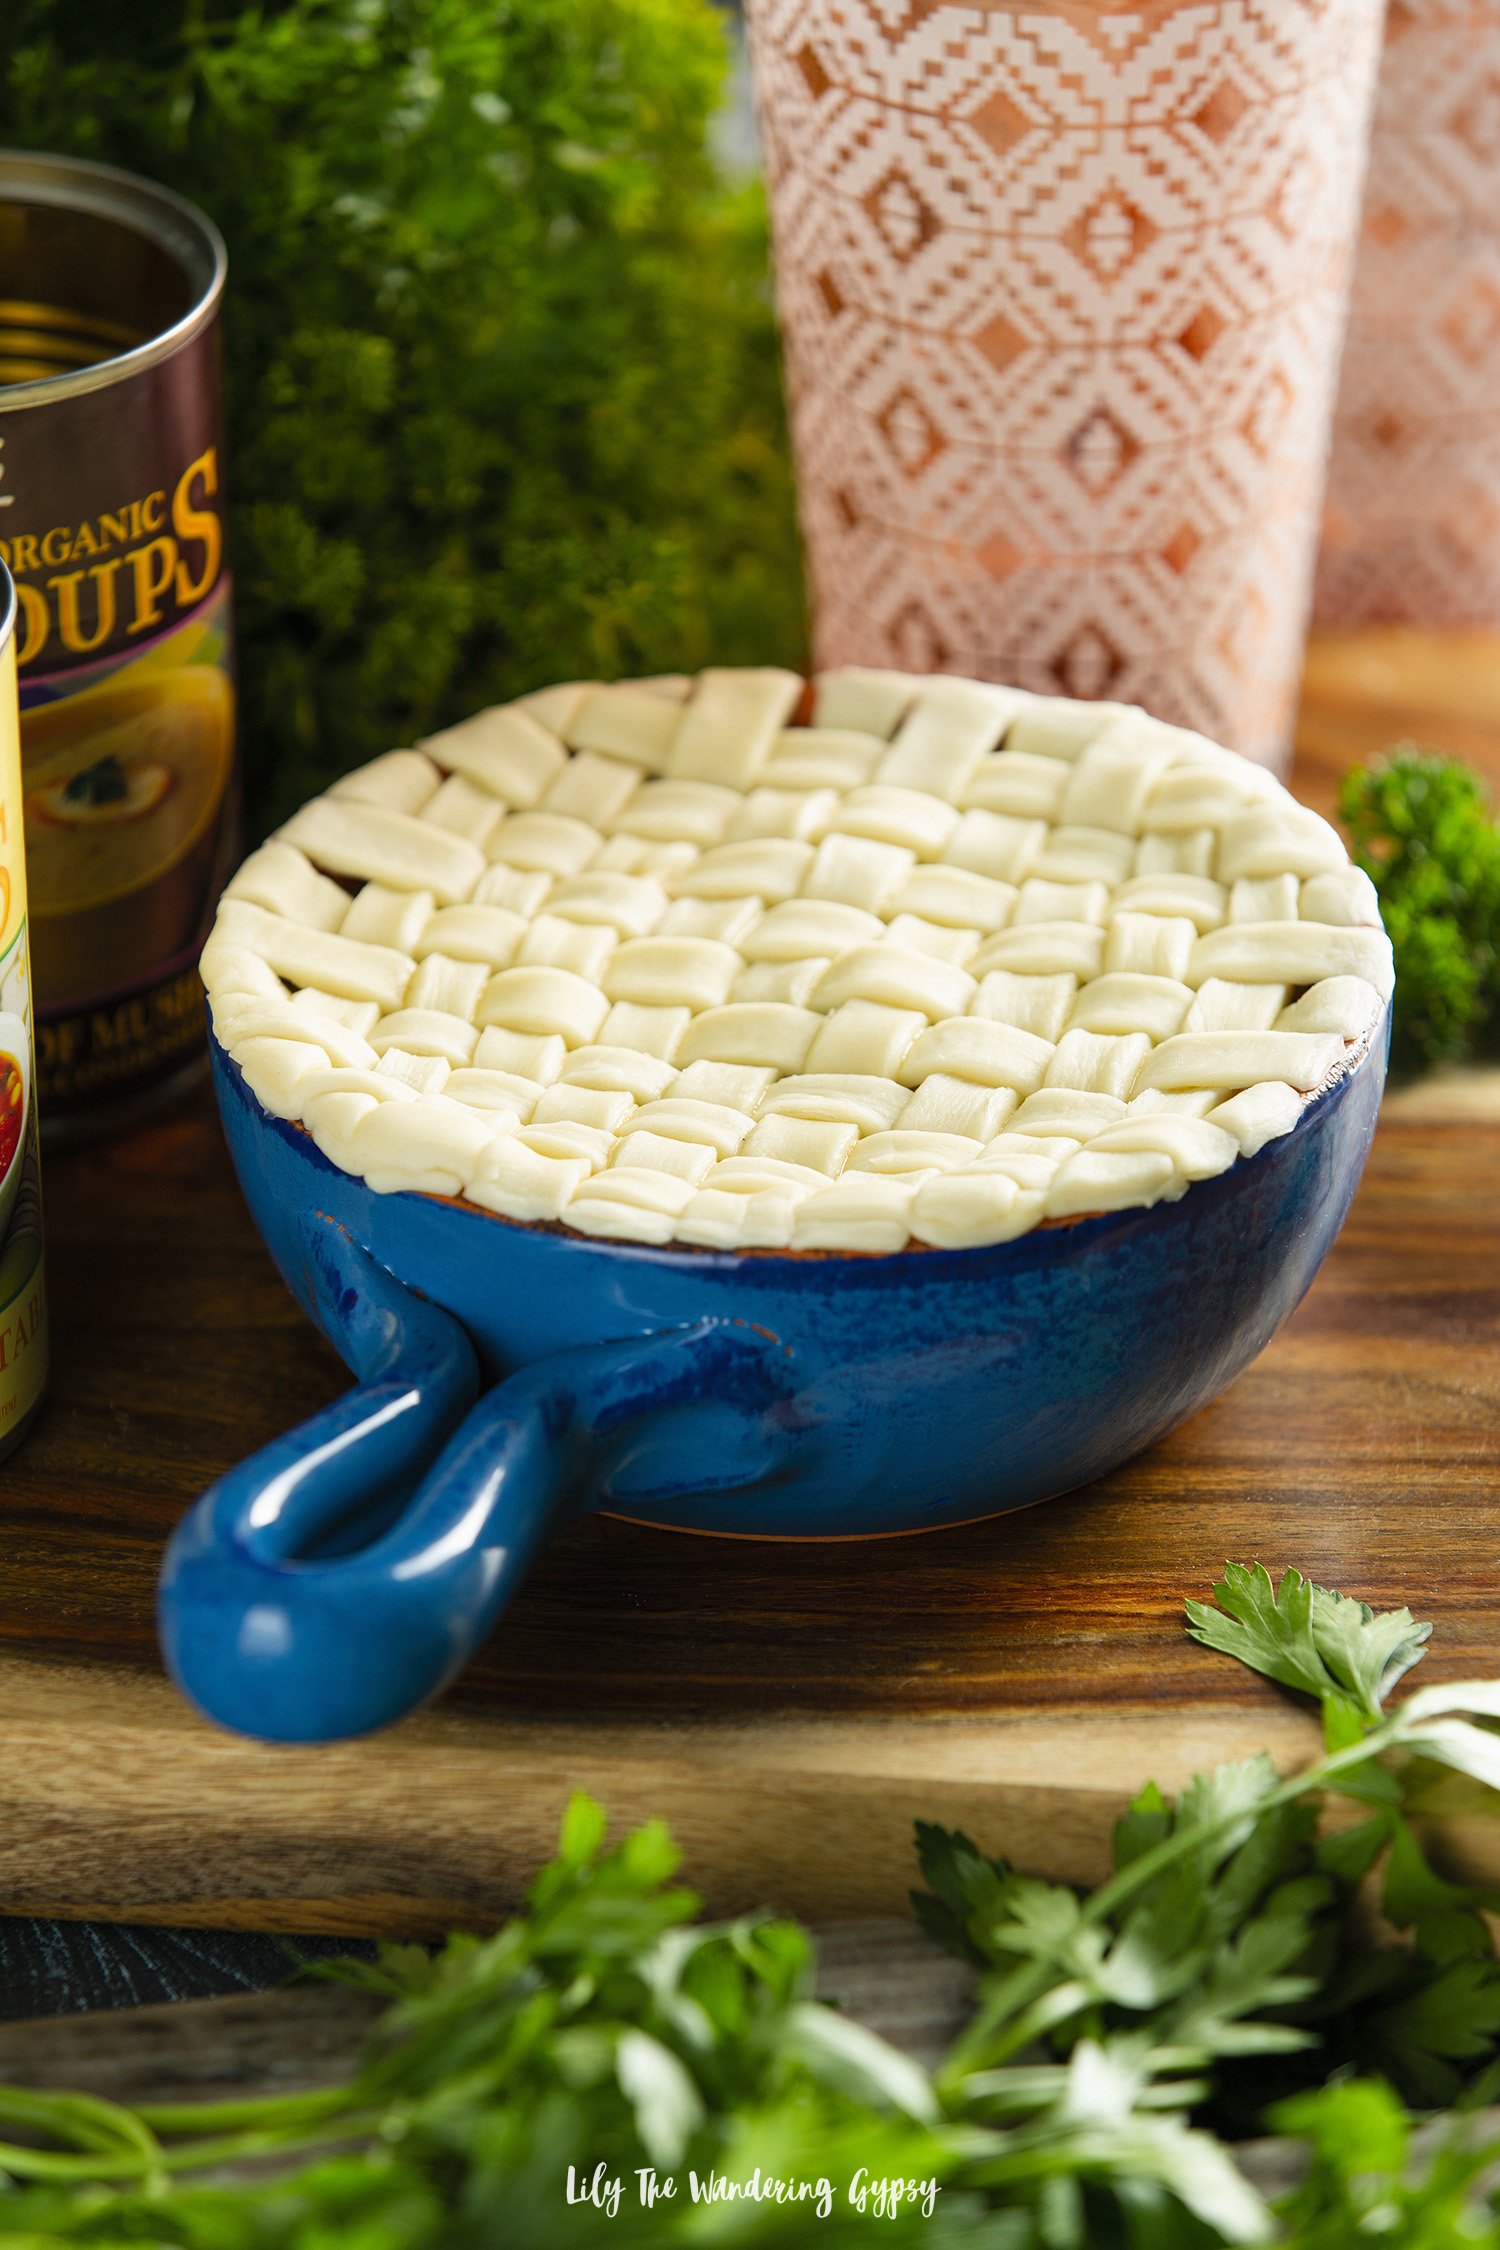
7.)   Time to do the crust! Either place one sheet of puff pastry across the top of the baking dish and trim the sides and cut vents at top, OR use the lattice technique I have shown in this post!

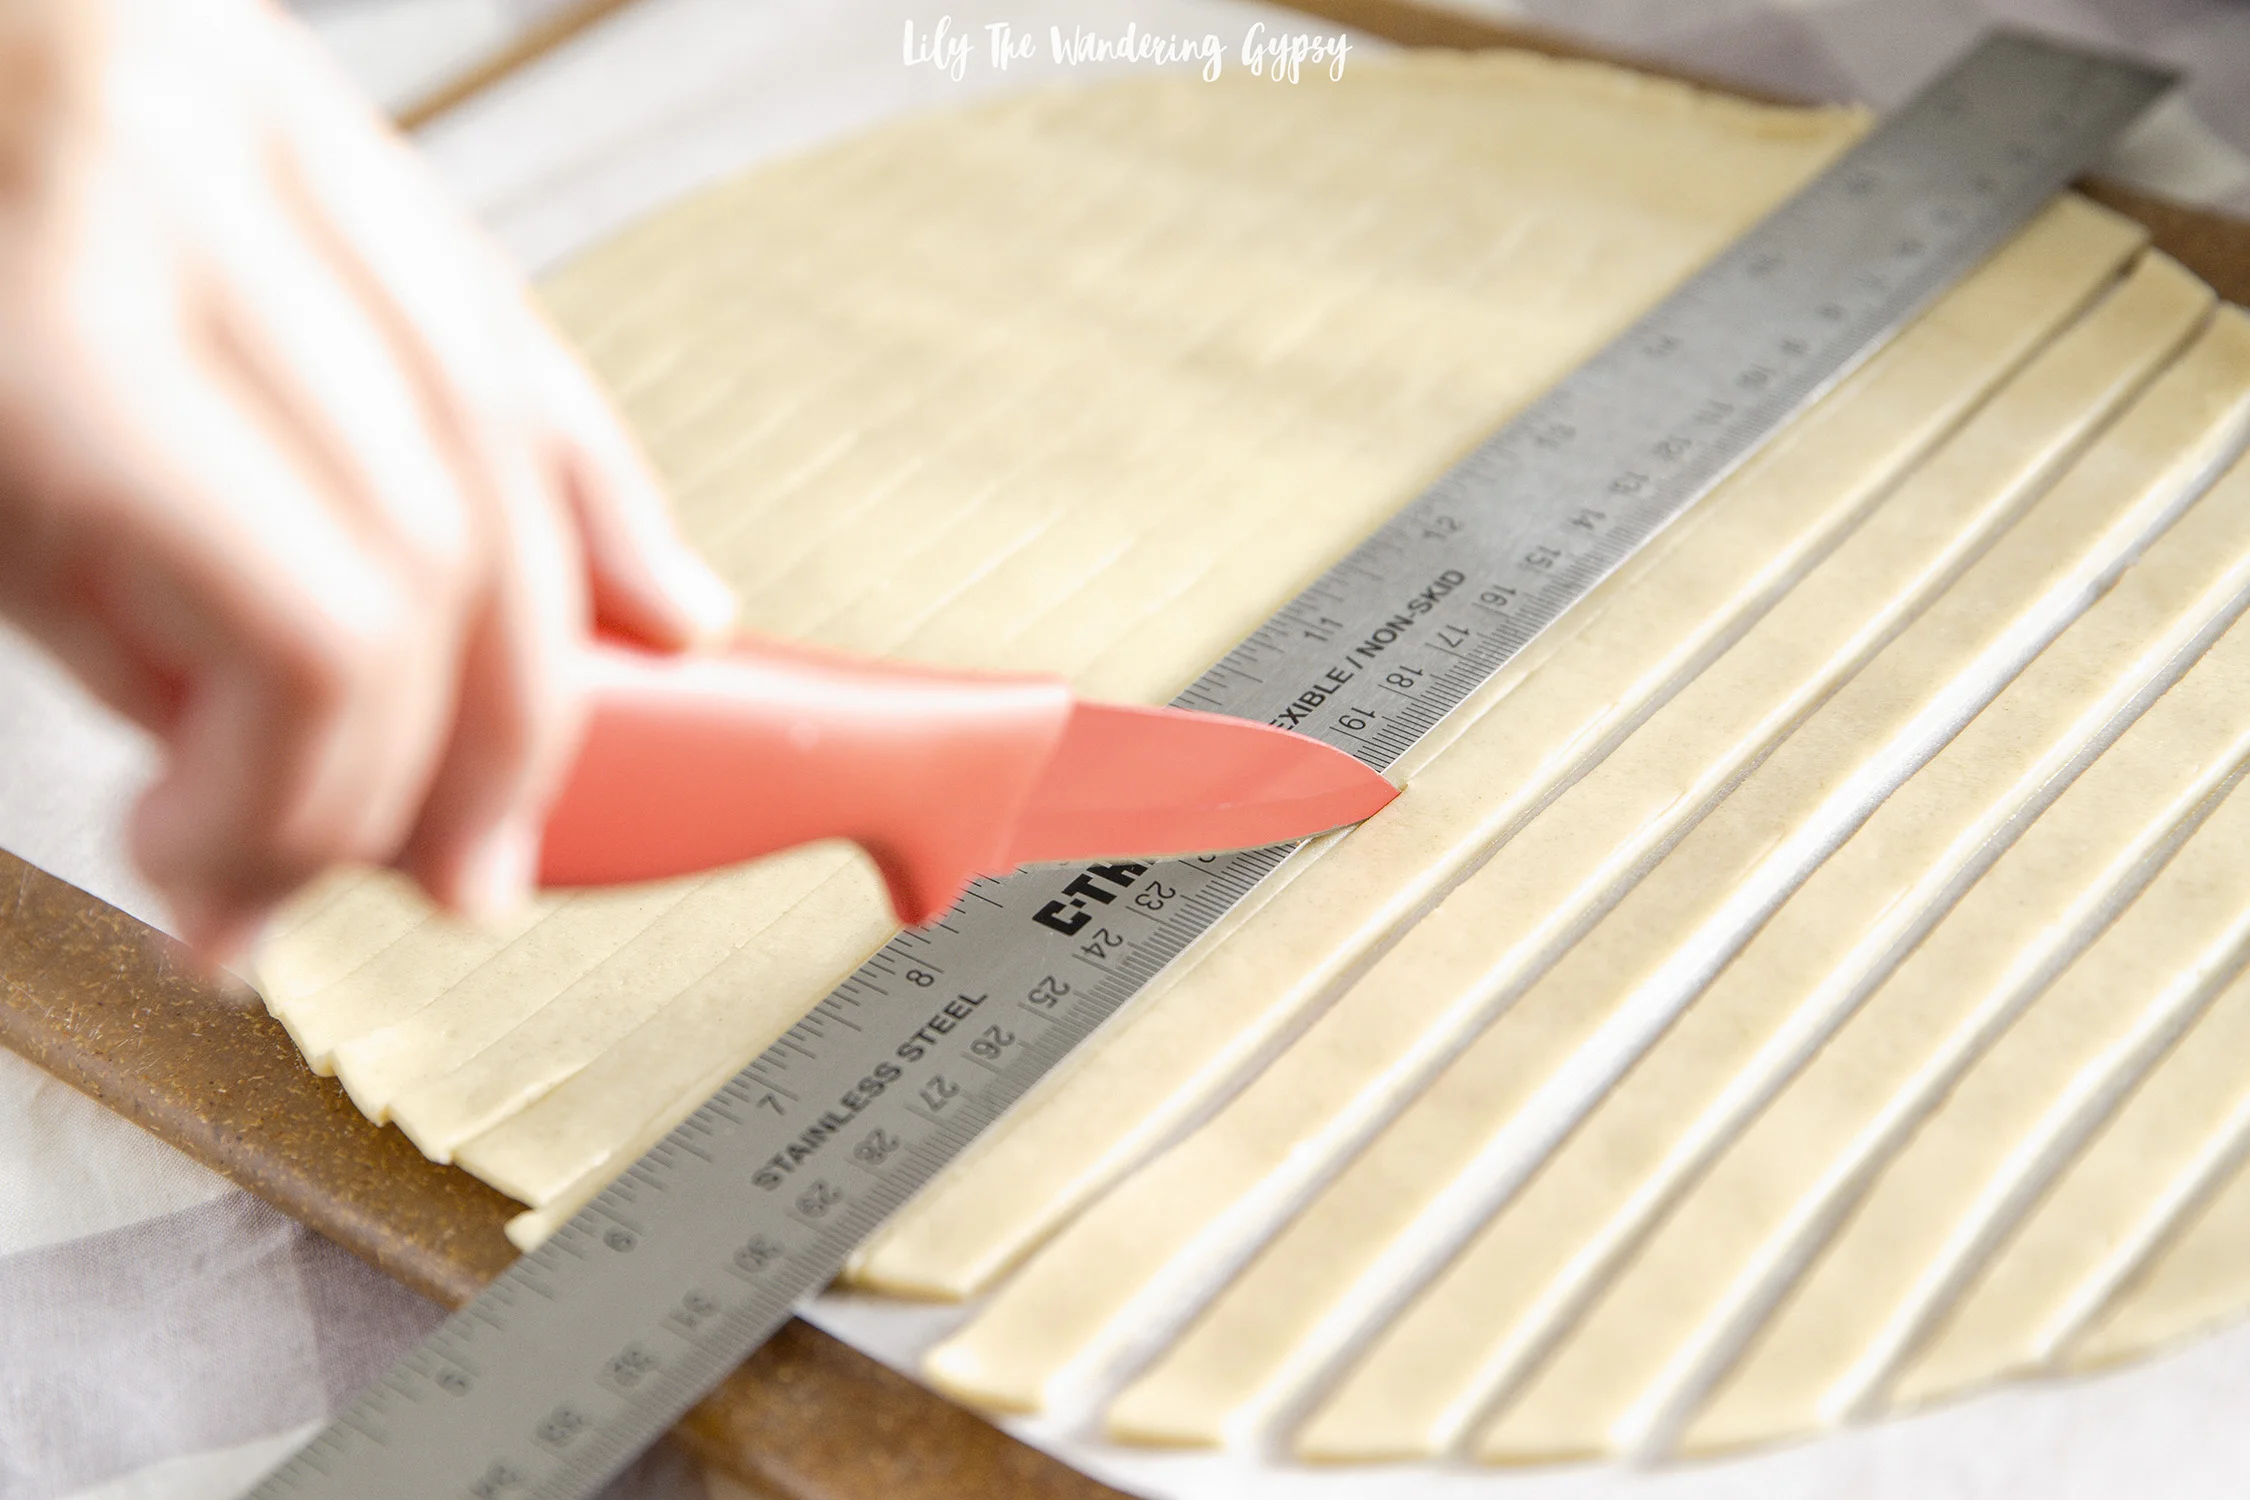
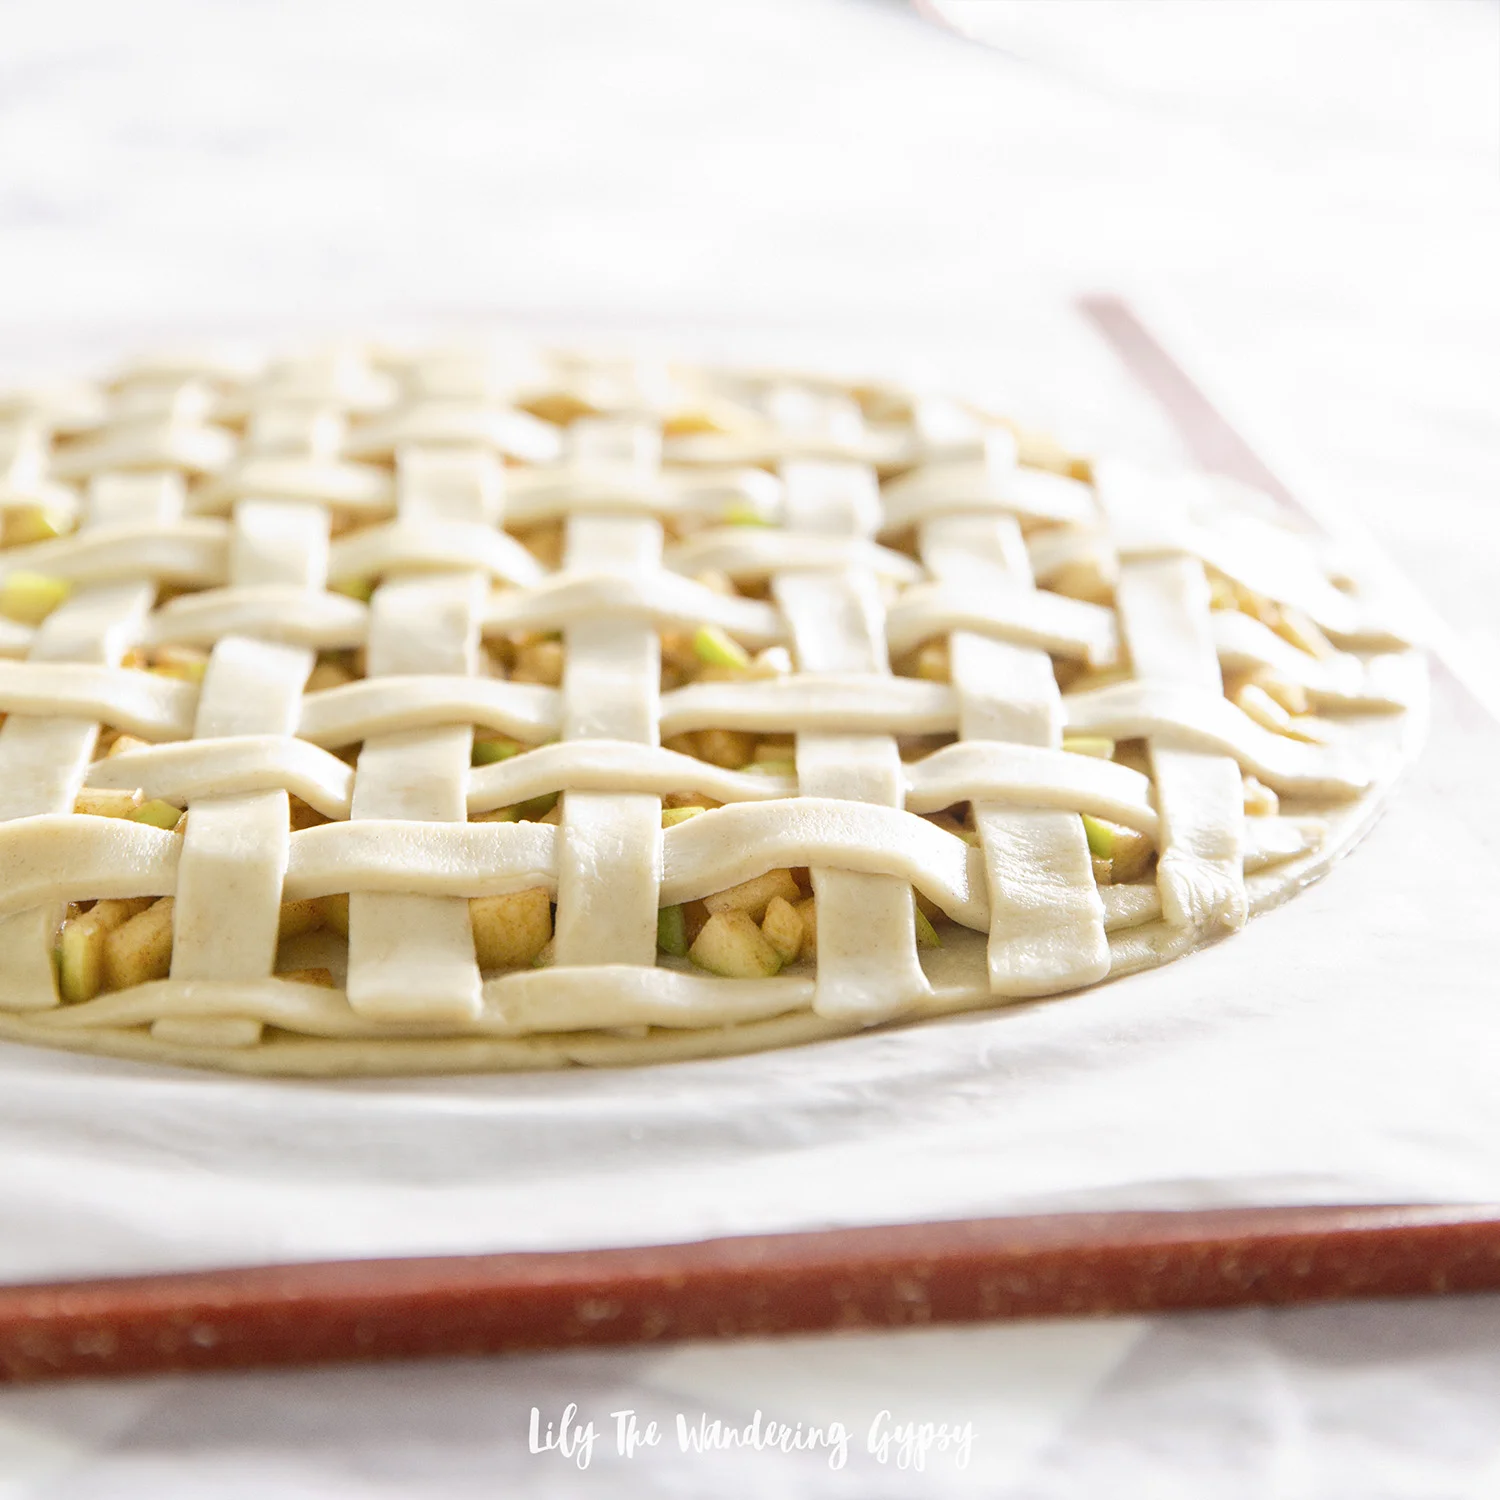
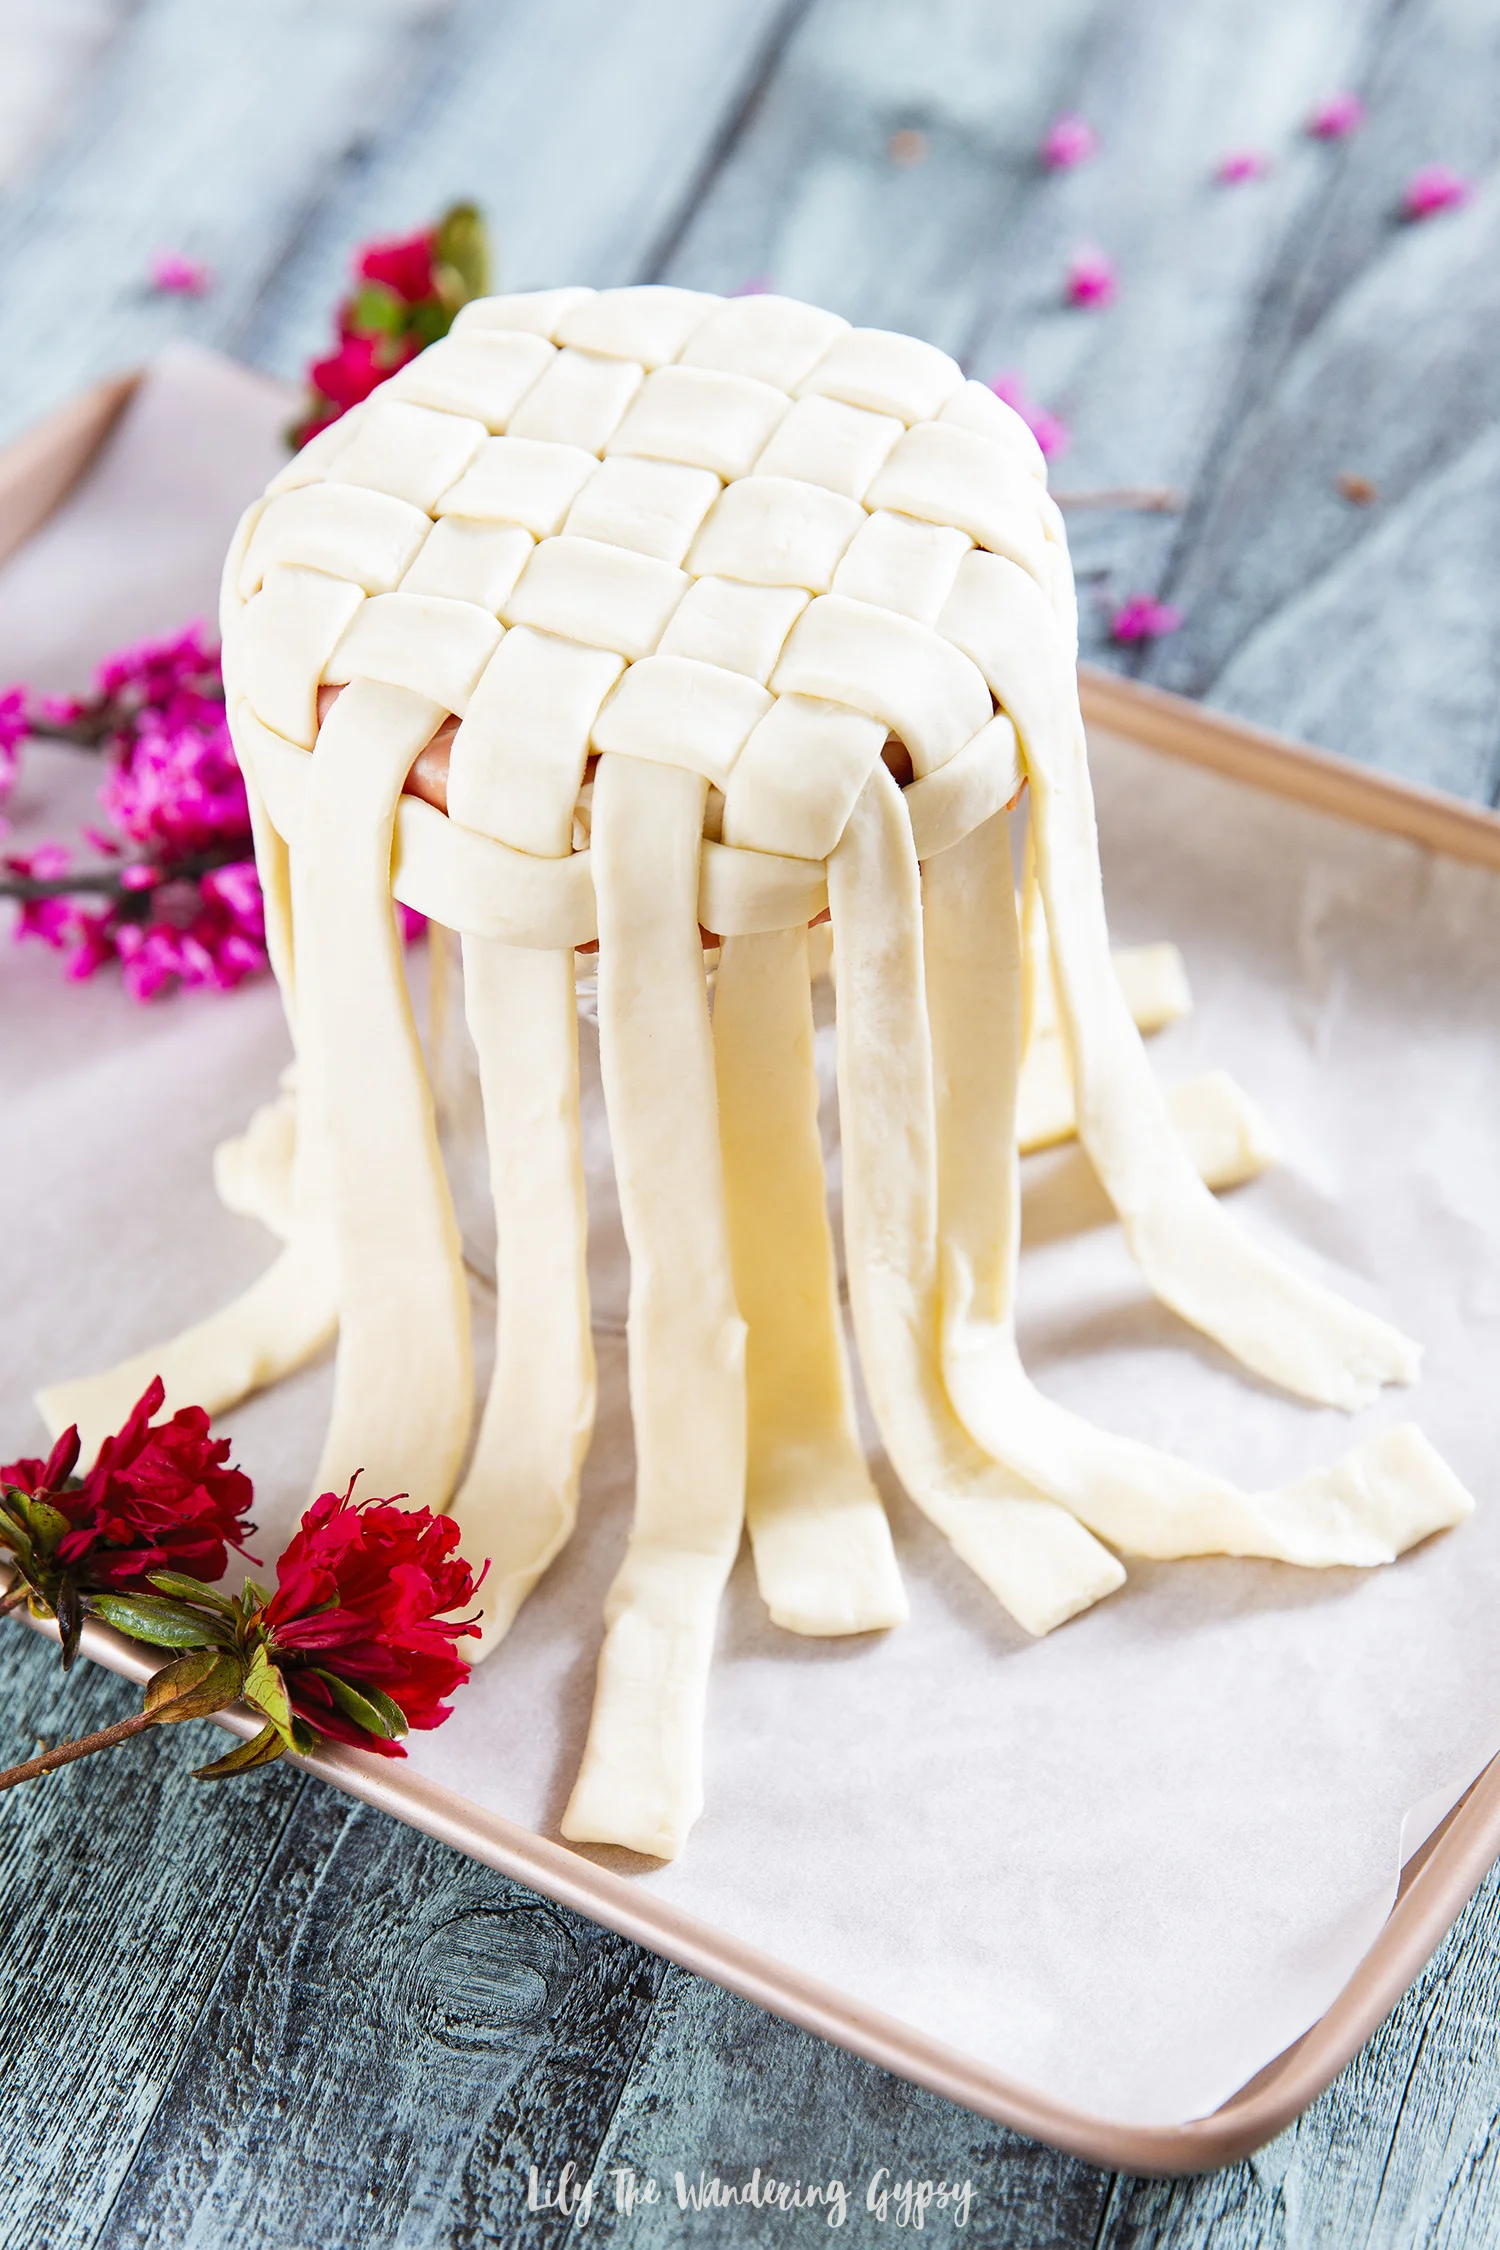
8.)   To lattice: cut ½” or 1” strips out of your puff pastry sheet and weave them across the top of the pie. I start by placing three strips vertically, then working on weaving in the three horizontal strips. From there, I can then place the remaining strips of puff pastry into the top of the pie. Cut excess dough hanging over sides of baking dish, and if you want, use your fingers to gently press the dough strips down onto the baking dish so it does not move while baking.

9.)   Brush top of pie with an optional egg wash, and bake small pies for 17-22 minutes or one pie for 25-35 minutes. The puff pastry need to be pretty crunchy on top to ensure that the dough touching the filling is not doughy.

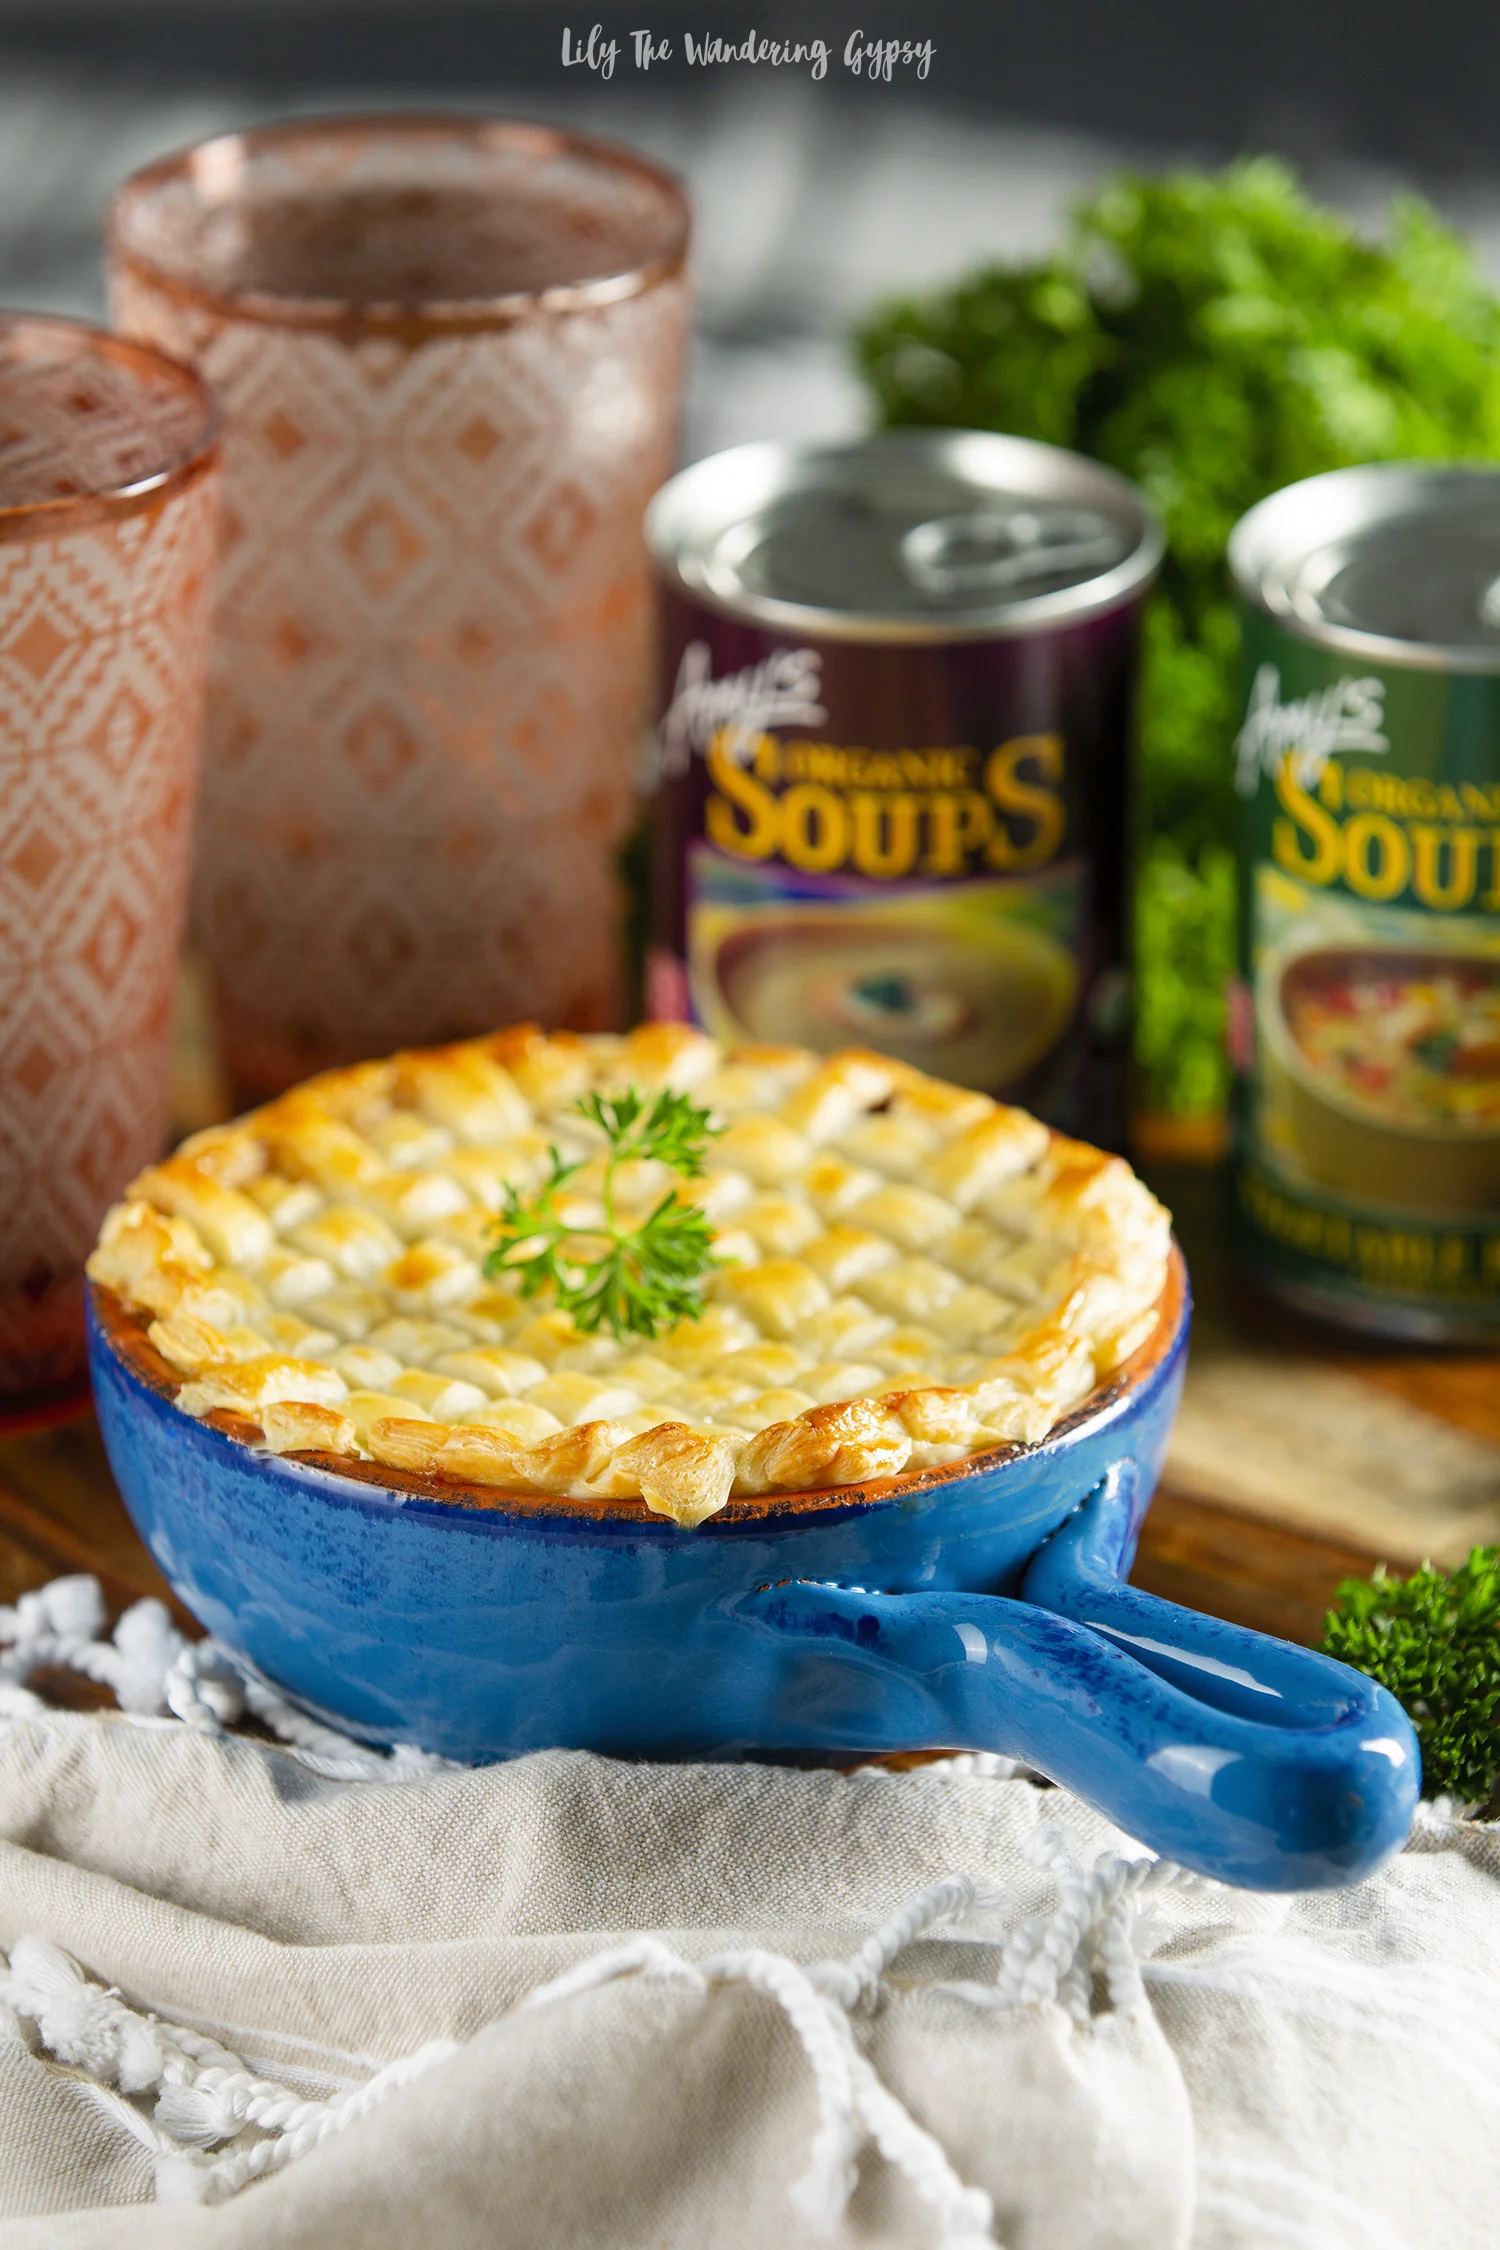
What a fun and comforting vegetarian meal to make for your favorite people! Perhaps you could even surprise a busy family with a frozen version of this pie, and they can enjoy a vegetarian meal in a less than a half hour of baking time! Enjoy!

I was selected for this opportunity as a member of CLEVER and the content and opinions expressed here are all my own.

Veggie Lovers’ Club Sandwich Recipe with Pepperidge Farm

This post has been sponsored by Pepperidge Farm®, all thoughts and opinions are my own.

If you’re wanting to find more ways to connect with family or friends, I often find that food brings people together better than nearly anything else. I recently created the most delicious Veggie Lovers’ Club Sandwich with Pepperidge Farm Farmhouse® Butter Bread, and it’s quickly becoming my go-to bread for sandwiches, breakfast recipes, and even making toast, which I love so dearly.

This sandwich contains ingredients in all sorts of colors; I just love to eat as many different colored veggies as possible each day. I hope you enjoy!

I find that sandwiches with fresh and delicious ingredients that can be made ahead of time really helps save time and brings families closer together. I absolutely love providing my friends and family with fresh, nourishing meals that in turn give them energy and encouragement to inspire wonderful days ahead. Whether you’re making this Club Sandwich for two or you’re making brunch for a whole house full of family and guests, I would definitely recommend the thick, rich, buttery taste of this awesome, slow baked Butter Bread – you’re going to love its fresh-from-the-oven taste!

When I visit the bread aisle at the grocery store, I see SO many choices for white bread. But even with all of those choices, few actually compare to this Butter Bread. I love how thick the slices are. Since I am already a huge fan of anything from Pepperidge Farm and I saw that this new flavor was available at a wide range of stores, I was instantly relieved to finally find a white bread with thicker slices and a bit of a buttery taste! YUM!

My boyfriend always jokes that any product that has butter in the name, I will love. Well, he is completely correct about that – I was seriously SO excited when I found out that one of my recipes contained butter bread, I nearly jumped for joy. That’s how much I love butter!

Find new Pepperidge Farm Farmhouse® Butter Bread at retailers like Target and Kroger here! This product may quickly become your FAVORITE new bread for every recipe you can imagine.

This Veggie Lovers’ Club Sandwich is such a fun way to spend more time together and also experience new and different ingredients and flavors – which is a super fun way to bond with those you love. Find joy in the simple flavors of these all-natural sandwich toppings!

INGREDIENTS (MAKES 2 SANDWICHES)

FOR THE SANDWICH:

6 slices of Pepperidge Farm Butter Bread

8 spinach leaves

10 slices of English cucumber

½ - 1 Cup sprouts (any flavor you like)

Toaster for bread

Food processor for beet spread

FOR THE BEET SPREAD:

1 package of pre-cooked beets or 1 can of beets (remove any liquid)

2-3 tsp olive oil

3 tsp balsamic vinaigrette

½ tsp salt

1 tsp Italian seasoning

(topped with chives – optional)

FOR THE GREEN GODDESS SANDWICH SPREAD:

¼ C. Greek yogurt (use non-dairy alternative for vegan)

1/8 C. mayo (use non-dairy alternative for vegan)

¼ C. finely chopped chives

2-3 Tbsp freshly chopped tarragon

1-2 tsp salt

1 tsp garlic powder

INSTRUCTIONS:

1.) Make Beet Sauce by putting all ingredients into food processor or blender, and pureeing until smooth. Add more salt if desired.

2.) Make Green Goddess Sandwich Spread by mixing all ingredients in a small bowl with a spoon until well combined. Feel free to add more salt, garlic powder, or any other seasonings you enjoy.

3.) Toast 6 slices of Butter Bread and get ready to make the Club Sandwich.

4.) To construct each sandwich – add Beet Spread on one slice of bread, then top with sprouts. On another slice of bread, add Green Goddess Spread and 5 slices of cucumbers (and a bit of salt on top of cucumbers if desired). One piece of bread will remain without any toppings.

5.) Lastly, layer the pieces like this – Beet Spread + Sprout slice, topped by the Green Goddess and Cucumber slice, then the final top slice of bread, and cut in half to serve! The beautiful layers of bread and ingredients are just so colorful and delicious. This toast also held up very well with all of these ingredients!

I hope you enjoy this vegetarian recipe with those you love! Good food brings people together, and that time with loved ones is what keeps me happy every day! Please let me know if you wind up making this recipe!

Rustic Apple Pie Pizza Recipe + Why I love Fall Baking

This is a sponsored post written by me on behalf of Oregon Chai®. The opinions and text are all mine. #OregonChaiMeTime 

Wow! Have I got an incredible recipe for you today. It embodies the fall spirit, and includes a dessert “pizza!” This delicious and unique recipe is rustic, sweet, and crunchy; an amazing pairing with a nice, warm Oregon Chai® Tea Latte! Make this amazing dessert for your next gathering, dinner with friends and family, or even for a potluck. This dessert will vanish before you know it.

To me, baking is one of the best ways to spend “me time.” I tend to find myself baking the most once the weather cools down, when I have a bit of free time, or even when too many days have passed since I created something delicious.  Any day that includes chai tea and some me time is a GOOD DAY!

I wasn’t always able to bake freely though. Before we got our new furnace this summer, the house would get WAY too hot (83 degrees +) when I turned on the oven, and so it was nearly impossible to justify baking when the house would not cool down from it. I made so many no-bake meals, or even used our awesome toaster oven to try to make complete meals, small casseroles, and even side dishes – baking cookies, pies, or brownies really doesn’t go well in the toaster oven.

I didn’t even realize how strong of a connection I had to baking, until I had limited use of the oven, and realized how sad I was when I looked through Pinterest and saw all of those recipes that I could not even attempt. I now bake every few days (or more) and I am so happy about how cool our house stays finally. Thank goodness for good air conditioning, LOL!

I also tend to LOVE sweet desserts and dishes, so this one is just perfect for me. If you like desserts that are on the more savory or less sweet side of life, then you can majorly reduce the amount of sugar I have suggested. Either way, you’re going to love this apple pie pizza.

Pizza is such a familiar comfort food, and when I had a slice of this Apple Pie Pizza, it took me back to eating some of the best thin crust pizza ever, combined with one of my favorite fall desserts ever.

Since we are surrounded by apple orchards here in southern Illinois, using apples in my recipe came as a very natural solution to eating more local ingredients!

This rustic recipe is crunchy around the edges from this crispy crunchy dough, sweet, tart from the apples, buttery from the dough, and the egg wash and cinnamon sugar topping makes the most excellent crunch when you bite into it.

Perfect for enjoying on a chilly fall day or evening! I was extremely happy with how this recipe turned out, and I know you will be too. I used an organic pie crust from the store, and it held the shape of the lattice just perfectly.

By cutting the lattice into smaller, ½” strips, I was able to make a very intricate pattern on top of this Apple Pie Pizza. Feel free to also cut the strips into 1” pieces to make life much easier! The ½” strips were not incredibly hard to work with, just a little more time consuming. But, patience always pays off when you’re baking.

RECIPE

INGREDIENTS:

1 package refrigerated pie crust (2 per package)

2 apples, I used green apples

4-5 Tbsp.  sugar

1 tsp. cinnamon

1/8 tsp. nutmeg

1 egg, whisked for egg wash

4-6 Tbsp. water in a small bowl to use to attach pie dough together

Round or Rectangular baking sheet

Parchment paper

Oregon Chai Tea Latte Concentrate to enjoy while baking!


INSTRUCTIONS:

1.) Chop 2 apples into tiny pieces and coat with 1 ½ - 2 Tbsp. sugar, ½ tsp. cinnamon, and 1/8 tsp. nutmeg.

2.) Unroll both pie crusts onto a work surface covered in parchment paper. Optional: use a rolling pin to smooth out any creases.

3.) Use a ruler to mark every ½” or 1” on one pie crust. Also, use the ruler and a sharp knife to impress even lines and cut strips from the pie crust. Set aside.

4.) Spread an even layer of apples onto the other pie crust.

5.) Weave dough strips over apples, first laying half of the strips vertically, then weaving the horizontal pieces in next. Feel free to use a little bit of water in each place where the dough strips overlap. Brush top crust with egg wash.

6.) Once done weaving, sprinkle on a mixture of 2 Tbsp. sugar + ½ tsp cinnamon, and bake for 15-20 minutes at 375 degrees F. Slice like a pizza and enjoy! We cut the finished Apple Pie Pizza with a sharp knife, but you could also use a pizza cutter!

Make sure to also grab your Ibotta offer here for 75 cents off any 1 Oregon Chai product at Walmart (9/26/18 – 11/30/18, or until supplies last).

Stock up now! This tea is so delicious you will want to incorporate it into your every day routines and serve it to anyone who visits you.

I was able to easily order the Oregon Chai Tea Latte Concentrate (32 oz.) on Walmart.com using their super easy Online Grocery Pickup service!

Below, you will see how easy it was to search for all of the available Oregon Chai products at Walmart. I spent around $12 to create this entire recipe, and since the Chai Tea was under $4.00 I saved SO much compared to going to a coffee shop for an overpriced drink.

After I went to the checkout page, I simply chose “Pickup” for FREE (see below)! No shipping charges at all, which saved me around $6.00. YAY!! I love a good deal.

The taste of this Oregon Chai Tea was rich, smooth, and has those amazing chai spices that I can’t get enough of. I like to add macadamia milk to my chai tea, instead of traditional dairy milk, and my body loves me for it! What a delicious way to get a little pick-me-up during baking or during any other time of the day.

Once my order was ready, I was able to run by my local Walmart and easily grab the tea in the pickup area. Super easy since I had so many errands to run that day.

Has your local Walmart installed an Online Grocery Pickup station yet? Ours JUST remodeled, and I had an extremely easy experience, let me walk you through it/ 

1.) Visit the Walmart Online Grocery Pickup station and scan the barcode given in your email.

You can also just wait outside and call the phone number on the pickup area. They will bring everything right out to you!

Like I said, baking helps me de-stress and helps me continue to be creative, so after getting a ton of things checked off the to-do list, I relaxed for a bit, then got to baking.

I hope you have an absolutely splendid fall, and please comment below to let me know if you tried making this recipe! This would be so fun with kids, and would be a fun holiday baking activity. Enjoy!

Easy Caramel Brownie Layer Cake

If you are a fan of layers upon layers of chocolate brownies, homemade whipped cream, and caramel, then this is definitely the cake for you! Although it looks so elegant, it really is pretty easy. This dessert allows us to think beyond the traditional chocolate cake, and make your next dessert rich, decadent, and delicious! When I made this dessert for a potluck, people raved about it. It was so delicious once the whipped cream layers sat with the brownie layers, because the sides stay a bit crunchy, and the inside portion of the cake moisten up and form more of a fudgy and cake-like consistency all at the same time, that’s out of this world! Hope you enjoy.

INGREDIENTS:

*Note - Amazon Affiliate Links have been provided if available

For The Whipped Cream:

For The Brownies:

  • 2 boxes of brownie mix (I used Ghirardelli caramel turtle brownie mix, and instead of mixing the caramel into the brownies to bake, I decorated the top pf the cake with it!)

  • Brownie ingredients (eggs, oil, and water)

  • 3 round baking sheets - I found mine for about $1 each at Walmart!

  • Caramel Sauce if not included in Brownie boxes you use.

INSTRUCTIONS:

1.) Preheat oven to 375 degrees. On parchment paper, trace your circular baking dish three times. Cut those three paper circles out and set aside. Spray three circular baking pans with Pam, then place the circular paper pieces into the baking pans and spray a little bit more to coat paper.

2.) Mix up 2 boxes of your favorite brownie mix and pour into three prepared circular baking pans. Bake the three circle pans for 15-20 minutes, check to see if they are done by inserting a toothpick to see if they are done.

3.) To make your homemade whipped cream, in a stand mixer, add 1 pint of heavy whipping cream + 1/3-1/2 C. sugar + 1-2tsp vanilla. I also love using vanilla bean powder to add little black flecks and more vanilla flavor to my whipped cream. Whip for 2-4 minutes on high, until stiff peaks form. Just keep mixing, it may seem like an eternity, but is so worth it! Do not over beat the cream, or it will begin to resemble butter, and not be very fluffy.

4.) Now, it’s time to “layer up”! I have shown all of my layering steps below, so you basically layer up: brownies and whipped cream until you get to the top layer. Make sure to make the top layer of whipped cream as smooth as possible. But, no need to stress about being perfect - this cake is a naked cake and is pretty rustic anyway, so the more homemade it looks, the better!

5.) To decorate the top: I used caramel sauce in a squeeze tube that worked perfectly to decorate. I basically just made a continuous line of caramel vertically across the entire cake, then crossed that again with caramel lines horizontally. I rotated the cake as I worked, which was great. Add sprinkles and enjoy!

THIS CAKE ROCKS! HOPE YOU ENJOY!

If you wind up making this recipe or any other recipes, please tag me on Instagram with @happysolez! Thanks!!

2 Ingredient Fall Apple Dip Recipe

Yum! Fall is right around the corner and I have an amazing recipe for you! Everyone loves this amazing dessert, and I know you will too. My al time favorite Fall flavor would have to be caramel apple. The mix of those sweet tart green apples meld so perfectly with the salted caramel sauce and the tangy bite of the cream cheese adds an upscale flavor to this dish, which I hope you enjoy!

INGREDIENTS:

1 (8 oz.) Block of Cream Cheese

1/3 - 1/2 of a jar of salted caramel sauce (we love the Smucker's Simple Delight Salted Caramel)

2-3 apples, sliced (we used green and red, any flavor will do!)

INSTRUCTIONS:

1.) Open the block of cream cheese, and place it onto a plate, and pour LOTS of caramel over the top of the cream cheese.

2.) Chop apples and place beside dip. Enjoy!

Pull Apart Cupcake Cake Recipe

This recipe is PERFECT for parties and holidays, because it's easy to eat! Everyone has their own individual cupcake to share the joy, no need to cut THIS cake. 

We were ecstatic when we learned that we had the opportunity to collaborate with Martha Stewart to promote her baking items at Macy's. It's quite the honor, and several times throughout this process I exclaimed, "I am shooting recipes for Martha Stewart"!!! 

In order to creatively incorporate her Essentials collection into pins that would encourage people to want to learn more, I thought that a sweet treat would obviously be perfect, so I found a fun recipe on marthastewart.com and creates it! Below, you will find that very recipe, and I hope you are inspired by this fun post to make your very own cupcake cake!

MARTHA STEWART RECIPE (originally found here):

Pull-Apart Vanilla-Wafer Cupcake Cake with Berries

Talk about a fun dessert! It looks like a sheet cake on top, but there are actually vanilla-coconut cupcakes underneath the fresh berries and fluffy whipped-cream frosting. It's easy to make and even easier to serve -- no slicing required.

Source: Martha Stewart Living, May 2018

INGREDIENTS

  • 45 vanilla-wafer cookies, pulsed in a food processor until finely ground (1 1/2 cups)
  • 1/2 cup unbleached all-purpose flour
  • 1 teaspoon baking powder
  • 1/4 teaspoon kosher salt
  • 1 stick unsalted butter, softened
  • 3/4 cup granulated sugar
  • 2 large eggs, room temperature
  • 3/4 cup whole milk
  • 1 cup sweetened shredded coconut
  • 1 teaspoon unflavored gelatin
  • 1 cup cold heavy cream
  • 2 tablespoons confectioners' sugar
  • 1/4 teaspoon pure vanilla extract
  • 1 1/2 cups mixed fresh berries, such as blueberries, raspberries, and blackberries

DIRECTIONS

  1. 1. Preheat oven to 350 degrees. Line a standard muffin tin with paper liners. Whisk together cookie crumbs, flour, baking powder, and salt.

  2. 2. Beat butter with granulated sugar on medium speed until pale and fluffy, about 1 minute. Beat in eggs, one at a time. Reduce speed to low and add flour mixture in 3 batches, alternating with milk, beginning and ending with flour mixture and beating until combined after each addition. Fold in coconut.

  3. 3. Divide batter among cups. Bake until cupcakes are golden brown and centers bounce back when gently pressed, 22 to 24 minutes. Let cool completely in tin on a wire rack.

  4. 4. Add 2 tablespoons water to a small saucepan. Sprinkle with gelatin; let stand until thick, about 5 minutes. Gently heat over medium until gelatin has dissolved. Remove from heat; let cool 5 minutes (but don't let it set).

  5. 5. Beat together cream, confectioners' sugar, and vanilla on medium speed until very soft peaks form, 1 to 2 minutes. Add gelatin mixture; beat on medium until stiff peaks form, about 1 minute more.

  6. 6. Remove cupcakes from tin and arrange on a platter in a three-by-four rectangle. Spoon frosting over each row of cupcakes; using an offset spatula, smooth to cover tops, forming a rectangular shape. Refrigerate at least 1 hour and up to 3 hours. Sprinkle with berries before serving.

Fresh Vegan Mushroom Tacos Recipe (Awesome in Cast Iron)

If you're looking for a new way to incorporate those fresh, local, Farmer's Market ingredients into a recipe, here's a good one! These Vegan Mushroom, Onion, and Pepper Tacos are super delicious and you definitely won't even miss the meat! 

Even more special, is the fact that we got to create this recipe for Martha Stewart Essentials available at Macy's. It's been SUCH an honor creating a set of four recipes for Martha! It's definitely a food blogger's dream :)

Keep reading to get the full details on this delicious, vegan recipe (but, feel free to add some cheese or sour cream if you like!!).

We found all of the fresh ingredients at our local Farmer's Market here in Carbondale, IL.

As soon as I learned about this amazing opportunity, I went searching through all of the items and decided upon four very delicious recipes, which I will link you to as soon as they are live! 

I was encouraged to use recipes right from MarthaStewart.com, so I used her basic recipes, then embellished and modernized them to make them extremely appealing for my Pinterest fans. Well, everyone has loved them so far, and now all of the cast iron skillets are SOLD OUT on the MAcy's website! Perhaps my recipes helped, but the fact that they were each around $15.00 might also be the reason these have all sold out. Nonetheless, find your favorite cast iron or other skillet, and let's get started!

Ingredients / Materials: 

- 1-2 lb. Fresh Mushrooms 

- 1 red onion

- 1 medium bell pepper (we used several small ones)

- 2 Tbsp. or more Mexican Seasoning

- 1/2 bunch of cilantro

- Small Flour Tortillas

- Martha Stewart Cast Iron Skillet 

Instructions:

1. Prepare and chop mushrooms, red onions, and bell peppers. 

2. Heat olive oil in a Cast Iron Skillet, add chopped onions, then belle peppers, then lastly, mushrooms.

3.) Season veggies generously with Mexican seasoning, a tiny bit of salt, and any other seasoning you would like. Also, add chopped cilantro at the end and stir everything one last time. 

4.) Warm tortillas, then add the veggie filling, and enjoy! They're so delicious, I hope you love them! 

FLYWAY FAMILY FARM MUSHROOMS (MAKANDA, IL)

As I mentioned, I got to use local ingredients from our Farmer's Market! We loved finally being able to utilize three different varieties of mushrooms from Flyway Family Farm. They have different mushrooms at the market almost every weekend!

Also, I used the red onions and colorful bell peppers from Country Sprout Organics, my other favorite booth at our local market! 

Hopefully, you have enjoyed this recipe! Stay tuned for several more recipes inspired by Martha Stewart! 

Two Amazing Recipes for Summer Get-Togethers with Mission® Tortillas

This is a sponsored post written by me on behalf of Mission®. All opinions are entirely my own.

If summer get-togethers make you giddy with joy and excitement, then you’re not alone! I too love brainstorming recipes with friends, then planning, prepping, and preparing the food, then finally getting everyone together to enjoy the bounty. Food always brings people together, and is great shared with old friends and new ones! This summer, I am going to make it my mission to enjoy the company of others over great food as much as possible!

I love how these Mission® Super Soft Flour Tortillas really made my two recipes even better than I could have ever imagined. I have tried all sorts of tortillas, and these are the softest, tastiest ones yet. They were so versatile, and absolutely perfect for my Vegetarian Southwest-Inspired Pinwheels AND for my Grilled Steak Tacos. I always feel like the tortillas make or break a recipe, and I was so happy to find a new favorite. You can use the store locator on the Mission website to find Mission tortillas at stores near you, and find even more delicious recipes as well.

I’m not sure if you’ve ever experienced this, but I am always let down when tortillas kind of get dried out super quickly, then kind of crack when you roll anything out of them (like the pinwheels). Well, these were perfect. They held together super well, and worked amazingly well for this 4 ingredient appetizer!

And, since I wanted to offer lots of delicious toppings for these Grilled Steak Tacos, my first thought was fresh ingredients of course!

I thought it would be so fun to offer guests some handmade pickled jalapeños as party favors. Every time we serve these to guests or bring them to someone’s house, we always get lots of compliments on them.

PICKLED JALAPENOS

(Making 1 day in advance is recommended)

I think it’s time to start sharing them with people, so I filled mini jars with a mixture of fresh ingredients like jalapeño slices, garlic cloves, and mini red onions. Now, it’s time to pickle!

I heated a solution of 1.5 cups white vinegar plus 1 cup water, and 1-2 tbsp salt until the salt has dissolved. Let it cool a bit, then carefully pour the vinegar solution over the ingredients, leaving a little bit of room at the top of the jar so it does not spill out. Place lids back on, and gift as soon as the next day.  

These turned out SO cute, and you could even tie cute ribbons around the jars for an even more festive look.

In addition to the pickled jalapeños, I offered pickled red onions (get my recipe here), plus a guacamole tomatillo sauce and a traditional red salsa too.

The lettuce even came right out of my own garden! This was my first year to try growing lettuce, and while it may be almost at the end of its season, I love treating friends to things I grew!

GRILLED STEAK TACOS

INGREDIENTS:

1/3 cup olive oil

2-3 tbsp soy sauce

2-3 tbsp or more taco seasoning

Juice from 1 lime

1 tsp salt

1-2 lbs flank steak or similar

INSTRUCTIONS:

Simply marinate each pound of steak in 1/3 cup olive oil, 2-3 tbsp soy sauce, 2-3 tbsp or more taco seasoning + the juice from 1 lime + 1 tsp salt for at least 1-2 hours or overnight. Simply grill for 3 or so minutes per side if your steak is thin like mine was. Slice and serve with fresh sides and warmed Mission Super Soft Flour Tortillas (they taste best warmed).

Slice up the steak and set out the toppings, the tacos are ready to eat!!!

SOUTHWEST INSPIRED VEGETARIAN PINWHEELS

I searched for vegetarian pinwheel recipes and hardly found anything! These are so great tasting, and you will never miss the meat.

Ingredients:

1 package Mission® Super Soft Flour Tortillas

Plus 1-2 bunches of cilantro

1 head of green lettuce

To create the sauce:

1 (8 oz.) box of cream cheese, softened

½ cup (or more) taco sauce or red enchilada sauce

½ - 1 cup cream cheese

¼ - ½ tsp salt, optional

INSTRUCTIONS:

1.    Mix all sauce ingredients together, and stir until smooth. I used a hand mixer

2.    Lay one tortilla out onto your work surface, and spread 1.5 -2 tbsp sauce in an even layer on tortilla.

3.    Add a line of cilantro and a line of small pieces of lettuce towards one side of the tortilla, then roll up into an even roll.

4.    Cut in 2” sections, and display on a cute tray. I used cactus pieces from a local market.

Enjoy!


The bottom line - I would definitely recommend Mission Super Soft Flour Tortillas to anyone who loves superior taste and excellent ingredients!

Happy summer, friends!

Brunch Party - Vegan Avocado and Egg Toast Board

Brunching ain't always easy, but I found a way to make it so :) Try setting up a toast board, where everyone can choose their own toppings! It's such a fun and interactive way to have guests gather around a giant array of great food and drinks! 

If you're a fan of hard boiled eggs, then here is one way to enjoy these protein packed, brunch-worthy hard boiled eggs from Great Day Farms, available at Walmart!

To make this amazing spread, you head to the produce section and grab as many colorful fresh ingredients as you possibly can. Make sure you do stick to a budget, as fresh veggies can sometimes items can weigh a bit more than expected and then ring the bill up quite a bit. I found these amazing heirloom tomatoes for around $2.99 per pound - which made them incredibly reasonable. 

Embrace anything that is in season (via the farmer's market or local grocer), like jalapeños, basil, avocados, red onions, and other delicious vegetarian ingredients. 

This is a great idea for hosting friends who are in town for the weekend, and all have different tastes - this toast board embraces just about everyone!

Also, you could prep these ingredients for lunch at work, or even for a summer picnic. These ingredients are 100% natural, and actually offer energy and so much inspiration for the day ahead. 

By offering fresh, wholesome ingredients to those you love, you can truly help nourish them with a seriously fulfilling meal. Feel free to add sliced turkey or even lox to add a really elegant vibe to this rather upscale meal.

Dr Pepper Pick Your Pepper Summer ~ Indoor Picnic Ideas

While summer is all about enjoying the outdoors, here in southern Illinois / most of the Midwest, the heat and humidity sometimes keep us indoors. I am not incredibly sensitive to the heat, but if you’re having guests over, not everyone is going to enjoy it or even be able to tolerate temps in the 90s, so you could always consider hosting an indoor picnic!

The theme/inspiration for this picnic was a bountiful French picnic that features ice cold Dr Pepper Pick Your Pepper theme bottles (a personal fave), and lots of delicious snacks. Nothing super heavy as far as food, just smaller bites that you and your guests can feast on throughout the evening.

Keep reading to learn more about how you can win fun and festive prizes for Summer.

Each 20 oz. Dr Pepper bottle features over 40 artistic and inspiring labels that contain a Snapchat code on them. To unlock this fun filter, simply open Snapchat, take a photo of the Snapchat logo / code on the side of the bottle, then a little notification will appear, giving you access to the filter. Below, two of my favorite Snapchat filters were outdoors themed.

YOU CAN WIN!

Callout that the fun, unique Pick Your Pepper packaging and how it’s fun, individualized, and designed by millennials, for millennials. Available in stores starting 6/15/18.

Call out the prize reward and drive to  http://bit.ly/2pts8Qo

When you buy Dr Pepper 6/15-8/15 this summer, you can upload your reciept at http://bit.ly/2pts8Qo  to get the prize featured in my blog here and/or other prizes like:

Spend $5 get 5 bottles = Dr Pepper Retro Specs

Spend $10 get 10 bottles = Dr Pepper Copper Lined Mug

Spend $20 get 20 bottles = Dr Pepper Bluetooth Speakers

Spend $30 get 30 bottles = Dr Pepper Pool Float

CHECK OUT THE RETRO SPECS, BELOW…

Scan the Snapchat code on any Dr Pepper Pick Your Pepper to reveal a unique filter you can use! I then save the image and share it wherever you want! Below, two of my favorites!

My boyfriend Bobby and I love being outdoors, so these filters are super cute. He adores fishing, so the Snapchat filter, shown above that says, “Keepin’ It Reel” is perfect for him!

While this particular picnic I hosted for this post was indoors, I loved bringing traditional outdoor picnic elements into the evening with galvanized metal trays to hold food, easy to eat bites of a huge assortment of foods, and even cozy floor pillows, rugs and lightweight picnic blankets. I still love incorporating rustic elements into my events no matter where I host!

There are so many benefits to hosting this picnic indoors - Think of it, no bugs, no heat, and all the food and drinks one can possibly snack on throughout the evening without having to leave the elevated comforts of home. It’s such a fun way to enjoy time with friends or have a date night!

TO SET A COZY SCENE:

I love the idea of reminiscing about days past, where we would put pillows and blankets onto the floor and have a sleepover. Now that I’m older, we don’t really do that anymore, so it’s fun and nostalgic to reminisce and more or less make a soft place on the floor to settle in for the evening! It could be super fun to set this up in the living room, where everything is centrally located. Or, even on a porch!

I also added upscale touches like French-inspired textiles in stripes and plaids of white and blue. I packed some of the 20 oz. bottles of Dr Pepper into a metal “picnic basket”, which was a great way to carry the bottles plus lots of other necessities.

FOR THE FOOD:

I am always drawn to bountiful plates of fruits and other bite sized foods, so this was the perfect opportunity to try my hand at not one but three snack trays!

For one platter, I used a large, round galvanized tray with handles to hold everything. I then placed a white charger plate in there, plus a marble cutting board to hold the meats and cheeses (this was the least messy way to display them), then placed items like croissants, red and green grapes, strawberries, and more.

For another tray, I placed mini chocolate chips, blueberries, and blackberries. For the last tray, I placed a bit of herbed goat cheese dip, sliced baguettes, and crackers to dip into the goat cheese.

I was so happy with how upscale everything looked!

TO SERVE YOUR GUESTS:

I used lightweight linens, gold plates, and gold plastic utensils (that almost looked real!!), which added a bit of shimmer and glitz to the picnic. The gold and white looked really lovely.

It would definitely be fun to host a similar picnic outdoors if you live somewhere the weather is nice all the time! I love this particular color scheme, and I know those party platters would really look great at so many of your summer events.

Connect with Dr Pepper across social media!

Facebook / Twitter / Pinterest /Instagram

PIN IT FOR LATER...

Lattice Weave Puff Pastry Wrapped Prosciutto + Brie Recipe

Looking for an elegant and luxurious recipe to bring to that next BBQ or summer party? Perhaps you want a special date night dish that can be enjoyed with a couple of drinks and a movie. This  Lattice Weave Puff Pastry Wrapped Prosciutto + Brieis so delicious, that those who get to enjoy such a treat will likely lick the plate clean. 

I found that by using Wewalka Puff Pastry, it held its shape super well and wasn't overly greasy, which was great. The brie I used, shown below, also worked out great. I found that brie is very affordable, ranging anywhere from $5 to way more expensive options. If you're new to Brie, then start off less expensive or in the middle of the price range.

This is a very rich and indulgent dish, but if you share it with friends, there's definitely no guilt in eating something like this. It's really amazing.

Ingredients:

1 (8 oz) Round of Brie 

1 package Wewalka puff pastry

1 egg, whisked with a fork for egg wash

1 package of Prosciutto, any brand you like

Crackers, pretzels, etc, to dip in cheese

Instructions:

1. Preheat oven to 400 degrees F. Slice puff pastry into 1/2" strips, set aside.

2. Wrap opened brie round with prosciutto, then set on a pan or clean work surface.

3. To create lattice: place two dough strips on top of prosciutto wrapped brie in an X shape. Here is a link to a good tutorial on how to make the rest of the lattice (just make sure dough has no spaces between strips, so it holds in the cheese well. Once the entire top of the brie has been latticed (see below), grab a drinking glass and let's finish this masterpiece!

4. So, the image below is a little strange looking, but I basically put the ingredients on top of a drinking glass to elevate it so I could then finish "weaving" the sides for a more finished look. You may notice that the widest part of the brie / the outer edge has one slice of dough wrapped around it, then I could easily finish wrapping the other pieces under the brie. I also sliced a few inches off of each strip, so there wasn't a huge wad of dough below the brie when it baked.

5. Below, you see the final brie round before baking! You can definitely prep this ahead of time, and bake it right before you need it. Brush with egg wash if desired for an even shinier finish.

And presto chango...Look at THIS BEAUTY, below! It is absolutely gorgeous!

6. Bake for 20-25 minutes or until crust is brown and flaky, cut into the cheese and let the middle just ooze out! Dip crackers, pretzels, green apples, and more into this creation, and enjoy!!

When you slice into this awesome creation, you may hear a little crunch of the flaky layers of dough, and then you will see the cheese just ooze out. Dip crackers, pretzels, and anything your heart desires into this melty cheese. The brie is very rich and creamy and does have a little bit of that funky taste that brie just has, but it pairs so well with the prosciutto and the puff pastry.

What do you think? Does this look like something you would eat or serve at your next gathering? I really hope you've enjoyed!!!

Casual Cookout with Tyson, Ball Park, and Lipton Tea!

This post is sponsored by Lipton, Tyson, and Bimbo but the content and opinions expressed here are my own.

Casual Cookouts are in season!! Bring weeknight (or weekend) dinners outside by making good use of your grill! You can enjoy the long summer nights as you picnic in the yard with your family. From cooking your own Ball Park® Hot Dogs to Tyson® Chicken sandwiches, let everyone join in on the fun and make it a festive family night. Excited to host lots of fun cookouts this year, and here is one to get me started.

BBQ CHICKEN SANDWICHES

Above, the Tyson Frozen Boneless Skinless Chicken Breasts. I used them for chicken sandwiches!

INSTRUCTIONS: Using a grill set to 450-550 degrees, spray non-stick cooking spray and place frozen chicken breasts onto hot grill. Cook for 10 minutes on fist side, season, then flip and grill for another 10-15 minutes, until chicken’s internal temperature is at least 165 degrees F.

Below, the classic Lipton Iced Tea brewed and lightly sweetened.

Condiments can easily be placed in vintage or glass jars or bowls to serve them in a more elegant way – don’t forget to add a spoon into each condiment J

Below, the white chopped onions, pickles, and potato salad, and a cute sign that reads, “Welcome Friends and Family”.

As you might notice, I placed these ingredients onto metal trays at varying heights so they were easier for everyone to reach.

CURBSIDE PICKUP:

 Since summer gets very busy, and I always have a million errands to run at once, I loved being able to use the Walmart Curbside Pickup! I logged in and just placed my order on http://grocery.walmart.com and then stopped by my local store to grab everything!

DÉCOR IDEAS:

For the BBQ party setup, I used a plastic folding table to hold everything, then covered it with a twin white sheet that I ironed. I used a piece of on trend gingham printed cotton in white and grey. I used 1.5 yards and I think that the double layer table covering idea really looked so elegant.


I also really love offering food to guests at different heights, bringing the food and refreshments to eye level. I stuck with more metallic accents like galvanized metal boxes, plus small metal buckets to hold utensils and festive paper napkins. I love the mixture of navy blue and red together, which worked perfectly for this theme.

I also found lots of cute Grilling and BBQ themed signs that were so cute! I am sure that you could simply print some fun quotes off the Internet and frame them if you already have all the supplies on hand.

CONNECT WITH THESE BRANDS ON SOCIAL:

Tyson®

Facebook: @TysonBrand

Twitter: @TysonBrand

Instagram: @TysonBrand

Pinterest: @TysonFoods

Lipton®

Facebook: @LiptonUS

Twitter: @Lipton

Instagram: @Lipton

Ball Park®

Facebook: @BallParkBrand

Instagram: @BallParkBrand

I really hope you’ve enjoyed this post, and I am eager to hear all about what you have planned for summer!

PIN IT FOR LATER...

Father's Day Gift Idea - Edible Treats!

A fun and easy way to show Dad you appreciate him this Father's Day! Simply head to the bulk section of your local Co-Op or grocery store, and find small samples of lots of different treats and package them up with custom labels. I actually made a game out of this gift by sticking the names to the INSIDE of the treat containers, so Dad could guess what treat he was trying. He LOVED this delicious and easy Edible Gift and I am sure anyone you make one for will too. 

You can even find sugar free candies and other more natural treats if you want. I provided a great variety of snacks like macadamia nuts, roasted peanuts, chocolate and yogurt covered raisins, all natural chocolate covered Sun Drops, maple almonds, and more. Whatever your dad's taste is, just cater your selection to that.

I used a paper mache box with a lid from a craft store, which made the presentation more professional looking. I found 8 small plastic lidded containers that fit into the box PERFECTLY! I was even able to add some tissue paper as padding, then shipped this gift to my Dad from IL all the way to Arizona and everything arrived safely, luckily!

What will you be giving Dad this year?!

Summer Grilling at Kroger with Smithfield + Yuengling

This is a sponsored post written by me on behalf of Smithfield®. The opinions and text are all mine. #GrillOutChillOut

Summer is JUST getting started, and I would love to know what your plans are for the next few months! Going anywhere fun or exciting? Planning out any cookouts or summer parties? I love using summer as an excuse to get together with friends, family, and good food – there’s nothing that tops the fun and excitement I get when I know there is something fun on the horizon.

Last year, I had the opportunity to feature Smithfield® Yuengling® Traditional Lager Bratwurst from the Smithfield® Craft Collection™ in a post about making summer grilling easier and MORE delicious. You can read that post here. This is the flagship beer from America’s Oldest Brewery!

This time around I decided it would be fun to serve these brats in a traditional manner with buns and grilled onions, PLUS it could be cute to serve these brats in more of a finger food / appetizer style - cut into slices and served with mustards.

Find everything you need for summer celebrations at your local Kroger or Kroger. The bratwurst are infused with real Yuengling Traditional Lager (a.k.a. DELICIOUS!!), and are made with premium cuts of pork and a special blend of sweet and savory spices. I just love the unique taste of these, and it’s so nice to not actually HAVE to cook them in beer before grilling, because the Yuengling flavors are already there.

Since I was incredibly inspired by the history of brats in general, I was particularly inspired by German or Bavarian offerings. I found that bratwurst generally contain fresh sausage, and if you’re looking for something that is already cooked, then sausage is typically available in dried, cured, or fresh varieties. This means that the brats do need to be cooked or grilled until their internal temperature reaches 165 degrees F. 

I decided to offer guests five or more different styles of stone ground or other higher end mustards, with slices of the bratwurst, then we could all try something new.

If you’re “brave” enough and want to experiment with even more pairings, feel free to offer guests some sauerkraut (which is a finely cut cabbage that is fermented, and tends to have a stronger smell if you’re not used to it), which would add an even more authentic taste to this meal.

I kept thinking about how these foods would be served at a traditional festival where brats and beer are the main focus, and I thought more of a party platter (in my case a wooden cutting board with a handle) full of small bites was definitely the way to go.

Mustards are something that I am just beginning to enjoy. BUT, my boyfriend and a few of our friends seem to “compete” to see who can eat mustard with the largest number of different foods. I am fine if I don’t win that contest, but mustard is such a versatile and traditional condiment that I want to even learn to make it soon.

I found five different mustards at the store, ranging from Stone Ground varieties to Dijon mustards and even one mustard that is bourbon barrel aged! 

I basically just looked to see which ones had the most texture (as in more mustard seeds), plus which ones would offer more of a visual variety and also as many different tastes as possible. This could be a great way to get rid of some mustards in the fridge that are only half full – just offer them up and I am sure they’ll get eaten!

As far as other foods to serve, I love the idea of offering fresh homemade soft pretzels plus hard pretzels (like the smaller crunchy ones), plus perhaps some slices of super crunchy bread or similar.

Below, you will see those lovely grill marks on the brat buns! This added SO much more flavor and visual interest to the meal.

CONNECT WITH THE BRAND ON SOCIAL:

Instagram- @smithfieldbrand, @yuenglingbeer

Facebook- @cookingwithsmithfield, @yuengling

Twitter- @smithfieldbrand, @yuengling_beer

Pinterest- @smithfieldbrand

Delicious No Bake Tiramisu Recipe

This Italian inspired dessert has been described as "sexual" and will make your tastebuds go crazy! Perhaps this recipe will start off your weekend just right! But in all seriousness, since this is a no-bake treat, and can be served in individual jars, it's perfect for summer parties, and everyone is going to love this recipe. 

Both rich and somehow light at the same time, the homemade whipped ricotta filling and the familiar taste of coffee really make for a decadent treat.

Easy Eggless No-Bake Tiramisu

Prep Time: 20 min + chill time

Yield: 9

INGREDIENTS

·       1 cup (250ml) whipping cream

·       1 cup (250g) mascarpone, softened

·       1/4 cup (50g) granulated sugar

·       1 tsp (5ml) vanilla extract

·       1&1/2 cups espresso or very strong coffee, cooled

·       2 tbsp (30ml) coffee liquor (I used Kahlua)

·       2 dozen lady fingers

·       2 tbsp cocoa powder

INSTRUCTIONS

1.   Beat the whipping cream until stiff peaks form. Set aside.

2.   Mix the mascarpone, sugar and vanilla until combined. Add in the whipped cream and beat again until smooth.

3. Prep small Ball jars by removing all lids, rinsing and drying thoroughly, and setting them all out onto a tray or surface.

3.   Stir the coffee and liqueur together. Lightly dip 2-3 lady fingers into the coffee mixture, then place the 2-3 lady fingers into the jars to create the bottom layer of the dessert. Make sure not to soak the lady fingers too much or there will be lots of coffee left in the bottom of the jars. Repeat in all jars.

The Kahlua is optional but adds a nice kick and authentic flavor to the flavor of this dessert!

4. Using the small ice cream scooper, scoop a generous amount of the ricotta mixture over each jar, making them look as much like a perfect scoop of ice cream as possible.

5. Sprinkle cocoa powder (or even hot cocoa mix) through a metal strainer over top of each jar. A light dusting of the cocoa powder really gives them a nicer, upscale look. Enjoy!

The other fun thing about this post is that I get to show off my new kitchen update, we painted and I installed new "tiles" from The Smart Tiles, here!

PRINT THE RECIPE...

PIN IT FOR LATER...

DIY Bottle Koozies + Vegetarian Taco Bowl Recipe

This shop has been compensated by Collective Bias, Inc. and Constellation Brands. All opinions are mine alone. The following content is intended for readers who are 21 or older. #CelebratorySips #CoronaSummer #CollectiveBias

Summer is here and what a better way to celebrate all the hard work you have done this year with a Beer + Craft Night with friends? I’ve been really wanting to make some customized / embellished drink koozies for some time, and when I learned about this amazing opportunity with Corona®, I jumped at the opportunity to celebrate all that Corona embodies - offering a passport to carefree enjoyment and refreshing, delicious refreshments! With a refreshing, smooth taste balanced between heavier European imports and lighter domestic beer, Corona Extra is an even-keeled cerveza with fruity-honey aromas and a touch of malt. The flavor is crisp, clean and well balanced between hops and malt.


What a perfect way to celebrate summer with a snazzy new way to keep your drinks cold and to liven up the party...even if it is a craft night that turns into a party :)


These bottle and can koozies really make a statement. They will also help you identify which beer belongs to each person. For only $3-4 you can make your very own Summer Drink Koozie - keep reading to get the instructions and design ideas!

KOOZIE MATERIALS:

Foam Koozies (found in the foam aisle at a craft store)

Ribbons and trim of various colors

Low temp glue gun

Glue sticks (I used fabric glue sticks)

Cardboard for use as your work surface, or a heat-safe work surface (the glue can get messy!)

KOOZIE INSTRUCTIONS:


  1. Plug in your glue gun and get it ready to use. Cut ribbons and trims to fit around your koozies, leaving a little extra just in case.

  2. Once glue is hot enough, on a heat-safe work surface, add a bit of hot glue to the end of one ribbon, and begin to glue it around the top of the koozie. For the more patterned koozies, I used 4 strips of woven ribbon around. See steps below.

Notice the raw edges of the ribbons, above. We will cover those in the next image, with one more strip of ribbon, glued up the back.

3. For the tassel koozie (below), I glued on my tassel trim first, then covered that with a more tie dyed looking ribbon for a more finished look. See steps below.

4. Feel free to embellish further with stick on jewels and more ribbons - let your creativity run wild! Note - I tried using sticky-backed jewels, but I needed to glue them on, or they would fall off after a short use. Still super cute either way!

FOR THE VEGETARIAN TACO SALADS:

Ingredients:

2 Sweet potatoes (chopped)

2-3 TBSP Olive Oil

2-4 TBSP Mexican Seasoning

1-2 tsp salt

(Other toppings include: lettuce, shredded cheddar, tomatoes, sour cream, guacamole, cilantro, and more!)

Note - this can be made vegan if you use all vegan toppings, like vegan sour cream.

Taco Salad Instructions:


  1. Preheat oven to 375-400 degrees.

  2. Cut sweet potatoes into cubes, and chop onions into small pieces. Place into a mixing bowl, and toss with 1-2 TBSP Olive Oil.

  3. Bake potatoes and onions for 15-20 minutes, then add sliced peppers on top, and bake another 10 minutes or until the ingredients are baked soft enough to enjoy.

  4. To create your bowls, add a bed of lettuce, then top with sweet potatoes, and any other toppings you like. Enjoy with a Corona Extra®!

Have an amazing summer, friends!

PIN IT FOR LATER...

Mediterranean Food + More

Looking for a fun way to spice up dinners? We had some of the most delicious Mediterranean-inspired food recently, and our friends really came together to make the night special. Below, you will see all sorts of amazing foods like chicken shwarma, warmed pita pockets, all the amazing sauces, and fallafel (which we found at an international grocery store and fried on the stove top).

We love hosting and attending potluck dinners, where we choose a theme and everyone brings their favorite, homemade, made from scratch, or whatever food or drink they love, and we all feast!

This photo was one of the only ones I have captured with out studio lights, and it was one of our most successful and most delicious potlucks yet! Here's to more...

Vegetarian Cashew and Superior Green Filled Cheesecake Recipe

This post is sponsored by FoodScience of Vermont. All opinions and content are my own.

#LiveSuperior

Looking to add more Superfoods to your diet? Learn how to infuse a cashew-based “cheesecake” with health-boosting ingredients!

This delicious cashew-based version of a traditional cheesecake is filled with all natural ingredients thanks to FoodScience of Vermont Superior Greens, which contains whole fruits and vegetables, promotes healthy aging and radiant skin, mental clarity, and a healthier immune system while offering a boost of healthy enzymes to support your immune system, plus probiotics. It’s amazing how this one line of Superior Powder products can offer so much!

Try it, you’ll love it. Find the product at Rite Aid® and RiteAid.com here!

I love incorporating unique and health conscious ingredients into my recipes, like the FoodScience of Vermont Superior Greens, which contains three servings of fruits and vegetables in each ½ scoop – which means that this ultra concentrated version of some of the healthiest ingredients on Earth really will work quickly and efficiently!

This recipe is divine! I believe this would be great for someone looking for healthier alternatives to dessert recipes, or someone who has never ever tried a cashew based cheesecake before. It’s fun to introduce friends and family to things like that.

I have been very interested in the detox process as well as considering eating as many whole foods as possible. This FoodScience of Vermont Superior Greens is a great step, in addition to more exercise and lots of water intake, towards reaching my nutrition and other health goals I have set for myself.

While the product can be enjoyed in a smoothie or mixed into a glass of cold water, I thought it would be exciting to introduce this product to my wonderful readers, friends, and family through a mouth-watering dessert recipe.

Perfect for summer when you don’t want to bake a ton, or when you want something that’s not overly sweet but deliciously frozen, this is the recipe that will check all of those boxes! Bring this to an event, or serve it to friends at a summer gathering and just look at everyone’s faces light up when they realize that this is not the “cheesecake” they were expecting, but one that is WAY, WAY better for them, but still tastes indulgent.

Now, as for the crust, I know the traditional vegan cheesecakes are made with dates, and are basically no bake, but my favorite part of a cheesecake IS the crust, so I wanted to keep it traditional with lots of additional natural ingredients to sweeten things up naturally. Feel free to use a date crust here too.

Food Science of Vermont provides us with ways to get 3 servings of fruits and vegetables in each ½ scoop. The scoop is provided, so it’s very easy to measure out just how much you will need.

While the traditional use for this product is mixed into smoothies, cold water, and other drinks, I thought it would be genius to use the delicious taste and the nourishing super food ingredients to infuse this recipe with a unique taste and twist.

The crust is made from a delicious mixture of coconut, walnuts, oats, graham crackers and vegan “butter”. I used a spring form pan, similar to a traditional cheesecake, but really modernized this recipe with almost all vegan ingredients and that extra boost of has helpful enzymes and probiotics, making this an all around awesome dessert or snack. Give it a try, I bet you’ll enjoy it!

INGREDIENTS:

(Makes “Cheesecake” in 6 in x 3 in spring form pan):

Crust Ingredients:

10 - 12 full graham cracker rectangles

¼ c. oats

¼ - ½ C. or more walnuts

½ C. or more dried coconut pieces/flakes

¼ tsp. cinnamon, optional

6-8 (or more) TBSP salted Vegan Butter or regular butter

¼ C. Sugar

*Note: Feel free to use less graham crackers and more of the oats, nuts, or coconut if you prefer and even healthier crust.

Filling Ingredients:

3 C. soaked cashews (soak for at least 3-5 hours)

1 can chilled coconut milk (use the top thicker part and save or discard water)

¾ - 1 C. macadamia milk, coconut milk, or similar

4 – ½ C. agave or maple syrup

½ - 1 tsp. vanilla

2 TBSP FoodScience of Vermont Superior Greens Powder


INSTRUCTIONS:

For The Vegan Filling:

1. Soak cashews for 3-5 hours, and strain. Add to a blender with coconut milk, and process until smooth. If the mixture does not pour well, then add a bit more macadamia milk or agave. Taste the filling to make sure it is to your liking. Time to make the crust!

For The Crust:

1.    Preheat oven to 350 degrees F, and prepare your spring form pan by using non stick spray inside, and using a paper towel to wipe pan for a more even finish. Also, you may cover the bottom of the pan so the butter does not drip out while baking. Alternately, bake on top of a sheet pan to prevent spills in the oven.

2.    In a food processor, blend up graham crackers (use hands to make pieces smaller before processing), coconut, walnuts, and oats. Feel free to mix in some whole oats after processing for that “whole oat” look in your crust.

1.    Once processed to an even powder, mix with melted butter, sugar, and pour 2 ½ cups into pan. Use a flat bottomed glass or candle holder to press and flatten the crust down, making sure to clean up the edges with a knife for a neater look once the spring form pan is removed.

4.    Bake crust for 15-20 minutes, until edges begin to brown. The crust will firm up quite a bit once cooled, so even if it’s soft after baking, it may already be done. Let crust cool completely, and fill with filling until there is about ½-1/4” until the top of the spring form pan. Freeze for 2-3 hours or overnight.

5.    Time to CAREFULLY remove it from the spring form pan. I would recommend using a sharp knife or skewer along the top edge to break the seal with the pan. At first, mine looked like it was cracking, so I re-tightened the outside of the spring form pan, ran a skewer along the top edge, and once I loosened the pan again, it removed pretty easily. Just be patient with it. At this point, feel free to place it back into the freezer

6.    Place “cheesecake” onto a plate to decorate. Top with fruits like blackberries, strawberries and blueberries (the two latter are actually ingredients in the FoodScience of Vermont Superior Greens powder). I sliced the strawberries in half and left the green parts on because the full strawberries just looked too big. The “cheesecake” would be fine to serve right now, or place back into the freezer for 2-4 hours so the berries begin to freeze and they get a beautiful frosty look to them.

FoodScience of Vermont offers three uniquely designed powdered drink supplements loaded with phytonutrients, stabilized probiotics, and many other beneficial natural ingredients. I really hope you enjoy!

Head to your local Rite Aid® or visit bit.ly/FSSuperiorPowders to get your Superior Powders.

Follow FoodScience of Vermont on social:

Follow the brand’s hashtag on Instagram #livesuperior

Facebook: https://www.facebook.com/FoodScienceVT

Twitter: @FoodScienceVT

Pinterest: https://www.pinterest.com/foodsciencevt/

Instagram: @foodscienceofvermont

Recipe For The Perfect Mother's Day #SpreadTheLove #ButterChardonnay 

Thank you JaM Cellars for sponsoring this post. Looking for Butter Chardonnay near you? Check out their easy-to-use Store Locator! Just pop in your zip code and the Butter will be waiting! This wine melts in your mouth, is creamy-licious, and everything is certainly Better with Butter! 

I am so inspired by the warmer weather that is finally here, gracing us with sunshine and more reasons to celebrate the ones we love. One sip of Butter Chardonnay will transport you to a more relaxing and uplifted place! This Chardonnay is easy drinking wine that has light, crisp flavors that will surely please moms everywhere!

I have lots of mother figures in my life and I am extremely grateful for each and every one of them! My mom, my step mom, Bobby's mom, and my friend who just became a mom for the first time. I don't have any grandmother figures in my life anymore, but they are always in my heart! There are a few ways to treat any mother figure to something special for Mother's Day Weekend, so here are a few ideas to treat them well.

I also thought that making sugar cookie bars would be perfect, because they travel well and are such a versatile treat for Mom. 

It's fun how wine can also accompany some great times. It's seriously so fun to sip a glass of wine with my mom and sister and do some baking. We do tend to love doing projects together, so this whole post was just such an incredible inspiration for me!

I will also be heading to Louisville, KY this weekend to see my sister graduate college AND to celebrate Mother's Day with a brunch to end the weekend. I will definitely be bringing one of these bottles of wine to that celebration as well. I am SO excited!!! 

Butter Chardonnay melts in your mouth just like smooth, rich butter!

This wine is made from California grown grapes, is cold fermented, and is aged in oak. 

 If you sip this delicious Butter Chardonnay, you might even taste hints of stone fruit or baked lemon with a vanilla finish.

This wine is best served chilled and has such a nice, complex flavor without being too sweet. This is the perfect choice for summer and beyond!

Keep reading to get the full recipe for these amazing Sugar Cookie Bars with Edible Flowers!

Jump to the bottom of this post to grab the recipe for these sugar cookie bars. A couple of other fun ideas for making Mother's Day great would be some thoughtful gift ideas. Check out my ideas, below!

Why not give mom a gift basket with all of these items inside?! That would make her smile for sure. 

SUGAR COOKIE BAR WITH EDIBLE FLOWERS RECIPE

{Adapted from a recipe, found here}

Ingredients:

  • Dough:
  • 1 1/2 cups butter, softened to room temperature
  • 2 cups sugar
  • 4 eggs
  • 1 tsp vanilla
  • 1 tsp almond extract
  • 5 cups flour
  • 1 1/2 tsp salt
  • 1/2 tsp baking powder

Frosting:

  • 8 oz cream cheese, softened to room temperature
  • 1/2 cup butter, softened to room temperature
  • 5 cups powdered sugar
  • 1 tsp vanilla
  • 1/2 tsp almond extract
  • dash of salt
  • Food coloring (optional)
  • 2-3 tsp milk if needed
  • 8-10 edible flower heads, I used violas, but marigolds, violets, and others would work too.

TIPS ON FINDING EDIBLE FLOWERS:

To find the best edible flowers, look no further than your local hardware store or garden center. I found Violas on sale for about $2 per container. Look for the package with the most blooms on it. Cut the flowers off to garnish your sugar cookie bars or any other treat for Mom, even cocktails. The great thing about buying flowers this way, is that you can then plant them in a sunny spot in your yard and they will keep growing throughout the year, just as love for Mom grows all the time.

Alternately, I have seen a cute package of edible flowers at our local Co-Op, packaged similarly to the refrigerated herbs.

Instructions:

  1. Cookie bars: Cream butter and sugar in a large mixing bowl. Add the eggs, vanilla, and almond extract. Beat till well blended. Whisk together the flour, salt, and baking powder in a small bowl. Add to the wet ingredients and stir till well combined.
  2. Press into a 17" x 12" rimmed baking sheet that has been sprayed with non-stick spray. Bake at 350° for 15-20 minutes or until barely light brown. Cool completely, then get ready to frost. See frosting instructions in next step.
  3. To Make Frosting: Beat softened cream cheese and butter in a large bowl until smooth. Add powdered sugar, extracts, salt, and food coloring. Beat till smooth and creamy, adding milk as needed. 

4. Carefully cut edges of sugar cookie bars with a large, sharp knife so the edges are straightened up, as shown below. 

5. To evenly cut sugar cookie bars, cut down the middle both ways, then cut each of those sections in half again. To ensure a cleaner cut, always wipe off the excess cake and icing between each slice. After slicing, add edible flowers and serve! These stay good a few days left out at room temp or in the fridge. Enjoy!

Aren't these just so beautiful?! 

I hope you enjoy theButter Chardonnay and these sugar cookie bars as much as my mom and I will! Have a wonderful Mother's Day, friends!

Make sure to check out more from JaM Cellars Butter Chardonnay here!

I was selected for this opportunity as a member of CLEVER and the content and opinions expressed here are all my own.

PIN IT FOR LATER...

Unicorn Cookie Bouquet from Cookies by Design

Look at this adorable Unicorn Cookie Pop Bouquet from Cookies By Design. I can think of so many people who would love this!

I received a well designed cookie bouquet, which contained 4 unicorn cookies, 2 over the rainbow cookies, and one star shaped cookie that read, Have A Magical Birthday!

This Unicorn Sugar Cookie Bouquet is an absolute show stopper. 

If you bring this bouquet to an event, or have it shipped to someone for their special day, you will be remembered forever! Think of how many photos will be posted of this awesome, edible gift. 

It's also pretty east to find other Unicorn themed party supplies at most stores, or make your own from scrapbooking paper, sequins, and tinsel. 

Cookies By Design is one of my awesome affiliate partners. If you purchase any cookie bouquet or other fun items from Cookies By Design, I make a small commission. Thank you so much for supporting the brands that help make my blog an inspiring space!

Check out this Mother's Day Sugar Cookie Bouquet. It's really lovely and Mom or Grandma would LOVE to receive such a delightful, thoughtful gift!